Embed Size (px)
Citation preview

Engineering White Paper
Installing and Configuring Oracle Real Application Clusters on EMC Symmetrix DMX
Storage A Guide to Best Practices
Oracle Version 9i Release 2/Linux 2.1
Abstract
This paper provides step-by-step configuration and installation instructions, and best practices when installing Oracle Real Application Clusters on EMC Symmetrix DMX storage systems.
Published 4/29/2005

4/29/2005
Copyright © 2005 EMC Corporation. All rights reserved.
EMC believes the information in this publication is accurate as of its publication date. The information is subject to change without notice.
THE INFORMATION IN THIS PUBLICATION IS PROVIDED “AS IS.” EMC CORPORATION MAKES NO REPRESENTATIONS OR WARRANTIES OF ANY KIND WITH RESPECT TO THE INFORMATION IN THIS PUBLICATION, AND SPECIFICALLY DISCLAIMS IMPLIED WARRANTIES OF MERCHANTABILITY OR FITNESS FOR A PARTICULAR PURPOSE.
Use, copying, and distribution of any EMC software described in this publication requires an applicable software license.
Part Number H1396
Installing and Configuring Oracle Real Application Clusters on EMC Symmetrix DMX Storage A Guide to Best Practices 2

4/29/2005
Table of Contents
Introduction.........................................................................................................5 Related Documentation ............................................................................................................... 5
Environment Setup .............................................................................................5 Software Components ................................................................................................................. 5 Internal Disk Partitions ................................................................................................................. 5 Upgrading the Linux Kernel ......................................................................................................... 6 RPM Package Managers ............................................................................................................. 6 Oracle Cluster File System RPM Package Managers................................................................. 6 Kernel Parameters ....................................................................................................................... 7
Shared Memory Parameters .................................................................................................... 7 Semaphores ............................................................................................................................. 7 File Handles.............................................................................................................................. 7 AIO Maximum Transfer Size .................................................................................................... 7 Network Parameters................................................................................................................. 8
Creating Users ............................................................................................................................. 8 Setting Oracle Environment Variables......................................................................................... 8 Creating Oracle Directories.......................................................................................................... 8 Installing hangcheck-timer Kernel Module................................................................................... 9 Configuring the Oracle Cluster File System............................................................................... 10
Generating the OCFS Configuration File ............................................................................... 10 OCFS File Structure ............................................................................................................... 11 Creating OCFS File Systems ................................................................................................. 12 Automatically Mounting the File Systems .............................................................................. 12
Enabling Asynchronous I/O ....................................................................................................... 12 Network Setup ........................................................................................................................... 13
Configuring Public and Private Networks............................................................................... 13 Configuring the hosts File....................................................................................................... 14 Configuring the hosts.equiv File ............................................................................................. 14 Verifying Network Connectivity............................................................................................... 15
Oracle Cluster Manager 9.2.0.1.0.....................................................................16 Creating the Cluster Manager Quorum File ........................................................................... 16 Installing Oracle Cluster Manager.......................................................................................... 16 Apply the Oracle9i RAC Patch Set......................................................................................... 20 Configuring the Oracle Cluster Manager................................................................................ 23 Starting the Oracle Cluster Manager...................................................................................... 24
Oracle Real Application Cluster Software ......................................................25 Creating the Shared Configuration File.................................................................................. 25 Installing Oracle Real Application Cluster Software............................................................... 25 Starting Oracle Global Services ............................................................................................. 29
Creating an Oracle Real Application Database ..............................................29 Network Creation Assistant .................................................................................................... 29 Database Configuration Assistant .......................................................................................... 32 Verifying Database Status...................................................................................................... 39
Best Practices ...................................................................................................40 Use Striped Metavolumes.......................................................................................................... 40
Installing and Configuring Oracle Real Application Clusters on EMC Symmetrix DMX Storage A Guide to Best Practices 3

4/29/2005
Use Server Parameter File (spfile) ............................................................................................ 40 Use Async I/O ............................................................................................................................ 40 Use Oracle Cluster File System................................................................................................. 40 Place Archive Logs on the Oracle Cluster Files System ........................................................... 40 Isolate Private Network .............................................................................................................. 40 Use the Linux hangcheck-timer Module .................................................................................... 41 Use a hosts File ......................................................................................................................... 41 Use Automatic Undo Management............................................................................................ 41
Undo Tablespaces ................................................................................................................. 41 Undo Management................................................................................................................. 41
Installing and Configuring Oracle Real Application Clusters on EMC Symmetrix DMX Storage A Guide to Best Practices 4

4/29/2005
Introduction This paper describes the setup, installation, and configuration of Oracle9i Database Release 2 Real Application Clusters for Linux with EMC Symmetrix® DMX SAN-based storage. The Linux operating system is Red Hat Linux Advanced Server 2.1.
It is assumed that readers are familiar with the Oracle9i Database software, Linux operating system, and basic networking. As such, readers already should be familiar with the installation and administration of Linux and the Oracle9i Database, including network interface configurations and applying patches. It also is assumed that readers are familiar with EMC® products. For detailed information about setting up the Symmetrix DMX™, consult your EMC Representatives, or refer to product guides and manuals bundled with your system.
Related Documentation • Oracle Best Practices: Pre-Requisites for Real Application Clusters Installation with SAN Storage • Oracle Real Application Clusters Administration Guide
Environment Setup
Software Components • Red Hat Linux Advanced Server 2.1 (Kernel Version 2.4.9-e.34smp) running on each Oracle9i RAC
cluster node • Oracle9i Database Release 2 Enterprise Edition (Version 9.2.0.1.0) for Linux running on each Oracle9i
RAC cluster node • Oracle9i RAC 9.2.0.2 patch set, applied on each node
Internal Disk Partitions Table 1 shows the minimum recommended internal disk partition sizes for each server and Oracle database instance.
Table 1. Minimum Space Requirements
Partition Minimum Recommended Size / 2 GB, ext3 /boot 64 MB, ext3 /home 2 GB, ext3 /opt/oracle 3.5 GB, ext3 /tmp 1 GB, ext 3 /usr 5 GB, ext3 /var 2 GB, ext3
Installing and Configuring Oracle Real Application Clusters on EMC Symmetrix DMX Storage A Guide to Best Practices 5

4/29/2005 Upgrading the Linux Kernel The recommended kernel for Linux 2.1 is Errata e.25 (2.4.9-e.25) or later. To check which kernel is currently running, execute the following command:
# uname -a # 2.4.9-e.34smp #1 SMP Wed Dec 10 16:52:22 EST 2003 i686 unknown If the Linux kernel is not Errata e.25 or higher, upgrade the kernel. For servers configured with less than 4 GB of RAM, use the kernel-smp. For servers configured with more than 4 GB of RAM, use the kernel-enterprise.
For example: To install the enterprise kernel, execute the following command: # rpm -ivh kernel-enterprise-2.4.9-e.25.i686.rpm
RPM Package Managers The following Red Hat Package Managers (rpms) are not typically installed with the base kernel but are required for a successful Oracle RAC installation. These rpms must be loaded on each node. Always check for the latest versions of these rpms prior to installation.
fileutils-4.1-10.4.i386.rpm rsh-server-0.17-5 cpp-2.96-124.7.2i386.rpm glibc-devel-2.2.4-32.11.i386.rpm kernel-headers-2.4.9-e.34.i386.rpm \ gcc-2.96-124.7.2.i386.rpm \ binutils-2.11.90.0.8-12.i386.rpm \ pdksh-5.2.14-22.i386.rpm \ ncurses4-5.0-5.i386.rpm procps-2.0.7-11 To determine if these rpms are part of the base kernel, execute the following command: # rpm -q ncurses4
package ncurses4 is not installed
To install the required rpm packages, execute the following commands: # su - root
# rpm -Uvh pdksh-5.2.14-22.i386.rpm ncurses4-5.0-5.i386.rpm
Oracle Cluster File System RPM Package Managers Before the Oracle Cluster file system can be configured, the Oracle Cluster File System (OCFS) software must be installed. The OCFS rpms must be installed in the listed order (support, kernel, tools). The OCFS rpms for RH AS 2.1 can be downloaded at: http://oss.oracle.com/projects/ocfs/files/RedHat/RHAS2.1
For servers configured with less that 4 GB of RAM, use the smp kernel. Load these rpms by executing the following commands: # su – root
# rpm –ivh rpm ocfs-support-1.0.10-1.i386.rpm
# rpm -ivh ocfs-2.4.9-e-smp-1.0.12-1.i686.rpm
# rpm –ivh ocfs-tools-1.0.10-1.i386.rpm
Installing and Configuring Oracle Real Application Clusters on EMC Symmetrix DMX Storage A Guide to Best Practices 6

4/29/2005 For servers configured with more than 4 GB of RAM, use the enterprise kernel. Load theses rpms by executing the following commands: # su – root
# rpm –ivh ocfs-support-1.0.10-1.i386.rpm
# rpm -ivh ocfs-2.4.9-e-enterprise-1.0.12-1.i686.rpm
# rpm -ivh ocfs-tools-1.0.10-1.i386.rpm
For single CPU servers, use the uniprocessor kernel. Load these rpms by executing the following commands: # su – root
# rpm –ivh ocfs-support-1.0.10-1.i386.rpm
# rpm -ivh ocfs-2.4.9-e-1.0.12-1.i686.rpm
# rpm -ivh ocfs-tools-1.0.10-1.i386.rpm
Kernel Parameters Using a vi editor, add the following entries to the end of the /etc/sysctl.conf file. The /etc/sysctl.conf file must be modified on all nodes in the cluster. After the file has been modified, execute the sysctrl –p command for the parameters to take effect or reboot the servers.
Shared Memory Parameters Set the shared memory and semaphore memory: kernel.shmmax = 2147483648
kernel.shmmin = 1
kernel.shmmni = 1024
kernel.shmseg = 10
Semaphores Set the semaphores kernel parameters: kernel.sem = 100 32000 32 128
File Handles Set the maximum number of file handles: fs.file-max=65536
AIO Maximum Transfer Size Set the Asynchronous I/O (AIO) maximum transfer size for DSS or OLTP workloads:
fs.aio-max-size=2147483648 DSS System
fs.aio-max-size=131072 OLTP System
Installing and Configuring Oracle Real Application Clusters on EMC Symmetrix DMX Storage A Guide to Best Practices 7

4/29/2005 Network Parameters Set the default and maximum send buffer size to 256 KB, and set the default and maximum receive buffer size to 256 KB. net.core.rmem_default=262144
net.core.wmem_default=262144
net.core.rmem_max=262144
net.core.wmem_max=262144
Creating Users In order to install the Oracle Real Application Cluster software, the following users and groups must be created. When using OCFS, the UID of the oracle user and GID of the oinstall group are required to be the same across all nodes. If the UID and GID are not the same, the OCFS file systems will not be properly owned by each node. # groupadd –g 700 dba
# groupadd –g 701 oinstall
# useradd –u 700 –g oinstall –G dba oracle
Setting Oracle Environment Variables Add the following environment variables to ~oracle/.bash_profile on each node. Each node’s ORACLE_SID must be unique (for example: ora1, ora2, etc.).
Table 2. Oracle Environment Variables
Environment Variable Recommended Value
ORACLE_BASE /opt/oracle ORACLE_HOME /opt/oracle/product/9.2.0 ORACLE_SID ora1 (must be unique for each node) ORACLE_TERM xterm NLS_LANG AMERICAN ORA_NLS33 $ORACLE_HOME/ocommon/nls/admin/data LD_LIBRARY_PATH $ORACLE_HOME/lib:$ORACLE_HOME/oracm/lib:/lib:/usr/lib THREADS_FLAG native PATH $PATH:$ORACLE_HOME/bin:$ORACLE_HOME/oracm/bin CLASSPATH $ORACLE_HOME/sqlj/lib/translator.zip:$CLASSPATH TNS_ADMIN $ORACLE_HOME/network/admin
Creating Oracle Directories Currently, the Oracle Cluster File System only supports Oracle datafiles. This includes Redo Log files, Archive Log files, controlfiles, and database datafiles. Therefore, OCFS cannot be used for Shared Oracle Home installs.
Create the following Oracle directories required for installation: # su - root
# mkdir /opt/oracle
# mkdir /opt/oracle/product
Installing and Configuring Oracle Real Application Clusters on EMC Symmetrix DMX Storage A Guide to Best Practices 8

4/29/2005 # mkdir /opt/oracle/product/9.2.0
# chown -R oracle.oinstall /opt/oracle
# mkdir /var/opt/oracle
# chown oracle.dba /var/opt/oracle
# chmod 755 /var/opt/oracle
Oracle Universal Installer does not properly replicate the following directories to other nodes in the cluster. The following directories must be created manually on all nodes: # su - oracle
$ mkdir -p $ORACLE_HOME/oracm/log
$ mkdir -p $ORACLE_HOME/network/log
$ mkdir -p $ORACLE_HOME/network/trace
$ mkdir -p $ORACLE_HOME/rdbms/log
$ mkdir -p $ORACLE_HOME/rdbms/audit
$ mkdir -p $ORACLE_HOME/network/agent/log
$ mkdir -p $ORACLE_HOME/network/agent/reco
Installing hangcheck-timer Kernel Module Linux (2.4.9-e.12 and higher) now includes a kernel module called hangcheck-timer. This module is not required for Oracle Cluster Manager operation, but its use is highly recommended. This module monitors the Linux kernel for long operating-system hangs that could affect the reliability of a RAC node and cause a corruption of a RAC database.
To determine if the hangcheck-timer module is installed, execute the following command:
# find /lib/modules -name "hangcheck-timer.o"
/lib/modules/2.4.9-e.25smp/kernel/drivers/char/hangcheck-timer.o
The inclusion of the hangcheck-timer kernel module also introduces two new configuration parameters to be used when the module is loaded:
hangcheck_tick — An interval indicating how often the hangcheck-timer checks on the health of the system. hangcheck_margin — Certain kernel activities may randomly introduce delays in the operation of the hangcheck-timer. The hangcheck_margin provides a margin of error to prevent unnecessary system resets due to these delays.
Table 3. Hangcheck Parameters
Parameter Oracle Recommended Setting
hangcheck_tick 30 seconds hangcheck_margin 180 seconds
To load the hangcheck-timer and set the recommended parameters, edit the /etc/modules.conf file and add the following line: options hangcheck-timer hangcheck_tick=30 hangcheck_margin=180
Now run modprobe to load the module. The hangcheck-module will now be loaded automatically; it is not necessary to run modeprobe after a reboot.
Installing and Configuring Oracle Real Application Clusters on EMC Symmetrix DMX Storage A Guide to Best Practices 9

4/29/2005 Configuring the Oracle Cluster File System Now that the Oracle Cluster File System software has been properly installed, you are ready to configure OCFS.
Generating the OCFS Configuration File Use the ocfs tool to generate the /etc/ocfs.conf file. Each node must have a configuration file; you must run the ocfs tool on each server.
1. Run the ocfs tool by typing the following commands:
# su root # ocfstool The OCFS Tool window opens, as shown in Figure 1.
Figure 1. OCFS Tool Window
2. Select Tasks, Generate Config.
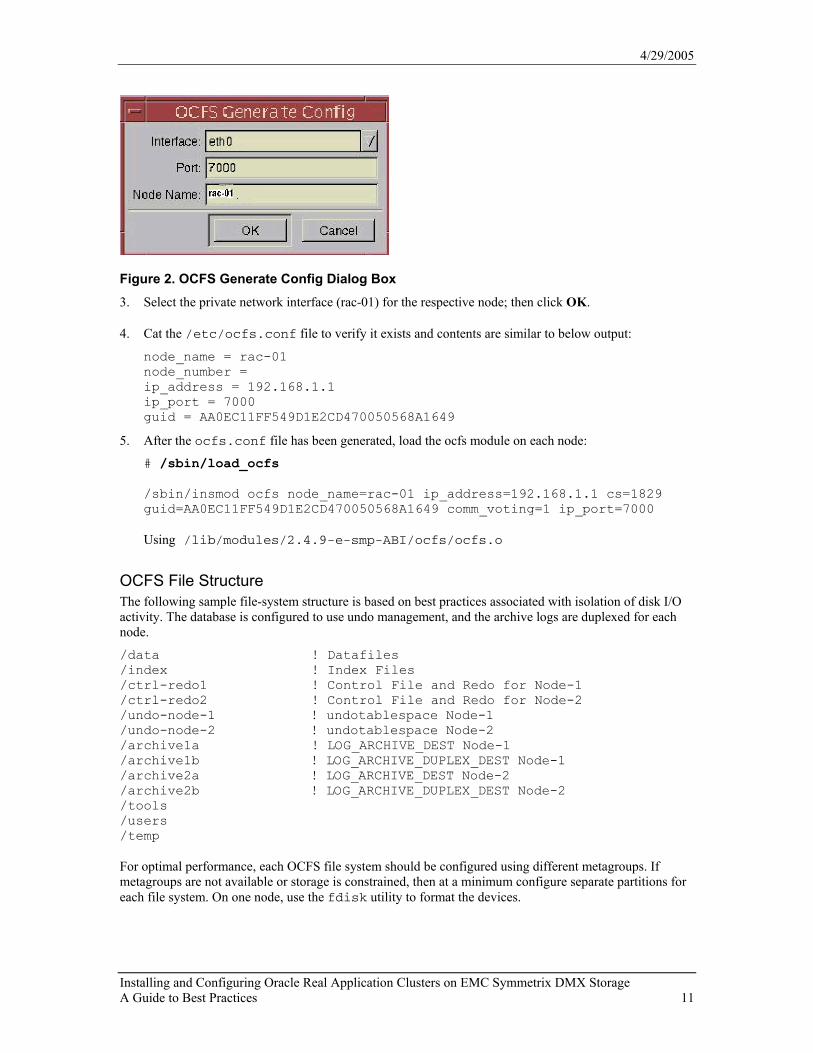
The OCFS Generate Config dialog box appears (Figure 2).
Installing and Configuring Oracle Real Application Clusters on EMC Symmetrix DMX Storage A Guide to Best Practices 10
4/29/2005
Figure 2. OCFS Generate Config Dialog Box 3. Select the private network interface (rac-01) for the respective node; then click OK.
4. Cat the /etc/ocfs.conf file to verify it exists and contents are similar to below output:
node_name = rac-01 node_number = ip_address = 192.168.1.1 ip_port = 7000 guid = AA0EC11FF549D1E2CD470050568A1649
5. After the ocfs.conf file has been generated, load the ocfs module on each node:
# /sbin/load_ocfs /sbin/insmod ocfs node_name=rac-01 ip_address=192.168.1.1 cs=1829 guid=AA0EC11FF549D1E2CD470050568A1649 comm_voting=1 ip_port=7000 Using /lib/modules/2.4.9-e-smp-ABI/ocfs/ocfs.o
OCFS File Structure The following sample file-system structure is based on best practices associated with isolation of disk I/O activity. The database is configured to use undo management, and the archive logs are duplexed for each node.
/data ! Datafiles /index ! Index Files /ctrl-redo1 ! Control File and Redo for Node-1 /ctrl-redo2 ! Control File and Redo for Node-2 /undo-node-1 ! undotablespace Node-1 /undo-node-2 ! undotablespace Node-2 /archive1a ! LOG_ARCHIVE_DEST Node-1 /archive1b ! LOG_ARCHIVE_DUPLEX_DEST Node-1 /archive2a ! LOG_ARCHIVE_DEST Node-2 /archive2b ! LOG_ARCHIVE_DUPLEX_DEST Node-2 /tools /users /temp For optimal performance, each OCFS file system should be configured using different metagroups. If metagroups are not available or storage is constrained, then at a minimum configure separate partitions for each file system. On one node, use the fdisk utility to format the devices.
Installing and Configuring Oracle Real Application Clusters on EMC Symmetrix DMX Storage A Guide to Best Practices 11

4/29/2005 After the disks have been partitioned, create the mount points for the OCFS file system:
# /archive1a /archive1b /archive2a /archive2b mkdir -p /data /index /ctrl-redo1 /ctrl-redo2 /undo-node-1 /undo-node-2 \
Creating OCFS File Systems To create the OCFS file system, use mkfs.ocfs. The options are as follows.
Table 4. Options for mkfs.ocfs
Option Description -b Block size in kilobytes -C Clear all data blocks -F Force format existing OCFS volume -g GID for the root directory -L Volume label -m Path where this device will be mounted -n Query only -p Permissions for the root directory -q Quiet execution -u UID for the root directory -V Print version and exit
To create an OCFS file system for /data, issue the following commands. Use these commands to create the remaining OCFS file systems as well: # su - root
# mkfs.ocfs -F -b 128 -L /data -m /oracle -u `id -u /data` -g `id -g oracle` -p 0775 /dev/sdb2
The OCFS file systems are ready to be mounted using the following command: # mount -t ocfs /dev/sdb2 /data
Automatically Mounting the File Systems To ensure the OCFS file systems are mounted automatically during a reboot, add their mount points to the /etc/fstab file on each node. The _netdev instructs to only mount after all network services are started.
For example:
/dev/sdb2 /data ocfs _netdev 0 0 /dev/sdc2 /index ocfs _netdev 0 0
Enabling Asynchronous I/O To enable asynchronous I/O for Oracle, it is necessary to relink Oracle. Oracle ships Oracle9i R2 with asynchronous I/O support disabled. # su - oracle
# cd $ORACLE_HOME/rdbms/lib
# make -f ins_rdbms.mk async_on
# make -f ins_rdbms.mk ioracle (Creates new Oracle executable.)
Set the pfile DISK_ASYNC_IO parameter to TRUE (the default).
Installing and Configuring Oracle Real Application Clusters on EMC Symmetrix DMX Storage A Guide to Best Practices 12

4/29/2005 Network Setup This section describes how to create and configure a public and private network for each node in the cluster. Although it is not necessary to configure a private network, it is highly recommended. The private network carries node participation and state information used by the Oracle Cluster Manager, as well as Cache Fusion traffic. The network setup must be done on all nodes in the cluster as the root user.
Configuring Public and Private Networks Using the redhat-config-network utility, configure the public network and private networks for each node. # su root
# redhat-config-network
To configure the public network, select eth0 and edit the parameters as shown in Figure 3. Enter the IP address, netmask, and default gateway as supplied by the Network Administrator. Be sure to select Activate device when computer starts.
Figure 3. Configuring the Public Network
To configure the private network, select eth1 and edit the parameters as shown in the previous figure. Enter the IP address, netmask, and default gateway as supplied by the Network Administrator. Be sure to select Activate device when computer starts.
You may also use your favorite vi editor to configure the public and private networks by editing the respective public and private ifcgf-xxxx files:
• Public — /etc/sysconfig/network-scripts/ifcfg-eth0 DEVICE=eth0
BOOTPROTO=static
IPADDR=137.69.8.185
NETMASK=255.255.0.0
ONBOOT=yes
• Private — /etc/sysconfig/network-scripts/ifcfg-eth0 DEVICE=eth1
ONBOOT=yes
Installing and Configuring Oracle Real Application Clusters on EMC Symmetrix DMX Storage A Guide to Best Practices 13

4/29/2005
BOOTPROTO=static
IPADDR=192.168.1.1
NETMASK=255.255.255.0
HOSTNAME=rac-01
Configuring the hosts File To publish the public and private hostnames to all hosts in the cluster, add these entries to the /etc/hosts file. It is recommended that private network addresses be managed by the hosts file and not DNS. This avoids making DNS a single point of failure for the database cluster.
Using the redhat-config-network utility, configure the hosts file for each node.
# su root
# redhat-config-network
To configure the hosts file, add the entries as shown in Figure 4 and click OK.
Figure 4. Adding Entries to the hosts File
You can also use your favorite vi editor to configure the /etc/hosts file:
# Do not remove the following line, or various programs # that require network functionality will fail. 127.0.0.1 node-1 localhost.localdomain localhost 192.168.1.1 rac-01 192.168.1.2 rac-02 137.69.8.185 node-1 137.69.8.183 node-2
Configuring the hosts.equiv File To deploy Oracle9i RAC, the oracle user must be able to run commands via rsh and copy files with rcp on all nodes in the cluster without providing a password. This is necessary to copy files into local ORACLE_HOME directories, modify database instance and network configurations, and to start and stop database instances. To accomplish this, Oracle uses the rsh and rlogin services, as well as the /etc/hosts.equiv file to establish host equivalence.
To verify these services are running, issue the following command on each node as root:
# chkconfig --list rlogin # rlogin on # chkconfig --list rsh
Installing and Configuring Oracle Real Application Clusters on EMC Symmetrix DMX Storage A Guide to Best Practices 14

4/29/2005 # rsh on As root, enter the public and private hostnames and oracle user to the /etc/hosts.equiv file:
# vi /etc/hosts.equiv rac-01 oracle rac-02 oracle node-1 oracle node-2 oracle
Verifying Network Connectivity Before installing the Oracle software, it is recommended to test and verify the network has been properly configured.
1. Check node-1 using the ping command:
# ping rac-02 Remote private hostname # ping node-2 Remote public node name # ping 192.168.1.2 Remote private IP address # ping 137.69.8.185 Remote public IP address
2. Check node-2 using the ping command:
# ping rac-01 Remote private hostname # ping node-1 Remote public node name # ping 192.168.1.1 Remote private IP address # ping 137.69.8.183 Remote public IP address
3. To test remote copy equivalency, create a temporary file in each node’s /tmp directory and execute the following commands:
$ touch /tmp/rcp1 When logged in to node-1 $ rcp /tmp/rcp1 rac-02:/tmp/
4. Log on to node-2 and verify that the file has been copied to the /tmp directory.
$ touch /tmp/rcp2 When logged in to node-2 $ rcp /tmp/rcp2 rac-02:/tmp/
5. Log on to node-1 and verify that the file has been copied to the /tmp directory.
6. To test remote shell host equivalency, log on as the oracle user and execute the following command. The remote hostname should be returned.
$ rsh rac-02 hostname When logged on to node-1 $ node-2
$ rsh rac-01 hostname When logged on to node-2 $ node-1
Installing and Configuring Oracle Real Application Clusters on EMC Symmetrix DMX Storage A Guide to Best Practices 15
4/29/2005
Oracle Cluster Manager 9.2.0.1.0 The Oracle Cluster Manager is installed using the Oracle Universal Installer (OUI). Plan on installing all Oracle software from a single node; OUI will copy the necessary software to all nodes registered to the cluster.
Creating the Cluster Manager Quorum File The Cluster Manager registers Oracle instances to the cluster and communicates to the Cluster Managers on other RAC nodes in the cluster.
1. Create a quorum file on any OCFS shared file system. The quorum file must be visible to all nodes.
# touch /data/quorum
2. Mount Oracle Installation disk 1 (node-1):
# su root # mount /mnt/cdrom
Installing Oracle Cluster Manager
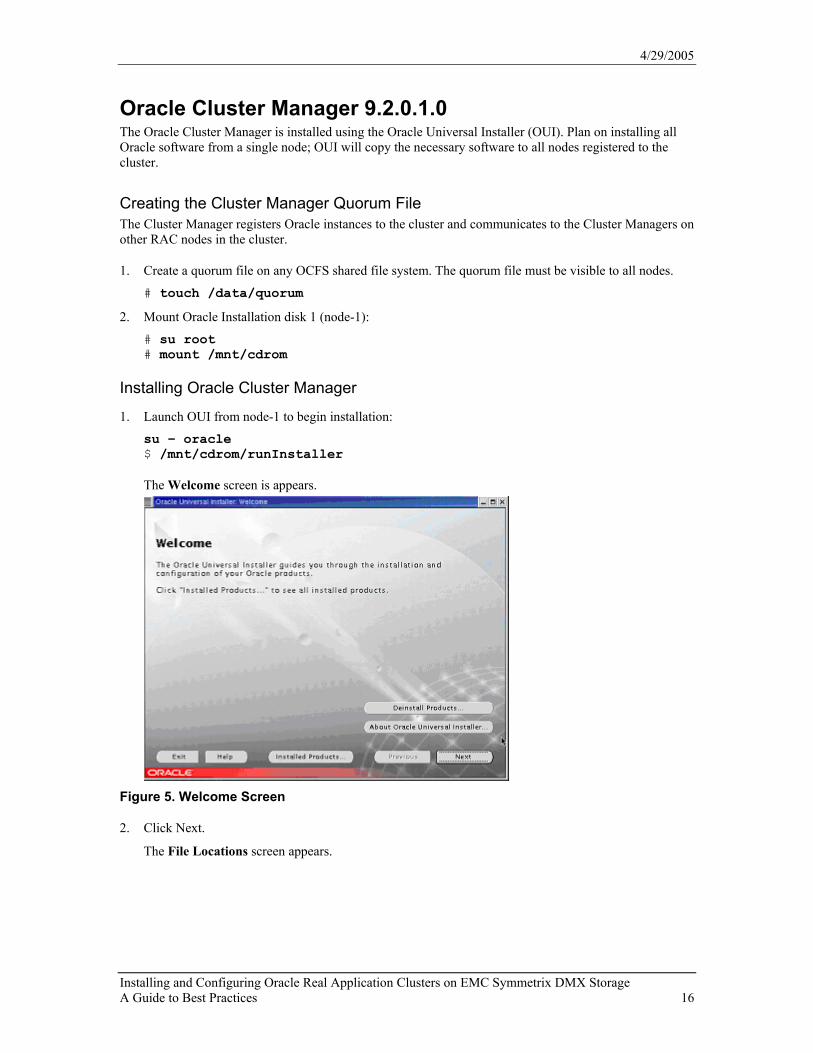
1. Launch OUI from node-1 to begin installation:
su – oracle $ /mnt/cdrom/runInstaller The Welcome screen is appears.
Figure 5. Welcome Screen
2. Click Next.
The File Locations screen appears.
Installing and Configuring Oracle Real Application Clusters on EMC Symmetrix DMX Storage A Guide to Best Practices 16

4/29/2005
Figure 6. File Locations Screen
3. Click Next for the inventory file location and
You will be prompted to run the orainstRoot.sh script.
4. Open another window as root and execute the script.
Figure 7. Available Products Screen
5. Select Oracle Cluster Manager 9.2.0.2.0 from the Available Products screen, and click Next.
The Public Node Information screen appears.
Installing and Configuring Oracle Real Application Clusters on EMC Symmetrix DMX Storage A Guide to Best Practices 17

4/29/2005
Figure 8. Public Node Information
6. In the Public Information screen, enter node-1 and node-2, and click Next.
The Private Node Information screen appears, as shown in Figure 9.
Figure 9. Private Node Information
7. In the Private Node Information screen, enter hostnames rac-01 and rac-02, and click Next.
The WatchDog Parameter Information screen appears.
Installing and Configuring Oracle Real Application Clusters on EMC Symmetrix DMX Storage A Guide to Best Practices 18

4/29/2005
Figure 10. WatchDog Parameter Information
8. Enter the WatchDog parameter value, and click Next (this will be changed a later step).
The Quorum Disk Information screen appears, as shown next.
Figure 11. Quorum Disk Information
9. Enter the location of the disk quorum file and click Next.
The Summary screen appears.
Installing and Configuring Oracle Real Application Clusters on EMC Symmetrix DMX Storage A Guide to Best Practices 19
4/29/2005
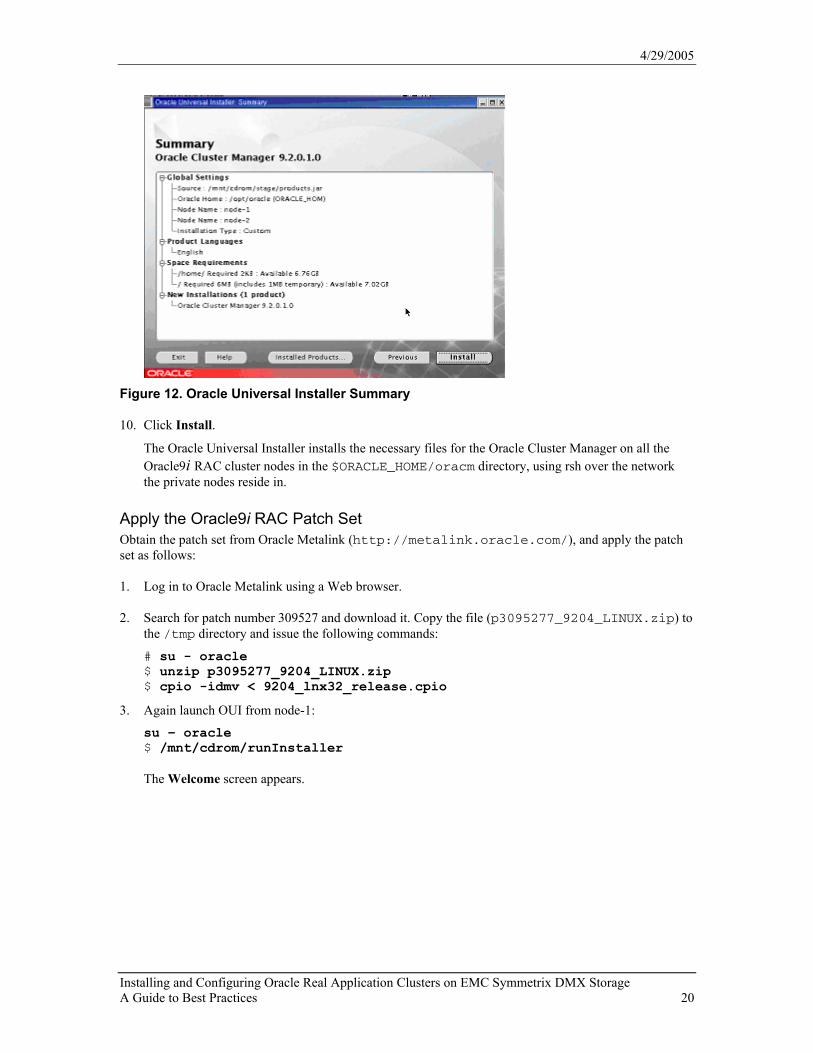
Figure 12. Oracle Universal Installer Summary
10. Click Install.
The Oracle Universal Installer installs the necessary files for the Oracle Cluster Manager on all the Oracle9i RAC cluster nodes in the $ORACLE_HOME/oracm directory, using rsh over the network the private nodes reside in.
Apply the Oracle9i RAC Patch Set Obtain the patch set from Oracle Metalink (http://metalink.oracle.com/), and apply the patch set as follows:
1. Log in to Oracle Metalink using a Web browser.
2. Search for patch number 309527 and download it. Copy the file (p3095277_9204_LINUX.zip) to the /tmp directory and issue the following commands:
# su - oracle $ unzip p3095277_9204_LINUX.zip $ cpio -idmv < 9204_lnx32_release.cpio
3. Again launch OUI from node-1:
su – oracle $ /mnt/cdrom/runInstaller The Welcome screen appears.
Installing and Configuring Oracle Real Application Clusters on EMC Symmetrix DMX Storage A Guide to Best Practices 20

4/29/2005
Figure 13. Oracle Universal Installer Welcome Screen
4. Click Next.
The File Locations screen appears, as shown next.
Figure 14. File Locations Screen
5. For the source file location, navigate to /tmp/Disk1/stage, which is the location of the patch set. Then select the products.jar file, click OK, and click Next.
The Available Products screen appears.
Installing and Configuring Oracle Real Application Clusters on EMC Symmetrix DMX Storage A Guide to Best Practices 21
4/29/2005
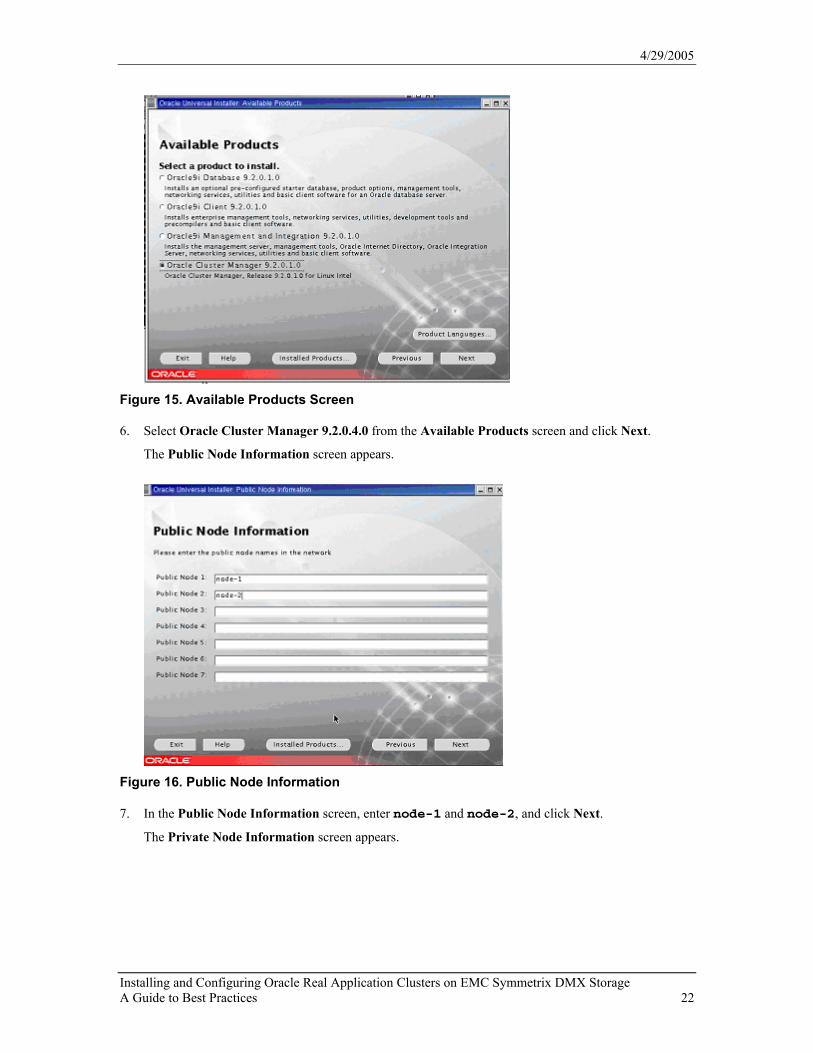
Figure 15. Available Products Screen
6. Select Oracle Cluster Manager 9.2.0.4.0 from the Available Products screen and click Next.
The Public Node Information screen appears.
Figure 16. Public Node Information
7. In the Public Node Information screen, enter node-1 and node-2, and click Next.
The Private Node Information screen appears.
Installing and Configuring Oracle Real Application Clusters on EMC Symmetrix DMX Storage A Guide to Best Practices 22

4/29/2005
Figure 17. Private Node Information
8. In the Private Node Information screen, enter hostname rac-01 and rac-02, and click Next.
9. Click Install. The Oracle Universal Installer installs the necessary files for the Oracle Cluster Manager patch on all the Oracle9i RAC cluster nodes in the $ORACLE_HOME/oracm directory, using rsh over the network the private nodes reside in.
Configuring the Oracle Cluster Manager In Linux 2.4.9-e.12 and higher, the WatchDog daemon has been depreciated and replaced with the hangcheck-timer kernel module. The following changes must be made to the ocmargs.ora and cmcfg.ora files, which reside in the $ORACLE_HOME/oraccm/admin directory. The ocmstart.sh file located in the $ORACLE_HOME/oracm/bin directory must also be modified. Be sure to make these modifications on all nodes.
1. Using a vi editor, remove the following line from the ocmargs.ora file:
watchdog
2. Remove the following lines from the cmfg.ora file:
WatchdogSafetyMargin=5000 WatchdogTimerMargin=60000
3. Add the following line to the cmcfg.ora file:
KernelModuleName=hangecheck-timer
4. Change the following parameter in the cmcfg.ora file:
MissCount=215 The cmcfg.ora file for node-1 should now contain the following lines: HeartBeat=15000 ClusterName=Oracle Cluster Manager, version 9i PollInterval=1000 MissCount=215 PrivateNodeNames=rac-01 rac-02 PublicNodeNames=node-1 node-2 ServicePort=9998
Installing and Configuring Oracle Real Application Clusters on EMC Symmetrix DMX Storage A Guide to Best Practices 23

4/29/2005
CmDiskFile=/data/quorum HostName=rac-01 KernelModuleName=hangcheck-timer
5. Comment out or remove the following lines from the ocstart.sh file:
WATCHDOGD_LOG_FILE=$ORACLE_HOME/oracm/log/wdd.log WATCHDOGD_BAK_FILE=$ORACLE_HOME/oracm/log/wdd.log.bak watchdogd_args=`grep '^watchdogd' $OCMARGS_FILE |\ sed -e 's+^watchdogd *++'` if watchdogd status | grep 'Watchdog daemon active' >/dev/null then echo 'ocmstart.sh: Error: watchdogd is already running' exit 1 fi if test -r $WATCHDOGD_LOG_FILE then mv $WATCHDOGD_LOG_FILE $WATCHDOGD_BAK_FILE fi Startup watchdogd echo watchdogd $watchdogd_args watchdogd $watchdogd_args
Starting the Oracle Cluster Manager
1. To start the Oracle Cluster Manager, run ocmstart.sh. Issue the following commands:
su - root # . ~oracle/.bash_profile # $ORACLE_HOME/oracm/bin/ocmstart.sh
2. Verify the Cluster Manager processes are running by executing the following command, which will generate the following sample output:
$ ps -ef | grep oracm root 3137 1 0 Jun28 ? 00:00:00 oracm root 3139 3137 0 Jun28 ? 00:00:00 oracm root 3140 3139 0 Jun28 ? 00:00:00 oracm root 3141 3139 0 Jun28 ? 00:00:00 oracm root 3142 3139 0 Jun28 ? 00:00:22 oracm root 3143 3139 0 Jun28 ? 00:00:00 oracm root 3144 3139 0 Jun28 ? 00:00:00 oracm root 3145 3139 0 Jun28 ? 00:00:00 oracm root 3146 3139 0 Jun28 ? 00:00:00 oracm oracle 12280 11935 0 15:16 pts/3 00:00:00 grep oracm
3. After a few seconds, verify that the oracle processes are still running. If the processes have died, execute the follow command:
su – oracle $ dd if=/dev/zero of=/data/quorum bs=4096 count=96
4. Restart the Cluster Manager on node-1; then start the Cluster Manager on all nodes in the cluster. It is not necessary to perform step 3 on all nodes.
Installing and Configuring Oracle Real Application Clusters on EMC Symmetrix DMX Storage A Guide to Best Practices 24

4/29/2005
Oracle Real Application Cluster Software The Oracle Real Application Cluster software is installed using the Oracle Universal Installer (OUI). Plan on installing all Oracle Software from a single node; OUI will copy the necessary software to all nodes registered to the cluster.
Creating the Shared Configuration File Real Application Cluster instances and listeners are managed by the srvctl utility. The srvctl utility requires a shared configuration file.
1. Create a shared configuration file on a OCFS shared file system:
# touch /data/SharedSrvctlConfigFile
2. Mount Oracle Installation disk 1 (node-1):
# su root # mount /mnt/cdrom
Installing Oracle Real Application Cluster Software
1. Launch OUI from node-1 to begin installation:
su – oracle $ /mnt/cdrom/runInstaller
The Welcome screen appears, as shown next.
Figure 18. Welcom Screen
2. Click Next.
The Cluster Node Selection screen appears. The screen should show node-1 and node-2. If a node does not appear on the selection screen, then the cluster manager is not running on that node.
Installing and Configuring Oracle Real Application Clusters on EMC Symmetrix DMX Storage A Guide to Best Practices 25

4/29/2005
Figure 19. Cluster Node Selection
3. Select all nodes, and then click Next.
The Available Products screen appears, as shown next.
Figure 20. Available Products Screen
4. Select Oracle9i Database 9.2.0.1.0, and click Next.
The Installation Types screen appears.
Installing and Configuring Oracle Real Application Clusters on EMC Symmetrix DMX Storage A Guide to Best Practices 26

4/29/2005
Figure 21. Installation Types Screen
5. Select the Enterprise Edition, and click Next.
The Database Configuration screen appears, as shown next.
Figure 22. Database Configuration Screen
6. Select Software Only, and click Next.
The Shared Configuration File Name screen appears.
Installing and Configuring Oracle Real Application Clusters on EMC Symmetrix DMX Storage A Guide to Best Practices 27

4/29/2005
Figure 23. Shared Configuration File Name Screen
7. Enter the name of the shared configuration file, and click Next.
The Summary window appears, as shown next.
Figure 24. Oracle Universal Installer Summary
8. Click Install. During the installation, you will be prompted to run the root.sh script. Open a window on each server and execute the script.
9. After the installation successfully completes, click Exit.
Installing and Configuring Oracle Real Application Clusters on EMC Symmetrix DMX Storage A Guide to Best Practices 28

4/29/2005 Starting Oracle Global Services After installing the Real Application Cluster software, initialize the shared server configuration file and start the Global Services daemon:
1. Initialize the shared server configuration file on one node:
su - oracle $ srvconfig -init
2. Start the Global Service daemon on each node:
su - oracle $ gsdctl start Successfully started GSD on local node $
Creating an Oracle Real Application Database It is recommended to use the Database Configuration Assistant (dbca) to create your database. Prior to running dbca, the Oracle listeners must be available and configured. During the installation process, dbca makes explicit calls to the Oracle listeners. If the listeners are not available, the database creating will fail.
Network Creation Assistant Use the Network Creation Assistant (netca) to configure Oracle listeners for each node. The dbca will create local listener entries in the pfile, using the format LISTNER_SID1, LISTNER_SID2, etc. Be sure to follow this convention when using the Network Configuration Assistant.
1. To start the Network Configuration Assistant, issue the dbca command as Oracle.
The Oracle Net Configuration Assistant Welcome screen appears.
Figure 25. Oracle Net Configuration Assistant Welcome Screen
2. Select Cluster configuration, and click Next.
The Nodes screen appears.
Installing and Configuring Oracle Real Application Clusters on EMC Symmetrix DMX Storage A Guide to Best Practices 29

4/29/2005
Figure 26. Nodes Screen
3. Click Select all nodes, and then click Next.
The Welcome screen prompts you for the configuration you want (Figure 27).
Figure 27. Selecting a Configuration
4. Select Listener configuration, and click Next.
The Listener Configuration screen appears.
Figure 28. Listener Configuration Screen
Installing and Configuring Oracle Real Application Clusters on EMC Symmetrix DMX Storage A Guide to Best Practices 30

4/29/2005 5. Select Add, and click Next.
The Listener Name screen appears, as shown next.
Figure 29. Listener Name Screen
6. Enter the listener name and click Next. The Select Protocols screen appears.
Figure 30. Select Protocols Screen
7. In the Available Protocols list, select the protocols you want to configure for the listener. Click the right arrow to move the protocols to the Selected Protocols list, then click Next.
The TCP/IP Protocol screen appears.
Installing and Configuring Oracle Real Application Clusters on EMC Symmetrix DMX Storage A Guide to Best Practices 31

4/29/2005
Figure 31. TCP/IP Protocol Screen
8. Select Use the standard port number of 1521, and click Next.
You can now choose whether you want to configure another listener (Figure 32).
Figure 32. Choosing to Configure Another Listener
9. Select Yes to configure a second listener for node-2. Repeat steps 5 through 8 using the following example parameters:
Listener Name: LISTENER_ORA2 Port Number: 1522
10. Start the listener using the following command:
$ lsnrctl start
Database Configuration Assistant When using OCFS, the Database Configuration Assistant should be started at the shared datafile location.
1. To start dbca, issue the following command:
# su oracle $ dbca –datafileDestination /data
The Welcome screen appears, as shown next.
Installing and Configuring Oracle Real Application Clusters on EMC Symmetrix DMX Storage A Guide to Best Practices 32

4/29/2005
Figure 33. Database Configuration Assistant Welcome Screen
2. Select Oracle cluster database, and click Next.
The Operations screen appears.
3. Select Create a database, and click Next.
The Node Selection screen appears.
Installing and Configuring Oracle Real Application Clusters on EMC Symmetrix DMX Storage A Guide to Best Practices 33

4/29/2005
Figure 34. Node Selection Screen
4. Click Select All, and then click Next.
The Database Templates screen appears.
5. Select the database type suitable for your application, and then click Next.
The Database Identification screen appears, as shown next.
Installing and Configuring Oracle Real Application Clusters on EMC Symmetrix DMX Storage A Guide to Best Practices 34

4/29/2005
Figure 35. Database Identification Screen
6. Enter a global database name ,and click Next.
The Network Configuration screen appears.
Figure 36. Network Configuration for the Database
7. Select Register this database with all the listeners, and then click Next.
The Database Connection Options screen appears.
Installing and Configuring Oracle Real Application Clusters on EMC Symmetrix DMX Storage A Guide to Best Practices 35

4/29/2005
Figure 37. Database Connection Options
8. Select Dedicated Server Mode, and click Next.
The Initialization Parameters screen appears.
Figure 38. Initialization Parameters Screen
Installing and Configuring Oracle Real Application Clusters on EMC Symmetrix DMX Storage A Guide to Best Practices 36

4/29/2005 9. In the Initialization Parameters screen, do the following:
a. Click the Archive tab.
b. Select Archive Log Mode.
c. Enter the Archive Log destination locations defined in the sample layout.
d. Click Next.
The Database Storage screen appears.
Figure 39. Database Storage Screen
10. Select Controlfile and delete control03.ctl. Enter the control file locations as defined in the sample layout.
11. In the Database Storage screen, select Datafiles (as shown in Figure 40), and enter the file locations as defined in the sample layout.
Installing and Configuring Oracle Real Application Clusters on EMC Symmetrix DMX Storage A Guide to Best Practices 37

4/29/2005
Figure 40. Working with Datafiles in the Database Storage Screen
12. In the Database Storage screen, select Redo Log Groups (Figure 41). Use Redo Log Groups 1 and 2 for node-1; place these redo logs in /ctrl-redo1. Use Redo Log Groups 3 and 4 for node-2; place these redo logs in /ctrl-redo2 as defined in the sample layout.
Figure 41. Working with Redo Log Groups
13. Click Next.
Installing and Configuring Oracle Real Application Clusters on EMC Symmetrix DMX Storage A Guide to Best Practices 38

4/29/2005
The Creation Options screen appears. The Create Database option will automatically be selected, as shown next.
Figure 42. Creation Options
14. Click Finish to create the database.
Verifying Database Status The RAC cluster should now be up and running. To check the database status, use the srvctl utility as follows:
# su - oracle $ srvctl status database -d ora Instance orca1 is running on node node-1 Instance orca2 is running on node node-2
Installing and Configuring Oracle Real Application Clusters on EMC Symmetrix DMX Storage A Guide to Best Practices 39

4/29/2005
Best Practices
Use Striped Metavolumes Configure metavolumes with eight or 16 members. Using eight- or 16-member metavolumes ensures that the members are placed on disks that are controlled by different DA processors. Therefore, the Symmetrix system will be able to utilize the full potential of the back end. Build striped metavolumes using the default stripe depth of two disk cylinders (960 KB).
Use Server Parameter File (spfile) Use a Server Parameter File to maintain instance parameters. The spfile is maintained on a shared disk and contains generic entries common to all nodes as well as instance specific parameters for each node. The spfile also holds persistent initialization parameters. If any of these parameters are changed using the ALTER SET command, Oracle will apply these changes to the current spfile. Since the database uses this file during startup, all parameters persist between startups and shutdowns. If an spfile is not used, a pfile for each instance must be maintained, which can be cumbersome as the cluster grows.
Use Async I/O Asynchronous I/O allows Oracle processes to issue multiple I/O requests to disk with a single system call rather than a large number of single I/O requests. The kernel can optimize disk activity by reordering requests or combining individual requests into fewer and larger requests. Be sure to adjust the aio-max-size kernel parameter for DSS or OLTP database activity as described in this paper. When using async I/O with OCFS, you must be on kernel e.24 or higher to be in an Oracle-supported configuration.
Use Oracle Cluster File System The Oracle Cluster File System is designed to provide an alternative to using raw devices for Oracle 9i RAC and beyond. OCFS solves the manageability problems associated with raw devices and the 255 raw device limits on Linux. OCFS performance is almost equivalent to that of raw devices
OCFS supports Oracle datafiles, which include Redo Log files, Archive log files, controlfiles, and database datafiles. The shared quorum disk file for the cluster manager and the shared init file are also supported.
Place Archive Logs on the Oracle Cluster Files System Oracle archive logs should be placed on an Oracle Cluster File System mount point(s). When the archive logs are placed in a shared file system, all instances or nodes can access the archived logs. This makes media recovery more efficient and easier to manage.
Isolate Private Network The private network should only be used by Oracle to carry Cluster Manager and Cache Fusion internode traffic. Configure a Gigabit Ethernet network to carry the internode communications. The private interconnect is also used to perform administrative tasks such as starting and stopping, and to determine the status of RAC instances. Using the private network in a nondedicated mode will degrade Oracle database performance.
Installing and Configuring Oracle Real Application Clusters on EMC Symmetrix DMX Storage A Guide to Best Practices 40

4/29/2005 Use the Linux hangcheck-timer Module Linux (2.4.9-e.12 and higher) now includes a kernel module called hangcheck-timer. This module is not required for Oracle Cluster Manager operation, but its use is highly recommended. This module monitors the Linux kernel for long operating system hangs that could affect the reliability of a RAC node and cause a corruption of a RAC database.
Use a hosts File Maintain the Private node names for your cluster in the /etc/hosts file. This avoids the problem of making a DNS server into a single point of failure for the database cluster.
Use Automatic Undo Management
Undo Tablespaces Use the automatic undo method for rollback purposes in a RAC system. It is no longer necessary to manually create and size the individual rollback segments for each instance when using automated undo management. All instances in the cluster must be configured to use the same undo mode. Use DBCA to configure automatic undo management for the RAC instances; this is the default behavior.
Undo Management When UNDO_MANGEMENT is set to AUTO, Oracle manages the segment free and used spaces with bitmaps, as opposed to free lists and free-list groups. Using bitmaps provides a simpler and more efficient way of managing segment free space. They not only provide better space utilization, but eliminate any need to specify and tune PCTUSED, PCTFREE, FREELISTS, and FREELIST GROUPS parameters. By default, DBCA will set UNDO_MANGEMENT to AUTO.
Installing and Configuring Oracle Real Application Clusters on EMC Symmetrix DMX Storage A Guide to Best Practices 41