Embed Size (px)
Citation preview
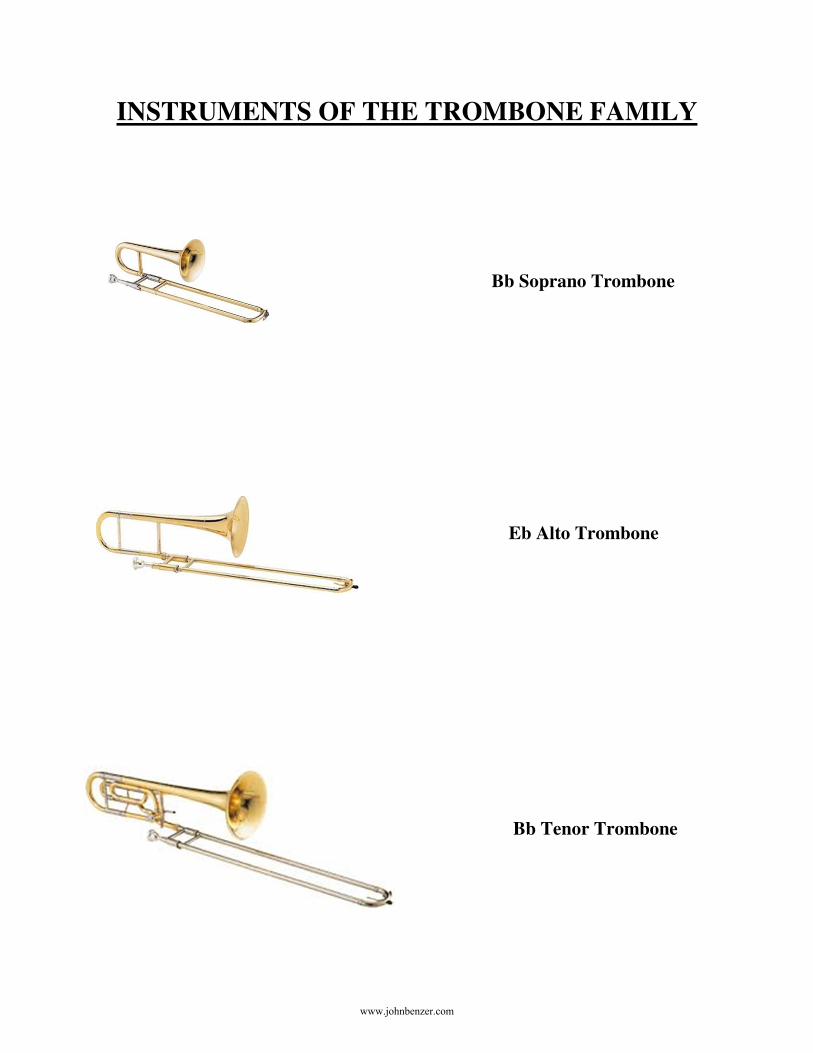
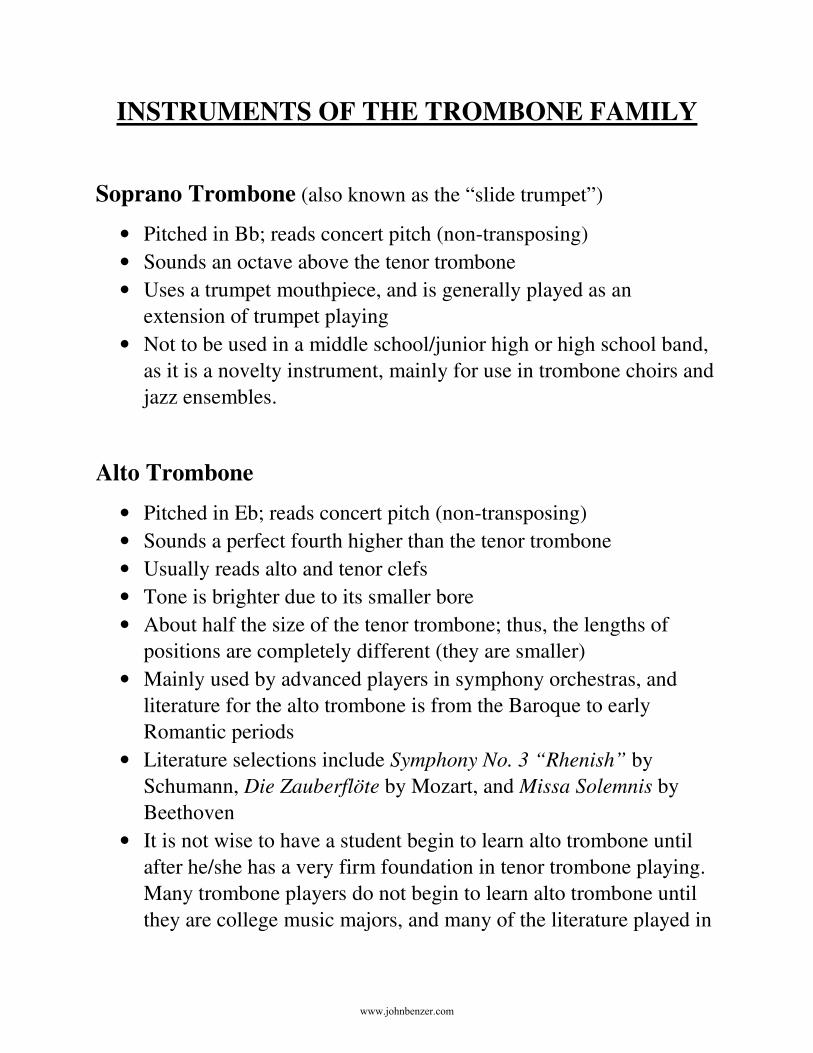
INSTRUMENTS OF THE TROMBONE FAMILY
Bb Soprano Trombone
Eb Alto Trombone
Bb Tenor Trombone
www.johnbenzer.com
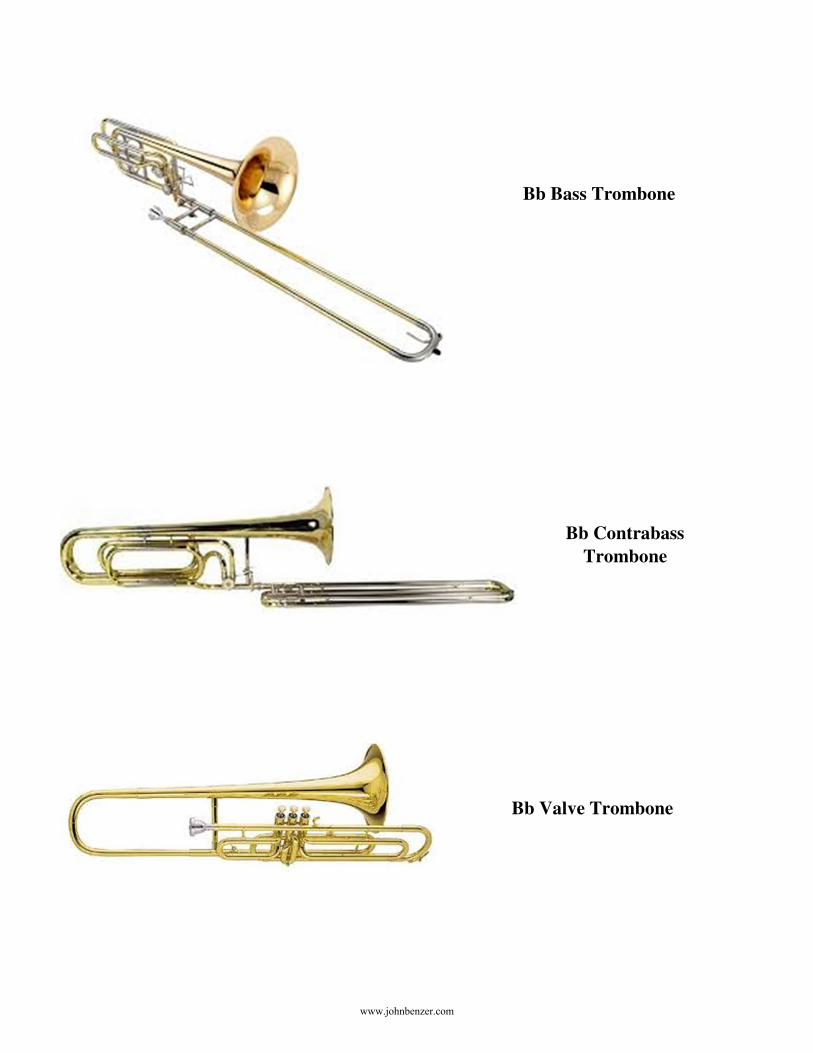
Bb Bass Trombone
Bb Contrabass
Trombone
Bb Valve Trombone
www.johnbenzer.com
INSTRUMENTS OF THE TROMBONE FAMILY
Soprano Trombone (also known as the “slide trumpet”)
• Pitched in Bb; reads concert pitch (non-transposing)
• Sounds an octave above the tenor trombone
• Uses a trumpet mouthpiece, and is generally played as an
extension of trumpet playing
• Not to be used in a middle school/junior high or high school band,
as it is a novelty instrument, mainly for use in trombone choirs and
jazz ensembles.
Alto Trombone
• Pitched in Eb; reads concert pitch (non-transposing)
• Sounds a perfect fourth higher than the tenor trombone
• Usually reads alto and tenor clefs
• Tone is brighter due to its smaller bore
• About half the size of the tenor trombone; thus, the lengths of
positions are completely different (they are smaller)
• Mainly used by advanced players in symphony orchestras, and
literature for the alto trombone is from the Baroque to early
Romantic periods
• Literature selections include Symphony No. 3 “Rhenish” by
Schumann, Die Zauberflöte by Mozart, and Missa Solemnis by
Beethoven
• It is not wise to have a student begin to learn alto trombone until
after he/she has a very firm foundation in tenor trombone playing.
Many trombone players do not begin to learn alto trombone until
they are college music majors, and many of the literature played in
www.johnbenzer.com
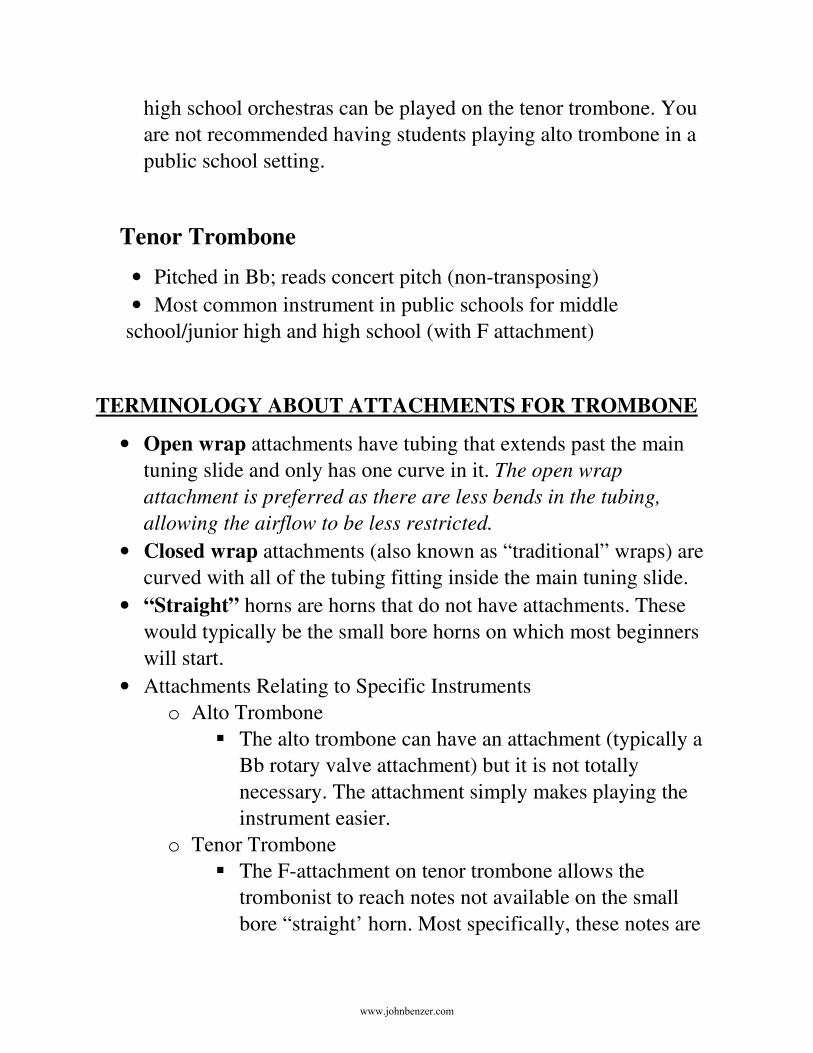
high school orchestras can be played on the tenor trombone. You
are not recommended having students playing alto trombone in a
public school setting.
Tenor Trombone
• Pitched in Bb; reads concert pitch (non-transposing)
• Most common instrument in public schools for middle
school/junior high and high school (with F attachment)
TERMINOLOGY ABOUT ATTACHMENTS FOR TROMBONE
• Open wrap attachments have tubing that extends past the main
tuning slide and only has one curve in it. The open wrap
attachment is preferred as there are less bends in the tubing,
allowing the airflow to be less restricted.
• Closed wrap attachments (also known as “traditional” wraps) are
curved with all of the tubing fitting inside the main tuning slide.
• “Straight” horns are horns that do not have attachments. These
would typically be the small bore horns on which most beginners
will start.
• Attachments Relating to Specific Instruments
o Alto Trombone
� The alto trombone can have an attachment (typically a
Bb rotary valve attachment) but it is not totally
necessary. The attachment simply makes playing the
instrument easier.
o Tenor Trombone
� The F-attachment on tenor trombone allows the
trombonist to reach notes not available on the small
bore “straight’ horn. Most specifically, these notes are
www.johnbenzer.com
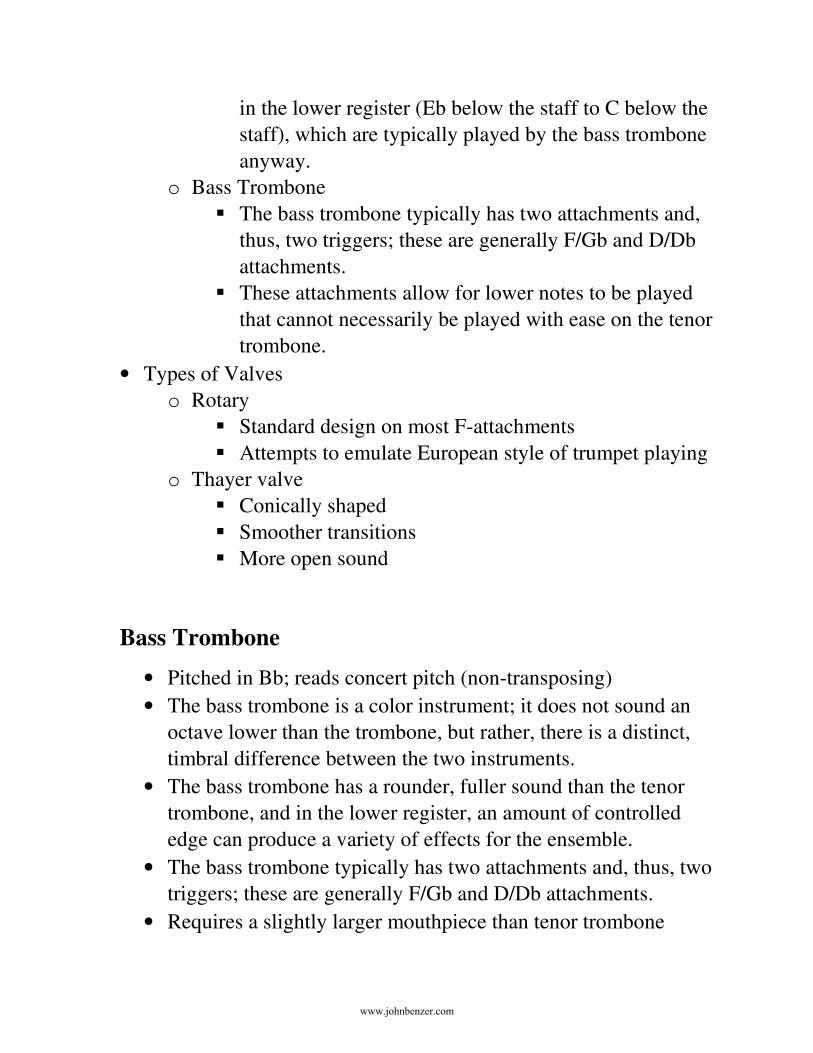
in the lower register (Eb below the staff to C below the
staff), which are typically played by the bass trombone
anyway.
o Bass Trombone
� The bass trombone typically has two attachments and,
thus, two triggers; these are generally F/Gb and D/Db
attachments.
� These attachments allow for lower notes to be played
that cannot necessarily be played with ease on the tenor
trombone.
• Types of Valves
o Rotary
� Standard design on most F-attachments
� Attempts to emulate European style of trumpet playing
o Thayer valve
� Conically shaped
� Smoother transitions
� More open sound
Bass Trombone
• Pitched in Bb; reads concert pitch (non-transposing)
• The bass trombone is a color instrument; it does not sound an
octave lower than the trombone, but rather, there is a distinct,
timbral difference between the two instruments.
• The bass trombone has a rounder, fuller sound than the tenor
trombone, and in the lower register, an amount of controlled
edge can produce a variety of effects for the ensemble.
• The bass trombone typically has two attachments and, thus, two
triggers; these are generally F/Gb and D/Db attachments.
• Requires a slightly larger mouthpiece than tenor trombone
www.johnbenzer.com
• Should only be played by mature players in a high school
ensemble. Middle school/junior high students should not be
playing the instrument because it is too challenging given the
physical and mental development of students in that age group.
Contrabass Trombone
• Pitched in Bb; reads in concert pitch (non-transposing)
• Not much different from the bass trombone other than it has a
double slide, which allows the instrument to play lower with
more ease than the bass trombone
• Not to be used in a middle school/junior high or high school
band, as it is rarely used outside of a professional ensemble
(much less in a professional ensemble!)
Valve Trombone
� Pitched in Bb
� It is shaped like a trombone but has valves where a
slide should be; in other words, it is the platypus of the
trombone family.
� Basically was developed for European polka bands and
early American military bands, but the most common
use today is a bass version known as the cimbasso,
which is typically played by tuba players on a tuba
mouthpiece in operatic works by Verdi and Puccini.
� Not to be used in a middle school/junior high or high
school band, as it is a novelty instrument
www.johnbenzer.com
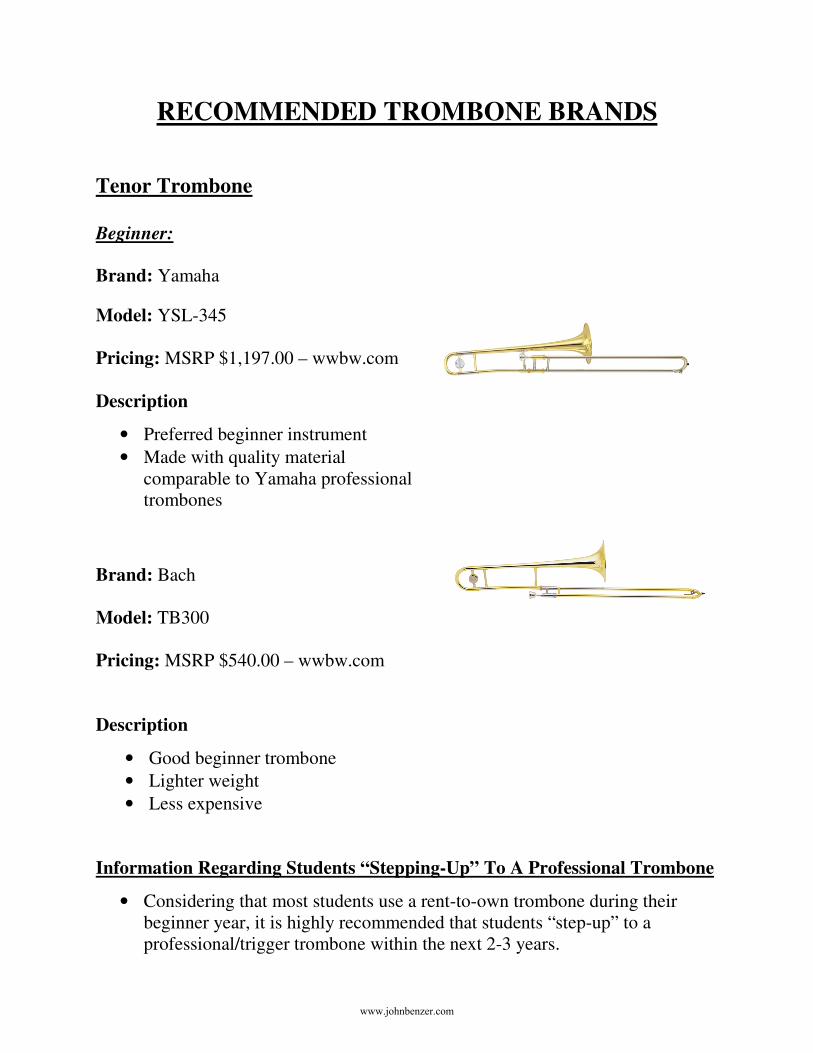
RECOMMENDED TROMBONE BRANDS
Tenor Trombone
Beginner:
Brand: Yamaha
Model: YSL-345 Pricing: MSRP $1,197.00 – wwbw.com
Description
• Preferred beginner instrument
• Made with quality material comparable to Yamaha professional trombones
Brand: Bach
Model: TB300
Pricing: MSRP $540.00 – wwbw.com
Description
• Good beginner trombone
• Lighter weight
• Less expensive
Information Regarding Students “Stepping-Up” To A Professional Trombone
• Considering that most students use a rent-to-own trombone during their beginner year, it is highly recommended that students “step-up” to a professional/trigger trombone within the next 2-3 years.
www.johnbenzer.com
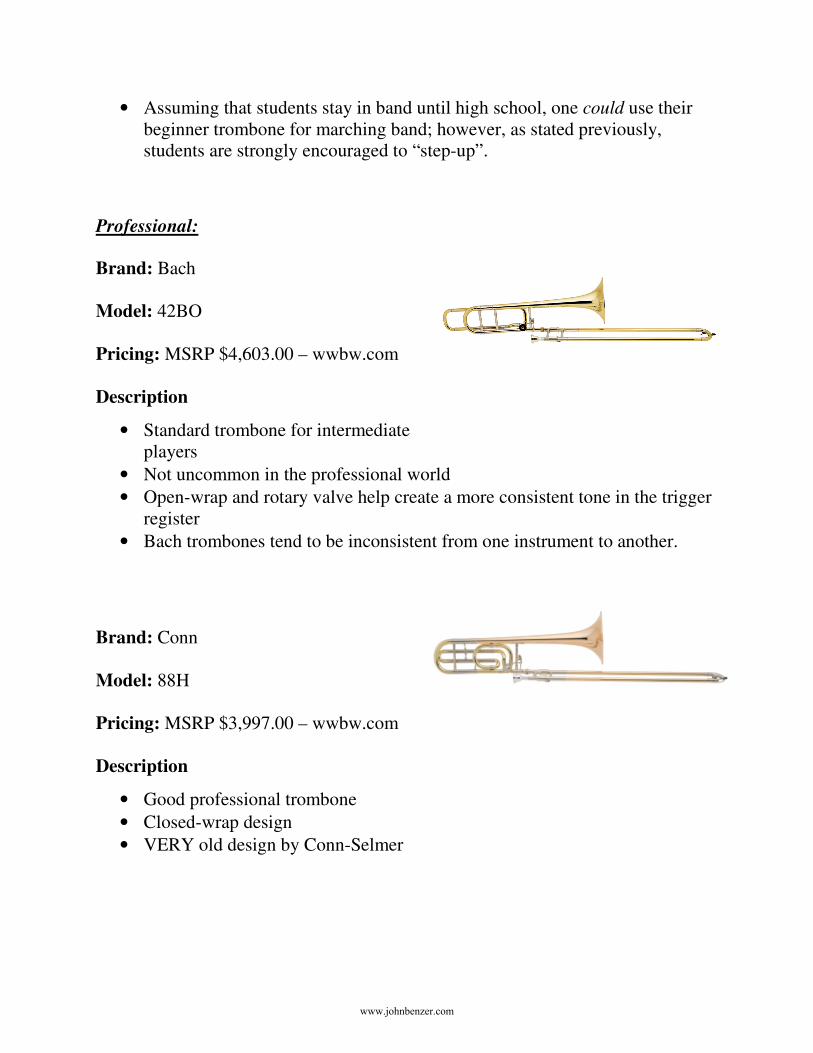
• Assuming that students stay in band until high school, one could use their beginner trombone for marching band; however, as stated previously, students are strongly encouraged to “step-up”.
Professional:
Brand: Bach
Model: 42BO
Pricing: MSRP $4,603.00 – wwbw.com
Description
• Standard trombone for intermediate players
• Not uncommon in the professional world
• Open-wrap and rotary valve help create a more consistent tone in the trigger register
• Bach trombones tend to be inconsistent from one instrument to another.
Brand: Conn
Model: 88H
Pricing: MSRP $3,997.00 – wwbw.com
Description
• Good professional trombone
• Closed-wrap design
• VERY old design by Conn-Selmer
www.johnbenzer.com
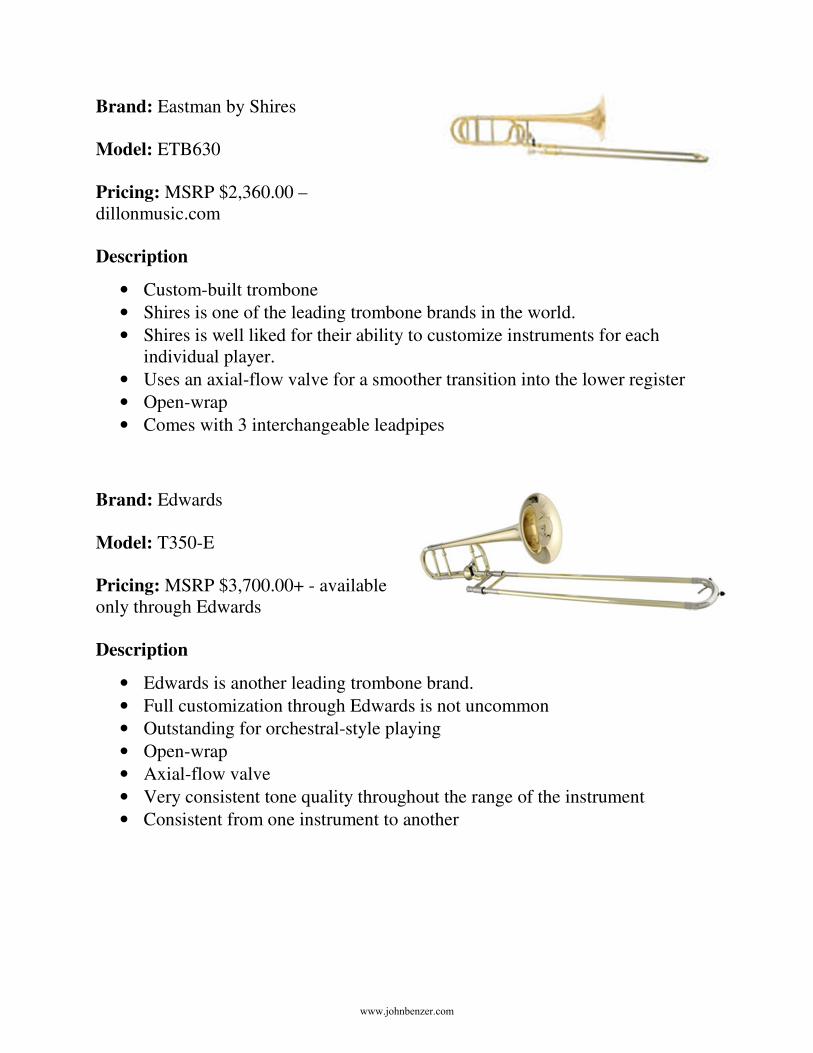
Brand: Eastman by Shires
Model: ETB630
Pricing: MSRP $2,360.00 – dillonmusic.com Description
• Custom-built trombone
• Shires is one of the leading trombone brands in the world.
• Shires is well liked for their ability to customize instruments for each individual player.
• Uses an axial-flow valve for a smoother transition into the lower register
• Open-wrap
• Comes with 3 interchangeable leadpipes
Brand: Edwards
Model: T350-E
Pricing: MSRP $3,700.00+ - available only through Edwards Description
• Edwards is another leading trombone brand.
• Full customization through Edwards is not uncommon
• Outstanding for orchestral-style playing
• Open-wrap
• Axial-flow valve
• Very consistent tone quality throughout the range of the instrument
• Consistent from one instrument to another
www.johnbenzer.com
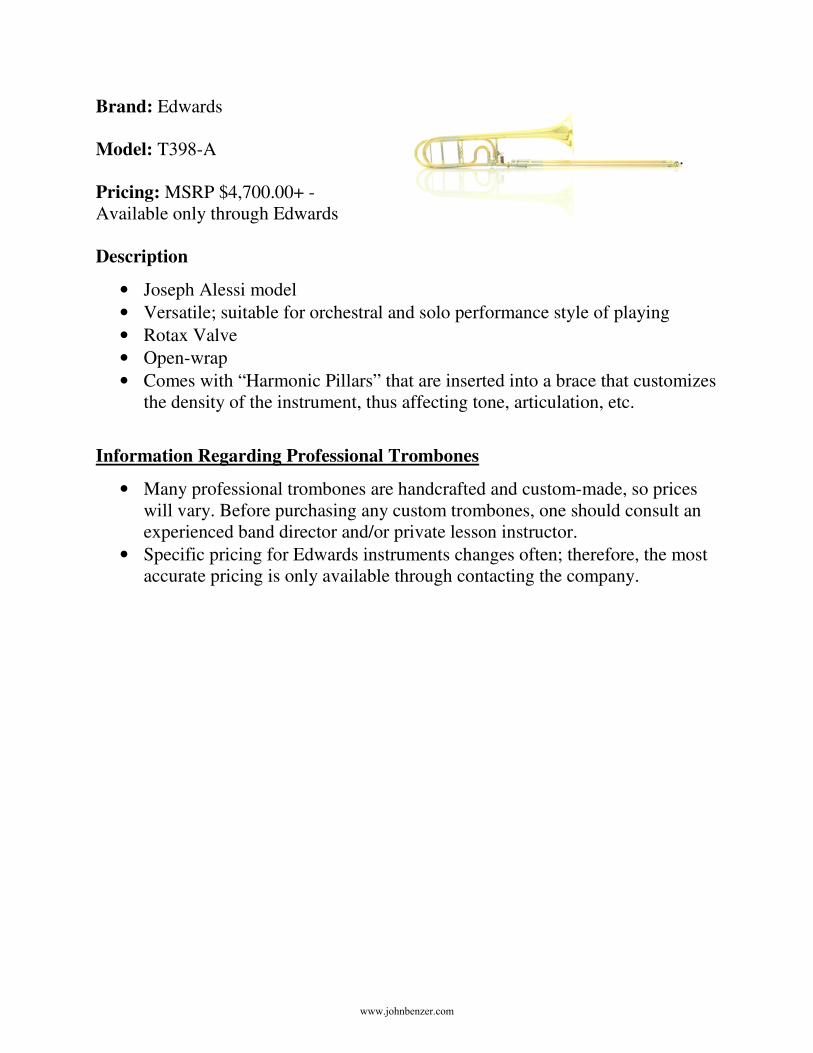
Brand: Edwards
Model: T398-A
Pricing: MSRP $4,700.00+ - Available only through Edwards
Description
• Joseph Alessi model
• Versatile; suitable for orchestral and solo performance style of playing
• Rotax Valve
• Open-wrap
• Comes with “Harmonic Pillars” that are inserted into a brace that customizes the density of the instrument, thus affecting tone, articulation, etc.
Information Regarding Professional Trombones
• Many professional trombones are handcrafted and custom-made, so prices will vary. Before purchasing any custom trombones, one should consult an experienced band director and/or private lesson instructor.
• Specific pricing for Edwards instruments changes often; therefore, the most accurate pricing is only available through contacting the company.
www.johnbenzer.com
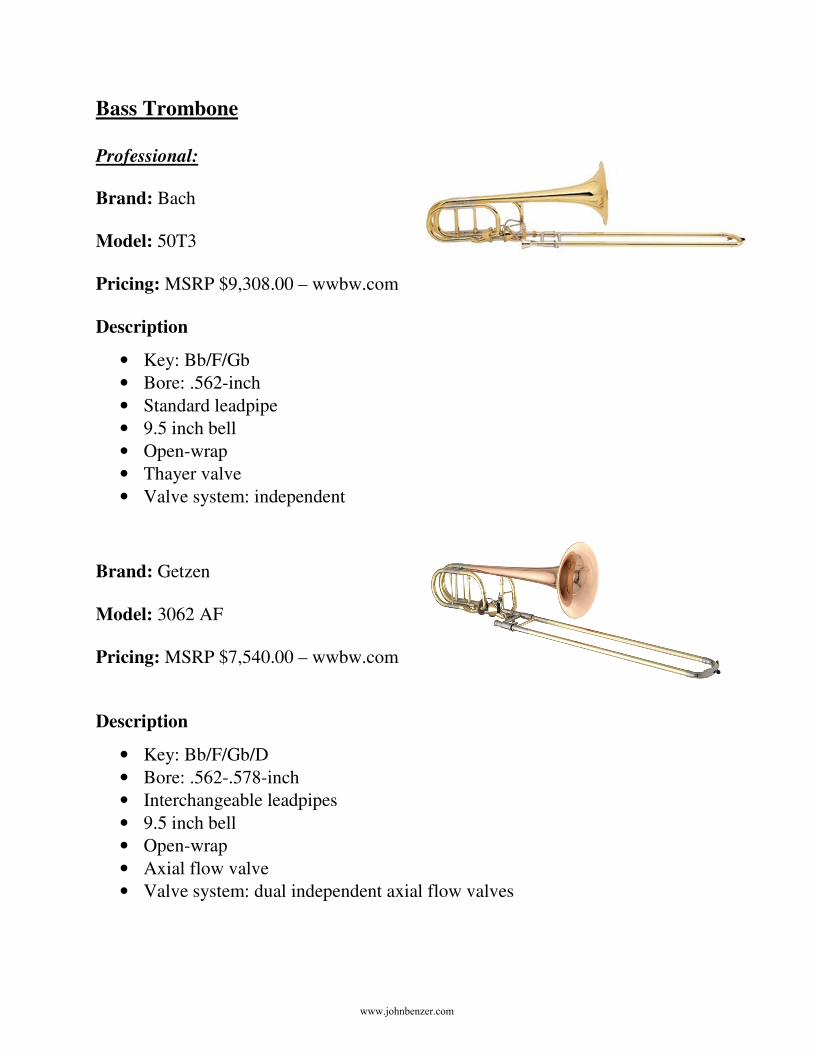
Bass Trombone
Professional:
Brand: Bach
Model: 50T3
Pricing: MSRP $9,308.00 – wwbw.com Description
• Key: Bb/F/Gb
• Bore: .562-inch
• Standard leadpipe
• 9.5 inch bell
• Open-wrap
• Thayer valve
• Valve system: independent
Brand: Getzen
Model: 3062 AF
Pricing: MSRP $7,540.00 – wwbw.com
Description
• Key: Bb/F/Gb/D
• Bore: .562-.578-inch
• Interchangeable leadpipes
• 9.5 inch bell
• Open-wrap
• Axial flow valve
• Valve system: dual independent axial flow valves
www.johnbenzer.com
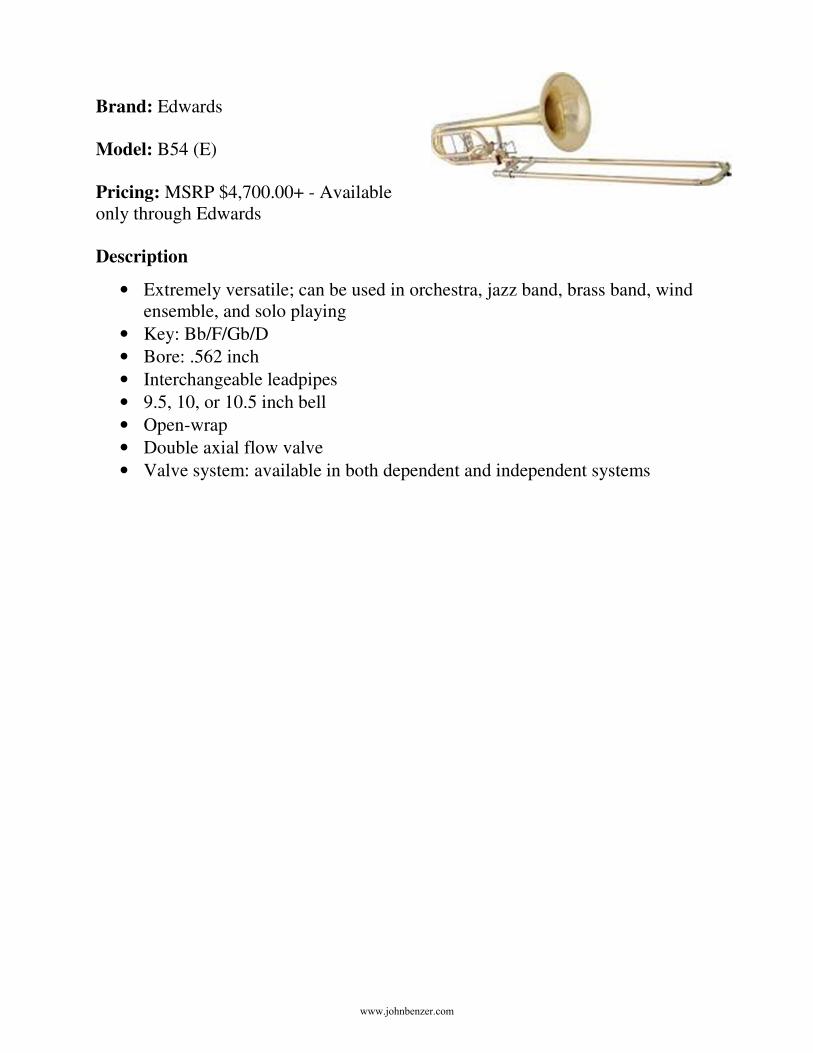
Brand: Edwards
Model: B54 (E)
Pricing: MSRP $4,700.00+ - Available only through Edwards
Description
• Extremely versatile; can be used in orchestra, jazz band, brass band, wind ensemble, and solo playing
• Key: Bb/F/Gb/D
• Bore: .562 inch
• Interchangeable leadpipes
• 9.5, 10, or 10.5 inch bell
• Open-wrap
• Double axial flow valve
• Valve system: available in both dependent and independent systems
www.johnbenzer.com
RECOMMENDED TROMBONE MOUTHPIECES
Beginner:
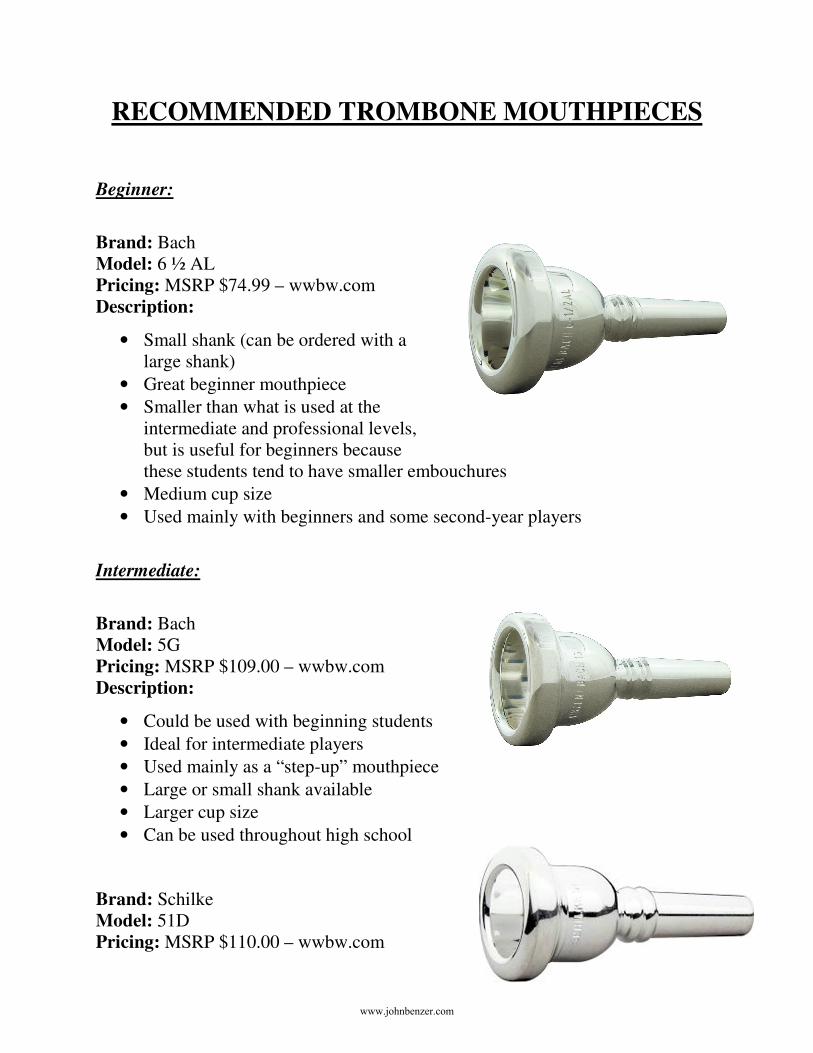
Brand: Bach Model: 6 ½ AL
Pricing: MSRP $74.99 – wwbw.com Description:
• Small shank (can be ordered with alarge shank)
• Great beginner mouthpiece
• Smaller than what is used at theintermediate and professional levels,but is useful for beginners becausethese students tend to have smaller embouchures
• Medium cup size
• Used mainly with beginners and some second-year players
Intermediate:
Brand: Bach Model: 5G Pricing: MSRP $109.00 – wwbw.com Description:
• Could be used with beginning students
• Ideal for intermediate players
• Used mainly as a “step-up” mouthpiece
• Large or small shank available
• Larger cup size
• Can be used throughout high school
Brand: Schilke Model: 51D Pricing: MSRP $110.00 – wwbw.com
www.johnbenzer.com
Description:
• Could be used with beginning students
• Used mainly as a “step-up” mouthpiece
• Large, small, or medium (“European”) shank available
• Larger cup size
• Available in gold plating
• Can be used throughout high school
Professional:
Advanced trombone mouthpieces are very subjective from player to player.
Consider mouthpieces from companies such as Griego, Greg Black, Doug Elliott,
Schilke and more.
www.johnbenzer.com
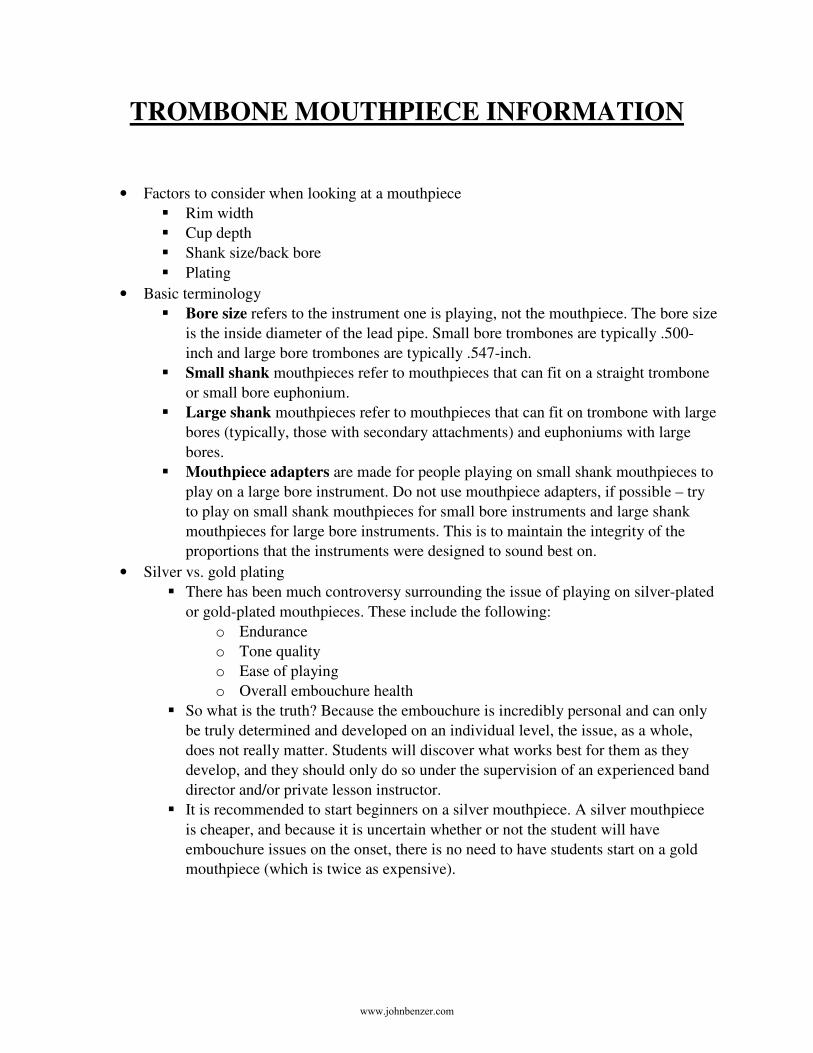
TROMBONE MOUTHPIECE INFORMATION
• Factors to consider when looking at a mouthpiece
� Rim width
� Cup depth
� Shank size/back bore
� Plating
• Basic terminology
� Bore size refers to the instrument one is playing, not the mouthpiece. The bore size
is the inside diameter of the lead pipe. Small bore trombones are typically .500-
inch and large bore trombones are typically .547-inch.
� Small shank mouthpieces refer to mouthpieces that can fit on a straight trombone
or small bore euphonium.
� Large shank mouthpieces refer to mouthpieces that can fit on trombone with large
bores (typically, those with secondary attachments) and euphoniums with large
bores.
� Mouthpiece adapters are made for people playing on small shank mouthpieces to
play on a large bore instrument. Do not use mouthpiece adapters, if possible – try
to play on small shank mouthpieces for small bore instruments and large shank
mouthpieces for large bore instruments. This is to maintain the integrity of the
proportions that the instruments were designed to sound best on.
• Silver vs. gold plating
� There has been much controversy surrounding the issue of playing on silver-plated
or gold-plated mouthpieces. These include the following:
o Endurance
o Tone quality
o Ease of playing
o Overall embouchure health
� So what is the truth? Because the embouchure is incredibly personal and can only
be truly determined and developed on an individual level, the issue, as a whole,
does not really matter. Students will discover what works best for them as they
develop, and they should only do so under the supervision of an experienced band
director and/or private lesson instructor.
� It is recommended to start beginners on a silver mouthpiece. A silver mouthpiece
is cheaper, and because it is uncertain whether or not the student will have
embouchure issues on the onset, there is no need to have students start on a gold
mouthpiece (which is twice as expensive).
www.johnbenzer.com
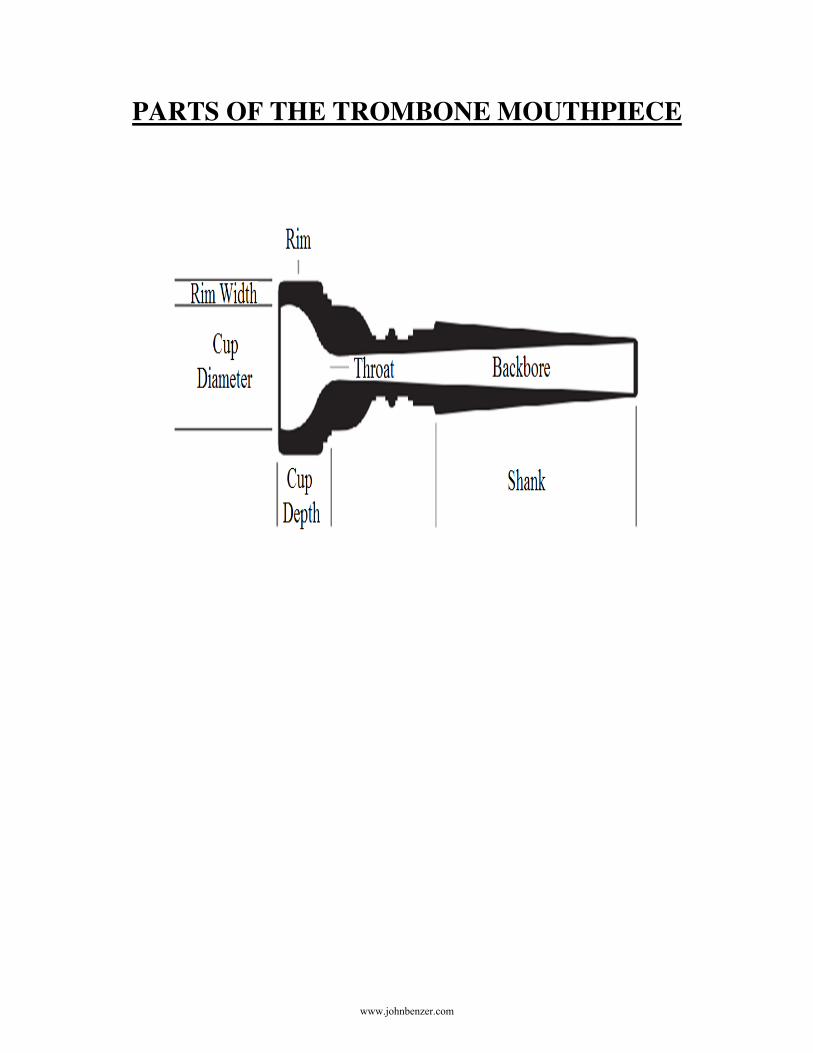
PARTS OF THE TROMBONE MOUTHPIECE
www.johnbenzer.com
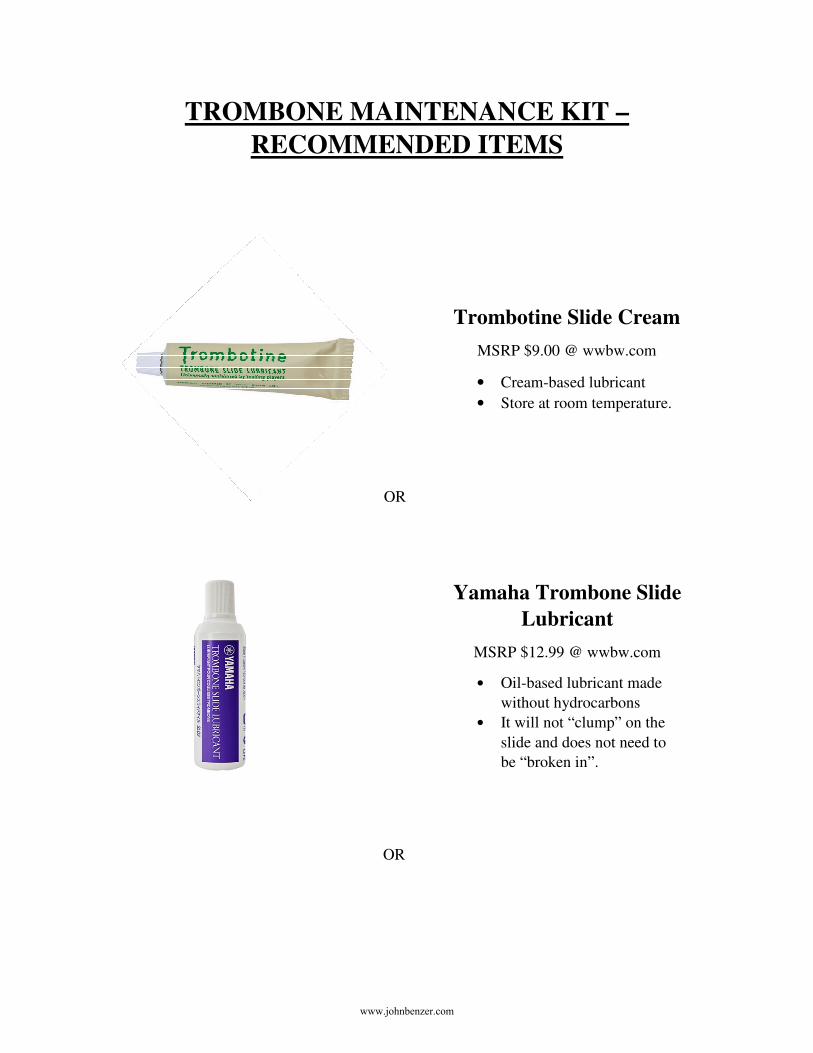
TROMBONE MAINTENANCE KIT –
RECOMMENDED ITEMS
OR
OR
Trombotine Slide Cream
MSRP $9.00 @ wwbw.com
• Cream-based lubricant
• Store at room temperature.
Yamaha Trombone Slide
Lubricant
MSRP $12.99 @ wwbw.com
• Oil-based lubricant made
without hydrocarbons
• It will not “clump” on the
slide and does not need to
be “broken in”.
www.johnbenzer.com
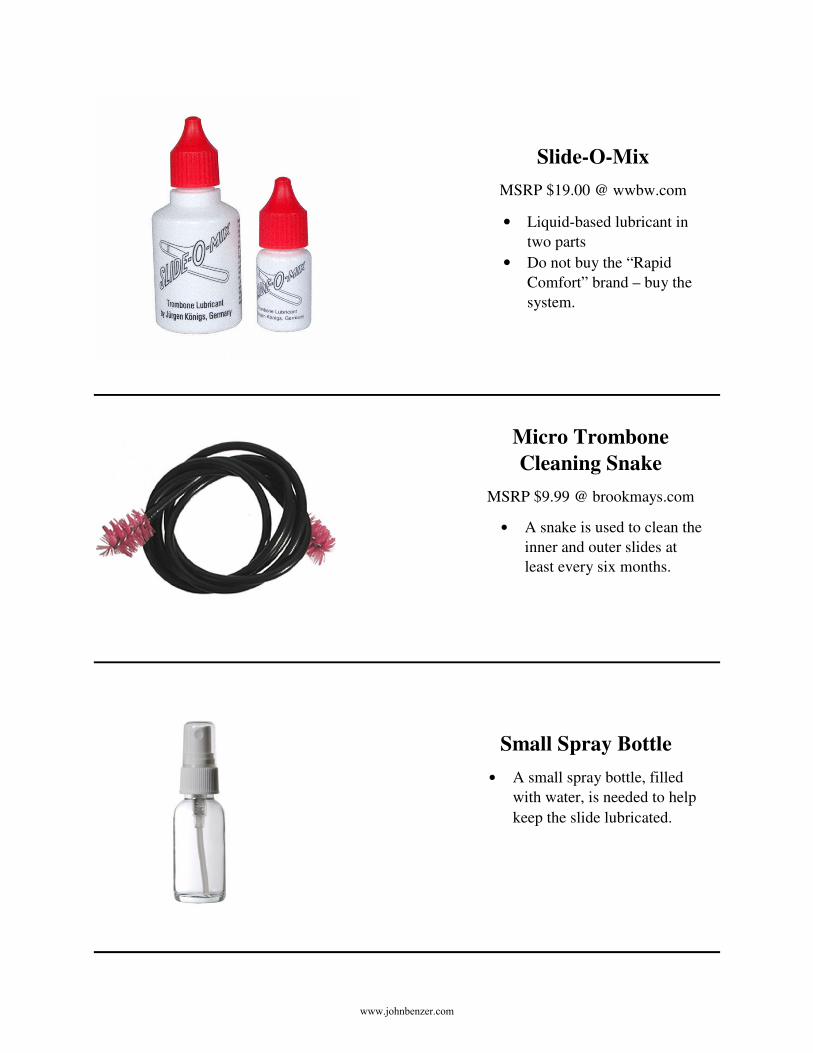
Slide-O-Mix
MSRP $19.00 @ wwbw.com
• Liquid-based lubricant in
two parts
• Do not buy the “Rapid
Comfort” brand – buy the
system.
Micro Trombone
Cleaning Snake
MSRP $9.99 @ brookmays.com
• A snake is used to clean the
inner and outer slides at
least every six months.
Small Spray Bottle
• A small spray bottle, filled
with water, is needed to help
keep the slide lubricated.
www.johnbenzer.com
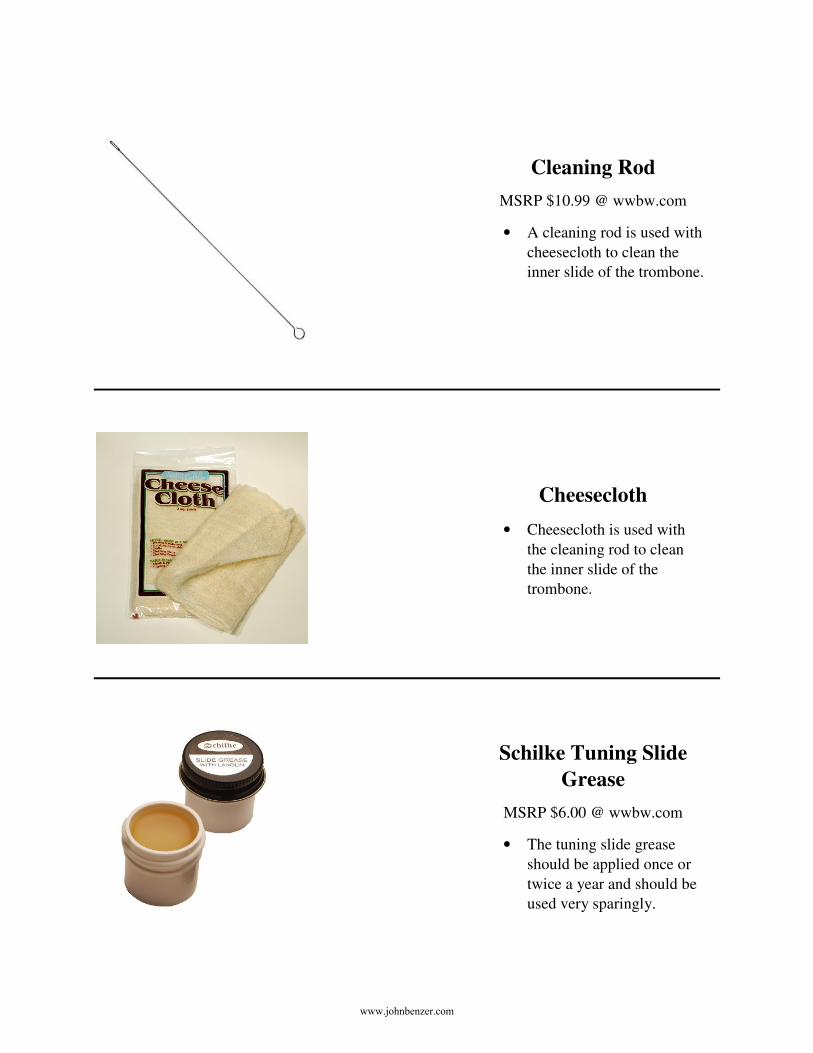
Cleaning Rod
MSRP $10.99 @ wwbw.com
• A cleaning rod is used with
cheesecloth to clean the
inner slide of the trombone.
Cheesecloth
• Cheesecloth is used with
the cleaning rod to clean
the inner slide of the
trombone.
Schilke Tuning Slide
Grease
MSRP $6.00 @ wwbw.com
• The tuning slide grease
should be applied once or
twice a year and should be
used very sparingly.
www.johnbenzer.com
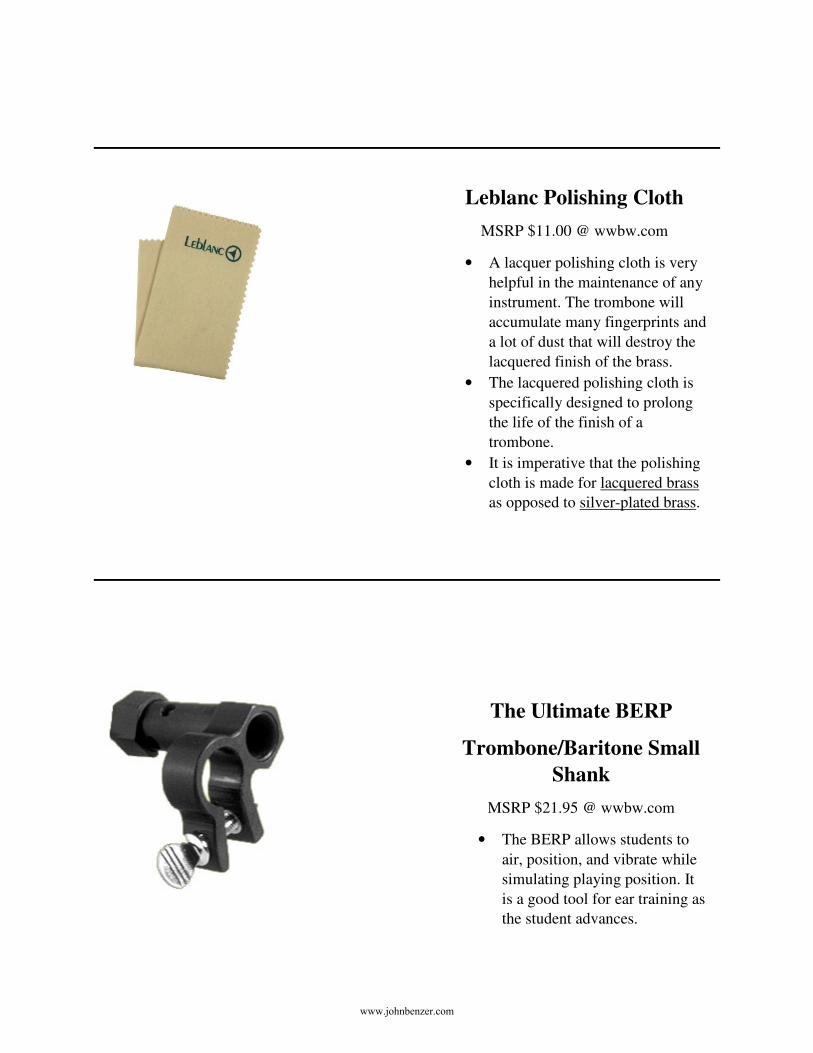
Leblanc Polishing Cloth
MSRP $11.00 @ wwbw.com
• A lacquer polishing cloth is very
helpful in the maintenance of any
instrument. The trombone will
accumulate many fingerprints and
a lot of dust that will destroy the
lacquered finish of the brass.
• The lacquered polishing cloth is
specifically designed to prolong
the life of the finish of a
trombone.
• It is imperative that the polishing
cloth is made for lacquered brass
as opposed to silver-plated brass.
The Ultimate BERP
Trombone/Baritone Small
Shank
MSRP $21.95 @ wwbw.com
• The BERP allows students to
air, position, and vibrate while
simulating playing position. It
is a good tool for ear training as
the student advances.
www.johnbenzer.com
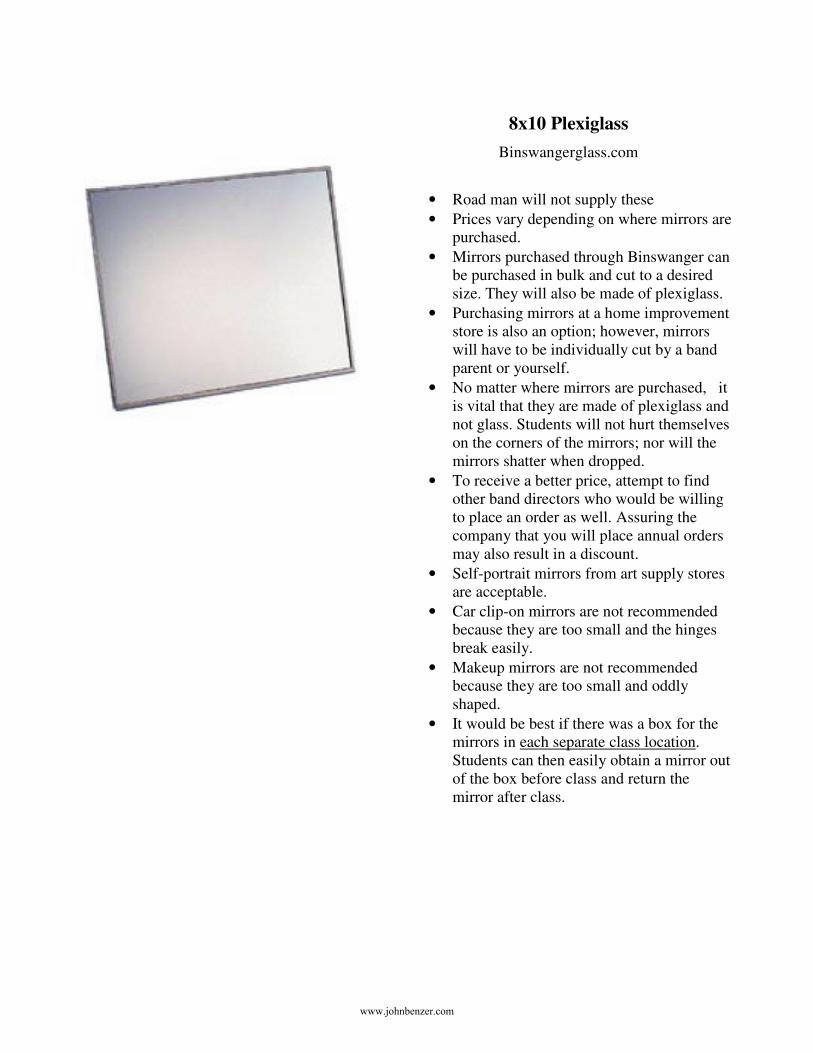
8x10 Plexiglass
Binswangerglass.com
• Road man will not supply these
• Prices vary depending on where mirrors are purchased.
• Mirrors purchased through Binswanger can be purchased in bulk and cut to a desired size. They will also be made of plexiglass.
• Purchasing mirrors at a home improvement store is also an option; however, mirrors will have to be individually cut by a band parent or yourself.
• No matter where mirrors are purchased, it is vital that they are made of plexiglass and not glass. Students will not hurt themselves on the corners of the mirrors; nor will the mirrors shatter when dropped.
• To receive a better price, attempt to find other band directors who would be willing to place an order as well. Assuring the company that you will place annual orders may also result in a discount.
• Self-portrait mirrors from art supply stores are acceptable.
• Car clip-on mirrors are not recommended because they are too small and the hinges break easily.
• Makeup mirrors are not recommended because they are too small and oddly shaped.
• It would be best if there was a box for the mirrors in each separate class location. Students can then easily obtain a mirror out of the box before class and return the mirror after class.
www.johnbenzer.com
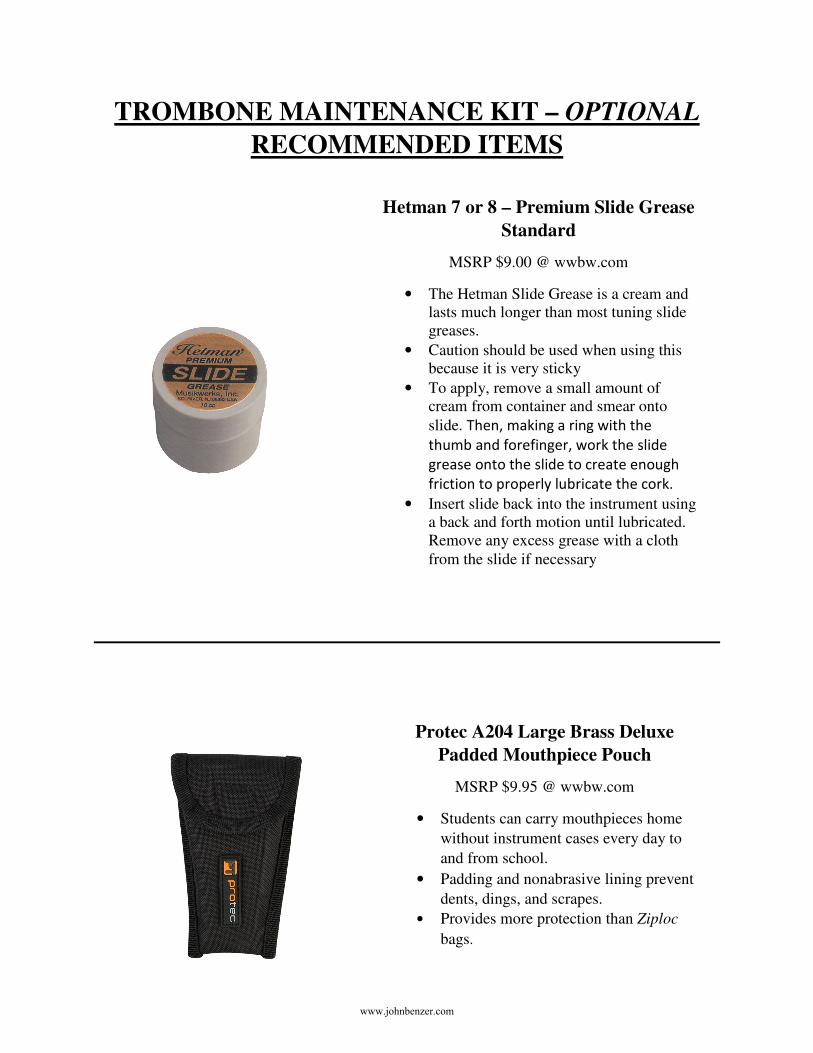
TROMBONE MAINTENANCE KIT – OPTIONAL
RECOMMENDED ITEMS
Hetman 7 or 8 – Premium Slide Grease
Standard
MSRP $9.00 @ wwbw.com
• The Hetman Slide Grease is a cream and lasts much longer than most tuning slide greases.
• Caution should be used when using this because it is very sticky
• To apply, remove a small amount of cream from container and smear onto
slide. Then, making a ring with the
thumb and forefinger, work the slide
grease onto the slide to create enough
friction to properly lubricate the cork.
• Insert slide back into the instrument using a back and forth motion until lubricated. Remove any excess grease with a cloth from the slide if necessary
Protec A204 Large Brass Deluxe
Padded Mouthpiece Pouch
MSRP $9.95 @ wwbw.com
• Students can carry mouthpieces home
without instrument cases every day to
and from school.
• Padding and nonabrasive lining prevent
dents, dings, and scrapes.
• Provides more protection than Ziploc
bags.
www.johnbenzer.com

One of the following can be used depending on socio-economic environment, availability, or preference
when selecting a suitable metronome.
Qwik Time QT-5 Metronome
MSRP $7.95 @ wwbw.com
• This metronome does not have a subdivision function.
• Credit card-sized
• A-440 tuning tone
• Low-battery indicator
Korg MA-1 Metronome
MSRP $24.99 @ wwbw.com
• Beat-Counting display makes it easier to
practice rhythm and phrasing.
• Tap Tempo function makes it easier to
quickly set the desired tempo.
• Beat display offers from 1 to 9 beats, plus 8
rhythm types to practice any style of music.
• Can tune any instrument using the 12-step
(C4 – B4) chromatic reference pitch
• Adjustable calibration setting (410 – 480
Hz)
• Earphone jack with adjustable volume
• Memory backup function and auto power-
off function
• Up to approximately 290 hours of
continuous operation
www.johnbenzer.com
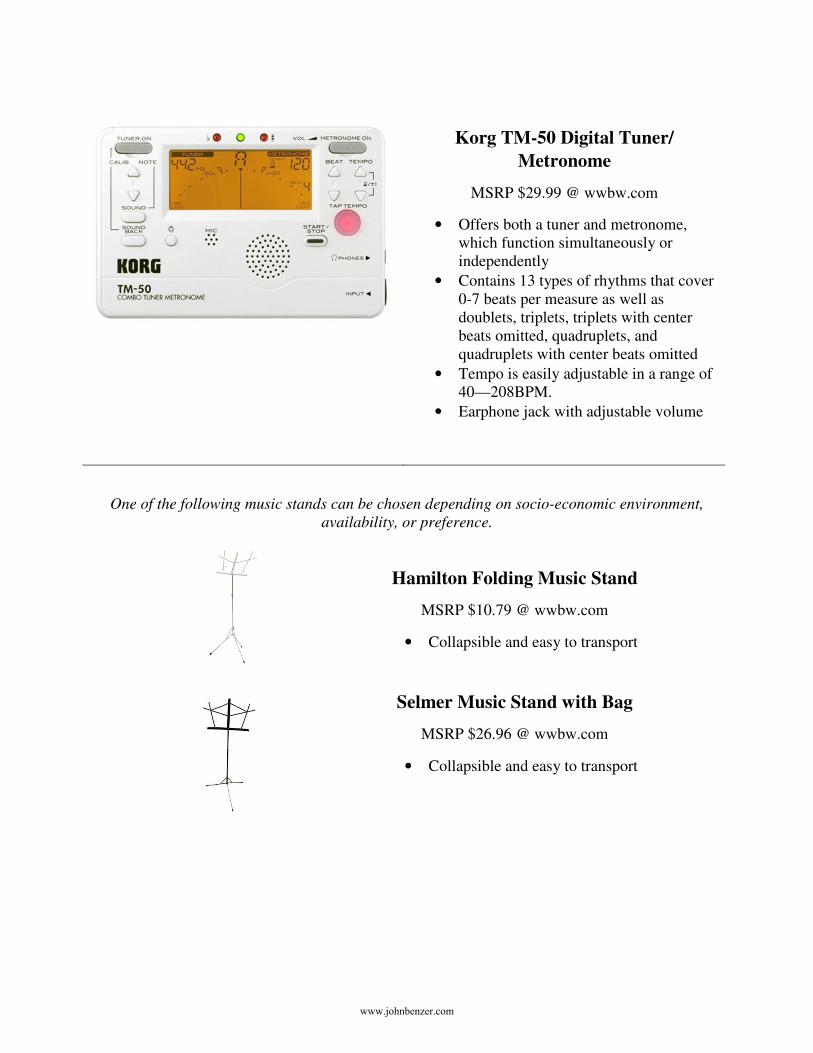
One of the following music stands can be chosen depending on socio-economic environment,
availability, or preference.
Korg TM-50 Digital Tuner/
Metronome
MSRP $29.99 @ wwbw.com
• Offers both a tuner and metronome, which function simultaneously or independently
• Contains 13 types of rhythms that cover 0-7 beats per measure as well as doublets, triplets, triplets with center beats omitted, quadruplets, and quadruplets with center beats omitted
• Tempo is easily adjustable in a range of 40—208BPM.
• Earphone jack with adjustable volume
Hamilton Folding Music Stand
MSRP $10.79 @ wwbw.com
• Collapsible and easy to transport
Selmer Music Stand with Bag
MSRP $26.96 @ wwbw.com
• Collapsible and easy to transport
www.johnbenzer.com
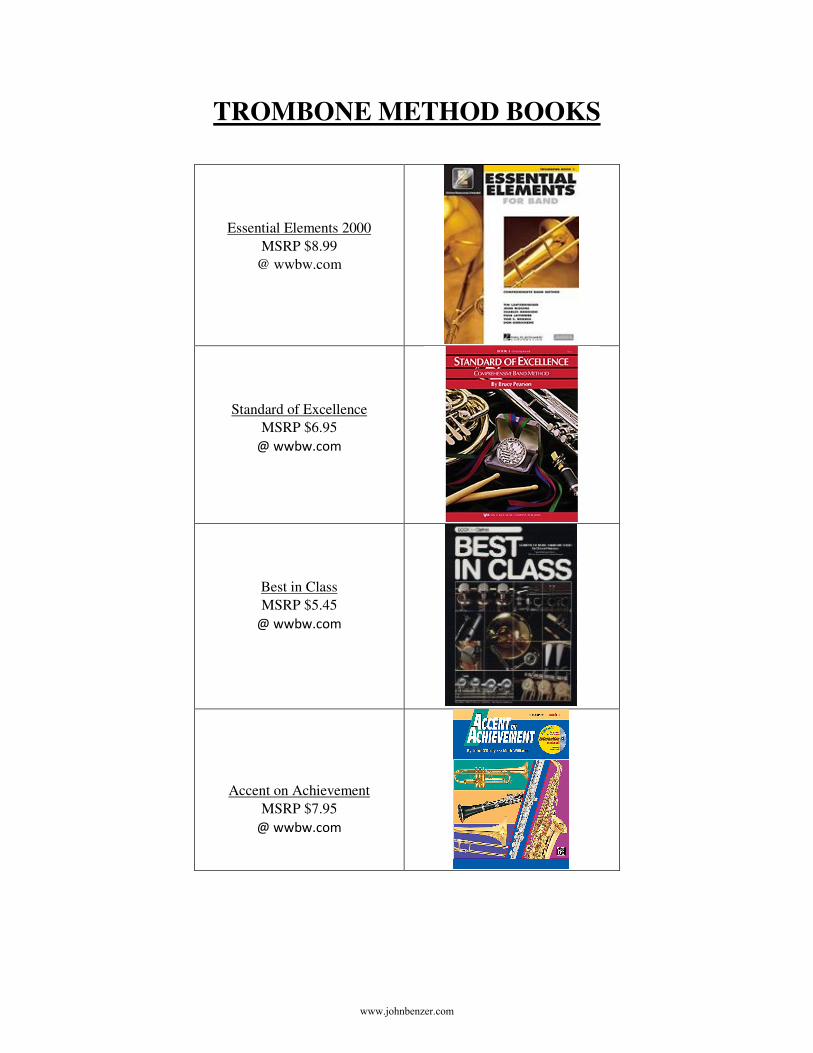
TROMBONE METHOD BOOKS
Essential Elements 2000
MSRP $8.99
@ wwbw.com
Standard of Excellence
MSRP $6.95
@ wwbw.com
Best in Class
MSRP $5.45
@ wwbw.com
Accent on Achievement
MSRP $7.95
@ wwbw.com
www.johnbenzer.com
SUPPLEMENTAL TROMBONE BOOKS
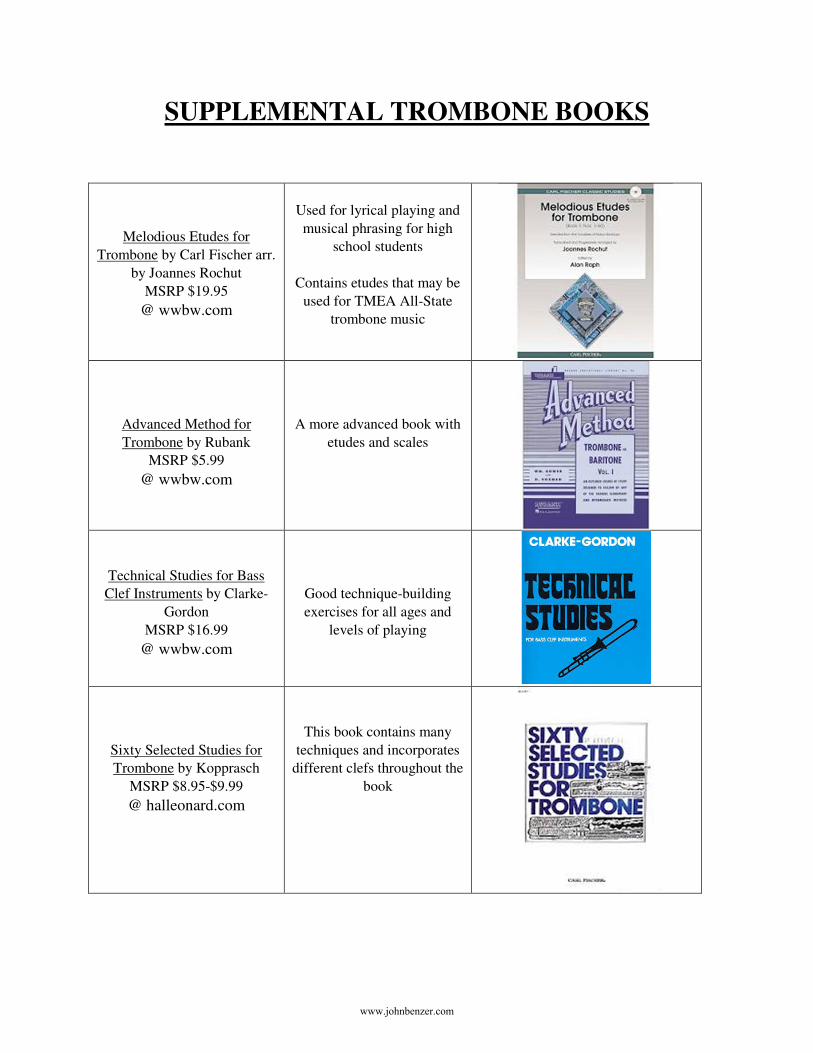
Melodious Etudes for
Trombone by Carl Fischer arr.
by Joannes Rochut
MSRP $19.95
@ wwbw.com
Used for lyrical playing and
musical phrasing for high
school students
Contains etudes that may be
used for TMEA All-State
trombone music
Advanced Method for
Trombone by Rubank
MSRP $5.99
@ wwbw.com
A more advanced book with
etudes and scales
Technical Studies for Bass
Clef Instruments by Clarke-
Gordon
MSRP $16.99
@ wwbw.com
Good technique-building
exercises for all ages and
levels of playing
Sixty Selected Studies for
Trombone by Kopprasch
MSRP $8.95-$9.99
@ halleonard.com
This book contains many
techniques and incorporates
different clefs throughout the
book
www.johnbenzer.com
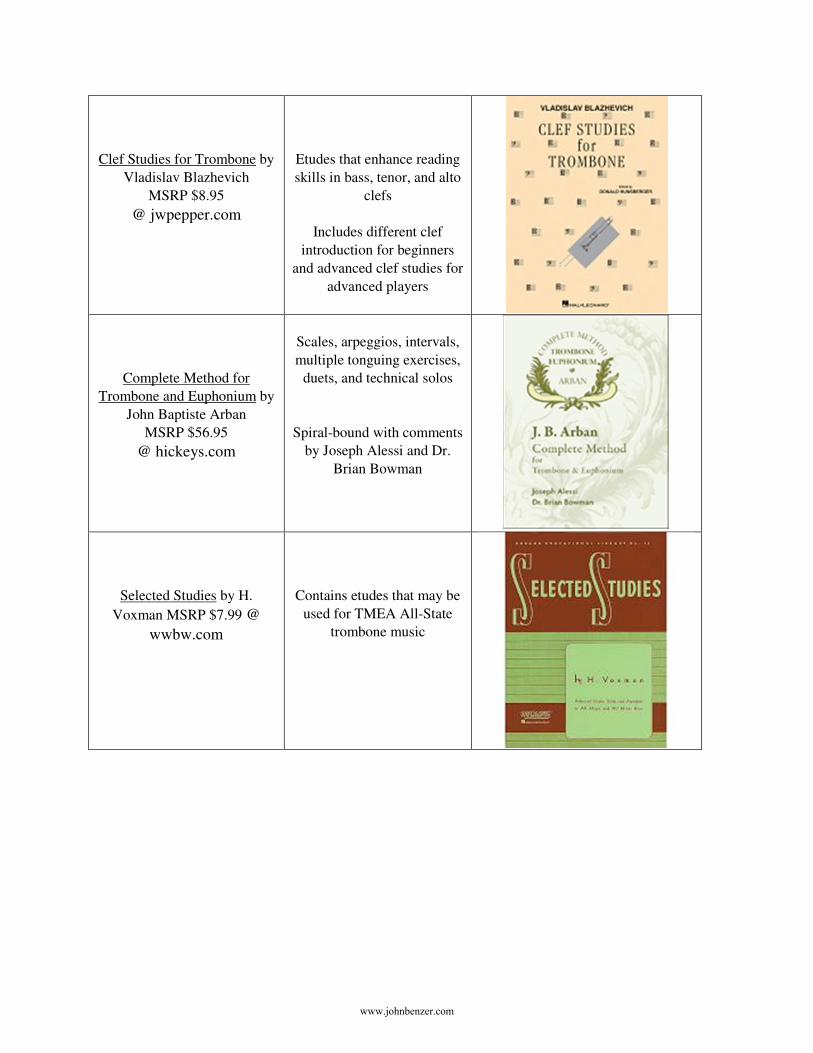
Clef Studies for Trombone by
Vladislav Blazhevich
MSRP $8.95
@ jwpepper.com
Etudes that enhance reading
skills in bass, tenor, and alto
clefs
Includes different clef
introduction for beginners
and advanced clef studies for
advanced players
Complete Method for
Trombone and Euphonium by
John Baptiste Arban
MSRP $56.95
@ hickeys.com
Scales, arpeggios, intervals,
multiple tonguing exercises,
duets, and technical solos
Spiral-bound with comments
by Joseph Alessi and Dr.
Brian Bowman
Selected Studies by H.
Voxman MSRP $7.99 @
wwbw.com
Contains etudes that may be
used for TMEA All-State
trombone music
www.johnbenzer.com
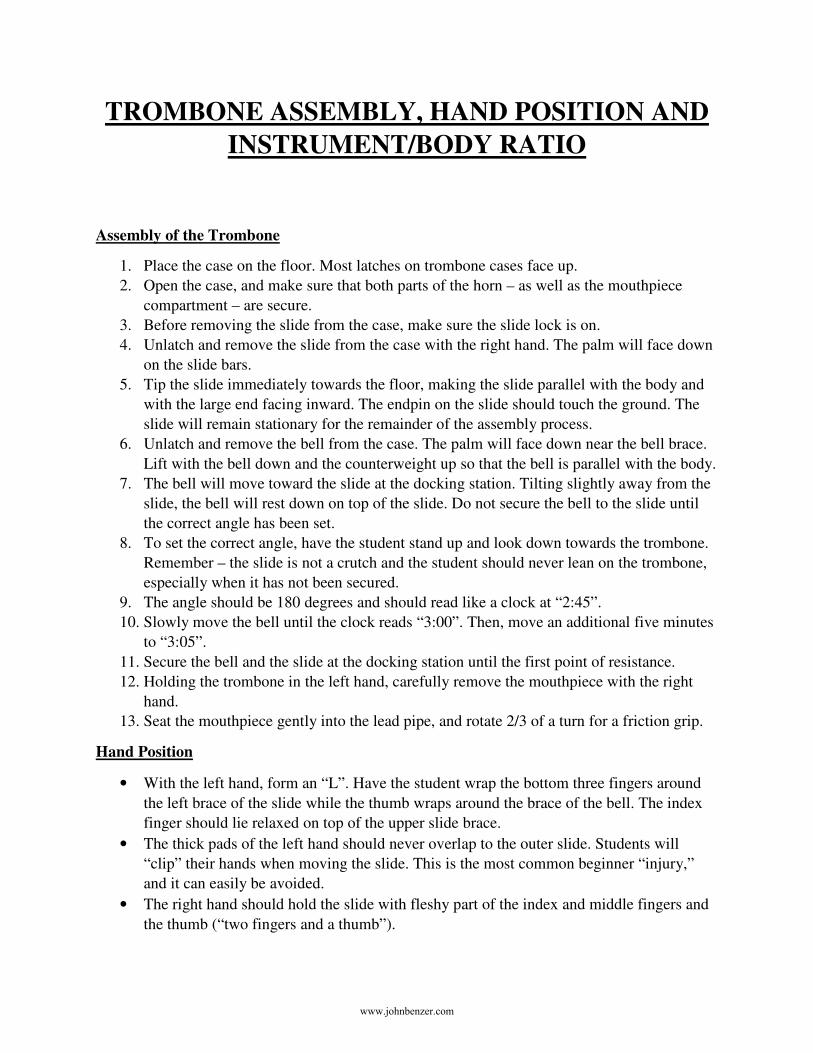
TROMBONE ASSEMBLY, HAND POSITION AND
INSTRUMENT/BODY RATIO
Assembly of the Trombone
1. Place the case on the floor. Most latches on trombone cases face up.
2. Open the case, and make sure that both parts of the horn – as well as the mouthpiece
compartment – are secure.
3. Before removing the slide from the case, make sure the slide lock is on.
4. Unlatch and remove the slide from the case with the right hand. The palm will face down
on the slide bars.
5. Tip the slide immediately towards the floor, making the slide parallel with the body and
with the large end facing inward. The endpin on the slide should touch the ground. The
slide will remain stationary for the remainder of the assembly process.
6. Unlatch and remove the bell from the case. The palm will face down near the bell brace.
Lift with the bell down and the counterweight up so that the bell is parallel with the body.
7. The bell will move toward the slide at the docking station. Tilting slightly away from the
slide, the bell will rest down on top of the slide. Do not secure the bell to the slide until
the correct angle has been set.
8. To set the correct angle, have the student stand up and look down towards the trombone.
Remember – the slide is not a crutch and the student should never lean on the trombone,
especially when it has not been secured.
9. The angle should be 180 degrees and should read like a clock at “2:45”.
10. Slowly move the bell until the clock reads “3:00”. Then, move an additional five minutes
to “3:05”.
11. Secure the bell and the slide at the docking station until the first point of resistance.
12. Holding the trombone in the left hand, carefully remove the mouthpiece with the right
hand.
13. Seat the mouthpiece gently into the lead pipe, and rotate 2/3 of a turn for a friction grip.
Hand Position
• With the left hand, form an “L”. Have the student wrap the bottom three fingers around
the left brace of the slide while the thumb wraps around the brace of the bell. The index
finger should lie relaxed on top of the upper slide brace.
• The thick pads of the left hand should never overlap to the outer slide. Students will
“clip” their hands when moving the slide. This is the most common beginner “injury,”
and it can easily be avoided.
• The right hand should hold the slide with fleshy part of the index and middle fingers and
the thumb (“two fingers and a thumb”).
www.johnbenzer.com
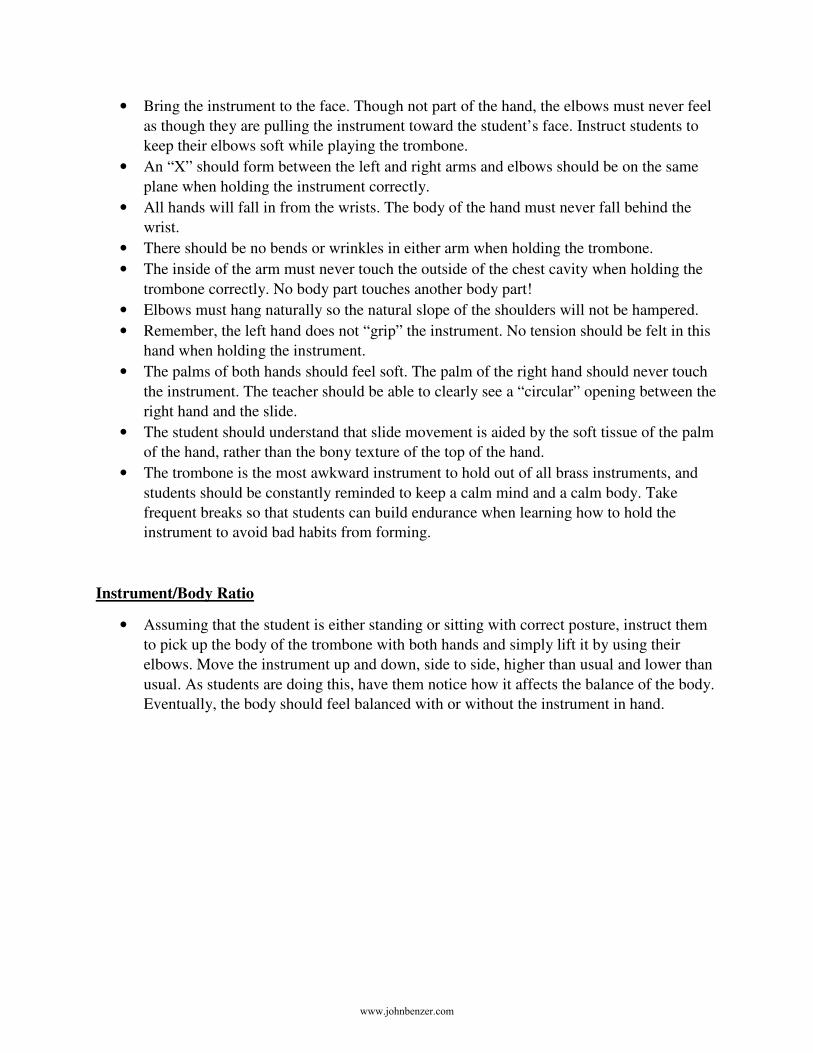
• Bring the instrument to the face. Though not part of the hand, the elbows must never feel
as though they are pulling the instrument toward the student’s face. Instruct students to
keep their elbows soft while playing the trombone.
• An “X” should form between the left and right arms and elbows should be on the same
plane when holding the instrument correctly.
• All hands will fall in from the wrists. The body of the hand must never fall behind the
wrist.
• There should be no bends or wrinkles in either arm when holding the trombone.
• The inside of the arm must never touch the outside of the chest cavity when holding the
trombone correctly. No body part touches another body part!
• Elbows must hang naturally so the natural slope of the shoulders will not be hampered.
• Remember, the left hand does not “grip” the instrument. No tension should be felt in this
hand when holding the instrument.
• The palms of both hands should feel soft. The palm of the right hand should never touch
the instrument. The teacher should be able to clearly see a “circular” opening between the
right hand and the slide.
• The student should understand that slide movement is aided by the soft tissue of the palm
of the hand, rather than the bony texture of the top of the hand.
• The trombone is the most awkward instrument to hold out of all brass instruments, and
students should be constantly reminded to keep a calm mind and a calm body. Take
frequent breaks so that students can build endurance when learning how to hold the
instrument to avoid bad habits from forming.
Instrument/Body Ratio
• Assuming that the student is either standing or sitting with correct posture, instruct them
to pick up the body of the trombone with both hands and simply lift it by using their
elbows. Move the instrument up and down, side to side, higher than usual and lower than
usual. As students are doing this, have them notice how it affects the balance of the body.
Eventually, the body should feel balanced with or without the instrument in hand.
www.johnbenzer.com
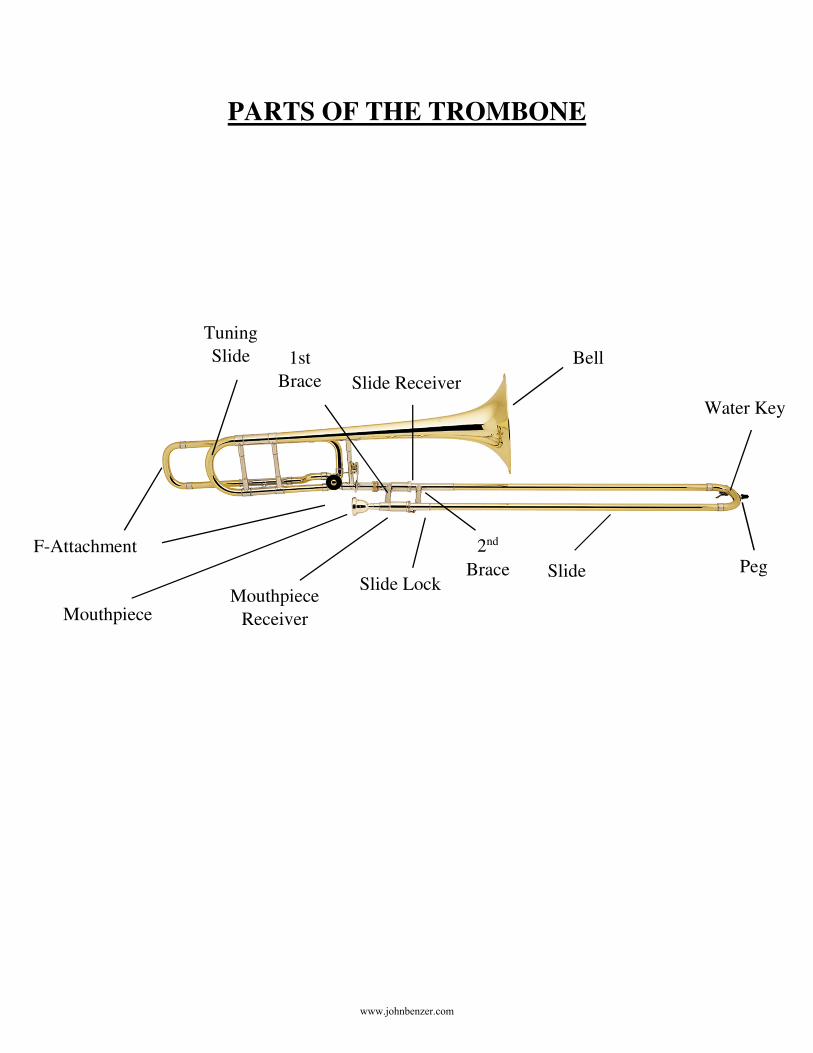
PARTS OF THE TROMBONE
Bell
Water Key
Slide Slide Lock
F-Attachment
Tuning
Slide
Slide Receiver
Mouthpiece
Receiver
1st
Brace
2nd
Brace
Mouthpiece
Peg
www.johnbenzer.com
TROMBONE FACE/EMBOUCHURE
• Each student should use their own “safe/unbreakable” mirror – both in the classroom and
at home.
• Using the mirror, have each student notice how natural their face looks. They will have to
later remember and memorize how it looks and feels.
• The head must be balanced on the shoulders in a comfortable position – not too far
forward and not too far backward.
• The eyes should be soft and natural and the “sight line” should be exactly level. The
distance between eyebrows should not change as air goes in and out of the body.
• Look for natural creases in the face, and allow any that are naturally present to exist
while playing. No other creases are allowed.
• The corners should move in toward the canine teeth. The corners should never look or
feel pulled back.
• The corners can move down from the natural position as the student progresses, but they
can never move up.
• The texture of both the upper and lower lip should be very soft and relaxed.
• There should be natural space between the inside of the lips and the gums and teeth. This
space should not change or feel different when the lips vibrate inside the cup of the
mouthpiece.
• The back teeth are slightly apart and should feel the same as when the student is reading,
watching television, etc. The teeth should not be pressed into each other when doing
these other activities.
• Brass instrument embouchures are formed with natural overbite. A student with an
underbite should be steered away from brass instruments.
• The thickness of a student’s lips should correspond to the size of the cup of the
mouthpiece for the chosen instrument. Students with a very thin top or bottom lip should
be steered towards high brass instruments rather than trombone.
• The bottom of the front of the tongue should lie in the soft tissue area which is located in
the front of the mouth just behind the ridge of the bottom gum.
• Remember that when playing the trombone, cheeks will only “puff out” if the air is
not freely going into the instrument. This should be avoided!
• Assuming that the above has been achieved, the embouchure will be formed with special
attention to the following:
o The mouthpiece must be placed in the middle of the mouth – up and down as well
as side to side.
o The corners are in their natural position and should be set against the canine teeth.
o The lips must be allowed to freely vibrate in response to the airstream rather than
made to “buzz” in front of the airstream.
www.johnbenzer.com

o The lips must feel natural so that air can freely move past them – they must not be
pulled back against the teeth or blown away from the teeth and gums.
o The students should remember that the mouthpiece “gathers” the air – not the lips.
o There must never be more energy placed against the upper lip than the lower lip;
hence the mouthpiece (and the instrument) will angle slightly downwards.
www.johnbenzer.com
TROMBONE ARTICULATION
• The tongue moves in the same manner when articulating a brass instrument as it does when you speak. The tongue moves up and down—not back and forth—both when speaking and when articulation on an instrument.
• The purpose of the tongue is to release the air which causes the lips to vibrate and creates the sound. The tongue’s release of the air simply defines the beginning/start of the vibration/sound.
• Articulation is used to define the vibrations necessary to create musical rhythm, style and movement--to contrast the use of slurring (which also creates similar musical entities).
• The students should think that the tongue “articulates” the sound created by the airstream. If the student is taught to create the sound correctly, articulation will be an easy transition.
a. sound occurs when the air moves past the naturally vibrating lips b. articulate the sound that is already present c. teach students to articulate at the moment the sound begins
• Without the instrument or mouthpiece, use the following procedure: 1. Say the word “DOG”. 2. Sing the syllable “DAH”. 3. Once these are mastered, have the student use the mouthpiece and instrument
and reproduce the “DAH” syllable in their brain to create an articulated sound. 4. The tongue should feel the same when saying, singing and playing the
mouthpiece and instrument. 5. The tongue should touch the enamel of the upper teeth directly below the gum
line—in the same spot with the same strength every time. 6. Use the syllable “DAH” because it creates smoother and more easily
controlled air as opposed to the “TAH” syllable. 7. After each “articulation”, the tongue must immediately fall down into its
natural “at rest” position. 8. The tongue will be naturally soft at all times, but can touch the teeth with
different strengths. 9. The tongue will be in its “down position” 98% of the time when articulating
correctly.
• Have the student start their sound with the air.
• Using the information about the basics of articulation, have the student articulate as fast as they can with no limitations of numbers, worries about evenness of articulation, etc. Simply get the students used to articulating!
• Have the student then use the “ta-day” syllable to practice using the tongue in an organized manner.
• Have the student then articulate “on command.” The student will start their sound, and articulate when you snap your fingers to practice gaining more control of the tongue.
www.johnbenzer.com
• Once the student understands pulse and the foot pat, have the student articulate exactly when the toe of the foot touches the floor.
• Have the student articulate with the down and up position of the foot.
• Proceed to written rhythms as students begin to read music.
Always practice this entire routine. The student must always go through the entire
process, so he will not lose the ability to move his tongue at various speeds and in a
structured manner.
www.johnbenzer.com
SLURRING ON THE TROMBONE
• Slurs can occur in 4 forms:
� Lip Slur
o No tongue
o Same position
� Natural Slur
o No tongue
o Different positions
� Valve slur
o No tongue
o Same or different positions
� Legato slur
o Legato tongue
o Different positions
• The only slur that requires a tongue-start is a legato slur. Legato slurs occur between
notes that are on the same harmonic/partial. Notes on the same partial can cause a
“glissando” and the legato slur is used to prevent that “smear” effect.
• Legato slurs require:
� A soft legato syllable, “dah” or “doo,” that brushes very lightly (think 3 taste buds)
� The tongue brushes on the ridge above the teeth; the legato tongue does not touch
enamel.
� The tongue must move away quickly to prevent compression of the air.
� The tongue must be synchronized with an efficient slide movement.
If beginning students are taught to slur correctly from the onset, the students will be ahead of the
game when transitioning through middle school/junior high. Apart from correct slide positions,
slurring on trombone is perhaps the most neglected aspect of playing by both young and
experienced teachers; therefore, it is vital that students are set up for success by instilling proper
habits from the beginning!
www.johnbenzer.com
TROMBONE FLEXIBILITY AND RANGE
EXTENSION
• Brass playing is based upon flexibility.
• There are two types of flexibility: flexibility within the instrument and flexibility within the note.
• Students eventually need to be flexible through each of the harmonic series in order to move up and down within the range of the instrument.
• Once the student can reproduce at will a given pitch, the teacher must decide whether flexibility up or down is needed first.
• Flexibility is controlled by air direction and the isometrics created by the corners and canine/eye teeth. The head must always stay in its natural, balanced position at all times. The angle of the instrument must not change at any time.
• Students must learn to angle the air in the cup of the mouthpiece without changing the position of the lips and/or the relationship of the upper and lower teeth.
• Flexibility is also enhanced by vowel sounds used in various registers. These sounds can be “ah” for the middle register….”ee” for the upper register….and “oh” for the lower register. Have students practice saying these vowel sounds with vocalization on appropriate lower, middle and higher sounds.
• The speed of the air and the shape of the vowel guide flexibility. The tongue assists the air speed similar to the way one’s thumb assists the water speed from a hose. The tongue relaxes when descending into the lower register and arches when ascending into the upper register.
• Bring to the students’ attention that the shape of the tongue changes dramatically from vowel sound to vowel sound. All students should be aware that vowel sounds are the middles of words that they speak every day. Practice saying words that use the required vowel sounds. (i.e. bow, ball, beep)
• Range is developed through flexibility. It is more important to create a resonant sound while practicing flexibility than to create wider intervals. The student can enhance their range by making more resonant sounds in the middle register before trying to extend higher or lower.
• While it is important to create resonant sounds in the register students can play in, it is important for students to occasionally try exploring both the upper and lower range they struggle to make a good sound in. This should be practiced perhaps twice a week.
• Make sure students understand the texture of the lips have nothing to do with range. For example, students should never be told to “tighten” their lips in order to play in the higher register.
www.johnbenzer.com
TROMBONE SLIDE MAINTENANCE
• Proper care of the trombone slide is crucial for the well-being of the instrument. A poorly
maintained trombone can start deteriorating in quality in as little as 5 years.
• It is suggested that the slide be cleaned at least every 7-10 days. If the trombone is going
to be “put away” for an extended amount of time, it needs to be cleaned beforehand to
minimize the moisture trapped inside the instrument while not in use.
• Materials needed:
� Cleaning rod
� Cheesecloth
� Glass cleaner or mild soap and water
� Trombotine, Yamaha Slide Lubricant, or Slide-O-Mix
� Spray bottle filled with water
• Insert at least a yard-length of cheesecloth through the eye of your cleaning rod. Wrap a
small amount of cheesecloth around the tip of the cleaning rod to avoid damage if it hits
the crook of the slide. Wrap the remainder of the cheesecloth around the length of the
cleaning rod. One should have enough cheesecloth to hold onto as it inserts the slide so it
does not get “lost” in the slide and become difficult to remove.
• Insert the cleaning rod and cheesecloth into the outer slide. Be careful not to hit the crook
of the slide as it is entering. Move the cleaning rod in and out of the outer slide, creating
friction as the cleaning rod moves. The friction breaks up the chemical bonds that hold
the left-over slide lubricant in the slide.
• Repeat in the opposite end of the slide.
• The same process should be used for the inner slide, but extreme care should be taken as
the inner slide is the most fragile part of the entire instrument.
• After this process is complete, the cheesecloth should be disposed of.
• Take glass cleaner (or a mild soapy water solution) and gently clean the exterior of the
inner slide. This will remove any residue left from previous applications of slide
lubricant. Please note that the inner slide is plated nickel -- not silver -- therefore silver
polish should not be used to clean it.
• Once the inner slide is clean, apply the slide lubricant.
o Yamaha Trombone Slide Lubricant
� Apply evenly over both prongs of the inner slide.
� Spray with water.
� No “working in” is necessary.
o Slide-O-Mix
� Apply a drop from the small flask at the stockings (wide end) of the inner
slide. Distribute evenly by putting on the outer slide and moving it up and
down several times.
www.johnbenzer.com
• Apply liquid from the larger bottle at the top of the inner slide and let it
trickle down the length of the slide. Once again, use the outer slide to help
evenly distribute the lubricant.
• Spray with water.
o Trombotine (standard in most classrooms)
• Apply a pea-sized amount of lubricant to the stocking (wide end) of the
slide.
• Begin by working the lubricant into the stocking of the slide, and work
your way up to the rest of the slide. Since the stocking is the wider part, it
will have the most contact with the outer slide; it is therefore crucial that it
is well-lubricated.
• The Trombotine should form a thin (nearly invisible) layer over the inner
slide.
• Repeat on the second prong of the inner slide.
• Spray with water.
• Trombotine can often act like a reed in the fact that it works in “cycles.” It
can take 2-3 days to “break in” and feel most effective. Once this point has
been reached, it will be at its best for about 7 days; then, it will deteriorate
for 2-3 days, by which time the slide needs to be cleaned and re-
lubricated.
www.johnbenzer.com
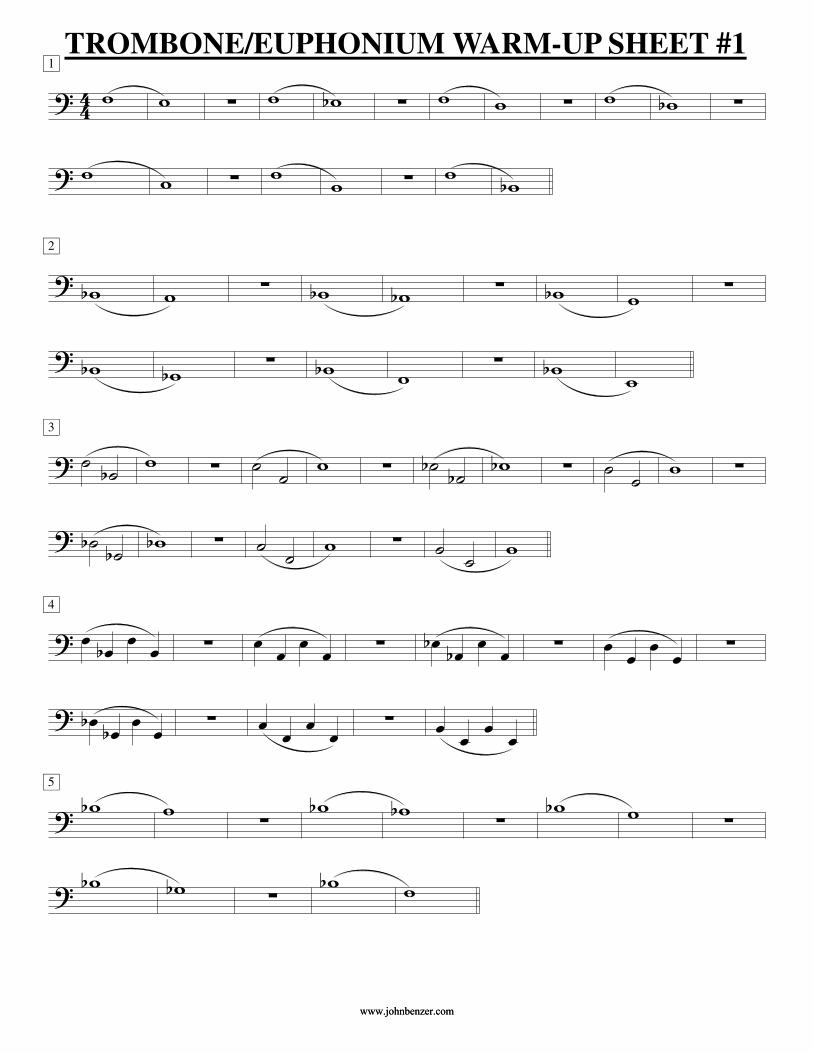
? 44 w1
w ∑ w wb ∑ w w ∑ w wb ∑? w w ∑ w w ∑ w wb
? wb2
w ∑ wb wb ∑ wb w ∑? wb wb ∑ wb w ∑ wb w
? ˙ ˙b3
w ∑ ˙ ˙ w ∑ ˙b ˙b wb ∑ ˙ ˙ w ∑? ˙b ˙b wb ∑ ˙ ˙ w ∑ ˙ ˙ w
? œ œb œ œ4
∑ œ œ œ œ ∑ œb œb œ œ ∑ œ œ œ œ ∑? œb œb œ œ ∑ œ œ œ œ ∑ œ œ œ œ? wb5 w ∑ wb wb ∑ wb w ∑? wb wb ∑ wb w
TROMBONE/EUPHONIUM WARM-UP SHEET #1
www.johnbenzer.comwww.johnbenzer.com
? 44 œ œ œ œ1
∑ œb œ œ œ ∑ œ œ œ œ ∑ œ œ œ œ ∑ œb œ œ œ ∑ wb
? wb2
∑ ˙ ˙ ∑ œ œ œ œ ∑ œb œ ˙ ∑? ˙ œ œ ∑ œ œ œ ˙ ∑ œ œ œ œ œ ∑ wb
? ˙b ˙3
wb ∑ ˙ ˙ w ∑ ˙b ˙b wb ∑ ˙ ˙ w ∑? ˙b ˙b wb ∑ ˙ ˙ w ∑ ˙ ˙ w? œb œ œb œ4 œb œ œb Œ œ œ œ œ# œ œ œ Œ œb œb œb œ œb œb œb Œ? œ œ œ œ œ œ œ Œ œb œb œb œb œb œb œb Œ œ œ œ œ œ œ œ Œ
? œ œ œ œ# œ œ œ Œ
? œb œ œ œ5 wb œ œ# œ œ w œb œ œb œ wb œ œ œ œ w
? œb œb œb œ wb œ œ œ œ w œ œ# œ œ w
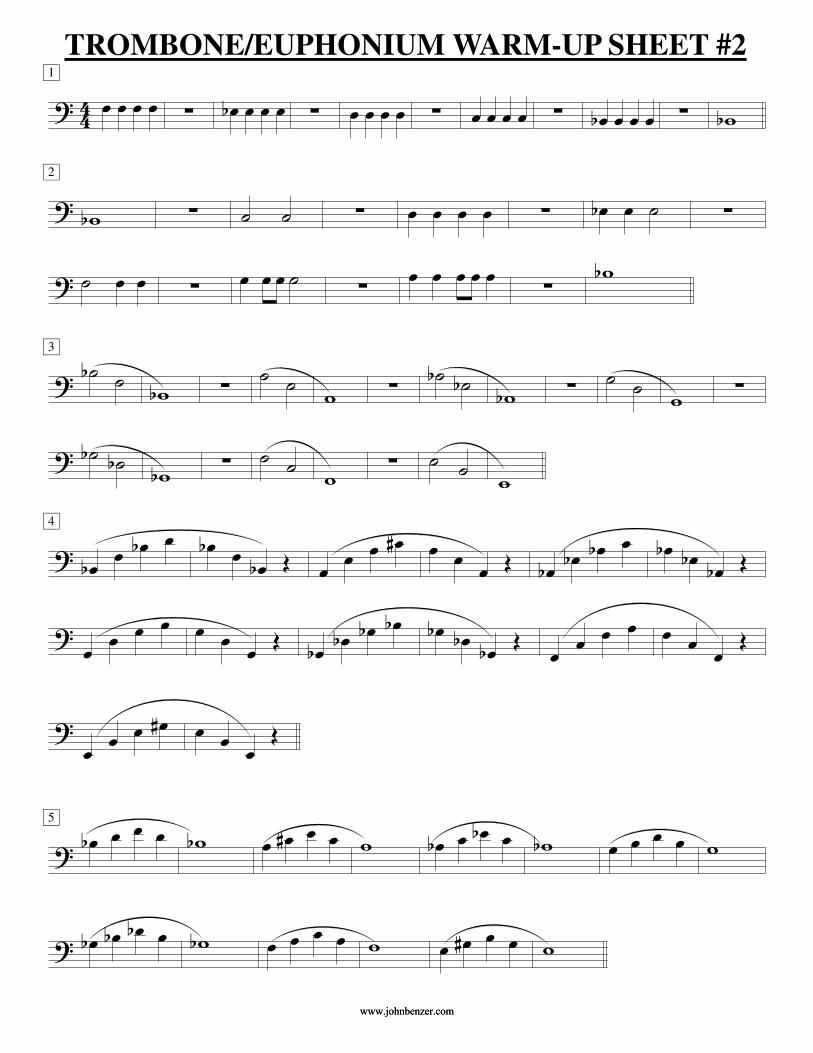
TROMBONE/EUPHONIUM WARM-UP SHEET #2
www.johnbenzer.comwww.johnbenzer.com
? 44 œ œ œ# œ œ# œ œ# œ œ œ# œ œ# œ œ œ# œ
? œ# œ œ# Œ œb œ œb œ œb œ œ œb
? œ œb œ œ œb œ œb œ œb œ œ Œ
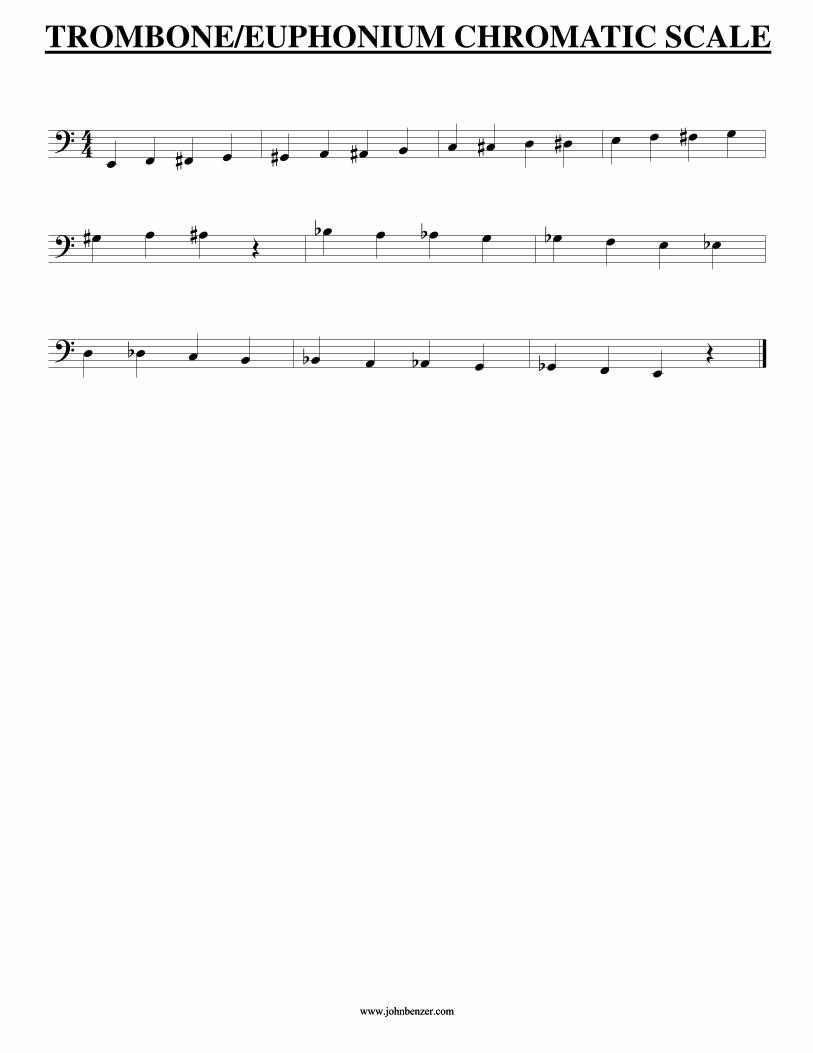
TROMBONE/EUPHONIUM CHROMATIC SCALE
www.johnbenzer.comwww.johnbenzer.com

? 44 œ œ ˙ œ œ ˙ œ œ œb œ ˙ Ó
? œb œ œ œ œb œ œ œ œ œ œ œ ˙ ˙
? œ œ ˙ œ œ ˙ œ œ œb œ ˙ Ó
? œb œ œ œ œb œ œ œ œ œ œb œ wb
? 44 œb œ œ œ œb œ ˙b œ œb œ œ ˙b ˙
? œb œ œ œ œb œ ˙b œ œb œ œ ˙b ˙
? œb œb œ œ œ œ ˙b œ œb œ œ ˙b ˙
? œb œ œ œ œb œ ˙ œb œb œ œ ˙b ˙b wb
TROMBONE/EUPHONIUM CHRISTMAS TUNES
Jingle Bells
Good King Wenceslas
www.johnbenzer.comwww.johnbenzer.com