Embed Size (px)
Citation preview
IntegriSign for MS Word
Contents
1. Introduction............................................................................................... 2
2. Using IntegriSign in MS Word 2003....................................................... 2
2.1 Macro Security..................................................................................................................................... 2 2.2 Authenticate and Secure ...................................................................................................................... 3 2.3 Freezing of Document ......................................................................................................................... 4 2.4 Signing in Protected documents and templates.................................................................................... 4 2.5 Creating a Signature ............................................................................................................................ 6 2.6 Sectional signing.................................................................................................................................. 7 2.7 Document Verification ........................................................................................................................ 8
3. Using IntegriSign in MS Word 2007....................................................... 8
4. Using IntegriSign in MS Word 2010/2013/2016................................... 11
5. Known Issues........................................................................................... 15
5.1 Text with Special Effects................................................................................................................... 15 5.2 Auto Text Fields ................................................................................................................................ 15
6. Troubleshooting ...................................................................................... 15
© IntegriSign 1
1. Introduction An IntegriSign plug-in allows you to create a document and sign it electronically with your handwritten signature using an ePad device. The plug-in facilitates:
1. Signature Capture - The signature trace is captured and stored on the electronic
document in a signature object. 2. Content Hashing - The signature object is bound to the contents of the document
such that any alteration of the document after signing it would render the signature invalid.
3. Document Verification – The document can be verified to ensure its integrity
(i.e., confirming that it has not been tampered) after the act of signing. 2. Using IntegriSign in MS Word 2003
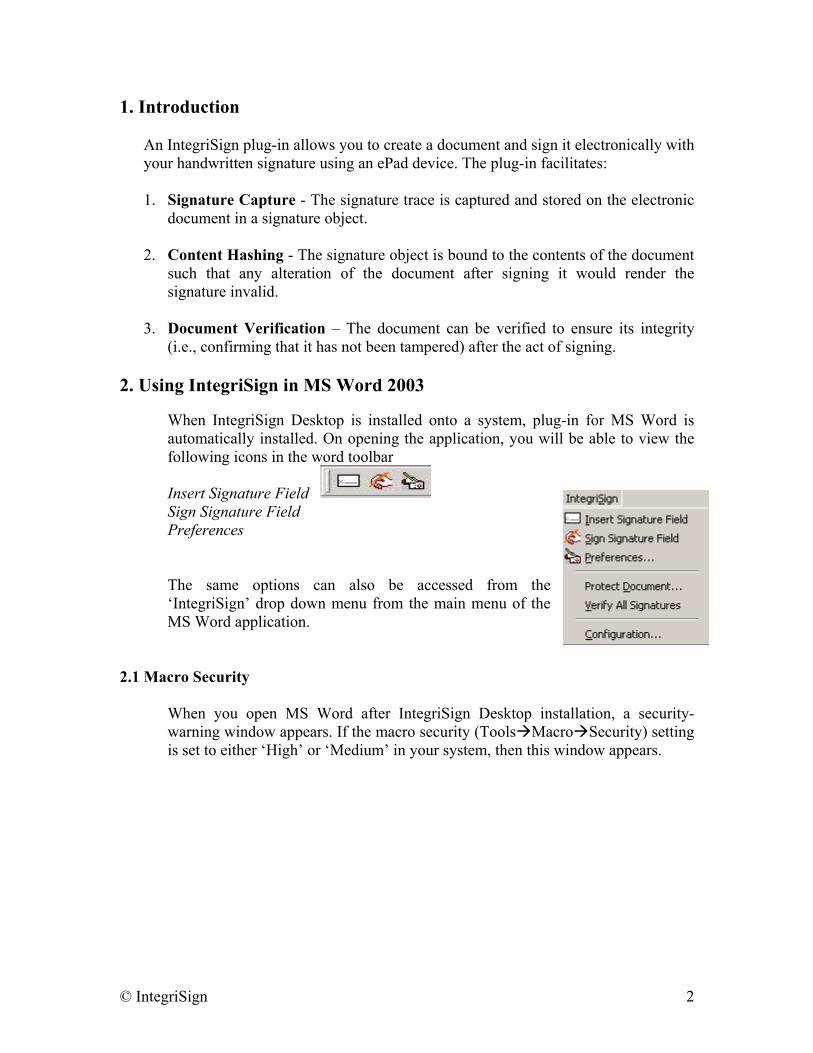
When IntegriSign Desktop is installed onto a system, plug-in for MS Word is automatically installed. On opening the application, you will be able to view the following icons in the word toolbar
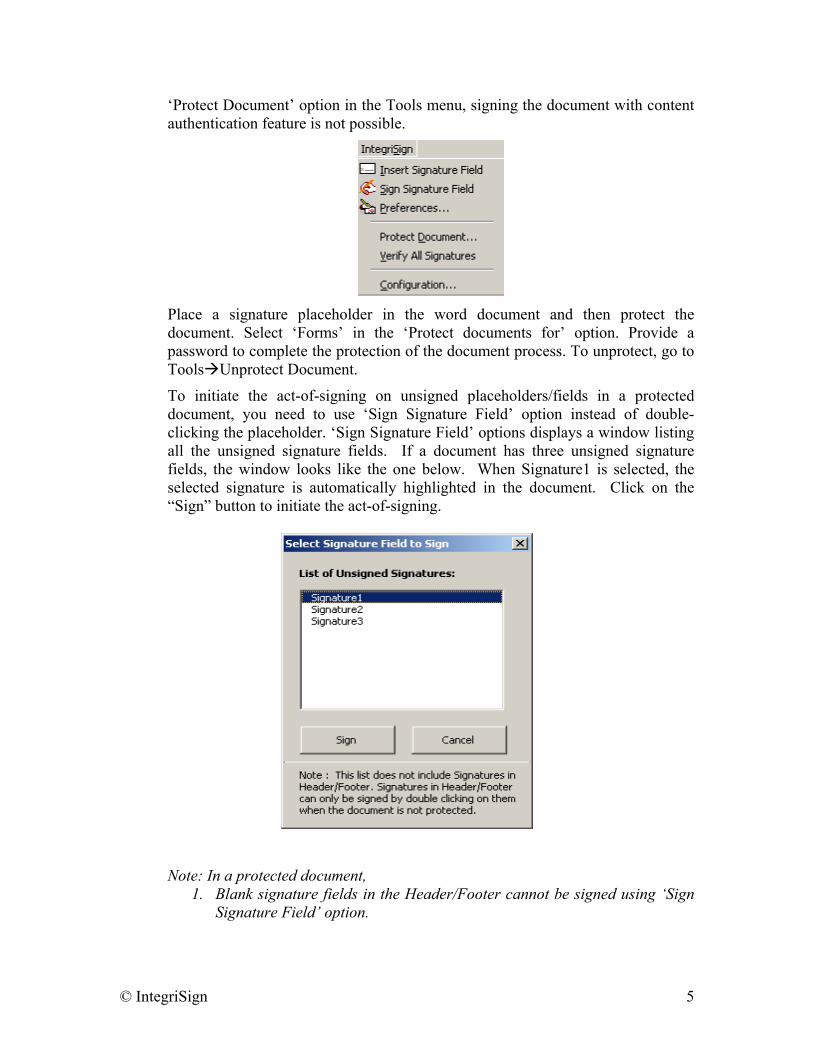
Insert Signature Field Sign Signature Field Preferences The same options can also be accessed from the ‘IntegriSign’ drop down menu from the main menu of the MS Word application.
2.1 Macro Security
When you open MS Word after IntegriSign Desktop installation, a security-warning window appears. If the macro security (ToolsMacroSecurity) setting is set to either ‘High’ or ‘Medium’ in your system, then this window appears.
© IntegriSign 2
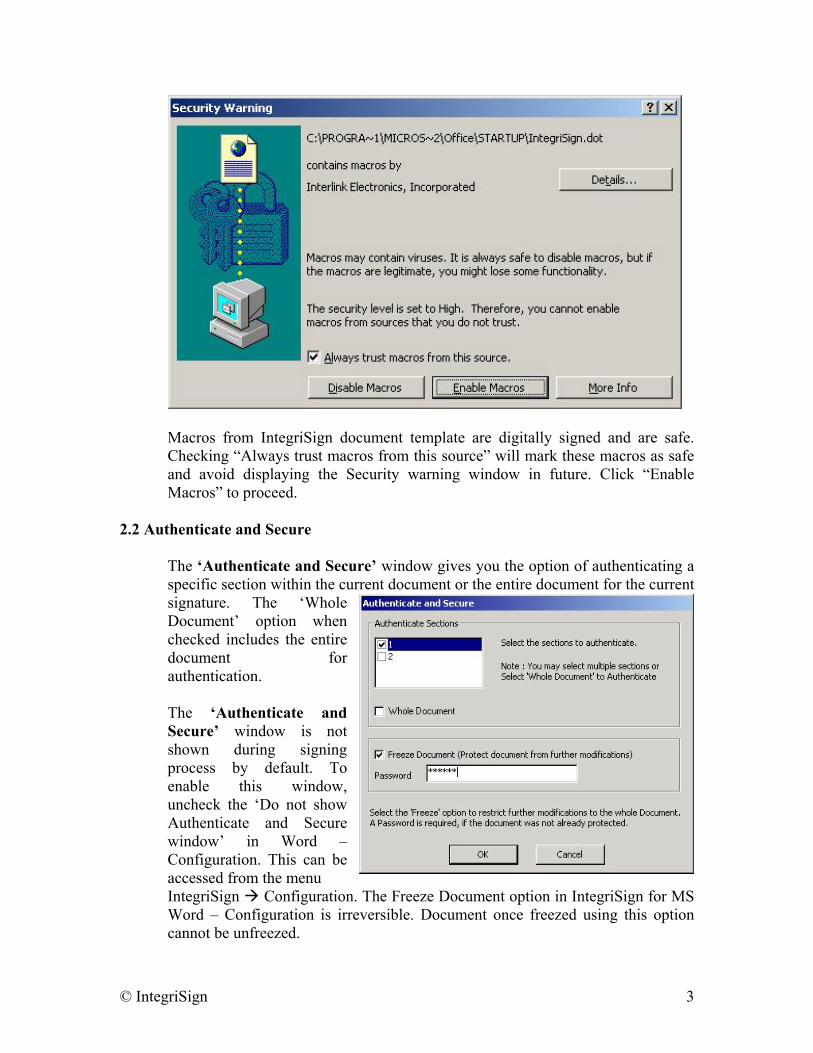
Macros from IntegriSign document template are digitally signed and are safe. Checking “Always trust macros from this source” will mark these macros as safe and avoid displaying the Security warning window in future. Click “Enable Macros” to proceed.
2.2 Authenticate and Secure
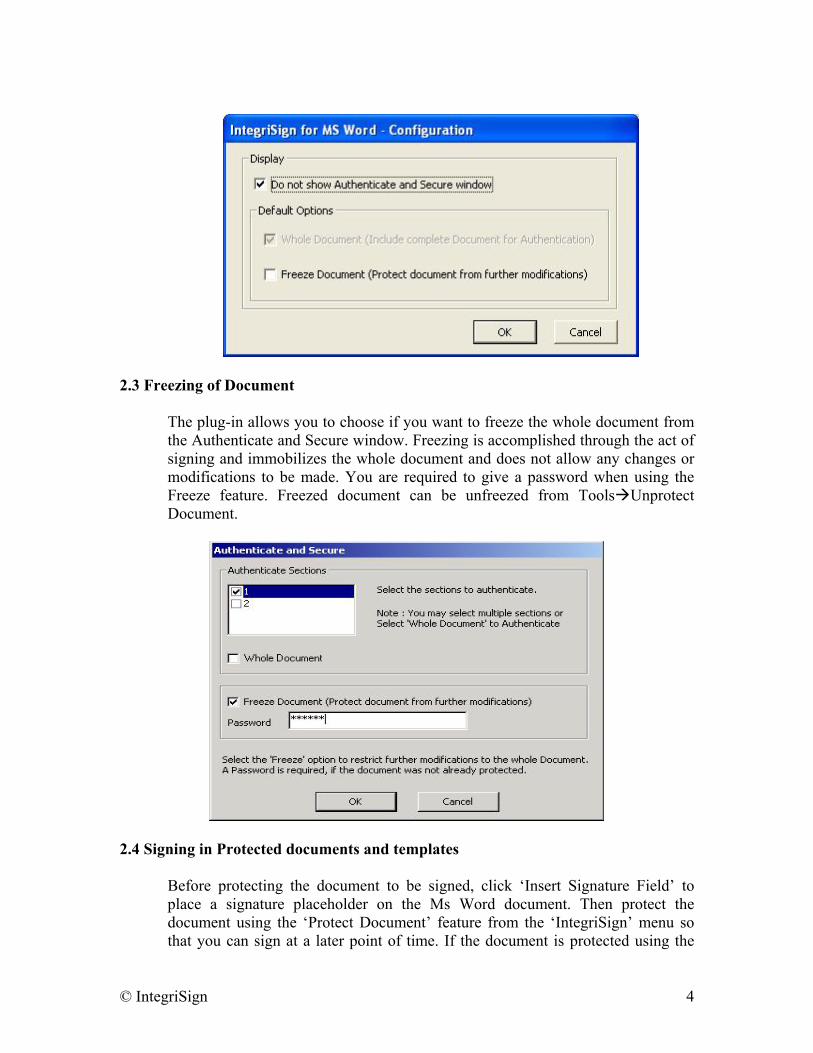
The ‘Authenticate and Secure’ window gives you the option of authenticating a specific section within the current document or the entire document for the current signature. The ‘Whole Document’ option when checked includes the entire document for authentication. The ‘Authenticate and Secure’ window is not shown during signing process by default. To enable this window, uncheck the ‘Do not show Authenticate and Secure window’ in Word – Configuration. This can be accessed from the menu IntegriSign Configuration. The Freeze Document option in IntegriSign for MS Word – Configuration is irreversible. Document once freezed using this option cannot be unfreezed.
© IntegriSign 3
2.3 Freezing of Document
The plug-in allows you to choose if you want to freeze the whole document from the Authenticate and Secure window. Freezing is accomplished through the act of signing and immobilizes the whole document and does not allow any changes or modifications to be made. You are required to give a password when using the Freeze feature. Freezed document can be unfreezed from ToolsUnprotect Document.
2.4 Signing in Protected documents and templates
Before protecting the document to be signed, click ‘Insert Signature Field’ to place a signature placeholder on the Ms Word document. Then protect the document using the ‘Protect Document’ feature from the ‘IntegriSign’ menu so that you can sign at a later point of time. If the document is protected using the
© IntegriSign 4
‘Protect Document’ option in the Tools menu, signing the document with content authentication feature is not possible.
Place a signature placeholder in the word document and then protect the document. Select ‘Forms’ in the ‘Protect documents for’ option. Provide a password to complete the protection of the document process. To unprotect, go to ToolsUnprotect Document.
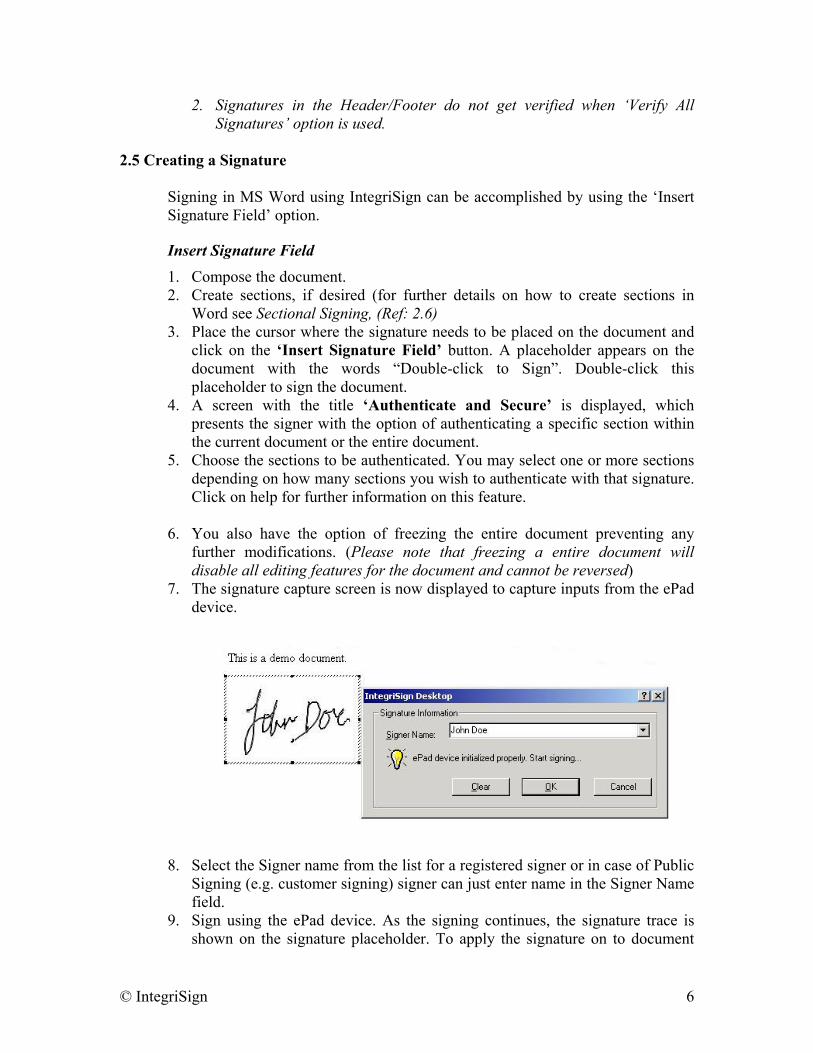
To initiate the act-of-signing on unsigned placeholders/fields in a protected document, you need to use ‘Sign Signature Field’ option instead of double-clicking the placeholder. ‘Sign Signature Field’ options displays a window listing all the unsigned signature fields. If a document has three unsigned signature fields, the window looks like the one below. When Signature1 is selected, the selected signature is automatically highlighted in the document. Click on the “Sign” button to initiate the act-of-signing.
Note: In a protected document,
1. Blank signature fields in the Header/Footer cannot be signed using ‘Sign Signature Field’ option.
© IntegriSign 5
2. Signatures in the Header/Footer do not get verified when ‘Verify All Signatures’ option is used.
2.5 Creating a Signature
Signing in MS Word using IntegriSign can be accomplished by using the ‘Insert Signature Field’ option. Insert Signature Field
1. Compose the document. 2. Create sections, if desired (for further details on how to create sections in
Word see Sectional Signing, (Ref: 2.6) 3. Place the cursor where the signature needs to be placed on the document and
click on the ‘Insert Signature Field’ button. A placeholder appears on the document with the words “Double-click to Sign”. Double-click this placeholder to sign the document.
4. A screen with the title ‘Authenticate and Secure’ is displayed, which presents the signer with the option of authenticating a specific section within the current document or the entire document.
5. Choose the sections to be authenticated. You may select one or more sections depending on how many sections you wish to authenticate with that signature. Click on help for further information on this feature.
6. You also have the option of freezing the entire document preventing any
further modifications. (Please note that freezing a entire document will disable all editing features for the document and cannot be reversed)
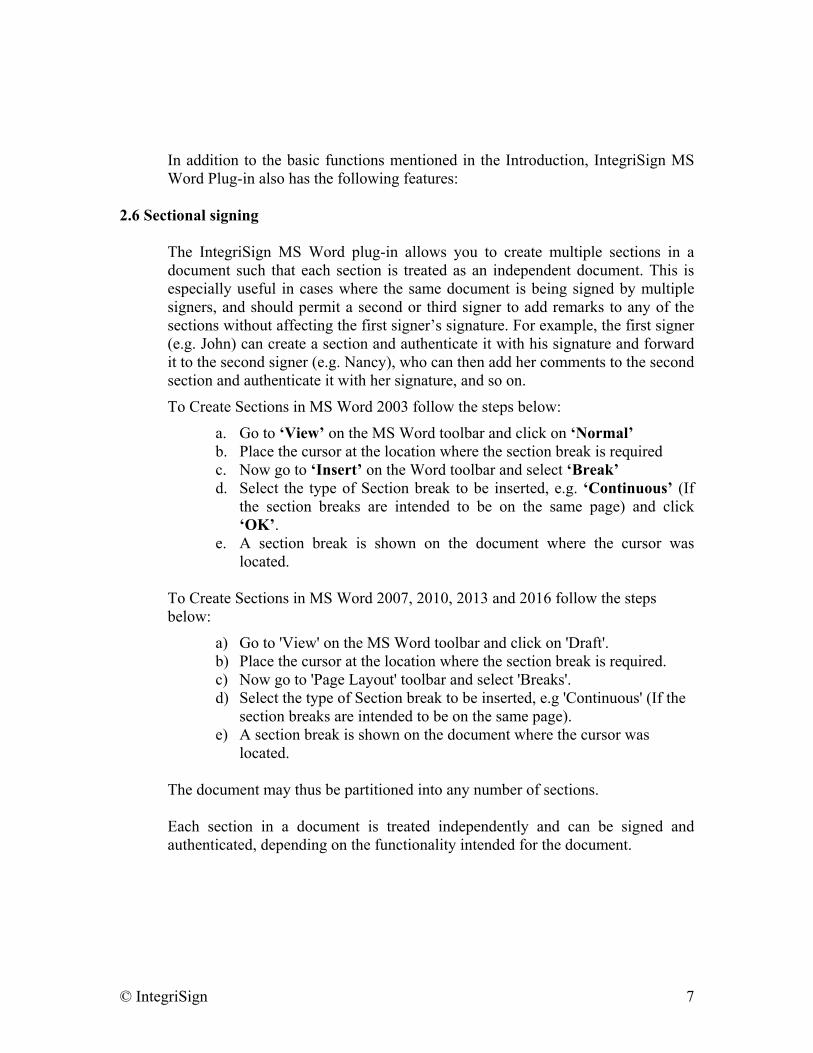
7. The signature capture screen is now displayed to capture inputs from the ePad device.
8. Select the Signer name from the list for a registered signer or in case of Public Signing (e.g. customer signing) signer can just enter name in the Signer Name field.
9. Sign using the ePad device. As the signing continues, the signature trace is shown on the signature placeholder. To apply the signature on to document
© IntegriSign 6
In addition to the basic functions mentioned in the Introduction, IntegriSign MS Word Plug-in also has the following features:
2.6 Sectional signing
The IntegriSign MS Word plug-in allows you to create multiple sections in a document such that each section is treated as an independent document. This is especially useful in cases where the same document is being signed by multiple signers, and should permit a second or third signer to add remarks to any of the sections without affecting the first signer’s signature. For example, the first signer (e.g. John) can create a section and authenticate it with his signature and forward it to the second signer (e.g. Nancy), who can then add her comments to the second section and authenticate it with her signature, and so on.
To Create Sections in MS Word 2003 follow the steps below:
a. Go to ‘View’ on the MS Word toolbar and click on ‘Normal’ b. Place the cursor at the location where the section break is required c. Now go to ‘Insert’ on the Word toolbar and select ‘Break’ d. Select the type of Section break to be inserted, e.g. ‘Continuous’ (If
the section breaks are intended to be on the same page) and click ‘OK’.
e. A section break is shown on the document where the cursor was located.
To Create Sections in MS Word 2007, 2010, 2013 and 2016 follow the steps below:
a) Go to 'View' on the MS Word toolbar and click on 'Draft'. b) Place the cursor at the location where the section break is required. c) Now go to 'Page Layout' toolbar and select 'Breaks'. d) Select the type of Section break to be inserted, e.g 'Continuous' (If the
section breaks are intended to be on the same page). e) A section break is shown on the document where the cursor was
located. The document may thus be partitioned into any number of sections. Each section in a document is treated independently and can be signed and authenticated, depending on the functionality intended for the document.
© IntegriSign 7
2.7 Document Verification
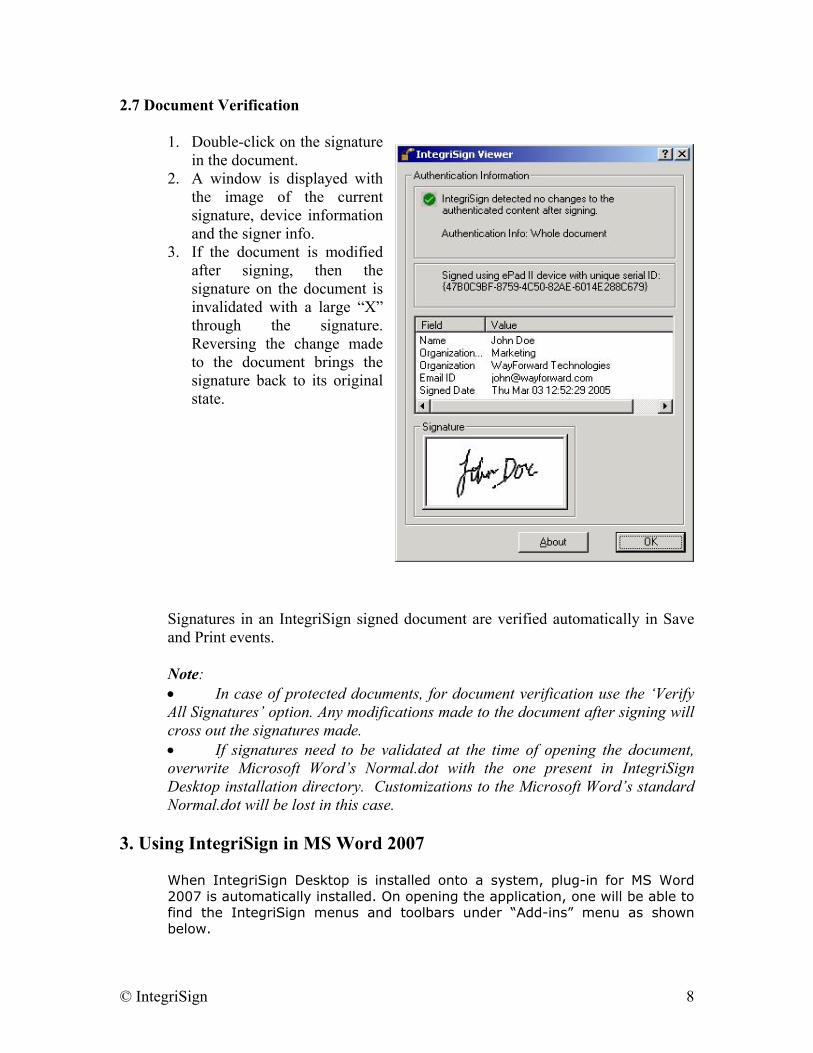
1. Double-click on the signature in the document.
2. A window is displayed with the image of the current signature, device information and the signer info.
3. If the document is modified after signing, then the signature on the document is invalidated with a large “X” through the signature. Reversing the change made to the document brings the signature back to its original state.
Signatures in an IntegriSign signed document are verified automatically in Save and Print events. Note: In case of protected documents, for document verification use the ‘Verify All Signatures’ option. Any modifications made to the document after signing will cross out the signatures made. If signatures need to be validated at the time of opening the document, overwrite Microsoft Word’s Normal.dot with the one present in IntegriSign Desktop installation directory. Customizations to the Microsoft Word’s standard Normal.dot will be lost in this case.
3. Using IntegriSign in MS Word 2007
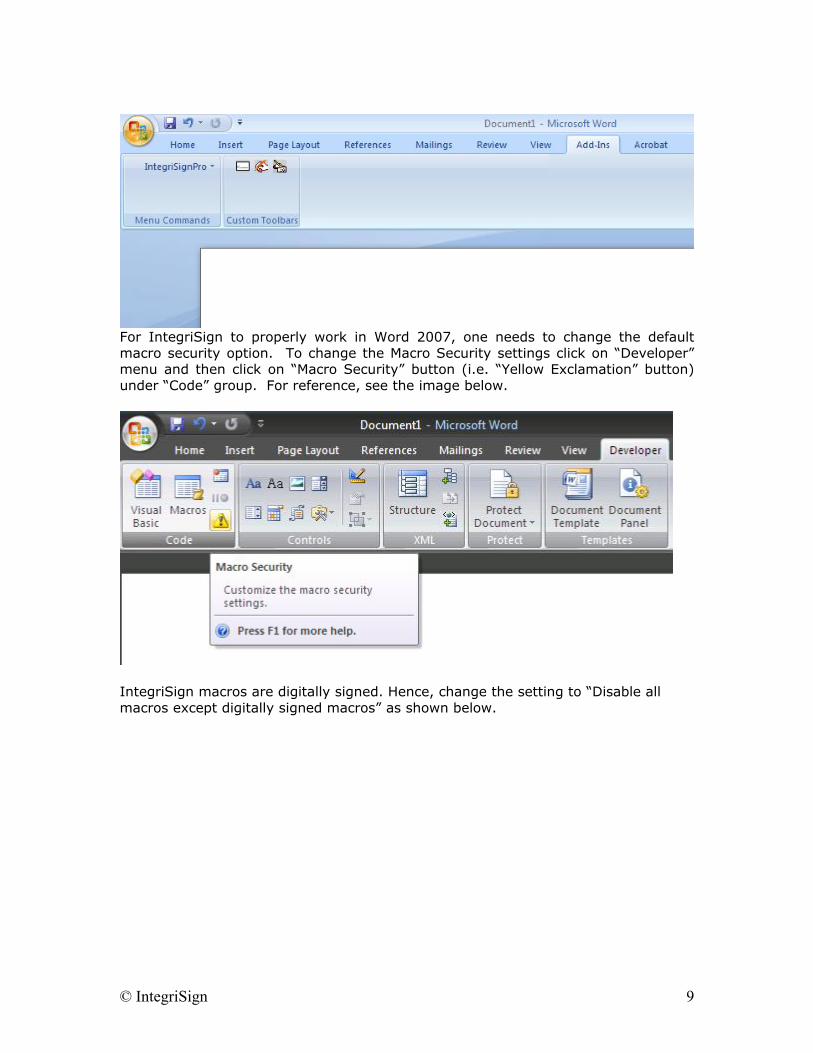
When IntegriSign Desktop is installed onto a system, plug-in for MS Word 2007 is automatically installed. On opening the application, one will be able to find the IntegriSign menus and toolbars under “Add-ins” menu as shown below.
© IntegriSign 8
For IntegriSign to properly work in Word 2007, one needs to change the default macro security option. To change the Macro Security settings click on “Developer” menu and then click on “Macro Security” button (i.e. “Yellow Exclamation” button) under “Code” group. For reference, see the image below.
IntegriSign macros are digitally signed. Hence, change the setting to “Disable all macros except digitally signed macros” as shown below.
© IntegriSign 9
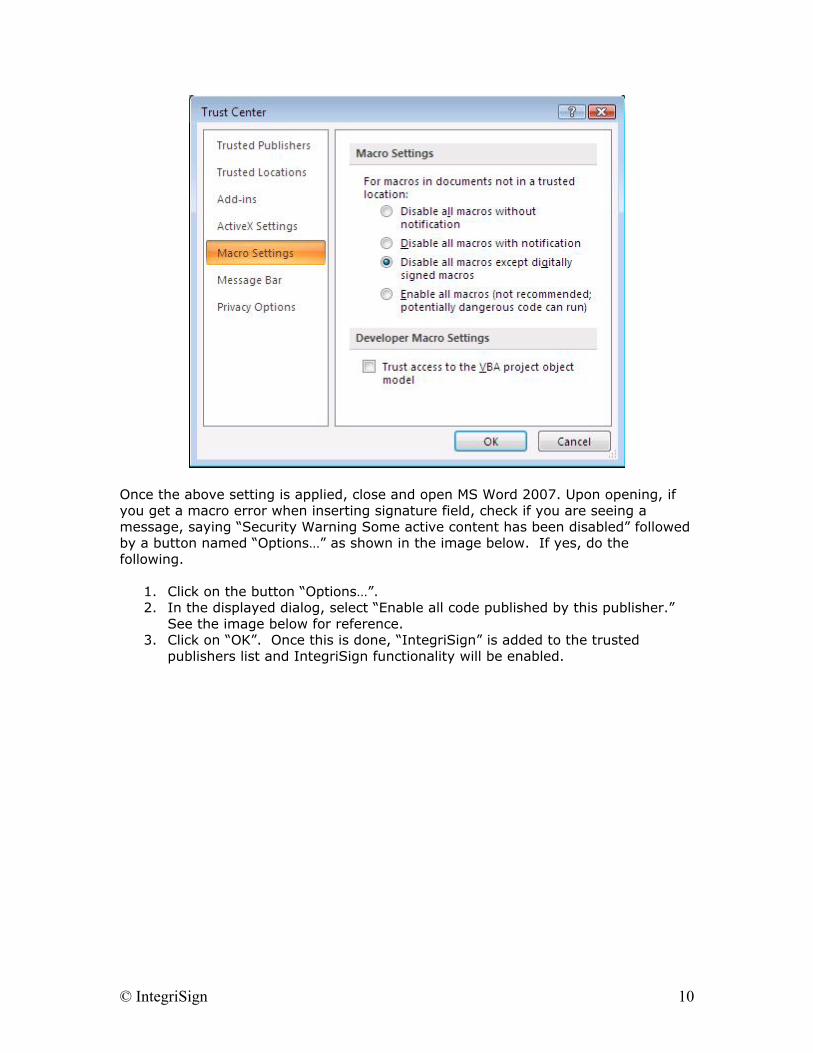
Once the above setting is applied, close and open MS Word 2007. Upon opening, if you get a macro error when inserting signature field, check if you are seeing a message, saying “Security Warning Some active content has been disabled” followed by a button named “Options…” as shown in the image below. If yes, do the following.
1. Click on the button “Options…”. 2. In the displayed dialog, select “Enable all code published by this publisher.”
See the image below for reference. 3. Click on “OK”. Once this is done, “IntegriSign” is added to the trusted
publishers list and IntegriSign functionality will be enabled.
© IntegriSign 10
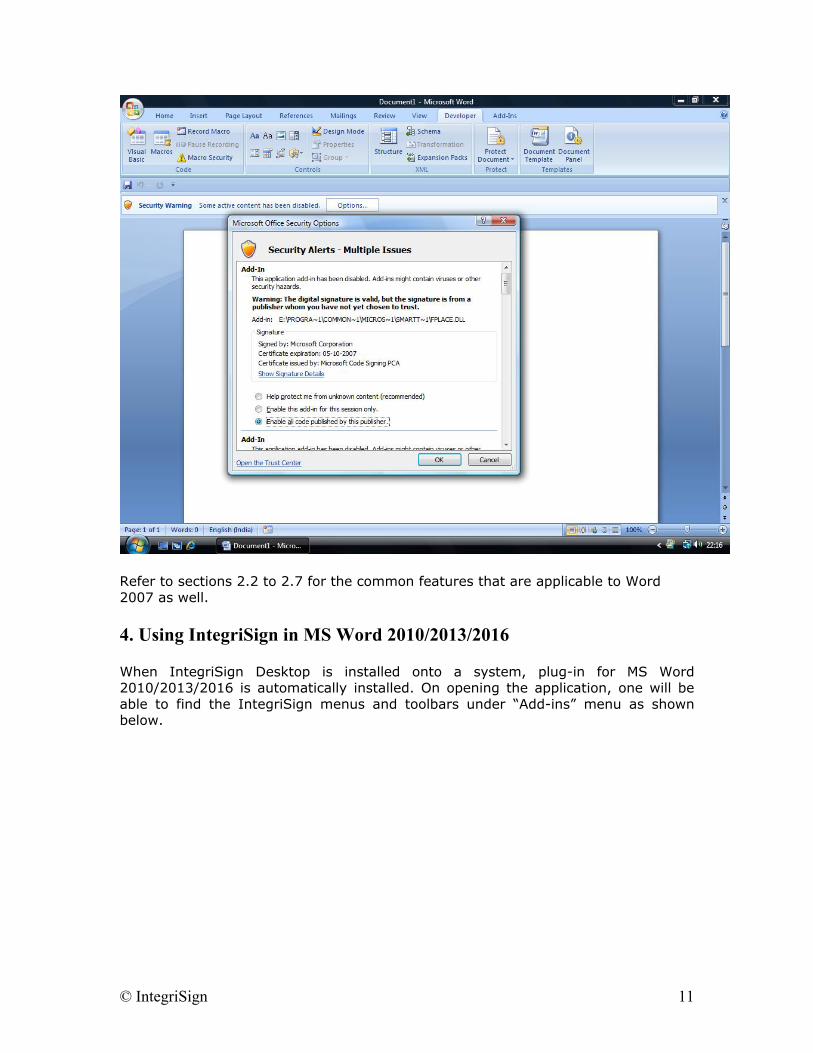
Refer to sections 2.2 to 2.7 for the common features that are applicable to Word 2007 as well. 4. Using IntegriSign in MS Word 2010/2013/2016 When IntegriSign Desktop is installed onto a system, plug-in for MS Word 2010/2013/2016 is automatically installed. On opening the application, one will be able to find the IntegriSign menus and toolbars under “Add-ins” menu as shown below.
© IntegriSign 11
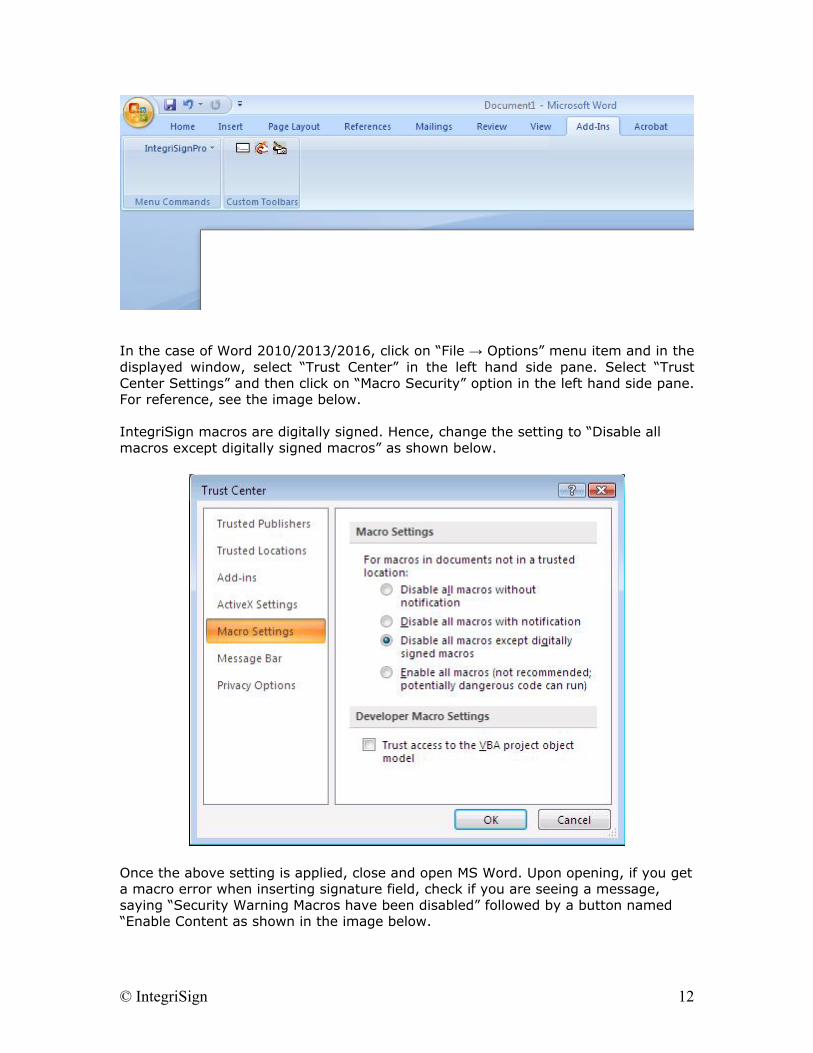
In the case of Word 2010/2013/2016, click on “File → Options” menu item and in the displayed window, select “Trust Center” in the left hand side pane. Select “Trust Center Settings” and then click on “Macro Security” option in the left hand side pane. For reference, see the image below. IntegriSign macros are digitally signed. Hence, change the setting to “Disable all macros except digitally signed macros” as shown below.
Once the above setting is applied, close and open MS Word. Upon opening, if you get a macro error when inserting signature field, check if you are seeing a message, saying “Security Warning Macros have been disabled” followed by a button named “Enable Content as shown in the image below.
© IntegriSign 12
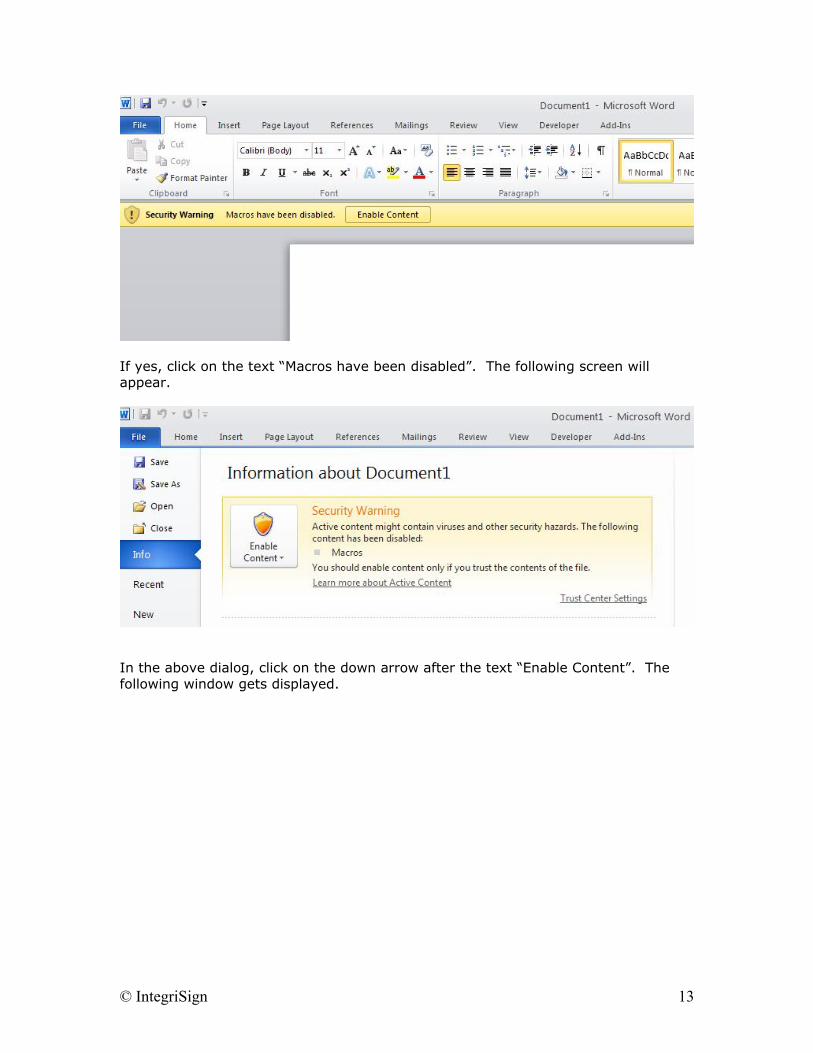
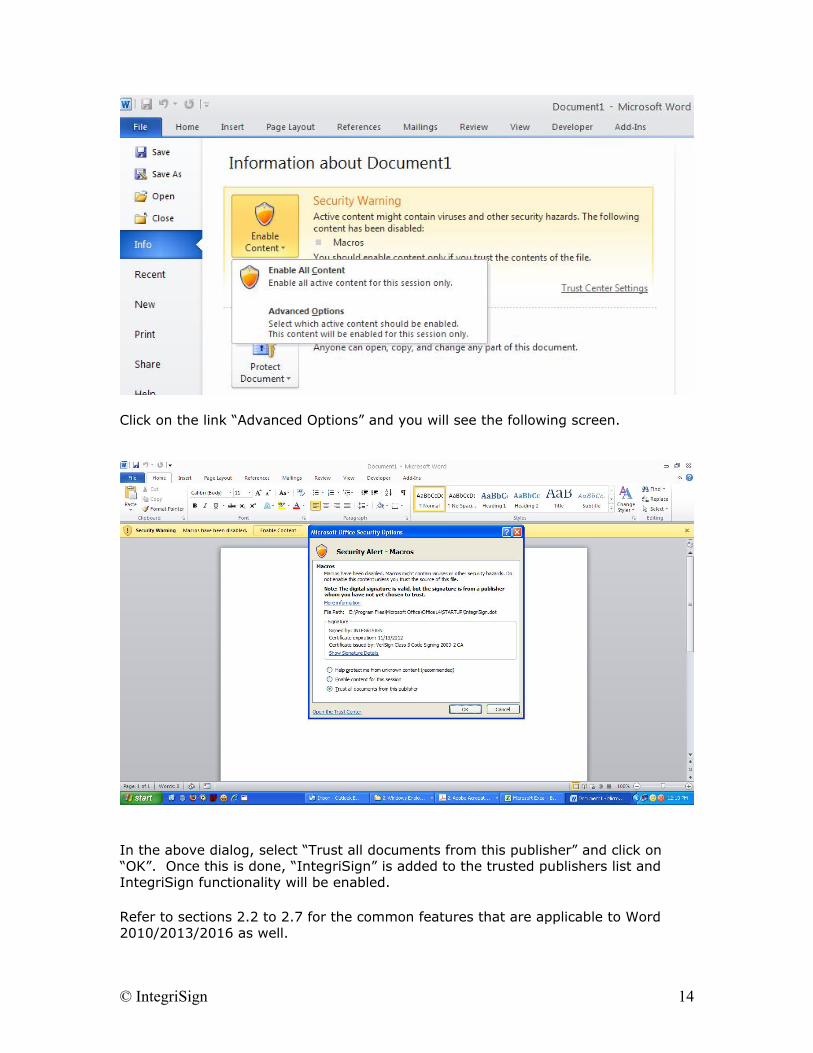
If yes, click on the text “Macros have been disabled”. The following screen will appear.
In the above dialog, click on the down arrow after the text “Enable Content”. The following window gets displayed.
© IntegriSign 13
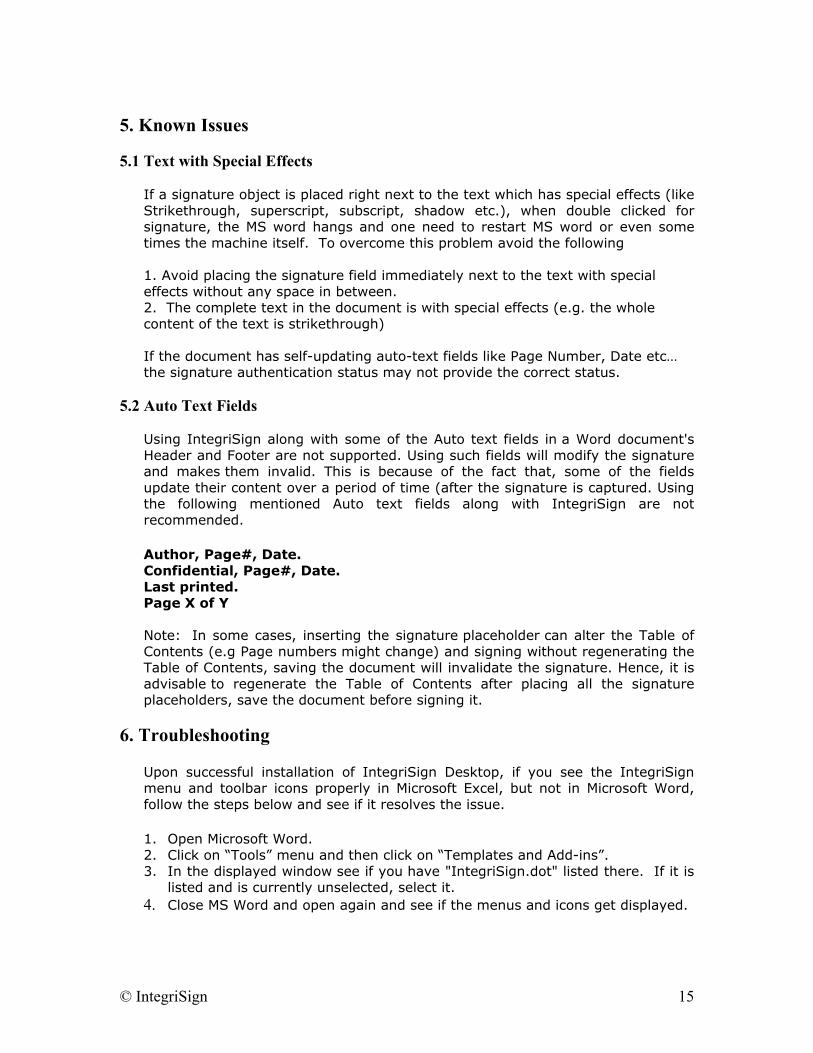
Click on the link “Advanced Options” and you will see the following screen.
In the above dialog, select “Trust all documents from this publisher” and click on “OK”. Once this is done, “IntegriSign” is added to the trusted publishers list and IntegriSign functionality will be enabled. Refer to sections 2.2 to 2.7 for the common features that are applicable to Word 2010/2013/2016 as well.
© IntegriSign 14
© IntegriSign 15
5. Known Issues
5.1 Text with Special Effects
If a signature object is placed right next to the text which has special effects (like Strikethrough, superscript, subscript, shadow etc.), when double clicked for signature, the MS word hangs and one need to restart MS word or even some times the machine itself. To overcome this problem avoid the following 1. Avoid placing the signature field immediately next to the text with special effects without any space in between. 2. The complete text in the document is with special effects (e.g. the whole content of the text is strikethrough) If the document has self-updating auto-text fields like Page Number, Date etc… the signature authentication status may not provide the correct status.
5.2 Auto Text Fields Using IntegriSign along with some of the Auto text fields in a Word document's Header and Footer are not supported. Using such fields will modify the signature and makes them invalid. This is because of the fact that, some of the fields update their content over a period of time (after the signature is captured. Using the following mentioned Auto text fields along with IntegriSign are not recommended.
Author, Page#, Date. Confidential, Page#, Date. Last printed. Page X of Y Note: In some cases, inserting the signature placeholder can alter the Table of Contents (e.g Page numbers might change) and signing without regenerating the Table of Contents, saving the document will invalidate the signature. Hence, it is advisable to regenerate the Table of Contents after placing all the signature placeholders, save the document before signing it.
6. Troubleshooting
Upon successful installation of IntegriSign Desktop, if you see the IntegriSign menu and toolbar icons properly in Microsoft Excel, but not in Microsoft Word, follow the steps below and see if it resolves the issue.
1. Open Microsoft Word. 2. Click on “Tools” menu and then click on “Templates and Add-ins”. 3. In the displayed window see if you have "IntegriSign.dot" listed there. If it is
listed and is currently unselected, select it. 4. Close MS Word and open again and see if the menus and icons get displayed.