Embed Size (px)
Citation preview
Clinical Skills in Hospitals ProjectIntravenous (IV) therapyModule 1: IV cannulation
Module 2: IV fluids
Module 3: Central venous access devices
Module 4: Central venous lines
Module 1: Intercostal catheters (ICCs)Module 2: PleurocathsModule 3: Underwater seal drainsModule 4: Management scenarios

Clinical Skills in Hospitals ProjectIntravenous (IV) therapyModule 1: IV cannulation
Module 2: IV fluids
Module 3: Central venous access devices
Module 4: Central venous lines
AcknowledgmentsThe authors wish to acknowledge the following people for their important contributions to this project:
■ Leanne Allen, Dr Stuart Dilley, Dr Neil Cunningham, Sharon Lourdes and Kelly Phillips from St Vincent’s Hospital, Melbourne, for their tireless efforts as the primary authors of the IV therapy package.
■ Mr Julian Van Dijk, Dr Robert O’Brien and Mr Matthew Williams at St Vincent’s Education Centre for their contributions to this package.
For further information please contact the project manager, Julian Van Dijk:
(03) 9288 [email protected]
© State of Victoria 2008
This publication is copyright. No part may be reproduced by any process except in accordance with the provisions of the Copyright Act 1968.
The Clinical Skills Centres in Hospitals Training Materials (’Materials’) were developed for the Department of Human Services (’DHS’) for use by clinical educators (’Educators’). Any Educator wishing to use the Materials must review the Materials prior to use and ensure that they are suitable for the Educator’s purpose, including the needs of the Educator’s intended training recipients (’Training Recipients’). Some aspects of the Materials may not be relevant to some Educators or Training Recipients. Educators and Training Recipients must not represent themselves as employees or agents of DHS in their use of the Materials. Except at the time of publication, neither DHS nor the State of Victoria warrants the accuracy of the information contained in the Materials. Neither DHS nor the State of Victoria makes any warranty as to the appropriateness of the information to the circumstances of Educators or Training Recipients. The Materials may not include all of the information required by Educators or Training Recipients in providing or receiving clinical training. If in doubt, Educators and Training Recipients should seek their own advice about the interpretation of the Materials. Any Educator or Training Recipient using the Materials does so at their own risk and shall accept responsibility for any actions arising from their use. DHS may update the Materials at its own discretion, but is not responsible for the provision of updates to the Materials. No responsibility is taken for failure to update the Materials and it is the responsibility of the Educator to ensure that the information contained in the Materials is up to date and reflects current medical practice, law and guidelines.
ii Intravenous (IV) therapy—Introduction
PrefaceIn 2007 the Department of Human Services commissioned St Vincent’s Hospital Melbourne, to design and develop simulation-based training packages for clinical skills trainers in Victorian hospitals.
The project provides Victorian health professionals—specifically, hospital clinical educators—with a resource to deliver simulation-based clinical skills training.
The information in this manual complements current training programs and should be considered as a resource in the workplace, rather than the definitive resource on the topic.
Every effort has been made to provide the most current literature references. Authors have consulted other health professionals and current programs when possible in development to ensure that the modules produced in this package are consistent with current health practices.
iiiIntravenous (IV) therapy—Introduction

vIntravenous (IV) therapy—Introduction
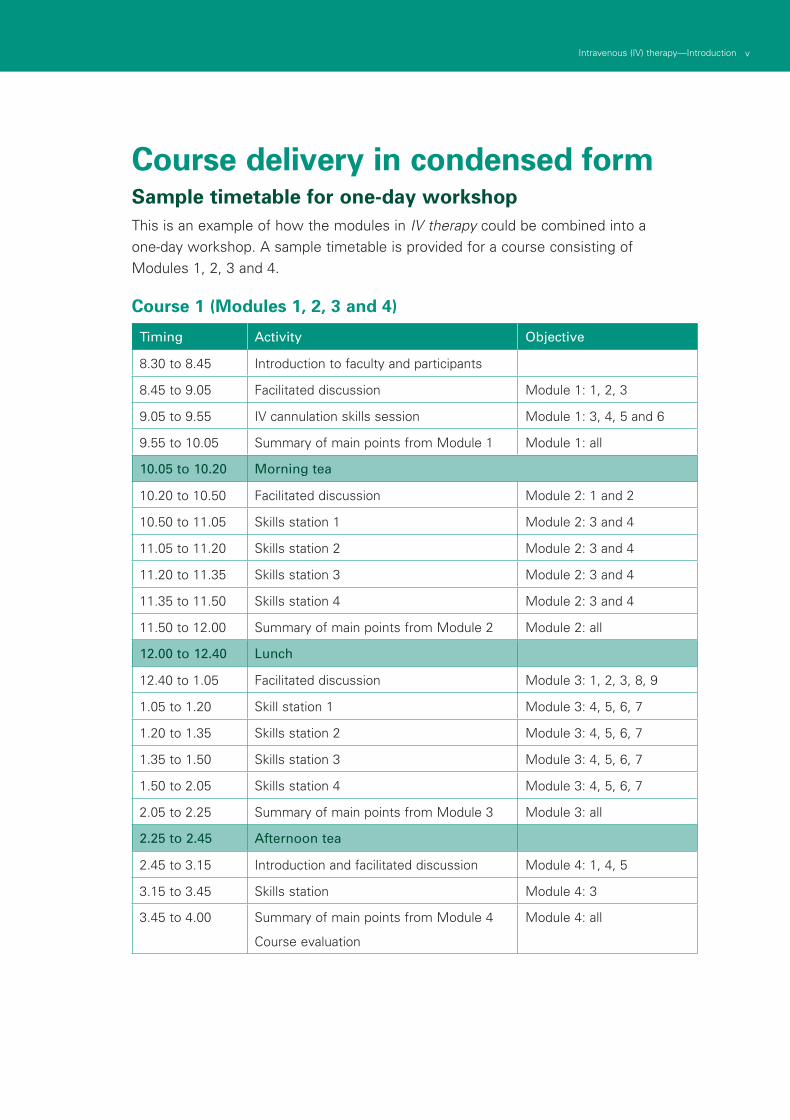
Course delivery in condensed formSample timetable for one-day workshopThis is an example of how the modules in IV therapy could be combined into a one-day workshop. A sample timetable is provided for a course consisting of Modules 1, 2, 3 and 4.
Course 1 (Modules 1, 2, 3 and 4)
Timing Activity Objective
8.30 to 8.45 Introduction to faculty and participants
8.45 to 9.05 Facilitated discussion Module 1: 1, 2, 3
9.05 to 9.55 IV cannulation skills session Module 1: 3, 4, 5 and 6
9.55 to 10.05 Summary of main points from Module 1 Module 1: all
10.05 to 10.20 Morning tea
10.20 to 10.50 Facilitated discussion Module 2: 1 and 2
10.50 to 11.05 Skills station 1 Module 2: 3 and 4
11.05 to 11.20 Skills station 2 Module 2: 3 and 4
11.20 to 11.35 Skills station 3 Module 2: 3 and 4
11.35 to 11.50 Skills station 4 Module 2: 3 and 4
11.50 to 12.00 Summary of main points from Module 2 Module 2: all
12.00 to 12.40 Lunch
12.40 to 1.05 Facilitated discussion Module 3: 1, 2, 3, 8, 9
1.05 to 1.20 Skill station 1 Module 3: 4, 5, 6, 7
1.20 to 1.35 Skills station 2 Module 3: 4, 5, 6, 7
1.35 to 1.50 Skills station 3 Module 3: 4, 5, 6, 7
1.50 to 2.05 Skills station 4 Module 3: 4, 5, 6, 7
2.05 to 2.25 Summary of main points from Module 3 Module 3: all
2.25 to 2.45 Afternoon tea
2.45 to 3.15 Introduction and facilitated discussion Module 4: 1, 4, 5
3.15 to 3.45 Skills station Module 4: 3
3.45 to 4.00 Summary of main points from Module 4
Course evaluation
Module 4: all

viiIntravenous (IV) therapy—Introduction
Intravenous (IV) therapyIntroduction Intravenous insertion and IV therapy was developed as a teaching and learning tool for Victorian clinical educators. The information contained in each module was developed using evidence-based resources and examples of best practice. Where expert opinion varies, a discussion section is included. However, it is not within the scope of IV therapy to address the full spectrum of local variations. Variations can occur in several areas, including practices relating to types of equipment used, infection control processes, practice guidelines and so on. Therefore, educators should, where appropriate, adapt content to reflect their local policies, procedures and protocols. This will ensure the relevancy of the package content to your learners.
The modules are designed to be discrete courses in their own right. They are timetabled so they can be completed in a 1–2 hour timeframe. This timeframe was chosen after we received feedback from clinical educators requesting shorter courses, because health professionals often have limited time to educate away from patients. However, the packages may also be combined into a one-or two-day course.
IV therapy should be used as an educational tool to assist in the teaching of clinical skills. It is structured as a guide to assist clinical educators, and uses many concepts taught in the Clinical Skills in Hospitals Project (Train-the-Trainer courses). Educators are encouraged to build on this resource by adding their own scenarios which incorporate hospital/health service protocols, policies and other resources. Each module is designed as a lesson plan to incorporate the simulations into the teaching of clinical skills.
AimsIV therapy aims to make participants confident in their use of intravenous devices— either from an insertion perspective (discipline specific) or as a therapy delivery device.
Package structureThe IV therapy package contains four modules, which provide learning opportunities for health professionals at all levels of experience and from medical and nursing disciplines. Modules 1 and 2 are regarded as fundamental. Modules 3 and 4 are set at the intermediate level.
The assessment for, and insertion of, IV cannula, plus knowledge of basic therapies, such as fluid types, are fundamental to this area of practice. The use of specific devices, such as central venous access ports, is less common in general health care settings, and requires specific knowledge and skill for their use. The insertion and care of central venous lines is covered in IV therapy–Module 4: Central venous lines. Although some skills are discipline specific, such as central line insertion, educators should consider an interdisciplinary approach to the use of these modules.

viii Intravenous (IV) therapy—Introduction
Level of complexity Package structure
ComplexFor participants with more than 4 years experience or who have completed Modules 1–4
IntermediateFor participants in postgraduate years 3–4 or who have completed Modules 1 and 2
FundamentalFor participants in postgraduate years 1–2
This package was designed to develop participants’ knowledge, skills and behaviours required to work with intravenous therapy, and to expose them to increasingly complex scenarios to test their ability to combine these individual skills, work as a team and problem solve in more difficult situations.
Educators delivering these modules should be aware of participants’ level of experience and choose appropriate modules. Modules presume an increasing level of knowledge as they progress, ranging from a fundamental knowledge of anatomy and physiology for the fundamental modules, up to detailed knowledge of central venous access devices and central lines. Novice participants (such as first-year graduates) are expected to start with the fundamental modules, and only move onto intermediate and more complex modules as they demonstrate proficiency. More experienced participants may start at the intermediate level if the educator is satisfied that they have the prior knowledge and skills. Individual educators are responsible for assessing each participant’s baseline knowledge and determining which modules they need to complete. More specific descriptions of presumed knowledge are outlined in each module.
IV cannulation IV fluids
Central venous lines
Central venous access devices
ixIntravenous (IV) therapy—Introduction
The design of these packages presumes that the clinical educators using them have knowledge and expertise in current best practice regarding the teaching of clinical skills and conducting facilitated discussions. Knowledge and expertise are presumed commensurate with the Department of Human Services’ basic and advanced Train-the-Trainer programs. Clinical educators are encouraged to refer to Department of Human Services’ Clinical Skills Facilitators Manual for theory on:
Peyton’s model for teaching clinical skills1.
leading small group discussions2.
giving feedback3.
crisis resource management skills.4.

1Intravenous (IV) therapy—Module 1: IV cannulation
IntroductionIntravenous insertion and IV therapy was developed as a teaching and learning tool for Victorian clinical educators. The information contained in each module was developed using evidence-based resources and examples of best practice. Where expert opinion varies, a discussion section is included. However, it is not within the scope of IV therapy to address the full spectrum of local variations. Variations can occur in several areas, including practices relating to types of equipment used, infection control processes, practice guidelines and so on. Therefore, educators should, where appropriate, adapt content to reflect their local policies, procedures and protocols. This will ensure the relevancy of the package content to your learners.
The modules are designed to be discrete courses in their own right. They are timetabled so they can be completed in a 1–2 hour timeframe. This timeframe was chosen after we received feedback from clinical educators requesting shorter courses, because health professionals often have limited time to educate away from patients. However, the packages may also be combined into a one- or two-day course.
IV therapy should be used as an educational tool to assist in the teaching of clinical skills. It is structured as a guide to assist clinical educators, and uses many concepts taught in the Clinical Skills in Hospitals Project (Train-the-Trainer courses). Educators are encouraged to build on this resource by adding their own scenarios which incorporate hospital/health service protocols, policies and other resources. Each module is designed as a lesson plan to incorporate the simulations into the teaching of clinical skills.
AimsIV therapy aims to make participants confident in their use intravenous devices– either from an insertion perspective (discipline specific) or as a therapy delivery device.
Package structureThe IV therapy package contains four modules, which provide learning opportunities for health professionals at all levels of experience and from medical and nursing disciplines. Modules 1 and 2 are regarded as fundamental. Modules 3 and 4 are set at the intermediate level.
The assessment for, and insertion of, IV cannula, plus knowledge of basic therapies, such as fluid types, are fundamental to this area of practice. The use of specific devices, such as central venous access ports, is less common in general health care settings, and requires specific knowledge and skill for their use. The insertion and care of central venous lines is covered in IV therapy–Module 4: Central venous lines. Although some skills are discipline specific, such as central line insertion, educators should consider an interdisciplinary approach to the use of these modules.
Module 1: IV cannulation

2 Respiratory 1–Module 2: Respiratory assessment2 Intravenous (IV) therapy—Module 1: IV cannulation
Level of complexity Package structure
ComplexFor participants with more than 4 years experience or who have completed Modules 1–4
IntermediateFor participants in postgraduate years 3–4 or who have completed Modules 1 and 2
FundamentalFor participants in postgraduate years 1–2
This package was designed to develop participants’ knowledge, skills and behaviours required to work with intravenous therapy, and to expose them to increasingly complex scenarios to test their ability to combine these individual skills, work as a team and problem solve in more difficult situations.
Educators delivering these modules should be aware of participants’ level of experience and choose appropriate modules. Modules presume an increasing level of knowledge as they progress, ranging from a fundamental knowledge of anatomy and physiology for the fundamental modules, up to detailed knowledge of central venous access devices and central lines. Novice participants (such as first-year graduates) are expected to start with the fundamental modules, and only move onto intermediate and more complex modules as they demonstrate proficiency. More experienced participants may start at the intermediate level if the educator is satisfied that they have the prior knowledge and skills. Individual educators are responsible for assessing each participant’s baseline knowledge and determining which modules they need to complete. More specific descriptions of presumed knowledge are outlined in each module.
IV cannulation IV fluids
Central venous lines
Central venous access devices
3Intravenous (IV) therapy—Module 1: IV cannulation
The design of these packages presumes that the clinical educators using them have knowledge and expertise in current best practice regarding the teaching of clinical skills and conducting facilitated discussions. Knowledge and expertise are presumed commensurate with the Department of Human Services’ basic and advanced Train-the-Trainer programs. Clinical educators are encouraged to refer to Department of Human Services’ Clinical Skills Facilitators Manual for theory on:
Peyton’s model for teaching clinical skills1.
leading small group discussions2.
giving feedback3.
crisis resource management skills.4.

4 Respiratory 1–Module 2: Respiratory assessment
5Intravenous (IV) therapy—Module 1: IV cannulation
Authors: Leanne Allen, Julian Van Dijk
AimsThis module assists the registered nurse to maintain and demonstrate current theoretical knowledge related to intravenous cannulation.
This program should be used as an adjunct to the organisation’s policies and procedures related to intravenous (IV) cannulation. Therefore, participants in this module should be identified by local health service policy.
Presumed knowledge
This module is designed to provide foundational skills. Participants should be graduates of health care degrees, in which IV cannulation is an identified requirement of practice.
ObjectivesBy the end of this module, participants should have:
discussed the patient assessment required before determining the need for 1.IV cannulation
discussed and identified potential intravenous cannulation sites2.
discussed and identified factors determining cannula type and size3.
discussed and identified precautions which must be undertaken when inserting 4.an intravenous cannula
discussed the theoretical and practical skills required to perform intravenous 5.cannulation
participated in IV cannulation skills stations demonstrating appropriate techniques 6.and environmental safety precautions
during the skills station activity, identified strategies to minimise IV cannulation 7.complications.
Background information for educatorsEnvironmental safety and legal aspects
Standard precautions should be used consistently during IV cannulation for all patients.
In the event of a body fluid exposure incident, the organisation’s local policy should be followed.
IV cannulation is an invasive procedure. Therefore, consent should be obtained from the patient before performing the procedure.
Routine or scheduled replacement of intravascular catheters is advocated as a method to prevent phlebitis and catheter-related infections.
Module 1: IV cannulation
6 Respiratory 1–Module 2: Respiratory assessment6 Intravenous (IV) therapy—Module 1: IV cannulation
IVs must be resited at 72 hours.
Remove cannulae at the first sign of phlebitis.
If cannula are inserted under emergency conditions, they must be resited within 12–24 hours.
Under extraordinary circumstances, a medical officer may request that the IV is left in situ after 72 hours.
Site preparation: 0.5% chlorhexidine in 70% alcohol (allow 60 seconds to dry).
Reasons for cannulating a patient■ restoring and maintaining fluid and electrolyte balance
■ administration of drug therapy
■ transfusion of blood and blood products
■ intravenous access.
Anatomy overview
Upper compared to lower extremity
Always use veins in the upper extremity before using lower extremity sites. Veins of the lower limb are generally used only in exceptional circumstances in adults.
If necessary, the veins of the dorsum of the foot and the saphenous vein at the ankle are the sites of choice.
Veins of the upper extremity
The preferred IV cannulation sites are the cephalic and basilic veins in the forearm and the veins on the dorsum of the hand.
Cannula selection
In determining cannula size and site, consider the purpose of cannulation and the likely duration of IV therapy.
As a general rule, use the smallest gauge and shortest length cannula that will meet the patient’s needs.
The cannula must be of a size that will allow good blood perfusion around the cannula, while still maintaining a large enough cannula bore, to allow adequate flow of the fluid into the vein.
7Intravenous (IV) therapy—Module 1: IV cannulation
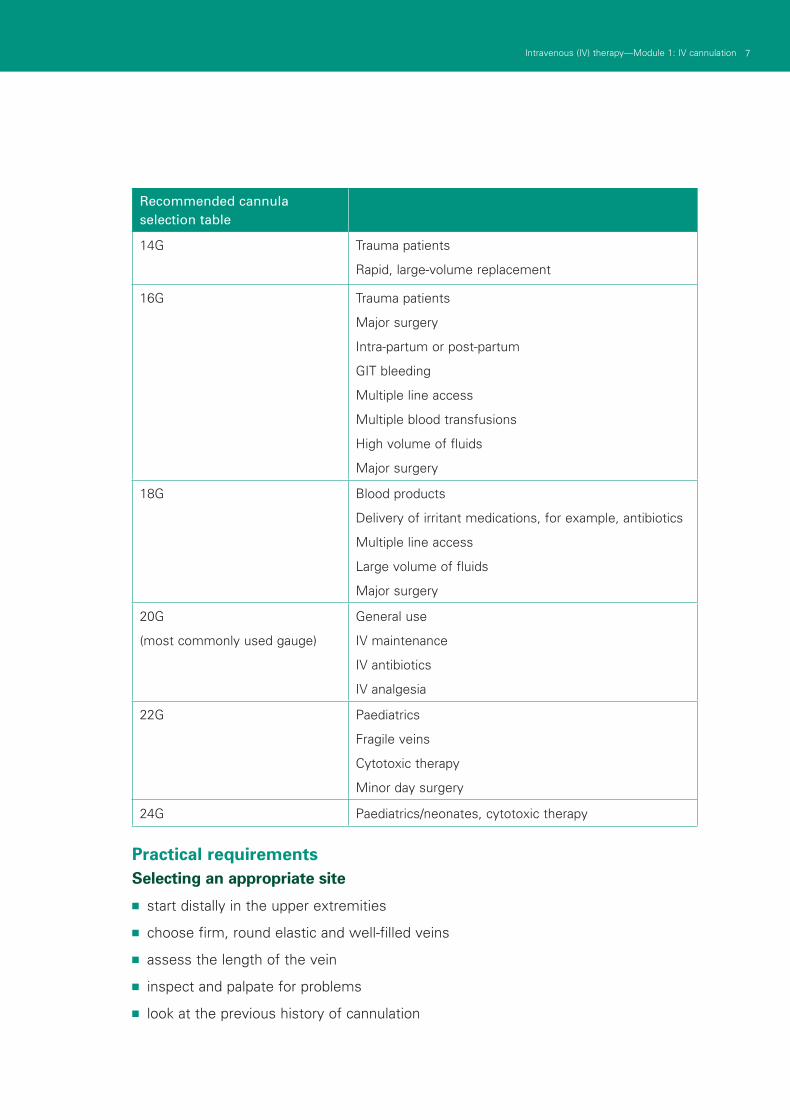
Recommended cannula selection table
14G Trauma patients
Rapid, large-volume replacement
16G Trauma patients
Major surgery
Intra-partum or post-partum
GIT bleeding
Multiple line access
Multiple blood transfusions
High volume of fluids
Major surgery
18G Blood products
Delivery of irritant medications, for example, antibiotics
Multiple line access
Large volume of fluids
Major surgery
20G
(most commonly used gauge)
General use
IV maintenance
IV antibiotics
IV analgesia
22G Paediatrics
Fragile veins
Cytotoxic therapy
Minor day surgery
24G Paediatrics/neonates, cytotoxic therapy
Practical requirementsSelecting an appropriate site
■ start distally in the upper extremities
■ choose firm, round elastic and well-filled veins
■ assess the length of the vein
■ inspect and palpate for problems
■ look at the previous history of cannulation
8 Respiratory 1–Module 2: Respiratory assessment8 Intravenous (IV) therapy—Module 1: IV cannulation
■ consider:
suitable location
purpose of infusion
duration of therapy.
Areas to avoid■ areas of flexion
■ areas below a previously accessed site
■ bruised, injured or phlebitic areas
■ arm of a patient with lymphoedema
■ arm of a patient with a mastectomy
■ arm with an AV fistula or shunt
■ lower limbs.
Reasons for avoiding cannulating the following areas
Areas of flexion:
■ uncomfortable for the patient, because it requires splinting
■ the vessel is easily occluded
■ greater risk of infiltration and phlebitis.
Haematomas or injured areas:
■ the peripheral return is reduced
■ risk of pieces of partially clotted blood from the haematoma breaking away and forming an emboli that could be transported throughout the system.
Mastectomy and or lymphedema:
■ patients have reduced peripheral return.
AV fistula or shunt sites:
■ risk of compromising the haemodialysis access.
Areas distal to previous cannulation:
■ these may be bruised or sclerosed from previous access
■ infusion may not run as efficiently if vein is damaged.
Lower limbs:
■ poor peripheral return
■ increased risk of deep vein thrombosis (DVT)
9Intravenous (IV) therapy—Module 1: IV cannulation
■ access difficulty
■ reduced flow rates
■ reduction in patient comfort
■ reduction in patient mobility.
Equipment■ IV trolley with sharps container attached and IV start packs
■ tourniquet
■ non-sterile gloves
■ IV cannula
■ interlink bung
■ 5 mL syringe and interlink needle
■ normal saline flush
■ skin preparation solution.
Note: The background information refers to interlink a needle system. Consider what needle system your health service requires when discussing accessing the IV bung for flushes.
IV start packs■ occlusive dressing
■ sterile strips
■ sterile towel
■ labels for history
■ gauze
■ swab
■ sterile basin.
Standard precautions■ one-minute hand wash
■ protective barriers, gloves and protective eyewear
■ handling of disposable sharps
■ handling of disposable waste
■ aseptic technique.
10 Respiratory 1–Module 2: Respiratory assessment10 Intravenous (IV) therapy—Module 1: IV cannulation
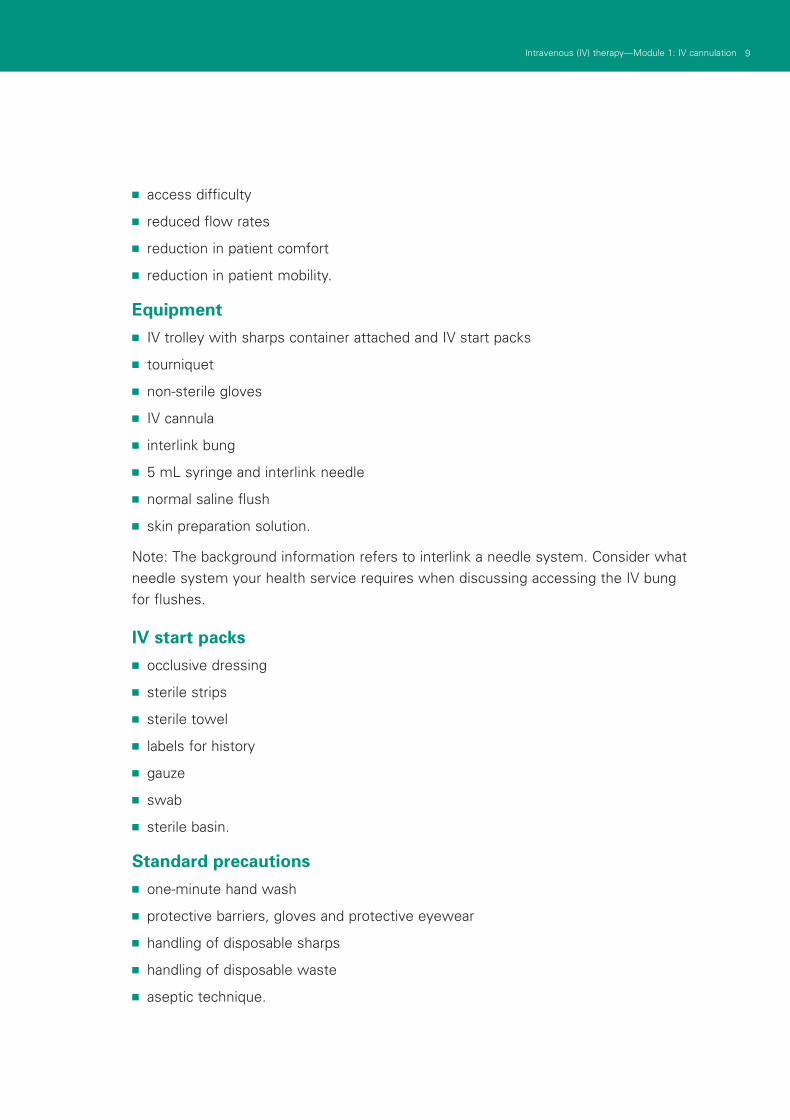
A new pair of disposable non-sterile gloves may be used in conjunction with a ‘no-touch’ technique for peripheral IV insertion. The planned IV insertion site is not palpated after skin cleansing, unless sterile gloves are worn. Wash hands before and after IV catheter insertion and dressing change (O’Grady et al., 2002).
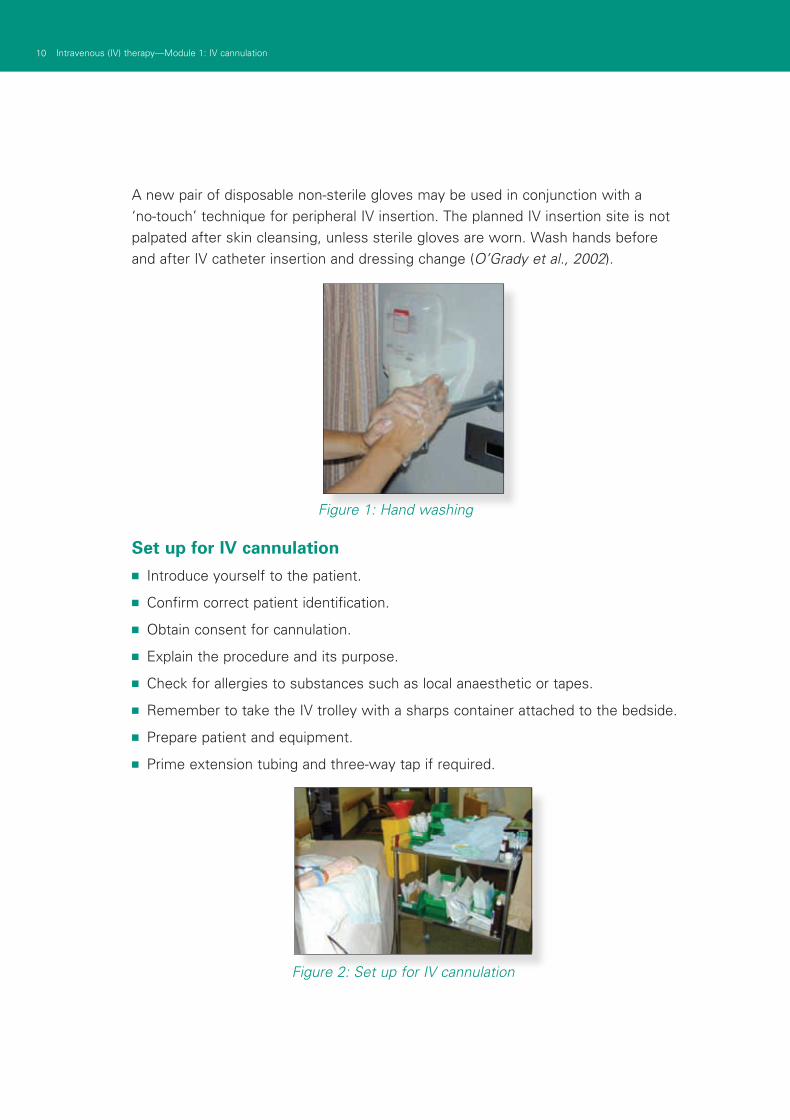
Figure 2: Set up for IV cannulation
Figure 1: Hand washing
Set up for IV cannulation■ Introduce yourself to the patient.
■ Confirm correct patient identification.
■ Obtain consent for cannulation.
■ Explain the procedure and its purpose.
■ Check for allergies to substances such as local anaesthetic or tapes.
■ Remember to take the IV trolley with a sharps container attached to the bedside.
■ Prepare patient and equipment.
■ Prime extension tubing and three-way tap if required.
11Intravenous (IV) therapy—Module 1: IV cannulation
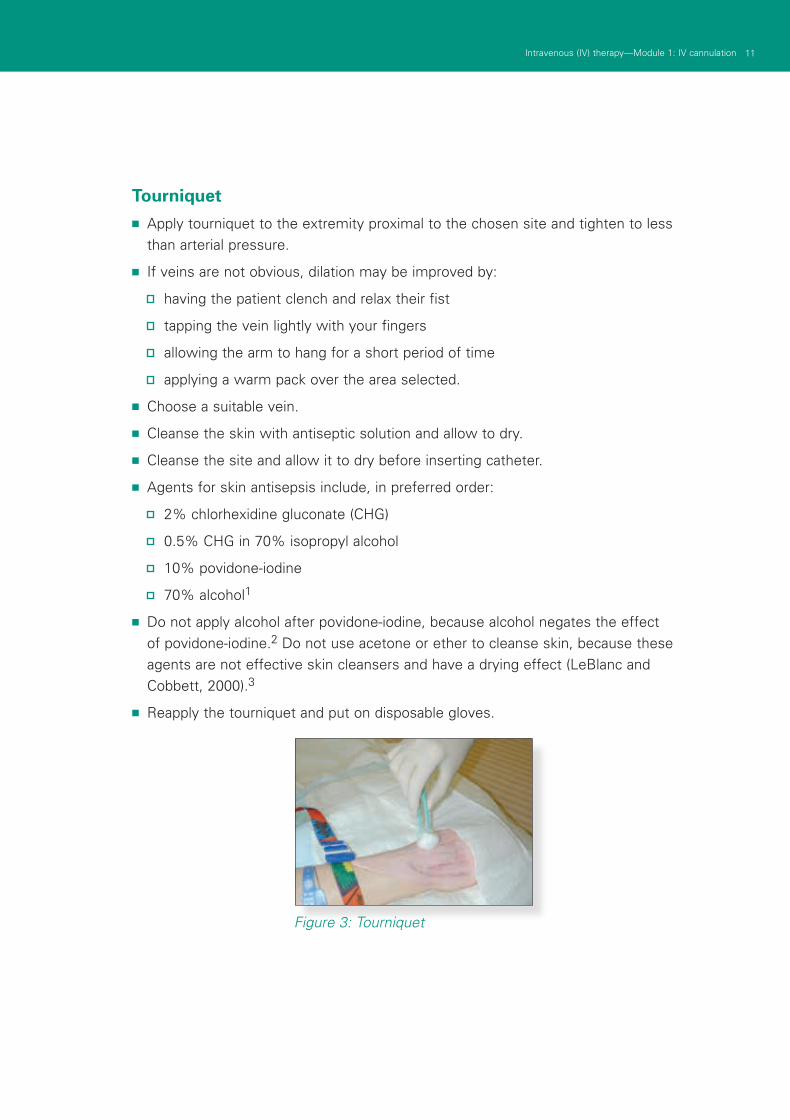
Tourniquet■ Apply tourniquet to the extremity proximal to the chosen site and tighten to less
than arterial pressure.
■ If veins are not obvious, dilation may be improved by:
having the patient clench and relax their fist
tapping the vein lightly with your fingers
allowing the arm to hang for a short period of time
applying a warm pack over the area selected.
■ Choose a suitable vein.
■ Cleanse the skin with antiseptic solution and allow to dry.
■ Cleanse the site and allow it to dry before inserting catheter.
■ Agents for skin antisepsis include, in preferred order:
2% chlorhexidine gluconate (CHG)
0.5% CHG in 70% isopropyl alcohol
10% povidone-iodine
70% alcohol1
■ Do not apply alcohol after povidone-iodine, because alcohol negates the effect of povidone-iodine.2 Do not use acetone or ether to cleanse skin, because these agents are not effective skin cleansers and have a drying effect (LeBlanc and Cobbett, 2000).3
■ Reapply the tourniquet and put on disposable gloves.
Figure 3: Tourniquet
12 Respiratory 1–Module 2: Respiratory assessment12 Intravenous (IV) therapy—Module 1: IV cannulation
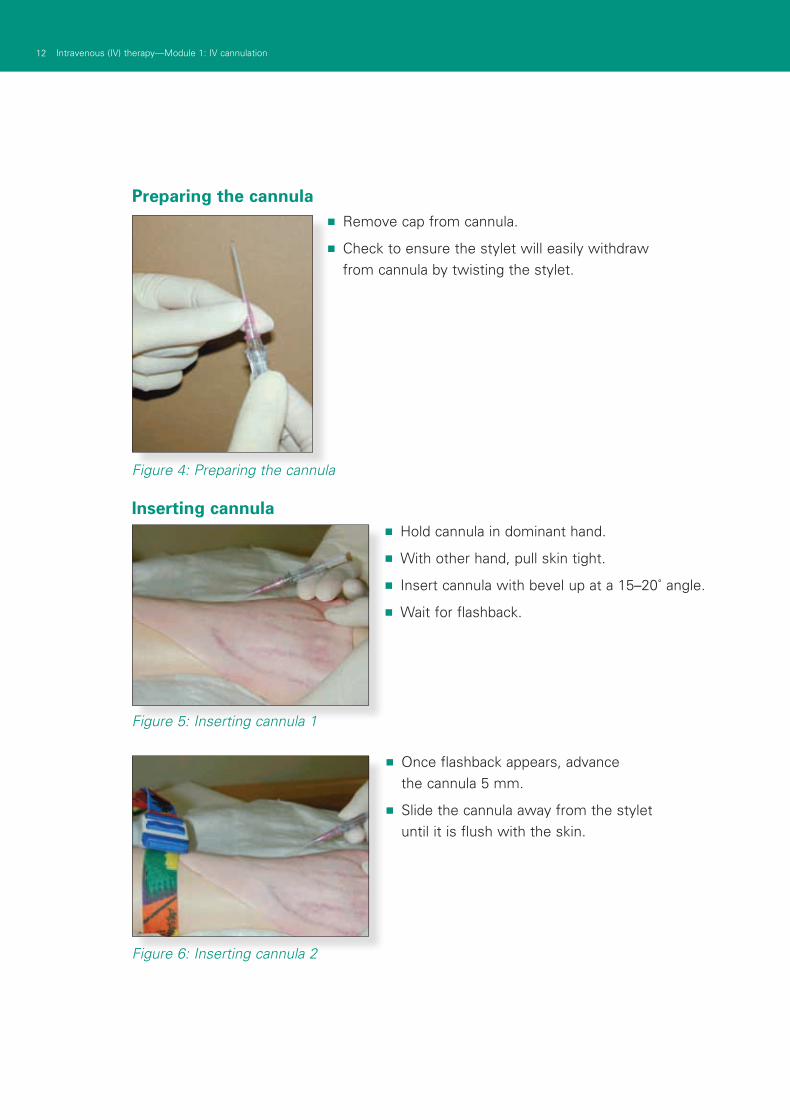
Preparing the cannula
■ Hold cannula in dominant hand.
■ With other hand, pull skin tight.
■ Insert cannula with bevel up at a 15–20˚ angle.
■ Wait for flashback.
■ Once flashback appears, advance the cannula 5 mm.
■ Slide the cannula away from the stylet until it is flush with the skin.
Figure 4: Preparing the cannula
Inserting cannula
■ Remove cap from cannula.
■ Check to ensure the stylet will easily withdraw from cannula by twisting the stylet.
Figure 5: Inserting cannula 1
Figure 6: Inserting cannula 2
13Intravenous (IV) therapy—Module 1: IV cannulation
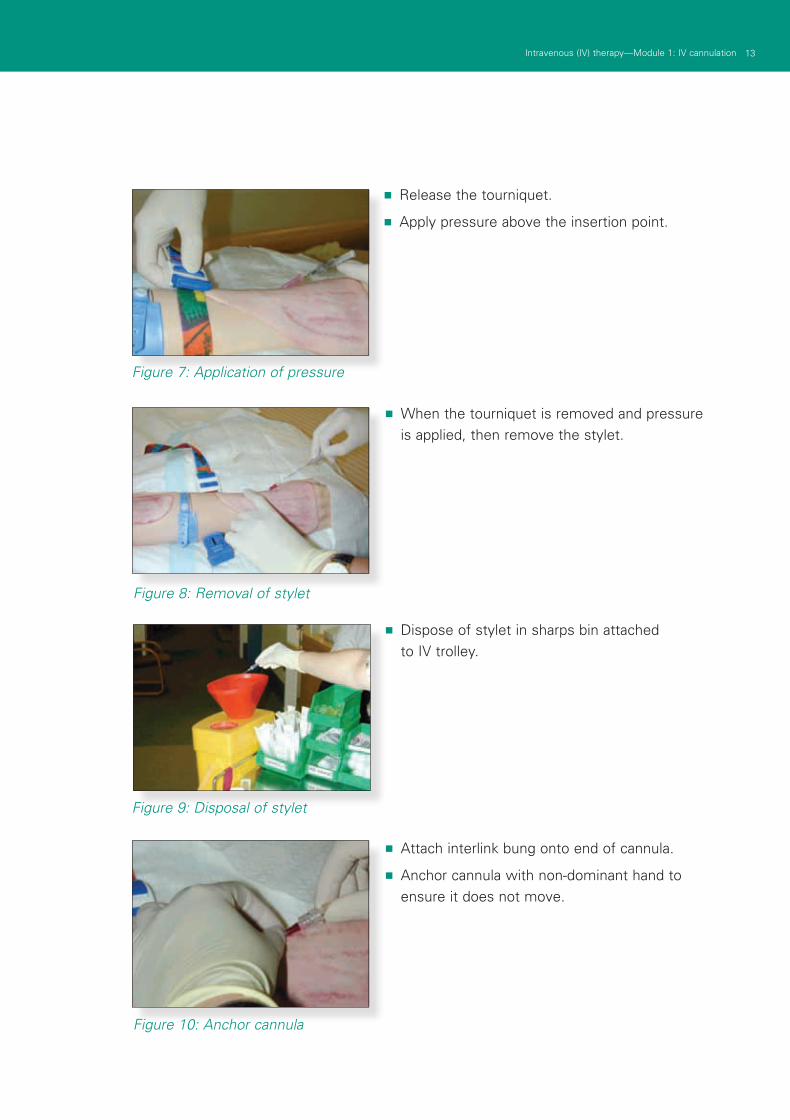
■ Release the tourniquet.
■ Apply pressure above the insertion point.
■ When the tourniquet is removed and pressure is applied, then remove the stylet.
■ Dispose of stylet in sharps bin attached to IV trolley.
Figure 7: Application of pressure
Figure 8: Removal of stylet
Figure 9: Disposal of stylet
■ Attach interlink bung onto end of cannula.
■ Anchor cannula with non-dominant hand to ensure it does not move.
Figure 10: Anchor cannula
14 Respiratory 1–Module 2: Respiratory assessment14 Intravenous (IV) therapy—Module 1: IV cannulation
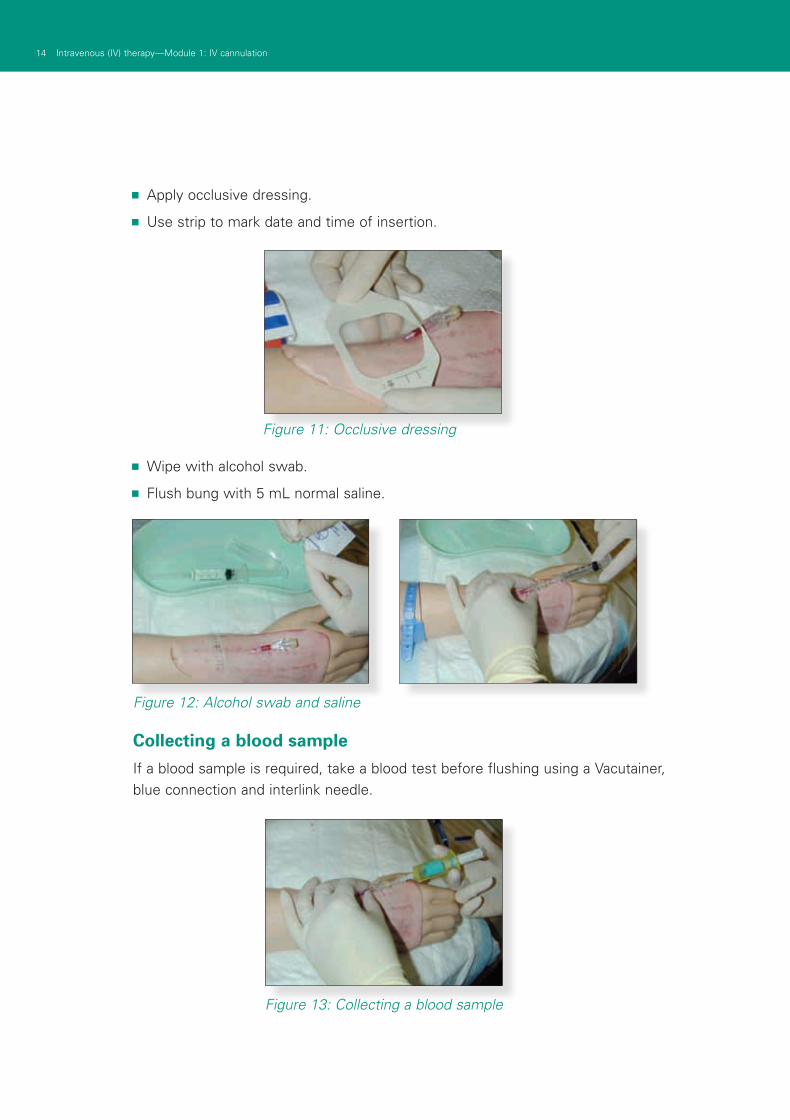
■ Apply occlusive dressing.
■ Use strip to mark date and time of insertion.
Figure 12: Alcohol swab and saline
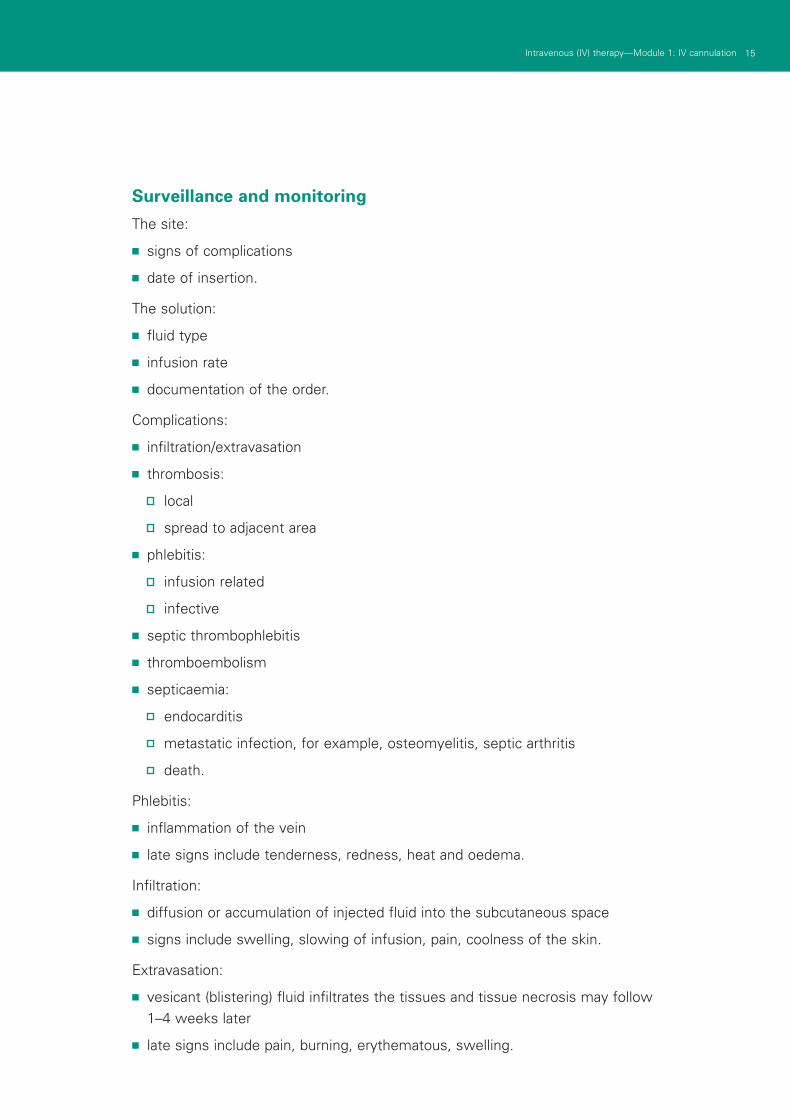
Collecting a blood sample
If a blood sample is required, take a blood test before flushing using a Vacutainer, blue connection and interlink needle.
■ Wipe with alcohol swab.
■ Flush bung with 5 mL normal saline.
Figure 13: Collecting a blood sample
Figure 11: Occlusive dressing
15Intravenous (IV) therapy—Module 1: IV cannulation
Surveillance and monitoring
The site:
■ signs of complications
■ date of insertion.
The solution:
■ fluid type
■ infusion rate
■ documentation of the order.
Complications:
■ infiltration/extravasation
■ thrombosis:
local
spread to adjacent area
■ phlebitis:
infusion related
infective
■ septic thrombophlebitis
■ thromboembolism
■ septicaemia:
endocarditis
metastatic infection, for example, osteomyelitis, septic arthritis
death.
Phlebitis:
■ inflammation of the vein
■ late signs include tenderness, redness, heat and oedema.
Infiltration:
■ diffusion or accumulation of injected fluid into the subcutaneous space
■ signs include swelling, slowing of infusion, pain, coolness of the skin.
Extravasation:
■ vesicant (blistering) fluid infiltrates the tissues and tissue necrosis may follow 1–4 weeks later
■ late signs include pain, burning, erythematous, swelling.
16 Respiratory 1–Module 2: Respiratory assessment16 Intravenous (IV) therapy—Module 1: IV cannulation
Tips■ use veins in non-dominant arm
■ choose a vein large enough for the purpose
■ rotate sites
■ use veins which are straight and palpable
■ consider where the catheter tip will be sited
■ do not persist after two failed attempts
■ never reinsert stylet into cannula
■ order from a doctor (verbal or written)
■ warm the arm if necessary.
Documentation
The patient:
■ date and time on occlusive dressing.
The medication chart:
■ fluid type and infusion rate
■ additives and allergies.
The history:
■ date, time, size and person.
17Intravenous (IV) therapy—Module 1: IV cannulation
Learning activitiesSuggested learning activities and timetables are outlined below.
Timing Activity Objective
20 Facilitated discussion 1, 2 and 3
50 Skills stations 3, 4, 5 and 6
10 Summary All
5 Evaluation
Total time: 1 hour 25 minutes
Facilitated discussion
The facilitator should lead a discussion amongst participants about the issues covered in the background information. The facilitator should not give a didactic lecture, but instead promote open discussion and knowledge sharing amongst participants. Participants should be encouraged to describe any real-life experiences they have encountered.
Skills stations
The skills stations should be the main focus of this module. The skills stations allow participants to practise the entire procedure of assessment, cannulation, dressing the cannula and flushing the cannula.
The skills station set requires one IV arm on a table with a selection of the relevant equipment listed below. These skills stations work better with two persons per arm, and will require enough equipment to meet that requirement.
It is recommended that the participants work in groups of two; therefore, based on a group of 12, six skills stations will be required.
Facilitators may conduct the facilitated discussion and demonstration from a skills station. This has the advantage of maintaining a practical focus on the session and allowing participants repeated practice opportunities.

18 Respiratory 1–Module 2: Respiratory assessment18 Intravenous (IV) therapy—Module 1: IV cannulation
Resource listThe following resource list assumes two facilitators for every 12 participants, a ratio of 1:6. As a minimum, the following resources are needed to conduct this module.
Resource Quantity Additional comments
Facilitators 1 1:12, but 2:12 is optimal
IV arms 6 (1:2) Manikin arms that have vascular access and will yield blood to simulate normal IV cannulation and blood taking
IV dressing packs 24 2 per workstation
IV cannulae sizes gauge 18, 20, 22 2 per table
Tourniquets 6
Kidney dishes 6
Sharps bin 6 1 per table
Chemical skin preparation 12 1 per person, skin preparation health service specific
Normal saline flushes 24 2 per participant
10 mL syringes 12 1 per participant
Bungs 12 1 per participant
Blood-taking equipment 6 1 set per table (health service specific)
Non-sterile gloves 3 boxes Small, medium, large
Summary
The summary session reinforces content covered in the learning activities, and is an opportunity for participants to reflect on what they have covered. No new material should be introduced.
Important points to include in the summary are:
■ Peripheral IV cannulation is a common procedure and can be performed by a range of health care professionals.
■ Vital to the success of this procedure is a health professional’s attention to procedural sterility to reduce the risk of post-cannulation phlebitis.
■ The program aims to ensure that participants have sufficient practice before attempting this procedure in the clinical setting.
19Intravenous (IV) therapy—Module 1: IV cannulation
EvaluationA formal evaluation has been specifically developed for this module. It incorporates the objectives of the module and the perceptions of the participants about whether they have increased their understanding by working through the module. It is highly recommended that this formal evaluation be copied and completed by all participants at the completion of the module.
A range of informal evaluation tools may also be used in conjunction with this evaluation throughout the module, including those available in the Department of Human Services’ Clinical Skills Facilitators Manual from the basic course conducted in 2007.
References O'Grady, N.P et al (2002) 1. Guidelines for the prevention of intravascular
catheter-related infections, MMWR Recomm Ref. Aug 9, 51(RR-10): 1–29.
Intravenous Nursing Society (INS), 2. Infusion nursing standards of practise. J Intraven Nurs 2000; 23 (Suppl 6): s 53–4, s81–8
LeBlanc A., Cobbett, S. (2000), 3. Traditional practice versus evidence-based practice for IV skin preparations. Canadian Journal Infection Control; Spring, 9–14

20 Respiratory 1–Module 2: Respiratory assessment20 Intravenous (IV) therapy—Module 1: IV cannulation
ResourcesFacilitator feedback form
The following form should be used to assist you in giving feedback after each participant has practised their IV cannulation skills at the skills station.
Feedback using the Pendleton model
Pendleton’s model of feedback assists learners to maximize their potential at different stages of training, raise their awareness of strengths and areas for improvement, and identify actions to be taken to improve performance. Pendleton’s rules are structured in such a way that the learner identifies the positives first, in order to create a safe environment. This is followed by the facilitator or group reinforcing these positives and discussing skills to achieve them. Different techniques are then suggested. The advantage of this method is that the learner’s strengths are discussed first. Avoiding a discussion of weaknesses right at the beginning prevents defensiveness and allows reflective behaviour in the learner.
Below is a series of questions to assist you in this technique:
1. Ask the learner how they feel.
2. Ask the learner what went well and why (this can be combined with question 1 and 3).
3. Tell the learner what went well and why.
4. Ask the learner what could have been done better and why.
5. Tell the learner what could have been done better and why.
6. Summarise the learner’s strengths and identify up to three things to concentrate on.
Note: This form does not need to be given to the participant — it is a guide for you, the group facilitator.
21Intravenous (IV) therapy—Module 1: IV cannulation
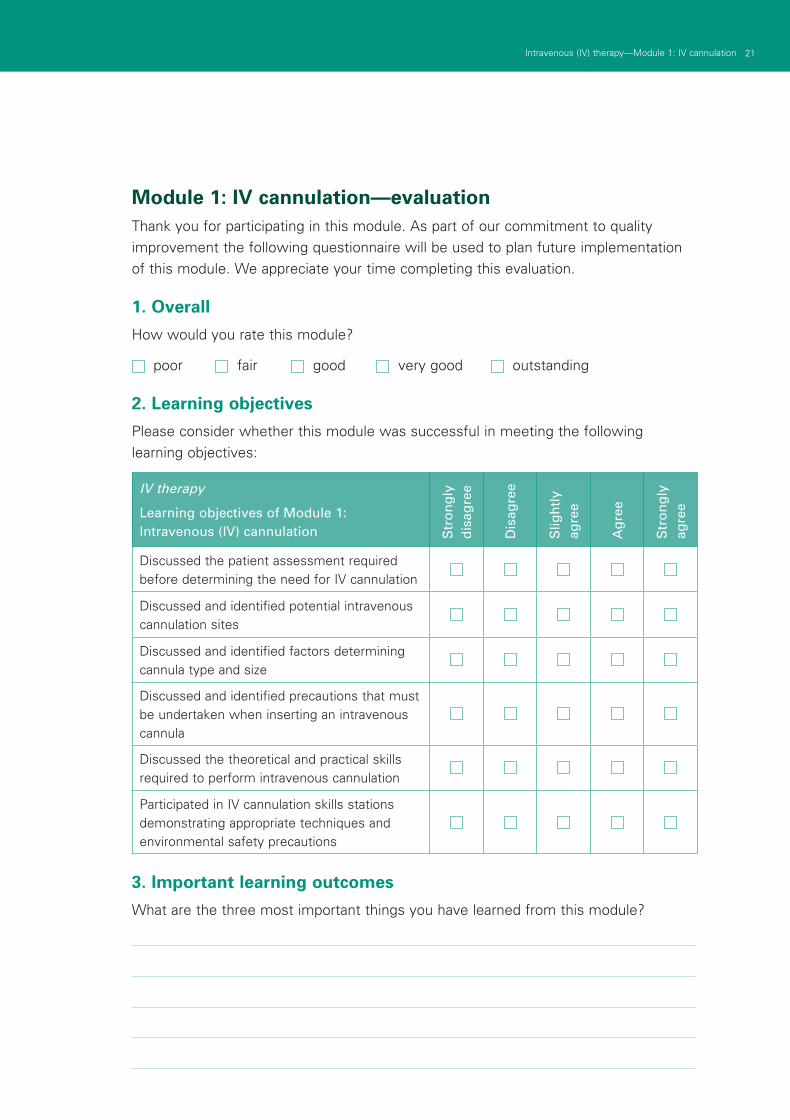
Module 1: IV cannulation—evaluationThank you for participating in this module. As part of our commitment to quality improvement the following questionnaire will be used to plan future implementation of this module. We appreciate your time completing this evaluation.
1. Overall
How would you rate this module?
poor fair good very good outstanding
2. Learning objectives
Please consider whether this module was successful in meeting the following learning objectives:
IV therapy
Learning objectives of Module 1: Intravenous (IV) cannulation S
tro
ng
ly
dis
agre
e
Dis
agre
e
Slig
htl
y ag
ree
Ag
ree
Str
on
gly
ag
ree
Discussed the patient assessment required before determining the need for IV cannulation
Discussed and identified potential intravenous cannulation sites
Discussed and identified factors determining cannula type and size
Discussed and identified precautions that must be undertaken when inserting an intravenous cannula
Discussed the theoretical and practical skills required to perform intravenous cannulation
Participated in IV cannulation skills stations demonstrating appropriate techniques and environmental safety precautions
3. Important learning outcomes
What are the three most important things you have learned from this module?

22 Respiratory 1–Module 2: Respiratory assessment22 Intravenous (IV) therapy—Module 1: IV cannulation
4. Module implementation
Please indicate to what extent you agree or disagree with each of the following statements in relation to the implementation of the module.
Str
on
gly
d
isag
ree
Dis
agre
e
Slig
htl
y ag
ree
Ag
ree
Str
on
gly
ag
ree
The facilitator respected my experience
The facilitator encouraged my participation
I was able to ask the facilitator questions
The facilitator was able to answer my questions
The feedback I received was clear
The feedback I received will assist me in my future performance
There was adequate time for the skills stations
There was adequate time for the facilitated discussions
There was adequate time for the simulations
I have increased my confidence in performing IV cannulation
I have identified future learning needs in this topic area
5. Future module implementation
Do you think the module should be altered in any way? yes no
If yes, what recommendations do you have?
Thank you
23Intravenous (IV) therapy—Module 1: IV cannulation
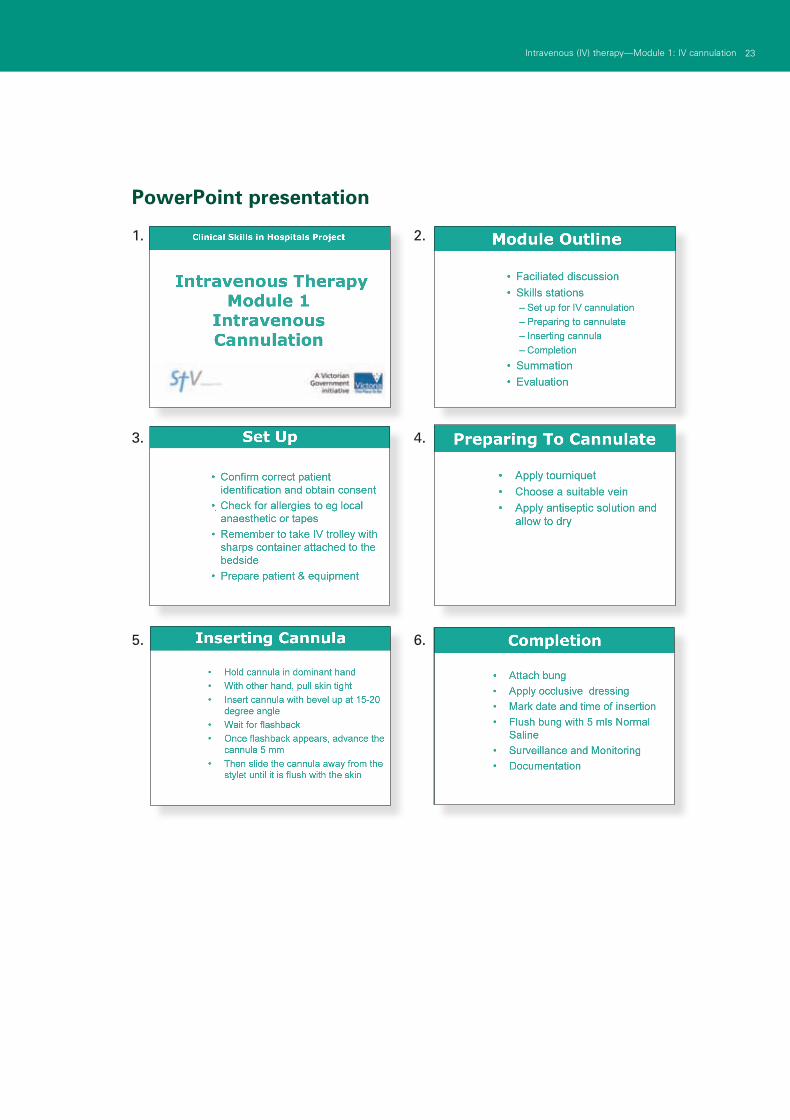
PowerPoint presentation
1. 2.
3. 4.
5. 6.

25Intravenous (IV) therapy—Module 2: IV fluids
Module 2: IV fluidsIntroduction Intravenous insertion and IV therapy was developed as a teaching and learning tool for Victorian clinical educators. The information contained in each module was developed using evidence-based resources and examples of best practice. Where expert opinion varies, a discussion section is included. However, it is not within the scope of IV therapy to address the full spectrum of local variations. Variations can occur in several areas, including practices relating to types of equipment used, infection control processes, practice guidelines and so on. Therefore, educators should, where appropriate, adapt content to reflect their local policies, procedures and protocols. This will ensure the relevancy of the package content to your learners.
The modules are designed to be discrete courses in their own right. They are timetabled so they can be completed in a 1–2 hour timeframe. This timeframe was chosen after we received feedback from clinical educators requesting shorter courses, because health professionals often have limited time to educate away from patients. However, the packages may also be combined into a one- or two-day course.
IV therapy should be used as an educational tool to assist in the teaching of clinical skills. It is structured as a guide to assist clinical educators, and uses many concepts taught in the Clinical Skills in Hospitals Project (Train-the-Trainer courses). Educators are encouraged to build on this resource by adding their own scenarios which incorporate hospital/health service protocols, policies and other resources. Each module is designed as a lesson plan to incorporate the simulations into the teaching of clinical skills.
AimsIV therapy aims to make participants confident in their use intravenous devices— either from an insertion perspective (discipline specific) or as a therapy delivery device.
Package structureThe IV therapy package contains four modules, which provide learning opportunities for health professionals at all levels of experience and from medical and nursing disciplines. Modules 1 and 2 are regarded as fundamental. Modules 3 and 4 are set at the intermediate level.
The assessment for and insertion of IV cannula, plus knowledge of basic therapies, such as fluid types, are fundamental to this area of practice. The use of specific devices, such as central venous access ports, is less common in general health care settings, and requires specific knowledge and skill for their use. The insertion and care of central venous lines is covered in IV therapy—Module 4: Central venous lines. Although some skills are discipline specific, such as central line insertion, educators should consider an interdisciplinary approach to the use of these modules.
26 Intravenous (IV) therapy—Module 2: IV fluids
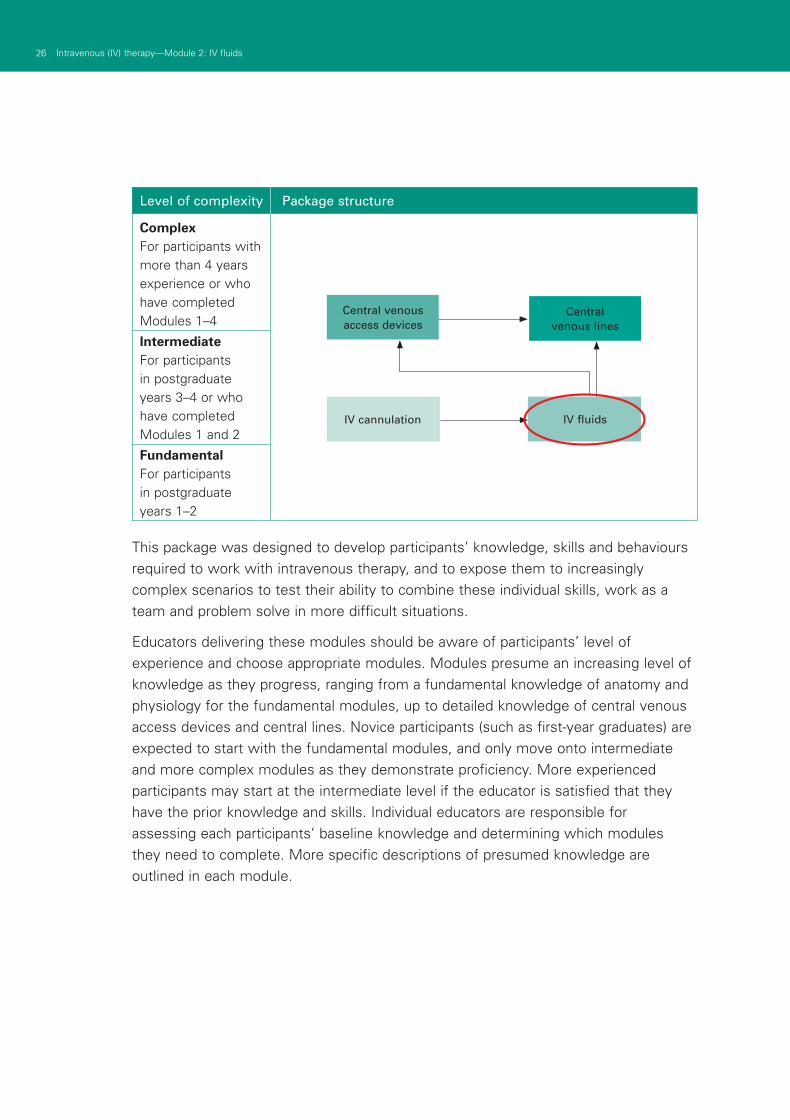
Level of complexity Package structure
ComplexFor participants with more than 4 years experience or who have completed Modules 1–4
IntermediateFor participants in postgraduate years 3–4 or who have completed Modules 1 and 2
FundamentalFor participants in postgraduate years 1–2
This package was designed to develop participants’ knowledge, skills and behaviours required to work with intravenous therapy, and to expose them to increasingly complex scenarios to test their ability to combine these individual skills, work as a team and problem solve in more difficult situations.
Educators delivering these modules should be aware of participants’ level of experience and choose appropriate modules. Modules presume an increasing level of knowledge as they progress, ranging from a fundamental knowledge of anatomy and physiology for the fundamental modules, up to detailed knowledge of central venous access devices and central lines. Novice participants (such as first-year graduates) are expected to start with the fundamental modules, and only move onto intermediate and more complex modules as they demonstrate proficiency. More experienced participants may start at the intermediate level if the educator is satisfied that they have the prior knowledge and skills. Individual educators are responsible for assessing each participants’ baseline knowledge and determining which modules they need to complete. More specific descriptions of presumed knowledge are outlined in each module.
IV cannulation IV fluids
Central venous lines
Central venous access devices
27Intravenous (IV) therapy—Module 2: IV fluids
The design of these packages presumes that the clinical educators using them have knowledge and expertise in current best practice regarding the teaching of clinical skills and conducting facilitated discussions. Knowledge and expertise are presumed commensurate with the Department of Human Services’ basic and advanced Train-the-Trainer programs. Clinical educators are encouraged to refer to Department of Human Services’ Clinical Skills Facilitators Manual for theory on:
Peyton’s model for teaching clinical skills1.
leading small group discussions2.
giving feedback3.
crisis resource management skills.4.

29Intravenous (IV) therapy—Module 2: IV fluids
Author: Dr Neil Cunningham
AimsThis module helps participants to become confident and competent in setting up and administering intravenous (IV) fluids.
Presumed knowledge
This module is aimed at medical and nursing health professionals involved in administering IV fluids. They are expected to have a basic knowledge of:
venous anatomy1.
routes of administration—peripheral IV cannulae, central venous catheters (CVCs), 2.rapid infusion devices and intraosseous devices
the physiology of the cardiovascular system.3.
This module does not cover the insertion of peripheral IV lines, CVCs and other vascular devices. Participants wishing to practise these skills are directed to other modules within this package.
ObjectivesBy the end of this module, participants should have:
reviewed the indications for IV fluid administration1.
reviewed their own hospital policies related to IV fluid administration2.
practised setting up appropriate equipment for IV fluid administration3.
discussed strategies to identify and manage important complications 4.of IV fluid administration.
Background information for educatorsThe main purpose of this module is for participants to become familiar with IV fluids and the equipment required for their safe administration. Educators should take note of the mix of health professionals in the group. While medical staff are responsible for IV fluid orders, all health professionals should be aware of the indications, techniques and problems associated with IV fluid administration. Where the group comprises non-medical staff, the focus of discussion and learning sessions should be on indications for, and complications of, IV fluid administration.
Module 2: IV fluids
30 Intravenous (IV) therapy—Module 2: IV fluids
IndicationsIndications for IV fluid therapy include:
■ resuscitation
■ delivery of maintenance fluid requirements
■ delivery of replacement fluid requirements
■ delivery of blood products
■ when facilitating IV drug administration
■ when facilitating patient nutrition (that is, total parenteral nutrition, or TPN).
Resuscitation
Rapid fluid infusion rates are usually required in the setting of patient resuscitation. Poiseuille’s law states that flow is proportional to the catheter radius to the power of four, and inversely proportional to the catheter’s length where:
Q = flowr = radiusL = length
This means that short, fat catheters better allow maximal flow rates. Flow rates deteriorate rapidly with long, skinny catheters.
Estimated flow rates through commonly used IV cannula are:
■ size 20G: 75 mL per minute
■ size 18G: 150 mL per minute
■ size 16G: 300 mL per minute.
Options
Access options
Large-bore, peripheral IV cannulae are the simplest, most rapid and most effective route for fluid or blood administration in the setting of resuscitation. Because of their relatively small individual lumen diameter and long catheter length, CVCs have high resistance to flow, making them less than ideal for rapid fluid infusion and resuscitation.
Several commercially available kits allow conversion of smaller peripheral IV cannulae to large-bore catheters, using a guide wire and Seldinger technique (for example, a rapid infusion catheter exchange set (RIC line). Rapid infusion device.
Q x r4
L
31Intravenous (IV) therapy—Module 2: IV fluids
Fluid options
Fluid options in the setting of resuscitation include:
■ crystalloid, for example, normal saline, Hartmann’s solution
■ colloid, for example, Gelofusine, Haemaccel, dextran
■ blood products, for example, albumin, blood, fresh frozen plasma.
Disagreement persists regarding which is the better choice of initial fluids in resuscitation. One Cochrane review found no benefit —but increased cost—for the use of colloids over crystalloids in resuscitation for patients with trauma, burns or following surgery1. However, another Cochrane review of the use of human albumin solution in resuscitation concluded that there was ‘no evidence that albumin reduces mortality when compared with cheaper alternatives such as saline’2.
Blood options
When blood is required for emergency resuscitation, its safety and availability depend on whether pre-transfusion compatibility testing has been completed and whether the antibody screen is negative. The transfusion of uncross-matched blood is a clinical decision determined by the level of urgency.
Fully cross-matched blood (ABO and RhD compatible) should always be administered if the patient’s condition allows time for this process to occur. Antibody screening for agglutinin/non-agglutinin antibodies and antiglobulin Coomb’s test takes approximately 20–30 minutes.
Type-specific (ABO and RhD compatible) blood should be available within 10 minutes.
Group O blood is described as ‘universal donor blood’, and can be used immediately in unstable, haemorrhaging patients. Women of childbearing age should receive O negative blood. Group-specific and cross-matched blood should be given as soon as the patient’s blood group is known.
Blood administration
Blood is usually provided to the patient as ‘packed red blood cells’. Most hospitals have their own protocols for the administration of blood and blood products. The Australian Red Cross Blood Service also provides guidelines3.
Hospital procedure for blood administration should include the following, as a minimum:
■ An explanation to the patient of benefits and risk of transfusion, the possible adverse effects and the need to report them to hospital staff.
■ Appropriate and documented orders in terms of blood product and duration of transfusion.
32 Intravenous (IV) therapy—Module 2: IV fluids
■ A large-bore IV cannula should be present and patent. Large-bore cannulae reduce the incidence of haemolysis.
■ Two qualified personnel must check:
the identity of the patient
that the donor number on the unit of blood is identical to the compatibility label attached to the blood and on the Blood Bank issue form
the expiry and issue date of the blood
that the blood is labelled as already tested for infectious diseases
the blood visually.
■ Blood should be returned to the Blood Bank and not used if:
the unit is not used immediately or is outside refrigeration for more than 30 minutes
the expiry date has passed
the cross-match date has expired
any discrepancies in the checking process might have occurred
any leakages are evident or suspected
evidence of clots, discolouration or turbidity exists
the blood is frozen
any other uncertainties are present.
■ Blood products should be mixed thoroughly by inversion.
■ Blood should be administered through an infusion line that is approved for blood transfusion. This should include a standard filter to remove clots and aggregates.
■ The infusion line should be connected to an appropriate blood warmer.
■ Infusion adjuncts for rapid infusion should be included in the line if required, for example, inline hand pump, pressure bags, mechanical pump devices.
■ The patient should be monitored for signs of transfusion reaction (see below under ‘Complications of IV fluid therapy’).
Other blood products
Fresh frozen plasma (FFP) transfusion is indicated for emergency reversal of warfarinisation, correction of coagulopathy, disseminated intravascular coagulation (DIC) and in the setting of massive transfusion.
Platelet transfusion is indicated prophylactically if the platelet count is < 50,000 per mL. No evidence exists to support their routine use in the setting of massive transfusion.
33Intravenous (IV) therapy—Module 2: IV fluids
Maintenance, drug administration and rehydration
IV fluid therapy is mostly used for the provision of maintenance and replacement fluids, and to facilitate the delivery of IV drugs.
Infusion equipment
The equipment required for IV infusion includes:
■ sterile plastic bag containing IV fluid
■ sterile giving set, comprising:
drip chamber—transparent, which allows for the observation of flow rate
sterile tube connecting fluid bag to patient’s IV cannula, including IV injection port and wheel/clamp device to regulate rate of flow
■ specialised giving sets which may be required, and which include an inline hand pump
■ burettes, which may be used for more accurate delivery of fluid volumes (in some institutions, the use of burettes is mandatory for all patients).
Infusion rate
The desired flow rate is achieved by:
■ placing the IV fluid bag above the level of the patient
■ using the clamp to regulate the rate
■ assisting flow by the use of manual or mechanical pumps.
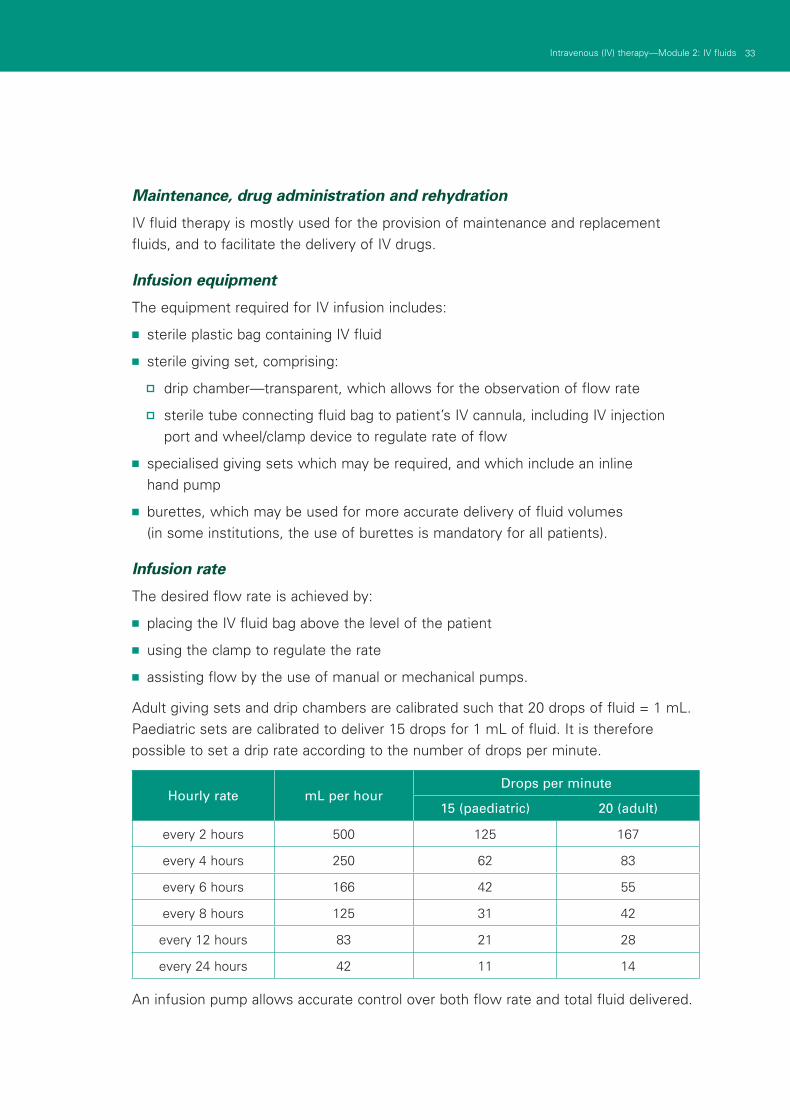
Adult giving sets and drip chambers are calibrated such that 20 drops of fluid = 1 mL. Paediatric sets are calibrated to deliver 15 drops for 1 mL of fluid. It is therefore possible to set a drip rate according to the number of drops per minute.
Hourly rate mL per hourDrops per minute
15 (paediatric) 20 (adult)
every 2 hours 500 125 167
every 4 hours 250 62 83
every 6 hours 166 42 55
every 8 hours 125 31 42
every 12 hours 83 21 28
every 24 hours 42 11 14
An infusion pump allows accurate control over both flow rate and total fluid delivered.
34 Intravenous (IV) therapy—Module 2: IV fluids
Fluid options
Water comprises approximately 60% of body weight. For an average 70 kg person, this equates to 42 litres of body fluid. Total body fluid is distributed between two compartments:
■ intracellular fluid (ICF) = 40% (approximately 28 litres)
■ extracellular fluid (ECF) = 20% (approximately 14 litres).
Blood volume consists in part of ICF (blood cells) and ECG (plasma), and accounts for approximately 12% (5 litres) of body fluid.
Most maintenance and replacement fluid requirements are met by the administration of crystalloid solutions. Colloids may be favoured in specific clinical situations.
Crystalloids
Different crystalloid solutions contain different concentrations of electrolytes and other compounds dissolved in water. The concentration of electrolytes within the fluid determines its distribution between body fluid compartments.
Solutions are classified as hypotonic, isotonic or hypertonic fluids, in reference to their tonicity with respect to plasma.
Hypotonic solutions:
■ have low osmolality
■ predominately move into the ICF
■ include 5% dextrose and hypotonic saline.
Isotonic solutions:
■ have the same electrolyte concentration and osmolality as plasma
■ predominately stay within ECF
■ include 0.9% (normal) saline and Hartmann’s solution.
Hypertonic solutions:
■ have a high osmolality, which tends to draw H2O (water) out of the ICF and into plasma
■ includes 3% (hypertonic) saline and 50% dextrose.
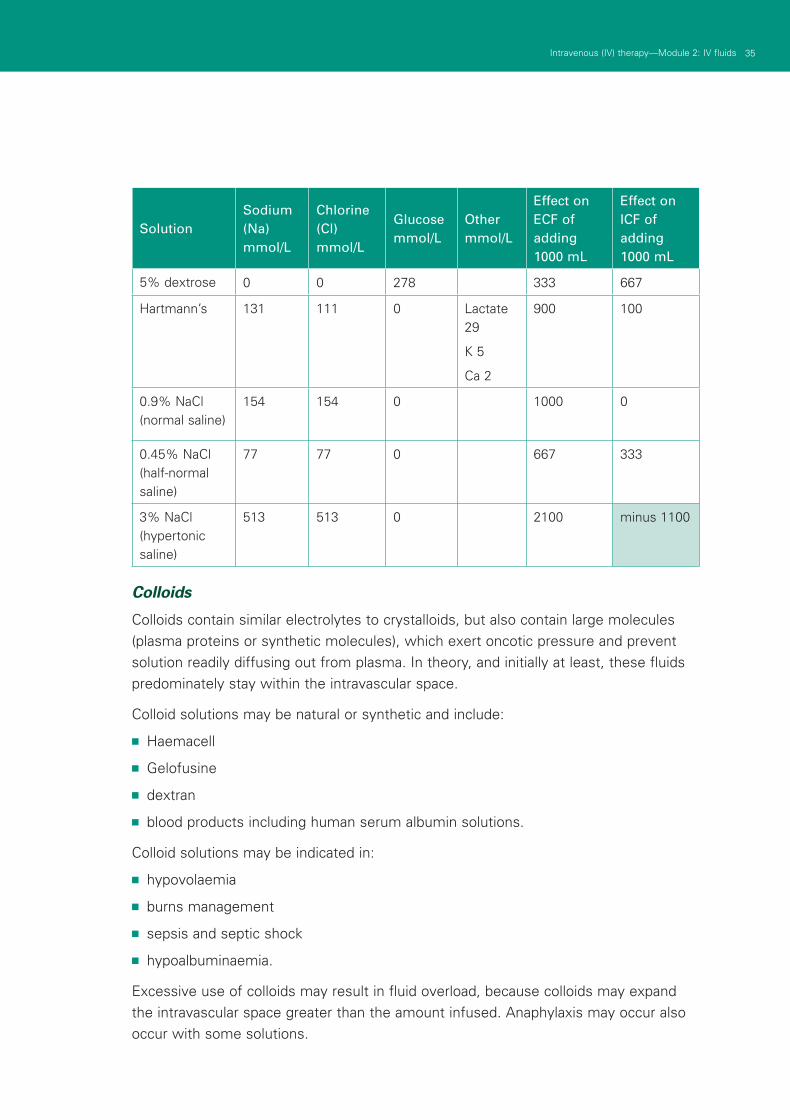
The constituents of commonly available crystalloid solutions are shown in the following table.
35Intravenous (IV) therapy—Module 2: IV fluids
SolutionSodium (Na) mmol/L
Chlorine (Cl) mmol/L
Glucose mmol/L
Other mmol/L
Effect on ECF of adding 1000 mL
Effect on ICF of adding 1000 mL
5% dextrose 0 0 278 333 667
Hartmann’s 131 111 0 Lactate 29
K 5
Ca 2
900 100
0.9% NaCl (normal saline)
154 154 0 1000 0
0.45% NaCl (half-normal saline)
77 77 0 667 333
3% NaCl (hypertonic saline)
513 513 0 2100 minus 1100
Colloids
Colloids contain similar electrolytes to crystalloids, but also contain large molecules (plasma proteins or synthetic molecules), which exert oncotic pressure and prevent solution readily diffusing out from plasma. In theory, and initially at least, these fluids predominately stay within the intravascular space.
Colloid solutions may be natural or synthetic and include:
■ Haemacell
■ Gelofusine
■ dextran
■ blood products including human serum albumin solutions.
Colloid solutions may be indicated in:
■ hypovolaemia
■ burns management
■ sepsis and septic shock
■ hypoalbuminaemia.
Excessive use of colloids may result in fluid overload, because colloids may expand the intravascular space greater than the amount infused. Anaphylaxis may occur also occur with some solutions.
36 Intravenous (IV) therapy—Module 2: IV fluids
Aims
The aims of IV fluid therapy in the non-resuscitation situation include:
■ provision of maintenance fluids to patients who are fasting or cannot tolerate oral fluids
■ provision of replacement fluids to rehydrate from previous losses, or in anticipation of ongoing losses
■ the delivery of certain IV drugs (for example, amiodarone via 5% dextrose infusion).
Complications of IV fluid therapy
Complications associated with IV fluid therapy are common. Most are preventable by attention to IV infusion equipment, aseptic technique and attention to fluid and electrolyte prescribing. Common problems are listed below.
Infection:
■ skin-based bacteria may enter through insertion site
■ local cellulitis or systemic bacteraemia are possible.
Phlebitis:
■ non-infectious vein irritation
■ due to the presence of the catheter/fluids or medication
■ chronic scarring from recurrent phlebitis is seen in intravenous drug addicts or chronically ill patients requiring multiple and recurrent IV access.
Fluid imbalance:
■ excessive or inadequate fluid infusion
■ excessive fluid can result in cardiac failure or pulmonary oedema
■ inadequate fluid can result in dehydration or hypovolaemic shock.
Electrolyte imbalances:
■ Delivery of crystalloid solutions can result in electrolyte disturbance or rapid osmolar shift.
■ The most commonly used solutions (normal saline, 5% dextrose) do not contain potassium, and hypokalaemia can easily occur if this is not considered. Appropriate fluid orders and repeated measurements of electrolytes are required to ensure that these problems do not arise.
■ Excessive shift from a hyperosmolar state (DKA) with hypoosmolar fluids can cause cerebral oedema. Excessive shift from a hypoosmolar state (hyponatraemia) with hyperosmolar fluids can cause central pontine myelinolysis.
37Intravenous (IV) therapy—Module 2: IV fluids
Embolism:
■ an air or thrombus embolism can cause venous blockage
■ peripheral IVs have a lower risk than CVCs.
Extravasation:
■ delivery of fluids or medications into surrounding tissue due to leakage from the catheter or a misplaced catheter.
Transfusion reactions
Immediate blood transfusion reactions may be fatal. These must be acted upon swiftly. Non-haemolytic febrile reactions are common. More important are acute haemolytic reactions and anaphylactic reactions. Symptoms and signs of immediate transfusion reactions include:
■ fever, chills, rigors
■ urticaria (hives), rash
■ facial flushing
■ shortness of breath
■ tachycardia
■ headache
■ nausea
■ chest pain, lumbar back pain
■ pain or bleeding at IV site.
In the event of a suspected transfusion reaction:
■ stop the transfusion immediately
■ maintain IV access
■ alert senior staff to the situation
■ manage airway, breathing and circulation as per BLS and ALS guidelines if needed
■ return blood products and giving set to blood bank and complete a blood transfusion reaction report
■ document reaction and treatment in patient’s medical file.
38 Intravenous (IV) therapy—Module 2: IV fluids
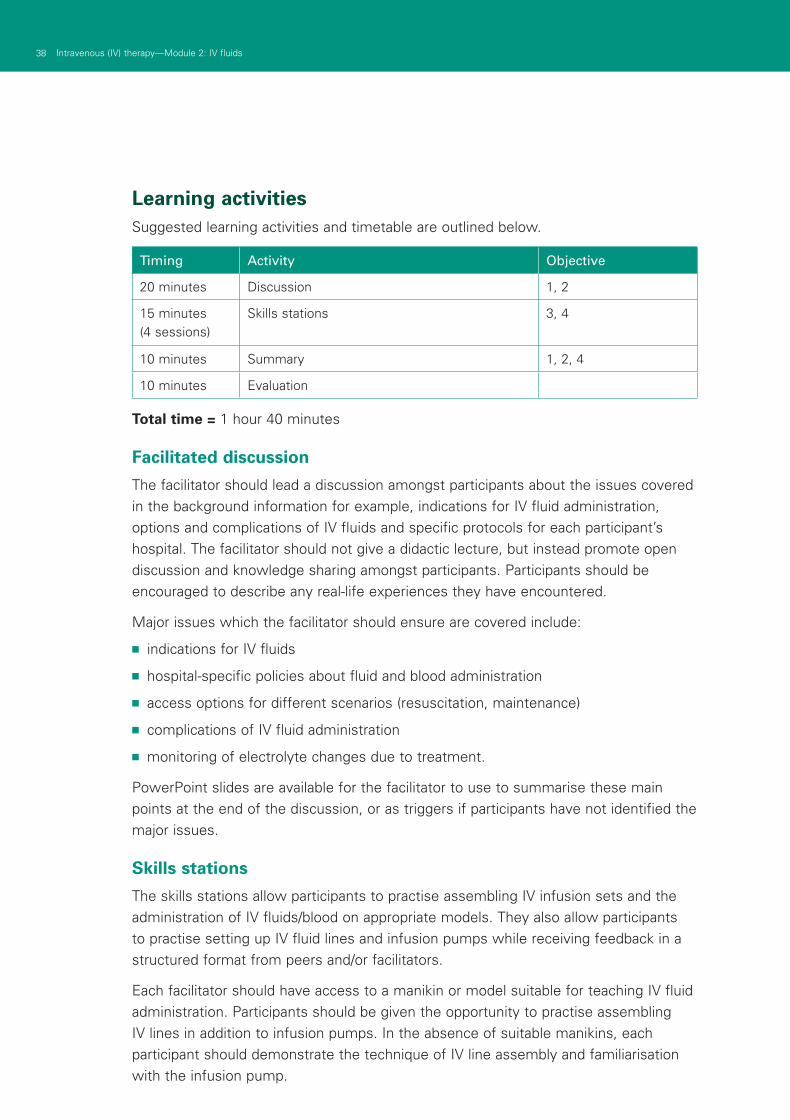
Learning activitiesSuggested learning activities and timetable are outlined below.
Timing Activity Objective
20 minutes Discussion 1, 2
15 minutes (4 sessions)
Skills stations 3, 4
10 minutes Summary 1, 2, 4
10 minutes Evaluation
Total time = 1 hour 40 minutes
Facilitated discussion
The facilitator should lead a discussion amongst participants about the issues covered in the background information for example, indications for IV fluid administration, options and complications of IV fluids and specific protocols for each participant’s hospital. The facilitator should not give a didactic lecture, but instead promote open discussion and knowledge sharing amongst participants. Participants should be encouraged to describe any real-life experiences they have encountered.
Major issues which the facilitator should ensure are covered include:
■ indications for IV fluids
■ hospital-specific policies about fluid and blood administration
■ access options for different scenarios (resuscitation, maintenance)
■ complications of IV fluid administration
■ monitoring of electrolyte changes due to treatment.
PowerPoint slides are available for the facilitator to use to summarise these main points at the end of the discussion, or as triggers if participants have not identified the major issues.
Skills stations
The skills stations allow participants to practise assembling IV infusion sets and the administration of IV fluids/blood on appropriate models. They also allow participants to practise setting up IV fluid lines and infusion pumps while receiving feedback in a structured format from peers and/or facilitators.
Each facilitator should have access to a manikin or model suitable for teaching IV fluid administration. Participants should be given the opportunity to practise assembling IV lines in addition to infusion pumps. In the absence of suitable manikins, each participant should demonstrate the technique of IV line assembly and familiarisation with the infusion pump.
39Intravenous (IV) therapy—Module 2: IV fluids
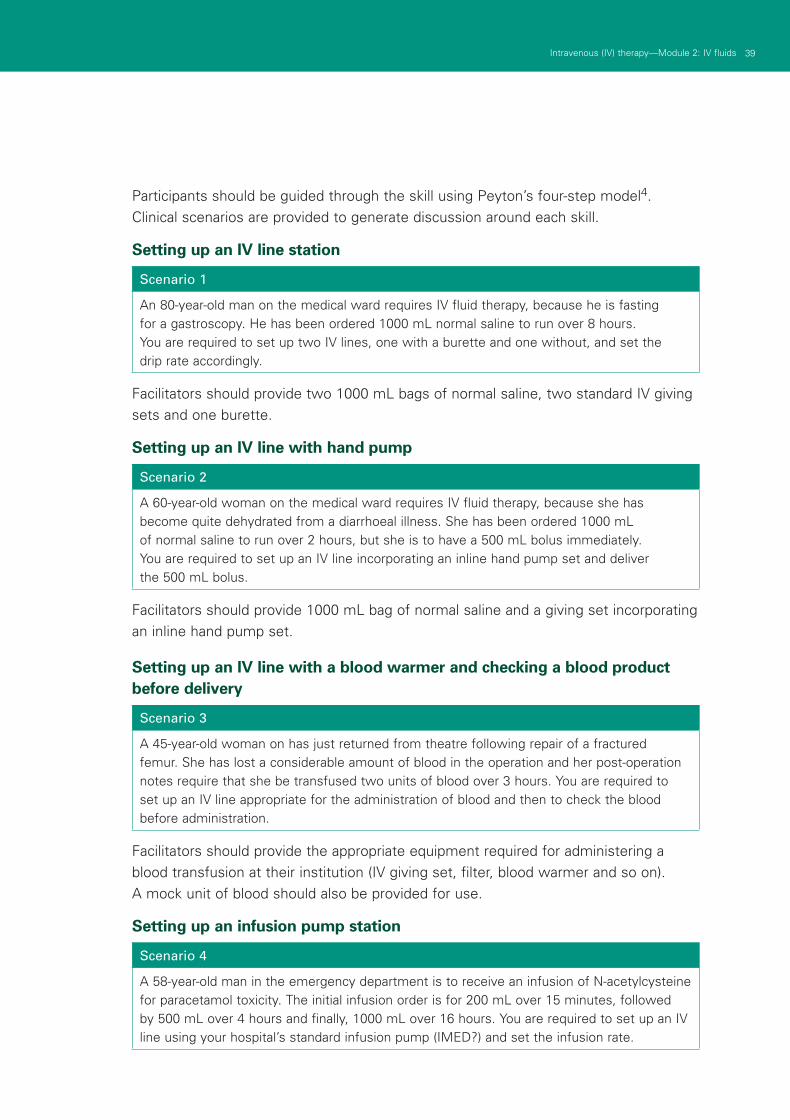
Participants should be guided through the skill using Peyton’s four-step model4. Clinical scenarios are provided to generate discussion around each skill.
Setting up an IV line station
Scenario 1
An 80-year-old man on the medical ward requires IV fluid therapy, because he is fasting for a gastroscopy. He has been ordered 1000 mL normal saline to run over 8 hours. You are required to set up two IV lines, one with a burette and one without, and set the drip rate accordingly.
Facilitators should provide two 1000 mL bags of normal saline, two standard IV giving sets and one burette.
Setting up an IV line with hand pump
Scenario 2
A 60-year-old woman on the medical ward requires IV fluid therapy, because she has become quite dehydrated from a diarrhoeal illness. She has been ordered 1000 mL of normal saline to run over 2 hours, but she is to have a 500 mL bolus immediately. You are required to set up an IV line incorporating an inline hand pump set and deliver the 500 mL bolus.
Facilitators should provide 1000 mL bag of normal saline and a giving set incorporating an inline hand pump set.
Setting up an IV line with a blood warmer and checking a blood product before delivery
Scenario 3
A 45-year-old woman on has just returned from theatre following repair of a fractured femur. She has lost a considerable amount of blood in the operation and her post-operation notes require that she be transfused two units of blood over 3 hours. You are required to set up an IV line appropriate for the administration of blood and then to check the blood before administration.
Facilitators should provide the appropriate equipment required for administering a blood transfusion at their institution (IV giving set, filter, blood warmer and so on). A mock unit of blood should also be provided for use.
Setting up an infusion pump station
Scenario 4
A 58-year-old man in the emergency department is to receive an infusion of N-acetylcysteine for paracetamol toxicity. The initial infusion order is for 200 mL over 15 minutes, followed by 500 mL over 4 hours and finally, 1000 mL over 16 hours. You are required to set up an IV line using your hospital’s standard infusion pump (IMED?) and set the infusion rate.
40 Intravenous (IV) therapy—Module 2: IV fluids
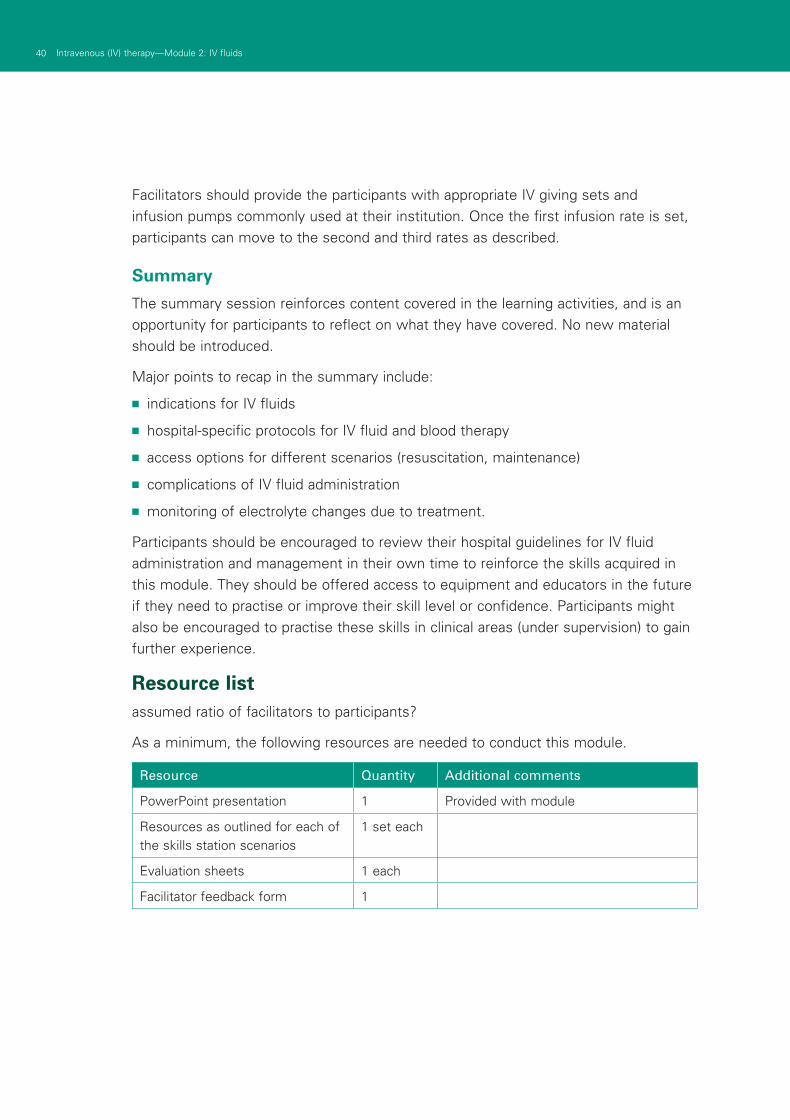
Facilitators should provide the participants with appropriate IV giving sets and infusion pumps commonly used at their institution. Once the first infusion rate is set, participants can move to the second and third rates as described.
Summary
The summary session reinforces content covered in the learning activities, and is an opportunity for participants to reflect on what they have covered. No new material should be introduced.
Major points to recap in the summary include:
■ indications for IV fluids
■ hospital-specific protocols for IV fluid and blood therapy
■ access options for different scenarios (resuscitation, maintenance)
■ complications of IV fluid administration
■ monitoring of electrolyte changes due to treatment.
Participants should be encouraged to review their hospital guidelines for IV fluid administration and management in their own time to reinforce the skills acquired in this module. They should be offered access to equipment and educators in the future if they need to practise or improve their skill level or confidence. Participants might also be encouraged to practise these skills in clinical areas (under supervision) to gain further experience.
Resource listassumed ratio of facilitators to participants?
As a minimum, the following resources are needed to conduct this module.
Resource Quantity Additional comments
PowerPoint presentation 1 Provided with module
Resources as outlined for each of the skills station scenarios
1 set each
Evaluation sheets 1 each
Facilitator feedback form 1
41Intravenous (IV) therapy—Module 2: IV fluids
EvaluationA formal evaluation has been specifically developed for this module. It incorporates the objectives of the module and the perceptions of the participants about whether they have increased their understanding by working through the module. It is highly recommended that this formal evaluation be copied and completed by all participants at the completion of the module.
A range of informal evaluation tools may also be used in conjunction with this evaluation throughout the module, including those available in the Department of Human Services’ Clinical Skills Facilitators Manual from the basic course conducted in 2007.
References Perel P, Roberts I. 1997 Colloids versus crystalloids for fluid resuscitation in critically 1.
ill patients, Cochrane Database of Systematic Reviews (4)
Alderson P, Bunn F, Li Wan Po A, et al. 2004 Human albumin solution for 2.resuscitation and volume expansion in critically ill patients. Cochrane Database of Systematic Reviews (4)
Australian Red Cross Blood Service 2003 3. Transfusion Medicine Manual 2003: Blood transfusion practice and clinical use of blood in Australia, Australian Red Cross Blood Service: http://www.intra.svhm.org.au/documents/pdf/Quality/Transfusion_1-127.pdf
Peyton J. 1998 4. Teaching and Learning in Medical Practice. Manticore Europe Ltd, Great Britain
42 Intravenous (IV) therapy—Module 2: IV fluids
ResourcesFacilitator feedback form
The following form should be used to assist you in giving feedback after each participant has practised their IV fluid skills at the skills station.
Feedback using the Pendleton model
Pendleton’s model of feedback assists learners to maximize their potential at different stages of training, raise their awareness of strengths and areas for improvement, and identify actions to be taken to improve performance. Pendleton’s rules are structured in such a way that the learner identifies the positives first, in order to create a safe environment. This is followed by the facilitator or group reinforcing these positives and discussing skills to achieve them. Different techniques are then suggested. The advantage of this method is that the learner’s strengths are discussed first. Avoiding a discussion of weaknesses right at the beginning prevents defensiveness and allows reflective behaviour in the learner.
Below is a series of questions to assist you in this technique:
1. Ask the learner how they feel.
2. Ask the learner what went well and why (this can be combined with question 1 and 3).
3. Tell the learner what went well and why.
4. Ask the learner what could have been done better and why.
5. Tell the learner what could have been done better and why.
6. Summarise the learner’s strengths and identify up to three things to concentrate on.
Note: This form does not need to be given to the participant — it is a guide for you, the group facilitator.
43Intravenous (IV) therapy—Module 2: IV fluids
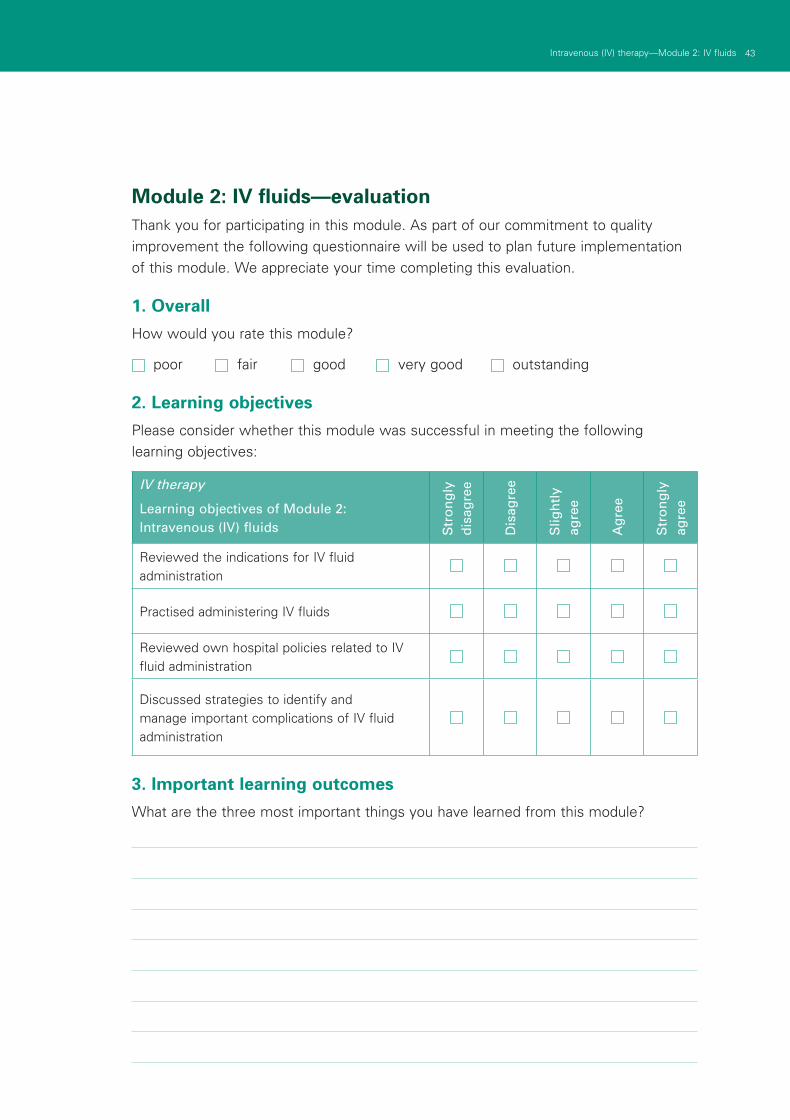
Module 2: IV fluids—evaluationThank you for participating in this module. As part of our commitment to quality improvement the following questionnaire will be used to plan future implementation of this module. We appreciate your time completing this evaluation.
1. Overall
How would you rate this module?
poor fair good very good outstanding
2. Learning objectives
Please consider whether this module was successful in meeting the following learning objectives:
IV therapy
Learning objectives of Module 2: Intravenous (IV) fluids S
tro
ng
ly
dis
agre
e
Dis
agre
e
Slig
htl
y ag
ree
Ag
ree
Str
on
gly
ag
ree
Reviewed the indications for IV fluid administration
Practised administering IV fluids
Reviewed own hospital policies related to IV fluid administration
Discussed strategies to identify and manage important complications of IV fluid administration
3. Important learning outcomes
What are the three most important things you have learned from this module?
44 Intravenous (IV) therapy—Module 2: IV fluids
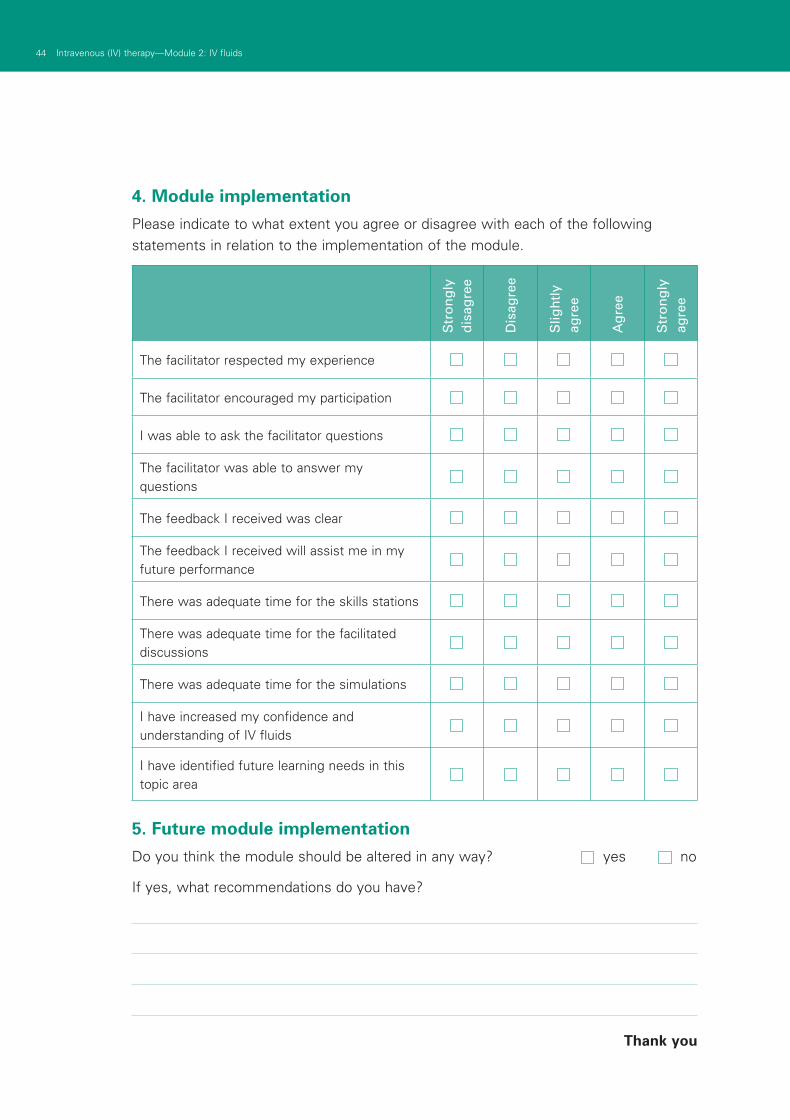
4. Module implementation
Please indicate to what extent you agree or disagree with each of the following statements in relation to the implementation of the module.
Str
on
gly
d
isag
ree
Dis
agre
e
Slig
htl
y ag
ree
Ag
ree
Str
on
gly
ag
ree
The facilitator respected my experience
The facilitator encouraged my participation
I was able to ask the facilitator questions
The facilitator was able to answer my questions
The feedback I received was clear
The feedback I received will assist me in my future performance
There was adequate time for the skills stations
There was adequate time for the facilitated discussions
There was adequate time for the simulations
I have increased my confidence and understanding of IV fluids
I have identified future learning needs in this topic area
5. Future module implementation
Do you think the module should be altered in any way? yes no
If yes, what recommendations do you have?
Thank you
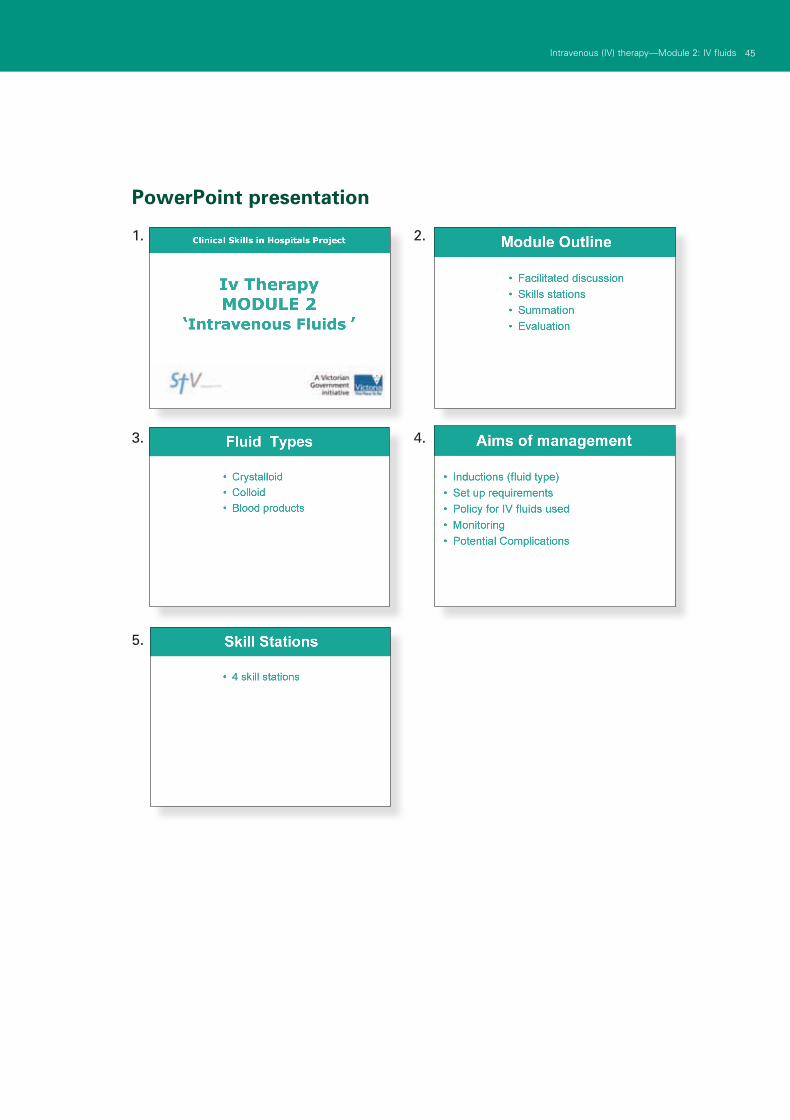
45Intravenous (IV) therapy—Module 2: IV fluids
PowerPoint presentation
1. 2.
3. 4.
5.

47Intravenous (IV) therapy—Module 3: Central venous access devices
Module 3: Central venous access devicesIntroductionIntravenous insertion and IV therapy was developed as a teaching and learning tool for Victorian clinical educators. The information contained in each module was developed using evidence-based resources and examples of best practice. Where expert opinion varies, a discussion section is included. However, it is not within the scope of IV therapy to address the full spectrum of local variations. Variations can occur in several areas, including practices relating to types of equipment used, infection control processes, practice guidelines and so on. Therefore, educators should, where appropriate, adapt content to reflect their local policies, procedures and protocols. This will ensure the relevancy of the package content to your learners.
The modules are designed to be discrete courses in their own right. They are timetabled so they can be completed in a 1–2 hour timeframe. This timeframe was chosen after we received feedback from clinical educators requesting shorter courses, because health professionals often have limited time to educate away from patients. However, the packages may also be combined into a one- or two-day course.
IV therapy should be used as an educational tool to assist in the teaching of clinical skills. It is structured as a guide to assist clinical educators, and uses many concepts taught in the Clinical Skills in Hospitals Project (Train-the-Trainer courses). Educators are encouraged to build on this resource by adding their own scenarios which incorporate hospital/health service protocols, policies and other resources. Each module is designed as a lesson plan to incorporate the simulations into the teaching of clinical skills.
AimsIV therapy aims to make participants confident in their use intravenous devices— either from an insertion perspective (discipline specific) or as a therapy delivery device.
Package structureThe IV therapy package contains four modules, which provide learning opportunities for health professionals at all levels of experience and from medical and nursing disciplines. Modules 1 and 2 are regarded as fundamental. Modules 3 and 4 are set at the intermediate level.
The assessment for and insertion of IV cannula, plus knowledge of basic therapies, such as fluid types, are fundamental to this area of practice. The use of specific devices, such as central venous access ports, is less common in general health care settings, and requires specific knowledge and skill for their use. The insertion and care of central venous lines is covered in IV therapy—Module 4: Central venous lines. Although some skills are discipline specific, such as central line insertion, educators should consider an interdisciplinary approach to the use of these modules.

48 Intravenous (IV) therapy—Module 3: Central venous access devices
Level of complexity Package structure
ComplexFor participants with more than 4 years experience or who have completed Modules 1–4
IntermediateFor participants in postgraduate years 3–4 or who have completed Modules 1 and 2
FundamentalFor participants in postgraduate years 1–2
This package was designed to develop participants’ knowledge, skills and behaviours required to work with intravenous therapy, and to expose them to increasingly complex scenarios to test their ability to combine these individual skills, work as a team and problem solve in more difficult situations.
Educators delivering these modules should be aware of participants’ level of experience and choose appropriate modules. Modules presume an increasing level of knowledge as they progress, ranging from a fundamental knowledge of anatomy and physiology for the fundamental modules, up to detailed knowledge of central venous access devices and central lines. Novice participants (such as first-year graduates) are expected to start with the fundamental modules, and only move onto intermediate and more complex modules as they demonstrate proficiency. More experienced participants may start at the intermediate level if the educator is satisfied that they have the prior knowledge and skills. Individual educators are responsible for assessing each participant’s baseline knowledge and determining which modules they need to complete. More specific descriptions of presumed knowledge are outlined in each module.
IV cannulation IV fluids
Central venous lines
Central venous access devices
49Intravenous (IV) therapy—Module 3: Central venous access devices
The design of these packages presumes that the clinical educators using them have knowledge and expertise in current best practice regarding the teaching of clinical skills and conducting facilitated discussions. Knowledge and expertise are presumed commensurate with the Department of Human Services’ basic and advanced Train-the-Trainer programs. Clinical educators are encouraged to refer to Department of Human Services’ Clinical Skills Facilitators Manual for theory on:
Peyton’s model for teaching clinical skills1.
leading small group discussions2.
giving feedback3.
crisis resource management skills.4.

Authors: Sharon Lourdes, Kelly Phillips
AimsThis module aims to make health professionals confident and competent in their management and maintenance of the patency of central venous access devices (CVADs) within the hospital setting. This module focuses on the clinical use of non-tunnelled peripherally inserted central catheter (PICC) and implanted ports.
Presumed knowledge
This module is aimed at nursing health professionals involved in managing PICCs and ports. They are expected to have a basic knowledge of:
central and peripheral venous anatomy1.
principles of aseptic technique2.
blood collection3.
principles of infection control.4.
ObjectivesBy the end of this module, participants should have:
identified the indications for insertion of PICCs or ports1.
identified the differences between non-tunnelled PICCs and internal ports2.
implemented the postoperative management of CVADs3.
practised and demonstrated changing the dressing and injection ports of the CVAD4.
practised and demonstrated accessing and de-accessing the CVAD port with a 5.Huber point device
practised and demonstrated blood collection from a CVAD6.
practised and demonstrate the methods for maintaining CVAD patency7.
investigated hospital policies in relation to the ongoing care of PICCs and ports8.
classified and evaluated clinical complications when using PICCs and ports.9.
Background information for educatorsIndications for the insertion of CVADs
With the increasing acuity of patients and subsequent management complexity, CVADs have become a far more common occurrence in the clinical setting than purely for the oncology/haematology patient.
Module 3: Central venous access devices
51Intravenous (IV) therapy—Module 3: Central venous access devices
52 Intravenous (IV) therapy—Module 3: Central venous access devices
Indications for the insertion of PICCs and ports include:
■ protecting the peripheral vessels due to expected long-term treatment requiring multiple venepuncture (O’Grady 2002; RNAO, 2004)
■ providing a secure method for drug delivery
■ access for the delivery of peripherally damaging medications, such as chemotherapy and parenteral nutrition
■ immediate venous access in an emergency situation.
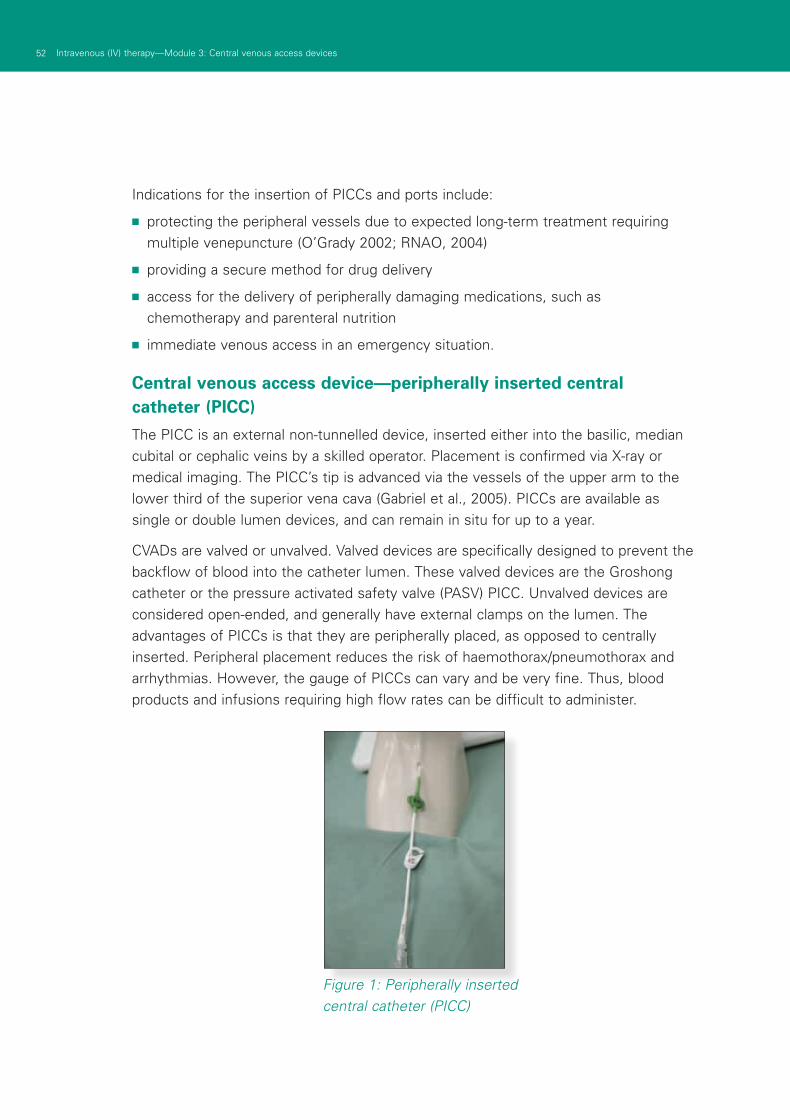
Central venous access device—peripherally inserted central catheter (PICC)
The PICC is an external non-tunnelled device, inserted either into the basilic, median cubital or cephalic veins by a skilled operator. Placement is confirmed via X-ray or medical imaging. The PICC’s tip is advanced via the vessels of the upper arm to the lower third of the superior vena cava (Gabriel et al., 2005). PICCs are available as single or double lumen devices, and can remain in situ for up to a year.
CVADs are valved or unvalved. Valved devices are specifically designed to prevent the backflow of blood into the catheter lumen. These valved devices are the Groshong catheter or the pressure activated safety valve (PASV) PICC. Unvalved devices are considered open-ended, and generally have external clamps on the lumen. The advantages of PICCs is that they are peripherally placed, as opposed to centrally inserted. Peripheral placement reduces the risk of haemothorax/pneumothorax and arrhythmias. However, the gauge of PICCs can vary and be very fine. Thus, blood products and infusions requiring high flow rates can be difficult to administer.
Figure 1: Peripherally inserted central catheter (PICC)
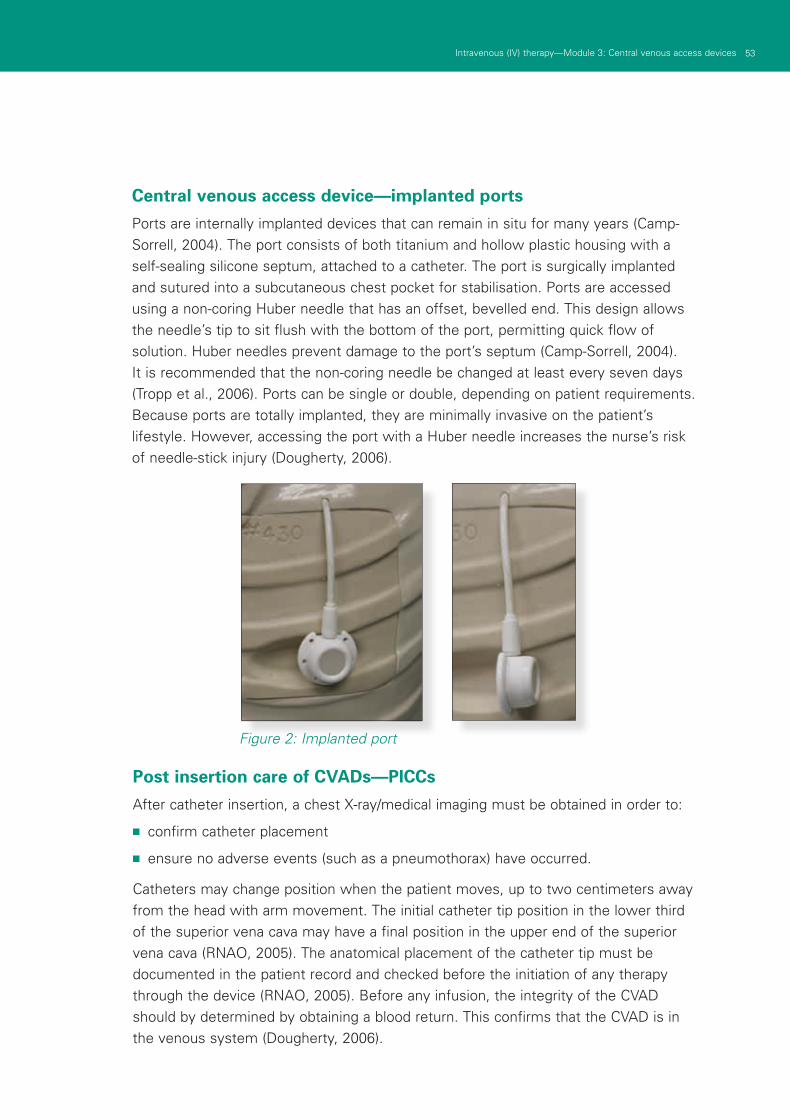
53Intravenous (IV) therapy—Module 3: Central venous access devices
Central venous access device—implanted ports
Ports are internally implanted devices that can remain in situ for many years (Camp-Sorrell, 2004). The port consists of both titanium and hollow plastic housing with a self-sealing silicone septum, attached to a catheter. The port is surgically implanted and sutured into a subcutaneous chest pocket for stabilisation. Ports are accessed using a non-coring Huber needle that has an offset, bevelled end. This design allows the needle’s tip to sit flush with the bottom of the port, permitting quick flow of solution. Huber needles prevent damage to the port’s septum (Camp-Sorrell, 2004). It is recommended that the non-coring needle be changed at least every seven days (Tropp et al., 2006). Ports can be single or double, depending on patient requirements. Because ports are totally implanted, they are minimally invasive on the patient’s lifestyle. However, accessing the port with a Huber needle increases the nurse’s risk of needle-stick injury (Dougherty, 2006).
Figure 1: Peripherally inserted central catheter (PICC)
Figure 2: Implanted port
Post insertion care of CVADs—PICCs
After catheter insertion, a chest X-ray/medical imaging must be obtained in order to:
■ confirm catheter placement
■ ensure no adverse events (such as a pneumothorax) have occurred.
Catheters may change position when the patient moves, up to two centimeters away from the head with arm movement. The initial catheter tip position in the lower third of the superior vena cava may have a final position in the upper end of the superior vena cava (RNAO, 2005). The anatomical placement of the catheter tip must be documented in the patient record and checked before the initiation of any therapy through the device (RNAO, 2005). Before any infusion, the integrity of the CVAD should by determined by obtaining a blood return. This confirms that the CVAD is in the venous system (Dougherty, 2006).
54 Intravenous (IV) therapy—Module 3: Central venous access devices
PICCs and ports
Post-operative observations should include:
■ level of consciousness (ANZCA, 2005)
■ cardiorespiratory status (ANZCA, 2005)
■ pain (ANZCA, 2005)
■ insertion site for swelling, bleeding or other complications (CNSA CVAD working party).
After insertion, the dressing should be changed within the first 24 hours (RCN, 2003).
Central venous access device (CVAD)—dressing theory
The CVAD insertion site should be assessed daily, using inspection and palpation through the dressing or port pocket (Camp-Sorrell, 2004). Remove the dressing to enable closer inspection if tenderness/pain, swelling or exudate is present. Document suspected signs and symptoms of infection and report these to a medical officer for appropriate treatment.
CVADs should be accessed using a sterile technique (Tropp et al., 2006; Camp-Sorrell, 2004). A 2% chlorhexidine gluconate and 70% alcohol solution is recommended to cleanse the CVAD site. Allow the site to air dry before applying the dressing. Skin cleaning and antisepsis are essential for preventing CVAD-related infection. Organisms that may cause infections are introduced either from the patient’s own skin, the hands of health care workers or through catheter movement in and out of the insertion site (RNAO, 2005).
The dressing should be changed once the integrity of the dressing is compromised and as appropriate for the dressing product (RNAO, 2005; O’Grady et al., 2002). Integrity is compromised when the dressing becomes damp, unsealed or soiled. Diaphoretic patients should have their dressings changed more frequently. The choice of dressing is made according to clinical context, including patient allergies and preference (Gillies et al., 2003; O’Grady et al., 2002). It is currently recommended that gauze dressings be changed every 48 hours and transparent semi-permeable dressings weekly. When showering, patients should cover the exit site and the external catheter with a waterproof cover, to minimise introducing organisms into the catheter or exit site (Camp-Sorrell, 2004; O’Grady et al., 2002).
The injection access cap should be changed for a sterile cap each seven days or earlier if compromised by presence of blood or if the integrity of the cap is compromised (MHRA, 2005; RCN, 2005; Perucca, 2001).
55Intravenous (IV) therapy—Module 3: Central venous access devices
Central venous access device—PICC dressing procedure
The patient should be positioned comfortably, and the procedure explained to allay 1.any patient concerns.
Perform hand wash.2.
Prepare appropriate equipment.3.
Perform hand wash.4.
Don clean gloves.5.
Remove old dressing without touching exit site.6.
Remove gloves and discard.7.
Perform hand wash and don sterile gloves.8.
Cleanse exit site.9.
Allow exit site to air dry.10.
Cleanse catheter length and injection caps.11.
Assess exit site for signs of infection and take appropriate action.12.
Assess catheter for signs of damage and take appropriate action.13.
Clamp catheter, unless device has a valved tip, and change injection caps.14.
Apply dressing.15.
Discard all waste appropriately.16.
Document procedure, status of the exit site, action taken, and outcome for 17.patient. (adapted from Cancer Nurses Society of Australia, 2007)
Sterile gauze and tape
Sterile gauze dressings are appropriate immediately after catheter insertion when the insertion site may be bloody and oozing. Gauze dressings do not provide an occlusive barrier, but do have an absorbent action (Camp-Sorrell, 2004). With a gauze dressing in situ, the health care professional should be mindful that they cannot view the insertion site. Gauze dressings should be changed every 48 hours using an aseptic technique (RNAO, 2005). Dressings (such as a Duoderm window) can be used for patients who are allergic to particular dressing adhesives, and are diaphoretic.
Sterile transparent semi-permeable dressings
While acting as a barrier to extrinsic liquid and microorganisms, semi-permeable dressings allow moisture evaporation (RNAO, 2005; Camp-Sorrell, 2004). If sterile gauze is placed under a transparent dressing, it is considered a gauze dressing (RNAO, 2005). Transparent semi-permeable dressings should be applied without stretching the skin and smoothed from the centre to the edge. Edges should not be
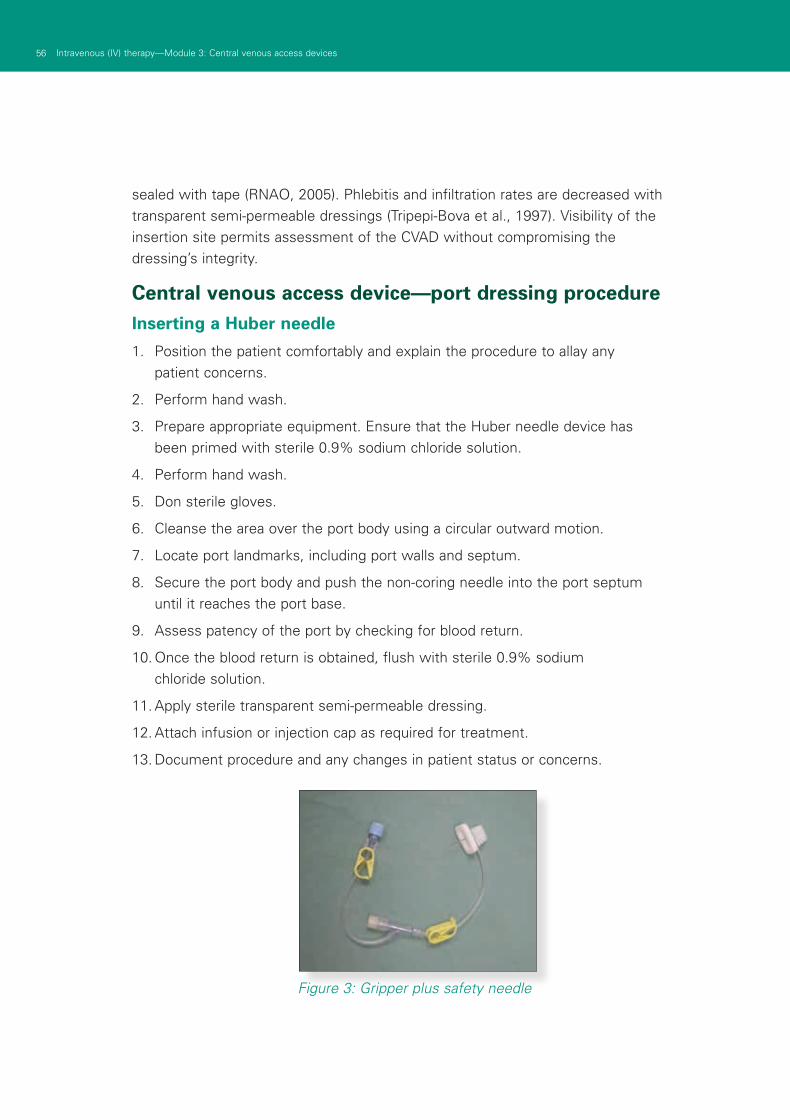
56 Intravenous (IV) therapy—Module 3: Central venous access devices
sealed with tape (RNAO, 2005). Phlebitis and infiltration rates are decreased with transparent semi-permeable dressings (Tripepi-Bova et al., 1997). Visibility of the insertion site permits assessment of the CVAD without compromising the dressing’s integrity.
Central venous access device—port dressing procedureInserting a Huber needle
Position the patient comfortably and explain the procedure to allay any 1.patient concerns.
Perform hand wash.2.
Prepare appropriate equipment. Ensure that the Huber needle device has 3.been primed with sterile 0.9% sodium chloride solution.
Perform hand wash.4.
Don sterile gloves.5.
Cleanse the area over the port body using a circular outward motion.6.
Locate port landmarks, including port walls and septum.7.
Secure the port body and push the non-coring needle into the port septum 8.until it reaches the port base.
Assess patency of the port by checking for blood return.9.
Once the blood return is obtained, flush with sterile 0.9% sodium 10.chloride solution.
Apply sterile transparent semi-permeable dressing.11.
Attach infusion or injection cap as required for treatment.12.
Document procedure and any changes in patient status or concerns.13.
Figure 3: Gripper plus safety needle
57Intravenous (IV) therapy—Module 3: Central venous access devices
Removing a Huber needle
The patient should be positioned comfortably and the procedure explained to 1.allay any patient concerns.
Perform hand wash.2.
Prepare appropriate equipment.3.
Flush and lock lumens, using the appropriate technique.4.
Don clean gloves.5.
Remove dressing and assess site.6.
Discard gloves and dressing.7.
Perform hand wash.8.
Don sterile gloves.9.
Stabilise the port with one hand, and grasp the non-coring needle hub with the 10.dominant hand.
Pull the needle from port while firmly stabilising the portal body. Use a technique 11.that protects the practitioner from needle-stick injury.
Apply pressure at site. Apply a dressing as required.12.
Discard all waste appropriately.13.
Document procedure and any changes in patient status or concerns. 14.(adapted from Cancer Nurses Society of Australia, 2007)
It is recommended that the non-coring needle, add-ons and dressing are changed every seven days.
Accessing and de-accessing the central venous access device
Gaining entry into a CVAD is termed ‘accessing’. The minimum size syringe used to access or flush CVADs is 10 mL. Smaller syringes exert higher output pressure and may cause catheter rupture (RNAO, 2005; Camp-Sorrell, 2004). Most manufacturers recommend a minimum size of 10 mL (Primhak, Gathercole and Reiter, 1998). Excessive force should never be used when flushing the CVAD. The equipment utilised to access the CVAD will depend on facility policy. CVADs should be accessed using a sterile technique (Tropp et al., 2006; Camp-Sorrell, 2004).
Before infusion of any solution, the integrity of the system should be determined by obtaining a blood return. This confirms that the CVAD is in the venous system and reduces the risk of extravasation (Dougherty, 2006). Once the intervention is complete, the CVAD should be flushed and de-accessed. CVADs are flushed using a ‘push-pause’ technique. This technique creates an intra-luminal turbidity purported to
58 Intravenous (IV) therapy—Module 3: Central venous access devices
be beneficial in cleaning the catheter lumens of debris (RNAO, 2005). A 0.9% sterile sodium chloride solution, flushing with 10–30 mL is recommended pre and post:
■ administration of medication
■ administration of blood and blood products
■ intermittent therapy
■ after obtaining blood specimens
■ when converting from intermittent therapy
■ for device maintenance when not in use (RNAO, 2005).
After the flush, the CVAD must be de-accessed, using the correct technique to prevent catheter occlusions by preventing blood flow back into the catheter when the CVAD device is not in use.
Accessing and de-accessing the central venous access device—PICC
Prepare the patient—explanation and positioning.1.
Prepare medication/infusion for administration and 10 mL 0.9% sterile sodium 2.chloride solution for flushing and locking catheter.
Perform hand wash.3.
Don gloves.4.
Maintaining strict aseptic technique, swab injection cap with 70% alcohol solution 5.and allow to air dry.
Obtain a blood return to confirm that the CVAD is in the venous system.6.
Administer medication/connect infusion. When complete, prepare to de-access 7.the PICC.
Flush the PICC using push/pause technique.8.
While holding the injection port, use a positive pressure locking method 9.to lock the PICC.
Discard waste.10.
Document procedure, outcomes for patient and device.11.
Accessing and de-accessing the central venous access device—port
Prepare the patient—explanation and positioning1.
Prepare medication/infusion for administration and 10 mL 0.9% sterile sodium 2.chloride solution for flushing and heparin for locking the catheter
Perform hand wash3.
Don gloves.4.
59Intravenous (IV) therapy—Module 3: Central venous access devices
Maintaining strict aseptic technique, swab injection cap with 70% alcohol solution 5.and allow to air dry.
Remove/open clamp on Huber device.6.
Obtain blood return to confirm that the CVAD is in the venous system.7.
Administer medication/connect infusion. When complete, prepare to 8.de-access port.
Flush port using push/pause technique.9.
Lock the Huber device line with 0.9% sodium chloride solution or heparinised 10.saline and reapply the clamp.
Discard waste.11.
Document procedure, outcomes for patient and device. 12.(adapted from Cancer Nurses Society of Australia, 2007)
If at any time the injection port is placed on the skin it must be re-swabbed.
Positive pressure locking method
For valveless or open-ended devices, maintain pressure on the syringe plunger while clamping the CVAD line. For valved devices, maintain pressure on the syringe plunger before removing the syringe from the CVAD (RNAO, 2005). This prevents blood flow back into the catheter, thrombus formation and catheter occlusion (RNAO, 2005). Incorrect technique can cause the CVAD to become totally occluded.
The positive pressure lock technique should not be used when using a positive fluid displacement device (RNAO, 2005).
There is limited evidence to suggest a definitive solution for, and subsequently the correct frequency of, flushing and locking CVADs.
Heparin is a common locking solution utilised in facilities. Heparin lock is used to lock the CVAD when not in use by preventing occlusions via blood flow back into the catheter. Heparin should be used in the lowest concentration and volume possible, and only when necessary (RNAO, 2005). Also, heparin may be contraindicated with some CVADs, mainly Groshong PICCs.
Unvalved open-ended ArrowCaths, without positive pressure caps, are at risk of intraluminal blood reflux and subsequent clotting (RNAO, 2005; Camp-Sorrell, 2004). Heparin inhibits coagulation and fibrin build-up (RNAO, 2005). To reduce the risk of clot formation and fibrin build-up, locking open-ended catheters with heparinised-saline is recommended. Open-ended device implanted ports are commonly locked utilising a 50 IU heparin in 5 mL 0.9% sterile sodium chloride solution concentration (CNSA CVAD working party). Dormant ports should be routinely flushed and locked every four to six weeks (RCN, 2005; Camp-Sorrell, 2004).
60 Intravenous (IV) therapy—Module 3: Central venous access devices
Blood collection from a CVAD
One of the many patient benefits of CVADs is that they are designed to permit blood collection for specimens. This method of blood collection protects the integrity of the patient’s peripheral venous system. To ensure the accuracy of laboratory tests, the previous solution instilled to lock the lumen should be withdrawn and discarded. The volume of blood that should be discarded to ensure test results are accurate is variable—between 3–10 mL, with 5–6 mL the most frequently used volume (Camp-Sorrell, 2004). Twice this volume is recommended when collecting for coagulation tests (RNAO, 2005).
Where there is a choice, blood should be collected from a dormant lumen, or collected from lines which are not used to instil medications, electrolytes or parenteral nutrition (CNSA CVAD working party). Blood collection from a CVAD should be documented on the laboratory, because values may be falsely prolonged due to heparin flushes (Camp-Sorrell, 2004). Blood results that appear to be inaccurate should be repeated using a sample drawn from a peripheral vein (Camp-Sorrell, 2004).
When blood cultures are to be collected from a CVAD, the specimen should include the lock solution (Everts and Harding, 2004).
Blood collection—Groshong PICC
Identify patient against name on pathology request.1.
Prepare the patient—explanation and positioning.2.
Prepare blood collection equipment according to hospital policy.3.
Perform hand wash.4.
Don gloves.5.
Maintain strict aseptic technique. Swab injection cap with 70% alcohol solution 6.and allow to air dry.
Withdraw discard blood via syringe or Vacutainer system.7.
Another sterile syringe or Vacutainer is used to obtain the blood samples.8.
Flush PICC using push/pause technique with 10—20 mL 0.9% sodium chloride 9.solution.
While holding the injection port, use a positive pressure locking method to lock 10.the PICC.
Discard waste.11.
Correctly label pathology tubes after blood collection.12.
Document concerns related to blood withdrawal or flushing. 13.(adapted from Cancer Nurses Society of Australia, 2007)
61Intravenous (IV) therapy—Module 3: Central venous access devices
Blood collection—port
Identify patient against name on pathology request.1.
Prepare the patient—explanation and positioning.2.
Prepare blood collection equipment according to hospital policy.3.
Perform hand wash.4.
Don gloves.5.
Maintain strict aseptic technique. Swab injection cap with 70% alcohol solution 6.and allow to air dry.
Remove/open clamp on Huber device.7.
Withdraw discard blood via syringe or Vacutainer system.8.
Another sterile syringe or Vacutainer is used to obtain the blood samples.9.
Flush port using push/pause technique with 10—20 mL 0.9% sodium 10.chloride solution.
Lock the Huber device line with 0.9% sodium chloride solution or heparinised 11.saline and reapply the clamp.
Discard waste.12.
Correctly label pathology tubes after blood collection.13.
Documents concerns related to blood withdrawal or flushing. 14.(adapted from Cancer Nurses Society of Australia, 2007)
CVAD complications—infection
Nurses have an important role in the prevention, early detection and management of complications related to CVADs (Dougherty, 2006). Information relating to CVAD events, including the cause, action taken and outcomes should be documented in the patient’s record (CNSA CVAD working party).
CVAD infections can occur within three weeks of insertion, and are commonly associated with contamination from skin flora upon insertion (Ray, 1999). Infections range from localised to systemic. Localised infections occur at the CVAD insertion site, along the cutaneous tunnelled tract or at the skin pocket containing the implanted port (Rosenthal, 2004). Systemic CVAD infections, also known as bacteraemia/septicaemia occur where both CVAD and peripheral blood cultures are positive for the same pathogen (Rosenthal, 2004; O’Grady et al., 2002). Unfortunately, many CVAD infections are undiagnosed or only recognised when septicaemia ensues (Dougherty, 2006).
62 Intravenous (IV) therapy—Module 3: Central venous access devices
Nurses must practise hand hygiene procedures before, during and after any CVAD manipulations or procedures (O’Grady et al., 2002). The use of gloves does not negate the need for hand washing (O’Grady et al., 2002). It is better to limit the number of CVAD accessing where possible (Rosenthal, 2004; O’Grady et al., 2002). Nurses should document their CVAD assessment findings and notify the medical officer when the patient’s temperature increases or when symptoms of suspected infection are found (CNSA CVAD working party).
Nurses also have an educative role in ensuring health care professionals. Patients and carers must utilise infection-control measures to prevent CVAD-related infections (O’Grady et al., 2002).
CVAD complications—CVAD occlusion
CVAD occlusion is defined in two ways:
1. Blood withdrawal occlusion
The catheter will flush, but the blood cannot be aspirated from the lumen. This occlusion not only greatly decreases the functionality of the CVAD, but also reduces the ability to verify both the position and patency of the CVAD (Mayo, 2001).
2. Total occlusion
The CVAD is unable to be flushed or yielded (Mayo, 2001).
An increasing resistance when flushing the CVAD is the first sign of a CVAD occlusion. Utilising the push-pause method to flush and positive pressure locking with the CVAD is the better way to prevent CVAD occlusion (Dougherty, 2006; Hamilton, 2006; Tezak, 2003). It is imperative that health care professionals document line patency with each access, including the observation of blood return and any resistance experienced (CNSA CVAD working party). Accurate documentation provides for early detection of CVAD problems. Unfortunately, the longer the catheter remains occluded, the lower the clearance success rate (RNAO, 2004).
The cause of CVAD occlusion is divided into two categories:
Non-thrombotic occlusions
■ Mechanical obstructions caused by external factors, such as kinked or clamped IV tubing or a clamped CVAD lumen; and internal factors, such as CVAD tip malposition, damage or malposition of needle (Camp-Sorrell, 2004).
■ Chemical occlusions may be caused by precipitates or lipid deposits from infusions of incompatible solutions (Dougherty, 2006; Hamilton, 2006; Steiger, 2006).

63Intravenous (IV) therapy—Module 3: Central venous access devices
Nursing management
■ Ensure lumen and IV tubing clamps are open before infusing.
■ Prepare and place IV administration tubing and CVAD lumens to prevent kinks.
■ Ensure infusion of compatible solutions.
■ Flushing the tubing and lumen as recommended (CNSA CVAD working party).
Thrombotic occlusions
■ A fibrin sheath or tail forming on the catheter tip acts as a one-way valve permitting infusion, but not blood aspiration.
■ Fibrin deposits and/or sludge accumulation within the portal reservoir.
■ An intraluminal blood clot (Camp-Sorrell, 2004; Gorski, 2003; Mayo 2001).
Nursing management
■ Flush the tubing and lumen as recommended (CNSA CVAD working party).
■ Using a 10 mL syringe, gentle flush and aspirate with 0.9% sodium chloride solution. This may clear the line and blood flashback may be returned (Dougherty, 2006).
■ If complete thrombotic occlusion is suspected, instillation of a thrombolytic agent should be considered by the medical unit (Dougherty, 2006; Camp-Sorrell, 2004; McKnight, 2004).
PICC removal
When the medical unit decides to remove a PICC, the patient’s coagulation profile must be reviewed to minimise the risk of bleeding (Dougherty, 2006). If the device is removed due to suspected or confirmed infection, the tip may be cut off using a sterile procedure and sent for culturing (Dougherty, 2006). After removal, the integrity and length of the CVAD should be checked to ensure the CVAD is intact (Dougherty, 2006). The health care professional must apply firm digital pressure post CVAD removal until haemostasis is achieved (CNSA CVAD working party), then a sterile occlusive dressing should be applied for at least 72 hours (RCN, 2005). Air embolism has been shown to occur up to 72 hours following device removal (RCN, 2005). The site should be reviewed and the following documented in the patient record:
■ date and time of removal
■ integrity of the device when removed
■ whether the tip was sent for culture
■ status of the site
■ details of dressing applied and ongoing care required
■ patient’s status following removal (CNSA CVAD working party).
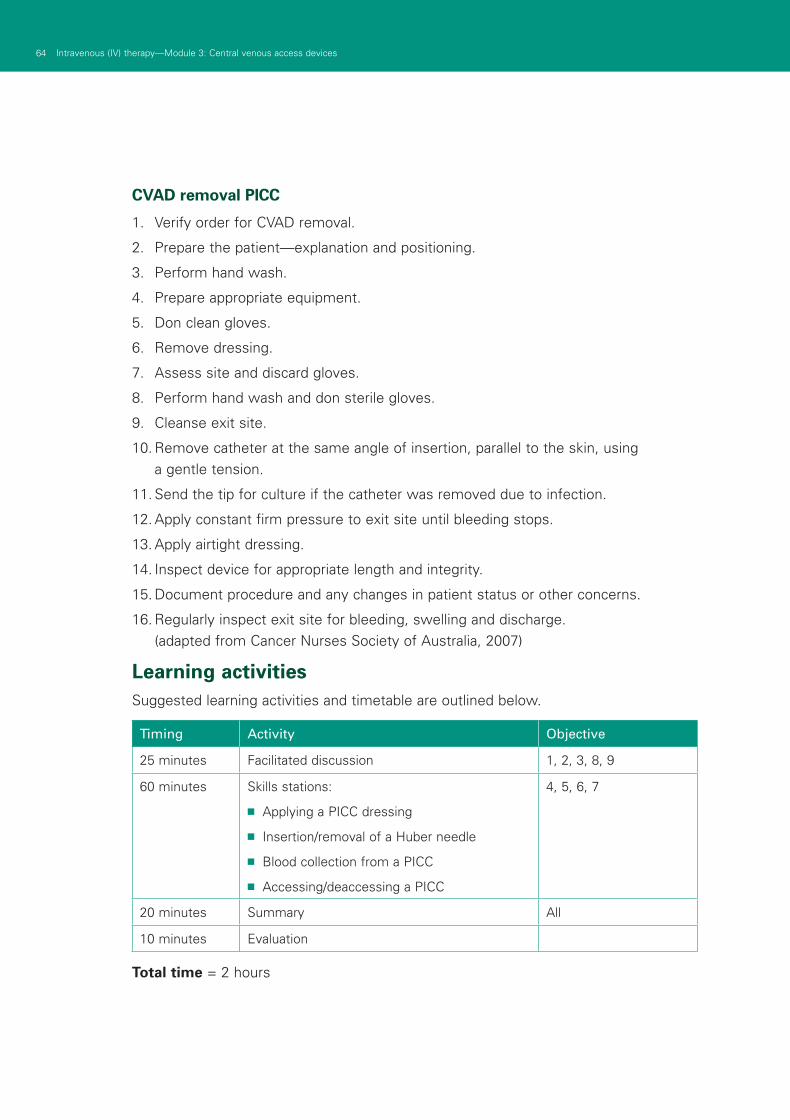
64 Intravenous (IV) therapy—Module 3: Central venous access devices
CVAD removal PICC
Verify order for CVAD removal.1.
Prepare the patient—explanation and positioning.2.
Perform hand wash.3.
Prepare appropriate equipment.4.
Don clean gloves.5.
Remove dressing.6.
Assess site and discard gloves.7.
Perform hand wash and don sterile gloves.8.
Cleanse exit site.9.
Remove catheter at the same angle of insertion, parallel to the skin, using 10.a gentle tension.
Send the tip for culture if the catheter was removed due to infection.11.
Apply constant firm pressure to exit site until bleeding stops.12.
Apply airtight dressing.13.
Inspect device for appropriate length and integrity.14.
Document procedure and any changes in patient status or other concerns.15.
Regularly inspect exit site for bleeding, swelling and discharge. 16.(adapted from Cancer Nurses Society of Australia, 2007)
Learning activitiesSuggested learning activities and timetable are outlined below.
Timing Activity Objective
25 minutes Facilitated discussion 1, 2, 3, 8, 9
60 minutes Skills stations:
■ Applying a PICC dressing
■ Insertion/removal of a Huber needle
■ Blood collection from a PICC
■ Accessing/deaccessing a PICC
4, 5, 6, 7
20 minutes Summary All
10 minutes Evaluation
Total time = 2 hours
65Intravenous (IV) therapy—Module 3: Central venous access devices
Facilitated discussion
The facilitator should lead a discussion amongst participants about the issues covered in the background information and module objectives 1, 2, 3, 8 and 9. The facilitator should not give a didactic lecture, but instead promote open discussion and knowledge sharing amongst participants. Participants should be encouraged to share any real-life experiences they have encountered and reflect on the patient’s psychological experiences in relation to treatment with and without the CVAD.
Major issues which the facilitator should ensure are covered include:
■ the indications for insertion of PICCs or ports
■ differences between non-tunnelled PICCs and internal ports
■ the postoperative management of CVADs
■ hospital policies for the ongoing care of PICCs and ports
■ clinical complications when using PICCs and ports.
PowerPoint slides are available for the facilitator to use to summarise these main points at the end of the discussion or to act as triggers for discussion if the participants have not identified them.
Skills stations
The skills stations allow participants to practise and demonstrate:
■ changing the dressing and injection ports of the CVAD
■ how to access and de-access the CVAD port with a Huber point device
■ blood collection from a PICC
■ methods for maintaining CVAD patency.
The skills stations allow participants to practise while receiving feedback in a structured format from peers and/or facilitators.
The program and resources required assume two facilitators for every six participants, a ratio of 1:3.
Applying a PICC dressing
The facilitator requires a manikin or model suitable for practising removing and applying PICC dressings, such as Chester Chest. Participants should have the opportunity to practise removing and applying PICC dressings. Feedback should be provided at the completion of the skill. Each participant should observe the facilitator initially and then spend 15 minutes on this task while observing the performance of two other participants.
66 Intravenous (IV) therapy—Module 3: Central venous access devices
Insertion/removal of a Huber needle
The facilitator requires all the necessary equipment to set up for insertion/removal of a Huber needle from a port. Participants should be given the opportunity to practise insertion/removal of a Huber needle, and receive feedback at the completion of the skill. Each participant should observe the facilitator initially and then spend 10 minutes on this task while observing the performance of two other participants.
Blood collection from a PICC
The facilitator requires a manikin or model suitable for practising collecting blood from a PICC, such as Chester Chest. Participants should be given the opportunity to practise collecting blood collection from a PICC, and receive feedback at the completion of the skill. Each participant should observe the facilitator initially and then spend 10 minutes on this task while observing the performance of two other participants.
Accessing/de-accessing a PICC
The facilitator requires a manikin or model suitable for practising accessing/de-accessing a PICC, such as Chester Chest. Participants should be given the opportunity to practise accessing/de-accessing a PICC, and receive feedback at the completion of the skill. Each participant should observe the facilitator initially and then spend 10 minutes on this task while observing the performance of two other participants.
Summary
The summary session reinforces content covered in the learning activities, and is an opportunity for participants to reflect on what they have covered. No new material should be introduced.
Major points to recap in the summary include:
■ the indications for insertion of PICCs or ports
■ differences between non-tunnelled PICCs and internal ports
■ the post-operative management of CVADs
■ hospital policies for the ongoing care of PICCs and ports
■ clinical complications when using PICCs and ports.
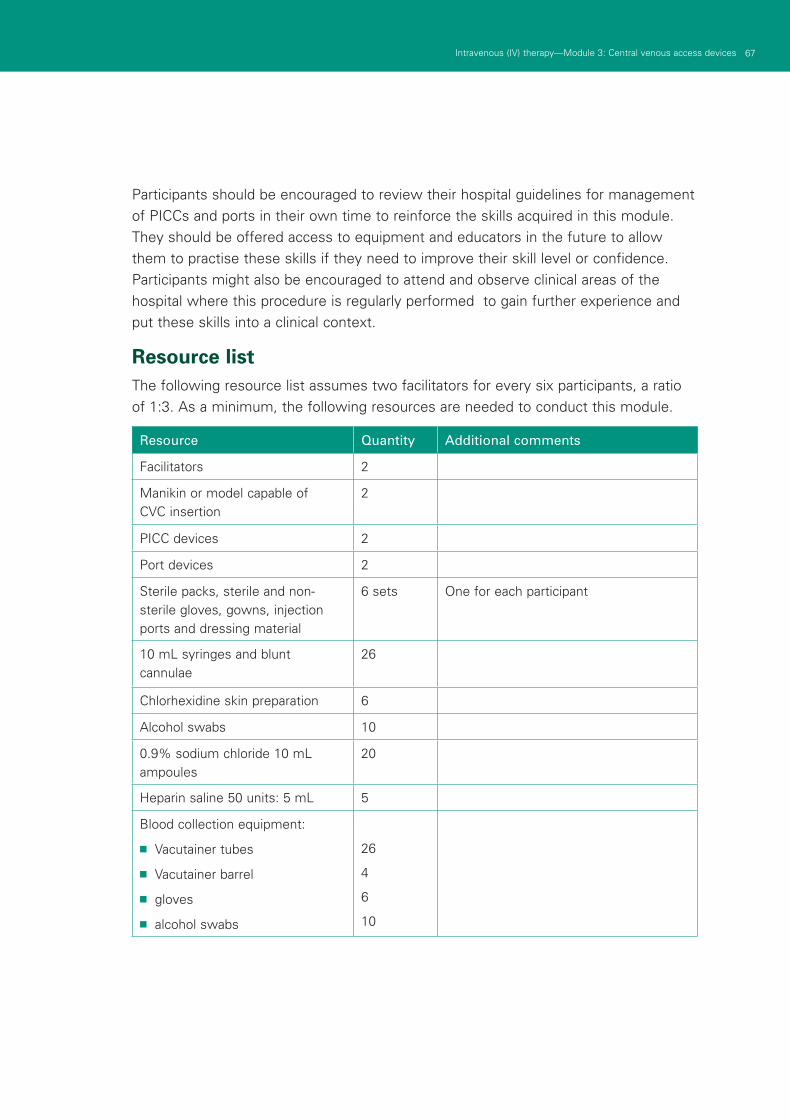
67Intravenous (IV) therapy—Module 3: Central venous access devices
Participants should be encouraged to review their hospital guidelines for management of PICCs and ports in their own time to reinforce the skills acquired in this module. They should be offered access to equipment and educators in the future to allow them to practise these skills if they need to improve their skill level or confidence. Participants might also be encouraged to attend and observe clinical areas of the hospital where this procedure is regularly performed to gain further experience and put these skills into a clinical context.
Resource listThe following resource list assumes two facilitators for every six participants, a ratio of 1:3. As a minimum, the following resources are needed to conduct this module.
Resource Quantity Additional comments
Facilitators 2
Manikin or model capable of CVC insertion
2
PICC devices 2
Port devices 2
Sterile packs, sterile and non-sterile gloves, gowns, injection ports and dressing material
6 sets One for each participant
10 mL syringes and blunt cannulae
26
Chlorhexidine skin preparation 6
Alcohol swabs 10
0.9% sodium chloride 10 mL ampoules
20
Heparin saline 50 units: 5 mL 5
Blood collection equipment:
■ Vacutainer tubes
■ Vacutainer barrel
■ gloves
■ alcohol swabs
26
4
6
10
68 Intravenous (IV) therapy—Module 3: Central venous access devices
EvaluationA formal evaluation has been specifically developed for this module. It incorporates the objectives of the module and the perceptions of the participants about whether they have increased their understanding by working through the module. It is highly recommended that this formal evaluation be copied and completed by all participants at the completion of the module.
A range of informal evaluation tools may also be used in conjunction with this evaluation throughout the module, including those available in the Department of Human Services’ Clinical Skills Facilitators Manual from the basic course conducted in 2007.
References Australian and New Zealand College of Anaesthetics 2005 1. Guidelines for
Conscious Sedation for Diagnostic, Interventional Medical and Surgical Procedures: www.medeserv.com.au/anzca/pdfdocs/PS9-2005.pdf
BARD Access Systems (accessed 5 June 2008):2.
– www.bardaccess.com/specs-grosh-picc.html
– www.bardaccess.com/pdfs/ifus/PK0707681-oe.pdf
– www.bardaccess.com/images/products/product-groshong-nxt.jpg
– www.bardaccess.com/pdfs/nursing/ng-grosh-nxt.pdf
– www.portadvantage.com/documents/Bard-Patient-Info-Bro.pdf
– www.bardaccess.com/pdfs
– www.bardaccess.com/pdfs/brochures/bro-hick-bro-leon.pdf
– www.bardaccess.com/pdfs/nursing/ng-hick-leon-brov.pdf
Camp-Sorrell D (Ed) 2004 3. Access device guidelines: recommendations for nursing practice and education (second edition) Pittsburgh: Oncology Nursing Society
Cancer Nurses Society of Australia 2007 4. Central Venous Access Devices: Principles for Nursing Practice and Education
Dougherty L. 2006 5. Central Venous Access Devices Care and Management. Oxford: Blackwell Publishing
Everts R and Harding H 2004 Catheter-drawn blood cultures: Is withdrawing the 6.heparin lock beneficial? Pathology 36(2): 170–73
Gabriel J, Bravery K, Doughtery L, Kayley J, Malster M and Scales K 2005 7.Vascular Access: indications and implications for patient care. Nursing Standard 9(26): 45–52
69Intravenous (IV) therapy—Module 3: Central venous access devices
Gillies D, O’Rhiordan L, Wallen, M, Morrison A, Rankin K and Nagy S 2005 8.Optimal timing for intravenous set replacement. The Cochrane Library, The Cochrane Collaboration Volume 1
Gorski LA 2003 Central venous access device occlusions: Part 1 Thrombotic 9.causes and treatment. Home Healthcare Nurse 21(2): 115–21
Hamilton H 2006 Complications associated with venous access devices: 10.Part 2. Nursing Standard 20(27): 59–66
Mayo D 2001 Catheter-related thrombosis. 11. Journal of Intravenous Nursing 24 (3S) S13-S22
McKnight S 2004, Nurse’s guide to understanding and treating thrombotic 12.occlusions of central venous access devices. Medsurg Nursing (13)6: 337–82
MHRA 2005 13. Medical Device Alert on all brands of needle free intravascular connectors, MDA/2005/030, issued 17 May 2005, London
O’Grady N, Alexander M, Dellinger EP, Gerberding JL, Heard SO, Maki DG, Masur 14.H, McCormick RD, Mermel LA, Pearson ML, Raad II, Randolf A and Weinstein RA 2002 Guidelines for the prevention of intravascular catheter-related infections. Centres for Disease Control and Prevention, Morbidity and Mortality
Recommendations Report 2002 August (9)51 (RR–10): 1–2915.
Perucca R 2001 Obtaining vascular access 16. Infusion Therapy in Clinical Practice (2nd edition) Pennsylvania: WB Saunders, Chapter 20: 338–97
Penne K 2002 Using evidence in central catheter care, 17. Seminars in oncology nursing (18)1: 66–70
Povoski SP 2005 Long-term venous access, Pazdur R, Hoskins W, Coia L, 18.Wagman L Cancer Management: A multidisciplinary approach (ninth edition). New York: CMP Medica
Primhak RH, Gathercole N and Reiter H 1998 Letters to the editor: Pressures used 19.to flush central venous catheter. Archives of Disease in Childhood—Fetal Neonatal Edition 78: 234
Ray CE 1999 Infection control principles and practices in the care and 20.management of central venous access devices Journal of Intravenous Nursing (22)65: S18—S25
Rosenthal K 2006 21. Navigating safely through a minefield of CVAD complications IV essentials 1: 56–58
Royal College of Nursing Intravenous Therapy Forum 2003, Standards for Infusion 22.Therapy. London: Royal College of Nursing
70 Intravenous (IV) therapy—Module 3: Central venous access devices
Registered Nurses’ Association of Ontario, (RNAO) 2005 23. Care and Maintenance to Reduce Vascular Access Complications. Toronto, Canada Registered Nurses’ Association of Ontario: www.rnao.org/bestpractices/PDF/BPG_Reduce_Vascular_Access_Complications.pdf (accessed March 2006)
Registered Nurses Association of Ontario (RNAO) 2004 24. Assessment and device selection for vascular access. Toronto: Registered Nurses Association of Ontario
Steiger E 2006 Dysfunction and thrombotic complications of vascular access 25.devices Journal of Parenteral and Enteral Nutrition (30)1: S70–S72
Tezak B 2003 Leading Change: Validating central line practices with research CINA: 26.Official journal of the Canadian Intravenous Nurses Association 19: 34–7
Tripepi-Bova KA, Woods KD and Loach MC 1997 A comparison of transparent 27.polyurethane and dry gauze dressings for peripheral IV catheter sites: rates of phlebitis, infiltration, and dislodgment by patients American Journal of Critical Care (6)5: 377–81
Tropp J, Bagnall-Reeb H, Gorski L, Hadaway L, Hunter M, Roth D and Saxton J 28.2006 Infusion Nursing Standards of Practice Journal of Infusion Nursing 29: 15
71Intravenous (IV) therapy—Module 3: Central venous access devices
ResourcesFacilitator feedback form
The following form should be used to assist you in giving feedback after each participant has practised their CVAD skills at the skills station.
Feedback using the Pendleton model
Pendleton’s model of feedback assists learners to maximize their potential at different stages of training, raise their awareness of strengths and areas for improvement, and identify actions to be taken to improve performance. Pendleton’s rules are structured in such a way that the learner identifies the positives first, in order to create a safe environment. This is followed by the facilitator or group reinforcing these positives and discussing skills to achieve them. Different techniques are then suggested. The advantage of this method is that the learner’s strengths are discussed first. Avoiding a discussion of weaknesses right at the beginning prevents defensiveness and allows reflective behaviour in the learner.
Below is a series of questions to assist you in this technique:
1. Ask the learner how they feel.
2. Ask the learner what went well and why (this can be combined with question 1 and 3).
3. Tell the learner what went well and why.
4. Ask the learner what could have been done better and why.
5. Tell the learner what could have been done better and why.
6. Summarise the learner’s strengths and identify up to three things to concentrate on.
Note: This form does not need to be given to the participant — it is a guide for you, the group facilitator.
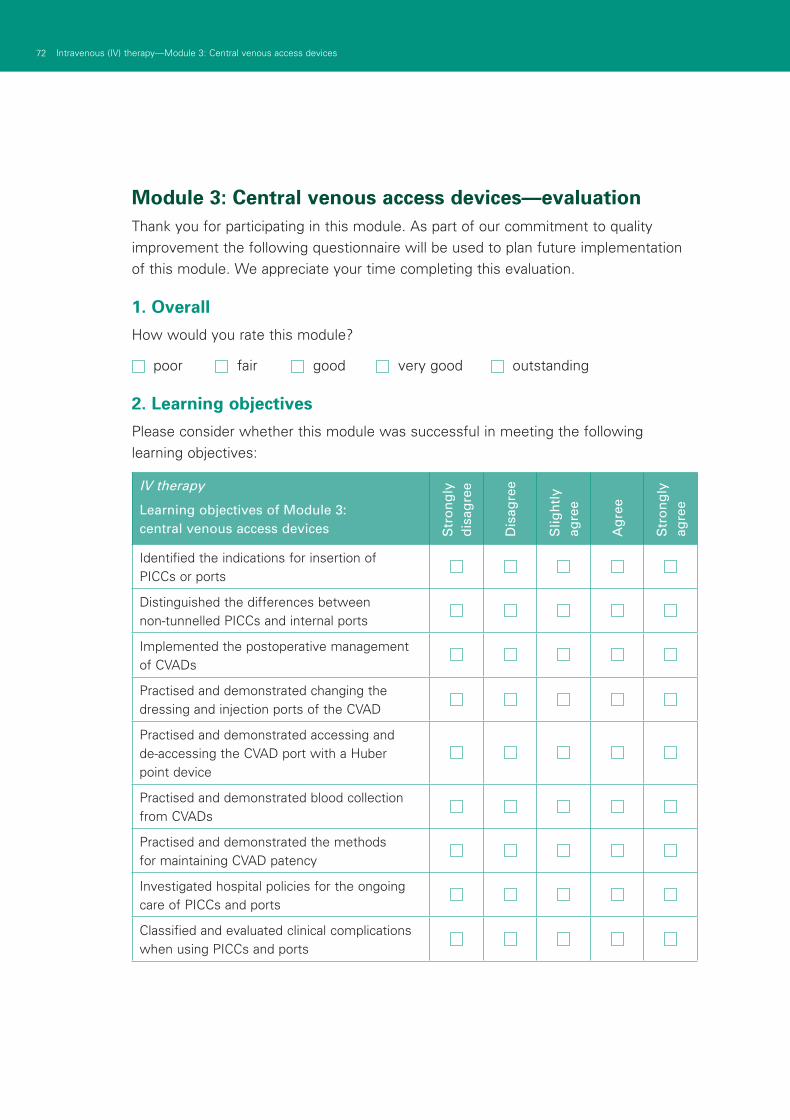
72 Intravenous (IV) therapy—Module 3: Central venous access devices
Module 3: Central venous access devices—evaluationThank you for participating in this module. As part of our commitment to quality improvement the following questionnaire will be used to plan future implementation of this module. We appreciate your time completing this evaluation.
1. Overall
How would you rate this module?
poor fair good very good outstanding
2. Learning objectives
Please consider whether this module was successful in meeting the following learning objectives:
IV therapy
Learning objectives of Module 3: central venous access devices S
tro
ng
ly
dis
agre
e
Dis
agre
e
Slig
htl
y ag
ree
Ag
ree
Str
on
gly
ag
ree
Identified the indications for insertion of PICCs or ports
Distinguished the differences between non-tunnelled PICCs and internal ports
Implemented the postoperative management of CVADs
Practised and demonstrated changing the dressing and injection ports of the CVAD
Practised and demonstrated accessing and de-accessing the CVAD port with a Huber point device
Practised and demonstrated blood collection from CVADs
Practised and demonstrated the methods for maintaining CVAD patency
Investigated hospital policies for the ongoing care of PICCs and ports
Classified and evaluated clinical complications when using PICCs and ports
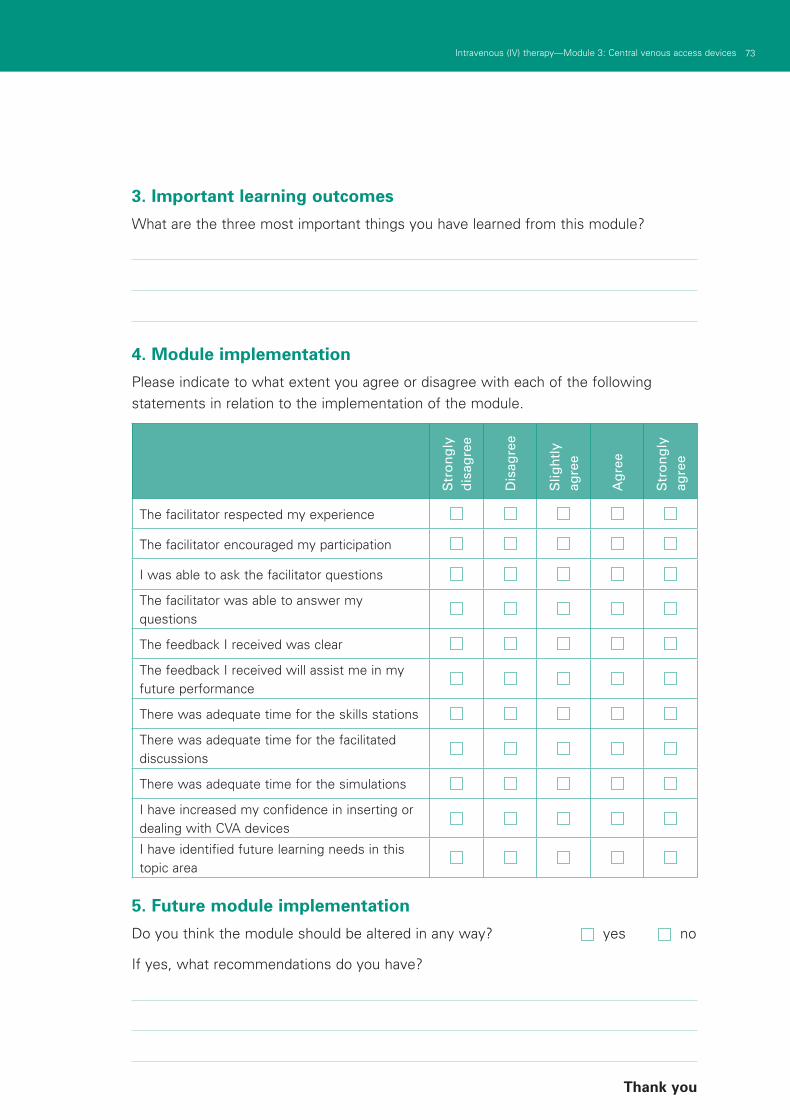
73Intravenous (IV) therapy—Module 3: Central venous access devices
3. Important learning outcomes
What are the three most important things you have learned from this module?
4. Module implementation
Please indicate to what extent you agree or disagree with each of the following statements in relation to the implementation of the module.
Str
on
gly
d
isag
ree
Dis
agre
e
Slig
htl
y ag
ree
Ag
ree
Str
on
gly
ag
ree
The facilitator respected my experience
The facilitator encouraged my participation
I was able to ask the facilitator questions
The facilitator was able to answer my questions
The feedback I received was clear
The feedback I received will assist me in my future performance
There was adequate time for the skills stations
There was adequate time for the facilitated discussions
There was adequate time for the simulations
I have increased my confidence in inserting or dealing with CVA devices
I have identified future learning needs in this topic area
5. Future module implementation
Do you think the module should be altered in any way? yes no
If yes, what recommendations do you have?
Thank you
PowerPoint presentation
1. 2.
3. 4.
5. 6.
7.
74 Intravenous (IV) therapy—Module 3: Central venous access devices
Module 4: Central venous linesIntroductionIntravenous insertion and IV therapy was developed as a teaching and learning tool for Victorian clinical educators. The information contained in each module was developed using evidence-based resources and examples of best practice. Where expert opinion varies, a discussion section is included. However, it is not within the scope of IV therapy to address the full spectrum of local variations. Variations can occur in several areas, including practices relating to types of equipment used, infection control processes, practice guidelines and so on. Therefore, educators should, where appropriate, adapt content to reflect their local policies, procedures and protocols. This will ensure the relevancy of the package content to your learners.
The modules are designed to be discrete courses in their own right. They are timetabled so they can be completed in a 1–2 hour timeframe. This timeframe was chosen after we received feedback from clinical educators requesting shorter courses, because health professionals often have limited time to educate away from patients. However, the packages may also be combined into a one- or two-day course.
IV therapy should be used as an educational tool to assist in the teaching of clinical skills. It is structured as a guide to assist clinical educators, and uses many concepts taught in the Clinical Skills in Hospitals Project (Train-the-Trainer courses). Educators are encouraged to build on this resource by adding their own scenarios which incorporate hospital/health service protocols, policies and other resources. Each module is designed as a lesson plan to incorporate the simulations into the teaching of clinical skills.
AimsIV therapy aims to make participants confident in their use intravenous devices— either from an insertion perspective (discipline specific) or as a therapy delivery device.
Package structureThe IV therapy package contains four modules, which provide learning opportunities for health professionals at all levels of experience and from medical and nursing disciplines. Modules 1 and 2 are regarded as fundamental. Modules 3 and 4 are set at the intermediate level.
The assessment for and insertion of IV cannula, plus knowledge of basic therapies, such as fluid types, are fundamental to this area of practice. The use of specific devices, such as central venous access ports, is less common in general health care settings, and requires specific knowledge and skill for their use. The insertion and care of central venous lines is covered in IV therapy—Module 4: Central venous lines. Although some skills are discipline specific, such as central line insertion, educators should consider an interdisciplinary approach to the use of these modules.
75Intravenous (IV) therapy—Module 4: Central venous lines

76 Intravenous (IV) therapy—Module 4: Central venous lines
Level of complexity Package structure
ComplexFor participants with more than 4 years experience or who have completed Modules 1–4
IntermediateFor participants in postgraduate years 3–4 or who have completed Modules 1 and 2
FundamentalFor participants in postgraduate years 1–2
This package was designed to develop participants’ knowledge, skills and behaviours required to work with intravenous therapy, and to expose them to increasingly complex scenarios to test their ability to combine these individual skills, work as a team and problem solve in more difficult situations.
Educators delivering these modules should be aware of participants’ level of experience and choose appropriate modules. Modules presume an increasing level of knowledge as they progress, ranging from a fundamental knowledge of anatomy and physiology for the fundamental modules, up to detailed knowledge of central venous access devices and central lines. Novice participants (such as first-year graduates) are expected to start with the fundamental modules, and only move onto intermediate and more complex modules as they demonstrate proficiency. More experienced participants may start at the intermediate level if the educator is satisfied that they have the prior knowledge and skills. Individual educators are responsible for assessing each participant’s baseline knowledge and determining which modules they should complete. More specific descriptions of presumed knowledge are outlined in each module.
IV cannulation IV fluids
Central venous lines
Central venous access devices
77Intravenous (IV) therapy—Module 4: Central venous lines
The design of these packages presumes that the clinical educators using them have knowledge and expertise in current best practice regarding the teaching of clinical skills and conducting facilitated discussions. Knowledge and expertise are presumed commensurate with the Department of Human Services’ basic and advanced Train-the-Trainer programs. Clinical educators are encouraged to refer to Department of Human Services’ Clinical Skills Facilitators Manual for theory on:
Peyton’s model for teaching clinical skills1.
leading small group discussions2.
giving feedback3.
crisis resource management skills.4.

79Intravenous (IV) therapy—Module 4: Central venous lines
Authors: Dr Stuart Dilley
AimsThis module helps health professionals to become confident and competent in inserting, or assisting in the insertion of, central venous catheters (CVC) and femoral lines. It also teaches recognition of and actions in response to important complications, as well as procedures for managing these lines in terms of monitoring and maintenance.
Presumed knowledge
This module is aimed at medical and nursing health professionals involved in inserting, using and maintaining CVCs. They are expected to have a basic knowledge of:
central venous anatomy—great vessels of the neck, subclavian vessels1.
chest and neck anatomy—clavicle, sternocleidomastoid muscle, trachea, lungs2.
femoral triangle anatomy—femoral vein, artery and nerve3.
physiology of central venous pressure.4.
ObjectivesBy the end of this module, participants should have:
reviewed the indications for CVC or femoral line insertion1.
practised inserting or assisting in the insertion of internal jugular, subclavian 2.and femoral lines on a simulated training model
practised using the CVC to measure central venous pressure (CVP) 3.on a simulated patient
reviewed their own hospital policies related to the ongoing care of CVC4.
discussed strategies to identify and manage important complications 5.of CVC insertion.
Background information for educatorsThe main purpose of this module is for participants to become familiar with central lines. Educators should take note of the mix of health professionals in the group. While medical staff are responsible for insertion of lines, all health professionals should be aware of the indications, techniques and problems associated with central line insertion. Where the group comprises non-medical staff, the focus of discussion and learning sessions should be on familiarity with equipment and assisting medical staff with CVC insertion.
Module 4: Central venous lines

80 Intravenous (IV) therapy—Module 4: Central venous lines
Indications
Serious complications—including death—can occur with CVC insertion. Up to 15% of patients who undergo this procedure experience one or more complications1 (see section below ‘Complications’). Health professionals must determine the risk of CVC insertion based on indications and contraindications.
Indications for the insertion of a CVC include1, 2:
■ administration of certain drugs—adrenaline, amiodarone, TPN
■ haemodynamic monitoring—measurement of central venous pressure
■ insertion of transvenous cardiac pacing wire
■ the need for haemodialysis/haemofiltration
■ inaccessible peripheral lines
■ prolonged intravenous therapy.
Because of the relatively small individual lumen diameter and long catheter length, these catheters have high resistance to flow, which makes them less than ideal for rapid fluid infusion and resuscitation. In this instance, large-bore, short, peripherally placed catheters are more appropriate.
Because CVC may be life saving, there are no absolute contraindications to CVC insertion. However, the need for CVC insertion should strongly be reconsidered in the following circumstances:
■ coagulopathy, including warfarin use
■ morbid obesity
■ local infection/burns at site of CVC insertion
■ obstructive airways disease due to the risk of pneumothorax
■ positive pressure ventilation due to the risk of pneumothorax.
Pre-insertion considerationsCatheter
Single or multiple lumen catheters are available. The complication rate is not affected by the number of lumens, so catheters should be chosen to suit the clinical needs of the patient. Multi-lumen catheters are usually used, and may negate the need for multiple venous access points.
Figure 1: Catheter
81Intravenous (IV) therapy—Module 4: Central venous lines
Site
Multiple approaches to the central veins include the internal jugular (IJ), external jugular (EJ) veins and subclavian (SC) veins. The right IJ vein is preferred over the left because it provides a more direct route to the superior vena cava (SVC) and avoids the thoracic duct, which is on the left. The dome of the left lung also rises higher in the neck than the right, making the risk of pneumothorax theoretically higher on the left.
There is probably a higher risk of arterial puncture with IJ catheterisation compared with SC catheterisation3, but this might be because carotid artery puncture is more easily recognised than subclavian artery puncture. Inadvertent carotid artery puncture is more easily managed than subclavian artery puncture. The risk of haemothorax or pneumothorax appears to be equal for both IJ and SC catheterisations3. While femoral vein catheterisation has no risk of pneumothorax, and can be performed in patients who cannot lie completely flat, infectious complications have been reported as 3–4 times more likely in femoral catheters than subclavian4.
Technique
Standard CVC line is the most commonly required central line. PICC lines, Hickman’s catheters and dialysis lines have specific indications and are usually inserted by dedicated staff and departments within the hospital, for example, radiology.
The following technique applies to the insertion of standard CVC lines and femoral lines.
Pre-procedure
Vital to the success of CVC insertion is preparation of the patient. Preparation should include the following:
■ explanation of procedure to patient, including rationale for insertion and potential complications
■ obtaining consent to proceed
■ cardiac monitoring
■ assembling and checking all equipment
■ optimal positioning of patient.
Patient position is influenced somewhat by the venous access site chosen. Correct positioning for IJ and SC catheter insertion should include:
■ supine, Trendelenburg position (on their back, 15º head down)
■ head turned away from side of access
■ a rolled-up towel placed between shoulderblades may assist access to the SC vein.
82 Intravenous (IV) therapy—Module 4: Central venous lines
For femoral line insertion, the patient should be fully reclined if possible, but head-down tilt is not required, and may make catheterisation more difficult by draining the leg veins.
Procedure
Having prepared the patient and identified landmarks, CVC insertion can proceed. A Seldinger technique is used, meaning the CVC catheter is fed over a guide wire, which has been placed in a central vein, directing the catheter to the desired location and then removing the guide wire. CVC insertion should adhere to the following points:
■ adherence to aseptic technique—that is, hand washing, gown, gloves and mask
■ skin cleaning with an appropriate disinfectant (chlorhexidine, iodine, alcohol)
■ application of sterile drapes
■ confirmation of anatomical landmarks and site of skin puncture (see below)
■ infiltration of skin with local anaesthetic (for example, approx 5 mL 0.5—1.0% lignocaine)
■ estimation of distance from entry site to SVC by placing catheter over patient’s chest.
Technique
■ Insert the catheterisation needle, bevel up, to locate the central vein. The direction of insertion depends on the CVC site chosen (see below).
■ Gentle suction is applied at all times so that localisation of the vein is immediately identified by rapid flush of venous blood into the barrel of the syringe.
■ The guide wire is then passed through the needle and into the central vein. Some CVC kits allow the wire to be passed directly through the syringe. Others require that the syringe be removed from the needle first. In this case, a thumb should be placed over the hub of the needle to reduce the risk of air embolisation.
■ Guide wires may be long enough to enter the heart, and the monitor should be checked for ventricular ectopy. If ectopic beats occur, the guide wire should be withdrawn until this no longer occurs.
■ Remove the catheterisation needle while holding the guide wire in place.
■ A scalpel and/or plastic dilator are then used to open the skin and dilate the subcutaneous tissues before insertion of the catheter.
■ The CVC catheter is then introduced over the guide wire to the predetermined depth (see below). The tip of the catheter should rest just above the junction of the SVC and right atrium.
■ The guide wire is then removed while holding the CVC catheter in place.
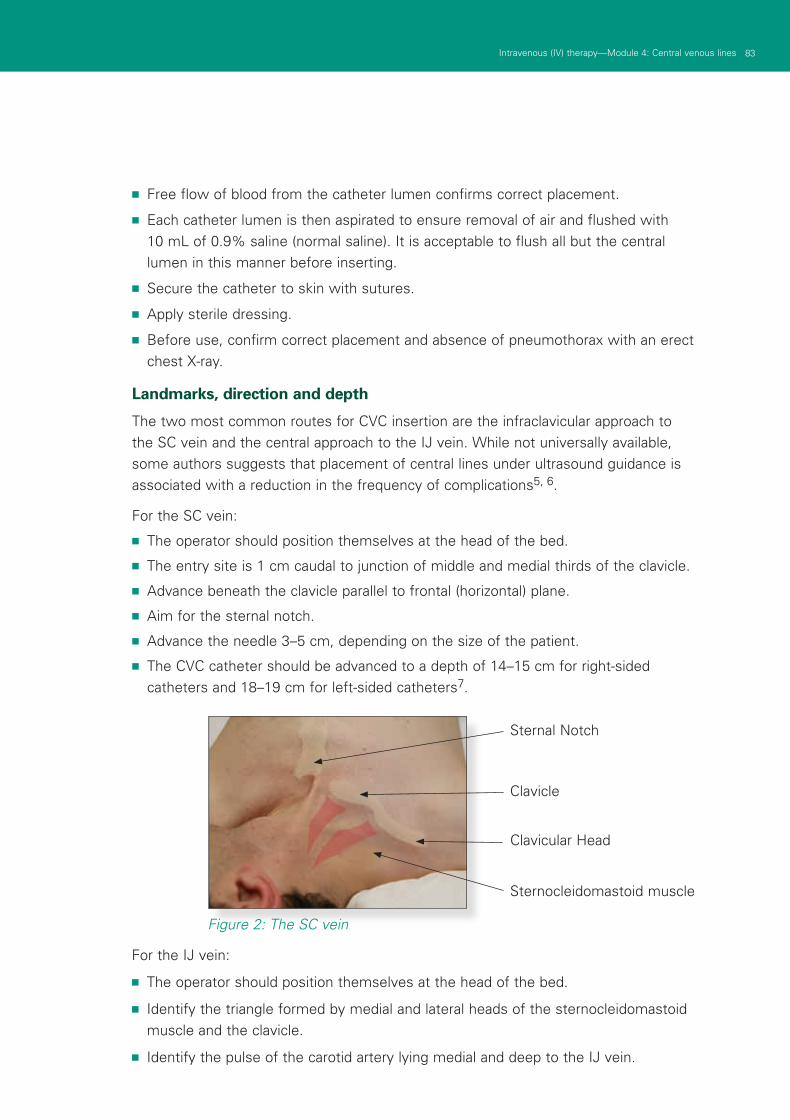
83Intravenous (IV) therapy—Module 4: Central venous lines
■ Free flow of blood from the catheter lumen confirms correct placement.
■ Each catheter lumen is then aspirated to ensure removal of air and flushed with 10 mL of 0.9% saline (normal saline). It is acceptable to flush all but the central lumen in this manner before inserting.
■ Secure the catheter to skin with sutures.
■ Apply sterile dressing.
■ Before use, confirm correct placement and absence of pneumothorax with an erect chest X-ray.
Landmarks, direction and depth
The two most common routes for CVC insertion are the infraclavicular approach to the SC vein and the central approach to the IJ vein. While not universally available, some authors suggests that placement of central lines under ultrasound guidance is associated with a reduction in the frequency of complications5, 6.
For the SC vein:
■ The operator should position themselves at the head of the bed.
■ The entry site is 1 cm caudal to junction of middle and medial thirds of the clavicle.
■ Advance beneath the clavicle parallel to frontal (horizontal) plane.
■ Aim for the sternal notch.
■ Advance the needle 3–5 cm, depending on the size of the patient.
■ The CVC catheter should be advanced to a depth of 14–15 cm for right-sided catheters and 18–19 cm for left-sided catheters7.
Figure 2: The SC vein
For the IJ vein:
■ The operator should position themselves at the head of the bed.
■ Identify the triangle formed by medial and lateral heads of the sternocleidomastoid muscle and the clavicle.
■ Identify the pulse of the carotid artery lying medial and deep to the IJ vein.
Sternal Notch
Clavicle
Clavicular Head
Sternocleidomastoid muscle

84 Intravenous (IV) therapy—Module 4: Central venous lines
■ The entry site is at the apex of the triangle, at an angle of 45o to the frontal (horizontal) plane.
■ Direct the needle caudally and laterally, towards the ipsilateral nipple.
■ Advance the needle 3–5 cm, depending on the size of the patient.
■ Advance the CVC catheter to a depth of 16–17 cm for right-sided catheters and 19–21 cm for left-sided catheters7.
For the femoral vein:
■ The patient should be supine, with legs slightly abducted.
■ The operator should position themselves at the side of the bed.
■ Identify the anterior superior iliac spine (ASIS) and pubic tubercle.
■ Insert the needle below the line joining these two points (inguinal ligament).
■ The femoral artery is identified by a palpating pulse.
■ The femoral vein lies parallel, 1 cm medial to the femoral artery.
■ The entry site over the femoral vein is 1–2 cm below the inguinal ligament and 1 cm medial to the femoral artery.
■ Direct the needle cephalad, at a 45o angle to the frontal (horizontal) plane.
■ Advance the needle to a depth of 3–5 cm, depending on the size of the patient.
Complications
Complications of CVC insertion are not uncommon1, 3. They include:
■ pneumothorax
■ haemothorax
■ arterial puncture
■ haematoma formation
■ infection
■ venous thrombosis
■ foreign body embolisation (guide wire)
■ arterio-venous fistula formation.
CVP monitoring
Individual hospitals may have site-specific preferences about equipment and protocols. Educators should take these preferences into account when facilitating this module. The general principles of CVP monitoring and pressure measurements are outlined below.
85Intravenous (IV) therapy—Module 4: Central venous lines
Transducer preparation
The following steps are a guide to preparing a transducer for CVP measurements. Individual hospital protocols may vary, and should be presented by facilitators during this module.
■ Attach a standard giving set to a 500 mL bag of 0.9% saline, and prime the line.
■ Place the saline bag within the pressure bag and inflate to 300 mmHg.
■ Attach the transducer to the primed line and flush.
■ Using an aseptic technique, aspirate the distal (brown) lumen of the CVC to remove air or clots.
■ Still using aseptic technique, connect a transducer to the distal lumen.
■ Flush the CVC lumen.
■ Connect the CVP transducer to the monitor.
■ Label the waveform ‘CVP’.
■ Locate the level of the patient’s right atrium (fourth intercostal space, mid-axillary line) and mark with ink marker.
■ Using a spirit level, position the transducer on a rack at the same height as the marker, or place it on the patient’s chest at that level.
CVP reading
CVP readings should be done in a standardised manner to ensure consistency in measuring and recording the CVP. The following method is suggested.
■ Elevate the patient’s head 30º.
■ Make sure the patient is settled—not coughing, straining or talking.
■ Pause any infusion running through the CVP monitoring lumen.
■ Ensure that the pressure bag is inflated to the appropriate level (300 mmHg).
■ Inspect the monitoring line for air bubbles, loose connections or blood, and remedy any irregularities by aspirating the line and tightening connections.
■ Turn the tap on the introducer so that it is off to the patient. Remove the cap on the injection site and open the system to atmospheric pressure (air).
■ Access the CVP menu of the monitor and zero the monitor and transducer to air. The monitor should display a CVP value of zero.
■ Replace the injection site cap and re-open the tap to the patient.
■ The monitor should now display the CVP waveform and a mean value for CVP.
■ CVP measurements should be obtained at end of expiration. CVP falls during normal inspiration.

86 Intravenous (IV) therapy—Module 4: Central venous lines
CVP interpretation
■ Normal CVP is 0–8 mmHg.
■ CVP > 8 mmHg suggests excess intravascular fluid.
■ CVP < 0 mmHg suggests insufficient intravascular fluid.
CVC care and troubleshooting
Once inserted, central venous lines should be observed for the occurrence of complications, including:
■ infection
■ migration in or out
■ blockage
■ disconnection.
Dressings should be changed regularly, according to individual hospital protocols. Transparent dressings provide for security of the CVC while allowing health professionals to observe the site of entry for bleeding, infection or migration. Routine antibiotics and routine replacement (for example, weekly change) is not shown to reduce the risk of infection2 and is not recommended. CVCs should be removed if they are obviously infected, or thought to be the focus of sepsis. Giving sets should be changed on a regular basis according to hospital protocols, (for example, every 72 hours routinely, immediately following blood transfusion, daily for TPN administration and so on).
Positive pressure flushing should be maintained to prevent blockage. The use of heparin compared to saline remains controversial, although the efficacy of heparin is unproven2. Follow individual hospital protocols. Flush catheters after each access if used intermittently. Maintain positive pressure while removing the syringe, in order to prevent a reflux of blood into the catheter.
Catheter blockage is evidenced by difficulty in infusing fluid or aspirating blood. Forcible introduction of fluid down the catheter lumen may damage the catheter and cause embolisation of foreign material. Thrombosed catheters may potentially be unblocked with the use of heparin and/or a fibrinolytic agent (for example, urokinase, alteplase and so on). Individual hospital protocols should exist for the use of these agents, including indications and doses.
Pain around the insertion site during infusion should prompt the cessation of infusion and medical review to ascertain the location of the catheter. Leakage around the insertion site suggests loose connections or catheter damage.
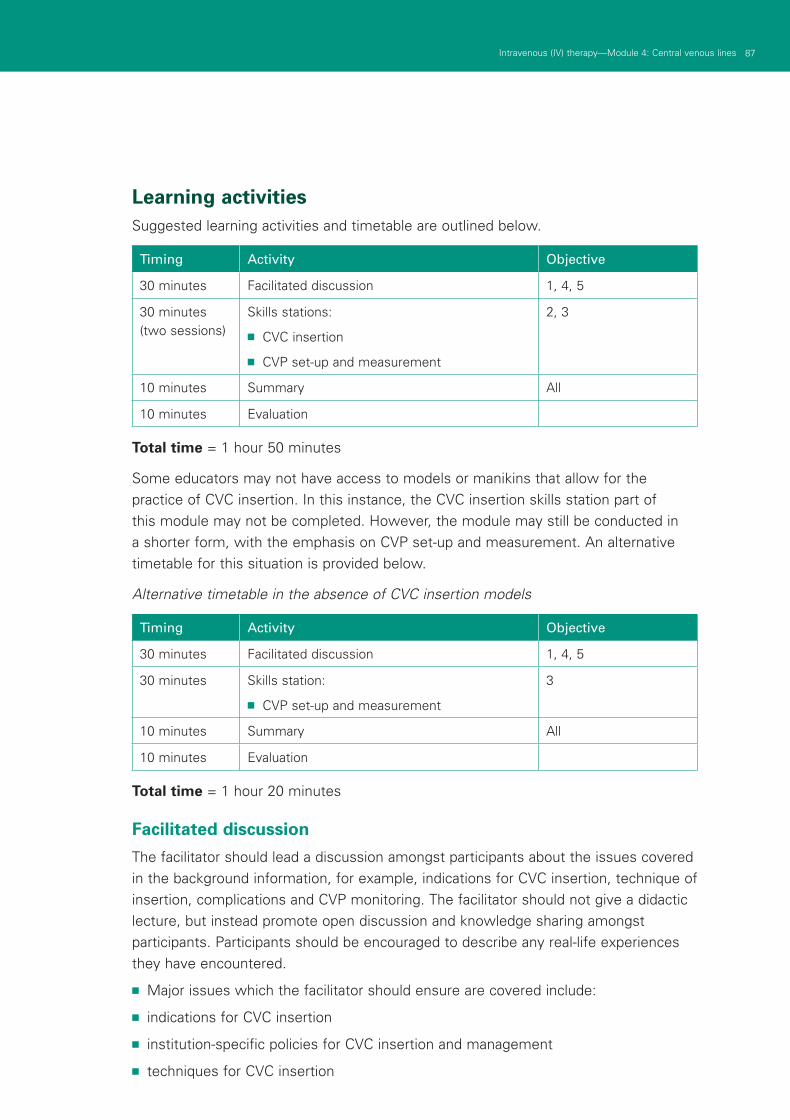
87Intravenous (IV) therapy—Module 4: Central venous lines
Learning activitiesSuggested learning activities and timetable are outlined below.
Timing Activity Objective
30 minutes Facilitated discussion 1, 4, 5
30 minutes (two sessions)
Skills stations:
■ CVC insertion
■ CVP set-up and measurement
2, 3
10 minutes Summary All
10 minutes Evaluation
Total time = 1 hour 50 minutes
Some educators may not have access to models or manikins that allow for the practice of CVC insertion. In this instance, the CVC insertion skills station part of this module may not be completed. However, the module may still be conducted in a shorter form, with the emphasis on CVP set-up and measurement. An alternative timetable for this situation is provided below.
Alternative timetable in the absence of CVC insertion models
Timing Activity Objective
30 minutes Facilitated discussion 1, 4, 5
30 minutes Skills station:
■ CVP set-up and measurement
3
10 minutes Summary All
10 minutes Evaluation
Total time = 1 hour 20 minutes
Facilitated discussion
The facilitator should lead a discussion amongst participants about the issues covered in the background information, for example, indications for CVC insertion, technique of insertion, complications and CVP monitoring. The facilitator should not give a didactic lecture, but instead promote open discussion and knowledge sharing amongst participants. Participants should be encouraged to describe any real-life experiences they have encountered.
■ Major issues which the facilitator should ensure are covered include:
■ indications for CVC insertion
■ institution-specific policies for CVC insertion and management
■ techniques for CVC insertion
88 Intravenous (IV) therapy—Module 4: Central venous lines
■ complications of CVC insertion
■ CVP measurement and monitoring.
PowerPoint slides are available for the facilitator to use to summarise these main points at the end of the discussion, or as triggers if participants have not identified the major issues.
Skills stations
The skills stations allow participants to practise insertion of, or to assist in the insertion of CVCs on appropriate models. They also allow participants to practise setting up CVP measurement lines and to practise CVP measurements while receiving feedback in a structured format from peers and/or facilitators.
Some educators may not have access to models or manikins that allow for the practice of CVC insertion. In this instance, the CVC insertion skills station part of this module may not be completed, and the alternative timetable provided for this situation should be followed.
The program and resources required assume two facilitators for every six participants, a ratio of 1:3.
CVC insertion station
One facilitator should have access to a manikin or model suitable for teaching CVC insertion. Participants should be given the opportunity to practise inserting IJ and SC CVC lines in addition to femoral lines. Participants should be guided through the skill using Peyton’s four-step model8. Feedback should be provided at the completion of the skill. Each participant should observe the facilitator initially and then spend 7–8 minutes on this task while observing the performance of two other participants.
CVP measurement station
The other facilitator should have all the necessary equipment to set up for CVP monitoring. Participants should be guided through the process of setting up for and measuring CVP using Peyton’s8 four-step method, as for the CVC insertion station. Each participant should observe the facilitator initially and then spend 7–8 minutes on this task while observing the performance of two other participants. This station might finish ahead of the CVC insertion station, in which case, facilitators should use this opportunity to discuss CVC positioning (using the X-ray provided), CVC care, complications and troubleshooting with their participants. Several case studies are provided to stimulate this discussion if needed.
Higher fidelity manikins may be employed to demonstrate CVP waveforms, but these manikins are not widely available. In that instance, this module provides some additional resource material (still shots of CVP monitor waveforms and DVD footage of CVP monitor waveforms) which can be presented to the participants for their interpretation.
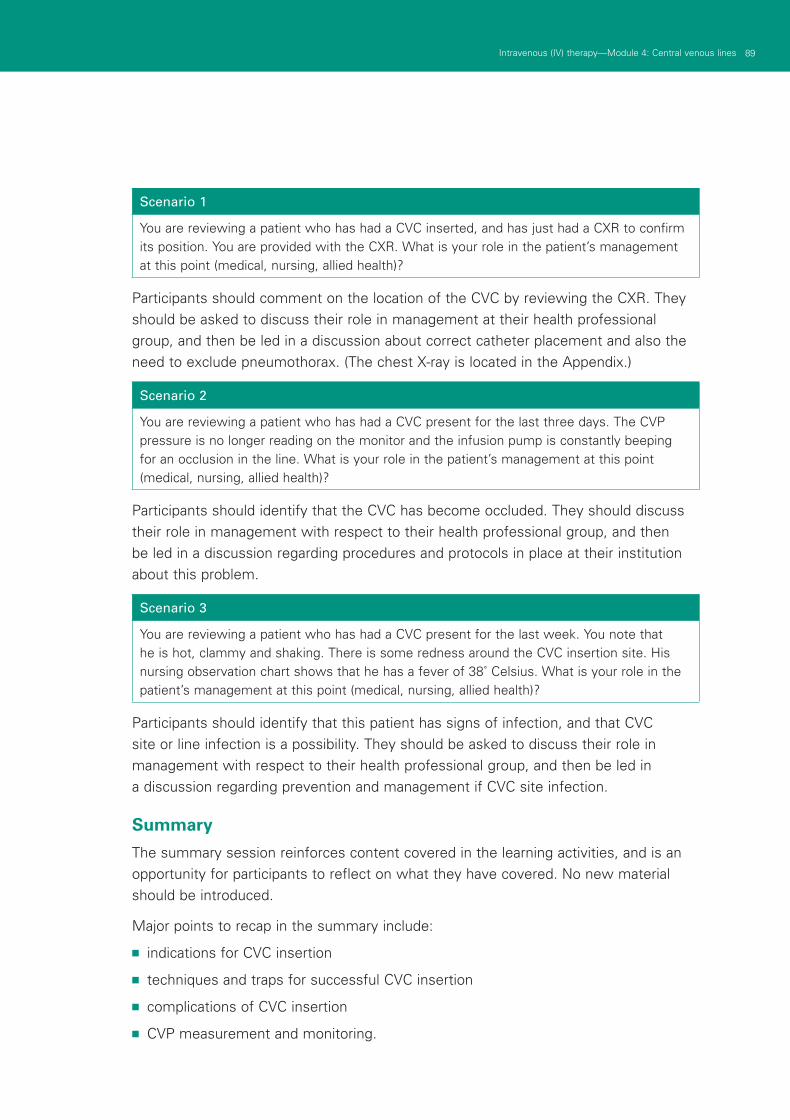
89Intravenous (IV) therapy—Module 4: Central venous lines
Scenario 1
You are reviewing a patient who has had a CVC inserted, and has just had a CXR to confirm its position. You are provided with the CXR. What is your role in the patient’s management at this point (medical, nursing, allied health)?
Participants should comment on the location of the CVC by reviewing the CXR. They should be asked to discuss their role in management at their health professional group, and then be led in a discussion about correct catheter placement and also the need to exclude pneumothorax. (The chest X-ray is located in the Appendix.)
Scenario 2
You are reviewing a patient who has had a CVC present for the last three days. The CVP pressure is no longer reading on the monitor and the infusion pump is constantly beeping for an occlusion in the line. What is your role in the patient’s management at this point (medical, nursing, allied health)?
Participants should identify that the CVC has become occluded. They should discuss their role in management with respect to their health professional group, and then be led in a discussion regarding procedures and protocols in place at their institution about this problem.
Scenario 3
You are reviewing a patient who has had a CVC present for the last week. You note that he is hot, clammy and shaking. There is some redness around the CVC insertion site. His nursing observation chart shows that he has a fever of 38˚ Celsius. What is your role in the patient’s management at this point (medical, nursing, allied health)?
Participants should identify that this patient has signs of infection, and that CVC site or line infection is a possibility. They should be asked to discuss their role in management with respect to their health professional group, and then be led in a discussion regarding prevention and management if CVC site infection.
Summary
The summary session reinforces content covered in the learning activities, and is an opportunity for participants to reflect on what they have covered. No new material should be introduced.
Major points to recap in the summary include:
■ indications for CVC insertion
■ techniques and traps for successful CVC insertion
■ complications of CVC insertion
■ CVP measurement and monitoring.
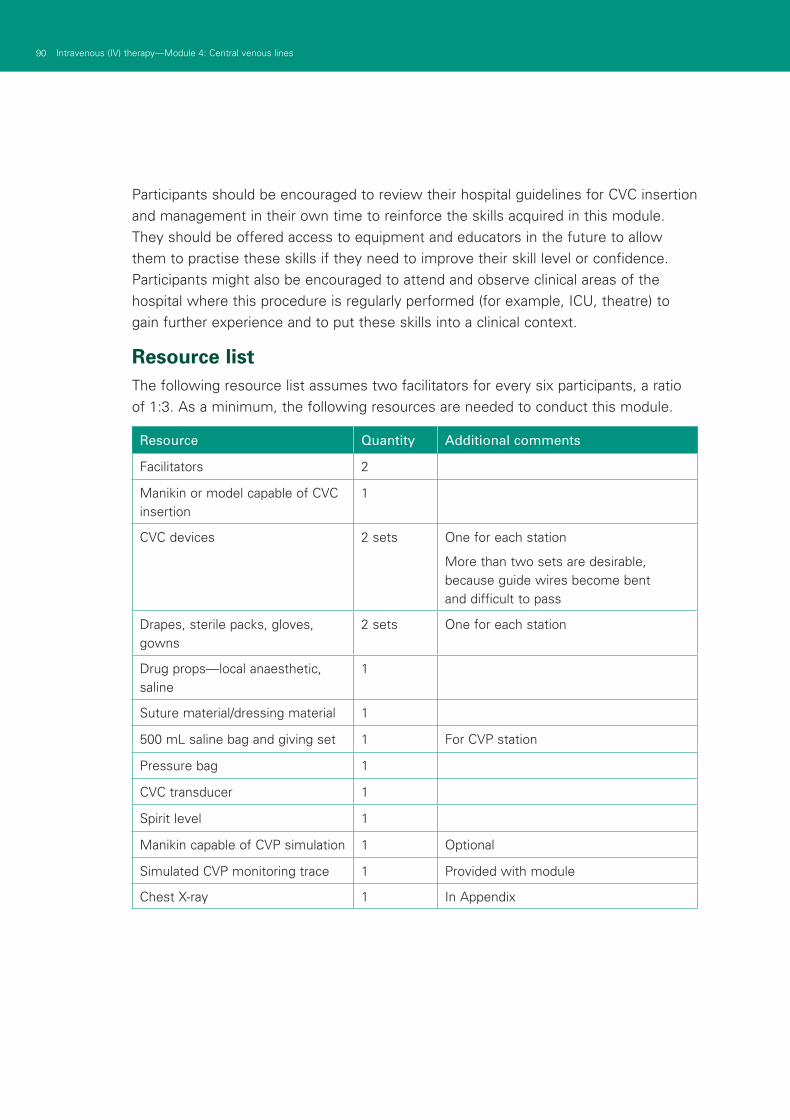
90 Intravenous (IV) therapy—Module 4: Central venous lines
Participants should be encouraged to review their hospital guidelines for CVC insertion and management in their own time to reinforce the skills acquired in this module. They should be offered access to equipment and educators in the future to allow them to practise these skills if they need to improve their skill level or confidence. Participants might also be encouraged to attend and observe clinical areas of the hospital where this procedure is regularly performed (for example, ICU, theatre) to gain further experience and to put these skills into a clinical context.
Resource listThe following resource list assumes two facilitators for every six participants, a ratio of 1:3. As a minimum, the following resources are needed to conduct this module.
Resource Quantity Additional comments
Facilitators 2
Manikin or model capable of CVC insertion
1
CVC devices 2 sets One for each station
More than two sets are desirable, because guide wires become bent and difficult to pass
Drapes, sterile packs, gloves, gowns
2 sets One for each station
Drug props—local anaesthetic, saline
1
Suture material/dressing material 1
500 mL saline bag and giving set 1 For CVP station
Pressure bag 1
CVC transducer 1
Spirit level 1
Manikin capable of CVP simulation 1 Optional
Simulated CVP monitoring trace 1 Provided with module
Chest X-ray 1 In Appendix
91Intravenous (IV) therapy—Module 4: Central venous lines
EvaluationA formal evaluation has been specifically developed for this module. It incorporates the objectives of the module and the perceptions of the participants about whether they have increased their understanding by working through the module. It is highly recommended that this formal evaluation be copied and completed by all participants at the completion of the module.
A range of informal evaluation tools may also be used in conjunction with this evaluation throughout the module, including those available in the Department of Human Services’ Clinical Skills Facilitators Manual from the basic course conducted in 2007.
References1. Taylor R, Palagiri A 2007 Central venous catheterization. Crit Care Med 35:
1390–1396
2. Bishop L, Dougherty L, Bodenham A et al. 2007 Guidelines on the insertion and management of central venous access devices in adults. Int Jnl Lab Hem 29: 261–278
3. Ruesch S, Walder B, Tramer M 2002 Complications of central venous catheters: Internal jugular versus subclavian access—A systematic review. Crit Care Med 30: 454–460
4. Hamilton H, Foxcroft D 2007 Central venous access sites for the prevention of venous thrombosis, stenosis and infection in patients requiring long-term intravenous therapy. Cochrane Database of Systematic Reviews, Issue 3. Art. No.: CD004084.DOI:10.1002/14651858.CD004084.pub2
5. Calvert N, Hind D, McWillams R et al. 2002 The effectiveness and cost-effectiveness of ultrasound locating devices for central venous access. National Institute for Clinical Excellence: www.nice.org.uk/nicemedia/pdf/ULD_assessment_report.pdf (accessed April 2008)
6. Randolph A, Cook D, Bonzales C et al. 1996 Ultrasound guidance for placement of central venous catheters: A meta-analysis of the literature. Crit Care Med 24: 2053–2058
7. Czepizak C, O’Callaghan J, Venus B 1995 Evaluation of formulas for optimal positioning of central venous catheters. Chest 107: 1662–1664
8. Peyton J. 1998 Teaching and Learning in Medical Practice. Manticore Europe Ltd, Great Britain
92 Intravenous (IV) therapy—Module 4: Central venous lines
ResourcesFacilitator feedback form
The following form should be used to assist you in giving feedback after each participant has practised their CVC skills at the skills station.
Feedback using the Pendleton model
Pendleton’s model of feedback assists learners to maximize their potential at different stages of training, raise their awareness of strengths and areas for improvement, and identify actions to be taken to improve performance. Pendleton’s rules are structured in such a way that the learner identifies the positives first, in order to create a safe environment. This is followed by the facilitator or group reinforcing these positives and discussing skills to achieve them. Different techniques are then suggested. The advantage of this method is that the learner’s strengths are discussed first. Avoiding a discussion of weaknesses right at the beginning prevents defensiveness and allows reflective behaviour in the learner.
Below is a series of questions to assist you in this technique:
1. Ask the learner how they feel.
2. Ask the learner what went well and why (this can be combined with question 1 and 3).
3. Tell the learner what went well and why.
4. Ask the learner what could have been done better and why.
5. Tell the learner what could have been done better and why.
6. Summarise the learner’s strengths and identify up to three things to concentrate on.
Note: This form does not need to be given to the participant — it is a guide for you, the group facilitator.

93Intravenous (IV) therapy—Module 4: Central venous lines
Module 4: Central venous linesThank you for participating in this module. As part of our commitment to quality improvement the following questionnaire will be used to plan future implementation of this module. We appreciate your time completing this evaluation.
1. Overall
How would you rate this module?
poor fair good very good outstanding
2. Learning objectives
Please consider whether this module was successful in meeting the following learning objectives:
IV therapy
Learning objectives of Module 4: Central venous lines S
tro
ng
ly
dis
agre
e
Dis
agre
e
Slig
htl
y ag
ree
Ag
ree
Str
on
gly
ag
ree
Reviewed the indications for CVC and femoral line insertion
Practised inserting or assisting the insertion of IJ, SC and femoral lines on a simulated training model
Practised using the CVC to measure CVP on a simulated patient
Reviewed their own hospital policies related to the ongoing care of CVCs
Discussed strategies to identify and manage important complications of CVC insertion
3. Important learning outcomes
What are the three most important things you have learned from this module?
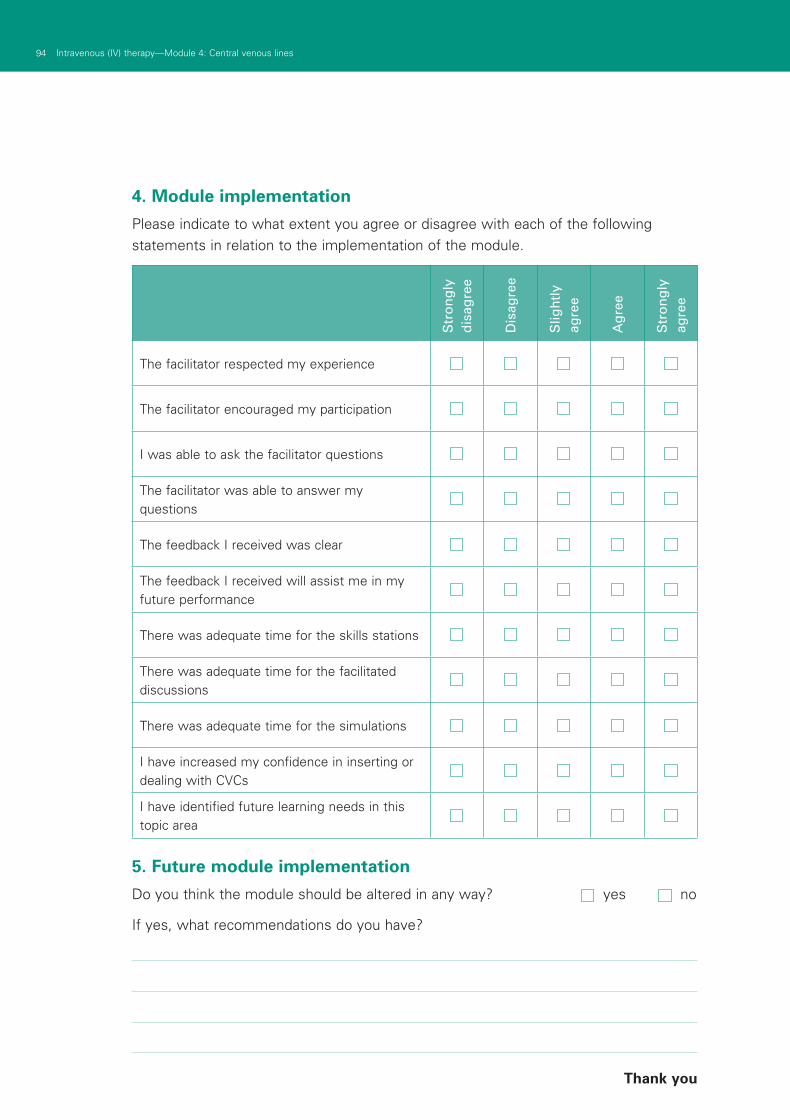
94 Intravenous (IV) therapy—Module 4: Central venous lines
4. Module implementation
Please indicate to what extent you agree or disagree with each of the following statements in relation to the implementation of the module.
Str
on
gly
d
isag
ree
Dis
agre
e
Slig
htl
y ag
ree
Ag
ree
Str
on
gly
ag
ree
The facilitator respected my experience
The facilitator encouraged my participation
I was able to ask the facilitator questions
The facilitator was able to answer my questions
The feedback I received was clear
The feedback I received will assist me in my future performance
There was adequate time for the skills stations
There was adequate time for the facilitated discussions
There was adequate time for the simulations
I have increased my confidence in inserting or dealing with CVCs
I have identified future learning needs in this topic area
5. Future module implementation
Do you think the module should be altered in any way? yes no
If yes, what recommendations do you have?
Thank you
95Intravenous (IV) therapy—Module 4: Central venous lines
PowerPoint presentation
1. 2.
3. 4.

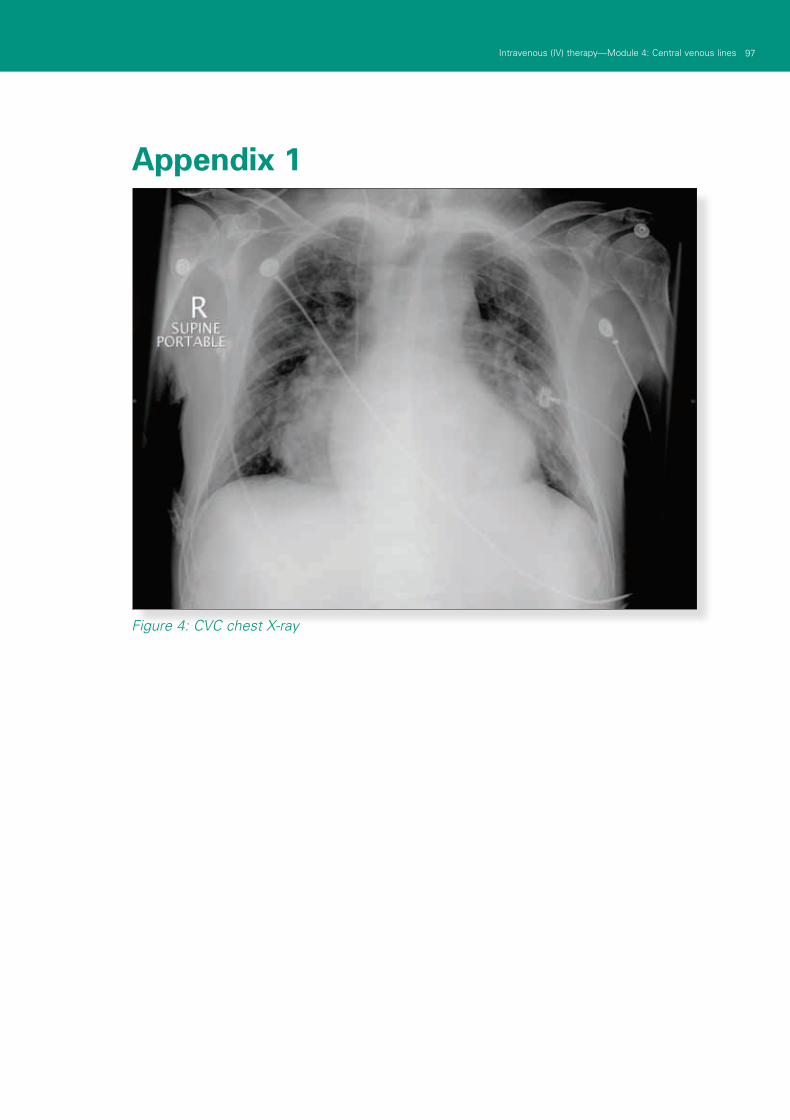
97Intravenous (IV) therapy—Module 4: Central venous lines
Appendix 1
Figure 4: CVC chest X-ray

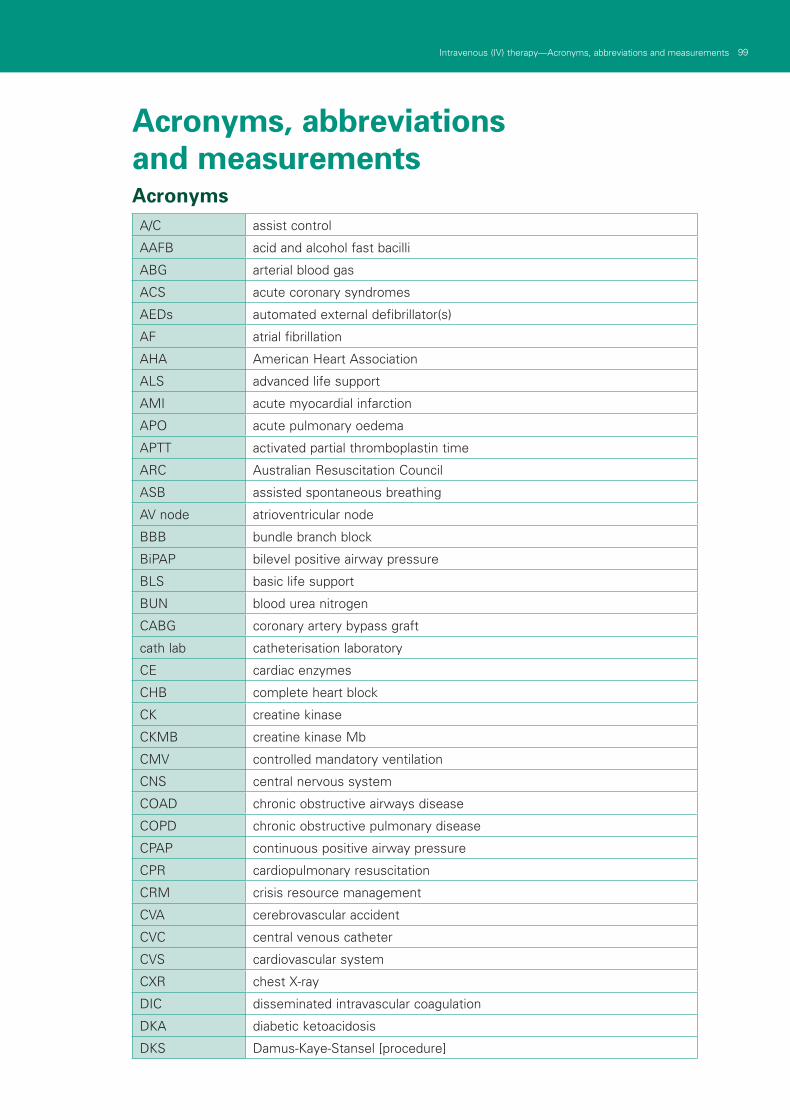
PB Intravenous (IV) therapy—Acronyms, abbreviations and measurements 99Intravenous (IV) therapy—Acronyms, abbreviations and measurements
Acronyms, abbreviations and measurements Acronyms
A/C assist control
AAFB acid and alcohol fast bacilli
ABG arterial blood gas
ACS acute coronary syndromes
AEDs automated external defibrillator(s)
AF atrial fibrillation
AHA American Heart Association
ALS advanced life support
AMI acute myocardial infarction
APO acute pulmonary oedema
APTT activated partial thromboplastin time
ARC Australian Resuscitation Council
ASB assisted spontaneous breathing
AV node atrioventricular node
BBB bundle branch block
BiPAP bilevel positive airway pressure
BLS basic life support
BUN blood urea nitrogen
CABG coronary artery bypass graft
cath lab catheterisation laboratory
CE cardiac enzymes
CHB complete heart block
CK creatine kinase
CKMB creatine kinase Mb
CMV controlled mandatory ventilation
CNS central nervous system
COAD chronic obstructive airways disease
COPD chronic obstructive pulmonary disease
CPAP continuous positive airway pressure
CPR cardiopulmonary resuscitation
CRM crisis resource management
CVA cerebrovascular accident
CVC central venous catheter
CVS cardiovascular system
CXR chest X-ray
DIC disseminated intravascular coagulation
DKA diabetic ketoacidosis
DKS Damus-Kaye-Stansel [procedure]
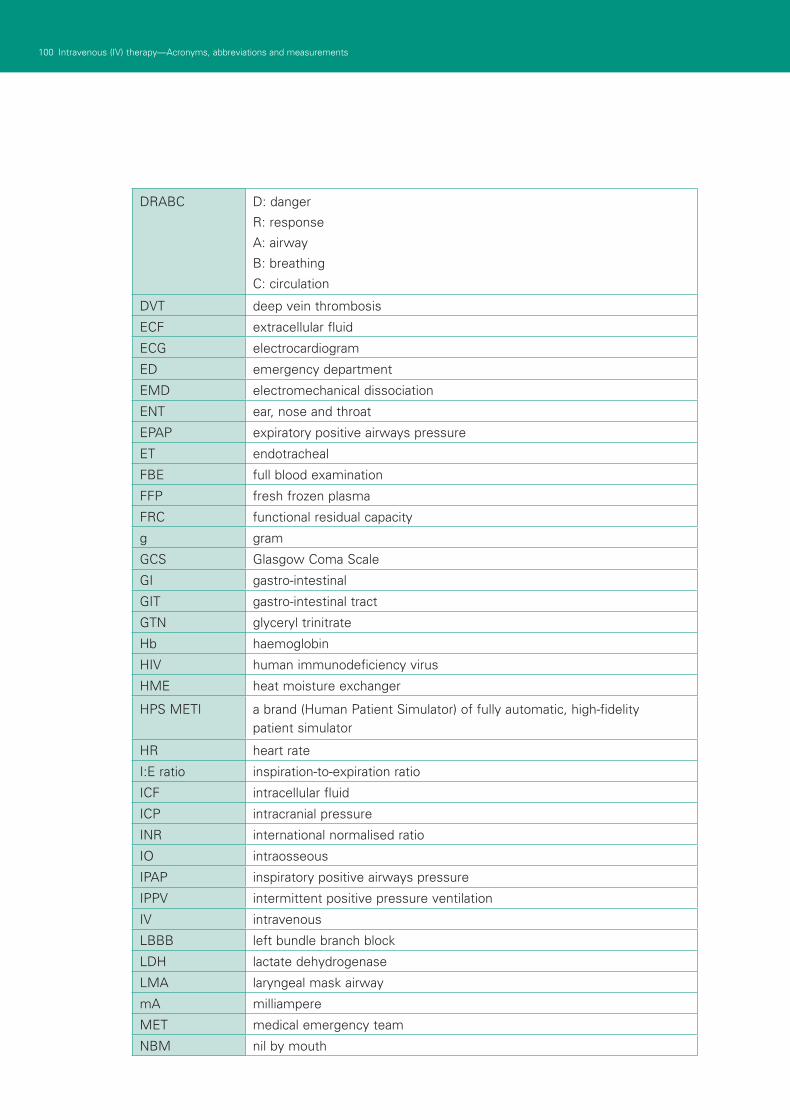
100 Intravenous (IV) therapy—Acronyms, abbreviations and measurements 101Intravenous (IV) therapy—Acronyms, abbreviations and measurements100 Intravenous (IV) therapy—Acronyms, abbreviations and measurements 101Intravenous (IV) therapy—Acronyms, abbreviations and measurements
DRABC D: danger
R: response
A: airway
B: breathing
C: circulation
DVT deep vein thrombosis
ECF extracellular fluid
ECG electrocardiogram
ED emergency department
EMD electromechanical dissociation
ENT ear, nose and throat
EPAP expiratory positive airways pressure
ET endotracheal
FBE full blood examination
FFP fresh frozen plasma
FRC functional residual capacity
g gram
GCS Glasgow Coma Scale
GI gastro-intestinal
GIT gastro-intestinal tract
GTN glyceryl trinitrate
Hb haemoglobin
HIV human immunodeficiency virus
HME heat moisture exchanger
HPS METI a brand (Human Patient Simulator) of fully automatic, high-fidelity patient simulator
HR heart rate
I:E ratio inspiration-to-expiration ratio
ICF intracellular fluid
ICP intracranial pressure
INR international normalised ratio
IO intraosseous
IPAP inspiratory positive airways pressure
IPPV intermittent positive pressure ventilation
IV intravenous
LBBB left bundle branch block
LDH lactate dehydrogenase
LMA laryngeal mask airway
mA milliampere
MET medical emergency team
NBM nil by mouth
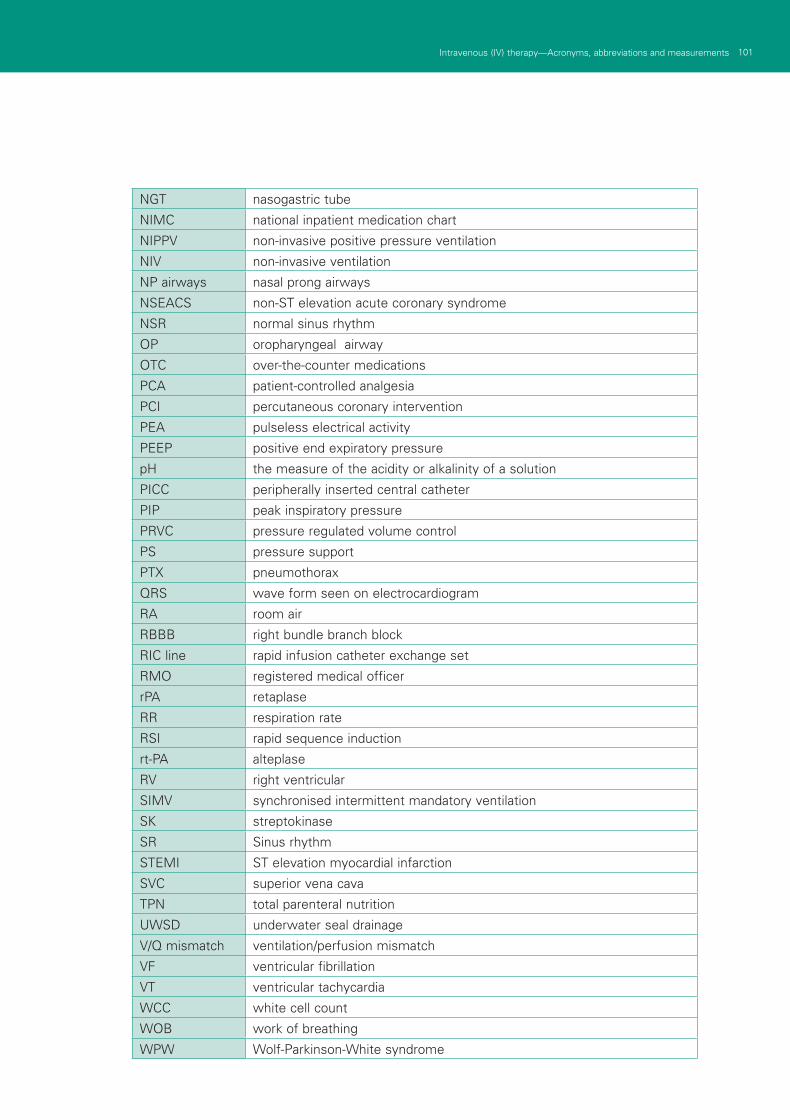
100 Intravenous (IV) therapy—Acronyms, abbreviations and measurements 101Intravenous (IV) therapy—Acronyms, abbreviations and measurements100 Intravenous (IV) therapy—Acronyms, abbreviations and measurements 101Intravenous (IV) therapy—Acronyms, abbreviations and measurements
NGT nasogastric tube
NIMC national inpatient medication chart
NIPPV non-invasive positive pressure ventilation
NIV non-invasive ventilation
NP airways nasal prong airways
NSEACS non-ST elevation acute coronary syndrome
NSR normal sinus rhythm
OP oropharyngeal airway
OTC over-the-counter medications
PCA patient-controlled analgesia
PCI percutaneous coronary intervention
PEA pulseless electrical activity
PEEP positive end expiratory pressure
pH the measure of the acidity or alkalinity of a solution
PICC peripherally inserted central catheter
PIP peak inspiratory pressure
PRVC pressure regulated volume control
PS pressure support
PTX pneumothorax
QRS wave form seen on electrocardiogram
RA room air
RBBB right bundle branch block
RIC line rapid infusion catheter exchange set
RMO registered medical officer
rPA retaplase
RR respiration rate
RSI rapid sequence induction
rt-PA alteplase
RV right ventricular
SIMV synchronised intermittent mandatory ventilation
SK streptokinase
SR Sinus rhythm
STEMI ST elevation myocardial infarction
SVC superior vena cava
TPN total parenteral nutrition
UWSD underwater seal drainage
V/Q mismatch ventilation/perfusion mismatch
VF ventricular fibrillation
VT ventricular tachycardia
WCC white cell count
WOB work of breathing
WPW Wolf-Parkinson-White syndrome

102 Intravenous (IV) therapy—Acronyms, abbreviations and measurements PBIntravenous (IV) therapy—Acronyms, abbreviations and measurements
Chemical formulaeCaCl2 calcium chloride
CO2 carbon dioxide
ETCO2 end-tidal carbon dioxide
FiO2 fraction of inspired oxygen
H2CO3 bicarbonate
MgCl2 magnesium chloride
MgSO4 magnesium sulphate
PaCO2 partial pressure of carbon dioxide in arterial blood
PaO2 partial pressure of oxygen in arterial blood
SpO2 percentage of oxygen saturation in blood
SaO2 saturation of oxygen in arterial blood flow
Units of Measurement abbreviation unit
mmHg millimetres of mercury
L litre
mL millilitre
μg microgram — one-millionth (10-6) of a gram
mmol millimole
J joule
mg milligram
cm centimetre
m metre

Clinical Skills in Hospitals ProjectIntravenous (IV) therapyModule 1: IV cannulation
Module 2: IV fluids
Module 3: Central venous access devices
Module 4: Central venous lines
Module 1: Intercostal catheters (ICCs)Module 2: PleurocathsModule 3: Underwater seal drainsModule 4: Management scenarios


![CEP10013 - Buyers' guide: Intravenous fluid …1] iv... · Intravenous (IV) fluid warming is a method of raising the temperature of fluids ... intravenous fluids (500 ml or more)](https://img.pdfslide.net/doc/110x75/5b92c11509d3f280378be82a/cep10013-buyers-guide-intravenous-fluid-1-iv-intravenous-iv-fluid.jpg)