Embed Size (px)
Citation preview
1
COMPSCI 345 | SOFTENG 350 Moiz
Safurah
Introduction to HTML (and HTML5)What you’ll learn to do:
Task 1:Create a new HTML document (webpage) Task 2: Add elements for body content structure Task 3: Add displayed content:
a) paragraph and headings b) text formatting c) list d) link e) image f) table g) simple form
---------------------------------By the end of this tutorial, you should have created simple and semantic web-pages with HTML5
10 min
5 min5 min
35 min5 min5 min5 min5 min5 min5 min5 min
2
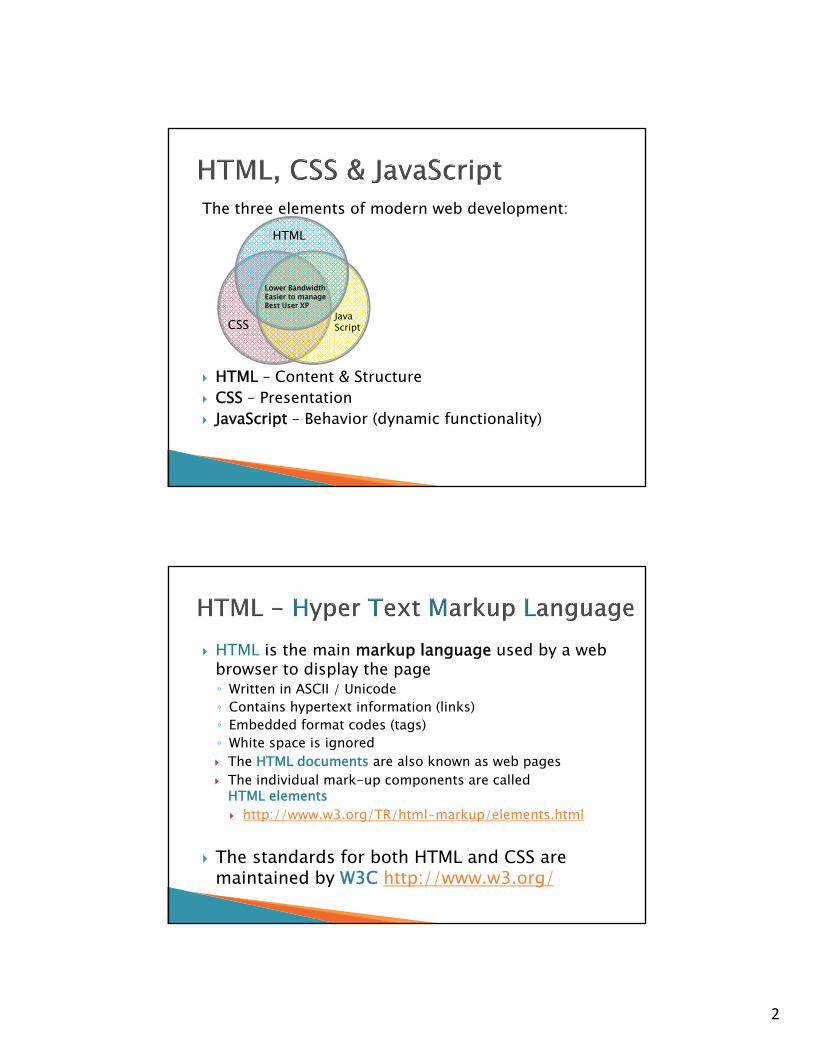
The three elements of modern web development:
HTML – Content & Structure CSS – Presentation JavaScript – Behavior (dynamic functionality)
HTML
JavaScriptCSS
Lower BandwidthEasier to manageBest User XP
HTML is the main markup language used by a web browser to display the page◦ Written in ASCII / Unicode◦ Contains hypertext information (links)◦ Embedded format codes (tags)◦ White space is ignored The HTML documents are also known as web pages The individual mark-up components are called
HTML elements http://www.w3.org/TR/html-markup/elements.html
The standards for both HTML and CSS are maintained by W3C http://www.w3.org/
3
Main difference is in the degree of support◦ No support: NotePad◦ Syntax highlighting: Notepad++
(http://notepad-plus-plus.org/)◦ Auto complete: Free HTML Editor
(http://www.coffeecup.com/free-editor/)◦ Comprehensive: Adobe Dreamweaver
http://www.adobe.com/cfusion/tdrc/index.cfm?product=dreamweaver
4
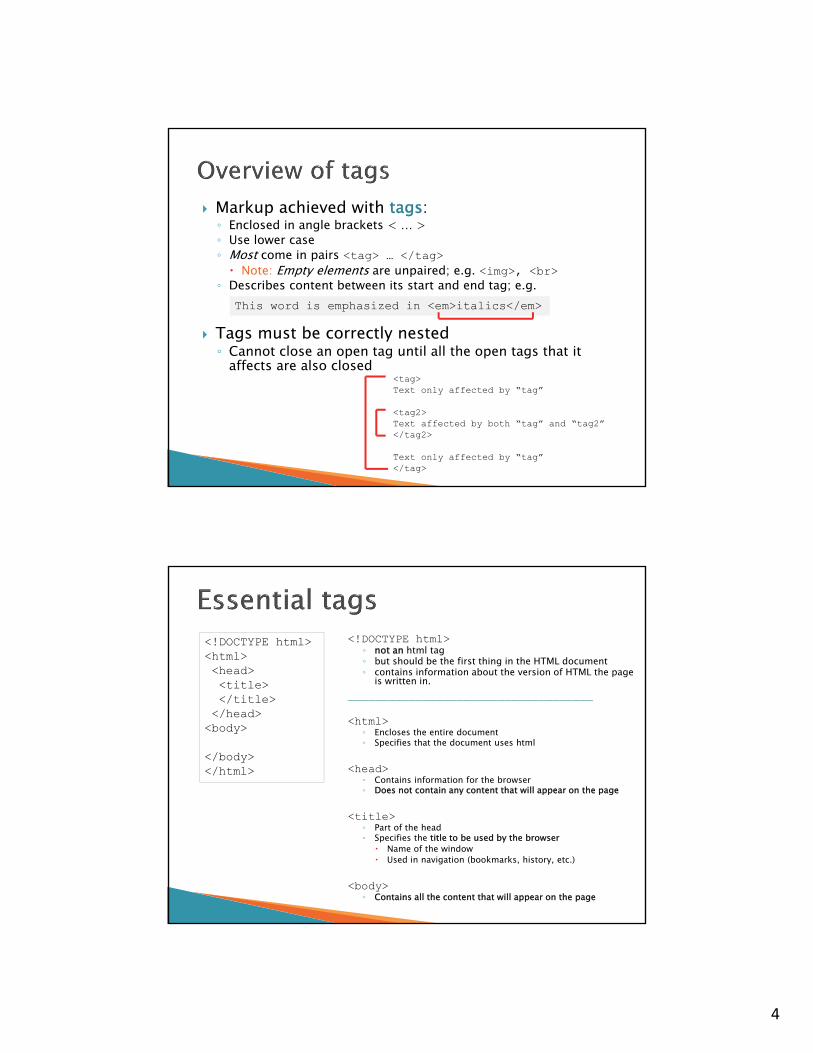
Markup achieved with tags: ◦ Enclosed in angle brackets < … >◦ Use lower case◦ Most come in pairs <tag> … </tag> Note: Empty elements are unpaired; e.g. <img>, <br>
◦ Describes content between its start and end tag; e.g.
Tags must be correctly nested◦ Cannot close an open tag until all the open tags that it
affects are also closed
This word is emphasized in <em>italics</em>
<tag>Text only affected by “tag”
<tag2>Text affected by both “tag” and “tag2”</tag2>
Text only affected by “tag”</tag>
<!DOCTYPE html>◦ not an html tag◦ but should be the first thing in the HTML document ◦ contains information about the version of HTML the page
is written in.____________________________________
<html>◦ Encloses the entire document◦ Specifies that the document uses html
<head>◦ Contains information for the browser◦ Does not contain any content that will appear on the page
<title>◦ Part of the head◦ Specifies the title to be used by the browser
Name of the window Used in navigation (bookmarks, history, etc.)
<body>◦ Contains all the content that will appear on the page
<!DOCTYPE html><html><head><title></title></head><body>
</body></html>
5
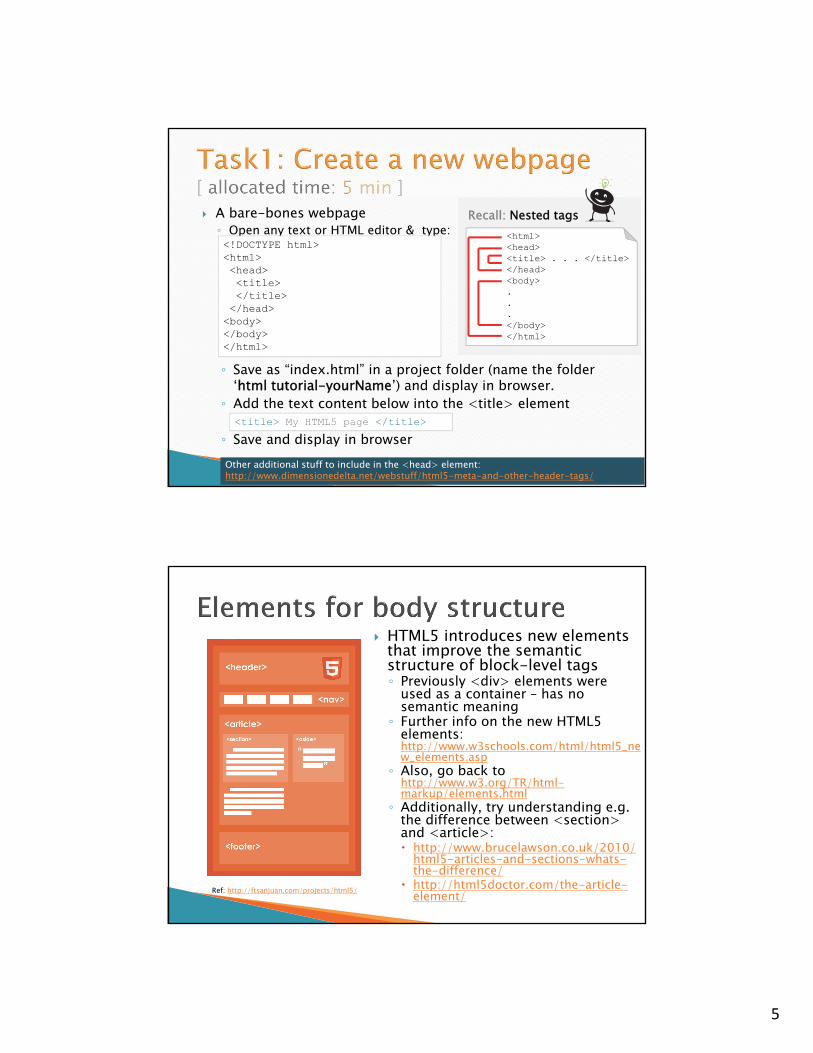
A bare-bones webpage ◦ Open any text or HTML editor & type:<!DOCTYPE html><html><head><title></title>
</head><body></body></html>
<html><head><title> . . . </title></head><body>...</body></html>
Recall: Nested tags
◦ Save as “index.html” in a project folder (name the folder ‘html tutorial-yourName’) and display in browser.
◦ Add the text content below into the <title> element
◦ Save and display in browser<title> My HTML5 page </title>
Other additional stuff to include in the <head> element:http://www.dimensionedelta.net/webstuff/html5-meta-and-other-header-tags/
HTML5 introduces new elements that improve the semantic structure of block-level tags◦ Previously <div> elements were
used as a container – has no semantic meaning
◦ Further info on the new HTML5 elements: http://www.w3schools.com/html/html5_new_elements.asp
◦ Also, go back to http://www.w3.org/TR/html-markup/elements.html
◦ Additionally, try understanding e.g. the difference between <section> and <article>: http://www.brucelawson.co.uk/2010/
html5-articles-and-sections-whats-the-difference/
http://html5doctor.com/the-article-element/Ref: http://ftsanjuan.com/projects/html5/
6
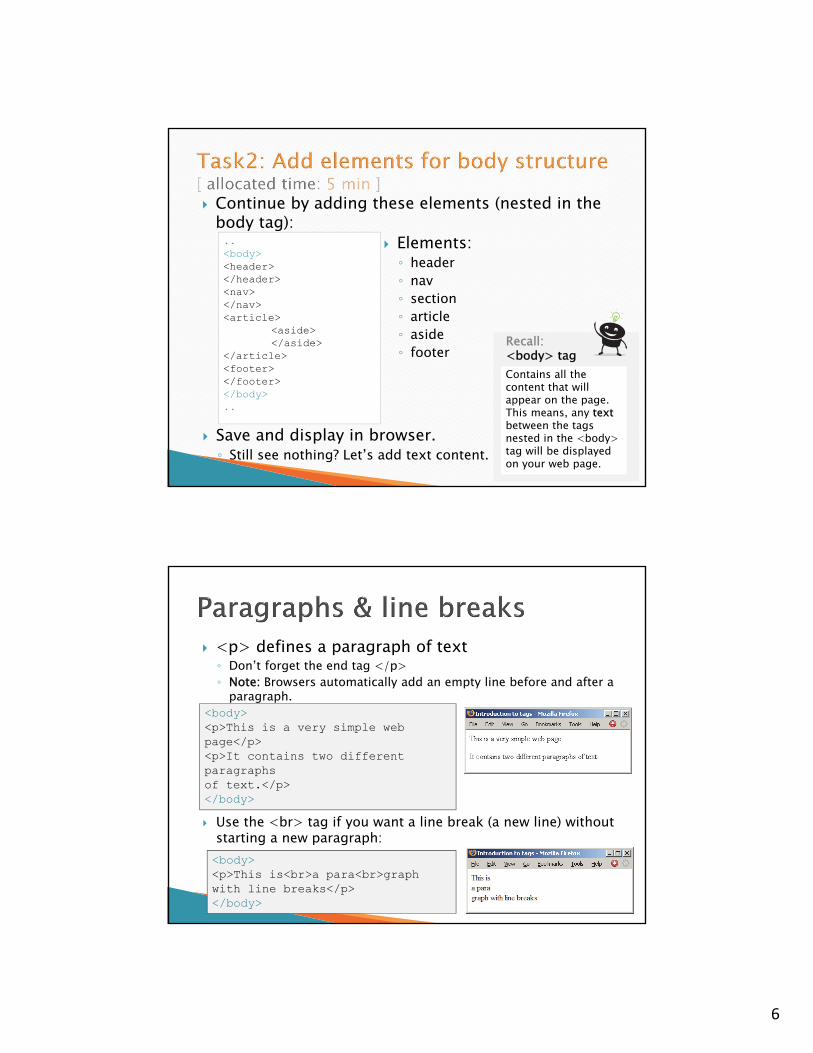
Continue by adding these elements (nested in the body tag):..<body><header> </header><nav> </nav><article>
<aside> </aside>
</article><footer> </footer></body>..
Elements: ◦ header◦ nav◦ section◦ article◦ aside◦ footer
Save and display in browser.◦ Still see nothing? Let’s add text content.
Recall: <body> tagContains all the content that will appear on the page. This means, any textbetween the tags nested in the <body> tag will be displayed on your web page.
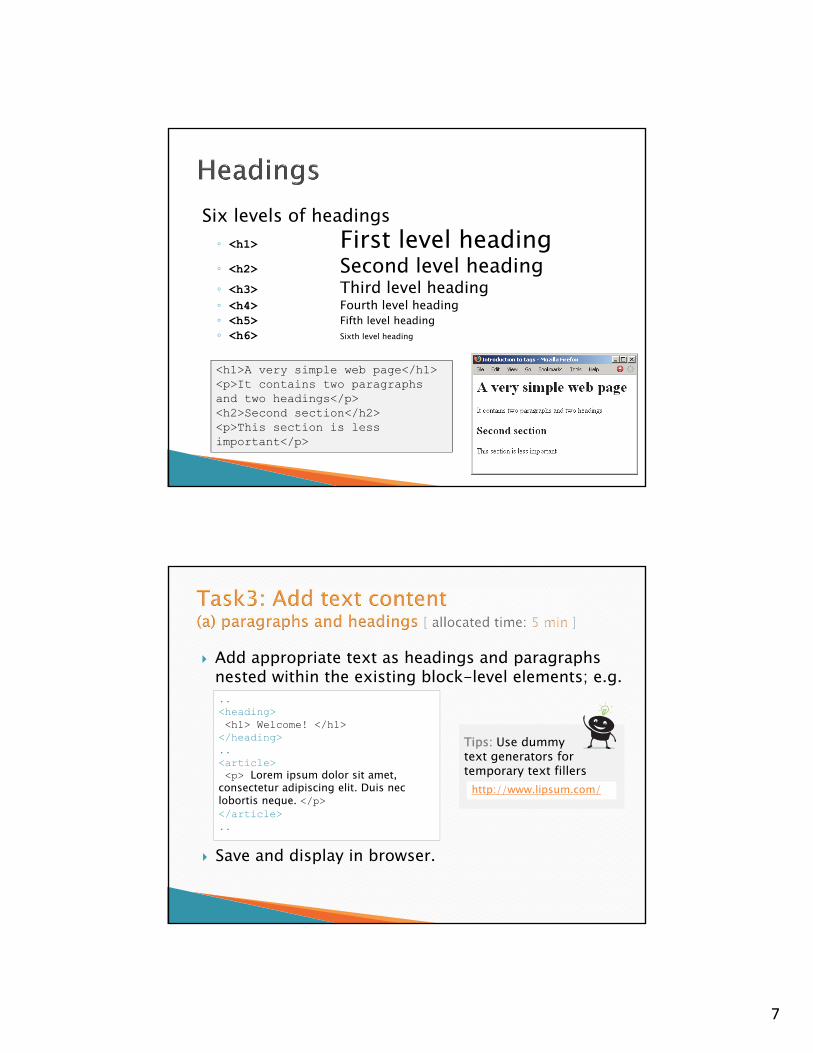
<p> defines a paragraph of text◦ Don’t forget the end tag </p>◦ Note: Browsers automatically add an empty line before and after a
paragraph.<body><p>This is a very simple web page</p><p>It contains two different paragraphsof text.</p></body>
Use the <br> tag if you want a line break (a new line) without starting a new paragraph:<body><p>This is<br>a para<br>graph with line breaks</p></body>
7
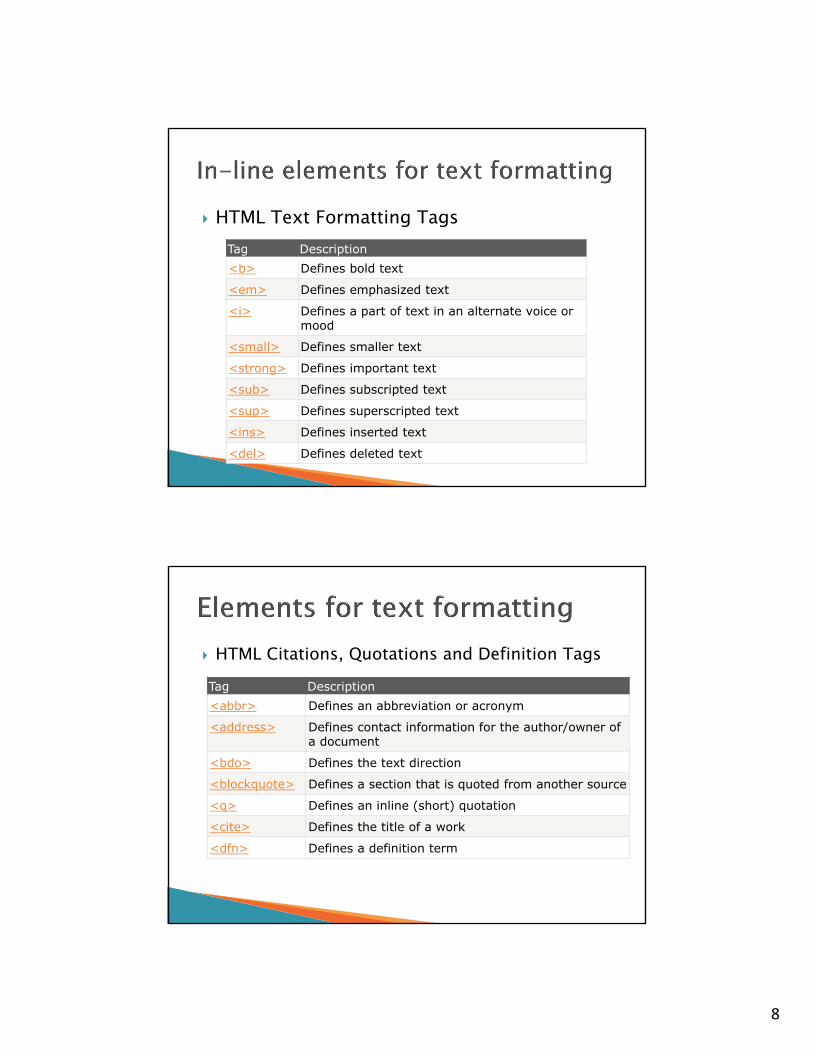
Six levels of headings◦ <h1> First level heading◦ <h2> Second level heading◦ <h3> Third level heading◦ <h4> Fourth level heading◦ <h5> Fifth level heading◦ <h6> Sixth level heading
<h1>A very simple web page</h1><p>It contains two paragraphs and two headings</p><h2>Second section</h2><p>This section is less important</p>
Add appropriate text as headings and paragraphs nested within the existing block-level elements; e.g...<heading> <h1> Welcome! </h1>
</heading>..<article> <p> Lorem ipsum dolor sit amet,
consectetur adipiscing elit. Duis neclobortis neque. </p> </article>..
Tips: Use dummy text generators for temporary text fillers
http://www.lipsum.com/
Save and display in browser.
8
HTML Text Formatting TagsTag Description<b> Defines bold text
<em> Defines emphasized text
<i> Defines a part of text in an alternate voice or mood
<small> Defines smaller text
<strong> Defines important text
<sub> Defines subscripted text
<sup> Defines superscripted text
<ins> Defines inserted text
<del> Defines deleted text
HTML Citations, Quotations and Definition TagsTag Description<abbr> Defines an abbreviation or acronym
<address> Defines contact information for the author/owner of a document
<bdo> Defines the text direction
<blockquote> Defines a section that is quoted from another source
<q> Defines an inline (short) quotation
<cite> Defines the title of a work
<dfn> Defines a definition term
9
Add in-line elements for formatting some of the text; e.g...<aside> <q> Donec eu risus pulvinar
purus suscipit vehicula. Duiserat nibh, egestas eget eleifendsed, dapibus eget velit. Integer condimentum lobortis</q></aside>..
Try them out beforehand:
http://www.w3schools.com/html/tryit.asp?filename=tryhtm
l_formatting
Save and display in browser.
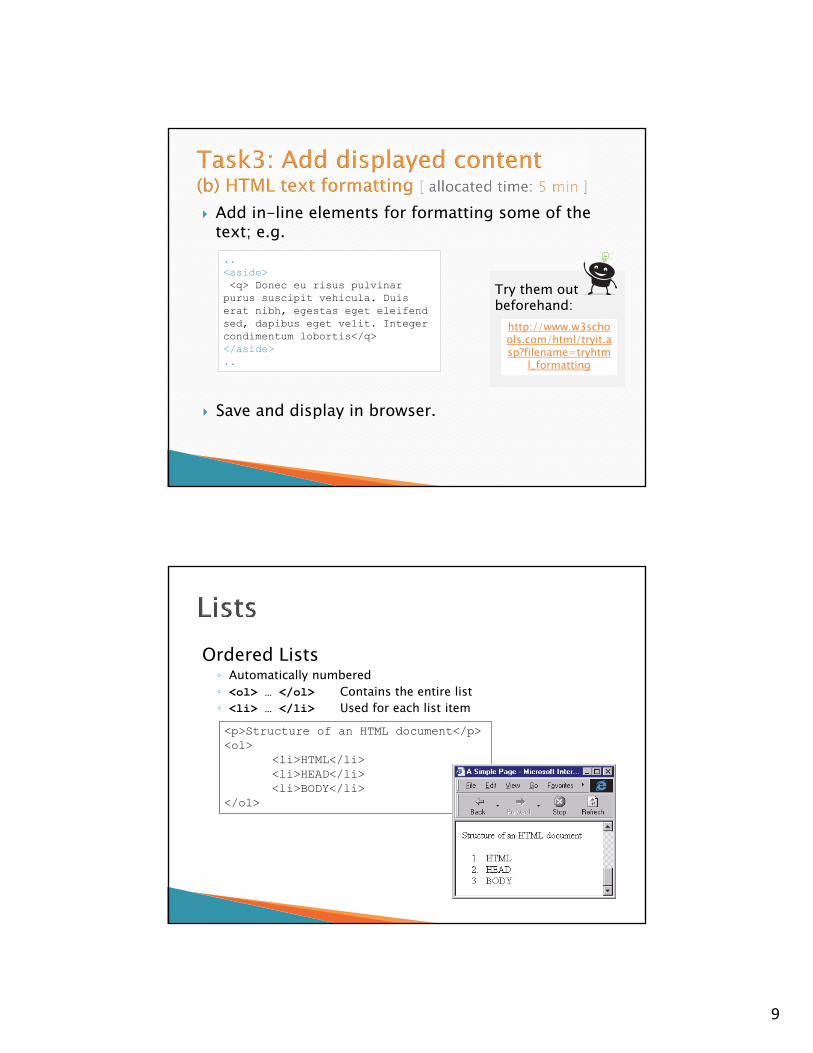
Ordered Lists ◦ Automatically numbered◦ <ol> … </ol> Contains the entire list◦ <li> … </li> Used for each list item<p>Structure of an HTML document</p><ol>
<li>HTML</li><li>HEAD</li><li>BODY</li>
</ol>
10
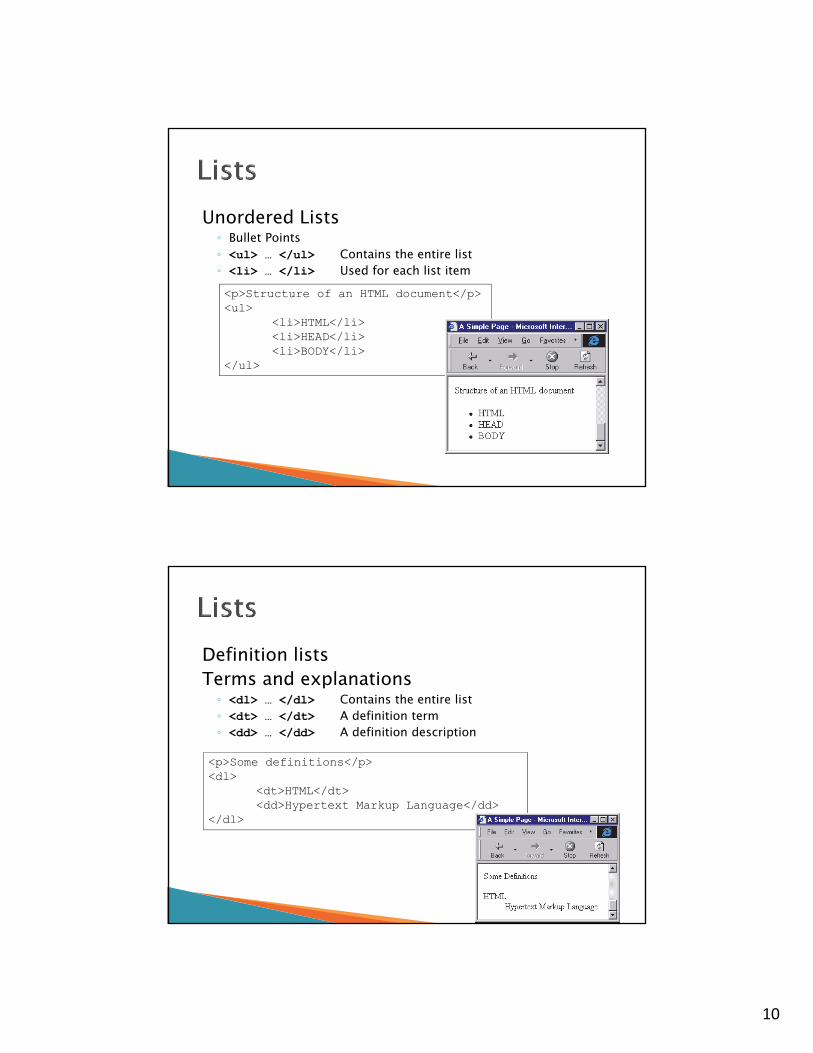
Unordered Lists ◦ Bullet Points◦ <ul> … </ul> Contains the entire list◦ <li> … </li> Used for each list item<p>Structure of an HTML document</p><ul>
<li>HTML</li><li>HEAD</li><li>BODY</li>
</ul>
Definition listsTerms and explanations◦ <dl> … </dl> Contains the entire list◦ <dt> … </dt> A definition term◦ <dd> … </dd> A definition description
<p>Some definitions</p><dl>
<dt>HTML</dt><dd>Hypertext Markup Language</dd>
</dl>
11
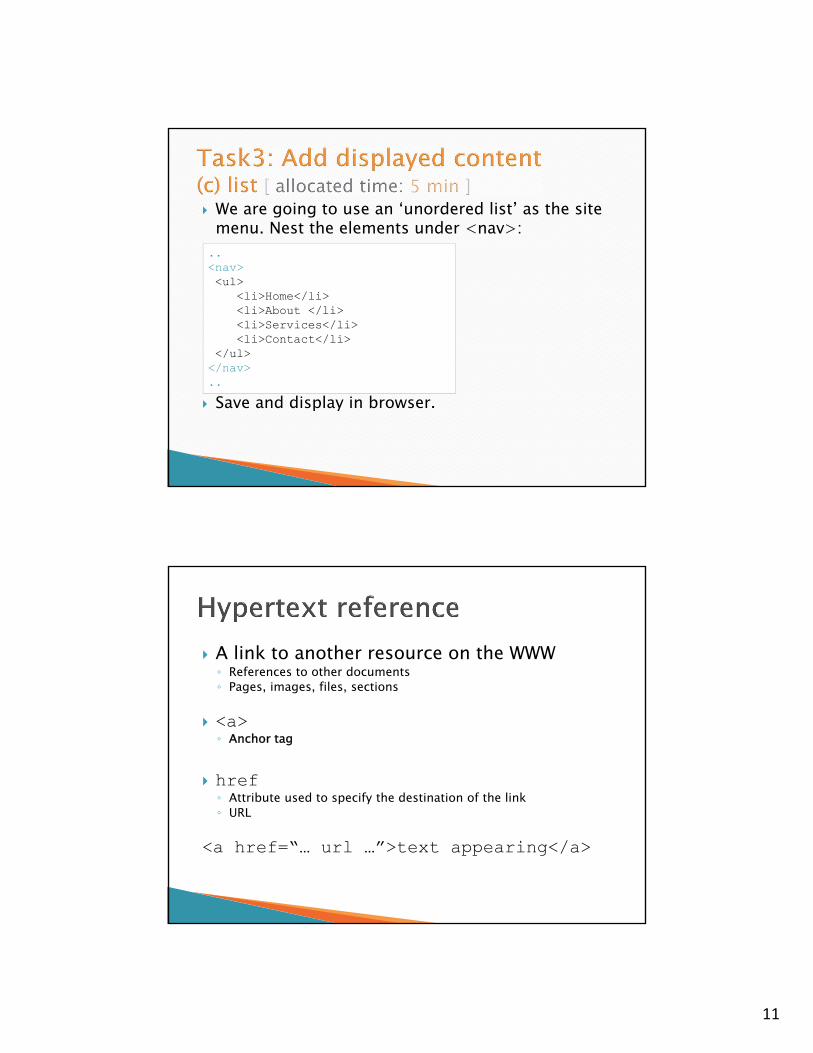
We are going to use an ‘unordered list’ as the site menu. Nest the elements under <nav>:
Save and display in browser.
..<nav> <ul>
<li>Home</li><li>About </li><li>Services</li><li>Contact</li>
</ul></nav>..
A link to another resource on the WWW◦ References to other documents◦ Pages, images, files, sections
<a>◦ Anchor tag
href◦ Attribute used to specify the destination of the link◦ URL
<a href=“… url …”>text appearing</a>
12
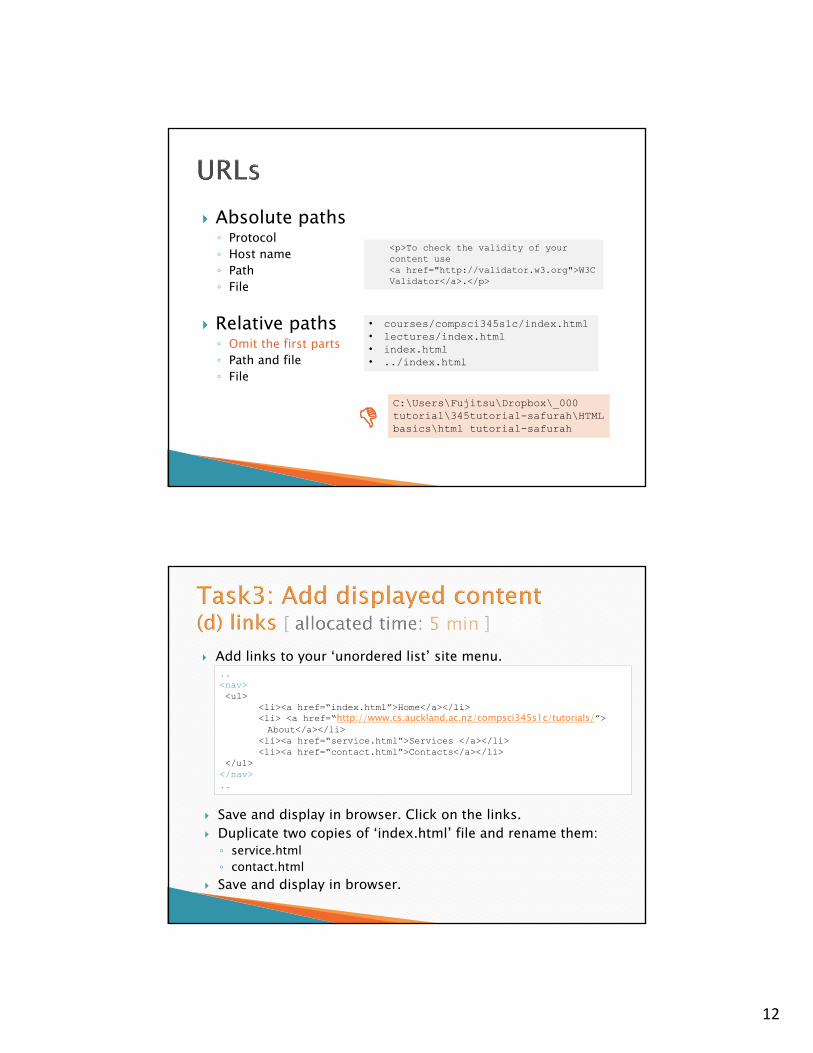
Absolute paths◦ Protocol◦ Host name◦ Path◦ File
Relative paths◦ Omit the first parts◦ Path and file◦ File
C:\Users\Fujitsu\Dropbox\_000 tutorial\345tutorial-safurah\HTML basics\html tutorial-safurah
• courses/compsci345s1c/index.html• lectures/index.html• index.html• ../index.html
<p>To check the validity of your content use <a href="http://validator.w3.org">W3C Validator</a>.</p>
Add links to your ‘unordered list’ site menu. ..<nav> <ul>
<li><a href=“index.html”>Home</a></li><li> <a href=“http://www.cs.auckland.ac.nz/compsci345s1c/tutorials/”>About</a></li>
<li><a href=“service.html”>Services </a></li><li><a href=“contact.html”>Contacts</a></li>
</ul></nav>..
Save and display in browser. Click on the links. Duplicate two copies of ‘index.html’ file and rename them:◦ service.html◦ contact.html
Save and display in browser.
13
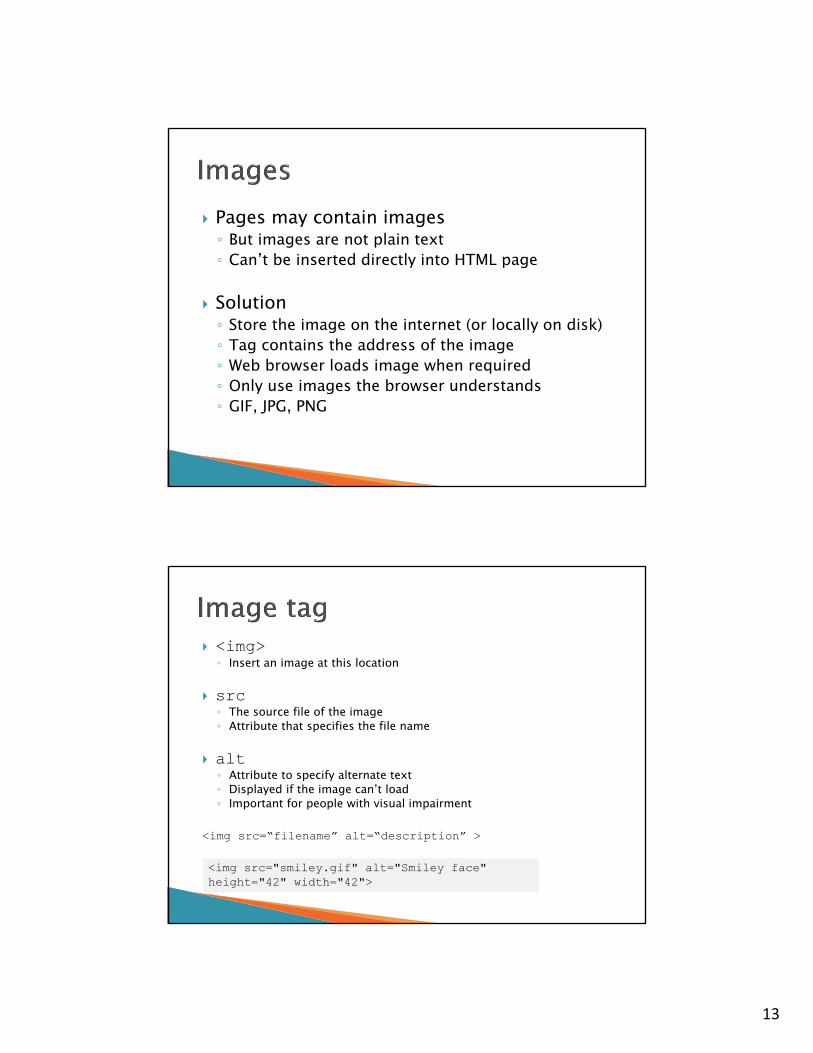
Pages may contain images◦ But images are not plain text◦ Can’t be inserted directly into HTML page
Solution◦ Store the image on the internet (or locally on disk)◦ Tag contains the address of the image◦ Web browser loads image when required◦ Only use images the browser understands◦ GIF, JPG, PNG
<img>◦ Insert an image at this location
src◦ The source file of the image◦ Attribute that specifies the file name
alt◦ Attribute to specify alternate text◦ Displayed if the image can’t load◦ Important for people with visual impairment
<img src=“filename” alt=“description” >
<img src="smiley.gif" alt="Smiley face" height="42" width="42">

14
An image is inserted inline, so it is used inside a block-level element (a paragraph in this example):<p>Here is one of my holiday pictures.<img src="Empire.jpg" alt="The Empire State Building“>It was late December and it was very cold.</p>
Create an ‘img’ subfolder in your project folder Copy an image (e.g. get one from the internet) into
the folder Add the image to one of your web page (e.g.
index.html) using the <img> element & relative path:
Save and display in browser.
..<section> <h3>My Profile</h3>.<img src=“img/me.jpg" alt=“Photo of me“><p>This is me.</p></section>..
15
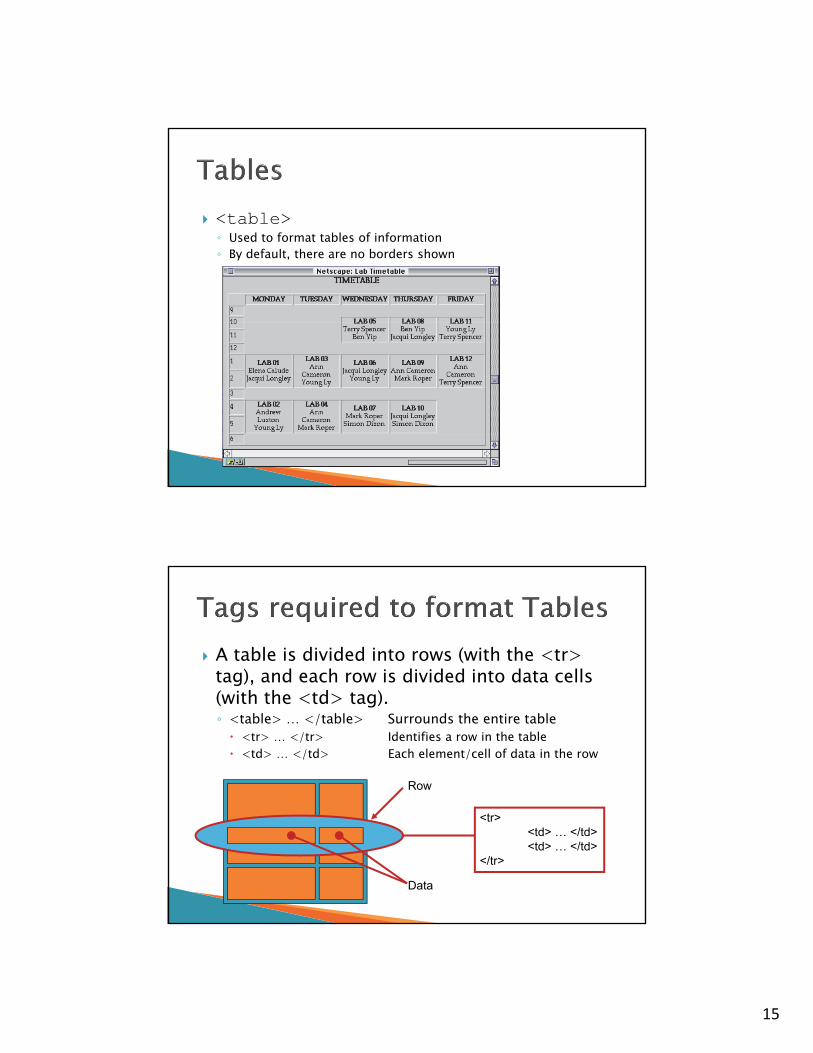
<table>◦ Used to format tables of information◦ By default, there are no borders shown
A table is divided into rows (with the <tr> tag), and each row is divided into data cells (with the <td> tag).◦ <table> … </table> Surrounds the entire table <tr> … </tr> Identifies a row in the table <td> … </td> Each element/cell of data in the row
Row
Data
<tr><td> … </td><td> … </td>
</tr>

16
<html><head>
<title>TABLES</title></head><body><p>What follows is a simple table</p>
<table><tr>
<td>One row</td><td>Two Columns</td></tr></table>
</body></html>
Add a simple table to one of your web page (e.g. services.html):
Save and display in browser.
..<section> <h3>Data table of services</h3>.<table>
<tr><td>row 1, cell 1</td><td>row 1, cell 2</td>
</tr><tr>
<td>row 2, cell 1</td><td>row 2, cell 2</td>
</tr></table></section>..
17
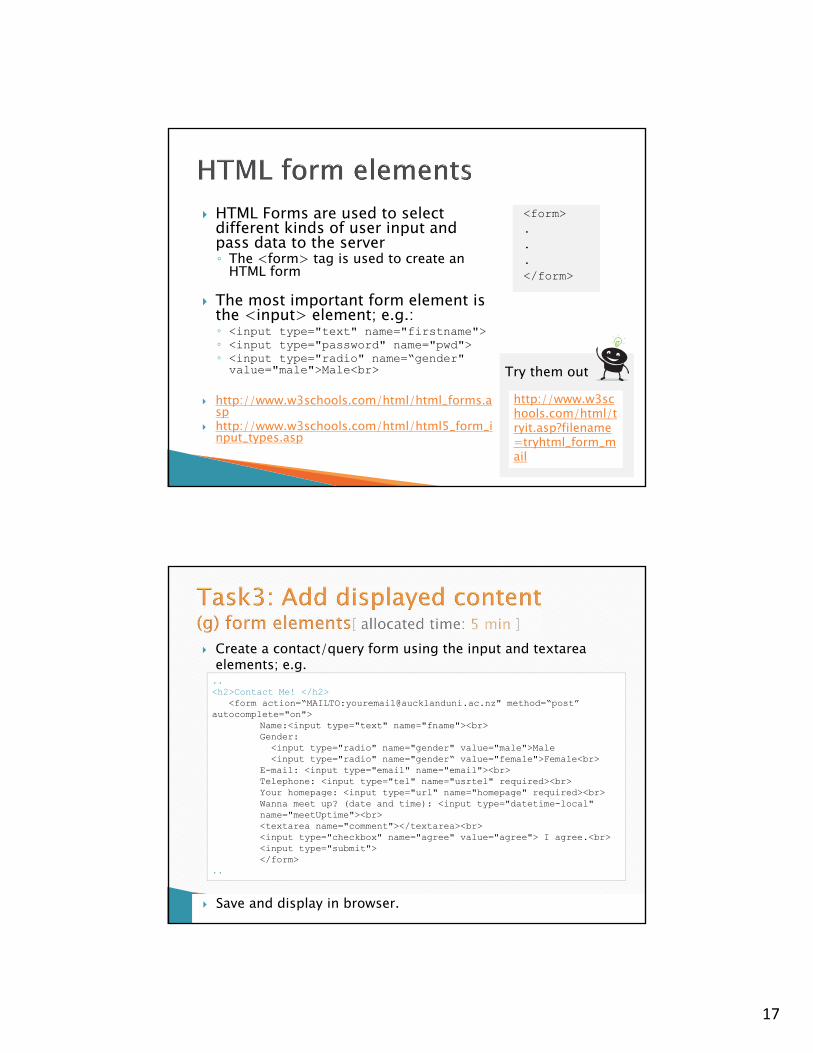
HTML Forms are used to select different kinds of user input and pass data to the server◦ The <form> tag is used to create an
HTML form
The most important form element is the <input> element; e.g.:◦ <input type="text" name="firstname">◦ <input type="password" name="pwd">◦ <input type="radio" name=“gender" value="male">Male<br>
http://www.w3schools.com/html/html_forms.asp
http://www.w3schools.com/html/html5_form_input_types.asp
<form>...</form>
Try them out
http://www.w3schools.com/html/tryit.asp?filename=tryhtml_form_mail
Create a contact/query form using the input and textareaelements; e.g. ..<h2>Contact Me! </h2>
<form action=“MAILTO:[email protected]" method=“post” autocomplete="on">
Name:<input type="text" name="fname"><br>Gender:<input type="radio" name="gender" value="male">Male<input type="radio" name="gender“ value="female">Female<br>
E-mail: <input type="email" name="email"><br>Telephone: <input type="tel" name="usrtel" required><br>Your homepage: <input type="url" name="homepage" required><br>Wanna meet up? (date and time): <input type="datetime-local"name="meetUptime"><br><textarea name="comment"></textarea><br><input type="checkbox" name="agree" value="agree"> I agree.<br><input type="submit"></form>
..
Save and display in browser.
18
End of tutorial. . .
Note: we will be styling these webpages in the next tutorial, so keep the HTML files you have created during
this session
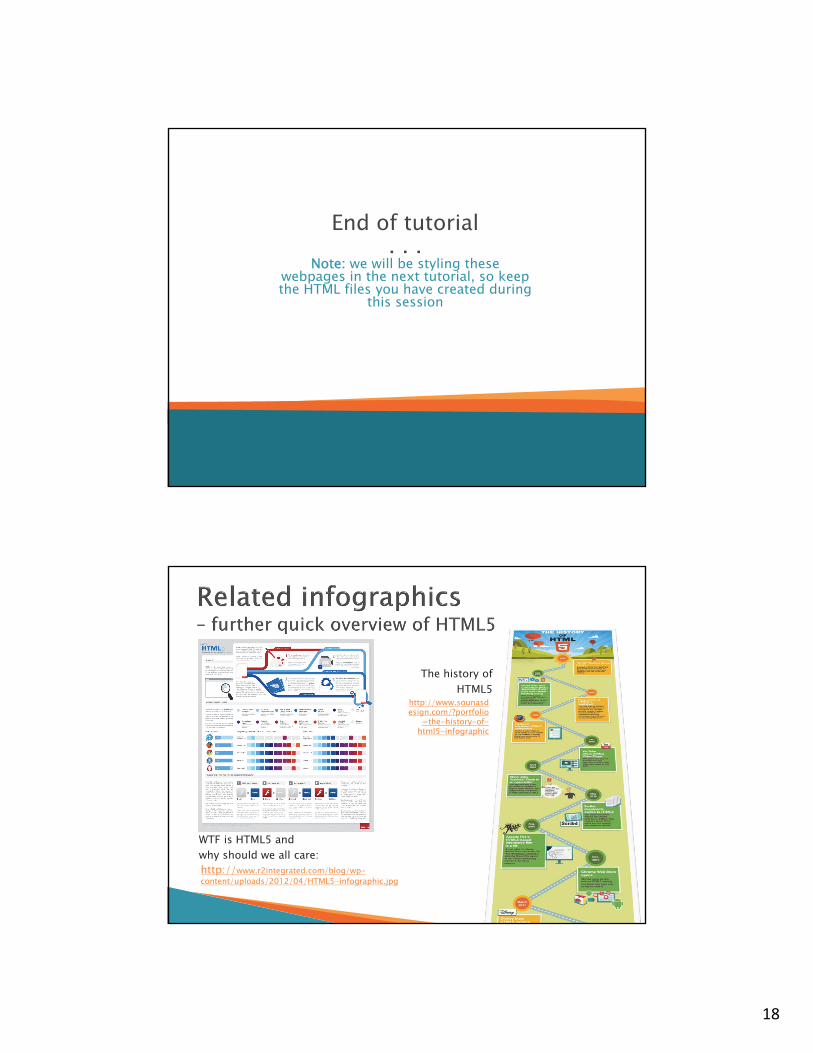
http://www.r2integrated.com/blog/wp-content/uploads/2012/04/HTML5-infographic.jpg
WTF is HTML5 and why should we all care:
The history ofHTML5
http://www.sounasdesign.com/?portfolio
=the-history-of-html5-infographic