Embed Size (px)
Citation preview

G-Biosciences ♦ 1-800-628-7730 ♦ 1-314-991-6034 ♦ [email protected]
A Geno Technology, Inc. (USA) brand name
think proteins! think G-Biosciences www.GBiosciences.com
PR025
Isolation&CharacterizationofBacteriaTeacher’sHandbook
(Cat.#BE‐204)

Page 2 of 12
MATERIALS INCLUDED WITH THE KIT ................................................................................ 3
SPECIAL HANDLING INSTRUCTIONS ................................................................................... 3
ADDITIONAL EQUIPMENT REQUIRED ................................................................................ 4
TIME REQUIRED ................................................................................................................. 4
OBJECTIVES ........................................................................................................................ 4
BACKGROUND ................................................................................................................... 4
TEACHER’S PRE EXPERIMENT SET UP ................................................................................ 5
MATERIALS FOR EACH GROUP .......................................................................................... 6
PROCEDURE ....................................................................................................................... 7
DAY‐1 ............................................................................................................................. 7
RESULTS, ANALYSIS & ASSESSMENT ................................................................................ 10

MATERIALSINCLUDEDWITHTHEKITThis kit has enough materials and reagents for 24 students (six groups of four students).
• 1 bottle PBS • 10 Cotton Swabs • 12 Inoculating Loops • 6 vials Loop Wash • 2 packs LB Agar • 12 Petri Dishes • 6 vials LB Broth • 10 Discs: Ampicillin Discs • 10 Discs: Penicillin Discs • 30 Discs: Blank Discs • 6 Forceps • 20 Centrifuge Tubes (2ml) • 4 Transfer pipettes (Large) • 1 Bacterial Gram Staining Kit • 1 bottle Gram Stain: Decolorizer Solution • 6 Glass Slides • 1 bottle Gram Crystal Violet • 1 bottle Gram Iodine • 1 bottle Gram Safranin
SPECIALHANDLINGINSTRUCTIONSStore Ampicillin Discs and Penicillin Discs at 4°C.
All other reagents can be stored at room temperature.
Briefly centrifuge all small vials before opening to prevent waste of reagents.
The majority of reagents and components supplied in the BioScience Excellence™ kits are non toxic and are safe to handle, however good laboratory procedures should be used at all times. This includes wearing lab coats, gloves and safety goggles.
For further details on reagents please review the Material Safety Data Sheets (MSDS).
Page 3 of 12

The following items need to be used with particular caution.
Part # Name Hazard
G051 Gram Crystal Violet Flammable
G081 Gram Stain: Decolorizer Solution Flammable
L041 Loop Wash Flammable
ADDITIONALEQUIPMENTREQUIRED• Shaking Incubator • Incubator • Autoclave* • Bunsen Burner
* 100ml premade bottles of LB agar (L011), which is melted in a boiling waterbath, can be used if an autoclave is not available. You will require 3 x LB Agar bottles.
TIMEREQUIRED• Day 1: 30 minutes • Day 2: 30 minutes • Day 3: 1‐2 hours • Day 4: 20 minutes
OBJECTIVES• Isolation of bacteria from test samples • Characterization of isolated bacteria • Characterization of the isolated bacteria with gram staining
BACKGROUND An interesting hands‐on lab activity that teaches students the skills required for the isolation of bacteria from test samples. This kit teaches aseptic handing techniques and cultivation of bacteria. Using theses bacterial culture techniques students discover and isolate the bacteria present around us. Following isolation of bacteria, students characterize the bacteria with household disinfectant products and antibiotics. Students learn and understand the significance of bacterial isolation in applied biotechnology.
The Gram staining method was first described in 1844 by the Danish bacteriologist Hans Christian Gram, after whom the test was named. The Gram staining test for bacteria is one of the most important tests in microbiology and is often one of the first tests performed in the identification of bacteria.
Page 4 of 12

The primary stain used in this kit for the Gram staining is crystal violet; however methylene blue is an adequate substitute. The microorganisms (bacteria) that retain the primary crystal violet stain appear as a purple brown color under the microscope. The stained bacteria are referred to as Gram‐positive. The microorganisms that do not retain the primary stain and are a red color are Gram‐negative.
The basic principle of Gram staining is the properties of certain bacteria cell walls to retain the crystal violet dye. The cell walls for Gram‐positive microorganisms have a higher peptidoglycan and lower lipid content than Gram‐negative bacteria.
The mechanics of the Gram staining method is that the bacteria cell walls retain the crystal violet and subsequently added iodine, which complexes with the crystal violet, preventing the easy removal of the dyes. This step is known as the “fixing the dye” step. During the subsequent addition of a decolorizer, a mixture of acetone and ethanol solvents, Gram‐positive cell walls dehydrate, closing the pores in the cell wall, resulting in the retention of the crystal violet:iodine complexes. In contrast, the decolorizer dissolves the higher lipid content of Gram‐negative bacteria and the primary stain is able to leach into the solvent, essentially washing away the dye, leaving the Gram‐negative bacteria unstained.
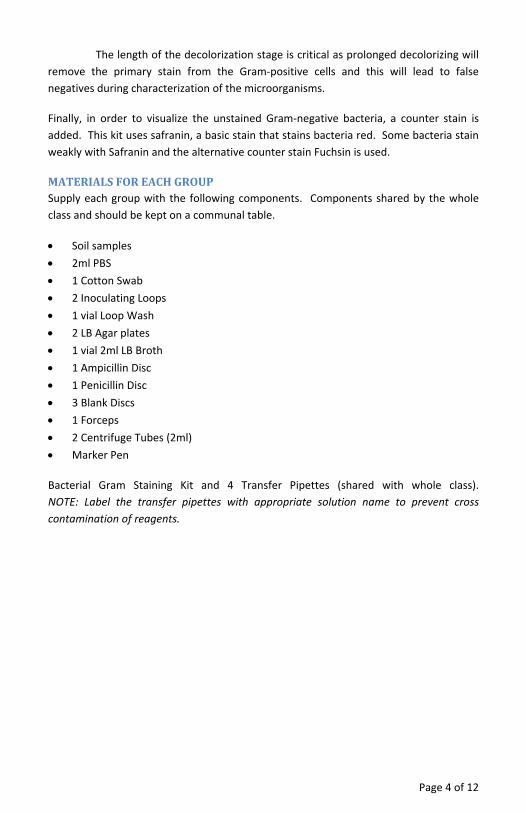
The length of the decolorization stage is critical as prolonged decolorizing will remove the primary stain from the Gram‐positive cells and this will lead to false negatives during characterization of the microorganisms.
Finally, in order to visualize the unstained Gram‐negative bacteria, a counter stain is added. This kit uses safranin, a basic stain that stains bacteria red. Some bacteria stain weakly with Safranin and the alternative counter stain Fuchsin is used.
TEACHER’SPREEXPERIMENTSETUPWear heat protective gloves throughout the autoclaving and pouring agar plate procedure.
Make Agar plates the day before the experiment. Agar plates can be made up to a week in advance, stored in an airtight container at 4°C.
1. Empty the entire contents of both LB Agar packs in to an autoclavable container and add 300ml distilled water. Autoclave for 15min at 121°C.
2. Once the LB Agar has cooled to hand hot temperature (about 45°C), pour a ~0.5cm / ¼” layer of agar into 12 Petri dishes. This is approximately 20‐25ml each plate.
3. Let the plate set for 20‐30minutes to solidify.
4. Distribute one agar plate to each group of students on day one and on day two.
Page 5 of 12
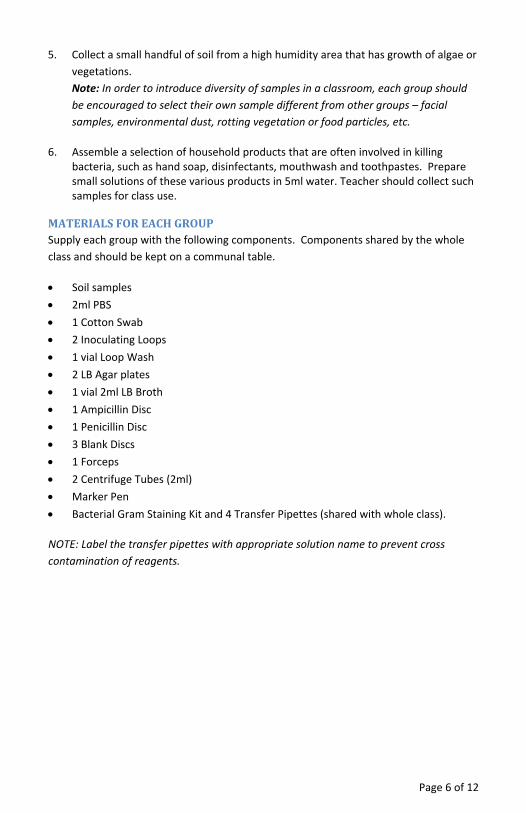
5. Collect a small handful of soil from a high humidity area that has growth of algae or vegetations. Note: In order to introduce diversity of samples in a classroom, each group should be encouraged to select their own sample different from other groups – facial samples, environmental dust, rotting vegetation or food particles, etc.
6. Assemble a selection of household products that are often involved in killing bacteria, such as hand soap, disinfectants, mouthwash and toothpastes. Prepare small solutions of these various products in 5ml water. Teacher should collect such samples for class use.
MATERIALSFOREACHGROUPSupply each group with the following components. Components shared by the whole class and should be kept on a communal table.
• Soil samples • 2ml PBS • 1 Cotton Swab • 2 Inoculating Loops • 1 vial Loop Wash • 2 LB Agar plates • 1 vial 2ml LB Broth • 1 Ampicillin Disc • 1 Penicillin Disc • 3 Blank Discs • 1 Forceps • 2 Centrifuge Tubes (2ml) • Marker Pen • Bacterial Gram Staining Kit and 4 Transfer Pipettes (shared with whole class).
NOTE: Label the transfer pipettes with appropriate solution name to prevent cross contamination of reagents.
Page 6 of 12

PROCEDURE
Wear gloves throughout the experiment procedure.
Day‐1 1. Your teacher will provide you with cotton swabs to collect samples from various
places around your laboratory or surrounding area. Use the swab to collect the sample as per your teacher’s instructions.
Instruct each student group to use different samples and compare results later. Discuss with students places they think bacteria would be found. Draw up a list of these locations and the students can then use the cotton swabs to collect the bacteria. Students can use the swab to collect samples from various locations, including their own mouths, hands, face, under their nails or from around the classroom and school. In addition, one group can attempt to isolate bacteria from the soil sample.
2. Add 1ml PBS to the centrifuge tubes. Add the sample to the PBS. If using the swabs, dip into the PBS and thoroughly agitate with the swab to release the bacteria. If using the soil sample, thoroughly mix by vigorous shaking. Note: The samples collected using the cotton swabs can be directly applied on the LB agar plate. Gentle press the swab on to the LB agar plate neat one edge. Add 10μl sterile water or PBS to the area where the swab was placed and then streak the plate as described in step 5.
3. Leave the tube at room temperature for 1 minute.
4. Write your group name on the bottom of the agar plate.
5. Transfer 10‐20µl sample to a corner of the plate. Open the inoculating loop at the opposite end to the loop. Remove the loop from the package. With the loop in one hand, lift the lid of the Petri dish slightly with the other hand (keep the lid over the Petri dish). Do NOT put the lid down. Quickly and gently steak four parallel lines across the agar to spread the sample, as shown in figure 1. Replace the lid.
Figure 1
Page 7 of 12

6. The next student dips the loop into the Loop Wash. Remove and gentle shake to remove excess wash solution, WAIT 20 seconds to allow the wash solution to evaporate whilst gently shaking in the air.
7. Dilute the bacteria on the plate, in order to isolate single colonies. From one end of the parallel streaks, streak four more parallel lines 90° to the original set. See figure 2. Replace the lid.
Figure 2
Figure 3
8. The next student repeats the loop wash step as in step 6 and streaks four parallel lines 90° to the previous set, starting at the end of the previous streaks. See figure 3.
9. The fourth student of the group repeats the wash as in step 6 and streaks a final set of parallel lines 90° to the previous set, as shown in figure 4. Be careful and ensure that you do NOT streak through the first set.
Figure 4
Page 8 of 12

10. Replace the lid and turn the Petri dish upside down to prevent moisture running onto the LB agar.
11. Place the inverted plate in a 37°C incubator overnight.
Day‐2
1. Observe the plate the following day and draw a rough sketch of the plate.
2. Pick one single colony from the plate using a fresh Inoculating Loop and suspend in the LB Broth vial.
3. Incubate the vial in a 37°C shaker overnight.
Day‐3
1. Pipette 1ml bacterial suspension on to the plate and gentle swirl and rock the plate to ensure the bacterial suspension covers the entire surface of the plate. Keep the remaining bacterial culture safe, as this will be used later.
2. Remove the excess bacterial suspension and let the plate dry for 10‐15 minutes.
3. Mark the bottom of LB Agar Plate in 4 areas for testing of antibiotics (Ampicillin and Penicillin) and two household products. Mark the center as blank control.
4. Using the forceps place 1 blank disc on the middle of the plate. Place the ampicillin and penicillin discs on their sections. Dip a blank disc into a household product provided by your teacher and place on the plate. Repeat with the second blank disc and a different household product.
5. Invert the plate and incubate at 37°C overnight.
6. Perform bacterial gram staining with remainder of the culture from step 1. Label a slide with your group name.
7. Place a small drop of the culture on the labeled glass slide.
8. Spread the sample over a large surface with a pipette tip to form a thin film.
9. Allow the suspension to completely air dry.
10. To fix the bacteria to the slide, hold the slide specimen side up, by its edge and quickly pass the slide across a Bunsen burner flame 10‐20 times. Make sure the slide is not overheated each time.
Page 9 of 12

CAUTION: Ensure that the students are carefully supervised during this stage. Or fix the bacteria to the slides for the students to minimize the dangers of a naked flame.
11. Cover the entire area of bacteria with Gram Crystal Violet and leave at room temperature for 1 minute. Rinse the slide for 5 seconds under slow running water using a wash bottle.
The specimen should appear blue‐violet when observed with the naked eye.
12. Cover the bacteria with the Gram Iodine and leave at room temperature for 1 minute. Rinse the slide for 5 seconds under slow running water then immediately proceed to the next step.
At this point the specimen should still be blue‐violet.
13. Add the Decolorizer Solution drop‐wise until the blue‐violet color is no longer visualized on the sample.
14. Rinse the slide for 5 seconds under slow running water using a wash bottle.
15. Cover the bacteria with the Gram Safranin and leave at room temperature for 1 minute. Rinse the slide for 5 seconds under slow running water to remove any excess dye.
16. Blot the slide gently with absorbent paper or allow it to air dry before viewing under a bright field microscope. 600 x magnification is adequate for viewing bacteria on the slide. Observe the center of the slide where bacteria has been treated with all Gram Stains. An oil immersion objective may be used for high magnification. A drop of oil can be placed directly on the slide.
Day‐4
1. Observe the plate the next day and measure the diameters of inhibition rings.
RESULTS,ANALYSIS&ASSESSMENT1. Did you see a lot of colonies on your plate the second day? Did you see any
other microorganism growth on your plate? Describe the colony you picked for testing. The number of colonies on the plate may vary depending on how many bacteria are in the sample. There may also be other kinds of microorganism growth on the plate, such as yeast and mold. Different student groups may pick different types of bacterial colony.
Page 10 of 12

Page 11 of 12
2. Are your isolated bacteria gram‐positive or gram‐negative? What kind of shape are your bacteria? The bacteria isolated will be either gram‐positive or gram‐negative. The most common shapes of bacteria are rod or globe.
3. Is the bacterium you isolated resistant to ampicillin, Penicillin or any of your household disinfectant products? Depends on the bacteria isolated, it may be resistant to one, more or none of the test antibiotics and disinfectants.
Last saved: 8/8/2014 CMH

\
www.GBiosciences.com
Page 12 of 12

G-Biosciences ♦ 1-800-628-7730 ♦ 1-314-991-6034 ♦ [email protected]
A Geno Technology, Inc. (USA) brand name
think proteins! think G-Biosciences www.GBiosciences.com
PR026
Isolation&CharacterizationofBacteriaStudent’sHandbook
(Cat.#BE‐204)

Page 2 of 12
OBJECTIVES .......................................................................................................... 3
BACKGROUND ...................................................................................................... 3
MATERIALS FOR EACH GROUP ............................................................................. 4
PROCEDURE ......................................................................................................... 5
RESULTS, ANALYSIS & ASSESSMENT .................................................................... 8

OBJECTIVES• Isolation of bacteria from test samples • Characterization of isolated bacteria • Characterization of the isolated bacteria with gram staining
BACKGROUND An interesting hands‐on lab activity that teaches students the skills required for the isolation of bacteria from test samples. This kit teaches aseptic handing techniques and cultivation of bacteria. Using theses bacterial culture techniques students discover and isolate the bacteria present around us. Following isolation of bacteria, students characterize the bacteria with household disinfectant products and antibiotics. Students learn and understand the significance of bacterial isolation in applied biotechnology.
The Gram staining method was first described in 1844 by the Danish bacteriologist Hans Christian Gram, after whom the test was named. The Gram staining test for bacteria is one of the most important tests in microbiology and is often one of the first tests performed in the identification of bacteria.
The primary stain used in this kit for the Gram staining is crystal violet; however methylene blue is an adequate substitute. The microorganisms (bacteria) that retain the primary crystal violet stain appear as a purple brown color under the microscope. The stained bacteria are referred to as Gram‐positive. The microorganisms that do not retain the primary stain and are a red color are Gram‐negative.
The basic principle of Gram staining is the properties of certain bacteria cell walls to retain the crystal violet dye. The cell walls for Gram‐positive microorganisms have a higher peptidoglycan and lower lipid content than Gram‐negative bacteria.
The mechanics of the Gram staining method is that the bacteria cell walls retain the crystal violet and subsequently added iodine, which complexes with the crystal violet, preventing the easy removal of the dyes. This step is known as the “fixing the dye” step. During the subsequent addition of a decolorizer, a mixture of acetone and ethanol solvents, Gram‐positive cell walls dehydrate, closing the pores in the cell wall, resulting in the retention of the crystal violet:iodine complexes. In contrast, the decolorizer dissolves the higher lipid content of Gram‐negative bacteria and the primary stain is able to leach into the solvent, essentially washing away the dye, leaving the Gram‐negative bacteria unstained.
Page 3 of 12
The length of the decolorization stage is critical as prolonged decolorizing will remove the primary stain from the Gram‐positive cells and this will lead to false negatives during characterization of the microorganisms.
Finally, in order to visualize the unstained Gram‐negative bacteria, a counter stain is added. This kit uses safranin, a basic stain that stains bacteria red. Some bacteria stain weakly with Safranin and the alternative counter stain Fuchsin is used.
MATERIALSFOREACHGROUPSupply each group with the following components. Components shared by the whole class and should be kept on a communal table.
• Soil samples • 2ml PBS • 1 Cotton Swab • 2 Inoculating Loops • 1 vial Loop Wash • 2 LB Agar plates • 1 vial 2ml LB Broth • 1 Ampicillin Disc • 1 Penicillin Disc • 3 Blank Discs • 1 Forceps • 2 Centrifuge Tubes (2ml) • Marker Pen
Bacterial Gram Staining Kit and 4 Transfer Pipettes (shared with whole class). NOTE: Label the transfer pipettes with appropriate solution name to prevent cross contamination of reagents.
Page 4 of 12

PROCEDURE.
Wear gloves throughout the experiment procedure
Day‐1
1. Your teacher will provide you with cotton swabs to collect samples from various places around your laboratory or surrounding area. Use the swab to collect the sample as per your teacher’s instructions. Instruct each student group to use different samples and compare results later. Discuss with students places they think bacteria would be found. Draw up a list of these locations and the students can then use the cotton swabs to collect the bacteria. Students can use the swab to collect samples from various locations, including their own mouths, hands, face, under their nails or from around the classroom and school. In addition, one group can attempt to isolate bacteria from the soil sample.
2. Add 1ml PBS to the centrifuge tubes. Add the sample to the PBS. If using the swabs, dip into the PBS and thoroughly agitate with the swab to release the bacteria. If using the soil sample, thoroughly mix by vigorous shaking. Note: The samples collected using the cotton swabs can be directly applied on the LB agar plate. Gentle press the swab on to the LB agar plate neat one edge. Add 10μl sterile water or PBS to the area where the swab was placed and then streak the plate as described in step 5.
3. Leave the tube at room temperature for 1 minute.
4. Write your group name on the bottom of the agar plate.
Figure 1
5. Transfer 10‐20µl sample to a corner of the plate. Open the inoculating loop at the opposite end to the loop. Remove the loop from the package. With the loop in one hand, lift the lid of the Petri dish slightly with the other hand (keep the lid over the Petri dish). Do NOT put the lid down. Quickly and gently steak four parallel lines across the agar to spread the sample, as shown in figure 1. Replace the lid.
Page 5 of 12

6. The next student dips the loop into the Loop Wash. Remove and gentle shake to remove excess wash solution, WAIT 20 seconds to allow the wash solution to evaporate whilst gently shaking in the air.
7. Dilute the bacteria on the plate, in order to isolate single colonies. From one end of the parallel streaks, streak four more parallel lines 90° to the original set. See figure 2. Replace the lid.
Figure 2
8. The next student repeats the loop wash step as in step 6 and streaks four parallel lines 90° to the previous set, starting at the end of the previous streaks. See figure 3.
Figure 3
9. The fourth student of the group repeats the wash as in step 6 and streaks a final set of parallel lines 90° to the previous set, as shown in figure 4. Be careful and ensure that you do NOT streak through the first set.
Figure 4
Page 6 of 12

10. Replace the lid and turn the Petri dish upside down to prevent moisture running onto the LB agar.
11. Place the inverted plate in a 37°C incubator overnight.
Day‐2
1. Observe the plate the following day and draw a rough sketch of the plate.
2. Pick one single colony from the plate using a fresh Inoculating Loop and suspend in the LB Broth vial.
3. Incubate the vial in a 37°C shaker overnight.
Day‐3
1. Pipette 1ml bacterial suspension on to the plate and gentle swirl and rock the plate to ensure the bacterial suspension covers the entire surface of the plate. Keep the remaining bacterial culture safe, as this will be used later.
2. Remove the excess bacterial suspension and let the plate dry for 10‐15 minutes.
3. Mark the bottom of LB Agar Plate in 4 areas for testing of antibiotics (Ampicillin and Penicillin) and two household products. Mark the center as blank control.
4. Using the forceps place 1 blank disc on the middle of the plate. Place the ampicillin and penicillin discs on their sections. Dip a blank disc into a household product provided by your teacher and place on the plate. Repeat with the second blank disc and a different household product.
5. Invert the plate and incubate at 37°C overnight.
6. Perform bacterial gram staining with remainder of the culture from step 1. Label a slide with your group name.
7. Place a small drop of the culture on the labeled glass slide.
8. Spread the sample over a large surface with a pipette tip to form a thin film.
9. Allow the suspension to completely air dry.
10. To fix the bacteria to the slide, hold the slide specimen side up, by its edge and quickly pass the slide across a Bunsen burner flame 10‐20 times. Make sure the slide is not overheated each time.
Page 7 of 12

CAUTION: Ensure that the students are carefully supervised during this stage. Or fix the bacteria to the slides for the students to minimize the dangers of a naked flame.
11. Cover the entire area of bacteria with Gram Crystal Violet and leave at room temperature for 1 minute. Rinse the slide for 5 seconds under slow running water using a wash bottle.
The specimen should appear blue‐violet when observed with the naked eye.
12. Cover the bacteria with the Gram Iodine and leave at room temperature for 1 minute. Rinse the slide for 5 seconds under slow running water then immediately proceed to the next step.
At this point the specimen should still be blue‐violet.
13. Add the Decolorizer Solution drop‐wise until the blue‐violet color is no longer visualized on the sample.
14. Rinse the slide for 5 seconds under slow running water using a wash bottle.
15. Cover the bacteria with the Gram Safranin and leave at room temperature for 1 minute. Rinse the slide for 5 seconds under slow running water to remove any excess dye.
16. Blot the slide gently with absorbent paper or allow it to air dry before viewing under a bright field microscope. 600 x magnification is adequate for viewing bacteria on the slide. Observe the center of the slide where bacteria has been treated with all Gram Stains. An oil immersion objective may be used for high magnification. A drop of oil can be placed directly on the slide.
Day‐4
1. Observe the plate the next day and measure the diameters of inhibition rings.
RESULTS,ANALYSIS&ASSESSMENT1. Did you see a lot of colonies on your plate the second day? Did you see any other
microorganism growth on your plate? Describe the colony you picked for testing. ___________________________________________________________________________________________________________________________________________________________________________________________________________________________________________________________________________________________________
Page 8 of 12

Page 9 of 12
2. Are your isolated bacteria gram‐positive or gram‐negative? What kind of shape are your bacteria? ___________________________________________________________________________________________________________________________________________________________________________________________________________________________________________________________________________________________________
3. Is the bacterium you isolated resistant to ampicillin, Penicillin or any of your household disinfectant products?
Depends on the bacteria isolated, it may be resistant to one, more or none of the test antibiotics and disinfectants.
___________________________________________________________________________________________________________________________________________________________________________________________________________________________________________________________________________________________________
Last saved: 8/8/2014 CMH
This page is intentionally left blank
Page 10 of 12

This page is intentionally left blank
Page 11 of 12

www.GBiosciences.com
Page 12 of 12
![MT-6034 - Moravek, Incproducts.moravek.com/DataSheets/MT6034DS.pdf · MT-6034 Thymidine, [methyl-3H]- Lot 846-160-020-A-20110826-THN A) All chromatograms were run using the HPLC method](https://img.pdfslide.net/doc/110x75/5fbb014fd16e00789a19d5b7/mt-6034-moravek-mt-6034-thymidine-methyl-3h-lot-846-160-020-a-20110826-thn.jpg)