Embed Size (px)
Citation preview
iTunes U is a virtual learning environment created by Apple to be used on Apple devices. It
can be used for posting materials, assignments and for having discussions with classes or
pupils. Its new features include the ability for students to submit assignments online by
annotating pdfs which the teacher can also mark within iTunes U and store marks in a built
in gradebook.
iTunes U Guide
1. Creating a course
2. Enrolling students
3. Course Outline
4. Materials
5. Posts & Assignments
6. Gradebook
7. Discussions
8. Contributors
9. Reusing courses
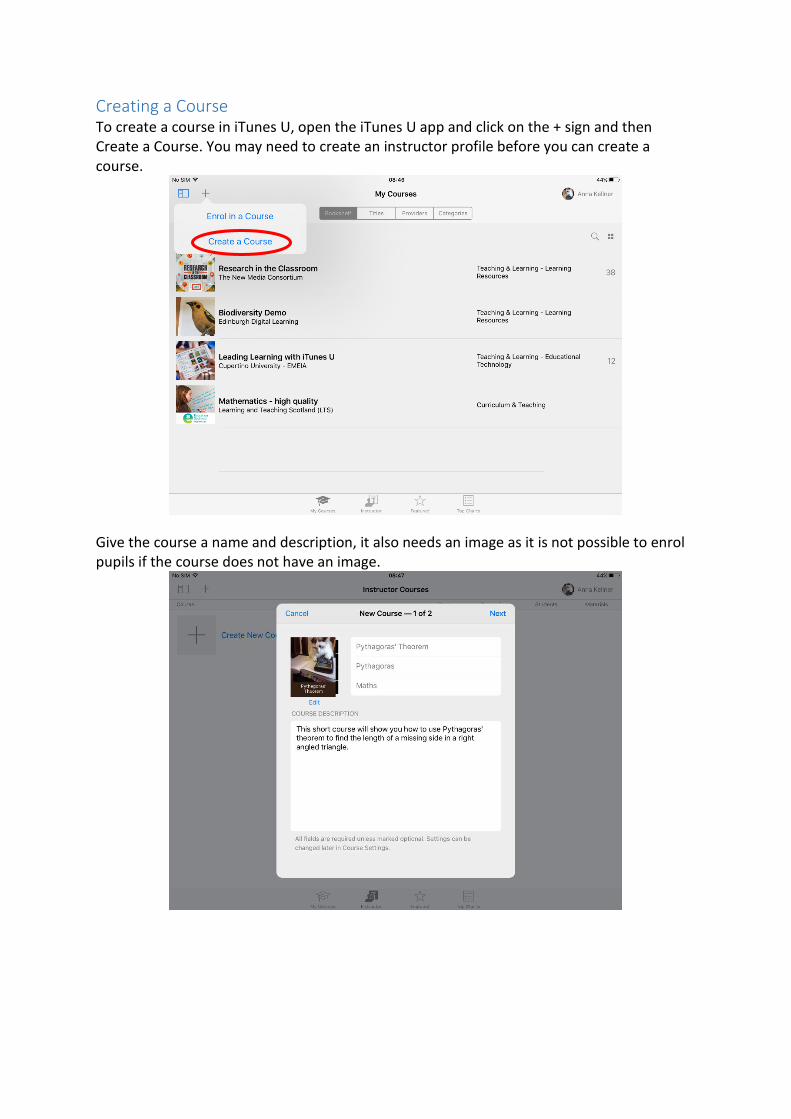
Creating a Course To create a course in iTunes U, open the iTunes U app and click on the + sign and then Create a Course. You may need to create an instructor profile before you can create a course.
Give the course a name and description, it also needs an image as it is not possible to enrol pupils if the course does not have an image.
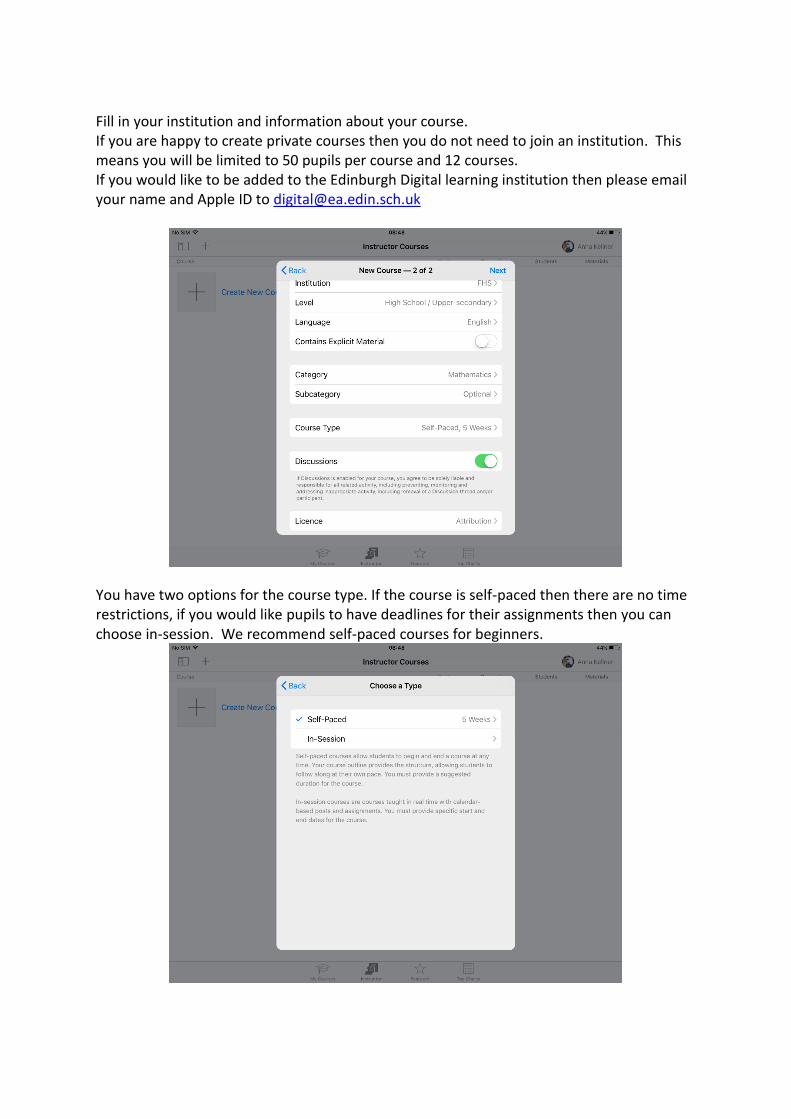
Fill in your institution and information about your course. If you are happy to create private courses then you do not need to join an institution. This means you will be limited to 50 pupils per course and 12 courses. If you would like to be added to the Edinburgh Digital learning institution then please email your name and Apple ID to [email protected]
You have two options for the course type. If the course is self-paced then there are no time restrictions, if you would like pupils to have deadlines for their assignments then you can choose in-session. We recommend self-paced courses for beginners.
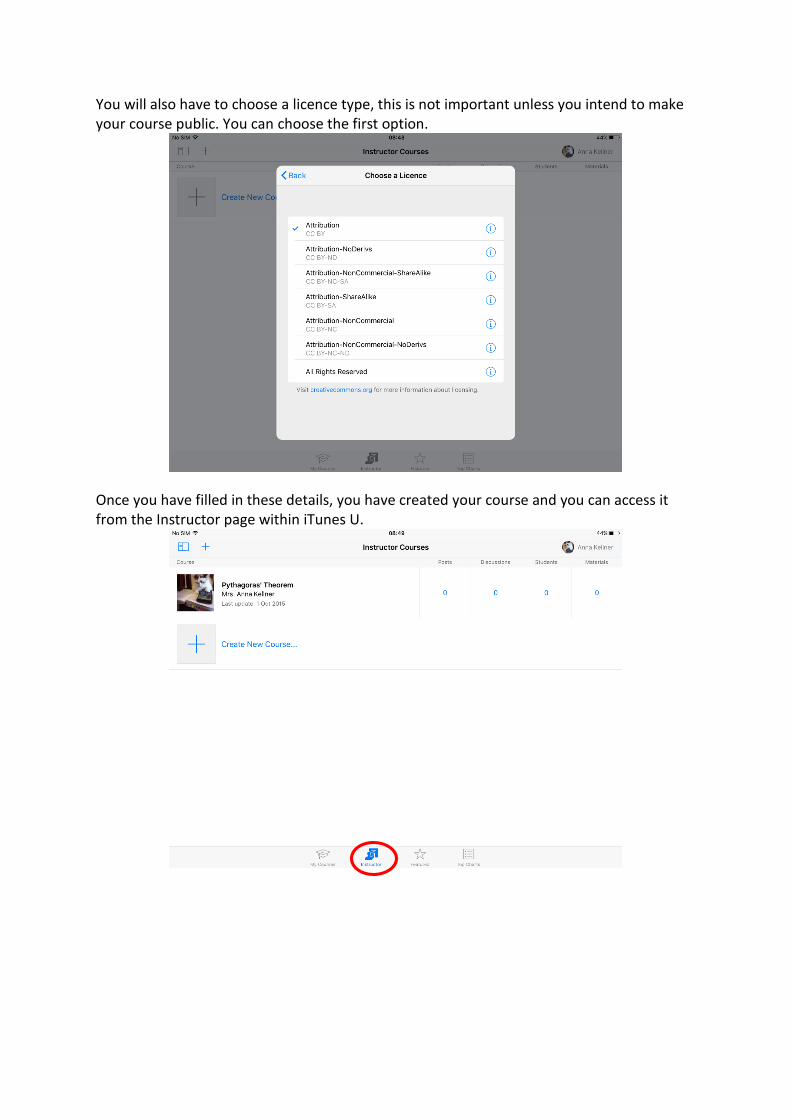
You will also have to choose a licence type, this is not important unless you intend to make your course public. You can choose the first option.
Once you have filled in these details, you have created your course and you can access it from the Instructor page within iTunes U.
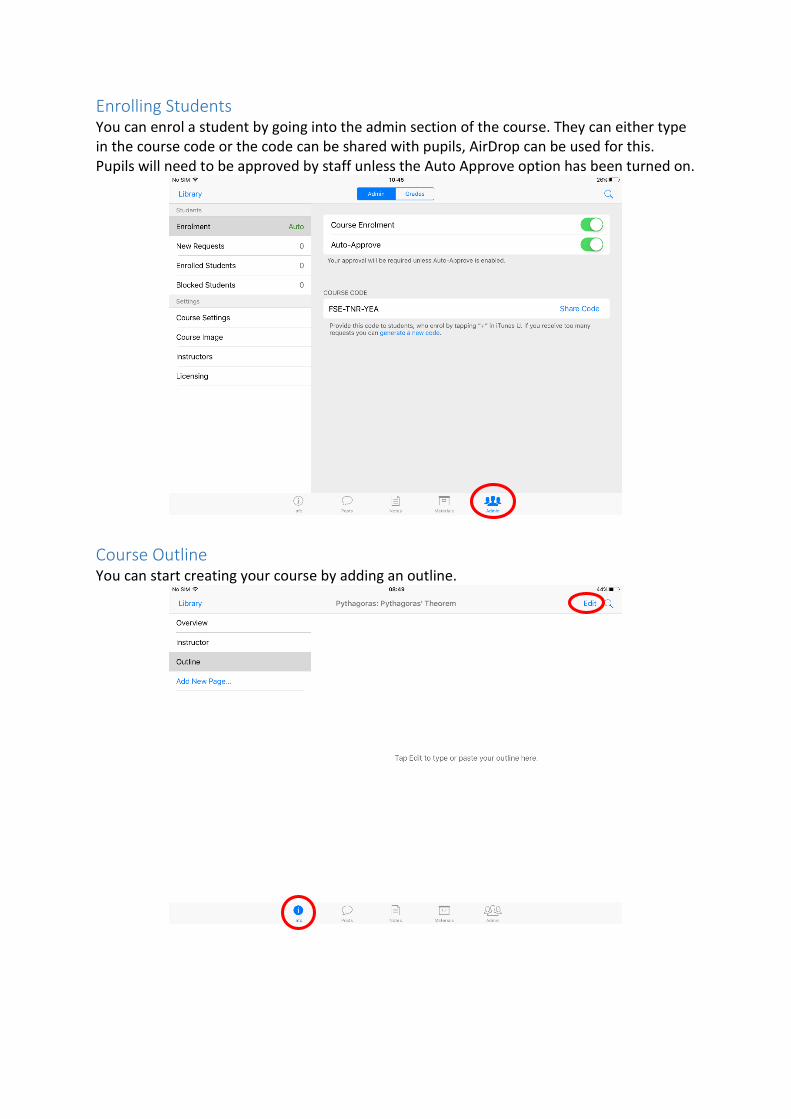
Enrolling Students You can enrol a student by going into the admin section of the course. They can either type in the course code or the code can be shared with pupils, AirDrop can be used for this. Pupils will need to be approved by staff unless the Auto Approve option has been turned on.
Course Outline You can start creating your course by adding an outline.
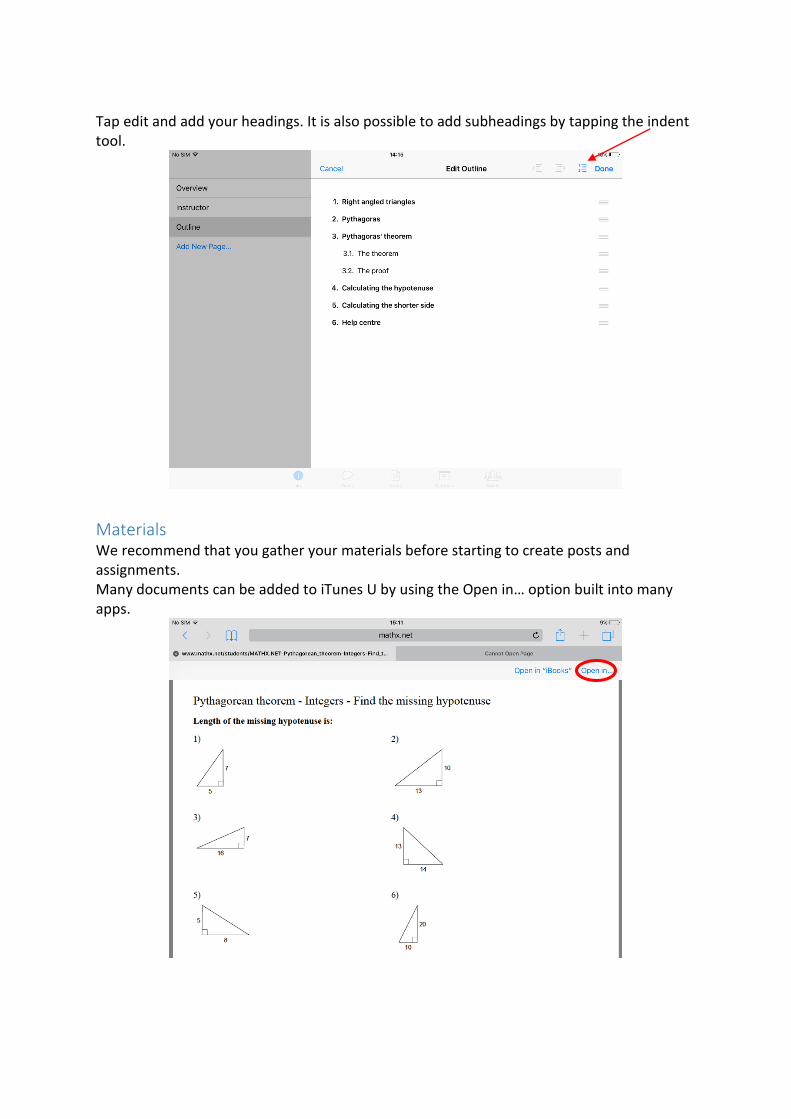
Tap edit and add your headings. It is also possible to add subheadings by tapping the indent tool.
Materials We recommend that you gather your materials before starting to create posts and assignments. Many documents can be added to iTunes U by using the Open in… option built into many apps.
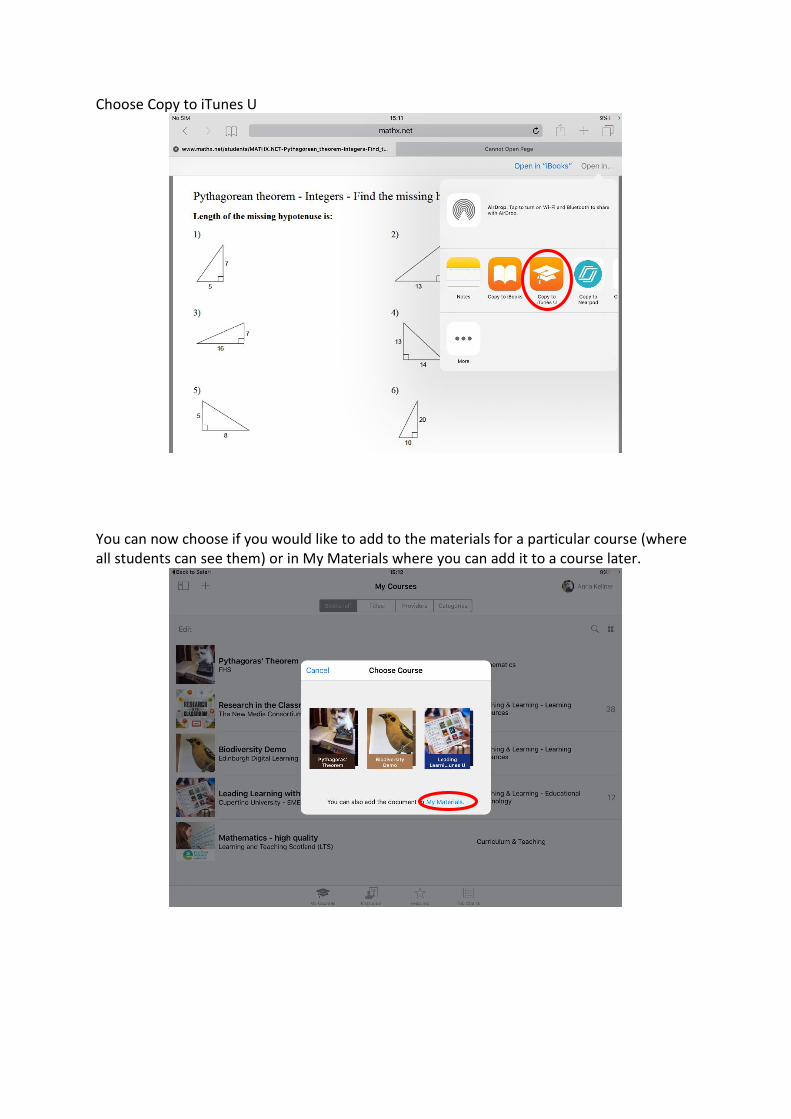
Choose Copy to iTunes U
You can now choose if you would like to add to the materials for a particular course (where all students can see them) or in My Materials where you can add it to a course later.
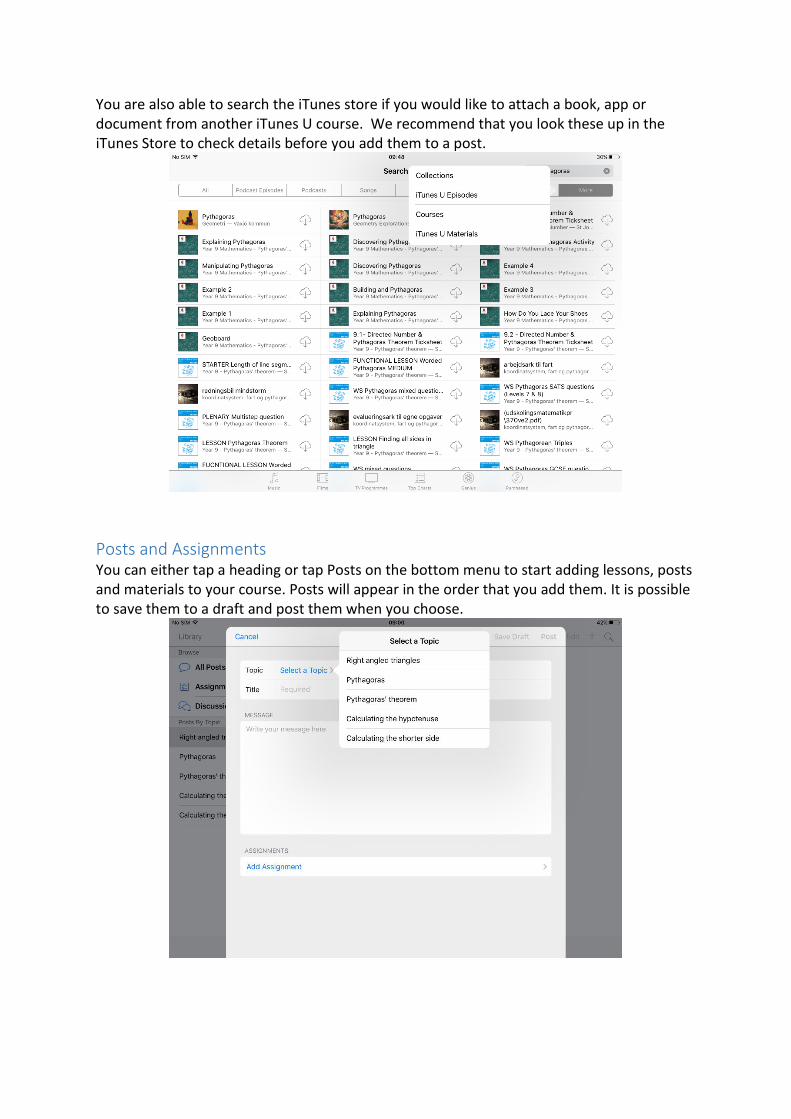
You are also able to search the iTunes store if you would like to attach a book, app or document from another iTunes U course. We recommend that you look these up in the iTunes Store to check details before you add them to a post.
Posts and Assignments You can either tap a heading or tap Posts on the bottom menu to start adding lessons, posts and materials to your course. Posts will appear in the order that you add them. It is possible to save them to a draft and post them when you choose.
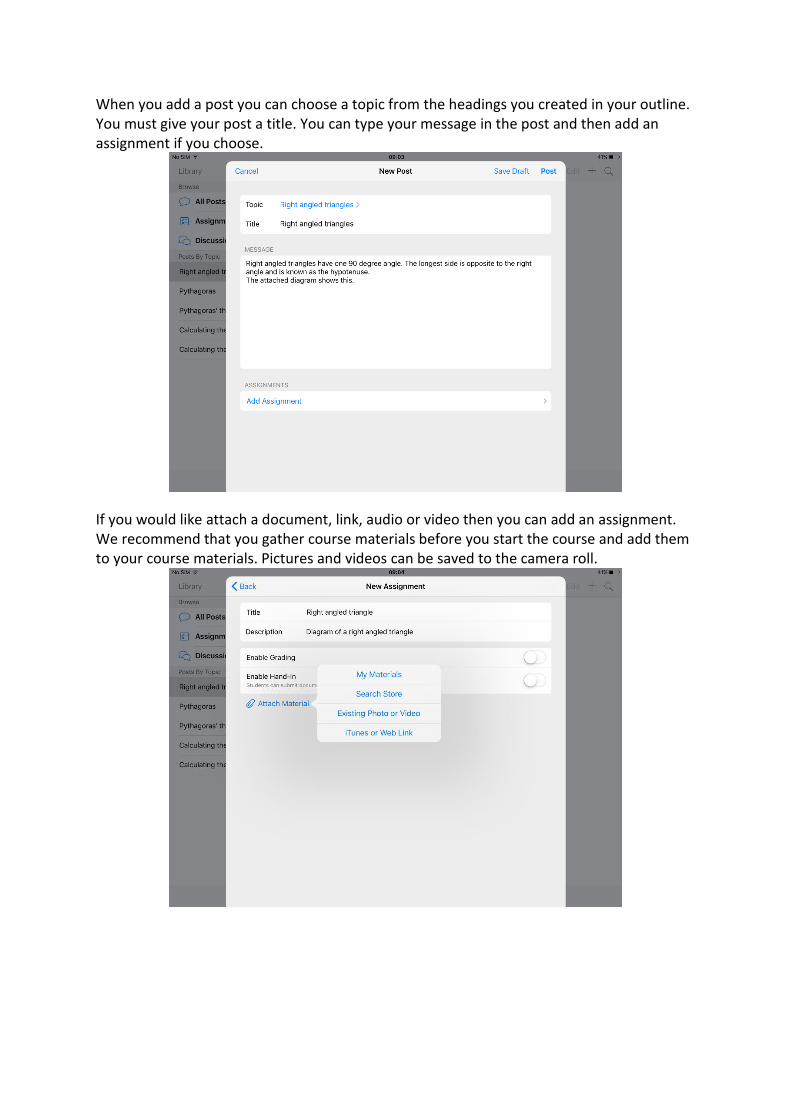
When you add a post you can choose a topic from the headings you created in your outline. You must give your post a title. You can type your message in the post and then add an assignment if you choose.
If you would like attach a document, link, audio or video then you can add an assignment. We recommend that you gather course materials before you start the course and add them to your course materials. Pictures and videos can be saved to the camera roll.
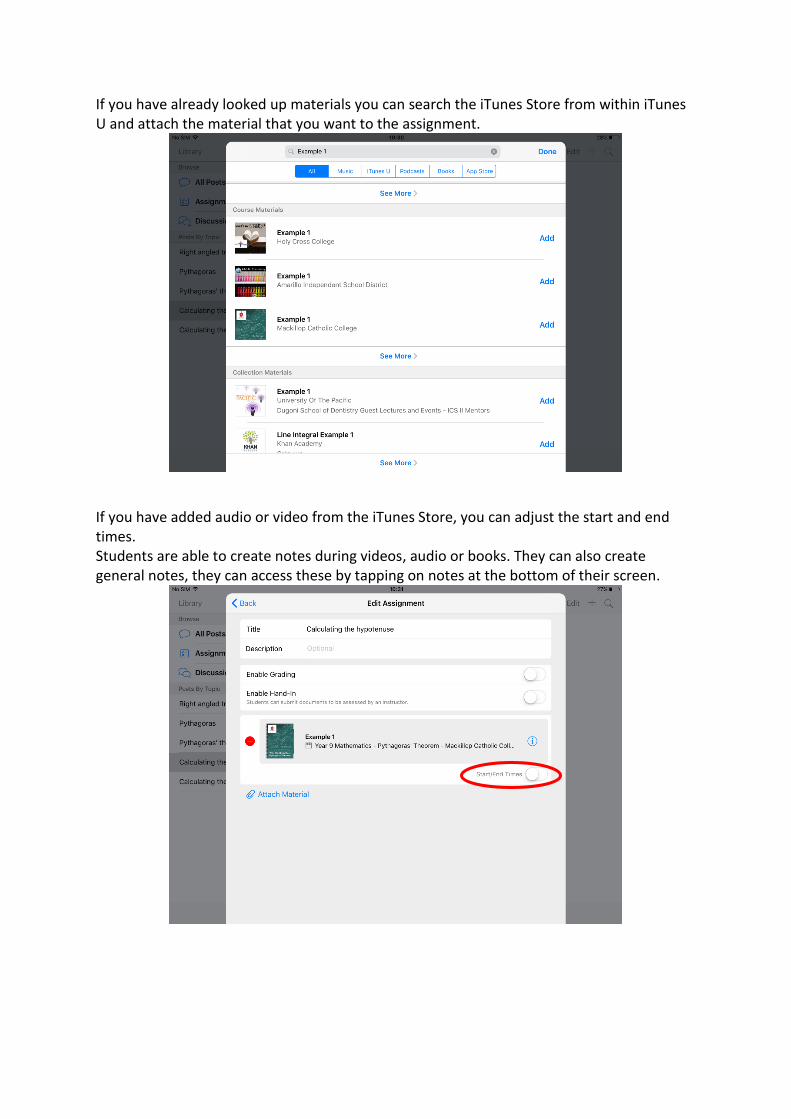
If you have already looked up materials you can search the iTunes Store from within iTunes U and attach the material that you want to the assignment.
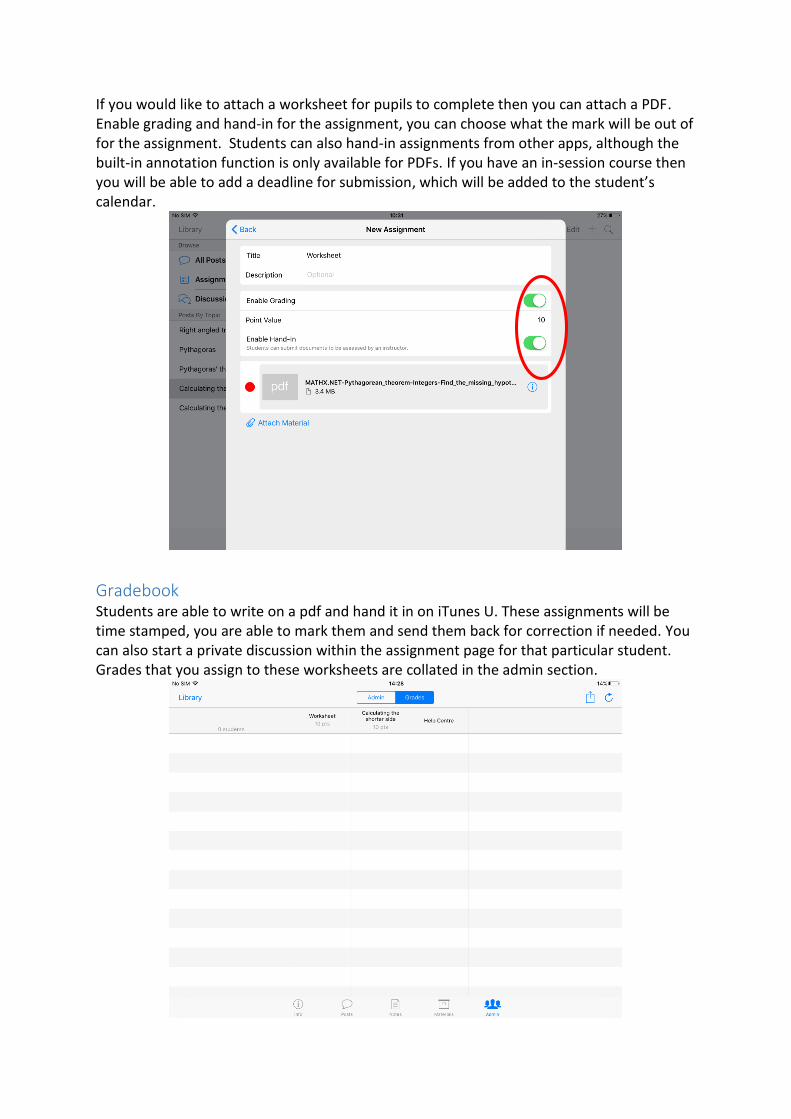
If you have added audio or video from the iTunes Store, you can adjust the start and end times. Students are able to create notes during videos, audio or books. They can also create general notes, they can access these by tapping on notes at the bottom of their screen.
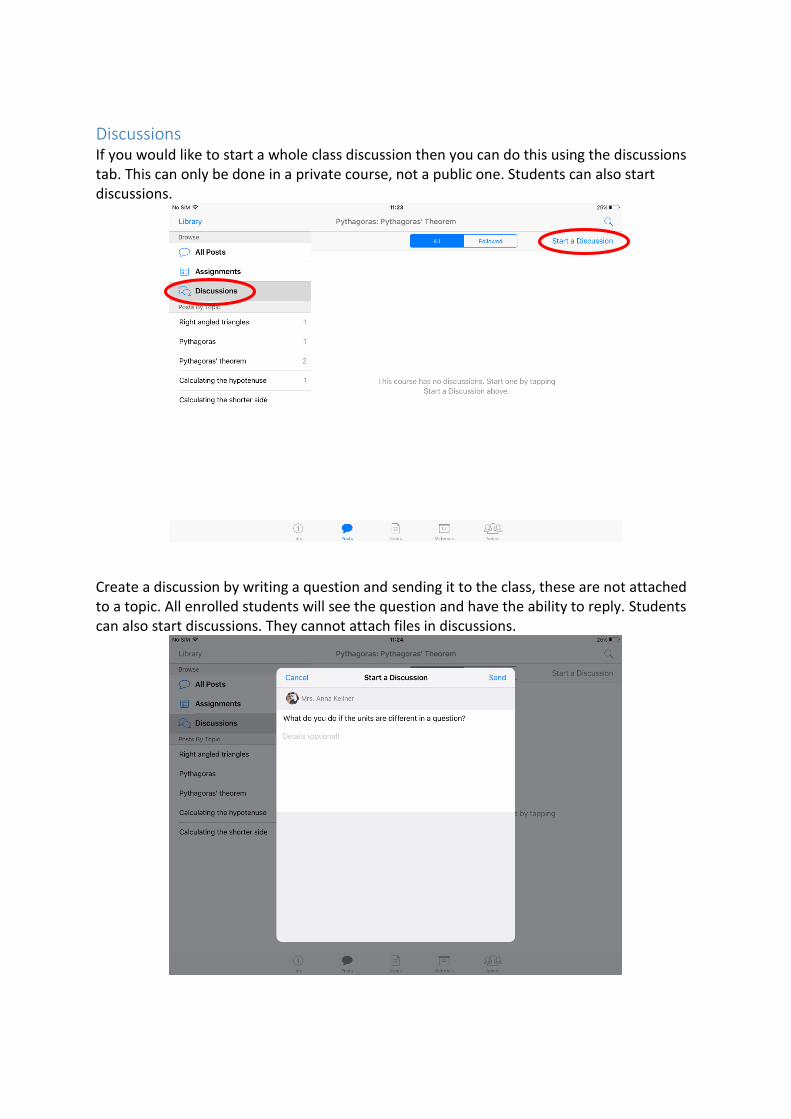
If you would like to attach a worksheet for pupils to complete then you can attach a PDF. Enable grading and hand-in for the assignment, you can choose what the mark will be out of for the assignment. Students can also hand-in assignments from other apps, although the built-in annotation function is only available for PDFs. If you have an in-session course then you will be able to add a deadline for submission, which will be added to the student’s calendar.
Gradebook Students are able to write on a pdf and hand it in on iTunes U. These assignments will be time stamped, you are able to mark them and send them back for correction if needed. You can also start a private discussion within the assignment page for that particular student. Grades that you assign to these worksheets are collated in the admin section.
Discussions If you would like to start a whole class discussion then you can do this using the discussions tab. This can only be done in a private course, not a public one. Students can also start discussions.
Create a discussion by writing a question and sending it to the class, these are not attached to a topic. All enrolled students will see the question and have the ability to reply. Students can also start discussions. They cannot attach files in discussions.
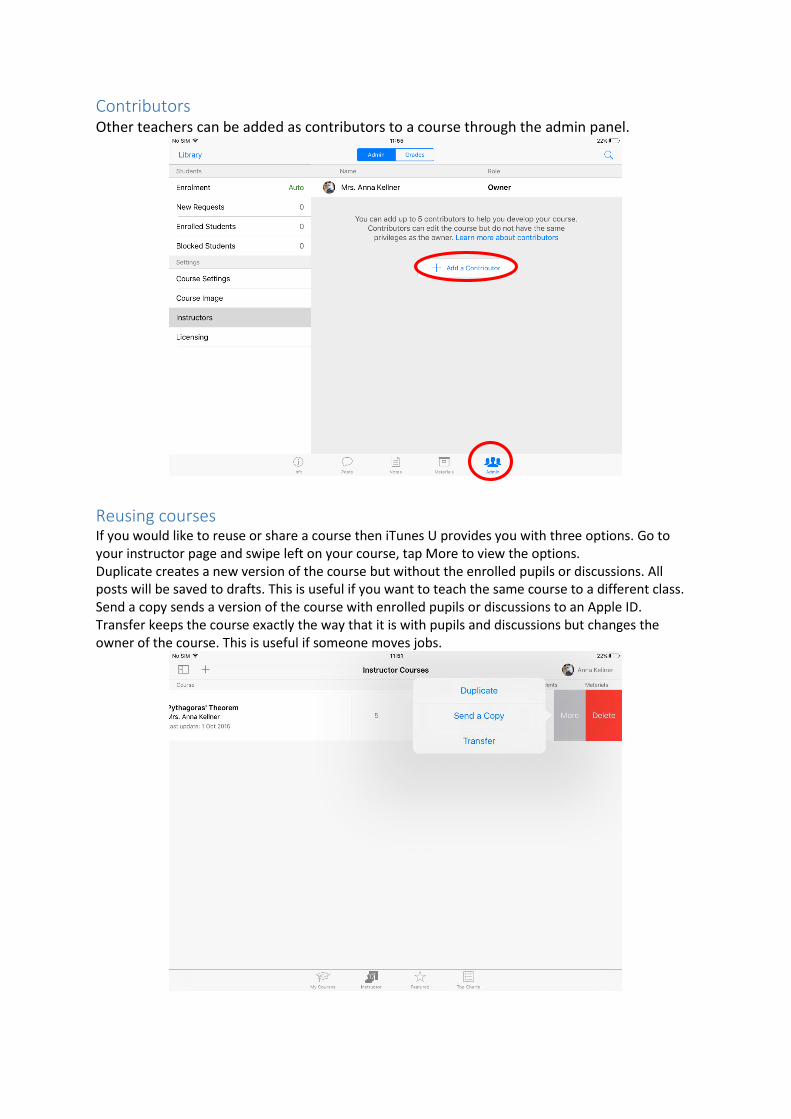
Contributors Other teachers can be added as contributors to a course through the admin panel.
Reusing courses If you would like to reuse or share a course then iTunes U provides you with three options. Go to your instructor page and swipe left on your course, tap More to view the options. Duplicate creates a new version of the course but without the enrolled pupils or discussions. All posts will be saved to drafts. This is useful if you want to teach the same course to a different class. Send a copy sends a version of the course with enrolled pupils or discussions to an Apple ID. Transfer keeps the course exactly the way that it is with pupils and discussions but changes the owner of the course. This is useful if someone moves jobs.
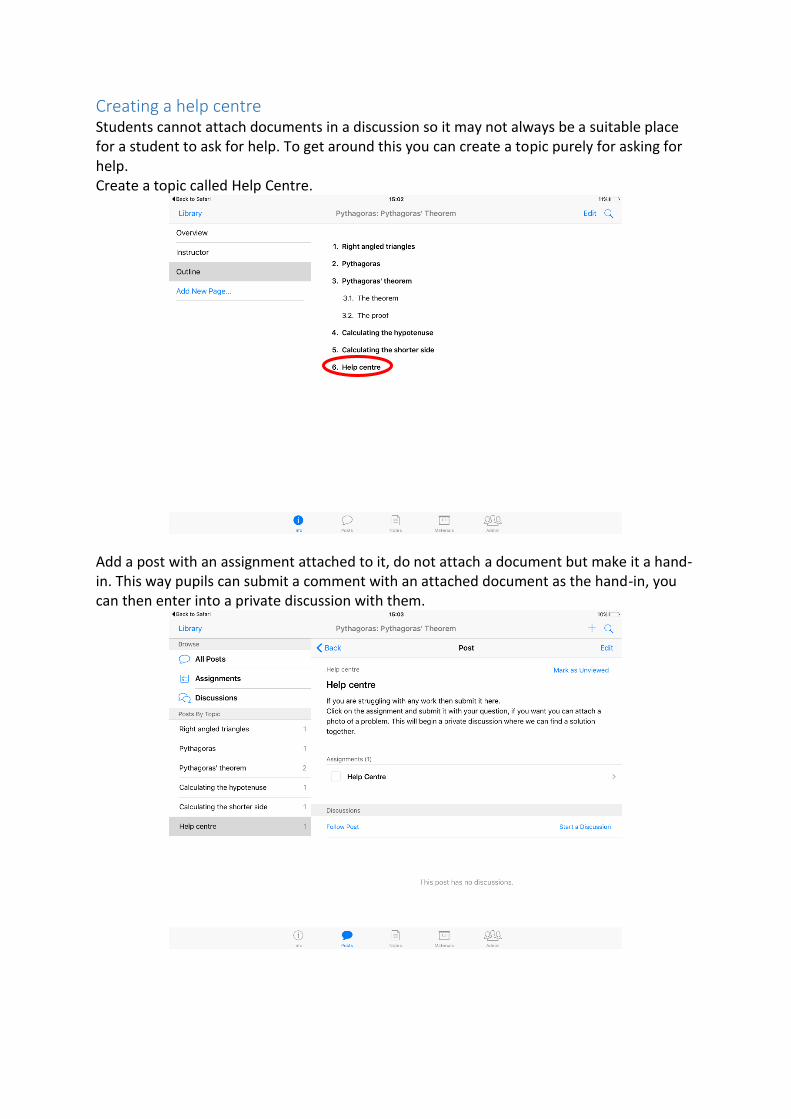
Creating a help centre Students cannot attach documents in a discussion so it may not always be a suitable place for a student to ask for help. To get around this you can create a topic purely for asking for help. Create a topic called Help Centre.
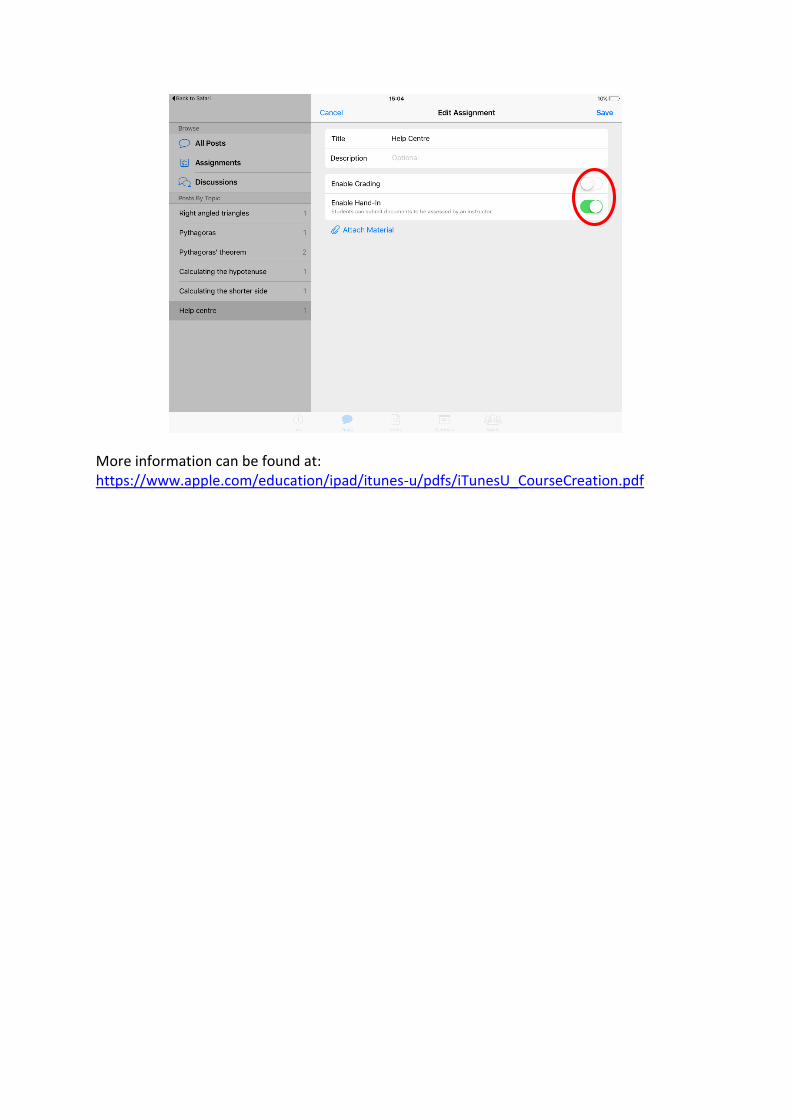
Add a post with an assignment attached to it, do not attach a document but make it a hand-in. This way pupils can submit a comment with an attached document as the hand-in, you can then enter into a private discussion with them.
More information can be found at: https://www.apple.com/education/ipad/itunes-u/pdfs/iTunesU_CourseCreation.pdf