Embed Size (px)
Citation preview

1
IWKS 3400 LAB 71
JK Bennett
This lab will introduce you to how to create terrain. We will first review some basic principles of 3D graphics, and will
gradually add complexity until we have a reasonably sophisticated representation of our desired terrain. In particular, we
will learn how HLSL (High Level Shader Language) effect files work. Lab 8 will further develop these ideas to allow us
to create even more sophisticated terrain.
You will need to load two files to complete this lab. Download and unzip this file to obtain them. If this link does not
work for some reason, here is the hard link: http://inworks.ucdenver.edu/jkb/IWKS3400/Labs/Lab7_Content.zip. After
creating our project, place these two file in the
Getting Started
Begin by creating a new Windows MonoGame project (named Lab7_Mono), as you have done in previous labs.
In this lab, we will begin to use more sophisticated capabilities of the graphics card.
Recall that a ‘device’ is a direct link to the graphics hardware on your computer. This variable is made available in
MonoGame as an instance of GraphicsDevice. Declare this variable by adding this line to the top of your class, just above
the Game1() method:
GraphicsDevice device;
Now initialize this variable by adding the following line to the LoadContent method:
device = graphics.GraphicsDevice;
Let's put it to use, by making the first line in our Draw method a tiny bit shorter:
device.Clear(Color.CornflowerBlue);
Next, we’re going to specify some extra stuff related to our window such as its size and title. Add this code to the
Initialize method:
graphics.GraphicsProfile = GraphicsProfile.HiDef; graphics.IsFullScreen = false; graphics.ApplyChanges(); graphics.PreferredBackBufferWidth = 800; graphics.PreferredBackBufferHeight = 800; graphics.ApplyChanges(); Window.Title = "Lab7_Mono - Terrain Tutorial";
The first two lines tells MonoGame that we will be expecting to use the more sophisticated features of the graphics card,
and that we want our program to run in a window (as opposed to full screen), after which we apply the changes. Then we
set the size of our backbuffer, which will contain what will be drawn to the screen. Then we apply the changes again.
Why? Because there is a minor bug in MonGame 3.7 that requires this particular work around to have all of our
instructions “take.” Finally, we set the title of our window.
When you run this code, you should see a window of 800x800 pixels, with the title as shown.
1 This lab is derived substantially from a series of excellent on-line XNA tutorials created by Riemer Grootjans. You can find his web site at
http://www.riemers.net/. The code and content in Riemer’s tutorials have been modified for MonoGame (Verion 3.7) – jkb, Oct. 2018.
2
Using a Custom Effect
MonoGame uses an effect for everything it draws. So what exactly is an effect?
In virtually all 3D programming, all objects are represented using triangles. Any shape can be represented using triangles,
if you use enough of them. An effect is some code that instructs your hardware (the graphics card) how it should display
these triangles. An effect file contains one or more techniques, for example technique A and technique B. Drawing
triangles using technique A might draw them semi-transparent, while drawing them using technique B might draw all
objects using only blue-gray colors, as seen in some horror movies.
Effects, textures, and images are all considered “content.” Monogame processes content using a “Content Pipeline.” The
content pipeline allows us to add content to our project, and tell compiler how to process the content for use in our
MonoGame project. In the Solution Explorer, locate the “Content” folder, and a file named Content.mgcb within this
folder. We open the Monogame Content Pipeline by double-clicking on this file.
MonoGame needs an effect file to draw even the simplest triangles. Outside of Visual Studio, you should have already
added effects.fx to the Content folder within the project. Effects.fx contains some very basic techniques created to
demonstrate basic HLSL operation. These techniques, originally developed for XNA 3.1, have been brought up to date
and modified to work correctly with Monogame. To add the file into our content pipeline, right-click on the “Content”
icon in the “Project” window, select Add->Existing Item and select the effects.fx file. After you’ve clicked the OK button,
the effects.fx file should be added to your Content entry.
Next, we will link this effect file to a variable, so we can actually use it in our code. We need to declare a new Effect
object, so put this at the beginning of the Game1 class code:
Effect effect;
In your LoadContent method, add this line to have MonoGame load the .fx file into the effect variable:
effect = Content.Load<Effect> ("effects");
3
The “effects” name refers to the part of the file before the .fx extension.
With all the necessary variables loaded, we can concentrate on the Draw method. You’ll notice the first line starts with a
Clear command. This line clears the buffer of our window and fills it with a specified color. Let’s set this to
DarkSlateBlue, just for fun:
device.Clear(Color.DarkSlateBlue);
MonoGame draws to a buffer, instead of drawing directly to the window. At the end of the Draw method, the contents of
the buffer are drawn on the screen all at once. This way, the screen will not flicker as it might if we were to draw each part
of our scene separately to the screen.
To draw something we first need to specify a technique from an Effect object. To activate an effect from our .fx file, add
this line to your Draw method:
effect.CurrentTechnique = effect.Techniques["Pretransformed"];
Open the Effects.fx file in your project and look for the implementation of the Pretransformed technique. A technique
can be made up of multiple passes, so we need to iterate through them. If you have developed HLSL code for other
systems, e.g., XNA, you will notice that the MonoGame HLSL compiler is a little more picky about type checking. For
example, consider line 83 of effects.fx:
float3 Normal = (float3) normalize(mul(normalize(((float4)(inNormal,0.0))), xWorld));
With a less picky compiler (for example, the one that came with XNA) we could just write:
float3 Normal = normalize(mul(normalize(inNormal), xWorld));
MonoGame will compile and run the latter statememnt, but it will warn us that we are asking the compiler to perform
implicit type conversion. Since this is usually a bad idea, the present code tells the compiler exactly what we intend, and it
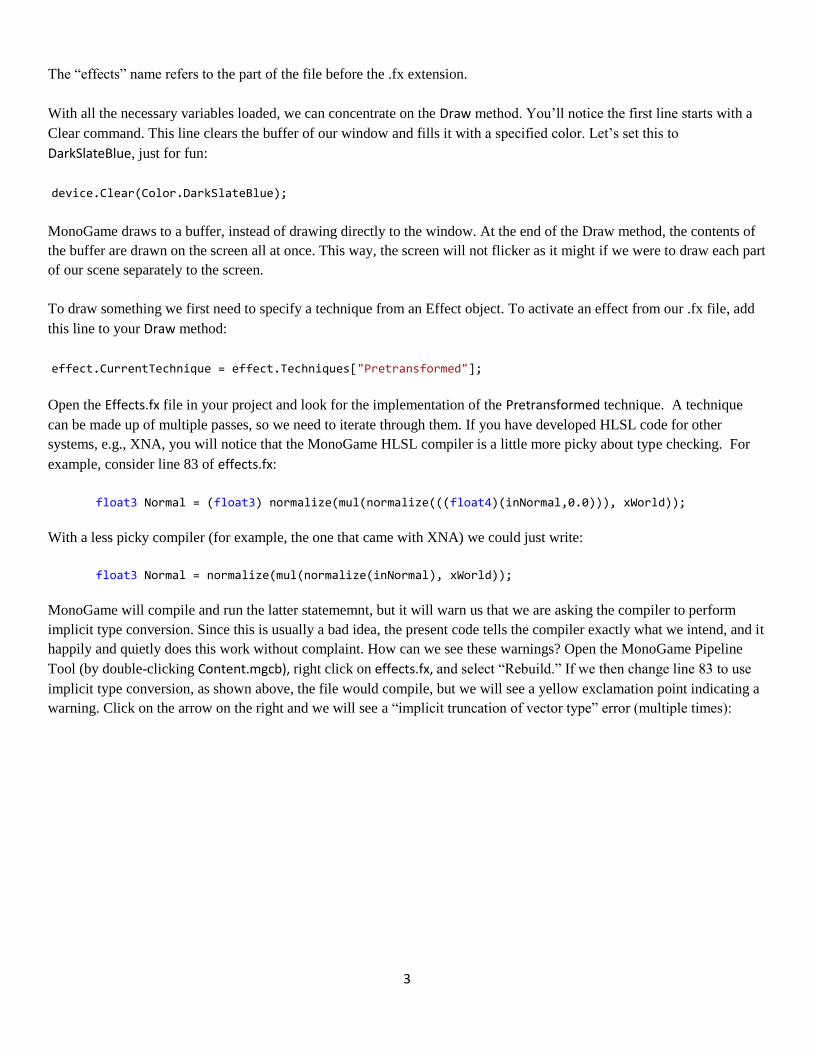
happily and quietly does this work without complaint. How can we see these warnings? Open the MonoGame Pipeline
Tool (by double-clicking Content.mgcb), right click on effects.fx, and select “Rebuild.” If we then change line 83 to use
implicit type conversion, as shown above, the file would compile, but we will see a yellow exclamation point indicating a
warning. Click on the arrow on the right and we will see a “implicit truncation of vector type” error (multiple times):
4
Now we are ready to move on. Add this code below the code that you just entered in the Draw method:
foreach (EffectPass pass in effect.CurrentTechnique.Passes) { pass.Apply(); }
All drawing code must be put after the call to pass.Apply().
With all of this code set up, we’re finally ready to start drawing things on the screen, which is what we will do next.
Every object drawn in 3D is drawn using triangles, and a triangle is defined by 3 points. Every point is defined by a
vector, specifying the X, Y and Z coordinates of the point. However, just knowing the coordinates of a point might not be
enough. For example, we might want to define a color for the given point as well. We will use the term “vertex” to refer to
the list of properties of a given point, including the position, color and so on.
MonoGame has a structure that works perfectly to hold our vertex information: the VertexPositionColor struct. A vertex of
this type can hold a position and a color, which is all we need for now. To define a triangle, we will need three vertices,
which we will store in an array. So let’s declare this variable at the top of our class (in Game1.cs, below “Effect effect”):
VertexPositionColor[] vertices;
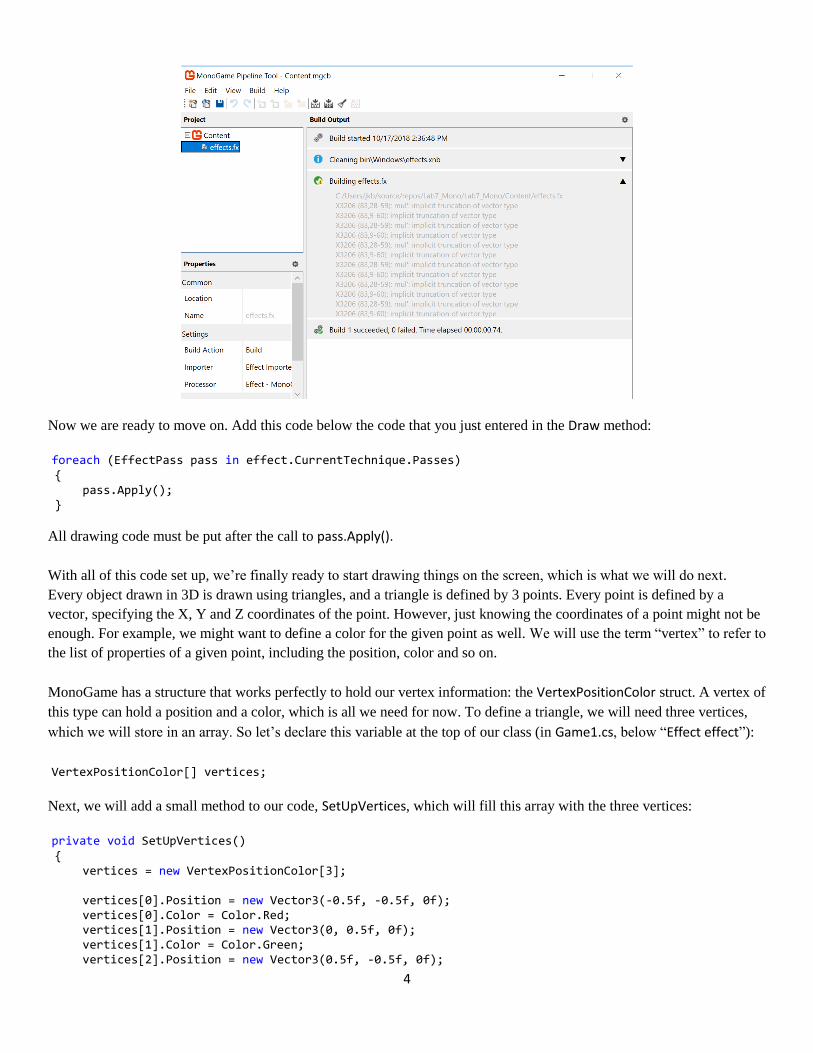
Next, we will add a small method to our code, SetUpVertices, which will fill this array with the three vertices:
private void SetUpVertices() { vertices = new VertexPositionColor[3]; vertices[0].Position = new Vector3(-0.5f, -0.5f, 0f); vertices[0].Color = Color.Red; vertices[1].Position = new Vector3(0, 0.5f, 0f); vertices[1].Color = Color.Green; vertices[2].Position = new Vector3(0.5f, -0.5f, 0f);
5
vertices[2].Color = Color.Yellow; }
The array is initialized to hold 3 vertices, after which it is filled. For now, we are using coordinates that are relative to the
screen: the (0,0,0) point would be the middle of our screen, the (-1, -1, 0) point bottom-left and the (1, 1, 0) point top-
right. So in the example above, the first point is halfway to the bottom left of the window, and the second point is halfway
to the top in the middle of our screen. (As these are not really 3D coordinates, they do not need to be transformed to 2D
coordinates. Hence, the name of the technique: ‘Pretransformed’)
As you can see, we have set each of the vertices to different colors. We now need to call our SetUpVertices method. As it
uses the device, call it at the end of the LoadContent method:
SetUpVertices();
All we have to do now is tell the device to draw the triangle! Go to our Draw method, where we want to draw the triangle
after the call to pass.Apply:
device.DrawUserPrimitives(PrimitiveType.TriangleList, vertices, 0, 1,
VertexPositionColor.VertexDeclaration);
This line actually tells the graphics card to draw the triangle: we want to draw one triangle from the vertices array, starting
at vertex 0. TriangleList indicates that our vertices array contains a list of triangles (in this case, a list of only one triangle).
If we wanted to draw four triangles, we would need an array of 12 vertices. Another possibility is to use a TriangleStrip,
which can perform a lot faster, but is only useful to draw triangles that are connected to each other. The last argument
specifies the VertexDeclaration, which tells the graphics card the format of the vertices we are sending it. We have stored
the position and color data for three vertices inside an array. When we instruct MonoGame to render a triangle based on
these data, MonoGame puts these data in a byte stream and sends it to the graphics card. Our graphics card receives the
byte stream, and interprets that byte stream based upon the VertexDeclaration that defines the vertices in the byte stream.
By specifying VertexPositionColor as the kind of VertexDeclaration we are using, we are telling the graphics card that
there are vertices coming its way that contain Position and Color data. We will see how to create our own vertex types
later.
Running this code should produce the following image – if it does not, compare your code to the code below.

6
Here is Game1.cs code so far:
using Microsoft.Xna.Framework; using Microsoft.Xna.Framework.Graphics; using Microsoft.Xna.Framework.Input; namespace Lab7_Mono { /// <summary> /// This is the main type for your game. /// </summary> public class Game1 : Game { GraphicsDeviceManager graphics; SpriteBatch spriteBatch; GraphicsDevice device; Effect effect; VertexPositionColor[] vertices; public Game1() { graphics = new GraphicsDeviceManager(this); Content.RootDirectory = "Content"; } private void SetUpVertices() { vertices = new VertexPositionColor[3]; vertices[0].Position = new Vector3(-0.5f, -0.5f, 0f); vertices[0].Color = Color.Red; vertices[1].Position = new Vector3(0, 0.5f, 0f); vertices[1].Color = Color.Green;
7
vertices[2].Position = new Vector3(0.5f, -0.5f, 0f); vertices[2].Color = Color.Yellow; } /// <summary> /// Allows the game to perform any initialization it needs to before starting to run. /// This is where it can query for any required services and load any non-graphic /// related content. Calling base.Initialize will enumerate through any components /// and initialize them as well. /// </summary> protected override void Initialize() { // TODO: Add your initialization logic here graphics.GraphicsProfile = GraphicsProfile.HiDef; graphics.IsFullScreen = false; graphics.ApplyChanges(); graphics.PreferredBackBufferWidth = 800; graphics.PreferredBackBufferHeight = 800; graphics.ApplyChanges(); Window.Title = "Lab7_Mono - Terrain Tutorial"; base.Initialize(); } /// <summary> /// LoadContent will be called once per game and is the place to load /// all of your content. /// </summary> protected override void LoadContent() { device = graphics.GraphicsDevice; effect = Content.Load<Effect>("effects"); SetUpVertices(); // Create a new SpriteBatch, which can be used to draw textures. spriteBatch = new SpriteBatch(GraphicsDevice); // TODO: use this.Content to load your game content here } /// <summary> /// UnloadContent will be called once per game and is the place to unload /// game-specific content. /// </summary> protected override void UnloadContent() { // TODO: Unload any non ContentManager content here } /// <summary> /// Allows the game to run logic such as updating the world, /// checking for collisions, gathering input, and playing audio. /// </summary> /// <param name="gameTime">Provides a snapshot of timing values.</param> protected override void Update(GameTime gameTime) { if (GamePad.GetState(PlayerIndex.One).Buttons.Back == ButtonState.Pressed || Keyboard.GetState().IsKeyDown(Keys.Escape)) Exit(); // TODO: Add your update logic here
8
base.Update(gameTime); } /// <summary> /// This is called when the game should draw itself. /// </summary> /// <param name="gameTime">Provides a snapshot of timing values.</param> protected override void Draw(GameTime gameTime) { device.Clear(Color.DarkSlateBlue); // TODO: Add your drawing code here effect.CurrentTechnique = effect.Techniques["Pretransformed"]; foreach (EffectPass pass in effect.CurrentTechnique.Passes) { pass.Apply(); device.DrawUserPrimitives(PrimitiveType.TriangleList, vertices, 0, 1, VertexPositionColor.VertexDeclaration); } base.Draw(gameTime); } } }
Optional - Test your knowledge:
1. Make the bottom-left corner of the triangle collide with the bottom-left corner of your window.
2. Render 2 triangles, covering your whole window.
Using a Custom Effect and World Coordinates
We just drew a triangle, using 'pretransformed' coordinates. These coordinates allowed us to directly specify their position
on the screen. However, we will usually use the untransformed coordinates, the so-called “World Space” coordinates,
which we specify in 3D coordinates. These allow us to create a whole scene using simple 3D coordinates, and,
importantly, to position a camera through which the user will look at the scene.
Let’s start by redefining our triangle coordinates in 3D world space. Replace the code in the SetUpVertices method with
this code:
private void SetUpVertices()
{ vertices = new VertexPositionColor[3]; vertices[0].Position = new Vector3(0f, 0f, 0f); vertices[0].Color = Color.Red; vertices[1].Position = new Vector3(10f, 10f, 0f); vertices[1].Color = Color.Yellow; vertices[2].Position = new Vector3(10f, 0f, -5f); vertices[2].Color = Color.Green; }
As you can see, from here on we will be using the Z-coordinate as well. Because we are no longer using pretransformed
screen coordinates (where the x and y coordinates are in the [-1, 1] region), we need to use a different technique from our
9
effect file. Let’s create one called ‘ColoredNoShading’, to reflect that we will be rendering a Colored 3D image, but will
not yet specify any lighting or shading information.
Open the effects.fx file and add a new technique by inserting the following code at the end of the file:
//------- Technique: ColoredNoShading -------- // No lighting or shading, so no normal info passed in VertexToPixel ColoredNoShadingVS(float4 inPos : POSITION, float4 inColor : COLOR) { VertexToPixel Output = (VertexToPixel)0; float4x4 preViewProjection = mul(xView, xProjection); float4x4 preWorldViewProjection = mul(xWorld, preViewProjection); Output.Position = mul(inPos, preWorldViewProjection); Output.Color = inColor; return Output; } PixelToFrame ColoredNoShadingPS(VertexToPixel PSIn) { PixelToFrame Output = (PixelToFrame)0; Output.Color = PSIn.Color; return Output; } technique ColoredNoShading { pass Pass0 { VertexShader = compile vs_4_0_level_9_1 ColoredNoShadingVS(); PixelShader = compile ps_4_0_level_9_1 ColoredNoShadingPS(); } }
A shader (or effect) is a program that is executed on the GPU (Graphical Processing Unit). The GPU is located on the
graphics card and usually contains several cores that can execute shader program parts concurrently. This allows the GPU
to have high throughput (number of triangles that can be processed per second). Shaders (GPU programs) are specialized
into (at least) different types: vertex shaders, geometry shaders and pixel shaders. Vertex shaders are executed once per
vertex. They transform 3D positions in space to 2D coordinates on the screen, and they manipulate position, color, and
texture coordinates, but they cannot add new vertices. Geometry shaders can add or remove vertices from a mesh,
procedurally generate geometry, or add detail to shapes. Pixel shaders (sometimes called fragment shaders) calculate the
color of individual pixels. They are used to implement lighting, texturing, bump mapping, etc., and are applied (executed)
once per pixel per geometric primitive. The C# MonoGame game code sends to the GPU the vertices and textures that
represent the input for the vertex and pixel shader.
HLSL is a C-like language used to write effects in MonoGame (and for many other graphics and gaming platforms).
Defining an effect in HLSL requires (at least) three parts: VertexToPixel, PixelToFrame, and the actual technique
declaration (in our case, ColoredNoShading).
10
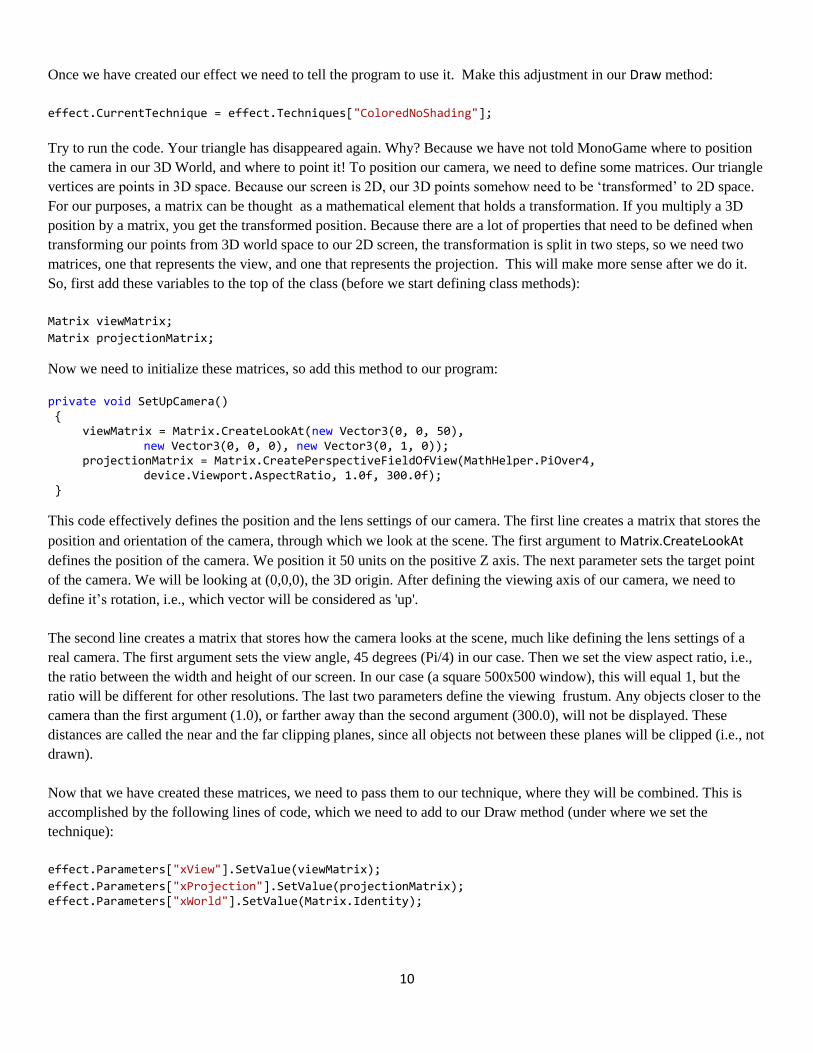
Once we have created our effect we need to tell the program to use it. Make this adjustment in our Draw method:
effect.CurrentTechnique = effect.Techniques["ColoredNoShading"];
Try to run the code. Your triangle has disappeared again. Why? Because we have not told MonoGame where to position
the camera in our 3D World, and where to point it! To position our camera, we need to define some matrices. Our triangle
vertices are points in 3D space. Because our screen is 2D, our 3D points somehow need to be ‘transformed’ to 2D space.
For our purposes, a matrix can be thought as a mathematical element that holds a transformation. If you multiply a 3D
position by a matrix, you get the transformed position. Because there are a lot of properties that need to be defined when
transforming our points from 3D world space to our 2D screen, the transformation is split in two steps, so we need two
matrices, one that represents the view, and one that represents the projection. This will make more sense after we do it.
So, first add these variables to the top of the class (before we start defining class methods):
Matrix viewMatrix;
Matrix projectionMatrix;
Now we need to initialize these matrices, so add this method to our program:
private void SetUpCamera() { viewMatrix = Matrix.CreateLookAt(new Vector3(0, 0, 50), new Vector3(0, 0, 0), new Vector3(0, 1, 0)); projectionMatrix = Matrix.CreatePerspectiveFieldOfView(MathHelper.PiOver4, device.Viewport.AspectRatio, 1.0f, 300.0f); }
This code effectively defines the position and the lens settings of our camera. The first line creates a matrix that stores the
position and orientation of the camera, through which we look at the scene. The first argument to Matrix.CreateLookAt
defines the position of the camera. We position it 50 units on the positive Z axis. The next parameter sets the target point
of the camera. We will be looking at (0,0,0), the 3D origin. After defining the viewing axis of our camera, we need to
define it’s rotation, i.e., which vector will be considered as 'up'.
The second line creates a matrix that stores how the camera looks at the scene, much like defining the lens settings of a
real camera. The first argument sets the view angle, 45 degrees (Pi/4) in our case. Then we set the view aspect ratio, i.e.,
the ratio between the width and height of our screen. In our case (a square 500x500 window), this will equal 1, but the
ratio will be different for other resolutions. The last two parameters define the viewing frustum. Any objects closer to the
camera than the first argument (1.0), or farther away than the second argument (300.0), will not be displayed. These
distances are called the near and the far clipping planes, since all objects not between these planes will be clipped (i.e., not
drawn).
Now that we have created these matrices, we need to pass them to our technique, where they will be combined. This is
accomplished by the following lines of code, which we need to add to our Draw method (under where we set the
technique):
effect.Parameters["xView"].SetValue(viewMatrix);
effect.Parameters["xProjection"].SetValue(projectionMatrix); effect.Parameters["xWorld"].SetValue(Matrix.Identity);
11
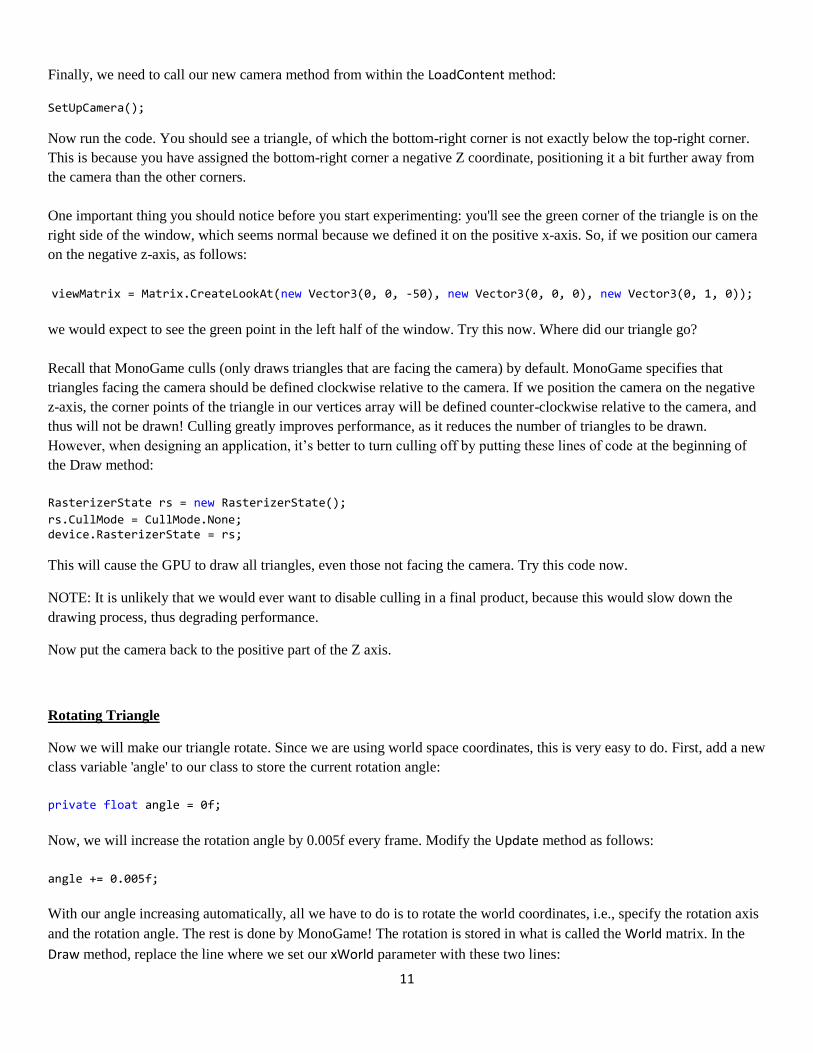
Finally, we need to call our new camera method from within the LoadContent method:
SetUpCamera();
Now run the code. You should see a triangle, of which the bottom-right corner is not exactly below the top-right corner.
This is because you have assigned the bottom-right corner a negative Z coordinate, positioning it a bit further away from
the camera than the other corners.
One important thing you should notice before you start experimenting: you'll see the green corner of the triangle is on the
right side of the window, which seems normal because we defined it on the positive x-axis. So, if we position our camera
on the negative z-axis, as follows:
viewMatrix = Matrix.CreateLookAt(new Vector3(0, 0, -50), new Vector3(0, 0, 0), new Vector3(0, 1, 0));
we would expect to see the green point in the left half of the window. Try this now. Where did our triangle go?
Recall that MonoGame culls (only draws triangles that are facing the camera) by default. MonoGame specifies that
triangles facing the camera should be defined clockwise relative to the camera. If we position the camera on the negative
z-axis, the corner points of the triangle in our vertices array will be defined counter-clockwise relative to the camera, and
thus will not be drawn! Culling greatly improves performance, as it reduces the number of triangles to be drawn.
However, when designing an application, it’s better to turn culling off by putting these lines of code at the beginning of
the Draw method:
RasterizerState rs = new RasterizerState();
rs.CullMode = CullMode.None; device.RasterizerState = rs;
This will cause the GPU to draw all triangles, even those not facing the camera. Try this code now.
NOTE: It is unlikely that we would ever want to disable culling in a final product, because this would slow down the
drawing process, thus degrading performance.
Now put the camera back to the positive part of the Z axis.
Rotating Triangle
Now we will make our triangle rotate. Since we are using world space coordinates, this is very easy to do. First, add a new
class variable 'angle' to our class to store the current rotation angle:
private float angle = 0f;
Now, we will increase the rotation angle by 0.005f every frame. Modify the Update method as follows:
angle += 0.005f;
With our angle increasing automatically, all we have to do is to rotate the world coordinates, i.e., specify the rotation axis
and the rotation angle. The rest is done by MonoGame! The rotation is stored in what is called the World matrix. In the
Draw method, replace the line where we set our xWorld parameter with these two lines:
12
Matrix worldMatrix = Matrix.CreateRotationY(3 * angle);
effect.Parameters["xWorld"].SetValue(worldMatrix);
The first line creates the World matrix, which we create as a rotation around the Y axis. The second line passes this World
matrix to the effect. From now on, everything we draw will be rotated along the Y axis by the amount currently stored in
‘angle’!
Run this code now. When we run the application, you will see that the triangle is spinning around its (0,0,0) point! This is
because the Y axis runs through this point, so the (0,0,0) point is the only point of our triangle that remains the same. Now
imagine we would like to spin the triangle around the center of the triangle. One possibility is to redefine the triangle so
the (0,0,0) would be in the center of our triangle. As easier solution is to first move (translate) the triangle a bit to the left
and down, and then rotate it. To do this, we simply multiply our World matrix by a translation matrix in the Draw method
by replaceing our worldMatrix code, as follows:
Matrix worldMatrix = Matrix.CreateTranslation(-20.0f/3.0f, -10.0f / 3.0f, 0) *
Matrix.CreateRotationZ(angle);
This will move the triangle so that its center point is at our (0,0,0) 3D World origin. Next, our triangle is rotated around
this point, along the Z axis, giving us the desired result. Run this code.
Note the order in which these transformations are applied. If you place the translation AFTER the rotation, you will see a
triangle rotating around one point, moved to the left and down. This is because matrix multiplications are NOT
commutative, i.e., M1*M2 is not the same as M2*M1!
We can easily change the code to make the triangle rotate around the X or Y axis. Remember that one point of our triangle
has a Z coordinate of -5, which explains why the triangle does not appear to rotate symmetrically.
We can also use Matrix CreateFromAxisAngle to specify a rotation about an arbitrary axis, as follows:
Vector3 rotAxis = new Vector3(3*angle, angle, 2*angle);
rotAxis.Normalize();
Matrix worldMatrix = Matrix.CreateTranslation(-20.0f/3.0f, -10.0f / 3.0f, 0) *
Matrix.CreateFromAxisAngle(rotAxis, angle);
This code will make our triangle spin around an axis that continues to change. The first line defines this axis (which is
changed every frame since it depends on the angle variable). The second line normalizes this axis, which is needed to
make the CreateFromAxisAngle method work properly (Normalize() changes the coordinates of the vector, so the distance
between the vector and the (0, 0, 0) point is exactly 1).
Here is our Game1.cs code so far:
using Microsoft.Xna.Framework; using Microsoft.Xna.Framework.Graphics; using Microsoft.Xna.Framework.Input; namespace Lab7_Mono { /// <summary> /// This is the main type for your game. /// </summary>
13
public class Game1 : Game { GraphicsDeviceManager graphics; SpriteBatch spriteBatch; GraphicsDevice device; Effect effect; VertexPositionColor[] vertices; Matrix viewMatrix; Matrix projectionMatrix; private float angle = 0f; public Game1() { graphics = new GraphicsDeviceManager(this); Content.RootDirectory = "Content"; } private void SetUpVertices() { vertices = new VertexPositionColor[3]; vertices[0].Position = new Vector3(0f, 0f, 0f); vertices[0].Color = Color.Red; vertices[1].Position = new Vector3(10f, 10f, 0f); vertices[1].Color = Color.Yellow; vertices[2].Position = new Vector3(10f, 0f, -5f); vertices[2].Color = Color.Green; } private void SetUpCamera() { viewMatrix = Matrix.CreateLookAt(new Vector3(0, 0, 50), new Vector3(0, 0, 0), new Vector3(0, 1, 0)); //viewMatrix = Matrix.CreateLookAt(new Vector3(0, 0, -50), new Vector3(0, 0, 0), new Vector3(0, 1, 0)); projectionMatrix = Matrix.CreatePerspectiveFieldOfView(MathHelper.PiOver4, device.Viewport.AspectRatio, 1.0f, 300.0f); } /// <summary> /// Allows the game to perform any initialization it needs to before starting to run. /// This is where it can query for any required services and load any non-graphic /// related content. Calling base.Initialize will enumerate through any components /// and initialize them as well. /// </summary> protected override void Initialize() { // TODO: Add your initialization logic here graphics.GraphicsProfile = GraphicsProfile.HiDef; graphics.IsFullScreen = false; graphics.ApplyChanges(); graphics.PreferredBackBufferWidth = 800; graphics.PreferredBackBufferHeight = 800; graphics.ApplyChanges(); Window.Title = "Lab7_Mono - Terrain Tutorial"; base.Initialize(); }
14
/// <summary> /// LoadContent will be called once per game and is the place to load /// all of your content. /// </summary> protected override void LoadContent() { device = graphics.GraphicsDevice; effect = Content.Load<Effect>("effects"); SetUpVertices(); SetUpCamera(); // Create a new SpriteBatch, which can be used to draw textures. spriteBatch = new SpriteBatch(GraphicsDevice); // TODO: use this.Content to load your game content here } /// <summary> /// UnloadContent will be called once per game and is the place to unload /// game-specific content. /// </summary> protected override void UnloadContent() { // TODO: Unload any non ContentManager content here } /// <summary> /// Allows the game to run logic such as updating the world, /// checking for collisions, gathering input, and playing audio. /// </summary> /// <param name="gameTime">Provides a snapshot of timing values.</param> protected override void Update(GameTime gameTime) { if (GamePad.GetState(PlayerIndex.One).Buttons.Back == ButtonState.Pressed || Keyboard.GetState().IsKeyDown(Keys.Escape)) Exit(); // TODO: Add your update logic here angle += 0.005f; base.Update(gameTime); } /// <summary> /// This is called when the game should draw itself. /// </summary> /// <param name="gameTime">Provides a snapshot of timing values.</param> protected override void Draw(GameTime gameTime) { device.Clear(Color.DarkSlateBlue); // Uncomment the Code below to show triangles facing away from the camera RasterizerState rs = new RasterizerState(); rs.CullMode = CullMode.None; device.RasterizerState = rs; // TODO: Add your drawing code here effect.CurrentTechnique = effect.Techniques["ColoredNoShading"]; effect.Parameters["xView"].SetValue(viewMatrix); effect.Parameters["xProjection"].SetValue(projectionMatrix);
15
//effect.Parameters["xWorld"].SetValue(Matrix.Identity); // Create a rotation // Matrix worldMatrix = Matrix.CreateRotationY(3 * angle); // Create a translation and rotation // Matrix worldMatrix = Matrix.CreateTranslation(-20.0f / 3.0f, -10.0f / 3.0f, 0) * Matrix.CreateRotationZ(3 * angle); // Rotate about a changing arbitrary axis Vector3 rotAxis = new Vector3(3 * angle, angle, 2 * angle); rotAxis.Normalize(); Matrix worldMatrix = Matrix.CreateTranslation(-20.0f / 3.0f, -10.0f / 3.0f, 0) * Matrix.CreateFromAxisAngle(rotAxis, angle); effect.Parameters["xWorld"].SetValue(worldMatrix); foreach (EffectPass pass in effect.CurrentTechnique.Passes) { pass.Apply(); device.DrawUserPrimitives(PrimitiveType.TriangleList, vertices, 0, 1, VertexPositionColor.VertexDeclaration); } base.Draw(gameTime); } } }
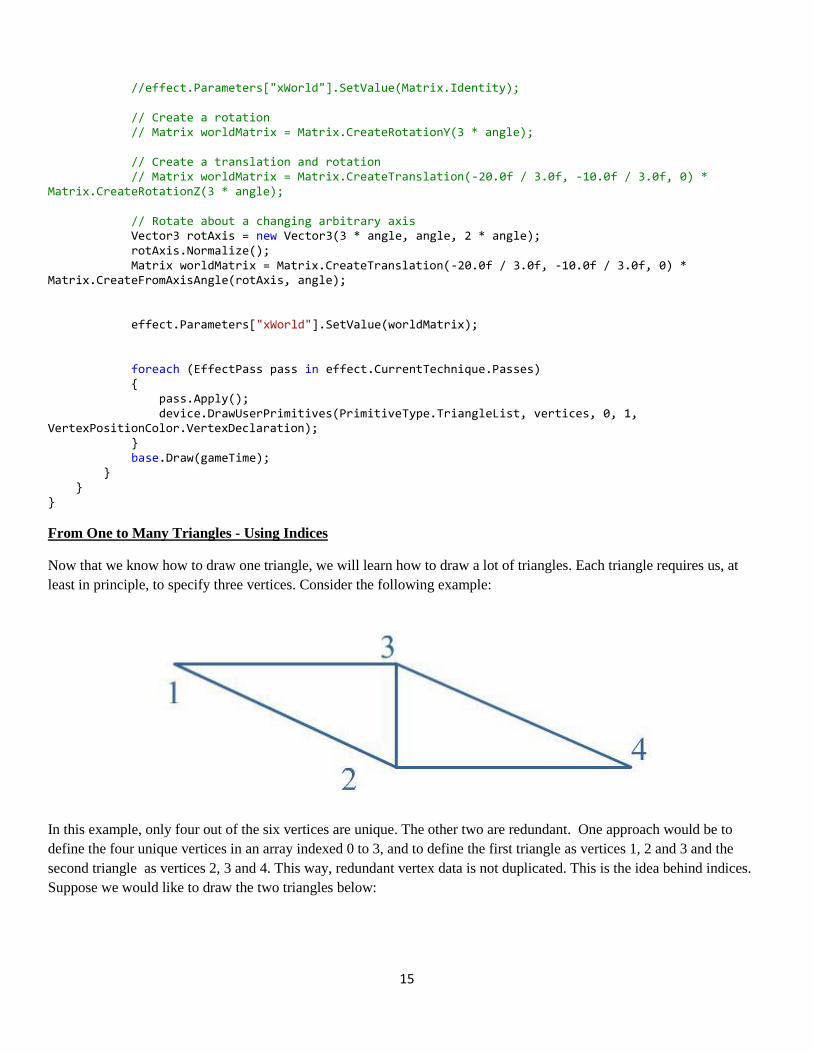
From One to Many Triangles - Using Indices
Now that we know how to draw one triangle, we will learn how to draw a lot of triangles. Each triangle requires us, at
least in principle, to specify three vertices. Consider the following example:
In this example, only four out of the six vertices are unique. The other two are redundant. One approach would be to
define the four unique vertices in an array indexed 0 to 3, and to define the first triangle as vertices 1, 2 and 3 and the
second triangle as vertices 2, 3 and 4. This way, redundant vertex data is not duplicated. This is the idea behind indices.
Suppose we would like to draw the two triangles below:
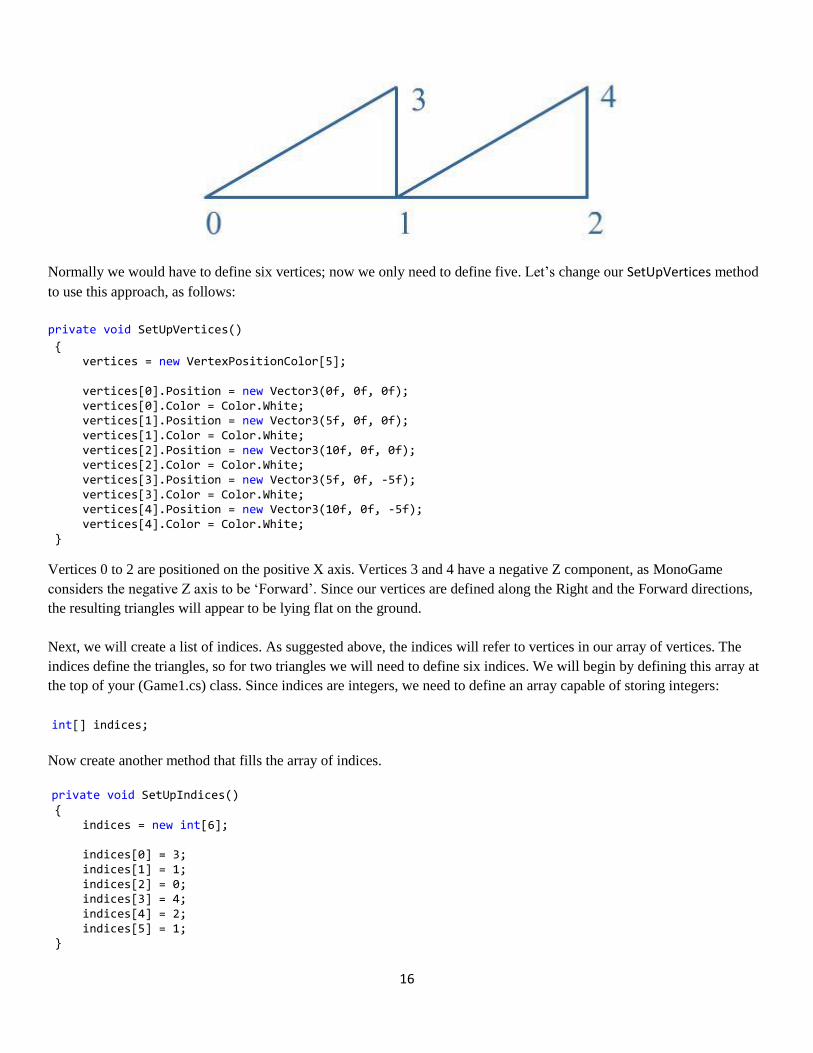
16
Normally we would have to define six vertices; now we only need to define five. Let’s change our SetUpVertices method
to use this approach, as follows:
private void SetUpVertices()
{ vertices = new VertexPositionColor[5]; vertices[0].Position = new Vector3(0f, 0f, 0f); vertices[0].Color = Color.White; vertices[1].Position = new Vector3(5f, 0f, 0f); vertices[1].Color = Color.White; vertices[2].Position = new Vector3(10f, 0f, 0f); vertices[2].Color = Color.White; vertices[3].Position = new Vector3(5f, 0f, -5f); vertices[3].Color = Color.White; vertices[4].Position = new Vector3(10f, 0f, -5f); vertices[4].Color = Color.White; }
Vertices 0 to 2 are positioned on the positive X axis. Vertices 3 and 4 have a negative Z component, as MonoGame
considers the negative Z axis to be ‘Forward’. Since our vertices are defined along the Right and the Forward directions,
the resulting triangles will appear to be lying flat on the ground.
Next, we will create a list of indices. As suggested above, the indices will refer to vertices in our array of vertices. The
indices define the triangles, so for two triangles we will need to define six indices. We will begin by defining this array at
the top of your (Game1.cs) class. Since indices are integers, we need to define an array capable of storing integers:
int[] indices;
Now create another method that fills the array of indices.
private void SetUpIndices() { indices = new int[6]; indices[0] = 3; indices[1] = 1; indices[2] = 0; indices[3] = 4; indices[4] = 2; indices[5] = 1; }

17
This method defines six indices, thus defining two triangles. Vertex Number 1 is used twice, as we can see it should be
from the image above. In this example, the savings are rather small, but in larger applications (as we will see soon) the
savings can be quite substantial. Also, note that the triangles have been defined in a clockwise order, so MonoGame will
see them as facing the camera and will not cull them away.
Now make sure that we call SetUpIndices() in the LoadContent method :
SetUpIndices();
All that's left is to draw the triangles from our buffer. To accomplish this, change the following line in our Draw method:
device.DrawUserIndexedPrimitives(PrimitiveType.TriangleList, vertices, 0, vertices.Length, indices, 0,
indices.Length / 3, VertexPositionColor.VertexDeclaration);
Instead of using the DrawUserPrimitives method, this time we call the DrawUserIndexedPrimitives method. This allows us
to specify both an array of vertices and an array of indices. The second-to-last argument specifies how many triangles are
defined by the indices. Since one triangle is defined by three indices, we specify the number of indices divided by 3.
Before you try this code, let’s make our triangles stop rotating by resetting their World matrix to the Identity matrix, as
follows:
Matrix worldMatrix = Matrix.Identity;
Run this code now. There will be not much to see. This is because both our triangles and our camera are positioned on the
floor! We will have to reposition the camera so the triangles are in sight of the camera. So, in our SetUpCamera method,
change the position of the camera so it is positioned above the (0,0,0) 3D origin, as follows:
viewMatrix = Matrix.CreateLookAt(new Vector3(0, 50, 0), new Vector3(0, 0, 0), new Vector3(0, 0, -1));
We have positioned the camera 50 units above the (0,0,0) 3D origin, as the Y axis is considered as the Up axis by
MonoGame. However, because the camera is looking down, we can no longer specify the (0,1,0) Up vector as he Up
vector for the camera. Therefore, we specify the (0,0,-1) Forward vector as Up vector for the camera.
Now when you run this code, you should see both triangles, but they are still solid. Try changing this property to our
RenderState by adding this line in the Draw method beneath rs.CullMode:
rs.FillMode = FillMode.WireFrame;
This will only draw the edges of our triangles, instead of solid triangles, as shown below:
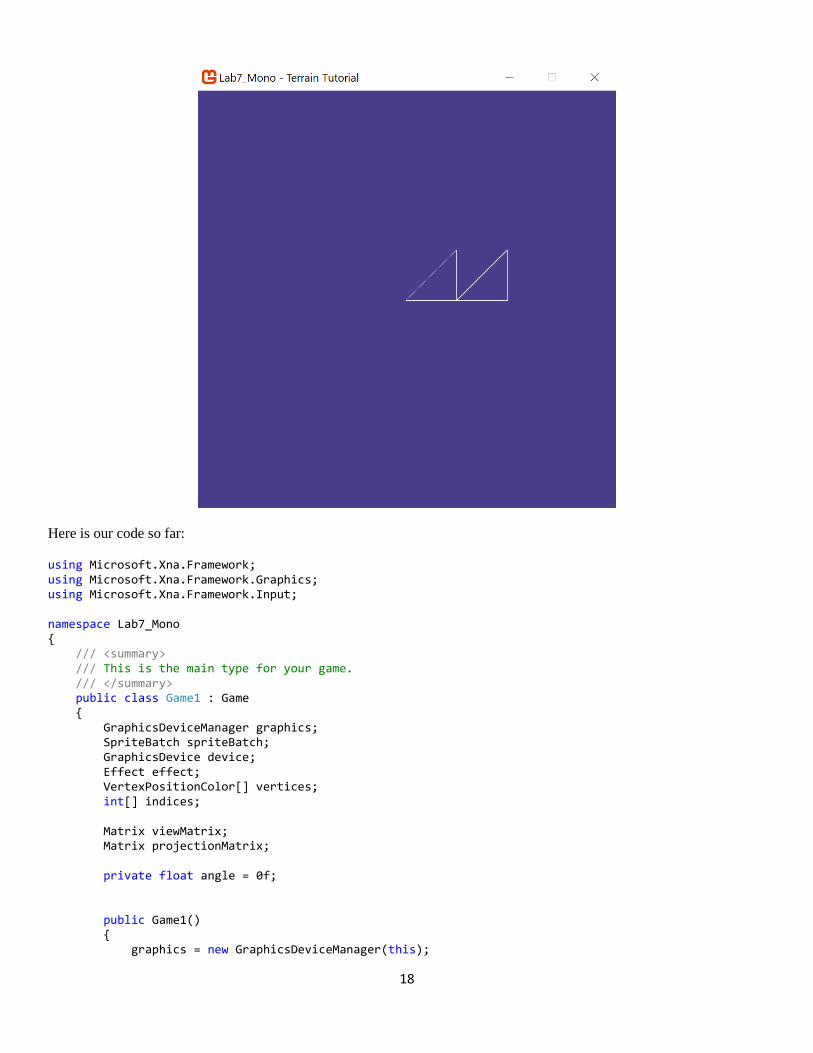
18
Here is our code so far:
using Microsoft.Xna.Framework; using Microsoft.Xna.Framework.Graphics; using Microsoft.Xna.Framework.Input; namespace Lab7_Mono { /// <summary> /// This is the main type for your game. /// </summary> public class Game1 : Game { GraphicsDeviceManager graphics; SpriteBatch spriteBatch; GraphicsDevice device; Effect effect; VertexPositionColor[] vertices; int[] indices; Matrix viewMatrix; Matrix projectionMatrix; private float angle = 0f; public Game1() { graphics = new GraphicsDeviceManager(this);
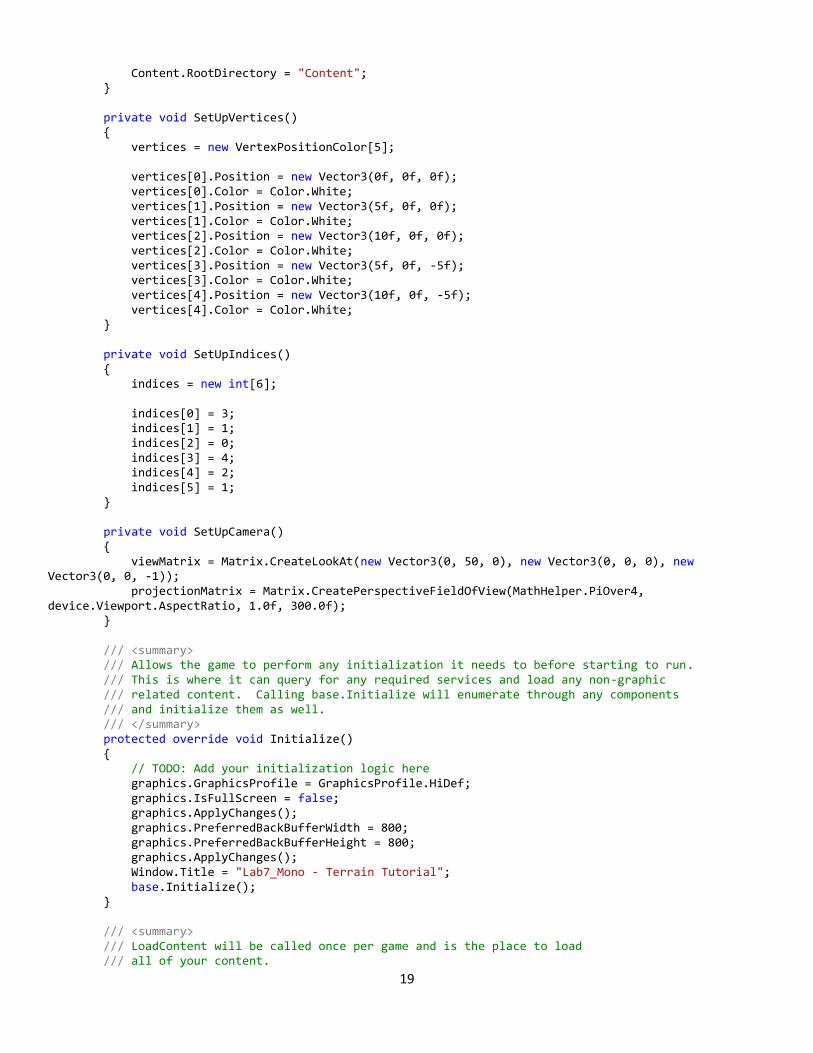
19
Content.RootDirectory = "Content"; } private void SetUpVertices() { vertices = new VertexPositionColor[5]; vertices[0].Position = new Vector3(0f, 0f, 0f); vertices[0].Color = Color.White; vertices[1].Position = new Vector3(5f, 0f, 0f); vertices[1].Color = Color.White; vertices[2].Position = new Vector3(10f, 0f, 0f); vertices[2].Color = Color.White; vertices[3].Position = new Vector3(5f, 0f, -5f); vertices[3].Color = Color.White; vertices[4].Position = new Vector3(10f, 0f, -5f); vertices[4].Color = Color.White; } private void SetUpIndices() { indices = new int[6]; indices[0] = 3; indices[1] = 1; indices[2] = 0; indices[3] = 4; indices[4] = 2; indices[5] = 1; } private void SetUpCamera() { viewMatrix = Matrix.CreateLookAt(new Vector3(0, 50, 0), new Vector3(0, 0, 0), new Vector3(0, 0, -1)); projectionMatrix = Matrix.CreatePerspectiveFieldOfView(MathHelper.PiOver4, device.Viewport.AspectRatio, 1.0f, 300.0f); } /// <summary> /// Allows the game to perform any initialization it needs to before starting to run. /// This is where it can query for any required services and load any non-graphic /// related content. Calling base.Initialize will enumerate through any components /// and initialize them as well. /// </summary> protected override void Initialize() { // TODO: Add your initialization logic here graphics.GraphicsProfile = GraphicsProfile.HiDef; graphics.IsFullScreen = false; graphics.ApplyChanges(); graphics.PreferredBackBufferWidth = 800; graphics.PreferredBackBufferHeight = 800; graphics.ApplyChanges(); Window.Title = "Lab7_Mono - Terrain Tutorial"; base.Initialize(); } /// <summary> /// LoadContent will be called once per game and is the place to load /// all of your content.
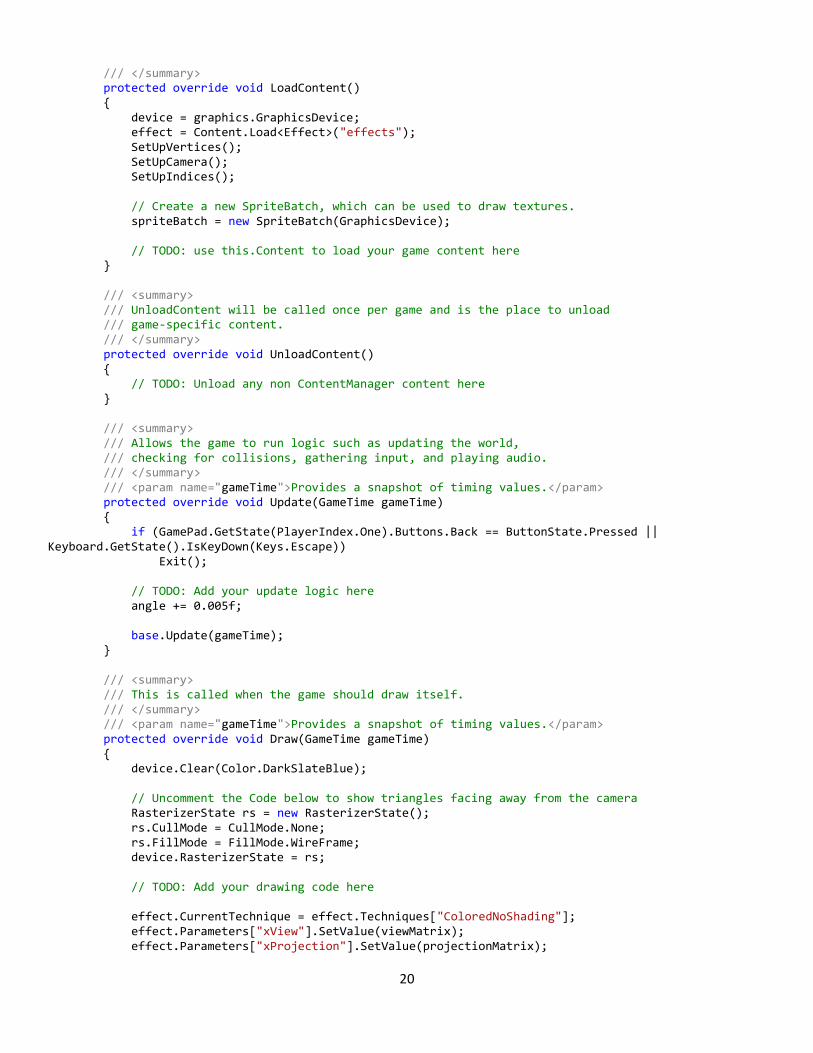
20
/// </summary> protected override void LoadContent() { device = graphics.GraphicsDevice; effect = Content.Load<Effect>("effects"); SetUpVertices(); SetUpCamera(); SetUpIndices(); // Create a new SpriteBatch, which can be used to draw textures. spriteBatch = new SpriteBatch(GraphicsDevice); // TODO: use this.Content to load your game content here } /// <summary> /// UnloadContent will be called once per game and is the place to unload /// game-specific content. /// </summary> protected override void UnloadContent() { // TODO: Unload any non ContentManager content here } /// <summary> /// Allows the game to run logic such as updating the world, /// checking for collisions, gathering input, and playing audio. /// </summary> /// <param name="gameTime">Provides a snapshot of timing values.</param> protected override void Update(GameTime gameTime) { if (GamePad.GetState(PlayerIndex.One).Buttons.Back == ButtonState.Pressed || Keyboard.GetState().IsKeyDown(Keys.Escape)) Exit(); // TODO: Add your update logic here angle += 0.005f; base.Update(gameTime); } /// <summary> /// This is called when the game should draw itself. /// </summary> /// <param name="gameTime">Provides a snapshot of timing values.</param> protected override void Draw(GameTime gameTime) { device.Clear(Color.DarkSlateBlue); // Uncomment the Code below to show triangles facing away from the camera RasterizerState rs = new RasterizerState(); rs.CullMode = CullMode.None; rs.FillMode = FillMode.WireFrame; device.RasterizerState = rs; // TODO: Add your drawing code here effect.CurrentTechnique = effect.Techniques["ColoredNoShading"]; effect.Parameters["xView"].SetValue(viewMatrix); effect.Parameters["xProjection"].SetValue(projectionMatrix);
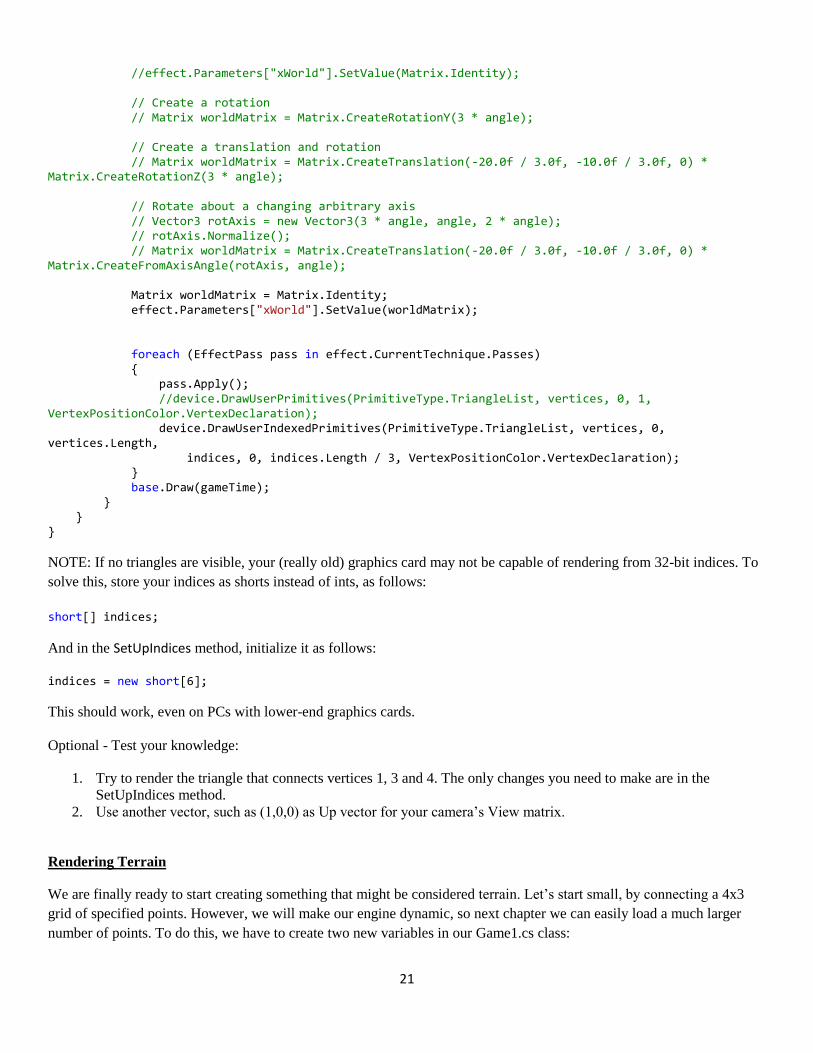
21
//effect.Parameters["xWorld"].SetValue(Matrix.Identity); // Create a rotation // Matrix worldMatrix = Matrix.CreateRotationY(3 * angle); // Create a translation and rotation // Matrix worldMatrix = Matrix.CreateTranslation(-20.0f / 3.0f, -10.0f / 3.0f, 0) * Matrix.CreateRotationZ(3 * angle); // Rotate about a changing arbitrary axis // Vector3 rotAxis = new Vector3(3 * angle, angle, 2 * angle); // rotAxis.Normalize(); // Matrix worldMatrix = Matrix.CreateTranslation(-20.0f / 3.0f, -10.0f / 3.0f, 0) * Matrix.CreateFromAxisAngle(rotAxis, angle); Matrix worldMatrix = Matrix.Identity; effect.Parameters["xWorld"].SetValue(worldMatrix); foreach (EffectPass pass in effect.CurrentTechnique.Passes) { pass.Apply(); //device.DrawUserPrimitives(PrimitiveType.TriangleList, vertices, 0, 1, VertexPositionColor.VertexDeclaration); device.DrawUserIndexedPrimitives(PrimitiveType.TriangleList, vertices, 0, vertices.Length, indices, 0, indices.Length / 3, VertexPositionColor.VertexDeclaration); } base.Draw(gameTime); } } }
NOTE: If no triangles are visible, your (really old) graphics card may not be capable of rendering from 32-bit indices. To
solve this, store your indices as shorts instead of ints, as follows:
short[] indices;
And in the SetUpIndices method, initialize it as follows:
indices = new short[6];
This should work, even on PCs with lower-end graphics cards.
Optional - Test your knowledge:
1. Try to render the triangle that connects vertices 1, 3 and 4. The only changes you need to make are in the
SetUpIndices method.
2. Use another vector, such as (1,0,0) as Up vector for your camera’s View matrix.
Rendering Terrain
We are finally ready to start creating something that might be considered terrain. Let’s start small, by connecting a 4x3
grid of specified points. However, we will make our engine dynamic, so next chapter we can easily load a much larger
number of points. To do this, we have to create two new variables in our Game1.cs class:
22
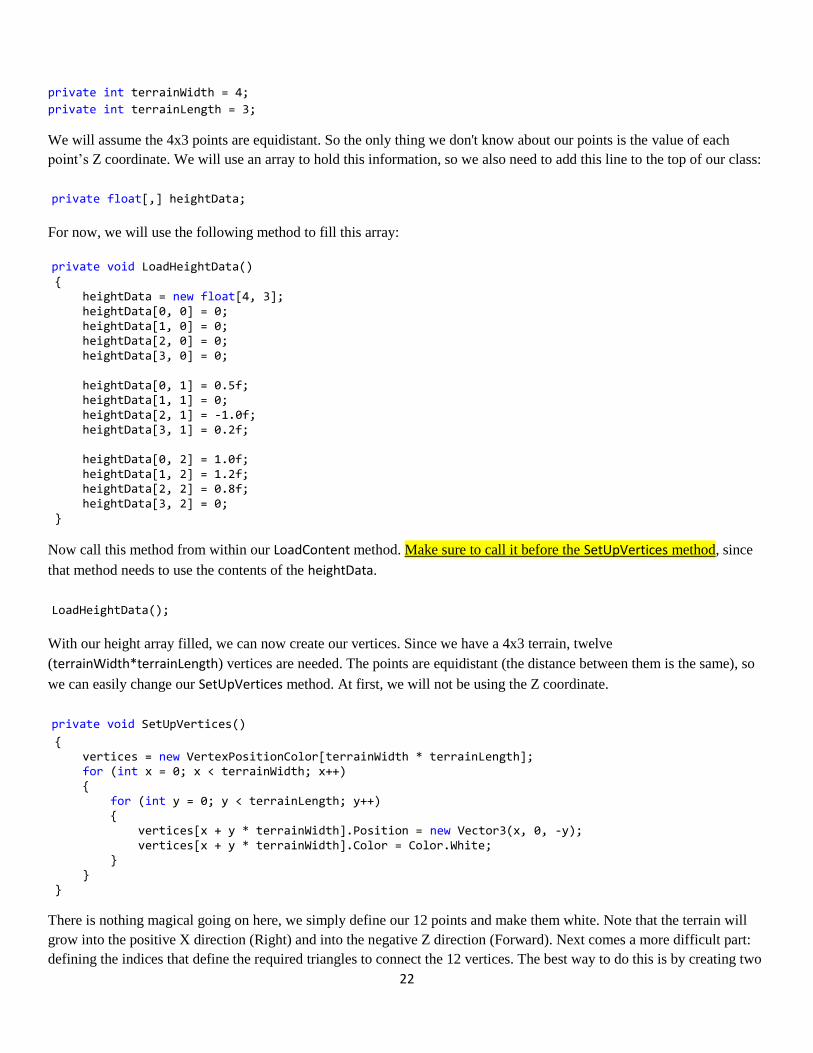
private int terrainWidth = 4;
private int terrainLength = 3;
We will assume the 4x3 points are equidistant. So the only thing we don't know about our points is the value of each
point’s Z coordinate. We will use an array to hold this information, so we also need to add this line to the top of our class:
private float[,] heightData;
For now, we will use the following method to fill this array:
private void LoadHeightData() { heightData = new float[4, 3]; heightData[0, 0] = 0; heightData[1, 0] = 0; heightData[2, 0] = 0; heightData[3, 0] = 0; heightData[0, 1] = 0.5f; heightData[1, 1] = 0; heightData[2, 1] = -1.0f; heightData[3, 1] = 0.2f; heightData[0, 2] = 1.0f; heightData[1, 2] = 1.2f; heightData[2, 2] = 0.8f; heightData[3, 2] = 0; }
Now call this method from within our LoadContent method. Make sure to call it before the SetUpVertices method, since
that method needs to use the contents of the heightData.
LoadHeightData();
With our height array filled, we can now create our vertices. Since we have a 4x3 terrain, twelve
(terrainWidth*terrainLength) vertices are needed. The points are equidistant (the distance between them is the same), so
we can easily change our SetUpVertices method. At first, we will not be using the Z coordinate.
private void SetUpVertices()
{ vertices = new VertexPositionColor[terrainWidth * terrainLength]; for (int x = 0; x < terrainWidth; x++) { for (int y = 0; y < terrainLength; y++) { vertices[x + y * terrainWidth].Position = new Vector3(x, 0, -y); vertices[x + y * terrainWidth].Color = Color.White; } } }
There is nothing magical going on here, we simply define our 12 points and make them white. Note that the terrain will
grow into the positive X direction (Right) and into the negative Z direction (Forward). Next comes a more difficult part:
defining the indices that define the required triangles to connect the 12 vertices. The best way to do this is by creating two
23
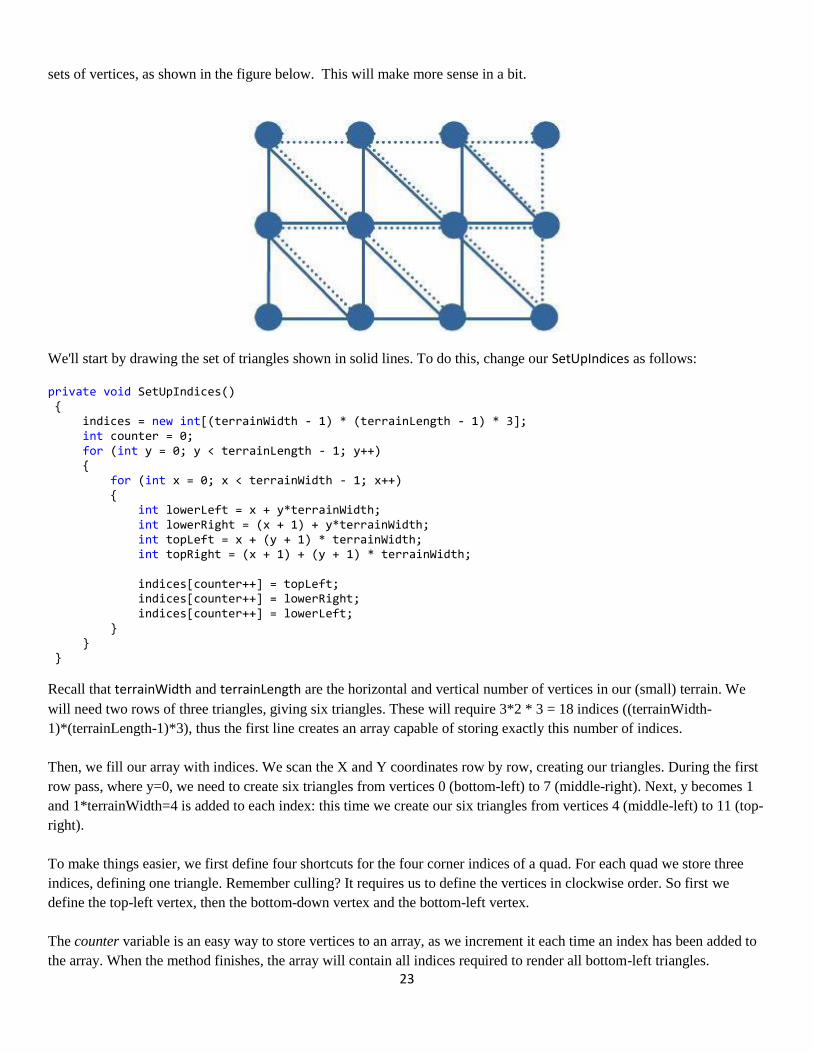
sets of vertices, as shown in the figure below. This will make more sense in a bit.
We'll start by drawing the set of triangles shown in solid lines. To do this, change our SetUpIndices as follows:
private void SetUpIndices() { indices = new int[(terrainWidth - 1) * (terrainLength - 1) * 3]; int counter = 0; for (int y = 0; y < terrainLength - 1; y++) { for (int x = 0; x < terrainWidth - 1; x++) { int lowerLeft = x + y*terrainWidth; int lowerRight = (x + 1) + y*terrainWidth; int topLeft = x + (y + 1) * terrainWidth; int topRight = (x + 1) + (y + 1) * terrainWidth; indices[counter++] = topLeft; indices[counter++] = lowerRight; indices[counter++] = lowerLeft; } } }
Recall that terrainWidth and terrainLength are the horizontal and vertical number of vertices in our (small) terrain. We
will need two rows of three triangles, giving six triangles. These will require 3*2 * 3 = 18 indices ((terrainWidth-
1)*(terrainLength-1)*3), thus the first line creates an array capable of storing exactly this number of indices.
Then, we fill our array with indices. We scan the X and Y coordinates row by row, creating our triangles. During the first
row pass, where y=0, we need to create six triangles from vertices 0 (bottom-left) to 7 (middle-right). Next, y becomes 1
and 1*terrainWidth=4 is added to each index: this time we create our six triangles from vertices 4 (middle-left) to 11 (top-
right).
To make things easier, we first define four shortcuts for the four corner indices of a quad. For each quad we store three
indices, defining one triangle. Remember culling? It requires us to define the vertices in clockwise order. So first we
define the top-left vertex, then the bottom-down vertex and the bottom-left vertex.
The counter variable is an easy way to store vertices to an array, as we increment it each time an index has been added to
the array. When the method finishes, the array will contain all indices required to render all bottom-left triangles.
24
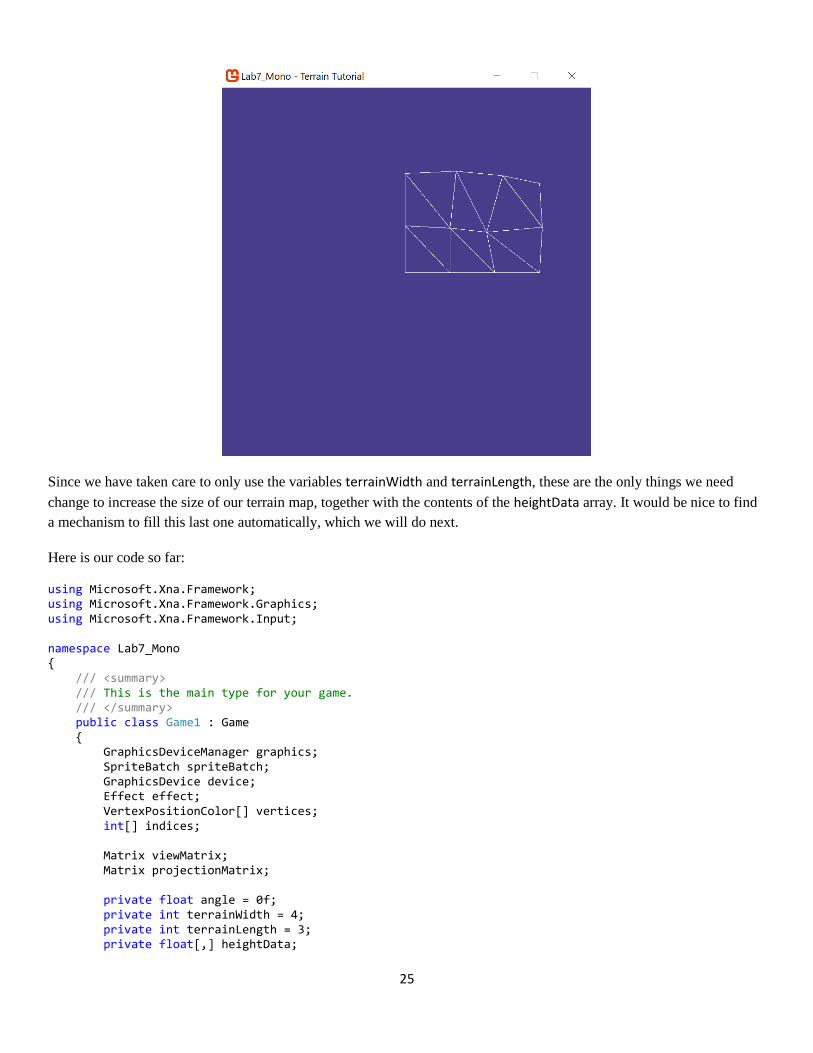
We’ve coded our Draw method in such a way that MonoGame draws a number of triangles specified by the length of our
indices array, so we can immediately run this code! Try it.
The triangles look tiny as rendered, so try positioning our camera at (0,10,0), by changing the first term of the
Matrix.CreateLookAt call, and rerun the program. You should see six triangles in the right half of our window, every
point of every triangle at the same Z coordinate. Now alter the vertices position computation in SetUpVertices to change
the height of our points according to our heightData array (do not change the line that sets the vertice’s color):
vertices[x + y * terrainWidth].Position = new Vector3(x, heightData[x,y], -y);
Run this code; you will notice the triangles are no longer positioned in the same plane.
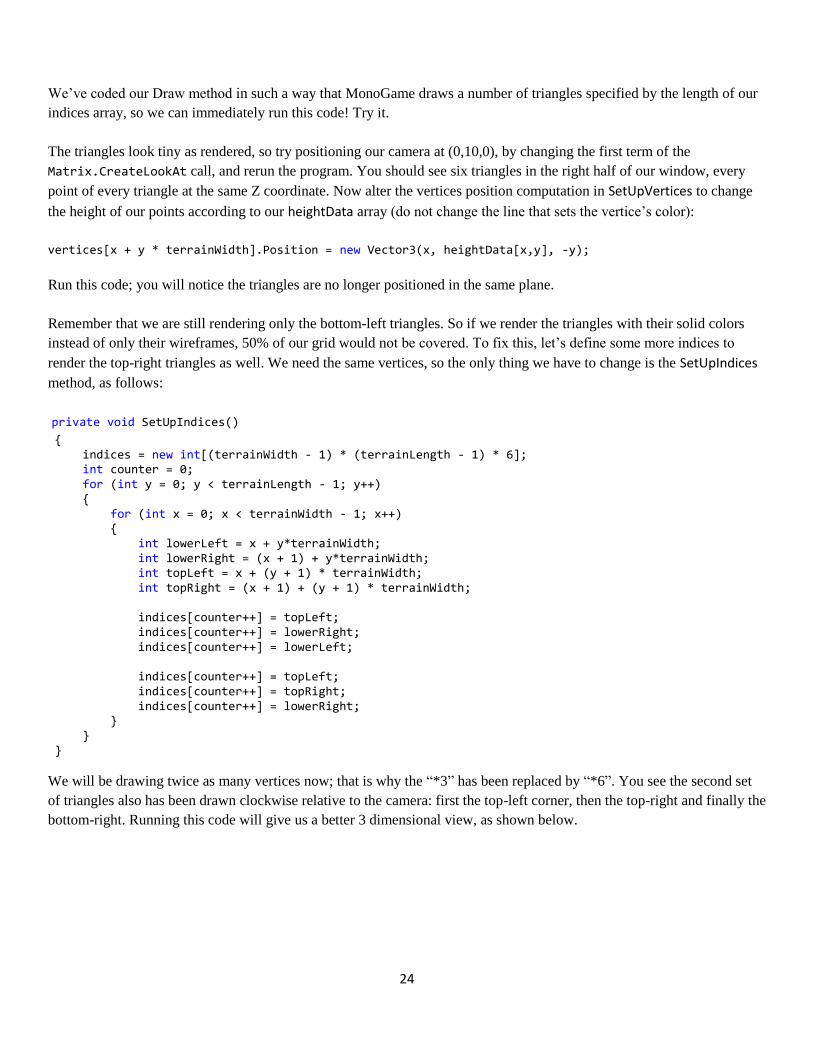
Remember that we are still rendering only the bottom-left triangles. So if we render the triangles with their solid colors
instead of only their wireframes, 50% of our grid would not be covered. To fix this, let’s define some more indices to
render the top-right triangles as well. We need the same vertices, so the only thing we have to change is the SetUpIndices
method, as follows:
private void SetUpIndices()
{ indices = new int[(terrainWidth - 1) * (terrainLength - 1) * 6]; int counter = 0; for (int y = 0; y < terrainLength - 1; y++) { for (int x = 0; x < terrainWidth - 1; x++) { int lowerLeft = x + y*terrainWidth; int lowerRight = (x + 1) + y*terrainWidth; int topLeft = x + (y + 1) * terrainWidth; int topRight = (x + 1) + (y + 1) * terrainWidth; indices[counter++] = topLeft; indices[counter++] = lowerRight; indices[counter++] = lowerLeft; indices[counter++] = topLeft; indices[counter++] = topRight; indices[counter++] = lowerRight; } } }
We will be drawing twice as many vertices now; that is why the “*3” has been replaced by “*6”. You see the second set
of triangles also has been drawn clockwise relative to the camera: first the top-left corner, then the top-right and finally the
bottom-right. Running this code will give us a better 3 dimensional view, as shown below.
25
Since we have taken care to only use the variables terrainWidth and terrainLength, these are the only things we need
change to increase the size of our terrain map, together with the contents of the heightData array. It would be nice to find
a mechanism to fill this last one automatically, which we will do next.
Here is our code so far:
using Microsoft.Xna.Framework; using Microsoft.Xna.Framework.Graphics; using Microsoft.Xna.Framework.Input; namespace Lab7_Mono { /// <summary> /// This is the main type for your game. /// </summary> public class Game1 : Game { GraphicsDeviceManager graphics; SpriteBatch spriteBatch; GraphicsDevice device; Effect effect; VertexPositionColor[] vertices; int[] indices; Matrix viewMatrix; Matrix projectionMatrix; private float angle = 0f; private int terrainWidth = 4; private int terrainLength = 3; private float[,] heightData;
26
public Game1() { graphics = new GraphicsDeviceManager(this); Content.RootDirectory = "Content"; } private void SetUpVertices() { vertices = new VertexPositionColor[terrainWidth * terrainLength]; for (int x = 0; x < terrainWidth; x++) { for (int y = 0; y < terrainLength; y++) { vertices[x + y * terrainWidth].Position = new Vector3(x, heightData[x, y], -y); vertices[x + y * terrainWidth].Color = Color.White; } } } private void SetUpIndices() { indices = new int[(terrainWidth - 1) * (terrainLength - 1) * 6]; int counter = 0; for (int y = 0; y < terrainLength - 1; y++) { for (int x = 0; x < terrainWidth - 1; x++) { int lowerLeft = x + y * terrainWidth; int lowerRight = (x + 1) + y * terrainWidth; int topLeft = x + (y + 1) * terrainWidth; int topRight = (x + 1) + (y + 1) * terrainWidth; indices[counter++] = topLeft; indices[counter++] = lowerRight; indices[counter++] = lowerLeft; indices[counter++] = topLeft; indices[counter++] = topRight; indices[counter++] = lowerRight; } } } private void SetUpCamera() { viewMatrix = Matrix.CreateLookAt(new Vector3(0, 10, 0), new Vector3(0, 0, 0), new Vector3(0, 0, -1)); projectionMatrix = Matrix.CreatePerspectiveFieldOfView(MathHelper.PiOver4, device.Viewport.AspectRatio, 1.0f, 300.0f); } private void LoadHeightData() { heightData = new float[4, 3]; heightData[0, 0] = 0; heightData[1, 0] = 0; heightData[2, 0] = 0; heightData[3, 0] = 0;
27
heightData[0, 1] = 0.5f; heightData[1, 1] = 0; heightData[2, 1] = -1.0f; heightData[3, 1] = 0.2f; heightData[0, 2] = 1.0f; heightData[1, 2] = 1.2f; heightData[2, 2] = 0.8f; heightData[3, 2] = 0; } /// <summary> /// Allows the game to perform any initialization it needs to before starting to run. /// This is where it can query for any required services and load any non-graphic /// related content. Calling base.Initialize will enumerate through any components /// and initialize them as well. /// </summary> protected override void Initialize() { // TODO: Add your initialization logic here graphics.GraphicsProfile = GraphicsProfile.HiDef; graphics.IsFullScreen = false; graphics.ApplyChanges(); graphics.PreferredBackBufferWidth = 800; graphics.PreferredBackBufferHeight = 800; graphics.ApplyChanges(); Window.Title = "Lab7_Mono - Terrain Tutorial"; base.Initialize(); } /// <summary> /// LoadContent will be called once per game and is the place to load /// all of your content. /// </summary> protected override void LoadContent() { device = graphics.GraphicsDevice; effect = Content.Load<Effect>("effects"); LoadHeightData(); SetUpVertices(); SetUpCamera(); SetUpIndices(); // Create a new SpriteBatch, which can be used to draw textures. spriteBatch = new SpriteBatch(GraphicsDevice); // TODO: use this.Content to load your game content here } /// <summary> /// UnloadContent will be called once per game and is the place to unload /// game-specific content. /// </summary> protected override void UnloadContent() { // TODO: Unload any non ContentManager content here } /// <summary> /// Allows the game to run logic such as updating the world, /// checking for collisions, gathering input, and playing audio.
28
/// </summary> /// <param name="gameTime">Provides a snapshot of timing values.</param> protected override void Update(GameTime gameTime) { if (GamePad.GetState(PlayerIndex.One).Buttons.Back == ButtonState.Pressed || Keyboard.GetState().IsKeyDown(Keys.Escape)) Exit(); // TODO: Add your update logic here angle += 0.005f; base.Update(gameTime); } /// <summary> /// This is called when the game should draw itself. /// </summary> /// <param name="gameTime">Provides a snapshot of timing values.</param> protected override void Draw(GameTime gameTime) { device.Clear(Color.DarkSlateBlue); // Uncomment the Code below to show triangles facing away from the camera RasterizerState rs = new RasterizerState(); rs.CullMode = CullMode.None; rs.FillMode = FillMode.WireFrame; device.RasterizerState = rs; // TODO: Add your drawing code here effect.CurrentTechnique = effect.Techniques["ColoredNoShading"]; effect.Parameters["xView"].SetValue(viewMatrix); effect.Parameters["xProjection"].SetValue(projectionMatrix); //effect.Parameters["xWorld"].SetValue(Matrix.Identity); // Create a rotation // Matrix worldMatrix = Matrix.CreateRotationY(3 * angle); // Create a translation and rotation // Matrix worldMatrix = Matrix.CreateTranslation(-20.0f / 3.0f, -10.0f / 3.0f, 0) * Matrix.CreateRotationZ(3 * angle); // Rotate about a changing arbitrary axis // Vector3 rotAxis = new Vector3(3 * angle, angle, 2 * angle); // rotAxis.Normalize(); // Matrix worldMatrix = Matrix.CreateTranslation(-20.0f / 3.0f, -10.0f / 3.0f, 0) * Matrix.CreateFromAxisAngle(rotAxis, angle); Matrix worldMatrix = Matrix.Identity; effect.Parameters["xWorld"].SetValue(worldMatrix); foreach (EffectPass pass in effect.CurrentTechnique.Passes) { pass.Apply(); //device.DrawUserPrimitives(PrimitiveType.TriangleList, vertices, 0, 1, VertexPositionColor.VertexDeclaration); device.DrawUserIndexedPrimitives(PrimitiveType.TriangleList, vertices, 0, vertices.Length, indices, 0, indices.Length / 3, VertexPositionColor.VertexDeclaration);
29
} base.Draw(gameTime); } } }
Optional - Test your knowledge:
1. Play around with the values of the heightData array.
2. Try to add an extra row to the grid.
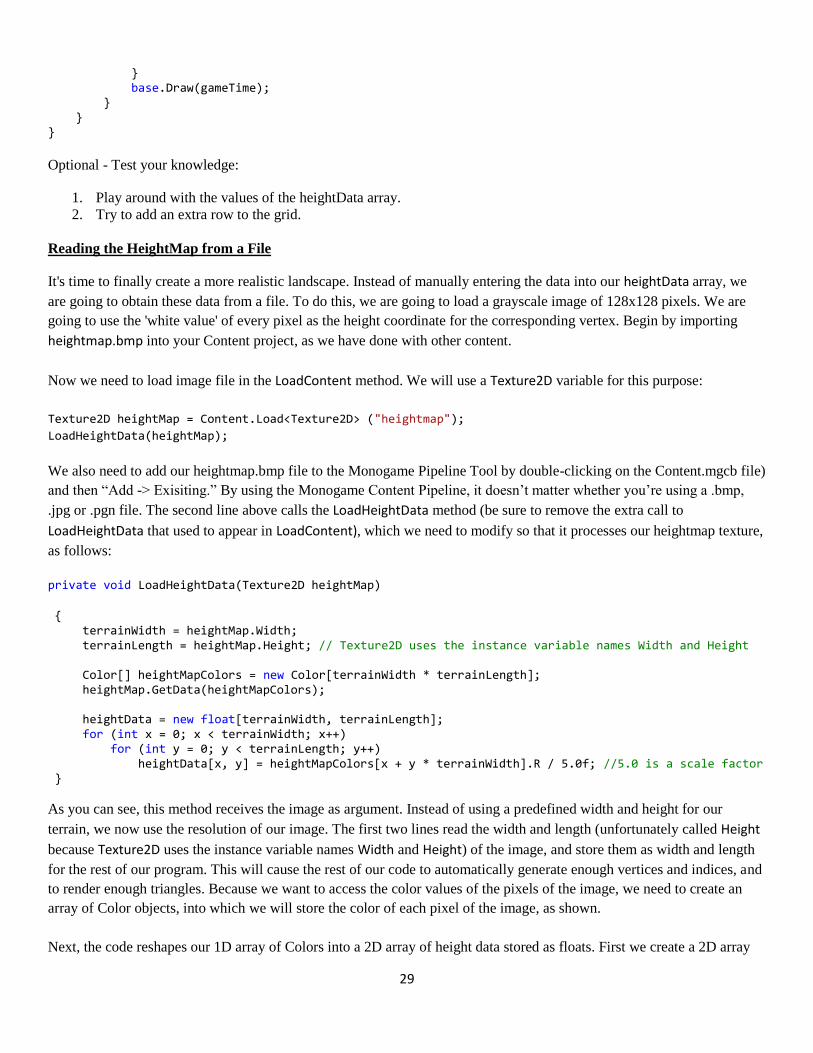
Reading the HeightMap from a File
It's time to finally create a more realistic landscape. Instead of manually entering the data into our heightData array, we
are going to obtain these data from a file. To do this, we are going to load a grayscale image of 128x128 pixels. We are
going to use the 'white value' of every pixel as the height coordinate for the corresponding vertex. Begin by importing
heightmap.bmp into your Content project, as we have done with other content.
Now we need to load image file in the LoadContent method. We will use a Texture2D variable for this purpose:
Texture2D heightMap = Content.Load<Texture2D> ("heightmap");
LoadHeightData(heightMap);
We also need to add our heightmap.bmp file to the Monogame Pipeline Tool by double-clicking on the Content.mgcb file)
and then “Add -> Exisiting.” By using the Monogame Content Pipeline, it doesn’t matter whether you’re using a .bmp,
.jpg or .pgn file. The second line above calls the LoadHeightData method (be sure to remove the extra call to
LoadHeightData that used to appear in LoadContent), which we need to modify so that it processes our heightmap texture,
as follows:
private void LoadHeightData(Texture2D heightMap)
{ terrainWidth = heightMap.Width; terrainLength = heightMap.Height; // Texture2D uses the instance variable names Width and Height Color[] heightMapColors = new Color[terrainWidth * terrainLength]; heightMap.GetData(heightMapColors); heightData = new float[terrainWidth, terrainLength]; for (int x = 0; x < terrainWidth; x++) for (int y = 0; y < terrainLength; y++) heightData[x, y] = heightMapColors[x + y * terrainWidth].R / 5.0f; //5.0 is a scale factor }
As you can see, this method receives the image as argument. Instead of using a predefined width and height for our
terrain, we now use the resolution of our image. The first two lines read the width and length (unfortunately called Height
because Texture2D uses the instance variable names Width and Height) of the image, and store them as width and length
for the rest of our program. This will cause the rest of our code to automatically generate enough vertices and indices, and
to render enough triangles. Because we want to access the color values of the pixels of the image, we need to create an
array of Color objects, into which we will store the color of each pixel of the image, as shown.
Next, the code reshapes our 1D array of Colors into a 2D array of height data stored as floats. First we create a 2D array
30
capable of storing these data. Next, we will cycle through all colors and select the Red value (notice the “.R”), which will
be a value between 0 (no red) and 255 (fully red). Before we store this value inside the 2D array, we will scale it down by
a factor of five (an arbitrarily chosen value), as otherwise our terrain would be too steep.
At this point, we have a 2D array containing the height for each point of our terrain. Our SetUpVertices method will
generate a vertex for each point of the array. Our SetUpIndices method will generate three indices for each triangle that
needs to be drawn to completely cover our terrain. Finally, our Draw method will render as many triangles as our indices
array indicate. Woo hoo!
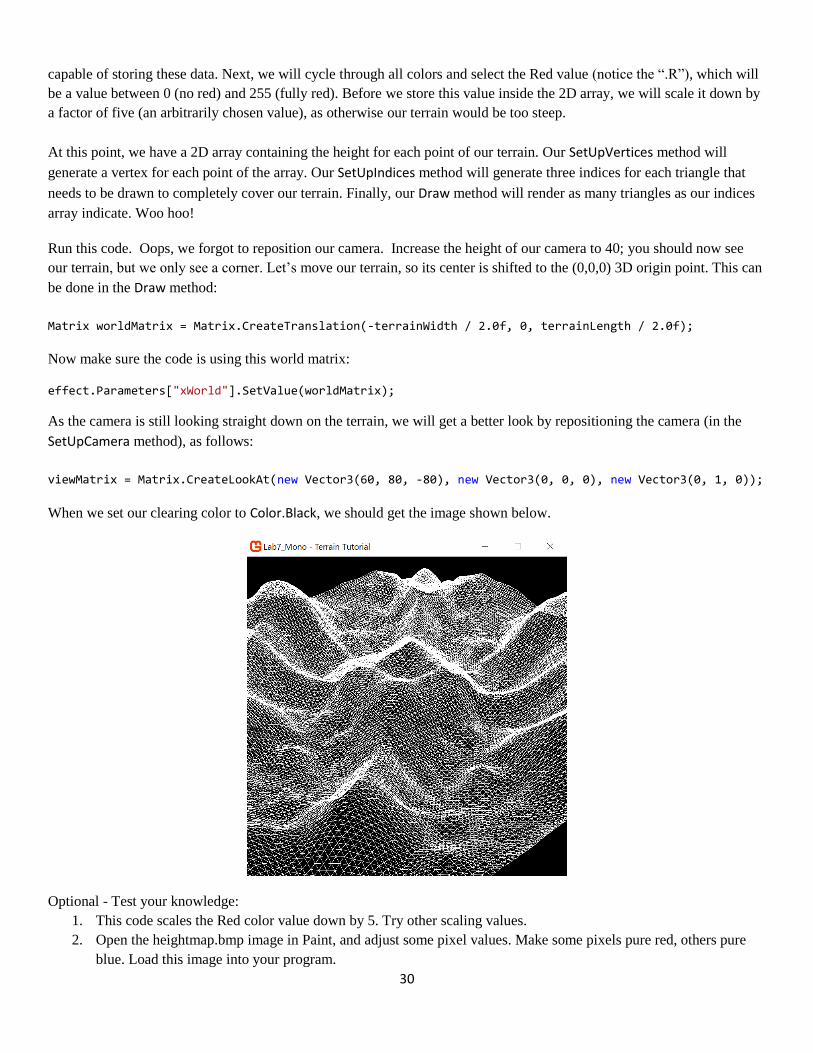
Run this code. Oops, we forgot to reposition our camera. Increase the height of our camera to 40; you should now see
our terrain, but we only see a corner. Let’s move our terrain, so its center is shifted to the (0,0,0) 3D origin point. This can
be done in the Draw method:
Matrix worldMatrix = Matrix.CreateTranslation(-terrainWidth / 2.0f, 0, terrainLength / 2.0f);
Now make sure the code is using this world matrix:
effect.Parameters["xWorld"].SetValue(worldMatrix);
As the camera is still looking straight down on the terrain, we will get a better look by repositioning the camera (in the
SetUpCamera method), as follows:
viewMatrix = Matrix.CreateLookAt(new Vector3(60, 80, -80), new Vector3(0, 0, 0), new Vector3(0, 1, 0));
When we set our clearing color to Color.Black, we should get the image shown below.
Optional - Test your knowledge:
1. This code scales the Red color value down by 5. Try other scaling values.
2. Open the heightmap.bmp image in Paint, and adjust some pixel values. Make some pixels pure red, others pure
blue. Load this image into your program.
31
3. Find another image file and load it into your program. Look for images with a small resolution, as this approach
will not allow you to render huge terrains.
Here is our code so far:
using Microsoft.Xna.Framework; using Microsoft.Xna.Framework.Graphics; using Microsoft.Xna.Framework.Input; namespace Lab7_Mono { /// <summary> /// This is the main type for your game. /// </summary> public class Game1 : Game { GraphicsDeviceManager graphics; SpriteBatch spriteBatch; GraphicsDevice device; Effect effect; VertexPositionColor[] vertices; int[] indices; Matrix viewMatrix; Matrix projectionMatrix; private float angle = 0f; private int terrainWidth = 4; private int terrainLength = 3; private float[,] heightData; public Game1() { graphics = new GraphicsDeviceManager(this); Content.RootDirectory = "Content"; } private void SetUpVertices() { vertices = new VertexPositionColor[terrainWidth * terrainLength]; for (int x = 0; x < terrainWidth; x++) { for (int y = 0; y < terrainLength; y++) { vertices[x + y * terrainWidth].Position = new Vector3(x, heightData[x, y], -y); vertices[x + y * terrainWidth].Color = Color.White; } } } private void SetUpIndices() { indices = new int[(terrainWidth - 1) * (terrainLength - 1) * 6]; int counter = 0; for (int y = 0; y < terrainLength - 1; y++) { for (int x = 0; x < terrainWidth - 1; x++)
32
{ int lowerLeft = x + y * terrainWidth; int lowerRight = (x + 1) + y * terrainWidth; int topLeft = x + (y + 1) * terrainWidth; int topRight = (x + 1) + (y + 1) * terrainWidth; indices[counter++] = topLeft; indices[counter++] = lowerRight; indices[counter++] = lowerLeft; indices[counter++] = topLeft; indices[counter++] = topRight; indices[counter++] = lowerRight; } } } private void SetUpCamera() { viewMatrix = Matrix.CreateLookAt(new Vector3(60, 80, -80), new Vector3(0, 0, 0), new Vector3(0, 1, 0)); projectionMatrix = Matrix.CreatePerspectiveFieldOfView(MathHelper.PiOver4, device.Viewport.AspectRatio, 1.0f, 300.0f); } private void LoadHeightData(Texture2D heightMap) { terrainWidth = heightMap.Width; terrainLength = heightMap.Height; // Texture2D uses the instance variable names Width and Height Color[] heightMapColors = new Color[terrainWidth * terrainLength]; heightMap.GetData(heightMapColors); heightData = new float[terrainWidth, terrainLength]; for (int x = 0; x < terrainWidth; x++) for (int y = 0; y < terrainLength; y++) heightData[x, y] = heightMapColors[x + y * terrainWidth].R / 5.0f; //5.0 is a scale factor } /// <summary> /// Allows the game to perform any initialization it needs to before starting to run. /// This is where it can query for any required services and load any non-graphic /// related content. Calling base.Initialize will enumerate through any components /// and initialize them as well. /// </summary> protected override void Initialize() { // TODO: Add your initialization logic here graphics.GraphicsProfile = GraphicsProfile.HiDef; graphics.IsFullScreen = false; graphics.ApplyChanges(); graphics.PreferredBackBufferWidth = 800; graphics.PreferredBackBufferHeight = 800; graphics.ApplyChanges(); Window.Title = "Lab7_Mono - Terrain Tutorial"; base.Initialize(); }

33
/// <summary> /// LoadContent will be called once per game and is the place to load /// all of your content. /// </summary> protected override void LoadContent() { Texture2D heightMap = Content.Load<Texture2D>("heightmap"); LoadHeightData(heightMap); device = graphics.GraphicsDevice; effect = Content.Load<Effect>("effects"); //LoadHeightData(); SetUpVertices(); SetUpCamera(); SetUpIndices(); // Create a new SpriteBatch, which can be used to draw textures. spriteBatch = new SpriteBatch(GraphicsDevice); // TODO: use this.Content to load your game content here } /// <summary> /// UnloadContent will be called once per game and is the place to unload /// game-specific content. /// </summary> protected override void UnloadContent() { // TODO: Unload any non ContentManager content here } /// <summary> /// Allows the game to run logic such as updating the world, /// checking for collisions, gathering input, and playing audio. /// </summary> /// <param name="gameTime">Provides a snapshot of timing values.</param> protected override void Update(GameTime gameTime) { if (GamePad.GetState(PlayerIndex.One).Buttons.Back == ButtonState.Pressed || Keyboard.GetState().IsKeyDown(Keys.Escape)) Exit(); // TODO: Add your update logic here angle += 0.005f; base.Update(gameTime); } /// <summary> /// This is called when the game should draw itself. /// </summary> /// <param name="gameTime">Provides a snapshot of timing values.</param> protected override void Draw(GameTime gameTime) { device.Clear(Color.Black); // Uncomment the Code below to show triangles facing away from the camera RasterizerState rs = new RasterizerState(); rs.CullMode = CullMode.None; rs.FillMode = FillMode.WireFrame; device.RasterizerState = rs;
34
// TODO: Add your drawing code here effect.CurrentTechnique = effect.Techniques["ColoredNoShading"]; effect.Parameters["xView"].SetValue(viewMatrix); effect.Parameters["xProjection"].SetValue(projectionMatrix); //effect.Parameters["xWorld"].SetValue(Matrix.Identity); // Create a rotation // Matrix worldMatrix = Matrix.CreateRotationY(3 * angle); // Create a translation and rotation // Matrix worldMatrix = Matrix.CreateTranslation(-20.0f / 3.0f, -10.0f / 3.0f, 0) * Matrix.CreateRotationZ(3 * angle); // Rotate about a changing arbitrary axis // Vector3 rotAxis = new Vector3(3 * angle, angle, 2 * angle); // rotAxis.Normalize(); // Matrix worldMatrix = Matrix.CreateTranslation(-20.0f / 3.0f, -10.0f / 3.0f, 0) * Matrix.CreateFromAxisAngle(rotAxis, angle); // Matrix worldMatrix = Matrix.Identity; Matrix worldMatrix = Matrix.CreateTranslation(-terrainWidth / 2.0f, 0, terrainLength / 2.0f); effect.Parameters["xWorld"].SetValue(worldMatrix); foreach (EffectPass pass in effect.CurrentTechnique.Passes) { pass.Apply(); //device.DrawUserPrimitives(PrimitiveType.TriangleList, vertices, 0, 1, VertexPositionColor.VertexDeclaration); device.DrawUserIndexedPrimitives(PrimitiveType.TriangleList, vertices, 0, vertices.Length, indices, 0, indices.Length / 3, VertexPositionColor.VertexDeclaration); } base.Draw(gameTime); } } }
Moving Terrain - Keyboard Input
Using MonoGame, it is very easy to read in the current state of the keyboard. The correct library,
Microsoft.Xna.Framework.Input, was loaded by default when we started our MonoGame project, so we can immediately
move on to the code that reads in the keyboard input, as follows.
Replace the line that updates our angle (angle += 0.005f;) with the following code in the Update method:
KeyboardState keyState = Keyboard.GetState(); if (keyState.IsKeyDown(Keys.PageUp)) angle += 0.05f; if (keyState.IsKeyDown(Keys.PageDown)) angle -= 0.05f;
When the user presses the PageUp or PageDown key, the value of the ‘angle’ variable will be adjusted.
In our Draw method, we need to make sure that this rotation is incorporated into our World matrix:
35
Matrix worldMatrix = Matrix.CreateTranslation(-terrainWidth / 2.0f, 0, terrainLength / 2.0f) * Matrix.CreateRotationY(angle);
The terrain is thus rotated around the Y Up axis before it is moved to the (0,0,0) 3D origin. When you run the code, you
can rotate the terrain simply by pressing the PageUp and PageDown keys.
On your own, add code that reads in the Arrow keys, and adjusts the World matrix so that the terrain is moved in the
direction of the Arrow key being pressed. Let’s also clean things up a bit to compute translation and rotation separately,
and take care of an initial translation of the worldMatrix to center our model. Here is the code after we have done all this:
using Microsoft.Xna.Framework; using Microsoft.Xna.Framework.Graphics; using Microsoft.Xna.Framework.Input; namespace Lab7_Mono { /// <summary> /// This is the main type for your game. /// </summary> public class Game1 : Game { GraphicsDeviceManager graphics; SpriteBatch spriteBatch; GraphicsDevice device; Effect effect; VertexPositionColor[] vertices; int[] indices; Matrix viewMatrix; Matrix projectionMatrix; //private float angle = 0f; private int terrainWidth = 4; private int terrainLength = 3; private float[,] heightData; Matrix worldMatrix = Matrix.Identity; // World matrix identity Matrix worldTranslation = Matrix.Identity; // Translation Matrix worldRotation = Matrix.Identity; // Rotation public Game1() { graphics = new GraphicsDeviceManager(this); Content.RootDirectory = "Content"; } private void SetUpVertices() { vertices = new VertexPositionColor[terrainWidth * terrainLength]; for (int x = 0; x < terrainWidth; x++) { for (int y = 0; y < terrainLength; y++) { vertices[x + y * terrainWidth].Position = new Vector3(x, heightData[x, y], -y); vertices[x + y * terrainWidth].Color = Color.White; } } }

36
private void SetUpIndices() { indices = new int[(terrainWidth - 1) * (terrainLength - 1) * 6]; int counter = 0; for (int y = 0; y < terrainLength - 1; y++) { for (int x = 0; x < terrainWidth - 1; x++) { int lowerLeft = x + y * terrainWidth; int lowerRight = (x + 1) + y * terrainWidth; int topLeft = x + (y + 1) * terrainWidth; int topRight = (x + 1) + (y + 1) * terrainWidth; indices[counter++] = topLeft; indices[counter++] = lowerRight; indices[counter++] = lowerLeft; indices[counter++] = topLeft; indices[counter++] = topRight; indices[counter++] = lowerRight; } } } private void SetUpCamera() { viewMatrix = Matrix.CreateLookAt(new Vector3(60, 80, -80), new Vector3(0, 0, 0), new Vector3(0, 1, 0)); projectionMatrix = Matrix.CreatePerspectiveFieldOfView(MathHelper.PiOver4, device.Viewport.AspectRatio, 1.0f, 300.0f); } private void LoadHeightData(Texture2D heightMap) { terrainWidth = heightMap.Width; terrainLength = heightMap.Height; // Texture2D uses the instance variable names Width and Height Color[] heightMapColors = new Color[terrainWidth * terrainLength]; heightMap.GetData(heightMapColors); heightData = new float[terrainWidth, terrainLength]; for (int x = 0; x < terrainWidth; x++) for (int y = 0; y < terrainLength; y++) heightData[x, y] = heightMapColors[x + y * terrainWidth].R / 5.0f; //5.0 is a scale factor } /// <summary> /// Allows the game to perform any initialization it needs to before starting to run. /// This is where it can query for any required services and load any non-graphic /// related content. Calling base.Initialize will enumerate through any components /// and initialize them as well. /// </summary> protected override void Initialize() { // TODO: Add your initialization logic here graphics.GraphicsProfile = GraphicsProfile.HiDef; graphics.IsFullScreen = false; graphics.ApplyChanges();
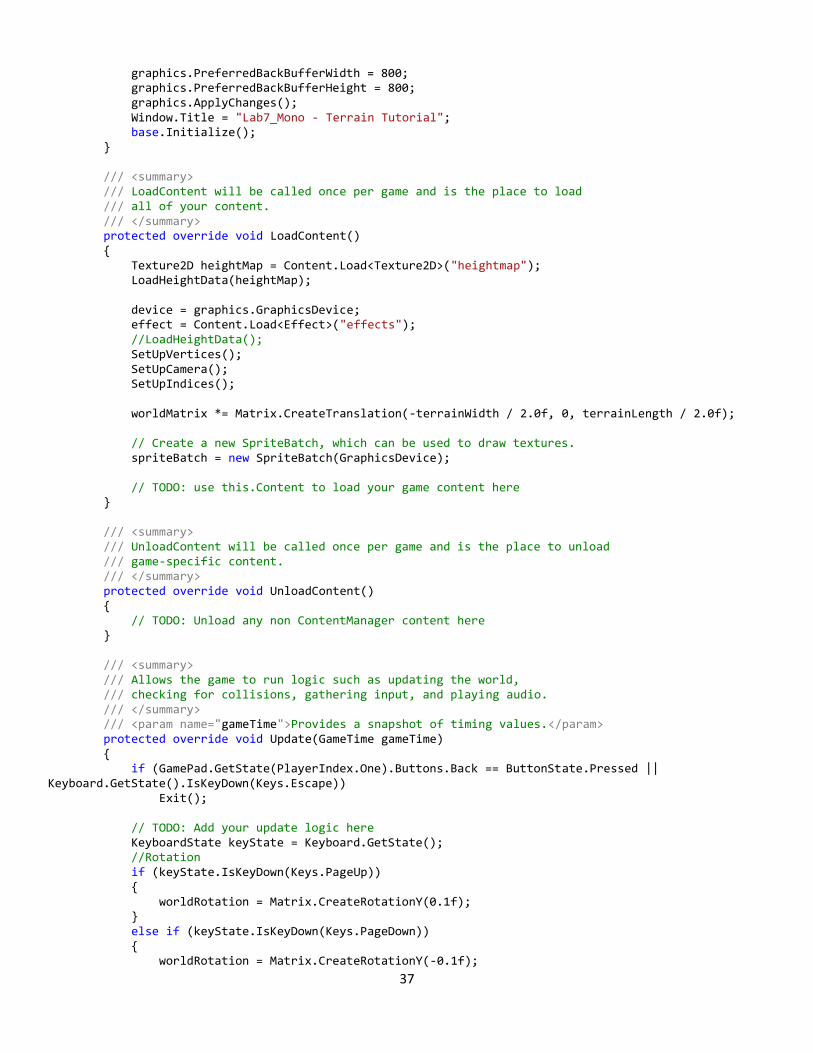
37
graphics.PreferredBackBufferWidth = 800; graphics.PreferredBackBufferHeight = 800; graphics.ApplyChanges(); Window.Title = "Lab7_Mono - Terrain Tutorial"; base.Initialize(); } /// <summary> /// LoadContent will be called once per game and is the place to load /// all of your content. /// </summary> protected override void LoadContent() { Texture2D heightMap = Content.Load<Texture2D>("heightmap"); LoadHeightData(heightMap); device = graphics.GraphicsDevice; effect = Content.Load<Effect>("effects"); //LoadHeightData(); SetUpVertices(); SetUpCamera(); SetUpIndices(); worldMatrix *= Matrix.CreateTranslation(-terrainWidth / 2.0f, 0, terrainLength / 2.0f); // Create a new SpriteBatch, which can be used to draw textures. spriteBatch = new SpriteBatch(GraphicsDevice); // TODO: use this.Content to load your game content here } /// <summary> /// UnloadContent will be called once per game and is the place to unload /// game-specific content. /// </summary> protected override void UnloadContent() { // TODO: Unload any non ContentManager content here } /// <summary> /// Allows the game to run logic such as updating the world, /// checking for collisions, gathering input, and playing audio. /// </summary> /// <param name="gameTime">Provides a snapshot of timing values.</param> protected override void Update(GameTime gameTime) { if (GamePad.GetState(PlayerIndex.One).Buttons.Back == ButtonState.Pressed || Keyboard.GetState().IsKeyDown(Keys.Escape)) Exit(); // TODO: Add your update logic here KeyboardState keyState = Keyboard.GetState(); //Rotation if (keyState.IsKeyDown(Keys.PageUp)) { worldRotation = Matrix.CreateRotationY(0.1f); } else if (keyState.IsKeyDown(Keys.PageDown)) { worldRotation = Matrix.CreateRotationY(-0.1f);
38
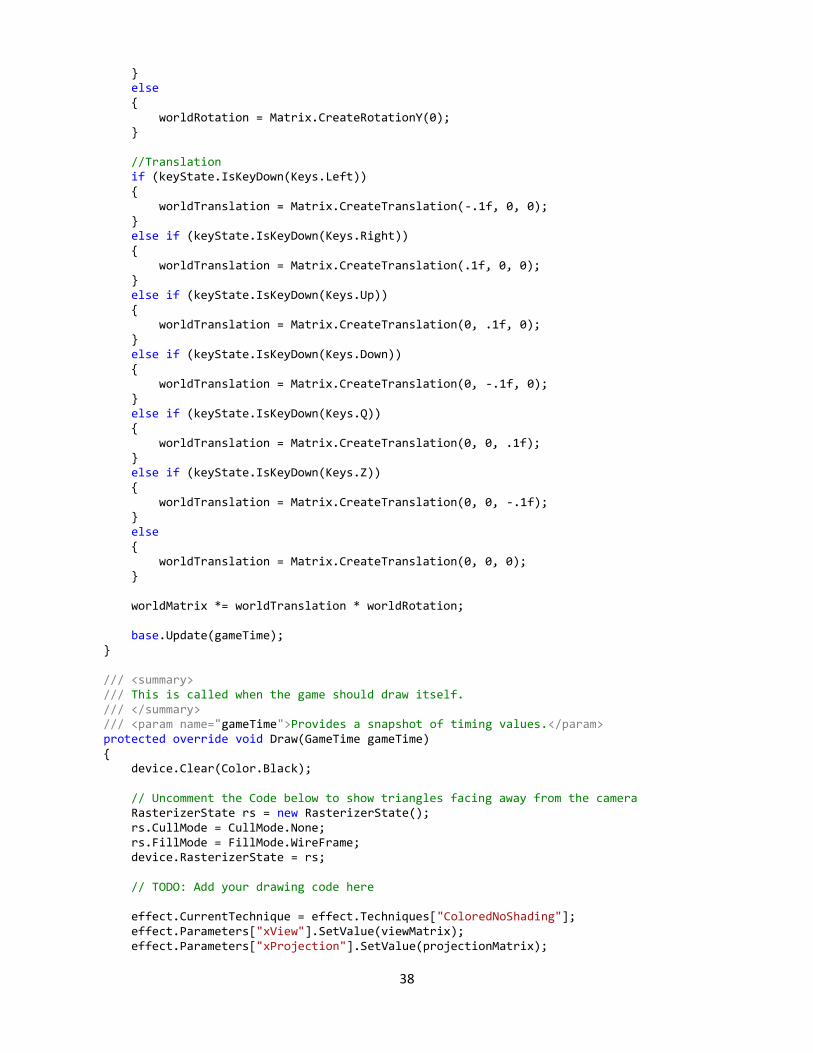
} else { worldRotation = Matrix.CreateRotationY(0); } //Translation if (keyState.IsKeyDown(Keys.Left)) { worldTranslation = Matrix.CreateTranslation(-.1f, 0, 0); } else if (keyState.IsKeyDown(Keys.Right)) { worldTranslation = Matrix.CreateTranslation(.1f, 0, 0); } else if (keyState.IsKeyDown(Keys.Up)) { worldTranslation = Matrix.CreateTranslation(0, .1f, 0); } else if (keyState.IsKeyDown(Keys.Down)) { worldTranslation = Matrix.CreateTranslation(0, -.1f, 0); } else if (keyState.IsKeyDown(Keys.Q)) { worldTranslation = Matrix.CreateTranslation(0, 0, .1f); } else if (keyState.IsKeyDown(Keys.Z)) { worldTranslation = Matrix.CreateTranslation(0, 0, -.1f); } else { worldTranslation = Matrix.CreateTranslation(0, 0, 0); } worldMatrix *= worldTranslation * worldRotation; base.Update(gameTime); } /// <summary> /// This is called when the game should draw itself. /// </summary> /// <param name="gameTime">Provides a snapshot of timing values.</param> protected override void Draw(GameTime gameTime) { device.Clear(Color.Black); // Uncomment the Code below to show triangles facing away from the camera RasterizerState rs = new RasterizerState(); rs.CullMode = CullMode.None; rs.FillMode = FillMode.WireFrame; device.RasterizerState = rs; // TODO: Add your drawing code here effect.CurrentTechnique = effect.Techniques["ColoredNoShading"]; effect.Parameters["xView"].SetValue(viewMatrix); effect.Parameters["xProjection"].SetValue(projectionMatrix);
39
//effect.Parameters["xWorld"].SetValue(Matrix.Identity); // Create a rotation // Matrix worldMatrix = Matrix.CreateRotationY(3 * angle); // Create a translation and rotation // Matrix worldMatrix = Matrix.CreateTranslation(-20.0f / 3.0f, -10.0f / 3.0f, 0) * Matrix.CreateRotationZ(3 * angle); // Rotate about a changing arbitrary axis // Vector3 rotAxis = new Vector3(3 * angle, angle, 2 * angle); // rotAxis.Normalize(); // Matrix worldMatrix = Matrix.CreateTranslation(-20.0f / 3.0f, -10.0f / 3.0f, 0) * Matrix.CreateFromAxisAngle(rotAxis, angle); // Matrix worldMatrix = Matrix.Identity; //Matrix worldMatrix = Matrix.CreateTranslation(-terrainWidth / 2.0f, 0, terrainLength / 2.0f) * Matrix.CreateRotationY(angle); effect.Parameters["xWorld"].SetValue(worldMatrix); foreach (EffectPass pass in effect.CurrentTechnique.Passes) { pass.Apply(); //device.DrawUserPrimitives(PrimitiveType.TriangleList, vertices, 0, 1, VertexPositionColor.VertexDeclaration); device.DrawUserIndexedPrimitives(PrimitiveType.TriangleList, vertices, 0, vertices.Length, indices, 0, indices.Length / 3, VertexPositionColor.VertexDeclaration); } base.Draw(gameTime); } } }
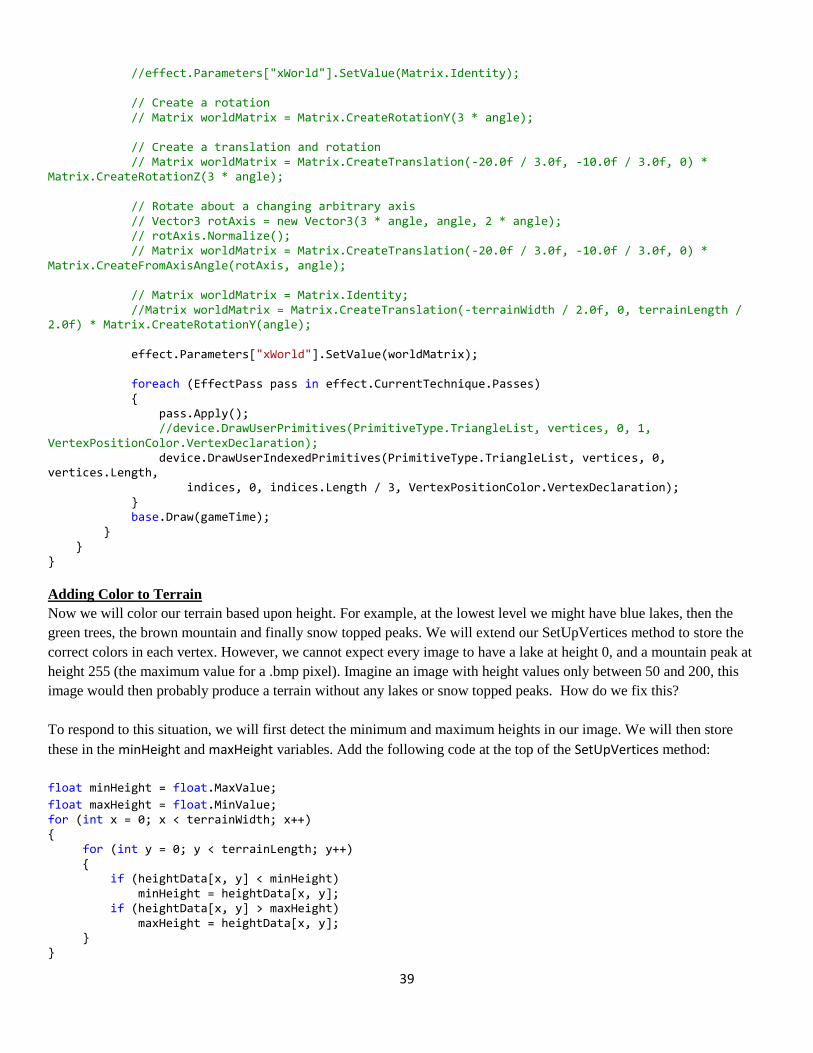
Adding Color to Terrain
Now we will color our terrain based upon height. For example, at the lowest level we might have blue lakes, then the
green trees, the brown mountain and finally snow topped peaks. We will extend our SetUpVertices method to store the
correct colors in each vertex. However, we cannot expect every image to have a lake at height 0, and a mountain peak at
height 255 (the maximum value for a .bmp pixel). Imagine an image with height values only between 50 and 200, this
image would then probably produce a terrain without any lakes or snow topped peaks. How do we fix this?
To respond to this situation, we will first detect the minimum and maximum heights in our image. We will then store
these in the minHeight and maxHeight variables. Add the following code at the top of the SetUpVertices method:
float minHeight = float.MaxValue;
float maxHeight = float.MinValue; for (int x = 0; x < terrainWidth; x++) { for (int y = 0; y < terrainLength; y++) { if (heightData[x, y] < minHeight) minHeight = heightData[x, y]; if (heightData[x, y] > maxHeight) maxHeight = heightData[x, y]; } }

40
Now we will check each point of our grid to see if that point’s height is below the current minHeight or above the current
maxHeight. If it is, store the current height in the corresponding variable. Now that we know minHeight and maxHeight,
we can specify the 4 color regions, as shown in the figure below:
The ideas is to compute the total range (maxHeight - minHeight), and divide that range by 4. This gives us the size of
each color range. Now when we declare our vertices and their colors, we are going to assign the desired color to the
correct height regions as follows: (after we have determined the min and max heights, i.e., in the second “for (int y = 0; y <
terrainLength; y++)” loop)
vertices[x + y * terrainWidth].Position = new Vector3(x, heightData[x, y], -y);
if (heightData[x, y] < minHeight + (maxHeight - minHeight) / 4) vertices[x + y * terrainWidth].Color = Color.Blue;
else if (heightData[x, y] < minHeight + (maxHeight - minHeight) * 2 / 4) vertices[x + y * terrainWidth].Color = Color.Green;
else if (heightData[x, y] < minHeight + (maxHeight - minHeight) * 3 / 4) vertices[x + y * terrainWidth].Color = Color.Brown;
else vertices[x + y * terrainWidth].Color = Color.White;
Run the code at this point. You should see a nicely colored network of lines. If we want to see the whole colored terrain,
we just have to remove (or comment out) this line (or set it to FillMode.Solid) in the Draw method:
rs.FillMode = FillMode.WireFrame;
Run the code, and rotate the terrain a couple of times. On some computers, you will see that sometimes the middle peaks
get overdrawn by the ‘invisible’ lake behind it. This is because we have not yet defined a ‘Z-buffer’. This Z buffer is an
array where our video card keeps track of the depth coordinate of every pixel that should be drawn on your screen (in our
case, a 800x800 array). Every time our card receives a triangle to draw, it checks whether the triangle’s pixels are closer to
the screen than the pixels already present in the Z-buffer. If they are closer, the Z-buffer’s contents is updated with these
pixels for that region.
This whole process if fully automated. All we have to do is to initialize our Z buffer with the largest possible distance to
Blk
Green
Brown
White
41
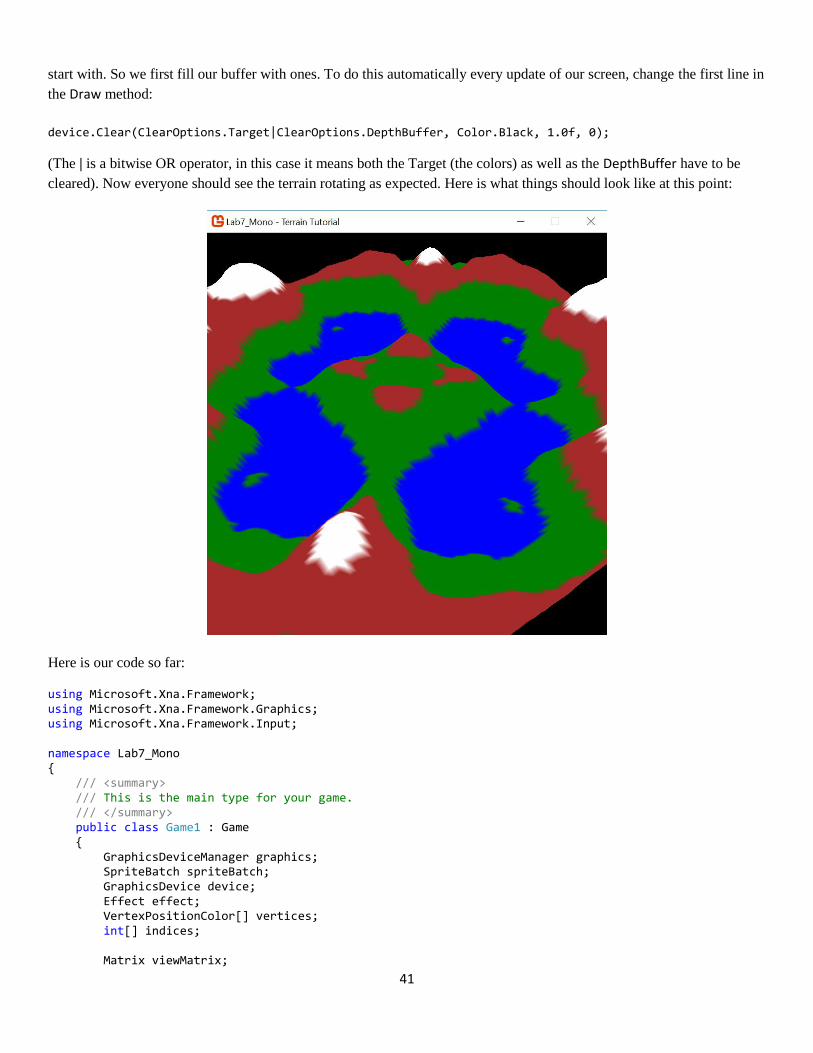
start with. So we first fill our buffer with ones. To do this automatically every update of our screen, change the first line in
the Draw method:
device.Clear(ClearOptions.Target|ClearOptions.DepthBuffer, Color.Black, 1.0f, 0);
(The | is a bitwise OR operator, in this case it means both the Target (the colors) as well as the DepthBuffer have to be
cleared). Now everyone should see the terrain rotating as expected. Here is what things should look like at this point:
Here is our code so far:
using Microsoft.Xna.Framework; using Microsoft.Xna.Framework.Graphics; using Microsoft.Xna.Framework.Input; namespace Lab7_Mono { /// <summary> /// This is the main type for your game. /// </summary> public class Game1 : Game { GraphicsDeviceManager graphics; SpriteBatch spriteBatch; GraphicsDevice device; Effect effect; VertexPositionColor[] vertices; int[] indices; Matrix viewMatrix;
42
Matrix projectionMatrix; //private float angle = 0f; private int terrainWidth = 4; private int terrainLength = 3; private float[,] heightData; Matrix worldMatrix = Matrix.Identity; // World matrix identity Matrix worldTranslation = Matrix.Identity; // Translation Matrix worldRotation = Matrix.Identity; // Rotation public Game1() { graphics = new GraphicsDeviceManager(this); Content.RootDirectory = "Content"; } private void SetUpVertices() { float minHeight = float.MaxValue; float maxHeight = float.MinValue; for (int x = 0; x < terrainWidth; x++) { for (int y = 0; y < terrainLength; y++) { if (heightData[x, y] < minHeight) minHeight = heightData[x, y]; if (heightData[x, y] > maxHeight) maxHeight = heightData[x, y]; } } vertices = new VertexPositionColor[terrainWidth * terrainLength]; for (int x = 0; x < terrainWidth; x++) { for (int y = 0; y < terrainLength; y++) { vertices[x + y * terrainWidth].Position = new Vector3(x, heightData[x, y], -y); if (heightData[x, y] < minHeight + (maxHeight - minHeight) / 4) vertices[x + y * terrainWidth].Color = Color.Blue; else if (heightData[x, y] < minHeight + (maxHeight - minHeight) * 2 / 4) vertices[x + y * terrainWidth].Color = Color.Green; else if (heightData[x, y] < minHeight + (maxHeight - minHeight) * 3 / 4) vertices[x + y * terrainWidth].Color = Color.Brown; else vertices[x + y * terrainWidth].Color = Color.White; } } } private void SetUpIndices() { indices = new int[(terrainWidth - 1) * (terrainLength - 1) * 6]; int counter = 0; for (int y = 0; y < terrainLength - 1; y++) { for (int x = 0; x < terrainWidth - 1; x++) { int lowerLeft = x + y * terrainWidth; int lowerRight = (x + 1) + y * terrainWidth; int topLeft = x + (y + 1) * terrainWidth;
43
int topRight = (x + 1) + (y + 1) * terrainWidth; indices[counter++] = topLeft; indices[counter++] = lowerRight; indices[counter++] = lowerLeft; indices[counter++] = topLeft; indices[counter++] = topRight; indices[counter++] = lowerRight; } } } private void SetUpCamera() { viewMatrix = Matrix.CreateLookAt(new Vector3(60, 80, -80), new Vector3(0, 0, 0), new Vector3(0, 1, 0)); projectionMatrix = Matrix.CreatePerspectiveFieldOfView(MathHelper.PiOver4, device.Viewport.AspectRatio, 1.0f, 300.0f); } private void LoadHeightData(Texture2D heightMap) { terrainWidth = heightMap.Width; terrainLength = heightMap.Height; // Texture2D uses the instance variable names Width and Height Color[] heightMapColors = new Color[terrainWidth * terrainLength]; heightMap.GetData(heightMapColors); heightData = new float[terrainWidth, terrainLength]; for (int x = 0; x < terrainWidth; x++) for (int y = 0; y < terrainLength; y++) heightData[x, y] = heightMapColors[x + y * terrainWidth].R / 5.0f; //5.0 is a scale factor } /// <summary> /// Allows the game to perform any initialization it needs to before starting to run. /// This is where it can query for any required services and load any non-graphic /// related content. Calling base.Initialize will enumerate through any components /// and initialize them as well. /// </summary> protected override void Initialize() { // TODO: Add your initialization logic here graphics.PreferredBackBufferWidth = 800; graphics.PreferredBackBufferHeight = 800; graphics.IsFullScreen = false; graphics.ApplyChanges(); Window.Title = "Lab7_Mono - Terrain Tutorial"; base.Initialize(); } /// <summary> /// LoadContent will be called once per game and is the place to load /// all of your content. /// </summary> protected override void LoadContent() {
44
Texture2D heightMap = Content.Load<Texture2D>("heightmap"); LoadHeightData(heightMap); device = graphics.GraphicsDevice; effect = Content.Load<Effect>("effects"); //LoadHeightData(); SetUpVertices(); SetUpCamera(); SetUpIndices(); worldMatrix *= Matrix.CreateTranslation(-terrainWidth / 2.0f, 0, terrainLength / 2.0f); // Create a new SpriteBatch, which can be used to draw textures. spriteBatch = new SpriteBatch(GraphicsDevice); // TODO: use this.Content to load your game content here } /// <summary> /// UnloadContent will be called once per game and is the place to unload /// game-specific content. /// </summary> protected override void UnloadContent() { // TODO: Unload any non ContentManager content here } /// <summary> /// Allows the game to run logic such as updating the world, /// checking for collisions, gathering input, and playing audio. /// </summary> /// <param name="gameTime">Provides a snapshot of timing values.</param> protected override void Update(GameTime gameTime) { if (GamePad.GetState(PlayerIndex.One).Buttons.Back == ButtonState.Pressed || Keyboard.GetState().IsKeyDown(Keys.Escape)) Exit(); // TODO: Add your update logic here KeyboardState keyState = Keyboard.GetState(); //Rotation if (keyState.IsKeyDown(Keys.PageUp)) { worldRotation = Matrix.CreateRotationY(0.1f); } else if (keyState.IsKeyDown(Keys.PageDown)) { worldRotation = Matrix.CreateRotationY(-0.1f); } else { worldRotation = Matrix.CreateRotationY(0); } //Translation if (keyState.IsKeyDown(Keys.Left)) { worldTranslation = Matrix.CreateTranslation(-.1f, 0, 0); } else if (keyState.IsKeyDown(Keys.Right)) {
45
worldTranslation = Matrix.CreateTranslation(.1f, 0, 0); } else if (keyState.IsKeyDown(Keys.Up)) { worldTranslation = Matrix.CreateTranslation(0, .1f, 0); } else if (keyState.IsKeyDown(Keys.Down)) { worldTranslation = Matrix.CreateTranslation(0, -.1f, 0); } else if (keyState.IsKeyDown(Keys.Q)) { worldTranslation = Matrix.CreateTranslation(0, 0, .1f); } else if (keyState.IsKeyDown(Keys.Z)) { worldTranslation = Matrix.CreateTranslation(0, 0, -.1f); } else { worldTranslation = Matrix.CreateTranslation(0, 0, 0); } worldMatrix *= worldTranslation * worldRotation; base.Update(gameTime); }
/// <summary>
/// This is called when the game should draw itself. /// </summary> /// <param name="gameTime">Provides a snapshot of timing values.</param> protected override void Draw(GameTime gameTime) { device.Clear(ClearOptions.Target | ClearOptions.DepthBuffer, Color.Black, 1.0f, 0); // Uncomment the Code below to show triangles facing away from the camera RasterizerState rs = new RasterizerState(); rs.CullMode = CullMode.None; // rs.FillMode = FillMode.WireFrame; device.RasterizerState = rs; // TODO: Add your drawing code here effect.CurrentTechnique = effect.Techniques["ColoredNoShading"]; effect.Parameters["xView"].SetValue(viewMatrix); effect.Parameters["xProjection"].SetValue(projectionMatrix); //effect.Parameters["xWorld"].SetValue(Matrix.Identity); // Create a rotation // Matrix worldMatrix = Matrix.CreateRotationY(3 * angle); // Create a translation and rotation // Matrix worldMatrix = Matrix.CreateTranslation(-20.0f / 3.0f, -10.0f / 3.0f, 0) * Matrix.CreateRotationZ(3 * angle); // Rotate about a changing arbitrary axis // Vector3 rotAxis = new Vector3(3 * angle, angle, 2 * angle); // rotAxis.Normalize();
46
// Matrix worldMatrix = Matrix.CreateTranslation(-20.0f / 3.0f, -10.0f / 3.0f, 0) * Matrix.CreateFromAxisAngle(rotAxis, angle); // Matrix worldMatrix = Matrix.Identity; //Matrix worldMatrix = Matrix.CreateTranslation(-terrainWidth / 2.0f, 0, terrainLength / 2.0f) * Matrix.CreateRotationY(angle); effect.Parameters["xWorld"].SetValue(worldMatrix); foreach (EffectPass pass in effect.CurrentTechnique.Passes) { pass.Apply(); //device.DrawUserPrimitives(PrimitiveType.TriangleList, vertices, 0, 1, VertexPositionColor.VertexDeclaration); device.DrawUserIndexedPrimitives(PrimitiveType.TriangleList, vertices, 0, vertices.Length, indices, 0, indices.Length / 3, VertexPositionColor.VertexDeclaration); } base.Draw(gameTime); } } }
Creating Lighted Terrain
Before continuing, make sure that you have completed Lab6d, which introduces basic lighting.
When we look at the current result, we notice that, even when using colors and a Z buffer, our terrain seems to lack depth
detail when we turn on the Solid FillMode. To improve things, we need to create lighted terrain. As we learned in Lab 6d
we add lighting by using the normal data associated with each vertex of our terrain, so that our graphics card can perform
the required lighting calculations. The normal is perpendicular to the triangle associated with each vertex. In cases where
the vertex is shared among multiple triangles (as will usually be the case with terrain) we will find the normal of all
triangles that use the vertex and then store the average of those normals for the vertex.
Start by adding a struct (above our Game1 class definition) that will allow normal data to be added to our vertices:
public struct VertexPositionColorNormal
{ public Vector3 Position; public Color Color; public Vector3 Normal; public readonly static VertexDeclaration vertexDeclaration = new VertexDeclaration ( new VertexElement(0, VertexElementFormat.Vector3, VertexElementUsage.Position, 0), new VertexElement(sizeof(float) * 3, VertexElementFormat.Color, VertexElementUsage.Color, 0), new VertexElement(sizeof(float) * 3 + 4, VertexElementFormat.Vector3, VertexElementUsage.Normal, 0) ); }
Now, update our vertices declaration:
VertexPositionColorNormal[] vertices;
47
During the instantiation of this array (in SetUpVertices, above “for (int x = 0; x < terrainWidth; x++)”), add:
vertices = new VertexPositionColorNormal[terrainWidth * terrainLength];
As well as the line that actually renders our triangles in our Draw method:
device.DrawUserIndexedPrimitives(PrimitiveType.TriangleList, vertices, 0, vertices.Length, indices, 0, indices.Length / 3, VertexPositionColorNormal.vertexDeclaration);
Now we are ready to calculate the normals. Let’s create a CalculateNormals method to do this. We will begin by clearing
the normals in each of our vertices. Place the following method after the end of the SetUpIndices method.
private void CalculateNormals()
{ for (int i = 0; i < vertices.Length; i++) vertices[i].Normal = new Vector3(0, 0, 0); }
Next, we are going to iterate through each of our triangles in CalculateNormals. For each triangle, we will calculate its
normal. Finally, we will add this normal to the normal each of the triangle’s three vertices, as follows:
for (int i = 0; i < indices.Length / 3; i++)
{ int index1 = indices[i * 3]; int index2 = indices[i * 3 + 1]; int index3 = indices[i * 3 + 2]; Vector3 side1 = vertices[index1].Position - vertices[index3].Position; Vector3 side2 = vertices[index1].Position - vertices[index2].Position; Vector3 normal = Vector3.Cross(side1, side2); vertices[index1].Normal += normal; vertices[index2].Normal += normal; vertices[index3].Normal += normal; }
This code works as follows: we first look up the indices for the three vertices of each triangle. If we know two sides of a
triangle, we can find its normal by taking the cross product of these two sides (this is because, given any two vectors, their
cross product gives us the vector that is perpendicular to both of the original vectors). Thus, we first find two sides of the
triangle by subtracting the position of one corner from the position of another. Then we find the normal by taking the
cross product of these two vectors. Finally, we add this cross product to the normal for each of the three vertices.
At this point, all vertices contain large normal vectors, but they need to be of length one. So we finish our
CalculateNormals method by normalizing all of the normal vectors:
for (int i = 0; i < vertices.Length; i++)
vertices[i].Normal.Normalize();
That’s it for the normals, except we need to call this method at the end of our LoadContent method:
CalculateNormals();
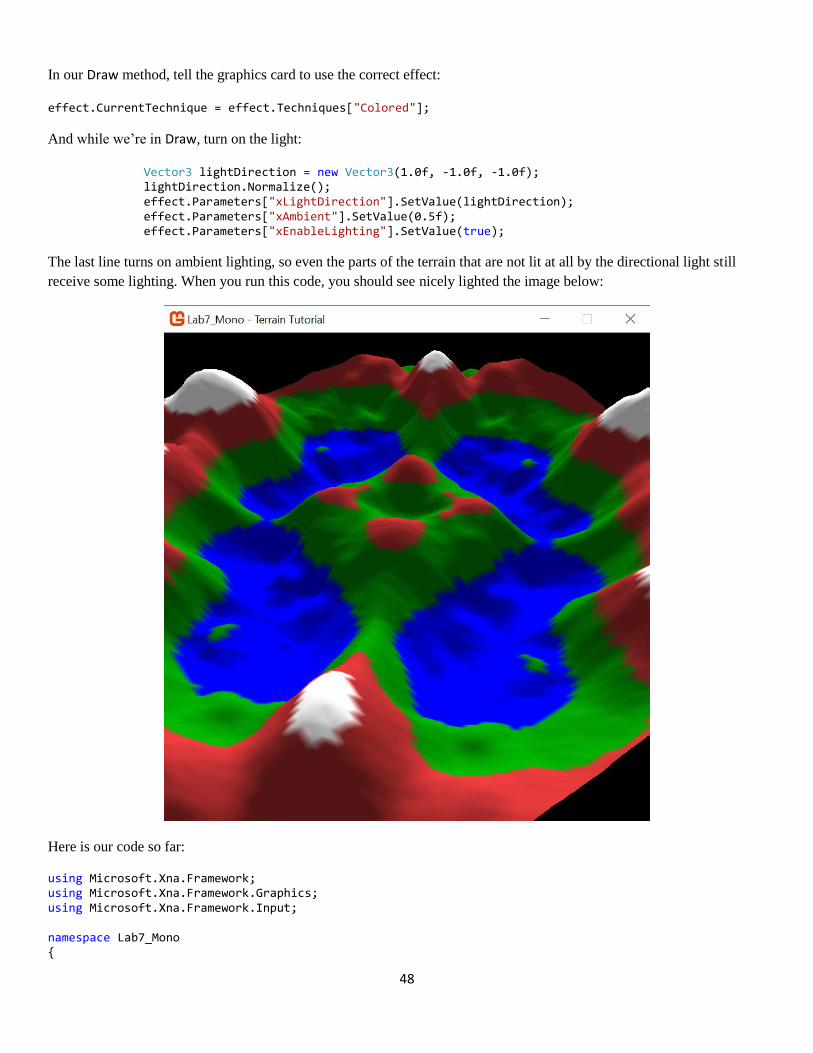
48
In our Draw method, tell the graphics card to use the correct effect:
effect.CurrentTechnique = effect.Techniques["Colored"];
And while we’re in Draw, turn on the light:
Vector3 lightDirection = new Vector3(1.0f, -1.0f, -1.0f); lightDirection.Normalize(); effect.Parameters["xLightDirection"].SetValue(lightDirection); effect.Parameters["xAmbient"].SetValue(0.5f); effect.Parameters["xEnableLighting"].SetValue(true);
The last line turns on ambient lighting, so even the parts of the terrain that are not lit at all by the directional light still
receive some lighting. When you run this code, you should see nicely lighted the image below:
Here is our code so far:
using Microsoft.Xna.Framework; using Microsoft.Xna.Framework.Graphics; using Microsoft.Xna.Framework.Input; namespace Lab7_Mono {
49
public struct VertexPositionColorNormal { public Vector3 Position; public Color Color; public Vector3 Normal; public readonly static VertexDeclaration vertexDeclaration = new VertexDeclaration ( new VertexElement(0, VertexElementFormat.Vector3, VertexElementUsage.Position, 0), new VertexElement(sizeof(float) * 3, VertexElementFormat.Color, VertexElementUsage.Color, 0), new VertexElement(sizeof(float) * 3 + 4, VertexElementFormat.Vector3, VertexElementUsage.Normal, 0) ); } /// <summary> /// This is the main type for your game. /// </summary> public class Game1 : Game { GraphicsDeviceManager graphics; SpriteBatch spriteBatch; GraphicsDevice device; Effect effect; VertexPositionColorNormal[] vertices; int[] indices; Matrix viewMatrix; Matrix projectionMatrix; //private float angle = 0f; private int terrainWidth = 4; private int terrainLength = 3; private float[,] heightData; Matrix worldMatrix = Matrix.Identity; // World matrix identity Matrix worldTranslation = Matrix.Identity; // Translation Matrix worldRotation = Matrix.Identity; // Rotation public Game1() { graphics = new GraphicsDeviceManager(this); Content.RootDirectory = "Content"; } private void SetUpVertices() { float minHeight = float.MaxValue; float maxHeight = float.MinValue; for (int x = 0; x < terrainWidth; x++) { for (int y = 0; y < terrainLength; y++) { if (heightData[x, y] < minHeight) minHeight = heightData[x, y]; if (heightData[x, y] > maxHeight) maxHeight = heightData[x, y]; } }
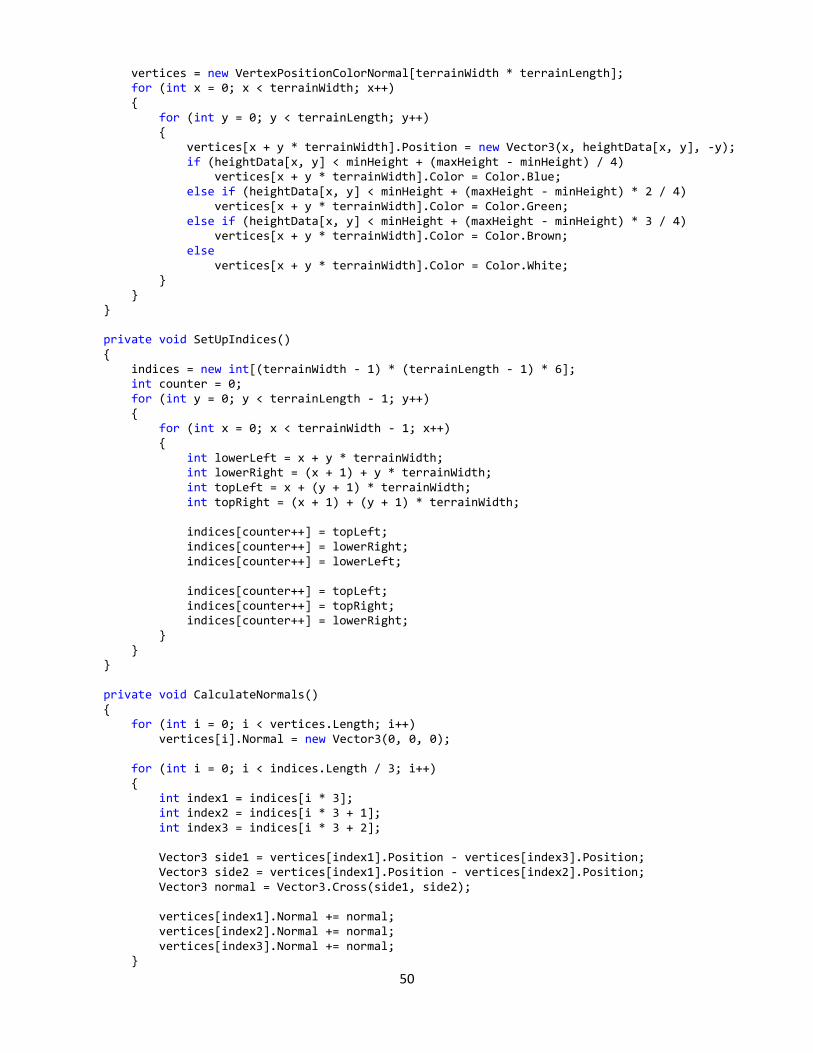
50
vertices = new VertexPositionColorNormal[terrainWidth * terrainLength]; for (int x = 0; x < terrainWidth; x++) { for (int y = 0; y < terrainLength; y++) { vertices[x + y * terrainWidth].Position = new Vector3(x, heightData[x, y], -y); if (heightData[x, y] < minHeight + (maxHeight - minHeight) / 4) vertices[x + y * terrainWidth].Color = Color.Blue; else if (heightData[x, y] < minHeight + (maxHeight - minHeight) * 2 / 4) vertices[x + y * terrainWidth].Color = Color.Green; else if (heightData[x, y] < minHeight + (maxHeight - minHeight) * 3 / 4) vertices[x + y * terrainWidth].Color = Color.Brown; else vertices[x + y * terrainWidth].Color = Color.White; } } } private void SetUpIndices() { indices = new int[(terrainWidth - 1) * (terrainLength - 1) * 6]; int counter = 0; for (int y = 0; y < terrainLength - 1; y++) { for (int x = 0; x < terrainWidth - 1; x++) { int lowerLeft = x + y * terrainWidth; int lowerRight = (x + 1) + y * terrainWidth; int topLeft = x + (y + 1) * terrainWidth; int topRight = (x + 1) + (y + 1) * terrainWidth; indices[counter++] = topLeft; indices[counter++] = lowerRight; indices[counter++] = lowerLeft; indices[counter++] = topLeft; indices[counter++] = topRight; indices[counter++] = lowerRight; } } } private void CalculateNormals() { for (int i = 0; i < vertices.Length; i++) vertices[i].Normal = new Vector3(0, 0, 0); for (int i = 0; i < indices.Length / 3; i++) { int index1 = indices[i * 3]; int index2 = indices[i * 3 + 1]; int index3 = indices[i * 3 + 2]; Vector3 side1 = vertices[index1].Position - vertices[index3].Position; Vector3 side2 = vertices[index1].Position - vertices[index2].Position; Vector3 normal = Vector3.Cross(side1, side2); vertices[index1].Normal += normal; vertices[index2].Normal += normal; vertices[index3].Normal += normal; }
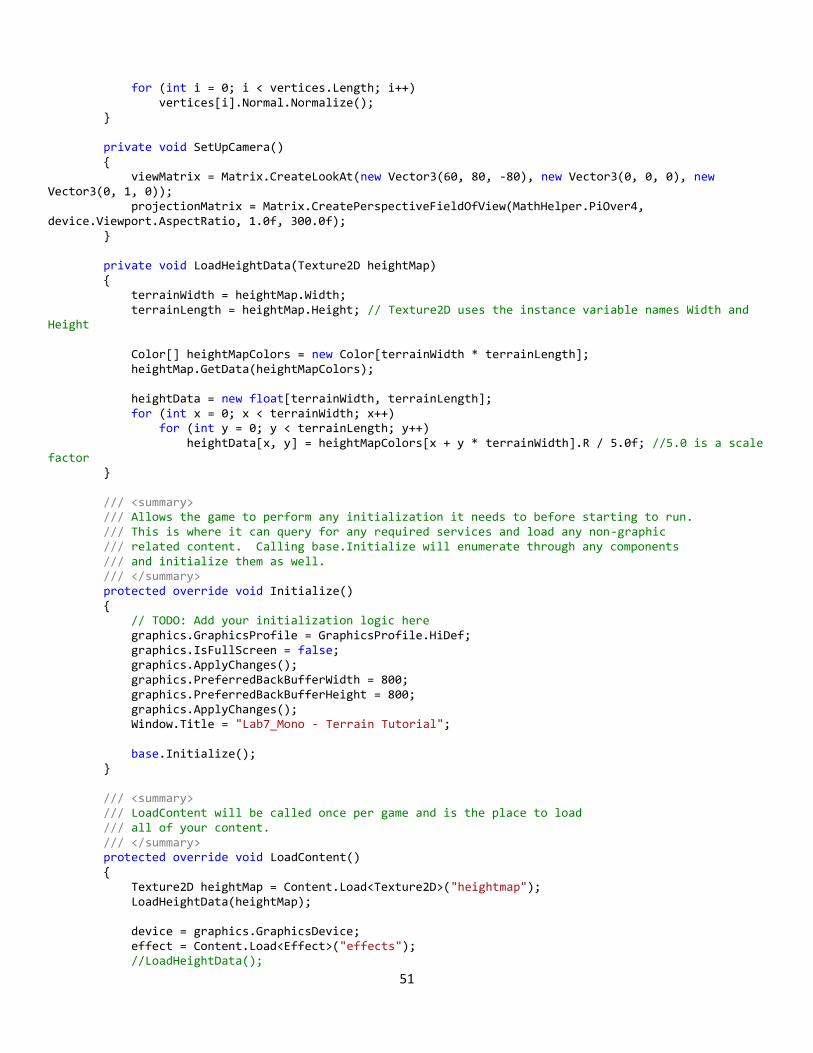
51
for (int i = 0; i < vertices.Length; i++) vertices[i].Normal.Normalize(); } private void SetUpCamera() { viewMatrix = Matrix.CreateLookAt(new Vector3(60, 80, -80), new Vector3(0, 0, 0), new Vector3(0, 1, 0)); projectionMatrix = Matrix.CreatePerspectiveFieldOfView(MathHelper.PiOver4, device.Viewport.AspectRatio, 1.0f, 300.0f); } private void LoadHeightData(Texture2D heightMap) { terrainWidth = heightMap.Width; terrainLength = heightMap.Height; // Texture2D uses the instance variable names Width and Height Color[] heightMapColors = new Color[terrainWidth * terrainLength]; heightMap.GetData(heightMapColors); heightData = new float[terrainWidth, terrainLength]; for (int x = 0; x < terrainWidth; x++) for (int y = 0; y < terrainLength; y++) heightData[x, y] = heightMapColors[x + y * terrainWidth].R / 5.0f; //5.0 is a scale factor } /// <summary> /// Allows the game to perform any initialization it needs to before starting to run. /// This is where it can query for any required services and load any non-graphic /// related content. Calling base.Initialize will enumerate through any components /// and initialize them as well. /// </summary> protected override void Initialize() { // TODO: Add your initialization logic here graphics.GraphicsProfile = GraphicsProfile.HiDef; graphics.IsFullScreen = false; graphics.ApplyChanges(); graphics.PreferredBackBufferWidth = 800; graphics.PreferredBackBufferHeight = 800; graphics.ApplyChanges(); Window.Title = "Lab7_Mono - Terrain Tutorial"; base.Initialize(); } /// <summary> /// LoadContent will be called once per game and is the place to load /// all of your content. /// </summary> protected override void LoadContent() { Texture2D heightMap = Content.Load<Texture2D>("heightmap"); LoadHeightData(heightMap); device = graphics.GraphicsDevice; effect = Content.Load<Effect>("effects"); //LoadHeightData();
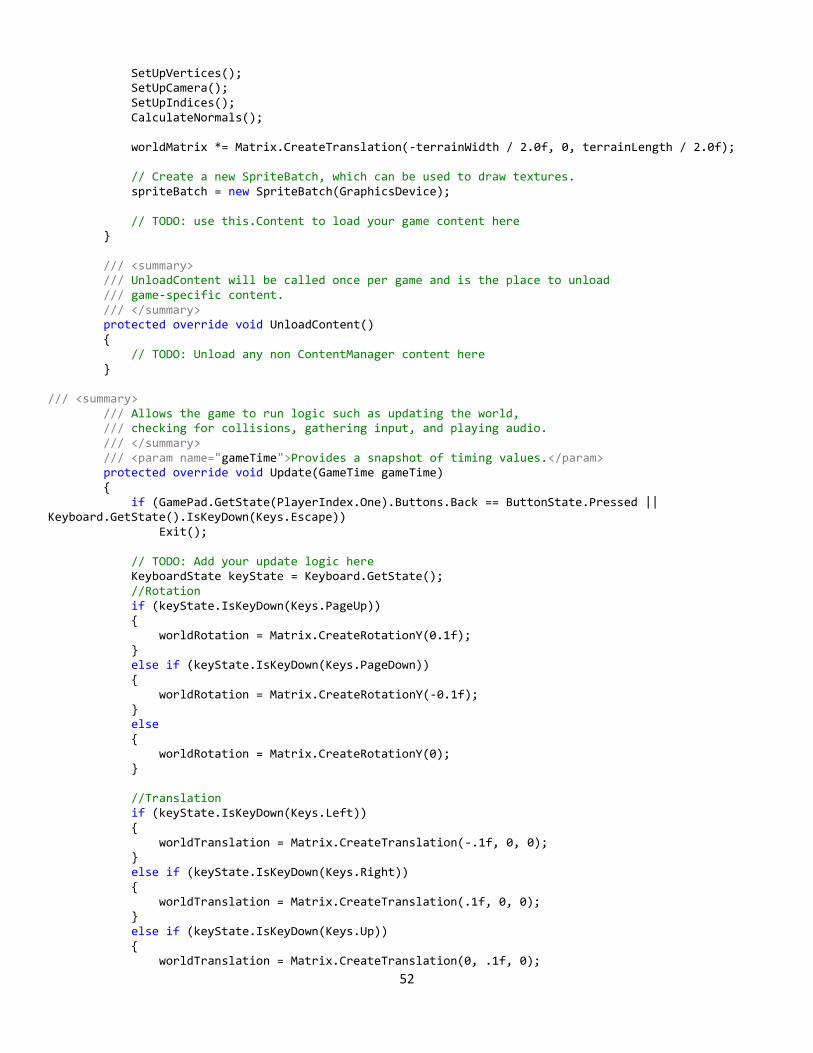
52
SetUpVertices(); SetUpCamera(); SetUpIndices(); CalculateNormals(); worldMatrix *= Matrix.CreateTranslation(-terrainWidth / 2.0f, 0, terrainLength / 2.0f); // Create a new SpriteBatch, which can be used to draw textures. spriteBatch = new SpriteBatch(GraphicsDevice); // TODO: use this.Content to load your game content here } /// <summary> /// UnloadContent will be called once per game and is the place to unload /// game-specific content. /// </summary> protected override void UnloadContent() { // TODO: Unload any non ContentManager content here } /// <summary> /// Allows the game to run logic such as updating the world, /// checking for collisions, gathering input, and playing audio. /// </summary> /// <param name="gameTime">Provides a snapshot of timing values.</param> protected override void Update(GameTime gameTime) { if (GamePad.GetState(PlayerIndex.One).Buttons.Back == ButtonState.Pressed || Keyboard.GetState().IsKeyDown(Keys.Escape)) Exit(); // TODO: Add your update logic here KeyboardState keyState = Keyboard.GetState(); //Rotation if (keyState.IsKeyDown(Keys.PageUp)) { worldRotation = Matrix.CreateRotationY(0.1f); } else if (keyState.IsKeyDown(Keys.PageDown)) { worldRotation = Matrix.CreateRotationY(-0.1f); } else { worldRotation = Matrix.CreateRotationY(0); } //Translation if (keyState.IsKeyDown(Keys.Left)) { worldTranslation = Matrix.CreateTranslation(-.1f, 0, 0); } else if (keyState.IsKeyDown(Keys.Right)) { worldTranslation = Matrix.CreateTranslation(.1f, 0, 0); } else if (keyState.IsKeyDown(Keys.Up)) { worldTranslation = Matrix.CreateTranslation(0, .1f, 0);
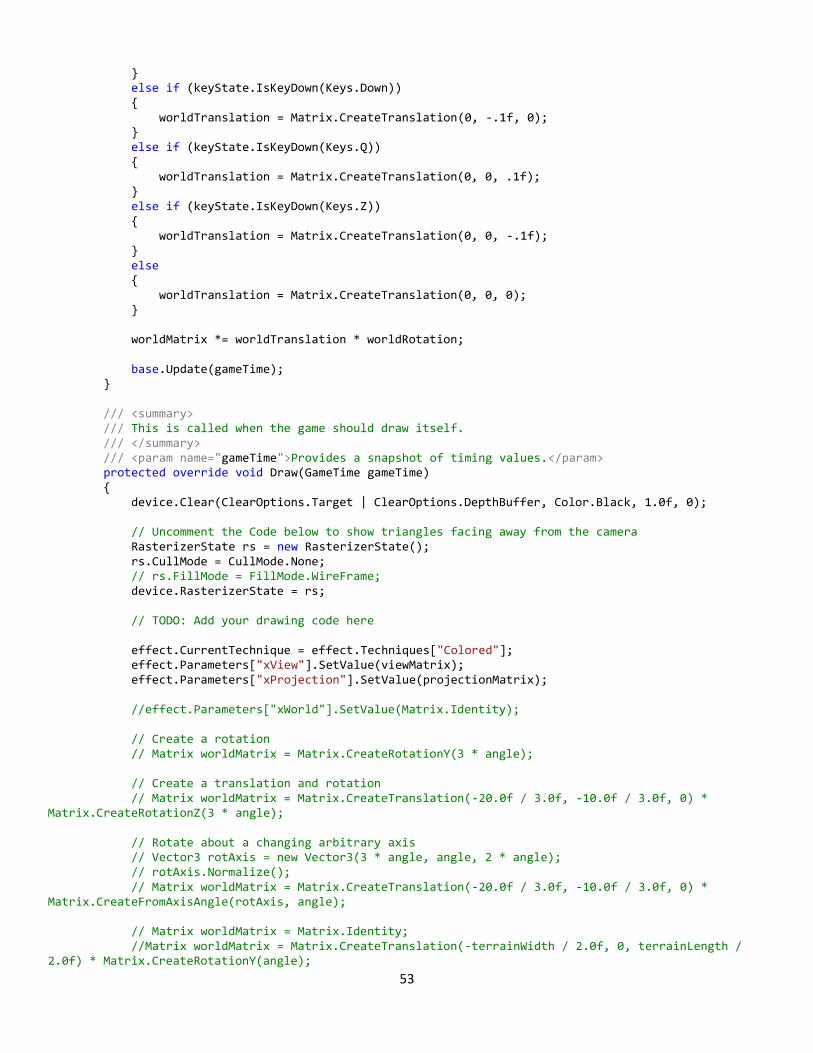
53
} else if (keyState.IsKeyDown(Keys.Down)) { worldTranslation = Matrix.CreateTranslation(0, -.1f, 0); } else if (keyState.IsKeyDown(Keys.Q)) { worldTranslation = Matrix.CreateTranslation(0, 0, .1f); } else if (keyState.IsKeyDown(Keys.Z)) { worldTranslation = Matrix.CreateTranslation(0, 0, -.1f); } else { worldTranslation = Matrix.CreateTranslation(0, 0, 0); } worldMatrix *= worldTranslation * worldRotation; base.Update(gameTime); } /// <summary> /// This is called when the game should draw itself. /// </summary> /// <param name="gameTime">Provides a snapshot of timing values.</param> protected override void Draw(GameTime gameTime) { device.Clear(ClearOptions.Target | ClearOptions.DepthBuffer, Color.Black, 1.0f, 0); // Uncomment the Code below to show triangles facing away from the camera RasterizerState rs = new RasterizerState(); rs.CullMode = CullMode.None; // rs.FillMode = FillMode.WireFrame; device.RasterizerState = rs; // TODO: Add your drawing code here effect.CurrentTechnique = effect.Techniques["Colored"]; effect.Parameters["xView"].SetValue(viewMatrix); effect.Parameters["xProjection"].SetValue(projectionMatrix); //effect.Parameters["xWorld"].SetValue(Matrix.Identity); // Create a rotation // Matrix worldMatrix = Matrix.CreateRotationY(3 * angle); // Create a translation and rotation // Matrix worldMatrix = Matrix.CreateTranslation(-20.0f / 3.0f, -10.0f / 3.0f, 0) * Matrix.CreateRotationZ(3 * angle); // Rotate about a changing arbitrary axis // Vector3 rotAxis = new Vector3(3 * angle, angle, 2 * angle); // rotAxis.Normalize(); // Matrix worldMatrix = Matrix.CreateTranslation(-20.0f / 3.0f, -10.0f / 3.0f, 0) * Matrix.CreateFromAxisAngle(rotAxis, angle); // Matrix worldMatrix = Matrix.Identity; //Matrix worldMatrix = Matrix.CreateTranslation(-terrainWidth / 2.0f, 0, terrainLength / 2.0f) * Matrix.CreateRotationY(angle);
54
effect.Parameters["xWorld"].SetValue(worldMatrix); Vector3 lightDirection = new Vector3(1.0f, -1.0f, -1.0f); lightDirection.Normalize(); effect.Parameters["xLightDirection"].SetValue(lightDirection); effect.Parameters["xAmbient"].SetValue(0.5f); effect.Parameters["xEnableLighting"].SetValue(true); foreach (EffectPass pass in effect.CurrentTechnique.Passes) { pass.Apply(); //device.DrawUserPrimitives(PrimitiveType.TriangleList, vertices, 0, 1, VertexPositionColor.VertexDeclaration); device.DrawUserIndexedPrimitives(PrimitiveType.TriangleList, vertices, 0, vertices.Length, indices, 0, indices.Length / 3, VertexPositionColorNormal.vertexDeclaration); } base.Draw(gameTime); } } }
Using Graphics Card Memory to Buffer Vertices and Indices
Our terrain is fully working, but in each frame, all vertices and indices are being sent from our computer memory to our
graphics card memory. This is a relatively slow process, and we are in fact sending over exactly the same data each time.
We can optimize this process by remembering that the graphics card has a lot of memory.
Thus, we want to send the data over to the graphics card only once, after which the graphics card should store it in its own
(fast) memory. This can be done by storing our vertices in what is called a VertexBuffer, and our indices in what is called
an IndexBuffer.
Start by declaring these two instance variables:
VertexBuffer myVertexBuffer;
IndexBuffer myIndexBuffer;
We will initialize and fill the VertexBuffer and IndexBuffer in a new method, CopyToBuffers. Put this code after the end of
SetUpCamera.
private void CopyToBuffers() { myVertexBuffer = new VertexBuffer(device, VertexPositionColorNormal.vertexDeclaration, vertices.Length, BufferUsage.WriteOnly); myVertexBuffer.SetData(vertices); myIndexBuffer = new IndexBuffer(device, typeof(int), indices.Length, BufferUsage.WriteOnly); myIndexBuffer.SetData(indices); }
55
The first line creates the VertexBuffer, which allocates a piece of memory on the graphics card that is large enough to
store all our vertices. Therefore, we need to tell the graphics card how many bytes of memory we need. This is done by
specifying the number of vertices in our array, as well the VertexDeclaration (which contains the size in bytes for one
vertex). The second line actually copies the data from our local vertices array into the memory on our graphics card. Then
we need do the same for our indices.
Now call this method at the end of our LoadContent method:
CopyToBuffers();
All that is left is to instruct our graphics card to fetch the vertex and index data from its own memory using the
DrawIndexedPrimitives method instead of the DrawUserIndexedPrimitives method. Before we call this method, we need
to let your graphics card know it should read from the buffers stored in its own memory. After pass.Apply() in the Draw
method, replace:
device.DrawUserIndexedPrimitives(PrimitiveType.TriangleList, vertices, 0, vertices.Length, indices, 0, indices.Length / 3, VertexPositionColorNormal.vertexDeclaration);
with this code:
device.Indices = myIndexBuffer;
device.SetVertexBuffer(myVertexBuffer);
device.DrawIndexedPrimitives(PrimitiveType.TriangleList, 0, 0, vertices.Length, 0, indices.Length / 3);
Running this code will give us the same result as before, but this time however, all vertex and index data is transferred
only once to your graphics card. How cool is that! Save your code at this point.
Our final code for Lab 7:
Game1.cs
using Microsoft.Xna.Framework; using Microsoft.Xna.Framework.Graphics; using Microsoft.Xna.Framework.Input; namespace Lab7_Mono { public struct VertexPositionColorNormal { public Vector3 Position; public Color Color; public Vector3 Normal; public readonly static VertexDeclaration vertexDeclaration = new VertexDeclaration ( new VertexElement(0, VertexElementFormat.Vector3, VertexElementUsage.Position, 0), new VertexElement(sizeof(float) * 3, VertexElementFormat.Color, VertexElementUsage.Color, 0), new VertexElement(sizeof(float) * 3 + 4, VertexElementFormat.Vector3, VertexElementUsage.Normal, 0) ); }
56
/// <summary> /// This is the main type for your game. /// </summary> public class Game1 : Game { GraphicsDeviceManager graphics; SpriteBatch spriteBatch; GraphicsDevice device; Effect effect; VertexPositionColorNormal[] vertices; int[] indices; Matrix viewMatrix; Matrix projectionMatrix; //private float angle = 0f; private int terrainWidth = 4; private int terrainLength = 3; private float[,] heightData; Matrix worldMatrix = Matrix.Identity; // World matrix identity Matrix worldTranslation = Matrix.Identity; // Translation Matrix worldRotation = Matrix.Identity; // Rotation VertexBuffer myVertexBuffer; IndexBuffer myIndexBuffer; public Game1() { graphics = new GraphicsDeviceManager(this); Content.RootDirectory = "Content"; } private void SetUpVertices() { float minHeight = float.MaxValue; float maxHeight = float.MinValue; for (int x = 0; x < terrainWidth; x++) { for (int y = 0; y < terrainLength; y++) { if (heightData[x, y] < minHeight) minHeight = heightData[x, y]; if (heightData[x, y] > maxHeight) maxHeight = heightData[x, y]; } } vertices = new VertexPositionColorNormal[terrainWidth * terrainLength]; for (int x = 0; x < terrainWidth; x++) { for (int y = 0; y < terrainLength; y++) { vertices[x + y * terrainWidth].Position = new Vector3(x, heightData[x, y], -y); if (heightData[x, y] < minHeight + (maxHeight - minHeight) / 4) vertices[x + y * terrainWidth].Color = Color.Blue; else if (heightData[x, y] < minHeight + (maxHeight - minHeight) * 2 / 4) vertices[x + y * terrainWidth].Color = Color.Green; else if (heightData[x, y] < minHeight + (maxHeight - minHeight) * 3 / 4) vertices[x + y * terrainWidth].Color = Color.Brown; else
57
vertices[x + y * terrainWidth].Color = Color.White; } } } private void SetUpIndices() { indices = new int[(terrainWidth - 1) * (terrainLength - 1) * 6]; int counter = 0; for (int y = 0; y < terrainLength - 1; y++) { for (int x = 0; x < terrainWidth - 1; x++) { int lowerLeft = x + y * terrainWidth; int lowerRight = (x + 1) + y * terrainWidth; int topLeft = x + (y + 1) * terrainWidth; int topRight = (x + 1) + (y + 1) * terrainWidth; indices[counter++] = topLeft; indices[counter++] = lowerRight; indices[counter++] = lowerLeft; indices[counter++] = topLeft; indices[counter++] = topRight; indices[counter++] = lowerRight; } } } private void CalculateNormals() { for (int i = 0; i < vertices.Length; i++) vertices[i].Normal = new Vector3(0, 0, 0); for (int i = 0; i < indices.Length / 3; i++) { int index1 = indices[i * 3]; int index2 = indices[i * 3 + 1]; int index3 = indices[i * 3 + 2]; Vector3 side1 = vertices[index1].Position - vertices[index3].Position; Vector3 side2 = vertices[index1].Position - vertices[index2].Position; Vector3 normal = Vector3.Cross(side1, side2); vertices[index1].Normal += normal; vertices[index2].Normal += normal; vertices[index3].Normal += normal; } for (int i = 0; i < vertices.Length; i++) vertices[i].Normal.Normalize(); } private void SetUpCamera() { viewMatrix = Matrix.CreateLookAt(new Vector3(60, 80, -80), new Vector3(0, 0, 0), new Vector3(0, 1, 0)); projectionMatrix = Matrix.CreatePerspectiveFieldOfView(MathHelper.PiOver4, device.Viewport.AspectRatio, 1.0f, 300.0f); }
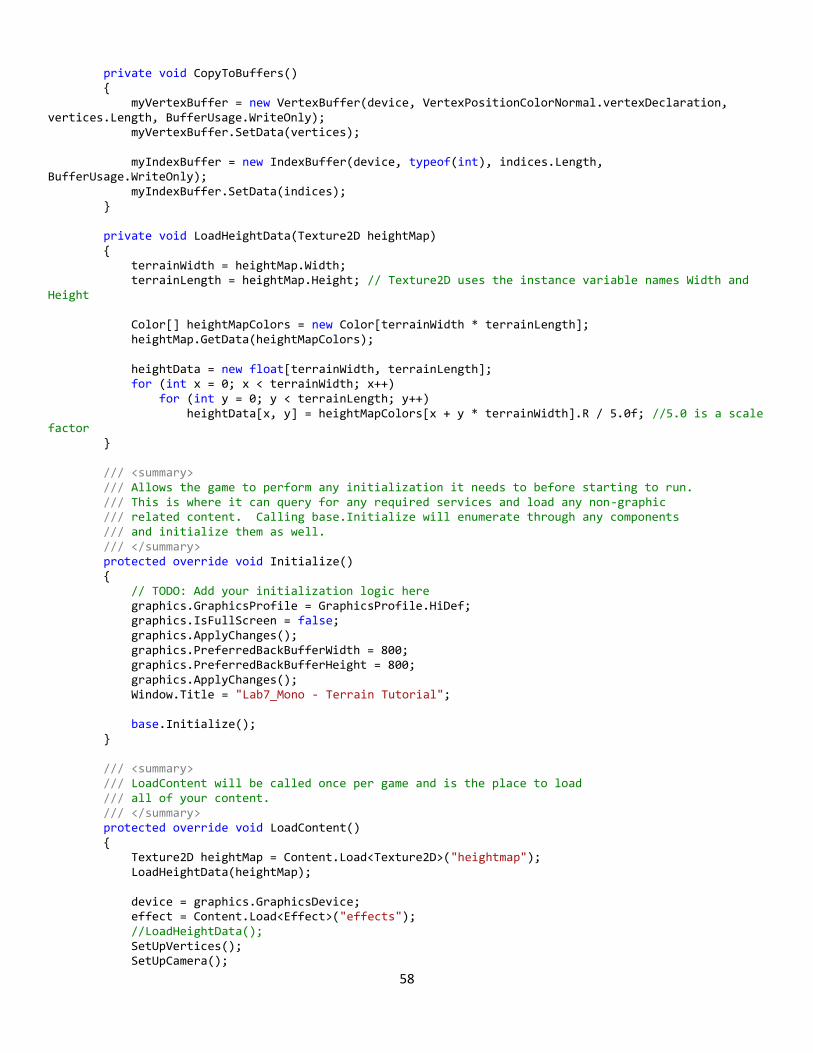
58
private void CopyToBuffers() { myVertexBuffer = new VertexBuffer(device, VertexPositionColorNormal.vertexDeclaration, vertices.Length, BufferUsage.WriteOnly); myVertexBuffer.SetData(vertices); myIndexBuffer = new IndexBuffer(device, typeof(int), indices.Length, BufferUsage.WriteOnly); myIndexBuffer.SetData(indices); } private void LoadHeightData(Texture2D heightMap) { terrainWidth = heightMap.Width; terrainLength = heightMap.Height; // Texture2D uses the instance variable names Width and Height Color[] heightMapColors = new Color[terrainWidth * terrainLength]; heightMap.GetData(heightMapColors); heightData = new float[terrainWidth, terrainLength]; for (int x = 0; x < terrainWidth; x++) for (int y = 0; y < terrainLength; y++) heightData[x, y] = heightMapColors[x + y * terrainWidth].R / 5.0f; //5.0 is a scale factor } /// <summary> /// Allows the game to perform any initialization it needs to before starting to run. /// This is where it can query for any required services and load any non-graphic /// related content. Calling base.Initialize will enumerate through any components /// and initialize them as well. /// </summary> protected override void Initialize() { // TODO: Add your initialization logic here graphics.GraphicsProfile = GraphicsProfile.HiDef; graphics.IsFullScreen = false; graphics.ApplyChanges(); graphics.PreferredBackBufferWidth = 800; graphics.PreferredBackBufferHeight = 800; graphics.ApplyChanges(); Window.Title = "Lab7_Mono - Terrain Tutorial"; base.Initialize(); } /// <summary> /// LoadContent will be called once per game and is the place to load /// all of your content. /// </summary> protected override void LoadContent() { Texture2D heightMap = Content.Load<Texture2D>("heightmap"); LoadHeightData(heightMap); device = graphics.GraphicsDevice; effect = Content.Load<Effect>("effects"); //LoadHeightData(); SetUpVertices(); SetUpCamera();

59
SetUpIndices(); CalculateNormals(); worldMatrix *= Matrix.CreateTranslation(-terrainWidth / 2.0f, 0, terrainLength / 2.0f); // Create a new SpriteBatch, which can be used to draw textures. spriteBatch = new SpriteBatch(GraphicsDevice); CopyToBuffers(); } /// <summary> /// UnloadContent will be called once per game and is the place to unload /// game-specific content. ictftf /// </summary> protected override void UnloadContent() { // TODO: Unload any non ContentManager content here } /// <summary> /// Allows the game to run logic such as updating the world, /// checking for collisions, gathering input, and playing audio. /// </summary> /// <param name="gameTime">Provides a snapshot of timing values.</param> protected override void Update(GameTime gameTime) { if (GamePad.GetState(PlayerIndex.One).Buttons.Back == ButtonState.Pressed || Keyboard.GetState().IsKeyDown(Keys.Escape)) Exit(); // TODO: Add your update logic here KeyboardState keyState = Keyboard.GetState(); //Rotation if (keyState.IsKeyDown(Keys.PageUp)) { worldRotation = Matrix.CreateRotationY(0.1f); } else if (keyState.IsKeyDown(Keys.PageDown)) { worldRotation = Matrix.CreateRotationY(-0.1f); } else { worldRotation = Matrix.CreateRotationY(0); } //Translation if (keyState.IsKeyDown(Keys.Left)) { worldTranslation = Matrix.CreateTranslation(-.1f, 0, 0); } else if (keyState.IsKeyDown(Keys.Right)) { worldTranslation = Matrix.CreateTranslation(.1f, 0, 0); } else if (keyState.IsKeyDown(Keys.Up)) { worldTranslation = Matrix.CreateTranslation(0, .1f, 0); } else if (keyState.IsKeyDown(Keys.Down)) {
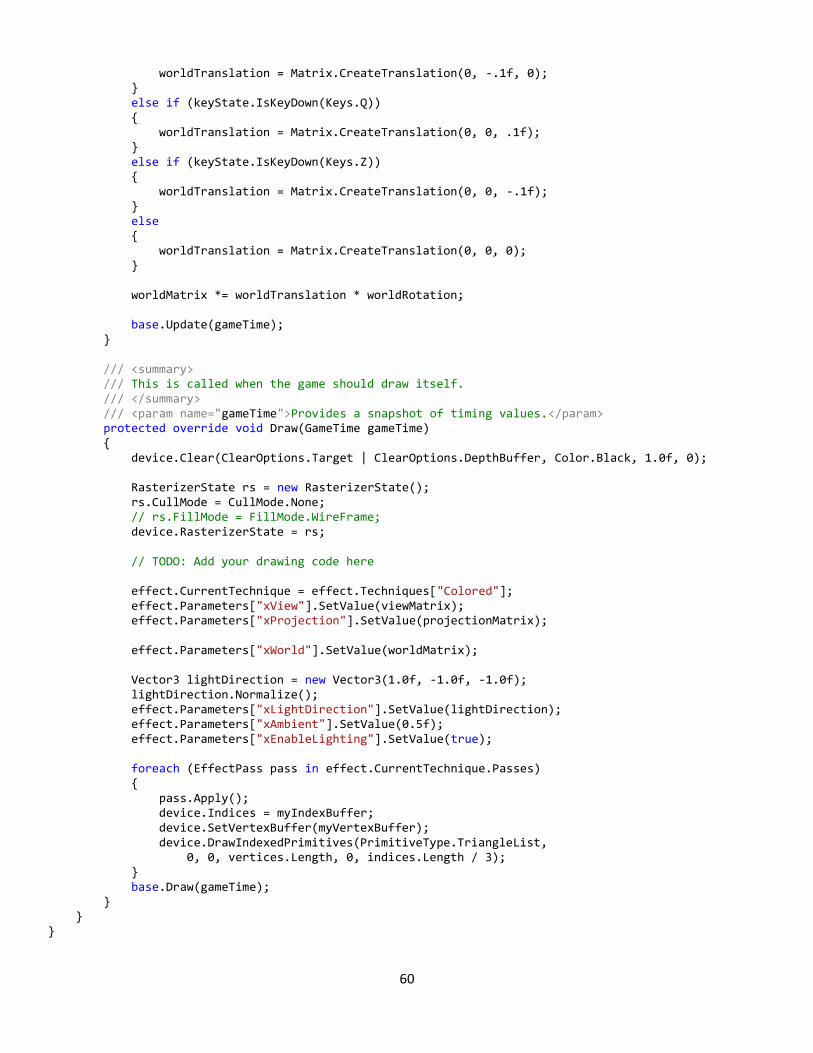
60
worldTranslation = Matrix.CreateTranslation(0, -.1f, 0); } else if (keyState.IsKeyDown(Keys.Q)) { worldTranslation = Matrix.CreateTranslation(0, 0, .1f); } else if (keyState.IsKeyDown(Keys.Z)) { worldTranslation = Matrix.CreateTranslation(0, 0, -.1f); } else { worldTranslation = Matrix.CreateTranslation(0, 0, 0); } worldMatrix *= worldTranslation * worldRotation; base.Update(gameTime); } /// <summary> /// This is called when the game should draw itself. /// </summary> /// <param name="gameTime">Provides a snapshot of timing values.</param> protected override void Draw(GameTime gameTime) { device.Clear(ClearOptions.Target | ClearOptions.DepthBuffer, Color.Black, 1.0f, 0); RasterizerState rs = new RasterizerState(); rs.CullMode = CullMode.None; // rs.FillMode = FillMode.WireFrame; device.RasterizerState = rs; // TODO: Add your drawing code here effect.CurrentTechnique = effect.Techniques["Colored"]; effect.Parameters["xView"].SetValue(viewMatrix); effect.Parameters["xProjection"].SetValue(projectionMatrix); effect.Parameters["xWorld"].SetValue(worldMatrix); Vector3 lightDirection = new Vector3(1.0f, -1.0f, -1.0f); lightDirection.Normalize(); effect.Parameters["xLightDirection"].SetValue(lightDirection); effect.Parameters["xAmbient"].SetValue(0.5f); effect.Parameters["xEnableLighting"].SetValue(true); foreach (EffectPass pass in effect.CurrentTechnique.Passes) { pass.Apply(); device.Indices = myIndexBuffer; device.SetVertexBuffer(myVertexBuffer); device.DrawIndexedPrimitives(PrimitiveType.TriangleList, 0, 0, vertices.Length, 0, indices.Length / 3); } base.Draw(gameTime); } } }
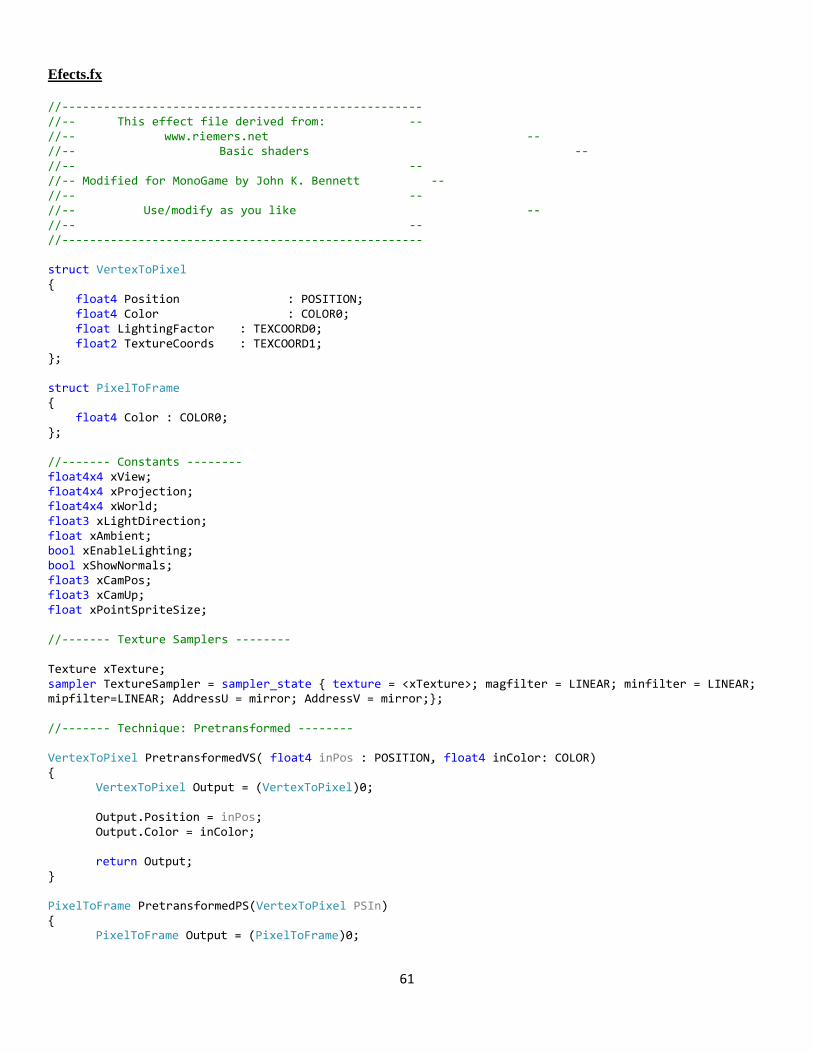
61
Efects.fx
//---------------------------------------------------- //-- This effect file derived from: -- //-- www.riemers.net -- //-- Basic shaders -- //-- -- //-- Modified for MonoGame by John K. Bennett -- //-- -- //-- Use/modify as you like -- //-- -- //---------------------------------------------------- struct VertexToPixel { float4 Position : POSITION; float4 Color : COLOR0; float LightingFactor : TEXCOORD0; float2 TextureCoords : TEXCOORD1; }; struct PixelToFrame { float4 Color : COLOR0; }; //------- Constants -------- float4x4 xView; float4x4 xProjection; float4x4 xWorld; float3 xLightDirection; float xAmbient; bool xEnableLighting; bool xShowNormals; float3 xCamPos; float3 xCamUp; float xPointSpriteSize; //------- Texture Samplers -------- Texture xTexture; sampler TextureSampler = sampler_state { texture = <xTexture>; magfilter = LINEAR; minfilter = LINEAR; mipfilter=LINEAR; AddressU = mirror; AddressV = mirror;}; //------- Technique: Pretransformed -------- VertexToPixel PretransformedVS( float4 inPos : POSITION, float4 inColor: COLOR) { VertexToPixel Output = (VertexToPixel)0; Output.Position = inPos; Output.Color = inColor; return Output; } PixelToFrame PretransformedPS(VertexToPixel PSIn) { PixelToFrame Output = (PixelToFrame)0;
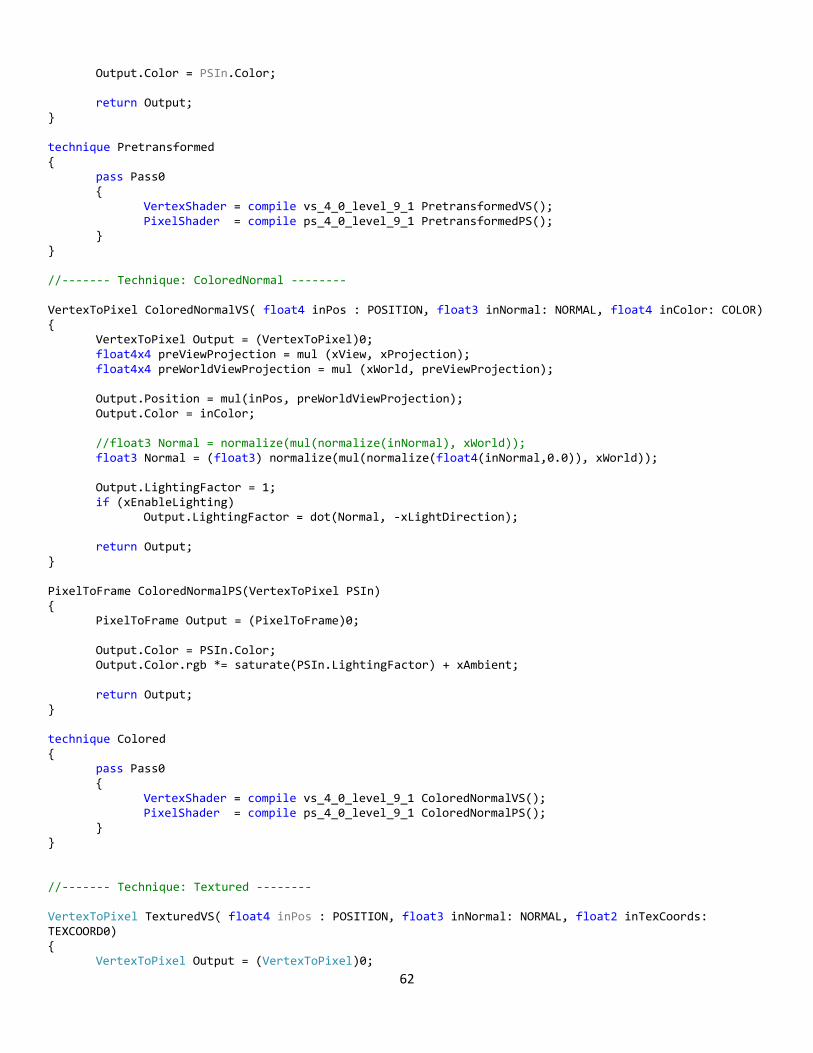
62
Output.Color = PSIn.Color; return Output; } technique Pretransformed { pass Pass0 { VertexShader = compile vs_4_0_level_9_1 PretransformedVS(); PixelShader = compile ps_4_0_level_9_1 PretransformedPS(); } } //------- Technique: ColoredNormal -------- VertexToPixel ColoredNormalVS( float4 inPos : POSITION, float3 inNormal: NORMAL, float4 inColor: COLOR) { VertexToPixel Output = (VertexToPixel)0; float4x4 preViewProjection = mul (xView, xProjection); float4x4 preWorldViewProjection = mul (xWorld, preViewProjection); Output.Position = mul(inPos, preWorldViewProjection); Output.Color = inColor; //float3 Normal = normalize(mul(normalize(inNormal), xWorld)); float3 Normal = (float3) normalize(mul(normalize(float4(inNormal,0.0)), xWorld)); Output.LightingFactor = 1; if (xEnableLighting) Output.LightingFactor = dot(Normal, -xLightDirection); return Output; } PixelToFrame ColoredNormalPS(VertexToPixel PSIn) { PixelToFrame Output = (PixelToFrame)0; Output.Color = PSIn.Color; Output.Color.rgb *= saturate(PSIn.LightingFactor) + xAmbient; return Output; } technique Colored { pass Pass0 { VertexShader = compile vs_4_0_level_9_1 ColoredNormalVS(); PixelShader = compile ps_4_0_level_9_1 ColoredNormalPS(); } } //------- Technique: Textured -------- VertexToPixel TexturedVS( float4 inPos : POSITION, float3 inNormal: NORMAL, float2 inTexCoords: TEXCOORD0) { VertexToPixel Output = (VertexToPixel)0;
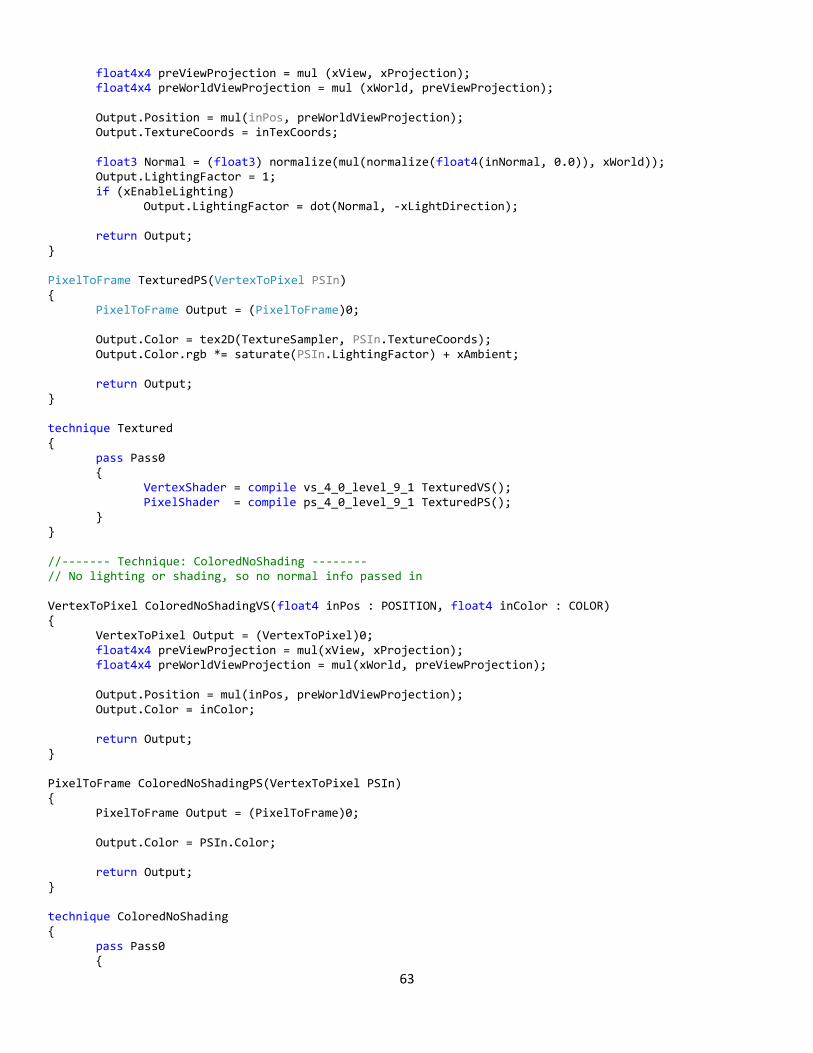
63
float4x4 preViewProjection = mul (xView, xProjection); float4x4 preWorldViewProjection = mul (xWorld, preViewProjection); Output.Position = mul(inPos, preWorldViewProjection); Output.TextureCoords = inTexCoords; float3 Normal = (float3) normalize(mul(normalize(float4(inNormal, 0.0)), xWorld)); Output.LightingFactor = 1; if (xEnableLighting) Output.LightingFactor = dot(Normal, -xLightDirection); return Output; } PixelToFrame TexturedPS(VertexToPixel PSIn) { PixelToFrame Output = (PixelToFrame)0; Output.Color = tex2D(TextureSampler, PSIn.TextureCoords); Output.Color.rgb *= saturate(PSIn.LightingFactor) + xAmbient; return Output; } technique Textured { pass Pass0 { VertexShader = compile vs_4_0_level_9_1 TexturedVS(); PixelShader = compile ps_4_0_level_9_1 TexturedPS(); } } //------- Technique: ColoredNoShading -------- // No lighting or shading, so no normal info passed in VertexToPixel ColoredNoShadingVS(float4 inPos : POSITION, float4 inColor : COLOR) { VertexToPixel Output = (VertexToPixel)0; float4x4 preViewProjection = mul(xView, xProjection); float4x4 preWorldViewProjection = mul(xWorld, preViewProjection); Output.Position = mul(inPos, preWorldViewProjection); Output.Color = inColor; return Output; } PixelToFrame ColoredNoShadingPS(VertexToPixel PSIn) { PixelToFrame Output = (PixelToFrame)0; Output.Color = PSIn.Color; return Output; } technique ColoredNoShading { pass Pass0 {

64
VertexShader = compile vs_4_0_level_9_1 ColoredNoShadingVS(); PixelShader = compile ps_4_0_level_9_1 ColoredNoShadingPS(); } }
That completes our introductory terrain tutorial. We have interesting, but non-realistic terrain. That is the subject of the
next terrain lab.