Embed Size (px)
Citation preview

Get all the help you need online at
mitre10.co.nz/easyas
GARDENCREATEHOW TO
BORDERS
CONCRETE EDGINGGetting started
J Run a string line where you want to lay your pavers. You can use a reinforcing rod or peg to fix the string line to. Ensure the line is tight.
J If your section is slightly sloping or uneven, fix your string line 100mm off the ground. This will be your point of reference, or ‘datum’ throughout the whole job and ensures that the edging will be straight and even.
Getting it done J Dig a trench wide enough to fit your chosen edging, and deep enough for a layer of base material and concrete. Our edging is 50mm thick so we need 50mm of concrete on top of a 20mm scoria base-course. The edging pavers will settle 10mm into the concrete, so the trench needs to be 110mm deep.
Mitre 10 Handy Hints:• If you’re laying a long stretch of edging, or it’s
a hot day, lay 4 – 5 pavers at a time so your concrete doesn’t set and become unworkable.
CONCRETE EDGINGMATERIALS
F Garden edge pavers
F Concrete
F Sponge
F Grout
F Scoria
F Pegs or reinforcing rods.
TOOLS F Spade
F String line
F Hammer
F Tape measure
F Level
F Brick layer’s pointing trowel
F Bucket
F Hose
WHAT YOU’LL NEEDTake this into store with you to make sure you get everything in one trip. For this project the following materials and equipment are required:
J Lay in the trench a 20mm deep base-course of scoria and compact it down.
JMix concrete according to packet instructions and lay it 50mm deep on top of the scoria and roughly smooth it off.
J Lay the edging pavers on top of the concrete, making sure they’re placed straight along the string line. When lined up, settle the edging 10mm down into the concrete, and ensure they’re 100mm below the string line.
J If you need to cut a piece of concrete edging to size you can use an angle grinder with a diamond or concrete cutting blade, or a bolster.
J Before the concrete sets do a final check that your pavers are in line and level.
JWait for the concrete to set, ready for grouting.
JMix up your grout and use a pointing trowel to work it into the gaps between the pavers and smooth it out.
J Use a wet sponge to clean excess grout off pavers to prevent staining.
Creating garden borders is one of the easiest ways to add character, create defined displays and keep your garden looking tidy. There are two common ways you can create a border, both create a different effect:
Macrocarpa sleepers – these are a solid raised option that adds strong definition to any garden.
Concrete edging pavers – these define garden edges and also double as a handy mowing strip so you no longer need to trim the edges of your lawn after mowing.
Follow the relevant instructions in this guide to create the border you want.
Limitation of LiabilityThis project planner has been produced to provide basic information and our experienced staff are available to answer any questions you may have. Because this planner is general in nature, neither your Mitre 10 supplier nor their staff are responsible for the application of these design principles in any particular case, as the contents of this brochure may need to be modified for the particular site and circumstances.Mitre 10 is not responsible for the quality of work carried out on the goods by the consumer and is not responsible for the design or construction of any structure in which the goods are incorporated.Where applicable consumers should ensure that they comply with The New Zealand Building Code and/or Local Body Bylaws in respect of any such structures.Consumers are advised to call a qualified tradesman such as a builder, electrician or plumber where expert services are required.Mitre 10 will not be liable for any consequential loss howsoever arising from the use of goods sold, nor for any loss caused by defective or inadequate structures in which goods are incorporated.
you want the first sleeper to be. Measure the distance between your fence and the peg and then measure parallel at the other end, where you want the last sleeper to be, and hammer in your second peg. Run your string line between the two pegs.
J If your backyard is uneven or sloping, then adjust the height of your string line to the same height as the sleepers you’re using. This line will be used as your point of reference or ‘datum’ when finally laying down your sleepers and ensures they’ll look straight and are parallel to the ground.
J In this case our sleepers are 100mm high so this will be the height of our string line.
J It’s a good idea at this stage to lay the sleepers out along the string line. If you do need to cut one sleeper down we recommend you put this sleeper at the end where it will be least noticeable.
Cutting and joining the sleepers J To join sleepers you can use either a butt join or a lap join. We’ve used a lap join as this type of join is stronger, and will ensure your sleepers remain straight. It takes a little more work, but will look better and it will last longer.
J If you prefer to do a simple butt join, just cut the end of each sleeper square using a handsaw, mitre saw or circular saw and butt the two sleepers together. Secure them by screwing a nail plate over the join on the back.
J For a lap join you need to cut a rebate into the end of each sleeper, so they can be overlapped and screwed together. To create a rebate: • Check the end of your sleeper is straight, if it’s not
then you’ll need to correct this yourself. Use a pencil and square to mark a line just in from the end – this will be your new straight edge. Cut along this line using a handsaw, mitre saw or circular saw.
• Mark a line 200mm in from the new end, then square this down the sides of the sleeper also.
• Measure the width of your sleeper (ours is 100mm). • Using your square, mark a line half the width of the
sleeper around the edges (ours is 50mm). • If using a circular saw, set the blade to the
depth (ours is 50mm) and make a series of cuts approximately 5mm apart across the sleeper.
• Take a large chisel (at least 40mm) and following the pencil line, hammer the chisel along the line. Using your hammer break out fins gently.
• Clean up the join with your chisel. J To secure the sleepers together use 90mm x 10mm galvanised coach screws. Mark on the sleeper where the screws need to be inserted. As our lap join is 200mm long, they need to be 100mm in from the end and 50mm from either side of the sleeper.
J To drill the hole for the coach screws, use a 28mm spade bit to drill holes 15mm deep. This size is slightly bigger than the washer of the screw, so that we can countersink the coach screw head tidily into the sleeper.
J Drill through the centre of the 28mm spade holes with a 10mm auger bit to accommodate the coach screws.
J Lay down the sleepers in line with the string line and check that the joins fit together.
J Now, using a 200mm x 7mm auger drill bit, pre drill a hole through the hole in the top sleeper, into the bottom sleeper, so that the coach screw has plenty of bite.
JWhen the sleepers are sitting in place, mark out the edge of the sleepers with a spade, and clearly number the sleepers in order. You now need to move your sleepers aside, but your numbering will ensure you put them back in to place properly.
Mitre 10 Handy Hints:• Use the chisel with bevel side facing down so
it doesn’t eat into the timber.
Mitre 10 Handy Hints:• To make sure you don’t drill deeper than
needed, apply masking tape to the spade bit 15mm up from the bottom edges so that you can easily see how far you have drilled.
MACROCARPA BORDERSMATERIALS
F Macrocarpa sleepers
F Reinforcing rod D:10mm
F Scoria
F Concrete
F 90mm x 10mm galvanised coach screws
F Pegs
F Sandpaper
TOOLS F Spade
F Shovel
F String line
F Hammer
F Tape measure
F Level
F Electric sander
F Pencil
F Square
F Circular saw
F Hand saw or mitre saw
F Hand plane
F Battery drill
F 28mm spade bit
F 200mm x 7mm auger bit
F Cutter/bender (optional)
WHAT YOU’LL NEEDTake this into store with you to make sure you get everything in one trip. For this project the following materials and equipment are required:
For more Easy As Guides visit mitre10.co.nz
J Hammer the straight end of the rods into the pre-drilled holes. The 90° end you be will set into the concrete.
J To set in concrete, use pegs to mark the position of the rods in the ground.
J Scrape out a channel, the length of your border, one spade-width wide and approximately 50mm deep.
JWhere your pegs are, dig holes 250mm deep and one spade-width square ready for concrete.
JMix concrete according to the packet instructions and place into the holes.
J Shovel scoria into the channel between each hole to a height of 50mm and level it off. This will help prevent the timber from being in direct contact with the earth and causing it to rot.
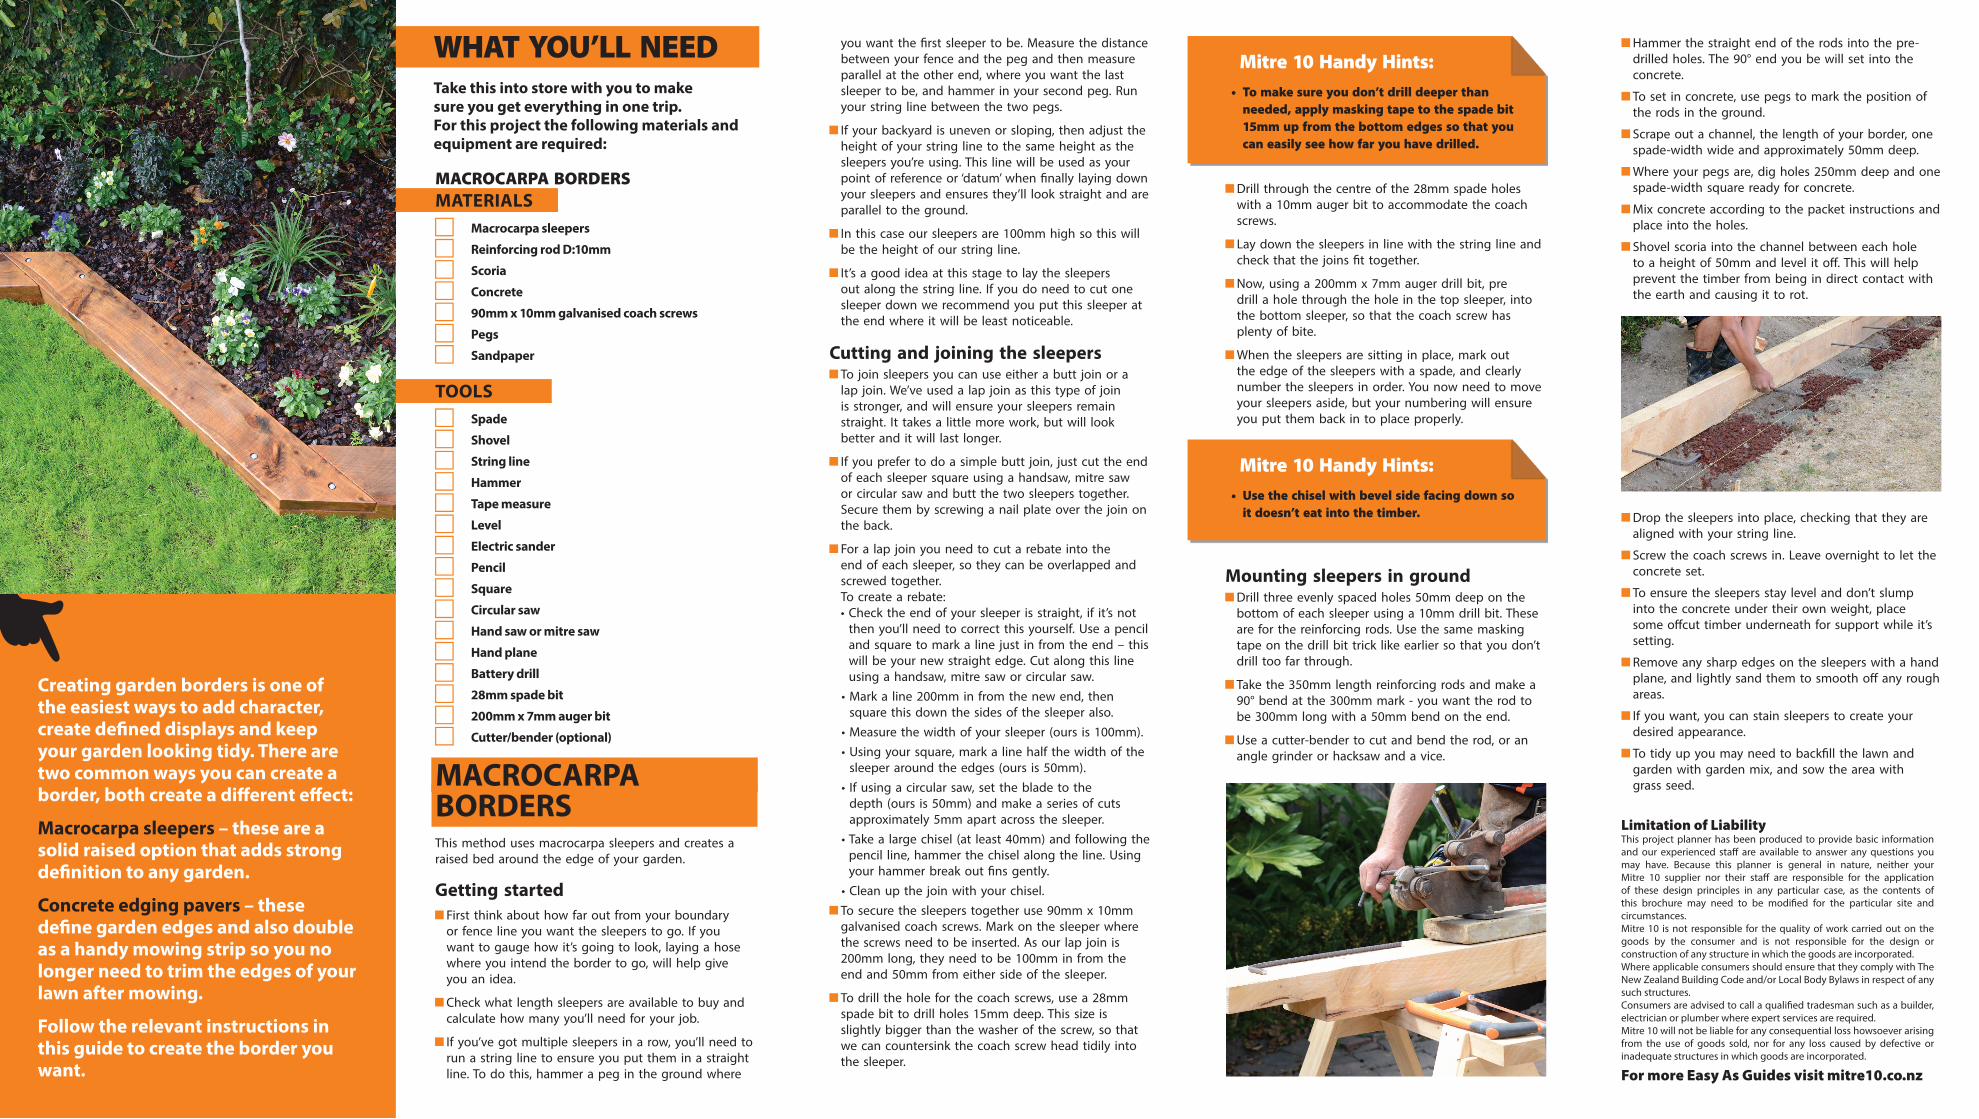
Mounting sleepers in ground J Drill three evenly spaced holes 50mm deep on the bottom of each sleeper using a 10mm drill bit. These are for the reinforcing rods. Use the same masking tape on the drill bit trick like earlier so that you don’t drill too far through.
J Take the 350mm length reinforcing rods and make a 90° bend at the 300mm mark - you want the rod to be 300mm long with a 50mm bend on the end.
J Use a cutter-bender to cut and bend the rod, or an angle grinder or hacksaw and a vice.
MACROCARPA BORDERSThis method uses macrocarpa sleepers and creates a raised bed around the edge of your garden.
Getting started J First think about how far out from your boundary or fence line you want the sleepers to go. If you want to gauge how it’s going to look, laying a hose where you intend the border to go, will help give you an idea.
J Check what length sleepers are available to buy and calculate how many you’ll need for your job.
J If you’ve got multiple sleepers in a row, you’ll need to run a string line to ensure you put them in a straight line. To do this, hammer a peg in the ground where
J Drop the sleepers into place, checking that they are aligned with your string line.
J Screw the coach screws in. Leave overnight to let the concrete set.
J To ensure the sleepers stay level and don’t slump into the concrete under their own weight, place some offcut timber underneath for support while it’s setting.
J Remove any sharp edges on the sleepers with a hand plane, and lightly sand them to smooth off any rough areas.
J If you want, you can stain sleepers to create your desired appearance.
J To tidy up you may need to backfill the lawn and garden with garden mix, and sow the area with grass seed.