Embed Size (px)
Citation preview

Jackson County Mini 4-H
Second Grade
October 2014

Jackson County Mini 4-H: Second Grade Welcome to Mini 4-H. This program is designed for boys and girls who are in second grade.
This project booklet contains information and exhibit requirements for thirteen different projects. They are: Bicycle, Cake Decorating, Crafts, Foods, Forestry, Garden, Health, Livestock, Models, Reading, Scrapbook, Sewing and Wildlife.
You may complete as many of these projects that you want, then choose one, two or three of your best and exhibit them at the Jackson County Fair. Mini 4-H’ers who are in second grade may exhibit one, two or three projects.
Here are some guidelines to remember when preparing your exhibit.
1. Posters should be 14” x 22”, horizontal, backed with stiff backing and covered with plastic. Give your poster a title.
2. Mini 4-H members are not to show livestock of any kind at the fair. Mini members choosing the livestock option must do a poster.
3. Mini 4-H projects will be judged community style or at an open judging. This allows the 4-H’ers to be present during judging to receive information and answer questions from the judges. Attendance is helpful, but not mandatory.
4. Please refer to the “Jackson County 4-H Handbook” for other information.
If you have any questions about Mini 4-H, call the Extension Office, (812)358-6101
It is the policy of the Purdue University Cooperative Extension Service that all persons have equal opportunity and access to its educational programs, services, activities, and facilities without regard to race, religion, color, sex, age, national origin or ancestry, marital status, parental status, sexual orientation, disability or status as a veteran. Purdue University is an
Affirmative Action institution. This material may be available in alternative formats.

Mini 4-H – Bicycle Participating in the mini second grade 4-H Bicycle Project will be lots of fun and you will
learn to be safe while riding your bicycle. In the mini second grade 4-H Bicycle Project you will learn the parts of your bike. Bicycling is fun for everyone! So start peddling and REMEMBER. “Wear your helmet!”
Exhibit – Second Grade – One poster with a picture of you on your bike. It can be a photograph or a picture you have drawn. Label four or more parts of your bike.
Poster Rules
1. All posters are to be 14” x 22” posterboard. 2. All posters need to have a stiff backing. 3. All posters need to be covered with a clear plastic. 4. All posters should be horizontal. 5. Give your poster a title.


Mini 4-H – Cake Decorating Welcome to the creative world of cake decorating. Not only is it important for our food to taste good but many times our taste buds begin to work just by seeing a baked good. In Mini Cake Decorating we will discover many of our hidden talents and creative ideas.
Project Exhibit:
Second Grade – Frost 3 two to four inch sugar cookies, using prepared frosting and decorate them using frosting from a purchased pressurized can or tube of icing. Place the decorated cookie on a paper plate and cover with plastic. You do not need to make your cookie.
To begin this project you need an idea. Think about what you like to do and maybe you could decorate your cookies like that. Make a list of the things you like to do, and then think about how you could decorate your cookies. Show your ideas to an adult and then consider the following things before you decide which one to use.
1. Does the idea sound fun to you? 2. Will it teach you something new? 3. Will the idea be easy enough for you to complete? 4. Will you need to purchase additional supplies or equipment before you start the
project?
Once you have considered these questions, then it is time to choose the best idea. Next you will need to make a list of supplies and equipment you will need to complete your project. Then check to see which supplies and equipment you already have at home, and which you will need to purchase the next times you go to the store.
Some basic supplies that you will need for all divisions include a metal spatula, purchased frosting and cookies.
After you have all the supplies you need and are ready to start decorating, the next step is to get together an area of the kitchen where you can work on your project and not be disturbed. Remember to choose a spot where younger or older brothers and sisters can’t accidentally mess up your project. If you have any pets in the house, be sure to keep your supplies out of their reach also.
Now that you have the perfect spot, you’re ready to start your project. Start your project when you will have plenty of time to work on it and won’t be interrupted. Set out all your supplies and equipment. Make sure you have an adult around to help you out.
Frosting adds more than just decoration to your cookies. It adds flavor and helps keep the cookies moist and fresh.
To ice your cookies, use a metal spatula. Do the top of the cookies. Apply a thin layer of icing to begin with and let dry. This is called a “crumb coat” because it seals the crumbs so

they do not show up in your decorator icing. After your crumb coat is dry, liberally apply icing making sure you thoroughly cover all the cookie. Get the icing as even and smooth as you can. Next decorate your cookies using prepared frosting from a purchased pressurized can or tube of icing.
After you have decorated your cookies, be sure to store them in a safe place until time to take them to the fair. Do not store them in an airtight container. This can cause condensation that will make your colors bleed. A cake box or similar box usually works best. Just make sure your cookies won’t touch the sides or top of the box.
For the fair, place the decorated cookies on a paper plate and cover with plastic. You do not need to make your cookie.

Mini 4-H – Crafts Let’s have fun with crafts! Everyone enjoys making things. Let’s be creative. In the Mini
4-H Crafts project, you may choose from a variety of things to do. You will have an opportunity for individual expressions and choice of articles that will be useful and satisfying.
If you wish, you may do all the crafts listed, just one, or one of your own not listed in
this book. Decide which one you like best and that can be the one you enter in the Jackson County Fair.
Second Grade – Make and exhibit one article from the area of needlework, latchwork,
candle-making, fine arts, etc. If drawing a picture or making a collage, either draw or make on 14” x 22” posterboard or mount on this type of posterboard.
If making a posterboard, please follow the Poster rules.
Poster Rules 1. All posters are to be 14” x 22” posterboard. 2. All posters need to have a stiff backing. 3. All posters need to be covered with a clear plastic. 4. All posters should be horizontal. 5. Give your poster a title.

Mini 4-H – Foods Cooking and baking are a lot of fun, as you will find out as you work on your Mini 4-H Foods Project. Be sure to follow directions carefully and ask an adult to help when you need it. Have fun and let your family enjoy your new ability.
Requirements – Second Grade
1. Complete the activities from this manual. 2. Set the table for two meals. 3. Help prepare a dish or snack. 4. Prepare and exhibit cookies.
What and How You Will Exhibit at the Fair
Three drop cookies made from a purchased cookie mix.
Exhibit on a small white paper plate.
Cover with plastic wrap or plastic bag.
What the Judge Will Be Looking For
Outside Characteristics – Color (typical of this kind)
Uniform shape
Uniform size
Inside Characteristics – Moist, neither soggy nor too dry
Crisp, chewy or soft according to kind
Tenderness
Flavor – Well-blended, characteristic of ingredients


Mini 4-H – Forestry Trees
A tree provides many things. It can be a home for birds, squirrels or raccoons. It can provide shade for a person when the sun is bright and hot, and it serves as an umbrella and provides protection to animals when it rains. Its roots hold the soil from eroding away. Its nuts or seeds can provide food for wildlife as well as for man. Its leaves recycle our air and help to keep it clean for us to breathe.
Trees grow in yards, in fields, and in forests. You can see that trees are very, very useful. While you are in mini 4-H, try to learn as many different kinds of trees as you can. Trees are one of our most valuable resources and it helps everyone to know about them.
Project Exhibit
Second Grade – Read about six different types of leaves and mount three on a 14” x 22” horizontal posterboard. Identify the three leaves on the poster.
Identify the tree you take it from (example: white oak, hickory, sassafras, tulip tree, etc.). You may need the help of an older person or a book. There is a small book available at the Extension Office that will help you with this. Make sure you identify the trees and leaves correctly.
To press the leaves, bring them home and place them between sheets of old newspaper and then put weight on them; heavy books work well. Leave them there for 3-5 days until they are dry. Check them every day to make sure they are drying flat and not curling up. When the leaves are dry you are ready for mounting them.
Arrange the leaves on a 14” x 22” horizontal poster. Attach it to the poster when you have it arranged like you want it. Beneath the leaves print the name of the leaves (sassafras, tulip tree, etc.). All posters should be backed with a stiff backing and covered with clear plastic. Give your poster a title.

Mini 4-H – Garden So you have joined the 4-H Mini Garden Project. Congratulations! As a mini gardener you are now enrolled in an important food project. Your garden, with assistance from an older person, will need to be properly planned and planted in order to produce an abundant supply of crisp, juicy, succulent vegetables of highest quality for the table or for canning and freezing. The experience and knowledge you gain will help you later in life.
There are several pointers you want to keep in mind when assisting with the garden plan and work.
A. Planning the Garden 1. Location should be open, fertile and clear. 2. Plan “blue print” of garden plot before planting. 3. Check equipment. 4. Order seeds and plants.
B. Planting the Garden 1. Prepare the soil. 2. Plant the seed. 3. Set out plants. 4. Be aware of frost danger.
C. Care of Garden 1. Weed control 2. Watering 3. Thinning 4. Mulching 5. Staking 6. Insect and disease control
Exhibit: Second Grade
Exhibit one vegetable and 1 single flower bloom from your garden. Display flower in pop bottle. Follow single vegetable requirements for correct number. Example: You would not exhibit 1 bean but rather 20 pods, or not 1 tomato, rather 5 tomatoes.

4-H Single Vegetable
The classes and amounts to be displayed are listed below.
1. Beans 20 pods (green snap) 2. Beans 20 pods (green lima) 3. Beans 20 pods (wax snap) 4. Beets, 5 on plate 5. Broccoli, 1 head 6. Cabbage, 1 head (round) 7. Cabbage, 1 head (flat) 8. Cabbage, 1 head (pointed) 9. Carrots, 5 on plate 10. Corn, 5 ears (white corn) 11. Corn 5 ears (yellow sweet) 12. Cucumbers, 5 on plate (slicing) 13. Cucumbers, 5 on plate (pickling) 14. Egg Plant, 1 on plate 15. Kohlrabi, 5 on plate 16. Muskmelon, 1 on plate (any variety) 17. Okra, 5 on plate 18. Onions, 5 on plate (flat white) 19. Onions, 5 on plate (flat yellow) 20. Onions, 5 on plate (globe white) 21. Onions, 5 on plate (globe yellow) 22. Peppers, 5 on plate (sweet bell) 23. Peppers, 5 on plate (sweet banana) 24. Pumpkins, 1 (any variety) 25. Squashes, 1 (acorn) 26. Squashes, 1 (bush scallop) 27. Squashes, 1 (butternut) 28. Squashes, 1 (Hubbard, blue/green) 29. Squashes, 1 (yellow crookneck and yellow straightneck) 30. Squashes, 1 (Zucchini) 31. Tomatoes, 5 on plate (red) 32. Tomatoes, 5 on plate (yellow) 33. Tomatoes, 5 on plate ( Rome type) 34. Tomatoes, 5 on plate (cherry type) 35. Watermelons, 1 (any variety long) 36. Watermelons, 1 (any variety round)

Mini 4-H – Health Congratulations on your wanting to learn about your health. You will be learning to
develop important life skills that are grouped into the four H’s in the 4-H clover – Head, Heart, Hands, and Health. Invite a parent or other adult to help you with your project. You are really going to enjoy all the new skills you will be learning.
Exhibit – Second Grade – Draw a picture or make a collage of what you might see on a bicycle outing with your family or friends. Mount your picture on 14 x 22” horizontal posterboard. When making your poster, follow the rules below.
Poster Rules
1. All posters are to be 14” x 22” posterboard. 2. All posters need to have a stiff backing. 3. All posters need to be covered with a clear plastic. 4. All posters should be horizontal. 5. Give your poster a title.

Mini 4-H Livestock So you have joined the 4-H Mini Livestock Project. Congratulations! This should be a fun
and educational learning experience for you. As a mini livestock project member you will pick two animals and then make a poster describing what it is, what its name is and what you have learned from your animals. Also included on your poster should be a picture of your animal. Please follow the poster rules as stated below.
Poster Rules
1. All posters are to be 14” x 22” posterboard. 2. All posters need to have a stiff backing. 3. All posters need to be covered with a clear plastic. 4. All posters should be horizontal. 5. Give your poster a title.
Animal can be one of the following: Dairy, Dairy Beef, Beef, Sheep, Goat, Swine, Horse & Pony, Rabbit, Poultry, Dog, Cat, etc.
Exhibit – Second Grade – Exhibit a 14”x22” poster that has a picture of your animals, what they are and what you have learned about them.
Parents Please Note: Mini 4-H Livestock members are not to show live animals in a 4-H Fair event.

Mini 4-H – Models Rules:
1. Second graders will exhibit a Lego type or snap together model. 2. Special display stands may be used to display model. 3. Models will be judged community style. It is recommended that the 4-H’er bring his own
model so he can listen to the comments of the judge.

Mini 4-H – Reading Mini 4-H reading is to encourage youth to share their love of reading to others. Book selection is your choice! What do you like to read? History? Biographies? Fiction? Mysteries?
Suggested activities:
Second Grade – Read three books. Share or read the books with another person (can be a brother or sister, mother or father, friends, neighbor, grandparent – you pick!)
Make a poster, (14” x 22”, stiff backed, covered in plastic) that tells about one of your books.

Mini 4-H – Scrapbooking Purpose: The scrapbook project allows you to preserve your memories in an organized and creative way. Memories may include family, 4-H, etc.
Exhibit: An album with pages according to your division. Judged pages will be those made since the last 4-H fair. Follow the guidelines included in this manual.
Requirements: Second Grade – four pages – two pages front and back
Layout: Simple 2-3 colors of paper, stickers and die cuts can be used, but are not mandatory.
Cropping: Straight cutting of photos using regular scissors of paper cutter. Decorative scissors can be used on colored paper only.
Journaling: Bullet labeling supplying only the basic information such as who, what, when and where.
Sample:
The Alamo
San Antonio, Texas
December 2013

General 4-H Scrapbook Requirements Scrapbook Album – each album should:
A. Have a front and back cover with pages firmly attached between the covers. B. Pages must be at least 8”x10” in size. (12”x12” is the most common size and will be
easier to work with and find materials for.) C. Pages must be acid-free, lignin-free, buffered scrapbook pages.
• Acid free, pH-balanced chemistry pages will not accelerate the natural deterioration of your photos.
• Lignin-free pages will maintain their durability and whiteness-non-yellowing. • Alkaline reserve (buffering) has a neutralizing effect to protect photos against
pollutants from “the outside” (e.g., the environment, acidic greeting cards, etc.) D. Polypropylene Page Protectors or covers
• Made of photo-safe plastic to protect album pages and photographs from finger prints, abrasion and accidental spills. Protectors or covers made of PVC give off chlorine gas that causes the plastic to bond with photographs over time, making it impossible to separate the two!
Labeling – each scrapbook album will have a label (attached with a string) with:
• 4-H member’s name • Club name • Grade • Page numbers to be judged • This label listing the page numbers will indicate the pages the 4-H member wishes the
judge to review for judging. The page numbers need not be written on the actual album page. Rather, the member should count the first page ad Page #1 and proceed onward. You may pick the pages you wish to be judged, always in sets of two to allow continuity of the album.
Photographs – photos are the focus of your album and must be included on at least half of your page requirements.
• The photos do not have to have been taken by the participant. If you would like to create and album honoring your grandparents, or maybe a special trip that you have taken with your family, this is acceptable. Just remember, this is your album and your memories.
Journaling – journaling is required on every page. Without words, you have pages of photographs and memorabilia, not a book of memories. Our photos and memorabilia are simply more complete, more meaningful and more fun with detail, emotion, and humor that only words can provide.

• Photo-safe Pigma pens are fade-proof, water-proof and acid-free when used on acid-free paper. These pens cause no damage to photos over time and will be legible for generations to come.
• Label photos with names, dates and places, etc.
Cropping Techniques – You may use a variety of cropping techniques and page layouts in your album. Not everything has to be cropped or “artsy,” use a nice balance, keeping in mind that the main focus is preservation of the photo and its story. Too many shapes on a page can be distracting to the eye and take away from the meaning of the photos.
Decorations – All decorations (including stickers and die cuts) should be acid-free and lignin-free to maintain the integrity of the page and photos. Once again, remember that these are decorations and should be added only to enhance the photos and journaling and not be the main focus of the page.
Page/Photo Layout and Design – A variety of page layouts will add creativity and interest to your album. Use a nice balance complementing your theme for the page and pictures. Keep in mind the proper placement of your photos. You are telling a story, so use chronology (putting things in order of occurrence), or themes to organize your album.
Neatness counts – Exhibit clean and neat pages with clear and neat handwriting. No computer created writing is allowed. Your handwriting is part of your heritage so use it often.
Page Requirements – each scrapbook album will have the following pages completed.
• Mini Grade 2-----4 pages • All eligible pages should include:
o Photos o Journaling o Decorations (stickers and die cuts) (optional)
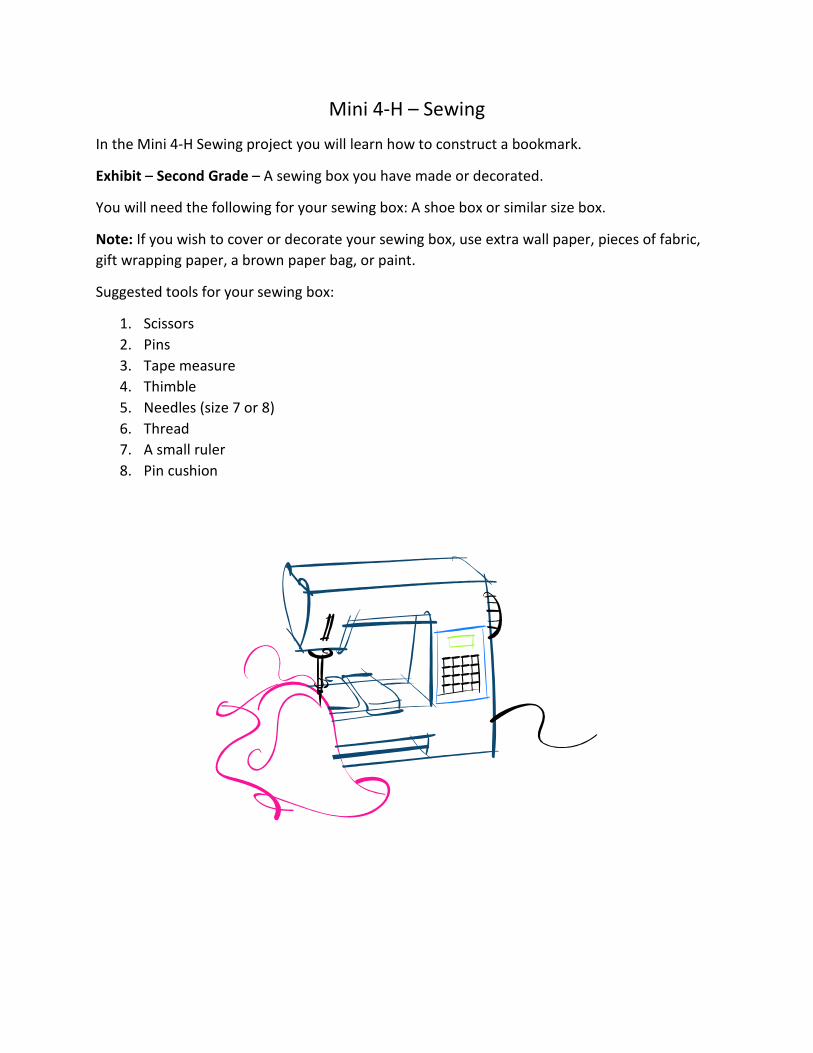
Mini 4-H – Sewing In the Mini 4-H Sewing project you will learn how to construct a bookmark.
Exhibit – Second Grade – A sewing box you have made or decorated.
You will need the following for your sewing box: A shoe box or similar size box.
Note: If you wish to cover or decorate your sewing box, use extra wall paper, pieces of fabric, gift wrapping paper, a brown paper bag, or paint.
Suggested tools for your sewing box:
1. Scissors 2. Pins 3. Tape measure 4. Thimble 5. Needles (size 7 or 8) 6. Thread 7. A small ruler 8. Pin cushion

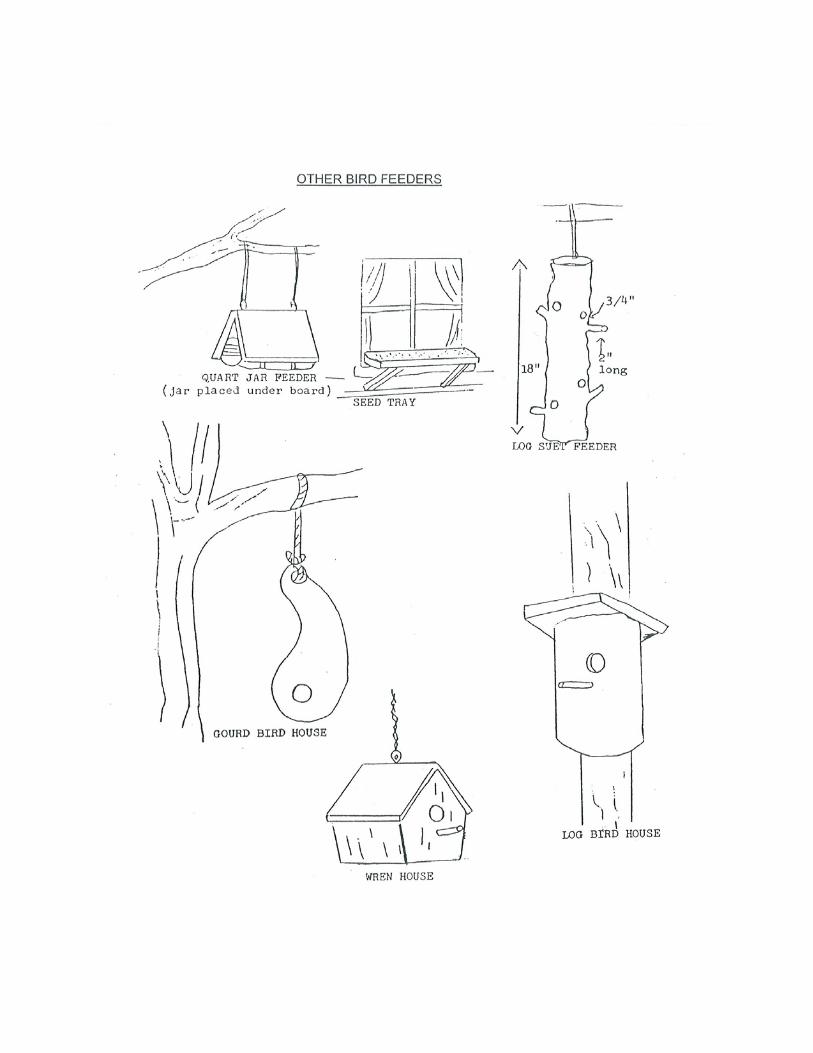
Mini 4-H – Wildlife Working with wildlife can be fun! And it can be twice as much fun if you can see your completed project being used. You will feel good and important when you are able to identify different birds or see the birds living in the house you have made for them.
When they are hungry and feeding their families, they will eat from the bird feeder you built. Do you know what kinds of birds visit your bird feeder?
Once you have made your house or feeder, you will want to hang or fasten it in an area that will attract the birds. If houses and feeders are not placed to meet the needs and habits or the birds they will go unused.
We looked for all kinds of good bird houses and feeders for you to choose from. Most of them have wood pieces, but we included a couple that aren’t made of wood in case you have a hard time finding the wood you need.
Exhibit – Second Grade – Make and exhibit one bird house or bird feeder.