Embed Size (px)
Citation preview

Japanese Knot Bagalternate sewing
instructions
Download the pattern that was made by Helen Heath at:
http://showyourworkings.wordpress.com
Follow her instructions for cutting out the pieces.
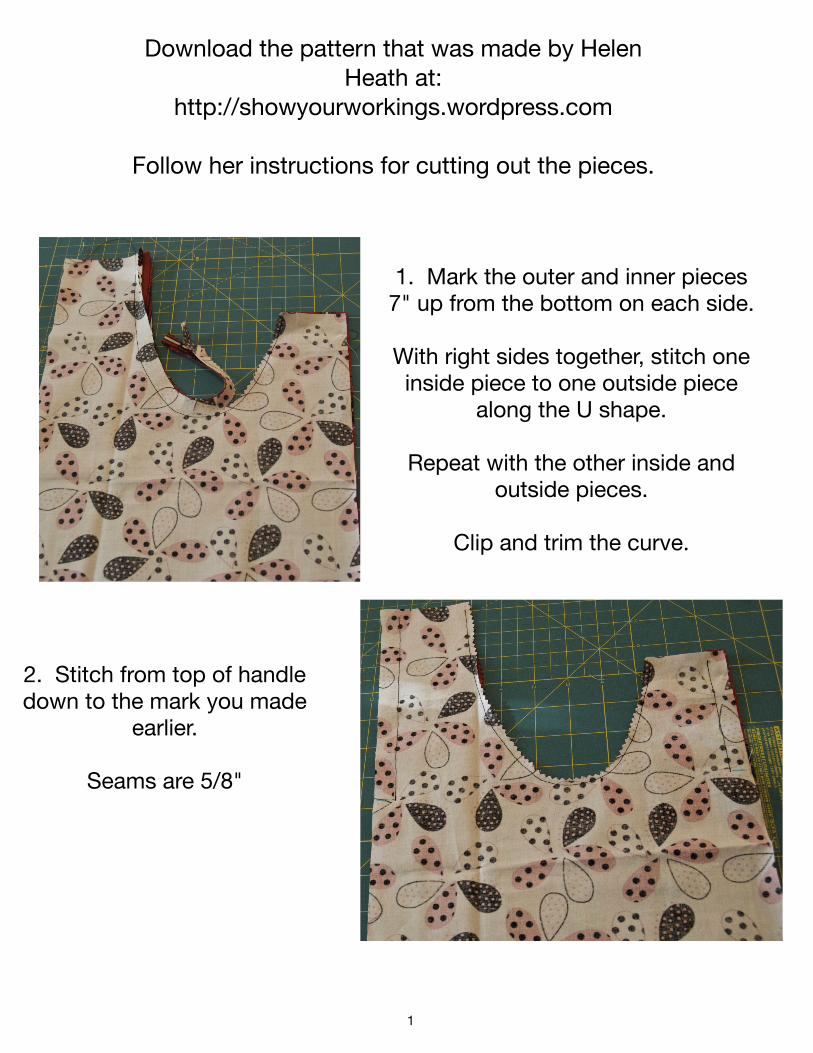
1. Mark the outer and inner pieces 7" up from the bottom on each side.
With right sides together, stitch one inside piece to one outside piece
along the U shape.
Repeat with the other inside and outside pieces.
Clip and trim the curve.
2. Stitch from top of handle down to the mark you made
earlier.
Seams are 5/8"
1
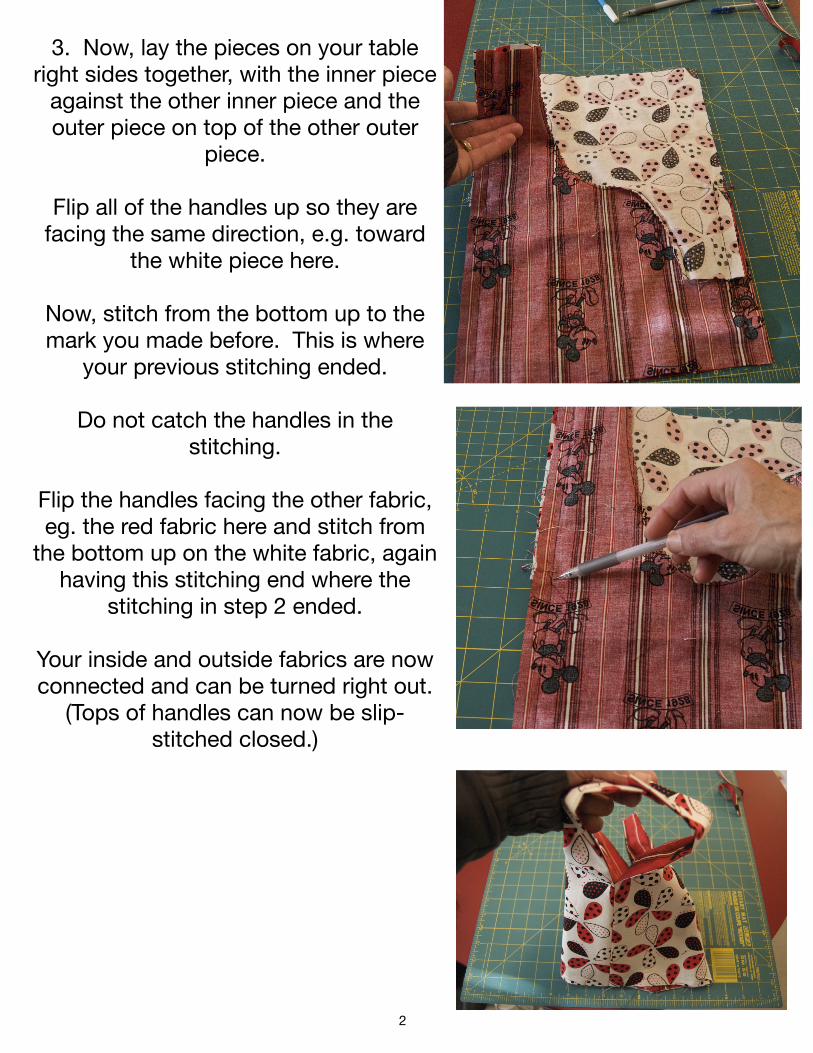
3. Now, lay the pieces on your table right sides together, with the inner piece
against the other inner piece and the outer piece on top of the other outer
piece.
Flip all of the handles up so they are facing the same direction, e.g. toward
the white piece here.
Now, stitch from the bottom up to the mark you made before. This is where
your previous stitching ended.
Do not catch the handles in the stitching.
Flip the handles facing the other fabric, eg. the red fabric here and stitch from
the bottom up on the white fabric, again having this stitching end where the
stitching in step 2 ended.
Your inside and outside fabrics are now connected and can be turned right out.
(Tops of handles can now be slip-stitched closed.)
2
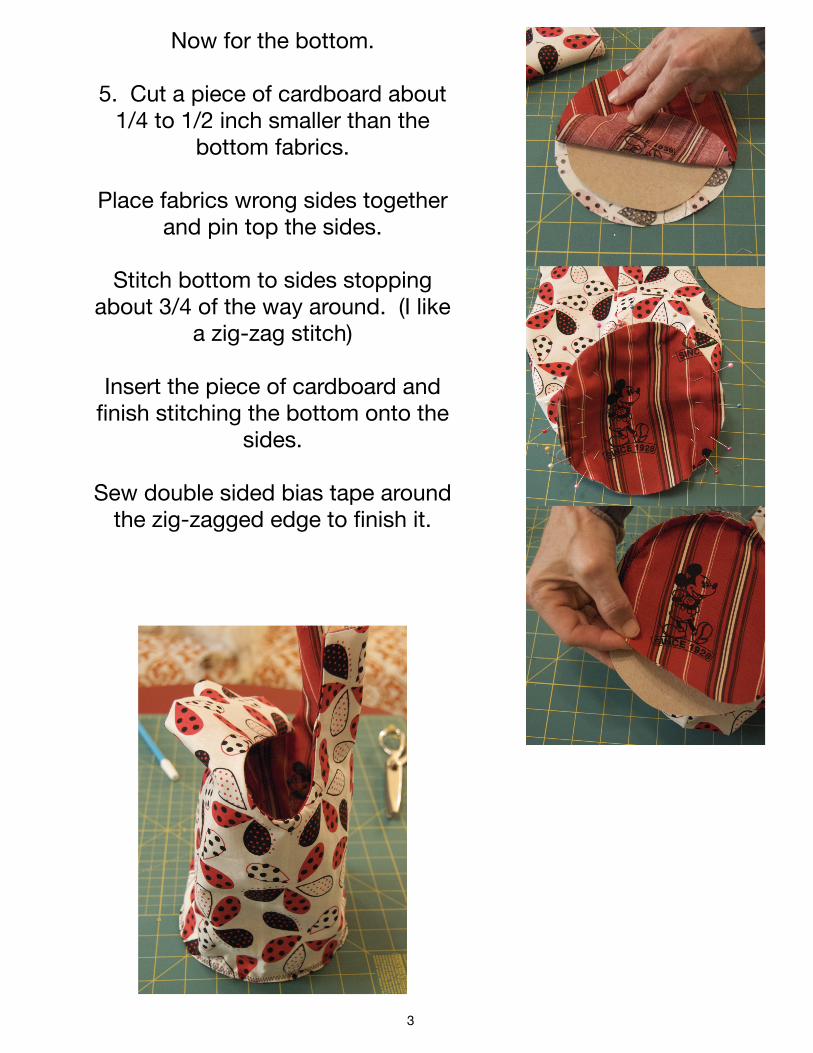
Now for the bottom.
5. Cut a piece of cardboard about 1/4 to 1/2 inch smaller than the
bottom fabrics.
Place fabrics wrong sides together and pin top the sides.
Stitch bottom to sides stopping about 3/4 of the way around. (I like
a zig-zag stitch)
Insert the piece of cardboard and finish stitching the bottom onto the
sides.
Sew double sided bias tape around the zig-zagged edge to finish it.
3
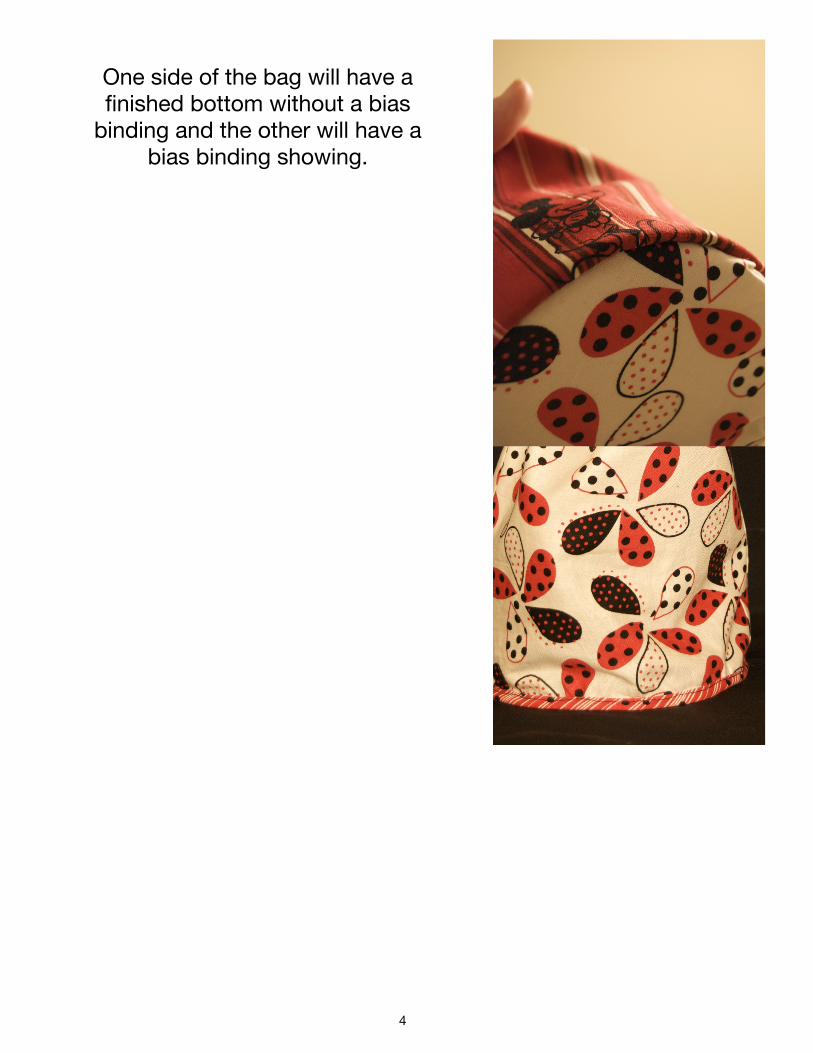
One side of the bag will have a finished bottom without a bias
binding and the other will have a bias binding showing.
4