Embed Size (px)
Citation preview

JENKS PUBLIC SCHOOLS 10/18/17 HIGH SCHOOL CAMPUS
JENKS, OK ADD. #1 PHASE 3 REMODEL
KKT ARCHITECTS, INC. CAST-IN-PLACE CONCRETE 033000 - 1
SECTION 033000
CAST-IN-PLACE CONCRETE
PART 1 - GENERAL
1.01 RELATED DOCUMENTS
A. Drawings and general provisions of the Contract, including other Division 01
Specification Sections, apply to this Section.
1.02 SUMMARY
A. Section includes cast-in-place concrete, including formwork, reinforcement, concrete
materials, mixture design, placement procedures, and finishes.
B. Related Requirements:
1. Section 312000 "Earth Moving" for drainage fill under slabs-on-grade.
2. Section 321313 "Concrete Paving" for concrete pavement and walks.
3. Section 321316 "Architectural Concrete Paving" for decorative concrete
pavement and walks.
1.03 DEFINITIONS
A. Cementitious Materials: Portland cement alone or in combination with one or more of
the following: blended hydraulic cement, fly ash, slag cement, other pozzolans, and
silica fume; materials subject to compliance with requirements.
B. W/C Ratio: The ratio by weight of water to cementitious materials.
1.04 PREINSTALLATION MEETINGS
A. Preinstallation Conference: Conduct conference at Project site.
1. Before submitting design mixtures, review concrete design mixture and examine
procedures for ensuring quality of concrete materials. Require representatives of
each entity directly concerned with cast-in-place concrete to attend, including
the following:
a. Contractor's superintendent.
b. Independent testing agency responsible for concrete design mixtures.
c. Ready-mix concrete manufacturer.
d. Concrete Subcontractor.
2. Review special inspection and testing and inspecting agency procedures for field
quality control, concrete finishes and finishing, cold- and hot-weather concreting
procedures, curing procedures, construction contraction and isolation joints, and
joint-filler strips, forms and form removal limitations, shoring and reshoring
procedures, vapor-retarder installation, anchor rod and anchorage device
installation tolerances, steel reinforcement installation, methods for achieving
specified floor and slab flatness and levelness floor and slab flatness and levelness
measurement, concrete repair procedures, and concrete protection.
1.05 ACTION SUBMITTALS
A. Product Data: For each type of product.

JENKS PUBLIC SCHOOLS 10/18/17 HIGH SCHOOL CAMPUS
JENKS, OK ADD. #1 PHASE 3 REMODEL
KKT ARCHITECTS, INC. CAST-IN-PLACE CONCRETE 033000 - 2
B. Design Mixtures: For each concrete mixture. Submit alternate design mixtures when
characteristics of materials, Project conditions, weather, test results, or other
circumstances warrant adjustments. Indicate amounts of mixing water to be withheld
for later addition at Project site.
C. Steel Reinforcement Shop Drawings: Placing Drawings that detail fabrication, bending,
and placement. Include bar sizes, lengths, material, grade, bar schedules, stirrup
spacing, bent bar diagrams, bar arrangement, splices and laps, mechanical
connections, tie spacing, hoop spacing, and supports for concrete reinforcement.
D. Construction Joint Layout: Indicate proposed construction joints required to construct
the structure. Location of construction joints is subject to approval of the Architect.
E. Samples: For vapor retarder.
1.06 INFORMATIONAL SUBMITTALS
A. Qualification Data: For Installer and manufacturer.
B. Material Certificates: For each of the following, signed by manufacturers:
1. Cementitious materials.
2. Admixtures.
3. Form materials and form-release agents.
4. Steel reinforcement and accessories.
5. Curing compounds.
6. Vapor retarders.
7. Semirigid joint filler.
8. Joint-filler strips.
C. Floor surface flatness and levelness measurements indicating compliance with
specified tolerances.
D. Minutes of preinstallation conference.
1.07 QUALITY ASSURANCE
A. Installer Qualifications: A qualified installer who employs on Project personnel qualified
as ACI-certified Flatwork Technician and Finisher and a supervisor who is an ACI-
certified Concrete Flatwork Technician.
B. Manufacturer Qualifications: A firm experienced in manufacturing ready-mixed
concrete products and that complies with ASTM C 94/C 94M requirements for
production facilities and equipment. Manufacturer certified according to NRMCA's
"Certification of Ready Mixed Concrete Production Facilities."
1.08 DELIVERY, STORAGE, AND HANDLING
A. Steel Reinforcement: Deliver, store, and handle steel reinforcement to prevent bending
and damage.

JENKS PUBLIC SCHOOLS 10/18/17 HIGH SCHOOL CAMPUS
JENKS, OK ADD. #1 PHASE 3 REMODEL
KKT ARCHITECTS, INC. CAST-IN-PLACE CONCRETE 033000 - 3
1.09 FIELD CONDITIONS
A. Cold-Weather Placement: Comply with ACI 306.1 and as follows. Protect concrete work
from physical damage or reduced strength that could be caused by frost, freezing
actions, or low temperatures.
1. When average high and low temperature is expected to fall below 40 deg F for
three successive days, maintain delivered concrete mixture temperature within
the temperature range required by ACI 301.
2. Do not use frozen materials or materials containing ice or snow. Do not place
concrete on frozen subgrade or on subgrade containing frozen materials.
3. Do not use calcium chloride, salt, or other materials containing antifreeze agents
or chemical accelerators unless otherwise specified and approved in mixture
designs.
B. Hot-Weather Placement: Comply with ACI 301 and as follows:
1. Maintain concrete temperature below 90 deg F at time of placement. Chilled
mixing water or chopped ice may be used to control temperature, provided
water equivalent of ice is calculated to total amount of mixing water. Using liquid
nitrogen to cool concrete is Contractor's option.
2. Fog-spray forms, steel reinforcement, and subgrade just before placing concrete.
Keep subgrade uniformly moist without standing water, soft spots, or dry areas.
PART 2 - PRODUCTS
2.01 CONCRETE, GENERAL
A. ACI Publications: Comply with the following unless modified by requirements in the
Contract Documents:
1. ACI 301.
2. ACI 117.
2.02 FORM-FACING MATERIALS
A. Rough-Formed Finished Concrete: Plywood, lumber, metal, or another approved
material. Provide lumber dressed on at least two edges and one side for tight fit.
B. Void Forms: Biodegradable paper surface, treated for moisture resistance, structurally
sufficient to support weight of plastic concrete and other superimposed loads.
C. Chamfer Strips: Wood, metal, PVC, or rubber strips, 3/4 by 3/4 inch, minimum.
D. Rustication Strips: Wood, metal, PVC, or rubber strips, kerfed for ease of form removal.
E. Form-Release Agent: Commercially formulated form-release agent that does not bond
with, stain, or adversely affect concrete surfaces and does not impair subsequent
treatments of concrete surfaces. Formulate form-release agent with rust inhibitor for
steel form-facing materials.
F. Form Ties: Factory-fabricated, removable or snap-off glass-fiber-reinforced plastic or
metal form ties designed to resist lateral pressure of fresh concrete on forms and to
prevent spalling of concrete on removal.
1. Furnish units that leave no corrodible metal closer than 1 inch to the plane of
exposed concrete surface.

JENKS PUBLIC SCHOOLS 10/18/17 HIGH SCHOOL CAMPUS
JENKS, OK ADD. #1 PHASE 3 REMODEL
KKT ARCHITECTS, INC. CAST-IN-PLACE CONCRETE 033000 - 4
2. Furnish ties that, when removed, leave holes no larger than 1 inch in diameter in
concrete surface.
2.03 STEEL REINFORCEMENT
A. Reinforcing Bars: ASTM A 615/A 615M, Grade 60, deformed.
2.04 REINFORCEMENT ACCESSORIES
A. Joint Dowel Bars: ASTM A 615/A 615M, Grade 60, plain-steel bars, cut true to length with
ends square and free of burrs.
B. Bar Supports: Bolsters, chairs, spacers, and other devices for spacing, supporting, and
fastening reinforcing bars and welded-wire reinforcement in place. Manufacture bar
supports from steel wire, plastic, or precast concrete according to CRSI's "Manual of
Standard Practice," of greater compressive strength than concrete and as follows:
2.05 CONCRETE MATERIALS
A. Source Limitations: Obtain each type or class of cementitious material of the same
brand from the same manufacturer's plant, obtain aggregate from single source, and
obtain admixtures from single source from single manufacturer.
B. Cementitious Materials:
1. Portland Cement: ASTM C 150/C 150M, Type I/II, gray.
2. Fly Ash: ASTM C 618, Class F or C.
C. Normal-Weight Aggregates: ASTM C 33/C 33M, Class 3S coarse aggregate or better,
graded. Provide aggregates from a single source.
1. Maximum Coarse-Aggregate Size: 1-1/2 inches nominal.
2. Fine Aggregate: Free of materials with deleterious reactivity to alkali in cement.
D. Air-Entraining Admixture: ASTM C 260/C 260M.
E. Chemical Admixtures: Certified by manufacturer to be compatible with other
admixtures and that do not contribute water-soluble chloride ions exceeding those
permitted in hardened concrete. Do not use calcium chloride or admixtures containing
calcium chloride.
1. Water-Reducing Admixture: ASTM C 494/C 494M, Type A.
F. Water: ASTM C 94/C 94M and potable.
2.06 VAPOR RETARDERS
A. Sheet Vapor Retarder: ASTM E 1745, Class A. Include manufacturer's recommended
adhesive or pressure-sensitive tape.
1. Products: Subject to compliance with requirements, provide one of the following:
a. Reef Industries, Inc; Vaporguard.
b. Stego Industries, LLC; Stego Wrap Vapor Barrier (15-Mil).
c. W.R. Meadows, Inc; Perminator 15 mil.
2. Maintain permeance of less than 0.01 Perms, as tested in accordance with
mandatory conditioning tests per ASTM E 1745 Section 7.1 (7.1.1-7.1.5).

JENKS PUBLIC SCHOOLS 10/18/17 HIGH SCHOOL CAMPUS
JENKS, OK ADD. #1 PHASE 3 REMODEL
KKT ARCHITECTS, INC. CAST-IN-PLACE CONCRETE 033000 - 5
3. Accessories:
a. Seam Tape: Shall have the following qualities:
1) Water Vapor Transmission Rate: ASTM E 96; 0.3 perms or lower.
b. Vapor Proofing Mastic: Shall have the following qualities:
1) Water Vapor Transmission Rate: ASTM E 96; 0.3 perms or lower.
c. Pipe Boots: Construct pipe boots from vapor barrier material, pressure
sensitive tape and/or mastic per manufacturer’s instructions.
2.07 CURING MATERIALS
A. Evaporation Retarder: Waterborne, monomolecular film forming, manufactured for
application to fresh concrete.
B. Absorptive Cover: AASHTO M 182, Class 2, burlap cloth made from jute or kenaf,
weighing approximately 9 oz./sq. yd. when dry.
C. Moisture-Retaining Cover: ASTM C 171, polyethylene film or white burlap-polyethylene
sheet.
D. Water: Potable.
E. Clear, Waterborne, Membrane-Forming Curing Compound: ASTM C 309, Type 1,
Class B, nondissipating, certified by curing compound manufacturer to not interfere
with bonding of floor covering.
F. Clear, Waterborne, Membrane-Forming Curing and Sealing Compound (SC):
ASTM C 1315, Type 1, Class A.
1. Manufacturers: Subject to compliance with requirements, available
manufacturers offering products that may be incorporated into the Work include,
but are not limited to, the following:
a. ChemMasters, Inc.
b. Dayton Superior.
c. Euclid Chemical Company (The); an RPM company.
d. Kaufman Products, Inc.
e. L&M Construction Chemicals, Inc.
f. Metalcrete Industries.
g. W. R. Meadows, Inc.
2.08 RELATED MATERIALS
A. Expansion- and Isolation-Joint-Filler Strips: ASTM D 1751, asphalt-saturated cellulosic
fiber.
B. Semirigid Joint Filler: Two-component, semirigid, 100 percent solids, aromatic polyurea
with a Type A shore durometer hardness range of 90 to 95 according to ASTM D 2240.
2.09 CONCRETE MIXTURES, GENERAL
A. Prepare design mixtures for each type and strength of concrete, proportioned on the
basis of laboratory trial mixture or field test data, or both, according to ACI 301. Use a
qualified independent testing agency for preparing and reporting proposed mixture
designs based on laboratory trial mixtures.
JENKS PUBLIC SCHOOLS 10/18/17 HIGH SCHOOL CAMPUS
JENKS, OK ADD. #1 PHASE 3 REMODEL
KKT ARCHITECTS, INC. CAST-IN-PLACE CONCRETE 033000 - 6
B. Cementitious Materials: Limit percentage, by weight, of cementitious materials other
than portland cement in concrete as follows:
1. Fly Ash: 25 percent.
2. Combined Fly Ash and Pozzolan: 25 percent.
C. Limit water-soluble, chloride-ion content in hardened concrete to 0.15 percent by
weight of cement.
D. Admixtures: Use admixtures according to manufacturer's written instructions. Use water-
reducing admixture in concrete, as required, for placement and workability.
2.10 CONCRETE MIXTURES FOR BUILDING ELEMENTS
A. Footings and Foundation Walls: Normal-weight concrete.
1. Minimum Compressive Strength: 4000 psi at 28 days.
2. Maximum W/C Ratio: 0.50.
3. Slump Limit: 5 inches, plus or minus 1 inch.
B. Slabs-on-Grade and Elevated Slabs: Normal-weight concrete.
1. Minimum Compressive Strength: 4000 psi at 28 days.
2. Maximum W/C Ratio: 0.45.
3. Minimum Cementitious Materials Content: 470 lb/cu. yd.
4. Slump Limit: 4 inches, plus or minus 1 inch.
5. Air Content: Do not allow air content of trowel-finished floors to exceed
3 percent.
2.11 FABRICATING REINFORCEMENT
A. Fabricate steel reinforcement according to CRSI's "Manual of Standard Practice."
2.12 CONCRETE MIXING
A. Ready-Mixed Concrete: Measure, batch, mix, and deliver concrete according to
ASTM C 94/C 94M, and furnish batch ticket information.
1. When air temperature is between 85 and 90 deg F, reduce mixing and delivery
time from 1-1/2 hours to 75 minutes; when air temperature is above 90 deg F,
reduce mixing and delivery time to 60 minutes.
2. Provide batch ticket for each batch discharged and used in the Work, indicating
Project identification name and number, date, mixture type, mixture time,
quantity, and amount of water added. Record approximate location of final
deposit in structure.
PART 3 - EXECUTION
3.01 FORMWORK INSTALLATION
A. Design, erect, shore, brace, and maintain formwork, according to ACI 301, to support
vertical, lateral, static, and dynamic loads, and construction loads that might be
applied, until structure can support such loads.
B. Construct formwork so concrete members and structures are of size, shape, alignment,
elevation, and position indicated, within tolerance limits of ACI 117.

JENKS PUBLIC SCHOOLS 10/18/17 HIGH SCHOOL CAMPUS
JENKS, OK ADD. #1 PHASE 3 REMODEL
KKT ARCHITECTS, INC. CAST-IN-PLACE CONCRETE 033000 - 7
C. Limit concrete surface irregularities, designated by ACI 347 as abrupt or gradual, as
follows:
1. Class B, 1/4 inch for rough-formed finished surfaces.
D. Construct forms tight enough to prevent loss of concrete mortar.
E. Construct forms for easy removal without hammering or prying against concrete
surfaces. Provide crush or wrecking plates where stripping may damage cast-concrete
surfaces. Provide top forms for inclined surfaces steeper than 1.5 horizontal to 1 vertical.
Do not use rust-stained steel form-facing material.
F. Set edge forms, bulkheads, and intermediate screed strips for slabs to achieve required
elevations and slopes in finished concrete surfaces. Provide and secure units to support
screed strips; use strike-off templates or compacting-type screeds.
G. Provide temporary openings for cleanouts and inspection ports where interior area of
formwork is inaccessible. Close openings with panels tightly fitted to forms and securely
braced to prevent loss of concrete mortar. Locate temporary openings in forms at
inconspicuous locations.
H. Chamfer exterior corners and edges of permanently exposed concrete.
I. Form openings, chases, offsets, sinkages, keyways, reglets, blocking, screeds, and
bulkheads required in the Work. Determine sizes and locations from trades providing
such items.
J. Clean forms and adjacent surfaces to receive concrete. Remove chips, wood,
sawdust, dirt, and other debris just before placing concrete.
K. Retighten forms and bracing before placing concrete, as required, to prevent mortar
leaks and maintain proper alignment.
L. Coat contact surfaces of forms with form-release agent, according to manufacturer's
written instructions, before placing reinforcement.
3.02 EMBEDDED ITEM INSTALLATION
A. Place and secure anchorage devices and other embedded items required for
adjoining work that is attached to or supported by cast-in-place concrete. Use setting
drawings, templates, diagrams, instructions, and directions furnished with items to be
embedded. Install anchor rods, accurately located, to elevations required and
complying with tolerances in Section 7.5 of AISC 303.
3.03 REMOVING AND REUSING FORMS
A. General: Formwork for sides of beams, walls, columns, and similar parts of the Work that
does not support weight of concrete may be removed after cumulatively curing at not
less than 50 deg F for 24 hours after placing concrete. Concrete has to be hard enough
to not be damaged by form-removal operations, and curing and protection operations
need to be maintained.
B. Clean and repair surfaces of forms to be reused in the Work. Split, frayed, delaminated,
or otherwise damaged form-facing material are not acceptable for exposed surfaces.
Apply new form-release agent.

JENKS PUBLIC SCHOOLS 10/18/17 HIGH SCHOOL CAMPUS
JENKS, OK ADD. #1 PHASE 3 REMODEL
KKT ARCHITECTS, INC. CAST-IN-PLACE CONCRETE 033000 - 8
C. When forms are reused, clean surfaces, remove fins and laitance, and tighten to close
joints. Align and secure joints to avoid offsets. Do not use patched forms for exposed
concrete surfaces unless approved by Architect.
3.04 VAPOR-RETARDER INSTALLATION
A. Sheet Vapor Retarders: Place, protect, and repair sheet vapor retarder according to
ASTM E 1643 and manufacturer's written instructions.
1. Lap vapor barrier over footings and seal to foundation walls.
2. Lap joints 6 inches and seal with manufacturer's recommended tape.
3. Seal penetrations (including pipes) per manufacturer’s instructions.
4. Repair damaged areas by cutting patches of vapor barrier, overlapping
damaged area 6 inches and taping all four sides with manufacturer’s
recommended tape.
3.05 STEEL REINFORCEMENT INSTALLATION
A. General: Comply with CRSI's "Manual of Standard Practice" for fabricating, placing,
and supporting reinforcement. Do not cut or puncture vapor retarder. Repair damage
and reseal vapor retarder before placing concrete.
B. Clean reinforcement of loose rust and mill scale, earth, ice, and other foreign materials
that reduce bond to concrete.
C. Accurately position, support, and secure reinforcement against displacement. Locate
and support reinforcement with bar supports to maintain minimum concrete cover. Do
not tack weld crossing reinforcing bars.
D. Set wire ties with ends directed into concrete, not toward exposed concrete surfaces.
3.06 JOINTS
A. General: Construct joints true to line with faces perpendicular to surface plane of
concrete.
B. Construction Joints: Install so strength and appearance of concrete are not impaired,
at locations indicated or as approved by Architect.
1. Place joints perpendicular to main reinforcement. Continue reinforcement across
construction joints unless otherwise indicated. Do not continue reinforcement
through sides of strip placements of floors and slabs.
2. Form keyed joints as indicated. Embed keys at least 1-1/2 inches into concrete.
3. Locate joints for beams, slabs, joists, and girders in the middle third of spans.
Offset joints in girders a minimum distance of twice the beam width from a beam-
girder intersection.
4. Use a bonding agent at locations where fresh concrete is placed against
hardened or partially hardened concrete surfaces.
C. Contraction Joints in Slabs-on-Grade: Form weakened-plane contraction joints,
sectioning concrete into areas as indicated. Construct contraction joints for a depth
equal to at least one-fourth of concrete thickness as follows:
1. Sawed Joints: Form contraction joints with power saws equipped with
shatterproof abrasive or diamond-rimmed blades. Cut maximum 3/16-inch-wide
joints into concrete when cutting action does not tear, abrade, or otherwise
damage surface and before concrete develops random contraction cracks.

JENKS PUBLIC SCHOOLS 10/18/17 HIGH SCHOOL CAMPUS
JENKS, OK ADD. #1 PHASE 3 REMODEL
KKT ARCHITECTS, INC. CAST-IN-PLACE CONCRETE 033000 - 9
3.07 CONCRETE PLACEMENT
A. Before placing concrete, verify that installation of formwork, reinforcement, and
embedded items is complete and that required inspections are completed.
B. Before test sampling and placing concrete, water may be added at Project site,
subject to limitations of ACI 301.
C. Deposit concrete continuously in one layer or in horizontal layers of such thickness that
no new concrete is placed on concrete that has hardened enough to cause seams or
planes of weakness. If a section cannot be placed continuously, provide construction
joints as indicated. Deposit concrete to avoid segregation.
1. Deposit concrete in horizontal layers of depth not to exceed formwork design
pressures and in a manner to avoid inclined construction joints.
2. Consolidate placed concrete with mechanical vibrating equipment according
to ACI 301.
3. Do not use vibrators to transport concrete inside forms. Insert and withdraw
vibrators vertically at uniformly spaced locations to rapidly penetrate placed
layer and at least 6 inches into preceding layer. Do not insert vibrators into lower
layers of concrete that have begun to lose plasticity. At each insertion, limit
duration of vibration to time necessary to consolidate concrete and complete
embedment of reinforcement and other embedded items without causing
mixture constituents to segregate.
D. Deposit and consolidate concrete for floors and slabs in a continuous operation, within
limits of construction joints, until placement of a panel or section is complete.
1. Consolidate concrete during placement operations, so concrete is thoroughly
worked around reinforcement and other embedded items and into corners.
2. Maintain reinforcement in position on chairs during concrete placement.
3. Screed slab surfaces with a straightedge and strike off to correct elevations.
4. Slope surfaces uniformly to drains where required.
5. Begin initial floating using bull floats or darbies to form a uniform and open-
textured surface plane, before excess bleedwater appears on the surface. Do
not further disturb slab surfaces before starting finishing operations.
3.08 FINISHING FORMED SURFACES
A. Rough-Formed Finish: As-cast concrete texture imparted by form-facing material with
tie holes and defects repaired and patched. Remove fins and other projections that
exceed specified limits on formed-surface irregularities.
3.09 FINISHING FLOORS AND SLABS
A. General: Comply with ACI 302.1R recommendations for screeding, restraightening, and
finishing operations for concrete surfaces. Do not wet concrete surfaces.
B. Float Finish: Consolidate surface with power-driven floats or by hand floating if area is
small or inaccessible to power-driven floats. Restraighten, cut down high spots, and fill
low spots. Repeat float passes and restraightening until surface is left with a uniform,
smooth, granular texture. Apply float finish to surfaces to receive trowel finish.
C. Trowel Finish: After applying float finish, apply first troweling and consolidate concrete
by hand or power-driven trowel. Continue troweling passes and restraighten until

JENKS PUBLIC SCHOOLS 10/18/17 HIGH SCHOOL CAMPUS
JENKS, OK ADD. #1 PHASE 3 REMODEL
KKT ARCHITECTS, INC. CAST-IN-PLACE CONCRETE 033000 - 10
surface is free of trowel marks and uniform in texture and appearance. Grind smooth
any surface defects that would telegraph through applied coatings or floor coverings.
1. Apply a trowel finish to surfaces exposed to view or to be covered with resilient
flooring, carpet, ceramic tile set over a cleavage membrane, paint, or another
thin-film-finish coating system.
2. Finish surfaces to the following tolerances, according to ASTM E 1155, for a
randomly trafficked floor surface:
a. Specified overall values of flatness, F(F) 45; and of levelness, F(L) 35; with
minimum local values of flatness, F(F) 35; and of levelness, F(L) 25.
D. Trowel and Fine-Broom Finish: Apply a first trowel finish to surfaces where ceramic or
quarry tile is to be installed by either thickset or thinset method. While concrete is still
plastic, slightly scarify surface with a fine broom. Comply with flatness and levelness
tolerances for trowel-finished floor surfaces.
E. Broom Finish: Apply a broom finish to exterior concrete platforms, steps, ramps, and
elsewhere as indicated. Immediately after float finishing, slightly roughen trafficked
surface by brooming with fiber-bristle broom perpendicular to main traffic route.
Coordinate required final finish with Architect before application.
3.10 MISCELLANEOUS CONCRETE ITEM INSTALLATION
A. Filling In: Fill in holes and openings left in concrete structures after work of other trades is
in place unless otherwise indicated. Mix, place, and cure concrete, as specified, to
blend with in-place construction. Provide other miscellaneous concrete filling indicated
or required to complete the Work.
B. Curbs: Provide monolithic finish to interior curbs by stripping forms while concrete is still
green and by steel-troweling surfaces to a hard, dense finish with corners, intersections,
and terminations slightly rounded.
C. Equipment Bases and Foundations:
1. Coordinate sizes and locations of concrete bases with actual equipment
provided.
2. Construct concrete bases 4 inches high unless otherwise indicated, and extend
base not less than 6 inches in each direction beyond the maximum dimensions of
supported equipment unless otherwise indicated or unless required for seismic
anchor support.
3. Minimum Compressive Strength: 4000 psi at 28 days.
4. Install dowel rods to connect concrete base to concrete floor. Unless otherwise
indicated, install dowel rods on 18-inch centers around the full perimeter of
concrete base.
5. For supported equipment, install epoxy-coated anchor bolts that extend through
concrete base and anchor into structural concrete substrate.
6. Prior to pouring concrete, place and secure anchorage devices. Use setting
drawings, templates, diagrams, instructions, and directions furnished with items to
be embedded.
7. Cast anchor-bolt insert into bases. Install anchor bolts to elevations required for
proper attachment to supported equipment.

JENKS PUBLIC SCHOOLS 10/18/17 HIGH SCHOOL CAMPUS
JENKS, OK ADD. #1 PHASE 3 REMODEL
KKT ARCHITECTS, INC. CAST-IN-PLACE CONCRETE 033000 - 11
3.11 CONCRETE PROTECTING AND CURING
A. General: Protect freshly placed concrete from premature drying and excessive cold or
hot temperatures. Comply with ACI 306.1 for cold-weather protection and ACI 301 for
hot-weather protection during curing.
B. Evaporation Retarder: Apply evaporation retarder to unformed concrete surfaces if
hot, dry, or windy conditions cause moisture loss approaching 0.2 lb/sq. ft. x h before
and during finishing operations. Apply according to manufacturer's written instructions
after placing, screeding, and bull floating or darbying concrete, but before float
finishing.
C. Formed Surfaces: Cure formed concrete surfaces, including underside of beams,
supported slabs, and other similar surfaces. If forms remain during curing period, moist
cure after loosening forms. If removing forms before end of curing period, continue
curing for remainder of curing period.
D. Unformed Surfaces: Begin curing immediately after finishing concrete. Cure unformed
surfaces, including floors and slabs, concrete floor toppings, and other surfaces.
E. Cure concrete according to ACI 308.1, by one or a combination of the following
methods:
1. Moisture Curing: Keep surfaces continuously moist for not less than seven days
with the following materials:
a. Water.
b. Continuous water-fog spray.
c. Absorptive cover, water saturated, and kept continuously wet. Cover
concrete surfaces and edges with 12-inch lap over adjacent absorptive
covers.
2. Moisture-Retaining-Cover Curing: Cover concrete surfaces with moisture-retaining
cover for curing concrete, placed in widest practicable width, with sides and
ends lapped at least 12 inches, and sealed by waterproof tape or adhesive. Cure
for not less than seven days. Immediately repair any holes or tears during curing
period, using cover material and waterproof tape.
a. Moisture cure or use moisture-retaining covers to cure concrete surfaces to
receive floor coverings.
b. Cure concrete surfaces to receive floor coverings with either a moisture-
retaining cover or a curing compound that the manufacturer certifies does
not interfere with bonding of floor covering used on Project.
3. Curing Compound: Apply uniformly in continuous operation by power spray or
roller according to manufacturer's written instructions. Recoat areas subjected to
heavy rainfall within three hours after initial application. Maintain continuity of
coating and repair damage during curing period.
4. Curing and Sealing Compound (SC): Apply uniformly to floors and slabs indicated
in a continuous operation by power spray or roller according to manufacturer's
written instructions. Recoat areas subjected to heavy rainfall within three hours
after initial application. Repeat process 24 hours later and apply a second coat.
Maintain continuity of coating and repair damage during curing period.
3.12 JOINT FILLING
A. Prepare, clean, and install joint filler according to manufacturer's written instructions.
Defer joint filling until concrete has aged at least one month. Do not fill joints until
construction traffic has permanently ceased.

JENKS PUBLIC SCHOOLS 10/18/17 HIGH SCHOOL CAMPUS
JENKS, OK ADD. #1 PHASE 3 REMODEL
KKT ARCHITECTS, INC. CAST-IN-PLACE CONCRETE 033000 - 12
B. Remove dirt, debris, saw cuttings, curing compounds, and sealers from joints; leave
contact faces of joints clean and dry.
C. Install semirigid joint filler full depth in saw-cut joints and at least 2 inches deep in formed
joints. Overfill joint and trim joint filler flush with top of joint after hardening.
3.13 CONCRETE SURFACE REPAIRS
A. Defective Concrete: Repair and patch defective areas when approved by Architect.
Remove and replace concrete that cannot be repaired and patched to Architect's
approval.
B. Patching Mortar: Mix dry-pack patching mortar, consisting of 1 part portland cement to
2-1/2 parts fine aggregate passing a No. 16 sieve, using only enough water for handling
and placing.
1. Correct other low areas scheduled to receive floor coverings with a repair
underlayment. Prepare, mix, and apply repair underlayment and primer
according to manufacturer's written instructions to produce a smooth, uniform,
plane, and level surface. Feather edges to match adjacent floor elevations.
2. Correct other low areas scheduled to remain exposed with a repair topping. Cut
out low areas to ensure a minimum repair topping depth of 1/4 inch to match
adjacent floor elevations. Prepare, mix, and apply repair topping and primer
according to manufacturer's written instructions to produce a smooth, uniform,
plane, and level surface.
3. Repair defective areas, except random cracks and single holes 1 inch or less in
diameter, by cutting out and replacing with fresh concrete. Remove defective
areas with clean, square cuts and expose steel reinforcement with at least a
3/4-inch clearance all around. Dampen concrete surfaces in contact with
patching concrete and apply bonding agent. Mix patching concrete of same
materials and mixture as original concrete, except without coarse aggregate.
Place, compact, and finish to blend with adjacent finished concrete. Cure in
same manner as adjacent concrete.
4. Repair random cracks and single holes 1 inch or less in diameter with patching
mortar. Groove top of cracks and cut out holes to sound concrete and clean off
dust, dirt, and loose particles. Dampen cleaned concrete surfaces and apply
bonding agent. Place patching mortar before bonding agent has dried.
Compact patching mortar and finish to match adjacent concrete. Keep
patched area continuously moist for at least 72 hours.
C. Repair materials and installation not specified above may be used, subject to
Architect's approval.
3.14 FIELD QUALITY CONTROL
A. Special Inspections: Owner will engage a special inspector and qualified testing and
inspecting agency to perform field tests and inspections and prepare test reports.
B. Inspections:
1. Steel reinforcement placement.
2. Headed bolts and studs.
3. Verification of use of required design mixture.
4. Concrete placement, including conveying and depositing.
5. Curing procedures and maintenance of curing temperature.

JENKS PUBLIC SCHOOLS 10/18/17 HIGH SCHOOL CAMPUS
JENKS, OK ADD. #1 PHASE 3 REMODEL
KKT ARCHITECTS, INC. CAST-IN-PLACE CONCRETE 033000 - 13
6. Verification of concrete strength before removal of shores and forms from beams
and slabs.
C. Concrete Tests: Testing of composite samples of fresh concrete obtained according to
ASTM C 172/C 172M shall be performed according to the following requirements:
1. Testing Frequency: Obtain one composite sample for each day's pour of each
concrete mixture exceeding 5 cu. yd., but less than 25 cu. yd., plus one set for
each additional 50 cu. yd. or fraction thereof.
2. Slump: ASTM C 143/C 143M; one test at point of placement for each composite
sample, but not less than one test for each day's pour of each concrete mixture.
Perform additional tests when concrete consistency appears to change.
3. Air Content: ASTM C 231/C 231M, pressure method, for normal-weight concrete;
one test for each composite sample, but not less than one test for each day's
pour of each concrete mixture.
4. Concrete Temperature: ASTM C 1064/C 1064M; one test hourly when air
temperature is 40 deg F and below or 80 deg F and above, and one test for each
composite sample.
5. Compression Test Specimens: ASTM C 31/C 31M.
a. Cast and laboratory cure two sets of two standard cylinder specimens for
each composite sample.
b. Cast and field cure two sets of two standard cylinder specimens for each
composite sample.
6. Compressive-Strength Tests: ASTM C 39/C 39M; test one set of two laboratory-
cured specimens at 7 days and one set of two specimens at 28 days.
a. Test one set of two field-cured specimens at 7 days and one set of two
specimens at 28 days.
b. A compressive-strength test shall be the average compressive strength from
a set of two specimens obtained from same composite sample and tested
at age indicated.
7. When strength of field-cured cylinders is less than 85 percent of companion
laboratory-cured cylinders, Contractor shall evaluate operations and provide
corrective procedures for protecting and curing in-place concrete.
8. Strength of each concrete mixture will be satisfactory if every average of any
three consecutive compressive-strength tests equals or exceeds specified
compressive strength and no compressive-strength test value falls below
specified compressive strength by more than 500 psi.
9. Test results shall be reported in writing to Architect, concrete manufacturer, and
Contractor within 48 hours of testing. Reports of compressive-strength tests shall
contain Project identification name and number, date of concrete placement,
name of concrete testing and inspecting agency, location of concrete batch in
Work, design compressive strength at 28 days, concrete mixture proportions and
materials, compressive breaking strength, and type of break for both 7- and
28-day tests.
10. Nondestructive Testing: Impact hammer, sonoscope, or other nondestructive
device may be permitted by Architect but will not be used as sole basis for
approval or rejection of concrete.
11. Additional Tests: Testing and inspecting agency shall make additional tests of
concrete when test results indicate that slump, air entrainment, compressive
strengths, or other requirements have not been met, as directed by Architect.
Testing and inspecting agency may conduct tests to determine adequacy of
concrete by cored cylinders complying with ASTM C 42/C 42M or by other
methods as directed by Architect.

JENKS PUBLIC SCHOOLS 10/18/17 HIGH SCHOOL CAMPUS
JENKS, OK ADD. #1 PHASE 3 REMODEL
KKT ARCHITECTS, INC. CAST-IN-PLACE CONCRETE 033000 - 14
12. Additional testing and inspecting, at Contractor's expense, will be performed to
determine compliance of replaced or additional work with specified
requirements.
13. Correct deficiencies in the Work that test reports and inspections indicate do not
comply with the Contract Documents.
D. Measure floor and slab flatness and levelness according to ASTM E 1155 within 48 hours
of finishing.
END OF SECTION 033000

JENKS PUBLIC SCHOOLS 10/18/17 HIGH SCHOOL CAMPUS
JENKS, OK ADD. #1 PHASE 3 REMODEL
KKT ARCHITECTS, INC. UNIT MASONRY 042000 - 1
SECTION 042000
UNIT MASONRY
PART 1 - GENERAL
1.01 RELATED DOCUMENTS
A. Drawings and general provisions of the Contract, including other Division 01
Specification Sections, apply to this Section.
1.02 SUMMARY
A. Section Includes:
1. Concrete masonry units.
2. Clay face brick.
3. Cast stone trim units.
4. Thin brick masonry adhered to existing masonry backup.
5. Mortar and grout.
6. Masonry-joint reinforcement.
7. Ties and anchors.
8. Embedded flashing.
9. Miscellaneous masonry accessories.
B. Products Installed but not Furnished under This Section:
1. Steel lintels in unit masonry.
2. Steel shelf angles for supporting unit masonry.
C. Related Requirements:
1. Section 055000 “Metal Fabrications” for skateboard deterrent clips for casting into
cast stone joints.
2. Section 071900 “Water Repellents” for coating brick “J” monuments and other
horizontal masonry.
3. Section 076200 "Sheet Metal Flashing and Trim" for exposed sheet metal flashing
and for furnishing manufactured reglets installed in masonry joints.
1.03 DEFINITIONS
A. CMU(s): Concrete masonry unit(s).
1.04 PREINSTALLATION MEETINGS
A. Preinstallation Conference: Conduct conference at Project site.
1.05 ACTION SUBMITTALS
A. Product Data: For each type of product.
B. Shop Drawings: For the following:
1. Masonry Units: Show sizes, profiles, coursing, and locations of special shapes.
2. Cast Stone Trim Units: Show sizes, profiles, and locations of each cast stone trim
unit required.

JENKS PUBLIC SCHOOLS 10/18/17 HIGH SCHOOL CAMPUS
JENKS, OK ADD. #1 PHASE 3 REMODEL
KKT ARCHITECTS, INC. UNIT MASONRY 042000 - 2
3. Fabricated Flashing: Detail corner units, end-dam units, and other special
applications.
C. Samples for Initial Selection:
1. Cast stone trim.
2. Weep holes/cavity vents.
D. Samples for Verification: For each type and color of the following:
1. Clay face brick, in the form of straps of five or more bricks.
2. Cast stone trim.
3. Weep holes and cavity vents.
4. Accessories embedded in masonry.
1.06 INFORMATIONAL SUBMITTALS
A. List of Materials Used in Constructing Mockups: List generic product names together
with manufacturers, manufacturers' product names, model numbers, lot numbers,
batch numbers, source of supply, and other information as required to identify materials
used. Include mix proportions for mortar and grout and source of aggregates. Submittal
is for information only. Receipt of list does not constitute approval of deviations from the
Contract Documents unless such deviations are specifically brought to the attention of
Architect and approved in writing.
B. Mix Designs: For each type of mortar and grout. Include description of type and
proportions of ingredients.
1. Include test reports for mortar mixes required to comply with property
specification. Test according to ASTM C 109/C 109M for compressive strength,
ASTM C 1506 for water retention, and ASTM C 91/C 91M for air content.
2. Include test reports, according to ASTM C 1019, for grout mixes required to
comply with compressive strength requirement.
C. Cold-Weather and Hot-Weather Procedures: Detailed description of methods,
materials, and equipment to be used to comply with requirements.
1.07 QUALITY ASSURANCE
A. Mockups: Build mockups to verify selections made under Sample submittals, to
demonstrate aesthetic effects, and to set quality standards for materials and execution.
1. Build mockups for typical exterior wall in sizes approximately 48 inches long by
72 inches high by full thickness, including face and backup wythes and
accessories.
a. Include a sealant-filled joint at least 16 inches long in exterior wall mockup.
b. Include lower corner of window opening at upper corner of exterior wall
mockup. Make opening approximately 12 inches wide by 16 inches high.
c. Include through-wall flashing installed for a 24-inch length in corner of
exterior wall mockup approximately 16 inches down from top of mockup,
with a 12-inch length of flashing left exposed to view (omit masonry above
half of flashing).
d. Include metal studs, sheathing, sheathing joint-and-penetration treatment
and air barrier, veneer anchors, flashing, cavity drainage material, and
weep holes in exterior masonry-veneer wall mockup.
2. Where masonry is to match existing, erect mockups adjacent and parallel to
existing surface.
3. Clean one-half of exposed faces of mockups as indicated.

JENKS PUBLIC SCHOOLS 10/18/17 HIGH SCHOOL CAMPUS
JENKS, OK ADD. #1 PHASE 3 REMODEL
KKT ARCHITECTS, INC. UNIT MASONRY 042000 - 3
4. Protect accepted mockups from the elements with weather-resistant membrane.
5. Approval of mockups is for color, texture, and blending of masonry units;
relationship of mortar and sealant colors to masonry unit colors; tooling of joints;
and aesthetic qualities of workmanship.
a. Approval of mockups is also for other material and construction qualities
specifically approved by Architect in writing.
b. Approval of mockups does not constitute approval of deviations from the
Contract Documents contained in mockups unless Architect specifically
approves such deviations in writing.
1.08 DELIVERY, STORAGE, AND HANDLING
A. Store masonry units on elevated platforms in a dry location. If units are not stored in an
enclosed location, cover tops and sides of stacks with waterproof sheeting, securely
tied. If units become wet, do not install until they are dry.
B. Store cementitious materials on elevated platforms, under cover, and in a dry location.
Do not use cementitious materials that have become damp.
C. Store aggregates where grading and other required characteristics can be maintained
and contamination avoided.
D. Deliver preblended, dry mortar mix in moisture-resistant containers. Store preblended,
dry mortar mix in delivery containers on elevated platforms in a dry location or in
covered weatherproof dispensing silos.
E. Store masonry accessories, including metal items, to prevent corrosion and
accumulation of dirt and oil.
1.09 FIELD CONDITIONS
A. Protection of Masonry: During construction, cover tops of walls, projections, and sills with
waterproof sheeting at end of each day's work. Cover partially completed masonry
when construction is not in progress.
1. Extend cover a minimum of 24 inches down both sides of walls, and hold cover
securely in place.
2. Where one wythe of multiwythe masonry walls is completed in advance of other
wythes, secure cover a minimum of 24 inches down face next to unconstructed
wythe, and hold cover in place.
B. Do not apply uniform floor or roof loads for at least 12 hours and concentrated loads for
at least three days after building masonry walls or columns.
C. Stain Prevention: Prevent grout, mortar, and soil from staining the face of masonry to be
left exposed or painted. Immediately remove grout, mortar, and soil that come in
contact with such masonry.
1. Protect base of walls from rain-splashed mud and from mortar splatter by
spreading coverings on ground and over wall surface.
2. Protect sills, ledges, and projections from mortar droppings.
3. Protect surfaces of window and door frames, as well as similar products with
painted and integral finishes, from mortar droppings.
4. Turn scaffold boards near the wall on edge at the end of each day to prevent
rain from splashing mortar and dirt onto completed masonry.

JENKS PUBLIC SCHOOLS 10/18/17 HIGH SCHOOL CAMPUS
JENKS, OK ADD. #1 PHASE 3 REMODEL
KKT ARCHITECTS, INC. UNIT MASONRY 042000 - 4
D. Cold-Weather Requirements: Do not use frozen materials or materials mixed or coated
with ice or frost. Do not build on frozen substrates. Remove and replace unit masonry
damaged by frost or by freezing conditions. Comply with cold-weather construction
requirements contained in TMS 602/ACI 530.1/ASCE 6.
1. Cold-Weather Cleaning: Use liquid cleaning methods only when air temperature
is 40 deg F and higher and will remain so until masonry has dried, but not less than
seven days after completing cleaning.
E. Hot-Weather Requirements: Comply with hot-weather construction requirements
contained in TMS 602/ACI 530.1/ASCE 6.
PART 2 - PRODUCTS
2.01 MANUFACTURERS
A. Source Limitations for Masonry Units: Obtain exposed masonry units of a uniform texture
and color, or a uniform blend within the ranges accepted for these characteristics,
from single source from single manufacturer for each product required.
B. Source Limitations for Mortar Materials: Obtain mortar ingredients of a uniform quality,
including color for exposed masonry, from single manufacturer for each cementitious
component and from single source or producer for each aggregate.
2.02 UNIT MASONRY, GENERAL
A. Masonry Standard: Comply with TMS 602/ACI 530.1/ASCE 6, except as modified by
requirements in the Contract Documents.
B. Defective Units: Referenced masonry unit standards may allow a certain percentage of
units to contain chips, cracks, or other defects exceeding limits stated. Do not use units
where such defects are exposed in the completed Work and will be within 20 feet
vertically and horizontally of a walking surface.
2.03 CONCRETE MASONRY UNITS
A. Shapes: Provide shapes indicated and as follows, with exposed surfaces matching
exposed faces of adjacent units unless otherwise indicated.
1. Provide special shapes for lintels, corners, jambs, sashes, movement joints,
headers, bonding, and other special conditions.
2. Provide square-edged units for outside corners unless otherwise indicated.
B. Integral Water Repellent: Provide units made with integral water repellent for exposed
units.
1. Integral Water Repellent: Liquid polymeric, integral water-repellent admixture that
does not reduce flexural bond strength. Units made with integral water repellent,
when tested according to ASTM E 514/E 514M as a wall assembly made with
mortar containing integral water-repellent manufacturer's mortar additive, with
test period extended to 24 hours, shall show no visible water or leaks on the back
of test specimen.
C. CMUs: ASTM C 90.
1. Density Classification: Lightweight.
2. Size (Width): Manufactured to dimensions 3/8 inch less than nominal dimensions.

JENKS PUBLIC SCHOOLS 10/18/17 HIGH SCHOOL CAMPUS
JENKS, OK ADD. #1 PHASE 3 REMODEL
KKT ARCHITECTS, INC. UNIT MASONRY 042000 - 5
2.04 BRICK
A. General: Provide shapes indicated and as follows, with exposed surfaces matching
finish and color of exposed faces of adjacent units:
1. For ends of sills and caps and for similar applications that would otherwise expose
unfinished brick surfaces, provide units without cores or frogs and with exposed
surfaces finished.
2. Provide special shapes for applications where stretcher units cannot
accommodate special conditions, including those at corners, movement joints,
bond beams, sashes, and lintels.
3. Provide special shapes for applications requiring brick of size, form, color, and
texture on exposed surfaces that cannot be produced by sawing.
4. Provide special shapes for applications where shapes produced by sawing would
result in sawed surfaces being exposed to view.
B. Clay Face Brick: Facing brick complying with ASTM C 216 or hollow brick complying
with ASTM C 652, Class H40V (void areas between 25 and 40 percent of gross cross-
sectional area).
1. Basis-of-Design: Subject to requirements, provide the following brick, by Sioux City
Brick; Sioux City, IA; 712.202.1100; www.siouxcitybrick.com, or an approved
equivalent.
a. Brick Color A: Welsford Ironspot, modular.
b. Brick Color B: Clear Buff velour, modular, or Doeskin velour, modular, as
selected by Owner.
2. Grade: SW.
3. Type: FBX or HBX.
4. Initial Rate of Absorption: Less than 30 g/30 sq. in. per minute when tested
according to ASTM C 67.
5. Efflorescence: Provide brick that has been tested according to ASTM C 67 and is
rated "not effloresced."
6. Size (Actual Dimensions): 3-5/8 inches wide by 2-1/4 inches high by 7-5/8 inches
long.
7. Application: Use where brick is exposed unless otherwise indicated.
C. Thin Brick Veneer: Provide thin brick matching color range, texture, and face size of
clay face brick above.
2.05 CAST STONE UNITS
A. Cast-Stone Units: Comply with ASTM C 1364.
1. Units shall be manufactured using the vibrant dry tamp or wet-cast method.
2. Units shall be resistant to freezing and thawing as determined by laboratory
testing according to ASTM C 666/C 666M, Procedure A, as modified by
ASTM C 1364.
B. Fabricate units with sharp arris and accurately reproduced details, with indicated
texture on all exposed surfaces unless otherwise indicated.
1. Slope exposed horizontal surfaces 1:12 to drain unless otherwise indicated.
2. Provide drips on projecting elements unless otherwise indicated.
C. Fabrication Tolerances:
1. Variation in Cross Section: Do not vary from indicated dimensions by more than
1/8 inch.

JENKS PUBLIC SCHOOLS 10/18/17 HIGH SCHOOL CAMPUS
JENKS, OK ADD. #1 PHASE 3 REMODEL
KKT ARCHITECTS, INC. UNIT MASONRY 042000 - 6
2. Variation in Length: Do not vary from indicated dimensions by more than 1/360 of
the length of unit or 1/8 inch, whichever is greater, but in no case by more than
1/4 inch.
3. Warp, Bow, and Twist: Not to exceed 1/360 of the length of unit or 1/8 inch,
whichever is greater.
4. Location of Grooves, False Joints, Holes, Anchorages, and Similar Features: Do not
vary from indicated position by more than 1/8 inch on formed surfaces of units
and 3/8 inch on unformed surfaces.
D. Cure Units as Follows:
1. Cure units in enclosed, moist curing room at 95 to 100 percent relative humidity
and temperature of 100 deg F for 12 hours or 70 deg F for 16 hours.
2. Keep units damp and continue curing to comply with one of the following:
a. No fewer than five days at mean daily temperature of 70 deg F or above.
b. No fewer than six days at mean daily temperature of 60 deg F or above.
c. No fewer than seven days at mean daily temperature of 50 deg F or
above.
d. No fewer than eight days at mean daily temperature of 45 deg F or above.
E. Acid etch units after curing to remove cement film from surfaces to be exposed to
view.
F. Colors and Textures: Provide units with fine-grained texture and buff color resembling
sand-rubbed Indiana limestone.
2.06 MORTAR AND GROUT MATERIALS
A. Portland Cement: ASTM C 150/C 150M, Type I or II, except Type III may be used for cold-
weather construction. Provide natural color or white cement as required to produce
mortar color indicated. Alkali content shall not be more than 0.1 percent when tested
according to ASTM C 114.
B. Hydrated Lime: ASTM C 207, Type S.
C. Portland Cement-Lime Mix: Packaged blend of portland cement and hydrated lime
containing no other ingredients.
D. Masonry Cement: ASTM C 91/C 91M.
E. Mortar Cement: ASTM C 1329/C 1329M.
F. Aggregate for Mortar: ASTM C 144.
1. For mortar that is exposed to view, use washed aggregate consisting of natural
sand or crushed stone.
2. For joints less than 1/4 inch thick, use aggregate graded with 100 percent passing
the No. 16 sieve.
G. Aggregate for Grout: ASTM C 404.
H. Cold-Weather Admixture: Nonchloride, noncorrosive, accelerating admixture
complying with ASTM C 494/C 494M, Type C, and recommended by manufacturer for
use in masonry mortar of composition indicated.

JENKS PUBLIC SCHOOLS 10/18/17 HIGH SCHOOL CAMPUS
JENKS, OK ADD. #1 PHASE 3 REMODEL
KKT ARCHITECTS, INC. UNIT MASONRY 042000 - 7
I. Water-Repellent Admixture: Liquid water-repellent mortar admixture intended for use
with CMUs containing integral water repellent from same manufacturer.
J. Water: Potable.
2.07 REINFORCEMENT
A. Uncoated-Steel Reinforcing Bars: ASTM A 615/A 615M or ASTM A 996/A 996M, Grade 60.
B. Reinforcing Bar Positioners: Wire units designed to fit into mortar bed joints spanning
masonry unit cells and to hold reinforcing bars in center of cells. Units are formed from
0.148-inch steel wire, hot-dip galvanized after fabrication. Provide units designed for
number of bars indicated.
C. Masonry-Joint Reinforcement, General: ASTM A 951/A 951M.
1. Exterior Walls: Hot-dip galvanized carbon steel.
2. Wire Size for Side Rods: 0.187-inch diameter.
3. Wire Size for Cross Rods: 0.187-inch diameter.
4. Spacing of Cross Rods, Tabs, and Cross Ties: Not more than 16 inches o.c.
D. Masonry-Joint Reinforcement for Multiwythe Masonry: Tab type, either ladder or truss
design, with one side rod at each face shell of backing wythe and with rectangular
tabs sized to extend at least halfway through facing wythe, but with at least 5/8-inch
cover on outside face.
2.08 TIES AND ANCHORS
A. General: Ties and anchors shall extend at least 1-1/2 inches into veneer but with at least
a 5/8-inch cover on outside face.
B. Materials: Provide ties and anchors specified in this article that are made from materials
that comply with the following unless otherwise indicated:
1. Stainless-Steel Wire: ASTM A 580/A 580M, Type 304.
2. Steel Sheet, Galvanized after Fabrication: ASTM A 1008/A 1008M, Commercial
Steel, with ASTM A 153/A 153M, Class B coating.
3. Steel Plates, Shapes, and Bars: ASTM A 36/A 36M.
4. Stainless-Steel Bars: ASTM A 276 or ASTM A 666, Type 304.
5. Cast Stone Anchors: Type 304 stainless steel complying with ASTM A 240/A 240M,
ASTM A 276, or ASTM A 666.
6. Cast Stone Dowels: 1/2-inch-diameter round bars, fabricated from Type 304
stainless steel complying with ASTM A 240/A 240M, ASTM A 276, or ASTM A 666.
C. Individual Wire Ties: Rectangular units with closed ends and not less than 4 inches wide.
1. Z-shaped ties with ends bent 90 degrees to provide hooks not less than 2 inches
long may be used for masonry constructed from solid units.
2. Where wythes are of different materials, use adjustable ties with pintle-and-eye
connections having a maximum adjustment of 1-1/4 inches.
3. Wire: Fabricate from 1/4-inch- diameter, stainless-steel wire.
D. Adjustable Anchors for Connecting to Structural Steel Framing: Provide anchors that
allow vertical or horizontal adjustment but resist tension and compression forces
perpendicular to plane of wall.
1. Anchor Section for Welding to Steel Frame: Crimped 1/4-inch-diameter, hot-dip
galvanized steel wire.

JENKS PUBLIC SCHOOLS 10/18/17 HIGH SCHOOL CAMPUS
JENKS, OK ADD. #1 PHASE 3 REMODEL
KKT ARCHITECTS, INC. UNIT MASONRY 042000 - 8
2. Tie Section: Triangular-shaped wire tie made from 1/4-inch-diameter, hot-dip
galvanized steel wire.
E. Adjustable Anchors for Connecting to Concrete: Provide anchors that allow vertical or
horizontal adjustment but resist tension and compression forces perpendicular to plane
of wall.
1. Connector Section: Dovetail tabs for inserting into dovetail slots in concrete and
attached to tie section; formed from 0.105-inch-thick steel sheet, galvanized after
fabrication.
2. Tie Section: Triangular-shaped wire tie made from 1/4-inch-diameter, stainless-
steel wire.
F. Adjustable Masonry-Veneer Anchors:
1. General: Provide anchors that allow vertical adjustment but resist a 100-lbf load in
both tension and compression perpendicular to plane of wall without deforming
or developing play in excess of 1/16 inch.
2. Fabricate sheet metal anchor sections and other sheet metal parts from 0.105-
inch-thick steel sheet, galvanized after fabrication.
3. Fabricate wire ties from 1/4-inch-diameter, stainless-steel wire unless otherwise
indicated.
4. Contractor's Option: Unless otherwise indicated, provide any of the adjustable
masonry-veneer anchors specified.
5. Screw-Attached, Masonry-Veneer Anchors: Wire tie and a rib-stiffened, sheet
metal anchor section with screw holes top and bottom, with a projecting vertical
tab having a slotted hole for inserting wire tie.
a. Products: Subject to compliance with requirements, provide the following:
1) Hohmann & Barnard, Inc; BL-407.
6. Screw-Attached, Masonry-Veneer Anchors: Wire tie and a rib-stiffened, sheet
metal anchor section with screw holes top and bottom, with projecting tabs
having holes for inserting vertical legs of wire tie formed to fit anchor section.
a. Products: Subject to compliance with requirements, provide one of the
following:
1) Heckmann Building Products, Inc.; 213 with 282.
2) Hohmann & Barnard, Inc; HB-200-X.
3) Wire-Bond; RJ-711 (#2401).
7. Screw-Attached, Masonry-Veneer Anchors: Wire tie and a sheet metal anchor
section, 1-1/4 inches wide by 9 inches long, with screw holes top and bottom and
with raised rib-stiffened strap, 5/8 inch wide by 5-1/2 inches long, stamped into
center to provide a slot between strap and base for inserting wire tie.
a. Products: Subject to compliance with requirements, provide the following:
1) Hohmann & Barnard, Inc; DW-10.
8. Screw-Attached, Masonry-Veneer Anchors: Wire tie and a sheet metal anchor
section, 1-1/4 inches wide by 6 inches long, with screw holes top and bottom and
with raised rib-stiffened strap, 5/8 inch wide by 3-5/8 inches long, stamped into
center to provide a slot between strap and base for inserting wire tie.
a. Products: Subject to compliance with requirements, provide one of the
following:
1) Heckmann Building Products, Inc.; 315-D with 316.
2) Hohmann & Barnard, Inc; DW-10HS.
3) Wire-Bond; 1004, Type III.

JENKS PUBLIC SCHOOLS 10/18/17 HIGH SCHOOL CAMPUS
JENKS, OK ADD. #1 PHASE 3 REMODEL
KKT ARCHITECTS, INC. UNIT MASONRY 042000 - 9
9. Screw-Attached, Masonry-Veneer Anchors: Wire tie and a corrosion-resistant, self-
drilling, eye-screw designed to receive wire tie. Eye-screw has spacer that seats
directly against framing and is same thickness as sheathing and has gasketed
washer head that covers hole in sheathing.
a. Products: Subject to compliance with requirements, provide one of the
following:
1) Heckmann Building Products, Inc.; Pos-I-Tie.
2) Hohmann & Barnard, Inc; 2-Seal Tie.
3) Wire-Bond; Sure Tie Anchoring System #4520, #4530, #4510.
10. Stainless-Steel Drill Screws for Steel Studs: ASTM C 954 except manufactured with
hex washer head and neoprene or EPDM washer, No. 10 diameter by length
required to penetrate steel stud flange with not less than three exposed threads;
either made from Type 410 stainless steel or made with a carbon-steel drill point
and 300 Series stainless-steel shank.
2.09 EMBEDDED FLASHING MATERIALS
A. Metal Flashing: Provide metal flashing complying with SMACNA's "Architectural Sheet
Metal Manual" and as follows:
1. Stainless Steel: ASTM A 240/A 240M or ASTM A 666, Type 304, 0.016 inch thick.
2. Fabricate continuous flashings in sections 96 inches long minimum, but not
exceeding 12 feet. Provide splice plates at joints of formed, smooth metal
flashing.
3. Fabricate metal drip edges from stainless steel. Extend at least 3 inches into wall
and 1/2 inch out from wall, with outer edge bent down 30 degrees and hemmed.
4. Fabricate metal expansion-joint strips from stainless steel to shapes indicated.
5. Solder metal items at corners.
B. Flexible Flashing: Use the following unless otherwise indicated:
1. Stainless Steel-Laminated Flashing: Type 304 stainless steel sheet bonded to glass-
fiber cloth. Use only where flashing is fully concealed in masonry.
a. Products: Subject to compliance with requirements, provide one of the
following:
1) Building Materials West Company, Inc.; Evacu-Flash SS.
2) Hohmann & Barnard, Inc; Mighty-Flash Stainless Steel Fabric Flashing.
3) STS Coatings, Inc.; Wall Guardian TWF Stainless Steel.
4) York Manufacturing, Inc; Multi-Flash Stainless Steel.
b. Provide stainless steel drip edge as indicated above.
C. Application: Unless otherwise indicated, use the following:
1. Where flashing is indicated to receive counterflashing, use metal flashing.
2. Where flashing is partly exposed at steel lintels, use flexible flashing with a metal
drip edge.
3. Where flashing is fully concealed, use flexible flashing.
D. Solder and Sealants for Sheet Metal Flashings: As specified in Section 076200 "Sheet
Metal Flashing and Trim."
1. Solder for Stainless Steel: ASTM B 32, Grade Sn96, with acid flux of type
recommended by stainless-steel sheet manufacturer.
2. Elastomeric Sealant: ASTM C 920, chemically curing urethane sealant; of type,
grade, class, and use classifications required to seal joints in sheet metal flashing
and remain watertight.

JENKS PUBLIC SCHOOLS 10/18/17 HIGH SCHOOL CAMPUS
JENKS, OK ADD. #1 PHASE 3 REMODEL
KKT ARCHITECTS, INC. UNIT MASONRY 042000 - 10
E. Adhesives, Primers, and Seam Tapes for Flashings: Flashing manufacturer's standard
products or products recommended by flashing manufacturer for bonding flashing
sheets to each other and to substrates.
F. Termination Bars for Flexible Flashing: Aluminum sheet 0.064 inch by 1-1/2 inches with a
3/8-inch sealant flange at top.
2.10 MISCELLANEOUS MASONRY ACCESSORIES
A. Compressible Filler: Premolded filler strips complying with ASTM D 1056, Grade 2A1;
compressible up to 35 percent; of width and thickness indicated; formulated from
neoprene.
B. Preformed Control-Joint Gaskets: Made from styrene-butadiene-rubber compound,
complying with ASTM D 2000, Designation M2AA-805 and designed to fit standard sash
block and to maintain lateral stability in masonry wall; size and configuration as
indicated.
C. Bond-Breaker Strips: Asphalt-saturated felt complying with ASTM D 226/D 226M, Type I
(No. 15 asphalt felt).
D. Weep/Cavity Vent Products: Use one of the following unless otherwise indicated:
1. Cellular Plastic Weep/Vent: One-piece, flexible extrusion made from UV-resistant
polypropylene copolymer, full height and width of head joint and depth 1/8 inch
less than depth of outer wythe, in color selected by Architect from manufacturer's
standard.
a. Products: Subject to compliance with requirements, provide one of the
following:
1) Advanced Building Products Inc.; Mortar Maze Cell Vent.
2) Heckmann Building Products, Inc.; No. 85 Cell Vent.
3) Hohmann & Barnard, Inc; QV Quadro-Vent.
4) Wire-Bond; Cell Vent (#3601).
2. Vinyl Weep Hole/Vent: Units made from flexible PVC, designed to fit into a head
joint and consisting of a louvered vertical leg, flexible wings to seal against ends
of masonry units, and a top flap to keep mortar out of the head joint; in color
selected by Architect from manufacturer's standard.
a. Products: Subject to compliance with requirements, provide one of the
following:
1) Hohmann & Barnard, Inc; #343 Weep Hole.
2) Williams Products, Inc; Williams-Goodco Brick Vent.
3) Wire-Bond; Louvered Weepholes(#3602).
E. Cavity Drainage Material: Free-draining mesh, made from polymer strands that will not
degrade within the wall cavity.
1. Products: Subject to compliance with requirements, provide one of the following:
a. Advanced Building Products Inc.; Mortar Break.
b. CavClear/Archovations, Inc.; CavClear Masonry Mat.
c. Heckmann Building Products, Inc.; Weep-Thru Mortar Deflector.
d. Hohmann & Barnard, Inc; Mortar Trap.
e. Mortar Net Solutions; Mortar Net with Insect Barrier.
f. Wire-Bond; Cavity Net II.
2. Configuration: Provide one of the following:
a. Strips, full depth of cavity and 10 inches high, with dovetail-shaped notches
7 inches deep that prevent clogging with mortar droppings.

JENKS PUBLIC SCHOOLS 10/18/17 HIGH SCHOOL CAMPUS
JENKS, OK ADD. #1 PHASE 3 REMODEL
KKT ARCHITECTS, INC. UNIT MASONRY 042000 - 11
b. Strips, not less than 1-1/2 inches thick and 10 inches high, with dimpled
surface designed to catch mortar droppings and prevent weep holes from
clogging with mortar.
2.11 MORTAR AND GROUT MIXES
A. General: Do not use admixtures, including pigments, air-entraining agents,
accelerators, retarders, water-repellent agents, antifreeze compounds, or other
admixtures unless otherwise indicated.
1. Do not use calcium chloride in mortar or grout.
2. Use portland cement-lime mortar unless otherwise indicated.
3. Add cold-weather admixture (if used) at same rate for mortar that will be
exposed to view, regardless of weather conditions, to ensure that mortar color is
consistent.
B. Preblended, Dry Mortar Mix: Furnish dry mortar ingredients in form of a preblended mix.
Measure quantities by weight to ensure accurate proportions, and thoroughly blend
ingredients before delivering to Project site.
C. Mortar for Unit Masonry: Comply with ASTM C 270, Proportion Specification. Provide the
following types of mortar for applications stated unless another type is indicated.
1. For masonry below grade or in contact with earth, use Type M.
2. For reinforced masonry, use Type S.
3. For exterior, above-grade, load-bearing and nonload-bearing walls and parapet
walls; for interior load-bearing walls; for interior nonload-bearing partitions; and for
other applications where another type is not indicated, use Type N.
4. For interior nonload-bearing partitions, Type O may be used instead of Type N.
D. Mortar for Adhered Thin Brick Veneer: 1 part portland cement, 1 part lime, 7 parts loose
damp sand, and enough water to produce a workable consistency.
E. Grout for Unit Masonry: Comply with ASTM C 476.
1. Use grout of type indicated or, if not otherwise indicated, of type (fine or coarse)
that will comply with TMS 602/ACI 530.1/ASCE 6 for dimensions of grout spaces
and pour height.
2. Proportion grout in accordance with ASTM C 476, Table 1 or paragraph 4.2.2 for
specified 28-day compressive strength indicated, but not less than 2000 psi.
3. Provide grout with a slump of 8 to 11 inches as measured according to
ASTM C 143/C 143M.
PART 3 - EXECUTION
3.01 EXAMINATION
A. Examine conditions, with Installer present, for compliance with requirements for
installation tolerances and other conditions affecting performance of the Work.
1. For the record, prepare written report, endorsed by Installer, listing conditions
detrimental to performance of the Work.
2. Verify that foundations are within tolerances specified.
3. Verify that reinforcing dowels are properly placed.
4. Verify that substrates are free of substances that impair mortar bond.
B. Before installation, examine rough-in and built-in construction for piping systems to verify
actual locations of piping connections.

JENKS PUBLIC SCHOOLS 10/18/17 HIGH SCHOOL CAMPUS
JENKS, OK ADD. #1 PHASE 3 REMODEL
KKT ARCHITECTS, INC. UNIT MASONRY 042000 - 12
C. Proceed with installation only after unsatisfactory conditions have been corrected.
3.02 INSTALLATION, GENERAL
A. Thickness: Build cavity and composite walls and other masonry construction to full
thickness shown. Build single-wythe walls to actual widths of masonry units, using units of
widths indicated.
B. Build chases and recesses to accommodate items specified in this and other Sections.
C. Leave openings for equipment to be installed before completing masonry. After
installing equipment, complete masonry to match construction immediately adjacent
to opening.
D. Use full-size units without cutting if possible. If cutting is required to provide a continuous
pattern or to fit adjoining construction, cut units with motor-driven saws; provide clean,
sharp, unchipped edges. Allow units to dry before laying unless wetting of units is
specified. Install cut units with cut surfaces and, where possible, cut edges concealed.
E. Select and arrange units for exposed unit masonry to produce a uniform blend of colors
and textures. Mix units from several pallets or cubes as they are placed.
F. Matching Existing Masonry: Match coursing, bonding, color, and texture of existing
masonry.
3.03 TOLERANCES
A. Dimensions and Locations of Elements:
1. For dimensions in cross section or elevation, do not vary by more than plus
1/2 inch or minus 1/4 inch.
2. For location of elements in plan, do not vary from that indicated by more than
plus or minus 1/2 inch.
3. For location of elements in elevation, do not vary from that indicated by more
than plus or minus 1/4 inch in a story height or 1/2 inch total.
B. Lines and Levels:
1. For bed joints and top surfaces of bearing walls, do not vary from level by more
than 1/4 inch in 10 feet, or 1/2-inch maximum.
2. For conspicuous horizontal lines, such as lintels, sills, parapets, and reveals, do not
vary from level by more than 1/8 inch in 10 feet, 1/4 inch in 20 feet, or 1/2-inch
maximum.
3. For vertical lines and surfaces, do not vary from plumb by more than 1/4 inch in
10 feet, 3/8 inch in 20 feet, or 1/2-inch maximum.
4. For conspicuous vertical lines, such as external corners, door jambs, reveals, and
expansion and control joints, do not vary from plumb by more than 1/8 inch in
10 feet, 1/4 inch in 20 feet, or 1/2-inch maximum.
5. For lines and surfaces, do not vary from straight by more than 1/4 inch in 10 feet,
3/8 inch in 20 feet, or 1/2-inch maximum.
6. For vertical alignment of exposed head joints, do not vary from plumb by more
than 1/4 inch in 10 feet or 1/2-inch maximum.
7. For faces of adjacent exposed masonry units, do not vary from flush alignment by
more than 1/16 inch except due to warpage of masonry units within tolerances
specified for warpage of units.

JENKS PUBLIC SCHOOLS 10/18/17 HIGH SCHOOL CAMPUS
JENKS, OK ADD. #1 PHASE 3 REMODEL
KKT ARCHITECTS, INC. UNIT MASONRY 042000 - 13
C. Joints:
1. For bed joints, do not vary from thickness indicated by more than plus or minus
1/8 inch, with a maximum thickness limited to 1/2 inch.
2. For exposed bed joints, do not vary from bed-joint thickness of adjacent courses
by more than 1/8 inch.
3. For head and collar joints, do not vary from thickness indicated by more than plus
3/8 inch or minus 1/4 inch.
4. For exposed head joints, do not vary from thickness indicated by more than plus
or minus 1/8 inch.
5. For exposed bed joints and head joints of stacked bond, do not vary from a
straight line by more than 1/16 inch from one masonry unit to the next.
3.04 LAYING MASONRY WALLS
A. Lay out walls in advance for accurate spacing of surface bond patterns with uniform
joint thicknesses and for accurate location of openings, movement-type joints, returns,
and offsets. Avoid using less-than-half-size units, particularly at corners, jambs, and,
where possible, at other locations.
B. Bond Pattern for Exposed Masonry: Unless otherwise indicated, lay exposed masonry in
running bond, unless otherwise indicated; do not use units with less-than-nominal 4-inch
horizontal face dimensions at corners or jambs.
C. Lay concealed masonry with units in a wythe in running bond or bonded by lapping
not less than 2 inches. Bond and interlock each course of each wythe at corners. Do
not use units with less-than-nominal 4-inch horizontal face dimensions at corners or
jambs.
D. Stopping and Resuming Work: Stop work by stepping back units in each course from
those in course below; do not tooth. When resuming work, clean masonry surfaces that
are to receive mortar, remove loose masonry units and mortar, and wet brick if required
before laying fresh masonry.
E. Built-in Work: As construction progresses, build in items specified in this and other
Sections. Fill in solidly with masonry around built-in items.
F. Fill space between steel frames and masonry solidly with mortar unless otherwise
indicated.
G. Where built-in items are to be embedded in cores of hollow masonry units, place a
layer of metal lath, wire mesh, or plastic mesh in the joint below, and rod mortar or
grout into core.
H. Fill cores in hollow CMUs with grout 24 inches under bearing plates, beams, lintels, posts,
and similar items unless otherwise indicated.
I. Build nonload-bearing interior partitions full height of story to underside of solid floor or
roof structure above unless otherwise indicated.
1. Install compressible filler in joint between top of partition and underside of
structure above.
2. Fasten partition top anchors to structure above and build into top of partition.
Grout cells of CMUs solidly around plastic tubes of anchors and push tubes down
into grout to provide 1/2-inch clearance between end of anchor rod and end of
tube. Space anchors 48 inches o.c. unless otherwise indicated.

JENKS PUBLIC SCHOOLS 10/18/17 HIGH SCHOOL CAMPUS
JENKS, OK ADD. #1 PHASE 3 REMODEL
KKT ARCHITECTS, INC. UNIT MASONRY 042000 - 14
3. Wedge nonload-bearing partitions against structure above with small pieces of
tile, slate, or metal. Fill joint with mortar after dead-load deflection of structure
above approaches final position.
3.05 MORTAR BEDDING AND JOINTING
A. Lay hollow brick and CMUs as follows:
1. Bed face shells in mortar and make head joints of depth equal to bed joints.
2. Bed webs in mortar in all courses of piers, columns, and pilasters.
3. Bed webs in mortar in grouted masonry, including starting course on footings.
4. Fully bed entire units, including areas under cells, at starting course on footings
where cells are not grouted.
5. Fully bed units and fill cells with mortar at anchors and ties as needed to fully
embed anchors and ties in mortar.
B. Lay solid masonry units with completely filled bed and head joints; butter ends with
sufficient mortar to fill head joints and shove into place. Do not deeply furrow bed joints
or slush head joints.
C. Set cast-stone units in full bed of mortar with full vertical joints. Fill dowel, anchor, and
similar holes.
1. Clean soiled surfaces with fiber brush and soap powder and rinse thoroughly with
clear water.
2. Wet joint surfaces thoroughly before applying mortar.
3. Rake out mortar joints for pointing with sealant.
4. Prepare and apply sealant of type indicated and in accordance with
Section 079200 "Joint Sealants."
D. Tool exposed joints slightly concave when thumbprint hard, using a jointer larger than
joint thickness unless otherwise indicated.
3.06 COMPOSITE MASONRY
A. Bond wythes of composite masonry together using the following methods:
1. Masonry-Joint Reinforcement: Installed in horizontal mortar joints.
a. Where bed joints of both wythes align, use tab-type reinforcement.
b. Where bed joints of wythes do not align, use adjustable-type (two-piece-
type) reinforcement.
2. Header Bonding: Provide masonry unit headers extending not less than 3 inches
into each wythe. Space headers not more than 8 inches clear horizontally and
16 inches clear vertically.
B. Bond wythes of composite masonry together using bonding system indicated on
Drawings.
C. Collar Joints: Solidly fill collar joints by parging face of first wythe that is laid and shoving
units of other wythe into place.
D. Collar Joints in Clay Tile Masonry: After each course is laid, fill the vertical, longitudinal
joint between wythes solidly with mortar at exterior walls, except cavity walls.
E. Corners: Provide interlocking masonry unit bond in each wythe and course at corners
unless otherwise indicated.

JENKS PUBLIC SCHOOLS 10/18/17 HIGH SCHOOL CAMPUS
JENKS, OK ADD. #1 PHASE 3 REMODEL
KKT ARCHITECTS, INC. UNIT MASONRY 042000 - 15
F. Intersecting and Abutting Walls: Unless vertical expansion or control joints are shown at
juncture, bond walls together as follows:
1. Provide individual metal ties not more than 8 inches o.c.
2. Provide rigid metal anchors not more than 48 inches o.c. If used with hollow
masonry units, embed ends in mortar-filled cores.
3.07 ANCHORED MASONRY VENEERS
A. Anchor masonry veneers to wall framing with masonry-veneer anchors to comply with
the following requirements:
1. Fasten screw-attached anchors through sheathing to wall framing with metal
fasteners of type indicated. Use two fasteners unless anchor design only uses one
fastener.
2. Embed tie sections in masonry joints.
3. Locate anchor sections to allow maximum vertical differential movement of ties
up and down.
4. Space anchors as indicated, but not more than 18 inches o.c. vertically and
24 inches o.c. horizontally, with not less than one anchor for each 2 sq. ft. of wall
area. Install additional anchors within 12 inches of openings and at intervals, not
exceeding 8 inches, around perimeter.
B. Provide not less than 2 inches of airspace between back of masonry veneer and face
of sheathing. Keep airspace clean of mortar droppings and other materials during
construction. Bevel beds away from airspace, to minimize mortar protrusions into
airspace. Do not attempt to trowel or remove mortar fins protruding into airspace.
3.08 ADHERED THIN BRICK MASONRY VENEER
A. Coat backs of stone units and face of masonry backup with cement-paste bond coat,
then butter both surfaces with setting mortar. Use sufficient setting mortar, so a slight
excess will be forced out the edges of stone units as they are set. Tap units into place,
completely filling space between units and masonry backup.
B. Rake out joints for pointing with mortar to depth of not less than 1/2 inch before setting
mortar has hardened. Rake joints to uniform depths with square bottoms and clean
sides.
C. Prepare thin brick-joint surfaces for pointing with mortar by removing dust and mortar
particles. Where setting mortar was removed to depths greater than surrounding areas,
apply pointing mortar in layers not more than 3/8 inch deep until a uniform depth is
formed.
D. Point thin brick joints by placing and compacting pointing mortar in layers of not more
than 3/8 inch deep. Compact each layer thoroughly, and allow it to become
thumbprint hard before applying next layer.
E. Tool joints, when pointing mortar is thumbprint hard, with a smooth jointing tool to
produce concave joint profile.
F. Keep existing weeps open. Do not fill with mortar or cover with thin brick.

JENKS PUBLIC SCHOOLS 10/18/17 HIGH SCHOOL CAMPUS
JENKS, OK ADD. #1 PHASE 3 REMODEL
KKT ARCHITECTS, INC. UNIT MASONRY 042000 - 16
3.09 MASONRY-JOINT REINFORCEMENT
A. General: Install entire length of longitudinal side rods in mortar with a minimum cover of
5/8 inch on exterior side of walls, 1/2 inch elsewhere. Lap reinforcement a minimum of
6 inches. Space reinforcement not more than 8 inches o.c.
B. Interrupt joint reinforcement at control and expansion joints unless otherwise indicated.
3.10 ANCHORING MASONRY TO STRUCTURAL STEEL AND CONCRETE
A. Anchor masonry to structural steel and concrete, where masonry abuts or faces
structural steel or concrete, to comply with the following:
1. Provide an open space not less than 2 inches wide between masonry and
structural steel or concrete unless otherwise indicated. Keep open space free of
mortar and other rigid materials.
2. Anchor masonry with anchors embedded in masonry joints and attached to
structure.
3. Space anchors as indicated, but not more than 24 inches o.c. vertically and
36 inches o.c. horizontally.
3.11 CONTROL AND EXPANSION JOINTS
A. General: Install control- and expansion-joint materials in unit masonry as masonry
progresses. Do not allow materials to span control and expansion joints without
provision to allow for in-plane wall or partition movement.
B. Form control joints in concrete masonry using one of the following methods:
1. Install interlocking units designed for control joints. Install bond-breaker strips at
joint. Keep head joints free and clear of mortar, or rake out joint for application of
sealant.
2. Install temporary foam-plastic filler in head joints, and remove filler when unit
masonry is complete for application of sealant.
C. Form expansion joints in brick as follows:
1. Build in compressible joint fillers where indicated.
2. Form open joint full depth of brick wythe and of width indicated, but not less than
3/8 inch for installation of sealant and backer rod specified in Section 079200
"Joint Sealants."
D. Provide horizontal, pressure-relieving joints by either leaving an airspace or inserting a
compressible filler of width required for installing sealant and backer rod specified in
Section 079200 "Joint Sealants," but not less than 3/8 inch. Locate horizontal, pressure-
relieving joints beneath shelf angles supporting masonry.
3.12 LINTELS
A. Install steel lintels where indicated.
B. Provide minimum bearing of 8 inches at each jamb unless otherwise indicated.
3.13 FLASHING, WEEP HOLES, AND CAVITY VENTS
A. General: Install embedded flashing and weep holes in masonry at shelf angles, lintels,
ledges, other obstructions to downward flow of water in wall, and where

JENKS PUBLIC SCHOOLS 10/18/17 HIGH SCHOOL CAMPUS
JENKS, OK ADD. #1 PHASE 3 REMODEL
KKT ARCHITECTS, INC. UNIT MASONRY 042000 - 17
indicated. Install cavity vents at shelf angles, ledges, and other obstructions to upward
flow of air in cavities, and where indicated.
B. Install flashing as follows unless otherwise indicated:
1. Prepare masonry surfaces so they are smooth and free from projections that
could puncture flashing. Where flashing is within mortar joint, place through-wall
flashing on sloping bed of mortar and cover with mortar. Before covering with
mortar, seal penetrations in flashing with adhesive, sealant, or tape as
recommended by flashing manufacturer.
2. At masonry-veneer walls, extend flashing through veneer, across airspace behind
veneer, and up face of sheathing at least 8 inches; with upper edge tucked
under water-resistive air barrier, lapping at least 4 inches. Fasten upper edge of
flexible flashing to sheathing through termination bar.
3. At lintels and shelf angles, extend flashing a minimum of 6 inches into masonry at
each end. At heads and sills, extend flashing 6 inches at ends and turn up not less
than 2 inches to form end dams.
4. Install metal drip edges beneath flexible flashing at exterior face of wall. Stop
flexible flashing 1/2 inch back from outside face of wall, and adhere flexible
flashing to top of metal drip edge.
5. Cut flexible flashing off flush with face of wall after masonry wall construction is
completed.
C. Install weep holes in exterior wythes and veneers in head joints of first course of masonry
immediately above embedded flashing.
1. Use specified weep/cavity vent products to form weep holes.
2. Space weep holes 24 inches o.c. unless otherwise indicated.
D. Place pea gravel in cavities as soon as practical to a height equal to height of first
course above top of flashing, but not less than 2 inches, to maintain drainage.
E. Place cavity drainage material in airspace behind veneers to comply with
configuration requirements for cavity drainage material in "Miscellaneous Masonry
Accessories" Article.
F. Install cavity vents in head joints in exterior wythes at spacing indicated. Use specified
weep/cavity vent products to form cavity vents.
3.14 REINFORCED UNIT MASONRY INSTALLATION
A. Placing Reinforcement: Comply with requirements in TMS 602/ACI 530.1/ASCE 6.
B. Grouting: Do not place grout until entire height of masonry to be grouted has attained
enough strength to resist grout pressure.
3.15 FIELD QUALITY CONTROL
A. Testing and Inspecting: Owner will engage special inspectors to perform tests and
inspections and prepare reports. Allow inspectors access to scaffolding and work areas
as needed to perform tests and inspections. Retesting of materials that fail to comply
with specified requirements shall be done at Contractor's expense.
B. Mortar Aggregate Ratio Test (Proportion Specification): For each mix provided,
according to ASTM C 780.

JENKS PUBLIC SCHOOLS 10/18/17 HIGH SCHOOL CAMPUS
JENKS, OK ADD. #1 PHASE 3 REMODEL
KKT ARCHITECTS, INC. UNIT MASONRY 042000 - 18
3.16 REPAIRING, POINTING, AND CLEANING
A. Remove and replace masonry units that are loose, chipped, broken, stained, or
otherwise damaged or that do not match adjoining units. Install new units to match
adjoining units; install in fresh mortar, pointed to eliminate evidence of replacement.
B. Pointing: During the tooling of joints, enlarge voids and holes, except weep holes, and
completely fill with mortar. Point up joints, including corners, openings, and adjacent
construction, to provide a neat, uniform appearance. Prepare joints for sealant
application, where indicated.
C. In-Progress Cleaning: Clean unit masonry as work progresses by dry brushing to remove
mortar fins and smears before tooling joints.
D. Final Cleaning: After mortar is thoroughly set and cured, clean exposed masonry as
follows:
1. Remove large mortar particles by hand with wooden paddles and nonmetallic
scrape hoes or chisels.
2. Test cleaning methods on sample wall panel; leave one-half of panel uncleaned
for comparison purposes. Obtain Architect's approval of sample cleaning before
proceeding with cleaning of masonry.
3. Clean brick by bucket-and-brush hand-cleaning method described in BIA
Technical Notes 20.
4. Clean concrete masonry by applicable cleaning methods indicated in
NCMA TEK 8-4A.
5. Clean cast stone trim to comply with cast stone supplier's written instructions.
3.17 MASONRY WASTE DISPOSAL
A. Salvageable Materials: Unless otherwise indicated, excess masonry materials are
Contractor's property. At completion of unit masonry work, remove from Project site.
B. Masonry Waste Recycling: Return broken CMUs not used as fill to manufacturer for
recycling.
C. Excess Masonry Waste: Remove excess clean masonry waste that cannot be used as
fill, as described above or recycled, and other masonry waste, and legally dispose of
off Owner's property.
END OF SECTION 042000

JENKS PUBLIC SCHOOLS 10/18/17 HIGH SCHOOL CAMPUS
JENKS, OK ADD. #1 PHASE 3 REMODEL
KKT ARCHITECTS, INC. TRAFFIC COATINGS 071800 - 1
SECTION 071800
TRAFFIC COATINGS
PART 1 - GENERAL
1.01 RELATED DOCUMENTS
A. Drawings and general provisions of the Contract, including General and
Supplementary Conditions and Division 01 Specification Sections, apply to this Section.
1.02 SUMMARY
A. Section includes traffic coatings for heavy-duty pedestrian traffic on exposed concrete
deck.
1.03 PREINSTALLATION MEETINGS
A. Preinstallation Conference: Conduct conference at Project site.
1.04 ACTION SUBMITTALS
A. Product Data: For each type of product. Include installation instructions and details,
material descriptions, dry or wet film thickness requirements, and finish.
B. Shop Drawings: For traffic coatings. Include details for treating substrate joints and
cracks, flashings, deck penetrations, and other termination conditions that are not
included in manufacturer's product data.
C. Samples for Initial Selection: For each type of exposed finish.
D. Samples for Verification: For each type of exposed finish, prepared on rigid backing.
Provide stepped Samples on backing to illustrate buildup of traffic coatings.
1.05 INFORMATIONAL SUBMITTALS
A. Qualification Data: For Installer.
B. Product Certificates: For each type of traffic coating.
C. Sample Warranty: For manufacturer's warranty.
1.06 CLOSEOUT SUBMITTALS
A. Maintenance Data: For traffic coatings to include in maintenance manuals.
1.07 QUALITY ASSURANCE
A. Installer Qualifications: An entity that employs installers and supervisors who are trained
and approved by manufacturer.

JENKS PUBLIC SCHOOLS 10/18/17 HIGH SCHOOL CAMPUS
JENKS, OK ADD. #1 PHASE 3 REMODEL
KKT ARCHITECTS, INC. TRAFFIC COATINGS 071800 - 2
B. Mockups: Build mockups to set quality standards for materials and execution.
1. Build mockup for each traffic coating and substrate to receive traffic coatings.
2. Size: 100 sq. ft. of each substrate to demonstrate surface preparation, joint and
crack treatment, thickness, texture, color, and standard of workmanship.
3. Approval of mockups does not constitute approval of deviations from the
Contract Documents contained in mockups unless Architect specifically
approves such deviations in writing.
4. Subject to compliance with requirements, approved mockups may become part
of the completed Work if undisturbed at time of Substantial Completion.
1.08 FIELD CONDITIONS
A. Environmental Limitations: Apply traffic coatings within the range of ambient and
substrate temperatures recommended in writing by manufacturer. Do not apply traffic
coatings to damp or wet substrates, when temperatures are below 40 deg F, when
relative humidity exceeds 85 percent, or when temperatures are less than 5 deg F
above dew point. Do not apply traffic coatings in snow, rain, fog, or mist, or when such
weather conditions are imminent during the application and curing period. Apply only
when frost-free conditions occur throughout the depth of substrate.
B. Do not install traffic coating until items that penetrate membrane have been installed.
1.09 WARRANTY
A. Manufacturer's Warranty: Manufacturer agrees to repair or replace traffic coating that
fails in materials or workmanship within specified warranty period.
1. Failures include, but are not limited to, the following:
a. Adhesive or cohesive failures.
b. Abrasion or tearing failures.
c. Surface crazing or spalling.
d. Intrusion of water, oils, gasoline, grease, salt, deicer chemicals, or acids into
deck substrate.
2. Warranty Period: Five (5) years from date of Substantial Completion.
PART 2 - PRODUCTS
2.01 MANUFACTURERS
A. Source Limitations: Obtain traffic coatings from single source from single manufacturer.
2.02 PERFORMANCE REQUIREMENTS
A. Material Compatibility: Provide primers; base coat, intermediate coat, and topcoat;
and accessory materials that are compatible with one another and with substrate
under conditions of service and application, as demonstrated by manufacturer based
on testing and field experience.

JENKS PUBLIC SCHOOLS 10/18/17 HIGH SCHOOL CAMPUS
JENKS, OK ADD. #1 PHASE 3 REMODEL
KKT ARCHITECTS, INC. TRAFFIC COATINGS 071800 - 3
2.03 TRAFFIC COATING
A. Traffic Coating: Manufacturer's standard, traffic-bearing, seamless, high-solids-content,
cold liquid-applied, elastomeric, water-resistant membrane system with integral
wearing surface for heavy-duty pedestrian traffic; according to ASTM C 957/C 957M.
1. Basis-of-Design Product: Subject to compliance with requirements, provide
Pecora Corporation; Pecora-Deck 8013HD, or a comparable product by one of
the following:
a. BASF Corp. - Construction Chemicals.
b. Neogard; a division of Jones-Blair, Inc.
c. Polyguard Products.
d. Tremco Sealants & Waterproofing.
2.04 MATERIALS
A. Concrete Primer: Pecora P-801-VOC; single-component, polyurethane penetrating
primer recommended for substrate conditions by traffic coating manufacturer, with the
following physical properties:
1. Solids Content: 90 percent in accordance with ASTM D 1353.
2. Viscosity: 250 cps.
3. VOC Content: Less than 100 g/L in accordance with ASTM D 1353.
4. Tack Free Time: 60 minutes at 75 degrees F at 50 percent relative humidity.
B. Base Coat: Pecora-Deck 802 Base Coat; one-part, cold-applied, polyurethane
coating, with the following physical properties:
1. Solids Content: 85 percent in accordance with ASTM D 1353.
2. Shore A Hardness: 65, plus or minus 5, in accordance with ASTM D 412.
3. Tensile Strength: 900 psi in accordance with ASTM D 412.
4. Ultimate Elongation: 625 percent in accordance with ASTM D 412.
5. Tear Resistance (Die C): 150 lb./inch in accordance with ASTM D 1004.
6. Pull-off Adhesion: 400 psi on primed concrete in accordance with ASTM D 4541.
7. Low Temperature Flexibility: Minus 65 degrees F in accordance with ASTM D 522.
8. Liquid Water Permeability: 0.0015 grains/hr./sq. ft. in accordance with
ASTM D 1653.
C. Intermediate Coat: Pecora-Deck 804 Intermediate Coat; one-part, cold-applied,
polyurethane coating, with the following physical properties:
1. Solids Content: 80 percent in accordance with ASTM D 1353.
2. Shore A Hardness: 80, plus or minus 5, in accordance with ASTM D 412.
3. Tensile Strength: 2100 psi in accordance with ASTM D 412.
4. Ultimate Elongation: 400 percent in accordance with ASTM D 412.
5. Tear Resistance (Die C): 200 lb./inch, plus or minus 50 lb. /inch, in accordance
with ASTM D 1004.
6. Low Temperature Flexibility: Minus 65 degrees F in accordance with ASTM D 522.
7. Liquid Water Permeability: 0.0039 grains/hr./sq. ft. in accordance with
ASTM D 1653.
D. Topcoat: Pecora-Deck 806 Top Coat; one-part, cold-applied, polyurethane coating,
with the following physical properties:
1. Solids Content: 75 percent, plus or minus 5 percent, in accordance with
ASTM D 1353.
2. Shore A Hardness: 90, plus or minus 5, in accordance with ASTM D 412.
3. Tensile Strength: 3200 psi, plus or minus 500 psi, in accordance with ASTM D 412.
4. Ultimate Elongation: 250 percent in accordance with ASTM D 412.

JENKS PUBLIC SCHOOLS 10/18/17 HIGH SCHOOL CAMPUS
JENKS, OK ADD. #1 PHASE 3 REMODEL
KKT ARCHITECTS, INC. TRAFFIC COATINGS 071800 - 4
5. Tear Resistance (Die C): 350 lb./inch, plus or minus 50 lb./inch, in accordance
with ASTM D 1004.
6. Low Temperature Flexibility: Minus 65 degrees F in accordance with ASTM D 522.
7. Abrasion Resistance: Less than 70 in accordance with ASTM C 501.
8. Liquid Water Permeability: 0.00028 grains/hr./sq. ft. in accordance with
ASTM D 1653.
E. Color: As selected by Architect from manufacturer's full range.
F. Aggregate: Dry, uniformly graded silica sand; free of clay, mica and organic matter;
round to sub-angular shape; capable of passing through sieve of the size specified for
each traffic coating system.
2.05 ACCESSORY MATERIALS
A. Joint Sealant: Nonsag, polyurethane joint sealant; ASTM C 920, Grade NS; color as
selected from manufacturer’s available colors.
1. Acceptable products include:
a. Single-Component, Class 25 Sealant: Pecora DynaTrol I-XL.
b. Multiple-Component, Class 25 Sealant: Pecora DynaTred.
2. Color: As selected by Architect from manufacturer’s full range.
B. Joint Sealant Primer: Pecora P-75 Primer.
C. Backer Rod: Open cell, closed cell or combination type as recommended by joint
sealant manufacturer for substrate conditions.
D. Accelerator: Traffic coating additive for reducing cure time.
1. Acceptable Product: Pecora-Deck 850 Accelerator.
PART 3 - EXECUTION
3.01 EXAMINATION
A. Examine substrates, areas, and conditions, with Installer present, for compliance with
requirements for maximum moisture content, surface smoothness, and other conditions
affecting performance of traffic-coating work.
B. Verify that substrates are visibly dry and free of moisture.
C. Prepare written report, endorsed by Installer, listing conditions detrimental to
performance of traffic-coating work.
D. Proceed with installation only after unsatisfactory conditions have been corrected.
1. Begin coating application only after substrate construction and penetrating work
have been completed.
2. Begin coating application only after minimum concrete-curing and -drying
period recommended in writing by traffic-coating manufacturer has passed and
after substrates are dry.
3. Application of coating indicates acceptance of surfaces and conditions.

JENKS PUBLIC SCHOOLS 10/18/17 HIGH SCHOOL CAMPUS
JENKS, OK ADD. #1 PHASE 3 REMODEL
KKT ARCHITECTS, INC. TRAFFIC COATINGS 071800 - 5
3.02 PREPARATION
A. Clean and prepare substrates according to ASTM C 1127 and manufacturer's written
instructions to produce clean, dust-free, dry substrate for traffic-coating application.
Remove projections, fill voids, and seal joints if any, as recommended in writing by
traffic-coating manufacturer.
B. Schedule preparation work so dust and other contaminants from process do not fall on
wet, newly coated surfaces.
C. Mask adjoining surfaces not receiving traffic coatings to prevent overspray, spillage,
leaking, and migration of coatings. Prevent traffic-coating materials from entering deck
substrate penetrations and clogging weep holes and drains.
D. Concrete Substrates: Do not begin work until concrete substrates have cured at least
28 days and moisture content is 12 percent or less.
1. Test concrete surfaces to determine moisture content or humidity in accordance
with ASTM D 4263 or ASTM F 2110.
a. Concrete Moisture Content: No beading water under plastic after 16 hours
per ASTM D 4263.
b. Humidity in Concrete: Not greater than 75 percent per ASTM F 2170.
2. Do not acid etch.
3. Remove laitance, glaze, efflorescence, curing compounds, concrete hardeners,
form-release agents, and other incompatible materials that might affect coating
adhesion.
4. Remove remaining loose material to provide a sound surface, and clean surfaces
according to ASTM D 4258.
E. Clean joints and saw cut cracks; install backer rod and joint sealant; tool joint sealant
flush with adjacent surface.
F. Prime surfaces indicated to receive traffic coatings as recommended by manufacturer.
Apply primers at minimum rates as required for the specified traffic coating systems by
manufacturer.
G. Apply joint sealant at juncture of horizontal and vertical surfaces including projections
through deck, curb, parking bumpers, walls and other surfaces; tool joint sealant to
form 1-inch, 45 degree cant. Install joint sealants in accordance with joint sealant
manufacturer’s installation instructions
H. Apply 6-inch wide, 30 mil (0,8 mm) thick coating of detail base coat material over
hairline cracks, sealed cracks, cold joints and control and expansion joints up to
1/2-inch wide; allow to cure before applying base coat.
I. Do not proceed with traffic coating application until unsatisfactory conditions are
corrected.
3.03 TRAFFIC-COATING APPLICATION
A. Apply traffic coating system in accordance with manufacturer's instructions.
B. Do not begin application of base coat until primers, joint sealants and other liquid
preparatory work has cured minimum 24 hours.

JENKS PUBLIC SCHOOLS 10/18/17 HIGH SCHOOL CAMPUS
JENKS, OK ADD. #1 PHASE 3 REMODEL
KKT ARCHITECTS, INC. TRAFFIC COATINGS 071800 - 6
C. Apply primer to prepared concrete surface at rate of 250 to 350 sq. ft. per gallon.
D. When primer is tacky to touch, apply base coat to minimum wet film thickness of
32 mils.
E. When base coat is tacky to touch, apply intermediate coat to minimum wet film
thickness of 16 mils.
F. In locations where textured finish is indicated, uniformly broadcast aggregate passing
No. 30 sieve at 25 lb. per 100 sq. ft. onto wet intermediate coat; immediately back-roll
aggregate to encapsulate in coating material.
G. When intermediate coat is tacky to touch, apply top coat to minimum wet film
thickness of 16 mils.
H. Remove traffic coatings from surfaces not indicated to receive traffic coatings as the
Work progresses using mineral spirits or isopropyl alcohol.
I. Prevent contamination or damage to traffic coatings during application and curing
periods.
J. Allow final topcoat to cure 48 hours before opening areas to traffic.
3.04 FIELD QUALITY CONTROL
A. Testing Agency: Owner will engage a qualified testing agency to perform the following
field tests and inspections:
1. Materials Testing:
a. Samples of material delivered to Project site shall be taken, identified,
sealed, and certified in presence of Owner and Contractor.
b. Testing agency shall perform tests for characteristics specified, using
applicable referenced testing procedures.
c. Testing agency shall verify thickness of coatings during traffic-coating
application for each 600 sq. ft. of installed traffic coating or part thereof.
2. Electronic Leak-Detection Testing:
a. Testing agency shall test each deck area for leaks using an electronic leak-
detection method that locates discontinuities in the traffic-coating
membrane.
b. Testing agency shall create a conductive electronic field over the area of
traffic coating to be tested and electronically determine locations of
discontinuities or leaks, if any, in the traffic coating.
c. Testing agency shall provide survey report indicating locations of
discontinuities, if any.
B. Final Traffic-Coating Inspection: Arrange for traffic-coating manufacturer's technical
personnel to inspect membrane installation on completion.
C. Waterproofing will be considered defective if it does not pass tests and inspections.
D. Prepare test and inspection reports.
JENKS PUBLIC SCHOOLS 10/18/17 HIGH SCHOOL CAMPUS
JENKS, OK ADD. #1 PHASE 3 REMODEL
KKT ARCHITECTS, INC. TRAFFIC COATINGS 071800 - 7
3.05 PROTECTING AND CLEANING
A. Allow finished traffic coating to cure minimum of 48 hours before opening areas to
traffic.
B. Protect traffic coatings during and after curing period from contact with contaminating
substances and from damage resulting from construction operations.
C. Repair damaged or deteriorated coatings before Substantial Completion.
D. Clean spillage and soiling from adjacent construction using cleaning agents and
procedures recommended by manufacturer of affected construction.
END OF SECTION 071800

JENKS PUBLIC SCHOOLS 10/18/17 HIGH SCHOOL CAMPUS
JENKS, OK ADD. #1 PHASE 3 REMODEL
KKT ARCHITECTS, INC. SBS-MODIFIED BITUMINOUS MEMBRANE ROOFING 075216 - 1
SECTION 075216
SBS-MODIFIED BITUMINOUS MEMBRANE ROOFING
PART 1 - GENERAL
1.01 RELATED DOCUMENTS
A. Drawings and general provisions of the Contract, including other Division 01
Specification Sections, apply to this Section.
1.02 SUMMARY
A. Section Includes:
1. Styrene-butadiene-styrene (SBS) modified bituminous membrane roofing.
2. Parapet flashing.
3. Roof insulation.
4. Flanged bellows-type roof expansion joints.
5. Walkways.
B. Related Sections:
1. Section 035216 “Lightweight Insulating Concrete” for roofing insulation at building
addition.
2. Section 061053 "Miscellaneous Rough Carpentry" for wood nailers, curbs, and
blocking.
3. Section 061600 “Sheathing” for parapet sheathing.
4. Section 070150.19 “Preparation for Reroofing” for extent of removal of existing
modified bituminous roofing systems.
5. Section 072100 "Thermal Insulation" for insulation beneath the roof deck.
6. Section 076200 "Sheet Metal Flashing and Trim" for metal roof flashings and
counterflashings.
7. Section 079200 "Joint Sealants" for joint sealants, joint fillers, and joint preparation.
8. Section 077200 "Roof Accessories" for roof curbs and other accessories to
coordinate with roofing installation.
9. Division 22 for roof drains.
C. Alternates: Refer to Division 1 Section "Alternates" for description of Work in this Section
affected by alternates.
1.03 DEFINITIONS
A. Roofing Terminology: See ASTM D 1079 and glossary of NRCA's "The NRCA Roofing and
Waterproofing Manual" for definition of terms related to roofing work in this Section.
1.04 PREINSTALLATION MEETINGS
A. Preinstallation Roofing Conference: Conduct conference at Project site.
1. Meet with Owner, Architect, Owner's insurer if applicable, testing and inspecting
agency representative, roofing Installer, roofing system manufacturer's
representative, deck Installer, and installers whose work interfaces with or affects
roofing, including installers of roof accessories and roof-mounted equipment.
2. Review methods and procedures related to roofing installation, including
manufacturer's written instructions.

JENKS PUBLIC SCHOOLS 10/18/17 HIGH SCHOOL CAMPUS
JENKS, OK ADD. #1 PHASE 3 REMODEL
KKT ARCHITECTS, INC. SBS-MODIFIED BITUMINOUS MEMBRANE ROOFING 075216 - 2
3. Review and finalize construction schedule, and verify availability of materials,
Installer's personnel, equipment, and facilities needed to make progress and
avoid delays.
4. Examine deck substrate conditions and finishes for compliance with requirements,
including flatness and fastening.
5. Review structural loading limitations of roof deck during and after roofing.
6. Review base flashings, special roofing details, roof drainage, roof penetrations,
equipment curbs, and condition of other construction that affects roofing system.
7. Review governing regulations and requirements for insurance and certificates if
applicable.
8. Review temporary protection requirements for roofing system during and after
installation.
9. Review roof observation and repair procedures after roofing installation.
1.05 ACTION SUBMITTALS
A. Product Data: For each type of product indicated.
B. Shop Drawings: For roofing system. Include plans, elevations, sections, details, and
attachments to other work.
1. Base flashings and membrane terminations.
2. Tapered insulation, including slopes.
3. Crickets, saddles, and tapered edge strips, including slopes.
4. Insulation fastening patterns for corner, perimeter, and field-of-roof locations.
5. Roof Expansion Joints: Provide isometric drawings of intersections, terminations,
changes in joint direction or planes, and transition to other expansion joint systems
depicting how components interconnect with each other and adjacent
construction to allow movement and achieve waterproof continuity.
C. Samples for Verification: For the following products:
1. 12-by-12-inch square of base ply sheet.
2. 12-by-12-inch square of mineral-granule-surfaced roofing membrane cap sheet,
of color specified.
3. 12-by-12-inch square of mineral-granule-surfaced flashing sheet.
4. 12-by-12-inch square of roof insulation.
5. 12-by-12-inch square of walkway pad or walkway cap sheet.
6. Six insulation fasteners of each type, length, and finish.
1.06 INFORMATIONAL SUBMITTALS
A. Qualification Data: For Installer and manufacturer.
B. Manufacturer Certificates: Signed by roofing manufacturer certifying that roofing
system complies with requirements specified in "Performance Requirements" Article.
Submit evidence of complying with Performance Requirements specified.
C. Product Test Reports: Based on evaluation of comprehensive tests performed by
manufacturer and witnessed by a qualified testing agency, for components of
membrane roofing system.
D. Research/Evaluation Reports: For components of membrane roofing system, from the
ICC-ES.
E. Maintenance Data: For roofing system to include in maintenance manuals.

JENKS PUBLIC SCHOOLS 10/18/17 HIGH SCHOOL CAMPUS
JENKS, OK ADD. #1 PHASE 3 REMODEL
KKT ARCHITECTS, INC. SBS-MODIFIED BITUMINOUS MEMBRANE ROOFING 075216 - 3
F. Sample Warranties: For manufacturer's special warranties.
1.07 CLOSEOUT SUBMITTALS
A. Maintenance Data: For roofing system to include in maintenance manuals.
1.08 QUALITY ASSURANCE
A. Manufacturer Qualifications: A qualified manufacturer that is UL listed and FM-Global
approved for membrane roofing system identical to that used for this Project.
B. Installer Qualifications:
1. A qualified firm that is approved, authorized, or licensed by roofing system
manufacturer to install manufacturer's product and that is eligible to receive the
specified manufacturer's warranty.
2. Bidding installers shall submit the following documentation with bid documents.
Bids received without this documentation will be subject to rejection:
a. Proof of a minimum of five (5) experience with the type of premium SBS
modified roof system specified.
b. Letter of Certification from Manufacturer.
c. Proof of a minimum $4,000,000 workman comp. / liability insurance umbrella
that has been in place a minimum of 1 year, and which is current.
d. Documentation from NCCI stating an Experience Modification Rating (EMR)
of 1.0 or less.
e. Documentation stating that Project Manager, Job Site Superintendent and
all other roofing applicators are employed directly by the Installer (no
subcontracting of roofing installation will be permitted).
f. Evidence of compliance with Oklahoma Bill #2180 “Roofing Contractor
Registration Act
C. Source Limitations: Obtain components including roof insulation and fasteners, for
membrane roofing system from same manufacturer as membrane roofing or approved
by membrane roofing manufacturer.
1.09 DELIVERY, STORAGE, AND HANDLING
A. Deliver roofing materials to Project site in original containers with seals unbroken and
labeled with manufacturer's name, product brand name and type, date of
manufacture, approval or listing agency markings, and directions for storing and mixing
with other components.
B. Store liquid materials in their original undamaged containers in a clean, dry, protected
location and within the temperature range required by roofing system manufacturer.
Protect stored liquid material from direct sunlight. Discard and legally dispose of liquid
material that cannot be applied within its stated shelf life.
C. Protect roof insulation materials from physical damage and from deterioration by
sunlight, moisture, soiling, and other sources. Store in a dry location. Comply with
insulation manufacturer's written instructions for handling, storing, and protecting during
installation.
D. Handle and store roofing materials and place equipment in a manner to avoid
permanent deflection of deck.

JENKS PUBLIC SCHOOLS 10/18/17 HIGH SCHOOL CAMPUS
JENKS, OK ADD. #1 PHASE 3 REMODEL
KKT ARCHITECTS, INC. SBS-MODIFIED BITUMINOUS MEMBRANE ROOFING 075216 - 4
1.10 PROJECT CONDITIONS
A. Weather Limitations: Proceed with installation only when existing and forecasted
weather conditions permit roofing system to be installed according to manufacturer's
written instructions and warranty requirements.
1.11 WARRANTY
A. Special Warranty: Manufacturer's standard or customized form, without monetary
limitation, in which manufacturer agrees to repair or replace components of
membrane roofing system that fail in materials or workmanship within specified
warranty period.
1. Special warranty includes membrane roofing, base flashings, roof insulation,
fasteners, cover boards, walkway products, roof expansion joints, and other
components of membrane roofing system.
2. Warranty Period: 20 years from date of Substantial Completion.
B. Roof Membrane Guarantee: Upon successful completion of the project, and after post
installation procedures have been completed, furnish the Owner with the
manufacturer's labor and materials membrane guarantee. The guarantee shall be a
term type, without deductibles or limitations on coverage amount, and shall be issued
at no additional cost to the Owner. This guarantee shall not exclude random areas of
ponding from coverage.
1. Guarantee Period: 20 years from date of Substantial Completion.
C. Special Project Warranty: Submit roofing Installer's warranty, on warranty form at end of
this Section, signed by Installer, covering the Work of this Section, including all
components of roofing system such as membrane roofing, base flashing, roof insulation,
fasteners, cover boards, and walkway products, for the following warranty period:
1. Warranty Period: Two (2) years from date of Substantial Completion.
PART 2 - PRODUCTS
2.01 MANUFACTURERS
A. Basis-of-Design Product: Subject to compliance with requirements, provide 3FID-CA
SBS-modified bituminous roof system, by Johns Manville, or approved equivalent by one
of the following:
1. Firestone.
2. GAF Materials Corporation.
3. Malarkey Roofing Products.
4. Siplast, Inc.
5. Soprema, Inc.
6. TAMKO Building Products, Inc.
7. Tremco Incorporated.
B. Source Limitations: Obtain components including fasteners for roofing system from
same manufacturer as membrane roofing or manufacturer approved by membrane
roofing manufacturer.
2.02 PERFORMANCE REQUIREMENTS
A. General Performance: Installed membrane roofing and base flashings shall withstand
specified uplift pressures, thermally induced movement, and exposure to weather

JENKS PUBLIC SCHOOLS 10/18/17 HIGH SCHOOL CAMPUS
JENKS, OK ADD. #1 PHASE 3 REMODEL
KKT ARCHITECTS, INC. SBS-MODIFIED BITUMINOUS MEMBRANE ROOFING 075216 - 5
without failure due to defective manufacture, fabrication, installation, or other defects
in construction. Membrane roofing and base flashings shall remain watertight.
1. Accelerated Weathering: Roofing system shall withstand 2000 hours of exposure
when tested according to ASTM G 152, ASTM G 154, or ASTM G 155.
2. Impact Resistance: Roofing system shall resist impact damage when tested
according to ASTM D 3746 or ASTM D 4272.
3. Fatigue Resistance: Roofing system shall pass 500 cycles of ASTM D 5849
Resistance to Cyclic Joint Displacement at 14 degrees F. Passing results shall
show no signs of membrane cracking or interply delamination after 500 cycles.
4. The roof system shall pass 200 cycles of ASTM D 5849 after heat aging. The
assembly shall possess waterproofing capability, such that a phased roof
application, with only the modified bitumen base ply in place, can be achieved
for prolonged periods of time without detriment to the watertight integrity of the
entire roof system.
B. Material Compatibility: Provide roofing materials that are compatible with one another
under conditions of service and application required, as demonstrated by membrane
roofing manufacturer based on testing and field experience.
C. Roofing System Design: Provide membrane roofing system that is identical to systems
that have been successfully tested by a qualified testing and inspecting agency to
resist uplift pressure calculated according to ASCE/SEI 7.
D. UL Listing: Roofing, base flashings, and component materials shall comply with
requirements as part of a membrane roofing system, as follows:
1. Underwriter’s Laboratory (U.L.): 790 Class A Fire Resistance.
2. Fire/Windstorm Classification: Class 1A-90, unless otherwise indicated.
3. Hail Resistance Rating: SH
2.03 ROOFING SHEET MATERIALS
A. Granule-Surface Roofing Membrane Cap Sheet: DynaGlas® FR cap, by Johns Manville;
ASTM D 6163, Grade G, Type I or II, SBS-modified asphalt sheet (reinforced with glass
fibers) granular surfaced; suitable for application method specified, and as follows:
1. Approved Substitutions:
a. Elastophene® LS FR GR cap, by Soprema.
b. Paradiene 30 FR, by Siplast.
2. Granule Color: Standard white, as approved by Architect.
B. Smooth SBS-Modified Base-Ply Sheets: DynaBase® SBS Base, by Johns Manville; ASTM D
6163, Type I or II, Grade S, SBS-modified asphalt sheet; suitable for application method
specified, and as follows:
1. Approved Substitutions:
a. Elastophene® Sanded 2.2 base ply, by Soprema.
b. Paradiene 20 HT, by Siplast.
2. Mechanically fasten to lightweight insulating concrete. Cold-adhesive apply to
cover board on roof insulation.
2.04 BASE FLASHING SHEET MATERIALS
A. Backer Sheet: If required by manufacturer’s recommendations for 20 year warranty
roof system and the manufacturer’s written recommendations for this roof system use
backer sheet recommended by roofing manufacturer for this application.
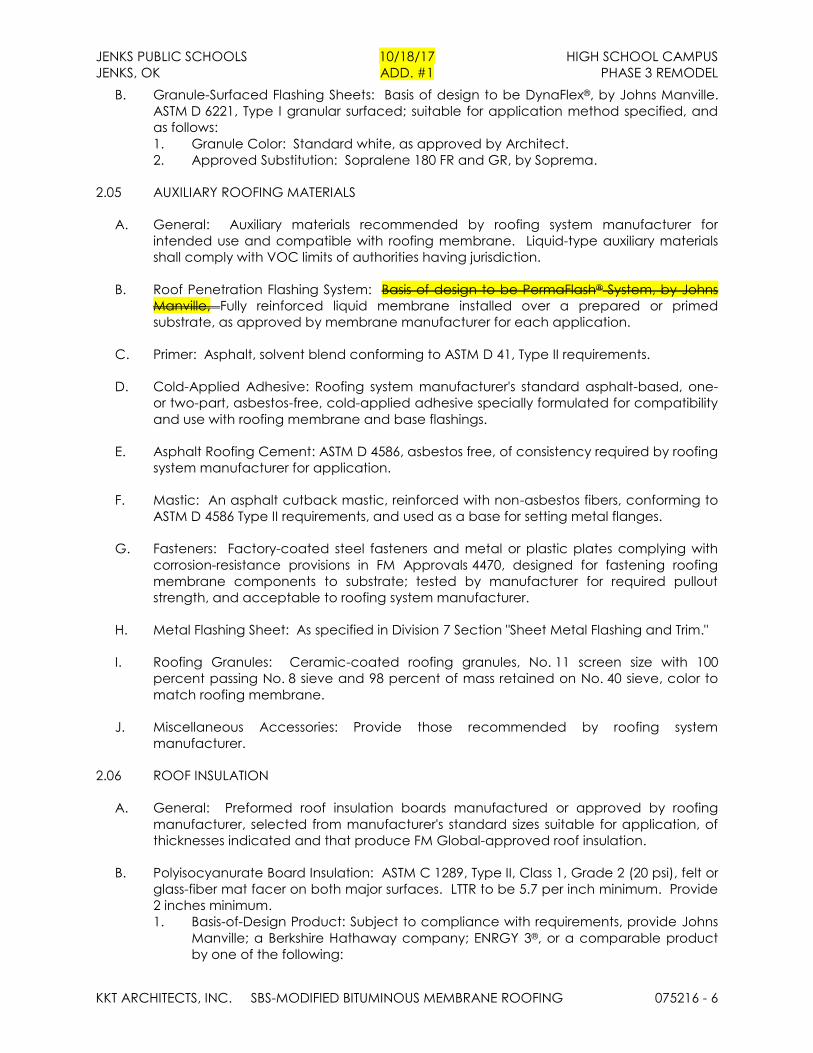
JENKS PUBLIC SCHOOLS 10/18/17 HIGH SCHOOL CAMPUS
JENKS, OK ADD. #1 PHASE 3 REMODEL
KKT ARCHITECTS, INC. SBS-MODIFIED BITUMINOUS MEMBRANE ROOFING 075216 - 6
B. Granule-Surfaced Flashing Sheets: Basis of design to be DynaFlex®, by Johns Manville.
ASTM D 6221, Type I granular surfaced; suitable for application method specified, and
as follows:
1. Granule Color: Standard white, as approved by Architect.
2. Approved Substitution: Sopralene 180 FR and GR, by Soprema.
2.05 AUXILIARY ROOFING MATERIALS
A. General: Auxiliary materials recommended by roofing system manufacturer for
intended use and compatible with roofing membrane. Liquid-type auxiliary materials
shall comply with VOC limits of authorities having jurisdiction.
B. Roof Penetration Flashing System: Basis of design to be PermaFlash® System, by Johns
Manville, Fully reinforced liquid membrane installed over a prepared or primed
substrate, as approved by membrane manufacturer for each application.
C. Primer: Asphalt, solvent blend conforming to ASTM D 41, Type II requirements.
D. Cold-Applied Adhesive: Roofing system manufacturer's standard asphalt-based, one-
or two-part, asbestos-free, cold-applied adhesive specially formulated for compatibility
and use with roofing membrane and base flashings.
E. Asphalt Roofing Cement: ASTM D 4586, asbestos free, of consistency required by roofing
system manufacturer for application.
F. Mastic: An asphalt cutback mastic, reinforced with non-asbestos fibers, conforming to
ASTM D 4586 Type II requirements, and used as a base for setting metal flanges.
G. Fasteners: Factory-coated steel fasteners and metal or plastic plates complying with
corrosion-resistance provisions in FM Approvals 4470, designed for fastening roofing
membrane components to substrate; tested by manufacturer for required pullout
strength, and acceptable to roofing system manufacturer.
H. Metal Flashing Sheet: As specified in Division 7 Section "Sheet Metal Flashing and Trim."
I. Roofing Granules: Ceramic-coated roofing granules, No. 11 screen size with 100
percent passing No. 8 sieve and 98 percent of mass retained on No. 40 sieve, color to
match roofing membrane.
J. Miscellaneous Accessories: Provide those recommended by roofing system
manufacturer.
2.06 ROOF INSULATION
A. General: Preformed roof insulation boards manufactured or approved by roofing
manufacturer, selected from manufacturer's standard sizes suitable for application, of
thicknesses indicated and that produce FM Global-approved roof insulation.
B. Polyisocyanurate Board Insulation: ASTM C 1289, Type II, Class 1, Grade 2 (20 psi), felt or
glass-fiber mat facer on both major surfaces. LTTR to be 5.7 per inch minimum. Provide
2 inches minimum.
1. Basis-of-Design Product: Subject to compliance with requirements, provide Johns
Manville; a Berkshire Hathaway company; ENRGY 3®, or a comparable product
by one of the following:

JENKS PUBLIC SCHOOLS 10/18/17 HIGH SCHOOL CAMPUS
JENKS, OK ADD. #1 PHASE 3 REMODEL
KKT ARCHITECTS, INC. SBS-MODIFIED BITUMINOUS MEMBRANE ROOFING 075216 - 7
a. Atlas EPS; a Division of Atlas Roofing Corporation.
b. Carlisle SynTec Incorporated.
c. CertainTeed Corporation.
d. Firestone Building Products.
e. GAF.
f. Hunter Panels.
g. Rmax, Inc.
2. Tapered Insulation: Provide factory-tapered insulation boards fabricated to
provide a slope of 1/4 inch per 12 inches, unless otherwise indicated.
C. Provide preformed saddles, crickets, tapered edge strips, and other insulation shapes
where indicated for sloping to drain. Fabricate to slopes indicated.
2.07 INSULATION ACCESSORIES
A. General: Furnish roof insulation accessories recommended by insulation manufacturer
for intended use and compatibility with membrane roofing.
B. Fasteners: Factory-coated steel fasteners and metal or plastic plates meeting
corrosion-resistance provisions in FM Global 4470, designed for fastening roof insulation
to substrate, and acceptable to roofing system manufacturer.
C. Cant Strips: Provide one of the following:
1. ASTM C 728, perlite insulation board.
2. ASTM C 208, Type II, Grade 1, cellulosic-fiber insulation board.
D. Wood Nailer Strips: Comply with requirements in Section 061053 "Miscellaneous Rough
Carpentry."
E. Tapered Edge Strips: Provide one of the following:
1. ASTM C 728, perlite insulation board.
2. ASTM C 208, Type II, Grade 1, cellulosic-fiber insulation board.
F. Cover Board: ASTM C 1177/C 1177M, glass-mat, water-resistant gypsum board or
ASTM C 1278/C 1278M, fiber-reinforced gypsum board.
1. Products: Subject to compliance with requirements, provide one of the following:
a. CertainTeed Corporation; GlassRoc Roof Board.
b. Georgia-Pacific Gypsum LLC; Dens Deck Prime.
c. National Gypsum Company; DEXcell Glass Mat Roof Board.
d. USG Corporation; Securock Glass-Fiber Roof Board.
2. Thickness: 1/4 inch.
3. Surface Finish: Factory primed.
G. Substrate Joint Tape: 6- or 8-inch wide, coated, glass fiber.
2.08 FLANGED BELLOWS-TYPE ROOF EXPANSION JOINTS
A. Flanged Bellows-Type Roof Expansion Joint: Factory-fabricated, continuous,
waterproof, joint cover consisting of exposed membrane bellows laminated to flexible,
closed-cell support foam, and secured along each edge to 3- to 4-inch wide metal
flange.
1. Basis-of-Design Product: Subject to compliance with requirements, provide
Nystrom, Inc.; EJ-EDF-400-W and EJ-ECF-400 Series, or a comparable product by
one of the following:

JENKS PUBLIC SCHOOLS 10/18/17 HIGH SCHOOL CAMPUS
JENKS, OK ADD. #1 PHASE 3 REMODEL
KKT ARCHITECTS, INC. SBS-MODIFIED BITUMINOUS MEMBRANE ROOFING 075216 - 8
a. Balco, Inc.
b. C/S Group.
c. InPro Corporation (IPC).
d. Johns Manville; a Berkshire Hathaway company.
e. MM Systems Corporation.
f. Watson Bowman Acme Corp.
2. Source Limitations: Obtain flanged bellows-type roof expansion joints approved
by roofing manufacturer and that are part of roofing membrane warranty.
3. Joint Movement Capability: Plus and minus 50 percent of joint size.
4. Bellows: EPDM flexible membrane, nominal 60 mils thick.
5. Flanges: Aluminum, 0.032 inch thick.
6. Configuration: Angle formed to fit curbs, as indicated on Drawings.
7. Corner, Intersection, and Transition Units: Provide factory-fabricated units for
corner and joint intersections and horizontal and vertical transitions including
those to other building expansion joints.
8. Cover Membrane: EPDM flexible membrane, factory laminated to bellows and
covering entire joint assembly and curbs.
a. Color: Black.
9. Accessories: Provide splicing units, adhesives, and other components as
recommended by roof-expansion-joint manufacturer for complete installation.
10. Secondary Seal: Continuous, waterproof membrane within joint and attached to
substrate on sides of joint below the primary bellows assembly.
a. Drain-Tube Assemblies: Equip secondary seal with drain tubes and seals to
direct collected moisture to exterior-wall expansion joint cover.
b. Thermal Insulation: Fill space above secondary seal with manufacturer's
standard, factory-installed mineral-fiber insulation; with maximum flame-
spread and smoke-developed indexes of 25 and 50, respectively, per
ASTM E 84.
B. Materials:
1. Aluminum Sheet: ASTM B 209, mill finish, with temper to suit forming operations
and performance required. Apply manufacturer's standard protective coating
on aluminum surfaces to be placed in contact with cementitious or preservative-
treated wood materials.
2. EPDM Membrane: ASTM D 4637, type standard with manufacturer for
application.
3. Fasteners: Manufacturer's recommended fasteners, suitable for application and
designed to withstand design loads.
a. Exposed Fasteners: Gasketed. Use screws with hex washer heads matching
color of material being fastened.
4. Mineral-Fiber Blanket: ASTM C 665.
2.09 WALKWAYS
A. Walkway Pads: Basis of design to be DynaTred Plus®, by Johns Manville. Reinforced
asphaltic composition pads with slip-resisting mineral-granule surface manufactured as
a traffic pad for foot traffic and acceptable to roofing system manufacturer, 1/3 inch
thick, minimum.
1. Pad Size: 32” x 32”.
2. Granule Color: As selected by Architect.

JENKS PUBLIC SCHOOLS 10/18/17 HIGH SCHOOL CAMPUS
JENKS, OK ADD. #1 PHASE 3 REMODEL
KKT ARCHITECTS, INC. SBS-MODIFIED BITUMINOUS MEMBRANE ROOFING 075216 - 9
PART 3 - EXECUTION
3.01 EXAMINATION
A. Re-roof Preparation: As specified in Section 070150.19 “Preparation for Reroofing.”
B. Examine substrates, areas, and conditions, with Installer present, for compliance with
the following requirements and other conditions affecting performance of roofing
system:
1. Verify that roof openings and penetrations are in place and curbs are set and
braced and that roof drain bodies are securely clamped in place.
2. Verify that wood blocking, curbs, and nailers are securely anchored to roof deck
at penetrations and terminations and that nailers match thicknesses of insulation.
3. Verify that surface plane flatness and fastening of steel roof deck complies with
requirements in Division 5 Section "Steel Decking."
4. Examine joint openings, substrates, and expansion-control joint systems that
interface with roof expansion joints, for suitable conditions where roof expansion
joints will be installed.
5. Verify roof-rated sheathing boards are installed over metal stud parapet walls, in
accordance with roofing manufacturer’s requirements.
6. Verify that minimum concrete drying period recommended by roofing system
manufacturer has passed.
7. Verify that concrete substrate is visibly dry and free of moisture. Test for capillary
moisture by plastic sheet method according to ASTM D 4263.
8. Verify that concrete-curing compounds that impair adhesion of roofing
components to roof deck have been removed.
C. Proceed with installation only after unsatisfactory conditions have been corrected.
3.02 PREPARATION
A. Clean substrate of dust, debris, moisture, and other substances detrimental to roofing
installation according to roofing system manufacturer's written instructions. Remove
sharp projections.
B. Prevent materials from entering and clogging roof drains and conductors and from
spilling or migrating onto surfaces of other construction. Remove roof-drain plugs when
no work is taking place or when rain is forecast.
C. Raise curbs of existing HVAC units (disconnect units by licensed craftsmen, if necessary)
and other equipment indicated to remain, to conform with the following:
1. Modify existing curbs as required to provide a minimum 8" base flashing height
measured from the surface of the roofing membrane to the top of the flashing
membrane.
2. Secure top of flashing and provide metal counterflashing prior to re-installation of
unit.
3. Perimeter nailers shall be elevated to match elevation of installed roof insulation.
D. Immediately remove debris from roof surface.
3.03 INSTALLATION, GENERAL
A. Comply with roofing system manufacturer's written instructions.

JENKS PUBLIC SCHOOLS 10/18/17 HIGH SCHOOL CAMPUS
JENKS, OK ADD. #1 PHASE 3 REMODEL
KKT ARCHITECTS, INC. SBS-MODIFIED BITUMINOUS MEMBRANE ROOFING 075216 - 10
B. Substrate-Joint Penetrations: Prevent roofing asphalt and adhesives from penetrating
substrate joints, entering building, or damaging roofing system components or adjacent
building construction.
3.04 INSULATION INSTALLATION
A. Comply with roofing system manufacturer's written instructions for installing roof
insulation.
B. Cant Strips: Install and secure preformed 45-degree insulation cant strips at junctures of
roofing membrane system with vertical surfaces or angle changes more than
45 degrees.
C. Install tapered insulation under area of roofing to conform to slopes indicated.
D. Install insulation with long joints of insulation in a continuous straight line with end joints
staggered between rows, abutting edges and ends between boards. Fill gaps
exceeding 1/4 inch with insulation. Cut and fit insulation within 1/4 inch of nailers,
projections, and penetrations.
E. Install insulation under area of roofing to achieve required thickness. Where overall
insulation thickness is 2.7 inches or more, install two or more layers with joints of each
succeeding layer staggered from joints of previous layer a minimum of 6 inches in each
direction.
F. Trim surface of insulation where necessary at roof drains so completed surface is flush
and does not restrict flow of water.
G. Install tapered edge strips at perimeter edges of roof that do not terminate at vertical
surfaces.
H. Mechanically Fastened Insulation: Install each layer of insulation and secure to deck
using mechanical fasteners specifically designed and sized for fastening specified
board-type roof insulation to deck type. Fasten insulation to resist uplift pressure at
corners, perimeter, and field of roof.
I. Install cover boards over insulation with long joints in continuous straight lines with end
joints staggered between rows. Offset joints a minimum of 6 inches in each direction
from joints of insulation below. Loosely butt cover boards together and fasten to roof
deck. Tape joints if required by roofing system manufacturer. Fasten cover boards
according to requirements in FM Global's "RoofNav" for specified Windstorm Resistance
Classification.
3.05 ROOFING MEMBRANE INSTALLATION, GENERAL
A. Install roofing membrane system according to roofing system manufacturer's written
instructions and applicable recommendations in ARMA/NRCA's "Quality Control
Guidelines for the Application of Polymer Modified Bitumen Roofing" and as follows:
1. Deck Type: I (insulated) or C (concrete), where indicated.
2. Adhering Method: L (cold-applied adhesive).
3. Base Sheet: One.
4. Number of SBS-Modified Asphalt Sheets: Two.
5. Surfacing Type: M (mineral-granule-surfaced cap sheet).

JENKS PUBLIC SCHOOLS 10/18/17 HIGH SCHOOL CAMPUS
JENKS, OK ADD. #1 PHASE 3 REMODEL
KKT ARCHITECTS, INC. SBS-MODIFIED BITUMINOUS MEMBRANE ROOFING 075216 - 11
B. Start installation of roofing in presence of manufacturer's technical personnel.
C. Where roof slope exceeds 1/2 inch per 12 inches, install roofing membrane sheets
parallel with slope.
D. Cooperate with testing agencies engaged or required to perform services for installing
roofing system.
E. Coordinate installation of roofing system so insulation and other components of the
roofing membrane system not permanently exposed are not subjected to precipitation
or left uncovered at the end of the workday or when rain is forecast.
1. Complete terminations and base flashings and provide temporary seals to
prevent water from entering completed sections of roofing system.
2. Remove and discard temporary seals before beginning work on adjoining
roofing.
F. Substrate-Joint Penetrations: Prevent roofing adhesives from penetrating substrate
joints, entering building, or damaging roofing system components or adjacent building
construction.
3.06 BASE-PLY SHEET INSTALLATION
A. Install base-ply sheets according to roofing system manufacturer's written instructions
starting at low point of roofing system. Align base-ply sheets without stretching. Extend
sheets over and terminate beyond cants.
3.07 SBS-MODIFIED BITUMINOUS MEMBRANE INSTALLATION
A. Install modified bituminous roofing ply sheets and cap sheet according to roofing
manufacturer's written instructions, starting at low point of roofing system. Extend
roofing membrane sheets over and terminate beyond cants, installing as follows:
1. Adhere to substrate in cold-applied adhesive.
2. Unroll roofing membrane sheets and allow them to relax for minimum time period
required by manufacturer.
B. Laps: Accurately align roofing membrane sheets, without stretching, and maintain
uniform side and end laps. Stagger end laps. Completely bond and seal laps, leaving
no voids. Repair tears and voids in laps and lapped seams not completely sealed.
C. Install roofing membrane sheets so side and end laps shed water.
3.08 FLASHING AND STRIPPING INSTALLATION
A. Install base flashing over cant strips and other sloped and vertical surfaces, at roof
edges, and at penetrations through roof; secure to substrates according to roofing
system manufacturer's written instructions, and as follows:
1. Backer Sheet Application: Mechanically fasten backer sheet to walls or
parapets. Adhere backer sheet over roofing membrane at cants in cold-applied
adhesive.
2. Flashing-Sheet Application: Adhere flashing sheet to substrate in cold-applied
adhesive at rate required by roofing system manufacturer.
B. Extend base flashing up walls or parapets a minimum of 8 inches above roofing
membrane and 4 inches onto field of roofing membrane.

JENKS PUBLIC SCHOOLS 10/18/17 HIGH SCHOOL CAMPUS
JENKS, OK ADD. #1 PHASE 3 REMODEL
KKT ARCHITECTS, INC. SBS-MODIFIED BITUMINOUS MEMBRANE ROOFING 075216 - 12
C. Mechanically fasten top of base flashing securely at terminations and perimeter of
roofing.
D. Install roofing membrane cap-sheet stripping where metal flanges and edgings are set
on membrane roofing according to roofing system manufacturer's written instructions.
E. Roof Drains: Set 30-by-30-inch-square metal flashing in bed of asphalt roofing cement
on completed roofing membrane. Cover metal flashing with roofing membrane cap-
sheet stripping and extend a minimum of 6 inches beyond edge of metal flashing onto
field of roofing membrane. Clamp roofing membrane, metal flashing, and stripping
into roof-drain clamping ring. Install stripping according to roofing system
manufacturer's written instructions.
3.09 ROOF EXPANSION JOINT INSTALLATION
A. General: Comply with manufacturer's written instructions for handling and installing roof
expansion joints.
1. Anchor roof expansion joints securely in place, with provisions for required
movement. Use fasteners, protective coatings, sealants, and miscellaneous items
as required to complete roof expansion joints.
2. Install roof expansion joints true to line and elevation; and without warping, jogs in
alignment, buckling, or tool marks.
3. Provide for linear thermal expansion of roof expansion joint materials.
4. Provide uniform profile of roof expansion joint throughout its length; do not stretch
or squeeze membranes.
5. Provide uniform, neat seams.
6. Install roof expansion joints to fit substrates and to result in watertight
performance.
B. Transitions to Other Expansion-Control Joint Assemblies: Coordinate installation of roof
expansion joints with other exterior expansion-control joint assemblies specified in
Section 07 9500 "Expansion Control" to result in watertight performance. Install factory-
fabricated units at transitions between roof expansion joints and exterior expansion-
control joint systems.
C. Splices: Splice roof expansion joints to provide continuous, uninterrupted, and
waterproof joints. Install waterproof splices and prefabricated end dams to prevent
leakage of secondary-seal membrane.
3.10 WALKWAY INSTALLATION
A. Walkway Pads: Install walkway pads using units of size indicated or, if not indicated, of
manufacturer's standard size according to walkway pad manufacturer's written
instructions. Set walkway pads in cold-applied adhesive.
3.11 FIELD QUALITY CONTROL
A. Testing Agency: Owner will engage a qualified testing agency to inspect substrate
conditions, surface preparation, membrane application, flashings, protection, and
drainage components, and to furnish reports to Architect.
B. Final Roof Inspection: Arrange for roofing system manufacturer's technical personnel to
inspect roofing installation on completion. Notify Architect and Owner 48 hours in
advance of date and time of inspection.

JENKS PUBLIC SCHOOLS 10/18/17 HIGH SCHOOL CAMPUS
JENKS, OK ADD. #1 PHASE 3 REMODEL
KKT ARCHITECTS, INC. SBS-MODIFIED BITUMINOUS MEMBRANE ROOFING 075216 - 13
C. Roofing system will be considered defective if it does not pass inspections. Additional
inspecting, at Contractor's expense, will be performed to determine if replaced or
additional work complies with specified requirements.
3.12 PROTECTING AND CLEANING
A. Protect roofing system from damage and wear during remainder of construction
period. When remaining construction will not affect or endanger roofing, inspect
roofing for deterioration and damage, describing its nature and extent in a written
report, with copies to Architect and Owner.
B. Correct deficiencies in or remove roofing system that does not comply with
requirements, repair substrates, and repair or reinstall roofing system to a condition free
of damage and deterioration at time of Substantial Completion and according to
warranty requirements.
C. Clean overspray and spillage from adjacent construction using cleaning agents and
procedures recommended by manufacturer of affected construction.

JENKS PUBLIC SCHOOLS 10/18/17 HIGH SCHOOL CAMPUS
JENKS, OK ADD. #1 PHASE 3 REMODEL
KKT ARCHITECTS, INC. SBS-MODIFIED BITUMINOUS MEMBRANE ROOFING 075216 - 14
3.13 ROOFING INSTALLER'S WARRANTY
A. WHEREAS _______________________________ of ___________________________, herein called
the "Roofing Installer," has performed roofing and associated work ("work") on the
following project:
1. Owner: ______________________________________________________________.
2. Address: _____________________________________________________________.
3. Building Name/Type: _________________________________________________.
4. Address: _____________________________________________________________.
5. Area of Work: ________________________________________________________.
6. Acceptance Date: _________________.
7. Warranty Period: ___________________.
8. Expiration Date: ____________________.
B. AND WHEREAS Roofing Installer has contracted (either directly with Owner or indirectly
as a subcontractor) to warrant said work against leaks and faulty or defective materials
and workmanship for designated Warranty Period,
C. NOW THEREFORE Roofing Installer hereby warrants, subject to terms and conditions
herein set forth, that during Warranty Period he will, at his own cost and expense, make
or cause to be made such repairs to or replacements of said work as are necessary to
correct faulty and defective work and as are necessary to maintain said work in a
watertight condition.
D. This Warranty is made subject to the following terms and conditions:
1. Specifically excluded from this Warranty are damages to work and other parts of
the building, and to building contents, caused by:
a. lightning;
b. peak gust wind speed exceeding 74 mph;
c. fire;
d. failure of roofing system substrate, including cracking, settlement, excessive
deflection, deterioration, and decomposition;
e. faulty construction of parapet walls, copings, chimneys, skylights, vents,
equipment supports, and other edge conditions and penetrations of the
work;
f. vapor condensation on bottom of roofing; and
g. activity on roofing by others, including construction contractors,
maintenance personnel, other persons, and animals, whether authorized or
unauthorized by Owner.
2. When work has been damaged by any of foregoing causes, Warranty shall be
null and void until such damage has been repaired by Roofing Installer and until
cost and expense thereof have been paid by Owner or by another responsible
party so designated.
3. Roofing Installer is responsible for damage to work covered by this Warranty but is
not liable for consequential damages to building or building contents resulting
from leaks or faults or defects of work.
4. During Warranty Period, if Owner allows alteration of work by anyone other than
Roofing Installer, including cutting, patching, and maintenance in connection
with penetrations, attachment of other work, and positioning of anything on roof,

JENKS PUBLIC SCHOOLS 10/18/17 HIGH SCHOOL CAMPUS
JENKS, OK ADD. #1 PHASE 3 REMODEL
KKT ARCHITECTS, INC. SBS-MODIFIED BITUMINOUS MEMBRANE ROOFING 075216 - 15
this Warranty shall become null and void on date of said alterations, but only to
the extent said alterations affect work covered by this Warranty. If Owner
engages Roofing Installer to perform said alterations, Warranty shall not become
null and void unless Roofing Installer, before starting said work, shall have notified
Owner in writing, showing reasonable cause for claim, that said alterations would
likely damage or deteriorate work, thereby reasonably justifying a limitation or
termination of this Warranty.
5. During Warranty Period, if original use of roof is changed and it becomes used for,
but was not originally specified for, a promenade, work deck, spray-cooled
surface, flooded basin, or other use or service more severe than originally
specified, this Warranty shall become null and void on date of said change, but
only to the extent said change affects work covered by this Warranty.
6. Owner shall promptly notify Roofing Installer of observed, known, or suspected
leaks, defects, or deterioration and shall afford reasonable opportunity for
Roofing Installer to inspect work and to examine evidence of such leaks, defects,
or deterioration.
7. This Warranty is recognized to be the only warranty of Roofing Installer on said
work and shall not operate to restrict or cut off Owner from other remedies and
resources lawfully available to Owner in cases of roofing failure. Specifically, this
Warranty shall not operate to relieve Roofing Installer of responsibility for
performance of original work according to requirements of the Contract
Documents, regardless of whether Contract was a contract directly with Owner
or a subcontract with Owner's General Contractor.
E. IN WITNESS THEREOF, this instrument has been duly executed this ___________ day of
___________________, ________________.
1. Authorized Signature: _______________________________________.
2. Name: _____________________________________________________.
3. Title: _______________________________________________________.
END OF SECTION 075216

JENKS PUBLIC SCHOOLS 10/18/17 HIGH SCHOOL CAMPUS
JENKS, OK ADD. #1 PHASE 3 REMODEL
KKT ARCHITECTS, INC. GLAZING 088000 - 1
SECTION 088000
GLAZING
PART 1 - GENERAL
1.01 RELATED DOCUMENTS
A. Drawings and general provisions of the Contract, including other Division 01
Specification Sections, apply to this Section.
1.02 SUMMARY
A. Section includes:
1. Glass for windows, doors, and interior borrowed lites.
2. Laminated, metal skinned spandrel panels.
3. Glazing gaskets and accessories.
4. Sliding window hardware.
1.03 DEFINITIONS
A. Glass Manufacturers: Firms that produce primary glass, fabricated glass, or both, as
defined in referenced glazing publications.
B. Glass Thicknesses: Indicated by thickness designations in millimeters according to
ASTM C 1036.
C. IBC: International Building Code.
D. Interspace: Space between lites of an insulating-glass unit.
1.04 COORDINATION
A. Coordinate glazing channel dimensions to provide necessary bite on glass, minimum
edge and face clearances, and adequate sealant thicknesses, with reasonable
tolerances.
1.05 PREINSTALLATION MEETINGS
A. Preinstallation Conference: Conduct conference at Project site.
1. Review and finalize construction schedule and verify availability of materials,
Installer's personnel, equipment, and facilities needed to make progress and
avoid delays.
2. Review temporary protection requirements for glazing during and after
installation.
1.06 ACTION SUBMITTALS
A. Product Data: For each type of product.
B. Samples: For each type of the following products; 12 inches square.
1. Coated glass.
2. Insulating glass.
3. Laminated, metal skinned spandrel panels.

JENKS PUBLIC SCHOOLS 10/18/17 HIGH SCHOOL CAMPUS
JENKS, OK ADD. #1 PHASE 3 REMODEL
KKT ARCHITECTS, INC. GLAZING 088000 - 2
C. Glazing Schedule: List glass types and thicknesses for each size opening and location.
Use same designations indicated on Drawings.
1.07 INFORMATIONAL SUBMITTALS
A. Qualification Data: For Installer and manufacturers of insulating-glass units with sputter-
coated, low-E coatings.
B. Sample Warranties: For special warranties.
1.08 CLOSEOUT SUBMITTALS
A. Maintenance Data: For each type of film overlay to include in maintenance manuals.
1.09 QUALITY ASSURANCE
A. Manufacturer Qualifications for Insulating-Glass Units with Sputter-Coated, Low-E
Coatings: A qualified insulating-glass manufacturer who is approved by coated-glass
manufacturer.
B. Installer Qualifications: A qualified installer who employs glass installers for this Project
who are certified under the National Glass Association's Certified Glass Installer
Program.
C. Mockups: Build mockups to demonstrate aesthetic effects and to set quality standards
for materials and execution. Subject to compliance with requirements, approved
mockups may become part of the completed Work if undisturbed at time of Substantial
Completion.
1.10 PRECONSTRUCTION TESTING
1.11 DELIVERY, STORAGE, AND HANDLING
A. Protect glass and glazing materials according to manufacturer's written instructions.
Prevent damage to glass and glazing materials from condensation, temperature
changes, direct exposure to sun, or other causes.
1.12 FIELD CONDITIONS
A. Environmental Limitations: Do not proceed with glazing when ambient and substrate
temperature conditions are outside limits permitted by glazing material manufacturers
and when glazing channel substrates are wet from rain, frost, condensation, or other
causes.
1.13 WARRANTY
A. Manufacturer's Special Warranty for Coated-Glass Products: Manufacturer agrees to
replace coated-glass units that deteriorate within specified warranty period.
Deterioration of coated glass is defined as defects developed from normal use that are
not attributed to glass breakage or to maintaining and cleaning coated glass contrary
to manufacturer's written instructions. Defects include peeling, cracking, and other
indications of deterioration in coating.
1. Warranty Period: 10 years from date of Substantial Completion.

JENKS PUBLIC SCHOOLS 10/18/17 HIGH SCHOOL CAMPUS
JENKS, OK ADD. #1 PHASE 3 REMODEL
KKT ARCHITECTS, INC. GLAZING 088000 - 3
B. Manufacturer's Special Warranty for Insulating Glass: Manufacturer agrees to replace
insulating-glass units that deteriorate within specified warranty period. Deterioration of
insulating glass is defined as failure of hermetic seal under normal use that is not
attributed to glass breakage or to maintaining and cleaning insulating glass contrary to
manufacturer's written instructions. Evidence of failure is the obstruction of vision by
dust, moisture, or film on interior surfaces of glass.
1. Warranty Period: 10 years from date of Substantial Completion.
PART 2 - PRODUCTS
2.01 GLASS MANUFACTURERS
A. Basis-of-Design Product: Subject to compliance with requirements, provide products by
Vitro, or a comparable product by one of the following:
1. AGC Glass Company North America, Inc.
2. Guardian Glass; SunGuard.
3. Oldcastle BuildingEnvelope™.
4. Pilkington North America.
5. Viracon, Inc.
B. Source Limitations for Glass: Obtain from single source from single manufacturer for
each glass type.
C. Source Limitations for Glazing Accessories: Obtain from single source from single
manufacturer for each product and installation method.
2.02 PERFORMANCE REQUIREMENTS
A. General: Installed glazing systems shall withstand normal thermal movement and wind
and impact loads (where applicable) without failure, including loss or glass breakage
attributable to the following: defective manufacture, fabrication, or installation; failure
of sealants or gaskets to remain watertight and airtight; deterioration of glazing
materials; or other defects in construction.
B. Delegated Design: Engage a qualified professional engineer, as defined in
Section 014000 "Quality Requirements," to design glazing.
C. Structural Performance: Glazing shall withstand the following design loads within limits
and under conditions indicated determined according to the IBC and ASTM E 1300.
1. Design Procedure for Glass: ASTM E 1300 and ICC's International Building Code.
2. Design Wind Pressures: As indicated on Drawings.
3. Maximum Lateral Deflection: For glass supported on all four edges, limit center-of-
glass deflection at design wind pressure to not more than 1/50 times the short-side
length or 1 inch, whichever is less.
4. Differential Shading: Design glass to resist thermal stresses induced by differential
shading within individual glass lites.
D. Safety Glazing: Where safety glazing is indicated, provide glazing that complies with
16 CFR 1201, Category II.
E. Thermal and Optical Performance Properties: Provide glass with performance
properties specified, as indicated in manufacturer's published test data, based on
procedures indicated below:
1. For monolithic-glass lites, properties are based on units with lites 6 mm thick.

JENKS PUBLIC SCHOOLS 10/18/17 HIGH SCHOOL CAMPUS
JENKS, OK ADD. #1 PHASE 3 REMODEL
KKT ARCHITECTS, INC. GLAZING 088000 - 4
2. For insulating-glass units, properties are based on units of thickness indicated for
overall unit and for each lite.
3. U-Factors: Center-of-glazing values, according to NFRC 100 and based on LBL's
WINDOW 5.2 computer program, expressed as Btu/sq. ft. x h x deg F.
4. Solar Heat-Gain Coefficient and Visible Transmittance: Center-of-glazing values,
according to NFRC 200 and based on LBL's WINDOW 5.2 computer program.
2.03 GLASS PRODUCTS, GENERAL
A. Glazing Publications: Comply with published recommendations of glass product
manufacturers and organizations below unless more stringent requirements are
indicated. See these publications for glazing terms not otherwise defined in this Section
or in referenced standards.
1. GANA Publications: "Glazing Manual."
2. IGMA Publication for Insulating Glass: SIGMA TM-3000, "North American Glazing
Guidelines for Sealed Insulating Glass Units for Commercial and Residential Use."
B. Safety Glazing Labeling: Where safety glazing is indicated, permanently mark glazing
with certification label of the SGCC or another certification agency acceptable to
authorities having jurisdiction. Label shall indicate manufacturer's name, type of glass,
thickness, and safety glazing standard with which glass complies.
C. Insulating-Glass Certification Program: Permanently marked either on spacers or on at
least one component lite of units with appropriate certification label of IGCC.
D. Thickness: Where glass thickness is indicated, it is a minimum. Provide glass that
complies with performance requirements and is not less than the thickness indicated.
1. Minimum Glass Thickness for Exterior Lites: 6 mm.
E. Strength: Where annealed float glass is indicated, provide heat-strengthened float
glass, or fully tempered float glass as needed to comply with "Performance
Requirements" Article. Where heat-strengthened float glass is indicated, provide heat-
strengthened float glass or fully tempered float glass as needed to comply with
"Performance Requirements" Article. Where fully tempered float glass is indicated,
provide fully tempered float glass.
2.04 GLASS PRODUCTS
A. Fully Tempered Glass: ASTM C 1048, Kind FT (fully tempered), Condition A (uncoated)
unless otherwise indicated, Type I, Class 1 (clear), Quality-Q3.
1. Fabrication Process: By horizontal (roller-hearth) process with roll-wave distortion
parallel to bottom edge of glass as installed unless otherwise indicated.
B. Heat-Strengthened Glass: ASTM C 1048, Kind HS (heat strengthened), Type I,
Condition A (uncoated) unless otherwise indicated, Type I, Class 1 (clear), Quality-Q3.
1. Fabrication Process: By horizontal (roller-hearth) process with roll-wave distortion
parallel to bottom edge of glass as installed unless otherwise indicated.
2.05 INSULATING GLASS
A. Insulating-Glass Units: Factory-assembled units consisting of sealed lites of glass
separated by a dehydrated interspace, qualified according to ASTM E 2190.
1. Sealing System: Dual seal, with manufacturer's standard primary and secondary
sealants.

JENKS PUBLIC SCHOOLS 10/18/17 HIGH SCHOOL CAMPUS
JENKS, OK ADD. #1 PHASE 3 REMODEL
KKT ARCHITECTS, INC. GLAZING 088000 - 5
2. Perimeter Spacer: Manufacturer's standard spacer material and construction.
3. Desiccant: Molecular sieve or silica gel, or a blend of both.
2.06 LAMINATED, METAL SKINNED SPANDREL PANELS
A. Panels - Laminated:
1. Basis-of-Design Product: Subject to compliance with requirements, provide metal
faced Mapes-R panels, by Mapes Industries, Inc.; Lincoln, NE; 800.228.2391;
www.mapespanels.com, or comparable product approved by Architect.
2. Finishes:
a. Exterior: Bronze Anodized Class 1, to match storefront framing.
b. Interior: Porcelain on Steel; color as selected by Architect from
manufacturer’s full range.
3. Panel Fabrication:
a. Exterior and Interior Substrate: Tempered Hardboard.
b. Core: Isocyanurate.
c. Tolerances: 0.8% of panels dimension length and width; +/- 1/16 inch.
d. Panel Thickness: 1 inc.
e. R-Value: 6.33.
f. Panel surfaces shall be free from defects prior to installation.
2.07 GLAZING TAPES
A. Back-Bedding Mastic Glazing Tapes: Preformed, butyl-based, 100 percent solids
elastomeric tape; nonstaining and nonmigrating in contact with nonporous surfaces;
with or without spacer rod as recommended in writing by tape and glass
manufacturers for application indicated; and complying with ASTM C 1281 and
AAMA 800 for products indicated below:
1. AAMA 806.3 tape, for glazing applications in which tape is subject to continuous
pressure.
2. AAMA 807.3 tape, for glazing applications in which tape is not subject to
continuous pressure.
2.08 MISCELLANEOUS GLAZING MATERIALS
A. General: Provide products of material, size, and shape complying with referenced
glazing standard, with requirements of manufacturers of glass and other glazing
materials for application indicated, and with a proven record of compatibility with
surfaces contacted in installation.
B. Cleaners, Primers, and Sealers: Types recommended by sealant or gasket
manufacturer.
C. Setting Blocks: Elastomeric material with a Shore, Type A durometer hardness of 85, plus
or minus 5.
D. Spacers: Elastomeric blocks or continuous extrusions of hardness required by glass
manufacturer to maintain glass lites in place for installation indicated.
E. Edge Blocks: Elastomeric material of hardness needed to limit glass lateral movement
(side walking).

JENKS PUBLIC SCHOOLS 10/18/17 HIGH SCHOOL CAMPUS
JENKS, OK ADD. #1 PHASE 3 REMODEL
KKT ARCHITECTS, INC. GLAZING 088000 - 6
2.09 SLIDING WINDOW HARDWARE
A. Fitting Set for Sliding Glass Panels: Provide CRL Satin Anodized Deluxe Track Assembly
D603 Upper and D602 Lower Track with D601 Insert Rails and Nylon Wheels, by CR
Laurence Co., Inc.; Archdale, NC; 800-421-6144, or approved equivalent. Set will
include a double running rail, D603, at top of glass doors, and the following fittings:
1. D652 Top Guides.
2. D610 Shoe Extrusions.
3. Mounting screws and suspension.
4. Stoppers with retaining spring.
5. D603 Double guide for bottom of glass window panes.
B. Install fittings in hollow metal frame in accordance with manufacturer’s instructions.
2.10 FABRICATION OF GLAZING UNITS
A. Fabricate glazing units in sizes required to fit openings indicated for Project, with edge
and face clearances, edge and surface conditions, and bite complying with written
instructions of product manufacturer and referenced glazing publications, to comply
with system performance requirements.
1. Allow for thermal movements from ambient and surface temperature changes
acting on glass framing members and glazing components.
a. Temperature Change: 120 deg F, ambient; 180 deg F, material surfaces.
PART 3 - EXECUTION
3.01 EXAMINATION
A. Examine framing, glazing channels, and stops, with Installer present, for compliance
with the following:
1. Manufacturing and installation tolerances, including those for size, squareness,
and offsets at corners.
2. Presence and functioning of weep systems.
3. Minimum required face and edge clearances.
4. Effective sealing between joints of glass-framing members.
B. Proceed with installation only after unsatisfactory conditions have been corrected.
3.02 PREPARATION
A. Clean glazing channels and other framing members receiving glass immediately before
glazing. Remove coatings not firmly bonded to substrates.
B. Examine glazing units to locate exterior and interior surfaces. Label or mark units as
needed so that exterior and interior surfaces are readily identifiable. Do not use
materials that leave visible marks in the completed Work.
3.03 GLAZING, GENERAL
A. Comply with combined written instructions of manufacturers of glass, sealants, gaskets,
and other glazing materials, unless more stringent requirements are indicated, including
those in referenced glazing publications.

JENKS PUBLIC SCHOOLS 10/18/17 HIGH SCHOOL CAMPUS
JENKS, OK ADD. #1 PHASE 3 REMODEL
KKT ARCHITECTS, INC. GLAZING 088000 - 7
B. Protect glass edges from damage during handling and installation. Remove damaged
glass from Project site and legally dispose of off Project site. Damaged glass includes
glass with edge damage or other imperfections that, when installed, could weaken
glass, impair performance, or impair appearance.
C. Apply primers to joint surfaces where required for adhesion of sealants, as determined
by preconstruction testing.
D. Install setting blocks in sill rabbets, sized and located to comply with referenced glazing
publications, unless otherwise required by glass manufacturer. Set blocks in thin course
of compatible sealant suitable for heel bead.
E. Do not exceed edge pressures stipulated by glass manufacturers for installing glass lites.
F. Provide spacers for glass lites where length plus width is larger than 50 inches.
1. Locate spacers directly opposite each other on both inside and outside faces of
glass. Install correct size and spacing to preserve required face clearances, unless
gaskets and glazing tapes are used that have demonstrated ability to maintain
required face clearances and to comply with system performance requirements.
2. Provide 1/8-inch minimum bite of spacers on glass and use thickness equal to
sealant width. With glazing tape, use thickness slightly less than final compressed
thickness of tape.
G. Provide edge blocking where indicated or needed to prevent glass lites from moving
sideways in glazing channel, as recommended in writing by glass manufacturer and
according to requirements in referenced glazing publications.
H. Set glass lites in each series with uniform pattern, draw, bow, and similar characteristics.
I. Set glass lites with proper orientation so that coatings face exterior or interior as
specified.
J. Where wedge-shaped gaskets are driven into one side of channel to pressurize sealant
or gasket on opposite side, provide adequate anchorage so gasket cannot walk out
when installation is subjected to movement.
K. Square cut wedge-shaped gaskets at corners and install gaskets in a manner
recommended by gasket manufacturer to prevent corners from pulling away; seal
corner joints and butt joints with sealant recommended by gasket manufacturer.
3.04 TAPE GLAZING
A. Position tapes on fixed stops so that, when compressed by glass, their exposed edges
are flush with or protrude slightly above sightline of stops.
B. Install tapes continuously, but not necessarily in one continuous length. Do not stretch
tapes to make them fit opening.
C. Cover vertical framing joints by applying tapes to heads and sills first, then to jambs.
Cover horizontal framing joints by applying tapes to jambs, then to heads and sills.
D. Place joints in tapes at corners of opening with adjoining lengths butted together, not
lapped. Seal joints in tapes with compatible sealant approved by tape manufacturer.

JENKS PUBLIC SCHOOLS 10/18/17 HIGH SCHOOL CAMPUS
JENKS, OK ADD. #1 PHASE 3 REMODEL
KKT ARCHITECTS, INC. GLAZING 088000 - 8
E. Do not remove release paper from tape until right before each glazing unit is installed.
F. Center glass lites in openings on setting blocks, and press firmly against tape by inserting
dense compression gaskets formed and installed to lock in place against faces of
removable stops. Start gasket applications at corners and work toward centers of
openings.
3.05 GASKET GLAZING (DRY)
A. Cut compression gaskets to lengths recommended by gasket manufacturer to fit
openings exactly, with allowance for stretch during installation.
B. Insert soft compression gasket between glass and frame or fixed stop so it is securely in
place with joints miter cut and bonded together at corners.
C. Installation with Drive-in Wedge Gaskets: Center glass lites in openings on setting blocks,
and press firmly against soft compression gasket by inserting dense compression gaskets
formed and installed to lock in place against faces of removable stops. Start gasket
applications at corners and work toward centers of openings. Compress gaskets to
produce a weathertight seal without developing bending stresses in glass. Seal gasket
joints with sealant recommended by gasket manufacturer.
D. Installation with Pressure-Glazing Stops: Center glass lites in openings on setting blocks,
and press firmly against soft compression gasket. Install dense compression gaskets and
pressure-glazing stops, applying pressure uniformly to compression gaskets. Compress
gaskets to produce a weathertight seal without developing bending stresses in glass.
Seal gasket joints with sealant recommended by gasket manufacturer.
E. Install gaskets so they protrude past face of glazing stops.
3.06 CLEANING AND PROTECTION
A. Immediately after installation remove nonpermanent labels and clean surfaces.
B. Protect glass and panels from contact with contaminating substances resulting from
construction operations. Examine glass surfaces adjacent to or below exterior concrete
and other masonry surfaces at frequent intervals during construction, but not less than
once a month, for buildup of dirt, scum, alkaline deposits, or stains. If, despite such
protection, contaminating substances do come into contact with glass, remove
substances immediately as recommended in writing by glass manufacturer. Remove
and replace glass that cannot be cleaned without damage to coatings.
C. Remove and replace glass that is damaged during construction period.
D. Wash glass on both exposed surfaces not more than four days before date scheduled
for inspections that establish date of Substantial Completion. Wash glass as
recommended in writing by glass manufacturer.
3.07 GLASS SCHEDULE
A. Glass Type (GL1): Low-E-coated, clear insulating glass.
1. Basis-of-Design Product: PPG 6mm Solarban® 70XL(2); Air 1/2"; Clear 6mm.
2. Overall Unit Thickness: 1 inch.
3. Minimum Thickness of Each Glass Lite: 6 mm.

JENKS PUBLIC SCHOOLS 10/18/17 HIGH SCHOOL CAMPUS
JENKS, OK ADD. #1 PHASE 3 REMODEL
KKT ARCHITECTS, INC. GLAZING 088000 - 9
4. Outdoor Lite: Fully tempered float glass.
5. Interspace Content: Air.
6. Indoor Lite: Fully tempered float glass.
7. Low-E Coating: Sputtered on second surface.
8. Winter Nighttime U-Factor: 0.28 maximum.
9. Visible Light Transmittance: 64 percent minimum.
10. Solar Heat Gain Coefficient: 0.27 maximum.
11. Safety glazing required.
B. Glass Type (GL2): Clear fully tempered float glass.
1. Minimum Thickness: 6 mm.
2. Safety glazing required.
C. Glass Type (GL3): Metal skinned, insulated spandrel panel.
1. Minimum Thickness: 12 mm.
END OF SECTION 088000

JENKS PUBLIC SCHOOLS 10/18/17 HIGH SCHOOL CAMPUS
JENKS, OK ADD. #1 PHASE 3 REMODEL
KKT ARCHITECTS, INC. RESINOUS FLOORING 096723 - 1
SECTION 096723
RESINOUS FLOORING
PART 1 - GENERAL
1.01 RELATED DOCUMENTS
A. Drawings and general provisions of the Contract, including General and
Supplementary Conditions and Division 01 Specification Sections, apply to this Section.
1.02 SUMMARY
A. Section includes resinous flooring systems.
1.03 PREINSTALLATION MEETINGS
A. Preinstallation Conference: Conduct conference at Project site.
1.04 ACTION SUBMITTALS
A. Product Data: For each type of product. Include manufacturer's technical data,
application instructions, and recommendations for each resinous flooring component
required. For flooring products, indicating compliance with requirements for low-
emitting materials.
1.05 CLOSEOUT SUBMITTALS
A. Maintenance Data: For resinous flooring to include in maintenance manuals.
1.06 QUALITY ASSURANCE
A. Engage an installer who is certified in writing by resinous flooring manufacturer as
qualified to apply resinous flooring systems indicated.
B. Mockups: Build mockups to verify selections made under Sample submittals and to
demonstrate aesthetic effects and set quality standards for materials and execution.
1. Apply full-thickness mockups on 64 square feet floor area selected by Architect.
2. Simulate finished lighting conditions for Architect's review of mockups.
3. Approval of mockups does not constitute approval of deviations from the
Contract Documents contained in mockups unless Architect specifically
approves such deviations in writing.
4. Subject to compliance with requirements, approved mockups may become part
of the completed Work if undisturbed at time of Substantial Completion.
1.07 DELIVERY, STORAGE, AND HANDLING
A. Deliver materials in original packages and containers, with seals unbroken, bearing
manufacturer's labels indicating brand name and directions for storage and mixing with
other components.

JENKS PUBLIC SCHOOLS 10/18/17 HIGH SCHOOL CAMPUS
JENKS, OK ADD. #1 PHASE 3 REMODEL
KKT ARCHITECTS, INC. RESINOUS FLOORING 096723 - 2
1.08 FIELD CONDITIONS
A. Environmental Limitations: Comply with resinous flooring manufacturer's written
instructions for substrate temperature, ambient temperature, moisture, ventilation, and
other conditions affecting resinous flooring application.
B. Lighting: Provide permanent lighting or, if permanent lighting is not in place, simulate
permanent lighting conditions during resinous flooring application.
C. Close spaces to traffic during resinous flooring application and for 24 hours after
application unless manufacturer recommends a longer period.
PART 2 - PRODUCTS
2.01 PERFORMANCE REQUIREMENTS
A. Flooring products shall comply with the requirements of the California Department of
Public Health's "Standard Method for the Testing and Evaluation of Volatile Organic
Chemical Emissions from Indoor Sources Using Environmental Chambers."
Formaldehyde emissions shall not exceed 16.5 mcg/cu. m or 13.5 ppb, whichever is less.
B. Flammability: Self-extinguishing according to ASTM D 635.
2.02 MANUFACTURERS
A. Source Limitations: Obtain primary resinous flooring materials, including primers, resins,
hardening agents, grouting coats, and topcoats, from single source from single
manufacturer. Obtain secondary materials, including patching and fill material, joint
sealant, and repair materials, of type and from manufacturer recommended in writing
by manufacturer of primary materials.
2.03 RESINOUS FLOORING (RF1)
A. Resinous Flooring System: Abrasion-, impact-, and chemical-resistant, aggregate-filled,
and resin-based monolithic floor surfacing designed to produce a seamless floor and
integral cove base.
1. Basis-of-Design Product: Subject to compliance with requirements, provide
Flooring System indicated on Drawings, by Dur-A-Flex, Inc.; 877.251.5418;
www.dur-a-flex.com, or a comparable system, as follows.
a. Duraflex, Inc.; DUR-A-CHIP System.
b. Elite Crete Systems; HERMETIC™ Flake Floor.
c. Sika Corporation; Flooring; Sikafloor DecoFlake Double Broadcast System.
B. System Characteristics:
1. Color and Pattern: As indicated by product designation on the Drawings and
approved by Architect from mockup.
2. Wearing Surface: Manufacturer's standard wearing surface.
3. Overall System Thickness: 3/16 - 1/4 inch, minimum.
4. Federal Agency Approvals: Meets ADA, USDA, FDA, OSHA, AND CFIA
Requirements.
C. Primer: Type recommended by resinous flooring manufacturer for substrate and resinous
flooring system indicated.

JENKS PUBLIC SCHOOLS 10/18/17 HIGH SCHOOL CAMPUS
JENKS, OK ADD. #1 PHASE 3 REMODEL
KKT ARCHITECTS, INC. RESINOUS FLOORING 096723 - 3
D. Self-Leveling Material: Resinous product of or approved by resinous flooring
manufacturer and recommended by manufacturer for application indicated.
E. Topcoat: Sealing or finish coats.
F. System Physical Properties: Provide resinous flooring system with the following minimum
physical property requirements when tested according to test methods indicated:
1. Compressive Strength: 6,000 minimum according to ASTM D 695.
2. Tensile Strength: 2175 psi minimum according to ASTM D 638.
PART 3 - EXECUTION
3.01 EXAMINATION
A. Examine substrates, areas and conditions, with Applicator present, for compliance with
requirements for maximum moisture content, installation tolerances and other
conditions affecting flooring performance. Verify that substrates and conditions are
satisfactory for flooring installation and comply with requirements specified.
3.02 PREPARATION
A. Prepare and clean substrates according to resinous flooring manufacturer's written
instructions for substrate indicated. Provide clean, dry substrate for resinous flooring
application.
B. Concrete Substrates: Provide sound concrete surfaces free of laitance, glaze,
efflorescence, curing compounds, form-release agents, dust, dirt, grease, oil, and other
contaminants incompatible with resinous flooring.
1. Roughen concrete substrates as follows:
a. Shot-blast surfaces with an apparatus that abrades the concrete surface,
contains the dispensed shot within the apparatus, and recirculates the shot
by vacuum pickup.
2. Repair damaged and deteriorated concrete according to resinous flooring
manufacturer's written instructions.
3. Verify that concrete substrates are dry and moisture-vapor emissions are within
acceptable levels according to manufacturer's written instructions.
a. Anhydrous Calcium Chloride Test: ASTM F 1869. Proceed with application of
resinous flooring only after substrates have maximum moisture-vapor-
emission rate of 3 lb of water/1000 sq. ft. of slab area in 24 hours.
b. Plastic Sheet Test: ASTM D 4263. Proceed with application only after testing
indicates absence of moisture in substrates.
c. Relative Humidity Test: Use in situ probes, ASTM F 2170. Proceed with
installation only after substrates have a maximum 75 percent relative
humidity level measurement.
4. Alkalinity and Adhesion Testing: Verify that concrete substrates have pH within
acceptable range. Perform tests recommended by manufacturer. Proceed with
application only after substrates pass testing.
C. Patching and Filling: Use self-leveling material to fill holes and depressions in substrates
according to manufacturer's written instructions.
1. Control Joint Treatment: Treat control joints and other nonmoving substrate
cracks to prevent cracks from reflecting through resinous flooring according to
manufacturer's written instructions.

JENKS PUBLIC SCHOOLS 10/18/17 HIGH SCHOOL CAMPUS
JENKS, OK ADD. #1 PHASE 3 REMODEL
KKT ARCHITECTS, INC. RESINOUS FLOORING 096723 - 4
D. Resinous Materials: Mix components and prepare materials according to resinous
flooring manufacturer's written instructions.
3.03 APPLICATION
A. Apply components of resinous flooring system according to manufacturer's written
instructions to produce a uniform, monolithic wearing surface of thickness indicated.
1. Coordinate application of components to provide optimum adhesion of resinous
flooring system to substrate, and optimum intercoat adhesion.
2. Cure resinous flooring components according to manufacturer's written
instructions. Prevent contamination during application and curing processes.
B. Primer: Apply primer over prepared substrate at manufacturer's recommended
spreading rate.
C. Self-Leveling Body Coats: Apply self-leveling slurry body coats in thickness indicated for
flooring system.
1. The broadcast coat shall be applied as a double broadcast system as specified
by the Architect.
2. The broadcast coat shall be comprised of two components, a resin, and
hardener as supplied by the Manufacturer and mixed in the ratio of 2 parts resin
to 1 part hardener.
3. The resin shall be added to the hardener and thoroughly mixed by suitably
approved mechanical means.
4. The first broadcast coat shall be applied over horizontal surfaces using the dip
and roll, and back roll method at the rate of 300 sf/gal.
5. Chips shall be broadcast to excess into the wet material, Macro chips at the rate
of 0.1 lbs/sf, and Micro chips at the rate of 0.15 lbs/sf.
6. Allow material to fully cure. Vacuum, sweep and/or blow to remove all loose
aggregate.
7. Scrape the floor with a trowel or floor scraper. Sweep and vacuum the floor
again.
8. Apply a second broadcast coat of resin shall be applied by flat squeegee then
back rolled with a coverage rate of 200 sf/gal.
9. Chips shall be broadcast to excess, Macro chips at the rate of 0.1 lbs/sf, and
Micro chips at the rate of 0.15 lbs/sf, unless otherwise determined from approved
mockups.
10. Allow material to fully cure. Vacuum, sweep and/or blow to remove all loose
chips.
11. Scrape the floor with a trowel or floor scraper. Sweep and vacuum the floor
again.
D. Topcoat: Apply topcoats in number indicated for flooring system and at spreading
rates recommended in writing by manufacturer and to produce wearing surface
indicated.
1. The topcoat of Armor Top shall be roller applied at the rate of 500 sf/gal to yield a
dry film thickness of 3 mils.
2. The topcoat shall be comprised of a liquid resin and hardener that is mixed at the
ratio of 4 parts hardener to 1 part resin and bag of grit per the manufacturer’s
instructions.
3. The finish floor will have a nominal thickness of 40 mils, unless otherwise
determined from approved mockups.
4. Texture: Even light sand yet scrubbable

JENKS PUBLIC SCHOOLS 10/18/17 HIGH SCHOOL CAMPUS
JENKS, OK ADD. #1 PHASE 3 REMODEL
KKT ARCHITECTS, INC. RESINOUS FLOORING 096723 - 5
3.04 FIELD QUALITY CONTROL
A. Tests, Inspection:
1. The following tests shall be conducted by the Applicator:
a. Temperature: Air, substrate temperatures and, if applicable, dew point.
b. Coverage Rates: Rates for all layers shall be monitored by checking
quantity of material used against the area covered.
3.05 CLEANING AND PROTECTION
A. Remove masking. Perform detail cleaning at floor termination, to leave cleanable
surface for subsequent work of other sections.
B. Protect resinous flooring from damage and wear during the remainder of construction
period. Use protective methods and materials, including temporary covering,
recommended in writing by resinous flooring manufacturer.
END OF SECTION 096723