Embed Size (px)
Citation preview
1
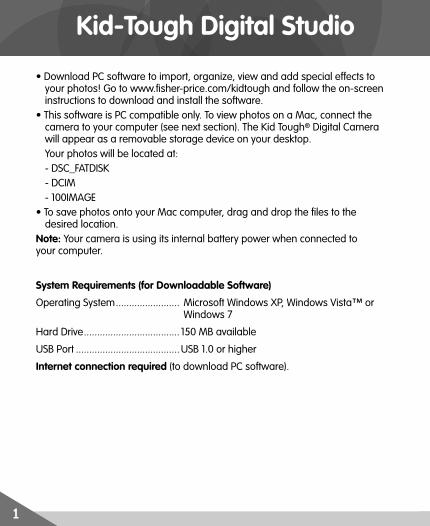
Kid-Tough Digital Studio
• Download PC software to import, organize, view and add special effects to your photos! Go to www.fi sher-price.com/kidtough and follow the on-screen instructions to download and install the software.
• This software is PC compatible only. To view photos on a Mac, connect the camera to your computer (see next section). The Kid Tough® Digital Camera will appear as a removable storage device on your desktop.
Your photos will be located at: - DSC_FATDISK - DCIM - 100IMAGE• To save photos onto your Mac computer, drag and drop the fi les to the
desired location.Note: Your camera is using its internal battery power when connected to your computer.
System Requirements (for Downloadable Software)
Operating System ........................ Microsoft Windows XP, Windows Vista™ or Windows 7
Hard Drive .................................... 150 MB available
USB Port .......................................USB 1.0 or higher
Internet connection required (to download PC software).

2
Computer Software
• Open the battery compartment door and insert the smaller end of a USB cord (not included) into the USB port on the camera.
• Insert the larger end of the USB cord into a USB port on your computer, generally marked with this symbol .
• If your camera does not turn on automatically, turn it on. The USB will appear on the LCD screen .
Note: Do not disconnect the camera or computer while photos are transferring to your computer.
To prevent strangulation, keep
computer cables away from children.
WARNING

3
Computer Software
Getting Started• The computer software automatically opens when you connect your camera
to your computer. You can also double-click on the icon on your desktop to open the computer software program.
• Click on the to select a background color of the computer software.Note: Depending on your computer’s screen resolution, this feature may not be available.• Click on the at any time to exit the computer software.
Background Color

4
Parental Controls
To set parental controls, click on the parental controls icon at the top, right of the screen.Password – Click the radio button to turn OFF or ON. Type your password in the New Password and Confi rm Password fi elds. Printing – Click to turn OFF or ON. You can limit the number of prints per session from 1 -20 or click the check box for unlimited prints. Choose a paper size from the drop down menu. Use Photo as Desktop Picture – Click to turn ON or OFF. If this is turned off, it will disable the set as desktop picture button in the Gallery. Enter child’s name to create a personalized stamper – Enter up to three names! Automatic Software/Firmware Updates – Click to turn ON or OFF. To receive updates, we recommend selecting ON.

5
Import Personal Photos/Videos
Import Personal Photos/Videos – Click on this button to import personal photos or videos from your computer.
Parental Controls
• Locate the photos or videos you would like to import and click the Open button.

6
• Click on the to save your changes and close Parental Controls.
Parental Controls
7
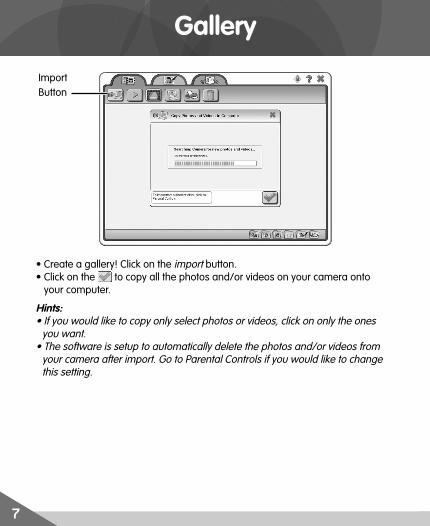
Gallery
• Create a gallery! Click on the import button.• Click on the to copy all the photos and/or videos on your camera onto
your computer.
Hints: • If you would like to copy only select photos or videos, click on only the ones
you want. • The software is setup to automatically delete the photos and/or videos from
your camera after import. Go to Parental Controls if you would like to change this setting.
Import Button

8
Gallery
• Click on the star below a photo or video to select your favorites.• Click on the show photos and videos, show photos, show videos, show
favorites, show edited photos or show projects button in the bottom left of the screen to customize your view in the gallery.
Favorites Button
Show Photos
Show Photos and Videos
Show Favorites
Show Videos
Show Edited Photos
Show Projects

9
Play Videos
• Click on the video you want to watch. • Click on the play button.Note: This button is only active if you select a video.• Click on the play/pause button below the video to watch it. Hint: You can click on the or buttons to make the video appear larger or smaller on your screen. • Click on the button when you are finished to return to the gallery.

10
Picture Show
• Click on the picture show button.Note: This button is only active if you select a photo.• Click on the button below the style of music you would like to listen to or
choose no music. Click the button.
Picture Show Button

11
Picture Show
• Click on the button below transition between photos that you would like to see. Click on the button.
• Click on the button below the transition speed. Click on the button.
Medium Fast
Slow
12
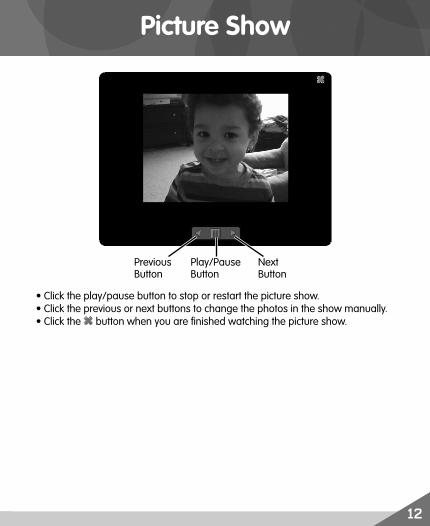
Picture Show
• Click the play/pause button to stop or restart the picture show.• Click the previous or next buttons to change the photos in the show manually.• Click the button when you are fi nished watching the picture show.
Previous Button
Next Button
Play/Pause Button

13
Set as Desktop Picture
• Click on a photo in the gallery. Then, click on the set as desktop picture button to save the photo as your computer background.
• Choose the background style you want for your desktop picture. Click on the radio button to make your selection. Click on the button.
Note: This option can be turned off. Go to Parental Controls to change this setting.
Set as Desktop Picture Button

14
• Click on a photo in the gallery. Then, click on the print button.• Choose a print size. Click on the radio button to make your selection.• Click on the button to print. Note: The number of available prints will appear in the print window. Go to Parental Controls to change this setting.
Print Button

15
Delete
• Click on the photo or video in the gallery that you would like to delete.• Click on the button. • Click the to confi rm you would like to delete the photo or video. If you do
not want to delete the photo or video. click the button to cancel.
Delete ButtonDelete Button

16
Edit Photo
• Click on the Edit Photo tab to edit your photos and add special effects. Tips:• Click on the button to undo your last change while using any of the
edit tools. • Click on the button to save your photo. • Click on the button to print your photo.
Edit
17
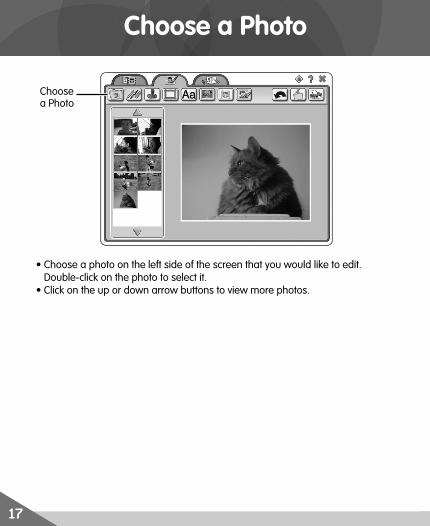
Choose a Photo
• Choose a photo on the left side of the screen that you would like to edit. Double-click on the photo to select it.
• Click on the up or down arrow buttons to view more photos.
Choose a Photo

18
Drawing Tools
• Choose your drawing tool. Click on the pencil, marker, paint brush or spray can. • Click on a color for your tool.• Use the mouse to draw or paint on your photo. • Click on an eraser style if you want to erase what you’ve added to your photo• Click on the undo button to remove all your edits from your photo.
Drawing Tools
Erase Tools
Colors
Undo
Drawing Tools

19
Stampers
• Click on a stamp to choose it. Click the page up or down to see more stamps to choose from.
• Click on the size buttons to change the size of your stamp. • Click on the rotate buttons to turn your stamp.• Click on the photo to add your stamp.
Stamps
Page Up
Page DownSize ButtonsRotate Buttons
Stampers

20
Frames
• Choose a frame to add to your photo. Click on the page up or down buttons to view more frames.
• Double-click on a frame to add it.
Frames
Page Up
Page Down
Frames

21
Typing
• Type a message in the typing fi eld.• Choose a font for your text. Scroll through the font list to view more. Click on
a font to preview it. • Click on a font style (bold, italic or underline). Hint: You can click on as many styles as you want. Click on the style again to turn it off. • Click on a color for your text. • Click on the size buttons to change the size of your text.• Click on the rotate buttons to turn the text. • Click on the photo to add your text. • Click on the button to delete the text in the typing fi eld and type
a new message!
Fonts
Font Styles
Font Sizes
Colors
Typing Field
Rotate Buttons
Typing

22
Special Effects
• Click on a button to choose a special effect for your photo.
Special Effects
Special Effects

23
Photo Warp
• Click on a button to add a warp effect to your photo. Note: Some effects will automatically warp your photo when you click the button, while others you will need to click on the photo to add. • Click on the size buttons to select the tool size.
Warp Tools
Size Buttons
Photo Warp

24
Photo Fix
• Click and drag the bar to adjust the contrast, brightness or saturation levels of your photo.
• Review your changes in the preview window and click on the button to confi rm your changes.
• Click on the red eye button if you need to fi x red eyes in your photo. Click on the subject’s eyes in the photo to fi x them.
Saturation
Preview
Red Eye Button
ContrastBrightness
Photo Fix

25
Photo Fix
• Click on the rotate or fl ip buttons to turn your photo.
Rotate Buttons
Flip Buttons

26
Create Projects
• Click on the Create Projects tab to make cards and books with your photos!Tips:• Click on the button to undo your last change while using any of the
edit tools. • Click on the button to save your project. • Click on the button to print your project.
Create Projects

27
• Click on the new project button.• Choose horizontal card, vertical card, blank page book or comic page book.
Click on the button to make your selection.Note: You can also click on the open project button to edit your saved projects.
New Project Button
Open Project Button
Create Projects

28
Create Projects
Tips for creating cards:• Click on the page numbers at the bottom of the screen to design the different
pages of your card.
Page Numbers

29
Create Projects
Tips for creating pages:• Click on the or buttons on the side of the screen to add more pages to
your blank page or comic page book. • Click on the up or down arrows to navigate the pages.

30
Create Projects
• Click on the get photo button to select photos to add to your project. • Click on a photo to select it. • Click on a shape button to change the shape of your photo.• Click on a size button to change your photo size.• Click on the rotate buttons to turn your photo. • Click on the project page to add your photo.• Repeat to add more photos.
Get Photo Button
Shape Buttons
Rotate Buttons
Size Buttons
31
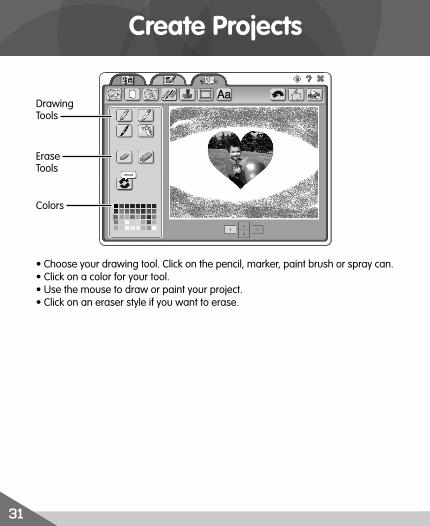
Create Projects
• Choose your drawing tool. Click on the pencil, marker, paint brush or spray can. • Click on a color for your tool.• Use the mouse to draw or paint your project. • Click on an eraser style if you want to erase.
Drawing Tools
Colors
Erase Tools

32
Create Projects
• Click on a stamp to choose it. Click the page up or down button to see more stamps to choose from.
• Click on the size buttons to change the size of your stamp. • Click on the rotate buttons to turn your stamp.• Click on the project page to add your stamp.
Page Up
Page Down
Stamps
Size ButtonsRotate Buttons
33
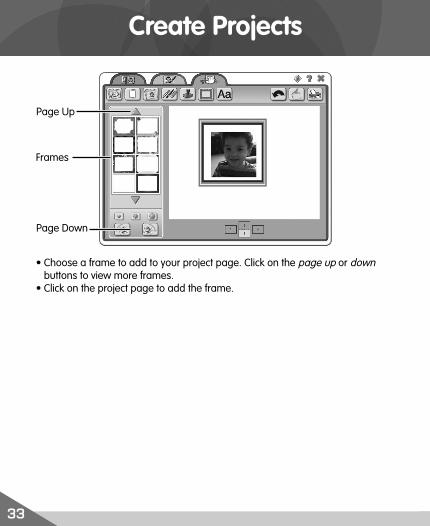
Create Projects
• Choose a frame to add to your project page. Click on the page up or down buttons to view more frames.
• Click on the project page to add the frame.
Page Up
Page Down
Frames

34
Create Projects
• Type a message in the typing fi eld.• Choose a font for your text. Scroll through the font list to view more. Click on
a font to preview it. • Click on a font style (bold, italic or underline). Hint: You can click on as many styles as you want. Click on the style again to turn it off. • Click on a color for your text. • Click on the size buttons to change the size of your text.• Click on the rotate buttons to turn the text. • Click on the project page to add your text. • Click on the to delete the text in the typing fi eld and type a new message!
Fonts
Font Styles
Font Sizes
Colors
Typing Field
Rotate Buttons

35
• Unplug the USB cord from your computer, then your camera.
• To disconnect your camera, click “eject disk” on your computer's task bar.• Select the “USB Mass Storage Device” (your camera) and click “stop”.• Click “OK” to confi rm.• A message will appear on your computer screen advising you to remove your
device (camera).
Disconnecting Your Camera

36
• Click on the following items (in order):- ”Start” menu on your computer taskbar- ”Programs”- ”Fisher-Price”- “Kid-Tough Digital Studio Software” - ”Uninstall Kid-Tough Digital Studio Software”
Software Uninstall
Windows is a registered trademark of Microsoft Corporation.
Fisher-Price, Inc., a subsidiary of Mattel, Inc., East Aurora, NY 14052 U.S.A.©2011 Mattel, Inc. All Rights Reserved. ® and ™ designate U.S. trademarks of Mattel, Inc., unless otherwise indicated.