Embed Size (px)
Citation preview
Touch • hearing • SighT • Smell • TaSTe
TcaPScreated December 2009
by J. mccain
obServaTionS WiTh SenSeSK i n d e r g a r t e n S c i e n c e
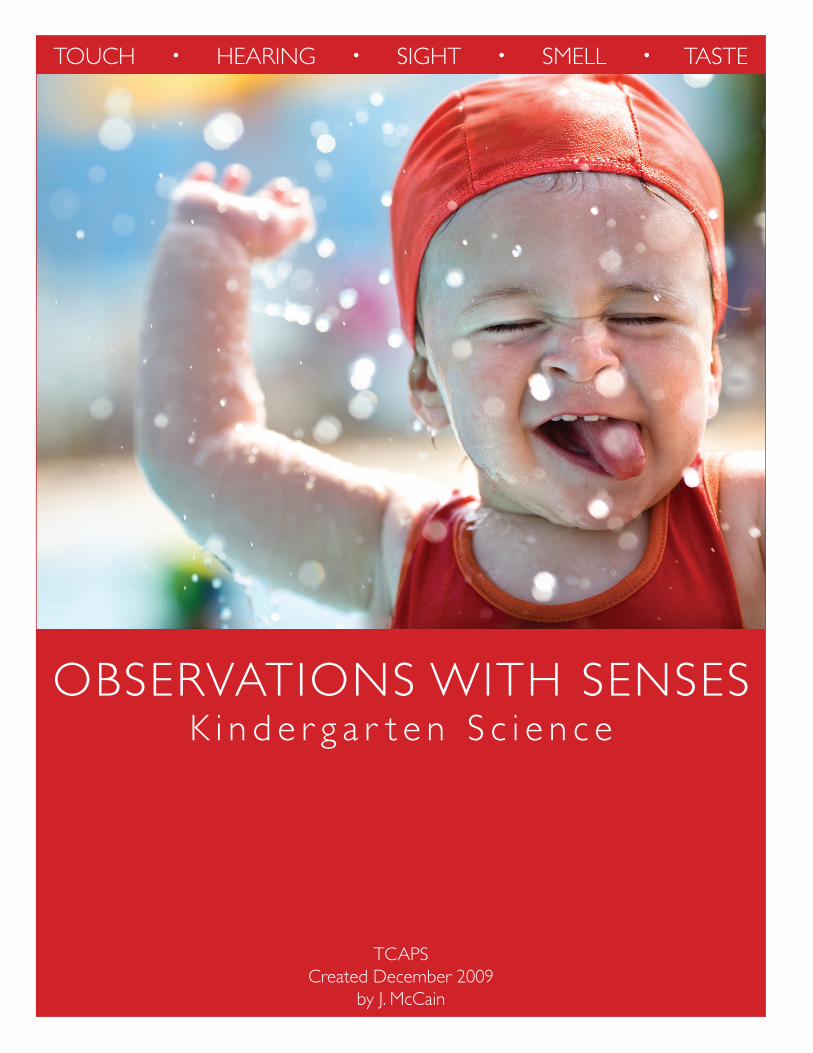
Observations with Senses TimelineLesson Number Description Est. Days for Activities
1 My Five Senses 2
2 What are our Eyes For? 3
3 What are our Ears For? 3 or 4
4 What are our Noses For? 3
5 What is our Skin For? 2
6 What is our Tongue For? 1
Total Number of Days 14 or 15
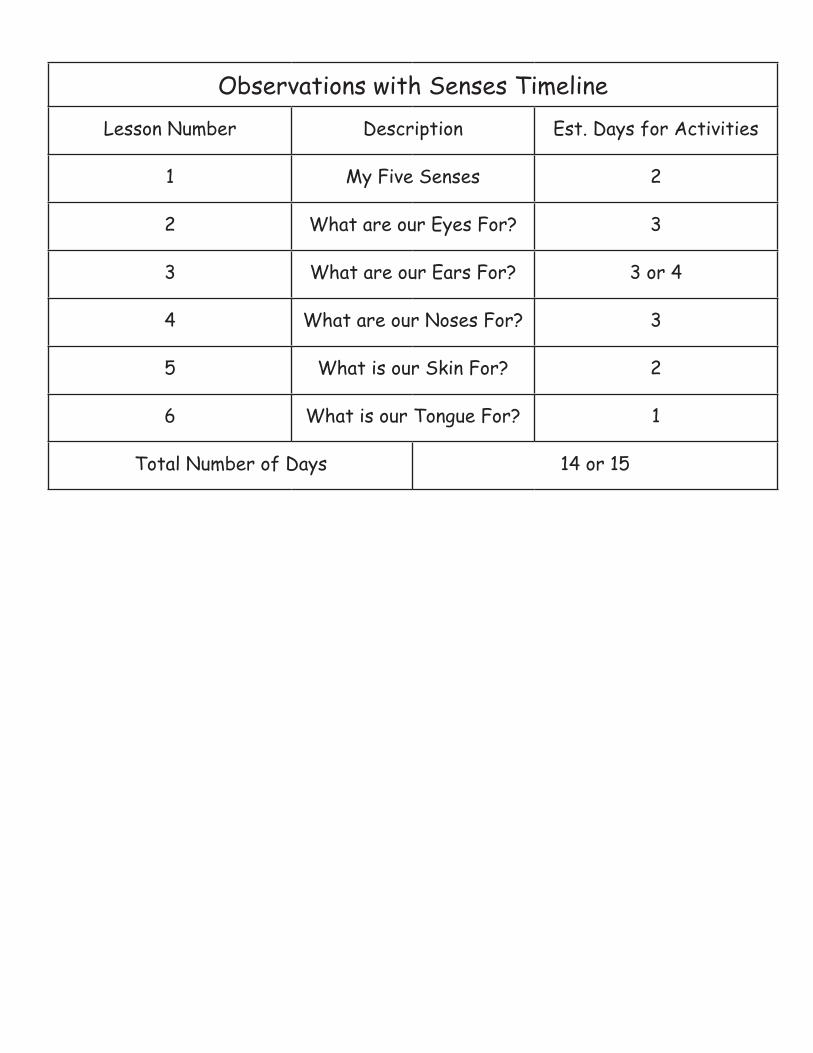
Table of Contents
Science GLCEs incorporated in this Unit . . . . . . . . . . . . . . . . . 2
Materials List . . . . . . . . . . . . . . . . . . . . . . . . . . . . . . . . . . . . . . . . 4
Overview of Lessons . . . . . . . . . . . . . . . . . . . . . . . . . . . . . . . . . . 5
Lesson 1: My Five Senses . . . . . . . . . . . . . . . . . . . . . . . . . . . . . . 6
Lesson 2: Seeing . . . . . . . . . . . . . . . . . . . . . . . . . . . . . . . . . . . . . 7
Lesson 3: Hearing . . . . . . . . . . . . . . . . . . . . . . . . . . . . . . . . . . . . 9
Lesson 4: Smelling . . . . . . . . . . . . . . . . . . . . . . . . . . . . . . . . . . . 12
Lesson 5: Touching . . . . . . . . . . . . . . . . . . . . . . . . . . . . . . . . . . 13
Lesson 6: Tasting . . . . . . . . . . . . . . . . . . . . . . . . . . . . . . . . . . . . 14
Optional Self Portrait . . . . . . . . . . . . . . . . . . . . . . . . . . . . . . . . 16
1
Science GLCEs Incorporated in Five Senses
Please see the complete Science GLCEs at www.michigan.gov/mde/ Below are some areas of the GLCEs for your reference that particularly pertain to this unit. Please reference the document at the link above for all Kindergarten Science GLCEs. Earth Science: Solid Earth
Early learners are naturally curious about the objects in their environment – soil, rocks, water, sand, rain, snow, and so on. Kindergarteners enter school with an idea that the Earth is made up of soil, rocks, pebbles, sand, water, and living things. They should be encouraged to closely observe materials found on Earth and begin to describe their properties.
The essential learning in Earth science for the kindergarten student is to be able to identify different Earth materials and recognize the Earth materials necessary to grow plants, linking the common thread of understanding in life science and Earth science.
Young students have difficulty understanding the concept that the Earth is round. Their own observations tell them that the Earth is essentially flat. When told that the Earth is round they may interpret that to mean that it is a flat disc or saucer. The introduction of globes as models of the Earth is essential in their beginning to understand the shape of objects in the sky such as the Earth, moon, and sun.
SCIENCE PROCESSES, Inquiry Process
K-7 Standard S.IP: Develop an understanding that scientific inquiry and reasoning involves observing, questioning, investigating, recording, and developing solutions to problems
S.IP.E.1 Inquiry involves generating questions, conducting investigations, and developing solutions to problems through reasoning and observation.
· S.IP.00.11 Make purposeful observation of the natural world using the appropriate senses.
· S.IP.00.12 Generate questions based on observations.
· S.IP.00.13 Plan and conduct simple investigations.
· S.IP.00.14 Manipulate simple tools (for example: hand lens, pencils, balances, non-standard objects for measurement) that aid observation and data collection.
· S.IP.00.15 Make accurate measurements with appropriate (non-standard) units for the measurement tool.
· S.IP.00.16 Construct simple charts from data and observations.
2
Science GLCEs Incorporated in Five Senses
Please see the complete Science GLCEs at www.michigan.gov/mde/ Below are some areas of the GLCEs for your reference that particularly pertain to this unit. Please reference the document at the link above for all Kindergarten Science GLCEs. Earth Science: Solid Earth
Early learners are naturally curious about the objects in their environment – soil, rocks, water, sand, rain, snow, and so on. Kindergarteners enter school with an idea that the Earth is made up of soil, rocks, pebbles, sand, water, and living things. They should be encouraged to closely observe materials found on Earth and begin to describe their properties.
The essential learning in Earth science for the kindergarten student is to be able to identify different Earth materials and recognize the Earth materials necessary to grow plants, linking the common thread of understanding in life science and Earth science.
Young students have difficulty understanding the concept that the Earth is round. Their own observations tell them that the Earth is essentially flat. When told that the Earth is round they may interpret that to mean that it is a flat disc or saucer. The introduction of globes as models of the Earth is essential in their beginning to understand the shape of objects in the sky such as the Earth, moon, and sun.
SCIENCE PROCESSES, Inquiry Process
K-7 Standard S.IP: Develop an understanding that scientific inquiry and reasoning involves observing, questioning, investigating, recording, and developing solutions to problems
S.IP.E.1 Inquiry involves generating questions, conducting investigations, and developing solutions to problems through reasoning and observation.
· S.IP.00.11 Make purposeful observation of the natural world using the appropriate senses.
· S.IP.00.12 Generate questions based on observations.
· S.IP.00.13 Plan and conduct simple investigations.
· S.IP.00.14 Manipulate simple tools (for example: hand lens, pencils, balances, non-standard objects for measurement) that aid observation and data collection.
· S.IP.00.15 Make accurate measurements with appropriate (non-standard) units for the measurement tool.
· S.IP.00.16 Construct simple charts from data and observations.
Inquiry Analysis and Communication
K-7 Standard S.IA: Develop an understanding that scientific inquiry and investigations require analysis and communication of findings, using appropriate technology.
S.IA.E.1 Inquiry includes an analysis and presentation of findings that lead to future questions, research, and investigations.
· S.IA.00.12 Share ideas about science through purposeful conversation.
· S.IA.00.13 Communicate and present findings of observations.
· S.IA.00.14 Develop strategies for information gathering (ask an expert, use a book, make observations, conduct simple investigations, and watch a video).
Reflection and Social Implications
K-7 Standard S.RS: Develop an understanding that claims and evidence for their scientific merit should be analyzed. Understand how scientists decide what constitutes scientific knowledge. Develop an understanding of the importance of reflection on scientific knowledge and its application to new situations to better understand the role of science in society and technology.
· S.RS.E.1 Reflecting on knowledge is the application of scientific knowledge to new and different situations. Reflecting on knowledge requires careful analysis of evidence that guides decision making and the application of science throughout history and within society.
o S.RS.00.11 Demonstrate scientific concepts through various illustrations, performances, models, exhibits, and activities.
3
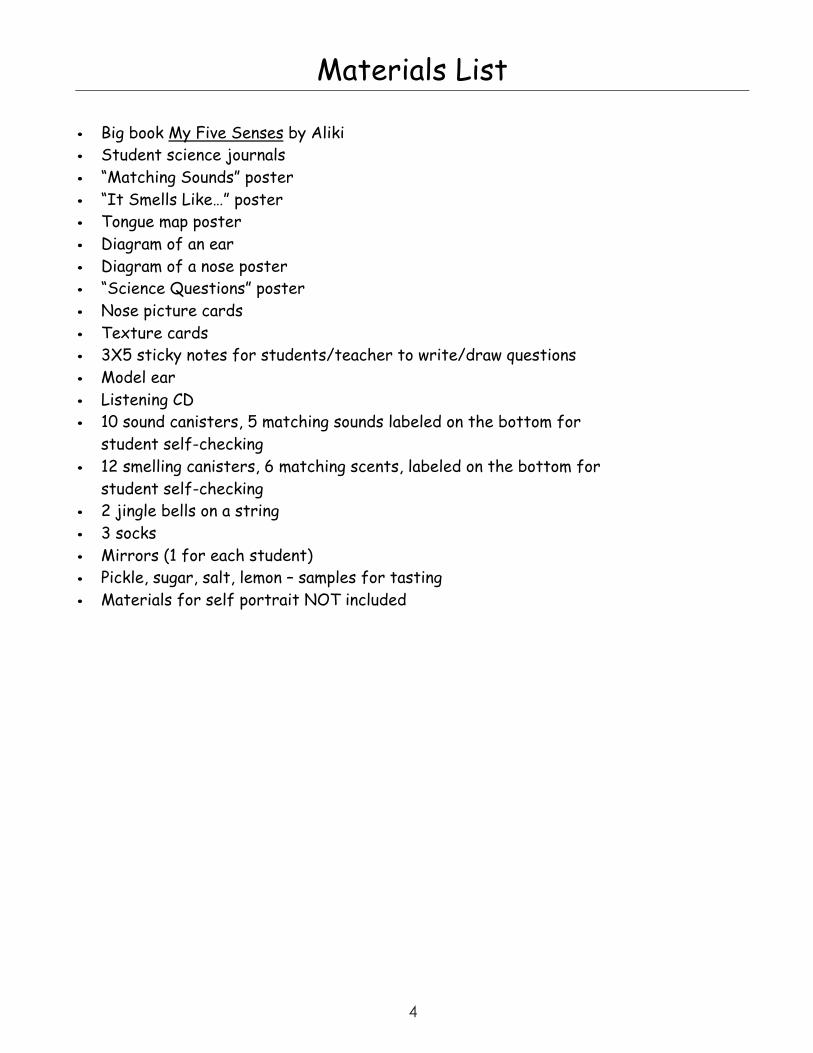
Materials List
· Big book My Five Senses by Aliki · Student science journals · “Matching Sounds” poster · “It Smells Like…” poster · Tongue map poster · Diagram of an ear · Diagram of a nose poster · “Science Questions” poster · Nose picture cards · Texture cards · 3X5 sticky notes for students/teacher to write/draw questions · Model ear · Listening CD · 10 sound canisters, 5 matching sounds labeled on the bottom for
student self-checking · 12 smelling canisters, 6 matching scents, labeled on the bottom for
student self-checking · 2 jingle bells on a string · 3 socks · Mirrors (1 for each student) · Pickle, sugar, salt, lemon – samples for tasting · Materials for self portrait NOT included
4
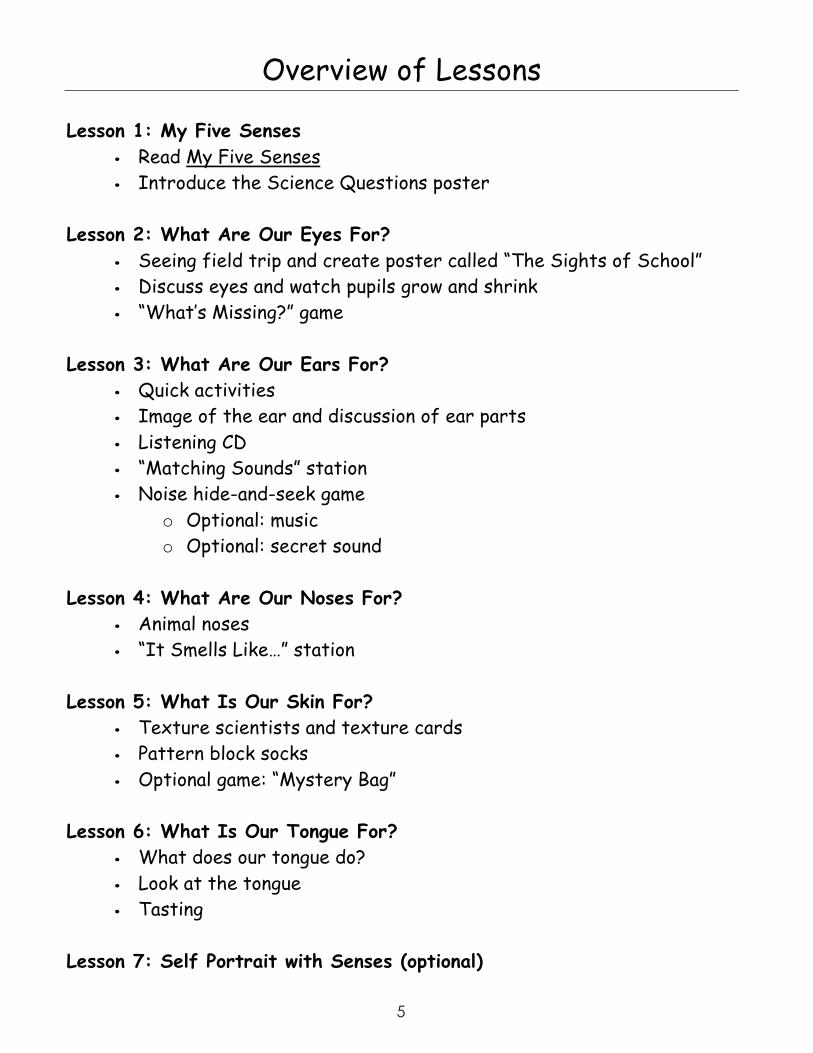
Overview of Lessons Lesson 1: My Five Senses
· Read My Five Senses · Introduce the Science Questions poster
Lesson 2: What Are Our Eyes For?
· Seeing field trip and create poster called “The Sights of School” · Discuss eyes and watch pupils grow and shrink · “What’s Missing?” game
Lesson 3: What Are Our Ears For?
· Quick activities · Image of the ear and discussion of ear parts · Listening CD · “Matching Sounds” station · Noise hide-and-seek game
o Optional: music o Optional: secret sound
Lesson 4: What Are Our Noses For?
· Animal noses · “It Smells Like…” station
Lesson 5: What Is Our Skin For?
· Texture scientists and texture cards · Pattern block socks · Optional game: “Mystery Bag”
Lesson 6: What Is Our Tongue For?
· What does our tongue do? · Look at the tongue · Tasting
Lesson 7: Self Portrait with Senses (optional)
Materials List
· Big book My Five Senses by Aliki · Student science journals · “Matching Sounds” poster · “It Smells Like…” poster · Tongue map poster · Diagram of an ear · Diagram of a nose poster · “Science Questions” poster · Nose picture cards · Texture cards · 3X5 sticky notes for students/teacher to write/draw questions · Model ear · Listening CD · 10 sound canisters, 5 matching sounds labeled on the bottom for
student self-checking · 12 smelling canisters, 6 matching scents, labeled on the bottom for
student self-checking · 2 jingle bells on a string · 3 socks · Mirrors (1 for each student) · Pickle, sugar, salt, lemon – samples for tasting · Materials for self portrait NOT included
Overview of Lessons Lesson 1: My Five Senses
· Read My Five Senses · Introduce the Science Questions poster
Lesson 2: What Are Our Eyes For?
· Seeing field trip and create poster called “The Sights of School” · Discuss eyes and watch pupils grow and shrink · “What’s Missing?” game
Lesson 3: What Are Our Ears For?
· Quick activities · Image of the ear and discussion of ear parts · Listening CD · “Matching Sounds” station · Noise hide-and-seek game
o Optional: music o Optional: secret sound
Lesson 4: What Are Our Noses For?
· Animal noses · “It Smells Like…” station
Lesson 5: What Is Our Skin For?
· Texture scientists and texture cards · Pattern block socks · Optional game: “Mystery Bag”
Lesson 6: What Is Our Tongue For?
· What does our tongue do? · Look at the tongue · Tasting
Lesson 7: Self Portrait with Senses (optional)
5
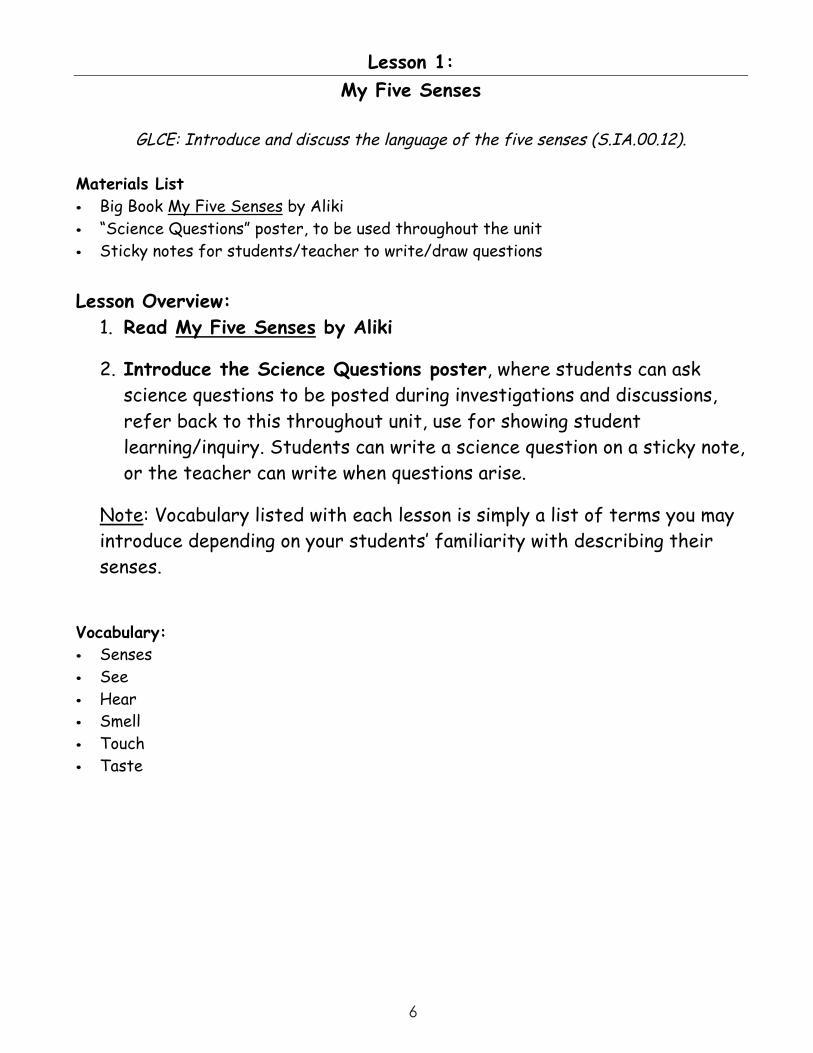
Lesson 1: My Five Senses
GLCE: Introduce and discuss the language of the five senses (S.IA.00.12).
Materials List · Big Book My Five Senses by Aliki · “Science Questions” poster, to be used throughout the unit · Sticky notes for students/teacher to write/draw questions
Lesson Overview:
1. Read My Five Senses by Aliki
2. Introduce the Science Questions poster, where students can ask science questions to be posted during investigations and discussions, refer back to this throughout unit, use for showing student learning/inquiry. Students can write a science question on a sticky note, or the teacher can write when questions arise.
Note: Vocabulary listed with each lesson is simply a list of terms you may introduce depending on your students’ familiarity with describing their senses.
Vocabulary: · Senses · See · Hear · Smell · Touch · Taste
6
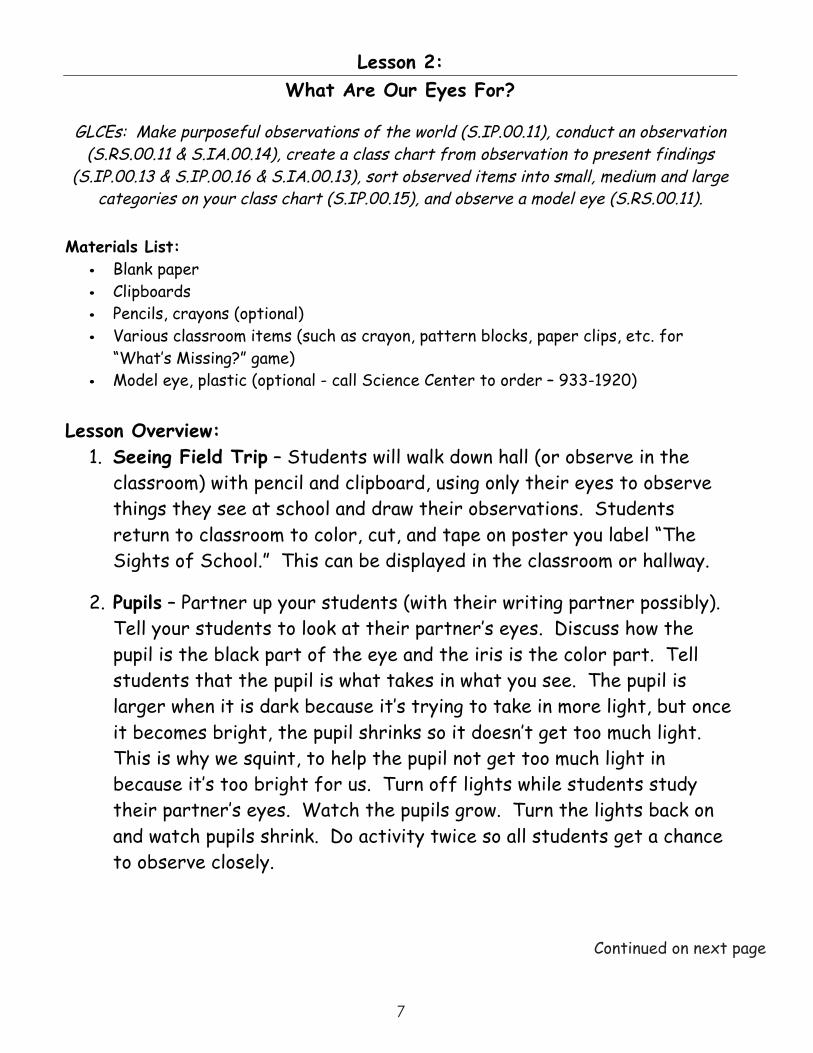
Lesson 2: What Are Our Eyes For?
GLCEs: Make purposeful observations of the world (S.IP.00.11), conduct an observation
(S.RS.00.11 & S.IA.00.14), create a class chart from observation to present findings (S.IP.00.13 & S.IP.00.16 & S.IA.00.13), sort observed items into small, medium and large
categories on your class chart (S.IP.00.15), and observe a model eye (S.RS.00.11).
Materials List: · Blank paper · Clipboards · Pencils, crayons (optional) · Various classroom items (such as crayon, pattern blocks, paper clips, etc. for
“What’s Missing?” game) · Model eye, plastic (optional - call Science Center to order – 933-1920)
Lesson Overview: 1. Seeing Field Trip – Students will walk down hall (or observe in the
classroom) with pencil and clipboard, using only their eyes to observe things they see at school and draw their observations. Students return to classroom to color, cut, and tape on poster you label “The Sights of School.” This can be displayed in the classroom or hallway.
2. Pupils – Partner up your students (with their writing partner possibly). Tell your students to look at their partner’s eyes. Discuss how the pupil is the black part of the eye and the iris is the color part. Tell students that the pupil is what takes in what you see. The pupil is larger when it is dark because it’s trying to take in more light, but once it becomes bright, the pupil shrinks so it doesn’t get too much light. This is why we squint, to help the pupil not get too much light in because it’s too bright for us. Turn off lights while students study their partner’s eyes. Watch the pupils grow. Turn the lights back on and watch pupils shrink. Do activity twice so all students get a chance to observe closely.
Lesson 1: My Five Senses
GLCE: Introduce and discuss the language of the five senses (S.IA.00.12).
Materials List · Big Book My Five Senses by Aliki · “Science Questions” poster, to be used throughout the unit · Sticky notes for students/teacher to write/draw questions
Lesson Overview:
1. Read My Five Senses by Aliki
2. Introduce the Science Questions poster, where students can ask science questions to be posted during investigations and discussions, refer back to this throughout unit, use for showing student learning/inquiry. Students can write a science question on a sticky note, or the teacher can write when questions arise.
Note: Vocabulary listed with each lesson is simply a list of terms you may introduce depending on your students’ familiarity with describing their senses.
Vocabulary: · Senses · See · Hear · Smell · Touch · Taste
Lesson 2: What Are Our Eyes For?
GLCEs: Make purposeful observations of the world (S.IP.00.11), conduct an observation
(S.RS.00.11 & S.IA.00.14), create a class chart from observation to present findings (S.IP.00.13 & S.IP.00.16 & S.IA.00.13), sort observed items into small, medium and large
categories on your class chart (S.IP.00.15), and observe a model eye (S.RS.00.11).
Materials List: · Blank paper · Clipboards · Pencils, crayons (optional) · Various classroom items (such as crayon, pattern blocks, paper clips, etc. for
“What’s Missing?” game) · Model eye, plastic (optional - call Science Center to order – 933-1920)
Lesson Overview: 1. Seeing Field Trip – Students will walk down hall (or observe in the
classroom) with pencil and clipboard, using only their eyes to observe things they see at school and draw their observations. Students return to classroom to color, cut, and tape on poster you label “The Sights of School.” This can be displayed in the classroom or hallway.
2. Pupils – Partner up your students (with their writing partner possibly). Tell your students to look at their partner’s eyes. Discuss how the pupil is the black part of the eye and the iris is the color part. Tell students that the pupil is what takes in what you see. The pupil is larger when it is dark because it’s trying to take in more light, but once it becomes bright, the pupil shrinks so it doesn’t get too much light. This is why we squint, to help the pupil not get too much light in because it’s too bright for us. Turn off lights while students study their partner’s eyes. Watch the pupils grow. Turn the lights back on and watch pupils shrink. Do activity twice so all students get a chance to observe closely.
7
Continued on next page
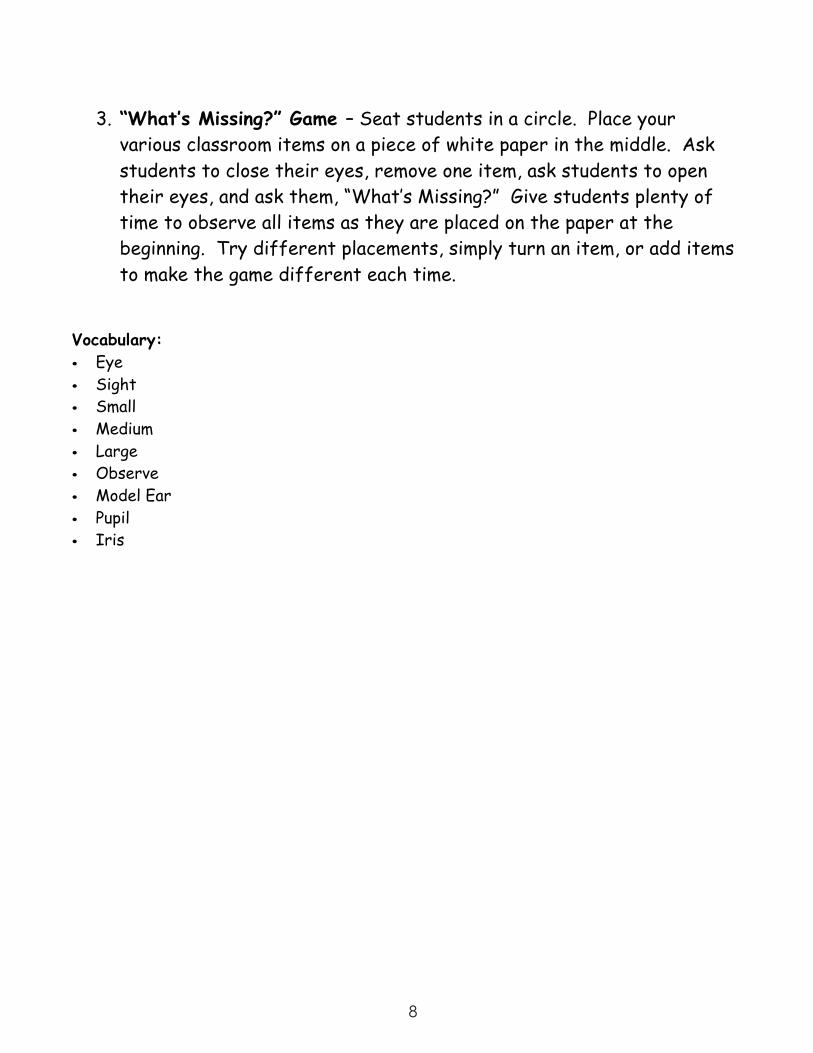
3. “What’s Missing?” Game – Seat students in a circle. Place your various classroom items on a piece of white paper in the middle. Ask students to close their eyes, remove one item, ask students to open their eyes, and ask them, “What’s Missing?” Give students plenty of time to observe all items as they are placed on the paper at the beginning. Try different placements, simply turn an item, or add items to make the game different each time.
Vocabulary: · Eye · Sight · Small · Medium · Large · Observe · Model Ear · Pupil · Iris
8
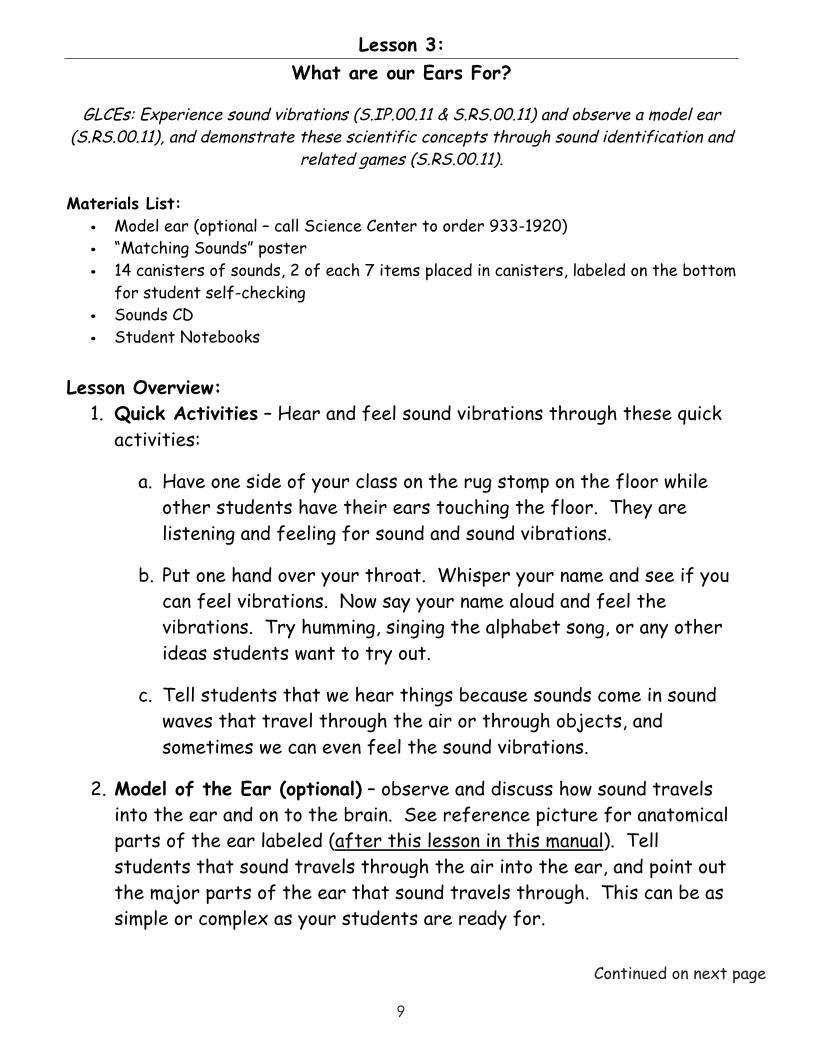
Lesson 3: What are our Ears For?
GLCEs: Experience sound vibrations (S.IP.00.11 & S.RS.00.11) and observe a model ear
(S.RS.00.11), and demonstrate these scientific concepts through sound identification and related games (S.RS.00.11).
Materials List:
· Model ear (optional – call Science Center to order 933-1920) · “Matching Sounds” poster · 14 canisters of sounds, 2 of each 7 items placed in canisters, labeled on the bottom
for student self-checking · Sounds CD · Student Notebooks
Lesson Overview: 1. Quick Activities – Hear and feel sound vibrations through these quick
activities:
a. Have one side of your class on the rug stomp on the floor while other students have their ears touching the floor. They are listening and feeling for sound and sound vibrations.
b. Put one hand over your throat. Whisper your name and see if you can feel vibrations. Now say your name aloud and feel the vibrations. Try humming, singing the alphabet song, or any other ideas students want to try out.
c. Tell students that we hear things because sounds come in sound waves that travel through the air or through objects, and sometimes we can even feel the sound vibrations.
2. Model of the Ear (optional) – observe and discuss how sound travels into the ear and on to the brain. See reference picture for anatomical parts of the ear labeled (after this lesson in this manual). Tell students that sound travels through the air into the ear, and point out the major parts of the ear that sound travels through. This can be as simple or complex as your students are ready for.
9
Continued on next page
3. Listening CD – Play each of the 4 CD tracks, encouraging students to sit silently and listen for sounds, drawing what they hear in their student notebook. The numbers in the notebook correlate with the tracks on the CD. Have students guess where they are based on the sounds they can hear and what makes them say that. Discuss each before going on to the next track.
4. “Matching Sounds” Station – Students can 1) identify each item in the canisters using the poster for help, and 2) shake film canisters (which are glued shut, not to be opened) and match the two canisters that have the same sound (or same item inside). The poster numbers each item that is in the canister, and the canisters are labeled on the bottom as to which item is in them, so students can see what the items look like that are in the container. Set this up as a station in your classroom that students can visit often. Note: You will have a similar station for smells, called “It Smells Like…” that can either replace the “Matching Sounds” or be side-by-side.
5. Noise Hide-and-Seek Game (whole group) – One student hides in the classroom with the jingle bell on a string. Students keep their eyes closed and point to where they think the student is, then open their eyes to see if they were right.
6. Optional activities:
a. Music – Listen to a song, drum on floor to the beat of music or borrow instruments (rhythm sticks) from music teacher to keep beat to a song. Create a class song!
b. Secret Sound – Students bring an object from home to make a “secret sound” behind their back for the class to guess what it is.
10
Vocabulary:• Ear• Hear• Loud
• Quiet • High Sound• Low Sound
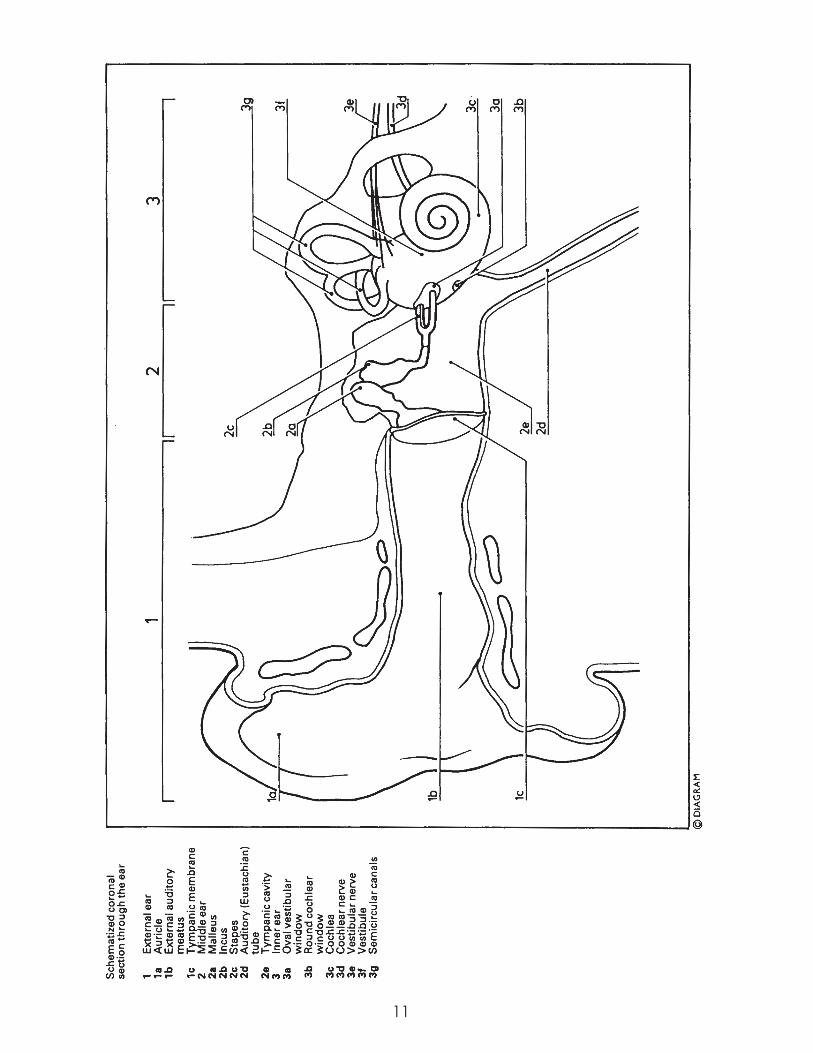
11
Lesson 4: What are our Noses For?
GLCEs: Observe animal noses in the natural world (S.IP.00.11), conduct an investigation on
smells (S.IP.00.13), and share ideas of scents experienced (S.IA.00.12). Materials List:
· Nose Cards · Diagram of a Nose poster · Smelling canisters · “It Smells Like…” poster · Student science journal
Lesson Overview:
1. Nose Cards – Look at noses of animals on Nose Cards and discuss parts of a nose. What does a nose do? What reasons does an animal have for using his/her nose? Use this opportunity to document any student questions about noses on the “Science Questions” poster.
2. Diagram of a Nose - Observe and discuss how air travels into the nose and the brain has to decide what the smell means. Teacher reads off each term and calls on a student to find & point to the word on the poster. Use this activity for some students to see that first letter can be a predictor sound for the word!
3. “It Smells Like…” Station – Students can open film canisters (but not touch contents, using only their noses) and match the picture on the poster with each scent they smell. The poster numbers each item that is in the canister, and the canisters are labeled on the bottom as to which item is in them, so students can see what the items should smell like. Encourage students to use smelling words like sweet, rotten, spicy, etc. Set this up as a station in your classroom that students can revisit often. Note: Please know that all scents are made with air fresheners, not with actual ingredients, in case you are concerned about allergies.
Vocabulary:• Nose• Smell• Sweet
• Rotten• Spicy
12
Lesson 5: What is our Skin For?
Objective: Observe textures in the natural world (S.IP.00.11) and investigate and
demonstrate this sense through identifying shapes of pattern blocks using only the sense of touch (S.IP.00.13 & S.RS.00.11).
Materials List:
· Texture cards · Pattern Blocks from math · Socks
Lesson Overview:
1. Sense of Touch – Discuss the following questions: What part of the body is used to feel things? What do your hands and fingers tell you about things? Feel the rug with your fingers – what words would you use to describe it? Discuss the brick wall, the white board, sand in the playground, any fabric in the room and what texture words you would use.
2. Texture Cards – Be texture scientists – Look at texture cards. Use words like rough, smooth, scratchy, soft, etc. Sort cards into soft/rough, smooth/bumpy, etc. as whole group or small group activities.
3. Blocks in Socks – Put a pattern block from math in a sock. Child reaches in the sock and chooses which shape he/she feels from the choice of pattern blocks, then pulls it out to check if they guessed the correct shape.
4. Optional Activity: See how long we can go in our school day without using hands – will probably only last 2 minutes!
5. Optional Game: Mystery Bag – (shaving cream, jello, rocks, popcorn, pudding, toothpaste, fur fabric, ice cubes) – please include wipes for hands to be clean!
Vocabulary: · Skin
Lesson 4: What are our Noses For?
GLCEs: Observe animal noses in the natural world (S.IP.00.11), conduct an investigation on
smells (S.IP.00.13), and share ideas of scents experienced (S.IA.00.12). Materials List:
· Nose Cards · Diagram of a Nose poster · Smelling canisters · “It Smells Like…” poster · Student science journal
Lesson Overview:
1. Nose Cards – Look at noses of animals on Nose Cards and discuss parts of a nose. What does a nose do? What reasons does an animal have for using his/her nose? Use this opportunity to document any student questions about noses on the “Science Questions” poster.
2. Diagram of a Nose - Observe and discuss how air travels into the nose and the brain has to decide what the smell means. Teacher reads off each term and calls on a student to find & point to the word on the poster. Use this activity for some students to see that first letter can be a predictor sound for the word!
3. “It Smells Like…” Station – Students can open film canisters (but not touch contents, using only their noses) and match the picture on the poster with each scent they smell. The poster numbers each item that is in the canister, and the canisters are labeled on the bottom as to which item is in them, so students can see what the items should smell like. Encourage students to use smelling words like sweet, rotten, spicy, etc. Set this up as a station in your classroom that students can revisit often. Note: Please know that all scents are made with air fresheners, not with actual ingredients, in case you are concerned about allergies.
Lesson 5: What is our Skin For?
Objective: Observe textures in the natural world (S.IP.00.11) and investigate and
demonstrate this sense through identifying shapes of pattern blocks using only the sense of touch (S.IP.00.13 & S.RS.00.11).
Materials List:
· Texture cards · Pattern Blocks from math · Socks
Lesson Overview:
1. Sense of Touch – Discuss the following questions: What part of the body is used to feel things? What do your hands and fingers tell you about things? Feel the rug with your fingers – what words would you use to describe it? Discuss the brick wall, the white board, sand in the playground, any fabric in the room and what texture words you would use.
2. Texture Cards – Be texture scientists – Look at texture cards. Use words like rough, smooth, scratchy, soft, etc. Sort cards into soft/rough, smooth/bumpy, etc. as whole group or small group activities.
3. Blocks in Socks – Put a pattern block from math in a sock. Child reaches in the sock and chooses which shape he/she feels from the choice of pattern blocks, then pulls it out to check if they guessed the correct shape.
4. Optional Activity: See how long we can go in our school day without using hands – will probably only last 2 minutes!
5. Optional Game: Mystery Bag – (shaving cream, jello, rocks, popcorn, pudding, toothpaste, fur fabric, ice cubes) – please include wipes for hands to be clean!
Vocabulary: · Skin
Vocabulary:• Skin• Touch / Feel• Shiny
• Soft• Hard• Rough
• Scratchy• Smooth
13
Lesson 5: What is our Skin For?
Objective: Observe textures in the natural world (S.IP.00.11) and investigate and
demonstrate this sense through identifying shapes of pattern blocks using only the sense of touch (S.IP.00.13 & S.RS.00.11).
Materials List:
· Texture cards · Pattern Blocks from math · Socks
Lesson Overview:
1. Sense of Touch – Discuss the following questions: What part of the body is used to feel things? What do your hands and fingers tell you about things? Feel the rug with your fingers – what words would you use to describe it? Discuss the brick wall, the white board, sand in the playground, any fabric in the room and what texture words you would use.
2. Texture Cards – Be texture scientists – Look at texture cards. Use words like rough, smooth, scratchy, soft, etc. Sort cards into soft/rough, smooth/bumpy, etc. as whole group or small group activities.
3. Blocks in Socks – Put a pattern block from math in a sock. Child reaches in the sock and chooses which shape he/she feels from the choice of pattern blocks, then pulls it out to check if they guessed the correct shape.
4. Optional Activity: See how long we can go in our school day without using hands – will probably only last 2 minutes!
5. Optional Game: Mystery Bag – (shaving cream, jello, rocks, popcorn, pudding, toothpaste, fur fabric, ice cubes) – please include wipes for hands to be clean!
Vocabulary: · Skin
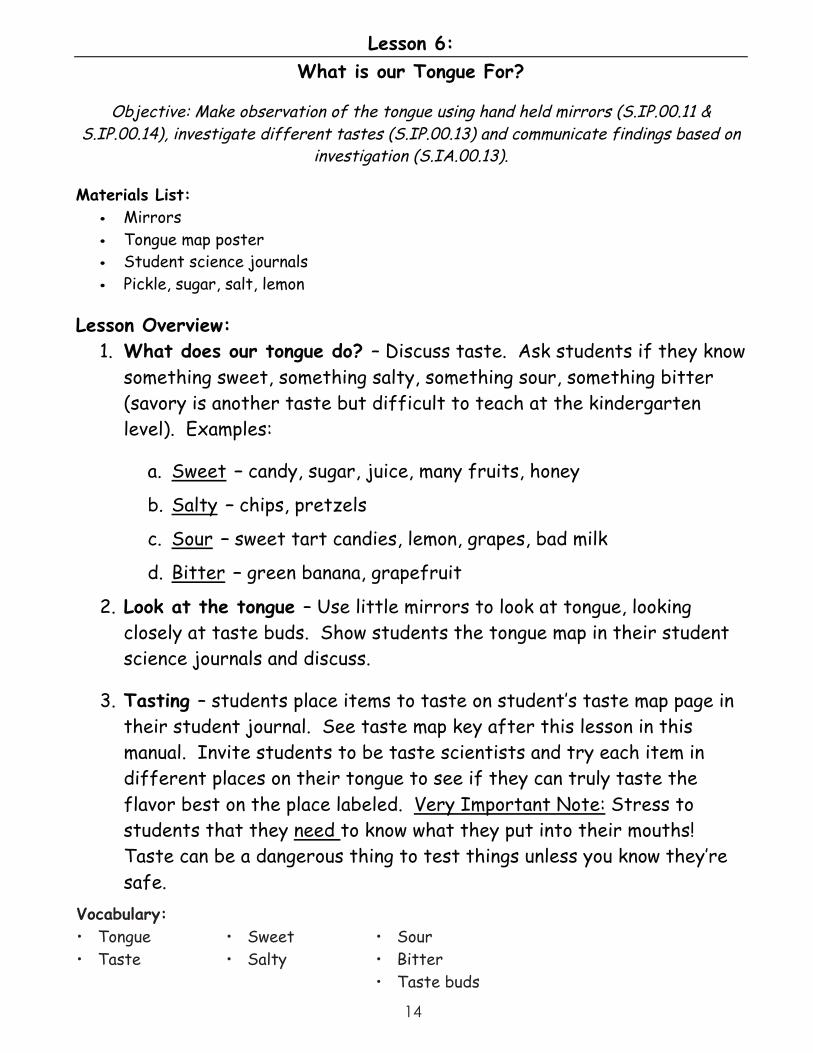
Lesson 6: What is our Tongue For?
Objective: Make observation of the tongue using hand held mirrors (S.IP.00.11 &
S.IP.00.14), investigate different tastes (S.IP.00.13) and communicate findings based on investigation (S.IA.00.13).
Materials List:
· Mirrors · Tongue map poster · Student science journals · Pickle, sugar, salt, lemon
Lesson Overview: 1. What does our tongue do? – Discuss taste. Ask students if they know
something sweet, something salty, something sour, something bitter (savory is another taste but difficult to teach at the kindergarten level). Examples:
a. Sweet – candy, sugar, juice, many fruits, honey
b. Salty – chips, pretzels
c. Sour – sweet tart candies, lemon, grapes, bad milk
d. Bitter – green banana, grapefruit
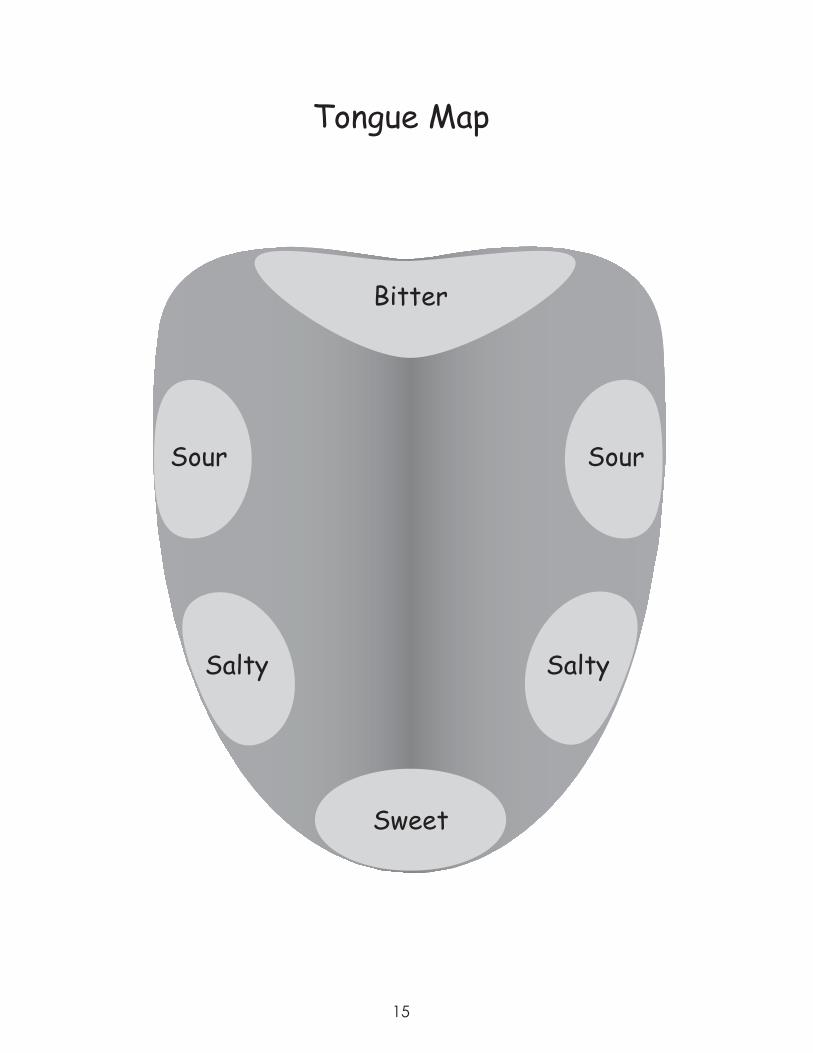
2. Look at the tongue – Use little mirrors to look at tongue, looking closely at taste buds. Show students the tongue map in their student science journals and discuss.
3. Tasting – students place items to taste on student’s taste map page in their student journal. See taste map key after this lesson in this manual. Invite students to be taste scientists and try each item in different places on their tongue to see if they can truly taste the flavor best on the place labeled. Very Important Note: Stress to students that they need to know what they put into their mouths! Taste can be a dangerous thing to test things unless you know they’re safe.
Vocabulary: · Tongue · Taste
Vocabulary:• Tongue• Taste
• Sweet• Salty
• Sour• Bitter • Taste buds
14
Lesson 6: What is our Tongue For?
Objective: Make observation of the tongue using hand held mirrors (S.IP.00.11 &
S.IP.00.14), investigate different tastes (S.IP.00.13) and communicate findings based on investigation (S.IA.00.13).
Materials List:
· Mirrors · Tongue map poster · Student science journals · Pickle, sugar, salt, lemon
Lesson Overview: 1. What does our tongue do? – Discuss taste. Ask students if they know
something sweet, something salty, something sour, something bitter (savory is another taste but difficult to teach at the kindergarten level). Examples:
a. Sweet – candy, sugar, juice, many fruits, honey
b. Salty – chips, pretzels
c. Sour – sweet tart candies, lemon, grapes, bad milk
d. Bitter – green banana, grapefruit
2. Look at the tongue – Use little mirrors to look at tongue, looking closely at taste buds. Show students the tongue map in their student science journals and discuss.
3. Tasting – students place items to taste on student’s taste map page in their student journal. See taste map key after this lesson in this manual. Invite students to be taste scientists and try each item in different places on their tongue to see if they can truly taste the flavor best on the place labeled. Very Important Note: Stress to students that they need to know what they put into their mouths! Taste can be a dangerous thing to test things unless you know they’re safe.
Vocabulary: · Tongue · Taste
15
Bitter
SourSour
SaltySalty
Sweet
Tongue Map
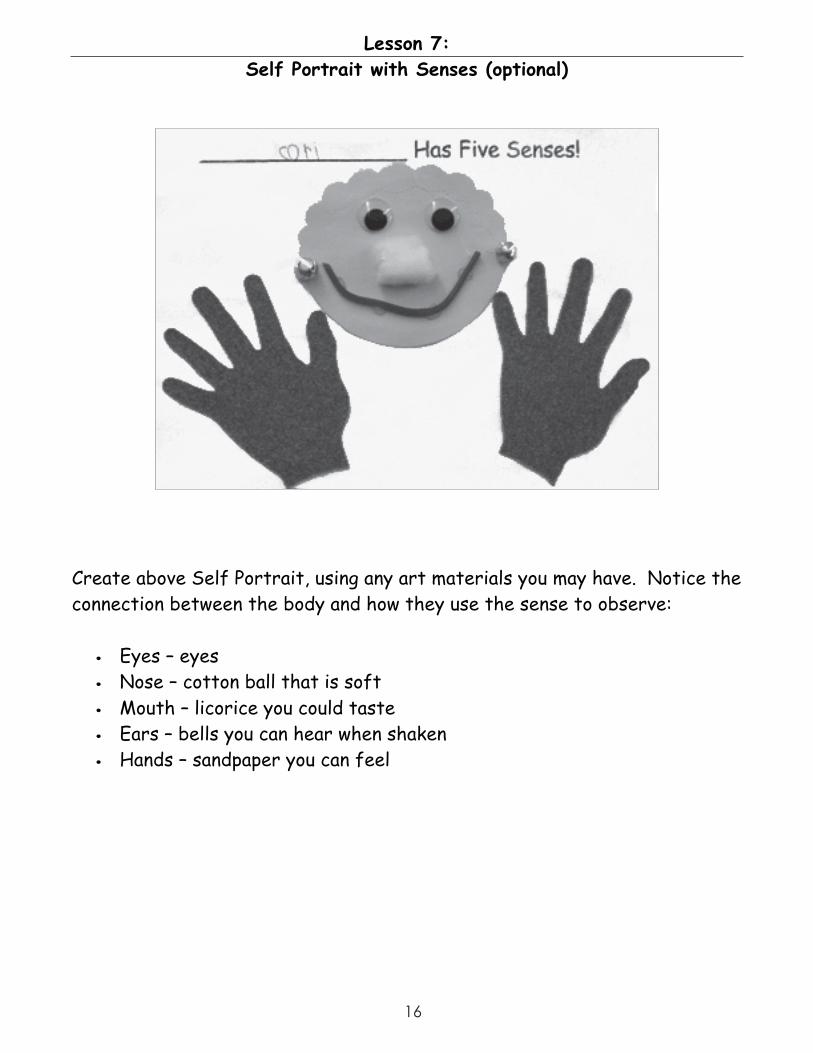
Lesson 7: Self Portrait with Senses (optional)
Create above Self Portrait, using any art materials you may have. Notice the connection between the body and how they use the sense to observe:
· Eyes – eyes · Nose – cotton ball that is soft · Mouth – licorice you could taste · Ears – bells you can hear when shaken · Hands – sandpaper you can feel
16
Lesson 7: Self Portrait with Senses (optional)
Create above Self Portrait, using any art materials you may have. Notice the connection between the body and how they use the sense to observe:
· Eyes – eyes · Nose – cotton ball that is soft · Mouth – licorice you could taste · Ears – bells you can hear when shaken · Hands – sandpaper you can feel