Embed Size (px)
Citation preview

Komen Grants eManagement SystemGeMS

Why Online Grants Reduce the amount of administrative paperwork
being completed by applicants and grantees.
Provide one central location for all Komen applicants and grantees to complete all tasks associated with the Komen grant process.
Assist grantees in evaluating their project.
Provide the Affiliate more time to build relationships with applicants and grantees.
2

User Roles
Project Director:
The role of Project Director should be assigned to the individual at your
organization that will serve as the project’s lead contact. This individual is
responsible for validating all new users when they register for the system
under their organization. This individual will have the highest level of
access in the system and will be responsible for overseeing all of the
administrative functions available such as application creation and
completion.
3

User Roles
Authorized Signer:
The role of Authorized Signer should be assigned to the individual at your
organization that has the authority to sign legal documents on behalf of
the organization. This individual is responsible for electronically signing
the application before submission and the grant contract if the
organization is awarded funds.
4

User Roles
Viewer:
The role of viewer should be assigned to any individual at your organization
that needs access to view the organization’s information but does not
need the functionality to save, add, edit, or change anything within the
organization’s information.
5

User Roles
Writer:
The role of writer should be assigned to any individual that needs access to
an organization’s application process to help complete the application but
does not have the authority to complete the submission process. This
individual cannot change the status of an application and will not have
administrative function availability.
6

User Roles
• The Project Director must be the first individual at your organization to register.
• The Authorized Signer must register and be validated/approved prior to the creation of the organizations first application.
7

Registration
8
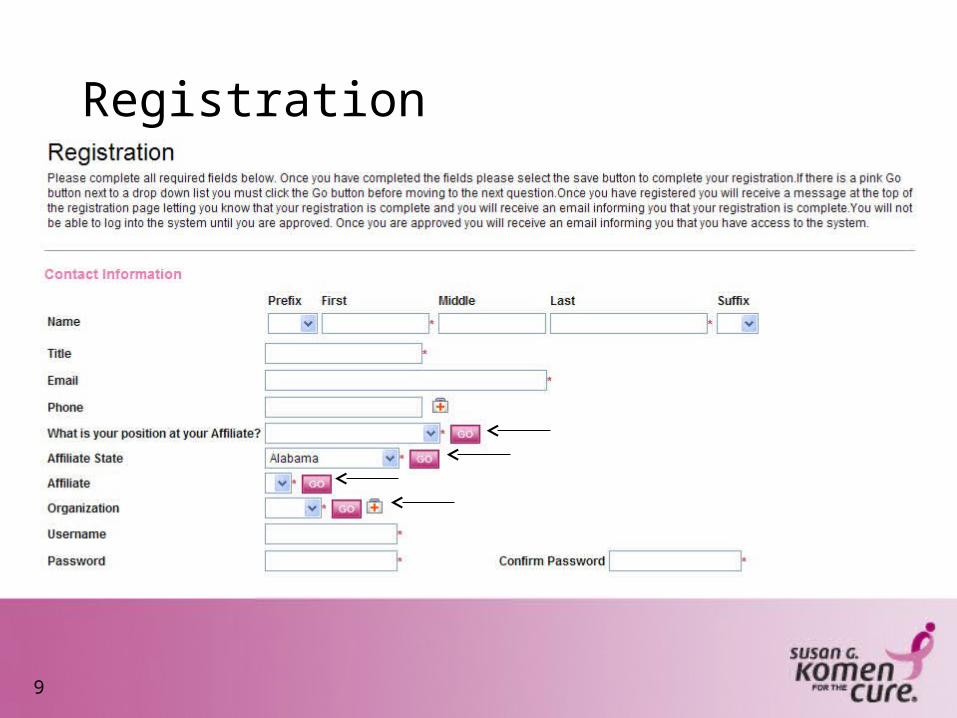
Registration
9

Registration
10

Registration
• After you save your contact and organization information, your account must be approved before you have access to the system.
• You will receive two email communications as part of the registrations process:
• Registration Submitted• Access Granted
11

User Approval
• Project Directors will be approved/validated by an Affiliate representative.
• All other users will be approved/validated by the organization’s Project Director.
12

13

User Homepage
14

Application Initiation
15
• From the User Homepage, click the “View Opportunities” button.

Application Initiation
16
• For grant programs you are eligible to apply for you will see an “Apply Now” button under the description of the grant.
• Click the “Apply Now” button to continue to initiate a new application.
Application Initiation
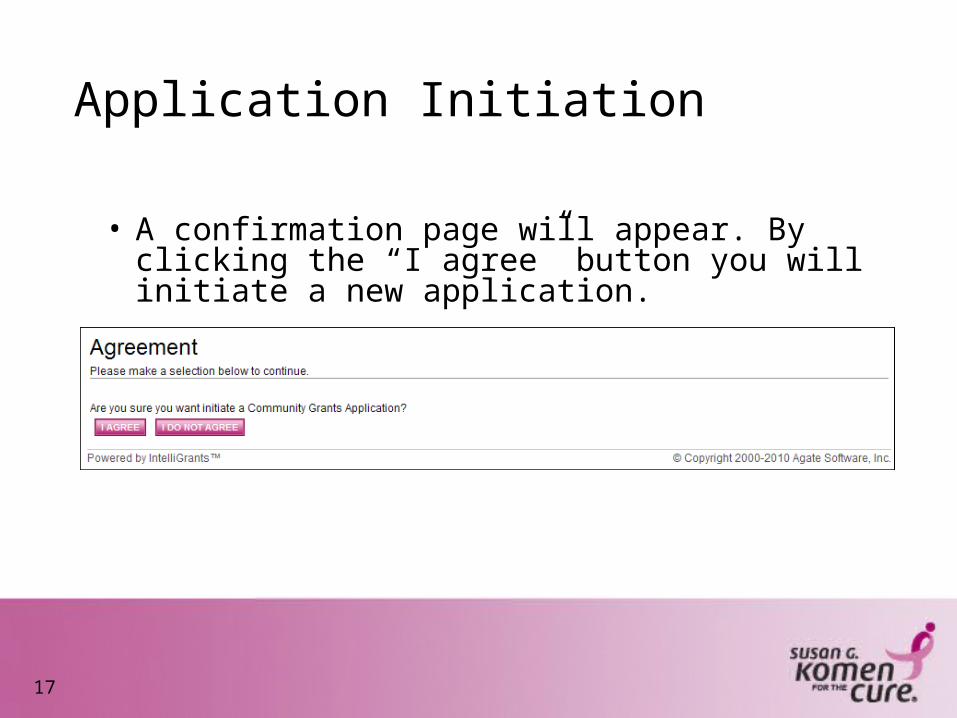
17
• A confirmation page will appear. By clicking the “I agree” button you will initiate a new application.

Application Menu
18

Application Pages
19

Application Pages
20
• We will now enter the GeMS System and review each page of the application.
• Important Reminders:• Always select the Save button before leaving a
page.• Utilize the navigation links at the bottom of the
page.• Always refer to the RFA while completing the
application.

Application Submission
21
• Project Director must change the status of the application to “Authorized Signature Required”.
• Authorized Signer must finalize the submission by changing the status to “Application Submitted”.

Application Submission
22
• Click on “Open My Tasks”.
• Select the grant you would like to submit from your task list.

Application Submission
23
Click on “View Status Options” to review the available statuses for the application.

Application Submission
24
Click “Apply Status” under the appropriate status.

Application Revision
25
Application Revision
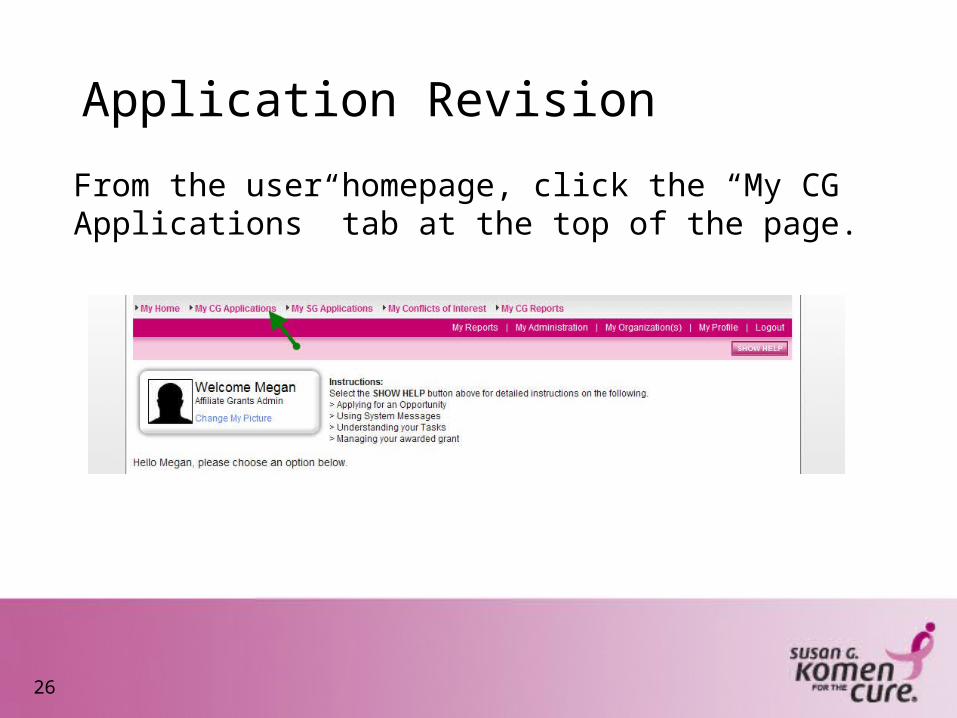
26
From the user homepage, click the “My CG Applications” tab at the top of the page.

Application Revision
27
Search for all applications in the status “Budget Revisions Required”.

Application Revision
28
Select the application name for the project in which revisions are required.

Application Revision
29
From the CG Application Menu, select “View Forms” below “View, Edit and Complete Forms”.

Application Revision
30
The pages of the application that needs revisions made to it will be marked with a notepad. Select the notepad next to the page you plan to revise.
Select the “Show Notes” section at the top of the page.

Application Revision
31
Review the notes provided by the Affiliate and make any necessary changes.
****Repeat previous steps for all pages marked with notes.

Application Revision
32
Once all revisions are completed, return to the application menu and select “View Status Options” under change the status.
Application Revision
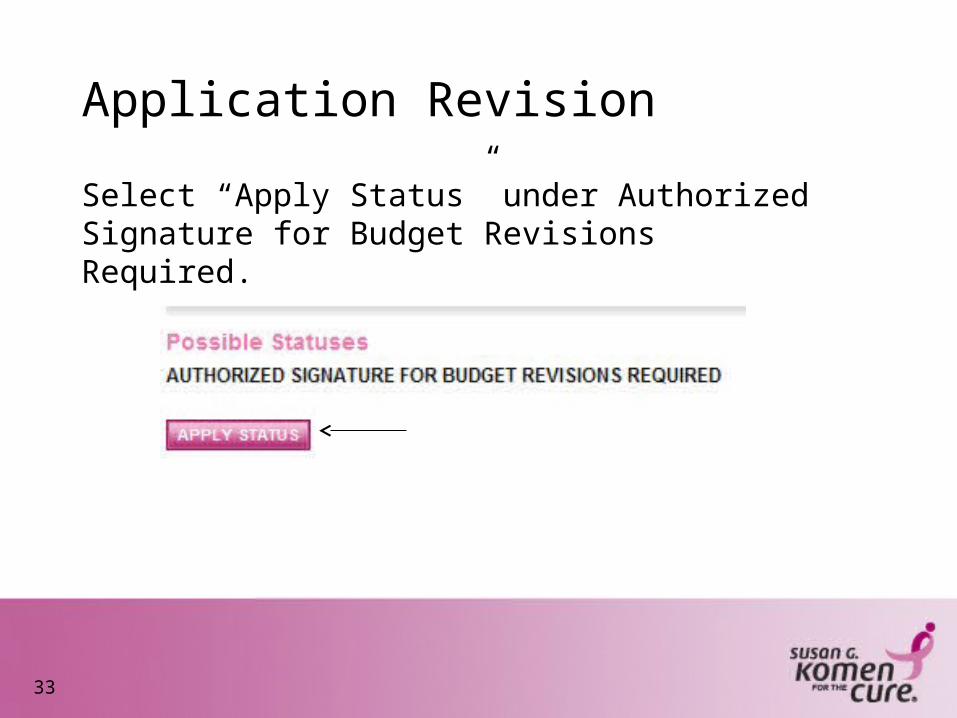
33
Select “Apply Status” under Authorized Signature for Budget Revisions Required.

Application Revision
34
Authorized Signer logs in to GeMS and clicks “Open my tasks” and then selects the application name they would like to submit revisions for.
Once in the application, they will click “View Status Options” to see possible statuses.
Application Revision
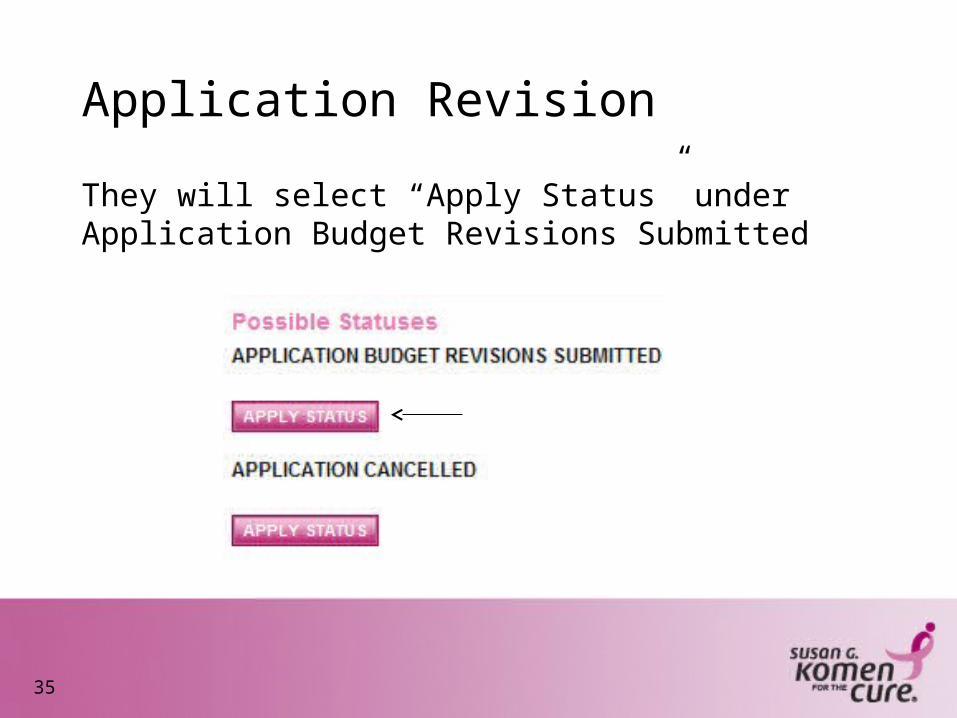
35
They will select “Apply Status” under Application Budget Revisions Submitted

Contract Acceptance
36
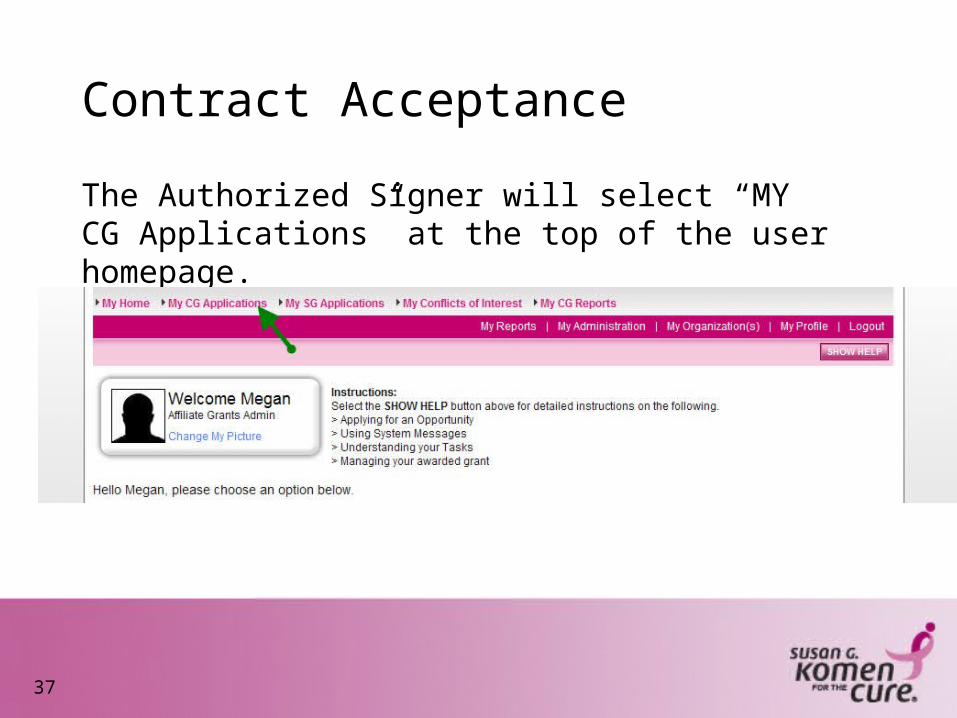
Contract Acceptance
37
The Authorized Signer will select “MY CG Applications” at the top of the user homepage.

Contract Acceptance
38
Search for all applications in the status “Contract Acceptance Required”

Contract Acceptance
39
Select the Application name for the project the contract is being reviewed for.

Contract Acceptance
40
From the CG Application Menu, select “View Forms” below View, Edit and Complete Forms.
Select the “Contract Acceptance page from the application page list.

Contract Acceptance
41
Complete the “Contract Acceptance” page. At this time the Insurance Certification and W9 must be uploaded and the contract must be accepted or declined.

Contract Acceptance
42
Return to the application menu and select “View Status Options” under Change the Status.

Contract Acceptance
43
If the contract is accepted select “Apply Status” under Contract Accepted.

Contract Acceptance
44
If the contract is declined select “Apply Status” under Contract Modifications Requested.
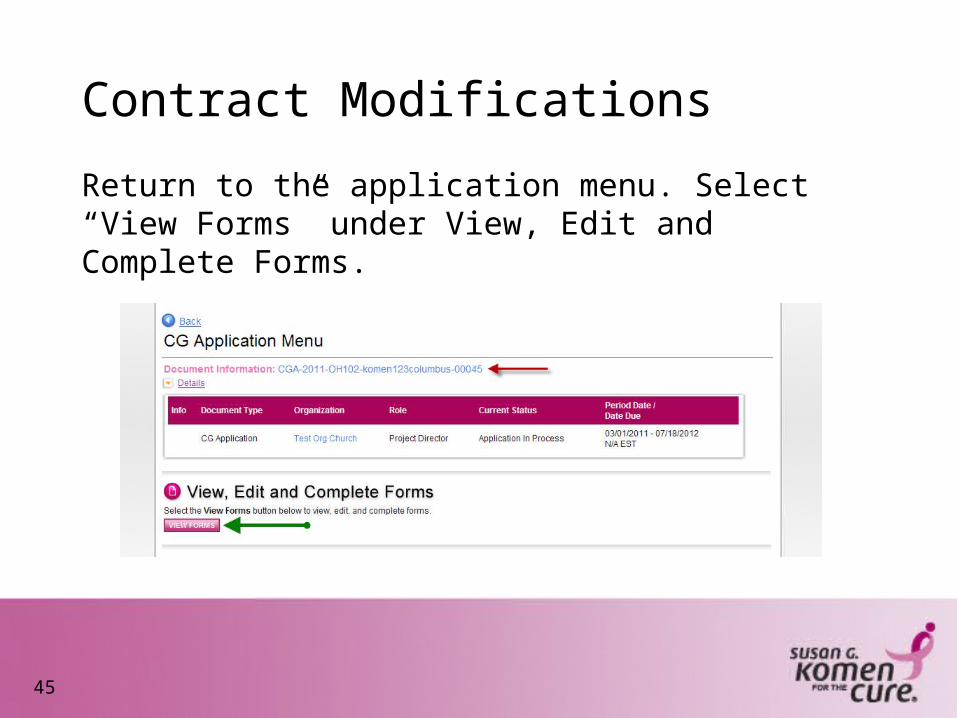
Contract Modifications
45
Return to the application menu. Select “View Forms” under View, Edit and Complete Forms.

Contract Modifications
46
Select the “Contract Modification Request” page from the application page list.

Contract Modifications
47
Complete the “Contract Modification Request” page. At this time input any change you would like to make to the contract verbiage. This information will be used to create a letter of clarification for the initial contract.

Contract Modifications
48
Return to the application menu and select “View Status Option” under Change the Status.

Contract Modifications
49
Select “Apply Status” under Contract Modifications Submitted.

Contract Modifications
50
Once you have been notified that the application is again in the status of “Contract Acceptance Required” return to the application menu. Select “View Forms” under View, Edit and Complete forms.

Contract Modifications
51
Select the “Contract Acceptance” page from the application page list and then complete the “Contract Acceptance” page.
There will now be a letter of clarification available as an attachment to the initial contract.

Contract Modifications
52
If the contract and letter of clarification are accepted, return t the application menu and select “View Status Options” under Change the status.

Contract Modifications
53
Select “Apply Status” under Contract Accepted.

Progress and Final Reports
54

Report Creation
55
From the User Homepage, click the “My CG Applications”tab at the top of the page.

Report Creation
56
Search for all applications in the status “Grant Awarded”.

Report Creation
57
Select the Application name for the project the progress or final report will be created for.

Report Creation
58
From the CG Application Menu, select “View Related Items” below Examine Related Items.
Report Creation
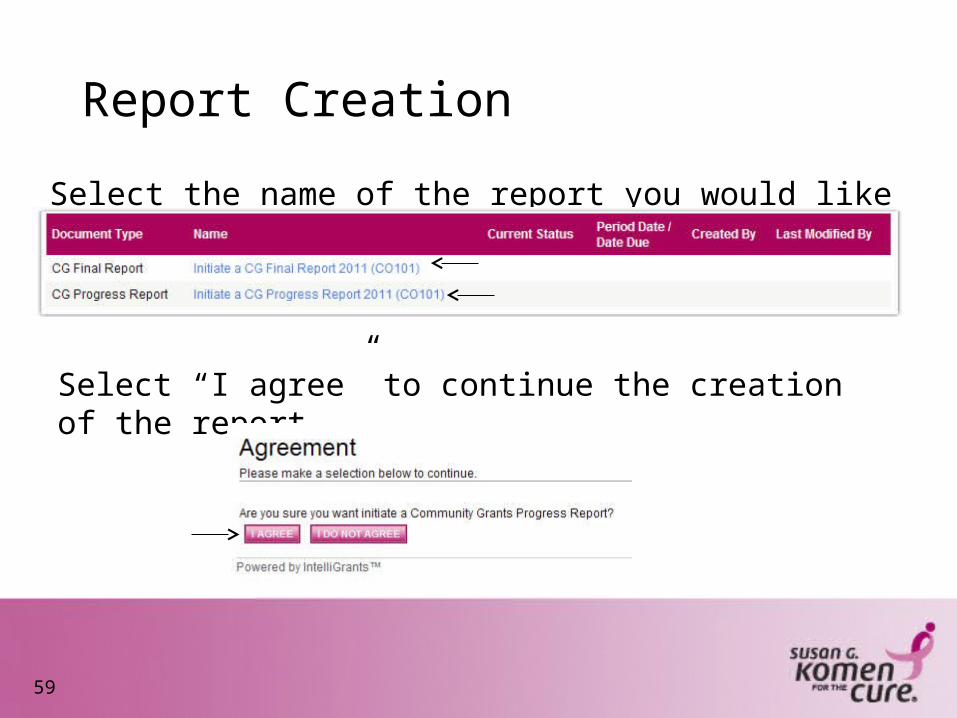
59
Select the name of the report you would like to create.
Select “I agree” to continue the creation of the report.

Report Creation
60
At this point the report menu will automatically open.

Report Completion
61
From the User Homepage click the “My CG Reports” tab at the top of the page.

Report Completion
62
Search for all reports in the status “CG Progress Report: Progress Report in Progress” or “CG Final Report: Final Report in Process”.

Report Completion
63
Select the report name for the project the progress or final report you would like to complete.

Report Completion
64
Select “View Form” under View, Edit and Complete Forms.

Report Completion
65
Complete each of the report pages.

Report Submission
66
From the user homepage, the Project Director will click the “My CG Reports” tab at the top of the page.

Report Submission
67
Search for all reports in the status “CG Progress Report: Progress Report in Process” or “CG Final Report: Final Report in Process”.

Report Submission
68
Select the report name for the project the progress or final report you would like to complete.

Report Submission
69
Select “View Status Options” under Change the Status.
Click “Apply Status” under Authorized Signature Required.

Report Submission
70
The Authorized Signer will now log into GeMS and click “Open My Tasks” and select the name of the report they would like to submit.

Report Submission
71
Click “View Status Options” to see the possible statuses.
Click “Apply Status” under Report Submitted.

Grant Changes
72

Amendment Submission
73
From the User Homepage, click the “My CG Applications” tab at the top of the page.

Amendment Submission
74
Search for all applications in the status “Grant Awarded”.

Amendment Submission
75
Select the Application name for the project the amendment will be created for.

Amendment Submission
76
From the CG Application Menu, select “View Status Options” below Change the Status.

Amendment Submission
77
Select “Apply Status” under Amendment Requested.

Amendment Submission
78
Return to the Application Menu and select “View Forms” under View, Edit and Complete Forms.
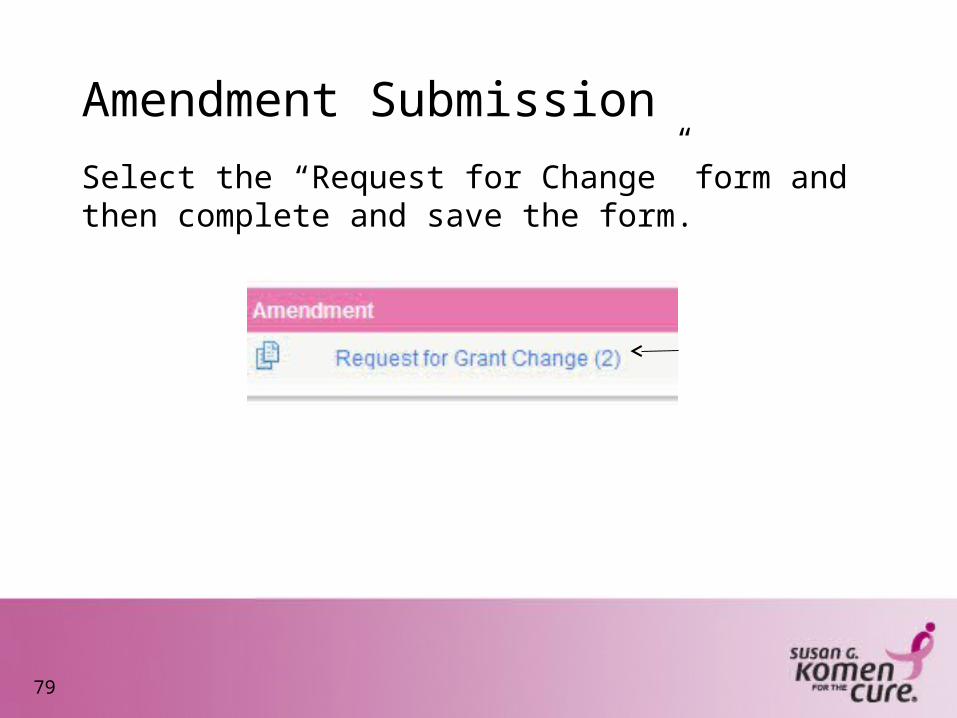
Amendment Submission
79
Select the “Request for Change” form and then complete and save the form.

Amendment Submission
80
Return to the Application Menu and select “View Status Options” under Change the Status.
Select “Apply Status” under Authorized Signature Required for Amendment Submission.

Amendment Submission
81
• Authorized Signer will log into GeMS and select “Open My Tasks”.
•They will select the application amendment that you would like to submit in the task list.
•Select “View Status Options” under Change the Status.
•Select “Apply Status” under Amendment Submitted.
Amendment Submission
82
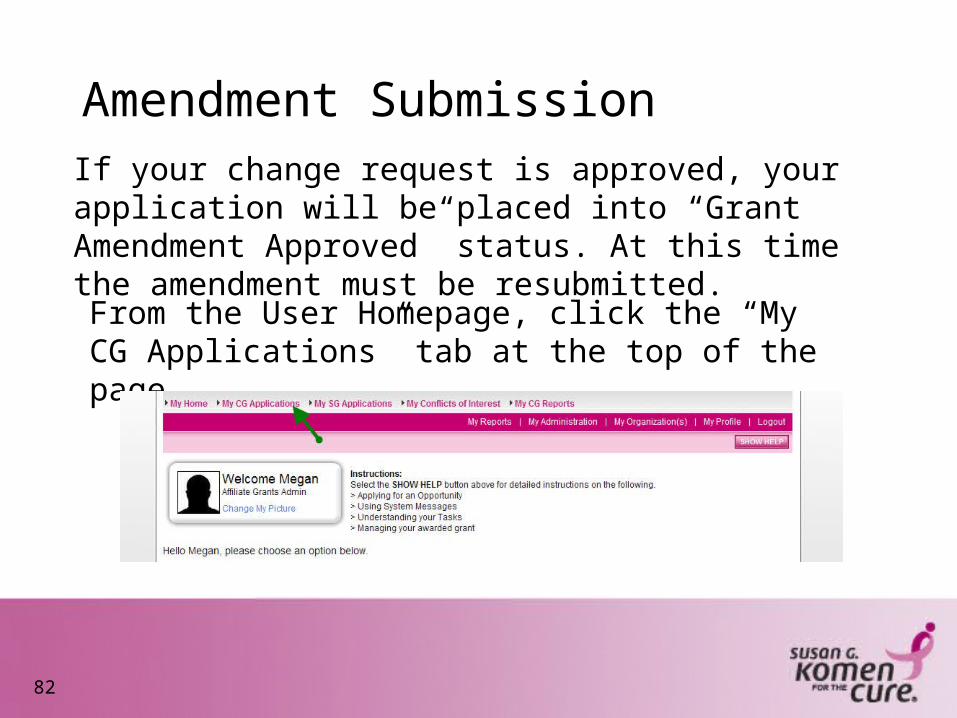
If your change request is approved, your application will be placed into “Grant Amendment Approved” status. At this time the amendment must be resubmitted.
From the User Homepage, click the “My CG Applications” tab at the top of the page.

Amendment Submission
83
Search for all applications in the status “Grant Amendment Approved”.

Amendment Submission
84
Select the Application name for the project the amendment will be created for.

Amendment Submission
85
From the CG Application Menu, select “View Forms” below View, Edit and Complete Forms.
Enter the application pages that the amendment affects and make the necessary changes to those pages.

Amendment Submission
86
Return to the Application menu and select “View Status Options” under Change the Status.
Amendment Submission
87
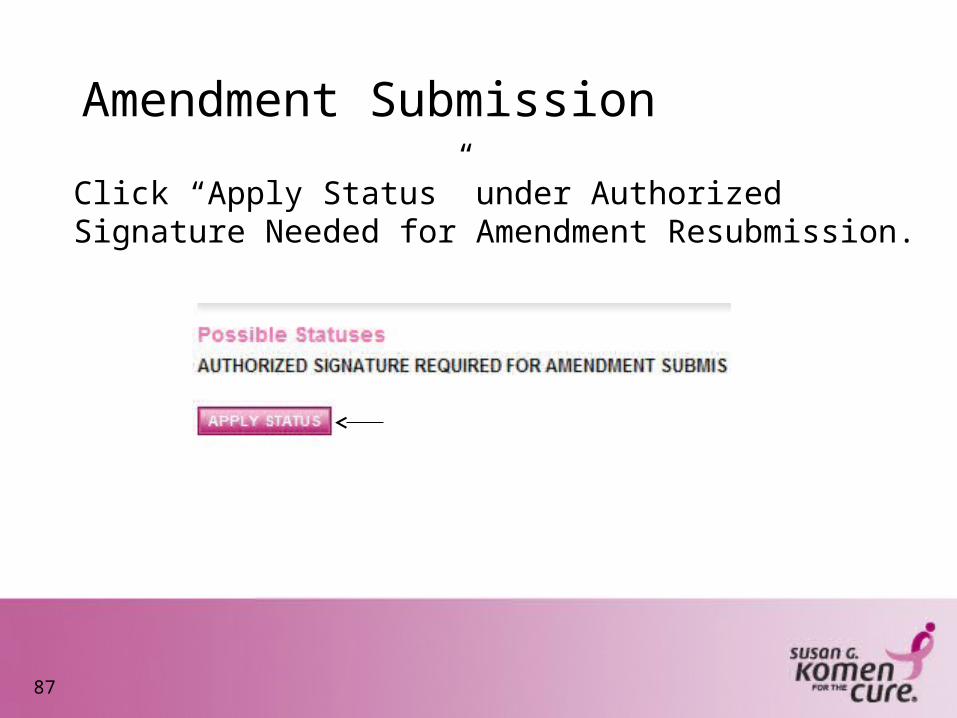
Click “Apply Status” under Authorized Signature Needed for Amendment Resubmission.

Amendment Submission
88
•Authorized Signer will log into GeMS and click “Open My Tasks”.
•They will then select the Application amendment that they would like to resubmit from their task list.
•Select “View Status Options” under Change the Status.
•Select “Apply Status” under Amendment Submitted.

Helpful Hints
89

• Always hit “save” to save your data. If you do not hit “save” and
you navigate away from the screen, your data will be lost.
• If you scroll over the first aid kits, help content will be available
for that specific question.
• The system will log out after 45 minutes with no activity. If the
system logs out automatically, the last data entered will not be
saved if the save button was not selected prior to the log out.
90

• If you copy and paste text from Word, you must hit the
backspace button within the text field for the character count to
be shown.
• Print versions of the blank report and completed report are
available within the Access Management Tools section of the
application menu.
• Always use the “Back” button within the system when trying to
return to a previous page.
91