Embed Size (px)
Citation preview
KVM-RT ™ Userís Guide
0898604-1.1
January 2020
Copyright 2020 by Concurrent Real-Time, Inc. All rights reserved. This publication or any part thereof is intended foruse with Concurrent Real-Time products by Concurrent Real-Time personnel, customers, and end–users. It may notbe reproduced in any form without the written permission of the publisher.
The information contained in this document is believed to be correct at the time of publication. It is subject to changewithout notice. Concurrent Real-Time makes no warranties, expressed or implied, concerning the information con-tained in this document.
To report an error or comment on a specific portion of the manual, photocopy the page in question and mark the cor-rection or comment on the copy. Mail the copy (and any additional comments) to Concurrent Real-Time, 800 NW 33Street, Pompano Beach, FL 33064. Mark the envelope “Attention: Publications Department.” This publicationmay not be reproduced for any other reason in any form without written permission of the publisher.
Concurrent Real-Time and its logo are registered trademarks of Concurrent Real-Time, Inc. All other ConcurrentReal-Time product names are trademarks of Concurrent Real-Time while all other product names are trademarks orregistered trademarks of their respective owners. Linux® is used pursuant to a sublicense from the Linux MarkInstitute.
Printed in U. S. A.
Revision History: Level: Effective With:
July 2019 1.0 RedHawk Linux 7.5
January 2020 1.1 RedHawk Linux 8.0
iii
Preface
Scope of Manual
This manual provides information and instructions for using Concurrent Real-Time’sRedHawk KVM-RTTM.
Structure of Manual
This manual consists of:
• Chapter 1, which introduces you to KVM-RT.
• Chapter 2, which explains the steps in setting up and booting virtualmachines in KVM-RT.
• Chapter 3, which discusses configuring KVM-RT.
• Chapter 4, which lists known issues.
Syntax Notation
The following notation is used throughout this manual:
italic Books, reference cards, and items that the user must specify appear initalic type. Special terms may also appear in italic.
list bold User input appears in list bold type and must be entered exactlyas shown. Names of directories, files, commands, options and manpage references also appear in list bold type.
Operating system and program output such as prompts, messages andlistings of files and programs appears in list type.
[] Brackets enclose command options and arguments that are optional.You do not type the brackets if you choose to specify these options orarguments.
hypertext links When viewing this document online, clicking on chapter, section,figure, table and page number references will display thecorresponding text. Clicking on Internet URLs provided in blue typewill launch your web browser and display the web site. Clicking onpublication names and numbers in red type will display thecorresponding manual PDF, if accessible.
RedHawk KVM-RT User’s Guide
iv
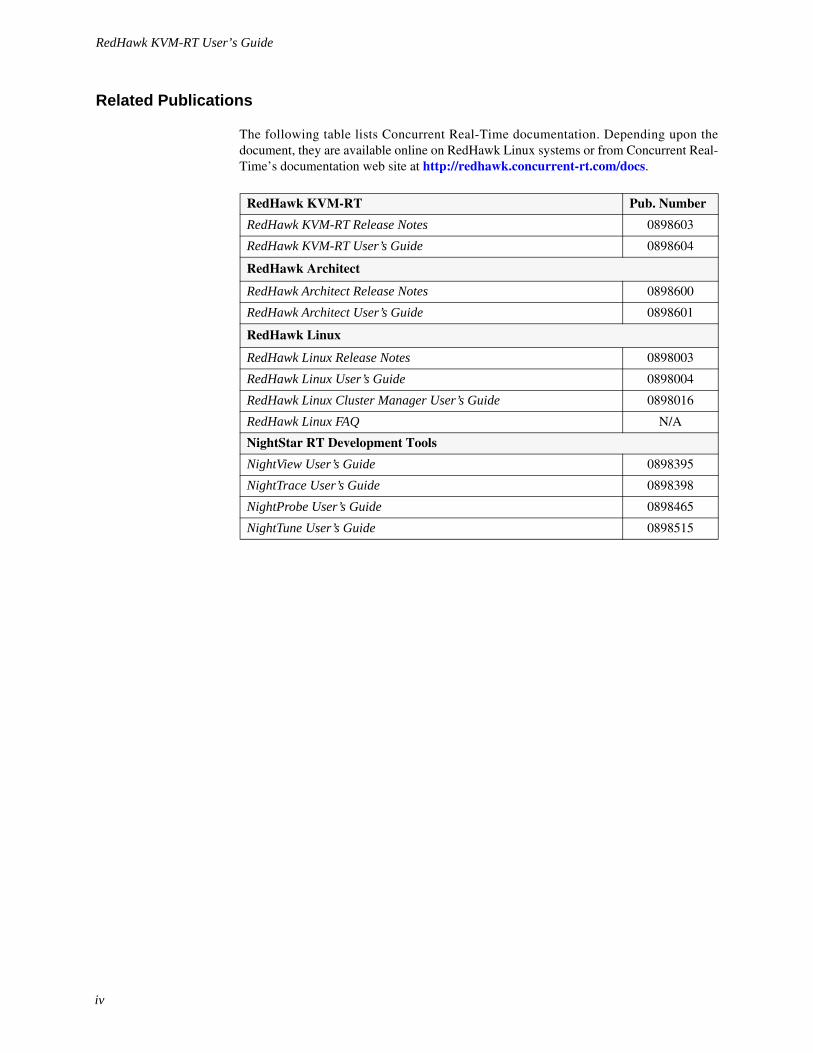
Related Publications
The following table lists Concurrent Real-Time documentation. Depending upon thedocument, they are available online on RedHawk Linux systems or from Concurrent Real-Time’s documentation web site at http://redhawk.concurrent-rt.com/docs.
RedHawk KVM-RT Pub. Number
RedHawk KVM-RT Release Notes 0898603
RedHawk KVM-RT User’s Guide 0898604
RedHawk Architect
RedHawk Architect Release Notes 0898600
RedHawk Architect User’s Guide 0898601
RedHawk Linux
RedHawk Linux Release Notes 0898003
RedHawk Linux User’s Guide 0898004
RedHawk Linux Cluster Manager User’s Guide 0898016
RedHawk Linux FAQ N/A
NightStar RT Development Tools
NightView User’s Guide 0898395
NightTrace User’s Guide 0898398
NightProbe User’s Guide 0898465
NightTune User’s Guide 0898515
v
Chapter 0Contents
Preface . . . . . . . . . . . . . . . . . . . . . . . . . . . . . . . . . . . . . . . . . . . . . . . . . . . . . . . . . . . . . . . . . . . . . . . . . . . . . . . . . iii
Chapter 1 Introduction to KVM-RT
Introduction. . . . . . . . . . . . . . . . . . . . . . . . . . . . . . . . . . . . . . . . . . . . . . . . . . . . . . . . . 1-1Host System Requirements and Installation . . . . . . . . . . . . . . . . . . . . . . . . . . . . . . . . 1-1
Host Kernel Configuration . . . . . . . . . . . . . . . . . . . . . . . . . . . . . . . . . . . . . . . . . 1-1
Chapter 2 Getting Started
Building Virtual Machines . . . . . . . . . . . . . . . . . . . . . . . . . . . . . . . . . . . . . . . . . . . . . 2-1Using Virtual Machine Manager to Create a Virtual Machine . . . . . . . . . . . . . . 2-1Using RedHawk Architect to Create a Virtual Machine . . . . . . . . . . . . . . . . . . . 2-1Cloning a Virtual Machine Image . . . . . . . . . . . . . . . . . . . . . . . . . . . . . . . . . . . . 2-2
Importing Virtual Machines into KVM-RT . . . . . . . . . . . . . . . . . . . . . . . . . . . . . . . . 2-2Booting and Shutting Down Virtual Machines. . . . . . . . . . . . . . . . . . . . . . . . . . . . . . 2-2Understanding QEMU/KVM Threads . . . . . . . . . . . . . . . . . . . . . . . . . . . . . . . . . . . . 2-3
Chapter 3 Configuring Virtual Machines
The KVM-RT Configuration File. . . . . . . . . . . . . . . . . . . . . . . . . . . . . . . . . . . . . . . . 3-1Configuration Tools . . . . . . . . . . . . . . . . . . . . . . . . . . . . . . . . . . . . . . . . . . . . . . . . . . 3-4Advanced Libvirt Configuration. . . . . . . . . . . . . . . . . . . . . . . . . . . . . . . . . . . . . . . . . 3-4Understanding the cpuset Configuration Attribute . . . . . . . . . . . . . . . . . . . . . . . . . . . 3-5Configuring Real-Time Virtual Machines . . . . . . . . . . . . . . . . . . . . . . . . . . . . . . . . . 3-5
Understanding KVM-RT Use of Threaded CPUs. . . . . . . . . . . . . . . . . . . . . . . . 3-7
Chapter 4 Known Issues
Known Issues in KVM-RT version 1.1 . . . . . . . . . . . . . . . . . . . . . . . . . . . . . . . . . . . 4-1

RedHawk KVM-RT User’s Guide
vi
1-1
1Chapter 1Introduction to KVM-RT
1 1
This chapter provides a general overview and requirements for using RedHawk KVM-RT.
Introduction 1
RedHawk KVM-RT is a Real-Time Hypervisor solution that utilizes QEMU/KVM andRedHawk real-time features to extend RedHawk's real-time determinism to guestRedHawk virtual machines.
It supports multiple guests, both real-time and non-real-time, running in virtual machineson a single host system.
Host System Requirements and Installation 1
Refer to the RedHawk KVM-RT Release Notes for hardware host system requirements andsoftware installation instructions.
Though not a requirement, it is highly recommended that the entire host system bededicated to running the Real-Time Hypervisor. Administrators of the KVM-RT hostsystem must be careful not to disturb CPU shielding or CPU affinities on the system, orelse real-time performance of virtual machines may be compromised.
Once KVM-RT is installed, the following command can be run to test the suitability of theof the host system.
$ sudo kvmrt-validate-host
Host Kernel Configuration 1
KVM-RT requires that a RedHawk kernel is booted on the host system while KVM-RT isbeing used. Additionally, the following kernel boot parameters may be required:
intel_iommu = on | amd_iommu = on
This parameter enables device-level remapping of memory regions used forDMA in virtual machines. This parameter is required if any virtual machineswill use PCI passthrough of physical PCI devices.

RedHawk KVM-RT User’s Guide
1-2
workqueue.pri = 3
Virtual machines that are enabled as real-time virtual machines will effec-tively "own" physical CPUs. This parameter allows host daemons and pro-cesses to run at a higher priority to allow the host to maintain control of thevirtual machines.This parameter is required to guarantee real-time perfor-mance to real-time VMs.
These parameters may be added to the system's boot time parameters with the commandblscfg(1) in RedHawk Linux version 8.0 and ccur-grub2(1) in RedHawk Linuxversion 7.5. Note that a reboot is necessary for the parameters to take effect.
2-1
2Chapter 2Getting Started
1 2 This
2
This chapter explains the steps in setting up and booting virtual machines in KVM-RT.Also discussed are the various QEMU/KVM threads that run on the host for each virtualmachine.
Building Virtual Machines 2
KVM-RT works with virtual machines that have been created and configured within thelibvirt framework. A virtual machine may be created and configured within libvirt inseveral ways, including:
• with Virtual Machine Manager
• with RedHawk Architect
• by cloning another virtual machine
Detailed instructions on how to build virtual machines are beyond the scope of this bookbut are well documented. General instructions and references to documentation are givenin the following sections.
Real-time virtual machines must contain a guest OS of RedHawk Linux 7.5 or later. Theguest CPU architecture must match that of the host.
Using Virtual Machine Manager to Create a Virtual Machine 2
The Virtual Machine Manager is a GUI tool that can be used to create, configure, andmanage virtual machines within the libvirt framework.
Start Virtual Machine Manager by running:
$ sudo run virt-manager
See the virt-manager(1) man page for more information.
Using RedHawk Architect to Create a Virtual Machine 2
RedHawk Architect is an optional product offered by Concurrent Real-Time thatspecializes in creating, customizing and deploying RedHawk Linux disk images.
RedHawk KVM-RT User’s Guide
2-2
Architect can be used to create a RedHawk virtual machine and to export it to the VirtualMachine Manager. Detailed instructions can be found in the documentation that comeswith RedHawk Architect. Below are the general steps required:
• run architect
• create a new session and configure the image as desired
• build the image
• deploy the image to a virtual machine
• export the virtual machine to Virtual Machine Manager
Cloning a Virtual Machine Image 2
Any existing virtual machine within the libvirt framework can be cloned by using the virt-clone command. For example:
$ sudo virt-clone -o old_vm -n new_vm
See the virt-clone(1) man page for more information.
Importing Virtual Machines into KVM-RT 2
Once virtual machines have been created within the libvirt framework, they can beimported into KVM-RT.
All libvirt virtual machines can be imported into KVM-RT with the following command:
$ sudo kvmrt-import
This command may be run at any time new VMs are created. Run kvmrt-import --help for more information and options.
When a VM is imported into KVM-RT it inherits the VM configuration settings fromlibvirt. Once this is done a VM may be further configured with KVM-RT as needed. See “Configuring Virtual Machines” in Chapter 3 for more information.
Booting and Shutting Down Virtual Machines 2
Once virtual machines have been imported into KVM-RT, the following KVM-RT toolscan be used to boot, shutdown, and view the status of VMs.
Run the following command to start up all configured VMs:
$ sudo kvmrt-startup
RedHawk KVM-RT User’s Guide
2-3
Run the following command to shutdown all configured VMs:
$ sudo kvmrt-shutdown
Run the following command to query the state of all VMs:
$ sudo kvmrt-stat
Individual VMs can be booted or shutdown with the kvmrt-start-vm and kvmrt-shutdown-vm commands. For example:
$ sudo kvmrt-start-vm RedHawk-8.0$ sudo kvmrt-shutdown-vm RedHawk-8.0
Run any of the above commands with the --help option for more information andoptions.
Understanding QEMU/KVM Threads 2
QEMU/KVM runs multiple threads for each virtual machine. The names and purpose ofthese threads are as follows:
qemu-kvm
These are emulator threads. There may be two or more of these.
qemu-system-x86
This is an alternate name for qemu-kvm in some distributions.
worker
These are dynamically created threads for long I/O operations being per-formed by the emulator.
SPICE Worker
This is a thread for a virtual console.
IO mon_ioth
This is an optional thread used for some I/O.
CPU n/KVM
These are virtual CPU (vCPU) threads. There will be one per virtual CPU,where n is the vCPU ID.
Use the kvmrt-stat -t command to display information about all currently runningVM threads.

RedHawk KVM-RT User’s Guide
2-4
3-1
3Chapter 3Configuring Virtual Machines
2 3 3
Virtual machines that are configured within the libvirt framework have an XMLconfiguration file that controls all attributes of the virtual machine.
This file usually exists as "/etc/libvirt/qemu/{DOMAIN}.xml" for the given VMdomain name and is created when the VM is created or imported into the libvirtframework. This file gets updated when VM configuration changes are made in VirtualMachine Manager.
KVM-RT uses a simplified configuration file, explained below, to manage multiple VMs.KVM-RT updates libvirt XML configuration files as needed to keep the two files in sync.
The KVM-RT Configuration File 3
The default location of the KVM-RT configuration file is /etc/kvmrt.cfg, but allkvmrt-* tools accept a -f option that allows the user to specify an alternateconfiguration file.
The KVM-RT configuration file uses the INI file format, where each section name is aVM (domain) name. An example configuration is shown below:
[RedHawk-8.0]autostart = Truetitle = RedHawk 8.0description = A RedHawk 8.0 VM.nr_vcpus = 2cpu_topology = autocpuset =rt = Falsert_memory = autonumatune = autohide_kvm = False
[RedHawk-8.0-RT]autostart = Truetitle = Real-Time RedHawk 8.0description = A RedHawk 8.0 VM configured real-time.nr_vcpus = 4cpu_topology = autocpuset = 1-5rt = Truert_memory = autonumatune = autohide_kvm = False
RedHawk KVM-RT User’s Guide
3-2
Defined below are the field types used in the attribute description that follows:
{string}: any string
{int}: any integer
{bool}: true | false | on | off | yes | no | 1 | 0(case-insensitive)
{ID-set}: a string that describes a set of ranges of integers in a human-readable form such as "0,2,4-7,12-15"
Each VM may be configured with the following attributes. Note that if an attribute is notset or it is missing from the file, the default value is used.
autostart = {bool}
This attribute enables auto-starting of the VM with kvmrt-startup. The default value is true (enabled).
title = {string}
This attribute sets the VM title. The default value is "".
description = {string}
This attribute sets the VM description. The default value is "".
nr_vcpus = {int}
This attribute defines the number of virtual CPUs in the VM.The default value is 1.
cpu_topology = {int}, {int}, {int} | auto
This attribute defines the CPU topology that is seen by the VM.
If not auto, the value must be a string of three positive integers separated bycommas ("sockets, cores, threads"), to describe the CPU topology. sockets isthe number of CPU sockets, cores is the number of cores per socket, andthreads is the number of threads per core.
When the value is auto, the topology is set to one socket, nr_vcpus coresper socket, and one thread per core.
The default value is auto.
RedHawk KVM-RT User’s Guide
3-3
NOTE
If the guest virtual machine is running a Windows operating sys-tem, the cpu_topology attribute may have been set to adefault value that will not work well in KVM-RT. It is best tochange this setting to auto. See the item labeled “VMs runningthe Windows operating system” in Chapter 4 for more informa-tion.
cpuset = {ID-set}
This attribute defines host CPUs IDs to which all VM threads are biased. The default value is "" (no CPU biasing). See the section “Understanding thecpuset Configuration Attribute” later in this chapter for more information.
rt_memory = {bool} | auto
This attribute enables memory locking of all pages used by the VM.
When the value is auto, this option is enabled if the rt attribute is enabledand disabled if rt is disabled.
The default value is auto.
numatune = {ID-set} | auto
This attribute sets the host NUMA nodes to be used for memory allocation tothe VM.
If not auto, the value must describe a set of host NUMA node IDs. The setmay be empty, in which case memory will not be restricted to any host NUMAnodes. If cpuset is empty then memory will not be restricted to any hostNUMA nodes.
When the value is auto, all NUMA nodes used by cpuset will be used.
The default value is auto.
hide_kvm = {bool}
This attribute hides KVM from the view of the guest OS in the VM. The default value is false (disabled).
rt = {bool}
This attribute configures the VM for real-time. The default value is false (disabled).
The cpuset and rt_memory attributes must be configured (enabled)when this attribute is enabled. It is also recommended to configure and enablenumatune when this attribute is enabled.

RedHawk KVM-RT User’s Guide
3-4
Configuration Tools 3
A KVM-RT configuration can be edited by running the command:
$ sudo kvmrt-edit-config
Note that KVM-RT configuration files should not be edited directly. kvmrt-edit-config validates and also synchronizes the configuration with libvirt.
A KVM-RT configuration, as interpreted by KVM-RT, can be displayed by running thecommand:
$ sudo kvmrt-show-config
The kvmrt-validate-config and kvmrt-sync-config commands can be run tovalidate and synchronize, respectively, a configuration. Users do not normally need to runthese commands directly when using kvmrt-edit-config.
Run any of the above commands with the --help option for more information andoptions.
Advanced Libvirt Configuration 3
Advanced configuration that is beyond the scope of the KVM-RT configuration file maybe made to the libvirt XML files, using Virtual Machine Manager or 'virsh edit', butadditional synchronization and validation steps are required for KVM-RT.
Note that some combinations of configuration may be invalid and users are encouraged tomake configuration changes by editing the KVM-RT configuration file with kvmrt-edit-config whenever possible.
If libvirt XML files are modified by the user outside of KVM-RT, then it is necessary torun kvmrt-sync-config -r and kvmrt-validate-config, like so:
$ sudo kvmrt-sync-config -r$ sudo kvmrt-validate-config
Also note that kvmrt-import -u may be used instead of kvmrt-sync-config -r,as in:
$ sudo kvmrt-import -u$ sudo kvmrt-validate-config
The kvmrt-validate-config command will display appropriate errors or warningsfor any invalid configuration.
Run any of the above commands with the --help option for more information andoptions.
RedHawk KVM-RT User’s Guide
3-5
Understanding the cpuset Configuration Attribute 3
The cpuset attribute controls host-CPU-biasing of the QEMU/KVM threads of a virtualmachine.
The cpuset attribute may be used for both real-time and non-real-time VMs. If cpusetis empty then the VM will not be bound to any particular host CPUs.
The first CPU in cpuset will be allocated to all non-vCPU threads. The remaining CPUsin cpuset will be used by the vCPU threads as follows:
• The CPU placement policy for all virtual CPU threads is round-robin onthe host CPUs defined by cpuset (after one CPU is allocated to all non-vCPU VM threads).
• Over-provisioning of host CPUs (more CPUs in cpuset than nr_vcpus+ 1) results in each virtual CPU being biased to more than one host CPU.
• Under-provisioning of host CPUs (less CPUs in cpuset than nr_vcpus+1) results in more than one virtual CPU being biased to each host CPU.
Configuring Real-Time Virtual Machines 3
Perform the following steps to configure a VM for real-time:
• enable the rt configuration attribute
• enable the rt_memory attribute (auto is recommended)
• consider enabling the numatune attribute (auto is recommended)
• configure the cpuset attribute as described below
Configuring the cpuset attribute for a real-time VM requires some understanding of thehost system's CPU topology. Use the cpu-topology command to see a display of thehost system's CPU topology:
$ cpu-topology
Run cpu-topology --help for more information and options.
cpu-topology displays the layout of CPU sockets, NUMA nodes, CPU cores, andlogical CPUs. Example output follows:
NUMA Node 0: Core 0: [Socket 0]
CPU 0Core 1: [Socket 0]
CPU 1Core 2: [Socket 0]
CPU 2Core 3: [Socket 0]
CPU 3
RedHawk KVM-RT User’s Guide
3-6
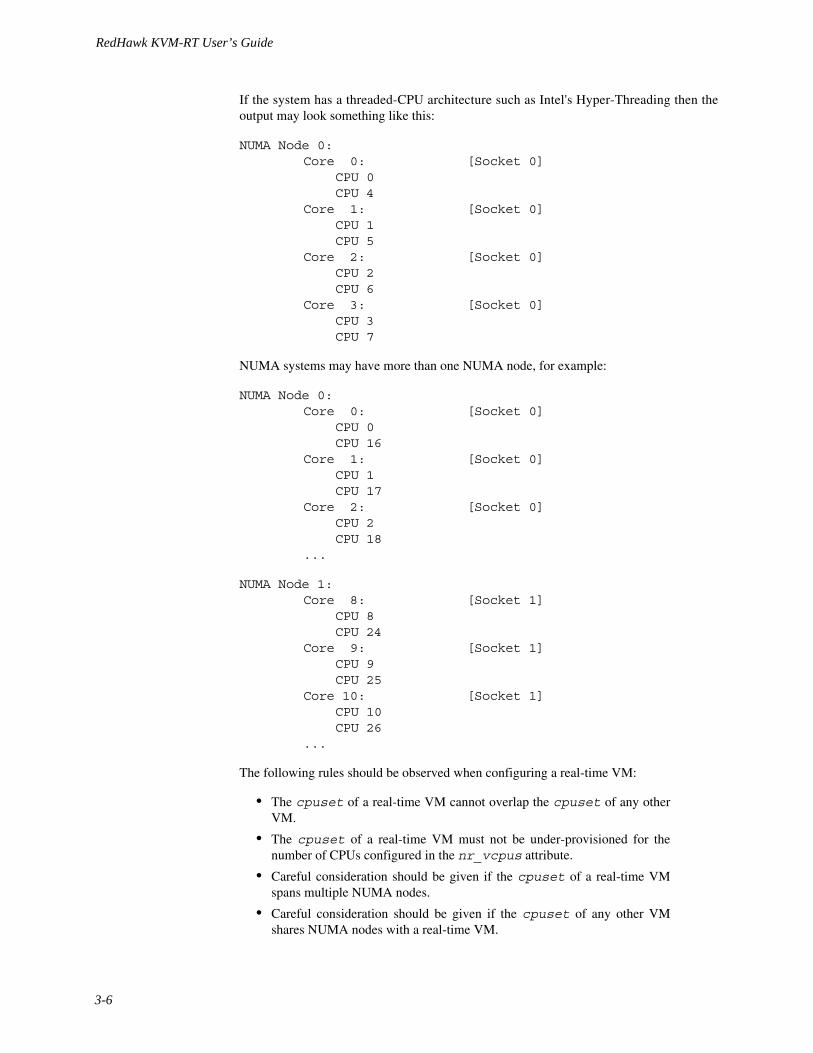
If the system has a threaded-CPU architecture such as Intel's Hyper-Threading then theoutput may look something like this:
NUMA Node 0:Core 0: [Socket 0]
CPU 0CPU 4
Core 1: [Socket 0]CPU 1CPU 5
Core 2: [Socket 0]CPU 2CPU 6
Core 3: [Socket 0]CPU 3CPU 7
NUMA systems may have more than one NUMA node, for example:
NUMA Node 0:Core 0: [Socket 0]
CPU 0CPU 16
Core 1: [Socket 0]CPU 1CPU 17
Core 2: [Socket 0]CPU 2CPU 18
...
NUMA Node 1:Core 8: [Socket 1]
CPU 8CPU 24
Core 9: [Socket 1]CPU 9CPU 25
Core 10: [Socket 1]CPU 10CPU 26
...
The following rules should be observed when configuring a real-time VM:
• The cpuset of a real-time VM cannot overlap the cpuset of any otherVM.
• The cpuset of a real-time VM must not be under-provisioned for thenumber of CPUs configured in the nr_vcpus attribute.
• Careful consideration should be given if the cpuset of a real-time VMspans multiple NUMA nodes.
• Careful consideration should be given if the cpuset of any other VMshares NUMA nodes with a real-time VM.
RedHawk KVM-RT User’s Guide
3-7
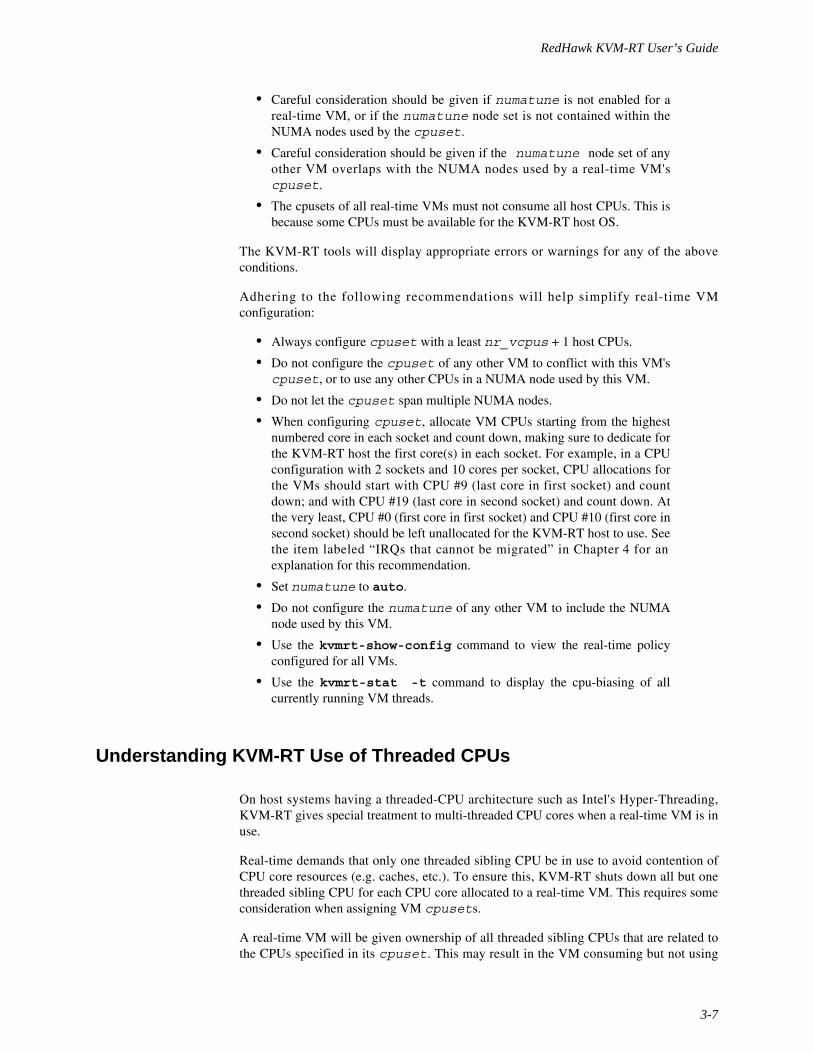
• Careful consideration should be given if numatune is not enabled for areal-time VM, or if the numatune node set is not contained within theNUMA nodes used by the cpuset.
• Careful consideration should be given if the numatune node set of anyother VM overlaps with the NUMA nodes used by a real-time VM'scpuset.
• The cpusets of all real-time VMs must not consume all host CPUs. This isbecause some CPUs must be available for the KVM-RT host OS.
The KVM-RT tools will display appropriate errors or warnings for any of the aboveconditions.
Adhering to the following recommendations will help simplify real-time VMconfiguration:
• Always configure cpuset with a least nr_vcpus + 1 host CPUs.
• Do not configure the cpuset of any other VM to conflict with this VM'scpuset, or to use any other CPUs in a NUMA node used by this VM.
• Do not let the cpuset span multiple NUMA nodes.
• When configuring cpuset, allocate VM CPUs starting from the highestnumbered core in each socket and count down, making sure to dedicate forthe KVM-RT host the first core(s) in each socket. For example, in a CPUconfiguration with 2 sockets and 10 cores per socket, CPU allocations forthe VMs should start with CPU #9 (last core in first socket) and countdown; and with CPU #19 (last core in second socket) and count down. Atthe very least, CPU #0 (first core in first socket) and CPU #10 (first core insecond socket) should be left unallocated for the KVM-RT host to use. Seethe item labeled “IRQs that cannot be migrated” in Chapter 4 for anexplanation for this recommendation.
• Set numatune to auto.
• Do not configure the numatune of any other VM to include the NUMAnode used by this VM.
• Use the kvmrt-show-config command to view the real-time policyconfigured for all VMs.
• Use the kvmrt-stat -t command to display the cpu-biasing of allcurrently running VM threads.
Understanding KVM-RT Use of Threaded CPUs 3
On host systems having a threaded-CPU architecture such as Intel's Hyper-Threading,KVM-RT gives special treatment to multi-threaded CPU cores when a real-time VM is inuse.
Real-time demands that only one threaded sibling CPU be in use to avoid contention ofCPU core resources (e.g. caches, etc.). To ensure this, KVM-RT shuts down all but onethreaded sibling CPU for each CPU core allocated to a real-time VM. This requires someconsideration when assigning VM cpusets.
A real-time VM will be given ownership of all threaded sibling CPUs that are related tothe CPUs specified in its cpuset. This may result in the VM consuming but not using

RedHawk KVM-RT User’s Guide
3-8
more CPUs than it has specified in it's cpuset. Only one CPU per threaded core will beused for real-time and the others will be shutdown.
No special treatment is given to threaded cores hosting non-real-time VMs.
4-1
4Chapter 4Known Issues
3
Special consideration should be given to the following areas:
Known Issues in KVM-RT version 1.1 4
Graphics intensive programs
If a graphics intensive VM does not use dedicated GPU hardware,emulated graphics or any graphics intensive programs can cause VMs toaffect the real-time performance of other virtual machines. The onboardgraphics of a CPU rely on the memory controllers on the chip for accessingVRAM memory for the host and the VMs. If the memory controllers areoverloaded with graphical accesses, the real-time VMs can suffer fromperformance hits.
VMs running the Windows operating system
There is a "per socket" license for Windows operating systems that willdramatically reduce the performance of a Windows virtual machine if youuse the default libvirt CPU topology settings. The user should adjust thecpu_topology setting in the KVM-RT configuration to be manycores/ threads on a s ingle socket . I t i s recommended that thecpu_topology parameter be set to auto for VMs running Windows. Ifthe CPU topology setting is not adjusted, the Windows VM will act like itis a single CPU system and system performance will be slow.
Per-CPU IRQs
Some device drivers use per-CPU IRQs. These IRQs may impact theperformance of real-time VMs. They will also prevent the shutting down ofsibling cpus in threaded-CPU architectures which also may impact real-time performance. Some per-CPU IRQs can be migrated using the shieldsystem service. Changes to this service can be made by editing the shieldconfiguration file /etc/sysconfig/shield and the changes can thenbe put into effect using systemctl(1).
IRQs that cannot be migrated
In some architectures, IRQs are bound to the first CPU of the first core ineach socket and cannot be migrated to another CPU. Note that in athreaded-CPU architecture a core may have more than one CPU hence theterm ‘first CPU’ is used. These IRQs may affect the performance of real-time VMs running on those CPUs, therefore, it is recommended that thefirst CPU of the first core in each socket be reserved for the KVM-RT hostand not be allocated to a real-time VM.

RedHawk KVM-RT User’s Guide
4-2