Embed Size (px)
Citation preview
12
/ department of mathematics and computer science 1/76
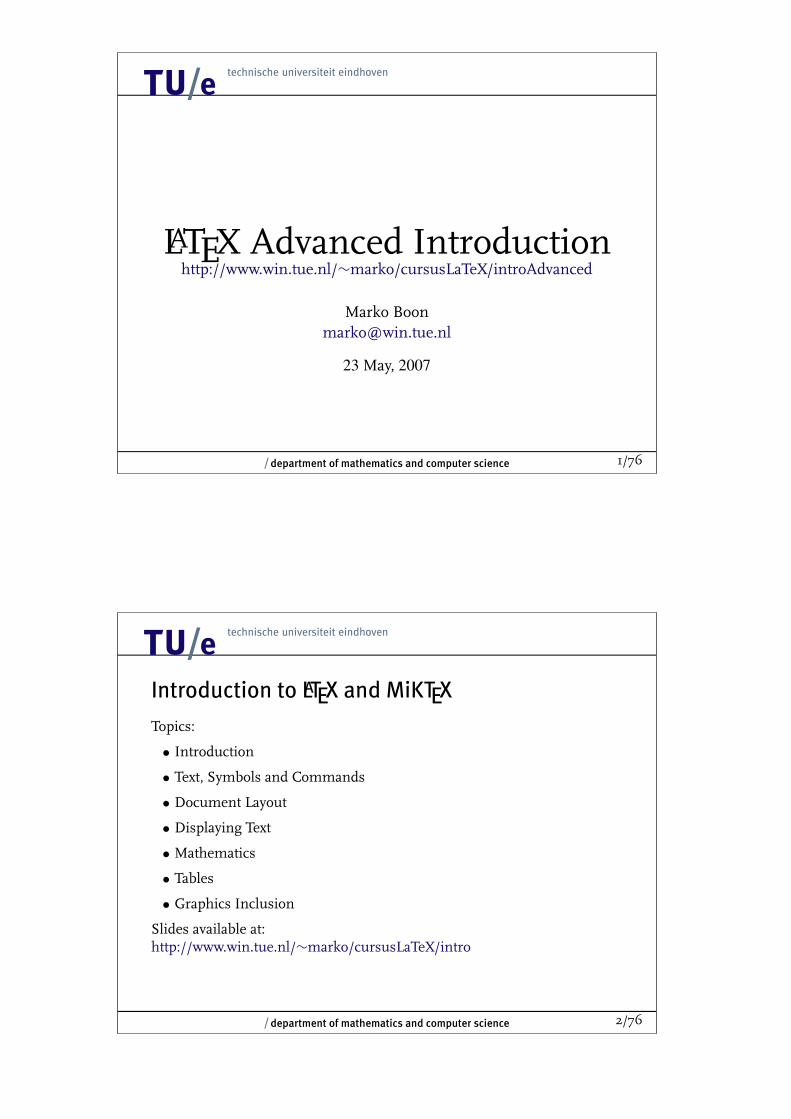
LATEX Advanced Introductionhttp://www.win.tue.nl/∼marko/cursusLaTeX/introAdvanced
Marko [email protected]
23 May, 2007
12
/ department of mathematics and computer science 2/76
Introduction to LATEX and MiKTEX
Topics:
• Introduction
• Text, Symbols and Commands
• Document Layout
• Displaying Text
• Mathematics
• Tables
• Graphics Inclusion
Slides available at:http://www.win.tue.nl/∼marko/cursusLaTeX/intro
12
/ department of mathematics and computer science 3/76
Introduction to LATEX Advanced
• WinEdt - working with a main file• Installing additional packages• LATEX search path• Scalable and non-scalable graphics• Table of contents• Page numbering• Multicolumn text• Footnotes• Fonts• Headers and footers• Mathematics• Floats• Interactive PDF file• Index• Including programming statements• Slide shows and posters
12
/ department of mathematics and computer science 4/76
WinEdt - Working with a main file
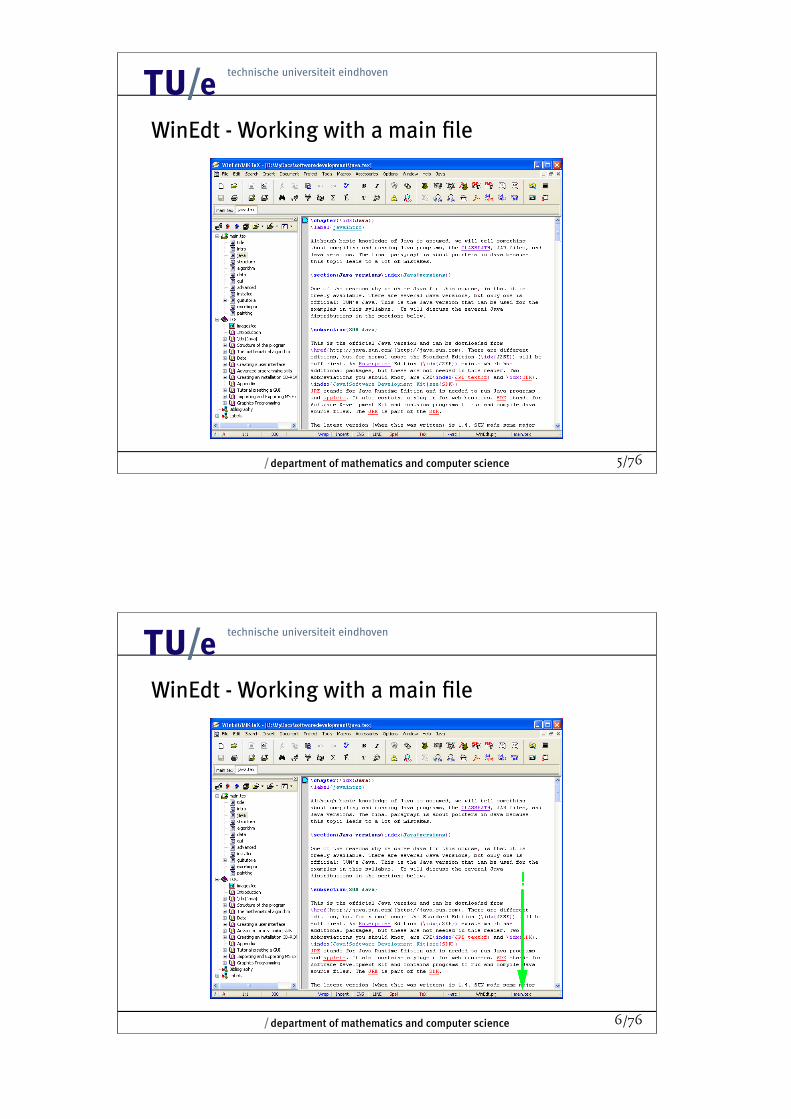
In bigger documents one often has one main file which includes several sub-documents: \input chapter1 etc.. WinEdt has special functionality todeal with this document structure:
declares the current file as main file. This means that the programslatex, yap, dvips, gsview, pdflatex operate on this mainfile, even if another document is opened in WinEdt.
does not consider the current file as main file anymore. The file that iscurrently open will be LATEXed.
displays the project tree (main file, input files, table of contents, bibliog-raphy and labels. You can click on files in this tree to open them.
12
/ department of mathematics and computer science 5/76
WinEdt - Working with a main file
12
/ department of mathematics and computer science 6/76
WinEdt - Working with a main file
!
12
/ department of mathematics and computer science 7/76
Installing additional packages
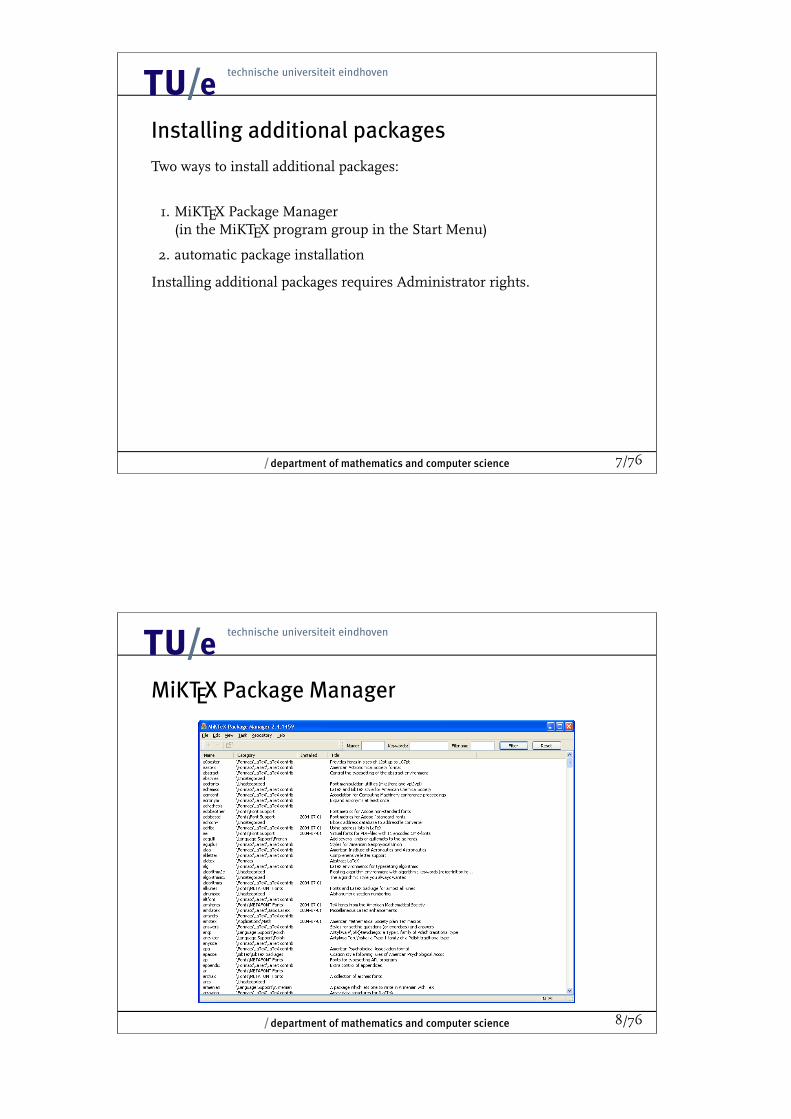
Two ways to install additional packages:
1. MiKTEX Package Manager(in the MiKTEX program group in the Start Menu)
2. automatic package installation
Installing additional packages requires Administrator rights.
12
/ department of mathematics and computer science 8/76
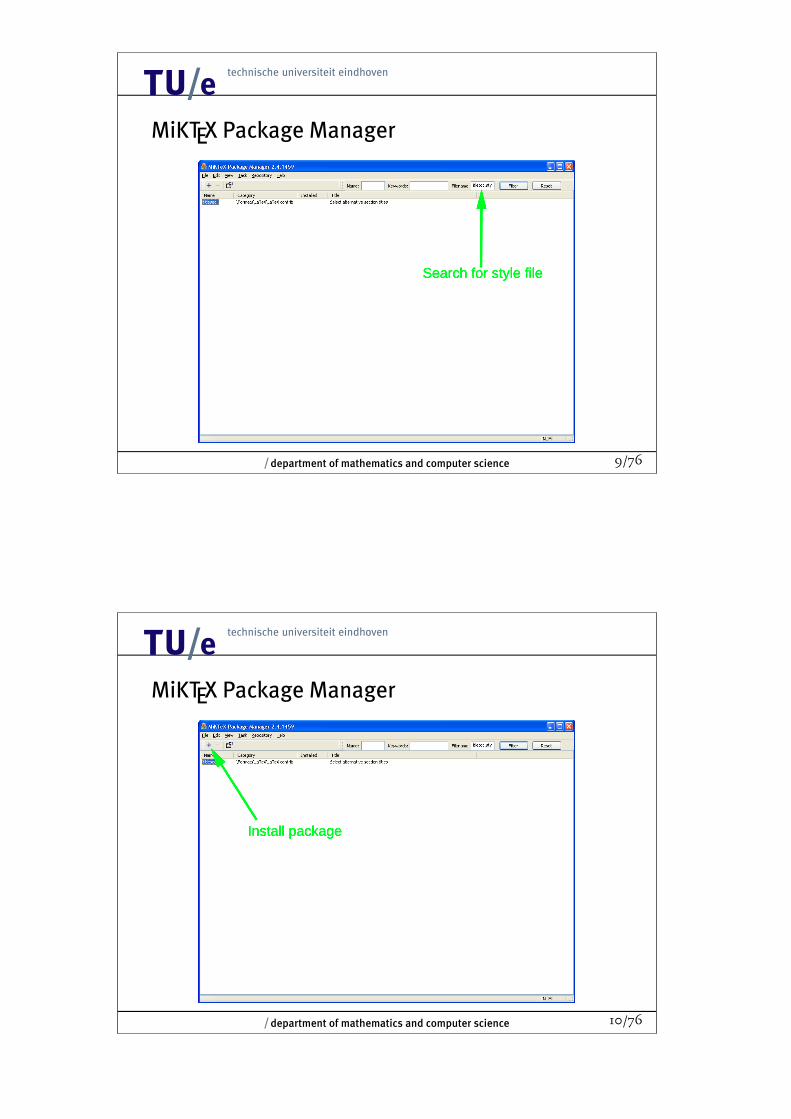
MiKTEX Package Manager
12
/ department of mathematics and computer science 9/76
MiKTEX Package Manager
Search for style file
12
/ department of mathematics and computer science 10/76
MiKTEX Package Manager
Install package
12
/ department of mathematics and computer science 11/76
MiKTEX Package Manager
12
/ department of mathematics and computer science 12/76
Automatic Package Installation
12
/ department of mathematics and computer science 13/76
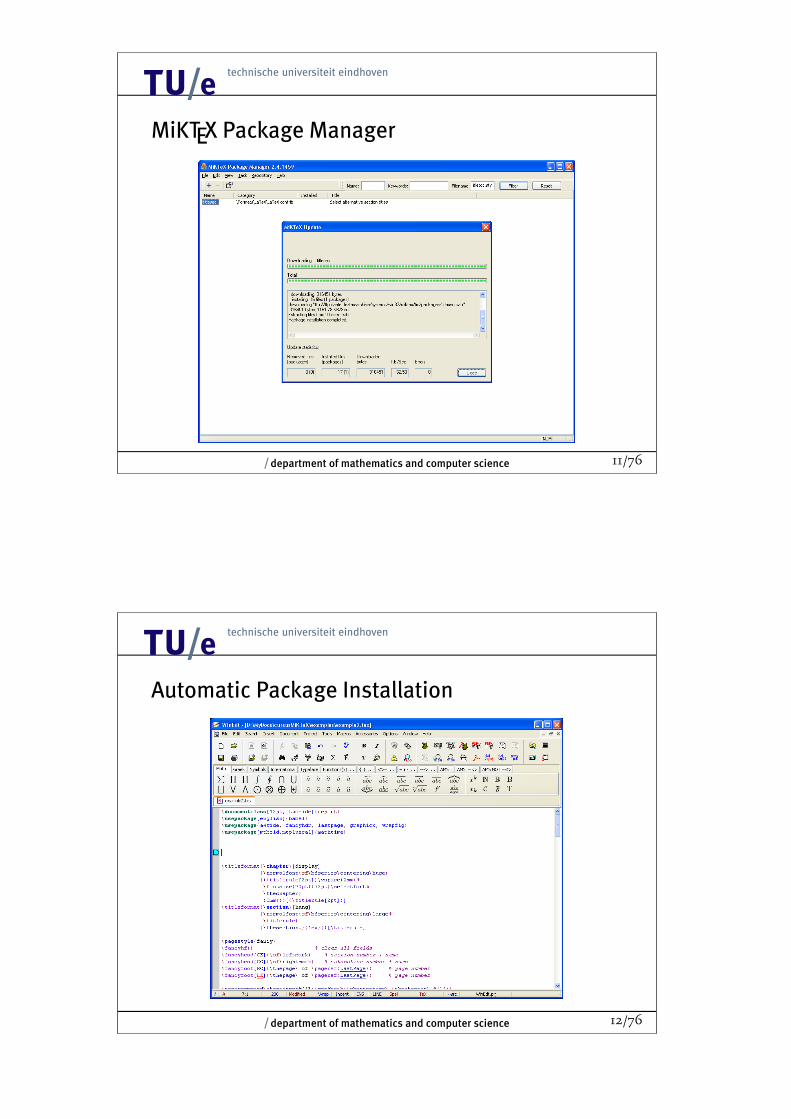
Automatic Package Installation
Use package
12
/ department of mathematics and computer science 14/76
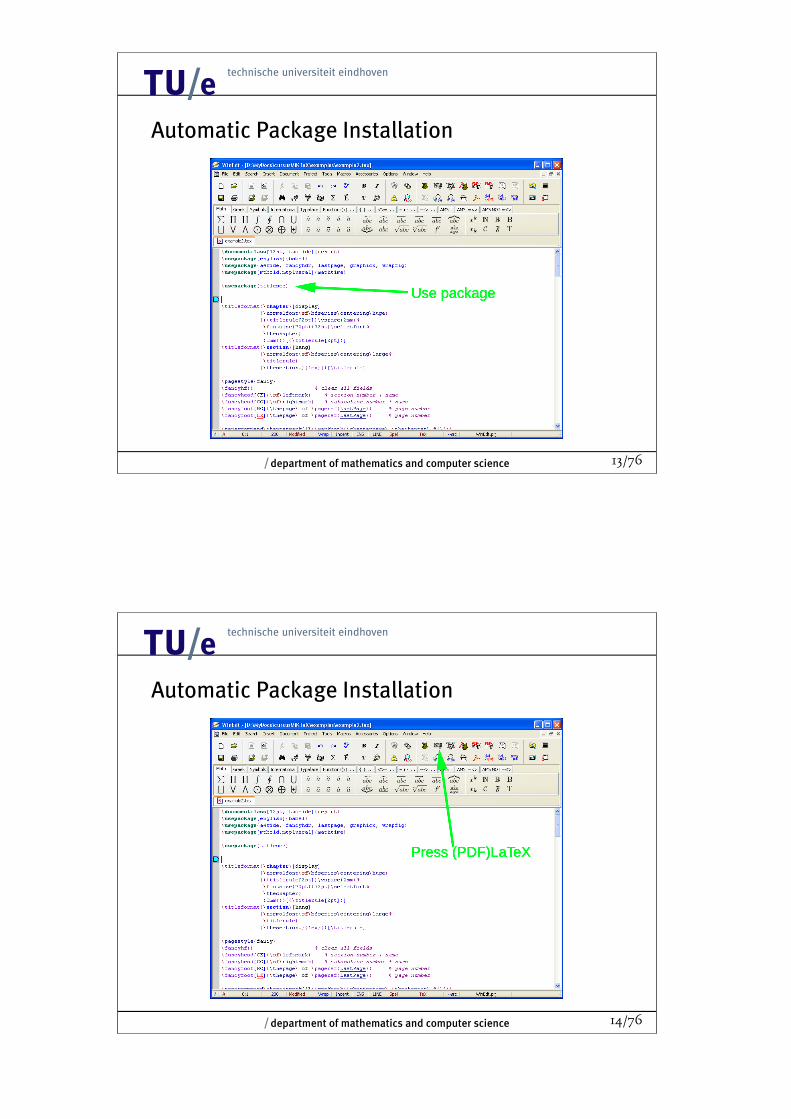
Automatic Package Installation
Press (PDF)LaTeX
12
/ department of mathematics and computer science 15/76
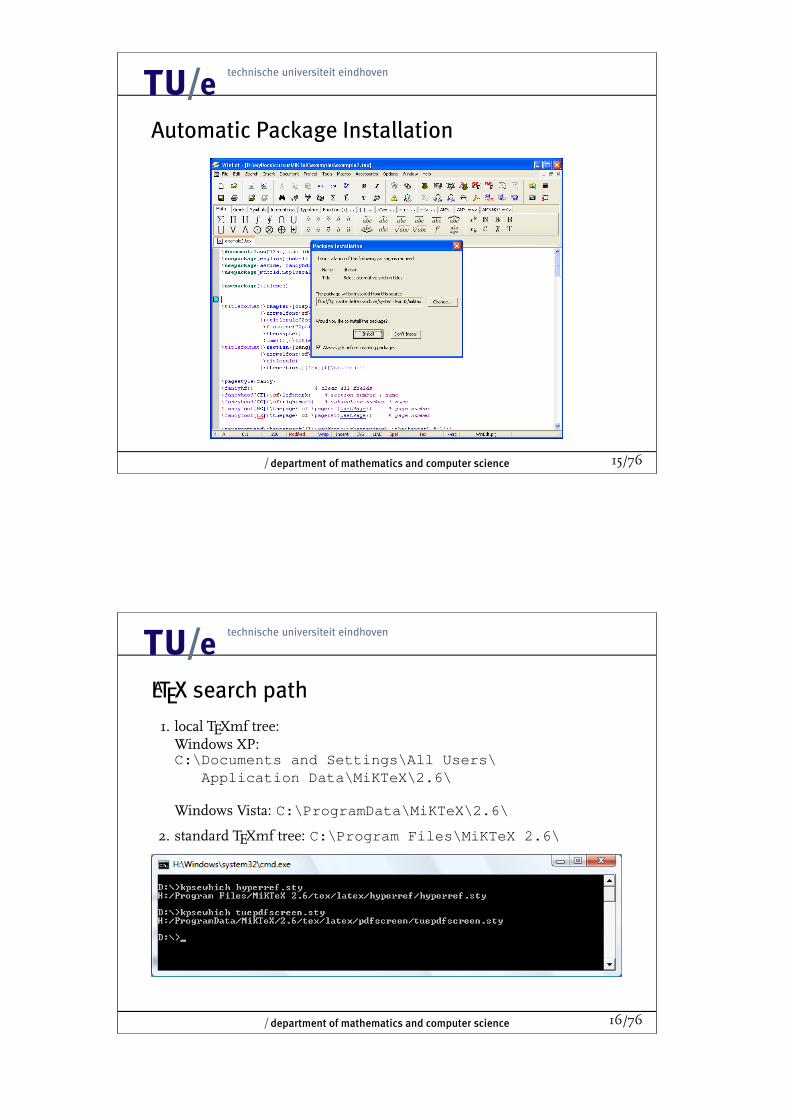
Automatic Package Installation
12
/ department of mathematics and computer science 16/76
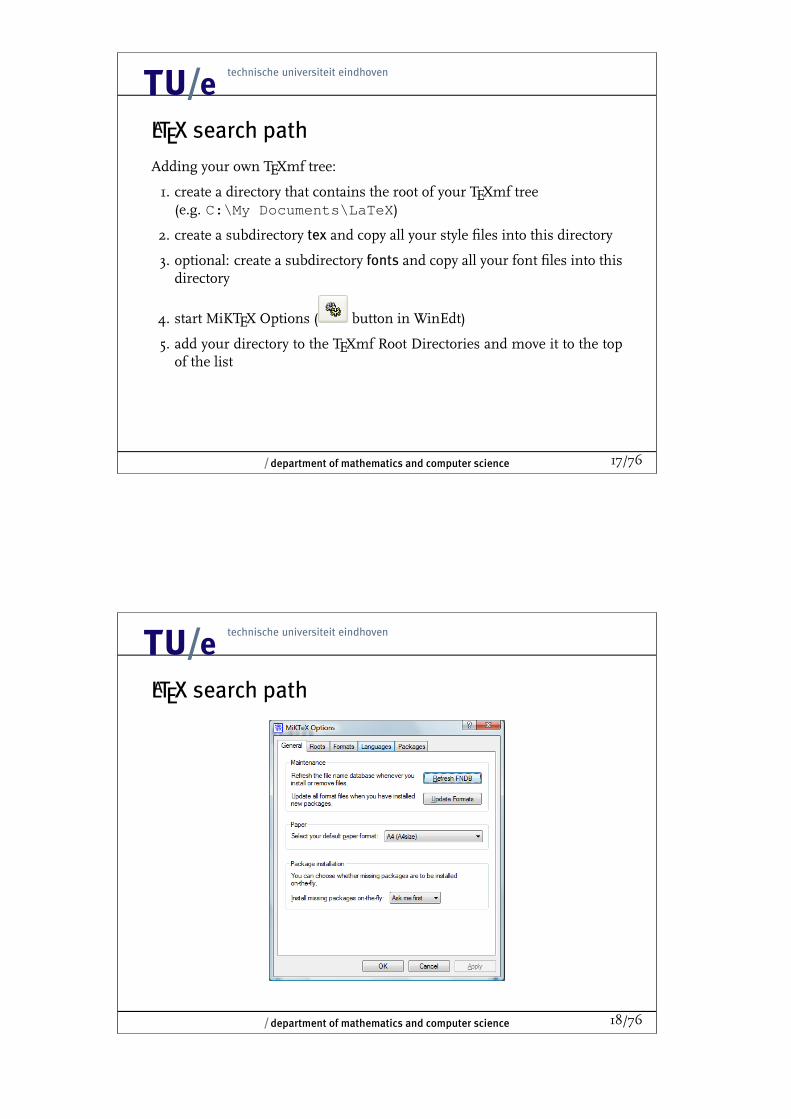
LATEX search path
1. local TEXmf tree:Windows XP:C:\Documents and Settings\All Users\
Application Data\MiKTeX\2.6\
Windows Vista: C:\ProgramData\MiKTeX\2.6\
2. standard TEXmf tree: C:\Program Files\MiKTeX 2.6\
12
/ department of mathematics and computer science 17/76
LATEX search path
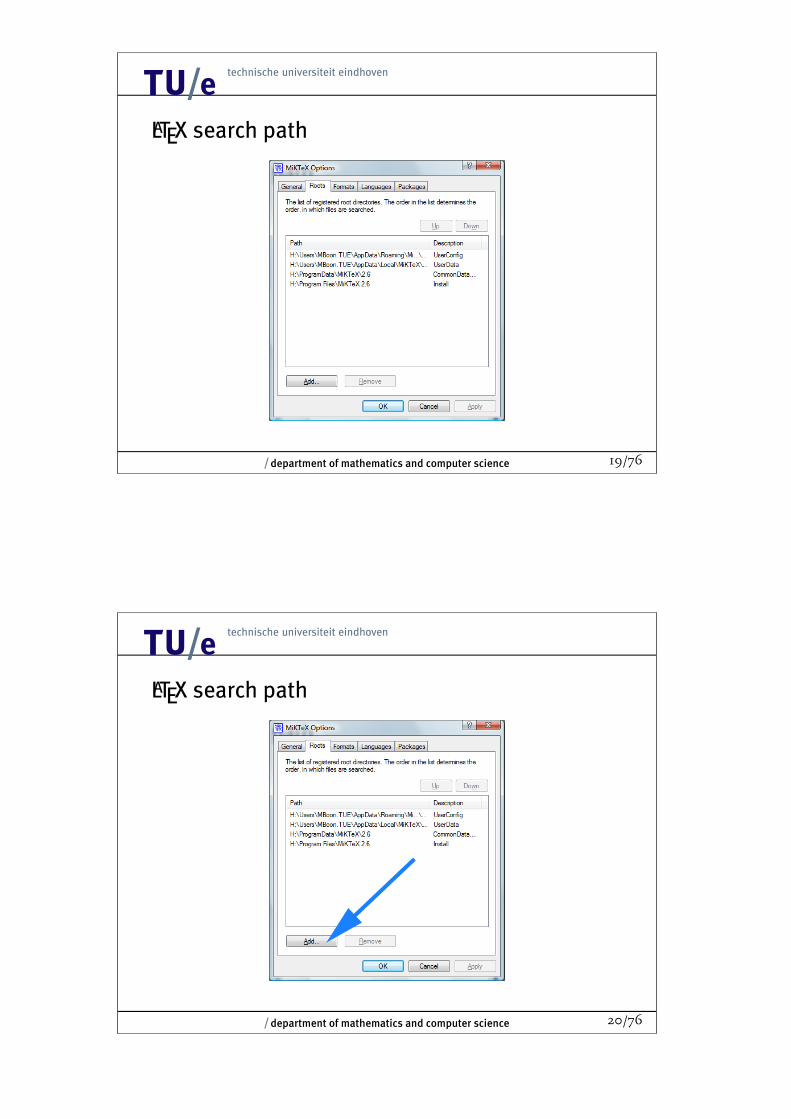
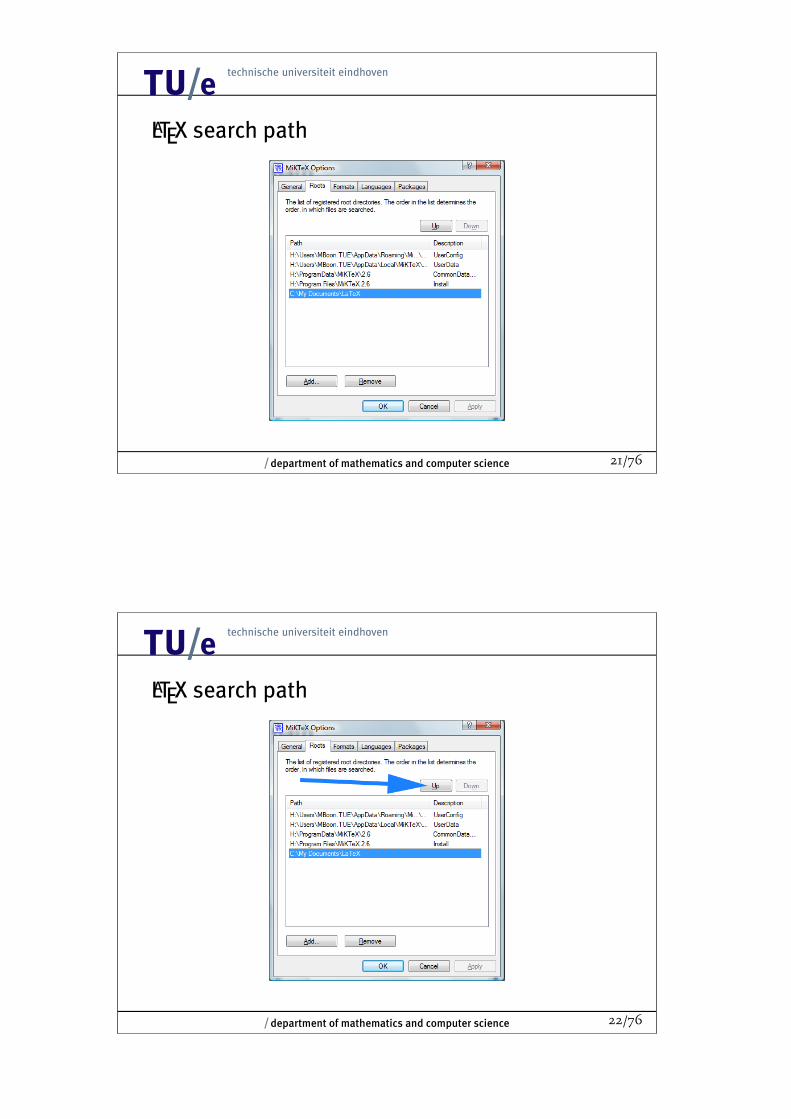
Adding your own TEXmf tree:
1. create a directory that contains the root of your TEXmf tree(e.g. C:\My Documents\LaTeX)
2. create a subdirectory tex and copy all your style files into this directory
3. optional: create a subdirectory fonts and copy all your font files into thisdirectory
4. start MiKTEX Options ( button in WinEdt)
5. add your directory to the TEXmf Root Directories and move it to the topof the list
12
/ department of mathematics and computer science 18/76
LATEX search path
12
/ department of mathematics and computer science 19/76
LATEX search path
12
/ department of mathematics and computer science 20/76
LATEX search path
12
/ department of mathematics and computer science 21/76
LATEX search path
12
/ department of mathematics and computer science 22/76
LATEX search path
12
/ department of mathematics and computer science 23/76
LATEX search path
12
/ department of mathematics and computer science 24/76
LATEX search path
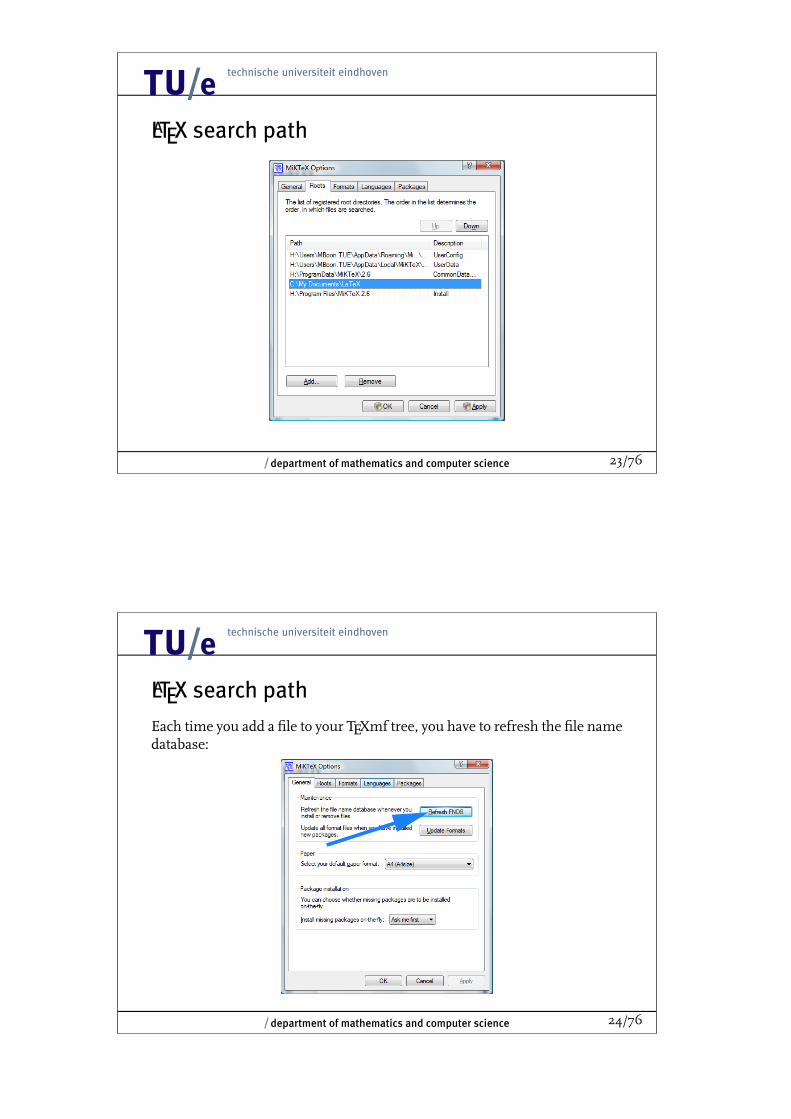
Each time you add a file to your TEXmf tree, you have to refresh the file namedatabase:
12
/ department of mathematics and computer science 25/76
Scalable and non-scalable graphics
O
P
Q
������6
7 ����������6
1
1
12
/ department of mathematics and computer science 26/76
Scalable and non-scalable graphics
O
P
Q
������6
7 ����������6
1
1
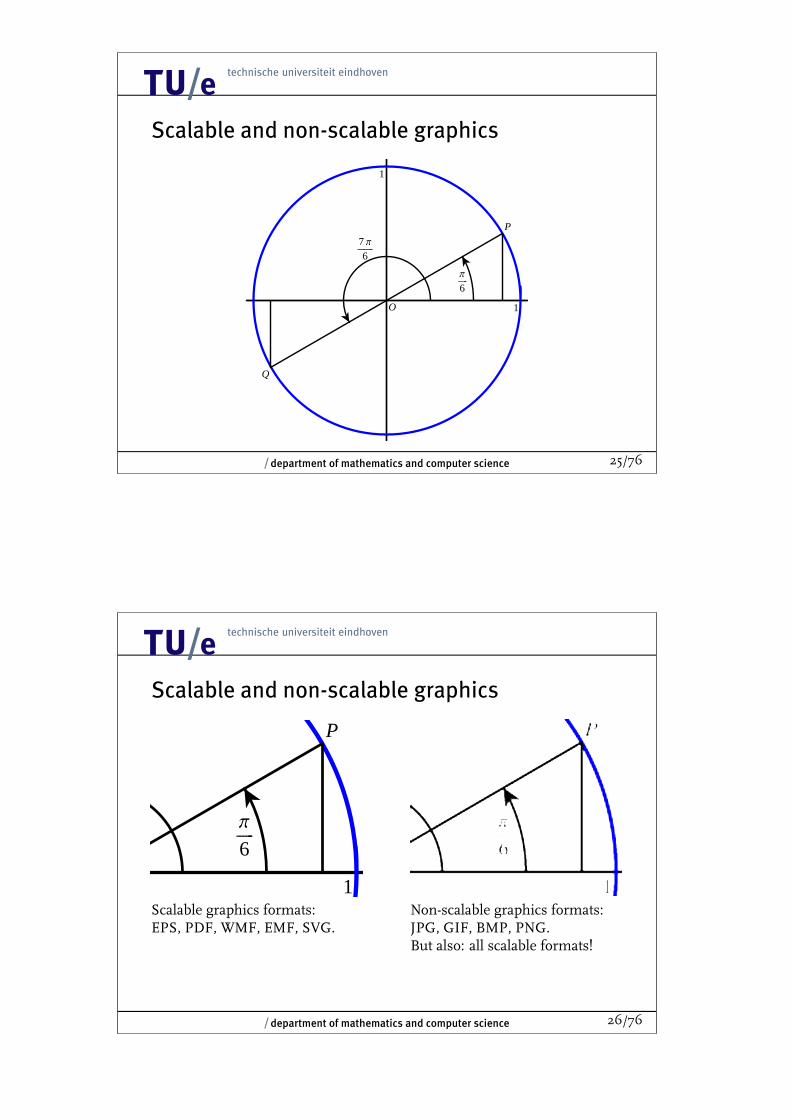
Scalable graphics formats:EPS, PDF, WMF, EMF, SVG.
Non-scalable graphics formats:JPG, GIF, BMP, PNG.But also: all scalable formats!
12
/ department of mathematics and computer science 27/76
Scalable Graphics Software
• Corel Designer,
• CorelDraw,
• Adobe Illustrator,
• Microsoft Visio,
• Microsoft Office Drawing,
• OpenOffice.org Draw,
• all computer algebra software (Mathematica, Matlab, Maple)
Non-scalable Graphics Software
• Adobe PhotoShop,
• Paint Shop Pro,
• MS Paint,
• all digital photo editing software!
12
/ department of mathematics and computer science 28/76
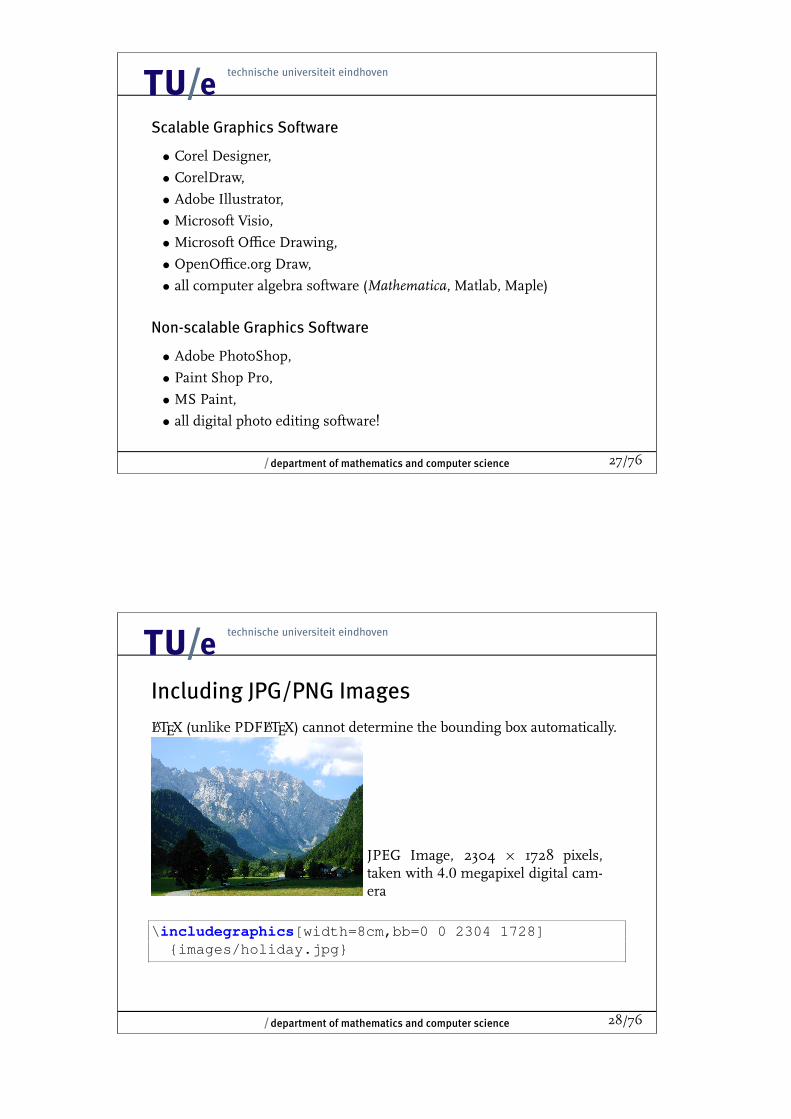
Including JPG/PNG Images
LATEX (unlike PDFLATEX) cannot determine the bounding box automatically.
JPEG Image, 2304 × 1728 pixels,taken with 4.0 megapixel digital cam-era
\includegraphics[width=8cm,bb=0 0 2304 1728]{images/holiday.jpg}
12
/ department of mathematics and computer science 29/76
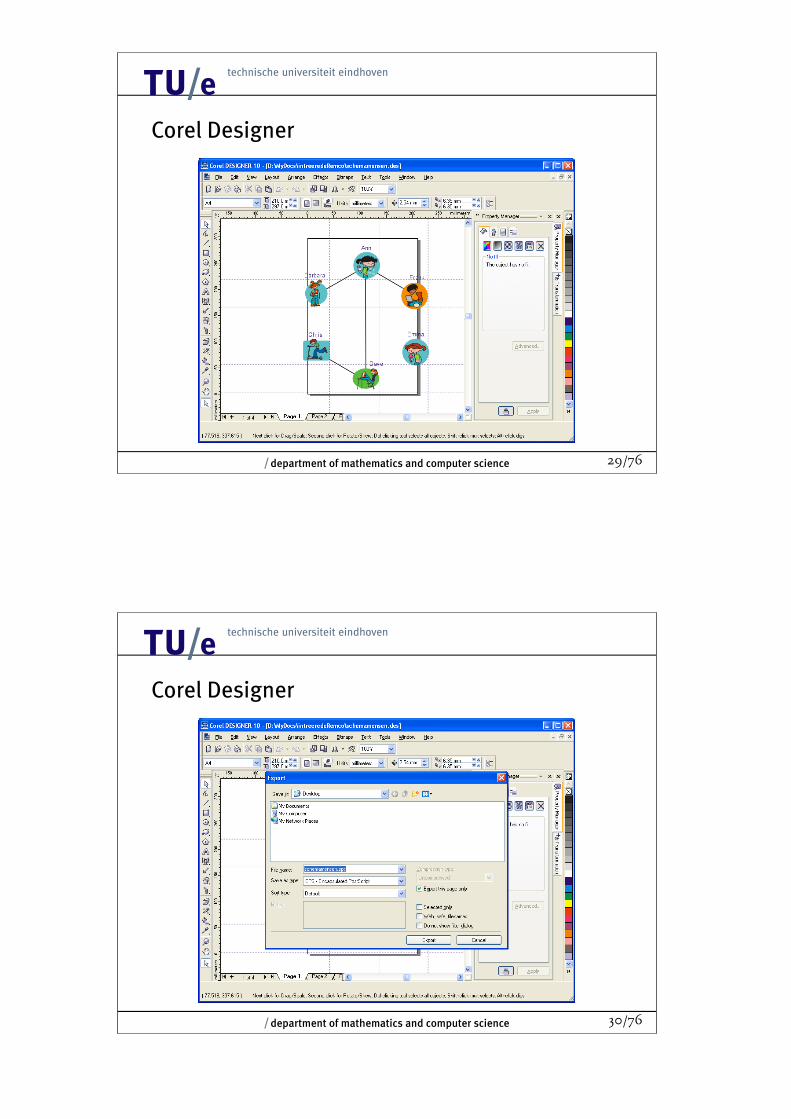
Corel Designer
12
/ department of mathematics and computer science 30/76
Corel Designer
12
/ department of mathematics and computer science 31/76
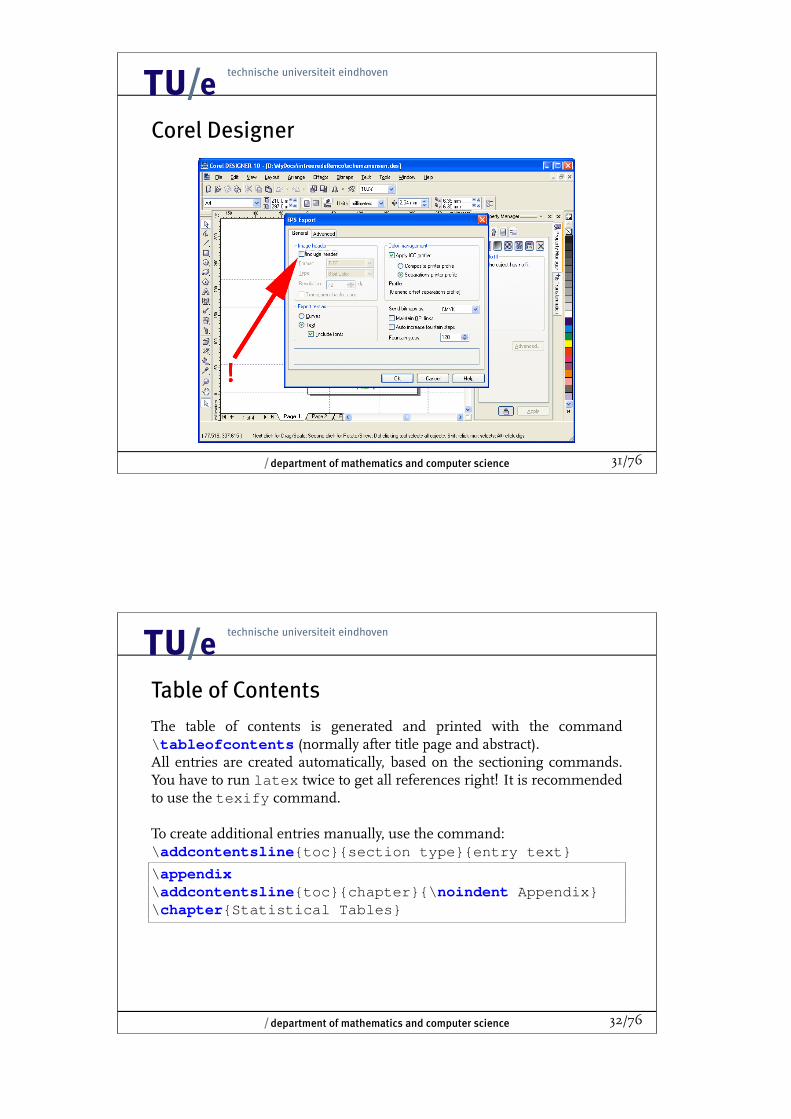
Corel Designer
12
/ department of mathematics and computer science 32/76
Table of Contents
The table of contents is generated and printed with the command\tableofcontents (normally after title page and abstract).All entries are created automatically, based on the sectioning commands.You have to run latex twice to get all references right! It is recommendedto use the texify command.
To create additional entries manually, use the command:\addcontentsline{toc}{section type}{entry text}
\appendix\addcontentsline{toc}{chapter}{\noindent Appendix}\chapter{Statistical Tables}
12
/ department of mathematics and computer science 33/76
Page Numbering
You can set the page number manually:
\setcounter{page}{14}
You can also control the style of the page numbering:
\pagenumbering{style}
The allowed styles are:
arabic normal (Arabic) numerals: 1, 2, 3, 4
roman lowercase Roman numerals: i, i i, i i i, iv
Roman uppercase Roman numerals: I, I I, I I I, I V
alph for lowercase letters: a, b, c, d
Alph for uppercase letters: A, B, C, D
12
/ department of mathematics and computer science 34/76
Book Structure
To simplify the structuring of the book, use the commands:
\frontmatter\mainmatter\backmatter
Front matter: preface, table of contentsMain matter: main body of textBack matter: bibliography, index
Front matter has Roman page numbering and suppresses the numbering ofchapters. Back matter also has unnumbered chapters. The page number isreset for the main matter.
12
/ department of mathematics and computer science 35/76
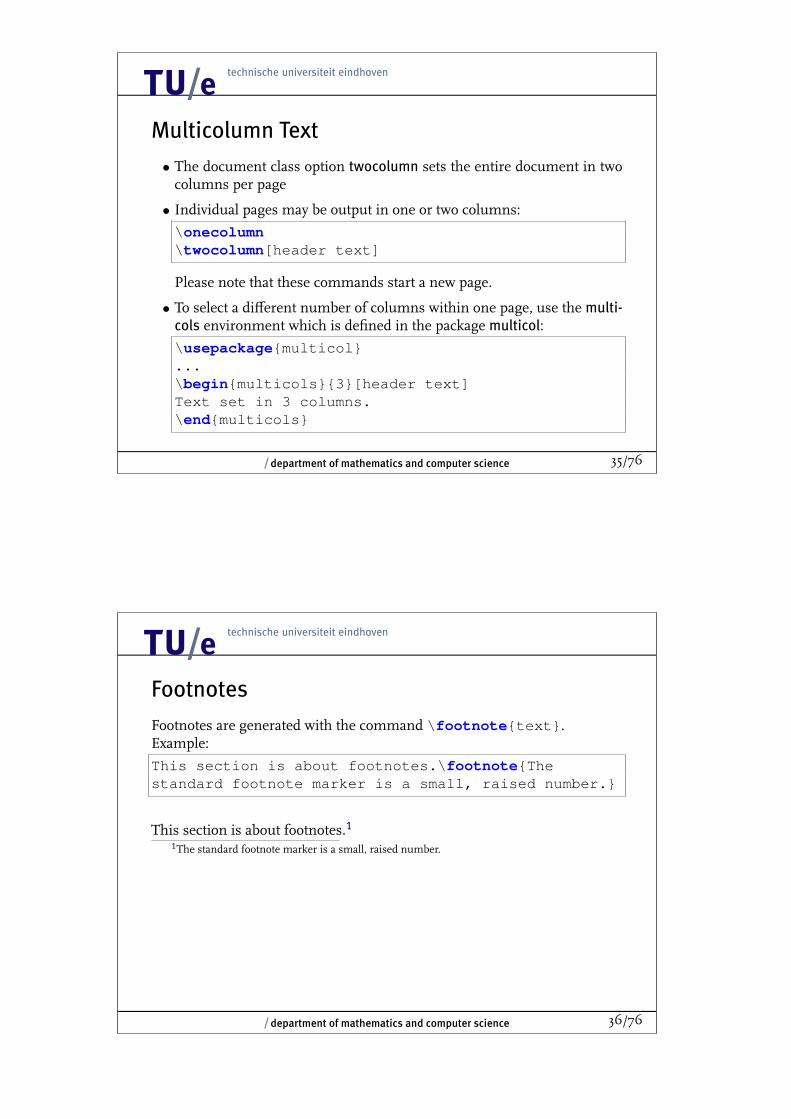
Multicolumn Text
• The document class option twocolumn sets the entire document in twocolumns per page
• Individual pages may be output in one or two columns:
\onecolumn\twocolumn[header text]
Please note that these commands start a new page.
• To select a different number of columns within one page, use the multi-cols environment which is defined in the package multicol:
\usepackage{multicol}...\begin{multicols}{3}[header text]Text set in 3 columns.\end{multicols}
12
/ department of mathematics and computer science 36/76
Footnotes
Footnotes are generated with the command \footnote{text}.Example:
This section is about footnotes.\footnote{Thestandard footnote marker is a small, raised number.}
This section is about footnotes.11The standard footnote marker is a small, raised number.
12
/ department of mathematics and computer science 37/76
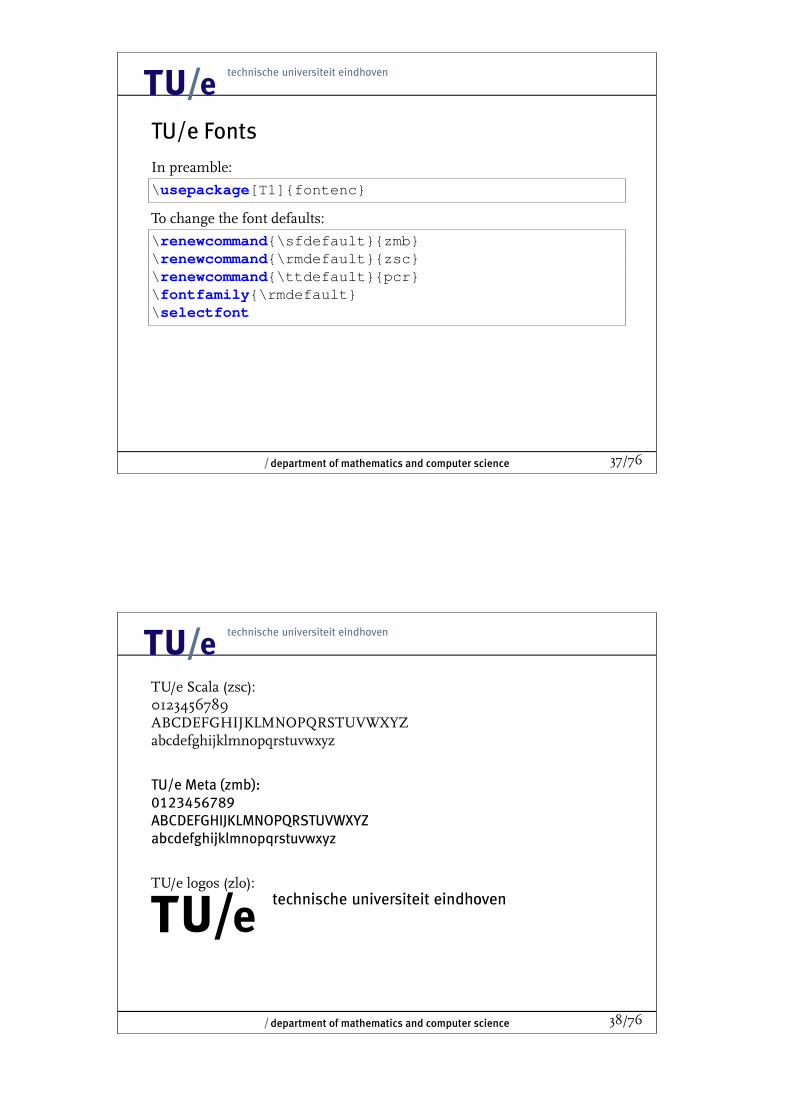
TU/e Fonts
In preamble:
\usepackage[T1]{fontenc}
To change the font defaults:
\renewcommand{\sfdefault}{zmb}\renewcommand{\rmdefault}{zsc}\renewcommand{\ttdefault}{pcr}\fontfamily{\rmdefault}\selectfont
12
/ department of mathematics and computer science 38/76
TU/e Scala (zsc):0123456789ABCDEFGHIJKLMNOPQRSTUVWXYZabcdefghijklmnopqrstuvwxyz
TU/e Meta (zmb):0123456789ABCDEFGHIJKLMNOPQRSTUVWXYZabcdefghijklmnopqrstuvwxyz
TU/e logos (zlo):
12
12
/ department of mathematics and computer science 39/76
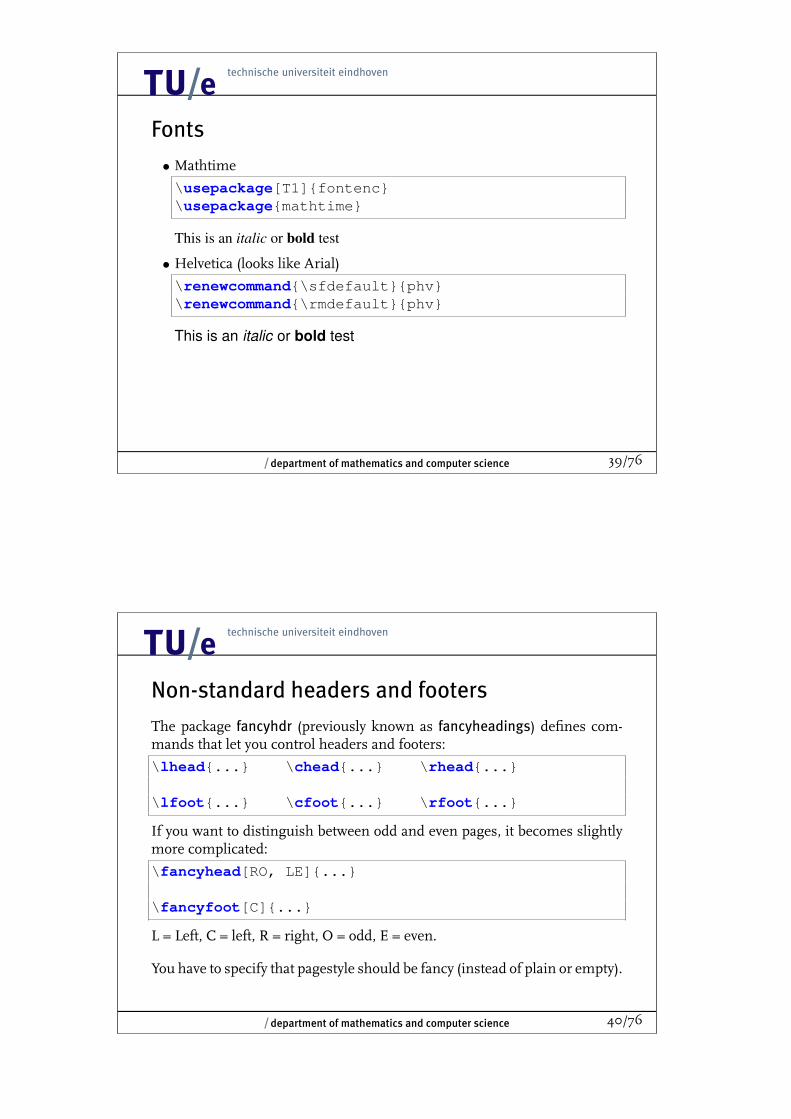
Fonts
• Mathtime
\usepackage[T1]{fontenc}\usepackage{mathtime}
This is an italic or bold test
• Helvetica (looks like Arial)
\renewcommand{\sfdefault}{phv}\renewcommand{\rmdefault}{phv}
This is an italic or bold test
12
/ department of mathematics and computer science 40/76
Non-standard headers and footers
The package fancyhdr (previously known as fancyheadings) defines com-mands that let you control headers and footers:
\lhead{...} \chead{...} \rhead{...}
\lfoot{...} \cfoot{...} \rfoot{...}
If you want to distinguish between odd and even pages, it becomes slightlymore complicated:
\fancyhead[RO, LE]{...}
\fancyfoot[C]{...}
L = Left, C = left, R = right, O = odd, E = even.
You have to specify that pagestyle should be fancy (instead of plain or empty).
12
/ department of mathematics and computer science 41/76
fancyhdr - Example
\pagestyle{fancy}\fancyhf{}\fancyhead[CE]{\sffamily\leftmark}\fancyhead[CO]{\sffamily\rightmark}\fancyfoot[RO]{\thepage\ of \pageref{LastPage}}\fancyfoot[LE]{\thepage\ of \pageref{LastPage}}
\renewcommand\chaptermark[1]{%\markboth{\chaptername\ \thechapter\ #1}{}}
\renewcommand\sectionmark[1]{%\markright{\thesection\ #1}}
\renewcommand\headrulewidth{0.4pt}
Please note that the LastPage reference is only available if you load the pack-age lastpage. You have to LATEX your document twice before it works.
12
/ department of mathematics and computer science 42/76
Exercise 1
1. Create a directory LaTeX in your Documents directory. Add this direc-tory to your LATEX search path. Make a subdirectory tex.
2. Download snowwhite.tex and snowwhite.jpg. Put the JPG filein the newly created TeXmf tree and Refresh the Filename Database.
3. Include the image snowwhite.jpg on the title page. Make sure thatyour document runs with latex and pdflatex!
4. Change the page numbering to uppercase Roman numbering.
5. find the second line in chapter 4.2 (They were seven dwarfs . . . ) andcreate a footnote at this place. It should say: Walt Disney was the firstone to give names to the dwarfs: Dopey, Grumpy, Doc, Happy, Bashful,Sneezy and Sleepy.
6. Change the default fonts of the document to TU/e fonts.
7. Create headers and footers just like in the fancyhdr example.
12
/ department of mathematics and computer science 43/76
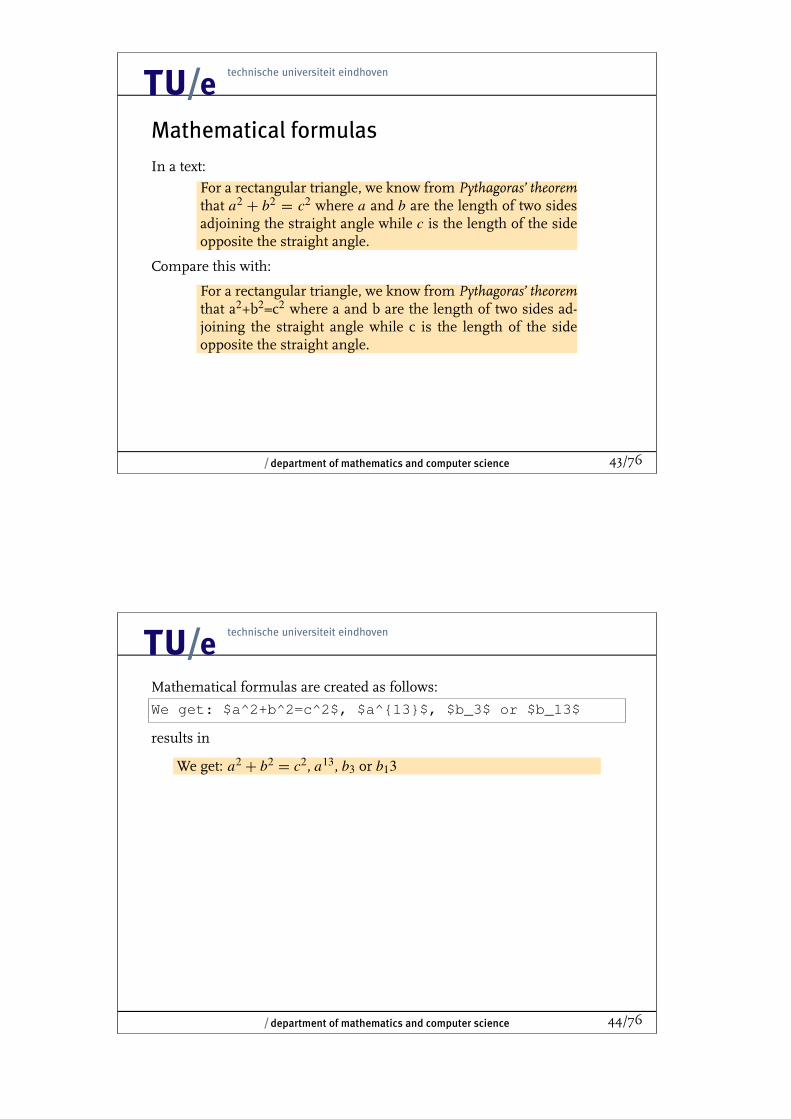
Mathematical formulas
In a text:
For a rectangular triangle, we know from Pythagoras’ theoremthat a2
+ b2= c2 where a and b are the length of two sides
adjoining the straight angle while c is the length of the sideopposite the straight angle.
Compare this with:
For a rectangular triangle, we know from Pythagoras’ theoremthat a2+b2=c2 where a and b are the length of two sides ad-joining the straight angle while c is the length of the sideopposite the straight angle.
12
/ department of mathematics and computer science 44/76
Mathematical formulas are created as follows:
We get: $a^2+b^2=c^2$, $a^{13}$, $b_3$ or $b_13$
results in
We get: a2+ b2
= c2, a13, b3 or b13
12
/ department of mathematics and computer science 45/76
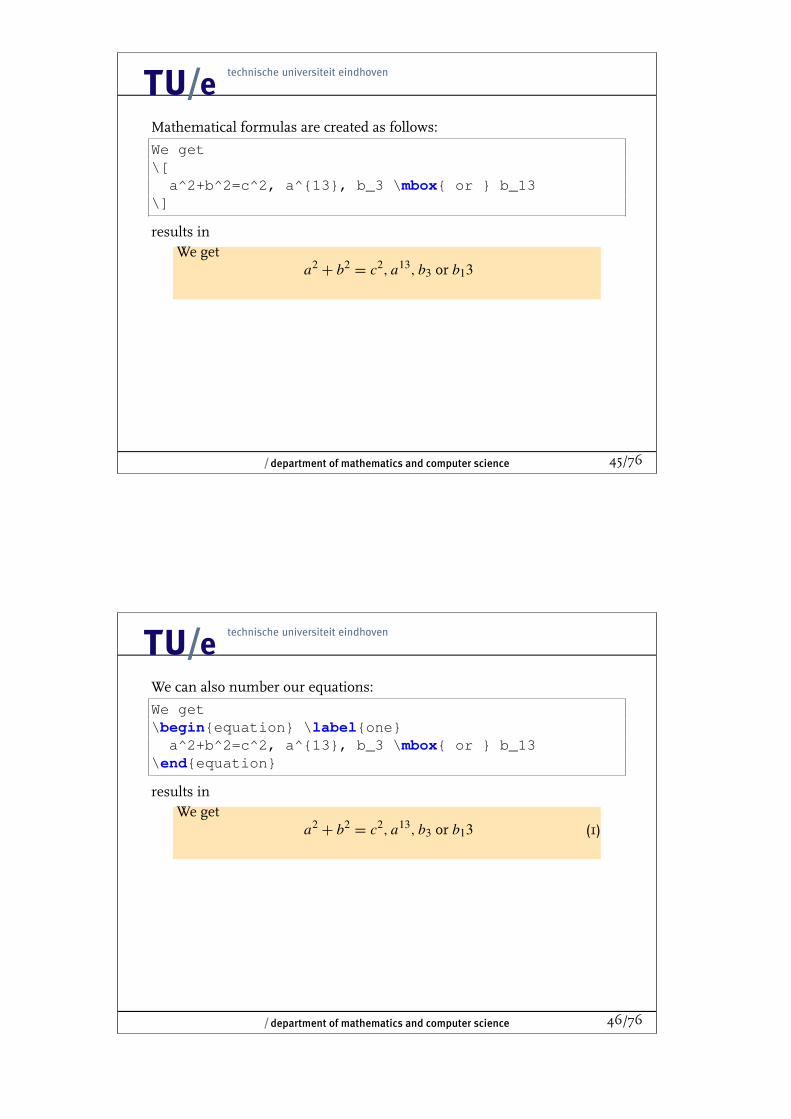
Mathematical formulas are created as follows:
We get\[
a^2+b^2=c^2, a^{13}, b_3 \mbox{ or } b_13\]
results inWe get
a2+ b2
= c2, a13, b3 or b13
12
/ department of mathematics and computer science 46/76
We can also number our equations:
We get\begin{equation} \label{one}
a^2+b^2=c^2, a^{13}, b_3 \mbox{ or } b_13\end{equation}
results inWe get
a2+ b2
= c2, a13, b3 or b13 (1)
12
/ department of mathematics and computer science 47/76
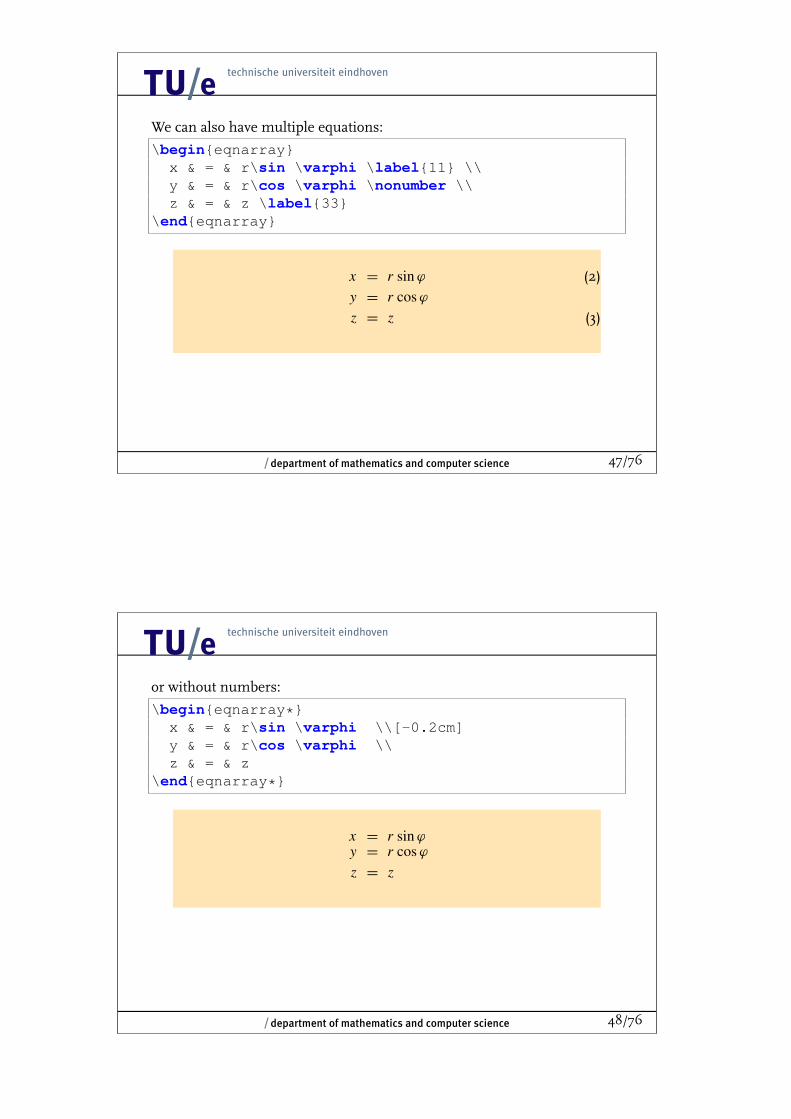
We can also have multiple equations:
\begin{eqnarray}x & = & r\sin \varphi \label{11} \\y & = & r\cos \varphi \nonumber \\z & = & z \label{33}
\end{eqnarray}
x = r sin ϕ (2)y = r cos ϕ
z = z (3)
12
/ department of mathematics and computer science 48/76
or without numbers:
\begin{eqnarray*}x & = & r\sin \varphi \\[-0.2cm]y & = & r\cos \varphi \\z & = & z
\end{eqnarray*}
x = r sin ϕy = r cos ϕ
z = z
12
/ department of mathematics and computer science 49/76
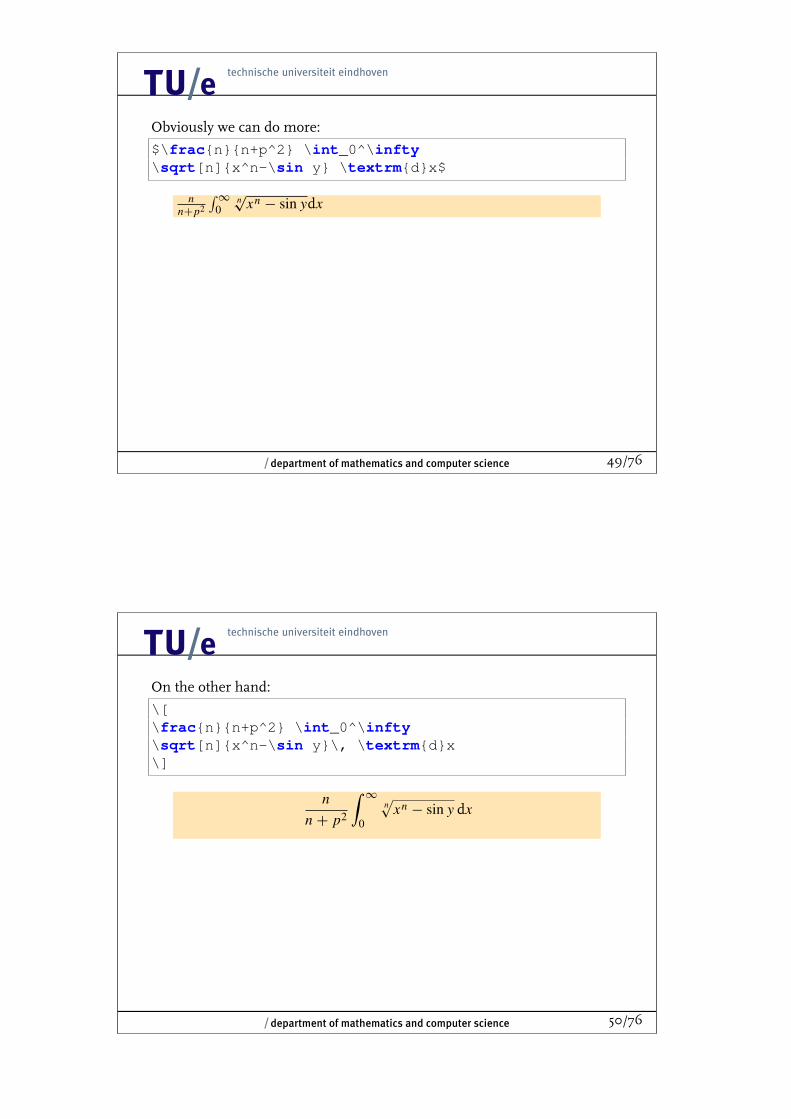
Obviously we can do more:
$\frac{n}{n+p^2} \int_0^\infty\sqrt[n]{x^n-\sin y} \textrm{d}x$
nn+p2
∫∞
0n√
xn − sin ydx
12
/ department of mathematics and computer science 50/76
On the other hand:
\[\frac{n}{n+p^2} \int_0^\infty\sqrt[n]{x^n-\sin y}\, \textrm{d}x\]
nn + p2
∫∞
0
n√
xn − sin y dx
12
/ department of mathematics and computer science 51/76
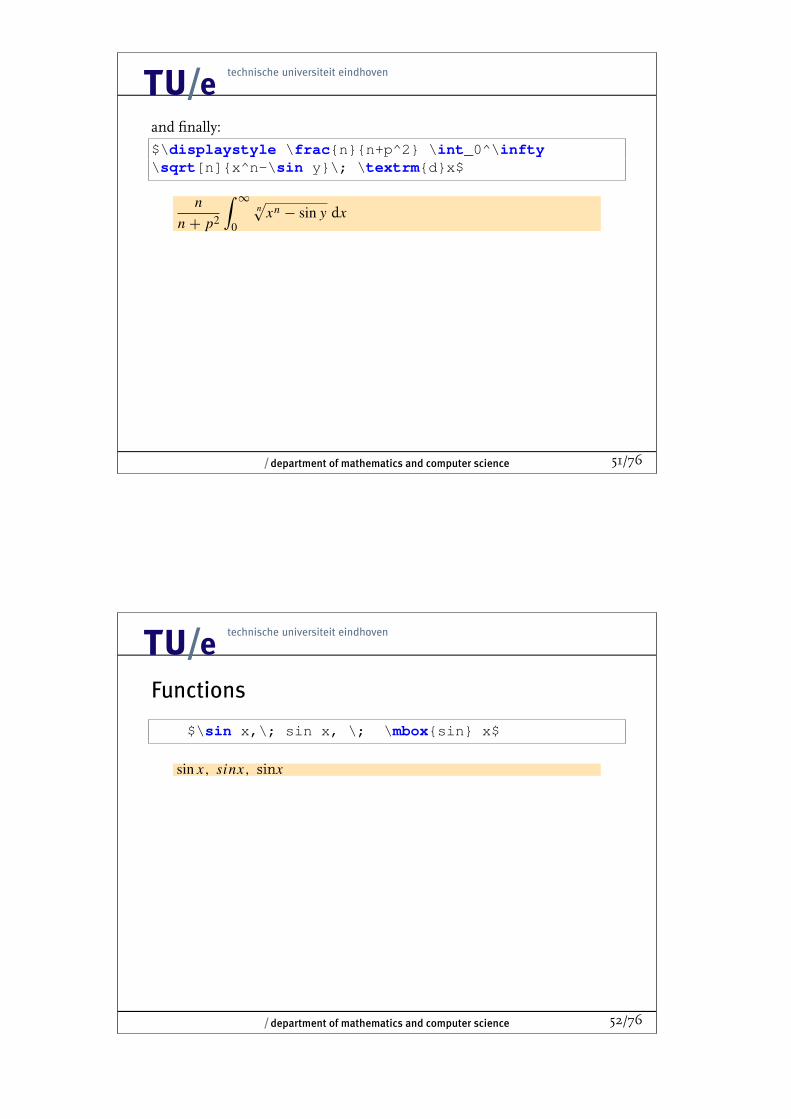
and finally:
$\displaystyle \frac{n}{n+p^2} \int_0^\infty\sqrt[n]{x^n-\sin y}\; \textrm{d}x$
nn + p2
∫∞
0
n√
xn − sin y dx
12
/ department of mathematics and computer science 52/76
Functions
$\sin x,\; sin x, \; \mbox{sin} x$
sin x, sinx, sinx
12
/ department of mathematics and computer science 53/76
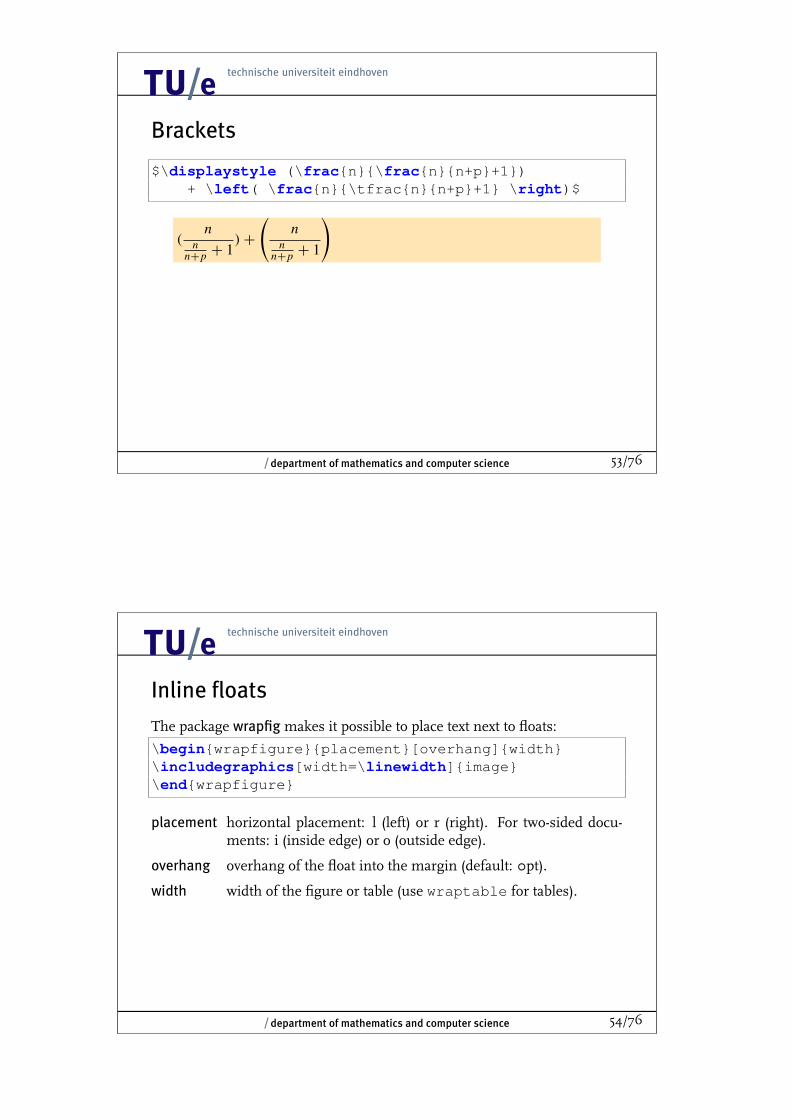
Brackets
$\displaystyle (\frac{n}{\frac{n}{n+p}+1})+ \left( \frac{n}{\tfrac{n}{n+p}+1} \right)$
(n
nn+p + 1
)+
(n
nn+p + 1
)
12
/ department of mathematics and computer science 54/76
Inline floats
The package wrapfig makes it possible to place text next to floats:
\begin{wrapfigure}{placement}[overhang]{width}\includegraphics[width=\linewidth]{image}\end{wrapfigure}
placement horizontal placement: l (left) or r (right). For two-sided docu-ments: i (inside edge) or o (outside edge).
overhang overhang of the float into the margin (default: 0pt).
width width of the figure or table (use wraptable for tables).
12
/ department of mathematics and computer science 55/76
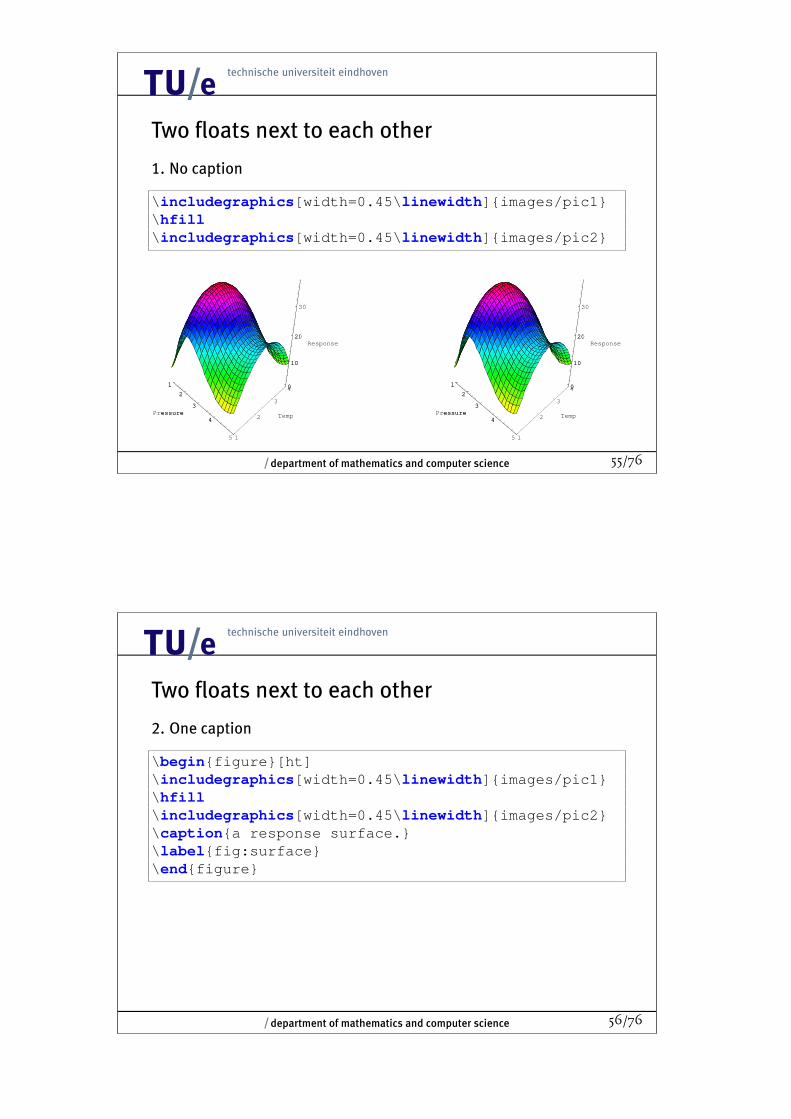
Two floats next to each other
1. No caption
\includegraphics[width=0.45\linewidth]{images/pic1}\hfill\includegraphics[width=0.45\linewidth]{images/pic2}
1
2
3
4
5
Pressure
1
2
3
4
Temp
0
10
20
30
Response
1
2
3
4Pressure
0
10
20
30
1
2
3
4
5
Pressure
1
2
3
4
Temp
0
10
20
30
Response
1
2
3
4Pressure
0
10
20
30
12
/ department of mathematics and computer science 56/76
Two floats next to each other
2. One caption
\begin{figure}[ht]\includegraphics[width=0.45\linewidth]{images/pic1}\hfill\includegraphics[width=0.45\linewidth]{images/pic2}\caption{a response surface.}\label{fig:surface}\end{figure}
12
/ department of mathematics and computer science 57/76
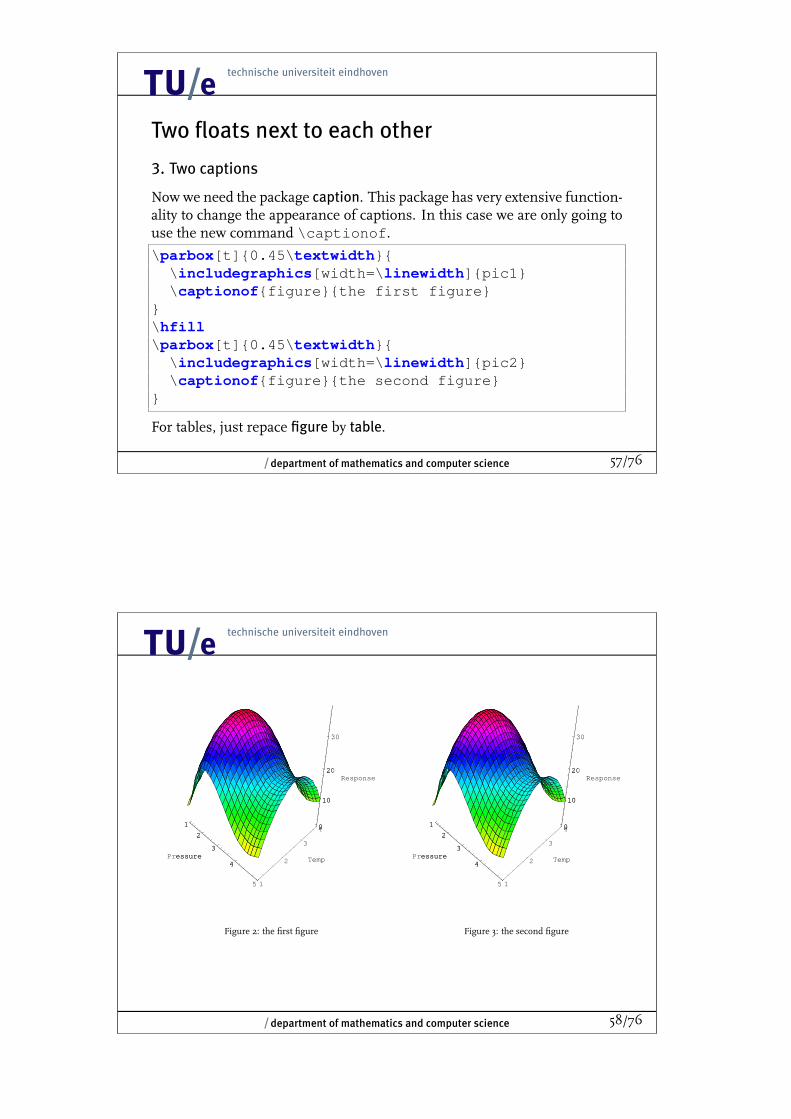
Two floats next to each other
3. Two captions
Now we need the package caption. This package has very extensive function-ality to change the appearance of captions. In this case we are only going touse the new command \captionof.
\parbox[t]{0.45\textwidth}{\includegraphics[width=\linewidth]{pic1}\captionof{figure}{the first figure}
}\hfill\parbox[t]{0.45\textwidth}{
\includegraphics[width=\linewidth]{pic2}\captionof{figure}{the second figure}
}
For tables, just repace figure by table.
12
/ department of mathematics and computer science 58/76
1
2
3
4
5
Pressure
1
2
3
4
Temp
0
10
20
30
Response
1
2
3
4Pressure
0
10
20
30
Figure 2: the first figure
1
2
3
4
5
Pressure
1
2
3
4
Temp
0
10
20
30
Response
1
2
3
4Pressure
0
10
20
30
Figure 3: the second figure

12
/ department of mathematics and computer science 59/76
Two floats next to each other
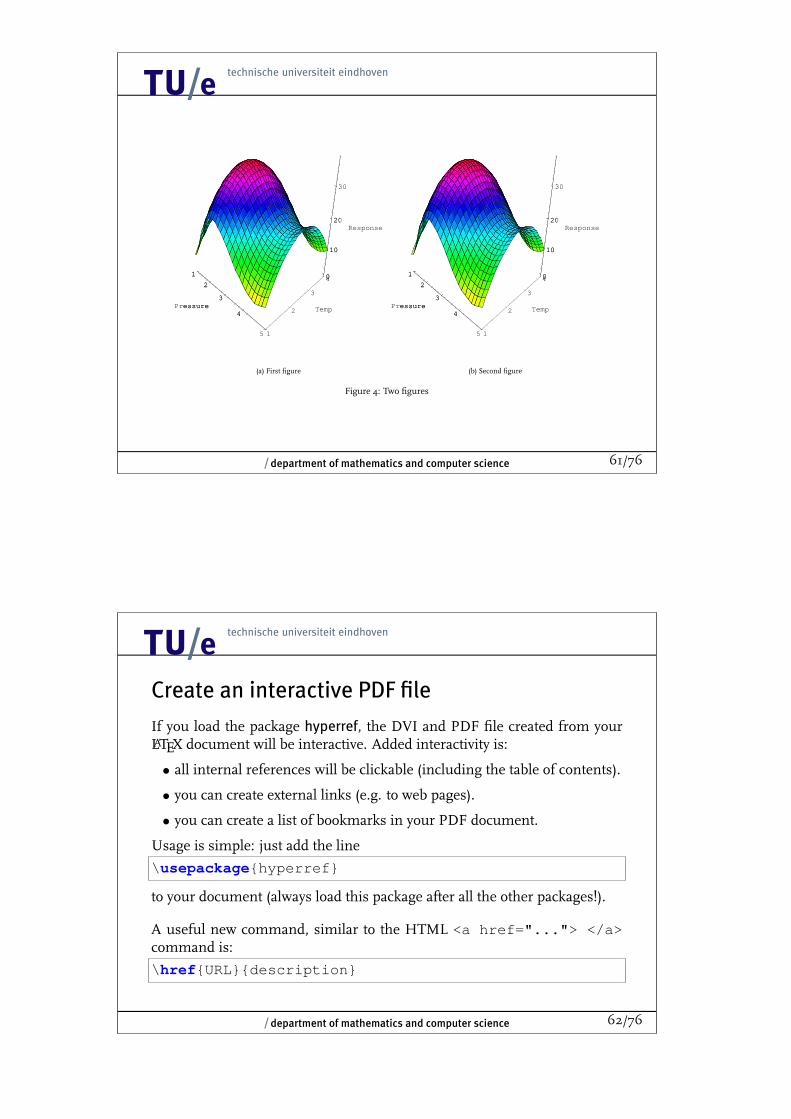
4. Sub-captions
Now we need the package subfig:
\begin{figure}[ht]\begin{center}\subfloat[First figure]{
\includegraphics[width=0.45\textwidth]{pic1}}\subfloat[Second figure]{
\includegraphics[width=0.45\textwidth]{pic2}}\caption{Two figures}\end{center}\end{figure}
12
/ department of mathematics and computer science 60/76
1
2
3
4
5
Pressure
1
2
3
4
Temp
0
10
20
30
Response
1
2
3
4Pressure
0
10
20
30
1
2
3
4
5
Pressure
1
2
3
4
Temp
0
10
20
30
Response
1
2
3
4Pressure
0
10
20
30
Figure 1: a response surface.
12
/ department of mathematics and computer science 61/76
1
2
3
4
5
Pressure
1
2
3
4
Temp
0
10
20
30
Response
1
2
3
4Pressure
0
10
20
30
(a) First figure
1
2
3
4
5
Pressure
1
2
3
4
Temp
0
10
20
30
Response
1
2
3
4Pressure
0
10
20
30
(b) Second figure
Figure 4: Two figures
12
/ department of mathematics and computer science 62/76
Create an interactive PDF file
If you load the package hyperref, the DVI and PDF file created from yourLATEX document will be interactive. Added interactivity is:
• all internal references will be clickable (including the table of contents).
• you can create external links (e.g. to web pages).
• you can create a list of bookmarks in your PDF document.
Usage is simple: just add the line
\usepackage{hyperref}
to your document (always load this package after all the other packages!).
A useful new command, similar to the HTML <a href="..."> </a>command is:
\href{URL}{description}
12
/ department of mathematics and computer science 63/76
Customizing hyperref
You can customize the appearance of hyperlinks in your document usingthe command \hypersetup:
\definecolor{mycolour}{rgb}{0.19,0.54,0.92}\hypersetup{
colorlinks=true,linkcolor=mycolour, urlcolor=mycolour,pdfpagemode=UseOutlines,bookmarksopen=true,bookmarksnumbered=true,plainpages=false, pdfpagelabels,pdftitle={Snow white and the seven dwarfs},pdfauthor={Grimm, Jacob and Wilhelm.}
}
You have to include the package color to use \definecolor. You can useWinEdt’s colour-picker to find RGB values of a selected colour.
12
/ department of mathematics and computer science 64/76
hyperref - Example
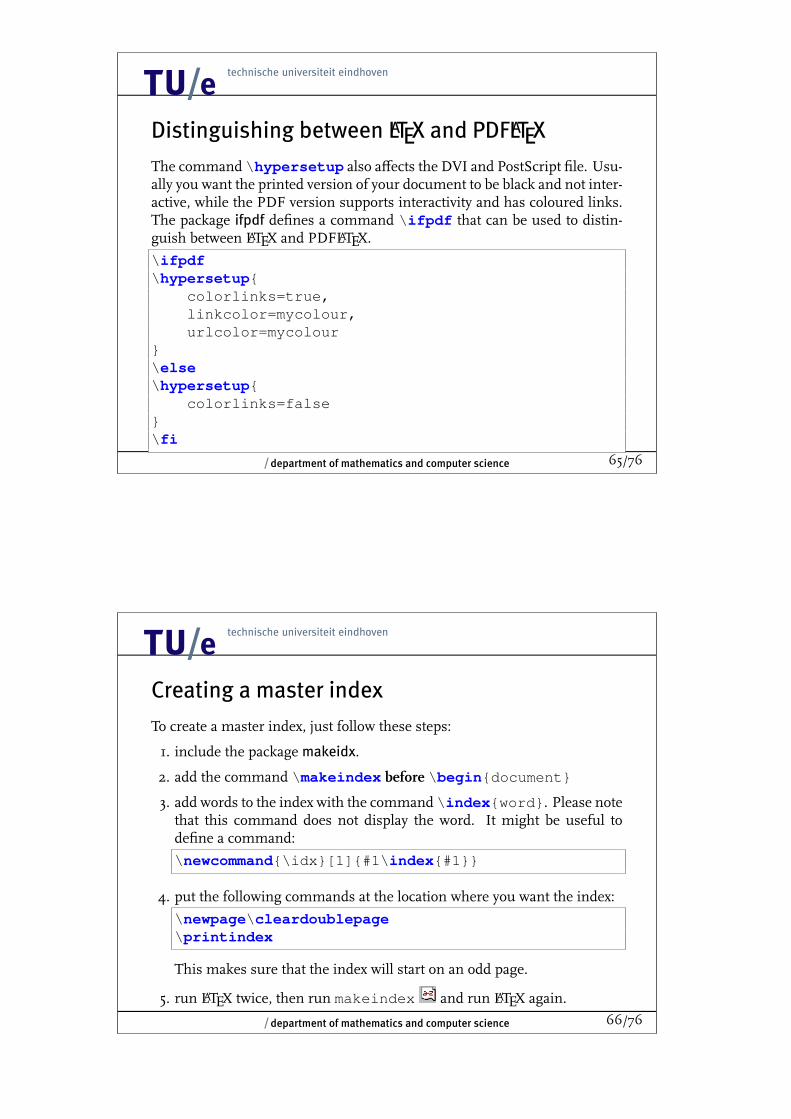
12
/ department of mathematics and computer science 65/76
Distinguishing between LATEX and PDFLATEX
The command \hypersetup also affects the DVI and PostScript file. Usu-ally you want the printed version of your document to be black and not inter-active, while the PDF version supports interactivity and has coloured links.The package ifpdf defines a command \ifpdf that can be used to distin-guish between LATEX and PDFLATEX.
\ifpdf\hypersetup{
colorlinks=true,linkcolor=mycolour,urlcolor=mycolour
}\else\hypersetup{
colorlinks=false}\fi
12
/ department of mathematics and computer science 66/76
Creating a master index
To create a master index, just follow these steps:
1. include the package makeidx.
2. add the command \makeindex before \begin{document}
3. add words to the index with the command \index{word}. Please notethat this command does not display the word. It might be useful todefine a command:
\newcommand{\idx}[1]{#1\index{#1}}
4. put the following commands at the location where you want the index:
\newpage\cleardoublepage\printindex
This makes sure that the index will start on an odd page.
5. run LATEX twice, then run makeindex and run LATEX again.
12
/ department of mathematics and computer science 67/76
Special index formats
Use this to point to another word:
\index{looking-glass|see{mirror}}
Use this to make the page number bold:
\index{forest|textbf}
Use this to make sub categories:
\index{plan!first}\index{plan!second}
Use this to span multiple pages:
\index{Snow white|(}\index{Snow white|)}
12
/ department of mathematics and computer science 68/76
Including programming statements
The package listings formats listings. It defines the following commands:
• \lstlisting{...} for inline programming statements.
• \begin{lstlisting} ... \end{lstlisting} for multi-linelistings.
• \lstinputlisting{filename} imports a complete source file

12
/ department of mathematics and computer science 69/76
Customizing listings
Using the command \lstset you can customize the language and appear-ance of the listing:
\lstset{language=Java,basicstyle=\color{black}\ttfamily,commentstyle=\color{green}\itshape\ttfamily,keywordstyle=\color{blue}\bfseries\ttfamily,showstringspaces=false,frame=single, % boxed listingsbackgroundcolor=\color{white}
}
Supported languages: too many to mention. Included are Basic, C, C++,Delphi, Fortran, HTML, Java, Mathematica, Matlab, Pascal, Perl, PHP, SAS,SQL, TeX, VBScript, XML.
12
/ department of mathematics and computer science 70/76
Customizing listings
Alternatively, you can specify options like this:\definecolor{myyellow}{rgb}{1.00,1.00,0.50}\begin{lstlisting}[language=Pascal,
backgroundcolor=\color{myyellow}]readln(N);for i := 1 to N dobegin
writeln(random)end
\end{lstlisting}
readln(N);for i := 1 to N dobeginwriteln(random)
end

12
/ department of mathematics and computer science 71/76
Create a PDF slide show or poster
The package pdfscreen was written for PDF slide show presentations. Un-fortunately this package contained some bugs, so another package was writ-ten: tuepdfscreen. This package can be used to create PDF slide shows. Thedefault appearance is in the TU/e style (colours, fonts) but this can be mod-ified. In fact, any Powerpoint style can be converted to PDF which makes itsuitable for TU/ePDFScreen.Detailed information about TU/ePDFScreen can be found in the fileslides.tex which is located in your local TEXmf tree, in the sub directoryexamples/presentatie.This file contains information about all features, like navigation buttons,page numbering, page transitions, step-by-step appearance of lists, includ-ing pictures and movies.This style can also be used for posters. See: poster.tex.
12
/ department of mathematics and computer science 72/76
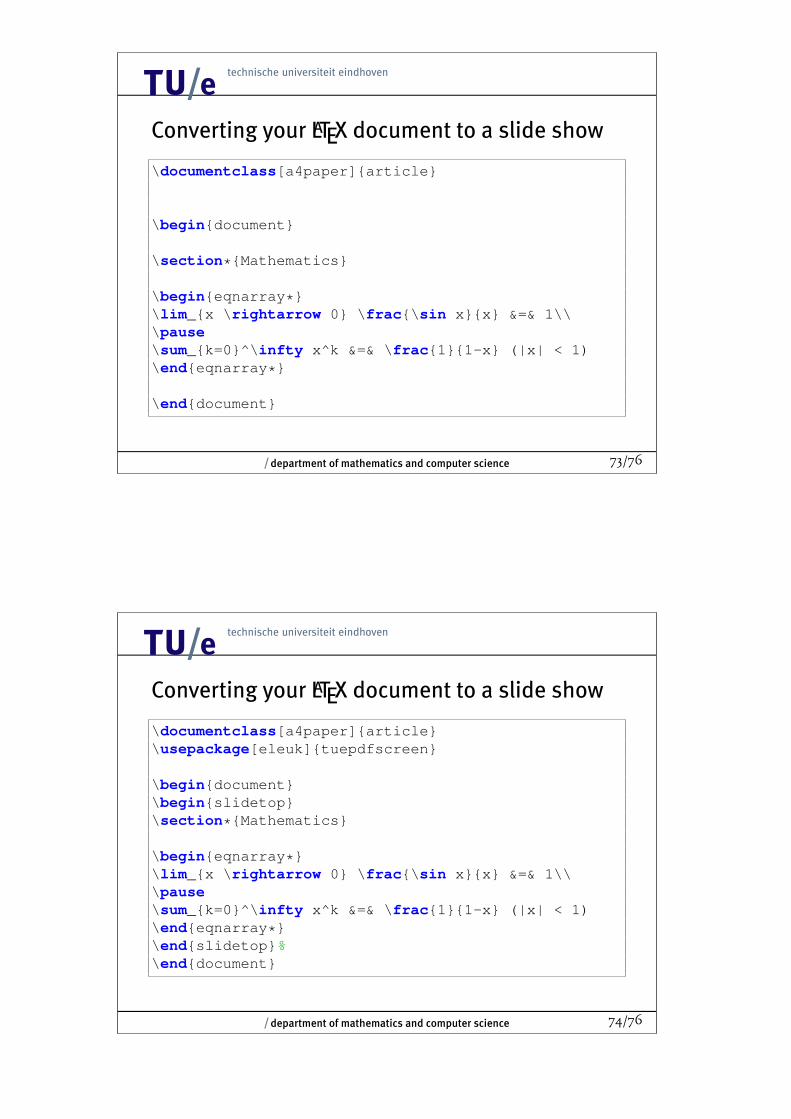
Converting your LATEX document to a slide show
1. make sure that your document runs with (LATEX and) PDFLATEX.
2. include the line
\usepackage[eleuk]{tuepdfscreen}
3. use the slide or slidetop environments to divide your text into differentslides.
4. if want pages to appear in multiple steps, use the \pause command todefine breaks.
5. run PDFLATEX on the file.
6. if you used the \pause command, run the program AddPause that canbe found in the MiKTEX Start Menu program group.
12
/ department of mathematics and computer science 73/76
Converting your LATEX document to a slide show
\documentclass[a4paper]{article}
\begin{document}
\section*{Mathematics}
\begin{eqnarray*}\lim_{x \rightarrow 0} \frac{\sin x}{x} &=& 1\\\pause\sum_{k=0}^\infty x^k &=& \frac{1}{1-x} (|x| < 1)\end{eqnarray*}
\end{document}
12
/ department of mathematics and computer science 74/76
Converting your LATEX document to a slide show
\documentclass[a4paper]{article}\usepackage[eleuk]{tuepdfscreen}
\begin{document}\begin{slidetop}\section*{Mathematics}
\begin{eqnarray*}\lim_{x \rightarrow 0} \frac{\sin x}{x} &=& 1\\\pause\sum_{k=0}^\infty x^k &=& \frac{1}{1-x} (|x| < 1)\end{eqnarray*}\end{slidetop}%\end{document}
12
/e 75/76
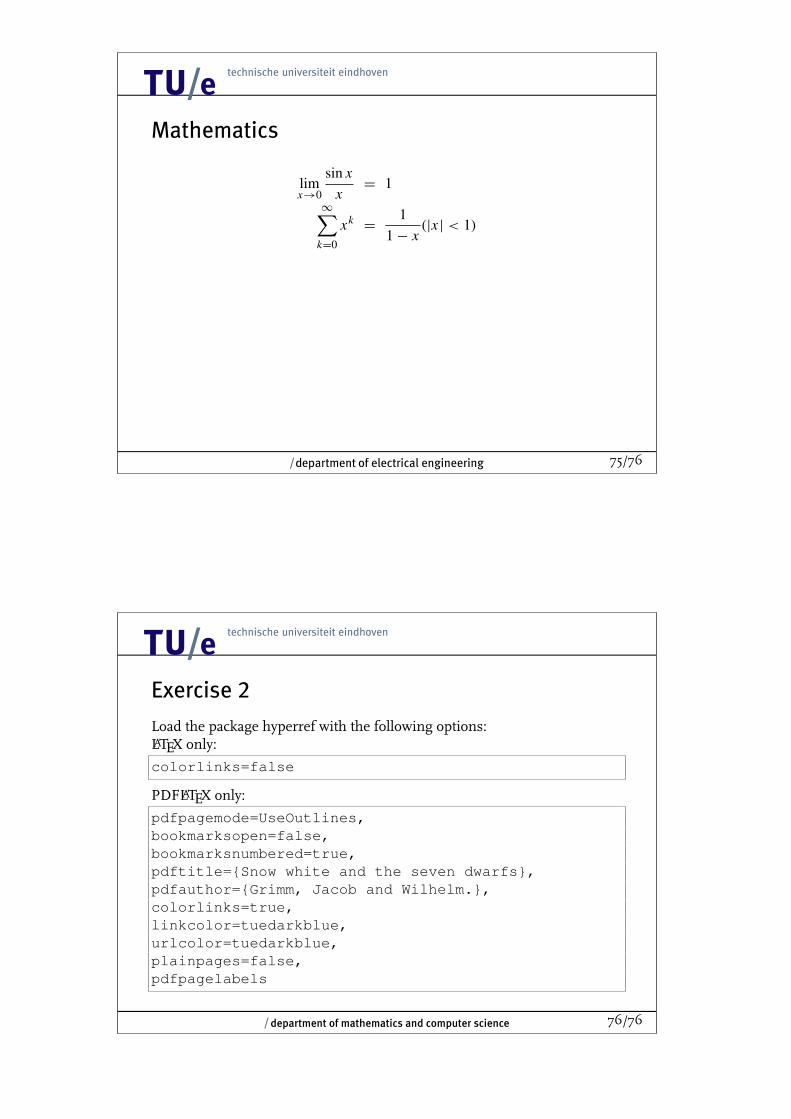
Mathematics
limx→0
sin xx= 1
∞∑k=0
xk=
11− x
(|x | < 1)
12
/ department of mathematics and computer science 76/76
Exercise 2
Load the package hyperref with the following options:LATEX only:
colorlinks=false
PDFLATEX only:
pdfpagemode=UseOutlines,bookmarksopen=false,bookmarksnumbered=true,pdftitle={Snow white and the seven dwarfs},pdfauthor={Grimm, Jacob and Wilhelm.},colorlinks=true,linkcolor=tuedarkblue,urlcolor=tuedarkblue,plainpages=false,pdfpagelabels