Embed Size (px)
Citation preview
lease through renew dhcp
• lease, on page 4• local-ip (IPC transport-SCTP local), on page 6• local-port, on page 8• logging (cfg-dns-view), on page 9• logging (DNS), on page 10• logging server-arp, on page 11• mac packet-classify, on page 13• mac packet-classify use vlan, on page 15• match learnt-interface, on page 16• match location, on page 18• match message-type, on page 20• match reply prefix-list, on page 21• match server access-list, on page 22• match service-instance, on page 23• match service-type, on page 24• mode (nat64), on page 25• name, on page 26• nat64 enable, on page 27• nat64 logging, on page 28• nat64 logging translations flow-export, on page 29• nat64 map-t, on page 31• nat64 prefix stateful, on page 32• nat64 prefix stateless, on page 34• nat64 route, on page 36• nat64 service ftp, on page 37• nat64 settings, on page 38• nat64 settings eif , on page 39• nat64 settings flow-entries disable, on page 40• nat64 settings mtu minimum, on page 42• nat64 switchover replicate http, on page 43• nat64 translation, on page 44• nat64 v4, on page 45• nat64 v4v6, on page 46
lease through renew dhcp1
• nat64 v6v4, on page 48• nat66 inside, on page 50• nat66 outside, on page 51• nat66 prefix, on page 52• netbios-name-server, on page 53• netbios-node-type, on page 54• network (DHCP), on page 55• next-server, on page 57• nhrp group, on page 58• nhrp map group, on page 60• nis address, on page 62• nis domain-name, on page 63• nisp domain-name, on page 64• nisp address, on page 65• odap client, on page 66• odap server, on page 67• option, on page 68• option hex, on page 70• option ext, on page 72• origin, on page 74• override default-router, on page 76• override utilization high, on page 78• override utilization low, on page 79• port-parameters, on page 80• preempt, on page 81• preference (DHCPv6 Guard), on page 82• prefix-delegation, on page 83• prefix-delegation aaa, on page 85• prefix-delegation pool, on page 88• priority (firewall), on page 90• protocol, on page 91• rate-limit (mDNS), on page 92• rbe nasip, on page 94• redistribute mdns-sd, on page 96• redundancy, on page 98• redundancy asymmetric-routing enable, on page 103• redundancy group, on page 104• redundancy group (interface), on page 105• relay agent information, on page 107• relay destination, on page 108• relay source, on page 109• relay target, on page 110• relay-information hex, on page 112• release dhcp, on page 114• remote command, on page 116• remote login, on page 118
lease through renew dhcp2
lease through renew dhcp
• remote-ip (IPC transport-SCTP remote), on page 120• remote-port, on page 122• remote-span, on page 123• renew deny unknown, on page 124• renew dhcp, on page 126
lease through renew dhcp3
lease through renew dhcp

leaseTo configure the duration of the lease for an IP address that is assigned from a Cisco IOS Dynamic HostConfiguration Protocol (DHCP) server to a DHCP client, use the lease command in DHCP pool configurationmode. To restore the default value, use the no form of this command.
lease {days [hours [minutes]]|infinite}no lease
Syntax Description Specifies the duration of the lease in numbers of days.days
(Optional) Specifies the number of hours in the lease. A days value must be supplied before youcan configure an hours value.
hours
(Optional) Specifies the number of minutes in the lease. A days value and an hours value mustbe supplied before you can configure a minutes value.
minutes
Specifies that the duration of the lease is unlimited.infinite
Command Default 1 day
Command Modes DHCP pool configuration
Command History ModificationRelease
This command was introduced.12.0(1)T
This command was integrated into Cisco IOS Release 12.2(33)SRA.12.2(33)SRA
This command is supported in the Cisco IOS Release 12.2SX train. Support in a specific12.2SX release of this train depends on your feature set, platform, and platform hardware.
12.2SX
Examples The following example shows a 1-day lease:
lease 1
The following example shows a 1-hour lease:
lease 0 1
The following example shows a 1-minute lease:
lease 0 0 1
The following example shows an infinite (unlimited) lease:
lease infinite
lease through renew dhcp4
lease through renew dhcplease

Related Commands DescriptionCommand
Configures a DHCP address pool on a Cisco IOS DHCP server and enters DHCP poolconfiguration mode.
ip dhcp pool
lease through renew dhcp5
lease through renew dhcplease
local-ip (IPC transport-SCTP local)To define at least one local IP address that is used to communicate with the local peer, use the local-ipcommandin IPC transport-SCTP local configuration mode. To remove one or all IP addresses from your configuration,use the no form of this command.
local-ip device-real-ip-address [device-real-ip-address2]no local-ip device-real-ip-address [device-real-ip-address2]
Syntax Description IP address of the local device.
The local IP addresses must match the remote IP addresses on the peer router.There can be either one or two IP addresses, which must be in global VirtualPrivate Network (VPN) routing and forwarding (VRF). A virtual IP (VIP) addresscannot be used.
device-real-ip-address
(Optional) IP address of the local device.device-real-ip-address2
Command Default No IP addresses are defined; thus, peers cannot communicate with the local peer.
Command Modes IPC transport-SCTP local configuration
Command History ModificationRelease
This commandwas introduced.12.3(8)T
Usage Guidelines Use the local-ip command to help associate Stream Control Transmission Protocol (SCTP) as the transportprotocol between the local and remote peer.
This command is part of a suite of commands used to configure the Stateful Switchover (SSO) protocol. SSOis necessary for IP Security (IPSec) and Internet Key Exchange (IKE) to learn about the redundancy state ofthe network and to synchronize their internal application state with their redundant peers.
Examples The following example shows how to enable SSO:
!redundancy inter-devicescheme standby HA-in!!ipc zone defaultassociation 1no shutdownprotocol sctplocal-port 5000local-ip 10.0.0.1remote-port 5000remote-ip 10.0.0.2
lease through renew dhcp6
lease through renew dhcplocal-ip (IPC transport-SCTP local)
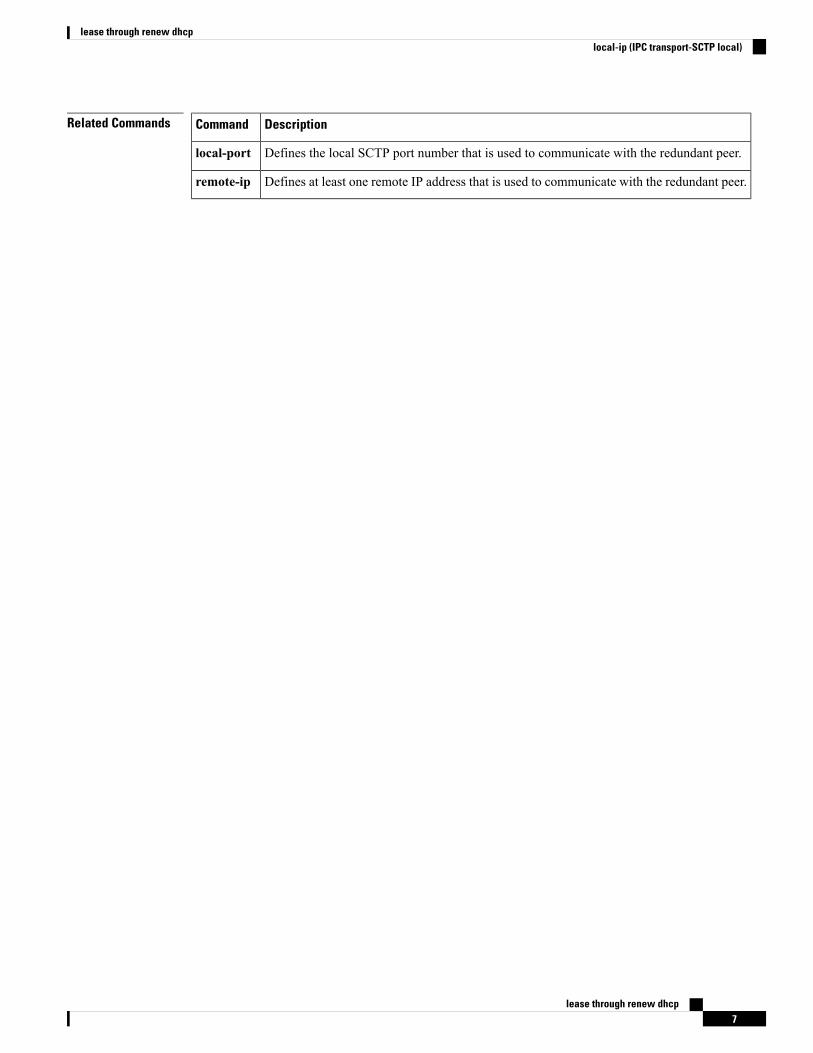
Related Commands DescriptionCommand
Defines the local SCTP port number that is used to communicate with the redundant peer.local-port
Defines at least one remote IP address that is used to communicate with the redundant peer.remote-ip
lease through renew dhcp7
lease through renew dhcplocal-ip (IPC transport-SCTP local)
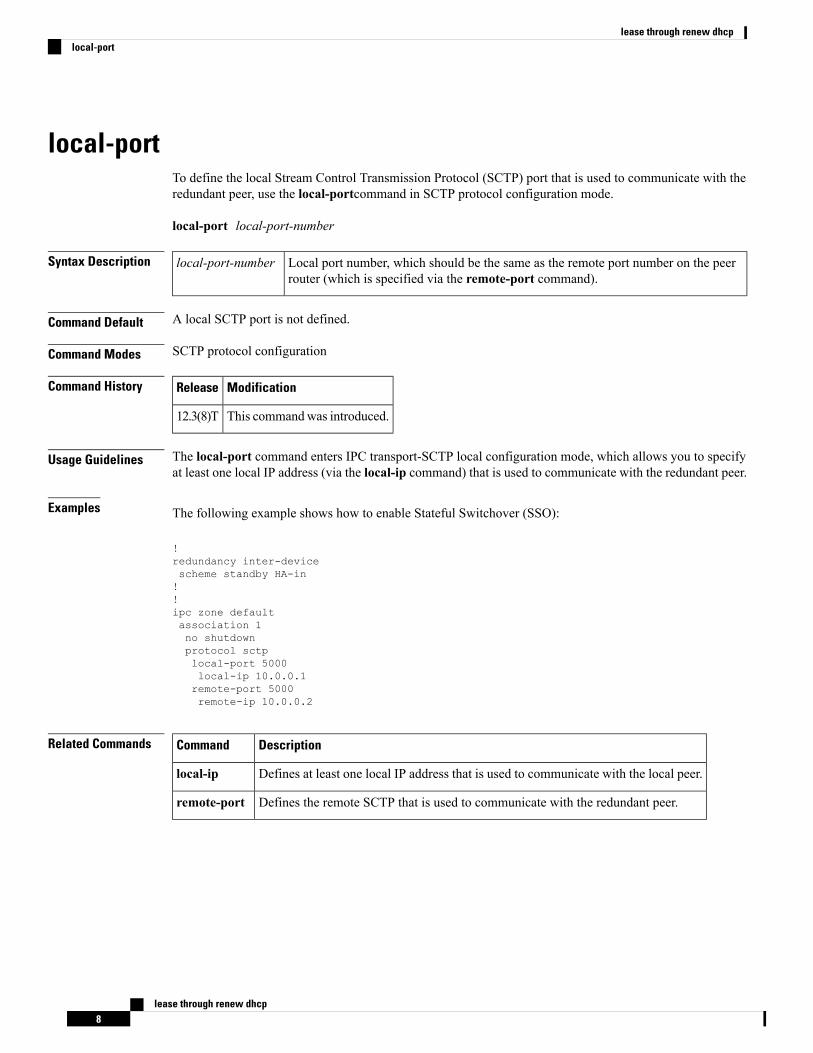
local-portTo define the local Stream Control Transmission Protocol (SCTP) port that is used to communicate with theredundant peer, use the local-portcommand in SCTP protocol configuration mode.
local-port local-port-number
Syntax Description Local port number, which should be the same as the remote port number on the peerrouter (which is specified via the remote-port command).
local-port-number
Command Default A local SCTP port is not defined.
Command Modes SCTP protocol configuration
Command History ModificationRelease
This commandwas introduced.12.3(8)T
Usage Guidelines The local-port command enters IPC transport-SCTP local configuration mode, which allows you to specifyat least one local IP address (via the local-ip command) that is used to communicate with the redundant peer.
Examples The following example shows how to enable Stateful Switchover (SSO):
!redundancy inter-devicescheme standby HA-in!!ipc zone defaultassociation 1no shutdownprotocol sctplocal-port 5000local-ip 10.0.0.1remote-port 5000remote-ip 10.0.0.2
Related Commands DescriptionCommand
Defines at least one local IP address that is used to communicate with the local peer.local-ip
Defines the remote SCTP that is used to communicate with the redundant peer.remote-port
lease through renew dhcp8
lease through renew dhcplocal-port
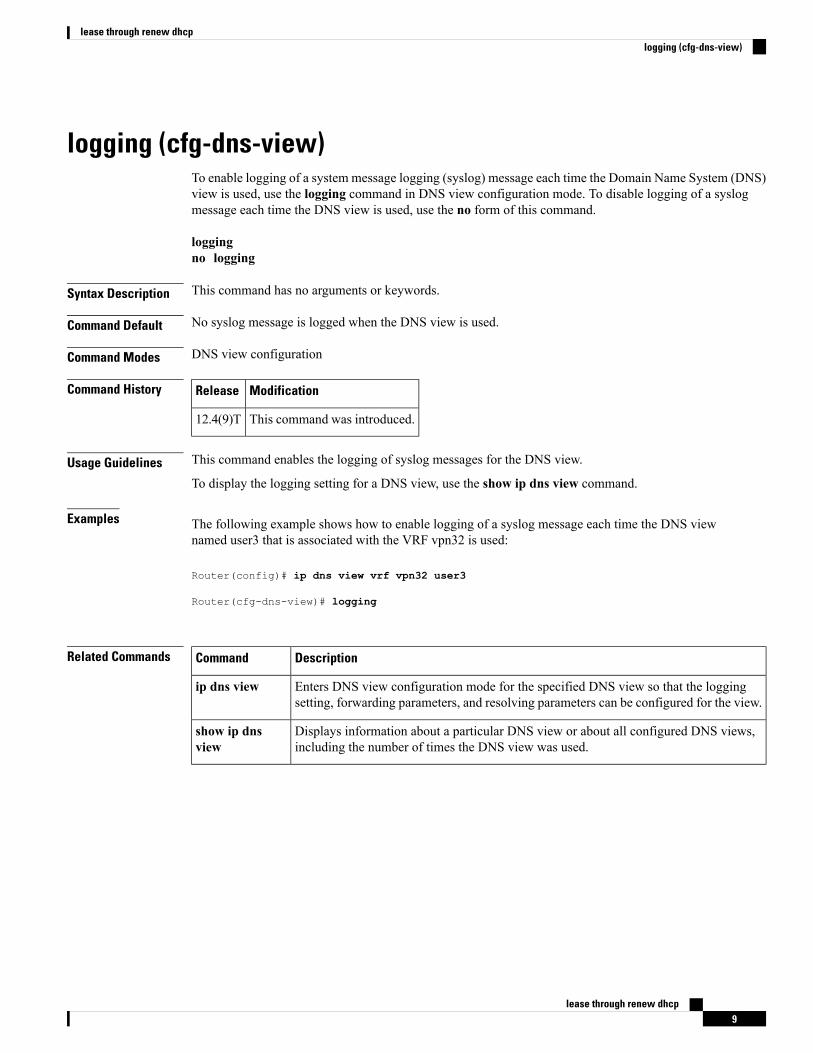
logging (cfg-dns-view)To enable logging of a system message logging (syslog) message each time the Domain Name System (DNS)view is used, use the logging command in DNS view configuration mode. To disable logging of a syslogmessage each time the DNS view is used, use the no form of this command.
loggingno logging
Syntax Description This command has no arguments or keywords.
Command Default No syslog message is logged when the DNS view is used.
Command Modes DNS view configuration
Command History ModificationRelease
This command was introduced.12.4(9)T
Usage Guidelines This command enables the logging of syslog messages for the DNS view.
To display the logging setting for a DNS view, use the show ip dns view command.
Examples The following example shows how to enable logging of a syslog message each time the DNS viewnamed user3 that is associated with the VRF vpn32 is used:
Router(config)# ip dns view vrf vpn32 user3
Router(cfg-dns-view)# logging
Related Commands DescriptionCommand
Enters DNS view configuration mode for the specified DNS view so that the loggingsetting, forwarding parameters, and resolving parameters can be configured for the view.
ip dns view
Displays information about a particular DNS view or about all configured DNS views,including the number of times the DNS view was used.
show ip dnsview
lease through renew dhcp9
lease through renew dhcplogging (cfg-dns-view)

logging (DNS)To enable logging of a system message logging (syslog) message each time the Domain Name System (DNS)view is used, use the logging command in DNS view configuration mode. To disable logging of a syslogmessage each time the DNS view is used, use the no form of this command.
loggingno logging
Syntax Description This command has no arguments or keywords.
Command Default No syslog message is logged when the DNS view is used.
Command Modes DNS view configuration
Command History ModificationRelease
This commandwas introduced.12.4(9)T
Usage Guidelines This command enables the logging of syslog messages for the DNS view.
To display the logging setting for a DNS view, use the show ip dns view command.
Examples The following example shows how to enable logging of a syslog message each time the DNS viewnamed user3 that is associated with the VRF vpn32 is used:
Router(config)# ip dns view vrf vpn32 user3
Router(cfg-dns-view)# logging
Related Commands DescriptionCommand
Enters DNS view configuration mode for the specified DNS view so that the loggingsetting, forwarding parameters, and resolving parameters can be configured for theview.
ip dns view
Displays information about a particular DNS view or about all configured DNS views,including the number of times the DNS view was used.
show ip dns view
lease through renew dhcp10
lease through renew dhcplogging (DNS)
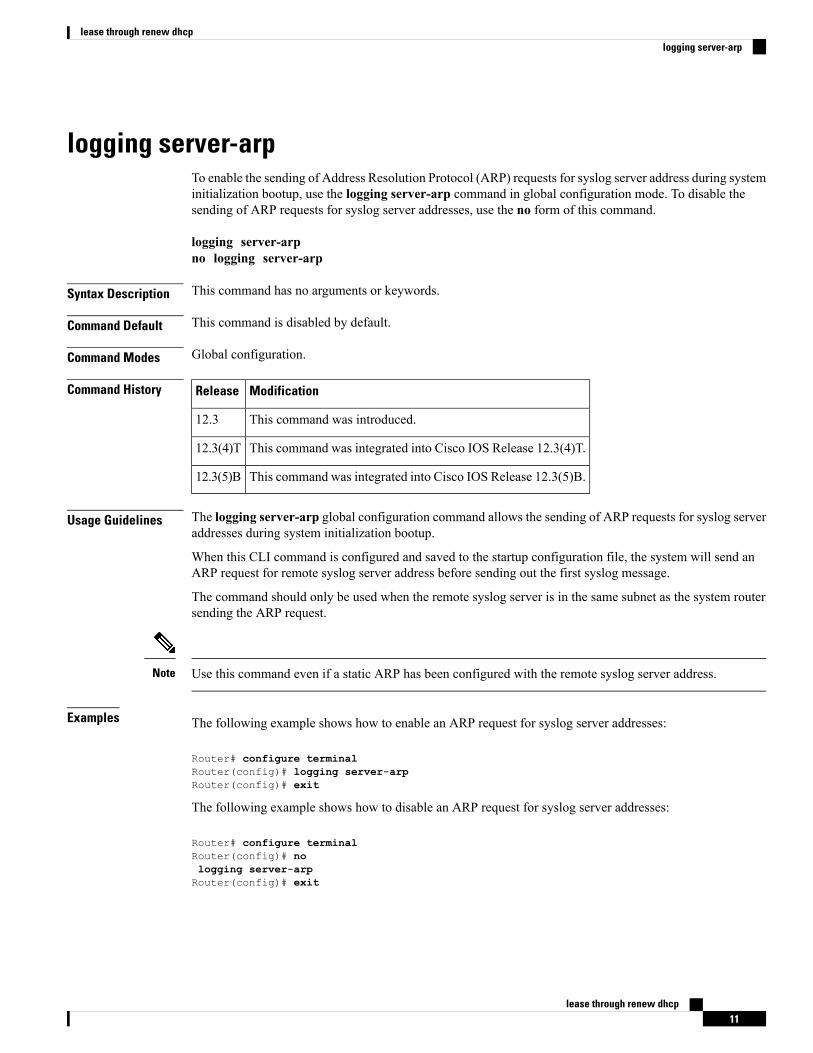
logging server-arpTo enable the sending of Address Resolution Protocol (ARP) requests for syslog server address during systeminitialization bootup, use the logging server-arp command in global configuration mode. To disable thesending of ARP requests for syslog server addresses, use the no form of this command.
logging server-arpno logging server-arp
Syntax Description This command has no arguments or keywords.
Command Default This command is disabled by default.
Command Modes Global configuration.
Command History ModificationRelease
This command was introduced.12.3
This command was integrated into Cisco IOS Release 12.3(4)T.12.3(4)T
This command was integrated into Cisco IOS Release 12.3(5)B.12.3(5)B
Usage Guidelines The logging server-arp global configuration command allows the sending of ARP requests for syslog serveraddresses during system initialization bootup.
When this CLI command is configured and saved to the startup configuration file, the system will send anARP request for remote syslog server address before sending out the first syslog message.
The command should only be used when the remote syslog server is in the same subnet as the system routersending the ARP request.
Use this command even if a static ARP has been configured with the remote syslog server address.Note
Examples The following example shows how to enable an ARP request for syslog server addresses:
Router# configure terminalRouter(config)# logging server-arpRouter(config)# exit
The following example shows how to disable an ARP request for syslog server addresses:
Router# configure terminalRouter(config)# nologging server-arpRouter(config)# exit
lease through renew dhcp11
lease through renew dhcplogging server-arp
Related Commands DescriptionCommand
Adds a permanent entry in the Address Resolution Protocol (ARP) cache, use the arpcommand in global configuration mode.
arp (global)
lease through renew dhcp12
lease through renew dhcplogging server-arp
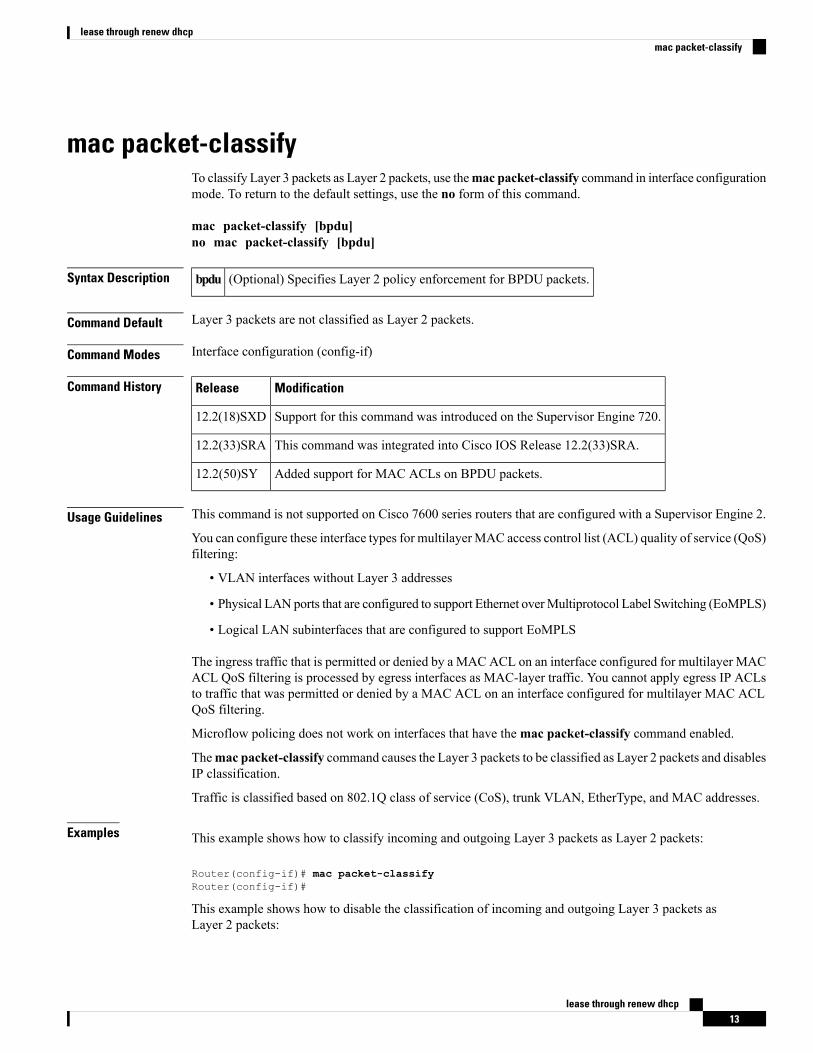
mac packet-classifyTo classify Layer 3 packets as Layer 2 packets, use themac packet-classify command in interface configurationmode. To return to the default settings, use the no form of this command.
mac packet-classify [bpdu]no mac packet-classify [bpdu]
Syntax Description (Optional) Specifies Layer 2 policy enforcement for BPDU packets.bpdu
Command Default Layer 3 packets are not classified as Layer 2 packets.
Command Modes Interface configuration (config-if)
Command History ModificationRelease
Support for this command was introduced on the Supervisor Engine 720.12.2(18)SXD
This command was integrated into Cisco IOS Release 12.2(33)SRA.12.2(33)SRA
Added support for MAC ACLs on BPDU packets.12.2(50)SY
Usage Guidelines This command is not supported on Cisco 7600 series routers that are configured with a Supervisor Engine 2.
You can configure these interface types for multilayerMAC access control list (ACL) quality of service (QoS)filtering:
• VLAN interfaces without Layer 3 addresses
• Physical LAN ports that are configured to support Ethernet overMultiprotocol Label Switching (EoMPLS)
• Logical LAN subinterfaces that are configured to support EoMPLS
The ingress traffic that is permitted or denied by a MAC ACL on an interface configured for multilayer MACACL QoS filtering is processed by egress interfaces as MAC-layer traffic. You cannot apply egress IP ACLsto traffic that was permitted or denied by a MAC ACL on an interface configured for multilayer MAC ACLQoS filtering.
Microflow policing does not work on interfaces that have themac packet-classify command enabled.
Themac packet-classify command causes the Layer 3 packets to be classified as Layer 2 packets and disablesIP classification.
Traffic is classified based on 802.1Q class of service (CoS), trunk VLAN, EtherType, and MAC addresses.
Examples This example shows how to classify incoming and outgoing Layer 3 packets as Layer 2 packets:
Router(config-if)# mac packet-classifyRouter(config-if)#
This example shows how to disable the classification of incoming and outgoing Layer 3 packets asLayer 2 packets:
lease through renew dhcp13
lease through renew dhcpmac packet-classify
Router(config-if)# no mac packet-classifyRouter(config-if)#
This example shows how to enforce Layer 2 policies on BPDU packets:
Router(config-if)# mac packet-classify bpduRouter(config-if)#
This example shows how to disable Layer 2 policies on BPDU packets:
Router(config-if)# no mac packet-classify bpduRouter(config-if)#
Related Commands DescriptionCommand
Enables VLAN-based QoS filtering in the MAC ACLs.mac packet-classify use vlan
lease through renew dhcp14
lease through renew dhcpmac packet-classify

mac packet-classify use vlanTo enable VLAN-based quality of service (QoS) filtering in the MAC access control lists (ACLs), use themac packet-classify use vlan command in global configuration mode. To return to the default settings, usethe no form of this command.
mac packet-classify use vlanno mac packet-classify use vlan
Syntax Description This command has no arguments or keywords.
Command Default VLAN-based QoS filtering in the MAC ACLs is disabled.
Command Modes Global configuration (config)
Command History ModificationRelease
Support for this command was introduced on the Supervisor Engine 720 and the SupervisorEngine 2.
12.2(18)SXD
This command was integrated into Cisco IOS Release 12.2(33)SRA.12.2(33)SRA
Usage Guidelines This command is supported in PFC3BXL or PFC3B mode only.
This command is not supported on Cisco 7600 series routers that are configured with a Supervisor Engine 2.
You must use the no mac packet-classify use vlan command to disable the VLAN field in the Layer 2 keyif you want to apply QoS to the Layer 2 Service Advertising Protocol (SAP)-encoded packets (for example,Intermediate System-to-Intermediate System [IS-IS] and Internet Packet Exchange [IPX]).
QoS does not allow policing of non-Advanced Research Protocol Agency (ARPA) Layer 2 packets (forexample, IS-IS and IPX) if the VLAN field is enabled.
Examples This example shows how to enable Layer 2 classification of IP packets:
Router(config)# mac packet-classify use vlanRouter(config)
This example shows how to disable Layer 2 classification of IP packets:
Router(config)# no mac packet-classify use vlanRouter(config)
Related Commands DescriptionCommand
Classifies Layer 3 packets as Layer 2 packets.macpacket-classify
lease through renew dhcp15
lease through renew dhcpmac packet-classify use vlan
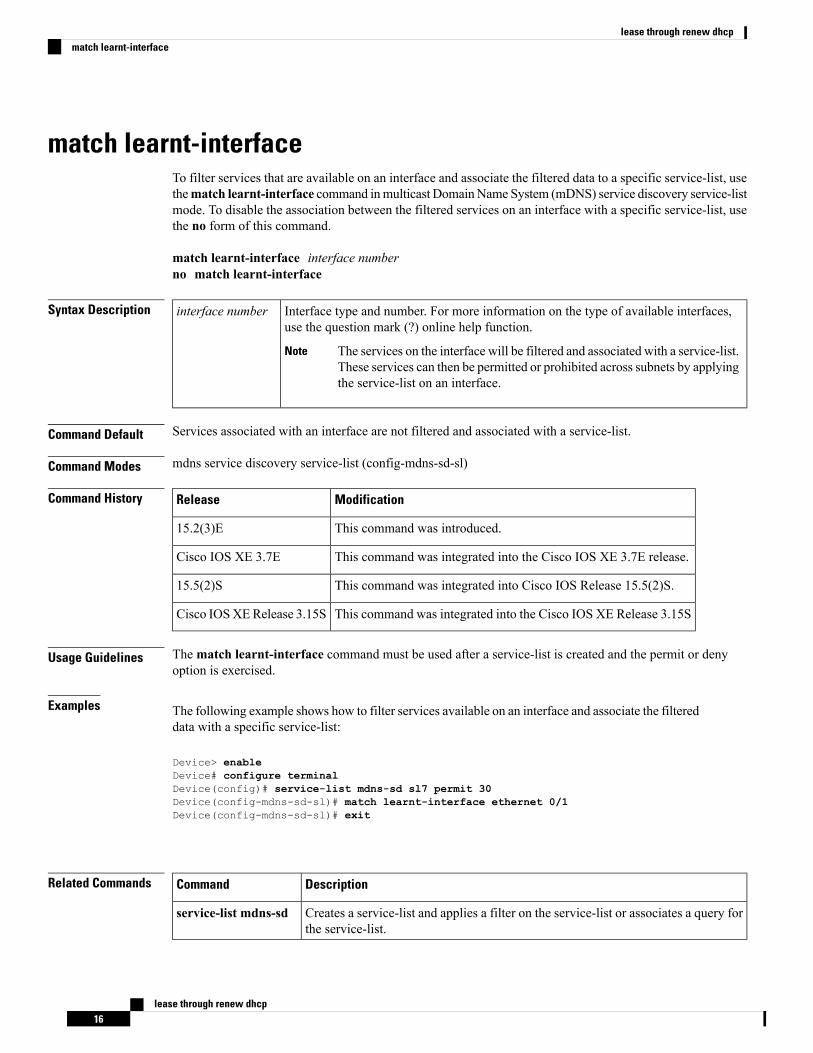
match learnt-interfaceTo filter services that are available on an interface and associate the filtered data to a specific service-list, usethematch learnt-interface command inmulticast DomainName System (mDNS) service discovery service-listmode. To disable the association between the filtered services on an interface with a specific service-list, usethe no form of this command.
match learnt-interface interface numberno match learnt-interface
Syntax Description Interface type and number. For more information on the type of available interfaces,use the question mark (?) online help function.
The services on the interface will be filtered and associated with a service-list.These services can then be permitted or prohibited across subnets by applyingthe service-list on an interface.
Note
interface number
Command Default Services associated with an interface are not filtered and associated with a service-list.
Command Modes mdns service discovery service-list (config-mdns-sd-sl)
Command History ModificationRelease
This command was introduced.15.2(3)E
This command was integrated into the Cisco IOS XE 3.7E release.Cisco IOS XE 3.7E
This command was integrated into Cisco IOS Release 15.5(2)S.15.5(2)S
This command was integrated into the Cisco IOS XE Release 3.15SCisco IOSXERelease 3.15S
Usage Guidelines Thematch learnt-interface command must be used after a service-list is created and the permit or denyoption is exercised.
Examples The following example shows how to filter services available on an interface and associate the filtereddata with a specific service-list:
Device> enableDevice# configure terminalDevice(config)# service-list mdns-sd sl7 permit 30Device(config-mdns-sd-sl)# match learnt-interface ethernet 0/1Device(config-mdns-sd-sl)# exit
Related Commands DescriptionCommand
Creates a service-list and applies a filter on the service-list or associates a query forthe service-list.
service-list mdns-sd
lease through renew dhcp16
lease through renew dhcpmatch learnt-interface
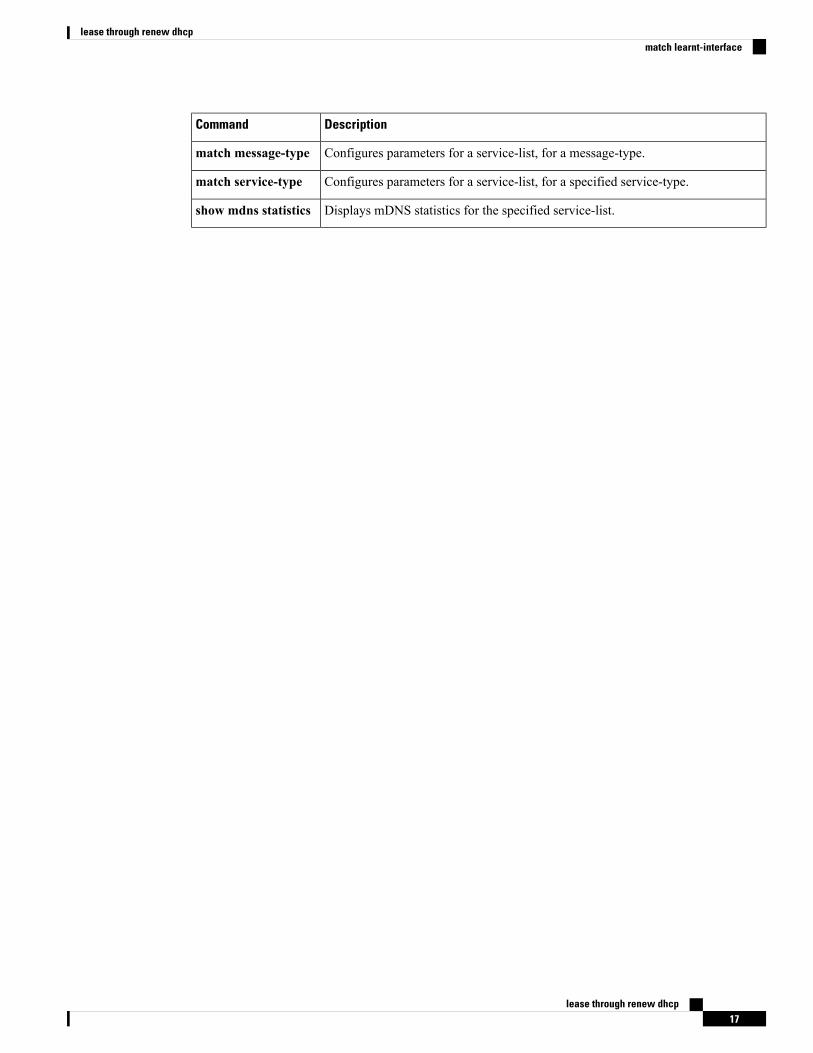
DescriptionCommand
Configures parameters for a service-list, for a message-type.match message-type
Configures parameters for a service-list, for a specified service-type.match service-type
Displays mDNS statistics for the specified service-list.show mdns statistics
lease through renew dhcp17
lease through renew dhcpmatch learnt-interface
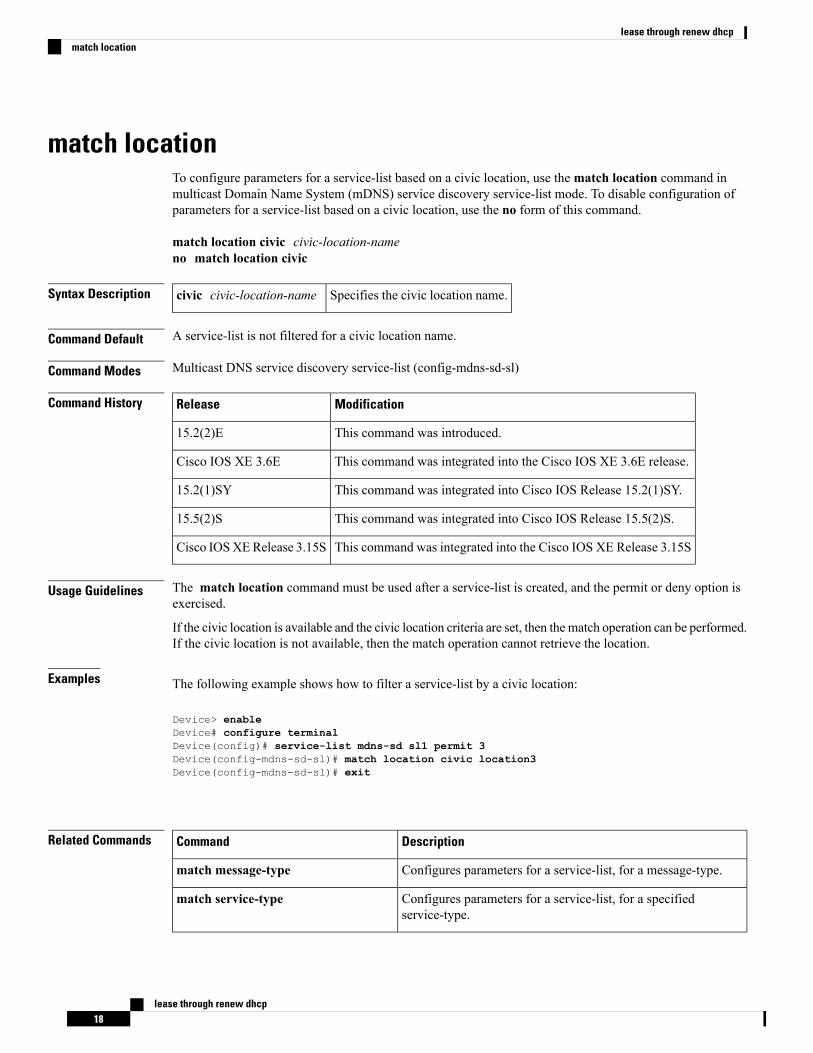
match locationTo configure parameters for a service-list based on a civic location, use thematch location command inmulticast Domain Name System (mDNS) service discovery service-list mode. To disable configuration ofparameters for a service-list based on a civic location, use the no form of this command.
match location civic civic-location-nameno match location civic
Syntax Description Specifies the civic location name.civic civic-location-name
Command Default A service-list is not filtered for a civic location name.
Command Modes Multicast DNS service discovery service-list (config-mdns-sd-sl)
Command History ModificationRelease
This command was introduced.15.2(2)E
This command was integrated into the Cisco IOS XE 3.6E release.Cisco IOS XE 3.6E
This command was integrated into Cisco IOS Release 15.2(1)SY.15.2(1)SY
This command was integrated into Cisco IOS Release 15.5(2)S.15.5(2)S
This command was integrated into the Cisco IOS XE Release 3.15SCisco IOSXERelease 3.15S
Usage Guidelines The match location command must be used after a service-list is created, and the permit or deny option isexercised.
If the civic location is available and the civic location criteria are set, then the match operation can be performed.If the civic location is not available, then the match operation cannot retrieve the location.
Examples The following example shows how to filter a service-list by a civic location:
Device> enableDevice# configure terminalDevice(config)# service-list mdns-sd sl1 permit 3Device(config-mdns-sd-sl)# match location civic location3Device(config-mdns-sd-sl)# exit
Related Commands DescriptionCommand
Configures parameters for a service-list, for a message-type.match message-type
Configures parameters for a service-list, for a specifiedservice-type.
match service-type
lease through renew dhcp18
lease through renew dhcpmatch location

DescriptionCommand
Creates a service-list and applies a filter on the service-list orassociates a query for the service-list.
service-list mdns-sd
Displays current running mDNS service-list configuration details.show running-config mdns-sdservice-list
lease through renew dhcp19
lease through renew dhcpmatch location
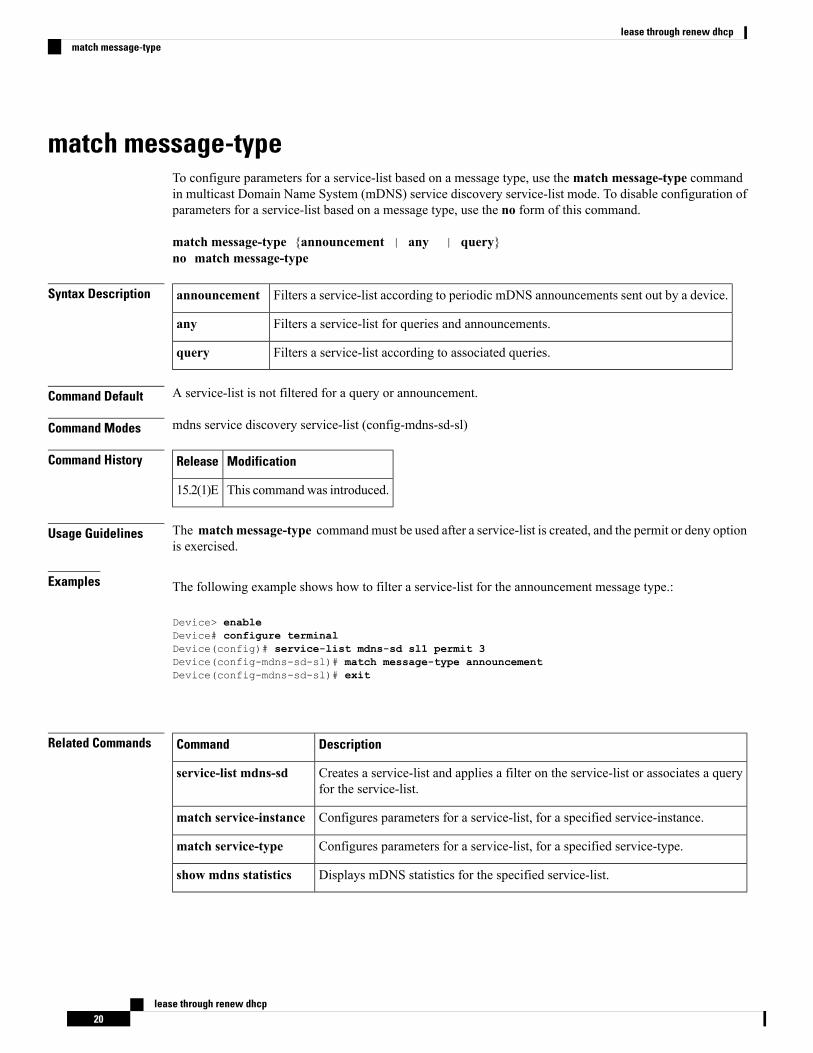
match message-typeTo configure parameters for a service-list based on a message type, use thematch message-type commandin multicast Domain Name System (mDNS) service discovery service-list mode. To disable configuration ofparameters for a service-list based on a message type, use the no form of this command.
match message-type {announcement | any | query}no match message-type
Syntax Description Filters a service-list according to periodic mDNS announcements sent out by a device.announcement
Filters a service-list for queries and announcements.any
Filters a service-list according to associated queries.query
Command Default A service-list is not filtered for a query or announcement.
Command Modes mdns service discovery service-list (config-mdns-sd-sl)
Command History ModificationRelease
This commandwas introduced.15.2(1)E
Usage Guidelines The matchmessage-type commandmust be used after a service-list is created, and the permit or deny optionis exercised.
Examples The following example shows how to filter a service-list for the announcement message type.:
Device> enableDevice# configure terminalDevice(config)# service-list mdns-sd sl1 permit 3Device(config-mdns-sd-sl)# match message-type announcementDevice(config-mdns-sd-sl)# exit
Related Commands DescriptionCommand
Creates a service-list and applies a filter on the service-list or associates a queryfor the service-list.
service-list mdns-sd
Configures parameters for a service-list, for a specified service-instance.match service-instance
Configures parameters for a service-list, for a specified service-type.match service-type
Displays mDNS statistics for the specified service-list.show mdns statistics
lease through renew dhcp20
lease through renew dhcpmatch message-type
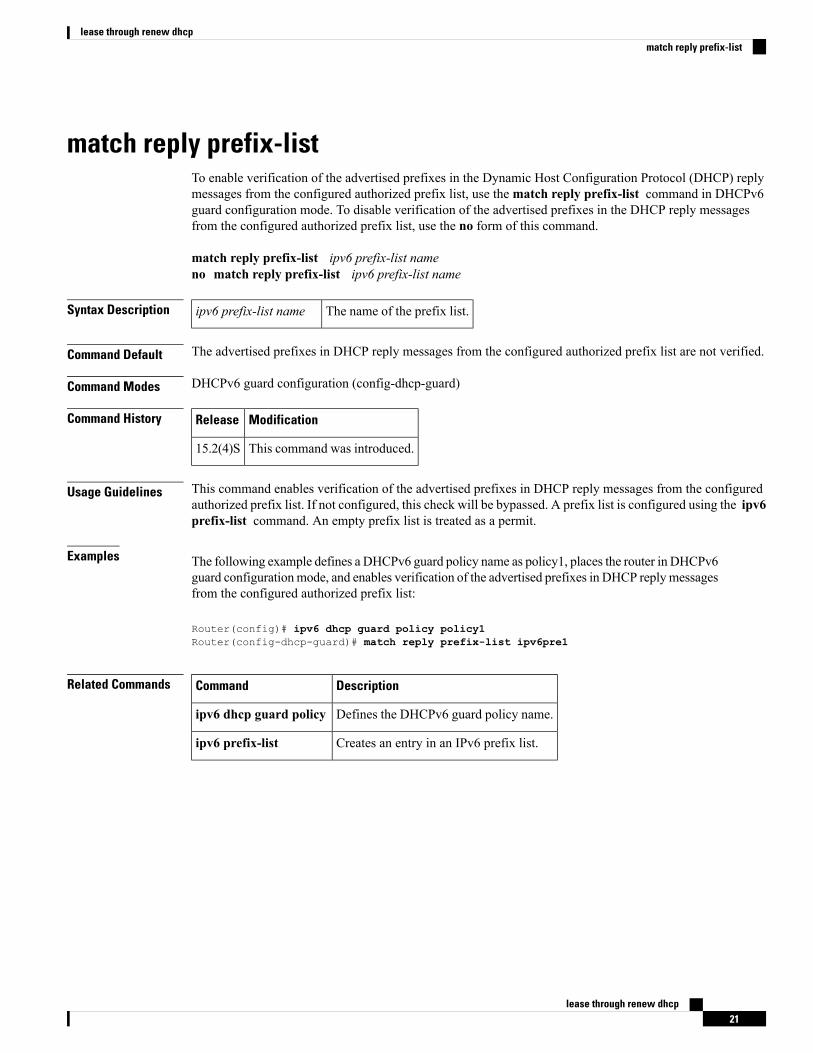
match reply prefix-listTo enable verification of the advertised prefixes in the Dynamic Host Configuration Protocol (DHCP) replymessages from the configured authorized prefix list, use thematch reply prefix-list command in DHCPv6guard configuration mode. To disable verification of the advertised prefixes in the DHCP reply messagesfrom the configured authorized prefix list, use the no form of this command.
match reply prefix-list ipv6 prefix-list nameno match reply prefix-list ipv6 prefix-list name
Syntax Description The name of the prefix list.ipv6 prefix-list name
Command Default The advertised prefixes in DHCP reply messages from the configured authorized prefix list are not verified.
Command Modes DHCPv6 guard configuration (config-dhcp-guard)
Command History ModificationRelease
This command was introduced.15.2(4)S
Usage Guidelines This command enables verification of the advertised prefixes in DHCP reply messages from the configuredauthorized prefix list. If not configured, this check will be bypassed. A prefix list is configured using the ipv6prefix-list command. An empty prefix list is treated as a permit.
Examples The following example defines a DHCPv6 guard policy name as policy1, places the router in DHCPv6guard configurationmode, and enables verification of the advertised prefixes in DHCP replymessagesfrom the configured authorized prefix list:
Router(config)# ipv6 dhcp guard policy policy1Router(config-dhcp-guard)# match reply prefix-list ipv6pre1
Related Commands DescriptionCommand
Defines the DHCPv6 guard policy name.ipv6 dhcp guard policy
Creates an entry in an IPv6 prefix list.ipv6 prefix-list
lease through renew dhcp21
lease through renew dhcpmatch reply prefix-list
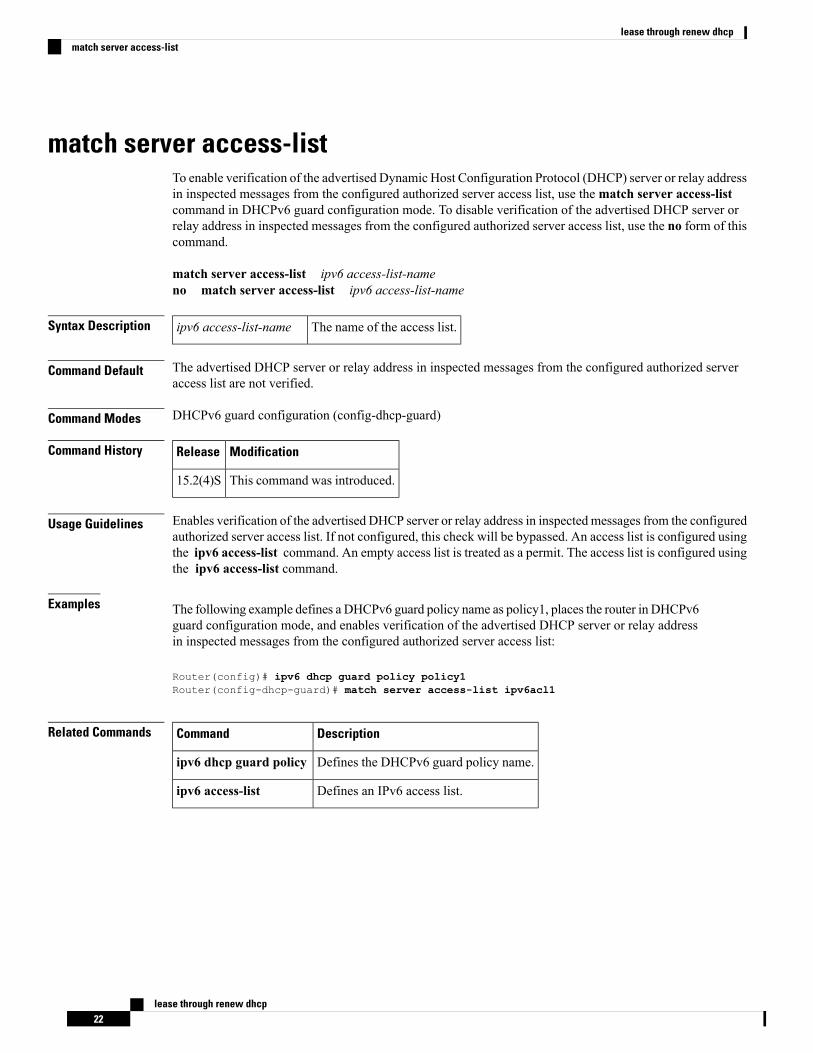
match server access-listTo enable verification of the advertised Dynamic Host Configuration Protocol (DHCP) server or relay addressin inspected messages from the configured authorized server access list, use thematch server access-listcommand in DHCPv6 guard configuration mode. To disable verification of the advertised DHCP server orrelay address in inspected messages from the configured authorized server access list, use the no form of thiscommand.
match server access-list ipv6 access-list-nameno match server access-list ipv6 access-list-name
Syntax Description The name of the access list.ipv6 access-list-name
Command Default The advertised DHCP server or relay address in inspected messages from the configured authorized serveraccess list are not verified.
Command Modes DHCPv6 guard configuration (config-dhcp-guard)
Command History ModificationRelease
This command was introduced.15.2(4)S
Usage Guidelines Enables verification of the advertised DHCP server or relay address in inspected messages from the configuredauthorized server access list. If not configured, this check will be bypassed. An access list is configured usingthe ipv6 access-list command. An empty access list is treated as a permit. The access list is configured usingthe ipv6 access-list command.
Examples The following example defines a DHCPv6 guard policy name as policy1, places the router in DHCPv6guard configuration mode, and enables verification of the advertised DHCP server or relay addressin inspected messages from the configured authorized server access list:
Router(config)# ipv6 dhcp guard policy policy1Router(config-dhcp-guard)# match server access-list ipv6acl1
Related Commands DescriptionCommand
Defines the DHCPv6 guard policy name.ipv6 dhcp guard policy
Defines an IPv6 access list.ipv6 access-list
lease through renew dhcp22
lease through renew dhcpmatch server access-list

match service-instanceTo configure parameters for a service-list based on a service-instance, use thematch service-instance commandin multicast Domain Name System (mDNS) service discovery service-list mode. To disable configuration ofparameters for a service-list based on a service-instance, use the no form of this command.
match service-instance instance-nameno match service-instance
Syntax Description Service instance name. The service-list is filtered according to the specified service-list.instance-name
Command Default A service-list is not filtered for a service-instance name.
Command Modes mdns service discovery service-list (config-mdns-sd-sl)
Command History ModificationRelease
This commandwas introduced.15.2(1)E
Usage Guidelines The match service-instance command must be used after a service-list is created, and the permit or denyoption is exercised.
Examples The following example shows how to filter a service-list by a service instance:
Device> enableDevice# configure terminalDevice(config)# service-list mdns-sd sl1 permit 3Device(config-mdns-sd-sl)# match service-instance service1Device(config-mdns-sd-sl)# exit
Related Commands DescriptionCommand
Creates a service-list and applies a filter on the service-list or associates a query forthe service-list.
service-list mdns-sd
Configures parameters for a service-list, for a message-type.match message-type
Configures parameters for a service-list, for a specified service-type.match service-type
Displays mDNS statistics for the specified service-list.show mdns statistics
lease through renew dhcp23
lease through renew dhcpmatch service-instance

match service-typeTo configure parameters for a service-list based on a service-type, use thematch service-type command inmulticast Domain Name System (mDNS) service discovery service-list mode. To disable configuration ofparameters for a service-list based on a service-type, use the no form of this command.
match service-type mDNS-service-type-stringno match service-type
Syntax Description Service type string. The service-list is filtered for the specified service-type.mDNS-service-type-string
Command Default A service-list is not filtered for a service-type.
Command Modes mdns service discovery service-list (config-mdns-sd-sl)
Command History ModificationRelease
This commandwas introduced.15.2(1)E
Usage Guidelines The match service-type command must be used after a service-list is created, and the permit or deny optionis exercised.
Examples The following example shows how to filter a service-list for a TXT service-type:
Device> enableDevice# configure terminalDevice(config)# service-list mdns-sd sl1 permit 3Device(config-mdns-sd-sl)# match service-type TXTDevice(config-mdns-sd-sl)# exit
Related Commands DescriptionCommand
Creates a service-list and applies a filter on the service-list or associates a queryfor the service-list.
service-list mdns-sd
Configures parameters for a service-list, for a service-instance.match service-instance
Configures parameters for a service-list, for a message-type.match message-type
Displays mDNS statistics for the specified service-list.show mdns statistics
lease through renew dhcp24
lease through renew dhcpmatch service-type

mode (nat64)To configure the Network Address Translation 64 (NAT64) mapping of addresses and ports (MAP-T) mode,use themode command in NAT64 MAP-T configuration mode. To exit from the NAT64 MAP-T mode, usethe no form of this command.
mode {divi |map-t}no mode
Syntax Description Configures the stateless dual translation mode.divi
Configures the MAP-T mode. This mode is the default.map-t
Command Default MAP-T is the default mode.
Command Modes NAT64 MAP-T configuration (config-nat64-mapt)
Command History ModificationRelease
This command was introduced.Cisco IOS XE Release 3.8S
This command was integrated into Cisco IOS Release 15.5(2)T.Cisco IOSRelease 15.5(2)T
Usage Guidelines MAP-T or Mapping of address and port (MAP) double stateless translation-based solution (MAP-T) providesIPv4 hosts connectivity to and across an IPv6 domain. MAP-T builds on existing stateless IPv4/IPv6 addresstranslation techniques that are specified in RFC 6052, RFC 6144, and RFC 6145.
In dual translation mode, IPv4 is translated into IPv6 and vice versa.
Examples The following example shows how to configure the dual translation mode for stateless NAT64:Device(config)# nat64 map-t domain 89Device(config-nat64-mapt)# mode divi
Related Commands DescriptionCommand
Configures NAT64 MAP-T settings.nat64map-t
lease through renew dhcp25
lease through renew dhcpmode (nat64)

nameTo configure the redundancy group with a name, use the namecommand in redundancy application groupconfiguration mode. To remove the name of a redundancy group, use the no form of this command.
name group-nameno name group-name
Syntax Description Name of the redundancy group.group-name
Command Default The redundancy group is not configured with a name.
Command Modes Redundancy application group configuration (config-red-app-grp)
Command History ModificationRelease
This command was introduced.Cisco IOSXERelease 3.1S
Examples The following example shows how to configure the redundancy group name as group1:
Router# configure terminalRouter(config)# redundancyRouter(config-red)# application redundancyRouter(config-red-app)# group 1Router(config-red-app-grp)# name group1
Related Commands DescriptionCommand
Enters redundancy application configuration mode.application redundancy
Enters redundancy application group configurationmode.group(firewall)
Shuts down a group manually.shutdown
lease through renew dhcp26
lease through renew dhcpname
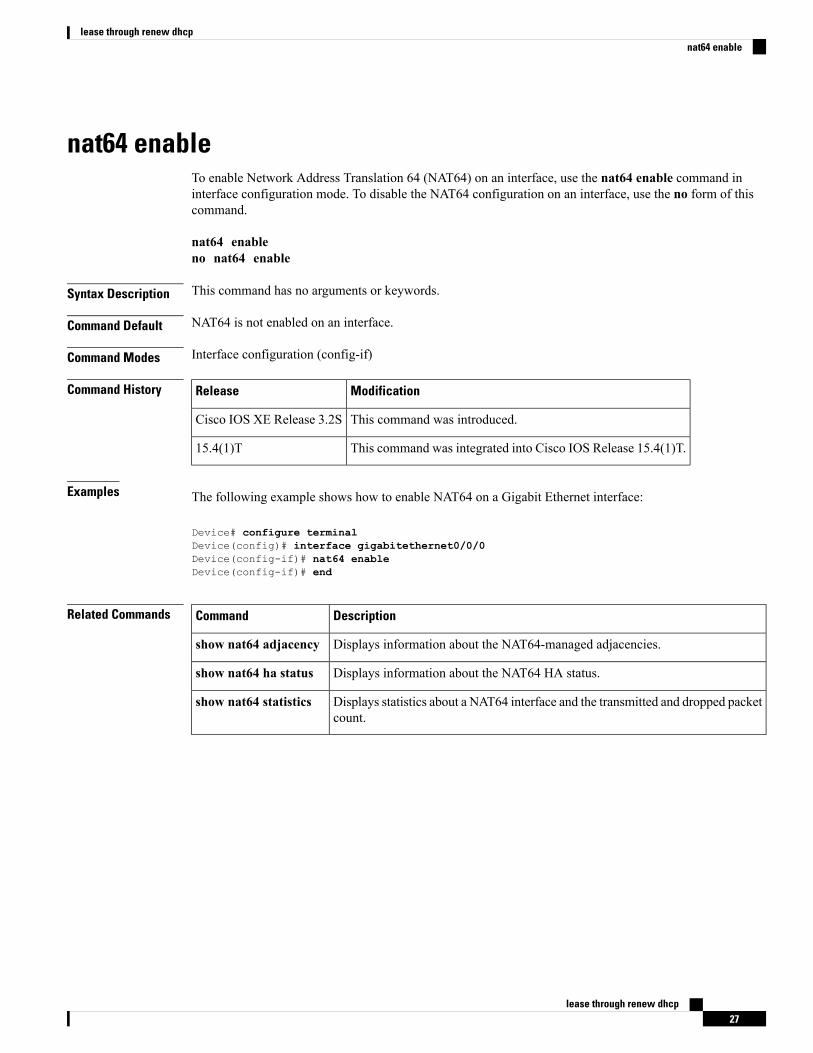
nat64 enableTo enable Network Address Translation 64 (NAT64) on an interface, use the nat64 enable command ininterface configuration mode. To disable the NAT64 configuration on an interface, use the no form of thiscommand.
nat64 enableno nat64 enable
Syntax Description This command has no arguments or keywords.
Command Default NAT64 is not enabled on an interface.
Command Modes Interface configuration (config-if)
Command History ModificationRelease
This command was introduced.Cisco IOS XE Release 3.2S
This command was integrated into Cisco IOS Release 15.4(1)T.15.4(1)T
Examples The following example shows how to enable NAT64 on a Gigabit Ethernet interface:
Device# configure terminalDevice(config)# interface gigabitethernet0/0/0Device(config-if)# nat64 enableDevice(config-if)# end
Related Commands DescriptionCommand
Displays information about the NAT64-managed adjacencies.show nat64 adjacency
Displays information about the NAT64 HA status.show nat64 ha status
Displays statistics about a NAT64 interface and the transmitted and dropped packetcount.
show nat64 statistics
lease through renew dhcp27
lease through renew dhcpnat64 enable

nat64 loggingTo enable Network Address Translation 64 (NAT64) high-speed logging (HSL), use the nat64 loggingcommand in global configuration mode. To disable NAT64 logging, use the no form of this command.
nat64 logging translations flow-export v9 udp destination hostname portno nat64 logging translations
Syntax Description Enables NAT64 translation logging.translations
Enables NAT64 logging through flow export.flow-export
Enables Version 9 NetFlow export format logging.v9
Enables logging of UDP packets.udp
Specifies the NAT64 external logging destination.destination
Hostname or the IPv4 address of the external collector for logging records.hostname
Port number of the IPv4 host of the external collector for logging records. Valid values arefrom 1 to 65535.
port
Command Default NAT64 logging is not enabled.
Command Modes Global configuration (config)
Command History ModificationRelease
This command was introduced.Cisco IOS XE Release 3.4S
This command was integrated into Cisco IOS Release 15.4(2)T.15.4(2)T
Usage Guidelines The nat64 logging command allows you to specify remote logging for NAT64 objects.
The nat64 logging command is based on the NetFlow Version 9 export format.
In Cisco IOSXERelease 3.4S and later releases, NAT supports HSL.When HSL is configured, NAT providesa log of the packets that are flowing through the routing devices (similar to the Version 9 NetFlow-like records)to an external collector.
Examples The following example shows how to enable NAT64 HSL logging:
Device(config)# nat64 logging translations flow-export v9 udp destination 10.1.1.1 2000
Related Commands DescriptionCommand
Enables NAT64 on an interface.nat64 enable
lease through renew dhcp28
lease through renew dhcpnat64 logging

nat64 logging translations flow-exportTo enable the high-speed logging of NAT64 translations by using a flow exporter, use the nat64 loggingtranslations flow-export command in global configurationmode. To disable the logging of NAT64 translationsby using a flow exporter, use the no form of this command.
nat64 logging translations flow-exportv9 udp{destination IPv4address-port|ipv6-destinationipv6address-port}[{vrf vrf-name|source interface-name interface-number}]no nat64 logging translations flow-export
Syntax Description Specifies the flow exporter Version9 format.
v9
Specifies the UDP protocol.udp
Specifies the destination IPv4address for which translations willbe logged.
destination
Specifies the destination addressfor which translations will belogged.
ipv6-destination
Name or IPv4 address of thedestination.
hostname
Local UDP port number. Validvalues are from 1 to 65335.
local-udp-port
(Optional) Specifies the sourceinterface for which translations willbe logged.
source interface-type interface-number
(Optional) Specifies the destinationVRF for which translations will belogged.
vrf vrf-name
Command Default Logging is disabled for all NAT64 translations.
Command Modes Global configuration (config)
Command History ModificationRelease
This command was introduced.Cisco IOS XE Release 3.1S
This command was modified. The bind-only keyword was added.Cisco IOS XE Release 3.7S
This command was modified. The following keywords were added:
• ipv6-destination
• vrf
Cisco IOSXE Fuji Release 16.7.1
lease through renew dhcp29
lease through renew dhcpnat64 logging translations flow-export
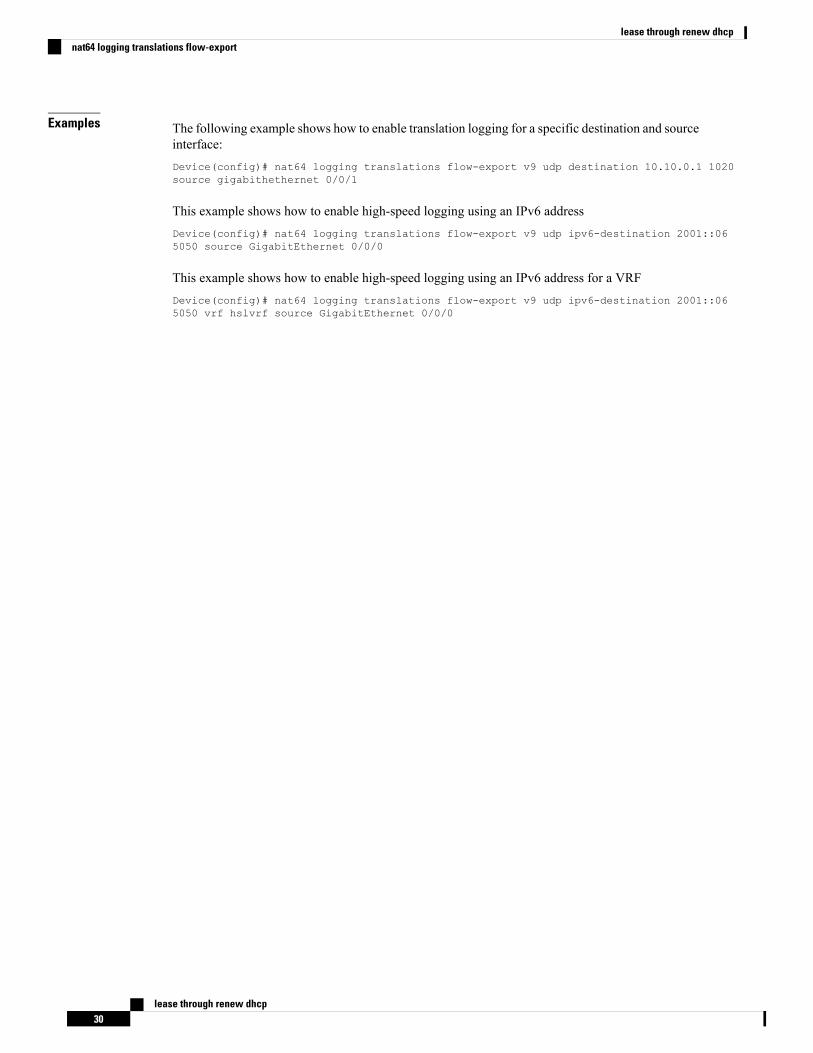
Examples The following example shows how to enable translation logging for a specific destination and sourceinterface:Device(config)# nat64 logging translations flow-export v9 udp destination 10.10.0.1 1020source gigabithethernet 0/0/1
This example shows how to enable high-speed logging using an IPv6 addressDevice(config)# nat64 logging translations flow-export v9 udp ipv6-destination 2001::065050 source GigabitEthernet 0/0/0
This example shows how to enable high-speed logging using an IPv6 address for a VRFDevice(config)# nat64 logging translations flow-export v9 udp ipv6-destination 2001::065050 vrf hslvrf source GigabitEthernet 0/0/0
lease through renew dhcp30
lease through renew dhcpnat64 logging translations flow-export

nat64 map-tTo configure the Network Address Translation 64 (NAT64) mapping of addresses and ports translation(MAP-T) settings, use the nat64 map-t command in global configuration mode. To remove the NAT64MAP-T settings, use the no form of this command.
nat64 map-t domain numberno nat64 map-t domain number
Syntax Description Specifies the NAT64 MAP-T domain. Valid values for the number argument are from1 to 128.
domain number
Command DefaultCommand Modes Global configuration (config)
Command History ModificationRelease
This command was introduced.Cisco IOS XE Release 3.8S
This command was integrated into Cisco IOS Release 15.5(2)T.Cisco IOSRelease 15.5(2)T
Usage Guidelines MAP-T or Mapping of address and port (MAP) double stateless translation-based solution (MAP-T) providesIPv4 hosts connectivity to and across an IPv6 domain. MAP-T builds on existing stateless IPv4/IPv6 addresstranslation techniques that are specified in RFC 6052, RFC 6144, and RFC 6145.
After you configure the nat64map-t command, the commandmode changes to NAT64MAP-T configurationmode.
Examples The following example shows how to configure NAT64 MAP-T settings:Device(config)# nat64 map-t domain 89Device(config-nat64-map-t)#
Related Commands DescriptionCommand
Configures a basic mapping rule for NAT64 MAP-T.basic-mapping-rule
Configures NAT64MAP-T domain default mapping rule.default-mapping-rule
lease through renew dhcp31
lease through renew dhcpnat64 map-t

nat64 prefix statefulTo configure a prefix and a prefix length for stateful Network Address Translation 64 (NAT64), use the nat64prefix stateful command in global configuration or interface configuration mode. To disable the configuration,use the no form of this command.
nat64 prefix stateful ipv6-prefix/prefix-lengthno nat64 prefix stateful ipv6-prefix/prefix-length
Syntax Description IPv6 network number to include in router advertisements. This argument must be in the formdocumented in RFC 2373 where the address is specified in hexadecimal using 16-bit valuesbetween colons.
ipv6-prefix
Length of the IPv6 prefix. A decimal value that indicates how many of the high-ordercontiguous bits of the address comprise the prefix (the network portion of the address). Aslash mark must precede the decimal value.
/prefix-length
Command Default NAT64 stateful prefixes are not configured.
Command Modes Global configuration (config)
Interface configuration (config-if)
Command History ModificationRelease
This command was introduced.Cisco IOS XE Release3.4 S
This command was integrated into Cisco IOS Release 15.4(2)T.15.4(2)T
Usage Guidelines Use the nat64 prefix stateful command in global configuration mode to assign a global NAT64 statefulprefix, or use it in interface configuration mode to assign a unique NAT64 stateful prefix for an interface. Amaximum of one global stateful prefix and one stateful prefix per interface is supported. If a global statefulprefix or an interface stateful prefix is not configured, the Well Known Prefix (WKP) of 64:ff9b::/96 is usedto translate the IPv4 address of the IPv4 host.
Examples The following example shows how to configure a global NAT64 stateful prefix:
Device(config)# nat64 prefix stateful 2001:DB8:0:1::/96
The following example shows how to configure a NAT64 stateful prefix for a Gigabit Ethernetinterface:Device(config)# interface gigabitethernet0/0/0Device(config-if)# nat64 prefix stateful 2001:DB8:0:1::/96
lease through renew dhcp32
lease through renew dhcpnat64 prefix stateful

Related Commands DescriptionCommand
Assigns a global or interface-specific NAT64 stateless prefix.nat64 prefix stateless
Displays information about NAT64 stateful prefixes.show nat64 prefix stateful
lease through renew dhcp33
lease through renew dhcpnat64 prefix stateful
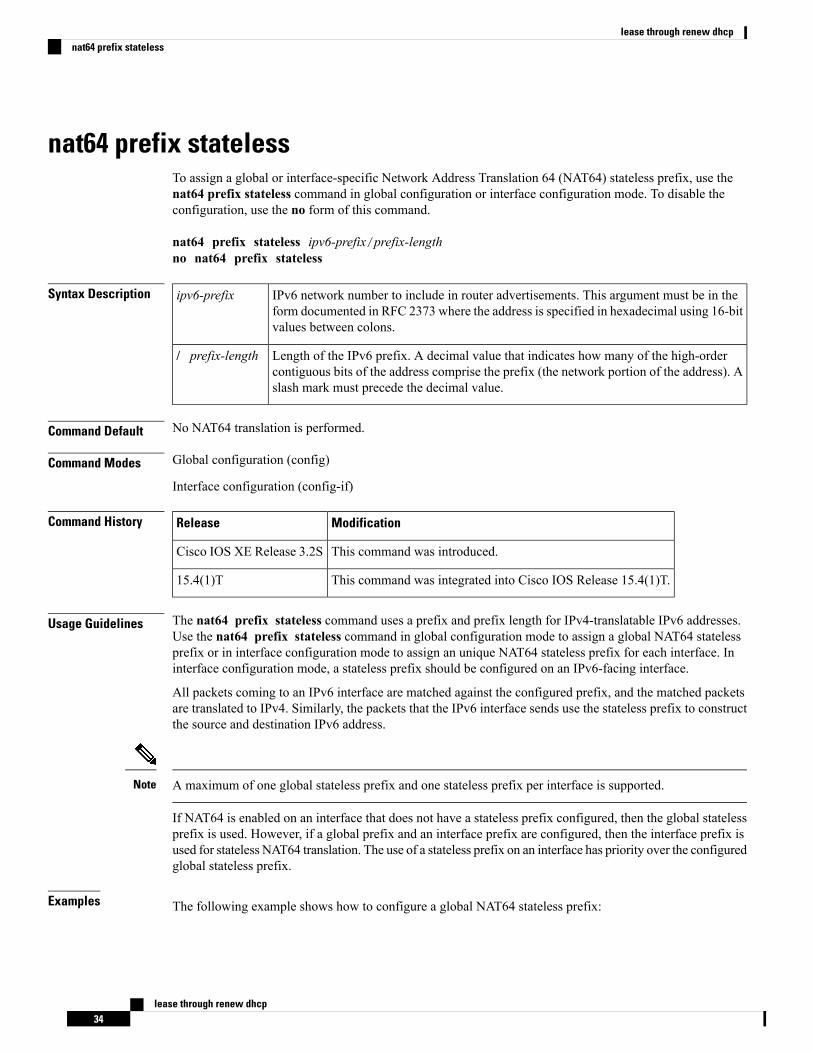
nat64 prefix statelessTo assign a global or interface-specific Network Address Translation 64 (NAT64) stateless prefix, use thenat64 prefix stateless command in global configuration or interface configuration mode. To disable theconfiguration, use the no form of this command.
nat64 prefix stateless ipv6-prefix/prefix-lengthno nat64 prefix stateless
Syntax Description IPv6 network number to include in router advertisements. This argument must be in theform documented in RFC 2373 where the address is specified in hexadecimal using 16-bitvalues between colons.
ipv6-prefix
Length of the IPv6 prefix. A decimal value that indicates how many of the high-ordercontiguous bits of the address comprise the prefix (the network portion of the address). Aslash mark must precede the decimal value.
/ prefix-length
Command Default No NAT64 translation is performed.
Command Modes Global configuration (config)
Interface configuration (config-if)
Command History ModificationRelease
This command was introduced.Cisco IOS XE Release 3.2S
This command was integrated into Cisco IOS Release 15.4(1)T.15.4(1)T
Usage Guidelines The nat64 prefix stateless command uses a prefix and prefix length for IPv4-translatable IPv6 addresses.Use the nat64 prefix stateless command in global configuration mode to assign a global NAT64 statelessprefix or in interface configuration mode to assign an unique NAT64 stateless prefix for each interface. Ininterface configuration mode, a stateless prefix should be configured on an IPv6-facing interface.
All packets coming to an IPv6 interface are matched against the configured prefix, and the matched packetsare translated to IPv4. Similarly, the packets that the IPv6 interface sends use the stateless prefix to constructthe source and destination IPv6 address.
A maximum of one global stateless prefix and one stateless prefix per interface is supported.Note
If NAT64 is enabled on an interface that does not have a stateless prefix configured, then the global statelessprefix is used. However, if a global prefix and an interface prefix are configured, then the interface prefix isused for stateless NAT64 translation. The use of a stateless prefix on an interface has priority over the configuredglobal stateless prefix.
Examples The following example shows how to configure a global NAT64 stateless prefix:
lease through renew dhcp34
lease through renew dhcpnat64 prefix stateless
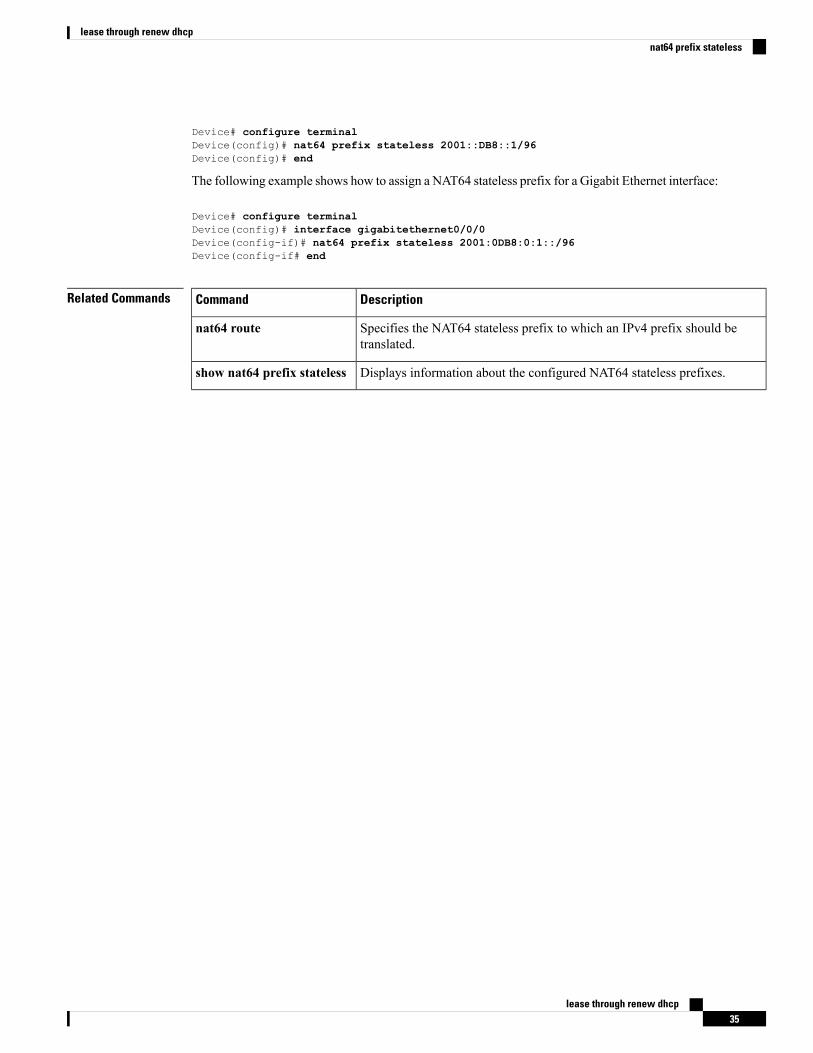
Device# configure terminalDevice(config)# nat64 prefix stateless 2001::DB8::1/96Device(config)# end
The following example shows how to assign a NAT64 stateless prefix for a Gigabit Ethernet interface:
Device# configure terminalDevice(config)# interface gigabitethernet0/0/0Device(config-if)# nat64 prefix stateless 2001:0DB8:0:1::/96Device(config-if# end
Related Commands DescriptionCommand
Specifies the NAT64 stateless prefix to which an IPv4 prefix should betranslated.
nat64 route
Displays information about the configured NAT64 stateless prefixes.show nat64 prefix stateless
lease through renew dhcp35
lease through renew dhcpnat64 prefix stateless
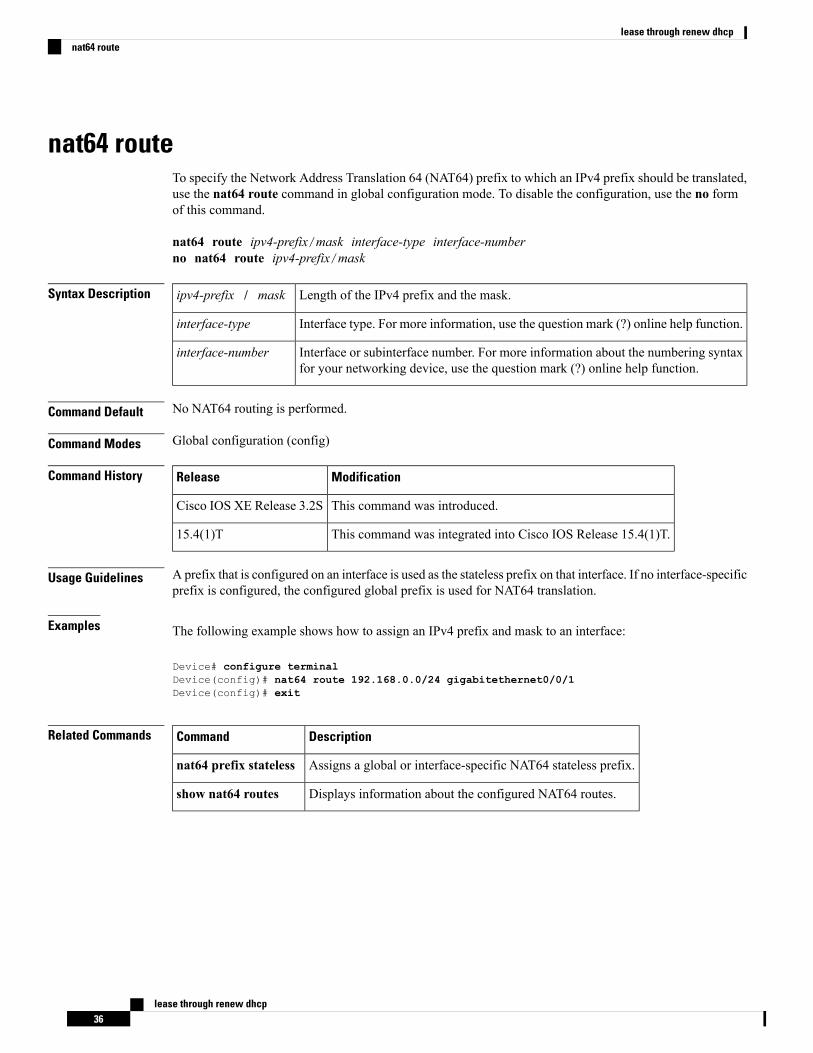
nat64 routeTo specify the Network Address Translation 64 (NAT64) prefix to which an IPv4 prefix should be translated,use the nat64 route command in global configuration mode. To disable the configuration, use the no formof this command.
nat64 route ipv4-prefix/mask interface-type interface-numberno nat64 route ipv4-prefix/mask
Syntax Description Length of the IPv4 prefix and the mask.ipv4-prefix / mask
Interface type. For more information, use the question mark (?) online help function.interface-type
Interface or subinterface number. For more information about the numbering syntaxfor your networking device, use the question mark (?) online help function.
interface-number
Command Default No NAT64 routing is performed.
Command Modes Global configuration (config)
Command History ModificationRelease
This command was introduced.Cisco IOS XE Release 3.2S
This command was integrated into Cisco IOS Release 15.4(1)T.15.4(1)T
Usage Guidelines A prefix that is configured on an interface is used as the stateless prefix on that interface. If no interface-specificprefix is configured, the configured global prefix is used for NAT64 translation.
Examples The following example shows how to assign an IPv4 prefix and mask to an interface:
Device# configure terminalDevice(config)# nat64 route 192.168.0.0/24 gigabitethernet0/0/1Device(config)# exit
Related Commands DescriptionCommand
Assigns a global or interface-specific NAT64 stateless prefix.nat64 prefix stateless
Displays information about the configured NAT64 routes.show nat64 routes
lease through renew dhcp36
lease through renew dhcpnat64 route
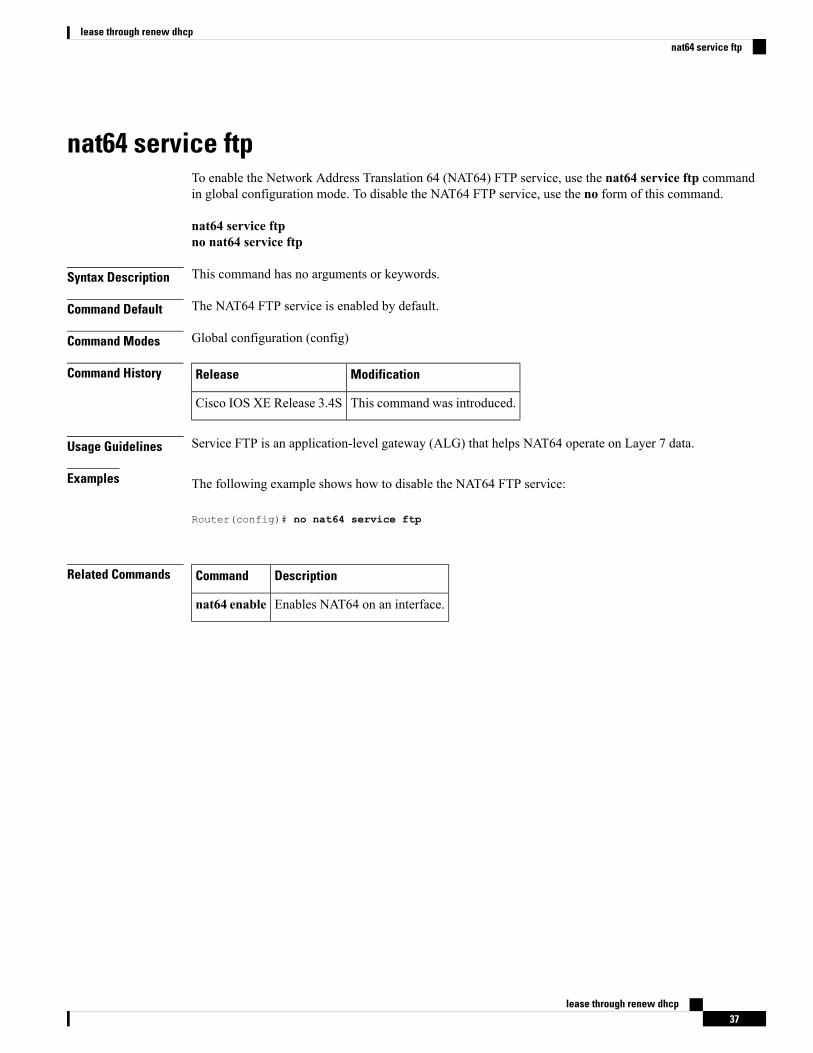
nat64 service ftpTo enable the Network Address Translation 64 (NAT64) FTP service, use the nat64 service ftp commandin global configuration mode. To disable the NAT64 FTP service, use the no form of this command.
nat64 service ftpno nat64 service ftp
Syntax Description This command has no arguments or keywords.
Command Default The NAT64 FTP service is enabled by default.
Command Modes Global configuration (config)
Command History ModificationRelease
This command was introduced.Cisco IOS XE Release 3.4S
Usage Guidelines Service FTP is an application-level gateway (ALG) that helps NAT64 operate on Layer 7 data.
Examples The following example shows how to disable the NAT64 FTP service:
Router(config)# no nat64 service ftp
Related Commands DescriptionCommand
Enables NAT64 on an interface.nat64 enable
lease through renew dhcp37
lease through renew dhcpnat64 service ftp
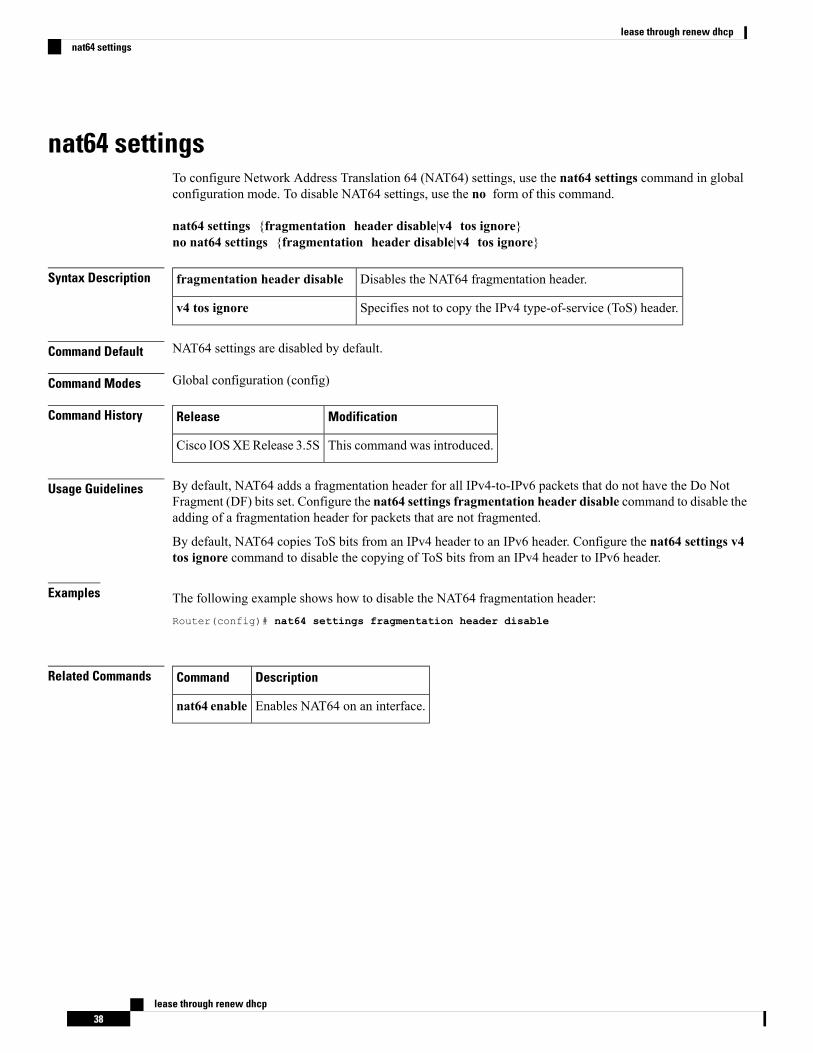
nat64 settingsTo configure Network Address Translation 64 (NAT64) settings, use the nat64 settings command in globalconfiguration mode. To disable NAT64 settings, use the no form of this command.
nat64 settings {fragmentation header disable|v4 tos ignore}no nat64 settings {fragmentation header disable|v4 tos ignore}
Syntax Description Disables the NAT64 fragmentation header.fragmentation header disable
Specifies not to copy the IPv4 type-of-service (ToS) header.v4 tos ignore
Command Default NAT64 settings are disabled by default.
Command Modes Global configuration (config)
Command History ModificationRelease
This command was introduced.Cisco IOSXERelease 3.5S
Usage Guidelines By default, NAT64 adds a fragmentation header for all IPv4-to-IPv6 packets that do not have the Do NotFragment (DF) bits set. Configure the nat64 settings fragmentation header disable command to disable theadding of a fragmentation header for packets that are not fragmented.
By default, NAT64 copies ToS bits from an IPv4 header to an IPv6 header. Configure the nat64 settings v4tos ignore command to disable the copying of ToS bits from an IPv4 header to IPv6 header.
Examples The following example shows how to disable the NAT64 fragmentation header:Router(config)# nat64 settings fragmentation header disable
Related Commands DescriptionCommand
Enables NAT64 on an interface.nat64 enable
lease through renew dhcp38
lease through renew dhcpnat64 settings
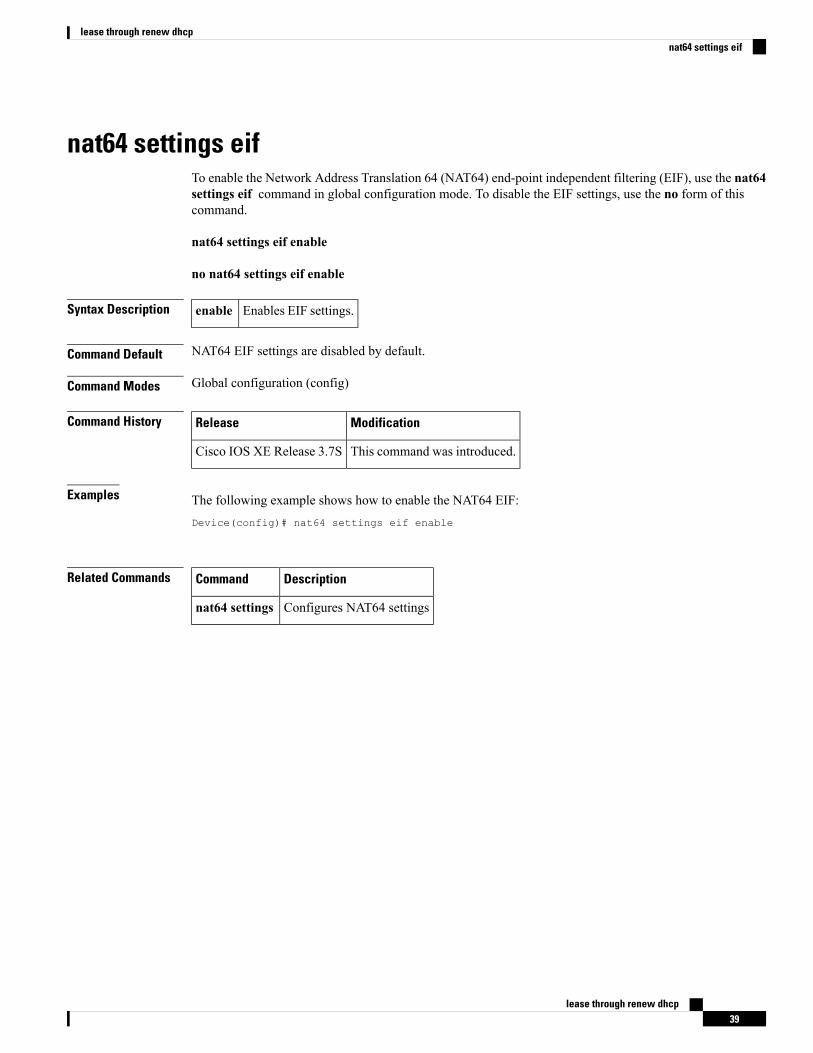
nat64 settings eifTo enable the Network Address Translation 64 (NAT64) end-point independent filtering (EIF), use the nat64settings eif command in global configuration mode. To disable the EIF settings, use the no form of thiscommand.
nat64 settings eif enable
no nat64 settings eif enable
Syntax Description Enables EIF settings.enable
Command Default NAT64 EIF settings are disabled by default.
Command Modes Global configuration (config)
Command History ModificationRelease
This command was introduced.Cisco IOS XE Release 3.7S
Examples The following example shows how to enable the NAT64 EIF:Device(config)# nat64 settings eif enable
Related Commands DescriptionCommand
Configures NAT64 settingsnat64 settings
lease through renew dhcp39
lease through renew dhcpnat64 settings eif

nat64 settings flow-entries disableTo disable flow cache entries in Network Address Translation 64 (NAT64) configurations, use the nat64settings flow-entries disable command in global configuration mode. To enable flow cache entries in NAT64configurations, use the no form of this command.
nat64 settings flow-entries disableno nat64 settings flow-entries disable
Syntax Description This command has no arguments or keywords.
Command Default Flow cache entries are enabled.
Command Modes Global configuration (config)
Command History ModificationRelease
This commandwas introduced.Cisco IOSXERelease 3.10S
Usage Guidelines
Disabling flow cache entries will result in lesser performance as this functionality performs multiple databasesearches to find the most specific translation to use.
Note
By default, Network Address Translation (NAT) creates a session (which is a 5-tuple entry) for every translation.A session is also called a flow cache entry.
NAT64 (stateful and stateless) translations support the disabling of flow cache entries. You can disable flowcache entries in dynamic and static NAT64 configurations. Instead of creating sessions, dynamic and staticNAT64 translations can translate a packet off the binding (or bindings if both inside and outside bindings areavailable). A binding or a half entry is an association between a local IP address and a global IP address.
Disabling flow cache entries for dynamic and static translations saves memory usage and provides morescalability for your NAT64 translations.
Port Address Translation (PAT) or interface overload does not support disabling of flow cache entries.Note
Examples The following example shows how to enable flow cache entries in a static NAT64 configuration:Device# configure terminalDevice(config)# ipv6 unicast-routingDevice(config)# nat64 prefix stateful 2001:DB8:1::1/96Device(config)# nat64 v6v4 static 2001:DB8:1::FFFE 209.165.201.1Device(config)# no nat64 settings flow-entries disable
lease through renew dhcp40
lease through renew dhcpnat64 settings flow-entries disable
Related Commands DescriptionCommand
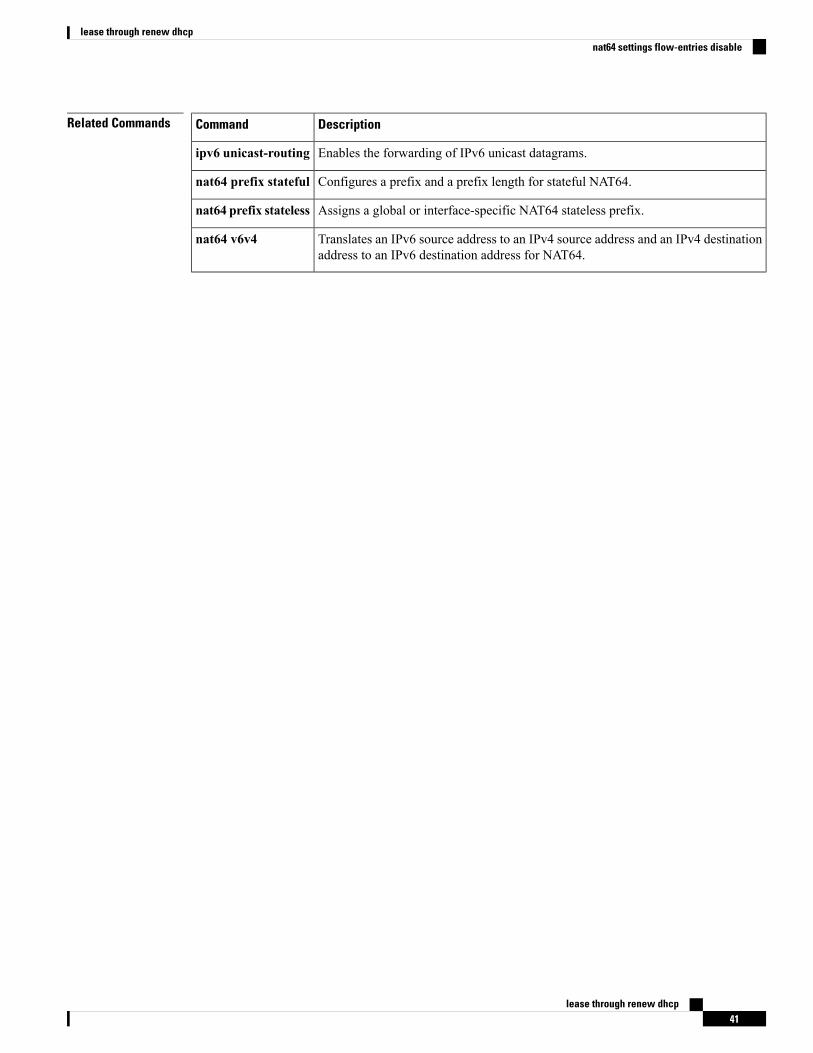
Enables the forwarding of IPv6 unicast datagrams.ipv6 unicast-routing
Configures a prefix and a prefix length for stateful NAT64.nat64 prefix stateful
Assigns a global or interface-specific NAT64 stateless prefix.nat64 prefix stateless
Translates an IPv6 source address to an IPv4 source address and an IPv4 destinationaddress to an IPv6 destination address for NAT64.
nat64 v6v4
lease through renew dhcp41
lease through renew dhcpnat64 settings flow-entries disable

nat64 settings mtu minimumTo set the minimum size for the Network Address Translation 64 (NAT64) maximum transmission units(MTU), use the nat64 settings mtu minimum command in interface configuration mode. To return to thedefault MTU size of 1280 bytes, use the no form of this command.
nat64 settings mtu minimum sizeno nat64 settings mtu minimum
Syntax Description Minimum MTU in bytes. The range is from 1281 to the MTU of the interface.size
Command Default The default value is 1280 bytes, which is the minimum MTU on an IPv6 link.
Command Modes Interface configuration (config-if)
Command History ModificationRelease
This command was introduced.Cisco IOSXERelease 3.5S
Usage Guidelines Each interface has a default maximum packet size or MTU size. The MTU size of an interface defaults to thelargest size possible for that interface type. To adjust theMTU size of an interface, configure themtu command.Packets are fragmented based on the configured MTU size.
If the Do Not Fragment (DF) bits are not set, during the NAT64 translation and fragmentation of IPv4 packetsto IPv6, NAT64 assumes that the IPv6 link minimum MTU size is 1280 bytes. However, the link MTU sizecould be greater than the minimum IPv6 link MTU size. To better utilize the network, network administratorscan use the nat64 settings mtu minimum command to set a higher minimum MTU size. For example, ifinterfaces in a network are all Ethernet interfaces and the MTU size is 1500 bytes, fragmenting packets at1280 bytes is not an effective utilization of the bandwidth. In this case, the network administrator can changetheMTU size to 1500 bytes.When the nat64 settingsmtuminimum command is configured, NAT64 ignoresthe implicit minimum MTU of 1280 bytes and fragments IPv6 packets based on the configured MTU size.
The nat64 settings mtu minimum command works only on IPv6-facing interfaces.Note
Examples The following example shows how to configure a minimum MTU size of 1450 bytes for GigabitEthernet interface 0/0/1:Router(config)# interface gigabitethernet 0/0/1Router(config-if)# nat64 settings mtu minimum 1450
Related Commands DescriptionCommand
Configures an interface and enters interface configuration mode.interface
Adjusts the maximum packet size or MTU size.mtu
lease through renew dhcp42
lease through renew dhcpnat64 settings mtu minimum

nat64 switchover replicate httpTo replicate the Network Address Translation 64 (NAT64) HTTP switchover settings, use the nat64 switchoverreplicate http command in global configuration mode. To disable the HTTP switchover replication settings,use the no form of this command.
nat64 switchover replicate http {enable |disable} port port-numberno nat64 switchover replicate http
Syntax Description Disables HTTP session replication.disable
Enables HTTP session replication.enable
Specifies the HTTP port.port
Port number. Valid values are from 1 to 65535.port-number
Command Default NAT64 HTTP sessions are not replicated.
Command Modes Global configuration (config)
Command History ModificationRelease
This command was introduced.Cisco IOSXERelease 3.5S
Usage Guidelines In stateful NAT64 intra-chassis redundancy, HTTP sessions are not backed up on the standby ForwardProcessor (FP). A typical HTTP application has short-lived, transient flows. Because of the transient natureof the HTTP flows, these flows are not replicated. With stateful NAT64 intra-chassis redundancy you havethe ability to replicate HTTP sessions so that HTTP flows can be made to live longer. To replicate HTTPsessions on the standby FP during a switchover, you must configure the nat64 switchover replicate httpenable command.
You can enable and disable the replication of HTTP sessions on ports. For example, you can configure thenat64 switchover replicate http port 80 command and replicate the switchover of HTTP sessions on port80. Configure the nat64 switchover replicate http disable port 8080 command to disable the replication ofHTTP sessions on port 8080. You can disable the replication of sessions on only one port at any given time;however, you can enable the replication of sessions on all ports.
Examples The following example shows how to replicate switchover of NAT64 HTTP sessions:Router(config)# nat64 switchover replicate http enable port 80
Related Commands DescriptionCommand
Replicates HTTP sessions during a switchover.ip nat switchover replication http
lease through renew dhcp43
lease through renew dhcpnat64 switchover replicate http

nat64 translationTo enable Network Address Translation 64 (NAT64) translation, use the nat64 translation command inglobal configuration mode. To disable NAT64 translation, use the no form of this command.
nat64 translation{max-entries limit|timeout {icmp|tcp|tcp-transient|udp} seconds}nat64 translation{max-entries|timeout {icmp|tcp|tcp-transient|udp}}
Syntax Description Configures the maximum number of stateful NAT64 translations allowed on a router.max-entries
NAT64 translation entry limit. Valid values are from 1 to 2147483647.limit
Specifies the NAT64 translation entry timeout.timeout
Specifies the timeout for NAT64 Internet Control Message Protocol (ICMP) traffic flow.icmp
Specifies the timeout for NAT64 established TCP traffic flow.tcp
Specifies the timeout for NAT64 transient TCP traffic flow.tcp-transient
Specifies the timeout for NAT64 UDP traffic flow.udp
Traffic timeout, in seconds. Valid values are from 1 to 536870.seconds
Command Default NAT64 translation is not enabled.
Command Modes Global configuration (config)
Command History ModificationRelease
This command was introduced.Cisco IOS XE Release 3.4S
This command was integrated into Cisco IOS Release 15.4(2)T.15.4(2)T
Usage Guidelines The nat64 translation timeout command overrides the default aging timeout for NAT64 translations.
A transient TCP session has three possible conditions: a synchronize (SYN) handshake is started, but it is notcomplete; a reset (RST) packet is received; or a finished (FIN) packet is received in both directions.
Examples The following example shows how to set the NAT64 translation maximum entry limit to 500:
Device(config)# nat64 translation max-entries 500
The following example shows how to set the NAT64 translation timeout for TCP to 20,000 seconds:Device(config)# nat64 translation timeout tcp 20000
Related Commands DescriptionCommand
Enables NAT64 on an interface.nat64 enable
lease through renew dhcp44
lease through renew dhcpnat64 translation
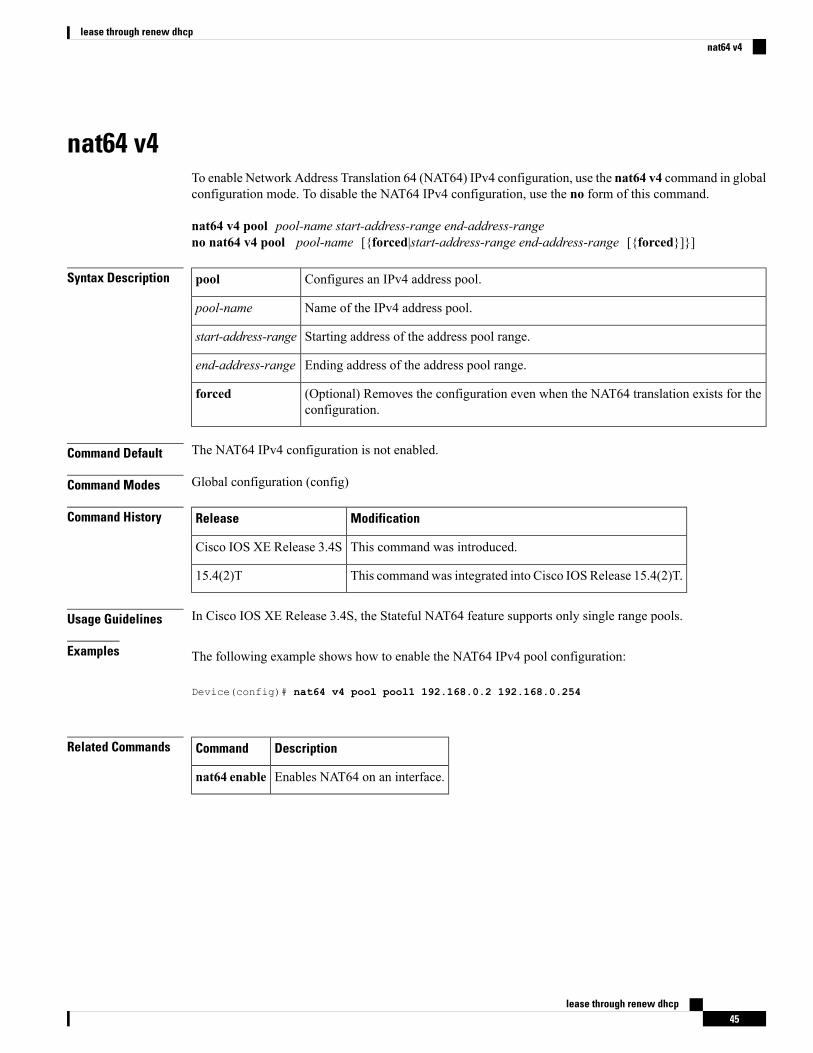
nat64 v4To enable Network Address Translation 64 (NAT64) IPv4 configuration, use the nat64 v4 command in globalconfiguration mode. To disable the NAT64 IPv4 configuration, use the no form of this command.
nat64 v4 pool pool-name start-address-range end-address-rangeno nat64 v4 pool pool-name [{forced|start-address-range end-address-range [{forced}]}]
Syntax Description Configures an IPv4 address pool.pool
Name of the IPv4 address pool.pool-name
Starting address of the address pool range.start-address-range
Ending address of the address pool range.end-address-range
(Optional) Removes the configuration even when the NAT64 translation exists for theconfiguration.
forced
Command Default The NAT64 IPv4 configuration is not enabled.
Command Modes Global configuration (config)
Command History ModificationRelease
This command was introduced.Cisco IOS XE Release 3.4S
This commandwas integrated into Cisco IOS Release 15.4(2)T.15.4(2)T
Usage Guidelines In Cisco IOS XE Release 3.4S, the Stateful NAT64 feature supports only single range pools.
Examples The following example shows how to enable the NAT64 IPv4 pool configuration:
Device(config)# nat64 v4 pool pool1 192.168.0.2 192.168.0.254
Related Commands DescriptionCommand
Enables NAT64 on an interface.nat64 enable
lease through renew dhcp45
lease through renew dhcpnat64 v4
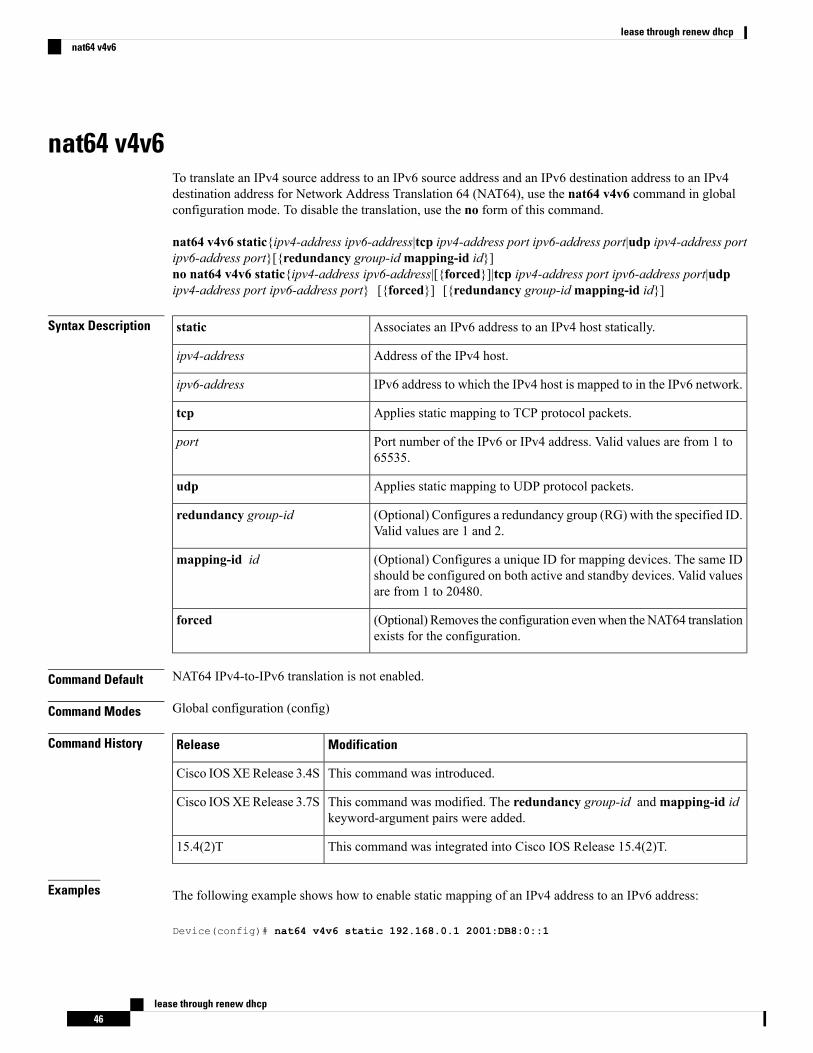
nat64 v4v6To translate an IPv4 source address to an IPv6 source address and an IPv6 destination address to an IPv4destination address for Network Address Translation 64 (NAT64), use the nat64 v4v6 command in globalconfiguration mode. To disable the translation, use the no form of this command.
nat64 v4v6 static{ipv4-address ipv6-address|tcp ipv4-address port ipv6-address port|udp ipv4-address portipv6-address port}[{redundancy group-idmapping-id id}]no nat64 v4v6 static{ipv4-address ipv6-address|[{forced}]|tcp ipv4-address port ipv6-address port|udpipv4-address port ipv6-address port} [{forced}] [{redundancy group-idmapping-id id}]
Syntax Description Associates an IPv6 address to an IPv4 host statically.static
Address of the IPv4 host.ipv4-address
IPv6 address to which the IPv4 host is mapped to in the IPv6 network.ipv6-address
Applies static mapping to TCP protocol packets.tcp
Port number of the IPv6 or IPv4 address. Valid values are from 1 to65535.
port
Applies static mapping to UDP protocol packets.udp
(Optional) Configures a redundancy group (RG) with the specified ID.Valid values are 1 and 2.
redundancy group-id
(Optional) Configures a unique ID for mapping devices. The same IDshould be configured on both active and standby devices. Valid valuesare from 1 to 20480.
mapping-id id
(Optional) Removes the configuration evenwhen theNAT64 translationexists for the configuration.
forced
Command Default NAT64 IPv4-to-IPv6 translation is not enabled.
Command Modes Global configuration (config)
Command History ModificationRelease
This command was introduced.Cisco IOSXERelease 3.4S
This command was modified. The redundancy group-id andmapping-id idkeyword-argument pairs were added.
Cisco IOSXERelease 3.7S
This command was integrated into Cisco IOS Release 15.4(2)T.15.4(2)T
Examples The following example shows how to enable static mapping of an IPv4 address to an IPv6 address:
Device(config)# nat64 v4v6 static 192.168.0.1 2001:DB8:0::1
lease through renew dhcp46
lease through renew dhcpnat64 v4v6
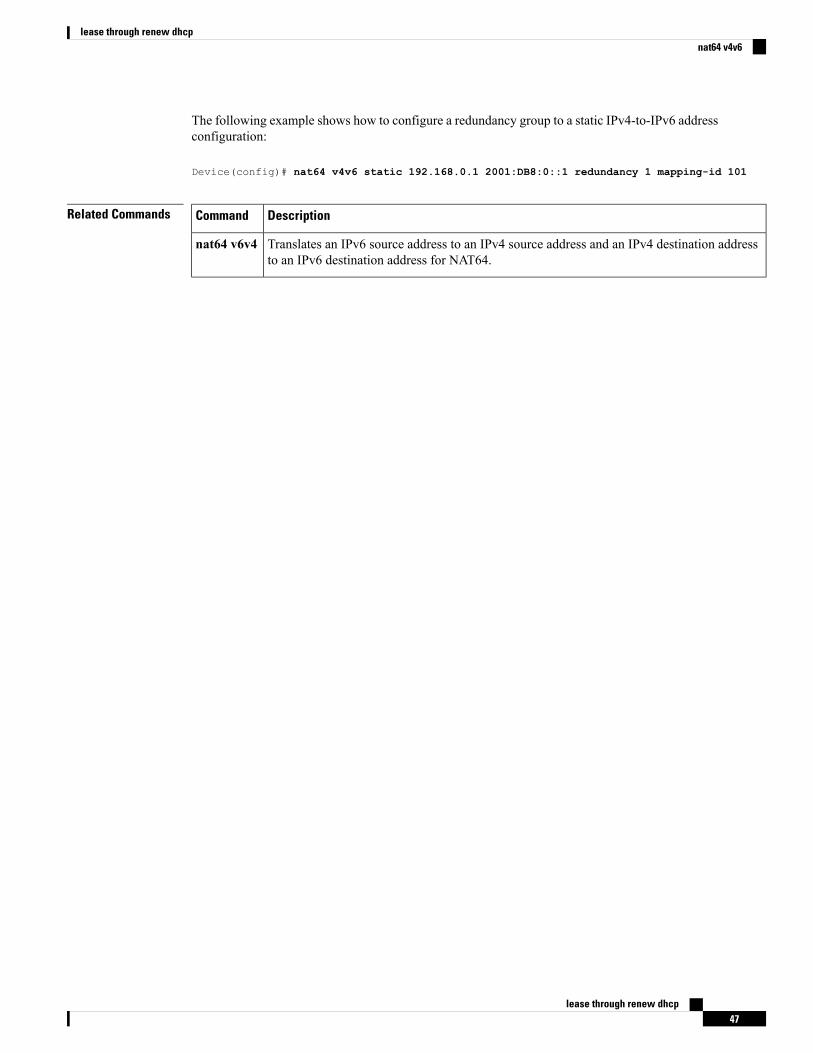
The following example shows how to configure a redundancy group to a static IPv4-to-IPv6 addressconfiguration:
Device(config)# nat64 v4v6 static 192.168.0.1 2001:DB8:0::1 redundancy 1 mapping-id 101
Related Commands DescriptionCommand
Translates an IPv6 source address to an IPv4 source address and an IPv4 destination addressto an IPv6 destination address for NAT64.
nat64 v6v4
lease through renew dhcp47
lease through renew dhcpnat64 v4v6
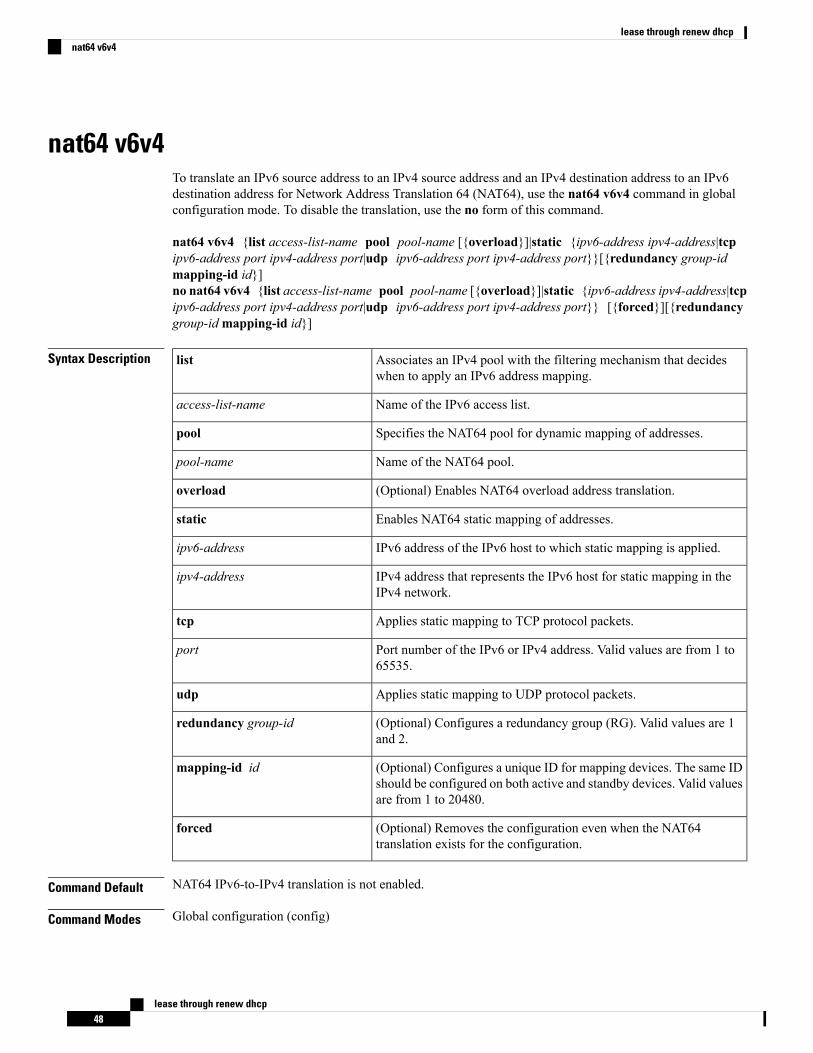
nat64 v6v4To translate an IPv6 source address to an IPv4 source address and an IPv4 destination address to an IPv6destination address for Network Address Translation 64 (NAT64), use the nat64 v6v4 command in globalconfiguration mode. To disable the translation, use the no form of this command.
nat64 v6v4 {list access-list-name pool pool-name [{overload}]|static {ipv6-address ipv4-address|tcpipv6-address port ipv4-address port|udp ipv6-address port ipv4-address port}}[{redundancy group-idmapping-id id}]no nat64 v6v4 {list access-list-name pool pool-name [{overload}]|static {ipv6-address ipv4-address|tcpipv6-address port ipv4-address port|udp ipv6-address port ipv4-address port}} [{forced}][{redundancygroup-idmapping-id id}]
Syntax Description Associates an IPv4 pool with the filtering mechanism that decideswhen to apply an IPv6 address mapping.
list
Name of the IPv6 access list.access-list-name
Specifies the NAT64 pool for dynamic mapping of addresses.pool
Name of the NAT64 pool.pool-name
(Optional) Enables NAT64 overload address translation.overload
Enables NAT64 static mapping of addresses.static
IPv6 address of the IPv6 host to which static mapping is applied.ipv6-address
IPv4 address that represents the IPv6 host for static mapping in theIPv4 network.
ipv4-address
Applies static mapping to TCP protocol packets.tcp
Port number of the IPv6 or IPv4 address. Valid values are from 1 to65535.
port
Applies static mapping to UDP protocol packets.udp
(Optional) Configures a redundancy group (RG). Valid values are 1and 2.
redundancy group-id
(Optional) Configures a unique ID for mapping devices. The same IDshould be configured on both active and standby devices. Valid valuesare from 1 to 20480.
mapping-id id
(Optional) Removes the configuration even when the NAT64translation exists for the configuration.
forced
Command Default NAT64 IPv6-to-IPv4 translation is not enabled.
Command Modes Global configuration (config)
lease through renew dhcp48
lease through renew dhcpnat64 v6v4

Command History ModificationRelease
This command was introduced.Cisco IOSXERelease 3.4S
This command was modified. The redundancy group-id andmapping-id idkeyword-argument pairs were added.
Cisco IOSXERelease 3.7S
This command was integrated into Cisco IOS Release 15.4(2)T.15.4(2)T
Examples The following example shows how to enable dynamicmapping of an IPv6 address to an IPv4 addresspool:Device(config)# nat64 v6v4 list list1 pool pool1
The following example shows how to configure an RG for a dynamic IPv6-to-IPv4 address pool:Device(config)# nat64 v6v4 list list1 pool pool1 redundancy 1 mapping-id 203
Related Commands DescriptionCommand
Translates an IPv4 source address to an IPv6 source address and an IPv6 destination addressto an IPv4 destination address for NAT64.
nat64 v4v6
lease through renew dhcp49
lease through renew dhcpnat64 v6v4

nat66 insideTo configure NPTv6 inside network interface, use the nat66 inside command in interface configuration mode.To remove the nat66 inside network address prefix, use the no form of this command.
nat66 insideno nat66 inside
Syntax Description This command has no arguments or keywords.
Command Default The NPTv6 inside network address prefix is not configured.
Command Modes Interface configuration (config-if)
Command History ModificationRelease
This commandwas introduced.Cisco IOSXEDenali 16.2
Usage Guidelines In Cisco IOS XE Denali 16.2 release, ASR1K NPTv6 feature does not support VRF and Multicast.
The following example shows how to configure NPTv6 inside network interface:Device(config-if)# nat66 inside
Related Commands DescriptionCommand
Specifies the IPv6 interface of the outside network for NAT66.nat66 outside
lease through renew dhcp50
lease through renew dhcpnat66 inside

nat66 outsideTo configure NPTv6 outside network interface, use the nat66 outside command in interface configurationmode. To remove the nat66 outside network address prefix, use the no form of this command.
nat66 outsideno nat66 outside
Syntax Description This command has no arguments or keywords.
Command Default The NPTv6 outside network interface is not configured.
Command Modes Interface configuration (config-if)
Command History ModificationRelease
This commandwas introduced.Cisco IOSXEDenali 16.2
Usage Guidelines In Cisco IOS XE Denali 16.2 release, ASR1K NPTv6 feature does not support VRF and Multicast.
The following example shows how to configure NPTv6 outside network interface:Device(config-if)# nat66 outside
Related Commands DescriptionCommand
Specifies the IPv6 interface of theinside network for NAT66.
nat66 inside
lease through renew dhcp51
lease through renew dhcpnat66 outside

nat66 prefixTo configure NPTv6 inside network address prefix and outside network address prefix for NPTv6 translation,use the nat66 prefix command in global configuration mode. To remove the IPv6 prefix to IPv6 prefixtranslation, use the no form of this command.
nat66 prefix inside prefix/prefix-length outside prefix/prefix-lengthno nat66 prefix inside prefix/prefix-length outside prefix/prefix-length
Syntax Description Specifies the IPv6 inside network.inside
Specifies the IPv6 outside network.outside
Specifies the IPv6 network prefix.prefix
Specifies the length of the IPv6 address prefix.prefix-length
Command Default The IPv6 address prefixes for NPTv6 translation is not configured.
Command Modes Global configuration (config)
Command History ModificationRelease
This commandwas introduced.Cisco IOSXEDenali 16.2
Usage Guidelines Configure IPv6 inside and outside network in interface configuration mode before configuring NPTv6translation.
The following example shows how to configure IPv6 to IPv6 network address prefix translation:Device(config)# nat66 prefix inside 2002:AB01::/64 outside 2002:AB02::/64
Related Commands DescriptionCommand
Specifies the IPv6 interface of the inside network for NAT66.nat66 inside
Specifies the IPv6 interface of the outside network for NAT66.nat66 outside
lease through renew dhcp52
lease through renew dhcpnat66 prefix

netbios-name-serverTo configure NetBIOSWindows Internet Naming Service (WINS) name servers that are available toMicrosoftDynamic Host Configuration Protocol (DHCP) clients, use the netbios-name-server command in DHCPpool configuration. To remove the NetBIOS name server list, use the no form of this command.
netbios-name-server address [address2 ... address8]no netbios-name-server
Syntax Description Specifies the IP address of the NetBIOSWINS name server. One IP address is required,although you can specify up to eight addresses in one command line.
address
(Optional) Specifies up to eight addresses in the command line.address2 ...address8
Command Modes DHCP pool configuration
Command History ModificationRelease
This command was introduced.12.0(1)T
This command was integrated into Cisco IOS Release 12.2(33)SRA.12.2(33)SRA
This command is supported in the Cisco IOS Release 12.2SX train. Support in a specific12.2SX release of this train depends on your feature set, platform, and platform hardware.
12.2SX
Usage Guidelines One IP address is required, although you can specify up to eight addresses in one command line. Servers arelisted in order of preference (address1 is the most preferred server, address2 is the next most preferred server,and so on).
Examples The following example specifies the IP address of a NetBIOS name server available to the client:
netbios-name-server 10.12.1.90
Related Commands DescriptionCommand
Specifies the DNS IP servers available to a DHCP client.dns-server
Specifies the domain name for a DHCP client.domain-name (DHCP)
Configures a DHCP address pool on a Cisco IOS DHCP Server and enters DHCPpool configuration mode.
ip dhcp pool
Configures the NetBIOS node type for Microsoft DHCP clients.netbios-node-type
lease through renew dhcp53
lease through renew dhcpnetbios-name-server

netbios-node-typeTo configure the NetBIOS node type for Microsoft Dynamic Host Configuration Protocol (DHCP) clients,use the netbios-node-type command in DHCP pool configuration mode. To remove the NetBIOS node type,use the no form of this command.
netbios-node-type typeno netbios-node-type
Syntax Description Specifies the NetBIOS node type. Valid types are:
• b-node --Broadcast
• p-node --Peer-to-peer
• m-node --Mixed
• h-node --Hybrid (recommended)
type
Command Modes DHCP pool configuration
Command History ModificationRelease
This command was introduced.12.0(1)T
This command was integrated into Cisco IOS Release 12.2(33)SRA.12.2(33)SRA
This command is supported in the Cisco IOS Release 12.2SX train. Support in a specific12.2SX release of this train depends on your feature set, platform, and platform hardware.
12.2SX
Usage Guidelines The recommended type is h-node (hybrid).
Examples The following example specifies the client’s NetBIOS type as hybrid:
netbios node-type h-node
Related Commands DescriptionCommand
Configures a DHCP address pool on a Cisco IOS DHCP Server and enters DHCPpool configuration mode.
ip dhcp pool
Configures NetBIOS WINS name servers that are available to Microsoft DHCPclients.
netbios name-server
lease through renew dhcp54
lease through renew dhcpnetbios-node-type
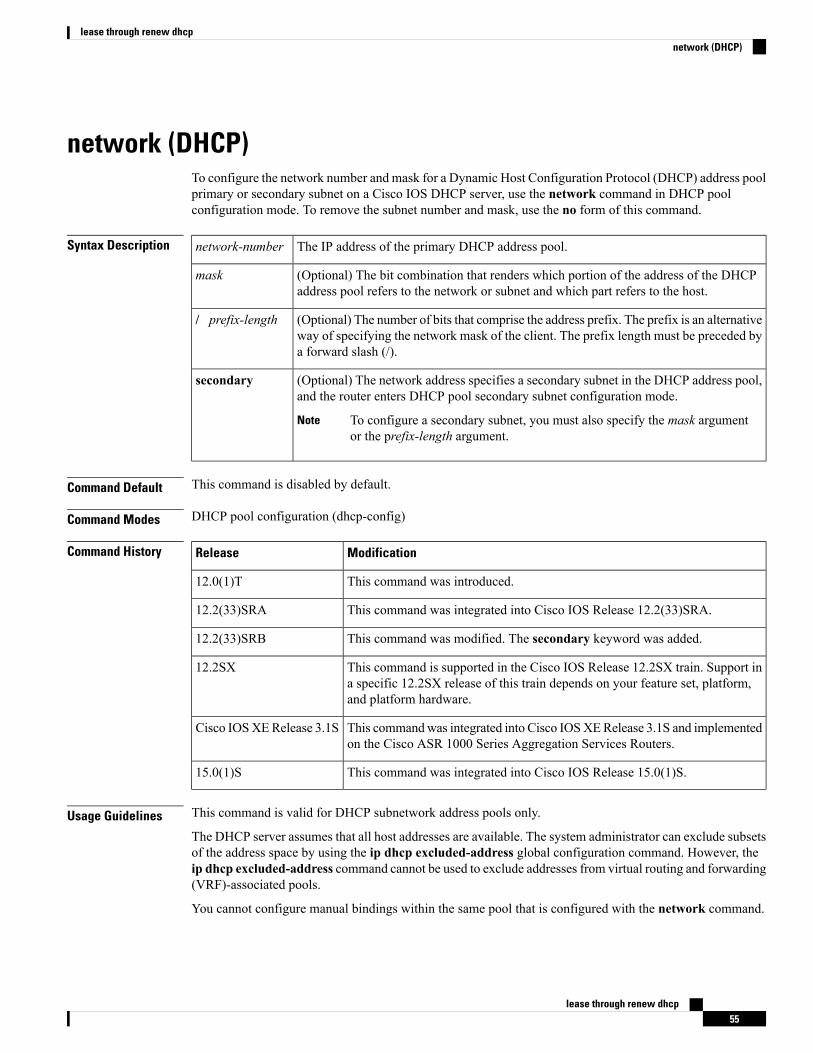
network (DHCP)To configure the network number and mask for a Dynamic Host Configuration Protocol (DHCP) address poolprimary or secondary subnet on a Cisco IOS DHCP server, use the network command in DHCP poolconfiguration mode. To remove the subnet number and mask, use the no form of this command.
Syntax Description The IP address of the primary DHCP address pool.network-number
(Optional) The bit combination that renders which portion of the address of the DHCPaddress pool refers to the network or subnet and which part refers to the host.
mask
(Optional) The number of bits that comprise the address prefix. The prefix is an alternativeway of specifying the network mask of the client. The prefix length must be preceded bya forward slash (/).
/ prefix-length
(Optional) The network address specifies a secondary subnet in the DHCP address pool,and the router enters DHCP pool secondary subnet configuration mode.
To configure a secondary subnet, you must also specify the mask argumentor the prefix-length argument.
Note
secondary
Command Default This command is disabled by default.
Command Modes DHCP pool configuration (dhcp-config)
Command History ModificationRelease
This command was introduced.12.0(1)T
This command was integrated into Cisco IOS Release 12.2(33)SRA.12.2(33)SRA
This command was modified. The secondary keyword was added.12.2(33)SRB
This command is supported in the Cisco IOS Release 12.2SX train. Support ina specific 12.2SX release of this train depends on your feature set, platform,and platform hardware.
12.2SX
This commandwas integrated into Cisco IOSXERelease 3.1S and implementedon the Cisco ASR 1000 Series Aggregation Services Routers.
Cisco IOSXERelease 3.1S
This command was integrated into Cisco IOS Release 15.0(1)S.15.0(1)S
Usage Guidelines This command is valid for DHCP subnetwork address pools only.
The DHCP server assumes that all host addresses are available. The system administrator can exclude subsetsof the address space by using the ip dhcp excluded-address global configuration command. However, theip dhcp excluded-address command cannot be used to exclude addresses from virtual routing and forwarding(VRF)-associated pools.
You cannot configure manual bindings within the same pool that is configured with the network command.
lease through renew dhcp55
lease through renew dhcpnetwork (DHCP)
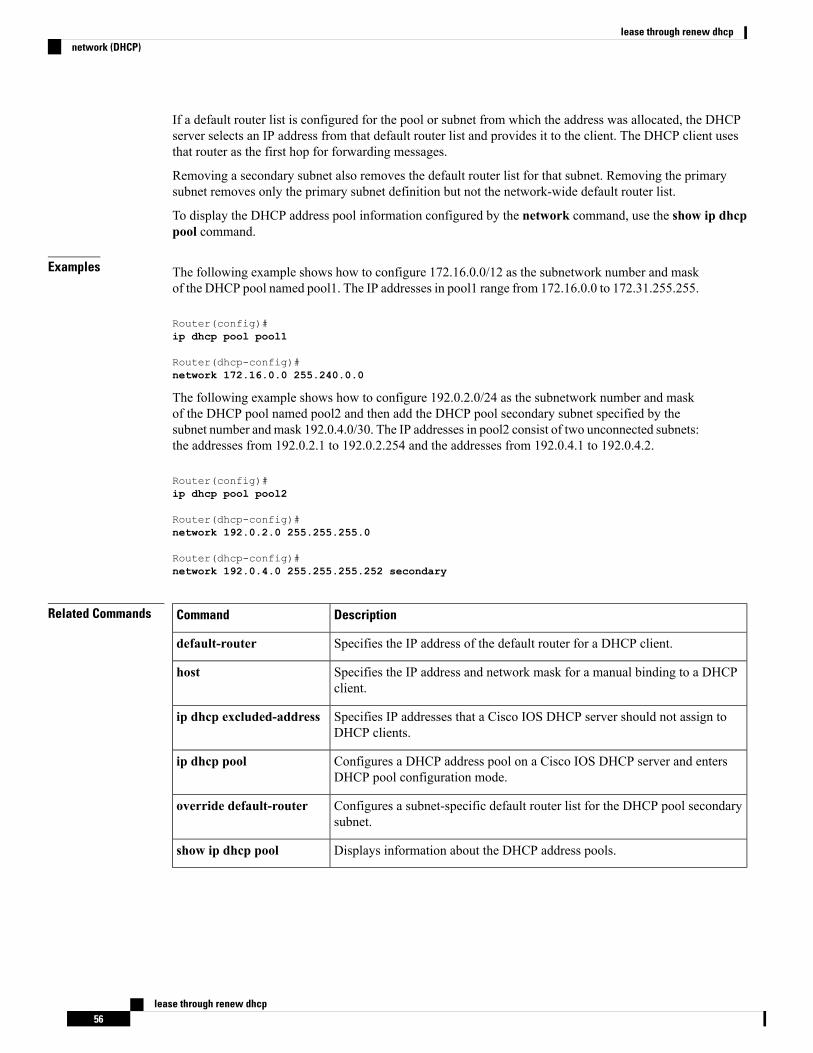
If a default router list is configured for the pool or subnet from which the address was allocated, the DHCPserver selects an IP address from that default router list and provides it to the client. The DHCP client usesthat router as the first hop for forwarding messages.
Removing a secondary subnet also removes the default router list for that subnet. Removing the primarysubnet removes only the primary subnet definition but not the network-wide default router list.
To display the DHCP address pool information configured by the network command, use the show ip dhcppool command.
Examples The following example shows how to configure 172.16.0.0/12 as the subnetwork number and maskof the DHCP pool named pool1. The IP addresses in pool1 range from 172.16.0.0 to 172.31.255.255.
Router(config)#ip dhcp pool pool1
Router(dhcp-config)#network 172.16.0.0 255.240.0.0
The following example shows how to configure 192.0.2.0/24 as the subnetwork number and maskof the DHCP pool named pool2 and then add the DHCP pool secondary subnet specified by thesubnet number and mask 192.0.4.0/30. The IP addresses in pool2 consist of two unconnected subnets:the addresses from 192.0.2.1 to 192.0.2.254 and the addresses from 192.0.4.1 to 192.0.4.2.
Router(config)#ip dhcp pool pool2
Router(dhcp-config)#network 192.0.2.0 255.255.255.0
Router(dhcp-config)#network 192.0.4.0 255.255.255.252 secondary
Related Commands DescriptionCommand
Specifies the IP address of the default router for a DHCP client.default-router
Specifies the IP address and network mask for a manual binding to a DHCPclient.
host
Specifies IP addresses that a Cisco IOS DHCP server should not assign toDHCP clients.
ip dhcp excluded-address
Configures a DHCP address pool on a Cisco IOS DHCP server and entersDHCP pool configuration mode.
ip dhcp pool
Configures a subnet-specific default router list for the DHCP pool secondarysubnet.
override default-router
Displays information about the DHCP address pools.show ip dhcp pool
lease through renew dhcp56
lease through renew dhcpnetwork (DHCP)

next-serverTo configure the next server in the boot process of a Dynamic Host Configuration Protocol (DHCP) client,use the next-server command in DHCP pool configuration. To remove the boot server list, use the no formof this command.
next-server address [address2 ... address8]no next-server address
Syntax Description Specifies the IP address of the next server in the boot process, which is typically aTrivial File Transfer Protocol (TFTP) server. One IP address is required, but up toeight addresses can be specified in one command line.
address
(Optional) Specifies up to seven additional addresses in the command line.address2 ...address8
Command Default If the next-server command is not used to configure a boot server list, the DHCP Server uses inbound interfacehelper addresses as boot servers.
Command Modes DHCP pool configuration
Command History ModificationRelease
This command was introduced.12.0(1)T
This command was integrated into Cisco IOS Release 12.2(33)SRA.12.2(33)SRA
This command is supported in the Cisco IOS Release 12.2SX train. Support in a specific12.2SX release of this train depends on your feature set, platform, and platform hardware.
12.2SX
Usage Guidelines You can specify up to eight servers in the list. Servers are listed in order of preference (address1 is the mostpreferred server, address2 is the next most preferred server, and so on).
Examples The following example specifies 10.12.1.99 as the IP address of the next server in the boot process:
next-server 10.12.1.99
Related Commands DescriptionCommand
Specifies the name of the default boot image for a DHCP client.accounting (DHCP)
Configures a DHCP address pool on a Cisco IOS DHCP server and enters DHCPpool configuration mode.
ip dhcp pool
Forwards UDP broadcasts, including BOOTP, received on an interface.ip helper-address
Configures Cisco IOS DHCP server options.option
lease through renew dhcp57
lease through renew dhcpnext-server
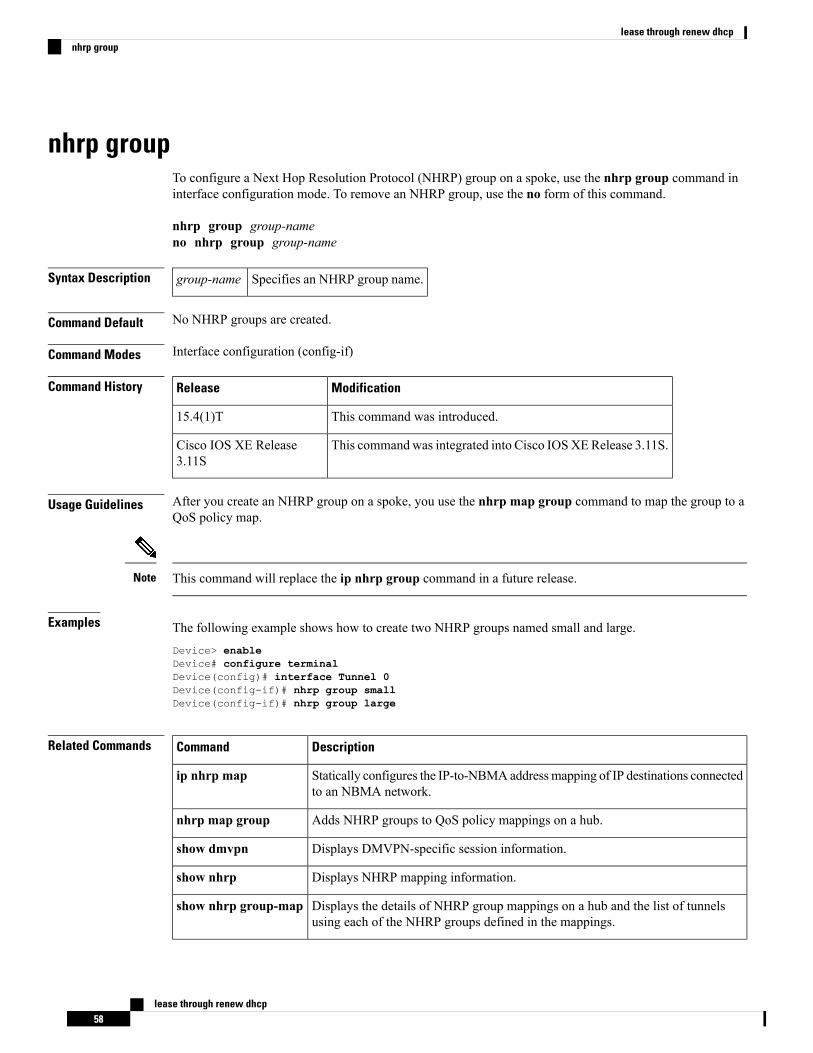
nhrp groupTo configure a Next Hop Resolution Protocol (NHRP) group on a spoke, use the nhrp group command ininterface configuration mode. To remove an NHRP group, use the no form of this command.
nhrp group group-nameno nhrp group group-name
Syntax Description Specifies an NHRP group name.group-name
Command Default No NHRP groups are created.
Command Modes Interface configuration (config-if)
Command History ModificationRelease
This command was introduced.15.4(1)T
This commandwas integrated into Cisco IOSXERelease 3.11S.Cisco IOS XE Release3.11S
Usage Guidelines After you create an NHRP group on a spoke, you use the nhrp map group command to map the group to aQoS policy map.
This command will replace the ip nhrp group command in a future release.Note
Examples The following example shows how to create two NHRP groups named small and large.Device> enableDevice# configure terminalDevice(config)# interface Tunnel 0Device(config-if)# nhrp group smallDevice(config-if)# nhrp group large
Related Commands DescriptionCommand
Statically configures the IP-to-NBMAaddressmapping of IP destinations connectedto an NBMA network.
ip nhrp map
Adds NHRP groups to QoS policy mappings on a hub.nhrp map group
Displays DMVPN-specific session information.show dmvpn
Displays NHRP mapping information.show nhrp
Displays the details of NHRP group mappings on a hub and the list of tunnelsusing each of the NHRP groups defined in the mappings.
show nhrp group-map
lease through renew dhcp58
lease through renew dhcpnhrp group

DescriptionCommand
Displays statistics about a specific QoS policy as it is applied to a tunnel endpoint.show policy-mapmgre
lease through renew dhcp59
lease through renew dhcpnhrp group

nhrp map groupTo associate a Next Hop Resolution Protocol (NHRP) group to a QoS policy map, use the nhrp map groupcommand in interface configuration mode. To remove an association, use the no form of this command.
nhrp map group group-name service-policy output qos-policy-map-nameno nhrp map group group-name service-policy output qos-policy-map-name
Syntax Description Specifies a QoS service policyservice-policy
Specifies an NHRP group name.group-name
Specifies a QoS policy map name.qos-policy-map-name
Command Default No mappings are created.
Command Modes Interface configuration (config-if)
Command History ModificationRelease
This command was introduced.15.4(1)T
This commandwas integrated into Cisco IOSXERelease 3.11S.Cisco IOS XE Release3.11S
Usage Guidelines The command allows a QoS policy in the output direction only.
This command will replace the ip nhrp map group command in a future release.Note
Examples The following example shows how to map two NHRP groups named small and large to two QoSpolicy maps named qos-small and qos-large respectively.Device> enableDevice# configure terminalDevice(config)# interface Tunnel 0Device(config-if)# nhrp map group small service-policy output qos-smallDevice(config-if)# nhrp map group large service-policy output qos-large
Related Commands DescriptionCommand
Statically configures the IP-to-NBMAaddressmapping of IP destinations connectedto an NBMA network.
ip nhrp map
Configures an NHRP group on a spoke.nhrp group
Displays DMVPN-specific session information.show dmvpn
lease through renew dhcp60
lease through renew dhcpnhrp map group
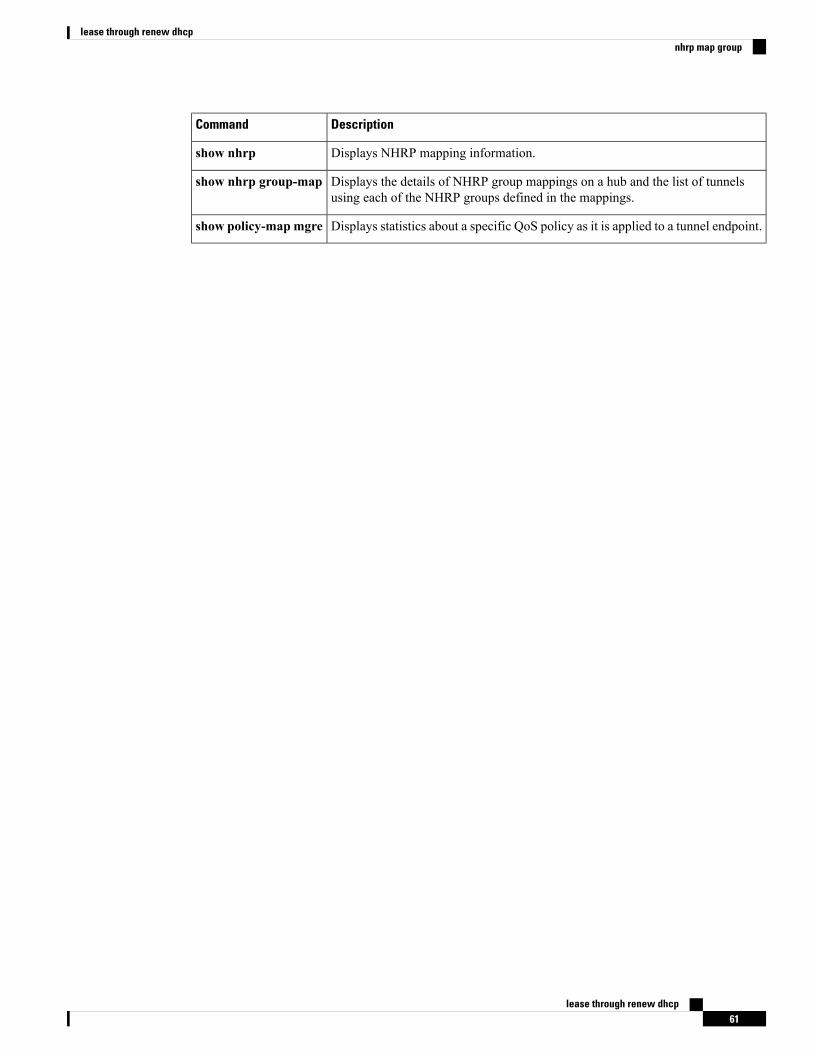
DescriptionCommand
Displays NHRP mapping information.show nhrp
Displays the details of NHRP group mappings on a hub and the list of tunnelsusing each of the NHRP groups defined in the mappings.
show nhrp group-map
Displays statistics about a specific QoS policy as it is applied to a tunnel endpoint.show policy-mapmgre
lease through renew dhcp61
lease through renew dhcpnhrp map group

nis addressTo specify the network information service (NIS) address of an IPv6 server to be sent to the client, use thenis address command in DHCP for IPv6 pool configuration mode. To remove the NIS address, use the noform of this command.
nis address ipv6-addressno nis address ipv6-address
Syntax Description The NIS address of an IPv6 server to be sent to the client.ipv6-address
Command Default No NIS address is specified.
Command ModesIPv6 DHCP pool configuration
Command History ModificationRelease
This command was introduced.12.4(15)T
This command was modified. It was integrated into Cisco IOS XE Release 2.5.Cisco IOSXERelease 2.5
This command was modified. It was integrated into Cisco IOS Release12.2(33)XNE.
12.2(33)XNE
Usage Guidelines The Dynamic Host Configuration Protocol (DHCP) for IPv6 for stateless configuration allows a DHCP forIPv6 client to export configuration parameters (that is, DHCP for IPv6 options) to a local DHCP for IPv6server pool. The local DHCP for IPv6 server can then provide the imported configuration parameters to otherDHCP for IPv6 clients.
The NIS server option provides a list of one or more IPv6 addresses of NIS servers available to send to theclient. The client must view the list of NIS servers as an ordered list, and the server may list the NIS serversin the order of the server’s preference.
The NIS server option code is 27. For more information on DHCP options and suboptions, see the "DHCPv6Options" appendix in the Network Registrar User's Guide , Release 6.2.
Examples The following example shows how to specify the NIS address of an IPv6 server:
nis address 23::1
Related Commands DescriptionCommand
Imports the NIS server option to a DHCP for IPv6 client.import nis address
Enables a server to convey a client’s NIS domain name information to the client.nis domain-name
lease through renew dhcp62
lease through renew dhcpnis address
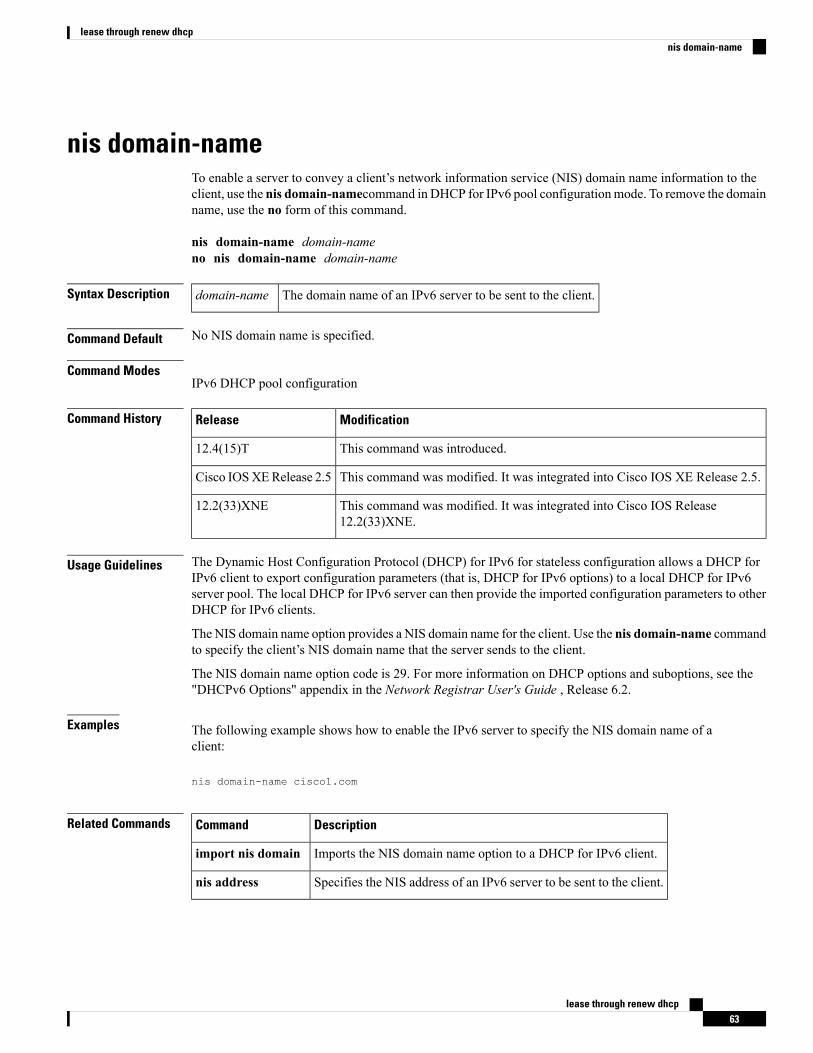
nis domain-nameTo enable a server to convey a client’s network information service (NIS) domain name information to theclient, use the nis domain-namecommand in DHCP for IPv6 pool configurationmode. To remove the domainname, use the no form of this command.
nis domain-name domain-nameno nis domain-name domain-name
Syntax Description The domain name of an IPv6 server to be sent to the client.domain-name
Command Default No NIS domain name is specified.
Command ModesIPv6 DHCP pool configuration
Command History ModificationRelease
This command was introduced.12.4(15)T
This command was modified. It was integrated into Cisco IOS XE Release 2.5.Cisco IOSXERelease 2.5
This command was modified. It was integrated into Cisco IOS Release12.2(33)XNE.
12.2(33)XNE
Usage Guidelines The Dynamic Host Configuration Protocol (DHCP) for IPv6 for stateless configuration allows a DHCP forIPv6 client to export configuration parameters (that is, DHCP for IPv6 options) to a local DHCP for IPv6server pool. The local DHCP for IPv6 server can then provide the imported configuration parameters to otherDHCP for IPv6 clients.
The NIS domain name option provides a NIS domain name for the client. Use the nis domain-name commandto specify the client’s NIS domain name that the server sends to the client.
The NIS domain name option code is 29. For more information on DHCP options and suboptions, see the"DHCPv6 Options" appendix in the Network Registrar User's Guide , Release 6.2.
Examples The following example shows how to enable the IPv6 server to specify the NIS domain name of aclient:
nis domain-name cisco1.com
Related Commands DescriptionCommand
Imports the NIS domain name option to a DHCP for IPv6 client.import nis domain
Specifies the NIS address of an IPv6 server to be sent to the client.nis address
lease through renew dhcp63
lease through renew dhcpnis domain-name
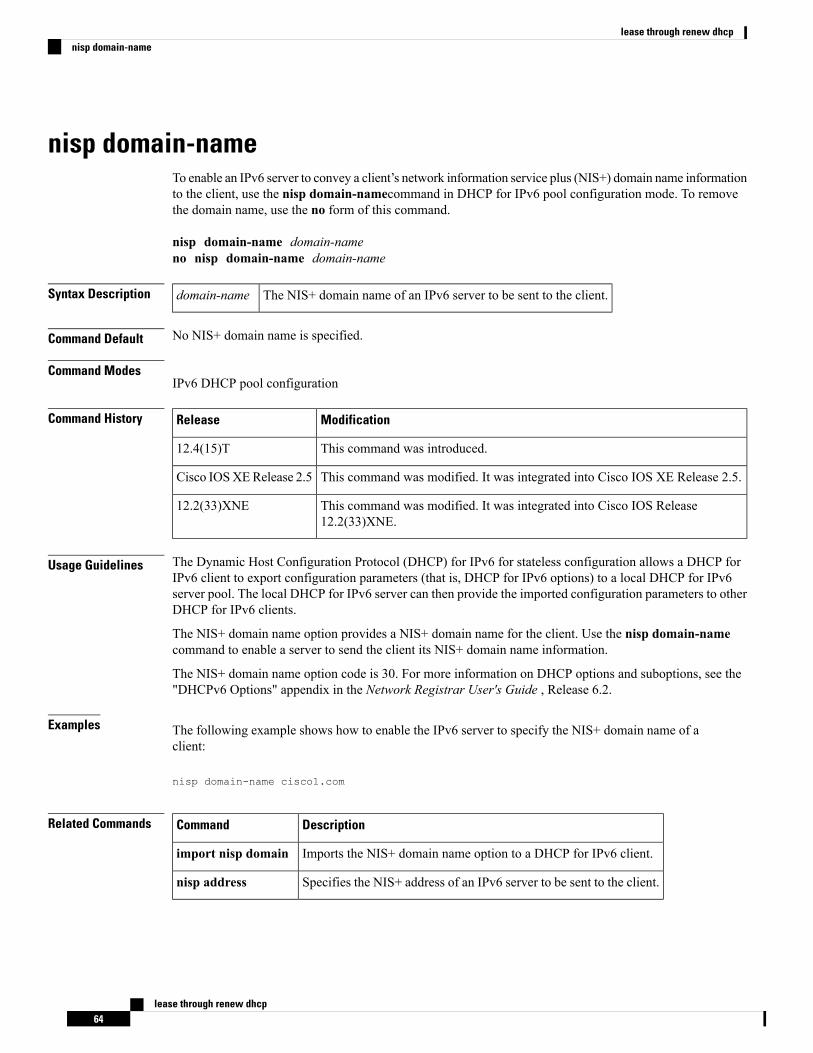
nisp domain-nameTo enable an IPv6 server to convey a client’s network information service plus (NIS+) domain name informationto the client, use the nisp domain-namecommand in DHCP for IPv6 pool configuration mode. To removethe domain name, use the no form of this command.
nisp domain-name domain-nameno nisp domain-name domain-name
Syntax Description The NIS+ domain name of an IPv6 server to be sent to the client.domain-name
Command Default No NIS+ domain name is specified.
Command ModesIPv6 DHCP pool configuration
Command History ModificationRelease
This command was introduced.12.4(15)T
This command was modified. It was integrated into Cisco IOS XE Release 2.5.Cisco IOSXERelease 2.5
This command was modified. It was integrated into Cisco IOS Release12.2(33)XNE.
12.2(33)XNE
Usage Guidelines The Dynamic Host Configuration Protocol (DHCP) for IPv6 for stateless configuration allows a DHCP forIPv6 client to export configuration parameters (that is, DHCP for IPv6 options) to a local DHCP for IPv6server pool. The local DHCP for IPv6 server can then provide the imported configuration parameters to otherDHCP for IPv6 clients.
The NIS+ domain name option provides a NIS+ domain name for the client. Use the nisp domain-namecommand to enable a server to send the client its NIS+ domain name information.
The NIS+ domain name option code is 30. For more information on DHCP options and suboptions, see the"DHCPv6 Options" appendix in the Network Registrar User's Guide , Release 6.2.
Examples The following example shows how to enable the IPv6 server to specify the NIS+ domain name of aclient:
nisp domain-name cisco1.com
Related Commands DescriptionCommand
Imports the NIS+ domain name option to a DHCP for IPv6 client.import nisp domain
Specifies the NIS+ address of an IPv6 server to be sent to the client.nisp address
lease through renew dhcp64
lease through renew dhcpnisp domain-name

nisp addressTo specify the network information service plus (NIS+) address of an IPv6 server to be sent to the client, usethe nisp address command in DHCP for IPv6 pool configuration mode. To remove the NIS+ address, usethe no form of the command.
nisp address ipv6-addressno nisp address ipv6-address
Syntax Description The NIS+ address of an IPv6 server to be sent to the client.ipv6-address
Command Default No NIS+ address is specified.
Command ModesIPv6 DHCP pool configuration
Command History ModificationRelease
This command was introduced.12.4(15)T
This command was modified. It was integrated into Cisco IOS XE Release 2.5.Cisco IOSXERelease 2.5
This command was modified. It was integrated into Cisco IOS Release12.2(33)XNE.
12.2(33)XNE
Usage Guidelines The Dynamic Host Configuration Protocol (DHCP) for IPv6 for stateless configuration allows a DHCP forIPv6 client to export configuration parameters (that is, DHCP for IPv6 options) to a local DHCP for IPv6server pool. The local DHCP for IPv6 server can then provide the imported configuration parameters to otherDHCP for IPv6 clients.
The NIS+ servers option provides a list of one or more IPv6 addresses of NIS+ servers available to send tothe client. The client must view the list of NIS+ servers as an ordered list, and the server may list the NIS+servers in the order of the server’s preference.
The NIS+ servers option code is 28. For more information on DHCP options and suboptions, see the "DHCPv6Options" appendix in the Network Registrar User's Guide , Release 6.2.
Examples The following example shows how to specify the NIS+ address of an IPv6 server:
nisp address 33::1
Related Commands DescriptionCommand
Imports the NIS+ servers option to a DHCP for IPv6 client.import nisp address
Enables a server to convey a client’s NIS+ domain name information to the client.nisp domain-name
lease through renew dhcp65
lease through renew dhcpnisp address

odap clientTo configure On–Demand Address Pooling (ODAP) client parameters, use the odap client command inDHCP pool configuration mode. To remove ODAP client parameters, use the no form of this command.
odap client{client-id id [interface type number] [target-server ip-address]|interface type number[client-id id] [target-server ip-address]|target-server ip-address [client-id id] [interface typenumber]}no odap client{client-id id [interface type number] [target-server ip-address]|interface type number[client-id id] [target-server ip-address]|target-server ip-address [client-id id] [interface typenumber]}
Syntax Description Configures the client ID string.client-id id
(Optional) Specifies the outgoing interface for sending subnet allocation request.interface type number
(Optional) Configures the target ODAP server's IP address.target-server ip-address
Command Default The outgoing interface for sending subnet allocation request is not configured.
The Cisco IOS DHCP ODAP client module prepares the client ID to be sent in the subnet allocation requestby concatenating the router hostname with the subnet pool name.
The target ODAP server's IP address is not configured.
Command Modes DHCP pool configuration (dhcp-config)
Command History ModificationRelease
This command was introduced.15.2(1)T
Usage Guidelines Use the odap client command to configure ODAP client parameters. Youmust configure one of the parameters.The parameters can be specified in any order.
Examples The following example shows how to configure ODAP client parameters:
Router# configure terminalRouter(config)# ip dhcp pool pool1Router(dhcp-config)# odap client client-id id1 interface gigabitethernet 0/0 target-server192.168.10.1Eouter(dhcp-config)# end
Related Commands DescriptionCommand
Configures the ODAP server parameters.odap server
lease through renew dhcp66
lease through renew dhcpodap client

odap serverTo configure On–Demand Address Pooling (ODAP) server parameters, use the odap server command inDHCP pool configuration mode. To remove the ODAP server parameter settings, use the no form of thiscommand.
odap server {rebind-time percent-value [renew-time percent-value]|renew-time percent-value[rebind-time percent-value]}no odap server {rebind-time percent-value [renew-time percent-value]|renew-time percent-value[rebind-time percent-value]}
Syntax Description Specifies the rebind timer.rebind-time
Percentage value of total lease.percent-value
Specifies the renew timer.renew-time
Command Default ODAP server parameters are not configured.
Command Modes DHCP pool configuration (dhcp-config)
Command History ModificationRelease
This command was introduced.15.2(1)T
Usage Guidelines Use the odap server command to configure ODAP server parameters. You must specify either the rebindtime or the renew time. You can specify the rebind time and renew time in any order. The rebind time cannotbe less than the renew time.
Examples The following example shows how to configure ODAP server parameters:
Router# configure terminalRouter(config)# ip dhcp pool pool1Router(dhcp-config)# odap server rebind-time 20 renew-time 10Router(dhcp-config)# end
Related Commands DescriptionCommand
Configures ODAP client parameters.odap client
lease through renew dhcp67
lease through renew dhcpodap server

optionTo configure DHCP server options, use the option command in DHCP pool configuration mode. To removethe options, use the no form of this command.
option code [instance number] {ascii string|hex {string|none}|ip {addresshostname}}no option code [instance number]
Syntax Description Specifies the DHCP option code. The range is from 0 to 254.code
(Optional) Specifies an instance number. The range is from 0 to 255. The default is 0.instance number
Specifies a network virtual terminal (NVT) ASCII character string. ASCII characterstrings that contain white spaces must be delimited by quotation marks. The ASCIIvalue is truncated to 255 characters entered.
ascii string
Specifies dotted hexadecimal data.hex
Hexadecimal value truncated to 180 characters entered. Each byte in hexadecimalcharacter strings is two hexadecimal digits. Each byte can be separated by a period,colon, or white space.
string
Specifies the zero-length hexadecimal string.none
Specifies an IP address. More than one IP address can be specified.ip address
Specifies the hostname. More than one hostname can be specified.ip hostname
Command Default The default instance number is 0.
Command Modes DHCP pool configuration (dhcp-config)
Command History ModificationRelease
This command was introduced.12.0(1)T
This command was integrated into Cisco IOS Release 12.2(33)SRA.12.2(33)SRA
This command was supported in the Cisco IOS Release 12.2SX train. Support in a specific12.2SX release of this train depends on your feature set, platform, and platform hardware.
12.2SX
This command was modified. The none keyword was added.12.4(24)T
This command was modified. A maximum limit of 180 characters was set for the dottedhexadecimal data and 255 characters for the ASCII data.
15.1(3)S
Usage Guidelines DHCP provides a framework for passing configuration information to hosts on a TCP/IP network. Theconfiguration parameters and other control information are carried in tagged data items that are stored in theoptions field of the DHCP message. The data items themselves are also called options. The current set ofDHCP options is documented in RFC 2131, Dynamic Host Configuration Protocol.
lease through renew dhcp68
lease through renew dhcpoption

Examples The following example shows how to configure DHCP option 19, which specifies whether the clientshould configure its IP layer for packet forwarding. A value of 0 means disable IP forwarding; avalue of 1 means enable IP forwarding. IP forwarding is enabled in the following example.
Router(config)# ip dhcp pool redRouter(dhcp-config)# option 19 hex 01
The following example shows how to configure DHCP option 72, which specifies the World WideWeb servers for DHCP clients.WorldWideWeb servers 172.16.3.252 and 172.16.3.253 are configuredin the following example.
Router(config)# ip dhcp pool redRouter(dhcp-config)# option 72 ip 172.16.3.252 172.16.3.253
Related Commands DescriptionCommand
Configures a DHCP address pool on a Cisco IOS DHCP server and enters DHCP poolconfiguration mode.
ip dhcp pool
lease through renew dhcp69
lease through renew dhcpoption
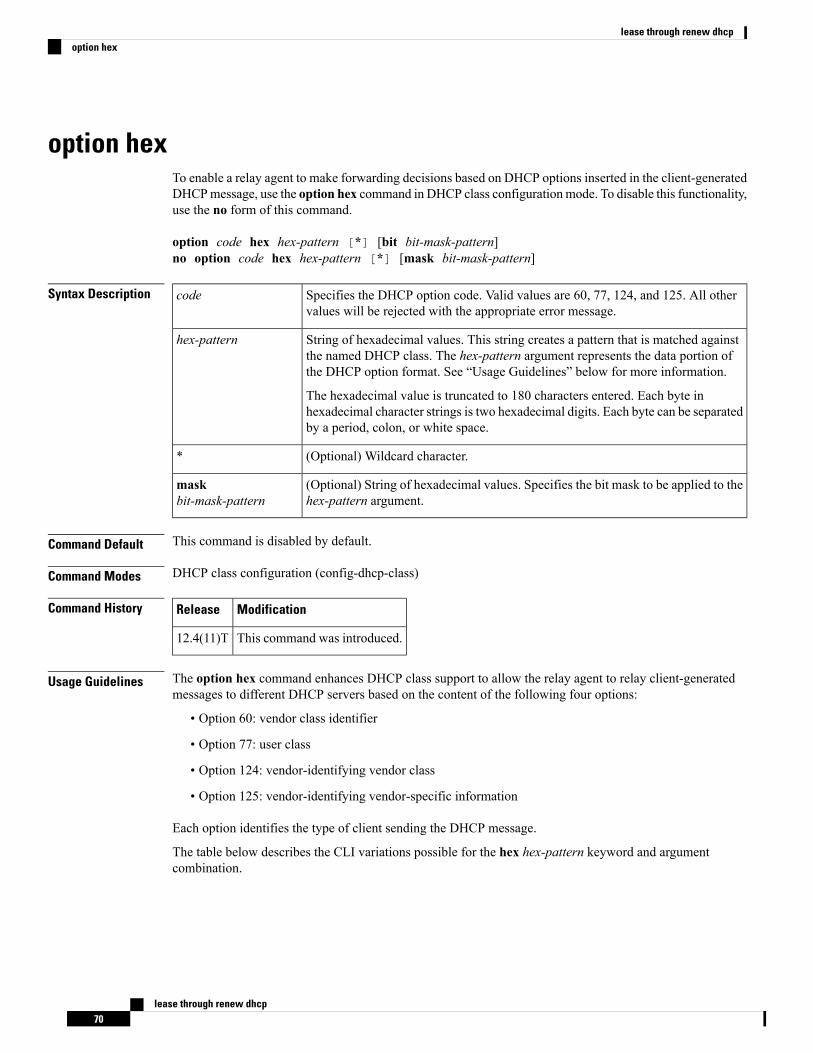
option hexTo enable a relay agent to make forwarding decisions based on DHCP options inserted in the client-generatedDHCPmessage, use the option hex command in DHCP class configurationmode. To disable this functionality,use the no form of this command.
option code hex hex-pattern [*] [bit bit-mask-pattern]no option code hex hex-pattern [*] [mask bit-mask-pattern]
Syntax Description Specifies the DHCP option code. Valid values are 60, 77, 124, and 125. All othervalues will be rejected with the appropriate error message.
code
String of hexadecimal values. This string creates a pattern that is matched againstthe named DHCP class. The hex-pattern argument represents the data portion ofthe DHCP option format. See “Usage Guidelines” below for more information.
The hexadecimal value is truncated to 180 characters entered. Each byte inhexadecimal character strings is two hexadecimal digits. Each byte can be separatedby a period, colon, or white space.
hex-pattern
(Optional) Wildcard character.*
(Optional) String of hexadecimal values. Specifies the bit mask to be applied to thehex-pattern argument.
maskbit-mask-pattern
Command Default This command is disabled by default.
Command Modes DHCP class configuration (config-dhcp-class)
Command History ModificationRelease
This command was introduced.12.4(11)T
Usage Guidelines The option hex command enhances DHCP class support to allow the relay agent to relay client-generatedmessages to different DHCP servers based on the content of the following four options:
• Option 60: vendor class identifier
• Option 77: user class
• Option 124: vendor-identifying vendor class
• Option 125: vendor-identifying vendor-specific information
Each option identifies the type of client sending the DHCP message.
The table below describes the CLI variations possible for the hex hex-pattern keyword and argumentcombination.
lease through renew dhcp70
lease through renew dhcpoption hex
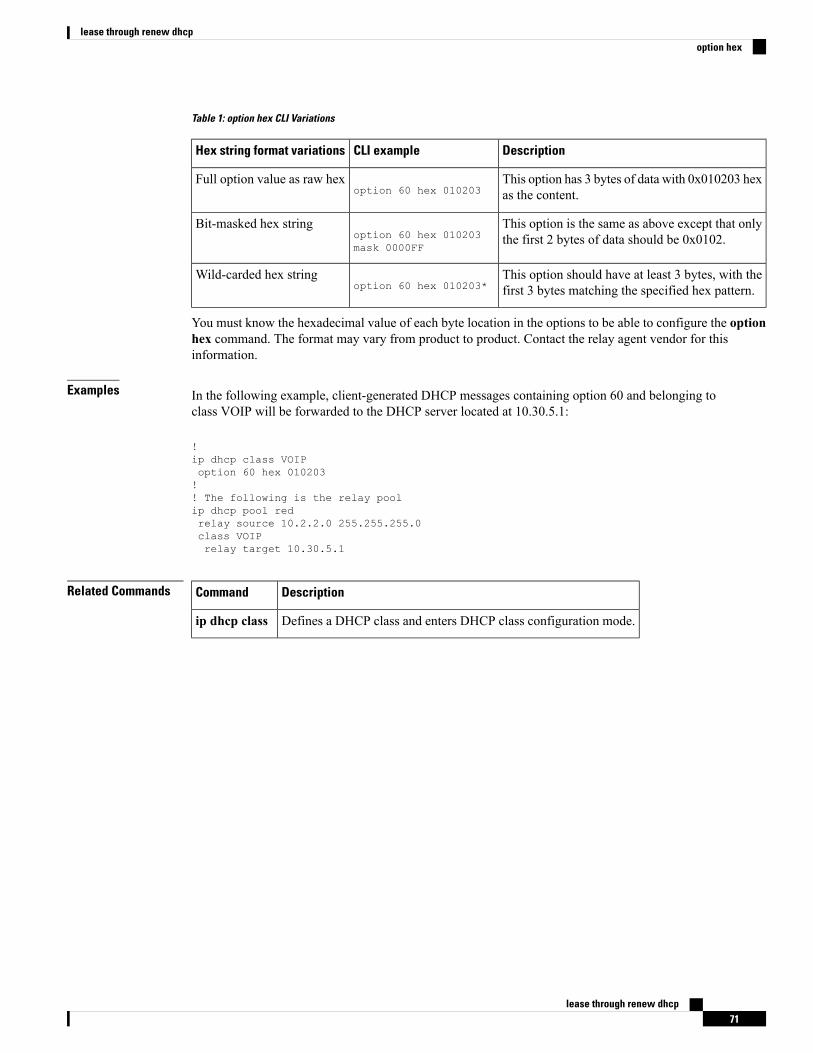
Table 1: option hex CLI Variations
DescriptionCLI exampleHex string format variations
This option has 3 bytes of data with 0x010203 hexas the content.option 60 hex 010203
Full option value as raw hex
This option is the same as above except that onlythe first 2 bytes of data should be 0x0102.option 60 hex 010203
mask 0000FF
Bit-masked hex string
This option should have at least 3 bytes, with thefirst 3 bytes matching the specified hex pattern.option 60 hex 010203*
Wild-carded hex string
You must know the hexadecimal value of each byte location in the options to be able to configure the optionhex command. The format may vary from product to product. Contact the relay agent vendor for thisinformation.
Examples In the following example, client-generated DHCP messages containing option 60 and belonging toclass VOIP will be forwarded to the DHCP server located at 10.30.5.1:
!ip dhcp class VOIPoption 60 hex 010203!! The following is the relay poolip dhcp pool redrelay source 10.2.2.0 255.255.255.0class VOIPrelay target 10.30.5.1
Related Commands DescriptionCommand
Defines a DHCP class and enters DHCP class configuration mode.ip dhcp class
lease through renew dhcp71
lease through renew dhcpoption hex
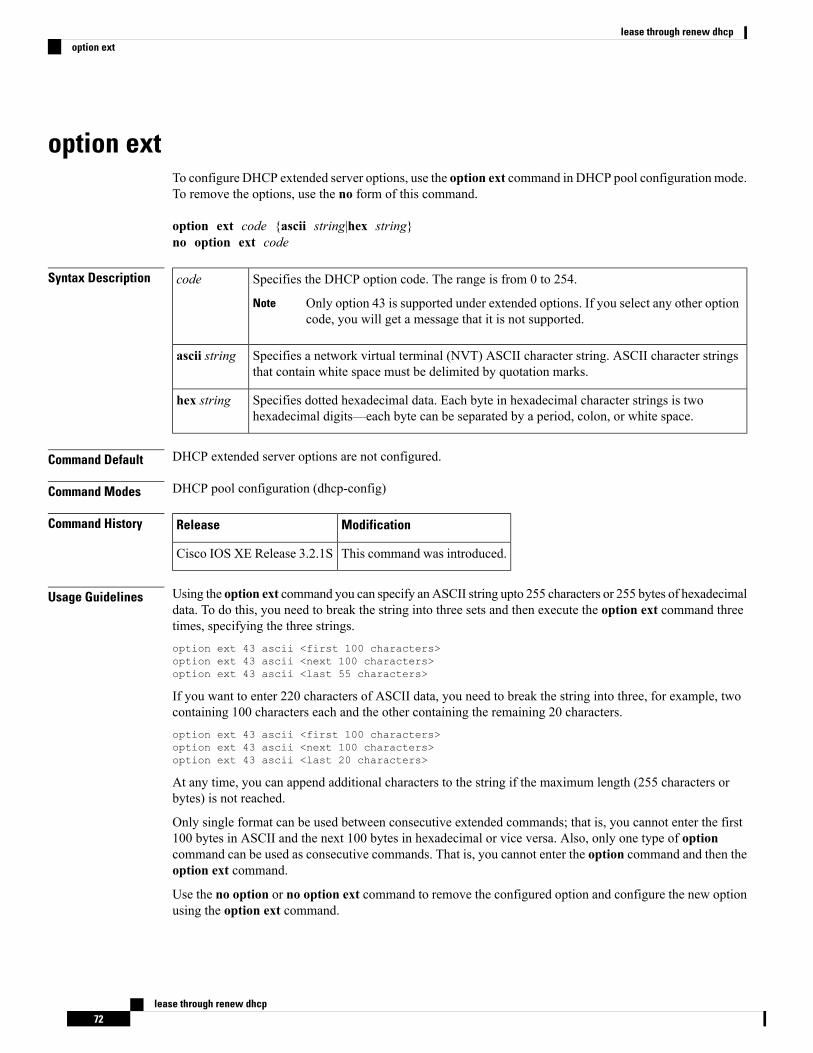
option extTo configure DHCP extended server options, use the option ext command in DHCP pool configuration mode.To remove the options, use the no form of this command.
option ext code {ascii string|hex string}no option ext code
Syntax Description Specifies the DHCP option code. The range is from 0 to 254.
Only option 43 is supported under extended options. If you select any other optioncode, you will get a message that it is not supported.
Note
code
Specifies a network virtual terminal (NVT) ASCII character string. ASCII character stringsthat contain white space must be delimited by quotation marks.
ascii string
Specifies dotted hexadecimal data. Each byte in hexadecimal character strings is twohexadecimal digits—each byte can be separated by a period, colon, or white space.
hex string
Command Default DHCP extended server options are not configured.
Command Modes DHCP pool configuration (dhcp-config)
Command History ModificationRelease
This command was introduced.Cisco IOS XE Release 3.2.1S
Usage Guidelines Using the option ext command you can specify anASCII string upto 255 characters or 255 bytes of hexadecimaldata. To do this, you need to break the string into three sets and then execute the option ext command threetimes, specifying the three strings.option ext 43 ascii <first 100 characters>option ext 43 ascii <next 100 characters>option ext 43 ascii <last 55 characters>
If you want to enter 220 characters of ASCII data, you need to break the string into three, for example, twocontaining 100 characters each and the other containing the remaining 20 characters.option ext 43 ascii <first 100 characters>option ext 43 ascii <next 100 characters>option ext 43 ascii <last 20 characters>
At any time, you can append additional characters to the string if the maximum length (255 characters orbytes) is not reached.
Only single format can be used between consecutive extended commands; that is, you cannot enter the first100 bytes in ASCII and the next 100 bytes in hexadecimal or vice versa. Also, only one type of optioncommand can be used as consecutive commands. That is, you cannot enter the option command and then theoption ext command.
Use the no option or no option ext command to remove the configured option and configure the new optionusing the option ext command.
lease through renew dhcp72
lease through renew dhcpoption ext
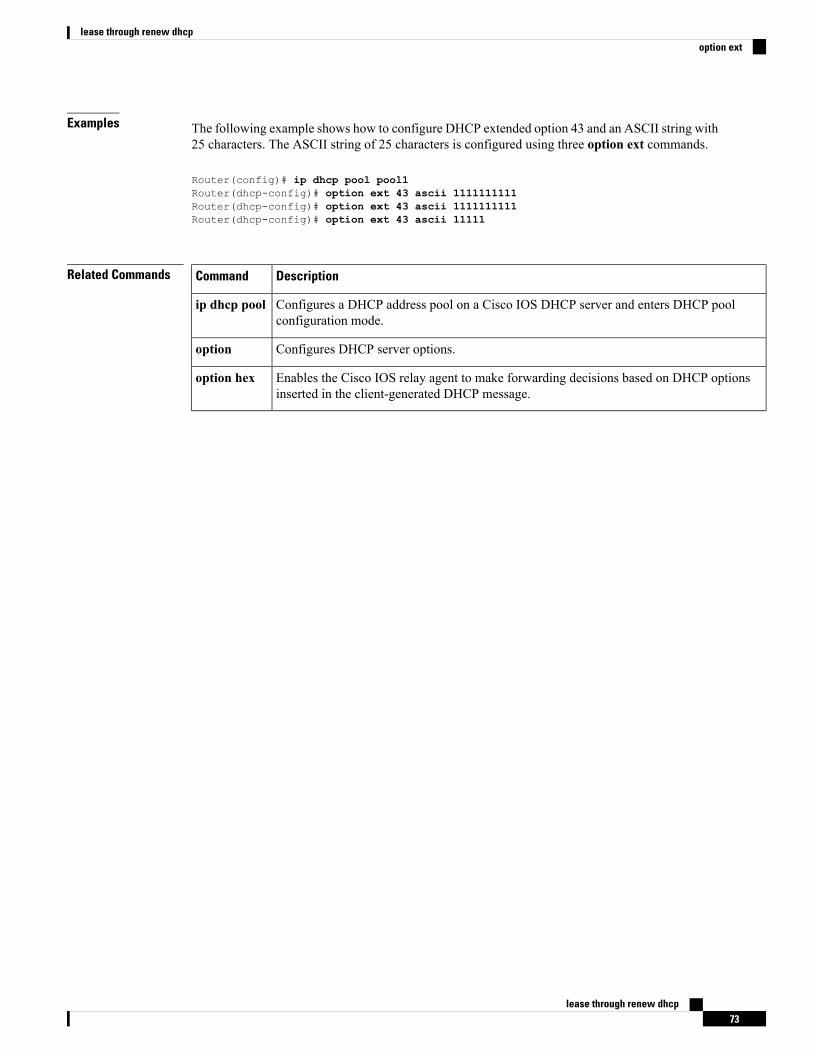
Examples The following example shows how to configure DHCP extended option 43 and an ASCII string with25 characters. The ASCII string of 25 characters is configured using three option ext commands.
Router(config)# ip dhcp pool pool1Router(dhcp-config)# option ext 43 ascii 1111111111Router(dhcp-config)# option ext 43 ascii 1111111111Router(dhcp-config)# option ext 43 ascii 11111
Related Commands DescriptionCommand
Configures a DHCP address pool on a Cisco IOS DHCP server and enters DHCP poolconfiguration mode.
ip dhcp pool
Configures DHCP server options.option
Enables the Cisco IOS relay agent to make forwarding decisions based on DHCP optionsinserted in the client-generated DHCP message.
option hex
lease through renew dhcp73
lease through renew dhcpoption ext
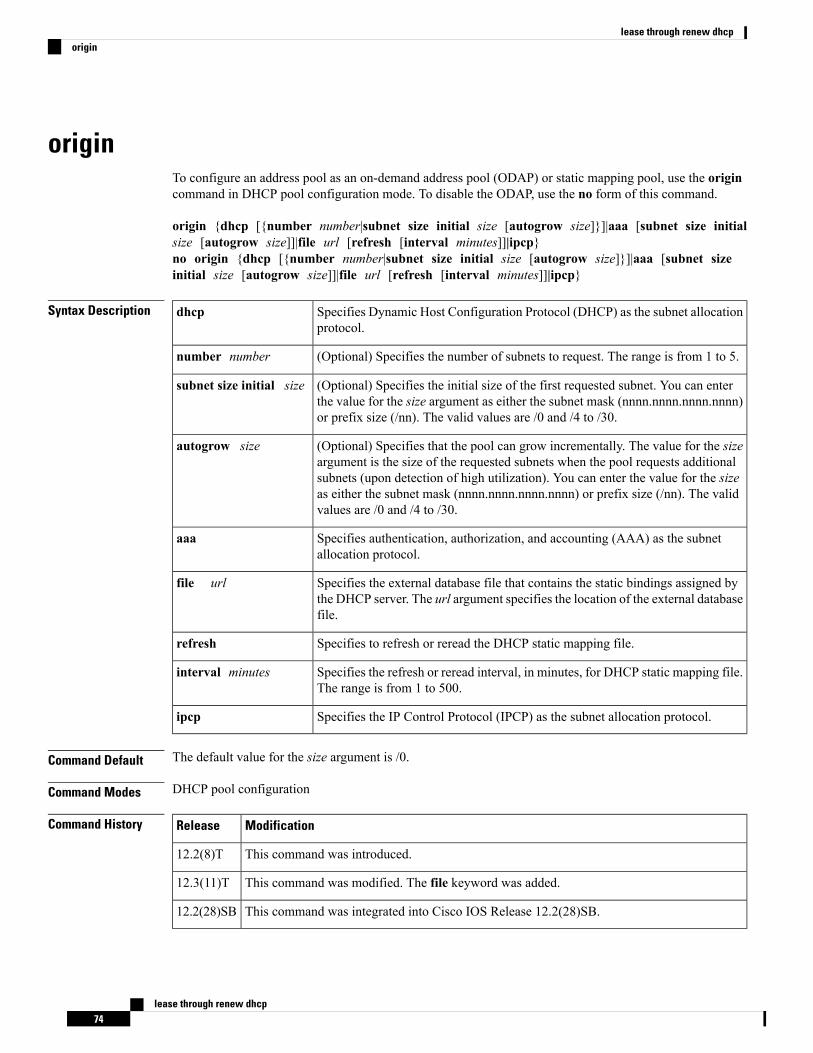
originTo configure an address pool as an on-demand address pool (ODAP) or static mapping pool, use the origincommand in DHCP pool configuration mode. To disable the ODAP, use the no form of this command.
origin {dhcp [{number number|subnet size initial size [autogrow size]}]|aaa [subnet size initialsize [autogrow size]]|file url [refresh [interval minutes]]|ipcp}no origin {dhcp [{number number|subnet size initial size [autogrow size]}]|aaa [subnet sizeinitial size [autogrow size]]|file url [refresh [interval minutes]]|ipcp}
Syntax Description Specifies Dynamic Host Configuration Protocol (DHCP) as the subnet allocationprotocol.
dhcp
(Optional) Specifies the number of subnets to request. The range is from 1 to 5.number number
(Optional) Specifies the initial size of the first requested subnet. You can enterthe value for the size argument as either the subnet mask (nnnn.nnnn.nnnn.nnnn)or prefix size (/nn). The valid values are /0 and /4 to /30.
subnet size initial size
(Optional) Specifies that the pool can grow incrementally. The value for the sizeargument is the size of the requested subnets when the pool requests additionalsubnets (upon detection of high utilization). You can enter the value for the sizeas either the subnet mask (nnnn.nnnn.nnnn.nnnn) or prefix size (/nn). The validvalues are /0 and /4 to /30.
autogrow size
Specifies authentication, authorization, and accounting (AAA) as the subnetallocation protocol.
aaa
Specifies the external database file that contains the static bindings assigned bythe DHCP server. The url argument specifies the location of the external databasefile.
file url
Specifies to refresh or reread the DHCP static mapping file.refresh
Specifies the refresh or reread interval, in minutes, for DHCP static mapping file.The range is from 1 to 500.
interval minutes
Specifies the IP Control Protocol (IPCP) as the subnet allocation protocol.ipcp
Command Default The default value for the size argument is /0.
Command Modes DHCP pool configuration
Command History ModificationRelease
This command was introduced.12.2(8)T
This command was modified. The file keyword was added.12.3(11)T
This command was integrated into Cisco IOS Release 12.2(28)SB.12.2(28)SB
lease through renew dhcp74
lease through renew dhcporigin
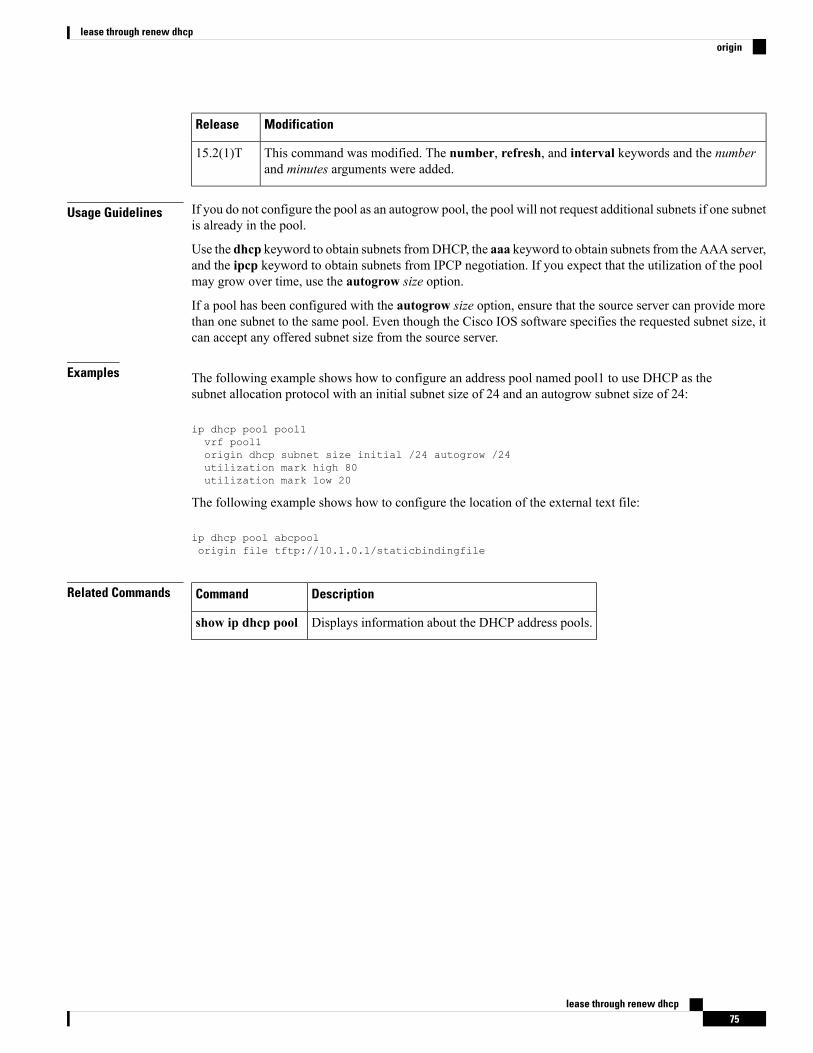
ModificationRelease
This command was modified. The number, refresh, and interval keywords and the numberand minutes arguments were added.
15.2(1)T
Usage Guidelines If you do not configure the pool as an autogrow pool, the pool will not request additional subnets if one subnetis already in the pool.
Use the dhcp keyword to obtain subnets fromDHCP, the aaa keyword to obtain subnets from the AAA server,and the ipcp keyword to obtain subnets from IPCP negotiation. If you expect that the utilization of the poolmay grow over time, use the autogrow size option.
If a pool has been configured with the autogrow size option, ensure that the source server can provide morethan one subnet to the same pool. Even though the Cisco IOS software specifies the requested subnet size, itcan accept any offered subnet size from the source server.
Examples The following example shows how to configure an address pool named pool1 to use DHCP as thesubnet allocation protocol with an initial subnet size of 24 and an autogrow subnet size of 24:
ip dhcp pool pool1vrf pool1origin dhcp subnet size initial /24 autogrow /24utilization mark high 80utilization mark low 20
The following example shows how to configure the location of the external text file:
ip dhcp pool abcpoolorigin file tftp://10.1.0.1/staticbindingfile
Related Commands DescriptionCommand
Displays information about the DHCP address pools.show ip dhcp pool
lease through renew dhcp75
lease through renew dhcporigin

override default-routerTo define a default router list for the DHCP pool secondary subnet, use the override default-router commandin DHCP pool secondary subnet configuration mode. To remove the default router list for this secondarysubnet, use the no form of this command.
override default-router address [address2 ... address8]no override default-router
Syntax Description IP address of the default router for the DHCP pool secondary subnet, preferably onthe same subnet as the DHCP pool secondary client subnet.
address
(Optional) IP addresses of up to seven additional default routers, delimited by a singlespace.
The ellipses in the syntax description are used to indicate a range of values.Do not use ellipses when entering IP addresses.
Note
address2 ... address8
Command Default No default router list is defined for the DHCP pool secondary subnet.
Command Modes DHCP pool secondary subnet configuration
Command History ModificationRelease
This command was introduced.12.2(33)SRB
This command was integrated into Cisco IOS Release 12.4(15)T.12.4(15)T
Usage Guidelines When an IP address is assigned to the DHCP client from a secondary subnet for which no subnet-specificdefault router list is defined, the default router list (configured by using the default-router command in DHCPpool configuration mode) will be used.
The IP address of every router in the list should be on the same subnet as the client subnet. You can specifyup to eight routers in the list. Routers are listed in order of preference (address is the most preferred router,address2 is the next most preferred router, and so on).
To display the default router lists, use the show running-config command. If default router lists are configuredfor a DHCP pool, the commands used to configure those lists are displayed following the ip dhcp poolcommand that configures the DHCP pool.
Examples The following example configures 10.1.1.1/29 as the subnetwork number and mask of the DHCPpool named pool1, adds the DHCP pool secondary subnet specified by the subnet number and mask10.1.1.17/29, then configures a subnet-specific default router list for that subnet:
Router(config)# dhcp pool pool1
Router(config-dhcp)# network 10.1.1.1 255.255.255.248
Router(config-dhcp)# network 10.1.1.17 255.255.255.248 secondary
lease through renew dhcp76
lease through renew dhcpoverride default-router
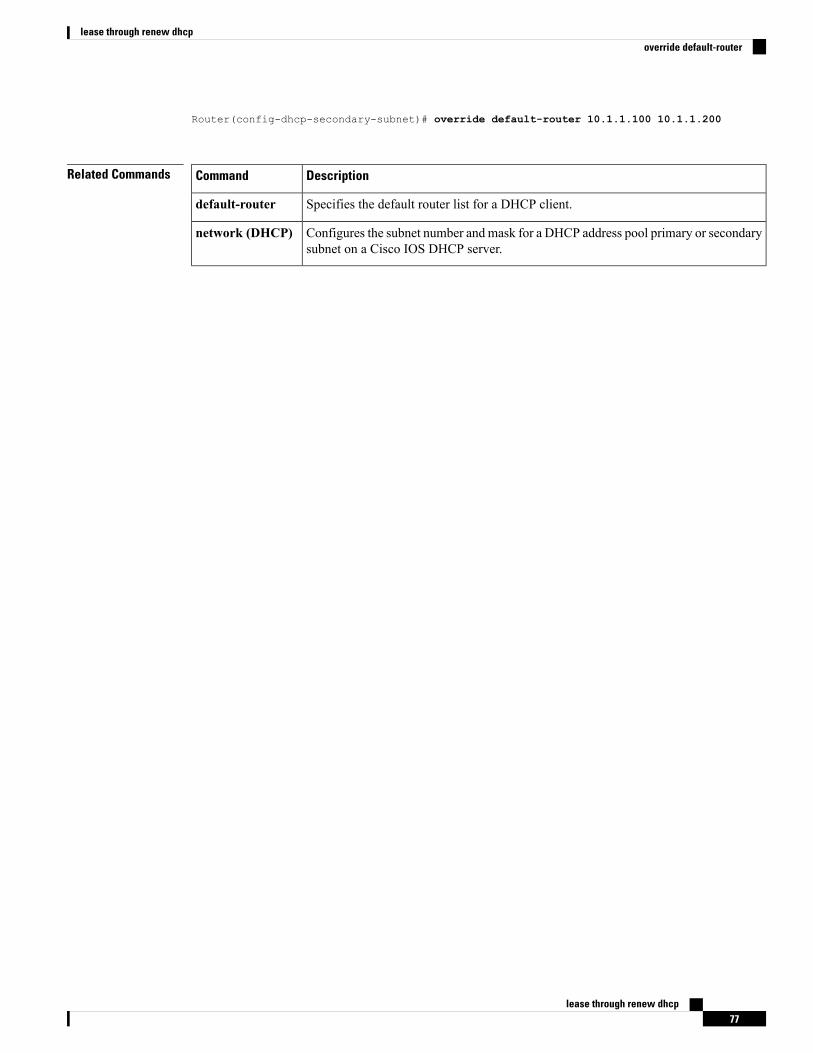
Router(config-dhcp-secondary-subnet)# override default-router 10.1.1.100 10.1.1.200
Related Commands DescriptionCommand
Specifies the default router list for a DHCP client.default-router
Configures the subnet number and mask for a DHCP address pool primary or secondarysubnet on a Cisco IOS DHCP server.
network (DHCP)
lease through renew dhcp77
lease through renew dhcpoverride default-router
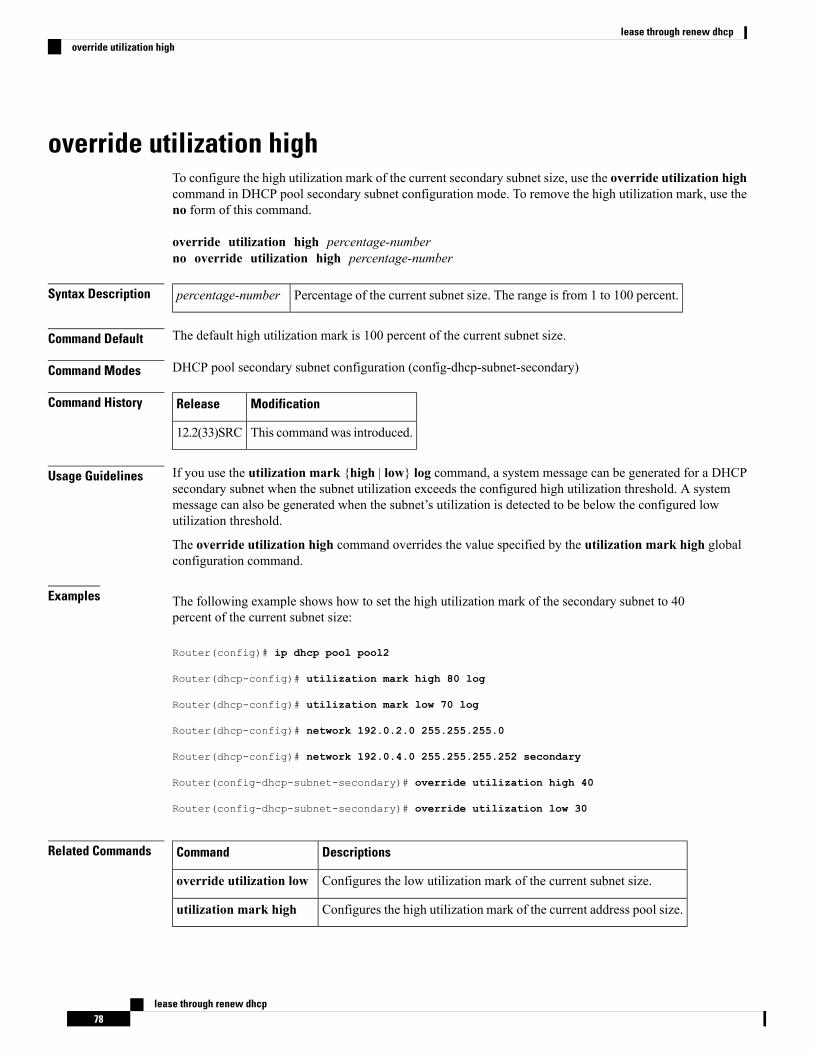
override utilization highTo configure the high utilization mark of the current secondary subnet size, use the override utilization highcommand in DHCP pool secondary subnet configuration mode. To remove the high utilization mark, use theno form of this command.
override utilization high percentage-numberno override utilization high percentage-number
Syntax Description Percentage of the current subnet size. The range is from 1 to 100 percent.percentage-number
Command Default The default high utilization mark is 100 percent of the current subnet size.
Command Modes DHCP pool secondary subnet configuration (config-dhcp-subnet-secondary)
Command History ModificationRelease
This commandwas introduced.12.2(33)SRC
Usage Guidelines If you use the utilization mark {high | low} log command, a system message can be generated for a DHCPsecondary subnet when the subnet utilization exceeds the configured high utilization threshold. A systemmessage can also be generated when the subnet’s utilization is detected to be below the configured lowutilization threshold.
The override utilization high command overrides the value specified by the utilization mark high globalconfiguration command.
Examples The following example shows how to set the high utilization mark of the secondary subnet to 40percent of the current subnet size:
Router(config)# ip dhcp pool pool2
Router(dhcp-config)# utilization mark high 80 log
Router(dhcp-config)# utilization mark low 70 log
Router(dhcp-config)# network 192.0.2.0 255.255.255.0
Router(dhcp-config)# network 192.0.4.0 255.255.255.252 secondary
Router(config-dhcp-subnet-secondary)# override utilization high 40
Router(config-dhcp-subnet-secondary)# override utilization low 30
Related Commands DescriptionsCommand
Configures the low utilization mark of the current subnet size.override utilization low
Configures the high utilization mark of the current address pool size.utilization mark high
lease through renew dhcp78
lease through renew dhcpoverride utilization high

override utilization lowTo configure the low utilization mark of the current secondary subnet size, use the override utilization lowcommand in DHCP pool secondary subnet configuration mode. To remove the low utilization mark, use theno form of this command.
override utilization low percentage-numberno override utilization low percentage-number
Syntax Description Percentage of the current subnet size. The range is from 1 to 100.percentage-number
Command Default The default low utilization mark is 0 percent of the current subnet size.
Command Modes DHCP pool secondary subnet configuration (config-dhcp-subnet-secondary)
Command History ModificationRelease
This commandwas introduced.12.2(33)SRC
Usage Guidelines If you use the utilization mark{high| low} log command, a system message can be generated for a DHCPsecondary subnet when the subnet utilization falls below the configured low utilization threshold. A systemmessage can also be generated when the subnet’s utilization exceeds the configured high utilization threshold.
The override utilization low command overrides the value specified by the utilization mark low globalconfiguration command.
Examples The following example shows how to set the low utilization mark of the secondary subnet to 30percent of the current subnet size:
Router(config)# ip dhcp pool pool2
Router(dhcp-config)# utilization mark high 80 log
Router(dhcp-config)# utilization mark low 70 log
Router(dhcp-config)# network 192.0.2.0 255.255.255.0
Router(dhcp-config)# network 192.0.4.0 255.255.255.252 secondary
Router(config-dhcp-subnet-secondary)# override utilization high 40
Router(config-dhcp-subnet-secondary)# override utilization low 30
Related Commands DescriptionCommand
Configures the high utilization mark of the current subnet size.override utilization high
Configures the low utilization mark of the current address pool size.utilization mark low
lease through renew dhcp79
lease through renew dhcpoverride utilization low
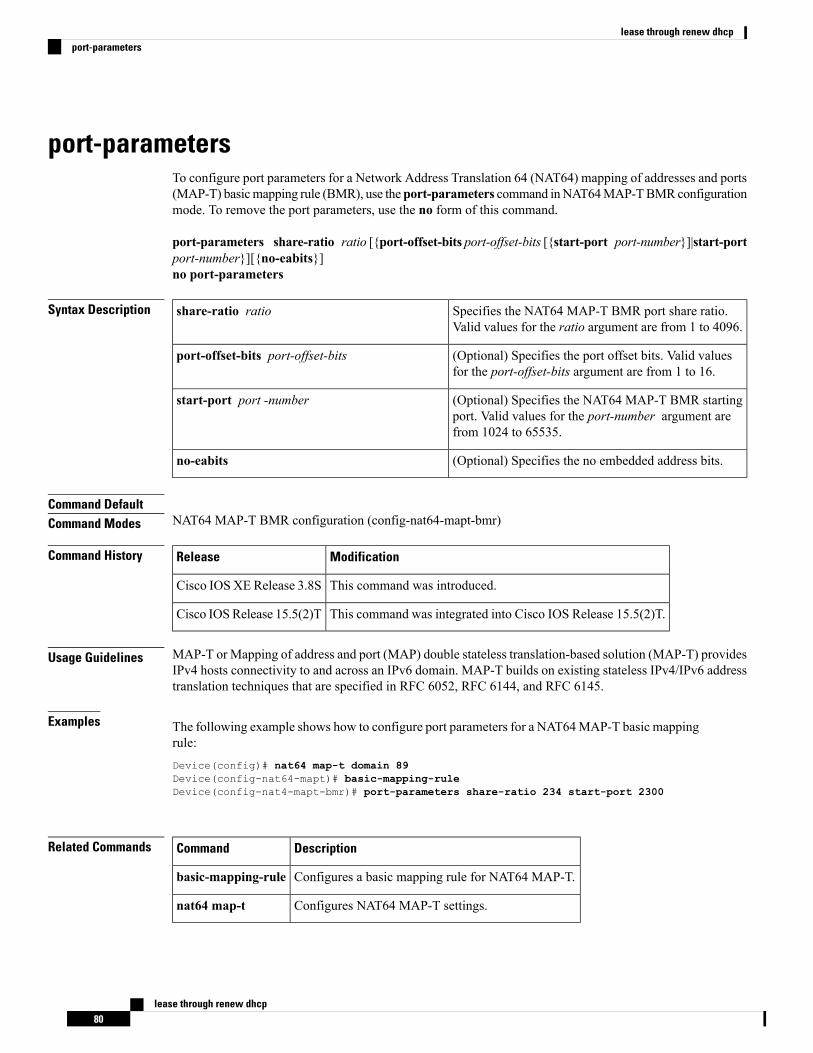
port-parametersTo configure port parameters for a Network Address Translation 64 (NAT64) mapping of addresses and ports(MAP-T) basicmapping rule (BMR), use theport-parameters command inNAT64MAP-TBMRconfigurationmode. To remove the port parameters, use the no form of this command.
port-parameters share-ratio ratio [{port-offset-bits port-offset-bits [{start-port port-number}]|start-portport-number}][{no-eabits}]no port-parameters
Syntax Description Specifies the NAT64 MAP-T BMR port share ratio.Valid values for the ratio argument are from 1 to 4096.
share-ratio ratio
(Optional) Specifies the port offset bits. Valid valuesfor the port-offset-bits argument are from 1 to 16.
port-offset-bits port-offset-bits
(Optional) Specifies the NAT64 MAP-T BMR startingport. Valid values for the port-number argument arefrom 1024 to 65535.
start-port port -number
(Optional) Specifies the no embedded address bits.no-eabits
Command DefaultCommand Modes NAT64 MAP-T BMR configuration (config-nat64-mapt-bmr)
Command History ModificationRelease
This command was introduced.Cisco IOS XE Release 3.8S
This command was integrated into Cisco IOS Release 15.5(2)T.Cisco IOSRelease 15.5(2)T
Usage Guidelines MAP-T or Mapping of address and port (MAP) double stateless translation-based solution (MAP-T) providesIPv4 hosts connectivity to and across an IPv6 domain. MAP-T builds on existing stateless IPv4/IPv6 addresstranslation techniques that are specified in RFC 6052, RFC 6144, and RFC 6145.
Examples The following example shows how to configure port parameters for a NAT64MAP-T basic mappingrule:Device(config)# nat64 map-t domain 89Device(config-nat64-mapt)# basic-mapping-ruleDevice(config-nat4-mapt-bmr)# port-parameters share-ratio 234 start-port 2300
Related Commands DescriptionCommand
Configures a basic mapping rule for NAT64 MAP-T.basic-mapping-rule
Configures NAT64 MAP-T settings.nat64 map-t
lease through renew dhcp80
lease through renew dhcpport-parameters
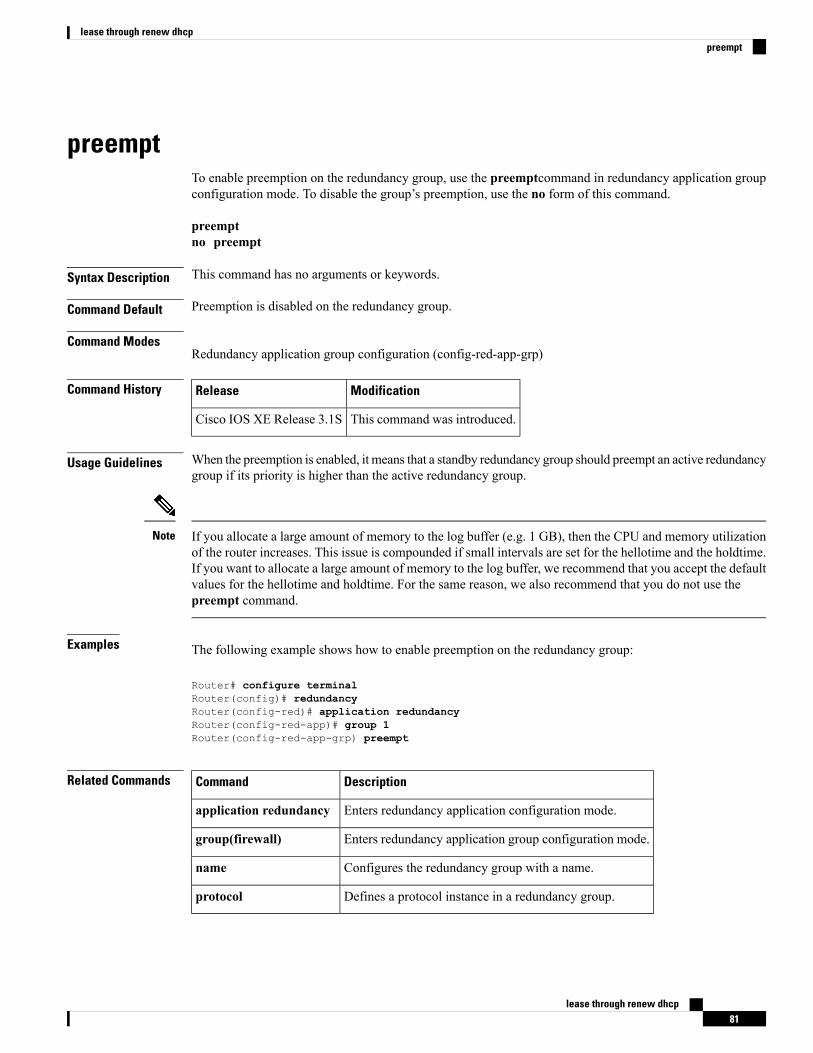
preemptTo enable preemption on the redundancy group, use the preemptcommand in redundancy application groupconfiguration mode. To disable the group’s preemption, use the no form of this command.
preemptno preempt
Syntax Description This command has no arguments or keywords.
Command Default Preemption is disabled on the redundancy group.
Command ModesRedundancy application group configuration (config-red-app-grp)
Command History ModificationRelease
This command was introduced.Cisco IOS XE Release 3.1S
Usage Guidelines When the preemption is enabled, it means that a standby redundancy group should preempt an active redundancygroup if its priority is higher than the active redundancy group.
If you allocate a large amount of memory to the log buffer (e.g. 1 GB), then the CPU and memory utilizationof the router increases. This issue is compounded if small intervals are set for the hellotime and the holdtime.If you want to allocate a large amount of memory to the log buffer, we recommend that you accept the defaultvalues for the hellotime and holdtime. For the same reason, we also recommend that you do not use thepreempt command.
Note
Examples The following example shows how to enable preemption on the redundancy group:
Router# configure terminalRouter(config)# redundancyRouter(config-red)# application redundancyRouter(config-red-app)# group 1Router(config-red-app-grp) preempt
Related Commands DescriptionCommand
Enters redundancy application configuration mode.application redundancy
Enters redundancy application group configuration mode.group(firewall)
Configures the redundancy group with a name.name
Defines a protocol instance in a redundancy group.protocol
lease through renew dhcp81
lease through renew dhcppreempt
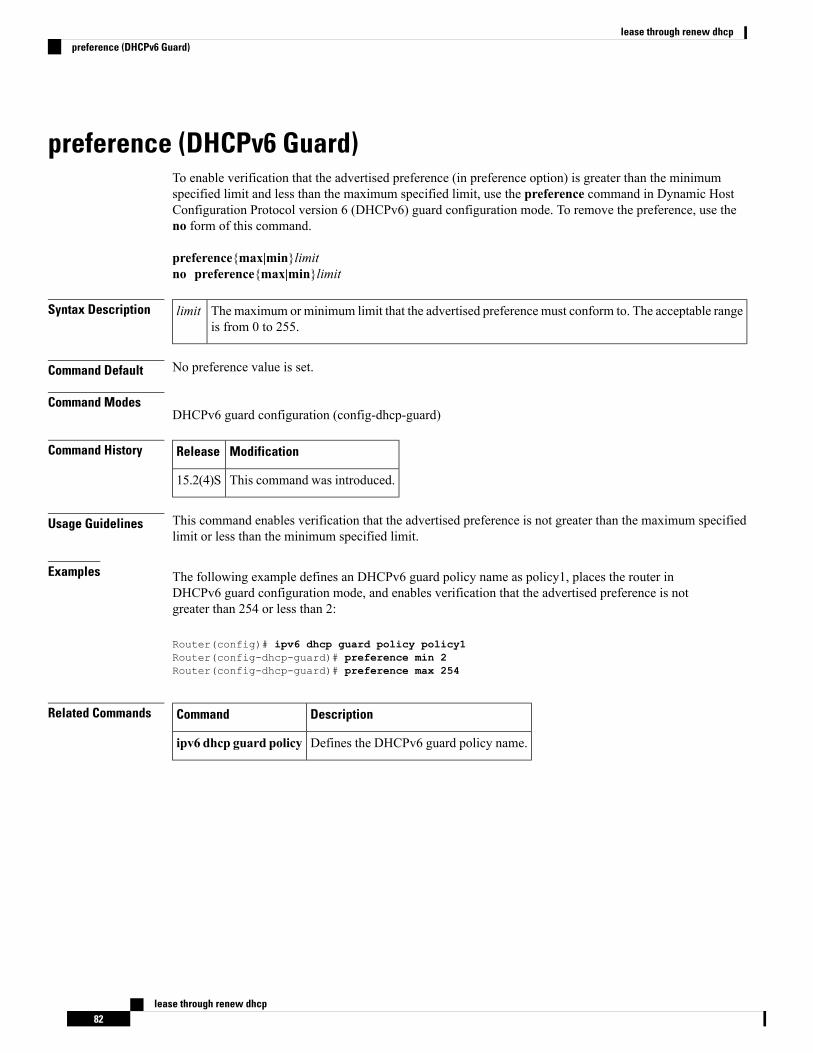
preference (DHCPv6 Guard)To enable verification that the advertised preference (in preference option) is greater than the minimumspecified limit and less than the maximum specified limit, use the preference command in Dynamic HostConfiguration Protocol version 6 (DHCPv6) guard configuration mode. To remove the preference, use theno form of this command.
preference{max|min}limitno preference{max|min}limit
Syntax Description Themaximum or minimum limit that the advertised preference must conform to. The acceptable rangeis from 0 to 255.
limit
Command Default No preference value is set.
Command ModesDHCPv6 guard configuration (config-dhcp-guard)
Command History ModificationRelease
This command was introduced.15.2(4)S
Usage Guidelines This command enables verification that the advertised preference is not greater than the maximum specifiedlimit or less than the minimum specified limit.
Examples The following example defines an DHCPv6 guard policy name as policy1, places the router inDHCPv6 guard configuration mode, and enables verification that the advertised preference is notgreater than 254 or less than 2:
Router(config)# ipv6 dhcp guard policy policy1Router(config-dhcp-guard)# preference min 2Router(config-dhcp-guard)# preference max 254
Related Commands DescriptionCommand
Defines the DHCPv6 guard policy name.ipv6 dhcp guard policy
lease through renew dhcp82
lease through renew dhcppreference (DHCPv6 Guard)
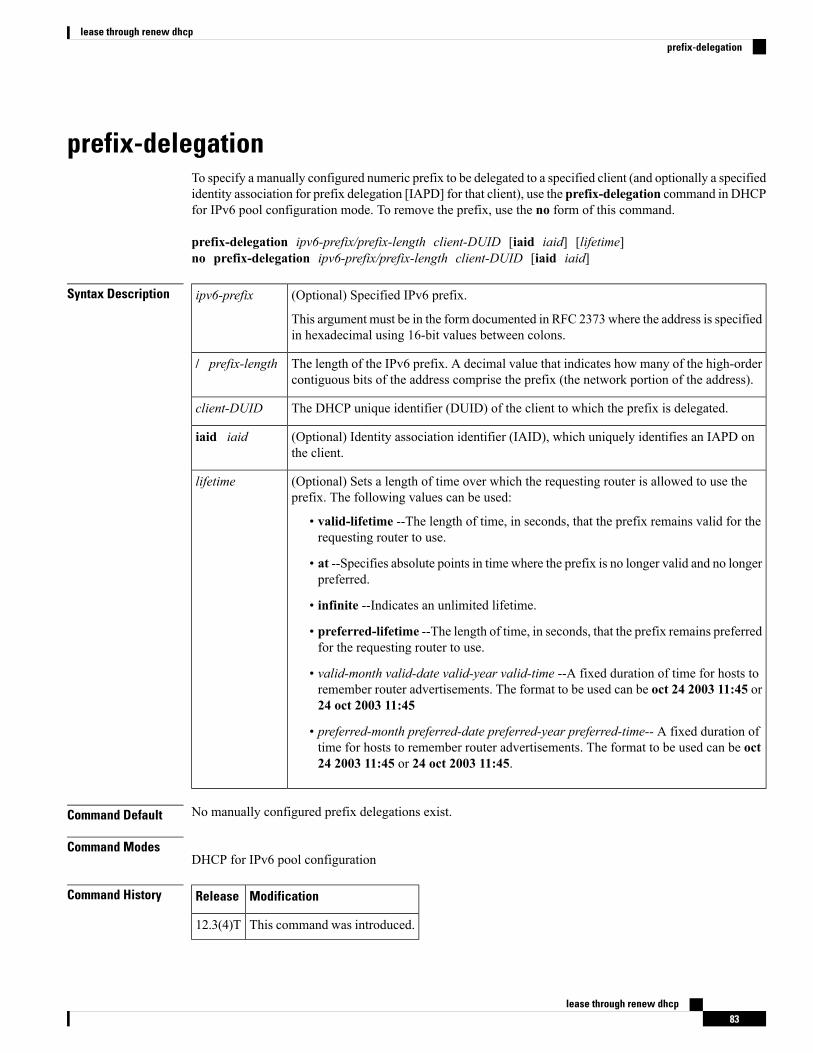
prefix-delegationTo specify a manually configured numeric prefix to be delegated to a specified client (and optionally a specifiedidentity association for prefix delegation [IAPD] for that client), use the prefix-delegation command in DHCPfor IPv6 pool configuration mode. To remove the prefix, use the no form of this command.
prefix-delegation ipv6-prefix/prefix-length client-DUID [iaid iaid] [lifetime]no prefix-delegation ipv6-prefix/prefix-length client-DUID [iaid iaid]
Syntax Description (Optional) Specified IPv6 prefix.
This argument must be in the form documented in RFC 2373 where the address is specifiedin hexadecimal using 16-bit values between colons.
ipv6-prefix
The length of the IPv6 prefix. A decimal value that indicates how many of the high-ordercontiguous bits of the address comprise the prefix (the network portion of the address).
/ prefix-length
The DHCP unique identifier (DUID) of the client to which the prefix is delegated.client-DUID
(Optional) Identity association identifier (IAID), which uniquely identifies an IAPD onthe client.
iaid iaid
(Optional) Sets a length of time over which the requesting router is allowed to use theprefix. The following values can be used:
• valid-lifetime --The length of time, in seconds, that the prefix remains valid for therequesting router to use.
• at --Specifies absolute points in time where the prefix is no longer valid and no longerpreferred.
• infinite --Indicates an unlimited lifetime.
• preferred-lifetime --The length of time, in seconds, that the prefix remains preferredfor the requesting router to use.
• valid-month valid-date valid-year valid-time --A fixed duration of time for hosts toremember router advertisements. The format to be used can be oct 24 2003 11:45 or24 oct 2003 11:45
• preferred-month preferred-date preferred-year preferred-time-- A fixed duration oftime for hosts to remember router advertisements. The format to be used can be oct24 2003 11:45 or 24 oct 2003 11:45.
lifetime
Command Default No manually configured prefix delegations exist.
Command ModesDHCP for IPv6 pool configuration
Command History ModificationRelease
This command was introduced.12.3(4)T
lease through renew dhcp83
lease through renew dhcpprefix-delegation

Usage Guidelines Administrators can manually configure a list of prefixes and associated preferred and valid lifetimes for anIAPD of a specific client that is identified by its DUID. This static binding of client and prefixes can bespecified based on users' subscription to an ISP using the prefix-delegationprefix-length command.
The client-DUID argument identifies the client to which the prefix is delegated. All the configured prefixeswill be assigned to the specified IAPD of the client. The IAPD to which the prefix is assigned is identifiedby the iaid argument if the iaid keyword is configured. If the iaid keyword is not configured, the prefix willbe assigned to the first IAPD from the client that does not have a static binding. This function is intended tomake it convenient for administrators to manually configure prefixes for a client that only sends one IAPDin case it is not easy to know the iaid in advance.
When the delegating router receives a request from a client, it checks whether there is a static binding configuredfor the IAPD in the client’s message. If one is present, the prefixes in the binding are returned to the client.If no such binding is found, the server attempts to assign prefixes for the client from other sources.
Optionally valid and preferred lifetimes can be specified for the prefixes assigned from this pool. Users shouldcoordinate the specified lifetimes with the lifetimes on prefixes from the upstream delegating router if theprefixes were acquired from that router.
The lifetimekeyword can be specified in one of two ways:
• A fixed duration that stays the same in consecutive advertisements.
• Absolute expiration time in the future so that advertised lifetime decrements in real time, which willresult in a lifetime of 0 at the specified time in the future.
The specified length of time is between 60 and 4294967295 seconds or infinity if the infinite keyword isspecified.
Examples The following example configures an IAPD for a specified client:
prefix-delegation 2001:0DB8::/64 00030001000BBFAA2408
Related Commands DescriptionCommand
Configures a DHCP for IPv6 pool and enters DHCP for IPv6 pool configurationmode.
ipv6 dhcp pool
Configures a local IPv6 prefix pool.ipv6 local pool
Specifies a named IPv6 local prefix pool from which prefixes are delegated toDHCP for IPv6 clients.
prefix-delegation pool
Displays DHCP for IPv6 configuration pool information.show ipv6 dhcp pool
lease through renew dhcp84
lease through renew dhcpprefix-delegation

prefix-delegation aaaTo specify that prefixes are to be acquired from authorization, authentication, and accounting (AAA) servers,use the prefix-delegation aaacommand in DHCP for IPv6 pool configuration mode. To disable this feature,use the no form of this command.
Cisco IOS Release 12.4(22)T and Earlier Releases and Cisco IOS Release 12.2(18)SXE, Cisco IOS XERelease 2.1, and Later Releasesprefix-delegation aaa [method-list method-list [lifetime] {{valid-lifetime|infinite}{valid-lifetime|infinite}|at {date month year time|month date year time} {date month year time|monthdate year time}}]no prefix-delegation aaa method-list method-list
Cisco IOS Release 15.0(1)M and Later Releasesprefix-delegation aaa method-list {method-list|default} [{lifetime {valid-lifetime|infinite}{preferred-lifetime|infinite}|at {date month year time|month date year time} {date month yeartime|month date year time}}]no prefix-delegation aaa method-list method-list
Syntax Description (Optional) Indicates a method list to be defined.method-list
Configuration type AAA authorization method list that defines how authorization willbe performed.
method-list
Specifies the default method list, nvgened.default
(Optional) Configures prefix lifetimes.lifetime
The length of time that the prefix remains valid for the requesting router to use, inseconds. The range is from 60 to 4294967295. The default value is 2592000 seconds.
valid-lifetime
Indicates an unlimited lifetime.infinite
The length of time that the prefix remains preferred for the requesting router to use, inseconds. The range is from 60 to 4294967295. The default value is 604800 seconds.
preferred-lifetime
Specifies absolute points in time where the prefix is no longer valid and no longerpreferred.
at
The date for the valid lifetime to expire.date
The month for the valid lifetime to expire.month
The year for the valid lifetime to expire. The range is from 2003 to 2035.year
The year for the valid lifetime to expire.time
Command Default The default time that the prefix remains valid is 2592000 seconds, and the default time that the prefix remainspreferred for the requesting router to use is 604800 seconds.
lease through renew dhcp85
lease through renew dhcpprefix-delegation aaa
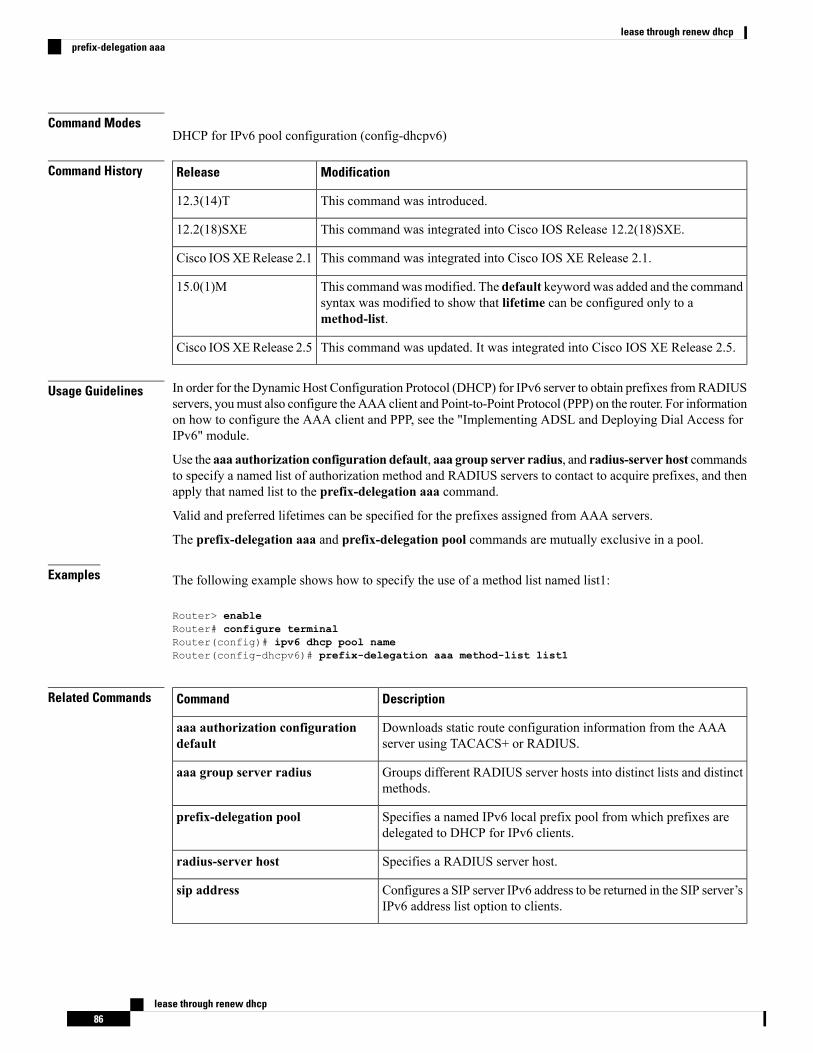
Command ModesDHCP for IPv6 pool configuration (config-dhcpv6)
Command History ModificationRelease
This command was introduced.12.3(14)T
This command was integrated into Cisco IOS Release 12.2(18)SXE.12.2(18)SXE
This command was integrated into Cisco IOS XE Release 2.1.Cisco IOSXERelease 2.1
This commandwasmodified. The default keyword was added and the commandsyntax was modified to show that lifetime can be configured only to amethod-list.
15.0(1)M
This command was updated. It was integrated into Cisco IOS XE Release 2.5.Cisco IOSXERelease 2.5
Usage Guidelines In order for the Dynamic Host Configuration Protocol (DHCP) for IPv6 server to obtain prefixes fromRADIUSservers, youmust also configure the AAA client and Point-to-Point Protocol (PPP) on the router. For informationon how to configure the AAA client and PPP, see the "Implementing ADSL and Deploying Dial Access forIPv6" module.
Use the aaa authorization configuration default, aaa group server radius, and radius-server host commandsto specify a named list of authorization method and RADIUS servers to contact to acquire prefixes, and thenapply that named list to the prefix-delegation aaa command.
Valid and preferred lifetimes can be specified for the prefixes assigned from AAA servers.
The prefix-delegation aaa and prefix-delegation pool commands are mutually exclusive in a pool.
Examples The following example shows how to specify the use of a method list named list1:
Router> enableRouter# configure terminalRouter(config)# ipv6 dhcp pool nameRouter(config-dhcpv6)# prefix-delegation aaa method-list list1
Related Commands DescriptionCommand
Downloads static route configuration information from the AAAserver using TACACS+ or RADIUS.
aaa authorization configurationdefault
Groups different RADIUS server hosts into distinct lists and distinctmethods.
aaa group server radius
Specifies a named IPv6 local prefix pool from which prefixes aredelegated to DHCP for IPv6 clients.
prefix-delegation pool
Specifies a RADIUS server host.radius-server host
Configures a SIP server IPv6 address to be returned in the SIP server’sIPv6 address list option to clients.
sip address
lease through renew dhcp86
lease through renew dhcpprefix-delegation aaa

DescriptionCommand
Configures an SIP server domain name to be returned in the SIPserver’s domain name list option to clients.
sip domain-name
lease through renew dhcp87
lease through renew dhcpprefix-delegation aaa
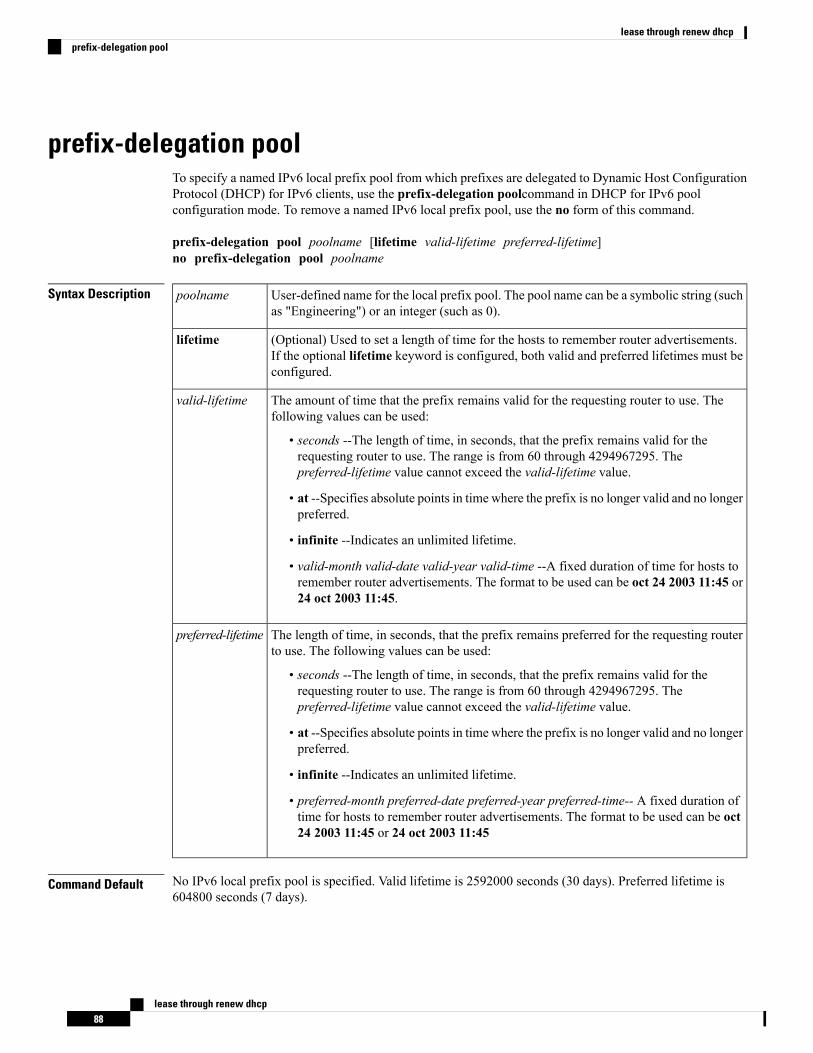
prefix-delegation poolTo specify a named IPv6 local prefix pool from which prefixes are delegated to Dynamic Host ConfigurationProtocol (DHCP) for IPv6 clients, use the prefix-delegation poolcommand in DHCP for IPv6 poolconfiguration mode. To remove a named IPv6 local prefix pool, use the no form of this command.
prefix-delegation pool poolname [lifetime valid-lifetime preferred-lifetime]no prefix-delegation pool poolname
Syntax Description User-defined name for the local prefix pool. The pool name can be a symbolic string (suchas "Engineering") or an integer (such as 0).
poolname
(Optional) Used to set a length of time for the hosts to remember router advertisements.If the optional lifetime keyword is configured, both valid and preferred lifetimes must beconfigured.
lifetime
The amount of time that the prefix remains valid for the requesting router to use. Thefollowing values can be used:
• seconds --The length of time, in seconds, that the prefix remains valid for therequesting router to use. The range is from 60 through 4294967295. Thepreferred-lifetime value cannot exceed the valid-lifetime value.
• at --Specifies absolute points in time where the prefix is no longer valid and no longerpreferred.
• infinite --Indicates an unlimited lifetime.
• valid-month valid-date valid-year valid-time --A fixed duration of time for hosts toremember router advertisements. The format to be used can be oct 24 2003 11:45 or24 oct 2003 11:45.
valid-lifetime
The length of time, in seconds, that the prefix remains preferred for the requesting routerto use. The following values can be used:
• seconds --The length of time, in seconds, that the prefix remains valid for therequesting router to use. The range is from 60 through 4294967295. Thepreferred-lifetime value cannot exceed the valid-lifetime value.
• at --Specifies absolute points in time where the prefix is no longer valid and no longerpreferred.
• infinite --Indicates an unlimited lifetime.
• preferred-month preferred-date preferred-year preferred-time-- A fixed duration oftime for hosts to remember router advertisements. The format to be used can be oct24 2003 11:45 or 24 oct 2003 11:45
preferred-lifetime
Command Default No IPv6 local prefix pool is specified. Valid lifetime is 2592000 seconds (30 days). Preferred lifetime is604800 seconds (7 days).
lease through renew dhcp88
lease through renew dhcpprefix-delegation pool
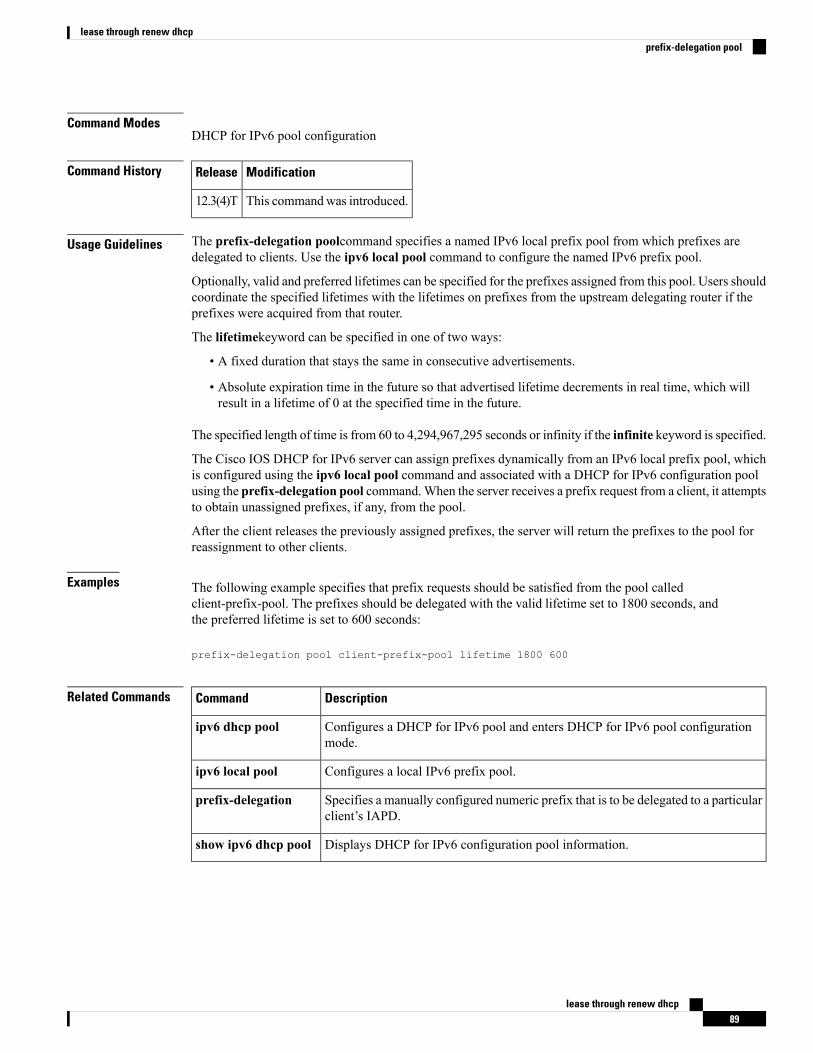
Command ModesDHCP for IPv6 pool configuration
Command History ModificationRelease
This commandwas introduced.12.3(4)T
Usage Guidelines The prefix-delegation poolcommand specifies a named IPv6 local prefix pool from which prefixes aredelegated to clients. Use the ipv6 local pool command to configure the named IPv6 prefix pool.
Optionally, valid and preferred lifetimes can be specified for the prefixes assigned from this pool. Users shouldcoordinate the specified lifetimes with the lifetimes on prefixes from the upstream delegating router if theprefixes were acquired from that router.
The lifetimekeyword can be specified in one of two ways:
• A fixed duration that stays the same in consecutive advertisements.
• Absolute expiration time in the future so that advertised lifetime decrements in real time, which willresult in a lifetime of 0 at the specified time in the future.
The specified length of time is from 60 to 4,294,967,295 seconds or infinity if the infinite keyword is specified.
The Cisco IOS DHCP for IPv6 server can assign prefixes dynamically from an IPv6 local prefix pool, whichis configured using the ipv6 local pool command and associated with a DHCP for IPv6 configuration poolusing the prefix-delegation pool command.When the server receives a prefix request from a client, it attemptsto obtain unassigned prefixes, if any, from the pool.
After the client releases the previously assigned prefixes, the server will return the prefixes to the pool forreassignment to other clients.
Examples The following example specifies that prefix requests should be satisfied from the pool calledclient-prefix-pool. The prefixes should be delegated with the valid lifetime set to 1800 seconds, andthe preferred lifetime is set to 600 seconds:
prefix-delegation pool client-prefix-pool lifetime 1800 600
Related Commands DescriptionCommand
Configures a DHCP for IPv6 pool and enters DHCP for IPv6 pool configurationmode.
ipv6 dhcp pool
Configures a local IPv6 prefix pool.ipv6 local pool
Specifies a manually configured numeric prefix that is to be delegated to a particularclient’s IAPD.
prefix-delegation
Displays DHCP for IPv6 configuration pool information.show ipv6 dhcp pool
lease through renew dhcp89
lease through renew dhcpprefix-delegation pool

priority (firewall)To specify a group priority and failover threshold value in a redundancy group, use the priority command inredundancy application group configuration mode. To disable the priority value of a group, use the no formof this command.
priority value [failover-threshold value]no priority value [failover-threshold value]
Syntax Description The priority value. The range is from 1 to 255.value
(Optional) Specifies the failover threshold value. The range is from 1 to 255.failover-threshold value
Command Default The default priority value is 100.
Command Modes Redundancy application group configuration (config-red-app-grp)
Command History ModificationRelease
This command was introduced.Cisco IOS XE Release 3.1S
Usage Guidelines The priority of the redundancy group is used to determine a redundancy group’s active or standby role on theconfigured node. The failover threshold is used to determine when a switchover must occur. After the priorityis set under threshold, the active redundancy group gives up its role.
Examples The following example shows how to configure the priority value and threshold value for theredundancy group named group1:
Router# configure terminalRouter(config)# redundancyRouter(config-red)# application redundancyRouter(config-red-app)# group 1Router(config-red-app-grp) priority 100 failover-threshold 90
Related Commands DescriptionCommand
Enters redundancy application configuration mode.application redundancy
Enters redundancy application group configuration mode.group(firewall)
Configures the redundancy group with a name.name
lease through renew dhcp90
lease through renew dhcppriority (firewall)
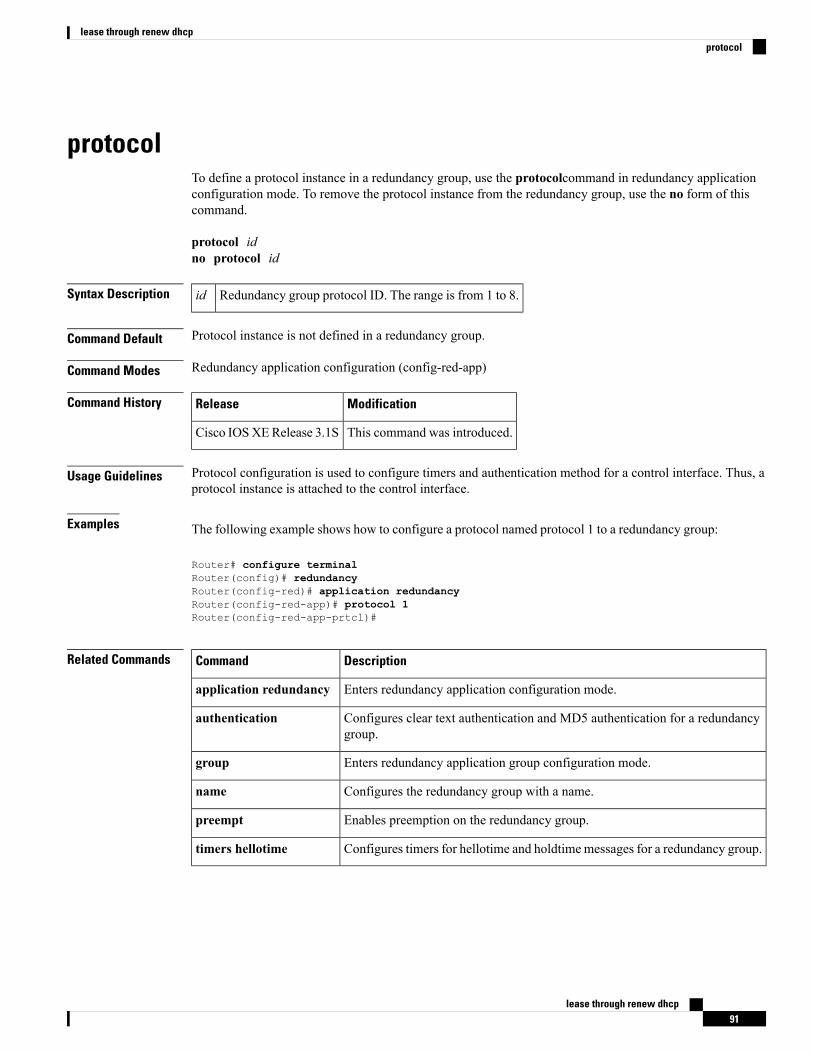
protocolTo define a protocol instance in a redundancy group, use the protocolcommand in redundancy applicationconfiguration mode. To remove the protocol instance from the redundancy group, use the no form of thiscommand.
protocol idno protocol id
Syntax Description Redundancy group protocol ID. The range is from 1 to 8.id
Command Default Protocol instance is not defined in a redundancy group.
Command Modes Redundancy application configuration (config-red-app)
Command History ModificationRelease
This command was introduced.Cisco IOSXERelease 3.1S
Usage Guidelines Protocol configuration is used to configure timers and authentication method for a control interface. Thus, aprotocol instance is attached to the control interface.
Examples The following example shows how to configure a protocol named protocol 1 to a redundancy group:
Router# configure terminalRouter(config)# redundancyRouter(config-red)# application redundancyRouter(config-red-app)# protocol 1Router(config-red-app-prtcl)#
Related Commands DescriptionCommand
Enters redundancy application configuration mode.application redundancy
Configures clear text authentication and MD5 authentication for a redundancygroup.
authentication
Enters redundancy application group configuration mode.group
Configures the redundancy group with a name.name
Enables preemption on the redundancy group.preempt
Configures timers for hellotime and holdtimemessages for a redundancy group.timers hellotime
lease through renew dhcp91
lease through renew dhcpprotocol

rate-limit (mDNS)To configure the rate limit of incoming multicast Domain Name System (mDNS) packets on a device, usethe rate-limit command inmDNS configurationmode. To disable rate limit configuration of incomingmDNSpackets on a device, use the no form of this command.
rate-limit in rate-limitno rate-limit in
Syntax Description Specifies that a rate limit is being applied for incoming mDNS packets.in
Rate limit value of incoming mDNS packets.
You can specify a rate limit value in the range 1-100 packets persecond (p/s).
Note
rate-limit
Command Default Rate limit of incoming mDNS packets on a device is not configured.
Command Modes Multicast DNS configuration (config-mdns)
Command History ModificationRelease
This command was introduced.15.2(2)E
This command was integrated into the Cisco IOS XE 3.6E release.Cisco IOS XE 3.6E
This command was integrated into the Cisco IOS XE Release 3.13SCisco IOSXERelease 3.13S
The rate limit value range for incomingmDNS packets on a device was changedfrom 1-1500 p/s to 1-100 p/s.
15.2(3)E
The rate limit value range for incomingmDNS packets on a device was changedfrom 1-1500 p/s to 1-100 p/s.
Cisco IOS XE 3.7E
This command was integrated into Cisco IOS Release 15.2(1)SY.15.2(1)SY
This command was integrated into Cisco IOS Release 15.5(2)S.15.5(2)S
This command was integrated into the Cisco IOS XE Release 3.15SCisco IOSXERelease 3.15S
Examples The following example shows you how to configure the rate limit of incoming mDNS packets on adevice:
Device> enableDevice# configure terminalDevice(config)# service-routing mdns-sdDevice(config-mdns)# rate-limit in 90Device(config-mdns)# exit
lease through renew dhcp92
lease through renew dhcprate-limit (mDNS)

Related Commands DescriptionCommand
Enables mDNS gateway functionality for a device.service-routing mdns-sd
Displays mDNS statistics for the specified service-list.show mdns statistics
Displays current runningmDNS service-policy configuration detailsfor the device or interface.
show running-config mdns-sd policy
lease through renew dhcp93
lease through renew dhcprate-limit (mDNS)

rbe nasipTo specify the IP address of an interface on the DHCP relay agent that will be sent to the DHCP server viathe agent remote ID option, use the rbe nasip command in global configuration mode. To remove thespecification, use the no form of this command.
rbe nasip interface-type numberno rbe nasip
Syntax Description Interface type. For more information, use the question mark (?) online help function.interface-type
Interface or subinterface number. For more information about the numbering syntax foryour networking device, use the question mark (?) online help function.
number
Command Default No IP address is specified.
Command Modes Global configuration (config)
Command History ModificationRelease
This command was introduced.12.2(2)T
This command was integrated into Cisco IOS Release 12.2(28)SB.12.2(28)SB
This command was integrated into Cisco IOS Release 15.1(1)S.15.1(1)S
Usage Guidelines The rbe nasip command is used to configure support for the DHCP relay agent information option (option82) for an ATM routed bridge encapsulation (RBE).
Support for the DHCP relay agent information option must be configured on the DHCP relay agent using theip dhcp relay information option command for the rbe nasip command to be effective.
Examples The following example shows how to enable support for DHCP option 82 on the DHCP relay agentby using the ip dhcp relay information option command. The rbe nasip command configures therouter to forward the IP address for Loopback0 to the DHCP server. ATM RBE is configured onATM subinterface 4/0.1.
ip dhcp-server 10.1.1.1!ip dhcp relay information option!interface Loopback0ip address 10.5.1.1 255.255.255.0!interface ATM 4/0no ip address!interface ATM 4/0.1 point-to-pointip unnumbered Loopback0ip helper-address 10.1.1.1atm route-bridged ip
lease through renew dhcp94
lease through renew dhcprbe nasip
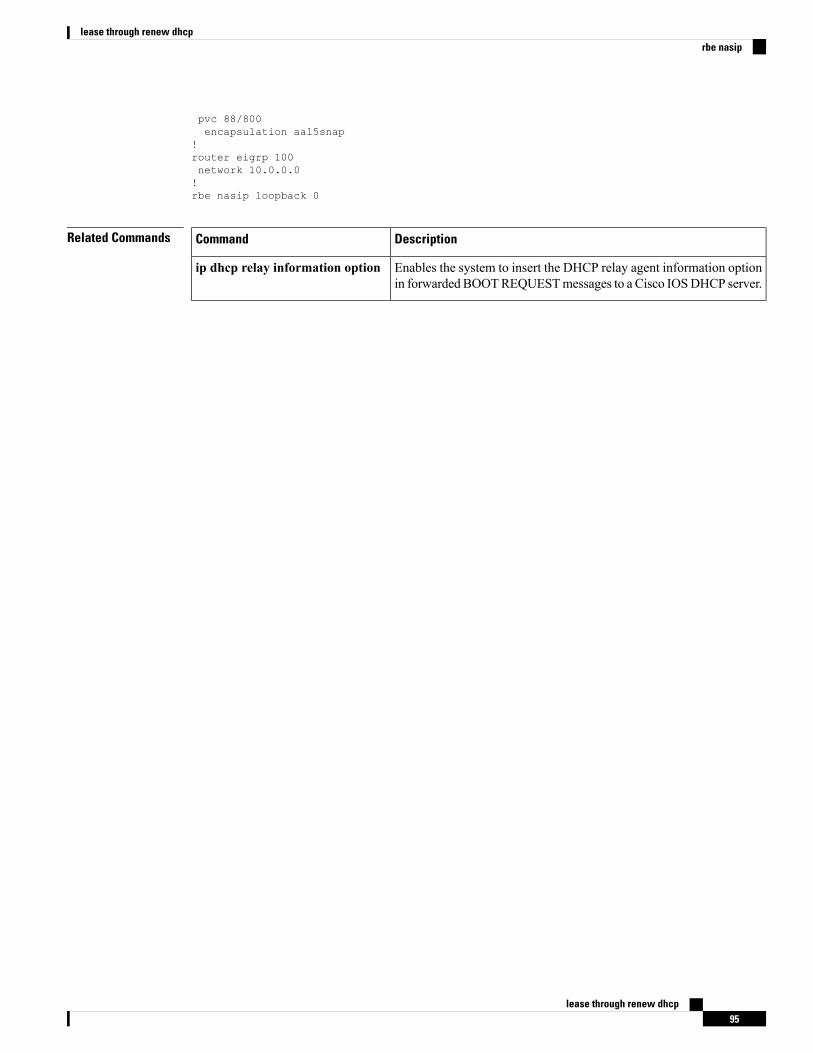
pvc 88/800encapsulation aal5snap
!router eigrp 100network 10.0.0.0!rbe nasip loopback 0
Related Commands DescriptionCommand
Enables the system to insert the DHCP relay agent information optionin forwarded BOOTREQUESTmessages to a Cisco IOSDHCP server.
ip dhcp relay information option
lease through renew dhcp95
lease through renew dhcprbe nasip
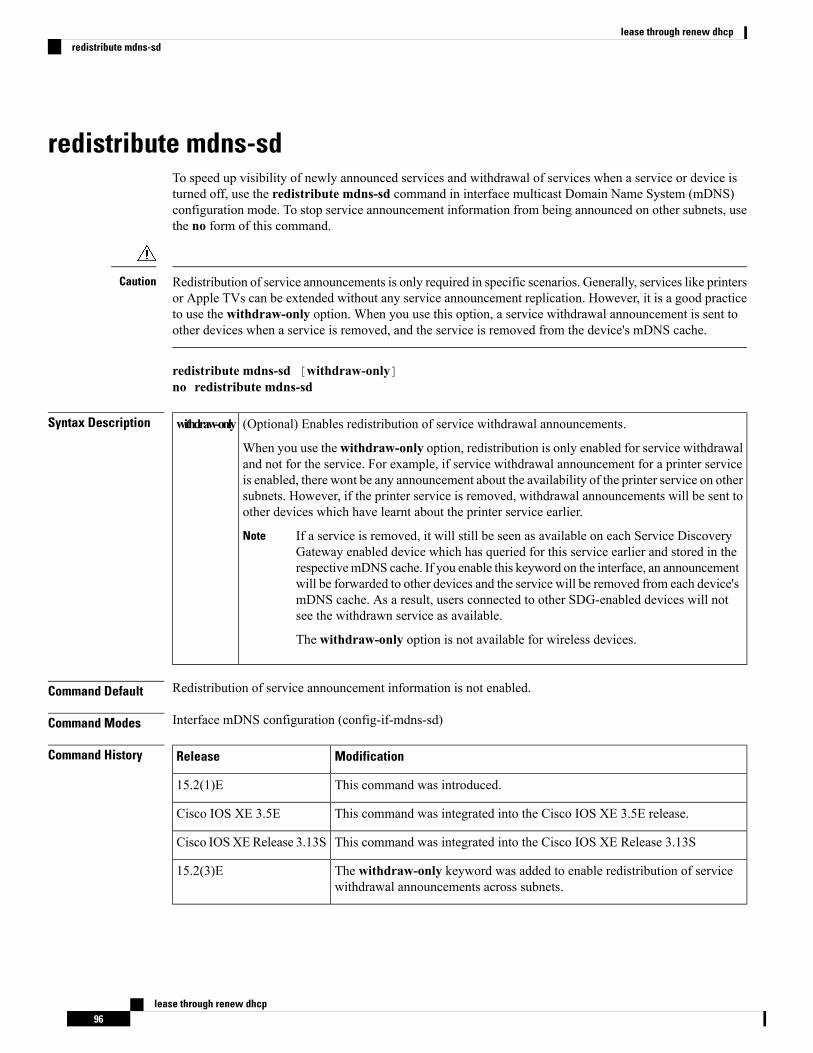
redistribute mdns-sdTo speed up visibility of newly announced services and withdrawal of services when a service or device isturned off, use the redistribute mdns-sd command in interface multicast Domain Name System (mDNS)configuration mode. To stop service announcement information from being announced on other subnets, usethe no form of this command.
Redistribution of service announcements is only required in specific scenarios. Generally, services like printersor Apple TVs can be extended without any service announcement replication. However, it is a good practiceto use the withdraw-only option. When you use this option, a service withdrawal announcement is sent toother devices when a service is removed, and the service is removed from the device's mDNS cache.
Caution
redistribute mdns-sd [withdraw-only]no redistribute mdns-sd
Syntax Description (Optional) Enables redistribution of service withdrawal announcements.
When you use the withdraw-only option, redistribution is only enabled for service withdrawaland not for the service. For example, if service withdrawal announcement for a printer serviceis enabled, there wont be any announcement about the availability of the printer service on othersubnets. However, if the printer service is removed, withdrawal announcements will be sent toother devices which have learnt about the printer service earlier.
If a service is removed, it will still be seen as available on each Service DiscoveryGateway enabled device which has queried for this service earlier and stored in therespectivemDNS cache. If you enable this keyword on the interface, an announcementwill be forwarded to other devices and the service will be removed from each device'smDNS cache. As a result, users connected to other SDG-enabled devices will notsee the withdrawn service as available.
The withdraw-only option is not available for wireless devices.
Note
withdraw-only
Command Default Redistribution of service announcement information is not enabled.
Command Modes Interface mDNS configuration (config-if-mdns-sd)
Command History ModificationRelease
This command was introduced.15.2(1)E
This command was integrated into the Cisco IOS XE 3.5E release.Cisco IOS XE 3.5E
This command was integrated into the Cisco IOS XE Release 3.13SCisco IOSXERelease 3.13S
The withdraw-only keyword was added to enable redistribution of servicewithdrawal announcements across subnets.
15.2(3)E
lease through renew dhcp96
lease through renew dhcpredistribute mdns-sd

ModificationRelease
The withdraw-only keyword was added to enable redistribution of servicewithdrawal announcements across subnets.
Cisco IOS XE 3.7E
This command was integrated into Cisco IOS Release 15.5(2)S.15.5(2)S
This command was integrated into the Cisco IOS XE Release 3.15SCisco IOSXERelease 3.15S
Usage Guidelines Redistribution of service announcements can be enabled for an interface only and not for a device. You mustensure that there are no loops in the network topology corresponding to the interface for which serviceannouncement redistribution is being enabled. A loop can lead to a broadcast storm.
Examples The following example shows how to enable redistribution of service announcement information:
Device> enableDevice# configure terminalDevice(config)# interface ethernet 0/1Device(config-if)# service-routing mdns-sdDevice(config-if-mdns-sd)# service-policy serv-pol1 INDevice(config-if-mdns-sd)# redistribute mdns-sdDevice(config-if-mdns-sd)# exit
The following example shows how to enable service withdrawal notifications to other devices:
Device> enableDevice# configure terminalDevice(config)# interface ethernet 0/2Device(config-if)# service-routing mdns-sdDevice(config-if-mdns-sd)# service-policy serv-pol3 INDevice(config-if-mdns-sd)# redistribute mdns-sd withdraw-onlyDevice(config-if-mdns-sd)# exit
Related Commands DescriptionCommand
Enables multicast Domain Name System (mDNS) gateway functionality for adevice.
service-routing mdns-sd
Filters in-bound or out-bound service information for a service-list.service-policy
lease through renew dhcp97
lease through renew dhcpredistribute mdns-sd
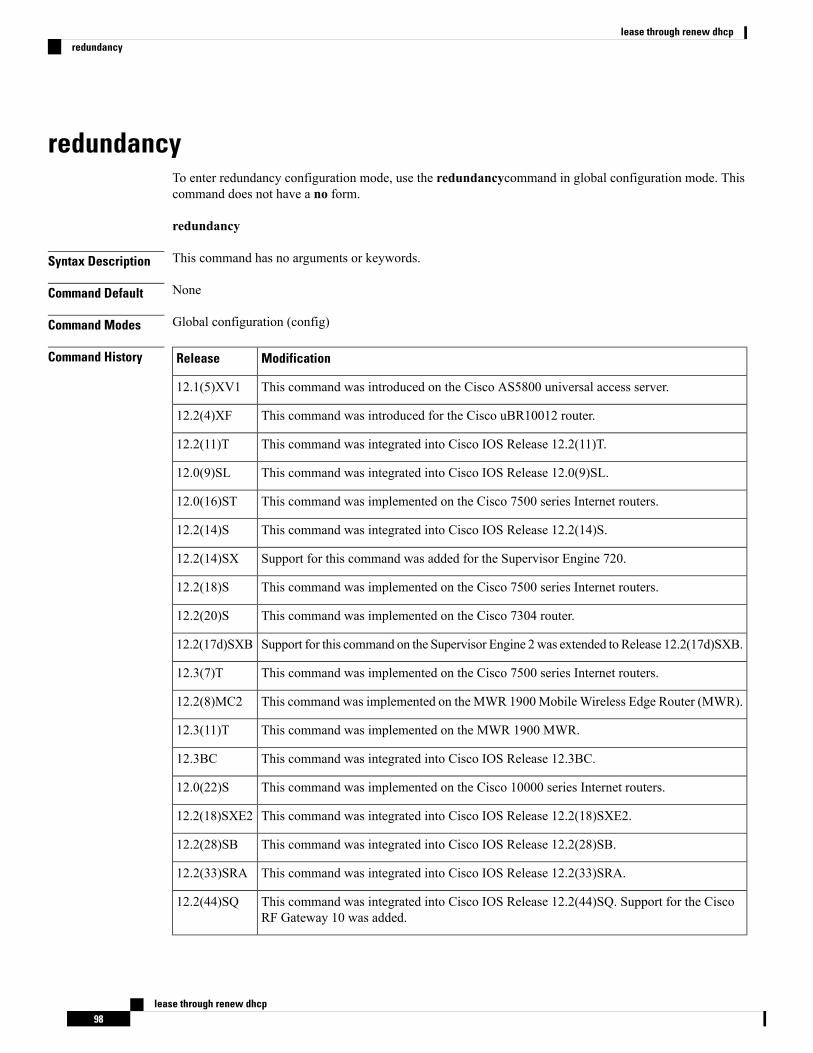
redundancyTo enter redundancy configuration mode, use the redundancycommand in global configuration mode. Thiscommand does not have a no form.
redundancy
Syntax Description This command has no arguments or keywords.
Command Default None
Command Modes Global configuration (config)
Command History ModificationRelease
This command was introduced on the Cisco AS5800 universal access server.12.1(5)XV1
This command was introduced for the Cisco uBR10012 router.12.2(4)XF
This command was integrated into Cisco IOS Release 12.2(11)T.12.2(11)T
This command was integrated into Cisco IOS Release 12.0(9)SL.12.0(9)SL
This command was implemented on the Cisco 7500 series Internet routers.12.0(16)ST
This command was integrated into Cisco IOS Release 12.2(14)S.12.2(14)S
Support for this command was added for the Supervisor Engine 720.12.2(14)SX
This command was implemented on the Cisco 7500 series Internet routers.12.2(18)S
This command was implemented on the Cisco 7304 router.12.2(20)S
Support for this command on the Supervisor Engine 2was extended to Release 12.2(17d)SXB.12.2(17d)SXB
This command was implemented on the Cisco 7500 series Internet routers.12.3(7)T
This command was implemented on the MWR 1900Mobile Wireless Edge Router (MWR).12.2(8)MC2
This command was implemented on the MWR 1900 MWR.12.3(11)T
This command was integrated into Cisco IOS Release 12.3BC.12.3BC
This command was implemented on the Cisco 10000 series Internet routers.12.0(22)S
This command was integrated into Cisco IOS Release 12.2(18)SXE2.12.2(18)SXE2
This command was integrated into Cisco IOS Release 12.2(28)SB.12.2(28)SB
This command was integrated into Cisco IOS Release 12.2(33)SRA.12.2(33)SRA
This command was integrated into Cisco IOS Release 12.2(44)SQ. Support for the CiscoRF Gateway 10 was added.
12.2(44)SQ
lease through renew dhcp98
lease through renew dhcpredundancy
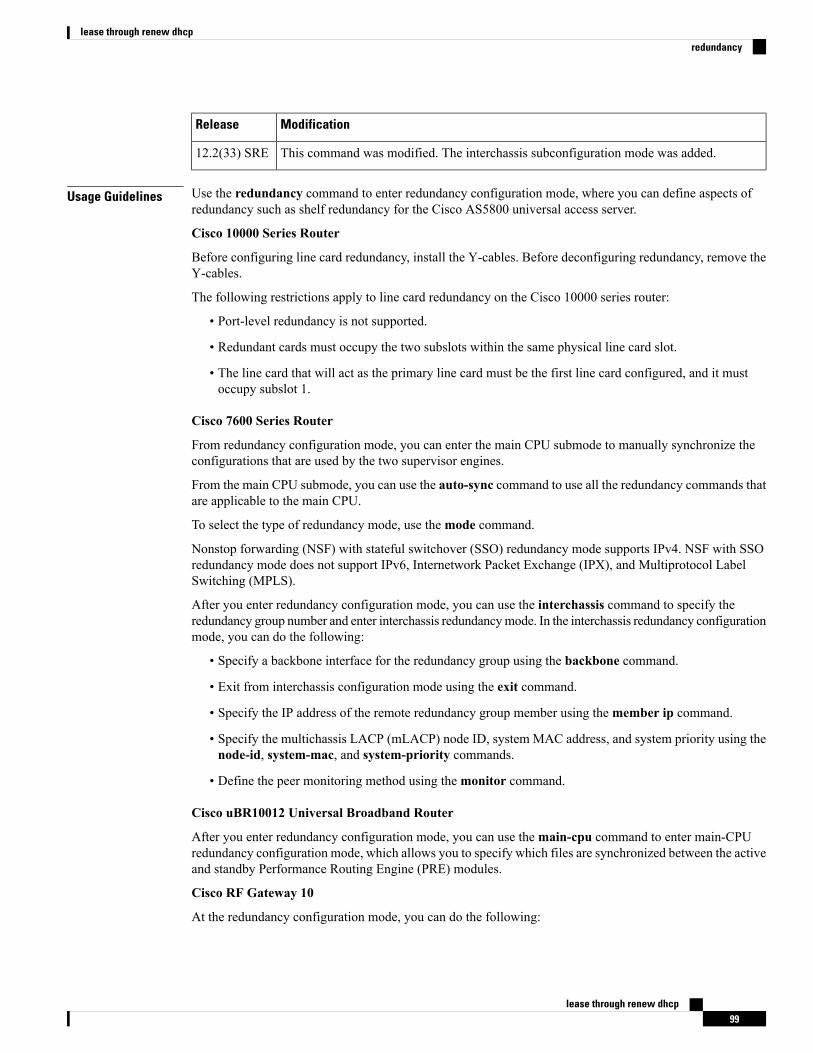
ModificationRelease
This command was modified. The interchassis subconfiguration mode was added.12.2(33) SRE
Usage Guidelines Use the redundancy command to enter redundancy configuration mode, where you can define aspects ofredundancy such as shelf redundancy for the Cisco AS5800 universal access server.
Cisco 10000 Series Router
Before configuring line card redundancy, install the Y-cables. Before deconfiguring redundancy, remove theY-cables.
The following restrictions apply to line card redundancy on the Cisco 10000 series router:
• Port-level redundancy is not supported.
• Redundant cards must occupy the two subslots within the same physical line card slot.
• The line card that will act as the primary line card must be the first line card configured, and it mustoccupy subslot 1.
Cisco 7600 Series Router
From redundancy configuration mode, you can enter the main CPU submode to manually synchronize theconfigurations that are used by the two supervisor engines.
From the main CPU submode, you can use the auto-sync command to use all the redundancy commands thatare applicable to the main CPU.
To select the type of redundancy mode, use themode command.
Nonstop forwarding (NSF) with stateful switchover (SSO) redundancy mode supports IPv4. NSF with SSOredundancy mode does not support IPv6, Internetwork Packet Exchange (IPX), and Multiprotocol LabelSwitching (MPLS).
After you enter redundancy configuration mode, you can use the interchassis command to specify theredundancy group number and enter interchassis redundancymode. In the interchassis redundancy configurationmode, you can do the following:
• Specify a backbone interface for the redundancy group using the backbone command.
• Exit from interchassis configuration mode using the exit command.
• Specify the IP address of the remote redundancy group member using themember ip command.
• Specify the multichassis LACP (mLACP) node ID, system MAC address, and system priority using thenode-id, system-mac, and system-priority commands.
• Define the peer monitoring method using themonitor command.
Cisco uBR10012 Universal Broadband Router
After you enter redundancy configuration mode, you can use themain-cpu command to enter main-CPUredundancy configuration mode, which allows you to specify which files are synchronized between the activeand standby Performance Routing Engine (PRE) modules.
Cisco RF Gateway 10
At the redundancy configuration mode, you can do the following:
lease through renew dhcp99
lease through renew dhcpredundancy
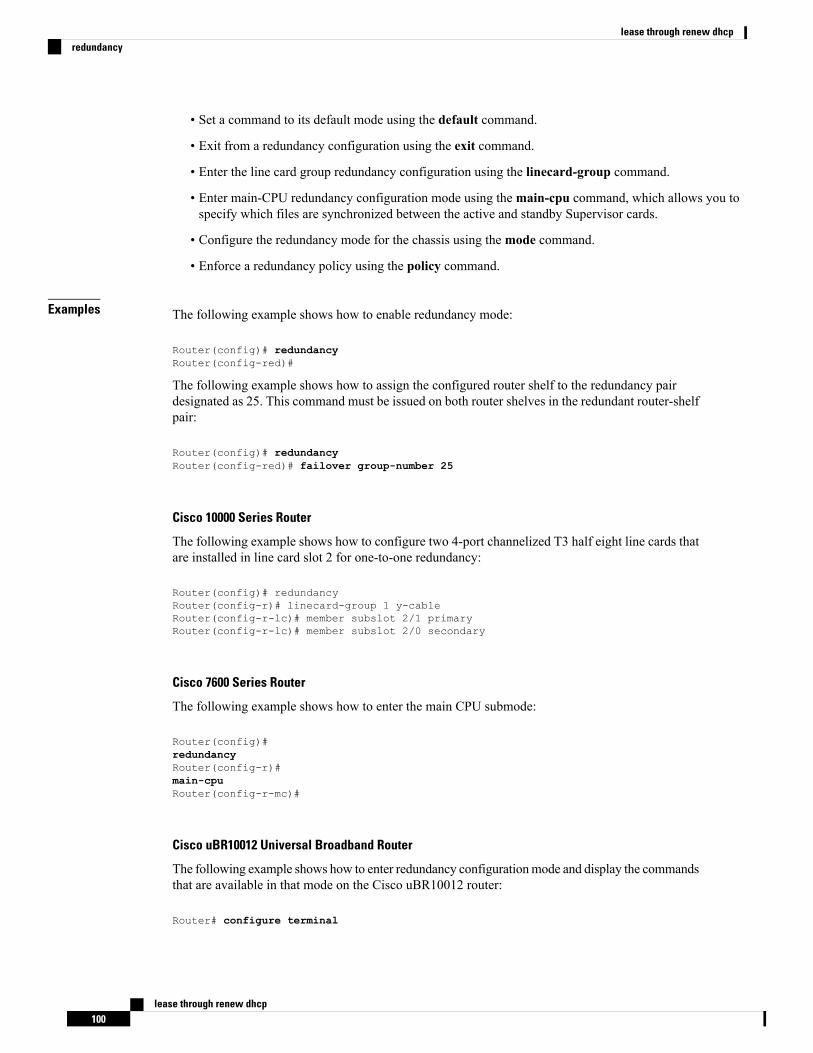
• Set a command to its default mode using the default command.
• Exit from a redundancy configuration using the exit command.
• Enter the line card group redundancy configuration using the linecard-group command.
• Enter main-CPU redundancy configuration mode using themain-cpu command, which allows you tospecify which files are synchronized between the active and standby Supervisor cards.
• Configure the redundancy mode for the chassis using themode command.
• Enforce a redundancy policy using the policy command.
Examples The following example shows how to enable redundancy mode:
Router(config)# redundancyRouter(config-red)#
The following example shows how to assign the configured router shelf to the redundancy pairdesignated as 25. This command must be issued on both router shelves in the redundant router-shelfpair:
Router(config)# redundancyRouter(config-red)# failover group-number 25
Cisco 10000 Series Router
The following example shows how to configure two 4-port channelized T3 half eight line cards thatare installed in line card slot 2 for one-to-one redundancy:
Router(config)# redundancyRouter(config-r)# linecard-group 1 y-cableRouter(config-r-lc)# member subslot 2/1 primaryRouter(config-r-lc)# member subslot 2/0 secondary
Cisco 7600 Series Router
The following example shows how to enter the main CPU submode:
Router(config)#redundancyRouter(config-r)#main-cpuRouter(config-r-mc)#
Cisco uBR10012 Universal Broadband Router
The following example shows how to enter redundancy configurationmode and display the commandsthat are available in that mode on the Cisco uBR10012 router:
Router# configure terminal
lease through renew dhcp100
lease through renew dhcpredundancy
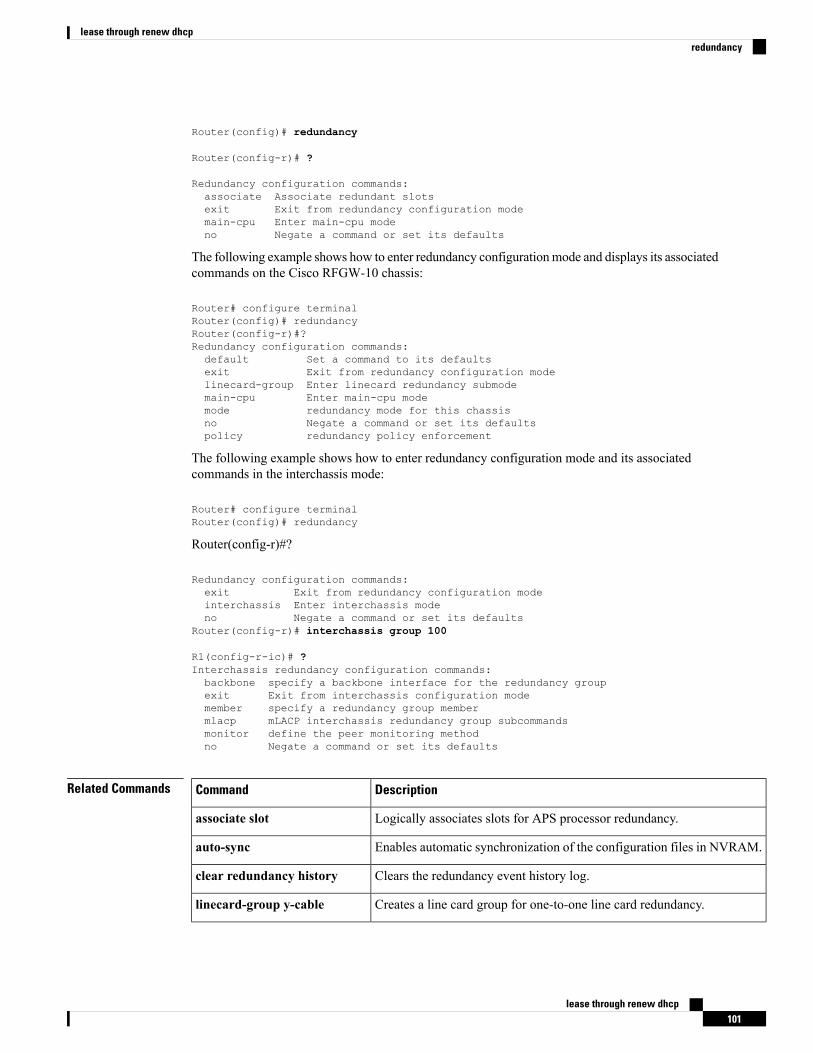
Router(config)# redundancy
Router(config-r)# ?
Redundancy configuration commands:associate Associate redundant slotsexit Exit from redundancy configuration modemain-cpu Enter main-cpu modeno Negate a command or set its defaults
The following example shows how to enter redundancy configurationmode and displays its associatedcommands on the Cisco RFGW-10 chassis:
Router# configure terminalRouter(config)# redundancyRouter(config-r)#?Redundancy configuration commands:default Set a command to its defaultsexit Exit from redundancy configuration modelinecard-group Enter linecard redundancy submodemain-cpu Enter main-cpu modemode redundancy mode for this chassisno Negate a command or set its defaultspolicy redundancy policy enforcement
The following example shows how to enter redundancy configuration mode and its associatedcommands in the interchassis mode:
Router# configure terminalRouter(config)# redundancy
Router(config-r)#?
Redundancy configuration commands:exit Exit from redundancy configuration modeinterchassis Enter interchassis modeno Negate a command or set its defaults
Router(config-r)# interchassis group 100
R1(config-r-ic)# ?Interchassis redundancy configuration commands:backbone specify a backbone interface for the redundancy groupexit Exit from interchassis configuration modemember specify a redundancy group membermlacp mLACP interchassis redundancy group subcommandsmonitor define the peer monitoring methodno Negate a command or set its defaults
Related Commands DescriptionCommand
Logically associates slots for APS processor redundancy.associate slot
Enables automatic synchronization of the configuration files in NVRAM.auto-sync
Clears the redundancy event history log.clear redundancy history
Creates a line card group for one-to-one line card redundancy.linecard-group y-cable
lease through renew dhcp101
lease through renew dhcpredundancy
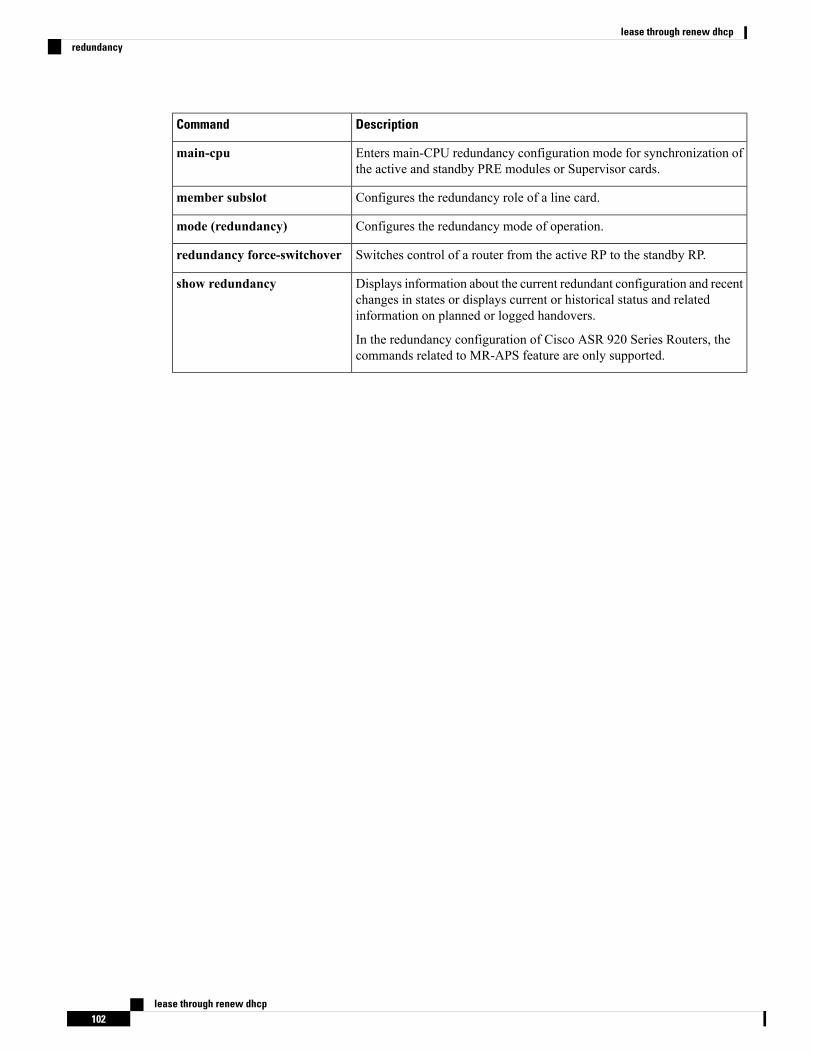
DescriptionCommand
Enters main-CPU redundancy configuration mode for synchronization ofthe active and standby PRE modules or Supervisor cards.
main-cpu
Configures the redundancy role of a line card.member subslot
Configures the redundancy mode of operation.mode (redundancy)
Switches control of a router from the active RP to the standby RP.redundancy force-switchover
Displays information about the current redundant configuration and recentchanges in states or displays current or historical status and relatedinformation on planned or logged handovers.
In the redundancy configuration of Cisco ASR 920 Series Routers, thecommands related to MR-APS feature are only supported.
show redundancy
lease through renew dhcp102
lease through renew dhcpredundancy

redundancy asymmetric-routing enableTo establish an asymmetric flow diversion tunnel for each redundancy group, use the redundancyasymmetric-routing enable command in interface configuration mode. To remove the established flowdiversion tunnel, use the no form of this command.
redundancy asymmetric-routing enableno redundancy asymmetric-routing enable
Syntax Description This command has no arguments or keywords.
Command Default An asymmetric routing traffic diversion tunnel is not configured for redundancy groups.
Command Modes Interface configuration (config-if)
Command History ModificationRelease
This command was introduced.Cisco IOSXERelease 3.5S
This command was integrated into Cisco IOS Release 15.2(3)T.15.2(3)T
Usage Guidelines You must configure this command on a traffic interface that sends or receives asymmetric routing traffic. Atunnel is established between the traffic interface and the asymmetric routing interface for each redundancygroup.
Examples The following example shows how to enable redundancy group asymmetric routing on a GigabitEthernet interface:Router(config)# interface gigabitethernet 0/0/1Router(config-if)# redundancy asymmetric-routing enable
Related Commands DescriptionCommand
Sets up an asymmetric routing link interface and enables applications to divert packetsreceived on the standby redundancy group to the active.
asymmetric-routing
Configures an interface and enters interface configuration mode.interface
lease through renew dhcp103
lease through renew dhcpredundancy asymmetric-routing enable
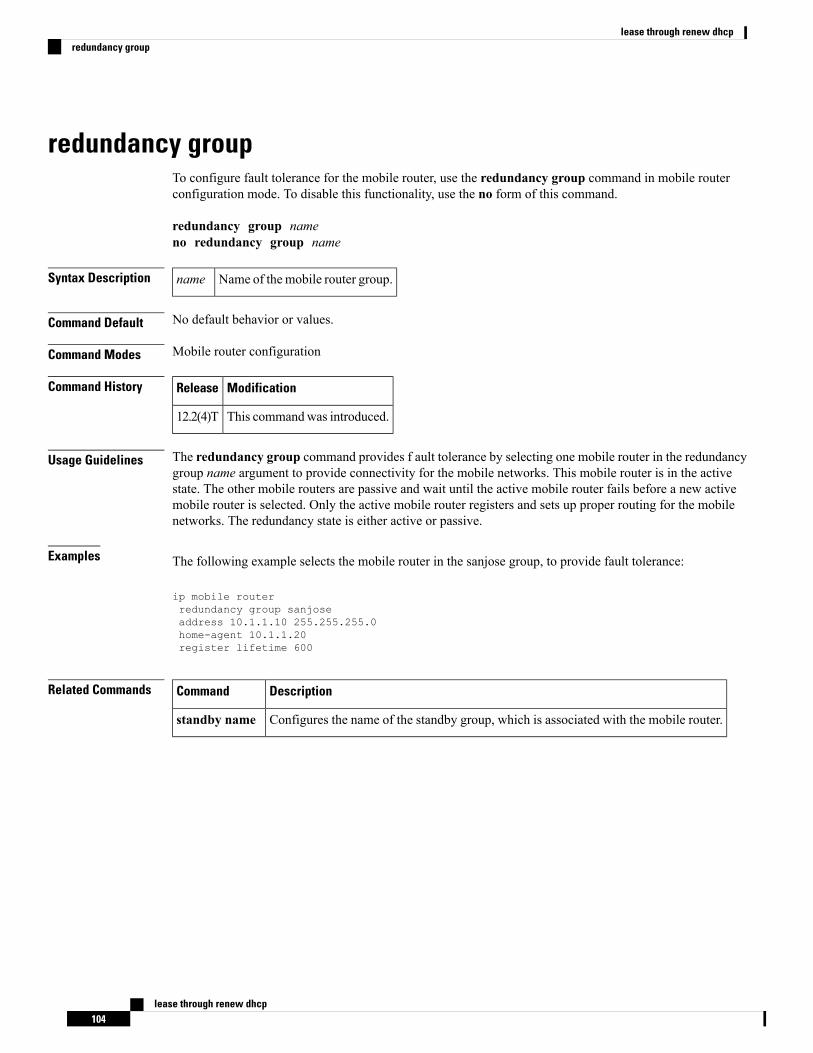
redundancy groupTo configure fault tolerance for the mobile router, use the redundancy group command in mobile routerconfiguration mode. To disable this functionality, use the no form of this command.
redundancy group nameno redundancy group name
Syntax Description Name of themobile router group.name
Command Default No default behavior or values.
Command Modes Mobile router configuration
Command History ModificationRelease
This commandwas introduced.12.2(4)T
Usage Guidelines The redundancy group command provides f ault tolerance by selecting one mobile router in the redundancygroup name argument to provide connectivity for the mobile networks. This mobile router is in the activestate. The other mobile routers are passive and wait until the active mobile router fails before a new activemobile router is selected. Only the active mobile router registers and sets up proper routing for the mobilenetworks. The redundancy state is either active or passive.
Examples The following example selects the mobile router in the sanjose group, to provide fault tolerance:
ip mobile routerredundancy group sanjoseaddress 10.1.1.10 255.255.255.0home-agent 10.1.1.20register lifetime 600
Related Commands DescriptionCommand
Configures the name of the standby group, which is associated with the mobile router.standby name
lease through renew dhcp104
lease through renew dhcpredundancy group
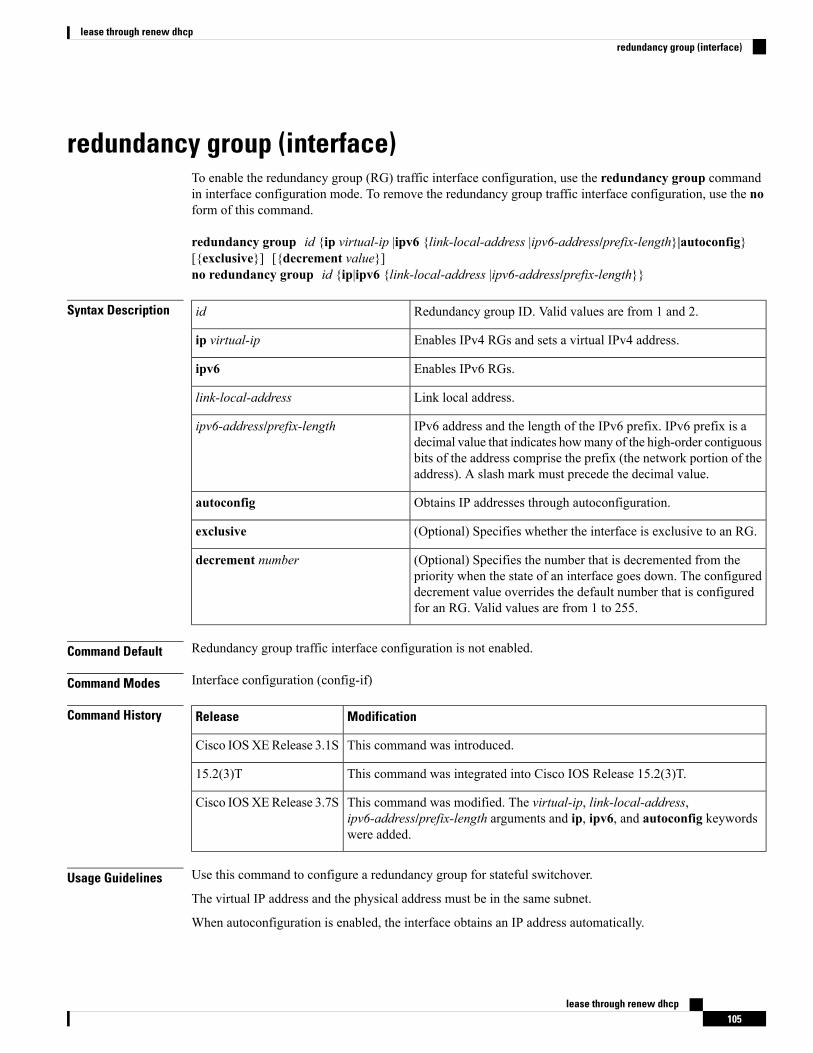
redundancy group (interface)To enable the redundancy group (RG) traffic interface configuration, use the redundancy group commandin interface configuration mode. To remove the redundancy group traffic interface configuration, use the noform of this command.
redundancy group id {ip virtual-ip |ipv6 {link-local-address |ipv6-address/prefix-length}|autoconfig}[{exclusive}] [{decrement value}]no redundancy group id {ip|ipv6 {link-local-address |ipv6-address/prefix-length}}
Syntax Description Redundancy group ID. Valid values are from 1 and 2.id
Enables IPv4 RGs and sets a virtual IPv4 address.ip virtual-ip
Enables IPv6 RGs.ipv6
Link local address.link-local-address
IPv6 address and the length of the IPv6 prefix. IPv6 prefix is adecimal value that indicates howmany of the high-order contiguousbits of the address comprise the prefix (the network portion of theaddress). A slash mark must precede the decimal value.
ipv6-address/prefix-length
Obtains IP addresses through autoconfiguration.autoconfig
(Optional) Specifies whether the interface is exclusive to an RG.exclusive
(Optional) Specifies the number that is decremented from thepriority when the state of an interface goes down. The configureddecrement value overrides the default number that is configuredfor an RG. Valid values are from 1 to 255.
decrement number
Command Default Redundancy group traffic interface configuration is not enabled.
Command Modes Interface configuration (config-if)
Command History ModificationRelease
This command was introduced.Cisco IOSXERelease 3.1S
This command was integrated into Cisco IOS Release 15.2(3)T.15.2(3)T
This command was modified. The virtual-ip, link-local-address,ipv6-address/prefix-length arguments and ip, ipv6, and autoconfig keywordswere added.
Cisco IOSXERelease 3.7S
Usage Guidelines Use this command to configure a redundancy group for stateful switchover.
The virtual IP address and the physical address must be in the same subnet.
When autoconfiguration is enabled, the interface obtains an IP address automatically.
lease through renew dhcp105
lease through renew dhcpredundancy group (interface)

Examples The following example shows how to enable the IPv6 redundancy group traffic interface configuration:Device(config)# interface gigabitethernet 0/0/1Device(config-if)# redundancy group 2 ipv6 FE80::260:3EFF:FE11:6770 exclusive
Related Commands DescriptionCommand
Configures the control interface type and number for a redundancy group.control
Configures the data interface type and number for a redundancy group.data
Configures an interface and enters interface configuration mode.interface
Configures the name of a redundancy group.name
Enables preemption on a redundancy group.preempt
Defines a protocol instance in a redundancy group.protocol
Configures an RII for a redundancy group.redundancy rii
lease through renew dhcp106
lease through renew dhcpredundancy group (interface)
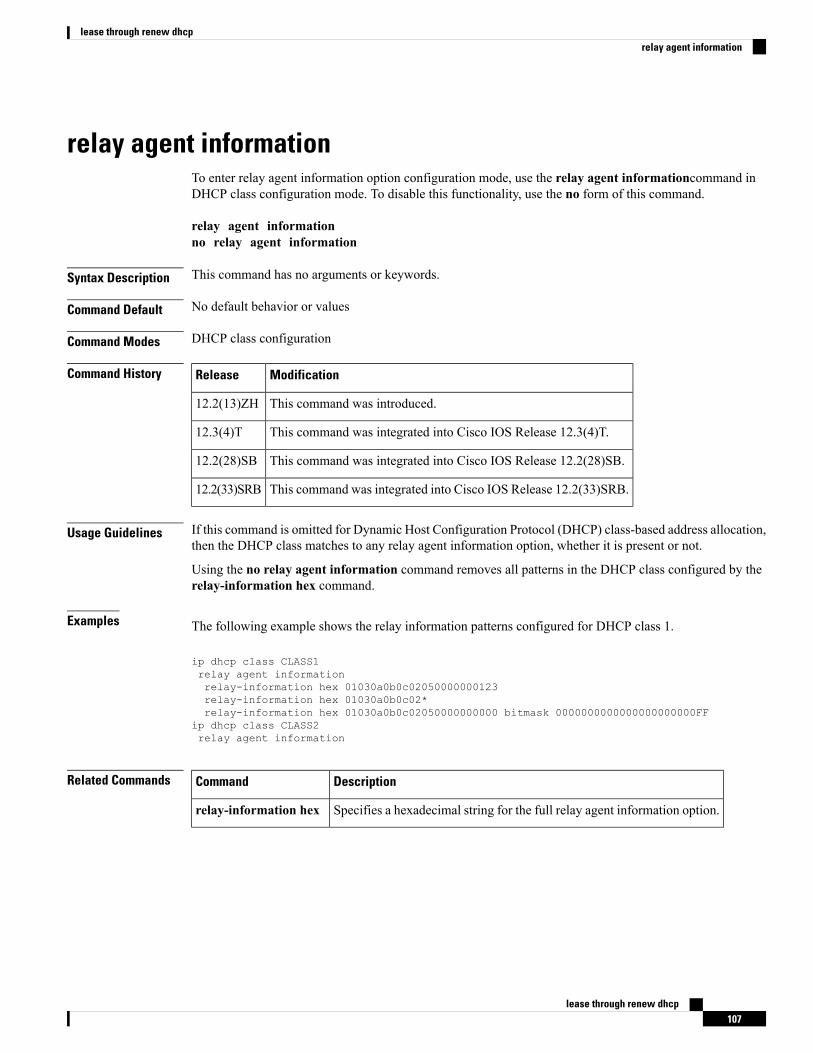
relay agent informationTo enter relay agent information option configuration mode, use the relay agent informationcommand inDHCP class configuration mode. To disable this functionality, use the no form of this command.
relay agent informationno relay agent information
Syntax Description This command has no arguments or keywords.
Command Default No default behavior or values
Command Modes DHCP class configuration
Command History ModificationRelease
This command was introduced.12.2(13)ZH
This command was integrated into Cisco IOS Release 12.3(4)T.12.3(4)T
This command was integrated into Cisco IOS Release 12.2(28)SB.12.2(28)SB
This command was integrated into Cisco IOS Release 12.2(33)SRB.12.2(33)SRB
Usage Guidelines If this command is omitted for Dynamic Host Configuration Protocol (DHCP) class-based address allocation,then the DHCP class matches to any relay agent information option, whether it is present or not.
Using the no relay agent information command removes all patterns in the DHCP class configured by therelay-information hex command.
Examples The following example shows the relay information patterns configured for DHCP class 1.
ip dhcp class CLASS1relay agent informationrelay-information hex 01030a0b0c02050000000123relay-information hex 01030a0b0c02*relay-information hex 01030a0b0c02050000000000 bitmask 0000000000000000000000FF
ip dhcp class CLASS2relay agent information
Related Commands DescriptionCommand
Specifies a hexadecimal string for the full relay agent information option.relay-information hex
lease through renew dhcp107
lease through renew dhcprelay agent information
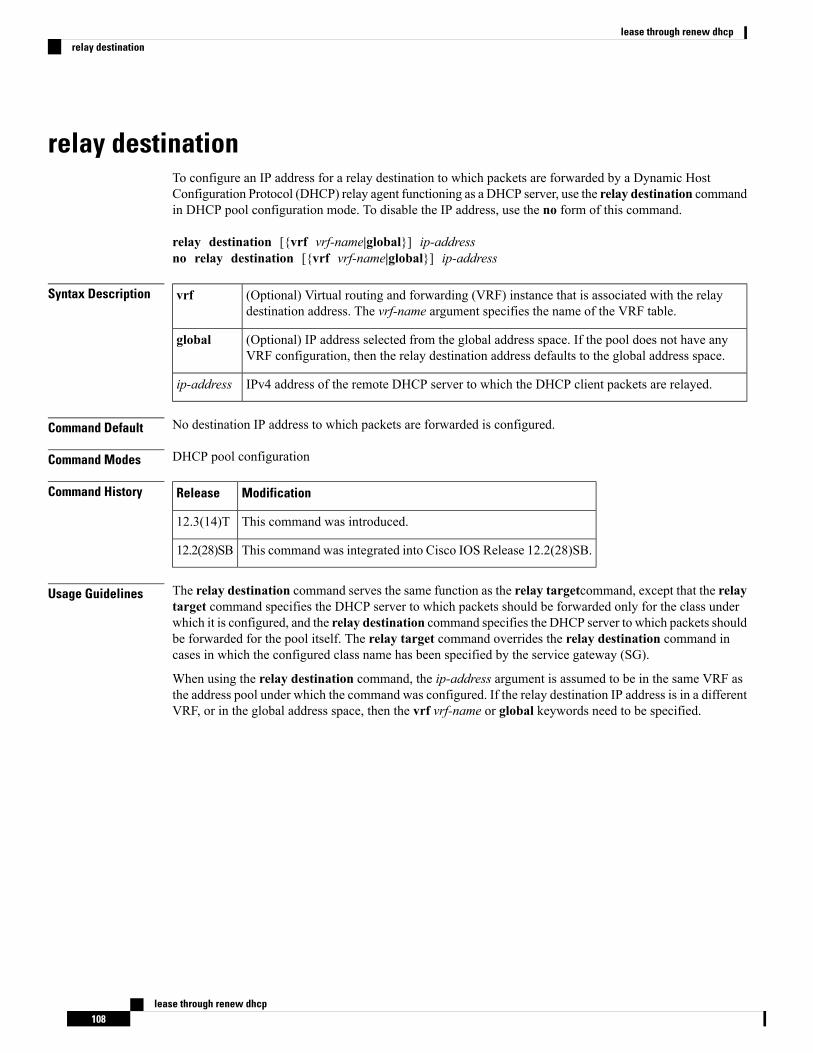
relay destinationTo configure an IP address for a relay destination to which packets are forwarded by a Dynamic HostConfiguration Protocol (DHCP) relay agent functioning as a DHCP server, use the relay destination commandin DHCP pool configuration mode. To disable the IP address, use the no form of this command.
relay destination [{vrf vrf-name|global}] ip-addressno relay destination [{vrf vrf-name|global}] ip-address
Syntax Description (Optional) Virtual routing and forwarding (VRF) instance that is associated with the relaydestination address. The vrf-name argument specifies the name of the VRF table.
vrf
(Optional) IP address selected from the global address space. If the pool does not have anyVRF configuration, then the relay destination address defaults to the global address space.
global
IPv4 address of the remote DHCP server to which the DHCP client packets are relayed.ip-address
Command Default No destination IP address to which packets are forwarded is configured.
Command Modes DHCP pool configuration
Command History ModificationRelease
This command was introduced.12.3(14)T
This command was integrated into Cisco IOS Release 12.2(28)SB.12.2(28)SB
Usage Guidelines The relay destination command serves the same function as the relay targetcommand, except that the relaytarget command specifies the DHCP server to which packets should be forwarded only for the class underwhich it is configured, and the relay destination command specifies the DHCP server to which packets shouldbe forwarded for the pool itself. The relay target command overrides the relay destination command incases in which the configured class name has been specified by the service gateway (SG).
When using the relay destination command, the ip-address argument is assumed to be in the same VRF asthe address pool under which the command was configured. If the relay destination IP address is in a differentVRF, or in the global address space, then the vrf vrf-name or global keywords need to be specified.
lease through renew dhcp108
lease through renew dhcprelay destination

relay sourceTo configure an IP address for a relay source from which packets are forwarded by a Dynamic HostConfiguration Protocol (DHCP) server, use the relay source command in DHCP-pool configuration mode.To disable the IP address, use the no form of this command.
relay source ip-address subnet-maskno relay source ip-address subnet-mask
Syntax Description IPv4 address of DHCP server from which the DHCP client packets are relayed.ip-address
Subnet mask that matches the subnet of the incoming interface of the DHCP client packet.subnet-mask
Command Default No IP address from which IP packets are forwarded is configured.
Command Modes DHCP pool configuration
Command History ModificationRelease
This command was introduced.12.3(14)T
This command was integrated into Cisco IOS Release 12.2(28)SB.12.2(28)SB
Examples The following example shows how to configure a source IP address fromwhich DHCP client packetsare relayed:
ip dhcp pool abc1relay source 10.0.0.0 255.255.0.0relay destination 10.5.1.1
Related Commands DescriptionCommand
Configures an IP address for a relay destination to which packets are forwarded by aDHCP server.
relay destination
Configures an IP address for a relay target to which packets are forward by a DHCPserver.
relay target
lease through renew dhcp109
lease through renew dhcprelay source
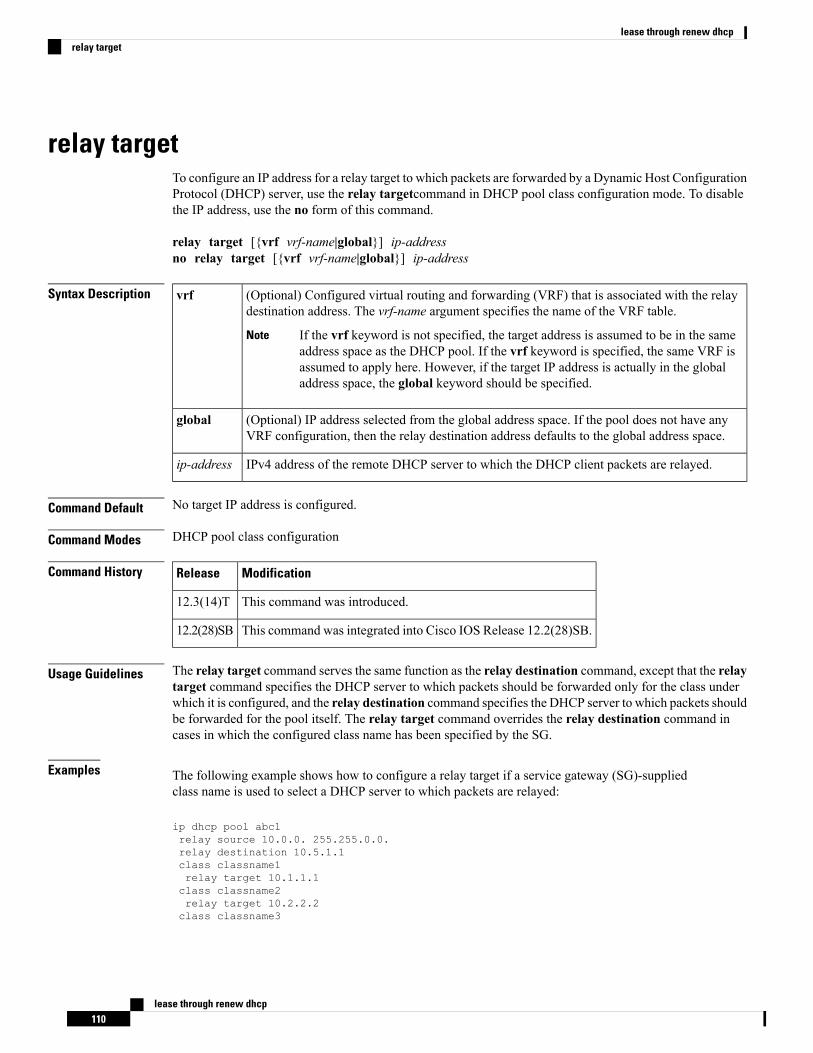
relay targetTo configure an IP address for a relay target to which packets are forwarded by a Dynamic Host ConfigurationProtocol (DHCP) server, use the relay targetcommand in DHCP pool class configuration mode. To disablethe IP address, use the no form of this command.
relay target [{vrf vrf-name|global}] ip-addressno relay target [{vrf vrf-name|global}] ip-address
Syntax Description (Optional) Configured virtual routing and forwarding (VRF) that is associated with the relaydestination address. The vrf-name argument specifies the name of the VRF table.
If the vrf keyword is not specified, the target address is assumed to be in the sameaddress space as the DHCP pool. If the vrf keyword is specified, the same VRF isassumed to apply here. However, if the target IP address is actually in the globaladdress space, the global keyword should be specified.
Note
vrf
(Optional) IP address selected from the global address space. If the pool does not have anyVRF configuration, then the relay destination address defaults to the global address space.
global
IPv4 address of the remote DHCP server to which the DHCP client packets are relayed.ip-address
Command Default No target IP address is configured.
Command Modes DHCP pool class configuration
Command History ModificationRelease
This command was introduced.12.3(14)T
This command was integrated into Cisco IOS Release 12.2(28)SB.12.2(28)SB
Usage Guidelines The relay target command serves the same function as the relay destination command, except that the relaytarget command specifies the DHCP server to which packets should be forwarded only for the class underwhich it is configured, and the relay destination command specifies the DHCP server to which packets shouldbe forwarded for the pool itself. The relay target command overrides the relay destination command incases in which the configured class name has been specified by the SG.
Examples The following example shows how to configure a relay target if a service gateway (SG)-suppliedclass name is used to select a DHCP server to which packets are relayed:
ip dhcp pool abc1relay source 10.0.0. 255.255.0.0.relay destination 10.5.1.1class classname1relay target 10.1.1.1class classname2relay target 10.2.2.2class classname3
lease through renew dhcp110
lease through renew dhcprelay target

In the above example, classname1 relays the DHCP DISCOVER packet to the server at 10.1.1.1,while classname2 relays the DHCP DISCOVER packet to the server at 10.2.2.2.
If the SG returned classname3, then the default pool at 10.5.1.1 is used. If the SG returns any otherclass name other than classname1, classname2, or classname3, then no relay action is taken.
The relay target configuration with respect to any configured DHCP pool works in the exact sameway as a relay destination configuration works.
Related Commands DescriptionCommand
Configures an IP address for a relay destination to which packets are forwarded by aDHCP server.
relay destination
Configures an IP address for a relay source from which packets are forward by a DHCPserver.
relay source
lease through renew dhcp111
lease through renew dhcprelay target

relay-information hexTo specify a hexadecimal string for the full relay agent information option, use the relay-information hexcommand in relay agent information option configuration mode. To remove the configuration, use the noform of this command.
relay-information hex pattern [*] [bitmask mask]no relay-information hex pattern [*] [bitmask mask]
Syntax Description String of hexadecimal values. This string creates a pattern that is matched against thenamed DHCP class.
pattern
(Optional) Wildcard character.*
(Optional) Hexadecimal bitmask.bitmask mask
Command Default No default behavior or values
Command Modes Relay agent information option configuration
Command History ModificationRelease
This command was introduced.12.2(13)ZH
This command was integrated into Cisco IOS Release 12.3(4)T.12.3(4)T
This command was integrated into Cisco IOS Release 12.2(28)SB.12.2(28)SB
This command was integrated into Cisco IOS Release 12.2(33)SRB.12.2(33)SRB
Usage Guidelines The relay-information hex command sets a pattern that is used to match against defined DHCP classes. Youcan configure multiple relay-information hex commands for a DHCP class. This is useful to specify a setof relay information options that can not be summarized with a wildcard or a bitmask.
The pattern itself, excluding the wildcard, must contain a whole number of bytes (a byte is two hexadecimalnumbers). For example, 010203 is 3 bytes (accepted) and 01020 is 2.5 bytes (not accepted).
If you omit this command, no pattern is configured and it is considered a match to any relay agent informationvalue, but the relay information option must be present in the DHCP packet.
You must know the hexadecimal value of each byte location in option 82 to be able to configure the relay-information hex command. The option 82 format may vary from product to product. Contact the relay agentvendor for this information.
Examples The following example shows the configured relay agent information patterns. Note that CLASS 2has no pattern configured and will “match to any” class.
ip dhcp class CLASS1relay agent informationrelay-information hex 01030a0b0c02050000000123relay-information hex 01030a0b0c02*
lease through renew dhcp112
lease through renew dhcprelay-information hex

relay-information hex 01030a0b0c02050000000000 bitmask 0000000000000000000000FFip dhcp class CLASS2relay agent information
lease through renew dhcp113
lease through renew dhcprelay-information hex
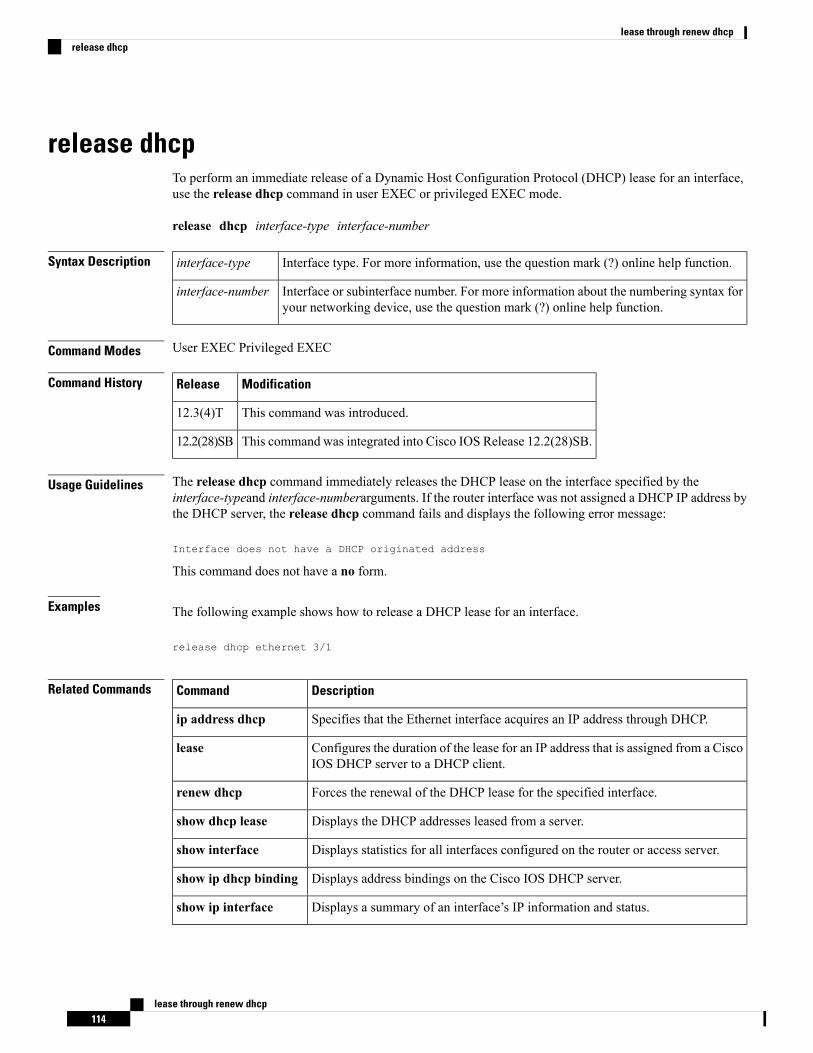
release dhcpTo perform an immediate release of a Dynamic Host Configuration Protocol (DHCP) lease for an interface,use the release dhcp command in user EXEC or privileged EXEC mode.
release dhcp interface-type interface-number
Syntax Description Interface type. For more information, use the question mark (?) online help function.interface-type
Interface or subinterface number. For more information about the numbering syntax foryour networking device, use the question mark (?) online help function.
interface-number
Command Modes User EXEC Privileged EXEC
Command History ModificationRelease
This command was introduced.12.3(4)T
This command was integrated into Cisco IOS Release 12.2(28)SB.12.2(28)SB
Usage Guidelines The release dhcp command immediately releases the DHCP lease on the interface specified by theinterface-typeand interface-numberarguments. If the router interface was not assigned a DHCP IP address bythe DHCP server, the release dhcp command fails and displays the following error message:
Interface does not have a DHCP originated address
This command does not have a no form.
Examples The following example shows how to release a DHCP lease for an interface.
release dhcp ethernet 3/1
Related Commands DescriptionCommand
Specifies that the Ethernet interface acquires an IP address through DHCP.ip address dhcp
Configures the duration of the lease for an IP address that is assigned from a CiscoIOS DHCP server to a DHCP client.
lease
Forces the renewal of the DHCP lease for the specified interface.renew dhcp
Displays the DHCP addresses leased from a server.show dhcp lease
Displays statistics for all interfaces configured on the router or access server.show interface
Displays address bindings on the Cisco IOS DHCP server.show ip dhcp binding
Displays a summary of an interface’s IP information and status.show ip interface
lease through renew dhcp114
lease through renew dhcprelease dhcp

DescriptionCommand
Displays the contents of the currently running configuration file or the configurationfor a specific interface.
show running-config
Displays the contents of the configuration file that will be used at the next systemstartup.
show startup-config
lease through renew dhcp115
lease through renew dhcprelease dhcp
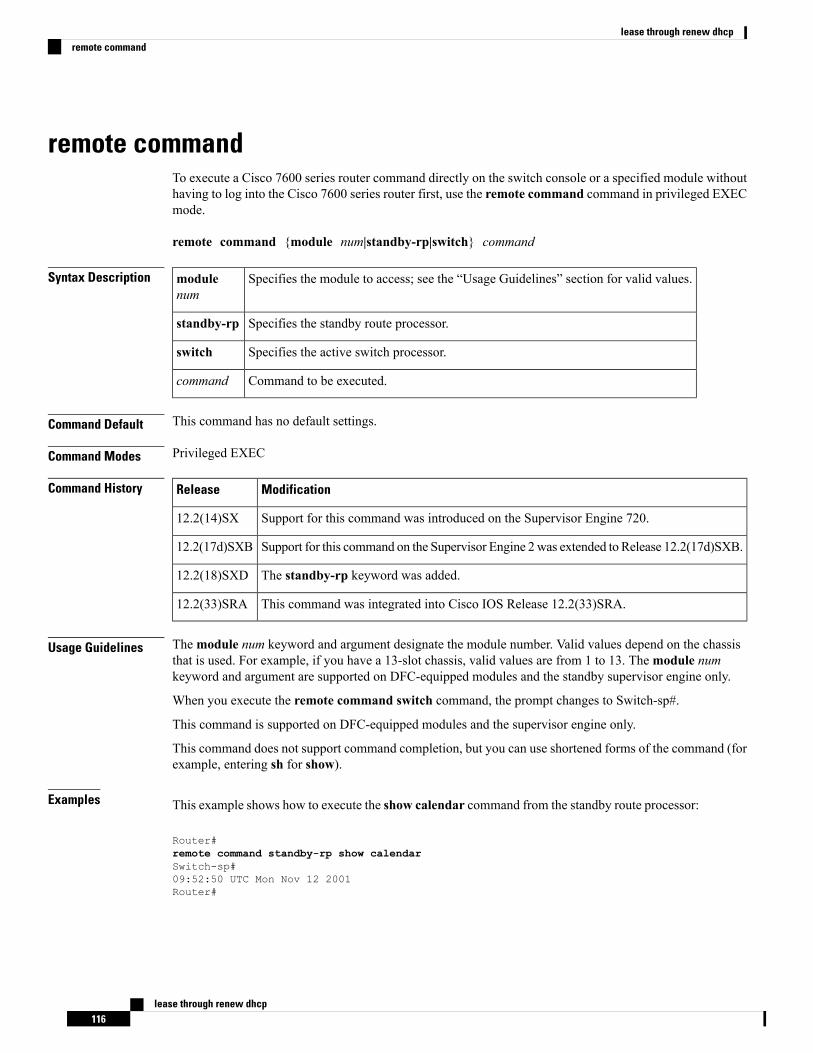
remote commandTo execute a Cisco 7600 series router command directly on the switch console or a specified module withouthaving to log into the Cisco 7600 series router first, use the remote command command in privileged EXECmode.
remote command {module num|standby-rp|switch} command
Syntax Description Specifies the module to access; see the “Usage Guidelines” section for valid values.modulenum
Specifies the standby route processor.standby-rp
Specifies the active switch processor.switch
Command to be executed.command
Command Default This command has no default settings.
Command Modes Privileged EXEC
Command History ModificationRelease
Support for this command was introduced on the Supervisor Engine 720.12.2(14)SX
Support for this command on the Supervisor Engine 2was extended to Release 12.2(17d)SXB.12.2(17d)SXB
The standby-rp keyword was added.12.2(18)SXD
This command was integrated into Cisco IOS Release 12.2(33)SRA.12.2(33)SRA
Usage Guidelines Themodule num keyword and argument designate the module number. Valid values depend on the chassisthat is used. For example, if you have a 13-slot chassis, valid values are from 1 to 13. Themodule numkeyword and argument are supported on DFC-equipped modules and the standby supervisor engine only.
When you execute the remote command switch command, the prompt changes to Switch-sp#.
This command is supported on DFC-equipped modules and the supervisor engine only.
This command does not support command completion, but you can use shortened forms of the command (forexample, entering sh for show).
Examples This example shows how to execute the show calendar command from the standby route processor:
Router#remote command standby-rp show calendarSwitch-sp#09:52:50 UTC Mon Nov 12 2001Router#
lease through renew dhcp116
lease through renew dhcpremote command

Related Commands DescriptionCommand
Accesses the Cisco 7600 series router console or a specific module.remotelogin
lease through renew dhcp117
lease through renew dhcpremote command
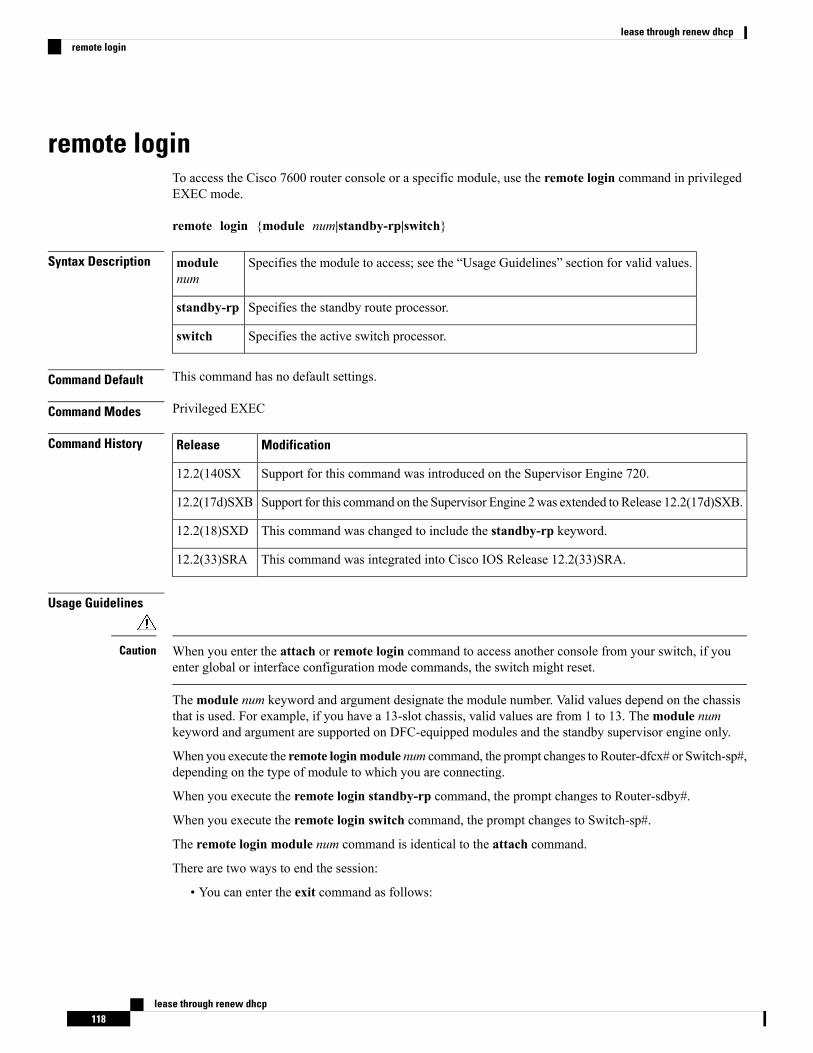
remote loginTo access the Cisco 7600 router console or a specific module, use the remote login command in privilegedEXEC mode.
remote login {module num|standby-rp|switch}
Syntax Description Specifies the module to access; see the “Usage Guidelines” section for valid values.modulenum
Specifies the standby route processor.standby-rp
Specifies the active switch processor.switch
Command Default This command has no default settings.
Command Modes Privileged EXEC
Command History ModificationRelease
Support for this command was introduced on the Supervisor Engine 720.12.2(140SX
Support for this command on the Supervisor Engine 2was extended to Release 12.2(17d)SXB.12.2(17d)SXB
This command was changed to include the standby-rp keyword.12.2(18)SXD
This command was integrated into Cisco IOS Release 12.2(33)SRA.12.2(33)SRA
Usage Guidelines
When you enter the attach or remote login command to access another console from your switch, if youenter global or interface configuration mode commands, the switch might reset.
Caution
Themodule num keyword and argument designate the module number. Valid values depend on the chassisthat is used. For example, if you have a 13-slot chassis, valid values are from 1 to 13. Themodule numkeyword and argument are supported on DFC-equipped modules and the standby supervisor engine only.
When you execute the remote loginmodule num command, the prompt changes to Router-dfcx# or Switch-sp#,depending on the type of module to which you are connecting.
When you execute the remote login standby-rp command, the prompt changes to Router-sdby#.
When you execute the remote login switch command, the prompt changes to Switch-sp#.
The remote login module num command is identical to the attach command.
There are two ways to end the session:
• You can enter the exit command as follows:
lease through renew dhcp118
lease through renew dhcpremote login

Switch-sp# exit[Connection to Switch closed by foreign host]Router#
• You can press Ctrl-C three times as follows:
Switch-sp# ^CSwitch-sp# ^CSwitch-sp# ^CTerminate remote login session? [confirm] y[Connection to Switch closed by local host]Router#
Examples This example shows how to perform a remote login to a specific module:
Router# remote login module 1Trying Switch ...Entering CONSOLE for SwitchType "^C^C^C" to end this sessionSwitch-sp#
This example shows how to perform a remote login to the Cisco 7600 series router processor:
Router# remote login switchTrying Switch ...Entering CONSOLE for SwitchType "^C^C^C" to end this sessionSwitch-sp#
This example shows how to perform a remote login to the standby route processor:
Router# remote login standby-rpTrying Switch ...Entering CONSOLE for SwitchType "^C^C^C" to end this sessionRouter-sdby#
Related Commands DescriptionCommand
Connects to a specific module from a remote location.attach
lease through renew dhcp119
lease through renew dhcpremote login
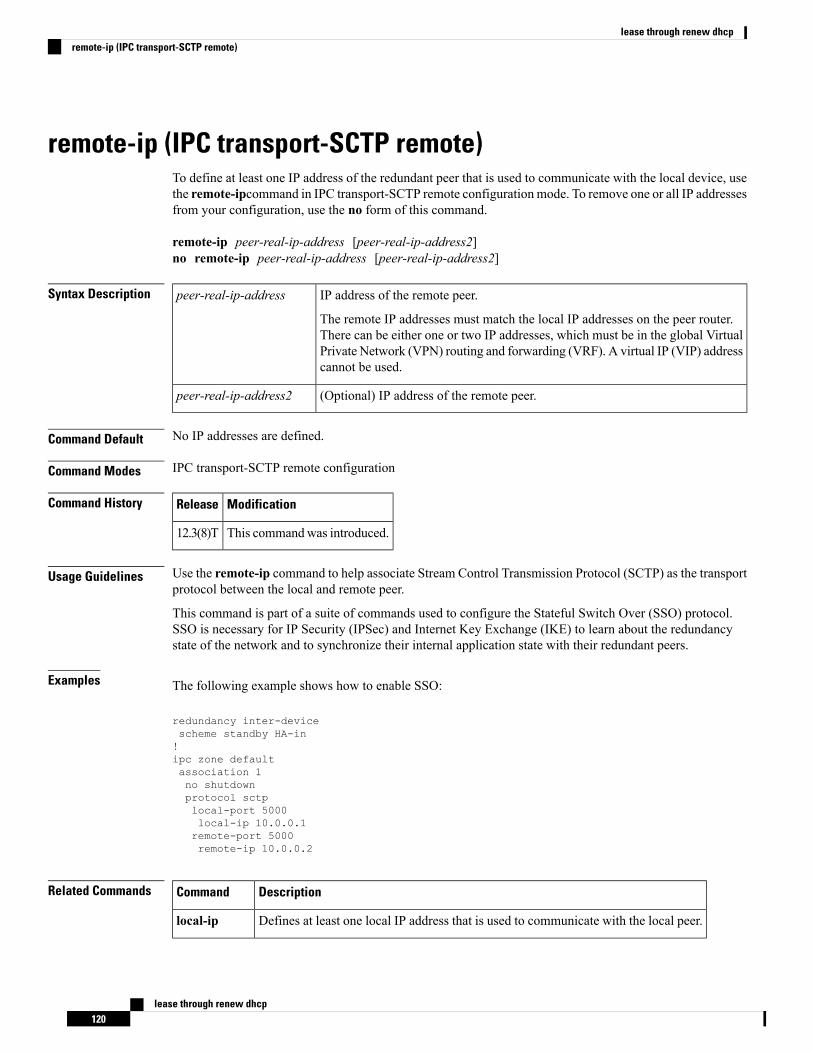
remote-ip (IPC transport-SCTP remote)To define at least one IP address of the redundant peer that is used to communicate with the local device, usethe remote-ipcommand in IPC transport-SCTP remote configurationmode. To remove one or all IP addressesfrom your configuration, use the no form of this command.
remote-ip peer-real-ip-address [peer-real-ip-address2]no remote-ip peer-real-ip-address [peer-real-ip-address2]
Syntax Description IP address of the remote peer.
The remote IP addresses must match the local IP addresses on the peer router.There can be either one or two IP addresses, which must be in the global VirtualPrivate Network (VPN) routing and forwarding (VRF). A virtual IP (VIP) addresscannot be used.
peer-real-ip-address
(Optional) IP address of the remote peer.peer-real-ip-address2
Command Default No IP addresses are defined.
Command Modes IPC transport-SCTP remote configuration
Command History ModificationRelease
This commandwas introduced.12.3(8)T
Usage Guidelines Use the remote-ip command to help associate Stream Control Transmission Protocol (SCTP) as the transportprotocol between the local and remote peer.
This command is part of a suite of commands used to configure the Stateful Switch Over (SSO) protocol.SSO is necessary for IP Security (IPSec) and Internet Key Exchange (IKE) to learn about the redundancystate of the network and to synchronize their internal application state with their redundant peers.
Examples The following example shows how to enable SSO:
redundancy inter-devicescheme standby HA-in!ipc zone defaultassociation 1no shutdownprotocol sctplocal-port 5000local-ip 10.0.0.1remote-port 5000remote-ip 10.0.0.2
Related Commands DescriptionCommand
Defines at least one local IP address that is used to communicate with the local peer.local-ip
lease through renew dhcp120
lease through renew dhcpremote-ip (IPC transport-SCTP remote)

DescriptionCommand
Defines the remote SCTP that is used to communicate with the redundant peer.remote-port
lease through renew dhcp121
lease through renew dhcpremote-ip (IPC transport-SCTP remote)

remote-portTo define the remote Stream Control Transmission Protocol (SCTP) port that is used to communicate withthe redundant peer, use the remote-portcommand in SCTP protocol configuration mode.
remote-port remote-port-number
Syntax Description Remote port number, which should be the same as the local port number on the peerrouter (which is specified via the local-port command).
remote-port-number
Command Default A remote SCTP port is not defined.
Command Modes SCTP protocol configuration
Command History ModificationRelease
This commandwas introduced.12.3(8)T
Usage Guidelines The remote-port command enters IPC transport-SCTP remote configuration mode, which allows you tospecify at least one remote IP address (via the remote-ip command) that is used to communicate with theredundant peer.
Examples The following example shows how to enable Stateful Switchover (SSO):
redundancy inter-devicescheme standby HA-in!ipc zone defaultassociation 1no shutdownprotocol sctplocal-port 5000local-ip 10.0.0.1remote-port 5000remote-ip 10.0.0.2
Related Commands DescriptionCommand
Defines the local SCTP port that is used to communicate with the redundant peer.local-port
Defines at least one IP address of the redundant peer that is used to communicate with the localdevice.
remote-ip
lease through renew dhcp122
lease through renew dhcpremote-port

remote-spanTo configure a virtual local area network (VLAN) as a remote switched port analyzer (RSPAN) VLAN, usethe remote-span command in config-VLAN mode. To remove the RSPAN designation, use the no form ofthis command.
remote-spanno remote-span
Syntax Description This command has no arguments or keywords.
Command Default This command has no default settings.
Command Modes Config-VLAN mode
Command History ModificationRelease
Support for this command was introduced on the Supervisor Engine 720.12.2(14)SX
Support for this command on the Supervisor Engine 2was extended to Release 12.2(17d)SXB.12.2(17d)SXB
This command was integrated into Cisco IOS Release 12.2(33)SRA.12.2(33)SRA
Usage Guidelines This command is not supported in the VLAN database mode.
You can enter the show vlan remote-span command to display the RSPAN VLANs in the Cisco 7600 seriesrouter.
Examples This example shows how to configure a VLAN as an RSPAN VLAN:
Router(config-vlan)# remote-spanRouter(config-vlan)
This example shows how to remove the RSPAN designation:
Router(config-vlan)# no remote-spanRouter(config-vlan)
Related Commands DescriptionConnect
Displays a list of RSPAN VLANs.show vlan remote-span
lease through renew dhcp123
lease through renew dhcpremote-span
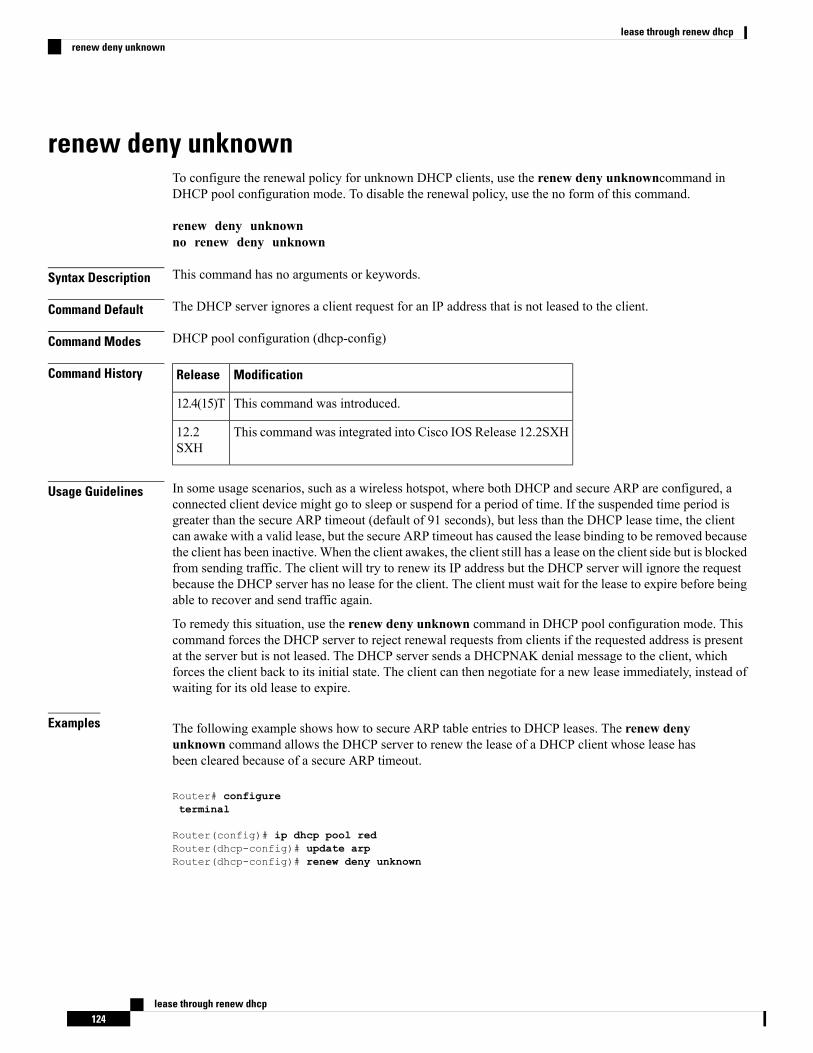
renew deny unknownTo configure the renewal policy for unknown DHCP clients, use the renew deny unknowncommand inDHCP pool configuration mode. To disable the renewal policy, use the no form of this command.
renew deny unknownno renew deny unknown
Syntax Description This command has no arguments or keywords.
Command Default The DHCP server ignores a client request for an IP address that is not leased to the client.
Command Modes DHCP pool configuration (dhcp-config)
Command History ModificationRelease
This command was introduced.12.4(15)T
This command was integrated into Cisco IOS Release 12.2SXH12.2SXH
Usage Guidelines In some usage scenarios, such as a wireless hotspot, where both DHCP and secure ARP are configured, aconnected client device might go to sleep or suspend for a period of time. If the suspended time period isgreater than the secure ARP timeout (default of 91 seconds), but less than the DHCP lease time, the clientcan awake with a valid lease, but the secure ARP timeout has caused the lease binding to be removed becausethe client has been inactive. When the client awakes, the client still has a lease on the client side but is blockedfrom sending traffic. The client will try to renew its IP address but the DHCP server will ignore the requestbecause the DHCP server has no lease for the client. The client must wait for the lease to expire before beingable to recover and send traffic again.
To remedy this situation, use the renew deny unknown command in DHCP pool configuration mode. Thiscommand forces the DHCP server to reject renewal requests from clients if the requested address is presentat the server but is not leased. The DHCP server sends a DHCPNAK denial message to the client, whichforces the client back to its initial state. The client can then negotiate for a new lease immediately, instead ofwaiting for its old lease to expire.
Examples The following example shows how to secure ARP table entries to DHCP leases. The renew denyunknown command allows the DHCP server to renew the lease of a DHCP client whose lease hasbeen cleared because of a secure ARP timeout.
Router# configureterminal
Router(config)# ip dhcp pool redRouter(dhcp-config)# update arpRouter(dhcp-config)# renew deny unknown
lease through renew dhcp124
lease through renew dhcprenew deny unknown

Related Commands DescriptionCommand
Secures dynamic ARP entries in the ARP table to their corresponding DHCP bindings.update arp
lease through renew dhcp125
lease through renew dhcprenew deny unknown
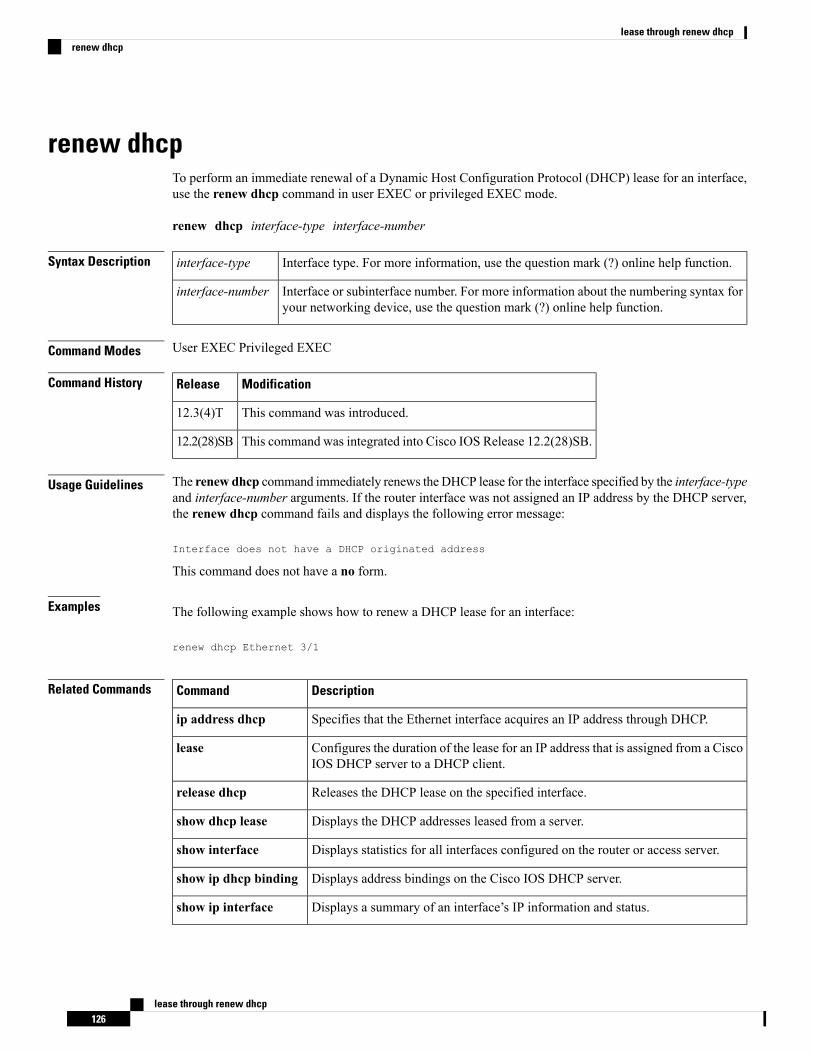
renew dhcpTo perform an immediate renewal of a Dynamic Host Configuration Protocol (DHCP) lease for an interface,use the renew dhcp command in user EXEC or privileged EXEC mode.
renew dhcp interface-type interface-number
Syntax Description Interface type. For more information, use the question mark (?) online help function.interface-type
Interface or subinterface number. For more information about the numbering syntax foryour networking device, use the question mark (?) online help function.
interface-number
Command Modes User EXEC Privileged EXEC
Command History ModificationRelease
This command was introduced.12.3(4)T
This command was integrated into Cisco IOS Release 12.2(28)SB.12.2(28)SB
Usage Guidelines The renew dhcp command immediately renews the DHCP lease for the interface specified by the interface-typeand interface-number arguments. If the router interface was not assigned an IP address by the DHCP server,the renew dhcp command fails and displays the following error message:
Interface does not have a DHCP originated address
This command does not have a no form.
Examples The following example shows how to renew a DHCP lease for an interface:
renew dhcp Ethernet 3/1
Related Commands DescriptionCommand
Specifies that the Ethernet interface acquires an IP address through DHCP.ip address dhcp
Configures the duration of the lease for an IP address that is assigned from a CiscoIOS DHCP server to a DHCP client.
lease
Releases the DHCP lease on the specified interface.release dhcp
Displays the DHCP addresses leased from a server.show dhcp lease
Displays statistics for all interfaces configured on the router or access server.show interface
Displays address bindings on the Cisco IOS DHCP server.show ip dhcp binding
Displays a summary of an interface’s IP information and status.show ip interface
lease through renew dhcp126
lease through renew dhcprenew dhcp
DescriptionCommand
Displays the contents of the currently running configuration file or the configurationfor a specific interface.
show running-config
Displays the contents of the configuration file that will be used at the next systemstartup.
show startup-config
lease through renew dhcp127
lease through renew dhcprenew dhcp

lease through renew dhcp128
lease through renew dhcprenew dhcp