Embed Size (px)
Citation preview

- 1 -
Lectora OnlineAdministrator Information Center

- 2 -
ContentsWelcome to the Lectora Online Administrator Information Center 4Managing your organizations 5
Adding an organization 5Specifying disk usage 13Specifying the user limit 13Viewing and editing organization settings 14Deleting an organization 21
Managing your users 22Roles 22Viewing your user group 25Adding a user 25Viewing and editing user information 27Importing users with a CSV file 29Exporting users to a CSV file 30Deleting a user 31
Managing properties 33Viewing the list of properties 40Adding a property 40Editing a property 40Deleting a property 41
Viewing the list of logged-in users 42Setting the log level 43Viewing system information 44Managing disk usage 46Generating an audit report 47Viewing the Log Viewer 48Generating a User Activity Report 49Generating an Organization Report 50Sending a System Alert 51Sending system and organization email 52Forcing the News tab to the front 53

- 3 -
Viewing repository information 54Backing up repository data 55Restoring data 56Viewing server commands information 57Completing a server thread dump 58Completing a XPath cache query 59Obtaining an Activation Code 60Configuring log-in password settings 61Managing skins 62
Creating custom skins 62Trademarks 63

Welcome to the Lectora Online Administrator Information Center
- 4 -
Welcome to the Lectora Online Admin-istrator Information CenterTopics in this Information Center describe the tasks you can use to administer LectoraOnline™.Administrator responsibilities include managing organizations, managing users withinorganizations, and managing the Lectora Online solution.See these topics for more information:
l Managing your organizationsl Managing your usersl Managing propertiesl Managing skinsl Viewing the list of logged-in usersl Setting the log levell Viewing system informationl Sending a system alertl Sending system and organization emaill Generating a User Activity Reportl Generating an Organization Reportl Generating an audit reportl Managing disk usagel Viewing the Log Viewerl Forcing the News tab to the frontl Backing up repository datal Restoring datal Obtaining an activation codel Viewing repository informationl Viewing server commands informationl Completing a Server Thread Dumpl Completing a XPath cache queryl Configuring Log-In password settings

Managing your organizations
- 5 -
Managing your organizationsAn organization is the top-level classification in your company or group's hierarchy. A typ-ical company or group consists of one or more organizations. The larger the company orgroup, the more organizations it will normally have. You can add, edit, and delete organ-izations and specify your organization's disk usage.You must be defined as a super administrator to have access to the Managing Organ-izations task.
See Roles for more information about the user classifications within LectoraOnline and the available tasks that each role can complete.
Super administrators can complete the following tasks:l Adding an organizationl Specifying disk usagel Specifying the user limitl Viewing and editing organization settingsl Deleting an organization
Adding an organizationAdministrators with super administrator access can add an organization. This includesspecifying the appropriate publishing targets and setting the maximum history size forshared titles.You can quickly add an organization and define and configure its administrator the usingthe Add Org banner link or you can add an organization when you are viewing organ-ization details from the Manage Organizations window.To add an organization and its administrator using the Add Org banner link:1. Click Add Org.2. Complete the fields in the New Organization box as follows:
Organization Name Name of the organization.Company Name Name of the company.User Limit Limits the number of users allowed in the organization.Disk Quota Disk quotas track and control disk storage usage for each
organization.Disk Usage Threshold Disk usage thresholds allow you to specify when warn-
ings are displayed to users when they exceed their diskquota limit.
Expires Date when user access to the organization expires.

Managing your organizations
- 6 -
3. Complete the fields in the New Administrator box as follows:
Role Specifies the user's role.User ID Specify the user ID for the administrator.First Name Specify the first name of the administrator.Last Name Specify the last name of the administrator.Description Specify a short description of the administrator's role.Email Address Specify the email address associated with this admin-
istrator user ID.Send Notification Email Enable this check box to send a message to the admin-
istrator.Password/Re-enterPassword
Specify the password for the administrator user ID.
Force PasswordChange on Next Login
Enable this check box to require the new user to create apassword the next time he or she logs in.
Locale Preference Specify the preferred location for this organization.4. To create the new organization, click Create Org and Admin.The organization is added.To add an organization from the Manage Organizations window:1. Click the Manage Organizations link on the Home Page. The Manage Organ-
izations window opens.2. Click Add. The Create Organization window opens.3. Complete the fields on the Create Organization window as follows:
Organization Name Name of the organization.Company Name Name of the company.Disk Quota Disk quotas track and control disk storage usage for each
organization.Disk Usage Threshold Disk usage thresholds allow you to specify when warn-
ings are displayed to users when they exceed their diskquota limit.
User Limit Limits the number of users allowed in the organization.User Count Displays the current number of users.Active Disable this check box to deactivate the organization.
Users are unable to log-in to a deactivated organization.Trial Enable this check box to specify that this is a trial organ-
ization.Expires Date when user access to the organization expires.Properties Use this table to enable or specify the following publishing

Managing your organizations
- 7 -
targets and organizational properties:
Property DescriptionDisable exportingtitles
When enabled, this restricts mem-bers of the organization from export-ing titles with the exception of theorganization administrators. Thisincludes restricting exporting of lib-rary objects as well.
Disable the cre-ation of privatetitles
When enabled, this restricts mem-bers of the organization from cre-ating private titles, with theexception of the organization admin-istrators.
Publish to AICC The Aviation Industry CBT Com-mittee (AICC) was established in1988 to define standards on howComputer Managed Instruction(CMI) systems should operate inpresenting course materials to stu-dents. For the latest specifications,documents, and explanations ofterms, see the official AICC website(http://www.aicc.org).
Publish toCourseMill Wave
CourseMill Wave is an online learn-ing management tool developed byTrivantis. CourseMill Wave allowsyou to recommend and assign con-tent to online viewers. Publisherscan enable ratings, guest book set-tings, run reports, and post contentto social networking sites. For moreinformation about CourseMill Wave,visit http://trivantis.com.
Publish toCourseMill
CourseMill is a powerful coursemanagement system developed byTrivantis and designed especiallyfor easy integration of Lectora titles.The CourseMill learning man-agement system makes the deliv-ery, management, and tracking ofonline learning across your organ-

Managing your organizations
- 8 -
ization easier and more affordable.For more information aboutCourseMill, visit http://trivantis.com.
Publish to Docebo Select this option to allow users topost titles to the Docebo learningmanagement system.. For moreinformation about the Docebo LMS,visit http://docebo.com.
Publish to Docebo:Server URL
For Docebo publishing, specify theURL for accessing the appropriateserver.
Publish to Docebo:Username
For Docebo publishing, specify theusername for accessing the appro-priate server.
Publish to Docebo:Password
For Docebo publishing, specify thepassword for accessing the appro-priate server.
Publish to HTML Select this option to allow users topost titles to the Internet or to theirIntranet.
Publish to iContent iContent is a content managementsystem developed by Suc-cessFactors. For the latest spe-cifications, documents, andexplanations of terms, see their offi-cial website (http://www.suc-cessfactors.com/).
Publish to iCon-tent: course URL
For iContent publishing, specify theURL for accessing the iContentcourse content on the iContentserver.
Publish to iCon-tent: password
For iContent publishing, specify thepassword for accessing the iCon-tent server.
Publish to iCon-tent: path
For iContent publishing, specify thepath to the iContent server.
Publish to iCon-tent: server
For iContent publishing, specify theaddress of the iContent server.
Publish to iCon-tent: username
For iContent publishing, specify theusername for accessing the iCon-tent server.

Managing your organizations
- 9 -
Publish to PWC PWC allows publishing contentfrom the PricewaterhouseCooperseLearning solution. For the latestspecifications, documents, andexplanations of terms, see their offi-cial website (http://www.pwc.com/).
Publish toReviewLink
ReviewLink is an online review tooldeveloped by Trivantis. ReviewLinkallows you to share titles with onlinereviewers and capture their feed-back. Reviewers can add com-ments and attach files to reviewedpages to provide feedback. Com-ments and attachments are tab-ulated and presented to bothpublishers and reviewers so theycan manage the status of the com-ments and complete the reviewcycle. For more information aboutReviewLink, visit http://trivantis.com.
Publish to SabaSCORM 2004
Saba SCORM 2004 is a set of inter-related technical specifications builtupon the work of the AICC, IMS,and IEEE to create a unified contentmodel for Web-based learning con-tent. For the latest specifications,documents, and explanations ofterms, see the official Saba website(http://www.saba.com).
Publish to SCORM The Shareable Content ObjectReference Model (SCORM) is a setof inter-related technical spe-cifications built upon the work of theAICC, IMS, and IEEE to create a uni-fied content model for Web-basedlearning content. For the latest spe-cifications, documents, and explan-ations of terms, see the officialSCORM website(http://www.adlnet.gov/).
Managing your organizations
- 10 -
Publish toSumTotal
SumTotal allows publishing contentfrom SumTotal eLearning systems.For the latest specifications, doc-uments, and explanations of terms,see the official SumTotal website(http://www.sumtotalssystems.com/).
Publish to xAPI The Experience API (xAPI) is part ofan evolving standard that enablesusers on learning management sys-tems to download the next gen-eration of SCORM-compliantmaterials. For the latest spe-cifications, documents, and explan-ations of terms, see the official xAPIwebsite (http://experienceapi.com).
Shared Title Max-imum History Size
Use the drop-down list to specifythe setting for the maximum historysize for shared titles.
When versions are trimmedfrom a title's history they aretaken from the "back-end" oroldest end. The version num-bers will always rise aschanges are checked in. Sofor example if you have a titlewith 10 versions (1 through10) and you set the MaximumHistory Size to 3 then ver-sions 1 through 7 will beremoved from the title history(the oldest 7) leaving versions8, 9 and 10. When the nextcheck-in occurs, that willbecome version 11 and ver-sion 8 would be removed;leaving versions 9, 10 and 11.You keep the latest three ver-sions basically.Note that the version trimming

Managing your organizations
- 11 -
process does not take placeimmediately. Requests arequeued up and run in thebackground. You should seeresults with in an hour gen-erally. Also note that "status"versions (indicates that statusof the title was changed)where the text is bold do notcount towards the MaximumHistory Size. Consequently,you might have a MaximumHistory Size of 5 and the his-tory shows 7 versions, but twoof them are status versions.
Shared TitleAccess - TeamOnly
Select this option to restrict visibilityof, and access to, shared titles toteam members only. On the Man-age Titles, Import/Export, andTitle Search lists, only private titlesand shared titles to which the Userrole is assigned will be displayed.For more details about roles, seeRoles.
This setting does not apply toadministrators or project man-agers and can be overriddenfor individual Users. For addi-tional information, see Addinga user and Editing user inform-ation.
User Fonts Specify the custom fonts you wantto be enabled within your organ-ization. The fonts you specify will bedisplayed in the font lists for theusers within the organization. Theformat to specify the fonts is spe-cific:
l Start and end the entire entrywith square brackets ([ and ]).

Managing your organizations
- 12 -
l Each font entry consists of thename of the font as you want itto appear in the font list andthe font family name, sep-arated by a comma.
l Separate multiple font entrieswith commas.
l Use single quotes around thefirst element in the font name ifa space exists in the fontname.
l Example: To enable new cus-tom fonts Army and Navy andhave them display as NewArmy Font and New NavyFont in the font lists, specify["'New ArmyFont',Army","'NewNavy Font',Navy"]
For your users to developtitles that use a custom font,their titles must contain aHTML Extension object forthe custom font. This isdescribed in detail in theAppendix of the InformationCenter - Enabling a customfont within a title.You can also have usersenable a custom font by cre-ating and sharing a libraryobject to insert into the title.For details about creating lib-rary objects, see Working withlibrary objects underManaging Titles > Workingwith objects in the InformationCenter.
Administrator Notes Administrator notes that were specified when the organ-ization was created or modified.

Managing your organizations
- 13 -
Super AdministratorNotes
Super-administrator notes that were specified when theorganization was created or modified.
Created for InternalUse
Enable this check box to indicate that this organization iscreated for internal use only.
4. To create the new organization and return to the Manage Organizations window,click Create and Quit. Otherwise, click Create to add and view the current settingsfor the new organization.
The new organization is added to the Organizations list.See also: Specifying disk usage
Specifying disk usageAdministrators with super administrator access can specify the disk quota and diskusage threshold. Disk quotas track and control disk storage usage for each organization.Disk usage thresholds allow you to specify when warnings are displayed to users whenthey exceed their disk quota limit.
Approaching Disk Quota Warning Notifications - Administrators with super admin-istrator access will receive email notifications when disk quota is approaching thespecified limit. Emails are sent when disk quota reaches levels of 80%, 90%, and100%.
Follow these steps to specify your organization's disk quota and disk usage threshold:1. Click the Manage Organization link on the Home Page.
The Manage Organizations window opens.2. Double-click the organization or select the organization and click Edit.
The Edit Organization window opens.3. Specify the disk quota in gigabytes (GB) in the Disk Quota field and specify the disk
usage threshold in the Disk Usage Threshold field.4. Click Save.See also: Modifying organization settings
Specifying the user limitAdministrators with super administrator access can specify the maximum number ofusers that can be added to the organization. The user limit includes both active and inact-ive users.Follow these steps to specify your organization's user limit:1. Click the Manage Organizations link on the Home Page.
The Manage Organizations window opens.2. Double-click the organization or select the organization and click Edit.

Managing your organizations
- 14 -
The Edit Organization window opens.3. Specify the maximum number of users that can be added to the organization in the
User Limit field.4. Click Save.See also: Modifying organization settings
Viewing and editing organization settingsAdministrators and super administrators can modify organization settings, such as organ-ization name and disk quota. You can also control publishing options for users.To view and edit an organization:1. Click the Manage Organizations link under the Administration side-tab on the
Home Page. On the Manage Organizations window, select the organization and clickEdit. Otherwise, click Organization Settings under the Administration side-tab.
2. On the Organization Settings window, modify the fields as follows:
Organization Name Name of the organization.Company Name Name of the company.Disk Quota Disk quotas track and control disk storage usage for each
organization.Disk UsageThreshold
Disk usage thresholds allow you to specify when warnings aredisplayed to users when they exceed their disk quota limit.
User Limit Limits the number of users allowed in the organization.User Count Displays the current number of users.Active Disable this check box to deactivate the organization. Users
are unable to log-in to a deactivated organization.Trial Enable this check box to specify that this is a trial organization.Expires Date when user access to the organization expires.Properties Use this table to enable or specify the following publishing tar-
gets and organizational properties:
Property DescriptionDisable exporting titles When enabled, this restricts mem-
bers of the organization fromexporting titles with the exceptionof the organization administrators.This includes restricting exportingof library objects as well.
Disable the creation ofprivate titles
When enabled, this restricts mem-bers of the organization from cre-ating private titles, with the

Managing your organizations
- 15 -
exception of the organizationadministrators.
Publish to AICC The Aviation Industry CBT Com-mittee (AICC) was established in1988 to define standards on howComputer Managed Instruction(CMI) systems should operate inpresenting course materials to stu-dents. For the latest spe-cifications, documents, andexplanations of terms, see the offi-cial AICC website (http://www.a-icc.org).
Publish to CourseMillWave
CourseMill Wave is an onlinelearning management tooldeveloped by Trivantis.CourseMill Wave allows you torecommend and assign content toonline viewers. Publishers canenable ratings, guest book set-tings, run reports, and post con-tent to social networking sites. Formore information aboutCourseMill Wave, visithttp://trivantis.com.
Publish to CourseMill CourseMill is a powerful coursemanagement system developedby Trivantis and designed espe-cially for easy integration of Lect-ora titles. The CourseMill learningmanagement system makes thedelivery, management, and track-ing of online learning across yourorganization easier and moreaffordable. For more informationabout CourseMill, visithttp://trivantis.com.
Publish to Docebo Select this option to allow users topost titles to the Docebo learningmanagement system.. For moreinformation about the DoceboLMS, visit http://docebo.com.

Managing your organizations
- 16 -
Publish to Docebo:Server URL
For Docebo publishing, specifythe URL for accessing the appro-priate server.
Publish to Docebo: User-name
For Docebo publishing, specifythe username for accessing theappropriate server.
Publish to Docebo: Pass-word
For Docebo publishing, specifythe password for accessing theappropriate server.
Publish to HTML Select this option to allow users topost titles to the Internet or to theirIntranet.
Publish to iContent iContent is a content managementsystem developed by Suc-cessFactors. For the latest spe-cifications, documents, andexplanations of terms, see theirofficial website (http://www.suc-cessfactors.com/).
Publish to iContent:course URL
For iContent publishing, specifythe URL for accessing the iCon-tent course content on the iCon-tent server.
Publish to iContent:password
For iContent publishing, specifythe password for accessing theiContent server.
Publish to iContent: path For iContent publishing, specifythe path to the iContent server.
Publish to iContent:server
For iContent publishing, specifythe address of the iContent server.
Publish to iContent: user-name
For iContent publishing, specifythe username for accessing theiContent server.
Publish to PWC PWC allows publishing contentfrom the PricewaterhouseCooperseLearning solution. For the latestspecifications, documents, andexplanations of terms, see theirofficial website (http://www.p-wc.com/).

Managing your organizations
- 17 -
Publish to ReviewLink ReviewLink is an online reviewtool developed by Trivantis.ReviewLink allows you to sharetitles with online reviewers andcapture their feedback. Reviewerscan add comments and attachfiles to reviewed pages to providefeedback. Comments and attach-ments are tabulated and presen-ted to both publishers andreviewers so they can manage thestatus of the comments and com-plete the review cycle. For moreinformation about ReviewLink,visit http://trivantis.com.
Publish to SabaSCORM 2004
Saba SCORM 2004 is a set ofinter-related technical spe-cifications built upon the work ofthe AICC, IMS, and IEEE to createa unified content model for Web-based learning content. For thelatest specifications, documents,and explanations of terms, see theofficial Saba website(http://www.saba.com).
Publish to SCORM The Shareable Content ObjectReference Model (SCORM) is aset of inter-related technical spe-cifications built upon the work ofthe AICC, IMS, and IEEE to createa unified content model for Web-based learning content. For thelatest specifications, documents,and explanations of terms, see theofficial SCORM website(http://www.adlnet.gov/).
Publish to SumTotal SumTotal allows publishing con-tent from SumTotal eLearning sys-tems. For the latest specifications,documents, and explanations ofterms, see the official SumTotalwebsite (http://www.sumtotalssys-

Managing your organizations
- 18 -
tems.com/).Publish to xAPI The Experience API (xAPI) is part
of an evolving standard thatenables users on learning man-agement systems to download thenext generation of SCORM-com-pliant materials. For the latest spe-cifications, documents, andexplanations of terms, see the offi-cial xAPI website (http://-experienceapi.com).
Shared Title MaximumHistory Size
Use the drop-down list to specifythe setting for the maximum his-tory size for shared titles.
When versions are trimmedfrom a title's history they aretaken from the "back-end"or oldest end. The versionnumbers will always rise aschanges are checked in. Sofor example if you have atitle with 10 versions (1through 10) and you set theMaximum History Size to 3then versions 1 through 7will be removed from thetitle history (the oldest 7)leaving versions 8, 9 and10. When the next check-inoccurs, that will become ver-sion 11 and version 8 wouldbe removed; leaving ver-sions 9, 10 and 11. Youkeep the latest three ver-sions basically.Note that the version trim-ming process does not takeplace immediately.Requests are queued upand run in the background.

Managing your organizations
- 19 -
You should see results within an hour generally. Alsonote that "status" versions(indicates that status of thetitle was changed) wherethe text is bold do not counttowards the Maximum His-tory Size. Consequently,you might have a MaximumHistory Size of 5 and thehistory shows 7 versions,but two of them are statusversions.
Shared Title Access -Team Only
Select this option to restrict vis-ibility of, and access to, sharedtitles to team members only. Onthe Manage Titles, Import/Ex-port, and Title Search lists, onlyprivate titles and shared titles towhich the User role is assignedwill be displayed. For more detailsabout roles, see Roles.
This setting does not applyto administrators or projectmanagers and can be over-ridden for individual Users.For additional information,see Adding a user and Edit-ing user information.
User Fonts Specify the custom fonts you wantto be enabled within your organ-ization. The fonts you specify willbe displayed in the font lists forthe users within the organization.he format to specify the fonts isspecific:
l Start and end the entireentry with square brackets ([ and ]).
l Each font entry consists of

Managing your organizations
- 20 -
the name of the font as youwant it to appear in the fontlist and the font family name,separated by a comma.
l Separate multiple fontentries with commas.
l Use single quotes aroundthe first element in the fontname if a space exists in thefont name.
l Example: To enable newcustom fonts Army and Navyand have them display asNew Army Font and NewNavy Font in the font lists,specify["'New ArmyFont',Army","'NewNavy Font',Navy"]
For your users to developtitles that use a custom font,their titles must contain aHTML Extension object forthe custom font. This isdescribed in detail in theAppendix of the InformationCenter - Enabling a customfont within a title.You can also have usersenable a custom font by cre-ating and sharing a libraryobject to insert into the title.For details about creatinglibrary objects, see Workingwith library objects underManaging Titles > Workingwith objects in the Inform-ation Center.
AdministratorNotes
Administrator notes that were specified when the organizationwas created or modified.

Managing your organizations
- 21 -
Super Admin-istrator Notes
Super-administrator notes that were specified when the organ-ization was created or modified.
Subscription Id Reserved for internal use.Transaction Id Reserved for internal use.Created for InternalUse
Enable this check box to indicate that this organization is cre-ated for internal use only.
3. Click Save to save your modifications.4. When you are finished, click Modify Organization Settings.Your modifications to the organization are implemented.
Deleting an organizationAdministrators with super administrator access can delete an organization.To delete an organization:1. Click the Manage Organizations link on the Home Page.
The Manage Organizations window opens.2. Select the organization and click Delete.The organization is removed from the Organizations list.

Managing your users
- 22 -
Managing your usersAdministrators can use the Manage Users link to add and delete users and edit theirinformation.You must be defined as an administrator or super administrator to have access to theManage Users task.View these topics for more information:l Rolesl Viewing your user groupl Adding a userl Viewing and editing user informationl Importing users with a CSV Filel Exporting users to a CSV Filel Deleting a user
RolesRoles control the tasks that users can execute. There are two types roles:
Organziation roles Manage organizations and control administrator tasks, such asadding users, managing the media library, creating and assign-ing assignments, and creating and sharing new titles. Theseroles are named super-administrator, administrator, projectmanager, user, and reviewer.
Project team roles Manage projects and control content development tasks, suchas editing and sharing titles, changing and removing projectteam members, and adding new reviewers. These roles arenamed primary owner, owner, developer, and reviewer.
The roles are hierarchical, meaning each role can do everything the role below it can doplus their own tasks.Organization RolesSuper administrator (sadmin) - Administers the software and provisions the organ-izations.
l Media Library tasks: Perform read-write operations (create, rename, remove, andadd media) on predefined and custom media directories. Perform read-write oper-ations (delete, get properties, download, update, download source and addsource) on predefined and custom media.
l Administration tasks: Manage all organizations, manage all users, manage all prop-erties, manage all skins, view all logged-In users, set all log level, view all system

Managing your users
- 23 -
information, send system alerts across all organizations, send system-wide emails,send organization emails to a specific organization, manage all news, performbackup and restore of all organizations, generation activation codes for all organ-izations, and view the Administrator Guide.
l Title management tasks: Create, import, and export titles within all organizations.Revert and remove any title, change title settings (such as primary owner) of anytitle, and add reviewers to any title. Also create assignments, generate assignmentreports, view title history, and generate title reports of all titles in all organizations.
Administrator (admin) - Manages users within each organization. Admins can alsomanage the operations on custom directories and media in the Media Library within theirown organizations.
l Media Library tasks: Perform read-only operations (get properties, download, anddownload source) on predefined media. Perform read-write operations (create,rename, remove, and add media) on custom media directories. Perform read-writeoperations (delete, get properties, download, update, download source and addsource) on custom media. (Cannot manipulate predefined media directories.)
l Administration tasks: Manage the organization settings of their own organizations,manage users in their own organizations, .view disk usage within their own organ-izations, manage the skins within their own organizations, send organizationemails within their own organizations.
l Title management tasks: Create, import, and export titles within their own organ-izations. Revert titles from within their own organizations, change title settings(such as primary owner) of titles within their own organizations, and add reviewersto titles within their own organizations. Also create assignments, generate assign-ment reports, view title history, and generate title reports of the titles within theirown organizations.
Project Manager - Manages titles of teams within the organization. The project managercan also manage the operations on custom directories and media in the Media library.
l Media Library tasks: Perform read-only operations (get properties, download, anddownload source) on predefined media. Perform limited read-write operations (cre-ate, and add media) on custom media directories. Perform read-write operations(delete, get properties, download, update, download source and add source) oncustom media if the owner and read-only operations (get properties, download,and download source) if not the owner. (Cannot manipulate predefined media dir-ectories.)
l Title management tasks: Create, import, and export titles within their own organ-izations. Update title settings (such as primary owner) of titles if owner or primaryowner (and view title settings of titles if not the owner). Add reviewers to titles ifowner or primary owner. Also create assignments, generate assignment reports,

Managing your users
- 24 -
view title history, and generate title reports of the titles within their own organ-izations. Can only delete their own assignments.
User - Manages their titles and the titles to which he or she is granted access. The usercan also manage the operations on custom directories and media in the Media Library.
l Media Library tasks: Perform read-only operations (get properties, download, anddownload source) on predefined media. Perform limited read-write operations (cre-ate, and add media) on custom media directories. Perform read-write operations(delete, get properties, download, update, download source and add source) oncustom media if the owner and read-only operations (get properties, download,and download source) if not the owner. (Cannot manipulate predefined media dir-ectories.)
l Title management tasks: Create, import, and export titles within their own organ-izations. Update title settings (such as primary owner) of titles if owner or primaryowner (and view title settings of titles if not the owner). View assignments, gen-erate assignment reports, view title history, and generate title reports of the titleswithin their own organizations. Cannot create, edit , or delete any assignments.
Reviewer - Reviews titles within an organization.l Media Library tasks: None.l Title management tasks: Can only be added to title team (as a Reviewer) and view
titles within the team.Project Team RolesPrimary Owner - Allowed to fully edit, manage, share, and revert the title.
l Title management tasks: Revert title to previous version, rename and removeshared title, change, add, and remove team members and change primary owner.Can add new reviewers to team if their organization role is project manager orhigher. Also view title history and notes.
l Title editing tasks: Fully edit title.Owner - Allowed to fully edit title, along with manage and share titles depending on own-ership of checkouts.
l Title management tasks: Rename and remove shared title if there are no check-outs other than their own, change, add, and remove team members but not changeprimary owner. Can add new reviewers to team if their organization role is projectmanager or higher.
l Title editing tasks: Fully edit title.Developer - Allowed to fully edit but cannot add and manage team members nor review-ers.
l Title management tasks: Nonel Title editing tasks: Fully edit title.

Managing your users
- 25 -
Reviewer - Add notes to titles, view notes that others have added to the title, createnotes reports, and preview published pages.
l Title management tasks: Nonel Title editing tasks: None.
Viewing your user groupAdministrators and super administrators can view the list of users within an organization.Users are listed by User ID, name, role and user status.Super administrators can view the list of users in each organization.To view your user group:1. Click the Manage Users link on the Home Page. The Manage Users window opens.2. If you are a super administrator, select the organization from the Organization drop-
down list.3. Click a column to alphabetically sort the column.The Manage Users window also displays the following administration information. Thelimits are determined by your super administrator.
Site User Limit Number of users allowed for each siteOrganization User Limit Number of users allowed for each organizationCurrent User Count Number of current users in the organizationAvailable User Count Number of available users that can be added to the organ-
ization
See also:Adding a userEditing user informationDeleting a user
Adding a userYou can add a user as your team grows. You must be an administrator or super admin-istrator to add a user.
Super administrators can bulk import users from multiple companies using CSV-formatted files. Comma-separated value (CSV) files are delimited text files con-taining user data that have been exported from spreadsheets like Microsoft Exceland Access. See Importing Users with a CSV File for more information.
To add a user:1. Click the Manage Users link on the Home Page.
The Manage Users window opens.2. If you are a super administrator, select the organization from the Organization drop-

Managing your users
- 26 -
down list.3. Click Add. The Create User window opens.4. Complete the fields as follows:
Role Use the pull-down list to select the new user's role as oneof the following:l Super Administrator (available to sadmins only)l Administratorl Project Managerl Userl Reviewerl Support
User ID Specify the new user's User ID.First Name Specify the new user's first name.Last Name Specify the new user's last name.Description Specify a short description of the new user's role.Email Address Specify the new user's email address.Change Password Specify the new user's password.Re-enter Password Re-enter the new user's password.Shared Title Visibility -Team Only
This selection is available if it is selected in the organ-ization settings and the role is User. Select the option torestrict visibility of, and access to, shared titles. On theManage Titles, Import/Export, and Title Search lists,only private titles and shared titles to which the User isassigned will be displayed. Disable the option to give theUser full visibility to all shared titles. For more detailsabout roles, see Roles.
This setting does not apply to administrators or pro-ject managers and can be overridden for individualUsers. For additional information, see Editing userinformation.
Force PasswordChange on Next Login
Enable this check box to require the new user to create apassword the next time he or she logs in.
Send Email to the NewUser
Enable this check box to send an introductory email to thenew user.
Active Disable this check box if the new user is to be inactive.Expires If you are adding a reviewer, click the calendar icon to spe-
cify when the reviewer's access will expire.Locale Preference Specify the new user's preferred language.
5. To create the new user account and return to the Manage Users window, click

Managing your users
- 27 -
Create and Quit. Otherwise, click Create to view the new user's information.The user is added to the list of users.
Viewing and editing user informationYou can view and edit user information if necessary. You must be an administrator orsuper administrator to edit user information.To edit user information:1. Click the Manage Users link on the Home Page.
The Manage Users window opens.2. If you are a super administrator, select the organization from the Organization drop-
down list.3. Double-click the user's row in the Manage Users window. The Edit User window
opens.

Managing your users
- 28 -
4. Edit the fields as necessary:
Organization The user's organization. This field cannot be changed.Role Use the pull-down list to select the user's role as one of the
following:l Super Administrator (available to sadmins only)l Administratorl Project Managerl Userl Reviewerl Support
User ID The user's ID. This field cannot be changed.First Name The user's first name.Last Name The user's last name.Description The description associated with the user.Email Address The user's email address.Change Password The user's password.Re-enter Password Reenter the user's password.Shared Title Visibility- Team Only
This selection is available if it is selected in the organizationsettings and the role is User. Select the option to restrict vis-ibility of, and access to, shared titles. On the Manage Titles,Import/Export, and Title Search lists, only private titles andshared titles to which the User is assigned will be displayed.Disable the option to give the User full visibility to all sharedtitles. For more details about roles, see Roles.
This setting does not apply to administrators or projectmanagers and can be overridden for individual Users.For additional information, see Adding a user.
Force PasswordChange on NextLogin
Enable this check box to require the user to create a newpassword the next time he or she logs in.
Send Email to Useron PasswordChange
Enable this check box to send email messages to userswhen they changes their passwords.
Active Disable this check box if the user is no longer active.Expires Specifies when the reviewer's password expires.Locale Preference Specifies the user's preferred locale.
5. Click Save.

Managing your users
- 29 -
Importing users with a CSV fileComma-separated value (CSV) files are delimited text files containing user data thathave been exported from spreadsheets like Microsoft Excel® and Access®.Super administrators can bulk import users from multiple companies using CSV-format-ted files. The format is the same for each organization. All fields are separated by a comma. Eachrecord starts on a new line. Each line in the file must contain all the input fields. Other-wise, the line is skipped. If entries contain a comma, enclose the entry in double-quotes.This is the default export format from Microsoft Excel and Access when exporting toCSV.CSV File Format and Example:#Or-ganization
LastNam-e
FirstNam-e
User-name
EmailAddress
LocalePrefer-ence
Pass-word
Role Descrip-tion
Act-ive
Expire-s
ResetPass-word
LastLog In
LogInCoun-t
Updat-e IfExists
Trivantis Jone-s
John sadmin [email protected] en abc123 Admin-istrator
Admin yes never no 8/6/201-4 17:44
7 yes
Trivantis King Joe jk_test [email protected]
en xyz123 User New tester yes never no 8/6/201-4 7:49
4 yes
The export fields are described as follows:
Field Description#Organization The user's organizationLast Name The user's last nameFirst Name The user's first nameUsername The user's username. An email address can be used as a username
value.Email Address The user's email addressLocale Prefer-ence
The user's preferred locale
Password The user's passwordRole The user's role. Values for role are:
l "Super Administrator"l "Administrator"l "Project Manager"l "User"l "Reviewer" (default)
Description The user's username. An email address can be used as a usernamevalue.
Active The user's statusExpires The user's password expiration dateReset Pass- The user's password status

Managing your users
- 30 -
wordLast Log In The user's last-log-in dateLog In Count The user's log-in countUpdate If Exists The user's access status
You can re-import using the CSV file as needed. However, keep in mind that re-importing might revert the data if you have made changes after the previous import.
To import users with a CSV file:1. Click the Import Users (CSV) task.
The Import window opens.2. Use the File field to specify the file to import or click the Browse button to navigate
and select a CSV file.3. Click Import.The users are imported. To verify, use the Manage Users task to view the list of users byorganization. See Viewing Your User Group for information.
Exporting users to a CSV fileYou can export user information as a comma-separated value (CSV) file on your com-puter.The format is the same for each organization. All fields are separated by a comma. Eachrecord starts on a new line. Each line in the file will contain all the input fields.
Enable Download Notifications: In certain cases, your browser's security settingscan be preventing file downloads without notifying you that a download is beingattempted, particularly if you use Internet Explorer. Check your browser's securitysettings to enable automatic prompting for file downloads.
CSV File Format and Example:#Or-ganization
LastNam-e
FirstNam-e
User-name
EmailAddress
LocalePrefer-ence
Pass-word
Role Descrip-tion
Act-ive
Expire-s
ResetPass-word
LastLog In
LogInCoun-t
Updat-e IfExists
Trivantis Jone-s
John sadmin [email protected] en abc123 Admin-istrator
Admin yes never no 8/6/201-4 17:44
7 yes
Trivantis King Joe jk_test [email protected]
en xyz123 User New tester yes never no 8/6/201-4 7:49
4 yes
The export fields are described as follows:
Field Description#Organization The user's organizationLast Name The user's last nameFirst Name The user's first name

Managing your users
- 31 -
Username The user's username. An email address can be used as a usernamevalue.
Email Address The user's email addressLocale Prefer-ence
The user's preferred locale
Password The user's passwordRole The user's role. Values for role are:
l "Super Administrator"l "Administrator"l "Project Manager"l "User"l "Reviewer" (default)
Description The user's username. An email address can be used as a usernamevalue.
Active The user's statusExpires The user's password expiration dateReset Pass-word
The user's password status
Last Log In The user's last-log-in dateLog In Count The user's log-in countUpdate If Exists The user's access status
You can re-import using the CSV file as needed. However, keep in mind that re-importing might revert the data if you have made changes after the previous import.
To export user information as a CSV file:1. Click the Export Users (CSV) task. The browser's save window opens.2. Navigate to the appropriate folder and rename the csv file, if necessary. Click Save.The user data is exported.
Deleting a userYou can delete a user. You must be an administrator or super administrator to delete auser. When you delete a user, the user account and all titles created by the user thathave not been shared are deleted.To delete a user:1. Click the Manage Users link on the Home Page.
The Manage Users window opens.2. If you are a super administrator, select the organization from the Organization drop-

Managing your users
- 32 -
down list.3. Click the user's row to highlight the user.4. Click Delete.The user is removed from the list. The deleted user is unable to access Lectora Online.

Managing properties
- 33 -
Managing propertiesProperties are configuration values that can be queried at run-time. You can view, add,edit, and delete a property.You must be defined as a super administrator to have access to the Manage Propertiestask.View these topics for more information:l Viewing the list of propertiesl Adding a propertyl Editing a propertyl Deleting a property
Property Description Valuesappl.agreement.betaUser Reservedappl.aws.accessKeyappl.aws.secretKeyappl.-backupRestore.-backupFolder.postfixappl.-backupRestore.-backupFodler.prefixappl.backupRestore.class Specifies the class
that implements thebackup and restore.See the Install Guidefor more information.
appl.-backupRestore.-class.LocalBackupStorage.pathappl.-backupRestore.-class.S3BackupStorage.pathappl.-backupRestore.ftp.passwordappl.backupRestore.ftp.serverappl.backupRestore.ftp.userappl.backupRestore.restore.pathappl.beta Reserved

Managing properties
- 34 -
appl.community Specifies whether todisplay the Com-munity link.
false
appl.customizationappl.disableImportsapp.enable.importPPT Reservedappl.-flashCompressionValue.default
Reserved
appl.flashConversion.enabled Reservedappl.fonts.override.disabledappl.help.url Specifies the initial
URL path for hostingthe online Help fileset. After the initialURL path(http://trivantis.-com/help/), the applic-ation builds theremaining path tomatch the appro-priate help asso-ciated with theversion and locale(for examplehttp://trivantis.-com/help/Lectora_Online/3/en/HelpHTMLs/index.html).
http://trivantis.com/help/
appl.linkedResources.enabled Specifies whether toenable a linked-resources deploy-ment. This requiresthe deployment ofLectora Online andCourseMill to be onthe same server.
false
appl.localesappl.logClientErrors Reservedappl.notifications.email.from Reservedappl.notifications.signupsEmail

Managing properties
- 35 -
appl.patch.js.1appl.patch.js.4appl.productNameappl.publish.pages.batchSizeappl.reports.GoogleDocsKeyappl.server.font.blacklist Specifies the fonts
that are removedfrom the list of serverfonts. If an unusablefont is encountered,add it to this list.
Hershey,Standard SymbolsL,Ding-bat-s,Symbol,Webdings,Wingdings,Wingdings2,Wingdings 3,BookshelfSymbol 7,Euro Sign,MSOutlook,MS Reference Spe-cialty,MT Extra,MV Boli,Mar-lett,OpenSymbol,SWGamekeysMT,ZWAdobeF
appl.startPageappl.store.urlappl.support.extendorg.daysappl.swr.notify.retry.durationappl.swr.retry.delayappl.swr.retry.maxappl.triv.blogURLappl.triv.forumURLappl.triv.resourceURLappl.triv.salesEmailappl.triv.salesNumberappl.triv.sampleTitlesURLappl.triv.storeURLappl.triv.supportNumberappl.tutorialsURLappl.upload.runtimesappl.validationCheck.delaybackupPostfix Reserveddevelopment Reserveddevelopment.rcdhome.feedback.bcc Specifies the Email
addresses that areblind-copied when

Managing properties
- 36 -
sending feedback.home.feedback.cc Specifies the Email
addresses that arecarbon-copied whensending feedback.
home.feedback.subject Specifies the subjecttext specified whensending feedback.
Lectora Online Feedback
home.feedback.to Specifies the Emailaddresses wherefeedback is sent.
home.tabs.news.url Reservedjob.removeExpiredOrgs.enabledjob.SendOr-gExpirationNotifications.enabled
Specifies whether tosend notifications oforganization expir-ation to the admin-istrator. The default isfalse.
job.SendOr-gEx-pirationNotifications.expired.email.ccList
Specifies the list ofrecipients to which tosend notifications oforganization expir-ation. Separate eachemail address with acomma.
job.SendOr-gExpirationNotifications.intervals
Specifies the numberof days before expir-ation to send noti-fications oforganization expir-ation. Separate eachnumber with acomma.
job.SendOr-gEx-pirationNotifications.toOrgAdmins
Specifies whether tosend notifications oforganization expir-ation to the admin-istrator of theorganization. Thedefault is false.

Managing properties
- 37 -
ipWidthnotifications.assn.modorg.publish.aiccorg.publish.htmlorg.publish.ce CourseMill Wave is
no longer being sup-ported as a pub-lishing target. If yourorganization nolonger requires pub-lishing to CourseMillWave, set this prop-erty to False. Thispermanentlyremoves CourseMillWave as a pub-lishing target. Other-wise, set this to Trueto allow publishing toCourseMill Wave.
True
org.publish.icontentorg.publish.iContent.courseUrlorg.pubish.iContent.passwordorg.publish.iContent.publishPathorg.publish.iContent.serverorg.publish.iContent.usernameorg.publish.pwcorg.publish.reviewlinkorg.publish.scormorg.publish.sumTotalorg.publish.tincanpayment.modifyURL Reservedpayment.payTrace.approveURL Reservedpayment.payTrace.checkoutURL Reservedpayment.payTrace.declineURL Reservedpayment.payTrace.password Reservedpayment.payTrace.returnURL Reservedpayment.payTrace.testEnabled Reserved

Managing properties
- 38 -
payment.payTrace.username Reservedpayment.payTrace.validateURL Reservedpayment.upgradeURL Reservedpublisher.text.fcksource Reservedpublisher.window.menuBar Reservedpublisher.window.statusBar Reservedpublisher.window.toolBar Reservedrepository.configFile Reservedrepository.customNodeTypesFile Reservedrepository.home Reservedrepository.jndi.name Reservedrepository.lockNode.timeout Reservedrepository.mimeTypesFile Reservedrepository.namespace.prefix Reservedrepository.namespace.uri Reservedrepository.transaction.timeout Reservedserver.debugserver.diskQuota.default Specifies the giga-
bytes (GB) for initialstorage space for anew organization.
10GB
server.diskUsage.threshold Specifies the per-centage full thresholdthat must be reachedbefore notificationsare sent.
98%
server.log.jvmheapinfoserver.logger.errors.email.fromserver.logger.errors.email.to Specifies the email
addresses to whichto send Trivantisserver logger errors.Separate each emailaddress with acomma.
serv-er.-logger.errors.maxEmailsPerDay
Managing properties
- 39 -
server.mailServer.address Specifies theaddress of themailServer.
serv-er.-mailServer.connection.password
Specifies the pass-word used for access-ing the mailServer.
serv-er.mailServer.connection.user
Specifies the user IDused for accessingthe mailServer.
serv-er.mailServer.maxAddrsPerMailserver.mailServer.restrictedFromserver.output.path Specifies the default
path that LectoraOnline uses for usingas a scratch filesys-tem.
server.output.webRoot Reservedserver.revAjax.enabled Reservedserver.revAjax.method Reservedserver.revAjax.polling.interval Reservedserv-er.revAjax.polling.interval.turbo
Reserved
server.sabaclientserver.tmp.relPath Specifies the path for
temporary files. Thisrelative path will beappended to theserver.output.pathvalue.
server.webRoot Reservedserver.winServer.url Specifies the URL if
you are using a Win-dows server.
server.winServer.url.eu.convserver.winServer.url.test.convserver.winServer.url.us.convsupport.addOrg.org.userLimitsup-
Managing properties
- 40 -
port.ad-dOr-g.org.userLimit.multiplierForDiskQuotasupport.addOrg.user.descriptionsupport.addOrg.user.password
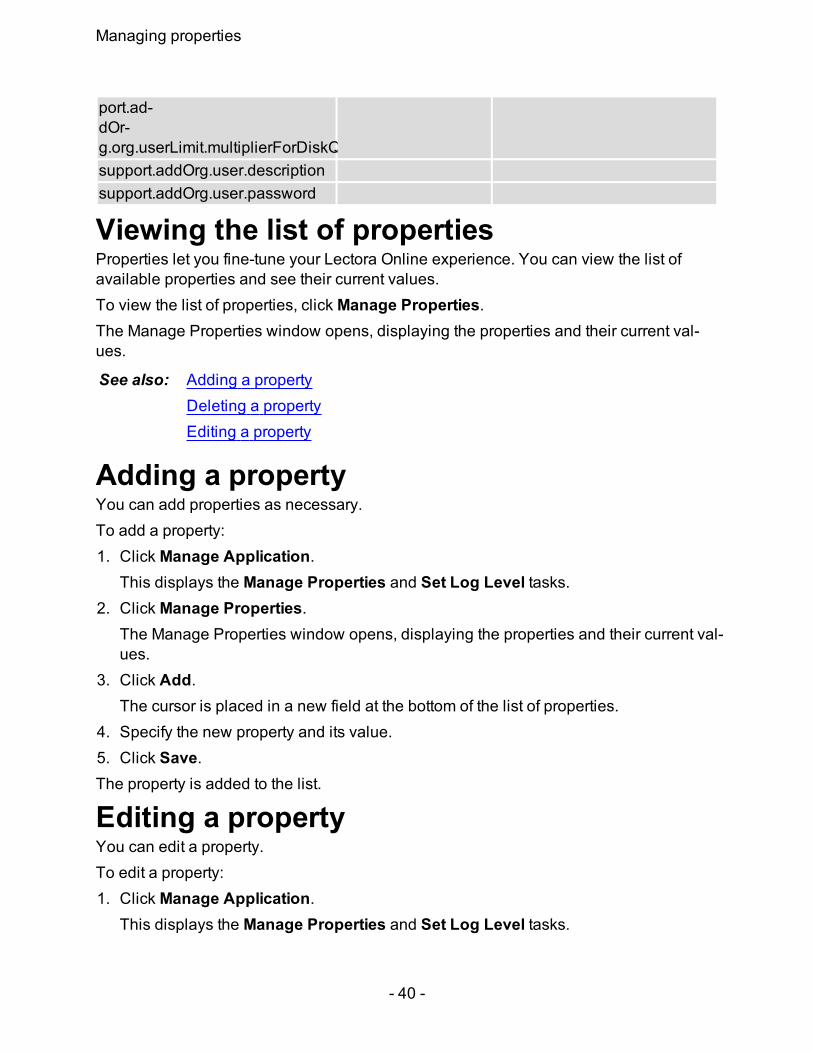
Viewing the list of propertiesProperties let you fine-tune your Lectora Online experience. You can view the list ofavailable properties and see their current values.To view the list of properties, click Manage Properties.The Manage Properties window opens, displaying the properties and their current val-ues.
See also: Adding a propertyDeleting a propertyEditing a property
Adding a propertyYou can add properties as necessary.To add a property:1. Click Manage Application.
This displays the Manage Properties and Set Log Level tasks.2. Click Manage Properties.
The Manage Properties window opens, displaying the properties and their current val-ues.
3. Click Add.The cursor is placed in a new field at the bottom of the list of properties.
4. Specify the new property and its value.5. Click Save.The property is added to the list.
Editing a propertyYou can edit a property.To edit a property:1. Click Manage Application.
This displays the Manage Properties and Set Log Level tasks.

Managing properties
- 41 -
2. Click Manage Properties.The Manage Properties window opens, displaying the properties and their current val-ues.
3. Select the property and click Edit. Update the property name and its value and clickSave.
The property is updated in the list.
Deleting a propertyYou can delete a property.To delete a property:1. Click Manage Application.
This displays the Manage Properties and Set Log Level tasks.2. Click Manage Properties.
The Manage Properties window opens, displaying the properties and their current val-ues.
3. Select the property and click Delete.The property is deleted from the list.

Viewing the list of logged-in users
- 42 -
Viewing the list of logged-in usersSuper administrators and Support users can view information about the current users ona specified host. This information includes the organization, User ID, user name, roleand server address of each logged-in user. At a glance, super administrators can viewthe number of active organizations and the number of active users. Select whether toview information for all servers on the cluster for a specific server.Click the Logged-In Users task to view information about logged-in users.The Logged-in Users window opens. The window displays the following information:
Active Organ-izations
Displays the number of organizations represented by currently logged-in users.
Active Users Displays the number of currently logged-in users.Server Use the pull-down menu to select the type of server information to dis-
play. Select All Servers in Cluster to display information for all serversin the cluster or select a specific server to only display information aboutthat server.
Status Displays the online status of each logged-in user. Hover over thegraphic to view the text of the status. The status can be one of the fol-lowing:
(act-ive)
The session has made server requests within the last 15minutes.
(inact-ive)
The session has not made server requests within the last 15minutes.
(zom-bie)
The session has not polled in two normal polling cycles. Thenormal polling interval is 1 minute.
(dead)The session has not polled in over an hour.
Organization Displays the type of organization of each logged-in user.Trial Displays whether the logged-in user is using a Trial subscription.User ID Displays the user ID of each logged-in user.User Name Displays the user name of each logged-in user.Role Displays the role of each logged-in user.Last Log In Displays the timestamp of when the user last logged in.Server Displays the server name from which each user is logged in.
Click Refresh to refresh the information in the window or click Close to return to thehome page.

Setting the log level
- 43 -
Setting the log levelThe log level controls the severity of messages that a component will log. A log recordwhose severity is greater than or equal to the log level is logged.You must be defined as a super administrator to have access to the Set Log Level task.You can set the log level for the main application or for a package within the application.
Use the server.logger.errors.emails.to property to specify the emails to which tosend logger-errors emails. For details about specifying properties, see ManagingProperties.
Specify the following log levels:
OFF No messages are loggedSEVERE Severe level messages onlyWARNING Warning level messages and upINFO Informational level messages and upCONFIG Configuration level messages and upFINE Fine level messages and upFINER Finer level messages and upFINEST Finest level messages and upALL All messages logged
To set the log level for the main application or a package level:1. Click Set Log Level. The Set Log Level window opens.2. Select the server from the Server drop-down list.3. To set the main log level, click the Main Level drop-down list and select the log level.4. To set the log level for a component, select the component from the Component
Levels list. This enables the Level drop-down list. Select the log level from the drop-down list. To save the new log level change to the server, click Save to Server. Tosave the new log level change to the entire cluster, click Save to Cluster.
To reset a package level, click Reset.

Viewing system information
- 44 -
Viewing system informationSuper administrators and Support users can view information about each host serverand summary information for all servers.To view the system information:
1. Click the System Information task.The System Information window opens.
2. Click a server tab to display the following information specific to the server youselected:
RequestURL
Displays the URL of the server.
AvailableProcessors
Displays the number of processors available on the server.
Running Displays the number of days the server has been running since itwas last restarted.
Logged-InUsers
Displays the number of logged-in users.
Memory(Heap)Information
Displays the memory allocation in megabytes (MB) for Allocated,Free, and Maximum memory. The pie chart displays the size ofeach portion in relation to the entire memory allocation. The per-centage for each portion is also displayed.Click Run Garbage Collection to free space that no longer needsto be retained.
System Prop-erties
Displays the current system properties and their values.
EnvironmentVariables
Displays the current environment variables.
Click Logged-In Users to view the list of logged-in users or click Set Log Level toset the log level for the main application or for a package within the application.
3. Use the Cluster Summary sidebar to view system information for the cluster. Thesidebar displays the following information:
Servers inCluster
Displays the number of servers in the cluster.
Logged-InUsers
Displays the number of logged-in users.
Server/Users Displays the number of logged-in users for each server in thecluster. Entries in the Servers/Users table are color-coded basedon the Used memory state of the server:

Viewing system information
- 45 -
Green Used memory is less then 80%Yellow Used memory is between 80 and 89%Red Used memory is 90% or more
The Cluster Summary also displays line charts representing usage in two profiles:1-Hour Memory Profile and 12-Hour Memory Profile. Servers are represented in dif-ferent colors as shown.Click Run Garbage Collection to free space that no longer needs to be retained.Click Logged-In Users to view the list of logged-in users. Click Refresh to refreshthe information in the Cluster Summary sidebar.

Managing disk usage
- 46 -
Managing disk usageSuper administrators and Support users can view disk usage statistics and status. Theycan view usage details for individual organizations, along with completing tasks such asrefreshing, clearing, and recomputing the usage data. Threshold percentages and diskquotas for each organization are also displayed. The disk usage information is displayedin a separate browser window.To view disk usage information, click the Disk Usage task. The Disk Usage windowopens. Detailed usage information is presented for each organization, including sum-mary statistics and title statistics for each user. Click Detail to view detailed informationfor the corresponding organization. Click Clear to that Clear button to clear all diskusage data that is kept is each node in the repository. This applies to all organizations,all shared titles in each organization, all private titles, and so on. Click Recompute toget the latest values in case a disk usage job was run.

Generating an audit report
- 47 -
Generating an audit reportSuper administrators and Support users can view audit information. They can viewusage details for individual administrators, including tracking of operations completed.The information is displayed in a separate browser window and can be downloaded toExcel.To view audit information, click the Audit Report task. The Audit window opens. ClickDownload all records to Excel to download the information to Excel.

Viewing the Log Viewer
- 48 -
Viewing the Log ViewerSuper administrators and Support users can view logging information. The Log Viewerdisplays messages contained in the log file. You can sort and filter the output as follows:l Last 1000 Linesl Last 5000 Linesl Todayl Today's Errorsl Today's Warningsl All Errorsl All Warnings
To view the Log Viewer, click the Log Viewer task to expose the filter options and selecta filter, such as Today's Errors or All Warnings. The Log Viewer window opens.

Generating a User Activity Report
- 49 -
Generating a User Activity ReportSuper administrators and Support users can view user log-in activity. The User ActivityReport, which lists users by organization based on their log-in timestamp, is displayed ina separate browser window and can be downloaded to Excel. Activity statistics are alsoprovided.To view the User Activity Report, click the User Activity Report task. The User ActivityReport is displayed.

Generating an Organization Report
- 50 -
Generating an Organization ReportSuper administrators and Support users can view organization statistics. User countswithin the organization are also listed. The Organization Report is displayed in a sep-arate browser window and can be downloaded to Excel.To view the Organization Report, click the Organization Report task. The OrganizationReport is displayed.

Sending a System Alert
- 51 -
Sending a System AlertSuper administrators can send system-wide messages to alert users. Use this task toalert users of maintenance outages and announcements, for example. The messagesare sent to all users in your organization that are currently logged in.To send a system alert:1. Click the Send System Alert task. The Send System Alert window opens.2. Type your message in the Message box and click Send.See also: Sending system and organization email

Sending system and organization email
- 52 -
Sending system and organization emailAdministrators and super administrators can send email messages to contact users.Super administrators can send email messages to an organization or to the entire sys-tem.
If you are a super-administrator, the From address defaults to the system emailaddress, which is specified by the property appl.notifications.email.from. Fordetails about using properties, see Managing properties.
To send an email message to an organization:1. Click the Send Organization Email task.
The Send Organization Email window opens.2. Complete the fields as follows:
From The From field must contain a valid email address or any placeholdertext if you do not have a valid email address. Enable the check box forCc me on this message to get copied on this message.
To Select All administrators in the organization to send to all admin-istrators in the organization or select Everyone in the organization tosend to all administrators and all users in the organization.
Subject Specify the subject of the message.
3. Type the message and click Send.Your organization message is sent.For super administrators to send a system-wide email to all organizations:
1. Click the Send System Email task.The Send System Email window opens.
2. Complete the fields as follows:
From The From field must contain a valid email address or any placeholdertext if you do not have a valid email address. Enable the check box forCc me on this message to get copied on this message.
To Select All administrators in the organization to send to all admin-istrators in the organization or select Everyone in the organization tosend to all administrators and all users in the organization.
Subject Specify the subject of the message.
3. Type the message and click Send.Your organization message is sent.
See also: Sending a system alert

Forcing the News tab to the front
- 53 -
Forcing the News tab to the frontYou can force the News tab to be the initial tab users see the next time they log in. Thisis useful when you want users to view important announcements, such as scheduledupgrades and company news.To force the News tab to the front:1. Click the New News task. The New News window opens.2. Click Yes.
Viewing repository information
- 54 -
Viewing repository informationSuper administrators and Support users can view repository information. The RepositoryViewer is displayed in a separate browser window. Tabs are available for the mainrepository, system repository, and the Org/Users repository.To view the Repository Viewer, click the View Repository task. The Repository Vieweris displayed. Click a tab to view the corresponding repository information.

Backing up repository data
- 55 -
Backing up repository dataUse the Backup task to save a copy of the repository data to a secure, remote location.You can select a specific organization or all organizations. The titles that make up thedatabase are saved as package files within compressed zip files.You can specify a backup file prefix to better organize and retrieve saved backups.Backed-up files can be restored for continued use to their original organizations whennecessary. See Restoring data for information.To backup repository data:1. Click the Backup task. The Backup window opens.2. Use the Organization pull-down to select a specific organization or select All Organ-
izations to specify that all your databases are to backed up.3. Enable the Include Private Titles field to include titles that users have not currently
shared.4. Use the Backup File Prefix field to specify a character sequence to prepend to the
beginning of zip file.5. Click Backup.To back up another organization, click Backup again. To restore backed-up files, clickRestore.

Restoring data
- 56 -
Restoring dataUse the Restore task to restore backed-up titles. Backed-up titles are saved as packagefiles within compressed zip files. When you select the zip file you want to restore, thepackage files that make up the zip file are displayed. Use the list of package files toselect a specific file, several files, or all the files to restore.To restore a backed up file:1. Click the Restore task. The Restore Files window opens.2. Use the Backup files pull-down to select the backed-up zip file you want to restore.
The package files that make up the zip file are displayed. You can select several filesby holding down the Ctrl key while selecting multiple files. To select all the files, clickonce on the first file, hold down the Shift key, and scroll to and click once on the lastfile.
3. Click Restore.The backed-up files are restored and available for use within the original organization.See also: Backing up repository data

Viewing server commands information
- 57 -
Viewing server commands informationSuper administrators and Support users can view the list of previously executed com-mands. Pending commands information is also displayed. The SWR Statistics windowis displayed in a separate browser window.To view the SWR Statistics, click the Server Commands task. The SWR Statistics win-dow is displayed.

Completing a server thread dump
- 58 -
Completing a server thread dumpSuper administrators and Support users can dump the server thread. A thread dump canbe collected to identify the reason for a hang or crash condition.To complete a server thread dump, click the Server Thread Dump task. The ThreadDump window is displayed, including current memory and thread summary statistics.

Completing a XPath cache query
- 59 -
Completing a XPath cache querySuper administrators and Support users can query the XPath cache.To complete a XPath cache query, click the XPath Query task. The XPath Cache win-dow is displayed, including current cache size and use information.

Obtaining an Activation Code
- 60 -
Obtaining an Activation CodeUse the Activation Code task to obtain your organization's Activation Code. The Activ-ation Code is a security measure used to validate your account. Should your accountexpire, it will remain temporarily active as a trial account.To obtain your activation code:1. Click the Activation Code task. The Activation Code window opens.2. Click the appropriate server tab and click Save Activation Code. 3. Click Close.

Configuring log-in password settings
- 61 -
Configuring log-in password settingsYou can configure log-in password settings. Set the following properties to configureyour log-in password policy. Properties are configuration values that can be queried atruntime.For details about managing properties, including adding, editing and deleting properties,see Managing properties.
Property Descriptionappl.login.attempts Specifies the number of failed login attempts
allowed before locking a user account.appl.login.locked.minutes Specifies the number of minutes for which an
account is locked after too many failed log-inattempts.
appl.login.pwd.length Specifies the minimum length required for a pass-word.
appl.login.pwd.numbers Specifies the minimum number of numbers requiredfor a password.
appl.login.pwd.upper Specifies the minimum number of upper-case lettersrequired for a password.
appl.login.pwd.lower Specifies the minimum number of lower-case lettersrequired for a password.
appl.login.pwd.special Specifies the minimum number of special characters(for example, "!", "@", and "#") required for a pass-word.
appl.login.pwd.nonames Specifies whether to not allow password to containusername, first, or last name.
appl.login.pwd.noconsec Specifies whether to allow consecutive characters ina password.
appl.login.pwd.mustchange.days Specifies the number of days a user can keep thesame password.
appl.login.pwd.timebtw.chgs.hours Specifies the minimum time between passwordchanges.

Managing skins
- 62 -
Managing skinsWhen you have selected to display a Flash video or a MP4-H.264 video object using acontroller, you can apply a predefined or custom skin to the controller.For information about creating a custom skin for the controller, see Creating customskins.To import a custom skin:1. Click the Manage Skins task. The Manage Custom Skins window opens.2. Click Import skin to navigate and select the custom skin zip file. The imported cus-
tom skin is added to the list in the box. A preview of the skin is displayed.3. To add the skin to the list of skins to apply, select the skin from the list and
click Close.The skin is added to the list of skins that can be applied to the controller.To delete a skin:1. Click Manage Skins. The Manage Custom Skins window opens.2. Select the skin you want to delete and click Delete skin.3. Click Close.The skin you selected is deleted.
If you add a custom skin to a title and then delete the skin (using Manage Skins),the skin is deleted from the custom skin list, but it is still available to the title(because it exists in the title area). If you import a new version of the skin with thesame name, you must use the Skins tab in the Publisher to update the title withthe new skin.
Creating custom skinsUsers can customize the framework of the Flash media player by creating and applyingcustom skins.A skin consists of a packaged zip file containing an XML document along with sub-folders containing the component graphics. The XML file defines the settings for theskin's components: control bar, display, dock, and playlist. Use your favorite image editorto design and save the visual elements that make up the skin and link to them in theskin's XML document.Lectora utilizes the custom skin format of the JW Player 5, the leading media player onthe Internet today. The player is easy to configure, customize, and extend. For detailsabout creating skins for the JW Player 5, visit http://www.longtailvideo.com/support/jw-player/jw-player-for-flash-v5/14/building-skins .

Trademarks
- 63 -
TrademarksLectora and Lectora Online are a trademark of the Trivantis in the United States, or othercountries, or both.Microsoft, Excel, and Access are trademarks of Microsoft, Inc. in the United States, orother countries, or both.Other company, product, and service names may be trademarks or service marks of oth-ers.


![LMS - download.mastersolution.agdownload.mastersolution.ag/media/LMS/MASTERSOLUTION_LMS_FLYER.pdf · Lern Management System [LMS] – individuelle Lernplattform, Benutzerverwaltung,](https://img.pdfslide.net/doc/110x75/5e1d0d435c6bc20e04570e9c/lms-lern-management-system-lms-a-individuelle-lernplattform-benutzerverwaltung.jpg)