Embed Size (px)
Citation preview

Lecture Series on Android Programming
Chapter.2 First Android Application
Lecturer: Prof.Luqun Li ([email protected])Teaching Assistants: Fengyou Sun, Haijun Yang, Ting Sun
Shanghai Normal University2
Contents
11 Set up the environment
22 Learing the Fundamental Components
33 Hello world
44Exploring the Structure of an Android Application
Shanghai Normal University3
Introducing Andorid computing platform
55Analyzing the Stucture of an Andorid Application
66Analyzing the Notepad Application
77 Examining the Applicationg Lifecycle
88 Debugging the App
Shanghai Normal University4
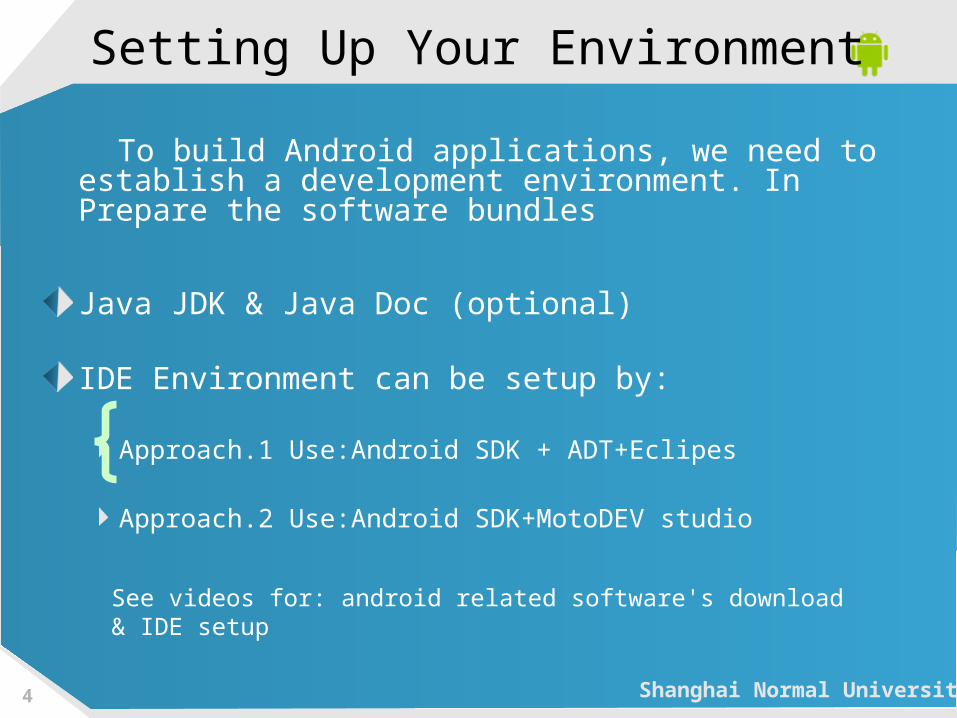
Setting Up Your Environment
To build Android applications, we need to establish a development environment. In Prepare the software bundles
Java JDK & Java Doc (optional)
IDE Environment can be setup by:
Approach.1 Use:Android SDK + ADT+Eclipes
Approach.2 Use:Android SDK+MotoDEV studio
See videos for: android related software's download & IDE setup

Shanghai Normal University5
Aproach.1 Eclipse+Android SDK+ADT
step1
Downloading JDK 7 and Eclipse 4.2
Shanghai Normal University6
Click to edit headline
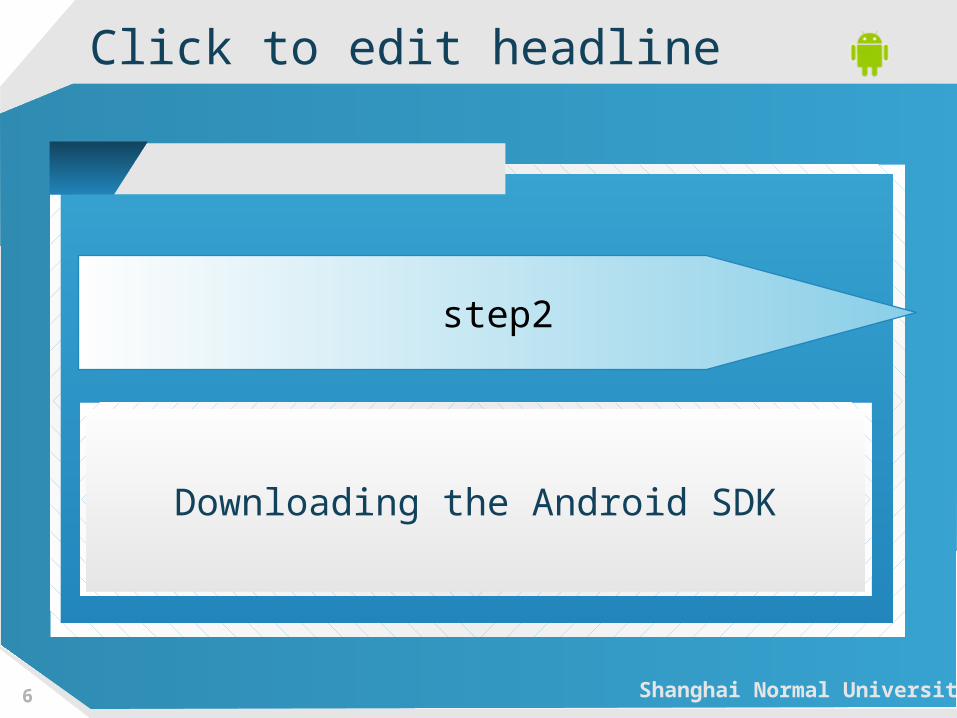
step2
Downloading the Android SDK

Shanghai Normal University7
Click to edit headline
step3
Installing Android Development Tools (ADT)

Shanghai Normal University8
Learning the Fundamental Components
Every application framework has some key components that developers need to understand before they can begin to write applications based on the framework
Shanghai Normal University9
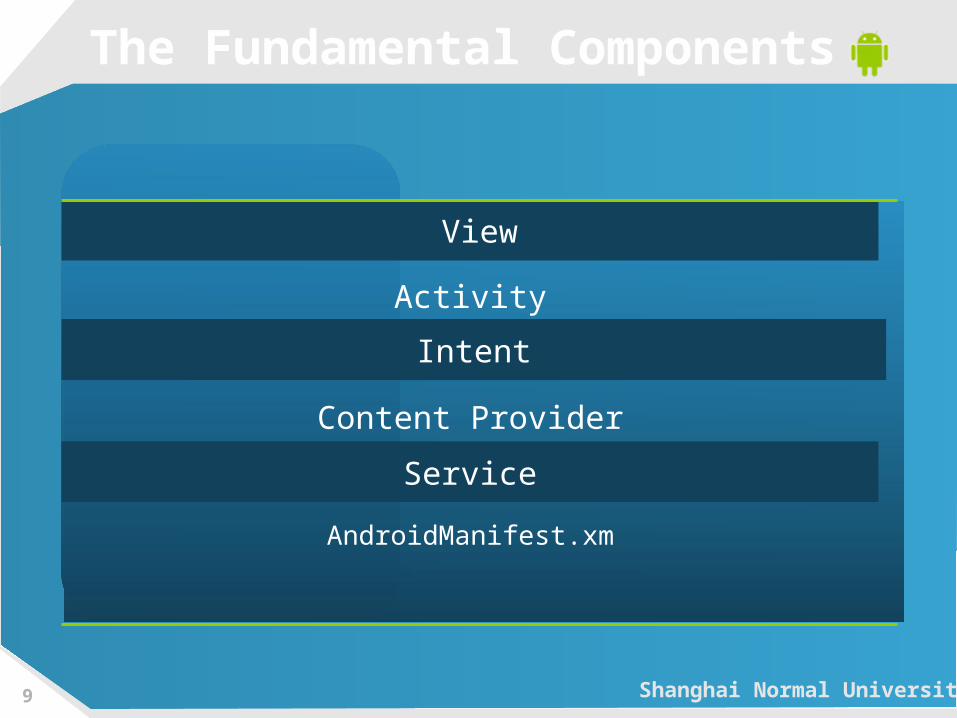
The Fundamental Components
Activity
Content Provider
AndroidManifest.xm
View
Intent
Service

Shanghai Normal University10
A Hello World Demo
Hello World!Now we ready to build our first
Android application. We’ll start by building a simple
“Hello World!” program. Create the skeleton of the application by following these steps:

Shanghai Normal University11
Click to edit headline
step 1
Launch Eclipse and select File New Project. ➤ ➤In the “New Project” dialog box, select “Android” and then click “Next.” You will then see the “New Android Project” dialog box

Shanghai Normal University12
Click to edit headline
step 2
enter HelloAndroid as the project name, pro.android asthe package name, HelloActivity as the activity name, and HelloAndroidApp as the application name
Shanghai Normal University13
Click to edit headline
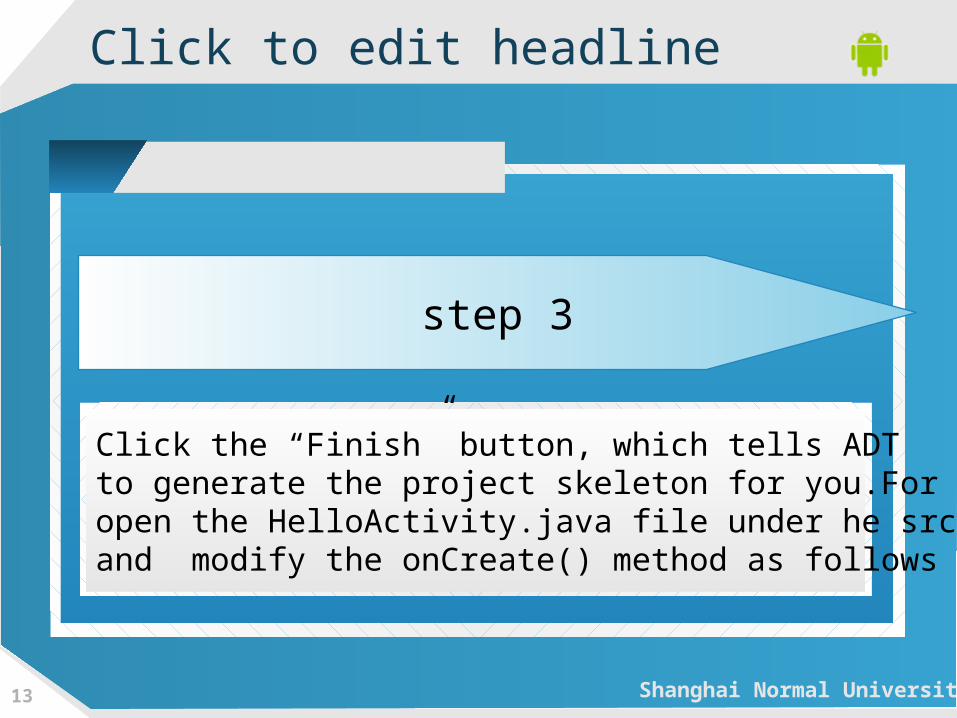
step 3
Click the “Finish” button, which tells ADT to generate the project skeleton for you.For now, open the HelloActivity.java file under he src folder and modify the onCreate() method as follows

Shanghai Normal University14
/** Called when the activity is first created. */@Overridepublic void onCreate(Bundle savedInstanceState) {super.onCreate(savedInstanceState);/** create a TextView and write Hello World! */ TextView tv = new TextView(this); tv.setText("Hello World!");/** set the content view to the TextView */setContentView(tv);}
Shanghai Normal University15
create an Eclipse launch configuration
Next page
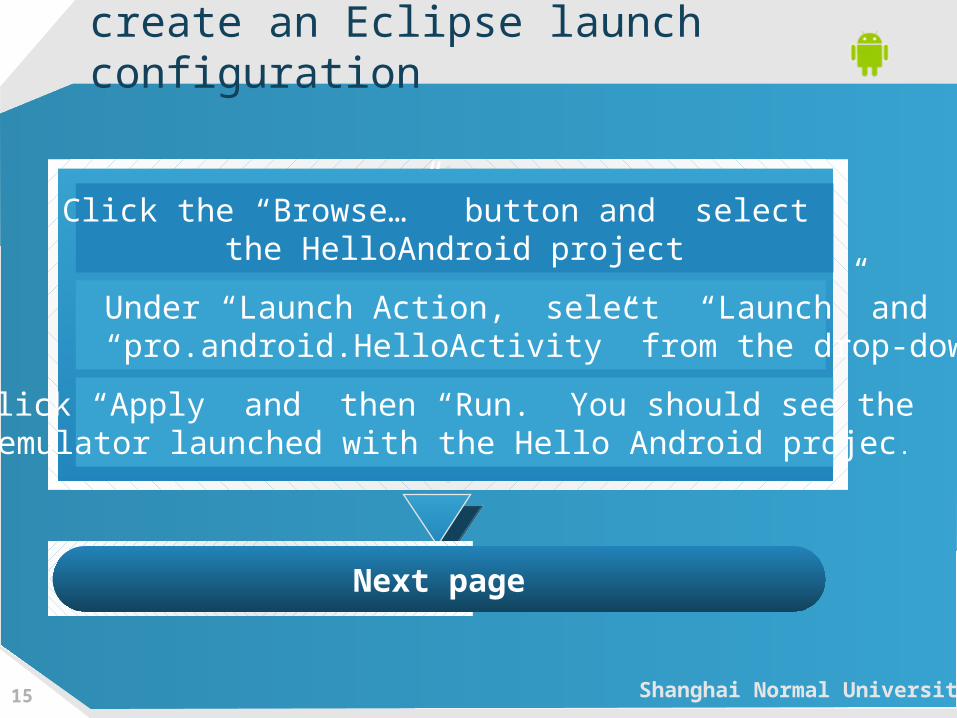
Click “Apply” and then “Run.” You should see the emulator launched with the Hello Android projec.
Under “Launch Action,” select “Launch” and select “pro.android.HelloActivity” from the drop-down list
Click the “Browse…” button and select the HelloAndroid project

Shanghai Normal University16
create an Eclipse launch configuration
Create the Eclipse launch configuration
Rename the configuration RunHelloWorld.
In the “Run Configurations” dialog box, double-click “Android Application" in the left pane. The wizard will insert
a new configuration named “New Configuration.”
Select Run Run Configurations➤

Shanghai Normal University17
Exploring the Structure of an Android Application
Although the size and complexity of Android applications can vary greatly, their structures will be similar
An Android application is primarily made up of three pieces

Shanghai Normal University18
Click to edit headline
an Android application
the application descriptor
a collection of various resources
the application’s source code.

Shanghai Normal University19
Analyzing the Notepad Applicationanalyzing its components will give you some realistic insight
into Android development.
Follow these steps to load the Notepad sample into the Eclipse IDE:
1. Start Eclipse.
2. Go to File ➤ New ➤ Project.
3. In the “New Project” dialog, select Android ➤ Android Project.

Shanghai Normal University20
4.In the “New Android Project” dialog, select “Create project from existing source” and set the “Location” field to the path of the Notepad application. Note that the Notepad application is located in c:\AndroidSDK\samples\, which you downloaded earlier. After you set the path, the dialog reads the AndroidManifest.xml file and prepopulates the remaining fields in the “New Android Project” dialog box.
5. Click the “Finish” button.

Shanghai Normal University21
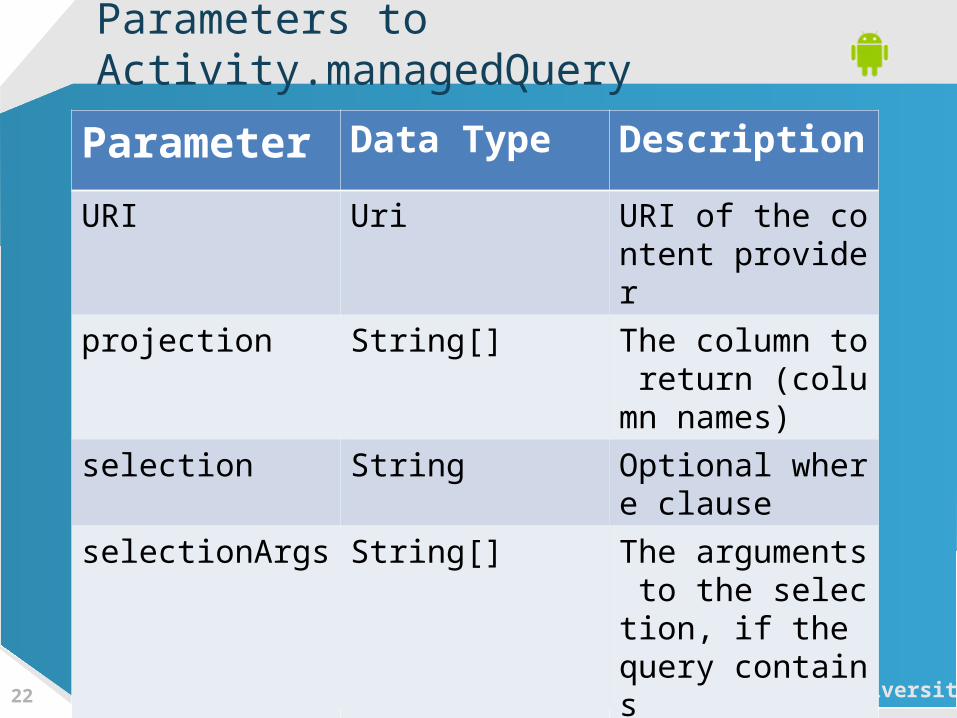
Next, we see the activity execute a managed query and get a cursor for the result. A managed query means that Android will manage the returned cursor. In other words, if the application has to be unloaded or reloaded, neither the application nor the activity has to worry about positioning the cursor, loading it, or unloading it. The parameters to managedQuery(), shown in Table , are interesting
Shanghai Normal University22
Parameters to Activity.managedQuery
Parameter Data Type Description
URI Uri URI of the content provider
projection String[] The column to return (column names)
selection String Optional where clause
selectionArgs String[] The arguments to the selection, if the query contains
sortOrder String Sort order to be used on the result set
Shanghai Normal University23
Examining the Application Lifecycle The lifecycle of Android applications differs
greatly from the lifecycle of web-based J2EE applications. J2EE apps are loosely managed by the container they run in. For example, a J2EE container can remove an application from memory if it sits idle for a predetermined time period. But the container generally won’t move applications in and out of memory based on load and/or available resources. In other words, it’s up to the application owners to ensure that resources are available.
Shanghai Normal University24
The concept of application lifecycle is logical, but a fundamental aspect of Android applications complicates matters. Specifically, the Android application architecture is compo- nent- and integration-oriented. This allows a rich user experience, seamless reuse, and easy application integration, but creates a complex task for the application-lifecycle manager.

Shanghai Normal University25
The following graph shows the list of lifecycle methods that Android calls during the life of an activ- ity. It’s important to understand when each of the methods is called by the system to ensure that you implement a stable application. Note that you do not need to react to all of these methods. If you do, however, be sure to call the superclass versions as well.

Shanghai Normal University26
onRestart
onCreateronStar
onStoponDestroy
onResume onPause
Activity Start
Activity Stop
Shanghai Normal University27
Debugging Your AppAfter we write a few lines of code for our first application,
we’ll start wondering if it’s pos- sible to have a debug session while you interact with your application in the emulator. Shortly after that, you’ll instinctively run to System.out.println(), which will fail because the code is running on the emulator and the sys-out statement is not fed back to the IDE. But don’t worry; the Android SDK includes a host of applications that we can use for debugging purposes.
The SDK also includes a file-explorer tool that you can use to view files on the device. These tools
are integrated with the Eclipse IDE

Shanghai Normal University28
Click to edit headline
You can view the tools by selecting the Debug perspective in Eclipse. You can also launch each tool by going to Window Show ➤View Other Android.➤ ➤One of the tools that you’ll use throughout your Android development is LogCat. This tool displays the log messages that you emit using android.util.Log, exceptions, and so on. We
will introduce the other tools throughout the book.t.
Shanghai Normal University29
Summary This chapter showed:
1. how to set up IDE
2. discussed & introduced views, activities, intents, content providers, and services.
3. Talk about the Android application lifecycle.
4. Finally, mentioned the Android SDK’s debugging tools