Embed Size (px)
Citation preview
Lender’s Guide to e-Filing of FSA Guaranteed Loans & Packages
More information James L Harms State Farm Loan Specialist Email: [email protected] Phone (573) 876-0980 Fax: (573) 876-0935 Ver. 9/03/04
Farm Service Agency • Missouri
eFiling Benefits For Lenders
Paperless:
Loan applications Closing Documents Interest Assistance Renewals Status Reports
Faster Service. Documents and forms are submitted in real-time. Save mailing time, paper generation, and get faster decisions.
Electronically sign documents. By using your USDA eAuthentication account, you can digitally sign documents so you don’t have to sign originals.
Secure and Private. eFiling uses 128 bit secure socket layer (SSL) encryption technology used by many commercial banks in on-line banking applications.
Flexible. No software to buy or install. You can continue to use your existing software and business practices for loan origination and servicing. eForms is flexible so you can submit documents and images in any of the following formats: Microsoft Word Microsoft Excel Adobe Acrobat PDF documents and images Web Equity Manager exported ZIP files Images Text
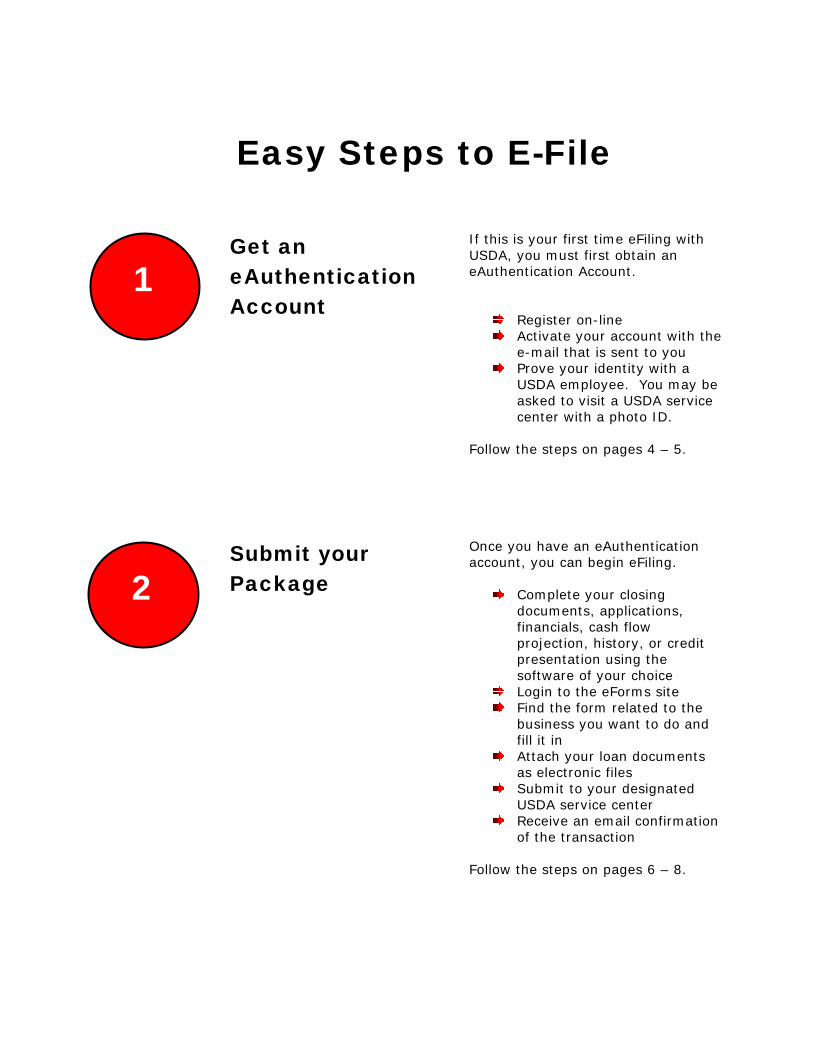
Easy Steps to E-File
Get an eAuthentication Account
If this is your first time eFiling with USDA, you must first obtain an eAuthentication Account.
Register on-line Activate your account with the
e-mail that is sent to you Prove your identity with a
USDA employee. You may be asked to visit a USDA service center with a photo ID.
Follow the steps on pages 4 – 5.
Submit your Package
Once you have an eAuthentication account, you can begin eFiling.
Complete your closing documents, applications, financials, cash flow projection, history, or credit presentation using the software of your choice
Login to the eForms site Find the form related to the
business you want to do and fill it in
Attach your loan documents as electronic files
Submit to your designated USDA service center
Receive an email confirmation of the transaction
Follow the steps on pages 6 – 8.
1
2
4
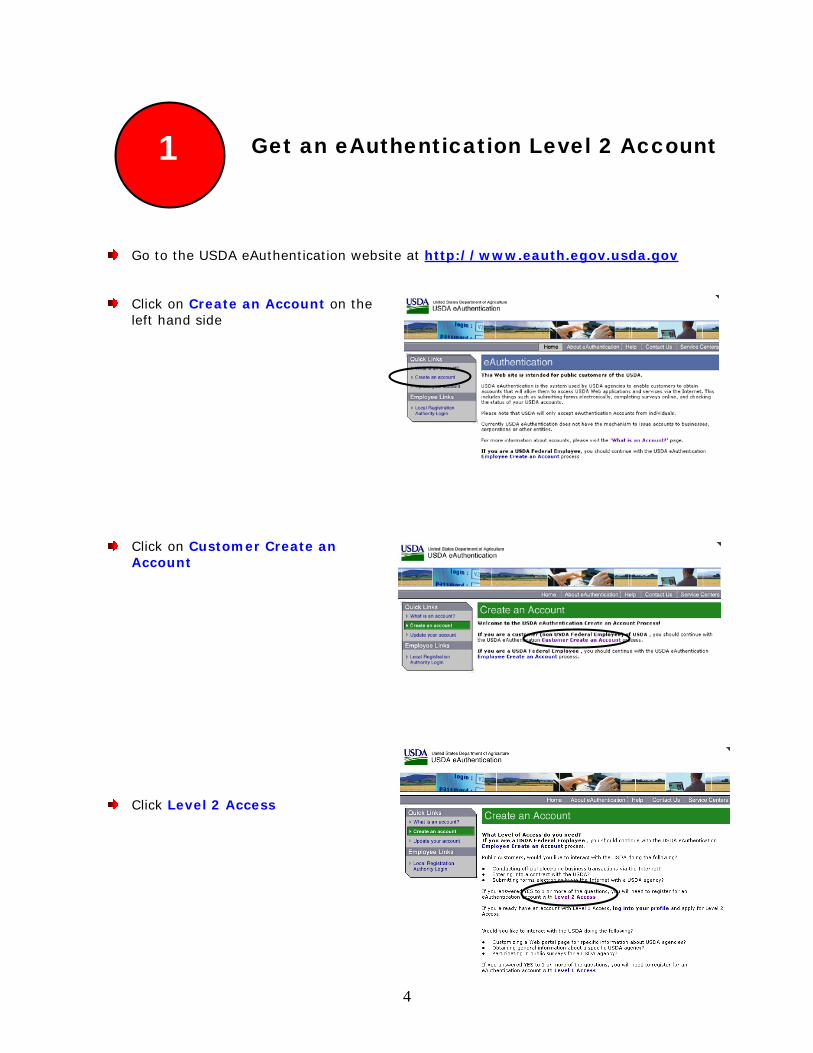
1
Get an eAuthentication Level 2 Account
Go to the USDA eAuthentication website at http://www.eauth.egov.usda.gov
Click on Create an Account on the left hand side
Click on Customer Create an Account
Click Level 2 Access

5
Enter in the requested info and click Continue; verify the info you submitted is correct on the next page and click Submit. Even though you are representing the Bank, you are still an individual and we need your individual information. You may use your bank address and phone number, etc.
You will receive a confirmation by e-mail that YOU MUST RESPOND TO. You must click on the Activate My Account link within the email before the account will be activated. You must do this within 7 days.
Next, a USDA employee must personally verify your identity so that you can electronically sign documents in USDA eForms system. Until you provide either a photo driver’s license or state-issued ID, you won’t be able to electronically submit and sign documents to USDA. You can either visit a USDA service center or have your local FSA loan personnel personally identify you.
6
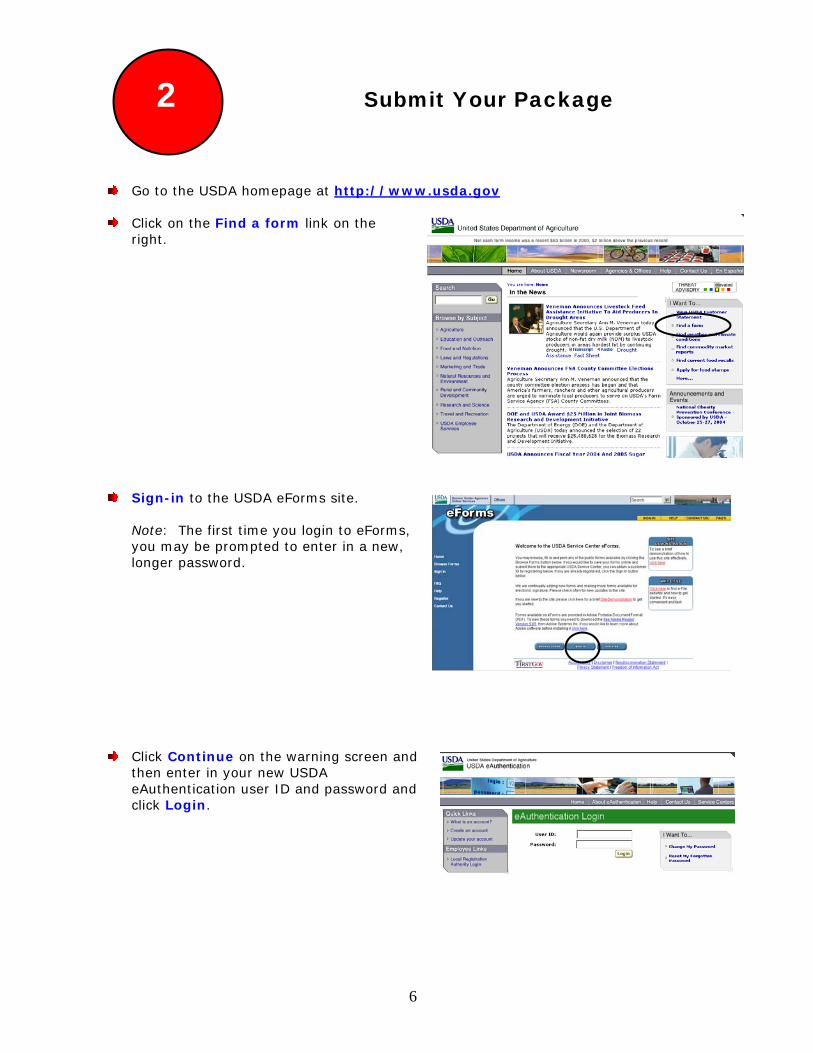
Submit Your Package
Go to the USDA homepage at http://www.usda.gov
Click on the Find a form link on the
right.
Sign-in to the USDA eForms site.
Note: The first time you login to eForms, you may be prompted to enter in a new, longer password.
Click Continue on the warning screen and then enter in your new USDA eAuthentication user ID and password and click Login.
2
7
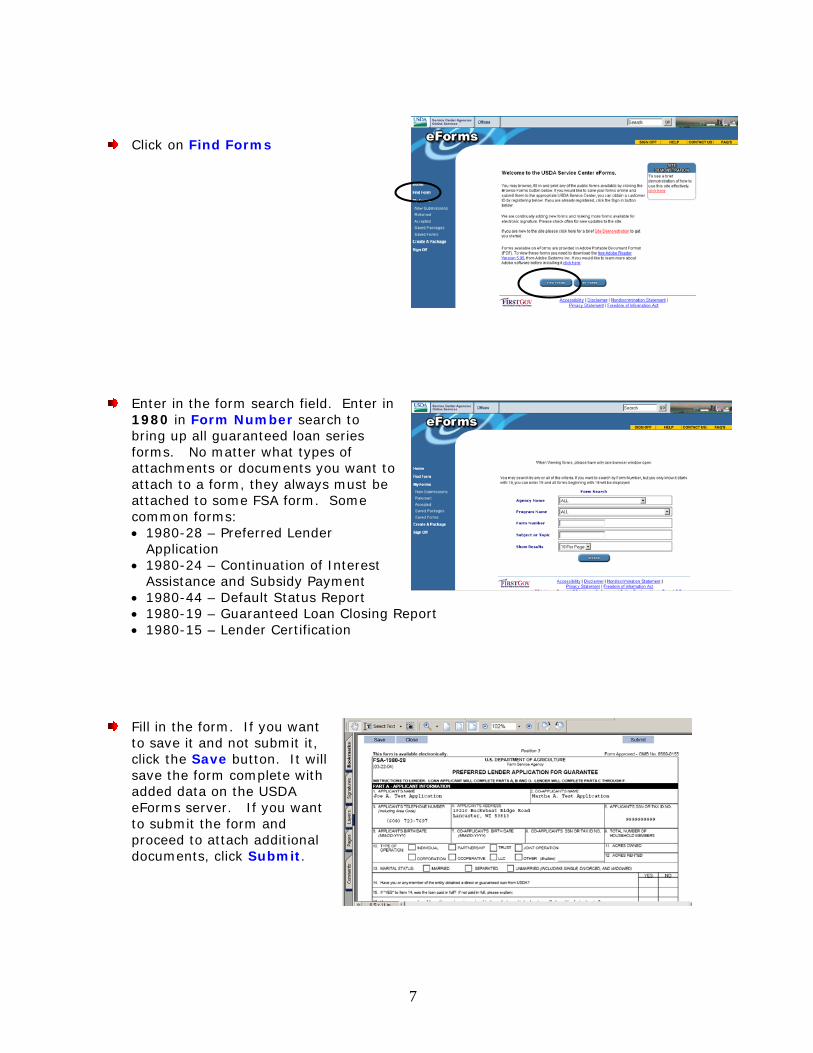
Click on Find Forms
Enter in the form search field. Enter in 1980 in Form Number search to bring up all guaranteed loan series forms. No matter what types of attachments or documents you want to attach to a form, they always must be attached to some FSA form. Some common forms: 1980-28 – Preferred Lender
Application 1980-24 – Continuation of Interest
Assistance and Subsidy Payment 1980-44 – Default Status Report 1980-19 – Guaranteed Loan Closing Report 1980-15 – Lender Certification
Fill in the form. If you want to save it and not submit it, click the Save button. It will save the form complete with added data on the USDA eForms server. If you want to submit the form and proceed to attach additional documents, click Submit.
8
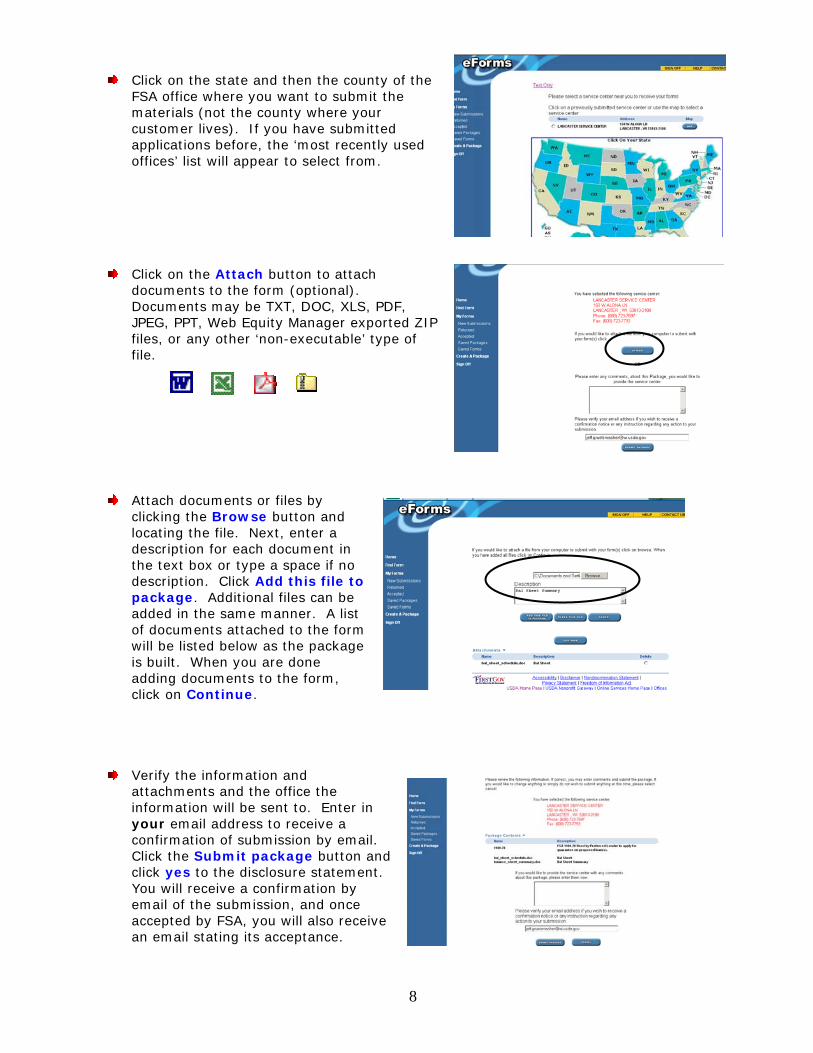
Click on the state and then the county of the FSA office where you want to submit the materials (not the county where your customer lives). If you have submitted applications before, the ‘most recently used offices’ list will appear to select from.
Click on the Attach button to attach documents to the form (optional). Documents may be TXT, DOC, XLS, PDF, JPEG, PPT, Web Equity Manager exported ZIP files, or any other ‘non-executable’ type of file.
Attach documents or files by clicking the Browse button and locating the file. Next, enter a description for each document in the text box or type a space if no description. Click Add this file to package. Additional files can be added in the same manner. A list of documents attached to the form will be listed below as the package is built. When you are done adding documents to the form, click on Continue.
Verify the information and attachments and the office the information will be sent to. Enter in your email address to receive a confirmation of submission by email. Click the Submit package button and click yes to the disclosure statement. You will receive a confirmation by email of the submission, and once accepted by FSA, you will also receive an email stating its acceptance.


![fsa imagery [Read-Only] · PDF fileObjectives of Presentation: ... FSA Imagery Requirements ... FSA Ortho Large Format FSA Ortho DOQs Small Format GIS Possible Yes Yes FAA](https://img.pdfslide.net/doc/110x75/5ab947c47f8b9ad5338dc355/fsa-imagery-read-only-of-presentation-fsa-imagery-requirements-fsa-ortho.jpg)