Embed Size (px)
Citation preview
1
Lesson Guide Drop Shoulder Blouse Draping: Intermediate
Module 1 – Lesson Prep
1
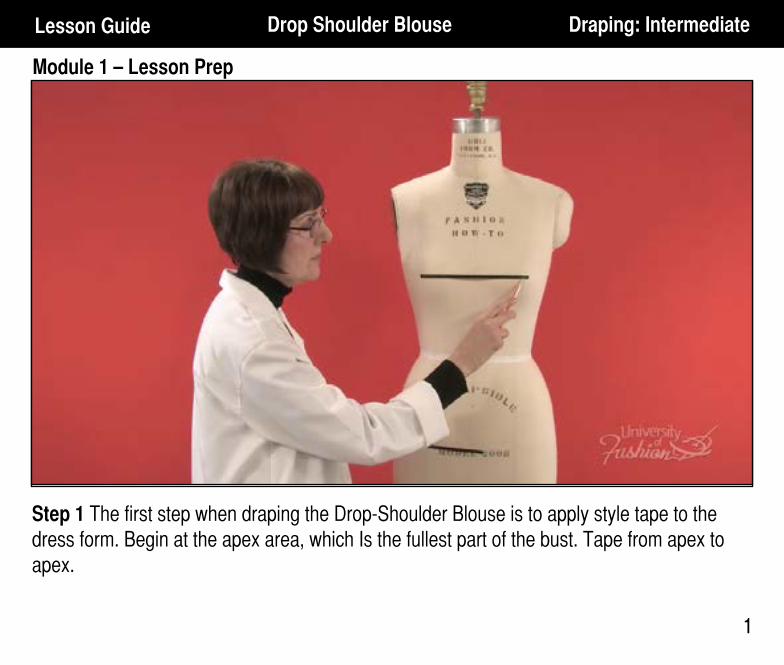
Step 1 The first step when draping the Drop-Shoulder Blouse is to apply style tape to the dress form. Begin at the apex area, which Is the fullest part of the bust. Tape from apex to apex.
2
Module 1 – Lesson Prep
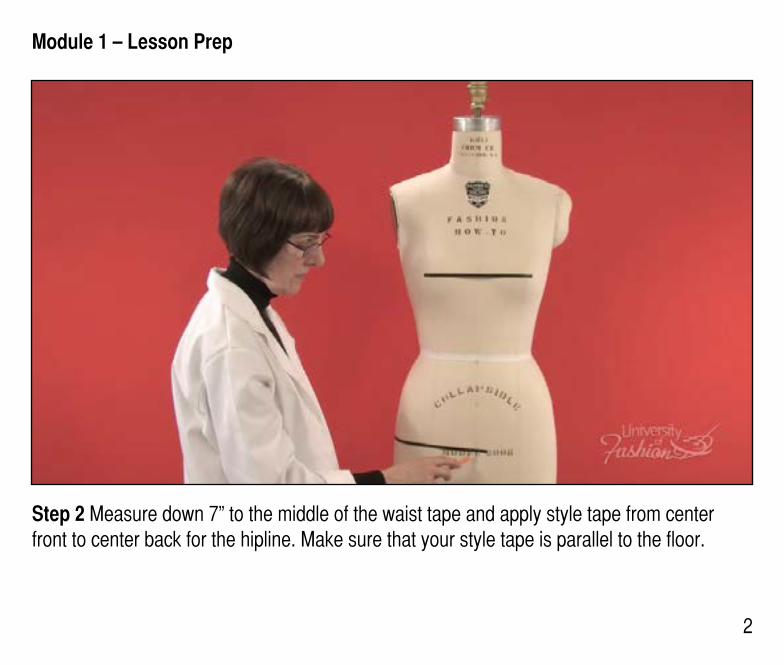
Step 2 Measure down 7” to the middle of the waist tape and apply style tape from center front to center back for the hipline. Make sure that your style tape is parallel to the floor.
3
Module 1 – Lesson Prep
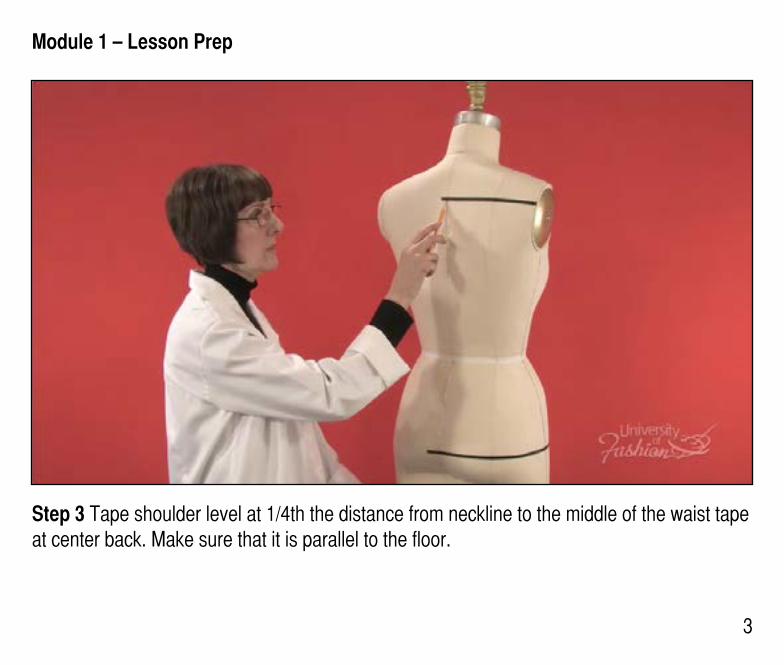
Step 3 Tape shoulder level at 1/4th the distance from neckline to the middle of the waist tape at center back. Make sure that it is parallel to the floor.
4
Lesson Guide Drop Shoulder Blouse Draping: Intermediate
Module 2 – Extract Measurements for Body Muslin Blocks
4
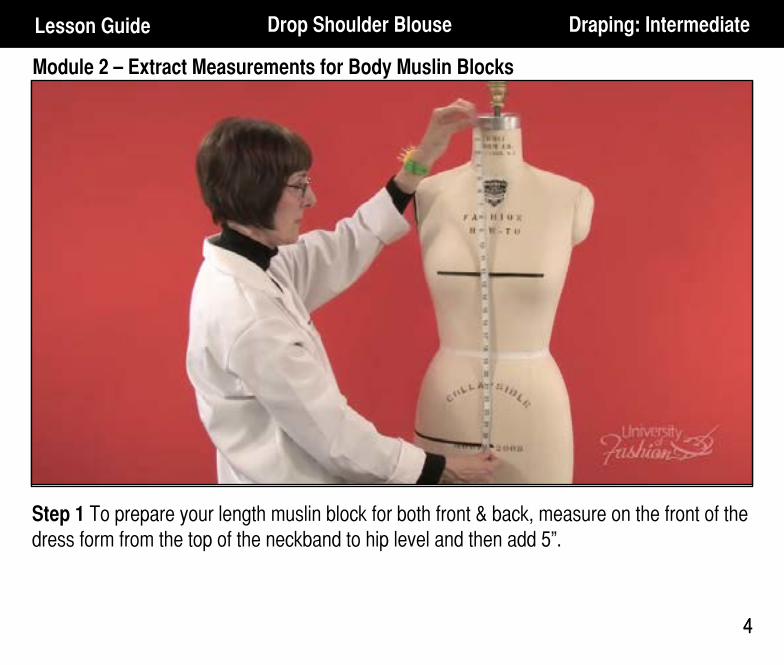
Step 1 To prepare your length muslin block for both front & back, measure on the front of the dress form from the top of the neckband to hip level and then add 5”.
5
Module 2 – Extract Measurements for Body Muslin Blocks
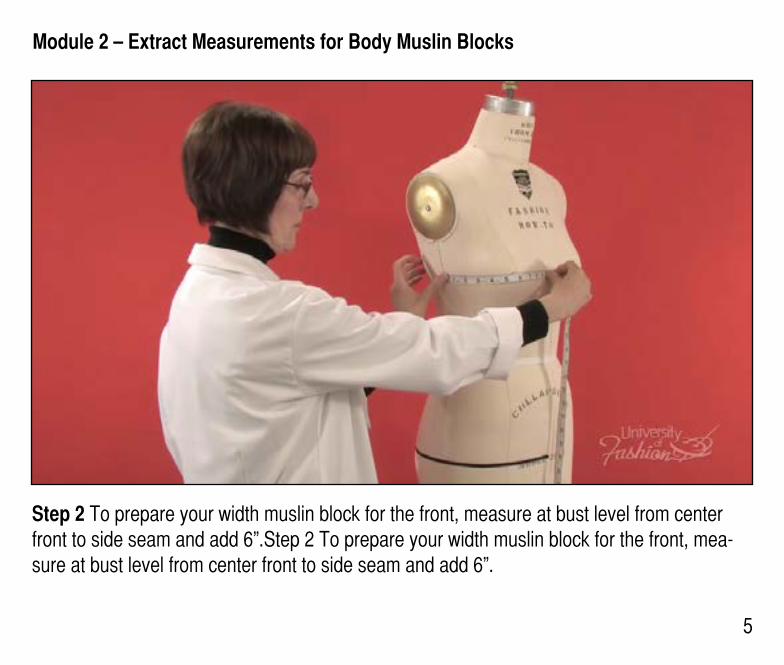
Step 2 To prepare your width muslin block for the front, measure at bust level from center front to side seam and add 6”.Step 2 To prepare your width muslin block for the front, mea-sure at bust level from center front to side seam and add 6”.
Module 2 – Extract Measurements for Body Muslin Blocks
6
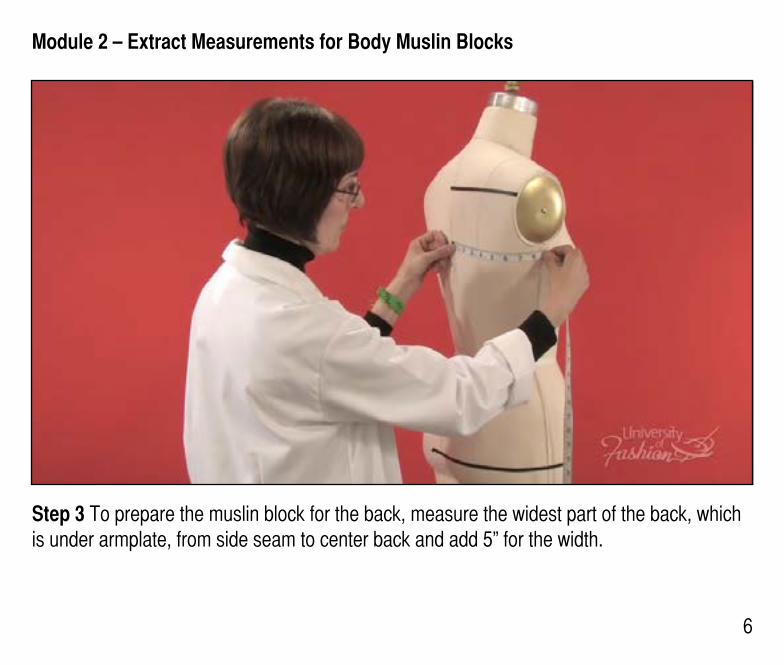
Step 3 To prepare the muslin block for the back, measure the widest part of the back, which is under armplate, from side seam to center back and add 5” for the width.
Module 2 – Extract Measurements for Body Muslin Blocks
7
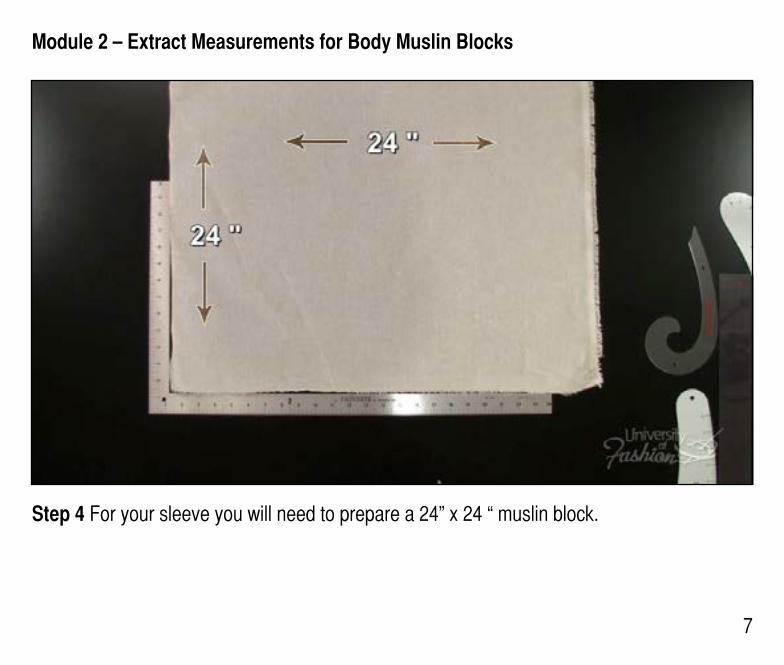
Step 4 For your sleeve you will need to prepare a 24” x 24 “ muslin block.
Module 2 – Extract Measurements for Body Muslin Blocks
8
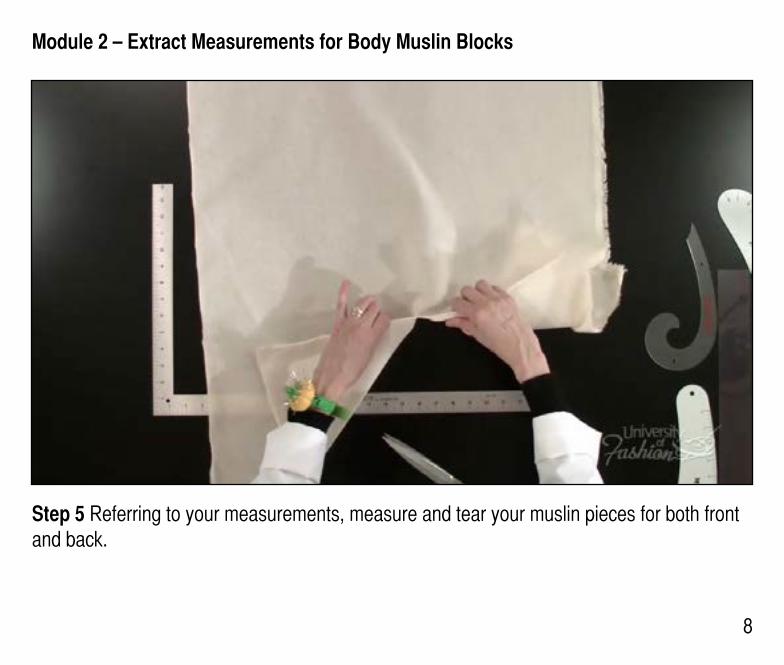
Step 5 Referring to your measurements, measure and tear your muslin pieces for both front and back.
9
Module 2 – Extract Measurements for Body Muslin Blocks
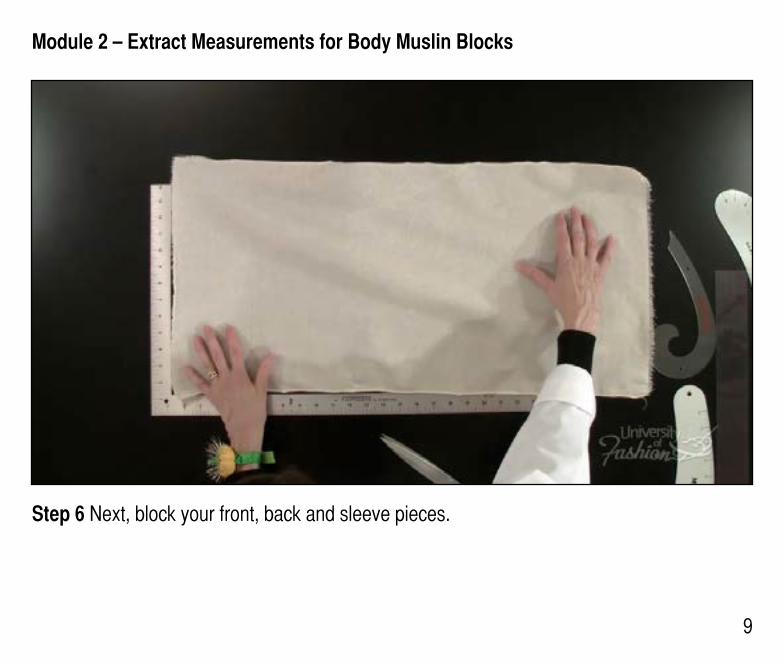
Step 6 Next, block your front, back and sleeve pieces.
10
Module 2 – Extract Measurements for Body Muslin Blocks
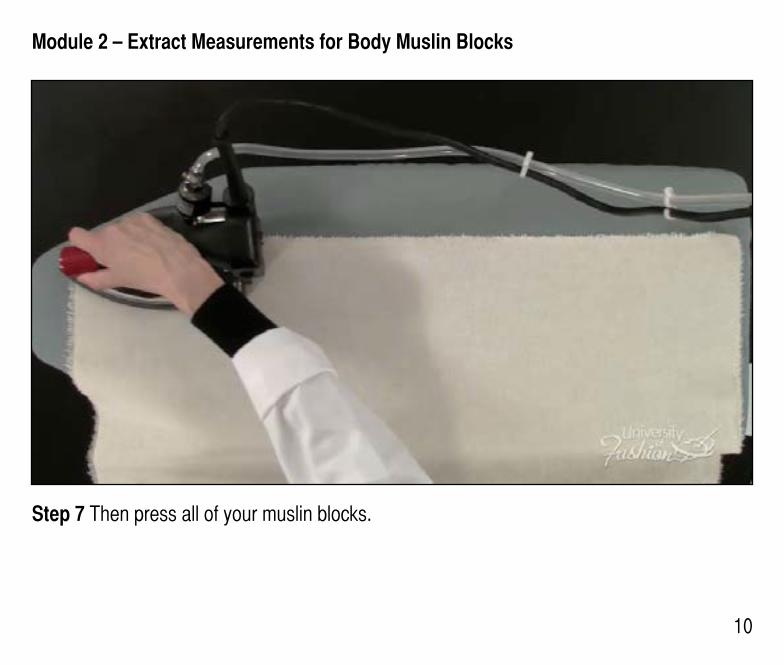
Step 7 Then press all of your muslin blocks.
Module 1
11
Lesson Guide Drop Shoulder Blouse Draping: Intermediate
11
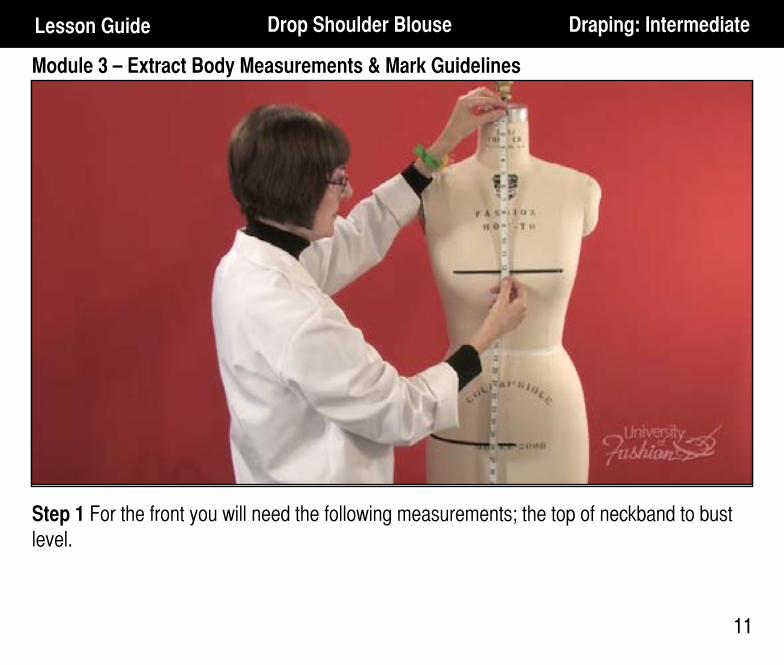
Module 3 – Extract Body Measurements & Mark Guidelines
Step 1 For the front you will need the following measurements; the top of neckband to bust level.
Module 3 – Extract Body Measurements & Mark Guidelines
12
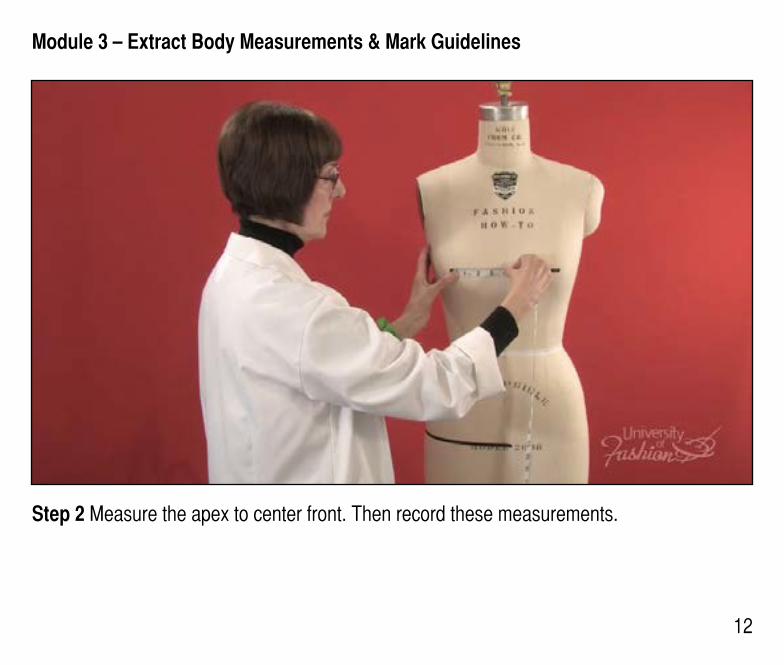
Step 2 Measure the apex to center front. Then record these measurements.
Module 3 – Extract Body Measurements & Mark Guidelines
13
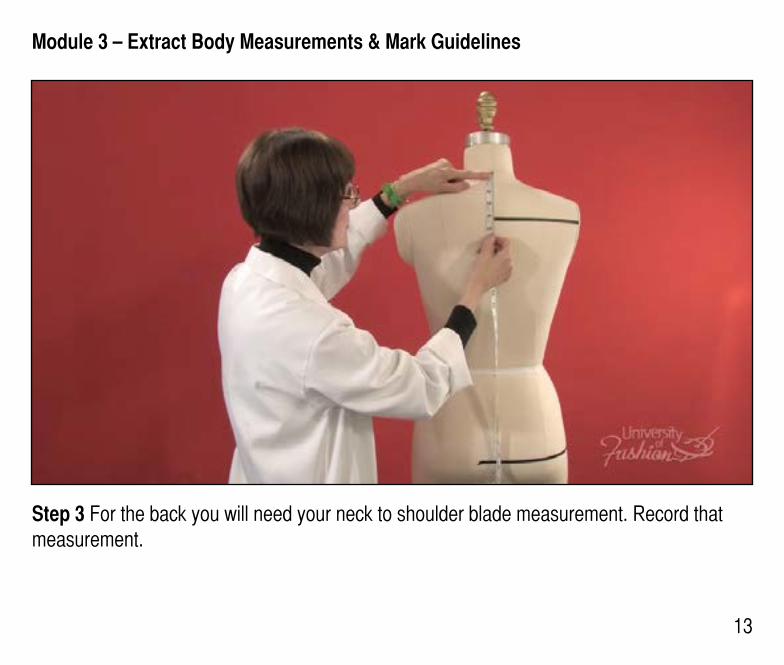
Step 3 For the back you will need your neck to shoulder blade measurement. Record that measurement.
Module 3 – Extract Body Measurements & Mark Guidelines
14
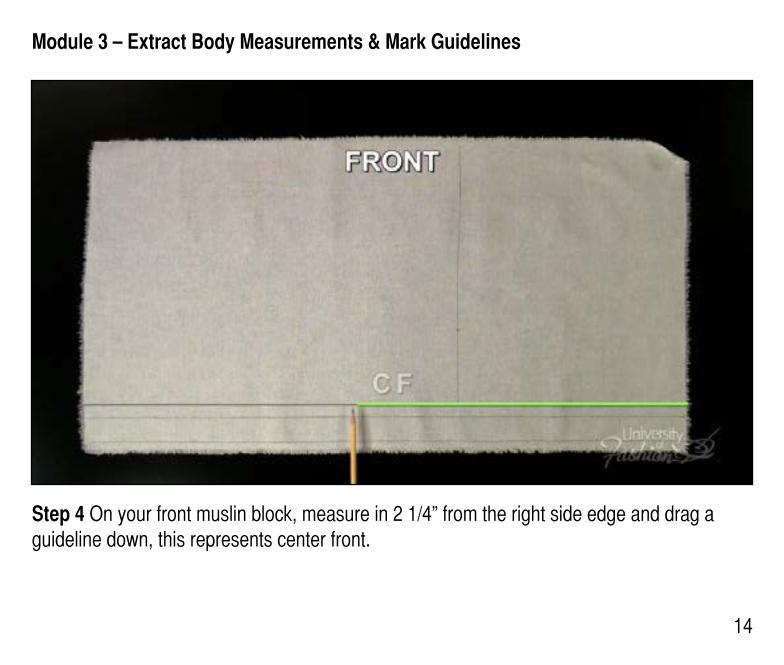
Step 4 On your front muslin block, measure in 2 1/4” from the right side edge and drag a guideline down, this represents center front.
Module 3 – Extract Body Measurements & Mark Guidelines
15
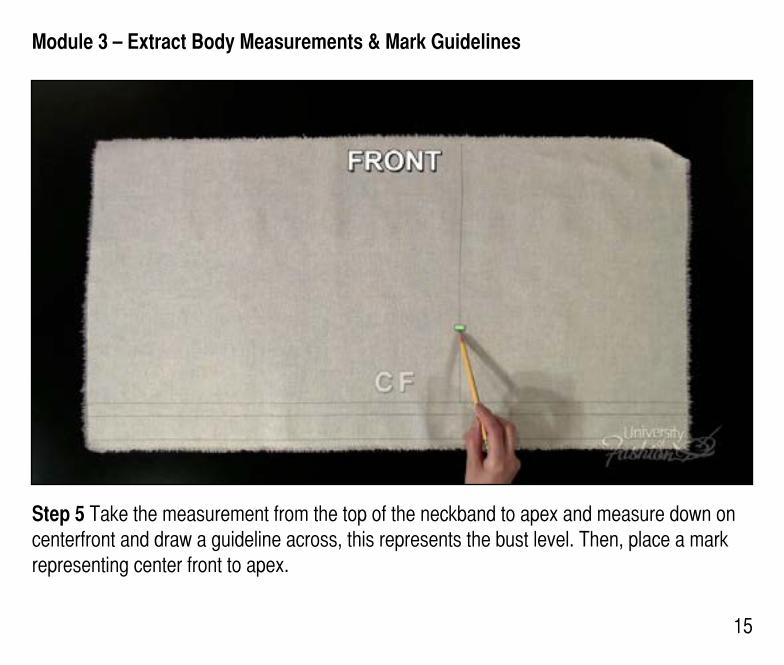
Step 5 Take the measurement from the top of the neckband to apex and measure down on centerfront and draw a guideline across, this represents the bust level. Then, place a mark representing center front to apex.
Module 3 – Extract Body Measurements & Mark Guidelines
16
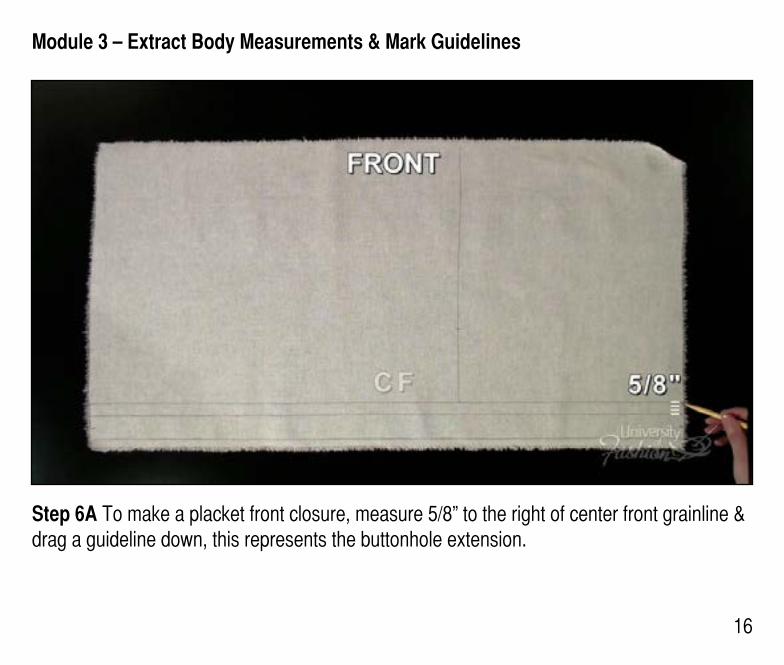
Step 6A To make a placket front closure, measure 5/8” to the right of center front grainline & drag a guideline down, this represents the buttonhole extension.

Module 3 – Extract Body Measurements & Mark Guidelines
17
Step 6B Then measure 1 1/4” to the right of the buttonhole extension and drag another guideline down, this completes the placket front closure.
Module 3 – Extract Body Measurements & Mark Guidelines
18
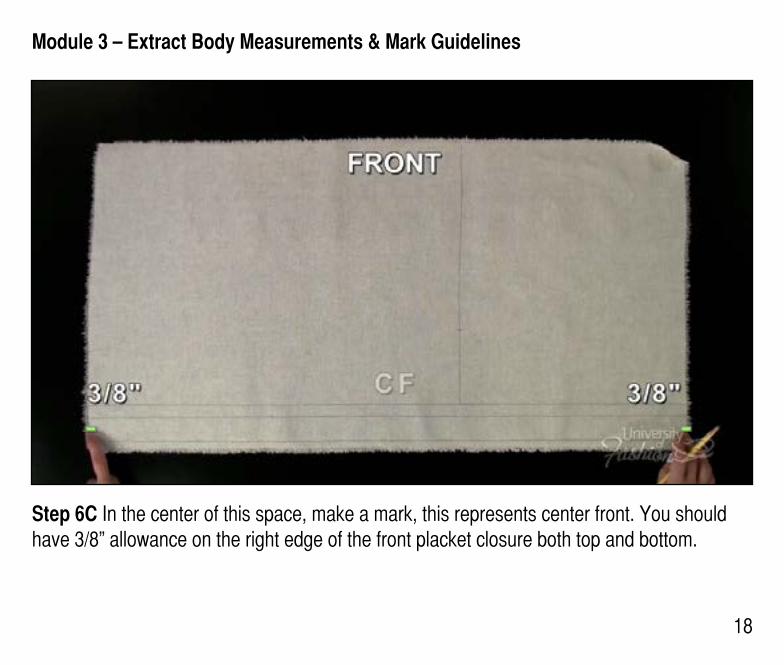
Step 6C In the center of this space, make a mark, this represents center front. You should have 3/8” allowance on the right edge of the front placket closure both top and bottom.
Module 3 – Extract Body Measurements & Mark Guidelines
19
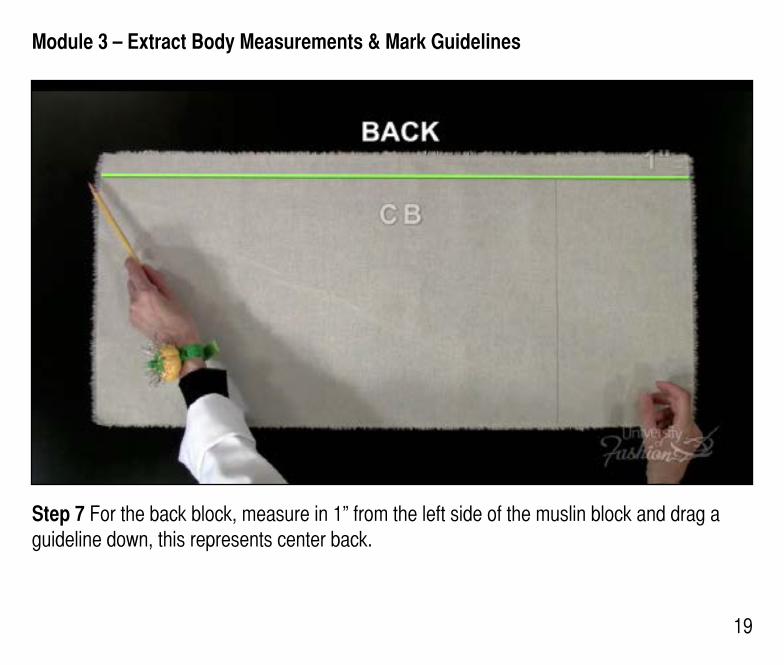
Step 7 For the back block, measure in 1” from the left side of the muslin block and drag a guideline down, this represents center back.

Module 3 – Extract Body Measurements & Mark Guidelines
20
Step 8 At center back, measure down 3” from the top of the muslin and place a mark, this represents neckline.
Module 3 – Extract Body Measurements & Mark Guidelines
21
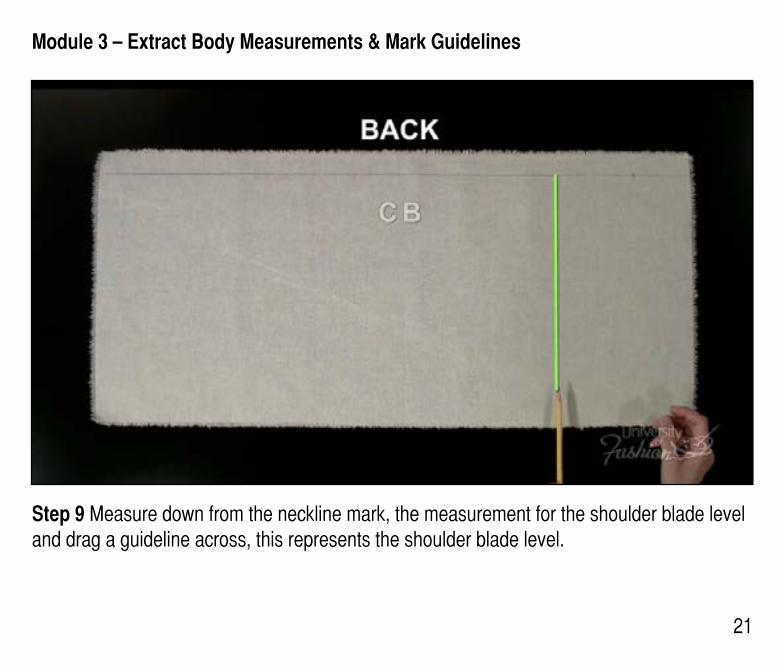
Step 9 Measure down from the neckline mark, the measurement for the shoulder blade level and drag a guideline across, this represents the shoulder blade level.
Module 3 – Extract Body Measurements & Mark Guidelines
22
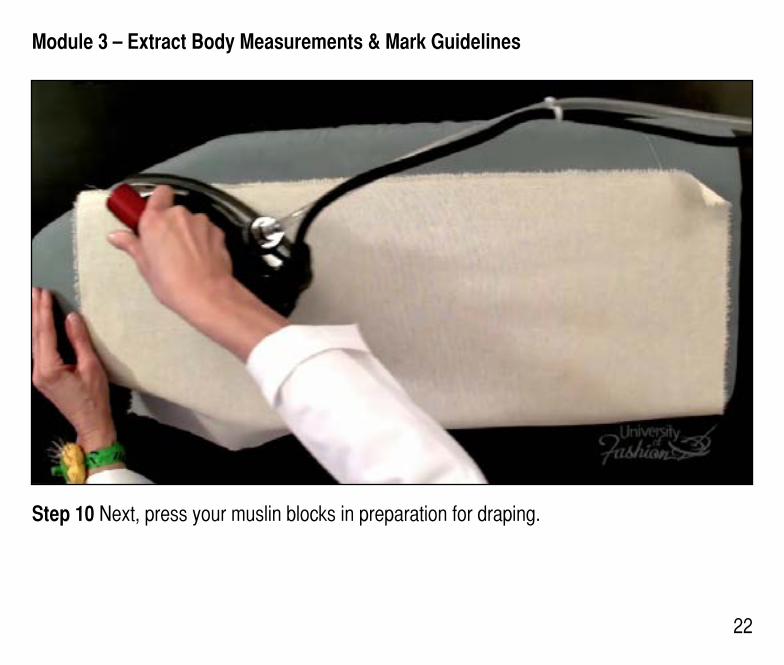
Step 10 Next, press your muslin blocks in preparation for draping.
23
Lesson Guide Drop Shoulder Blouse Draping: Intermediate
Module – 4 Draping the Front
23
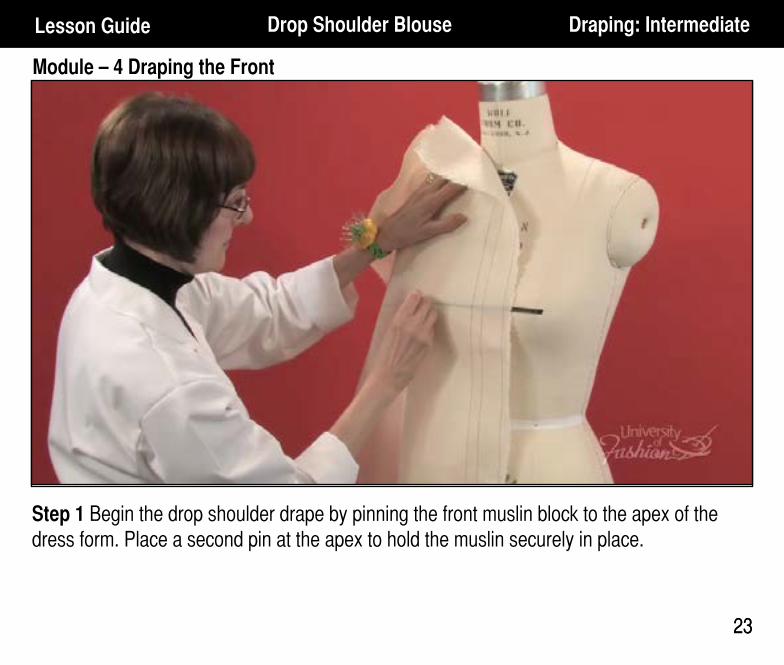
Step 1 Begin the drop shoulder drape by pinning the front muslin block to the apex of the dress form. Place a second pin at the apex to hold the muslin securely in place.
Module – 4 Draping the Front
24
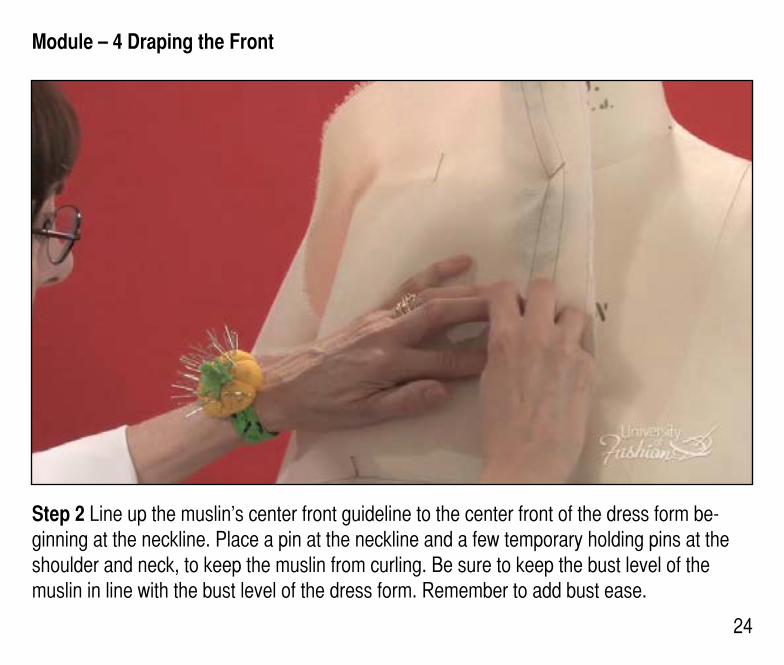
Step 2 Line up the muslin’s center front guideline to the center front of the dress form be-ginning at the neckline. Place a pin at the neckline and a few temporary holding pins at the shoulder and neck, to keep the muslin from curling. Be sure to keep the bust level of the muslin in line with the bust level of the dress form. Remember to add bust ease.
Module – 4 Draping the Front
25
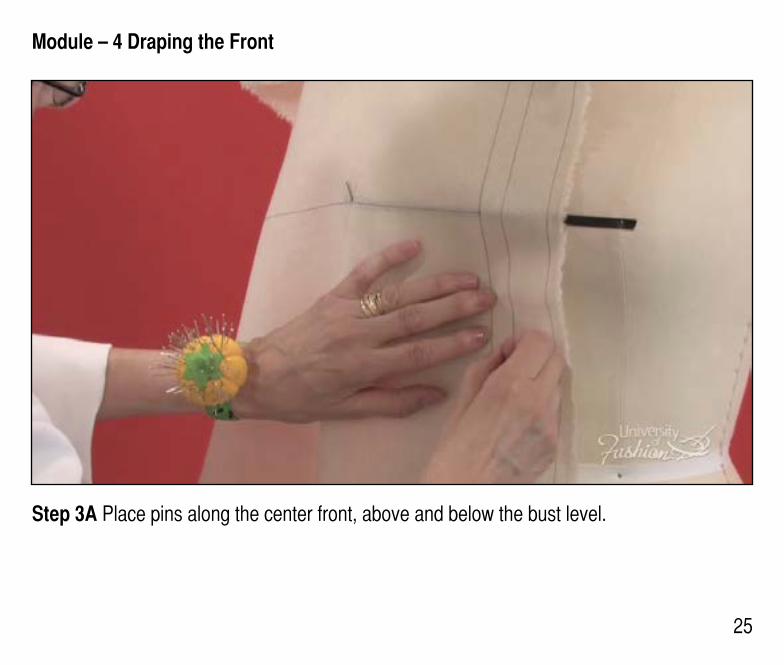
Step 3A Place pins along the center front, above and below the bust level.

Module – 4 Draping the Front
26
Step 3B Place a pin at the center front/hipline intersection.
Module – 4 Draping the Front
27
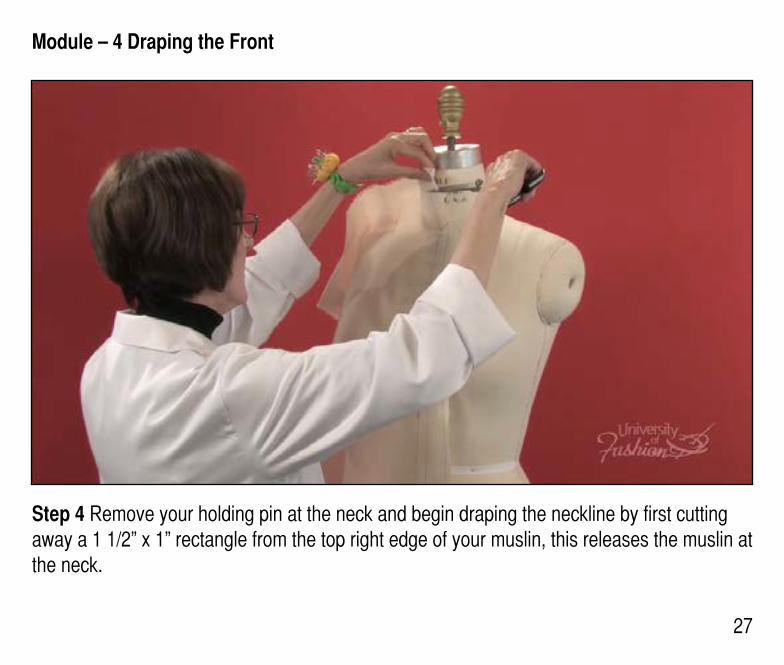
Step 4 Remove your holding pin at the neck and begin draping the neckline by first cutting away a 1 1/2” x 1” rectangle from the top right edge of your muslin, this releases the muslin at the neck.
Module – 4 Draping the Front
28
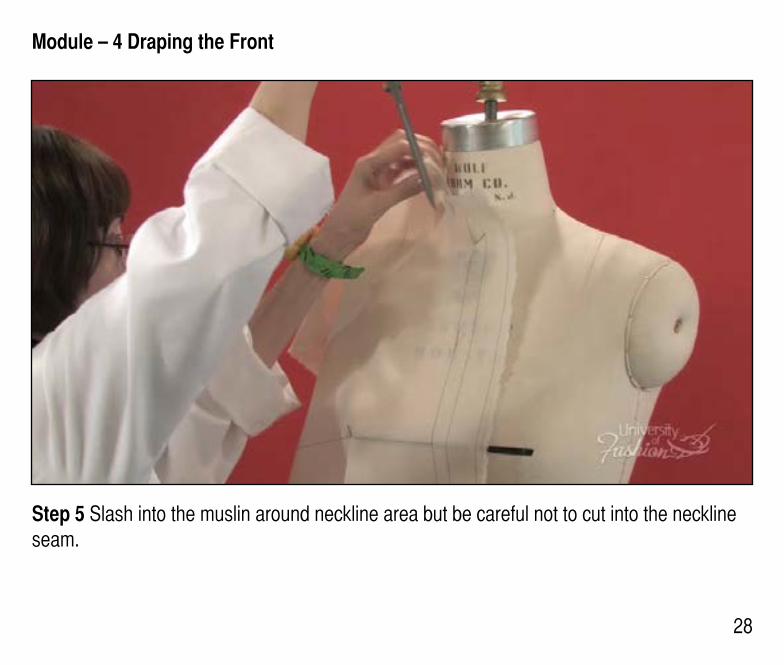
Step 5 Slash into the muslin around neckline area but be careful not to cut into the neckline seam.
Module – 4 Draping the Front
29
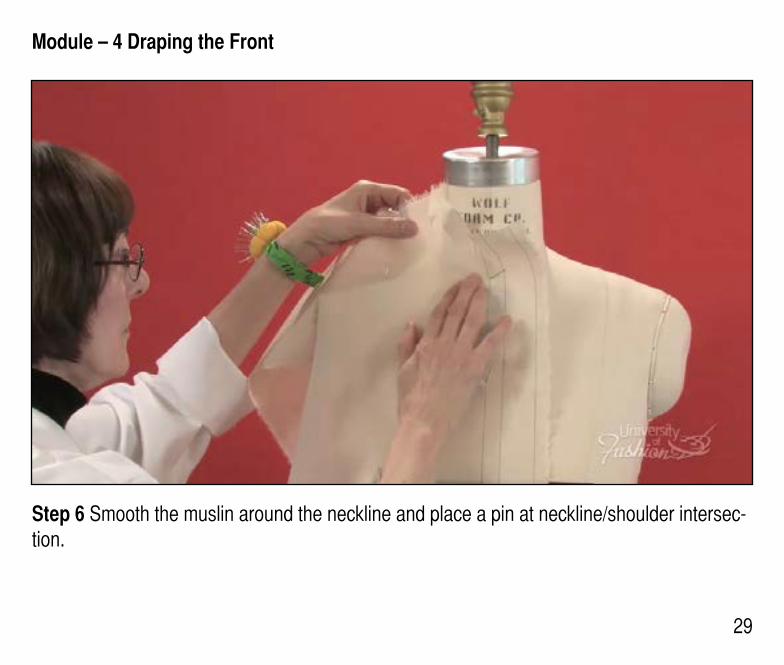
Step 6 Smooth the muslin around the neckline and place a pin at neckline/shoulder intersec-tion.
Module – 4 Draping the Front
30
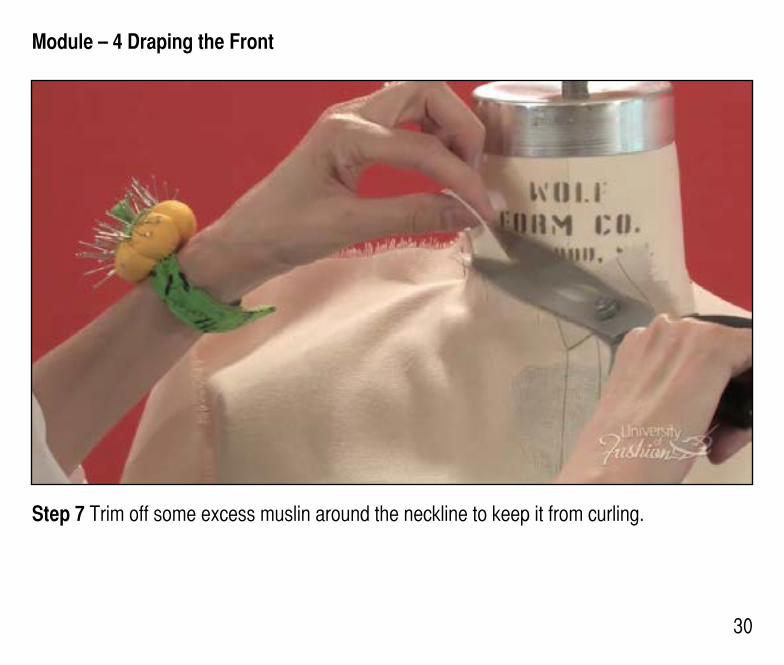
Step 7 Trim off some excess muslin around the neckline to keep it from curling.
Module – 4 Draping the Front
31
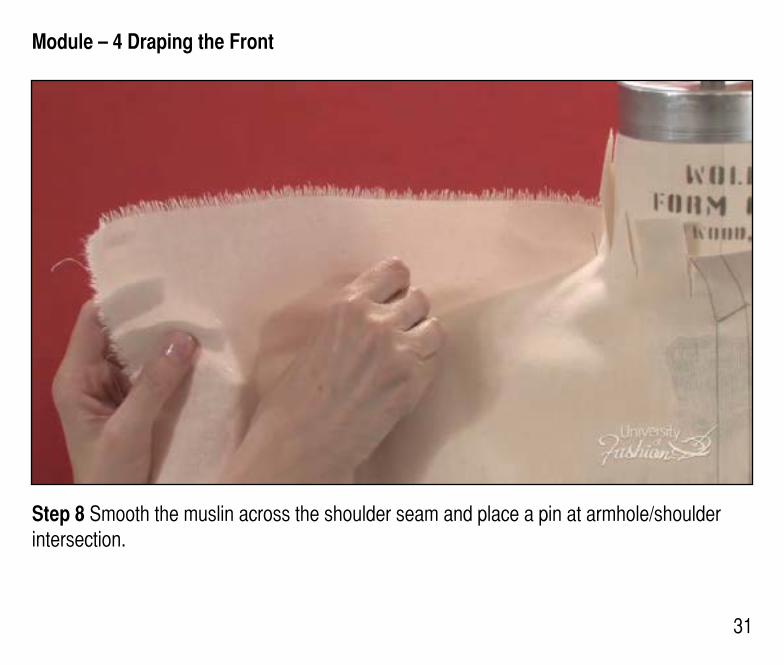
Step 8 Smooth the muslin across the shoulder seam and place a pin at armhole/shoulder intersection.
Module – 4 Draping the Front
32
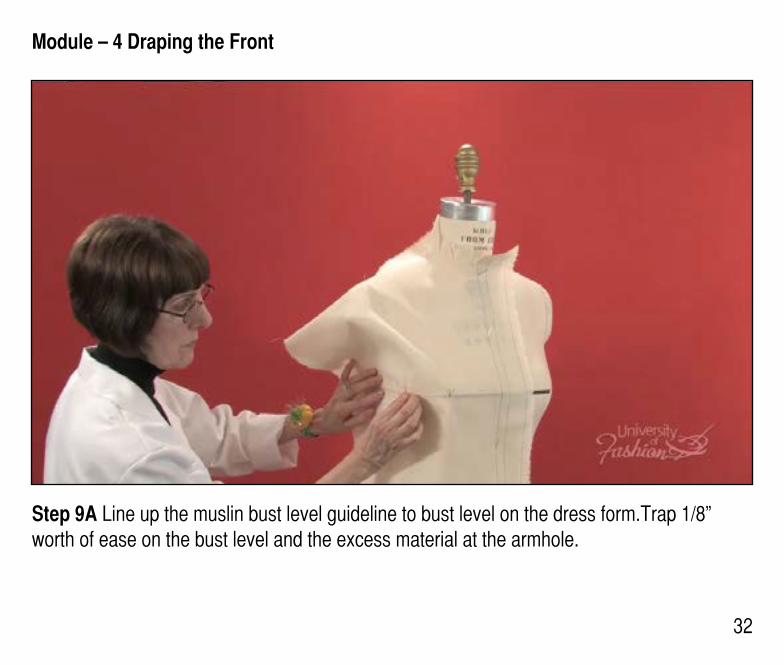
Step 9A Line up the muslin bust level guideline to bust level on the dress form.Trap 1/8” worth of ease on the bust level and the excess material at the armhole.
Module – 4 Draping the Front
33
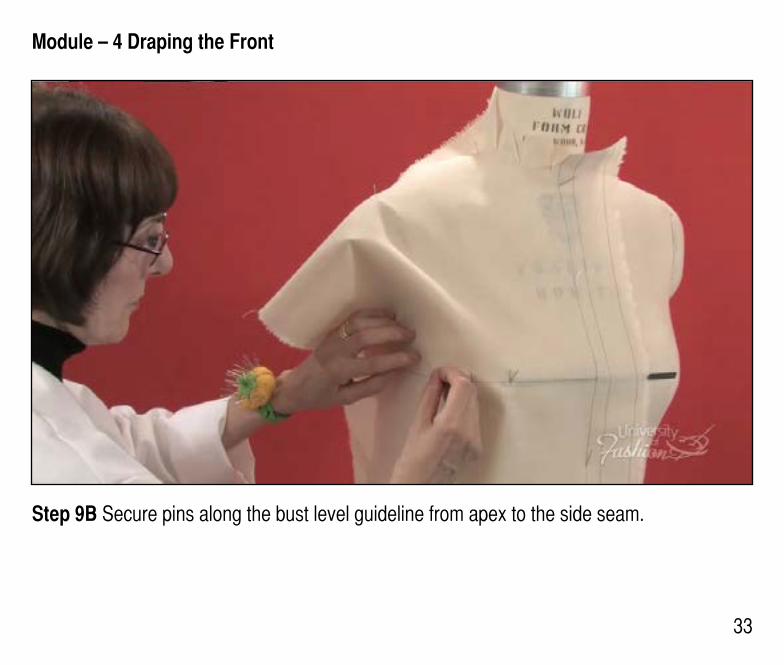
Step 9B Secure pins along the bust level guideline from apex to the side seam.
Module – 4 Draping the Front
34
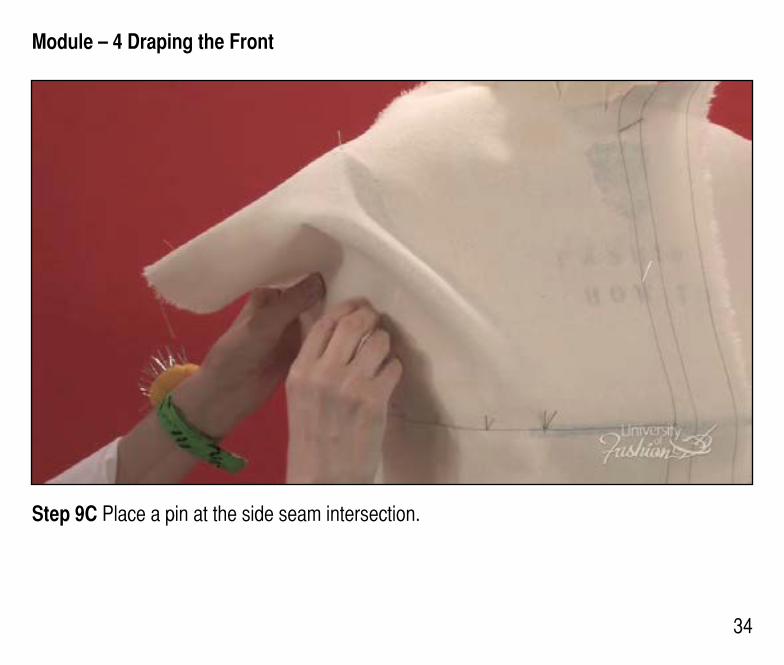
Step 9C Place a pin at the side seam intersection.
Module – 4 Draping the Front
35
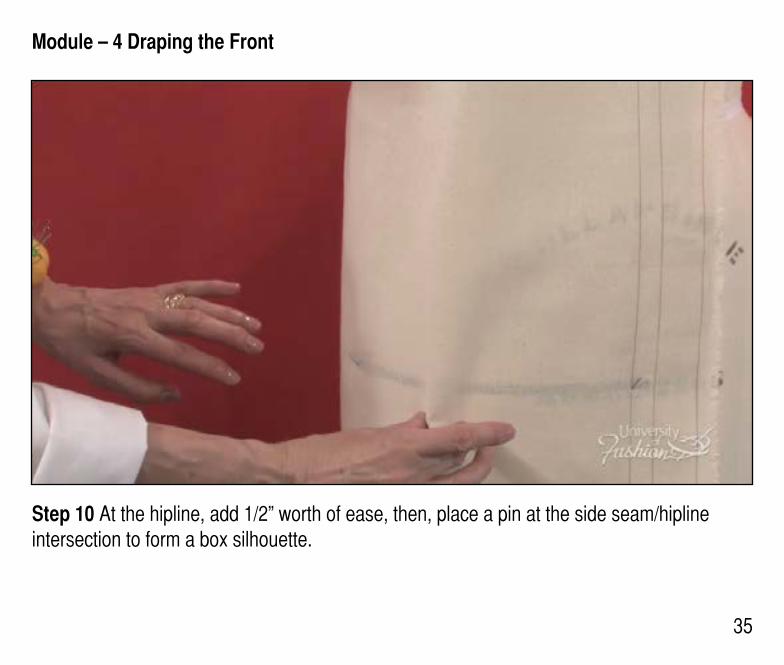
Step 10 At the hipline, add 1/2” worth of ease, then, place a pin at the side seam/hipline intersection to form a box silhouette.
36
Lesson Guide Drop Shoulder Blouse Draping: Intermediate
Module – 5 Marking the Front
36
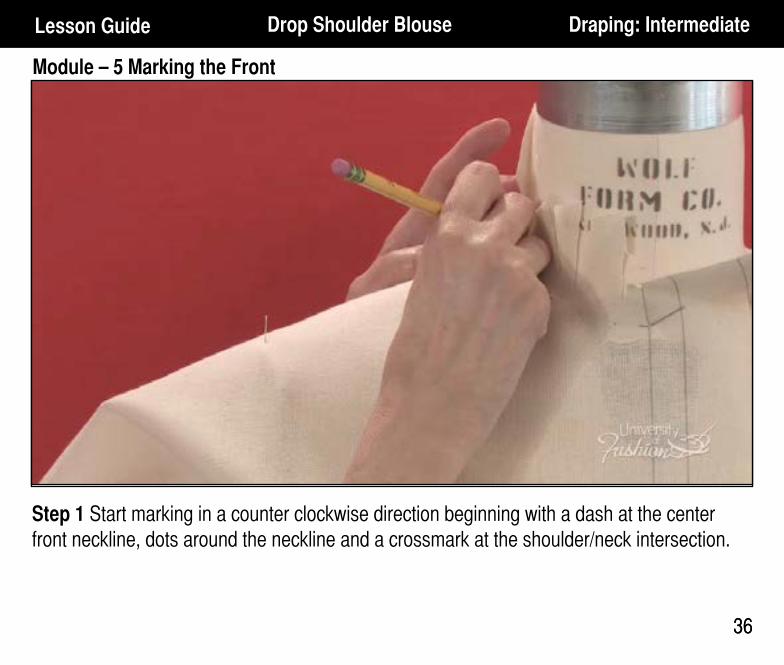
Step 1 Start marking in a counter clockwise direction beginning with a dash at the center front neckline, dots around the neckline and a crossmark at the shoulder/neck intersection.

Module – 5 Marking the Front
37
Step 2 Place a crossmark at the shoulder/armhole intersection.
Module – 5 Marking the Front
38
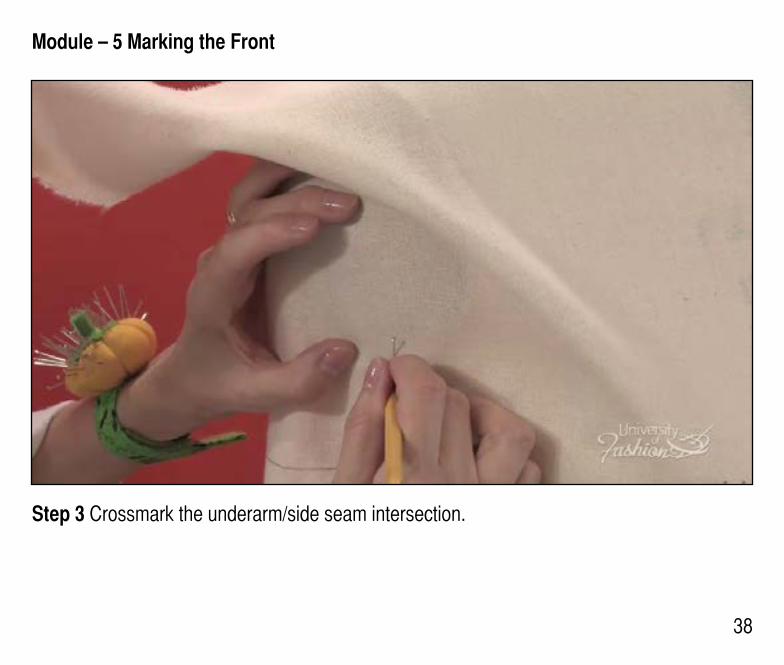
Step 3 Crossmark the underarm/side seam intersection.
Module – 5 Marking the Front
39
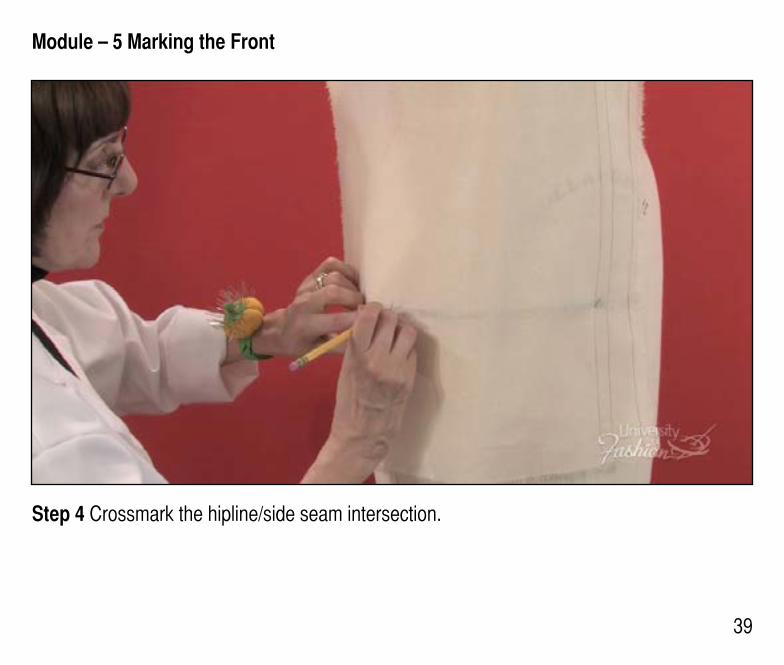
Step 4 Crossmark the hipline/side seam intersection.
Module – 5 Marking the Front
40
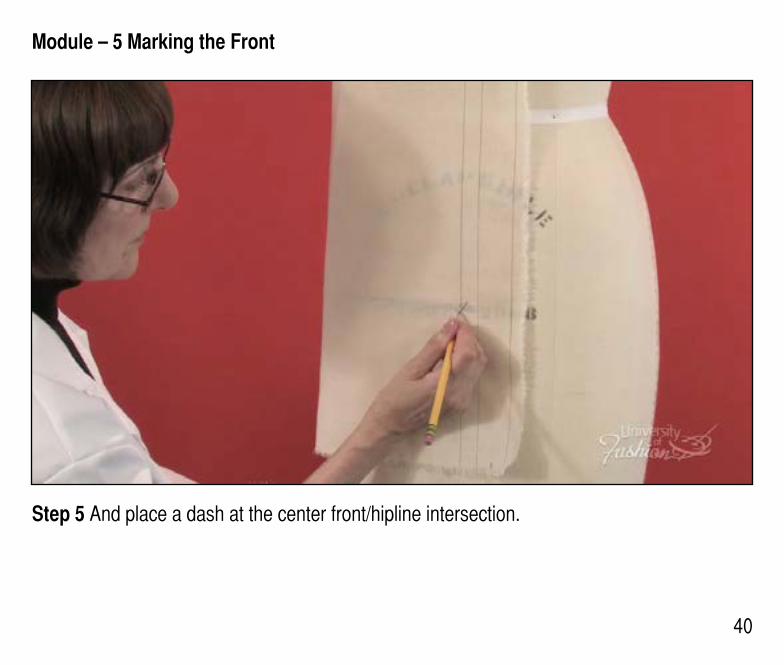
Step 5 And place a dash at the center front/hipline intersection.
Module – 5 Marking the Front
41
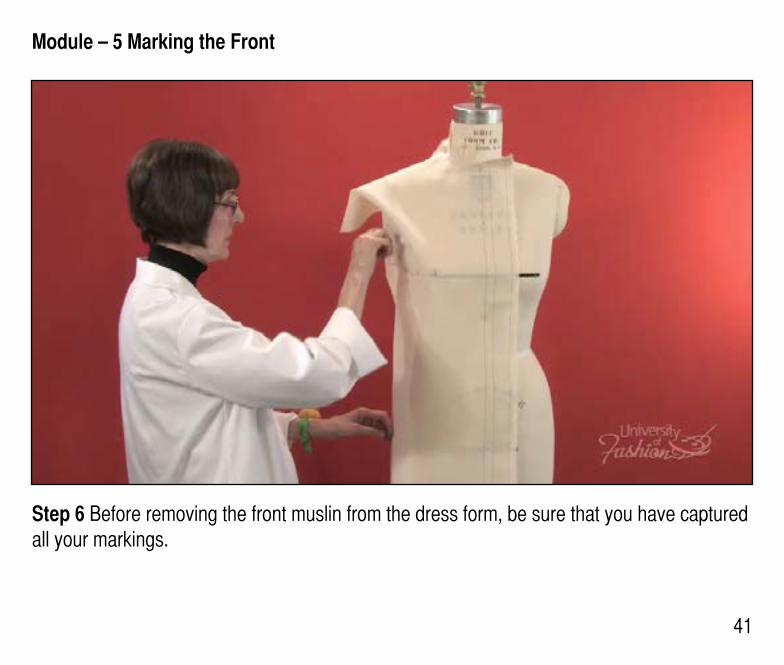
Step 6 Before removing the front muslin from the dress form, be sure that you have captured all your markings.
42
Lesson Guide Drop Shoulder Blouse Draping: Intermediate
Module – 6 Trueing the Front
42
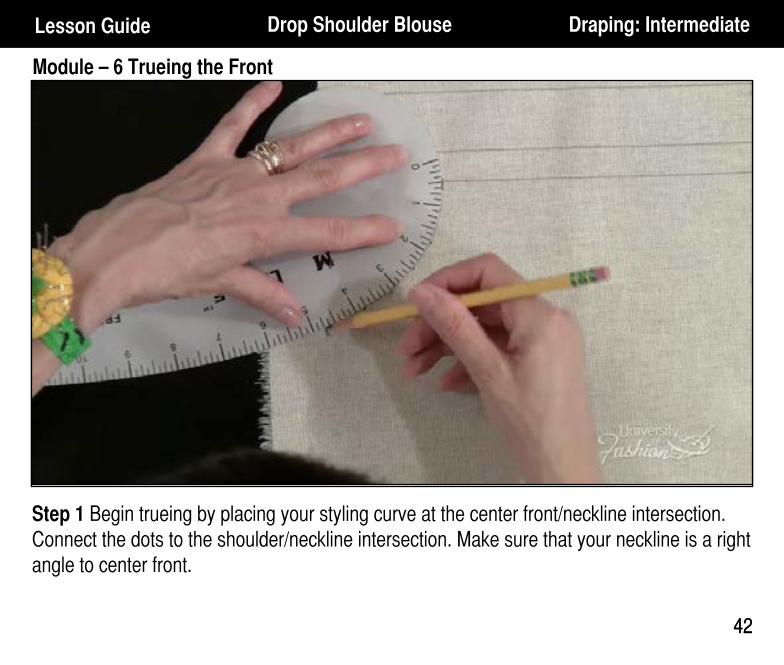
Step 1 Begin trueing by placing your styling curve at the center front/neckline intersection. Connect the dots to the shoulder/neckline intersection. Make sure that your neckline is a right angle to center front.
Module – 6 Trueing the Front
43
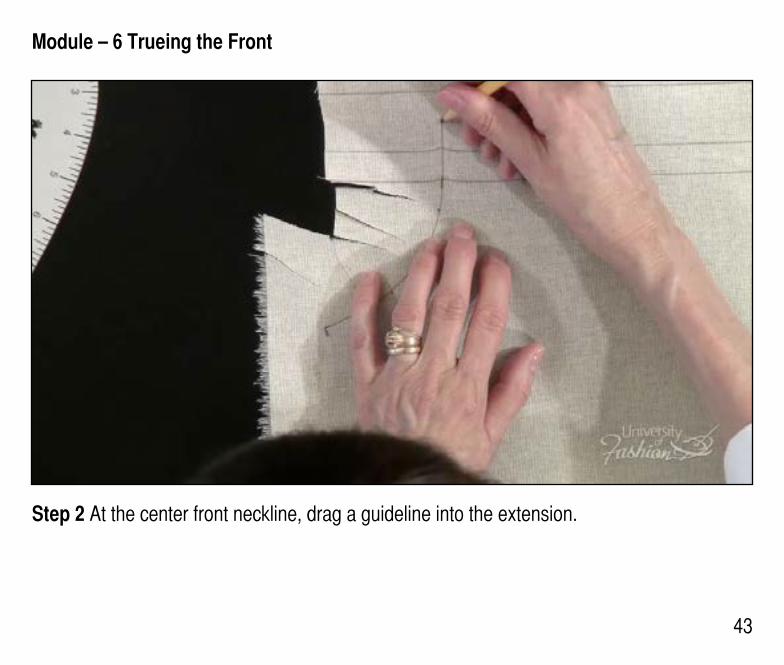
Step 2 At the center front neckline, drag a guideline into the extension.
Module – 6 Trueing the Front
44
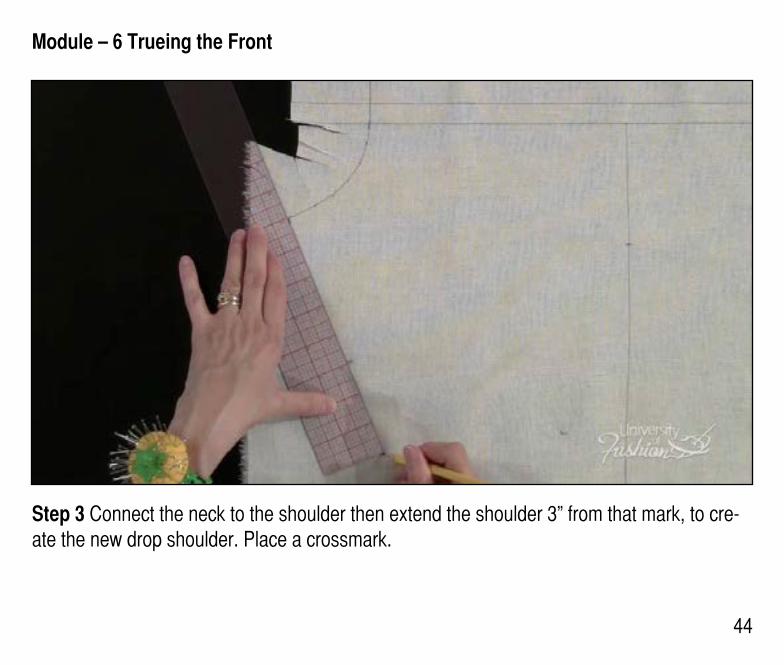
Step 3 Connect the neck to the shoulder then extend the shoulder 3” from that mark, to cre-ate the new drop shoulder. Place a crossmark.
Module – 6 Trueing the Front
45
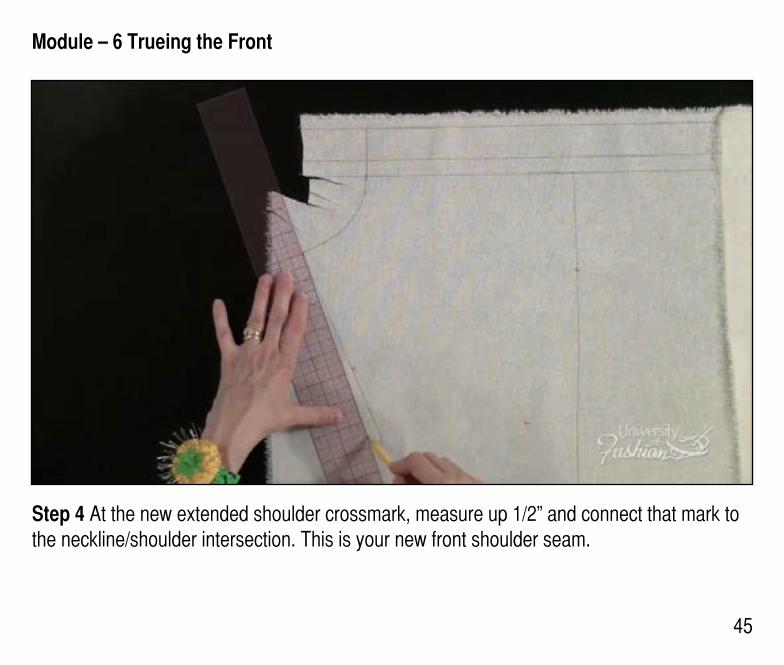
Step 4 At the new extended shoulder crossmark, measure up 1/2” and connect that mark to the neckline/shoulder intersection. This is your new front shoulder seam.
Module – 6 Trueing the Front
46
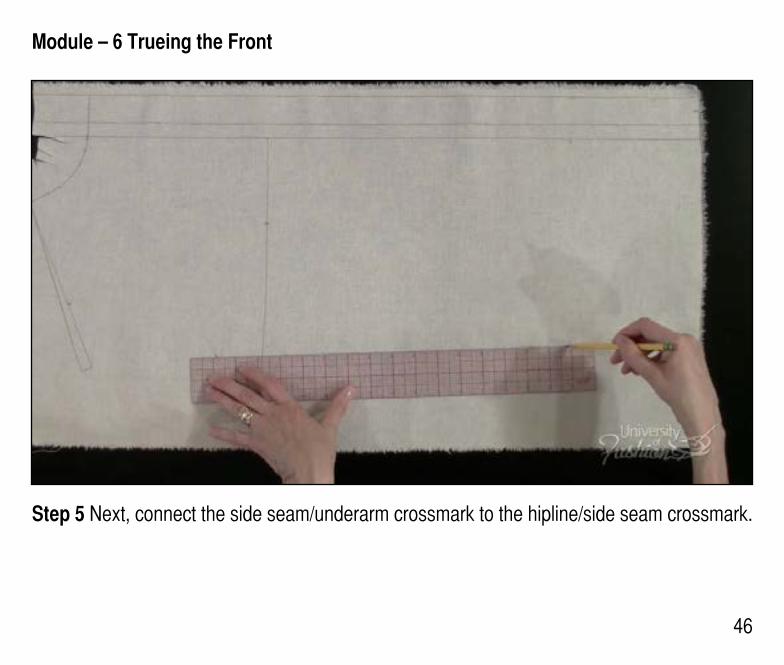
Step 5 Next, connect the side seam/underarm crossmark to the hipline/side seam crossmark.
Module – 6 Trueing the Front
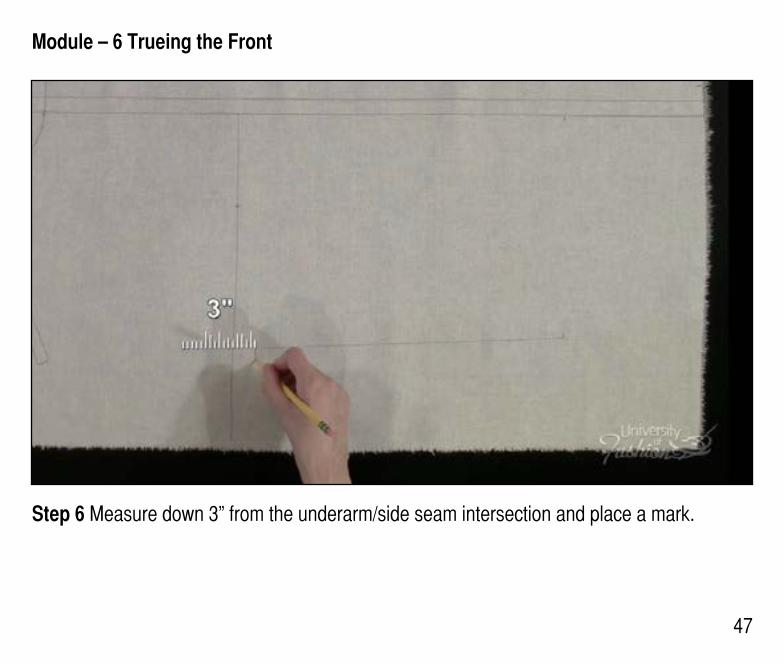
47
Step 6 Measure down 3” from the underarm/side seam intersection and place a mark.
Module – 6 Trueing the Front
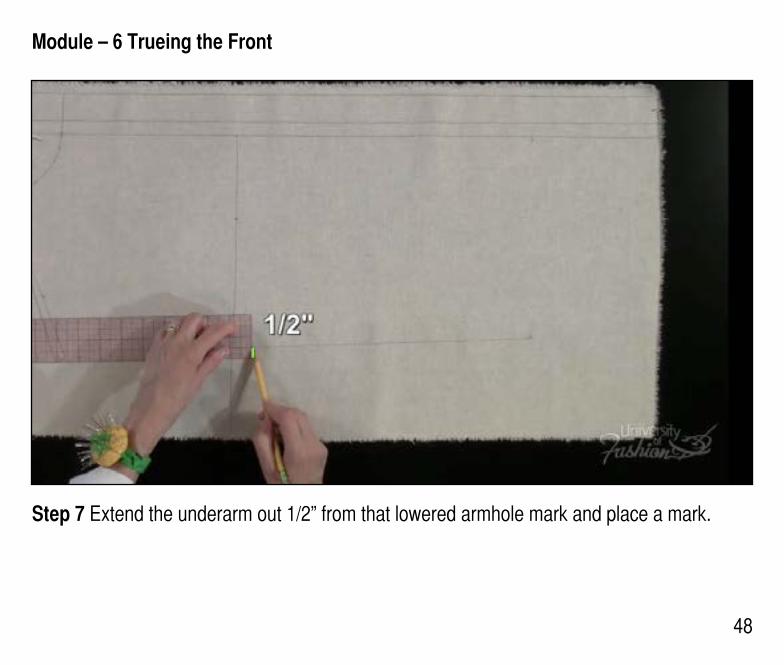
48
Step 7 Extend the underarm out 1/2” from that lowered armhole mark and place a mark.
Module – 6 Trueing the Front
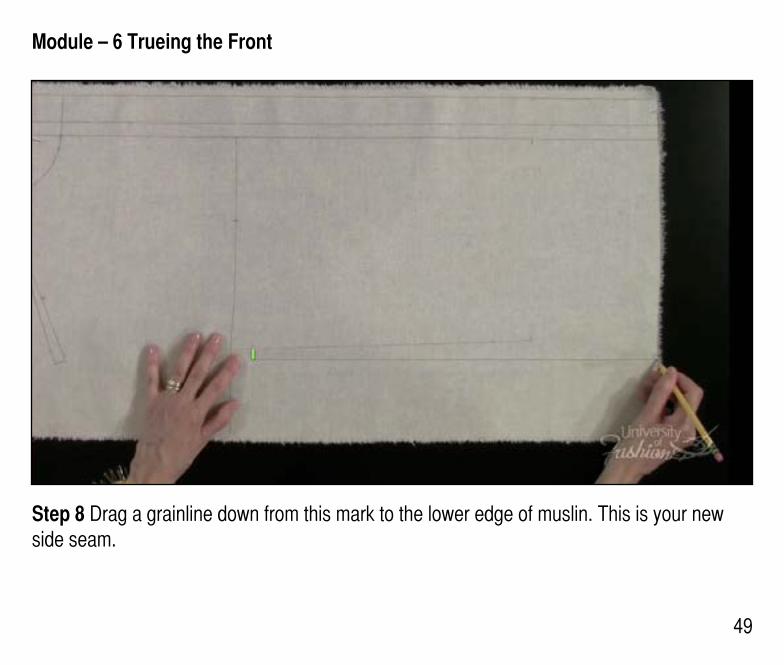
49
Step 8 Drag a grainline down from this mark to the lower edge of muslin. This is your new side seam.
Module – 6 Trueing the Front
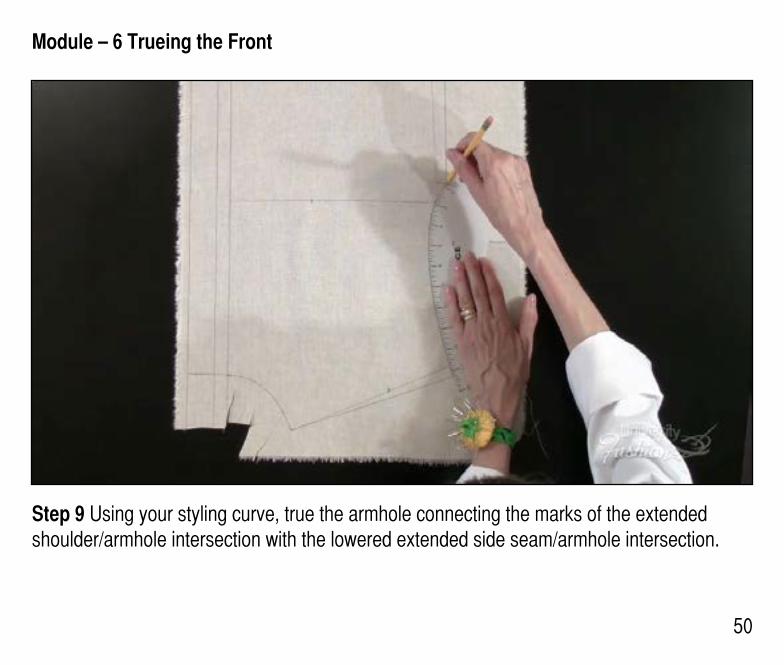
50
Step 9 Using your styling curve, true the armhole connecting the marks of the extended shoulder/armhole intersection with the lowered extended side seam/armhole intersection.
Module – 6 Trueing the Front
51
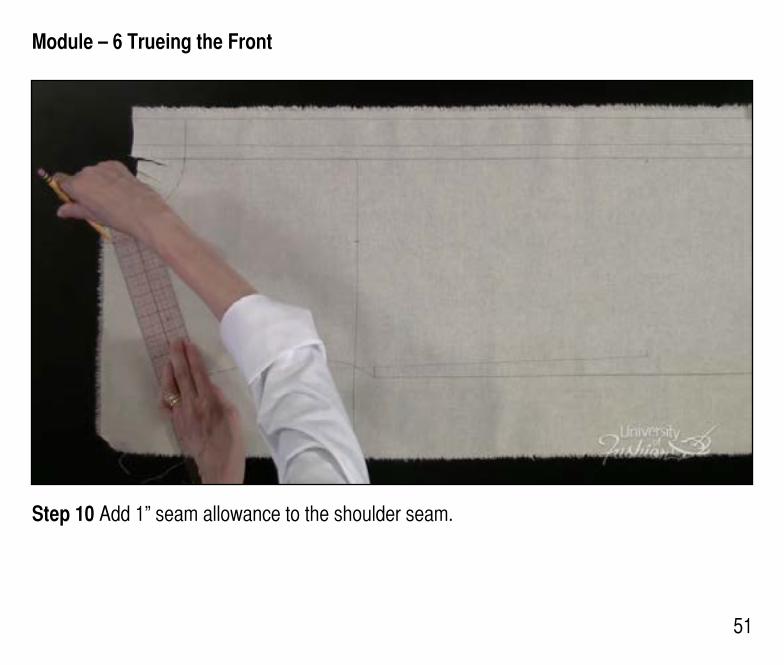
Step 10 Add 1” seam allowance to the shoulder seam.
Module – 6 Trueing the Front
52
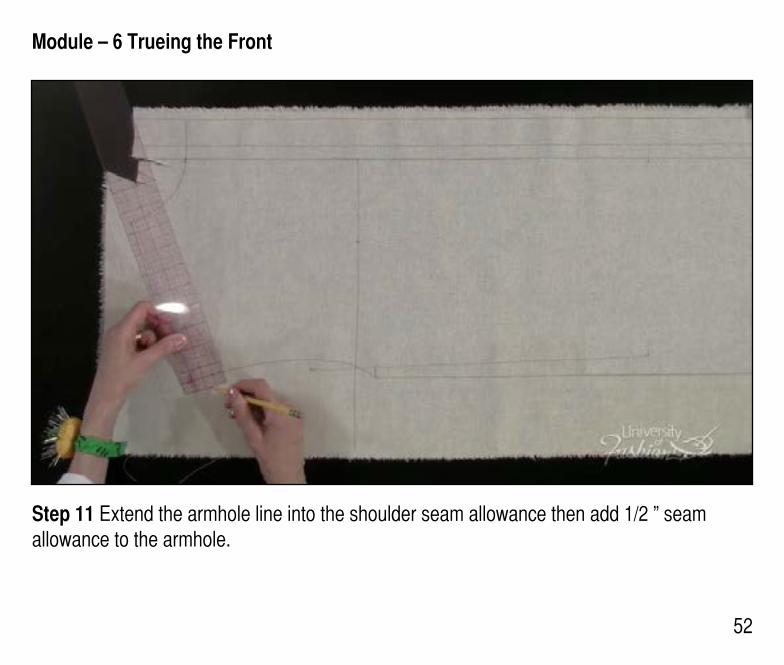
Step 11 Extend the armhole line into the shoulder seam allowance then add 1/2 ” seam allowance to the armhole.
Module – 6 Trueing the Front
53
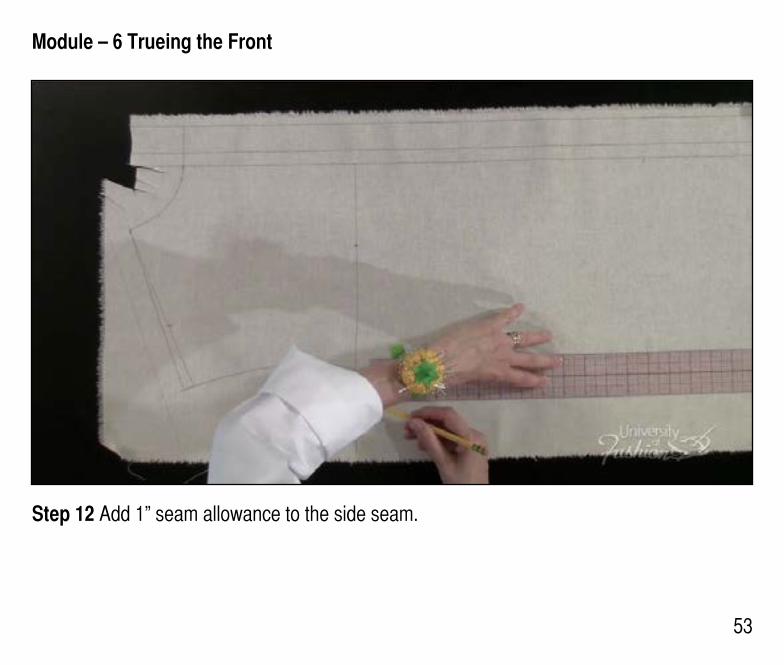
Step 12 Add 1” seam allowance to the side seam.

Module – 6 Trueing the Front
54
Step 13 Trim the excess muslin from the side seam, the armhole and the shoulder seam.
55
Lesson Guide Drop Shoulder Blouse Draping: Intermediate
Module 7 – Draping the Back
55
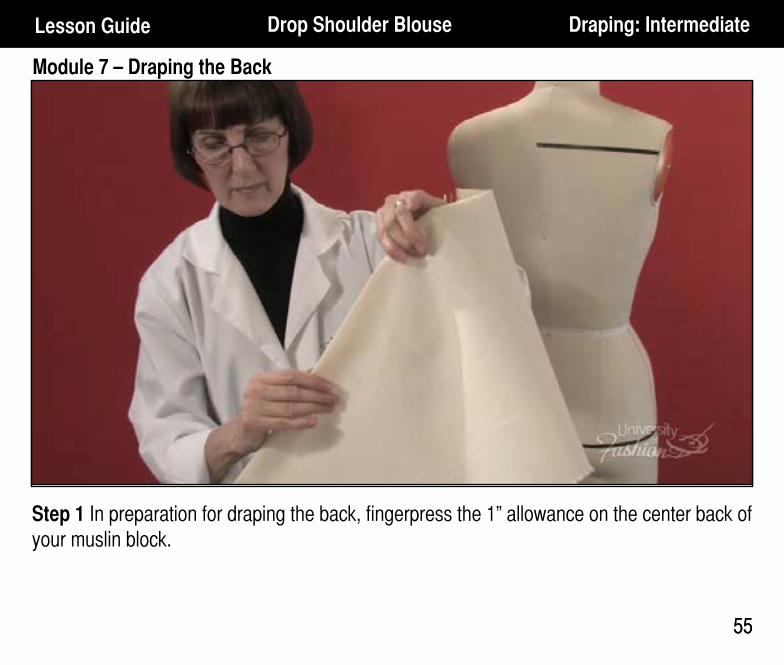
Step 1 In preparation for draping the back, fingerpress the 1” allowance on the center back of your muslin block.
Module 7 – Draping the Back
56
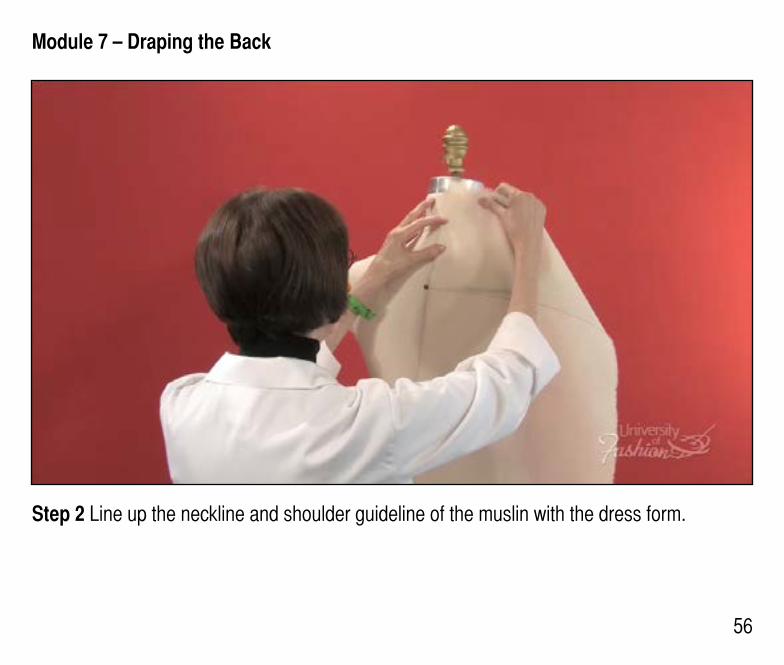
Step 2 Line up the neckline and shoulder guideline of the muslin with the dress form.
Module 7 – Draping the Back
57
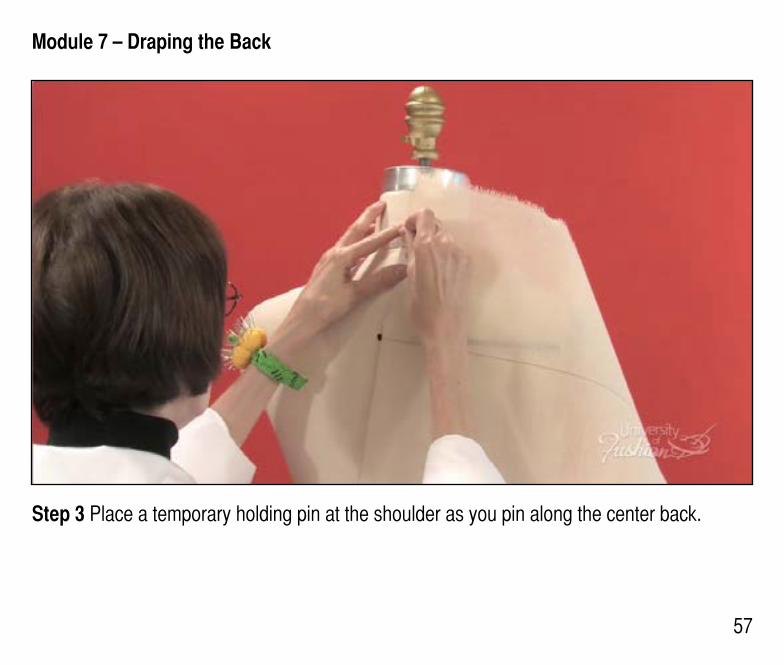
Step 3 Place a temporary holding pin at the shoulder as you pin along the center back.
Module 7 – Draping the Back
58
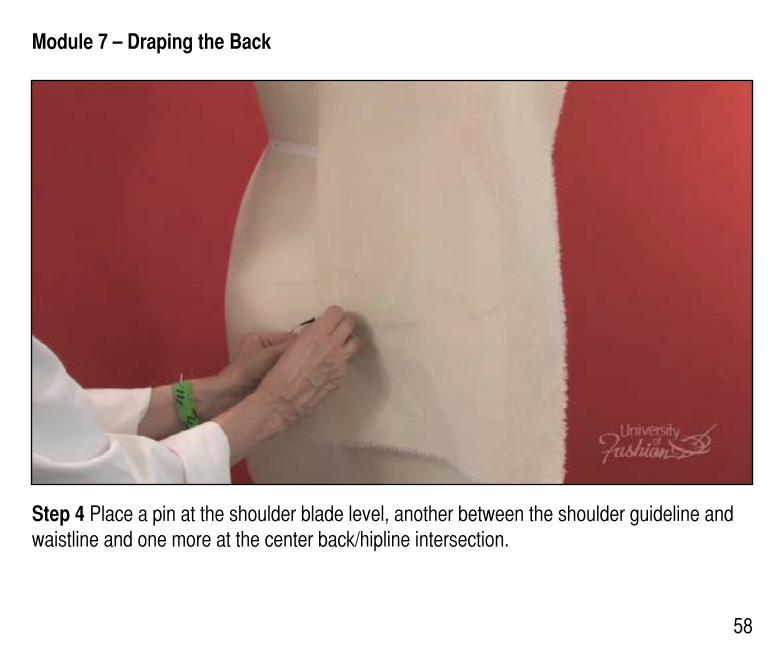
Step 4 Place a pin at the shoulder blade level, another between the shoulder guideline and waistline and one more at the center back/hipline intersection.
Module 7 – Draping the Back
59
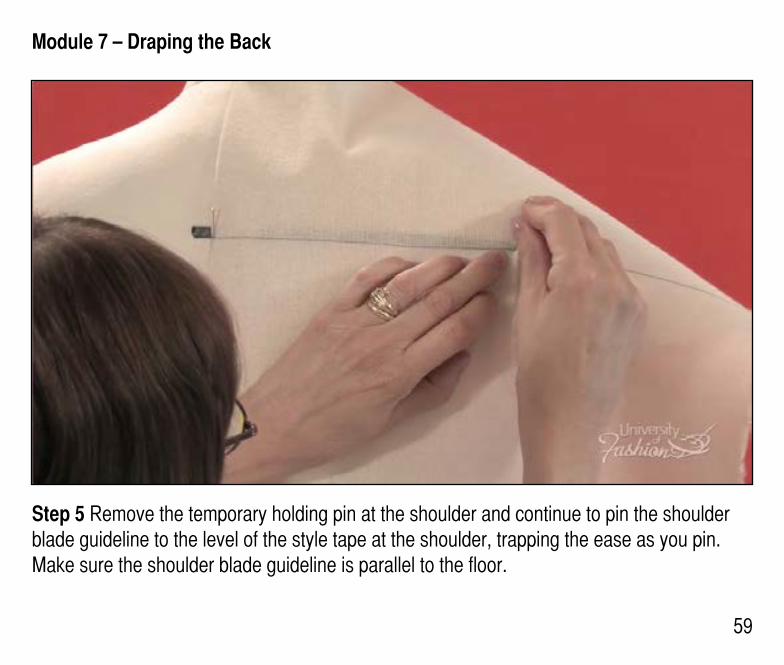
Step 5 Remove the temporary holding pin at the shoulder and continue to pin the shoulder blade guideline to the level of the style tape at the shoulder, trapping the ease as you pin. Make sure the shoulder blade guideline is parallel to the floor.
Module 7 – Draping the Back
60
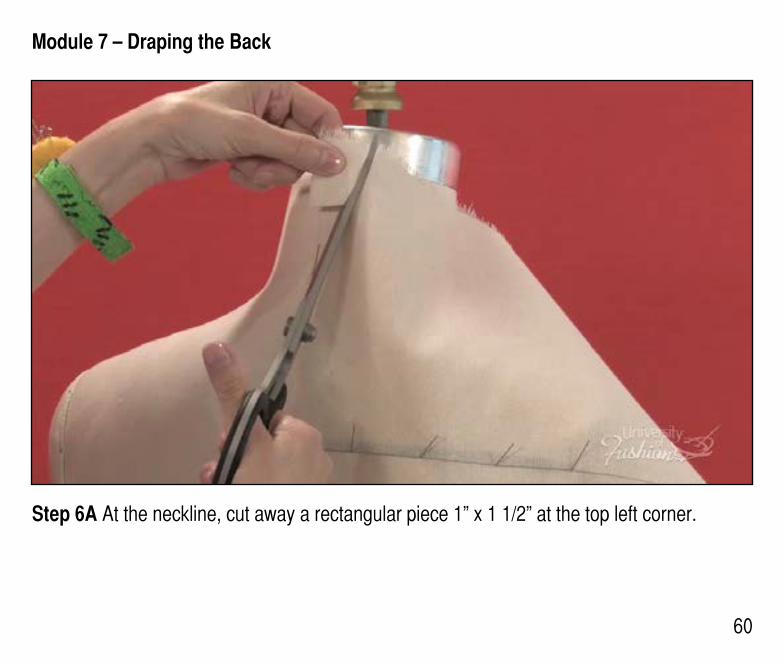
Step 6A At the neckline, cut away a rectangular piece 1” x 1 1/2” at the top left corner.
Module 7 – Draping the Back
61
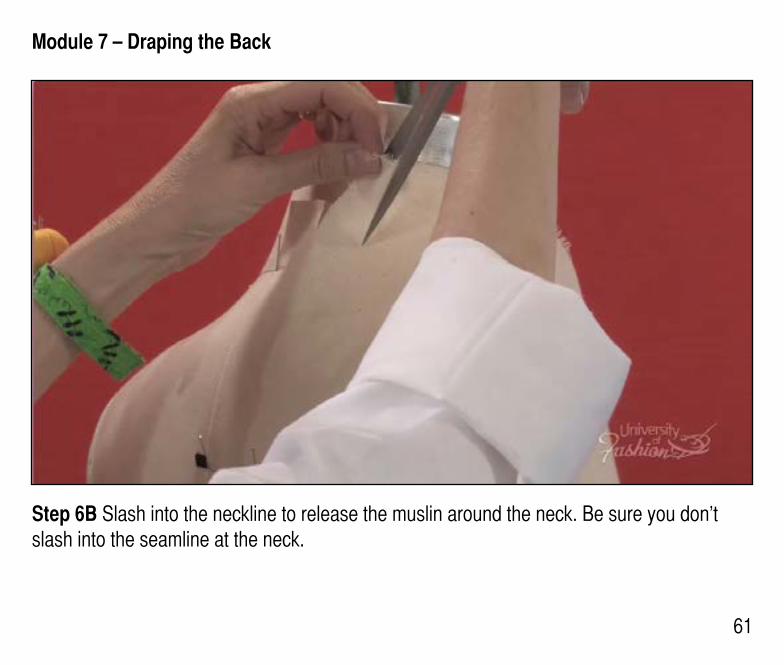
Step 6B Slash into the neckline to release the muslin around the neck. Be sure you don’t slash into the seamline at the neck.
Module 7 – Draping the Back
62
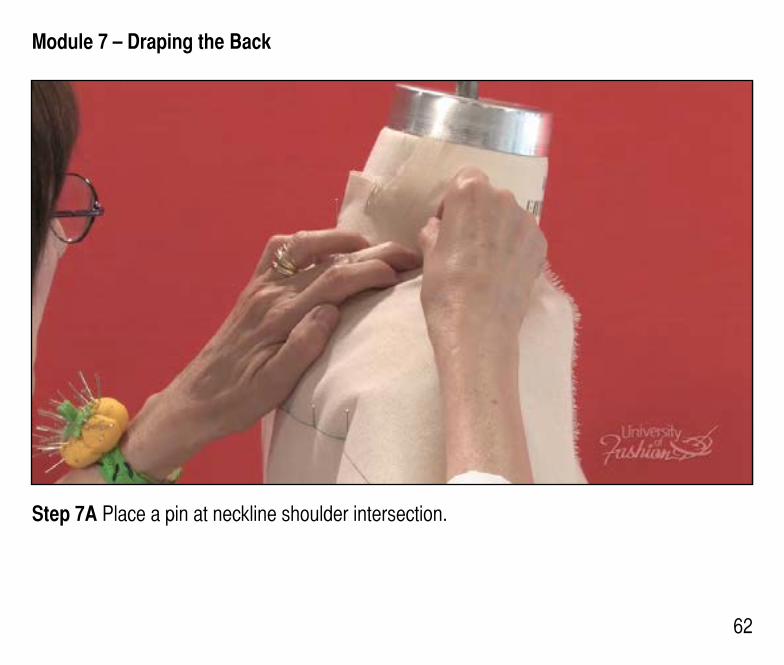
Step 7A Place a pin at neckline shoulder intersection.
Module 7 – Draping the Back
63
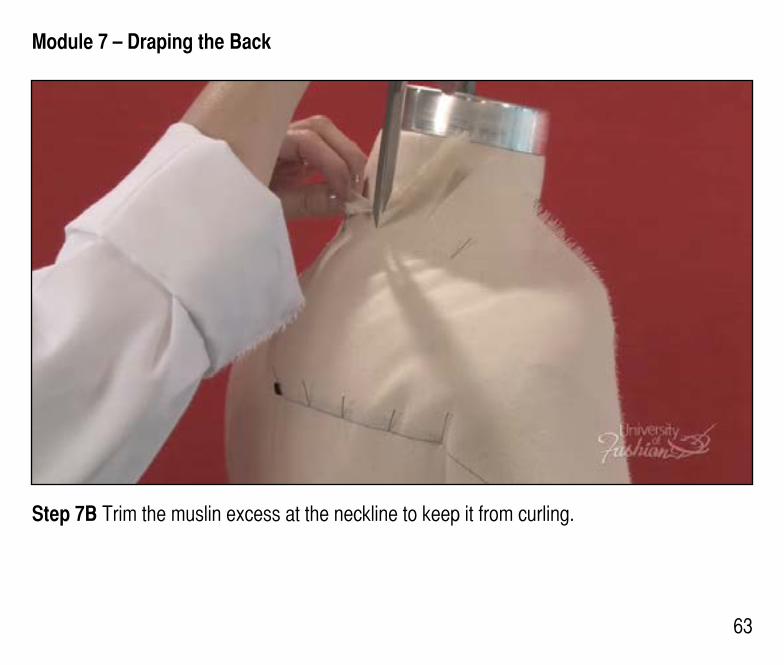
Step 7B Trim the muslin excess at the neckline to keep it from curling.
Module 7 – Draping the Back
64
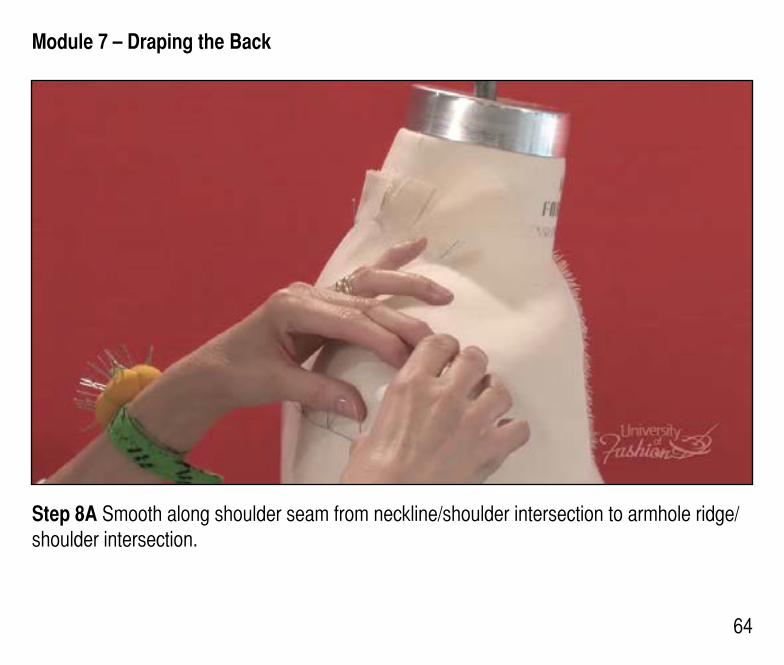
Step 8A Smooth along shoulder seam from neckline/shoulder intersection to armhole ridge/shoulder intersection.

Module 7 – Draping the Back
65
Step 8B Place a pin at armhole ridge/shoulder intersection.
Module 7 – Draping the Back
66
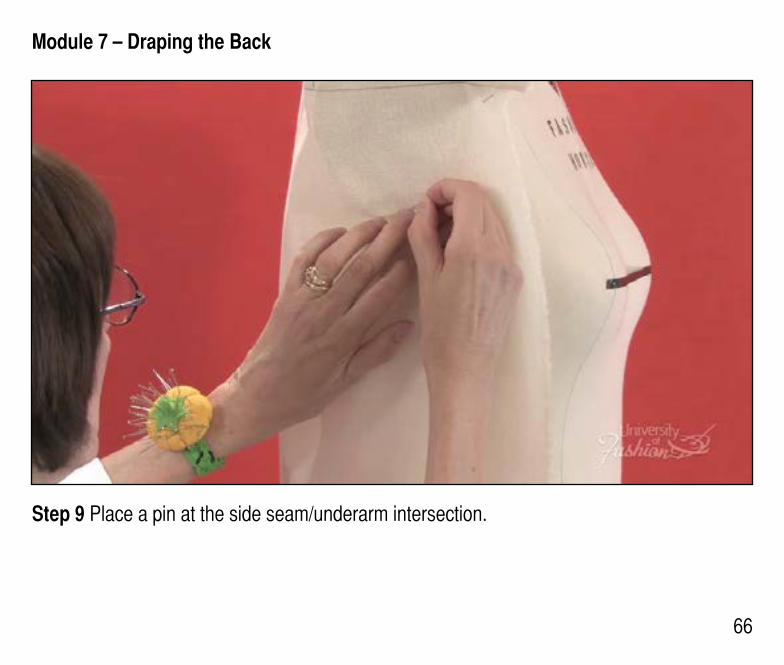
Step 9 Place a pin at the side seam/underarm intersection.
Module 7 – Draping the Back
67
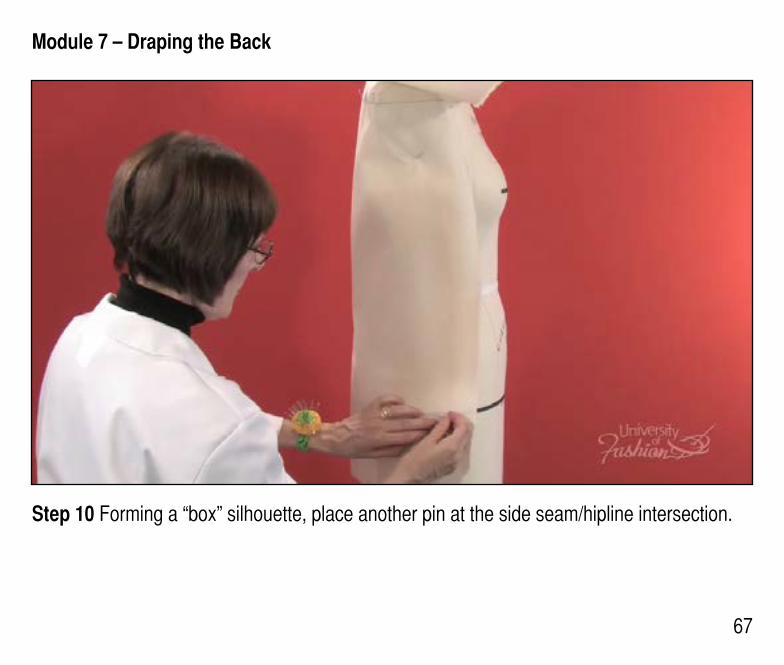
Step 10 Forming a “box” silhouette, place another pin at the side seam/hipline intersection.
68
Lesson Guide Drop Shoulder Blouse Draping: Intermediate
Module 8 – Marking the Back
68
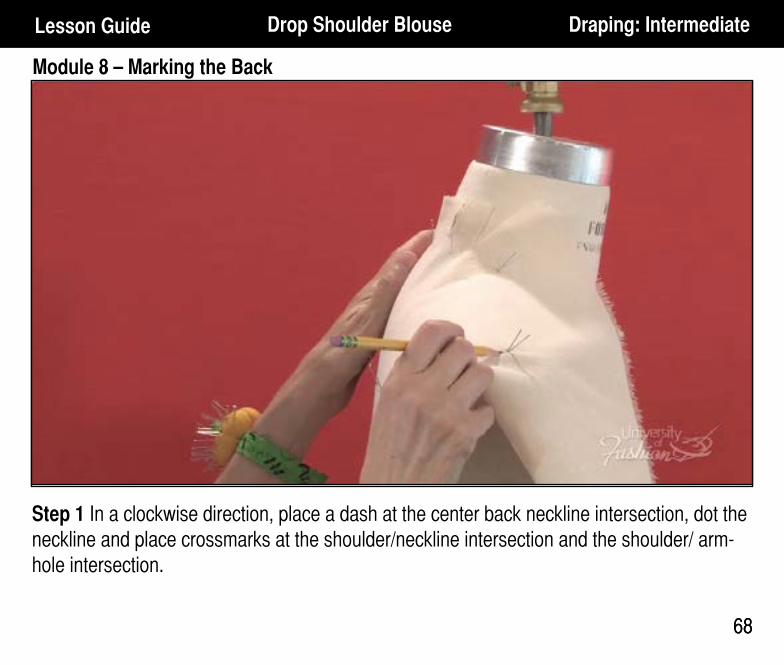
Step 1 In a clockwise direction, place a dash at the center back neckline intersection, dot the neckline and place crossmarks at the shoulder/neckline intersection and the shoulder/ arm-hole intersection.
69
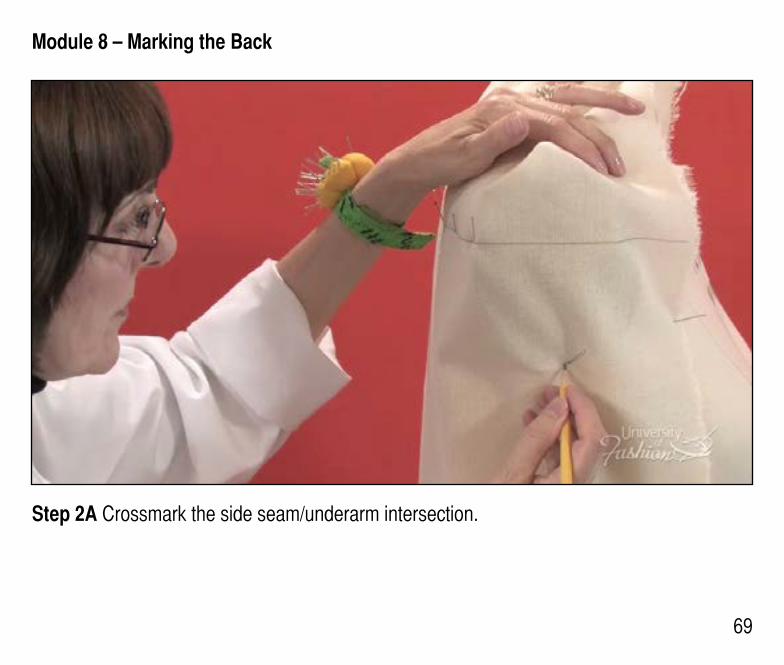
Module 8 – Marking the Back
Step 2A Crossmark the side seam/underarm intersection.
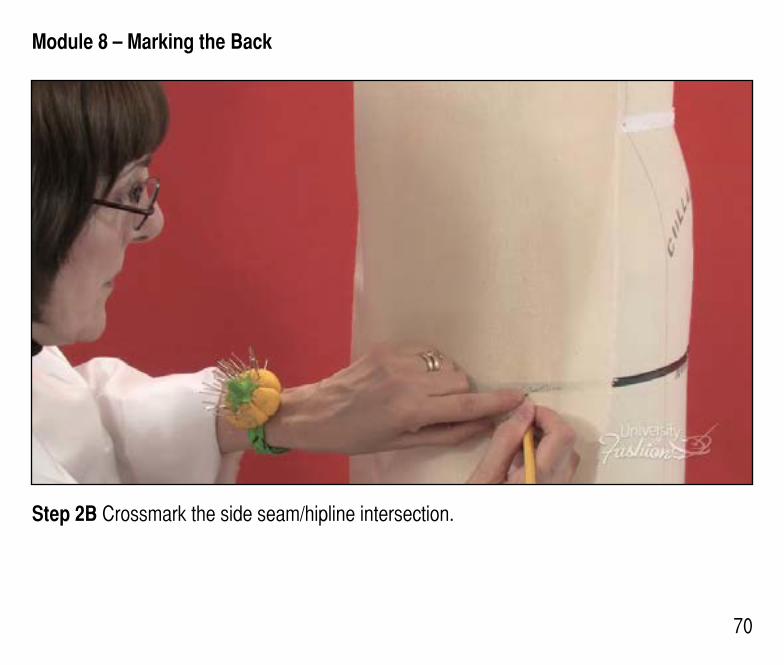
Module 8 – Marking the Back
70
Step 2B Crossmark the side seam/hipline intersection.
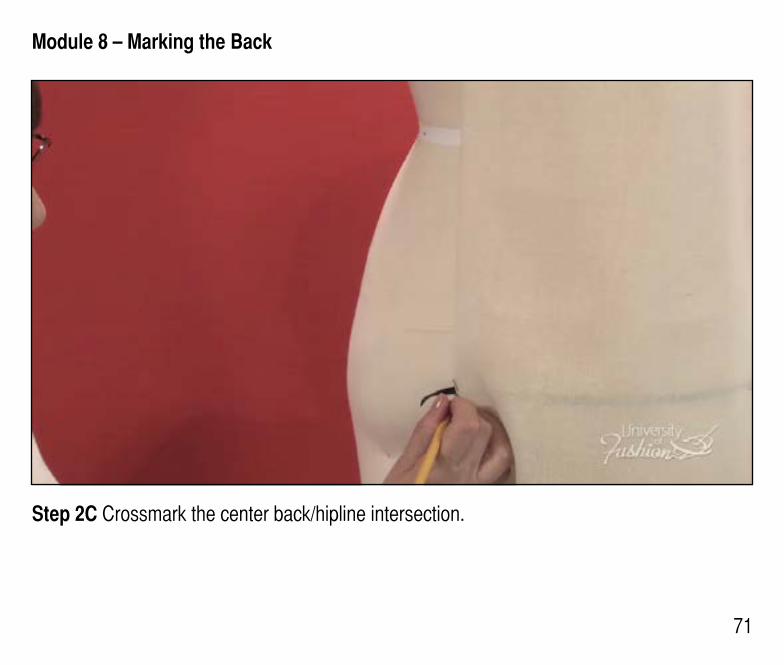
Module 8 – Marking the Back
71
Step 2C Crossmark the center back/hipline intersection.

Module 8 – Marking the Back
72
Step 3 Before removing the back muslin from the dress form, be sure that you have captured all your markings.
73
Lesson Guide Drop Shoulder Blouse Draping: Intermediate
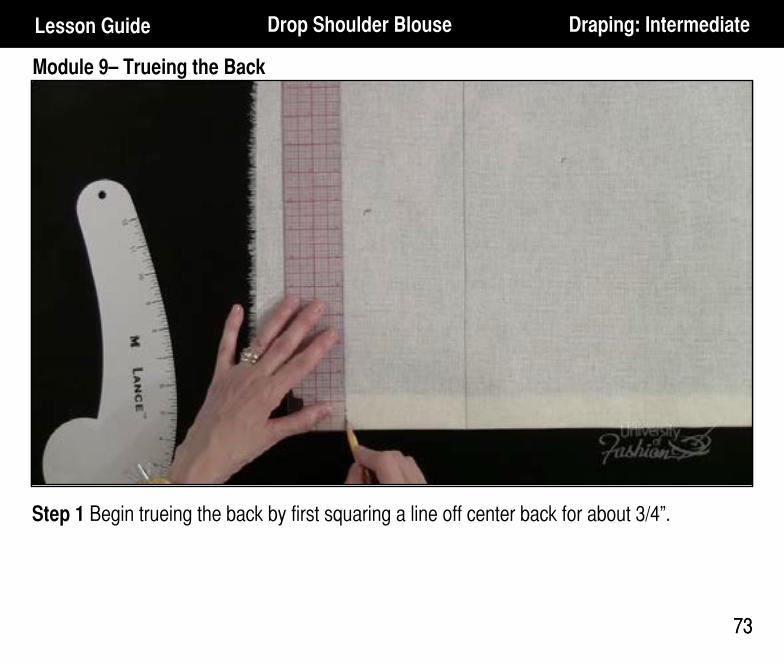
Module 9– Trueing the Back
73
Step 1 Begin trueing the back by first squaring a line off center back for about 3/4”.
Module 9– Trueing the Back
74
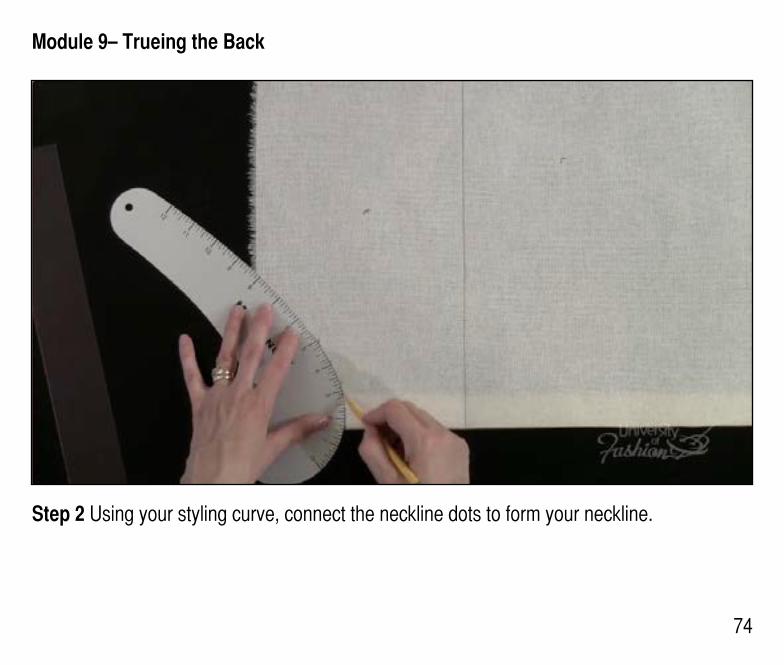
Step 2 Using your styling curve, connect the neckline dots to form your neckline.
Module 9– Trueing the Back
75
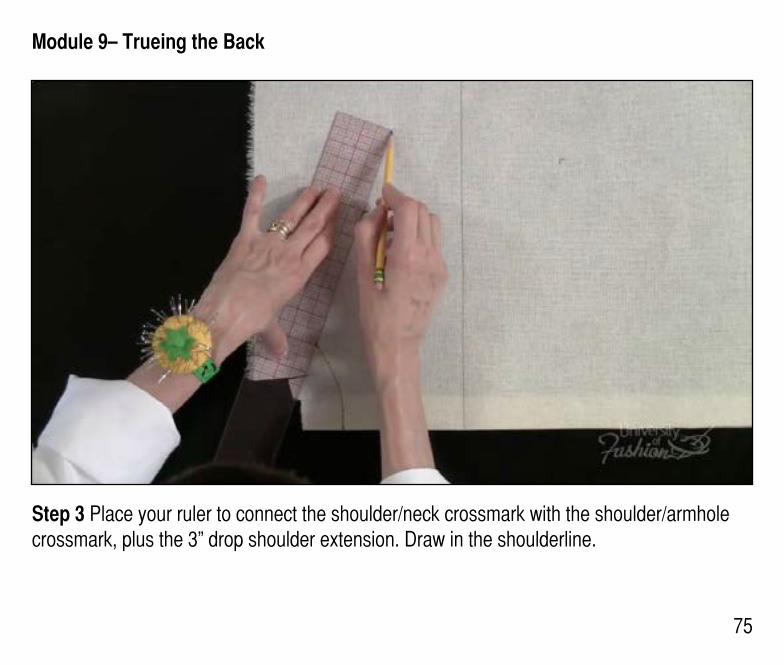
Step 3 Place your ruler to connect the shoulder/neck crossmark with the shoulder/armhole crossmark, plus the 3” drop shoulder extension. Draw in the shoulderline.
Module 9– Trueing the Back
76
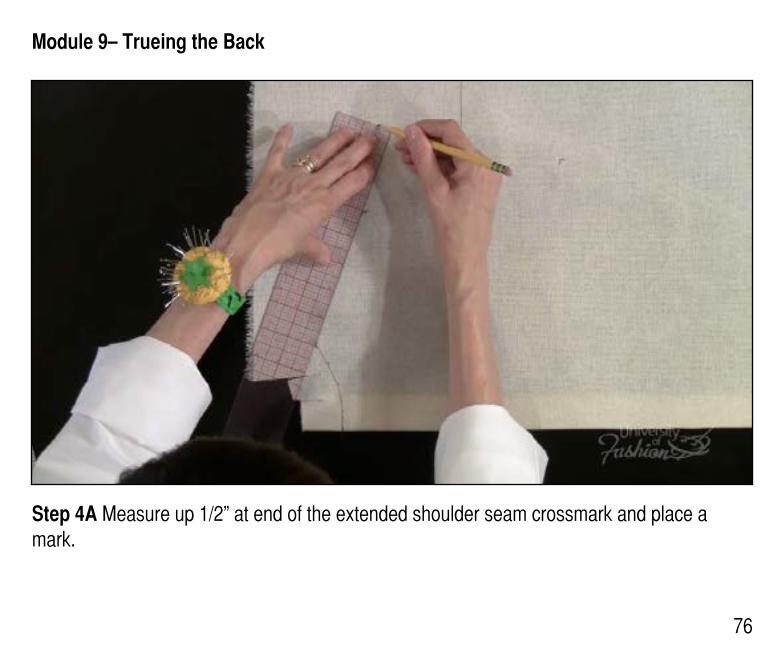
Step 4A Measure up 1/2” at end of the extended shoulder seam crossmark and place a mark.
Module 9– Trueing the Back
77
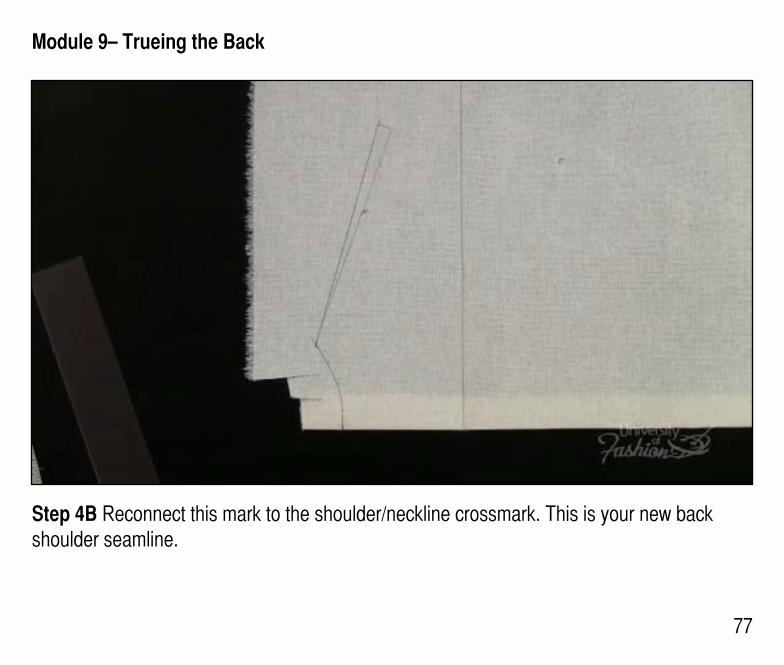
Step 4B Reconnect this mark to the shoulder/neckline crossmark. This is your new back shoulder seamline.
Module 9– Trueing the Back
78
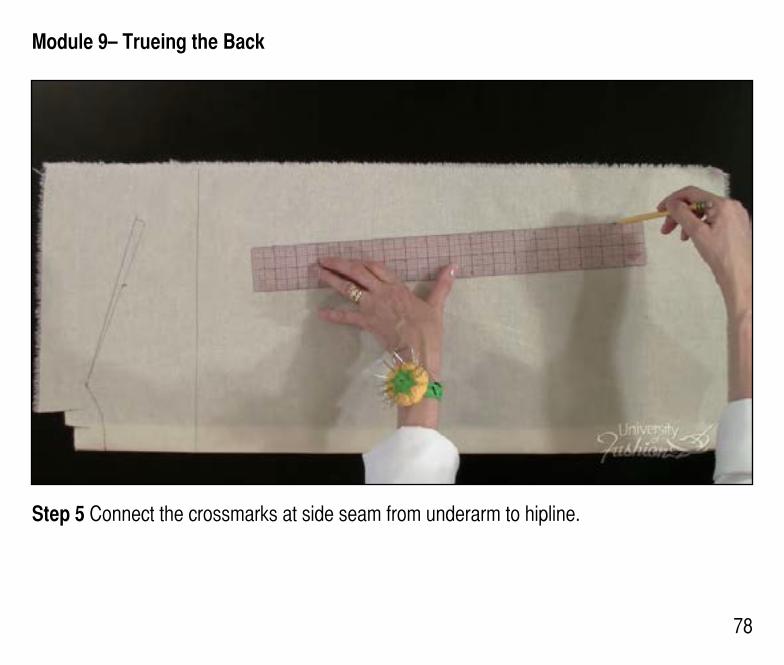
Step 5 Connect the crossmarks at side seam from underarm to hipline.

Module 9– Trueing the Back
79
Step 6A Lower the armhole 3” from the side seam/armhole crossmark.
Module 9– Trueing the Back
80
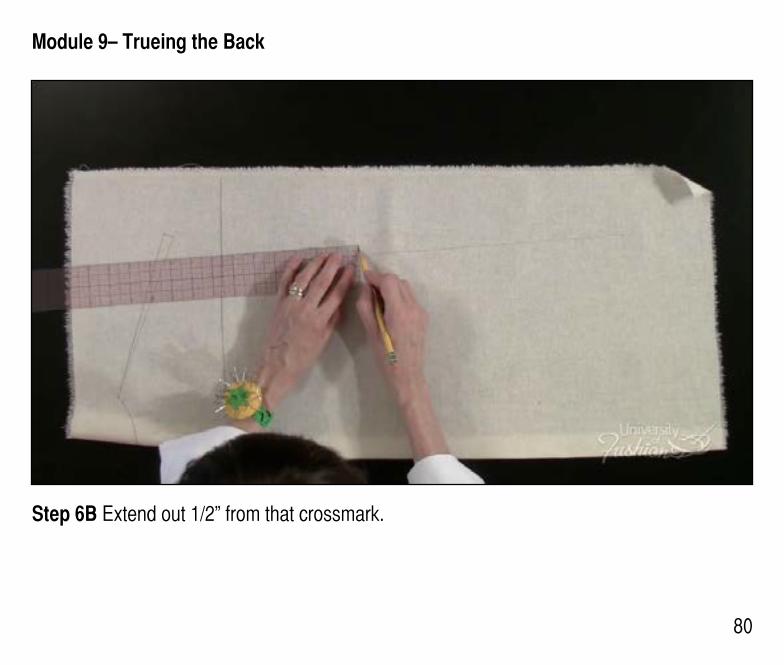
Step 6B Extend out 1/2” from that crossmark.
Module 9– Trueing the Back
81
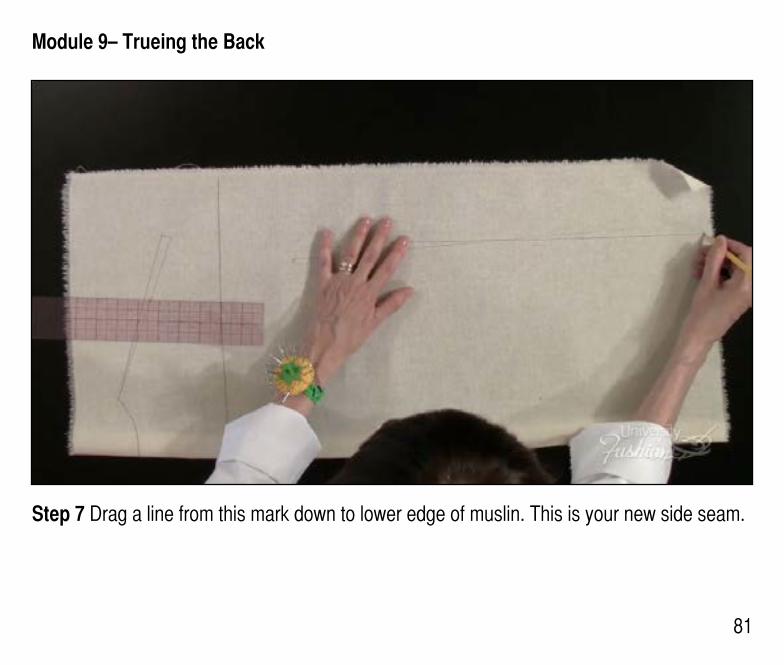
Step 7 Drag a line from this mark down to lower edge of muslin. This is your new side seam.
Module 9– Trueing the Back
82
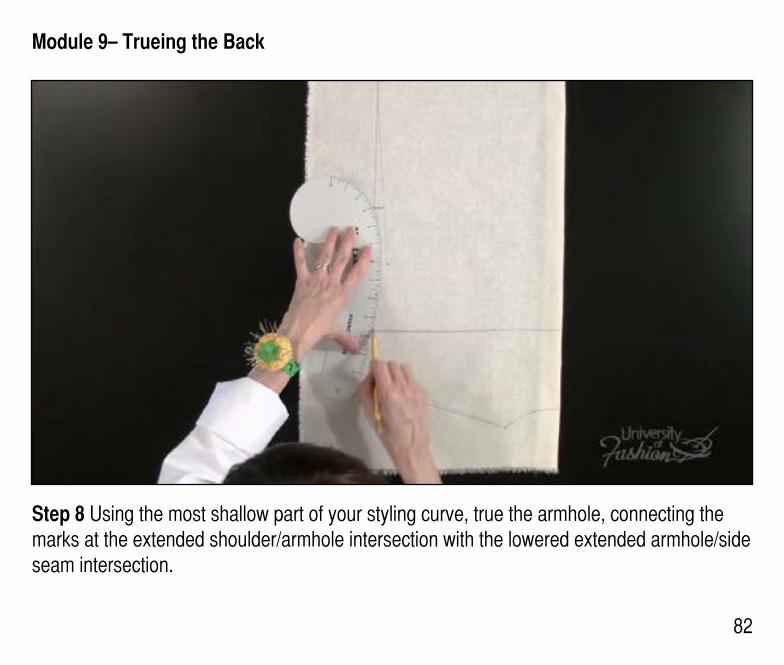
Step 8 Using the most shallow part of your styling curve, true the armhole, connecting the marks at the extended shoulder/armhole intersection with the lowered extended armhole/side seam intersection.
Module 9– Trueing the Back
83
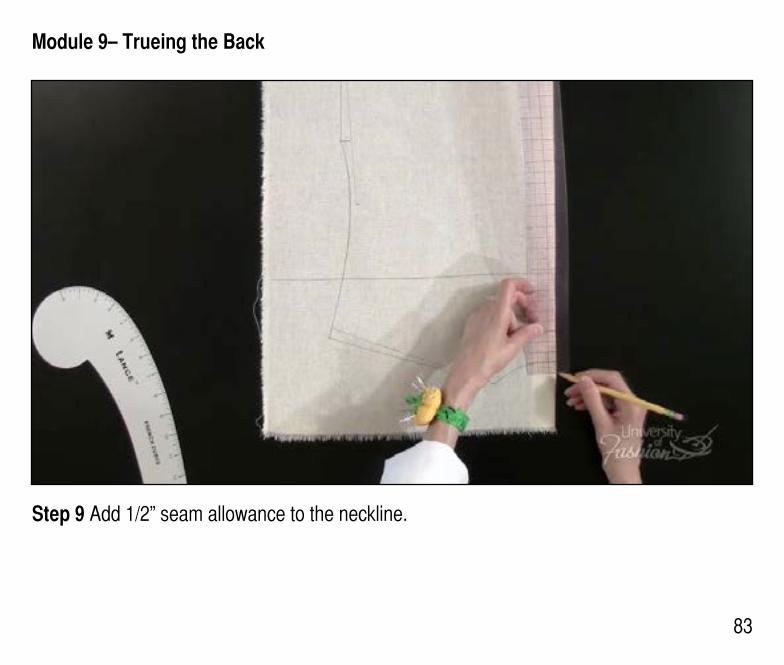
Step 9 Add 1/2” seam allowance to the neckline.
Module 9– Trueing the Back
84
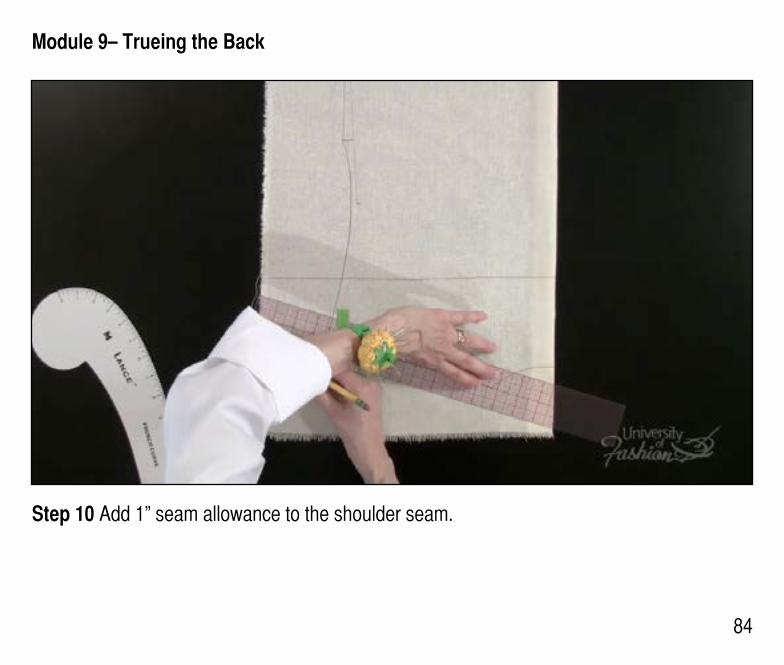
Step 10 Add 1” seam allowance to the shoulder seam.

Module 9– Trueing the Back
85
Step 11 Add 1/2” seam allowance to the armhole.
Module 9– Trueing the Back
86
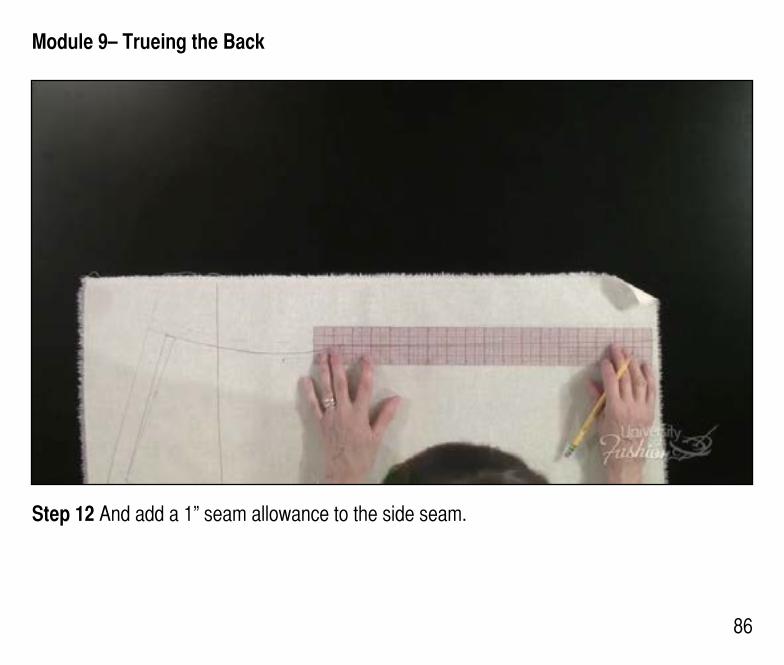
Step 12 And add a 1” seam allowance to the side seam.
Module 9– Trueing the Back
87
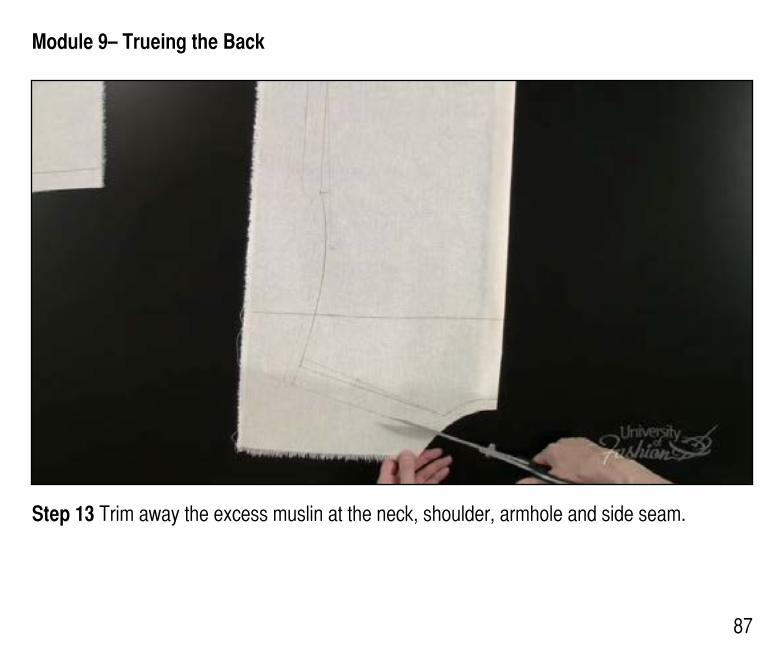
Step 13 Trim away the excess muslin at the neck, shoulder, armhole and side seam.
88
Lesson Guide Drop Shoulder Blouse Draping: Intermediate
Module 10– Placket Front Closure
88
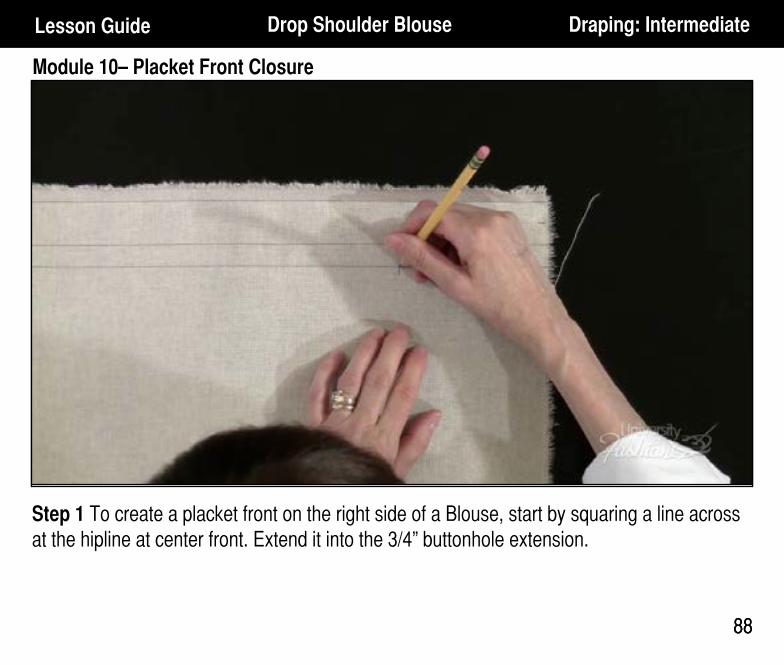
Step 1 To create a placket front on the right side of a Blouse, start by squaring a line across at the hipline at center front. Extend it into the 3/4” buttonhole extension.
Module 10– Placket Front Closure
89
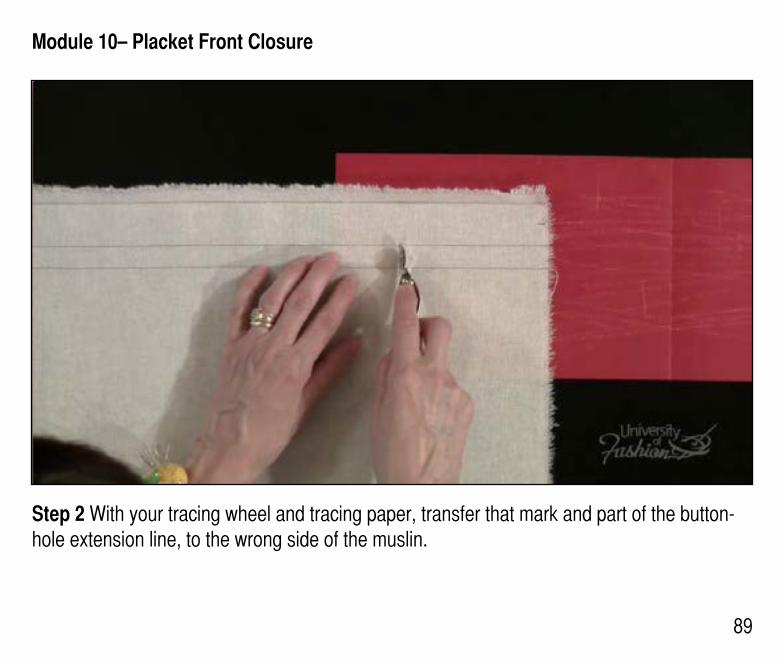
Step 2 With your tracing wheel and tracing paper, transfer that mark and part of the button-hole extension line, to the wrong side of the muslin.
Module 10– Placket Front Closure
90
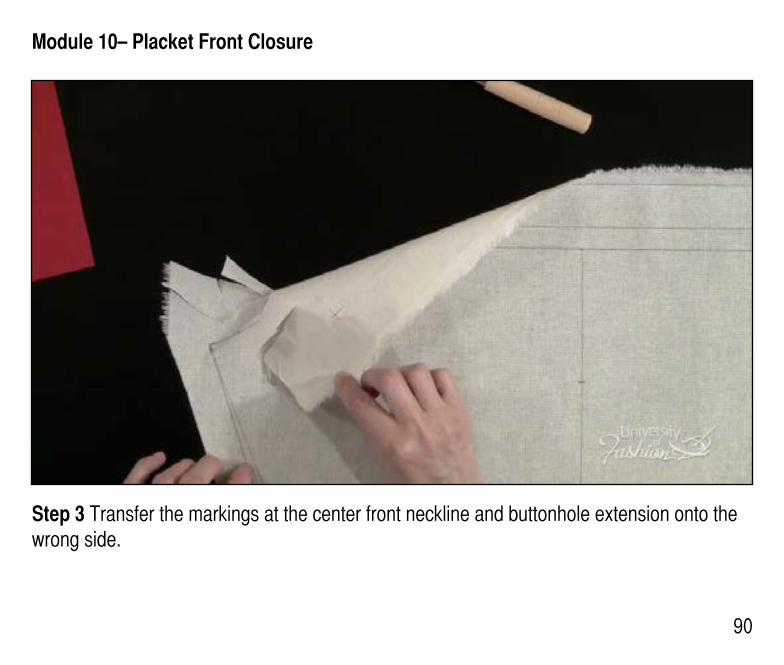
Step 3 Transfer the markings at the center front neckline and buttonhole extension onto the wrong side.
Module 10– Placket Front Closure
91
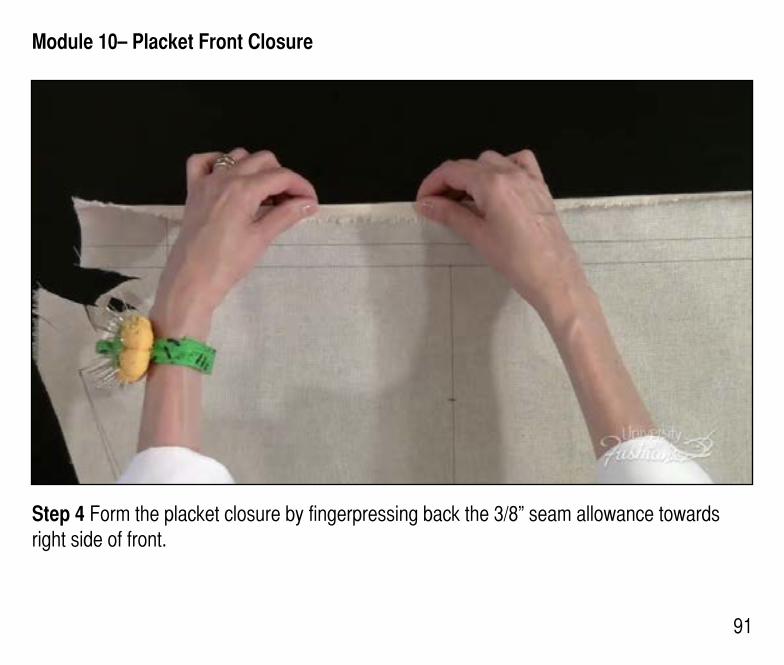
Step 4 Form the placket closure by fingerpressing back the 3/8” seam allowance towards right side of front.
Module 10– Placket Front Closure
92
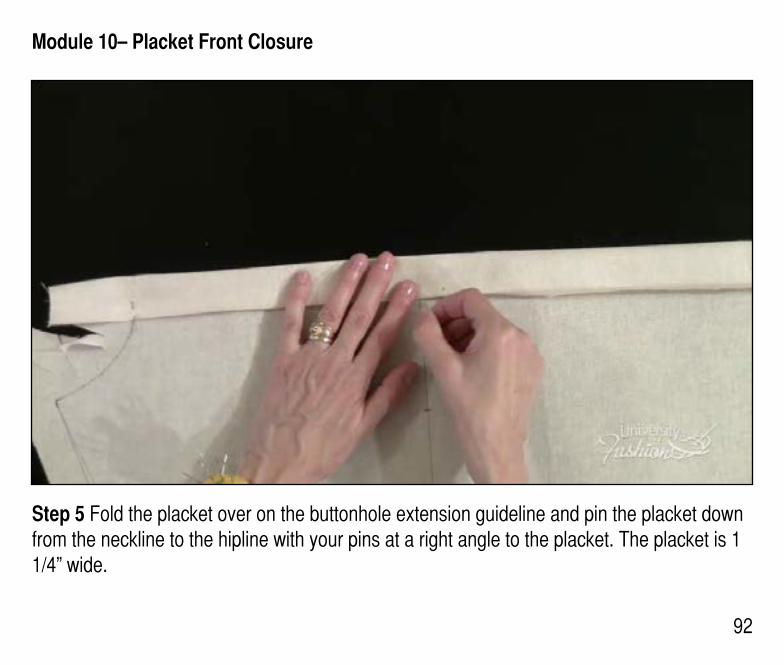
Step 5 Fold the placket over on the buttonhole extension guideline and pin the placket down from the neckline to the hipline with your pins at a right angle to the placket. The placket is 1 1/4” wide.
93
Lesson Guide Drop Shoulder Blouse Draping: Intermediate
Module 11– Collar Neckline Prep/Drafting
93
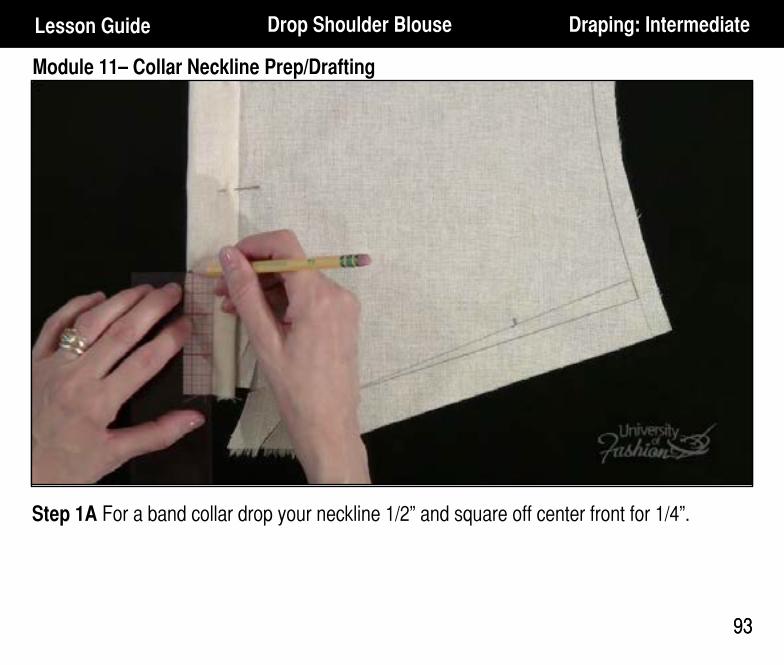
Step 1A For a band collar drop your neckline 1/2” and square off center front for 1/4”.
Module 11– Collar Neckline Prep/Drafting
94
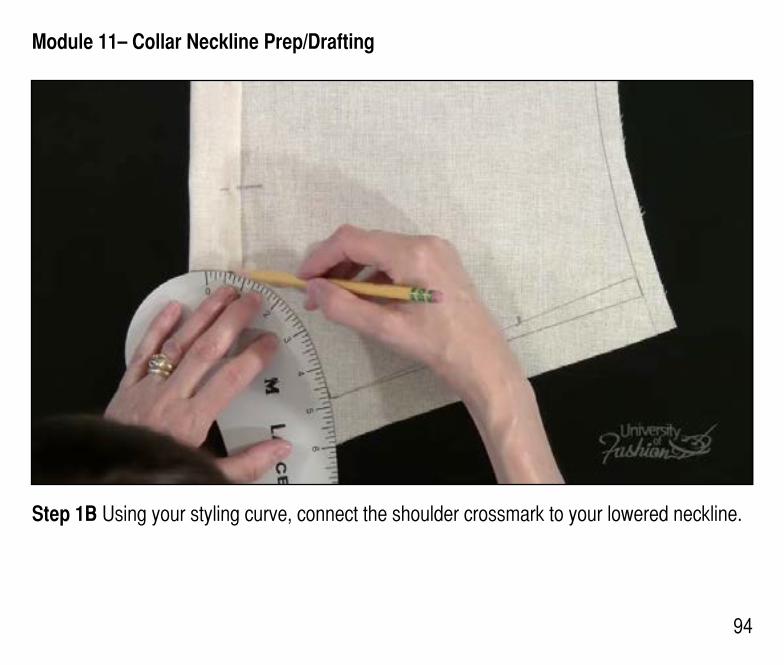
Step 1B Using your styling curve, connect the shoulder crossmark to your lowered neckline.
Module 11– Collar Neckline Prep/Drafting
95
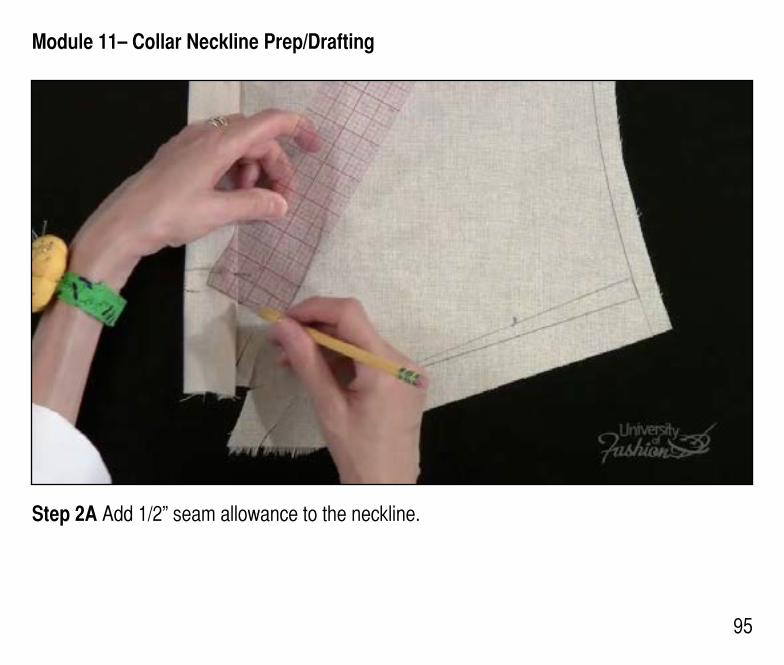
Step 2A Add 1/2” seam allowance to the neckline.
Module 11– Collar Neckline Prep/Drafting
96
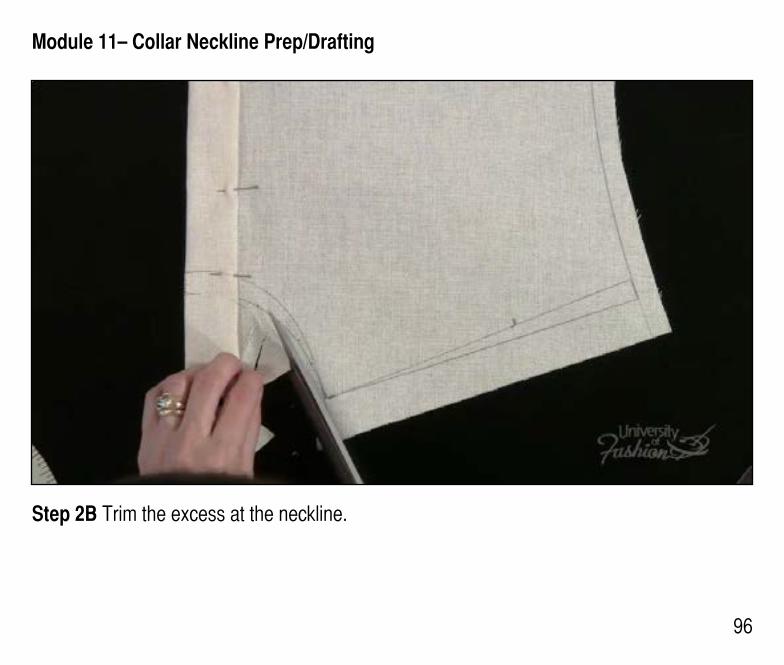
Step 2B Trim the excess at the neckline.
Module 11– Collar Neckline Prep/Drafting
97
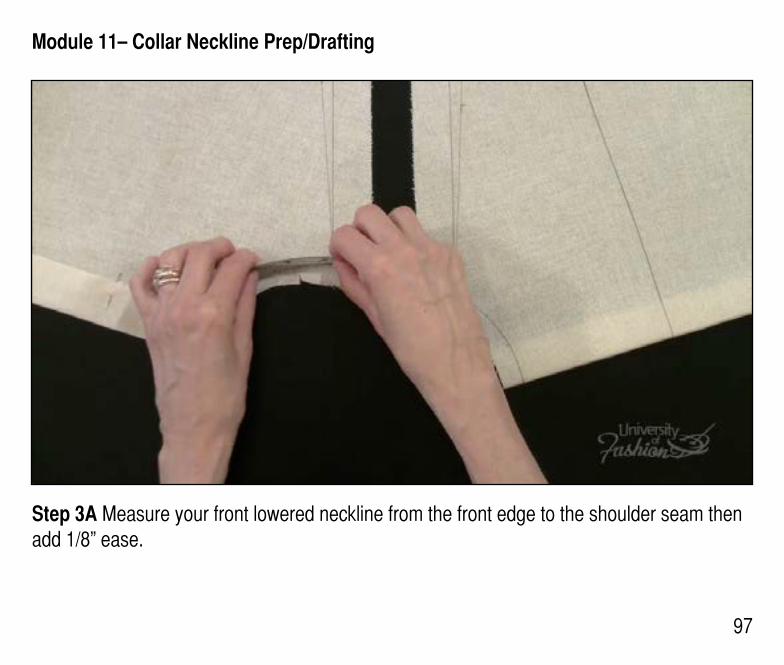
Step 3A Measure your front lowered neckline from the front edge to the shoulder seam then add 1/8” ease.
Module 11– Collar Neckline Prep/Drafting
98
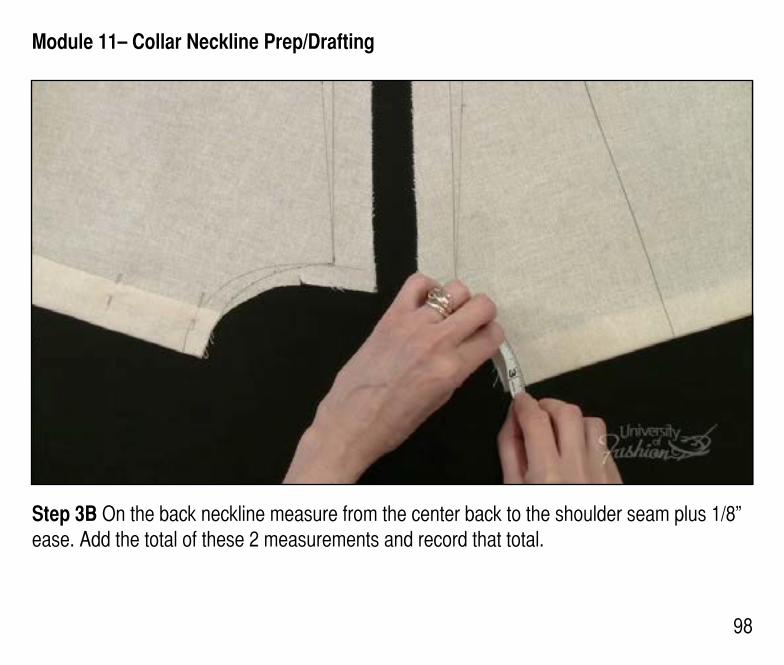
Step 3B On the back neckline measure from the center back to the shoulder seam plus 1/8” ease. Add the total of these 2 measurements and record that total.
Module 11– Collar Neckline Prep/Drafting
99
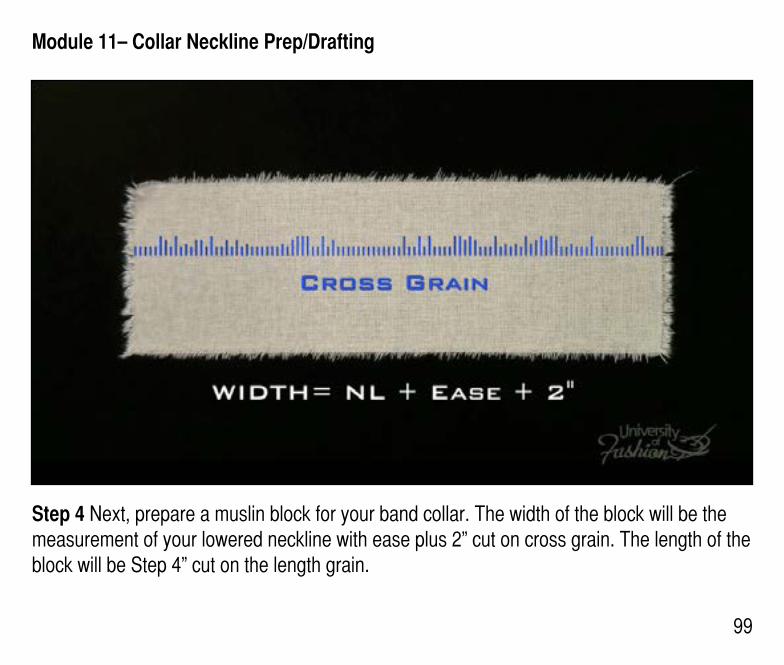
Step 4 Next, prepare a muslin block for your band collar. The width of the block will be the measurement of your lowered neckline with ease plus 2” cut on cross grain. The length of the block will be Step 4” cut on the length grain.
Module 11– Collar Neckline Prep/Drafting
100
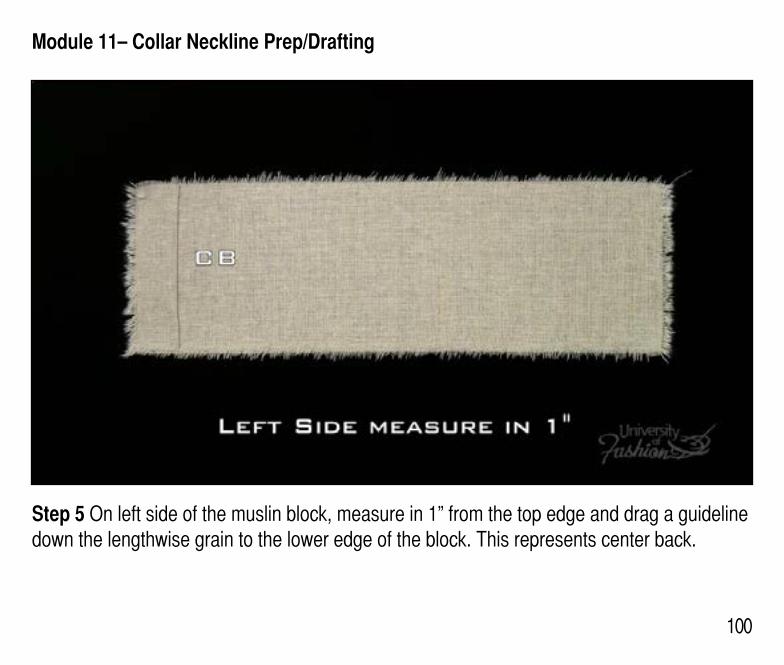
Step 5 On left side of the muslin block, measure in 1” from the top edge and drag a guideline down the lengthwise grain to the lower edge of the block. This represents center back.
Module 11– Collar Neckline Prep/Drafting
101
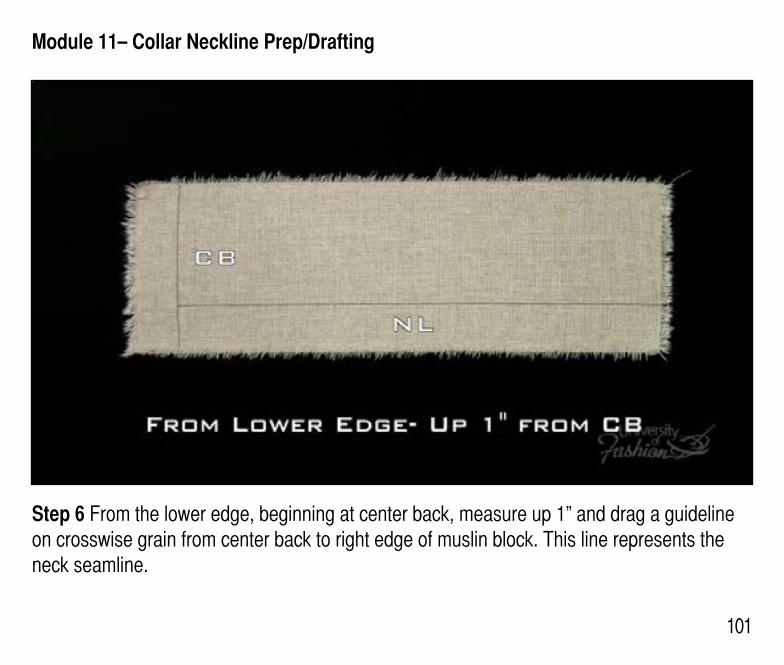
Step 6 From the lower edge, beginning at center back, measure up 1” and drag a guideline on crosswise grain from center back to right edge of muslin block. This line represents the neck seamline.
Module 11– Collar Neckline Prep/Drafting
102
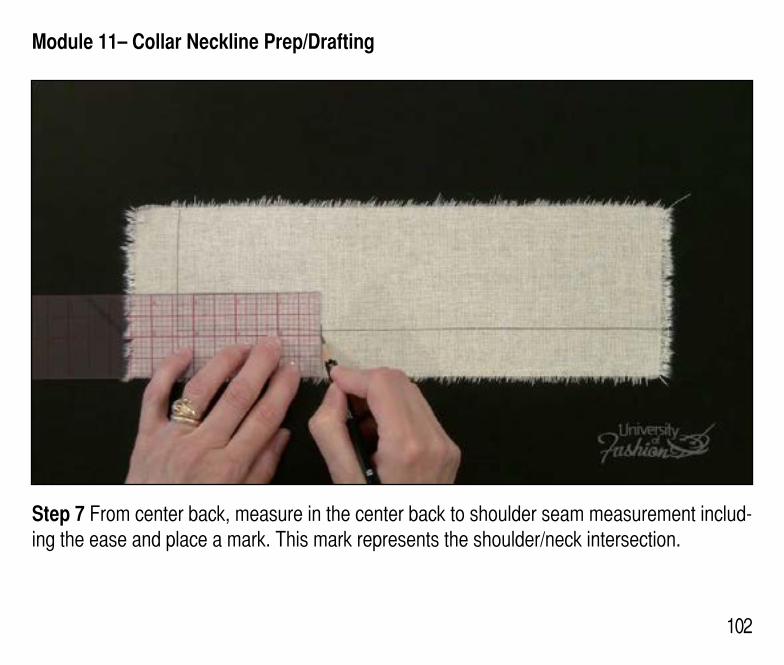
Step 7 From center back, measure in the center back to shoulder seam measurement includ-ing the ease and place a mark. This mark represents the shoulder/neck intersection.
Module 11– Collar Neckline Prep/Drafting
103
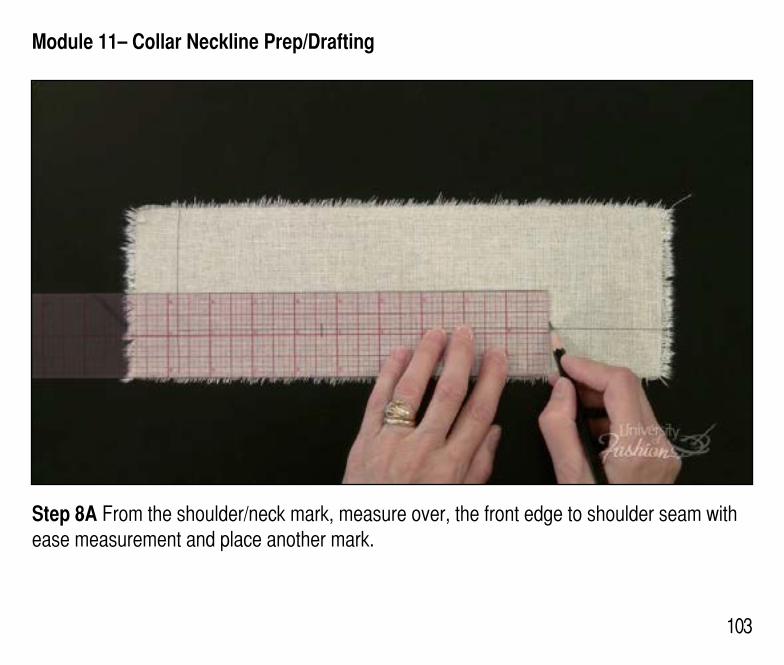
Step 8A From the shoulder/neck mark, measure over, the front edge to shoulder seam with ease measurement and place another mark.
Module 11– Collar Neckline Prep/Drafting
104
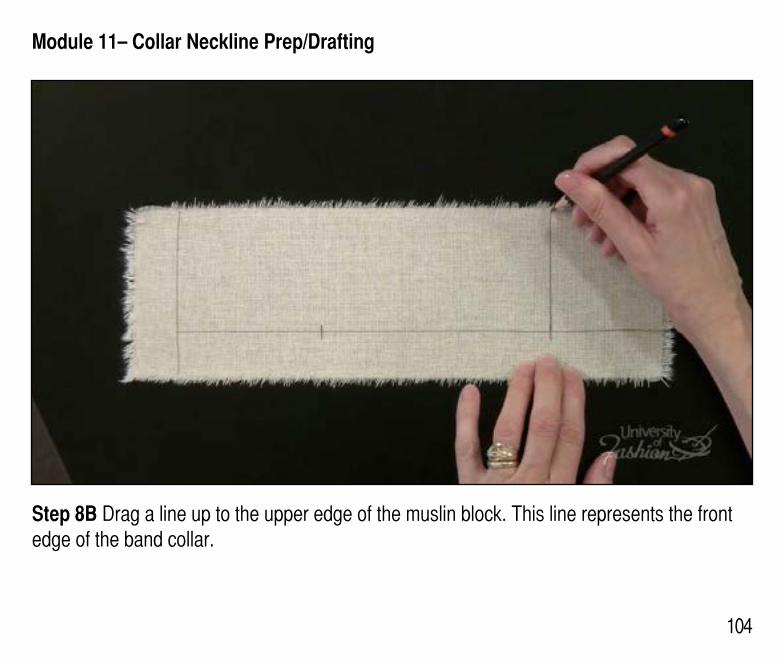
Step 8B Drag a line up to the upper edge of the muslin block. This line represents the front edge of the band collar.
Module 11– Collar Neckline Prep/Drafting
105
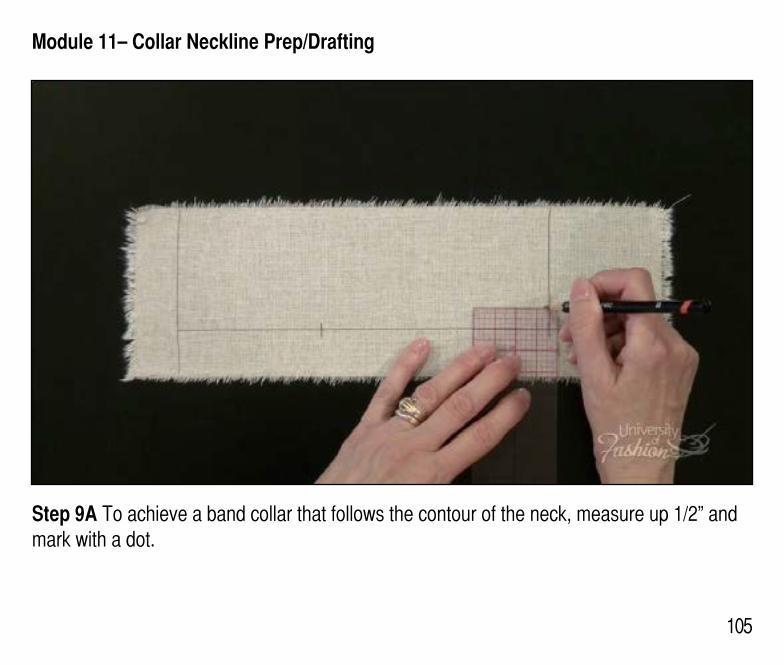
Step 9A To achieve a band collar that follows the contour of the neck, measure up 1/2” and mark with a dot.
Module 11– Collar Neckline Prep/Drafting
106
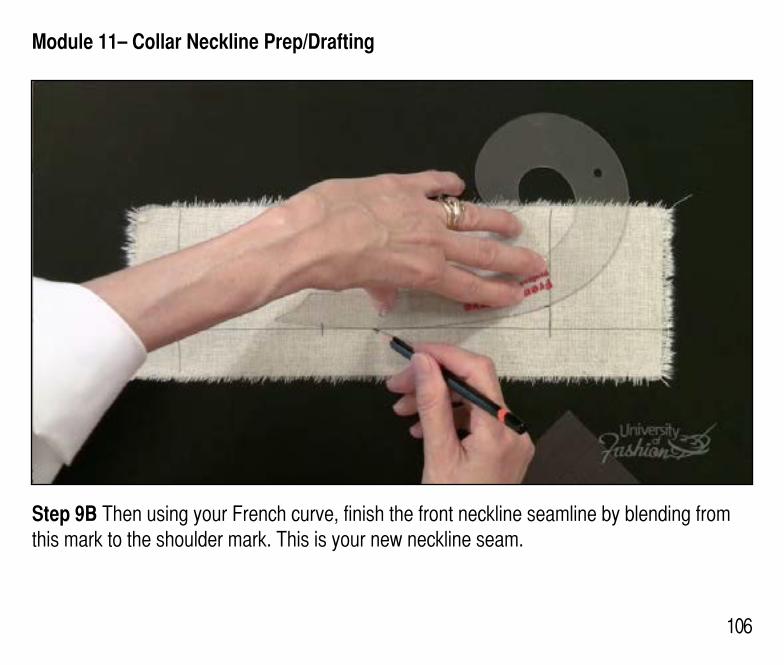
Step 9B Then using your French curve, finish the front neckline seamline by blending from this mark to the shoulder mark. This is your new neckline seam.
Module 11– Collar Neckline Prep/Drafting
107
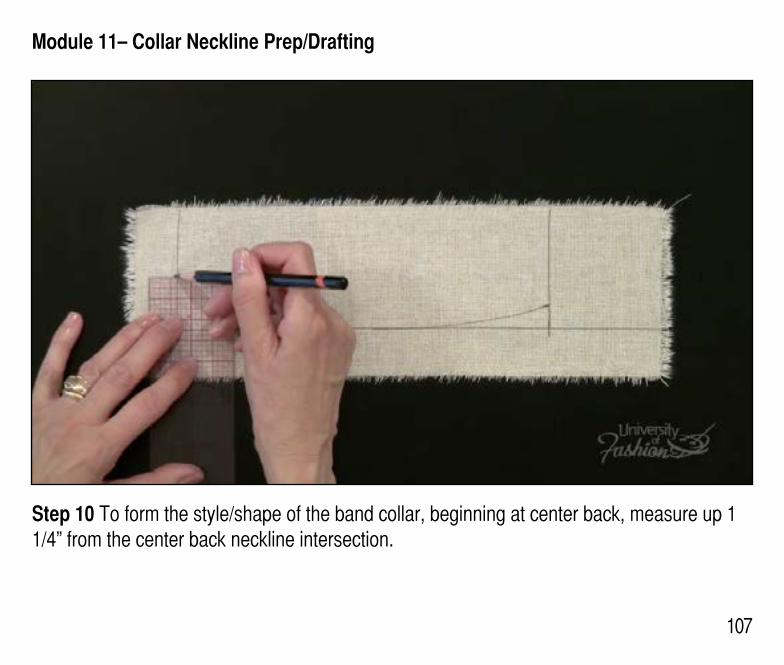
Step 10 To form the style/shape of the band collar, beginning at center back, measure up 1 1/4” from the center back neckline intersection.
Module 11– Collar Neckline Prep/Drafting
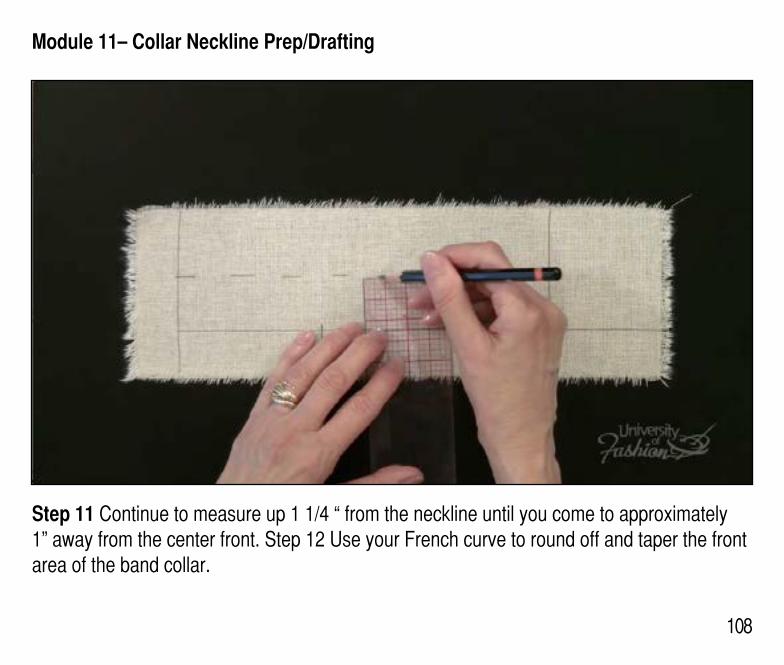
108
Step 11 Continue to measure up 1 1/4 “ from the neckline until you come to approximately 1” away from the center front. Step 12 Use your French curve to round off and taper the front area of the band collar.
Module 11– Collar Neckline Prep/Drafting
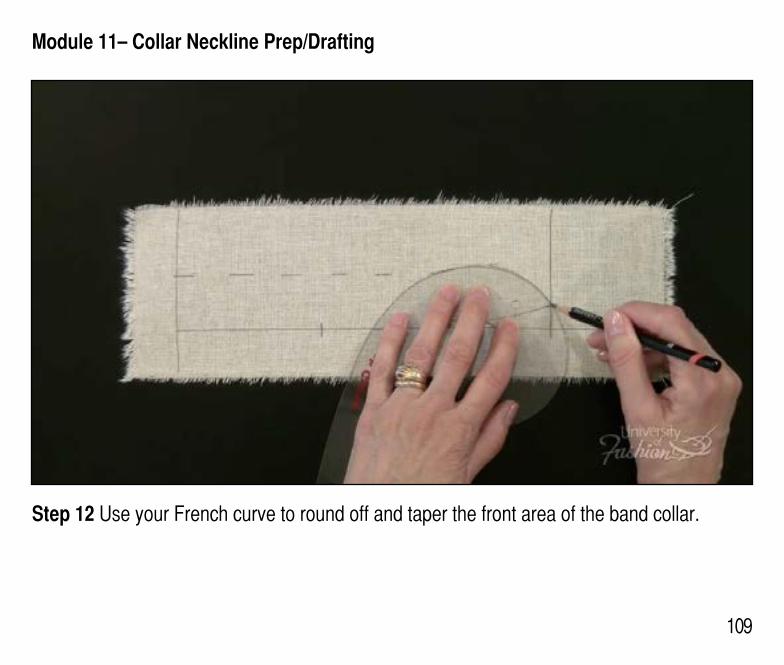
109
Step 12 Use your French curve to round off and taper the front area of the band collar.
Module 11– Collar Neckline Prep/Drafting
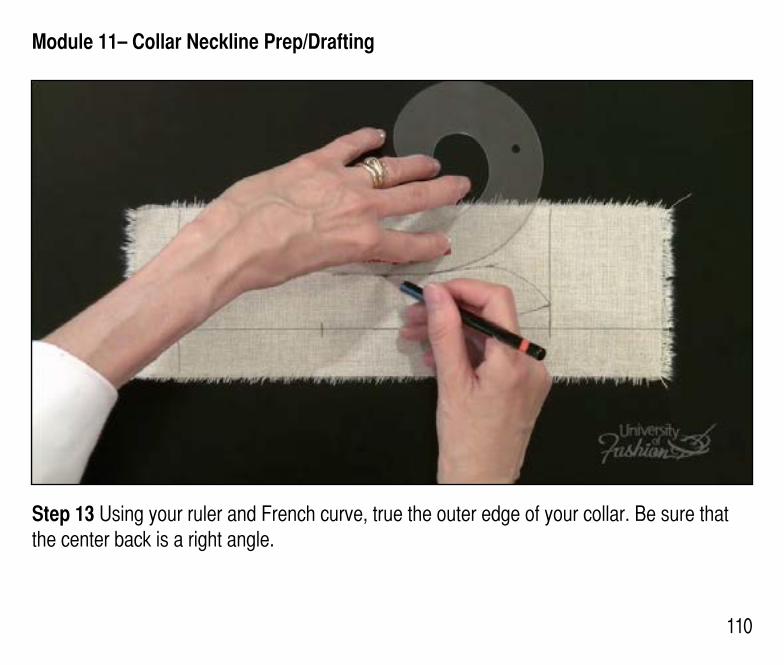
110
Step 13 Using your ruler and French curve, true the outer edge of your collar. Be sure that the center back is a right angle.
Module 11– Collar Neckline Prep/Drafting
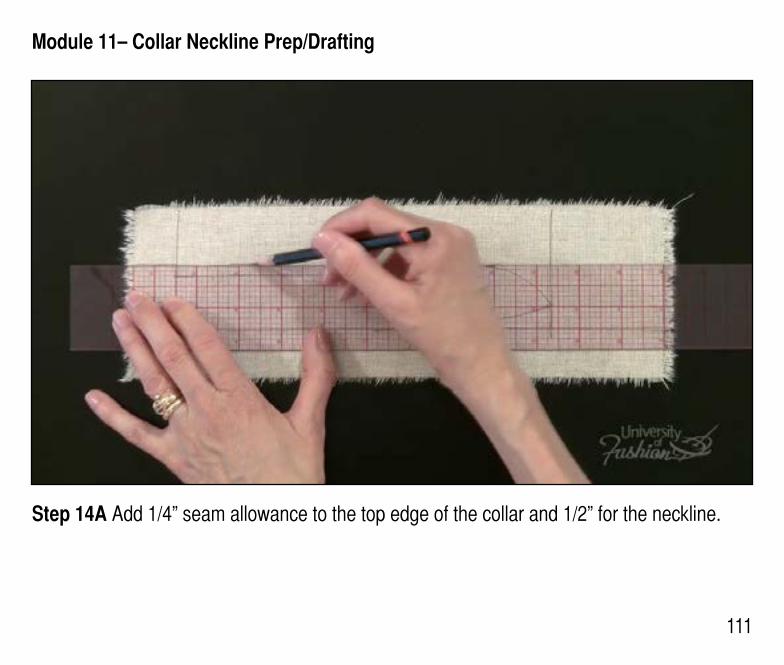
111
Step 14A Add 1/4” seam allowance to the top edge of the collar and 1/2” for the neckline.
Module 11– Collar Neckline Prep/Drafting
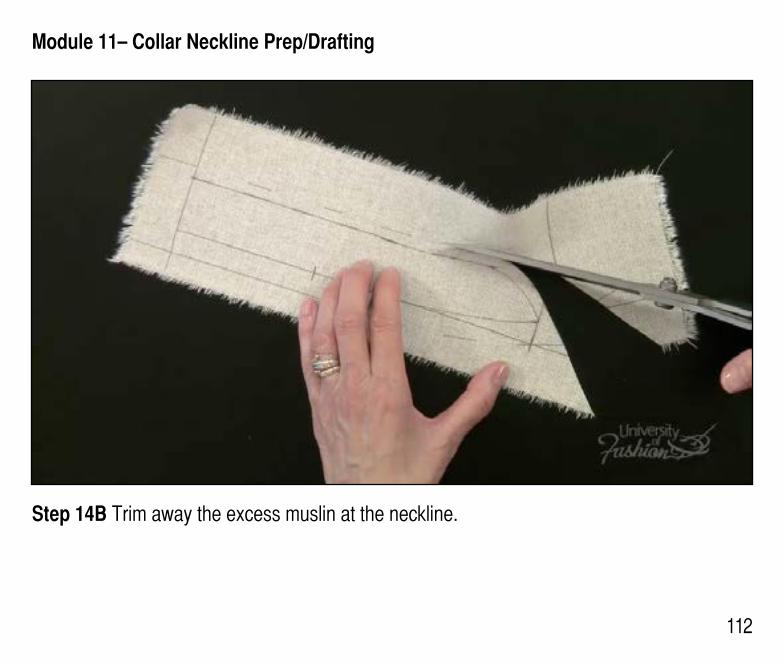
112
Step 14B Trim away the excess muslin at the neckline.
113
Lesson Guide Drop Shoulder Blouse Draping: Intermediate
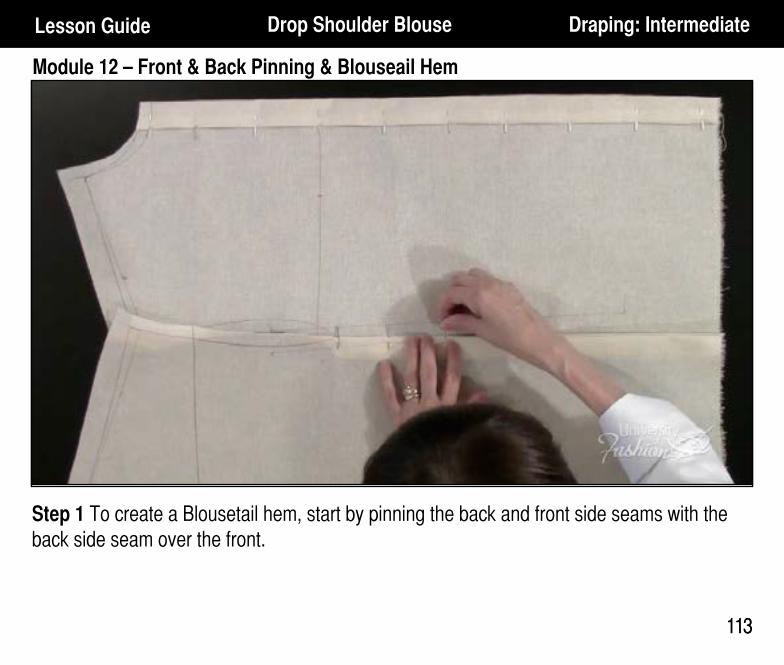
Module 12 – Front & Back Pinning & Blouseail Hem
113
Step 1 To create a Blousetail hem, start by pinning the back and front side seams with the back side seam over the front.
114
Module 12 – Front & Back Pinning & Blouseail Hem
114
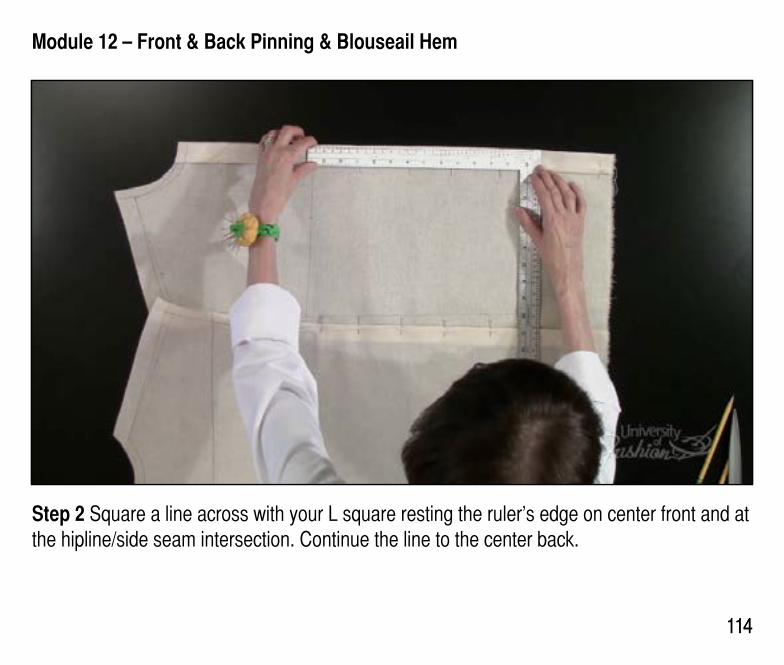
Step 2 Square a line across with your L square resting the ruler’s edge on center front and at the hipline/side seam intersection. Continue the line to the center back.
Module 12 – Front & Back Pinning & Blouseail Hem
115
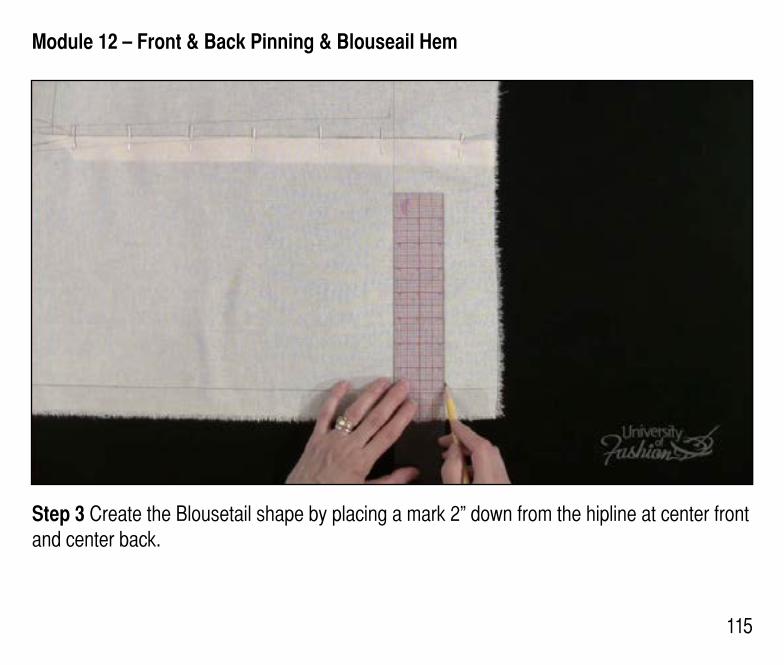
Step 3 Create the Blousetail shape by placing a mark 2” down from the hipline at center front and center back.
Module 12 – Front & Back Pinning & Blouseail Hem
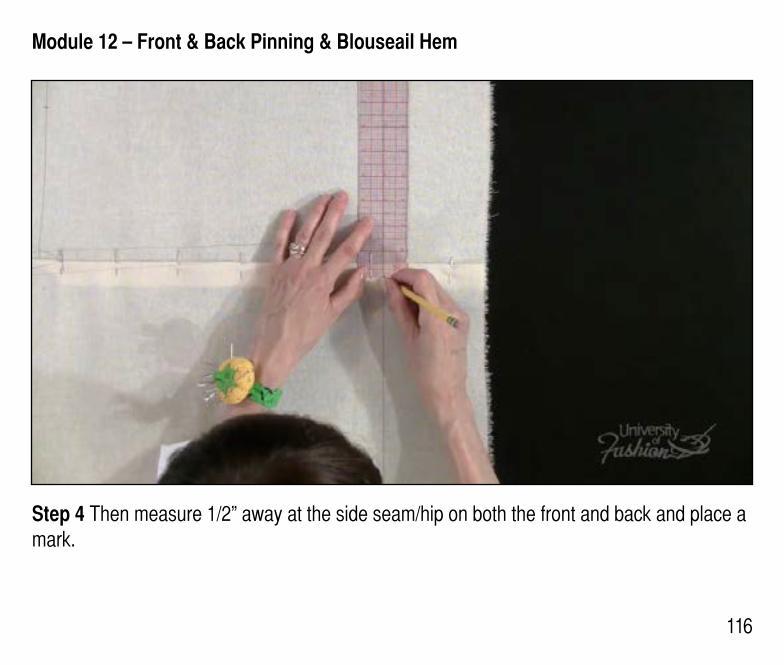
116
Step 4 Then measure 1/2” away at the side seam/hip on both the front and back and place a mark.
Module 12 – Front & Back Pinning & Blouseail Hem
117
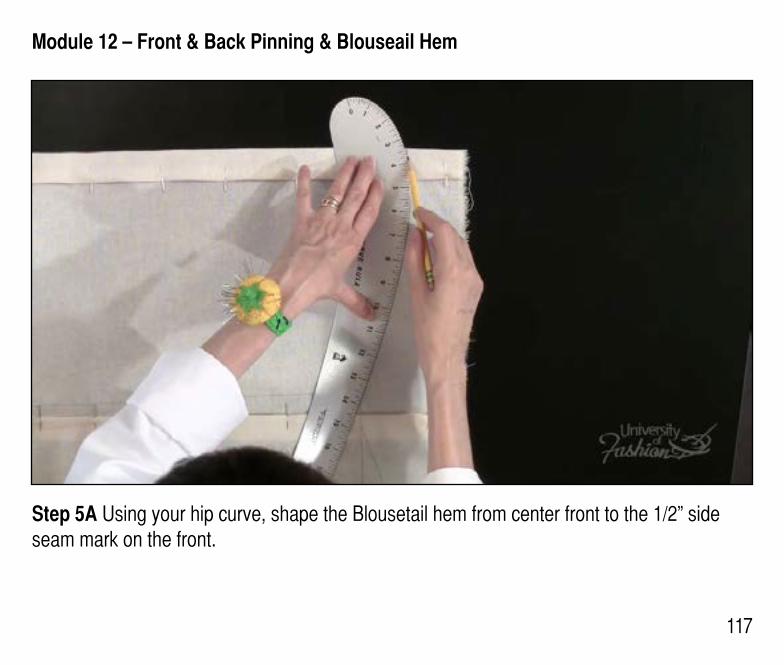
Step 5A Using your hip curve, shape the Blousetail hem from center front to the 1/2” side seam mark on the front.
Module 12 – Front & Back Pinning & Blouseail Hem
118
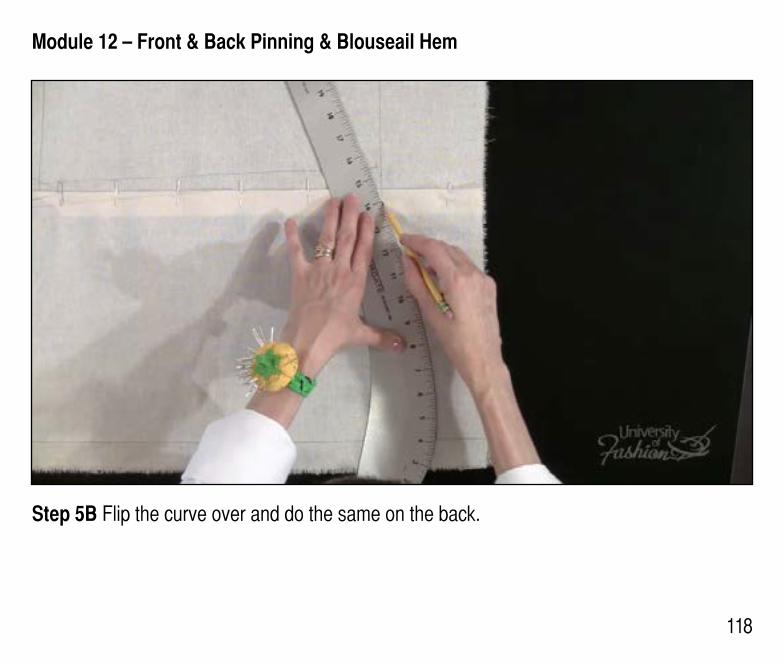
Step 5B Flip the curve over and do the same on the back.
Module 12 – Front & Back Pinning & Blouseail Hem
119
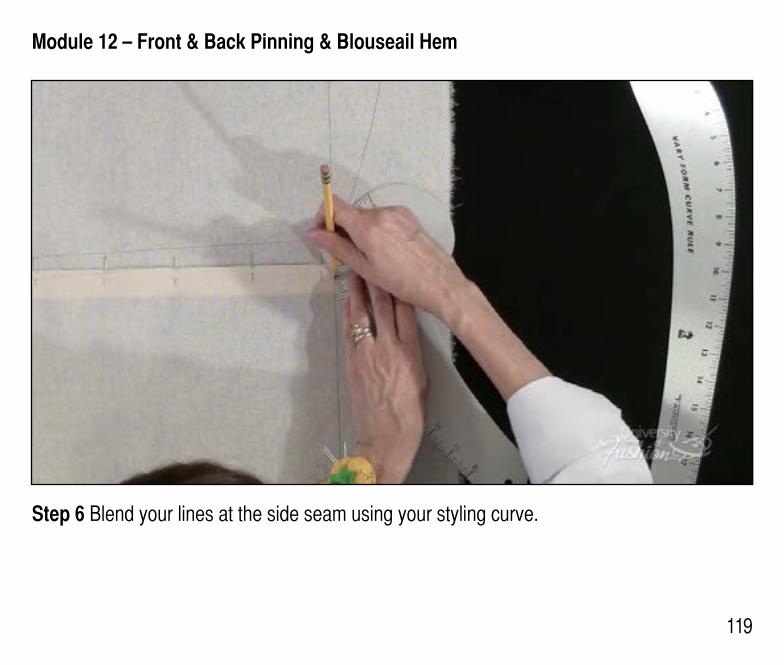
Step 6 Blend your lines at the side seam using your styling curve.
Module 12 – Front & Back Pinning & Blouseail Hem
120
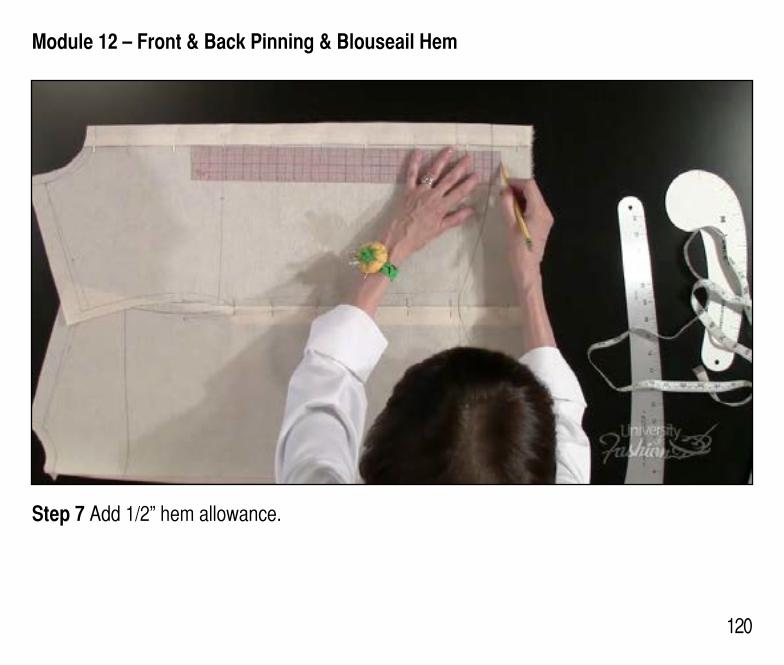
Step 7 Add 1/2” hem allowance.
Module 12 – Front & Back Pinning & Blouseail Hem
121
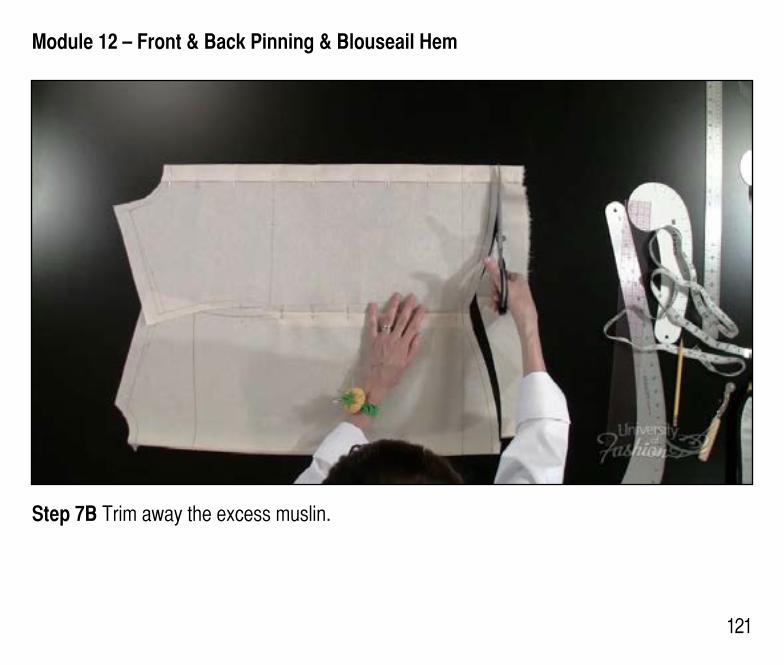
Step 7B Trim away the excess muslin.
122
Lesson Guide Drop Shoulder Blouse Draping: Intermediate
Module 13 – Drop Shoulder Sleeve –Extract Measurements & Mark Guidelines
122
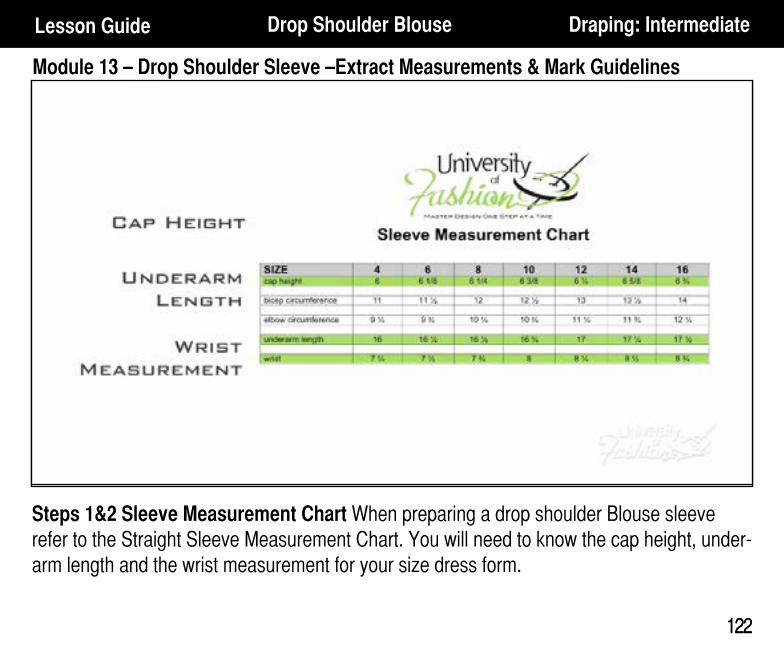
Steps 1&2 Sleeve Measurement Chart When preparing a drop shoulder Blouse sleeve refer to the Straight Sleeve Measurement Chart. You will need to know the cap height, under-arm length and the wrist measurement for your size dress form.
123
Module 13 – Drop Shoulder Sleeve –Extract Measurements & Mark Guidelines
123
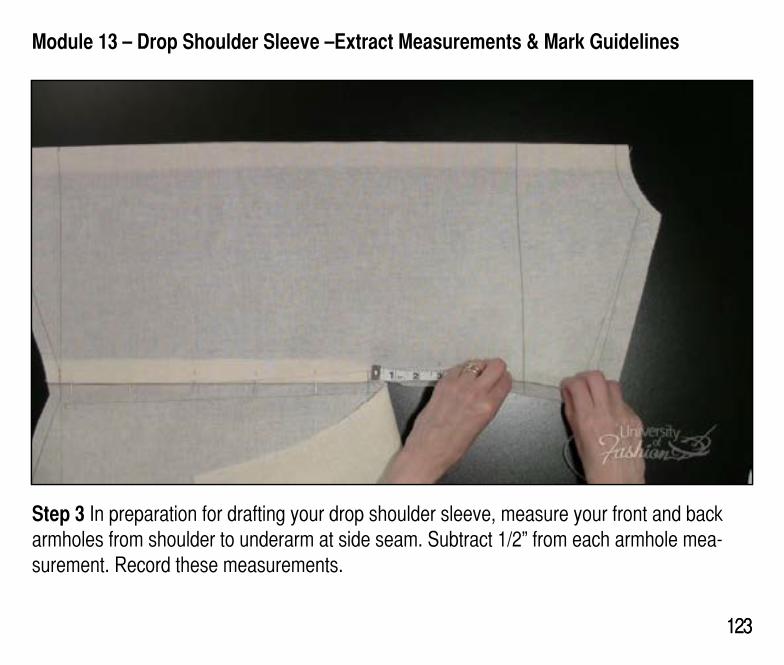
Step 3 In preparation for drafting your drop shoulder sleeve, measure your front and back armholes from shoulder to underarm at side seam. Subtract 1/2” from each armhole mea-surement. Record these measurements.
Module 13 – Drop Shoulder Sleeve –Extract Measurements & Mark Guidelines
124
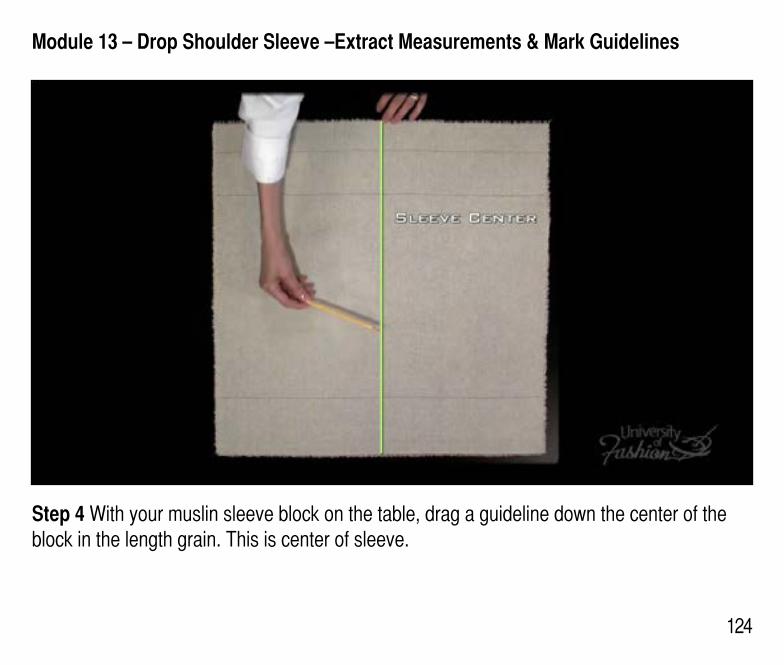
Step 4 With your muslin sleeve block on the table, drag a guideline down the center of the block in the length grain. This is center of sleeve.

Module 13 – Drop Shoulder Sleeve –Extract Measurements & Mark Guidelines
125
Step 5 Measure down 2” from top of the muslin & drag a guideline across the muslin block. This line represents the top of the sleeve.
Module 13 – Drop Shoulder Sleeve –Extract Measurements & Mark Guidelines
126
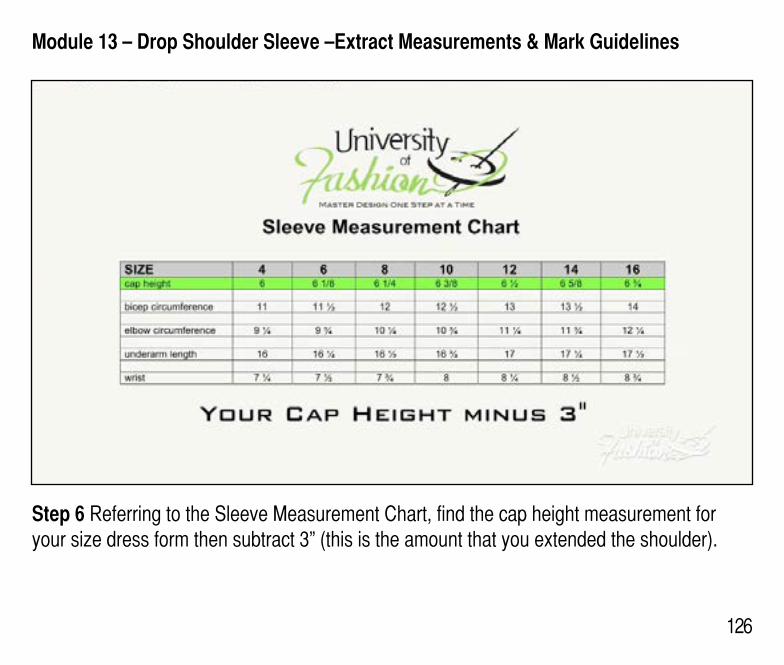
Step 6 Referring to the Sleeve Measurement Chart, find the cap height measurement for your size dress form then subtract 3” (this is the amount that you extended the shoulder).
Module 13 – Drop Shoulder Sleeve –Extract Measurements & Mark Guidelines
127
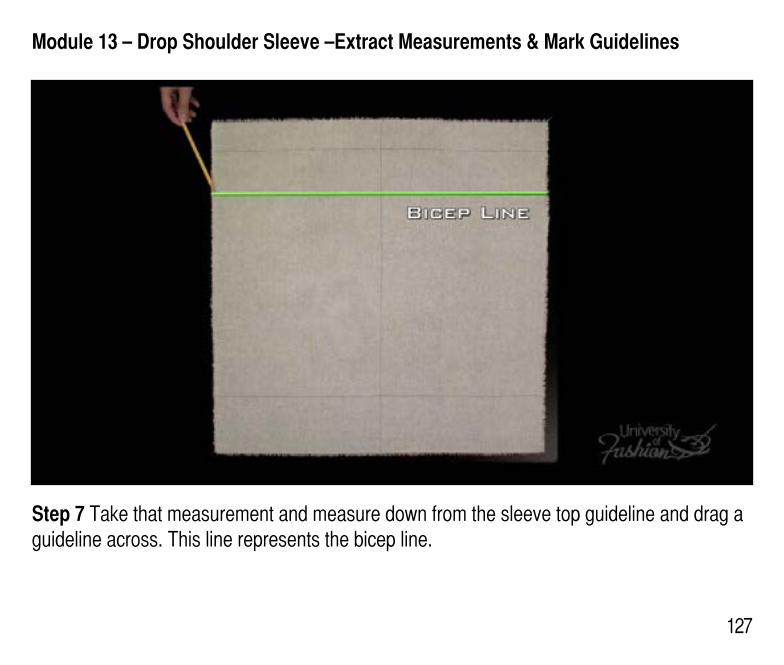
Step 7 Take that measurement and measure down from the sleeve top guideline and drag a guideline across. This line represents the bicep line.
Module 13 – Drop Shoulder Sleeve –Extract Measurements & Mark Guidelines
128
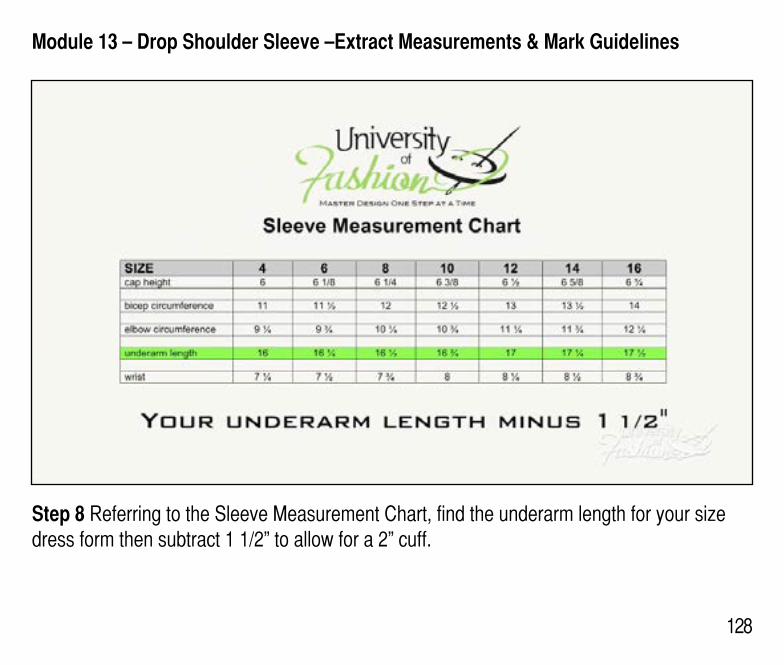
Step 8 Referring to the Sleeve Measurement Chart, find the underarm length for your size dress form then subtract 1 1/2” to allow for a 2” cuff.
Module 13 – Drop Shoulder Sleeve –Extract Measurements & Mark Guidelines
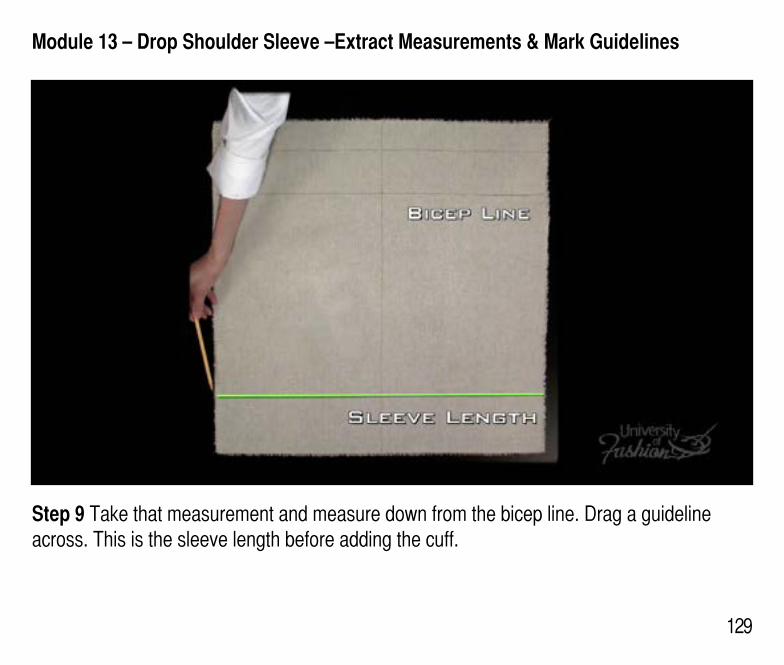
129
Step 9 Take that measurement and measure down from the bicep line. Drag a guideline across. This is the sleeve length before adding the cuff.
130
Lesson Guide Drop Shoulder Blouse Draping: Intermediate
Module 14 – Drafting the Drop Shoulder Blouse Sleeve
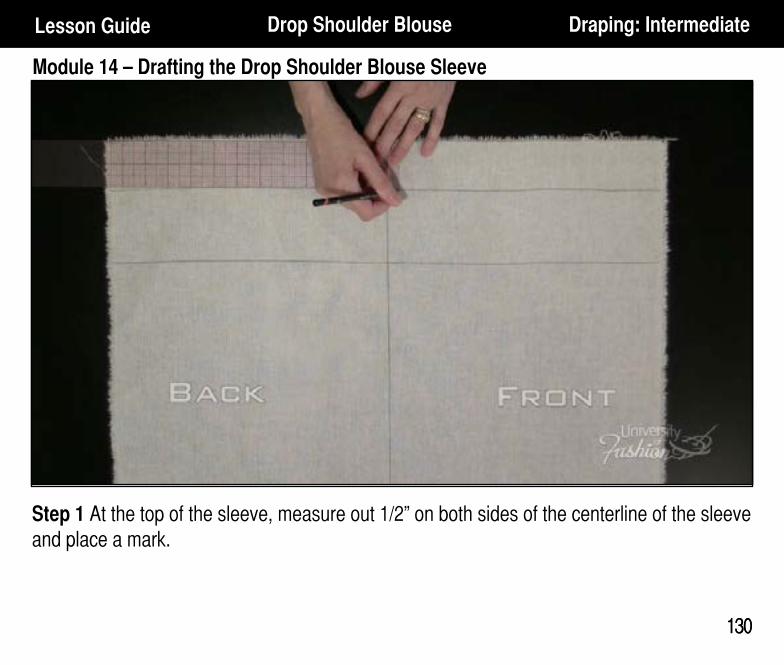
130
Step 1 At the top of the sleeve, measure out 1/2” on both sides of the centerline of the sleeve and place a mark.
131
Module 14 – Drafting the Drop Shoulder Blouse Sleeve
131
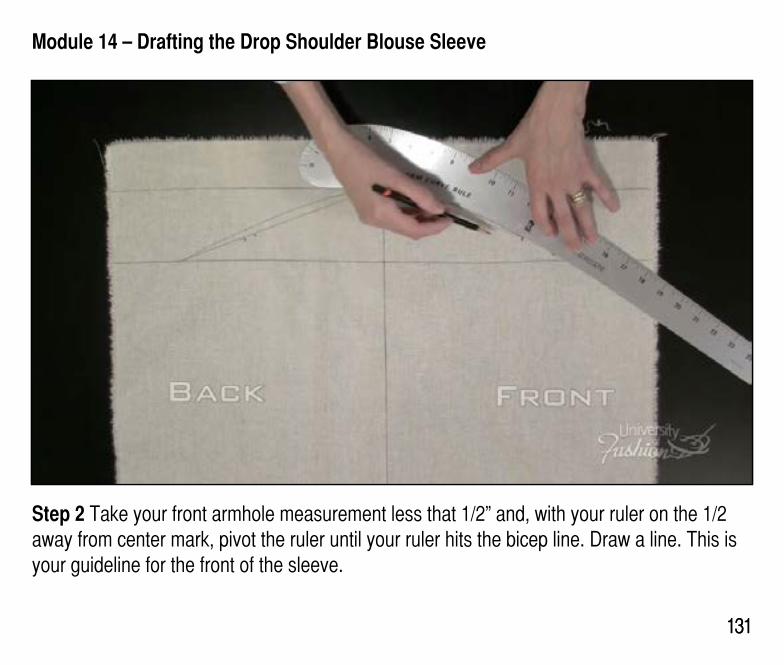
Step 2 Take your front armhole measurement less that 1/2” and, with your ruler on the 1/2 away from center mark, pivot the ruler until your ruler hits the bicep line. Draw a line. This is your guideline for the front of the sleeve.
Module 14 – Drafting the Drop Shoulder Blouse Sleeve
132
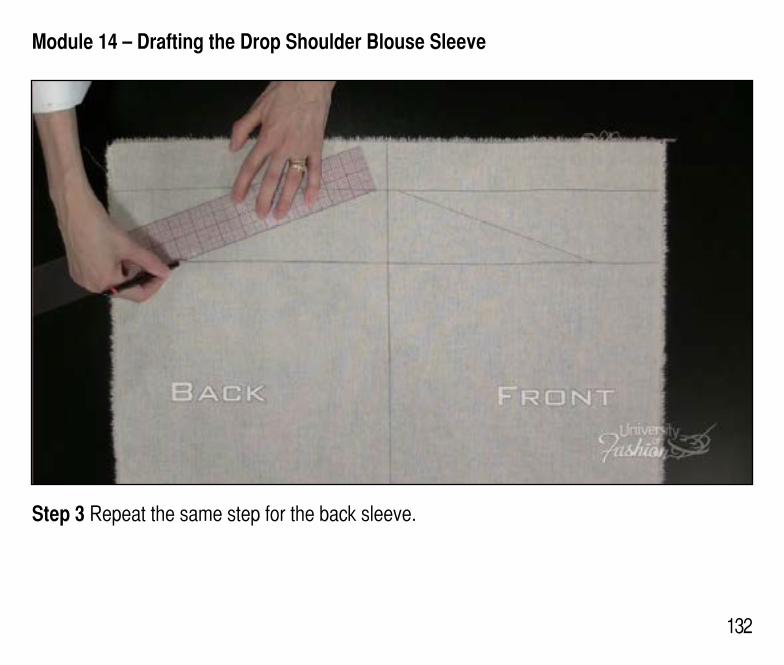
Step 3 Repeat the same step for the back sleeve.
Module 14 – Drafting the Drop Shoulder Blouse Sleeve
133
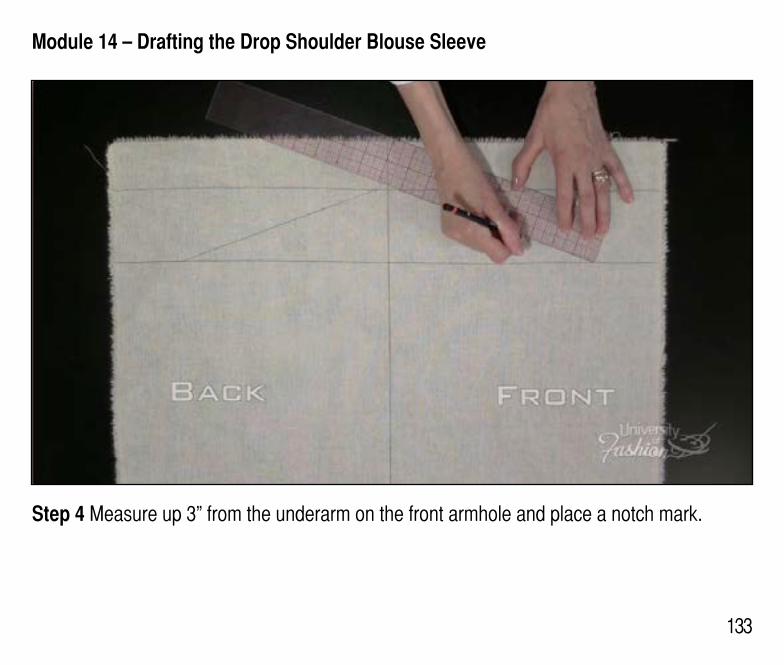
Step 4 Measure up 3” from the underarm on the front armhole and place a notch mark.
Module 14 – Drafting the Drop Shoulder Blouse Sleeve
134
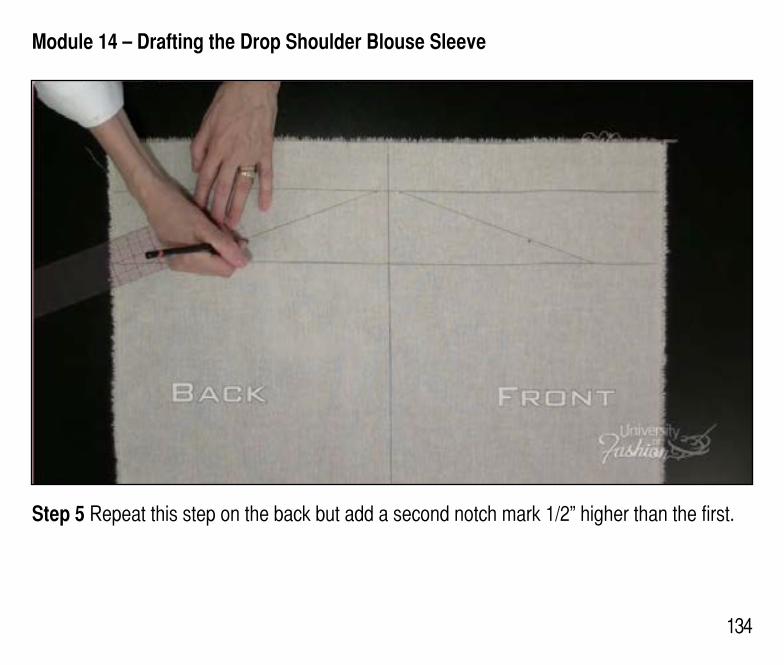
Step 5 Repeat this step on the back but add a second notch mark 1/2” higher than the first.
Module 14 – Drafting the Drop Shoulder Blouse Sleeve
135
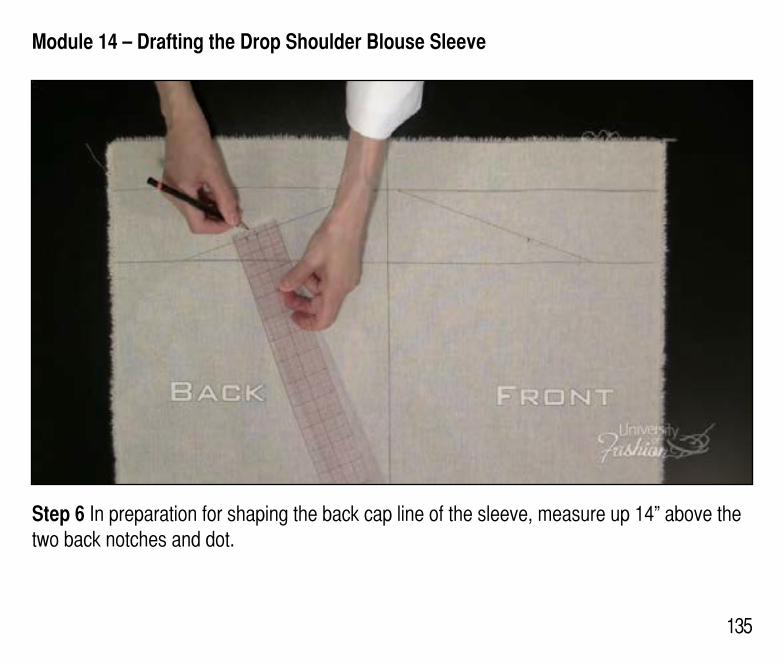
Step 6 In preparation for shaping the back cap line of the sleeve, measure up 14” above the two back notches and dot.
Module 14 – Drafting the Drop Shoulder Blouse Sleeve
136
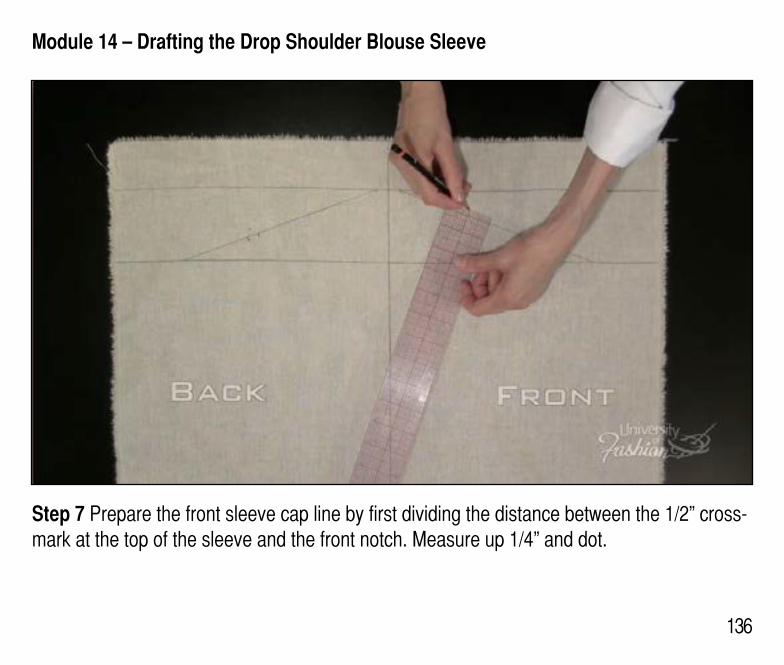
Step 7 Prepare the front sleeve cap line by first dividing the distance between the 1/2” cross-mark at the top of the sleeve and the front notch. Measure up 1/4” and dot.
Module 14 – Drafting the Drop Shoulder Blouse Sleeve
137
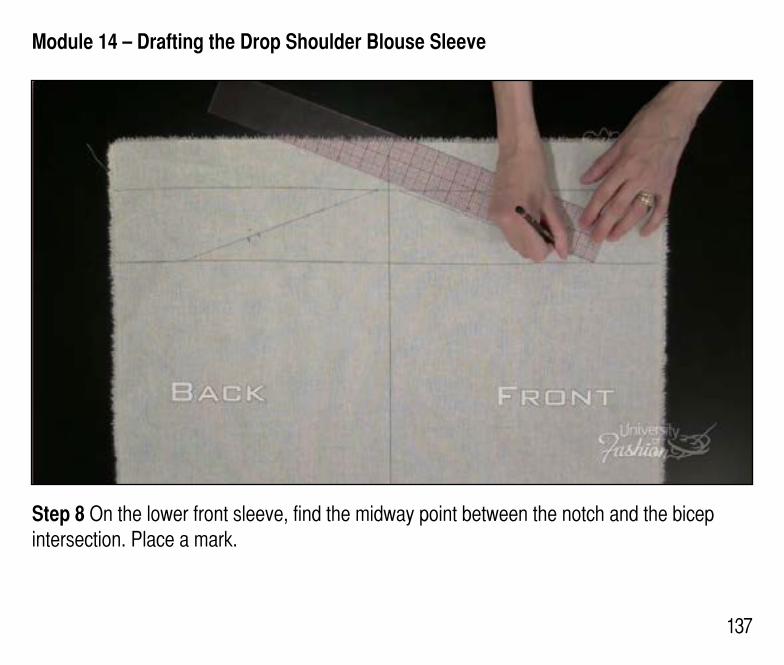
Step 8 On the lower front sleeve, find the midway point between the notch and the bicep intersection. Place a mark.
Module 14 – Drafting the Drop Shoulder Blouse Sleeve
138
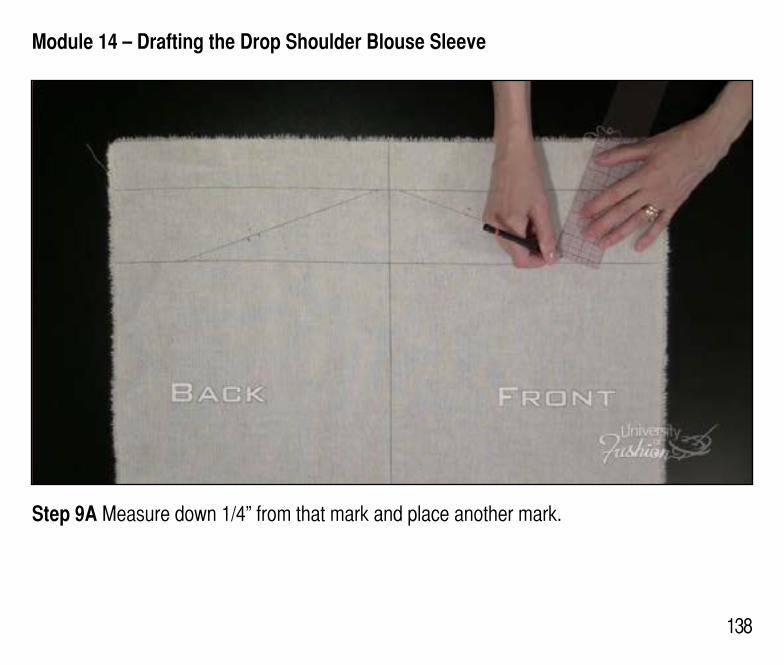
Step 9A Measure down 1/4” from that mark and place another mark.
Module 14 – Drafting the Drop Shoulder Blouse Sleeve
139
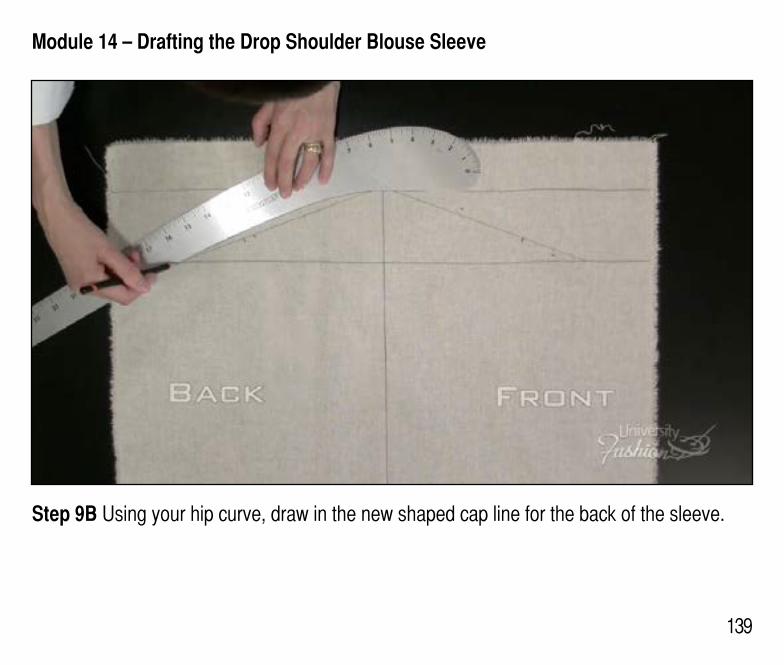
Step 9B Using your hip curve, draw in the new shaped cap line for the back of the sleeve.

Module 14 – Drafting the Drop Shoulder Blouse Sleeve
140
Step 10A True in the front sleeve cap line.
Module 14 – Drafting the Drop Shoulder Blouse Sleeve
141
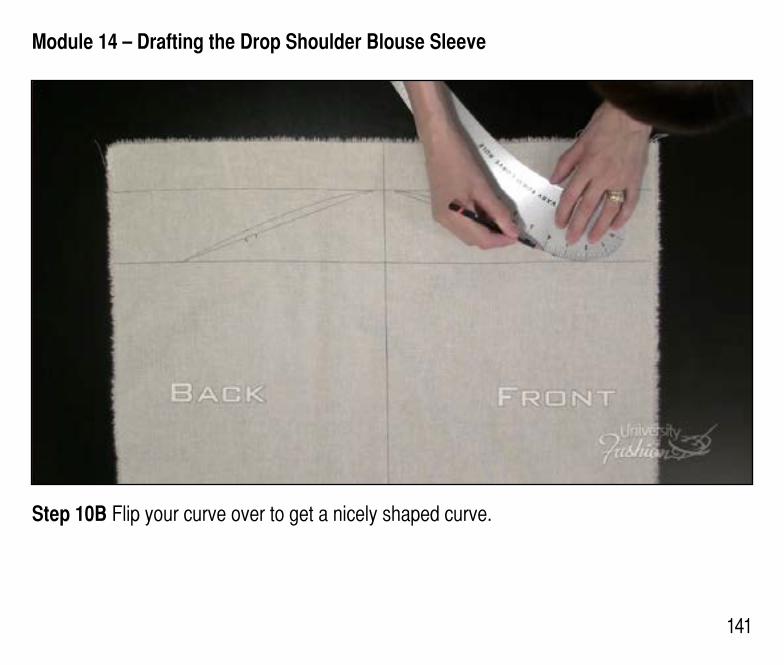
Step 10B Flip your curve over to get a nicely shaped curve.
Module 14 – Drafting the Drop Shoulder Blouse Sleeve
142
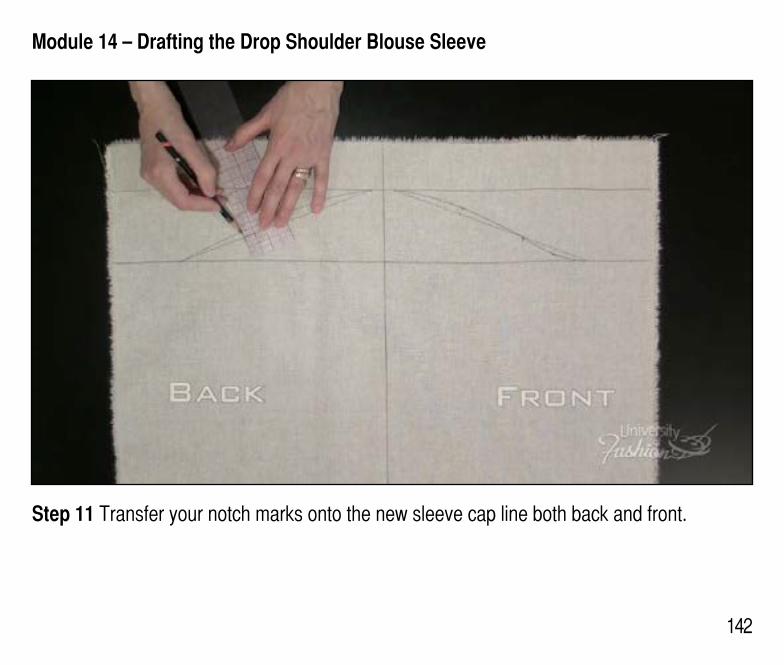
Step 11 Transfer your notch marks onto the new sleeve cap line both back and front.
Module 14 – Drafting the Drop Shoulder Blouse Sleeve
143
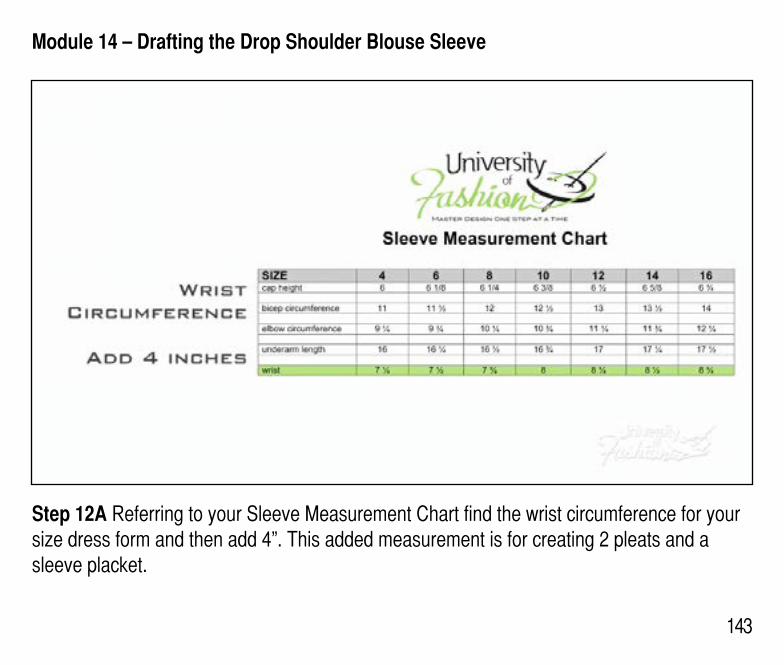
Step 12A Referring to your Sleeve Measurement Chart find the wrist circumference for your size dress form and then add 4”. This added measurement is for creating 2 pleats and a sleeve placket.
Module 14 – Drafting the Drop Shoulder Blouse Sleeve
144
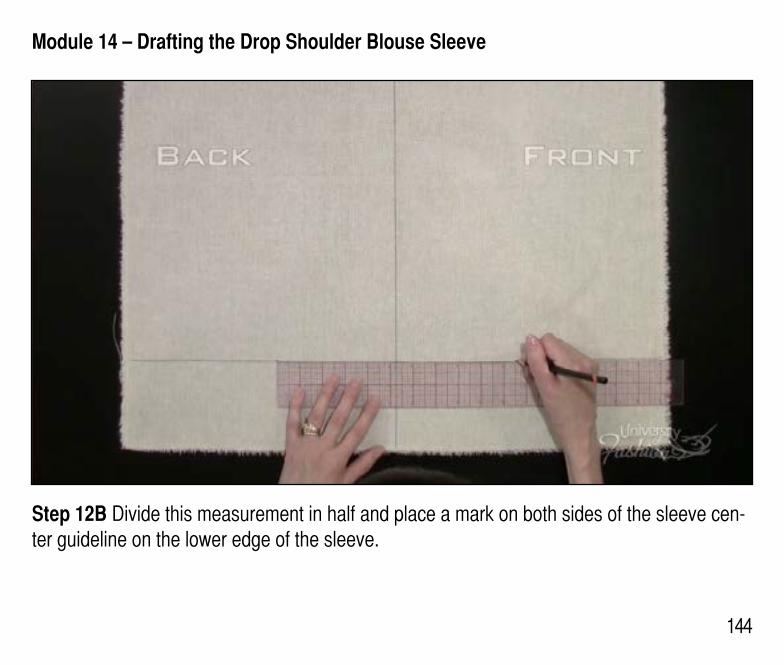
Step 12B Divide this measurement in half and place a mark on both sides of the sleeve cen-ter guideline on the lower edge of the sleeve.

Module 14 – Drafting the Drop Shoulder Blouse Sleeve
145
Step 13 Connect the wrist markings to your inseam/bicep marks for both front and back. These are your sleeve inseams.
Module 14 – Drafting the Drop Shoulder Blouse Sleeve
146
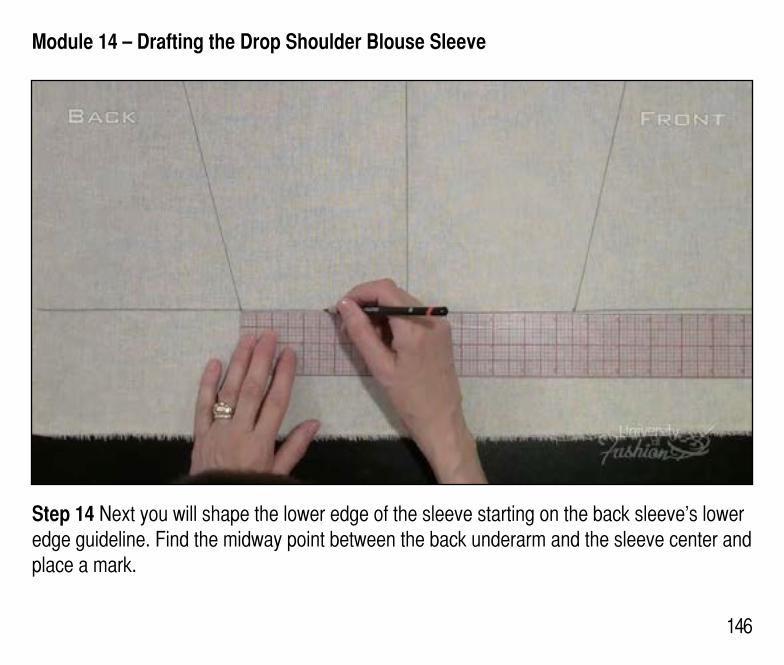
Step 14 Next you will shape the lower edge of the sleeve starting on the back sleeve’s lower edge guideline. Find the midway point between the back underarm and the sleeve center and place a mark.
Module 14 – Drafting the Drop Shoulder Blouse Sleeve
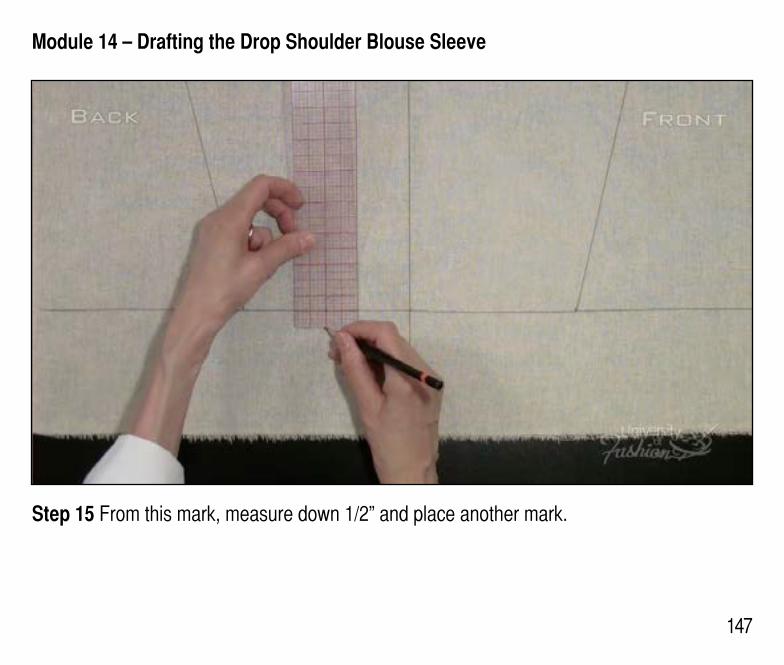
147
Step 15 From this mark, measure down 1/2” and place another mark.
Module 14 – Drafting the Drop Shoulder Blouse Sleeve
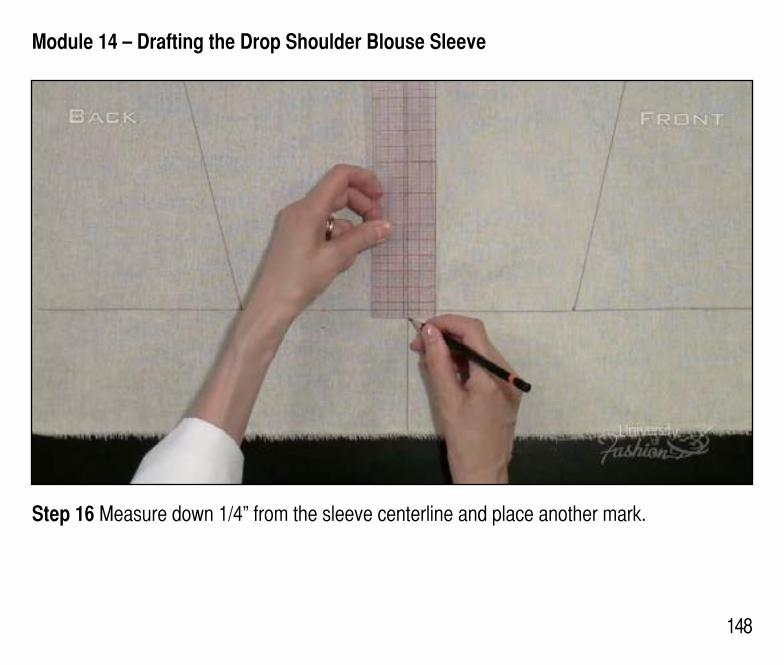
148
Step 16 Measure down 1/4” from the sleeve centerline and place another mark.
Module 14 – Drafting the Drop Shoulder Blouse Sleeve
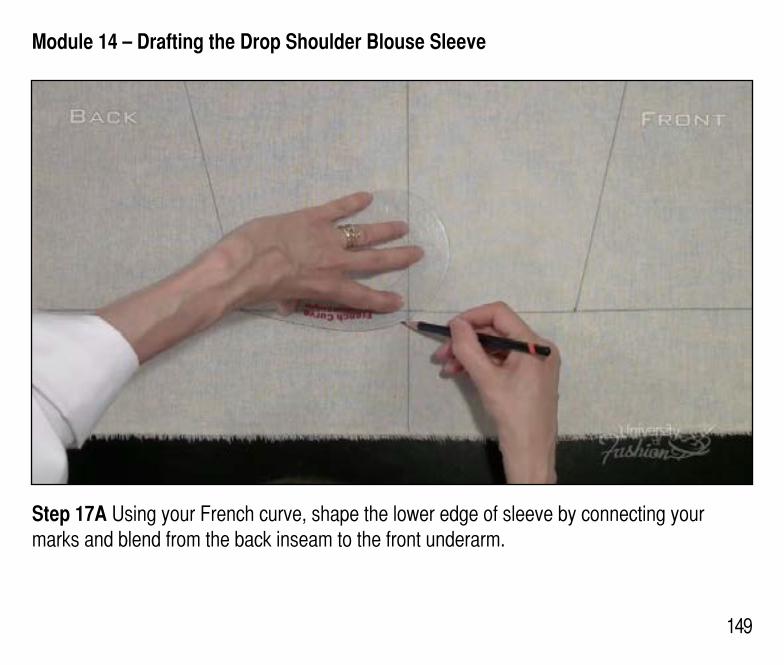
149
Step 17A Using your French curve, shape the lower edge of sleeve by connecting your marks and blend from the back inseam to the front underarm.
Module 14 – Drafting the Drop Shoulder Blouse Sleeve
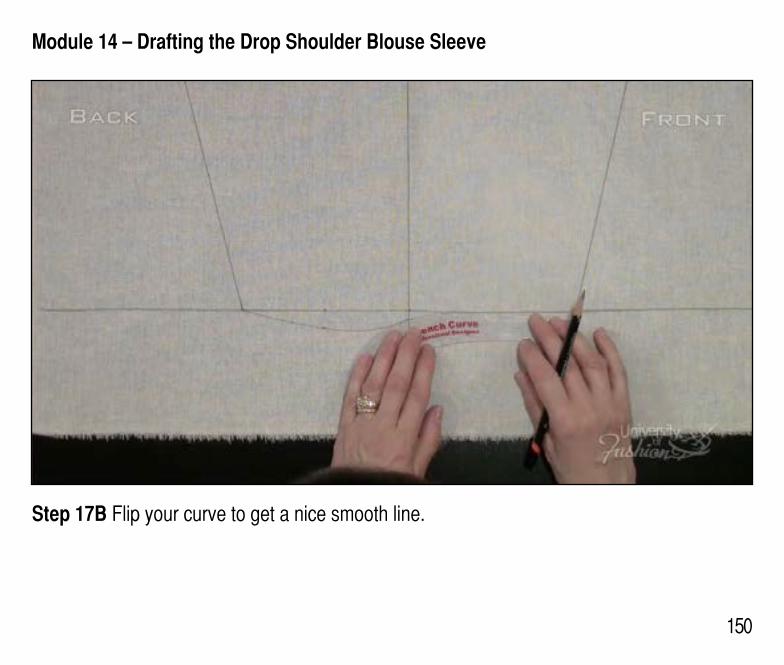
150
Step 17B Flip your curve to get a nice smooth line.

Module 14 – Drafting the Drop Shoulder Blouse Sleeve
151
Step 18 To mark you placket opening on the sleeve back, measure up 3” at the back midway mark and draw a line. Place your ruler at a right angle to the lower edge guideline. Place a dash at the end of the line.
Module 14 – Drafting the Drop Shoulder Blouse Sleeve
152
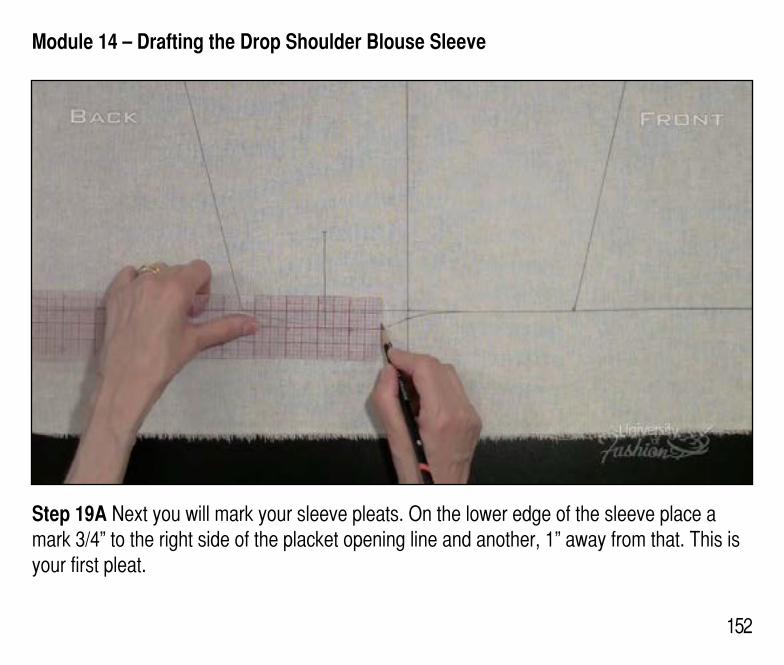
Step 19A Next you will mark your sleeve pleats. On the lower edge of the sleeve place a mark 3/4” to the right side of the placket opening line and another, 1” away from that. This is your first pleat.
Module 14 – Drafting the Drop Shoulder Blouse Sleeve
153
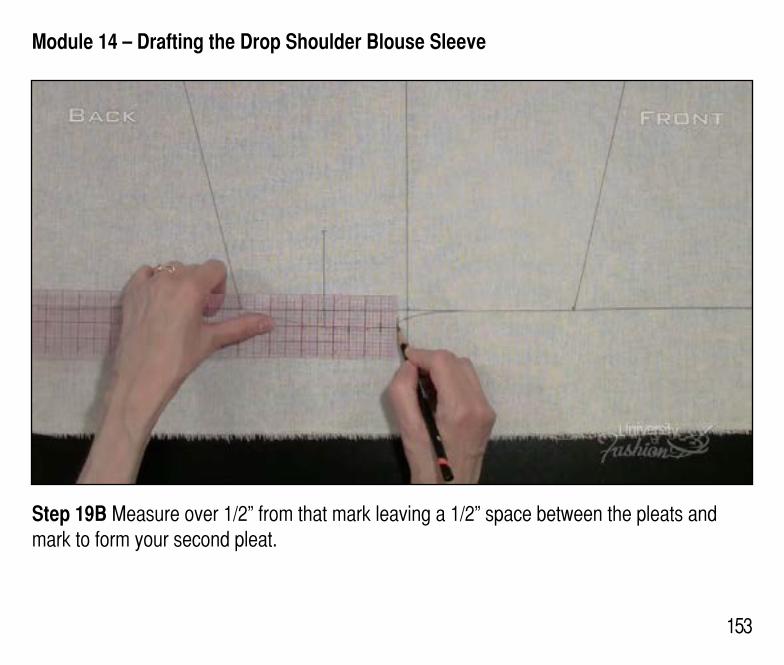
Step 19B Measure over 1/2” from that mark leaving a 1/2” space between the pleats and mark to form your second pleat.
Module 14 – Drafting the Drop Shoulder Blouse Sleeve
154
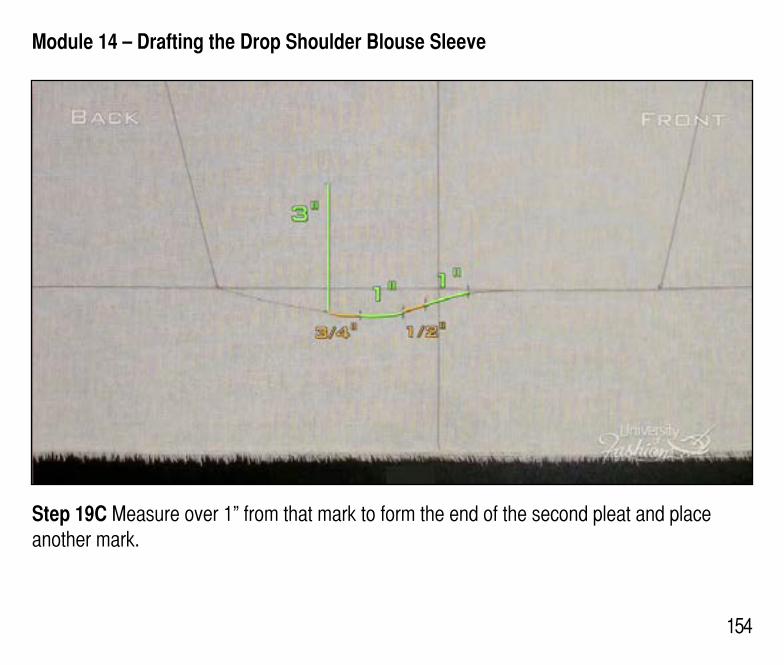
Step 19C Measure over 1” from that mark to form the end of the second pleat and place another mark.
Module 14 – Drafting the Drop Shoulder Blouse Sleeve
155
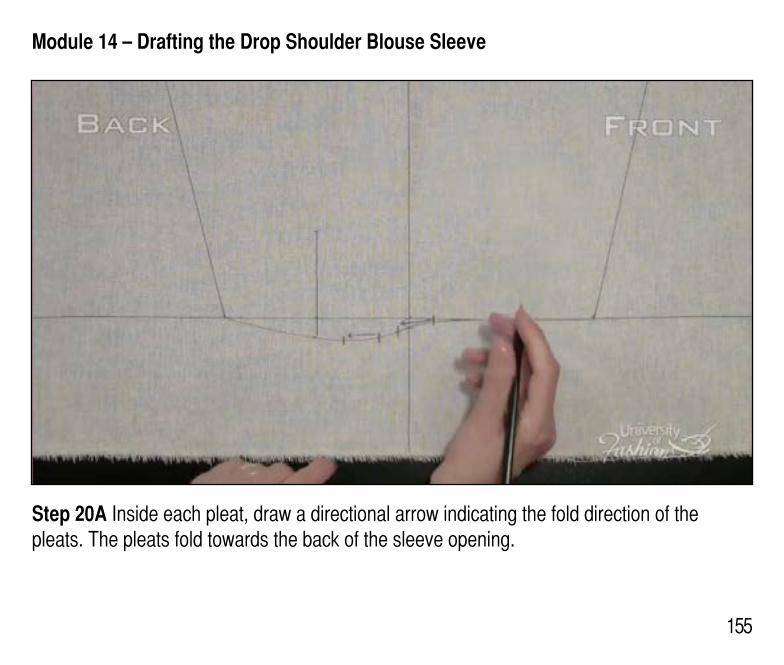
Step 20A Inside each pleat, draw a directional arrow indicating the fold direction of the pleats. The pleats fold towards the back of the sleeve opening.
Module 14 – Drafting the Drop Shoulder Blouse Sleeve
156
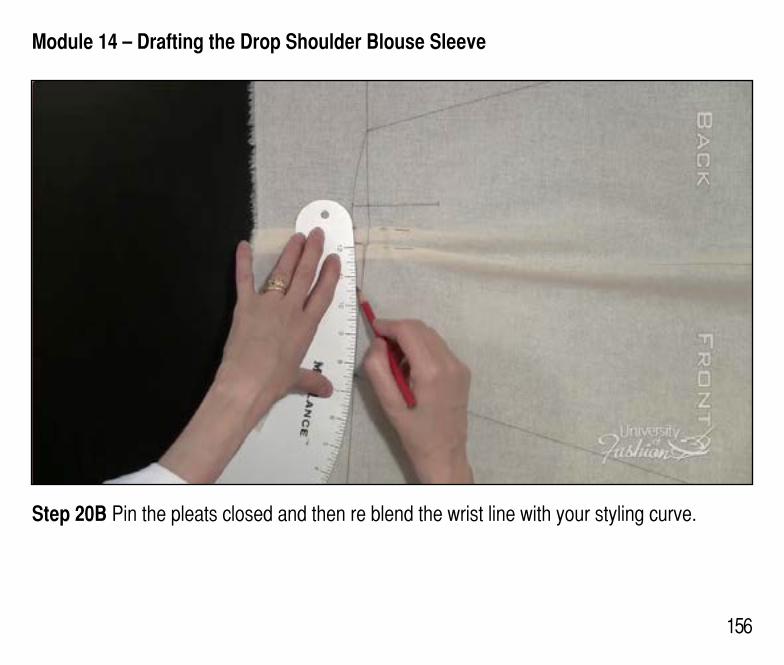
Step 20B Pin the pleats closed and then re blend the wrist line with your styling curve.
Module 14 – Drafting the Drop Shoulder Blouse Sleeve
157
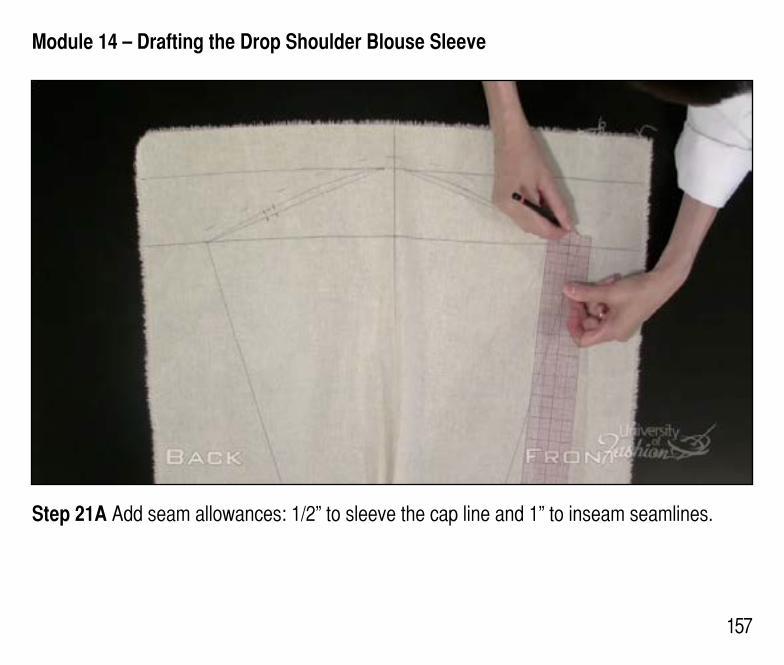
Step 21A Add seam allowances: 1/2” to sleeve the cap line and 1” to inseam seamlines.
Module 14 – Drafting the Drop Shoulder Blouse Sleeve
158
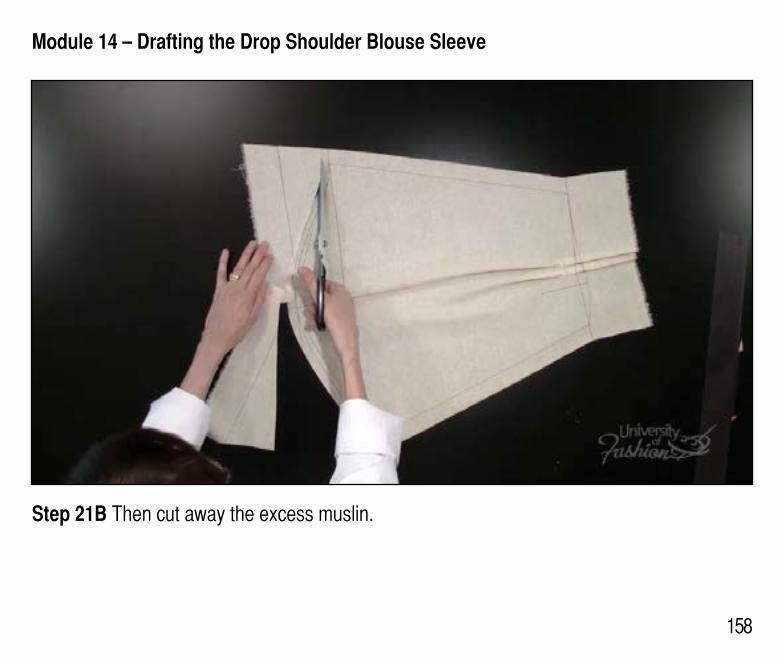
Step 21B Then cut away the excess muslin.
Module 14 – Drafting the Drop Shoulder Blouse Sleeve
159
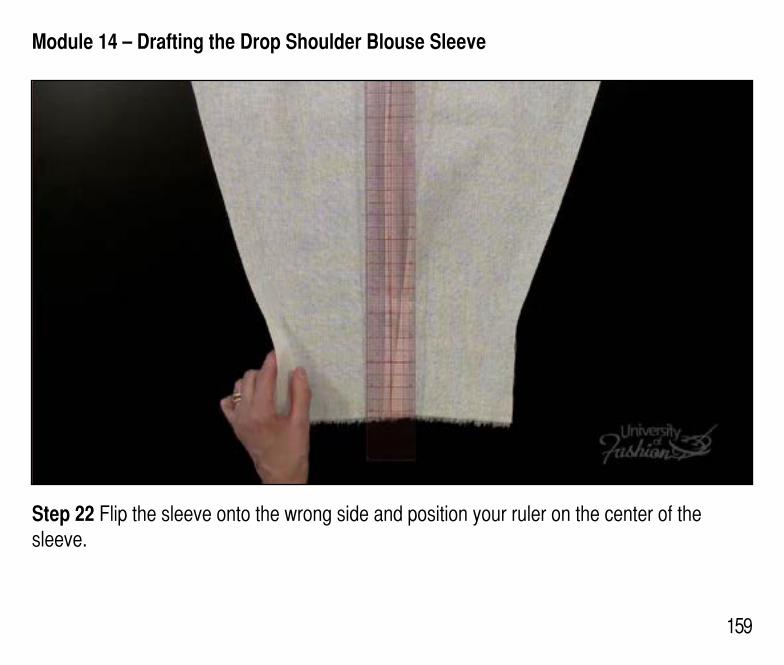
Step 22 Flip the sleeve onto the wrong side and position your ruler on the center of the sleeve.
Module 14 – Drafting the Drop Shoulder Blouse Sleeve
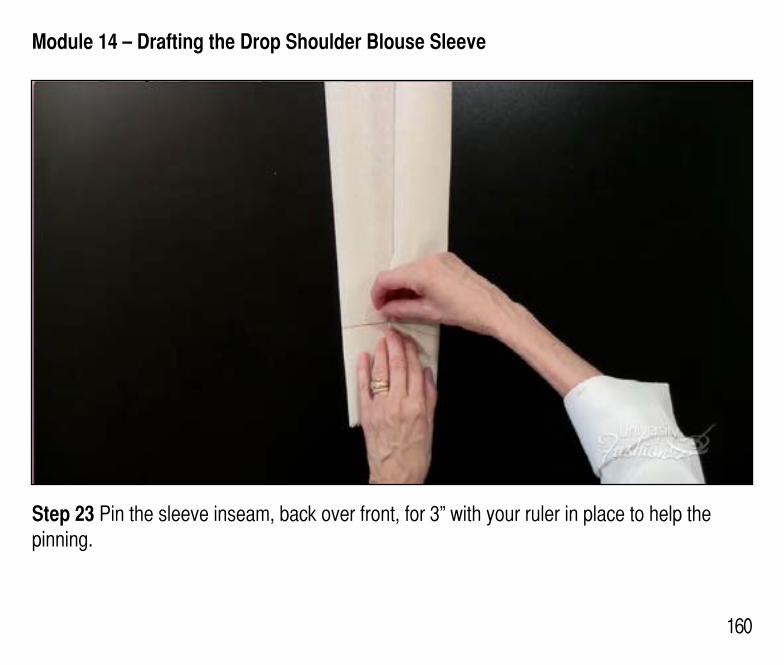
160
Step 23 Pin the sleeve inseam, back over front, for 3” with your ruler in place to help the pinning.
Module 14 – Drafting the Drop Shoulder Blouse Sleeve
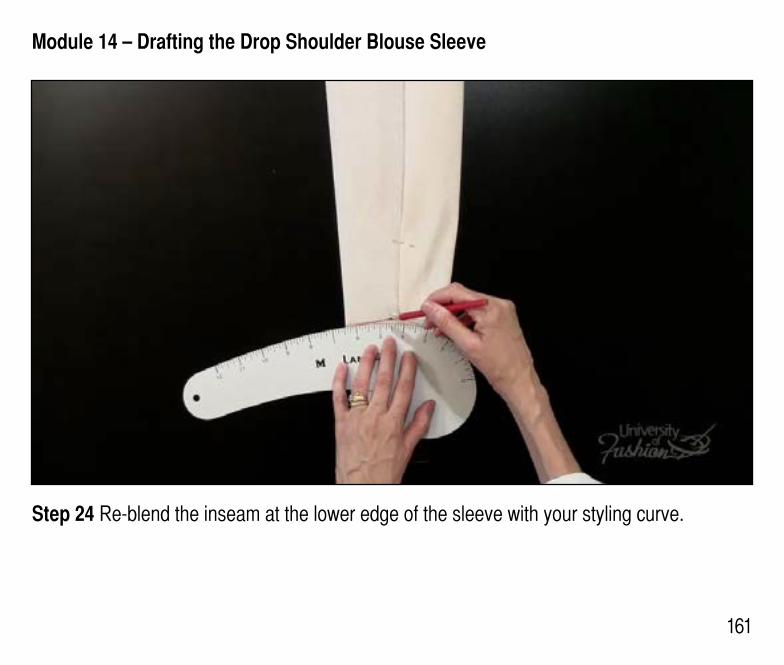
161
Step 24 Re-blend the inseam at the lower edge of the sleeve with your styling curve.

Module 14 – Drafting the Drop Shoulder Blouse Sleeve
162
Step 25 Unpin the inseam and turn the sleeve over to the right side. Then re-blend your lines.
Module 14 – Drafting the Drop Shoulder Blouse Sleeve
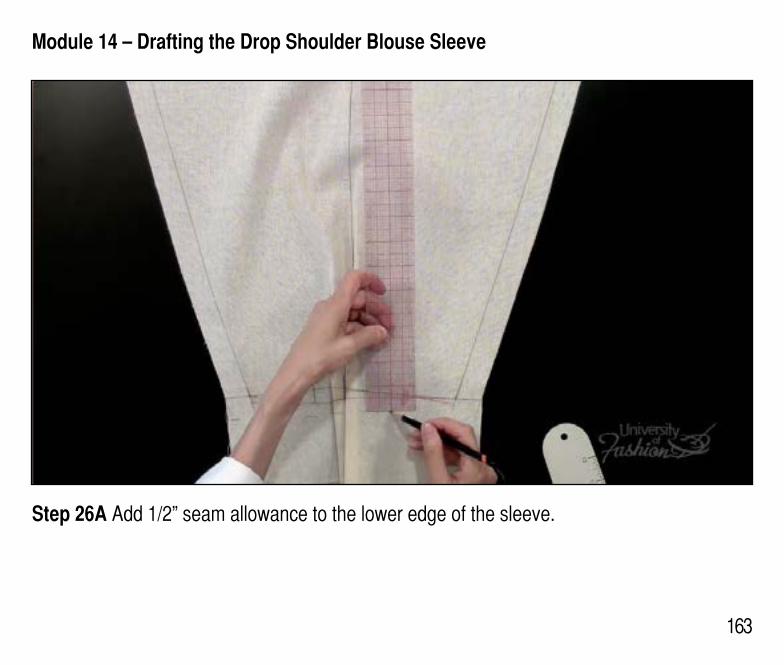
163
Step 26A Add 1/2” seam allowance to the lower edge of the sleeve.

Module 14 – Drafting the Drop Shoulder Blouse Sleeve
164
Step 26B Trim the excess muslin.
Module 14 – Drafting the Drop Shoulder Blouse Sleeve
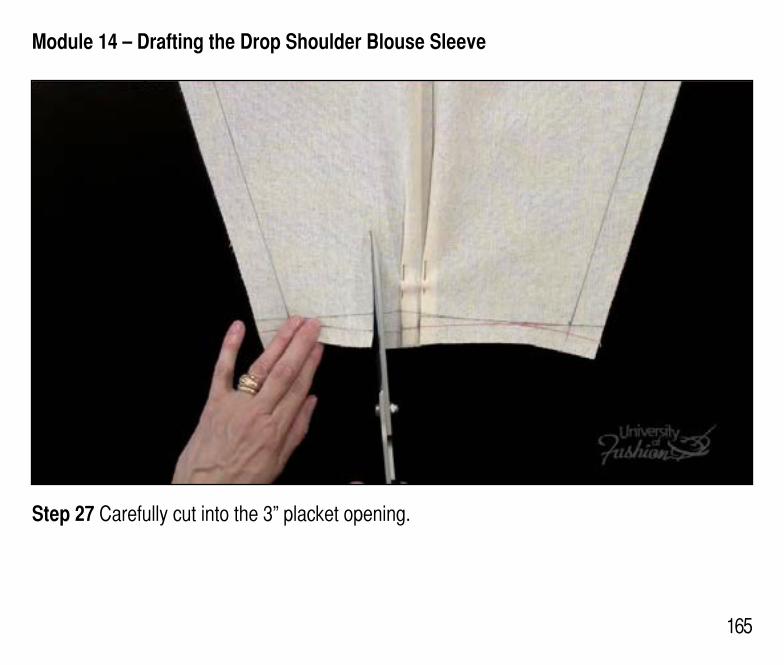
165
Step 27 Carefully cut into the 3” placket opening.
166
Lesson Guide Drop Shoulder Blouse Draping: Intermediate
Module 15 – Continuous Lap Placement & Blouse Sleeve Cuff
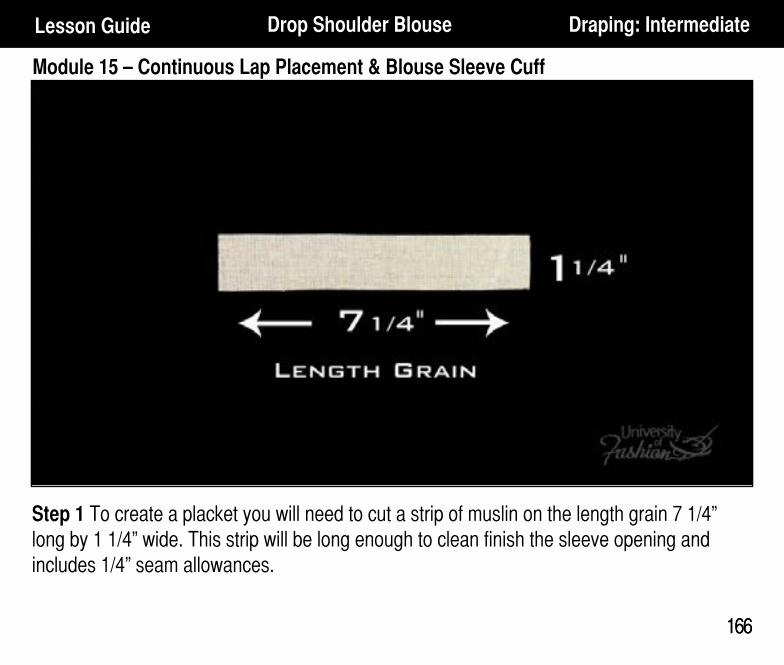
166
Step 1 To create a placket you will need to cut a strip of muslin on the length grain 7 1/4” long by 1 1/4” wide. This strip will be long enough to clean finish the sleeve opening and includes 1/4” seam allowances.

167
Module 15 – Continuous Lap Placement & Blouse Sleeve Cuff
167
Step 2 At your sewing machine stay stitch your pleats, removing the pins as you sew.
Module 15 – Continuous Lap Placement & Blouse Sleeve Cuff
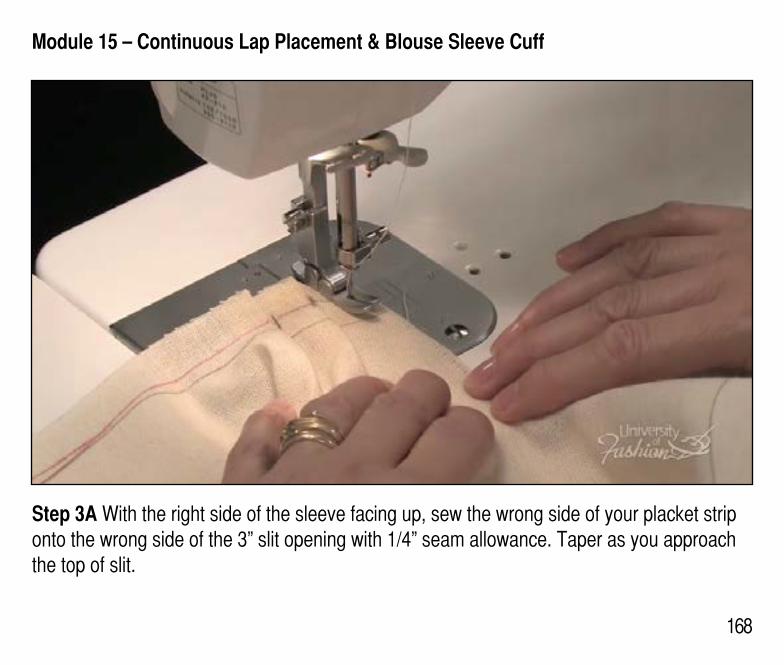
168
Step 3A With the right side of the sleeve facing up, sew the wrong side of your placket strip onto the wrong side of the 3” slit opening with 1/4” seam allowance. Taper as you approach the top of slit.

Module 15 – Continuous Lap Placement & Blouse Sleeve Cuff
169
Step 3B Trim the excess placket muslin then continue sewing until you reach the end of the sleeve opening.
Module 15 – Continuous Lap Placement & Blouse Sleeve Cuff
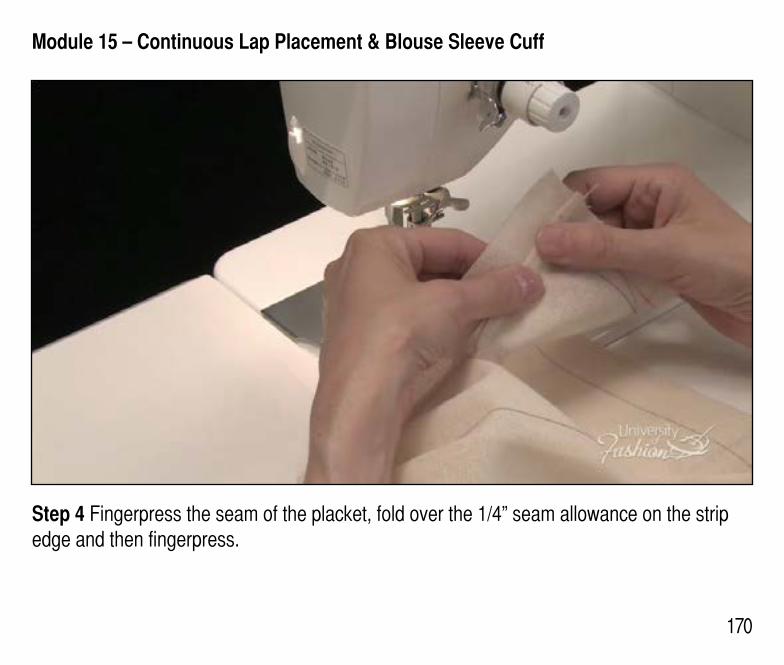
170
Step 4 Fingerpress the seam of the placket, fold over the 1/4” seam allowance on the strip edge and then fingerpress.
Module 15 – Continuous Lap Placement & Blouse Sleeve Cuff
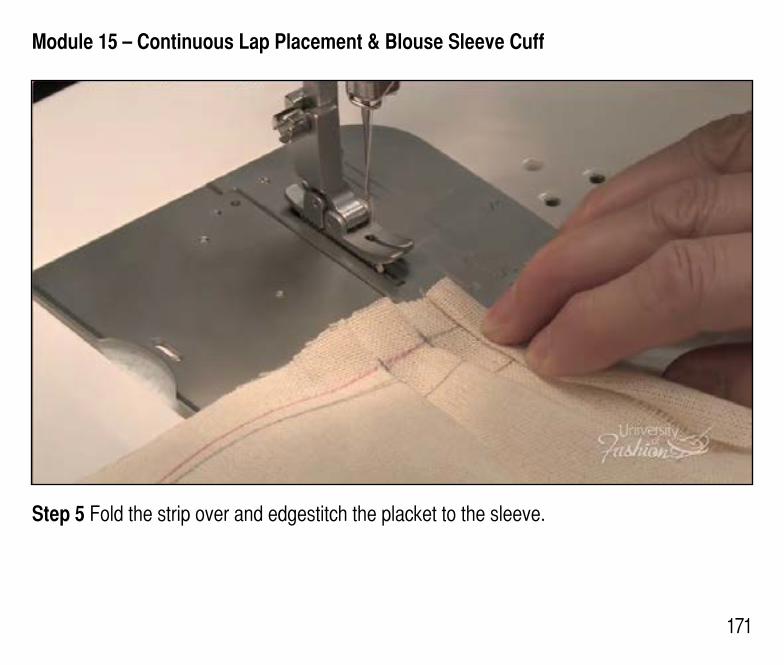
171
Step 5 Fold the strip over and edgestitch the placket to the sleeve.
Module 15 – Continuous Lap Placement & Blouse Sleeve Cuff
172
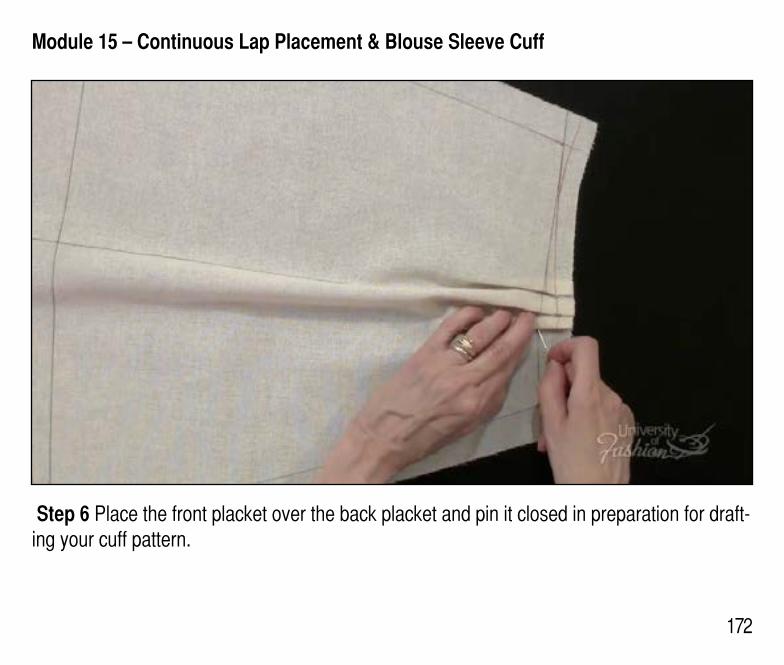
Step 6 Place the front placket over the back placket and pin it closed in preparation for draft-ing your cuff pattern.
Module 15 – Continuous Lap Placement & Blouse Sleeve Cuff
173
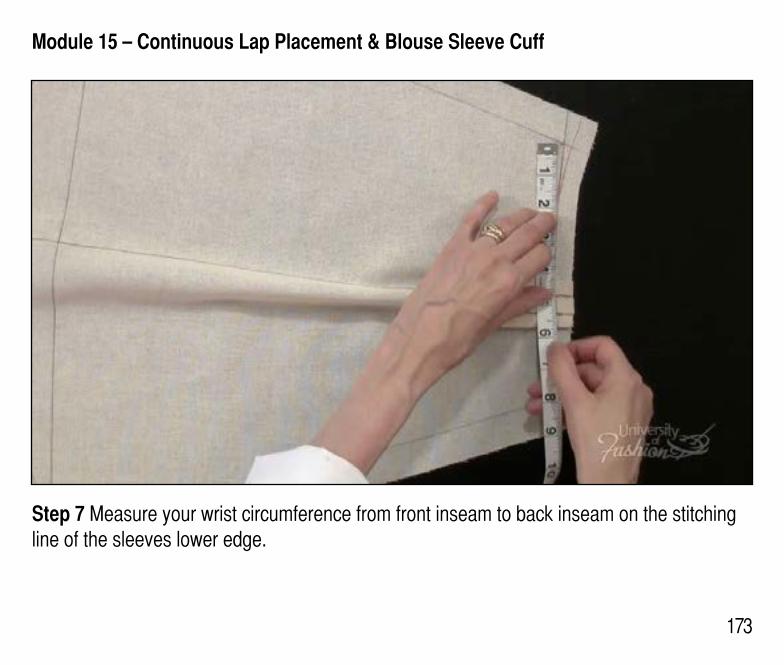
Step 7 Measure your wrist circumference from front inseam to back inseam on the stitching line of the sleeves lower edge.
Module 15 – Continuous Lap Placement & Blouse Sleeve Cuff
174
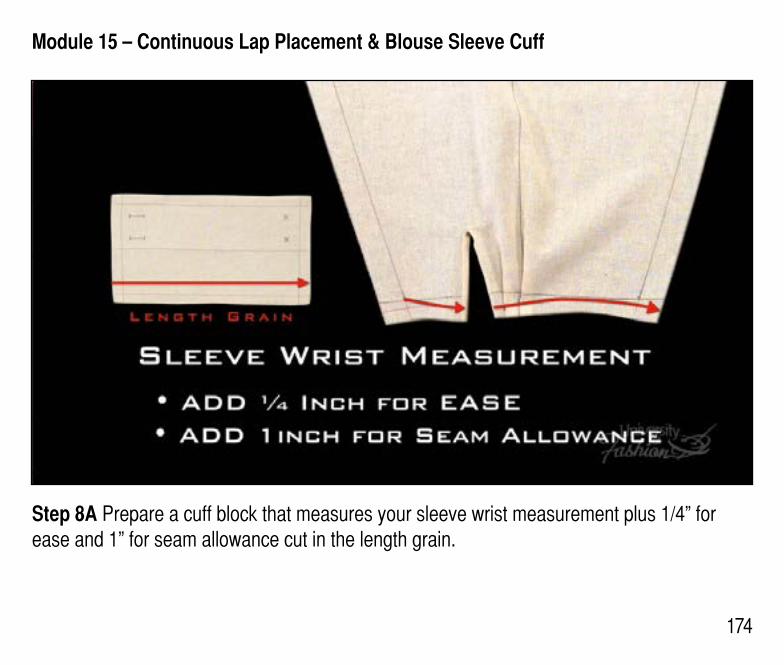
Step 8A Prepare a cuff block that measures your sleeve wrist measurement plus 1/4” for ease and 1” for seam allowance cut in the length grain.
Module 15 – Continuous Lap Placement & Blouse Sleeve Cuff
175
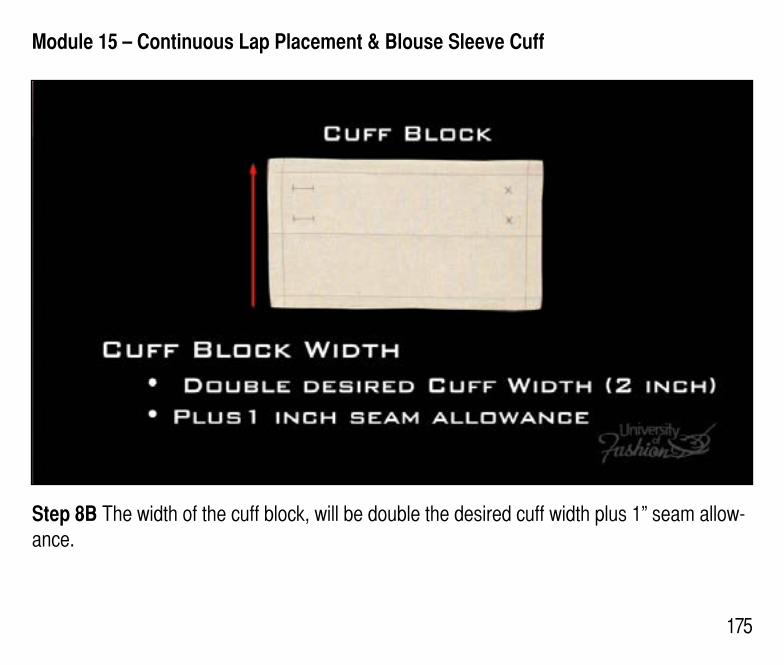
Step 8B The width of the cuff block, will be double the desired cuff width plus 1” seam allow-ance.
Module 15 – Continuous Lap Placement & Blouse Sleeve Cuff
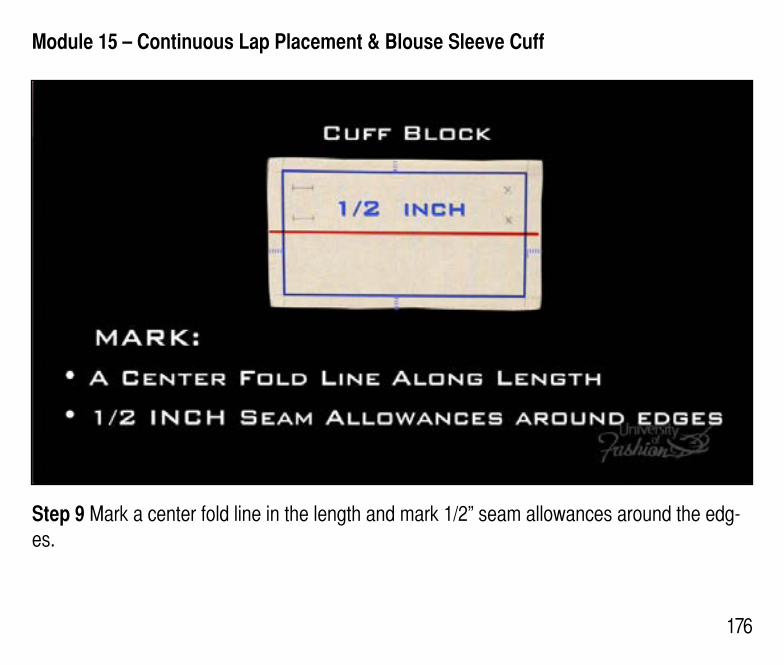
176
Step 9 Mark a center fold line in the length and mark 1/2” seam allowances around the edg-es.
Module 15 – Continuous Lap Placement & Blouse Sleeve Cuff
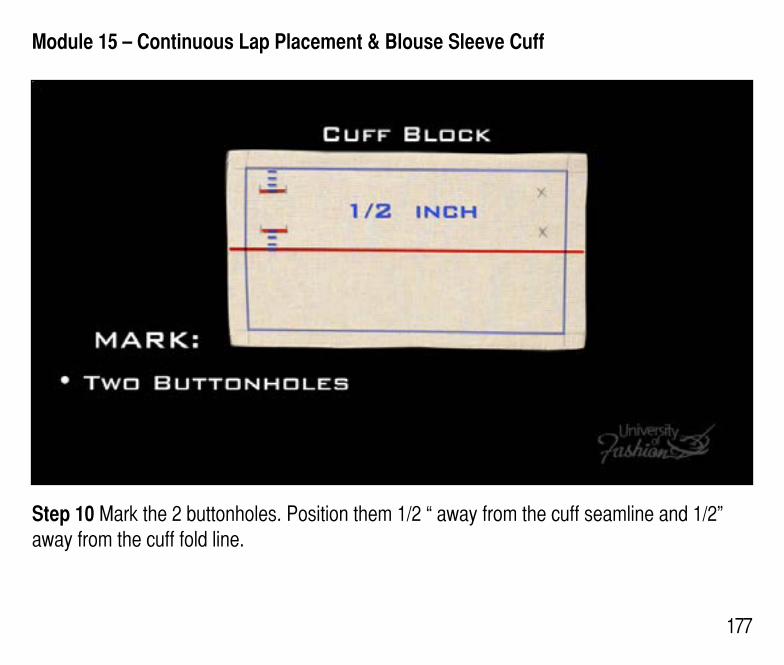
177
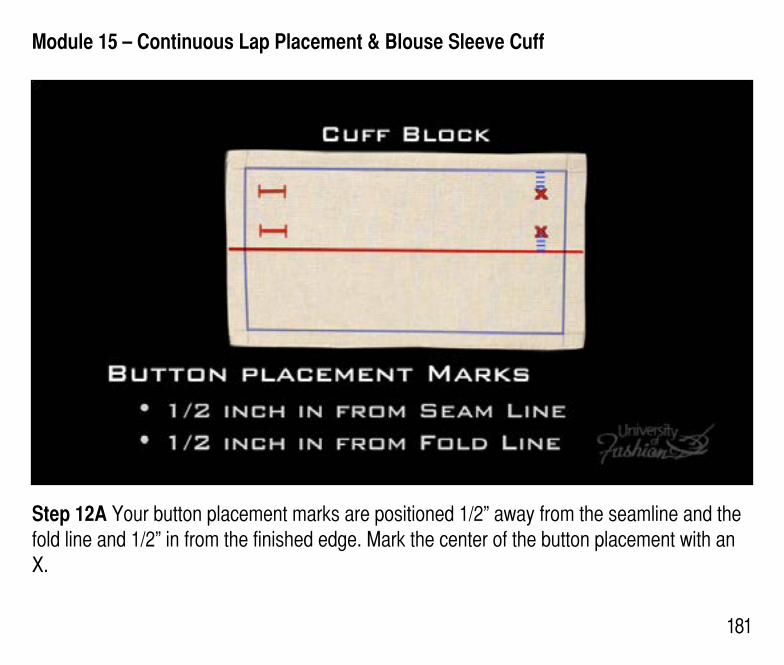
Step 10 Mark the 2 buttonholes. Position them 1/2 “ away from the cuff seamline and 1/2” away from the cuff fold line.
Module 15 – Continuous Lap Placement & Blouse Sleeve Cuff
178
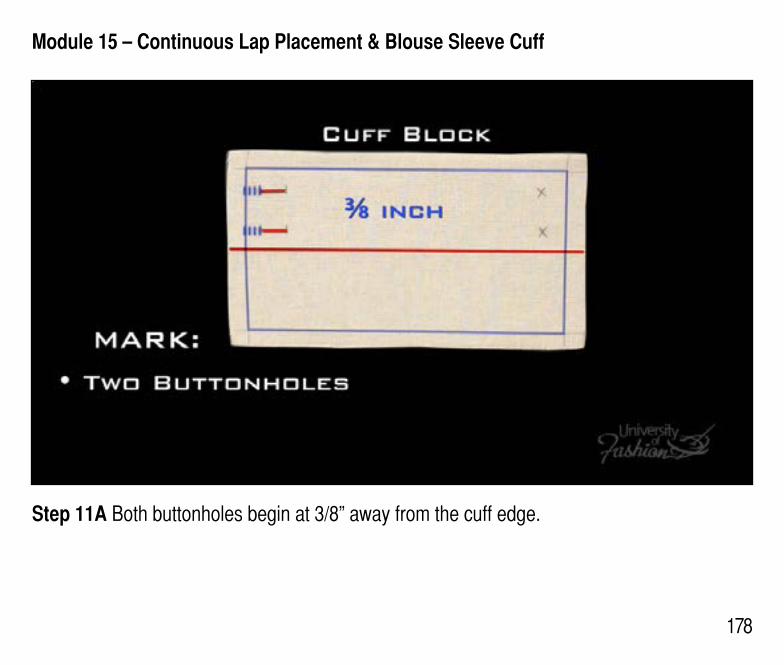
Step 11A Both buttonholes begin at 3/8” away from the cuff edge.
Module 15 – Continuous Lap Placement & Blouse Sleeve Cuff
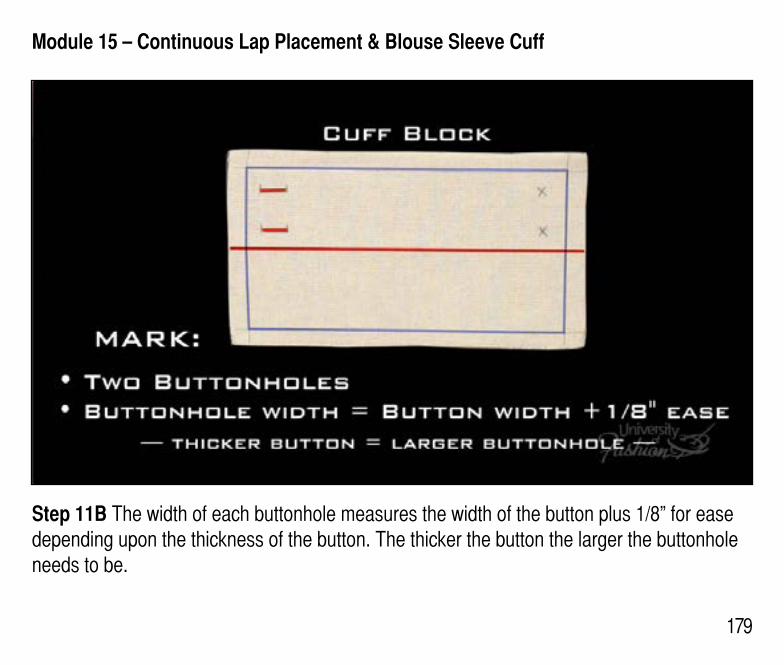
179
Step 11B The width of each buttonhole measures the width of the button plus 1/8” for ease depending upon the thickness of the button. The thicker the button the larger the buttonhole needs to be.

Module 15 – Continuous Lap Placement & Blouse Sleeve Cuff
180
Step 11C Place dashes at the end of the buttonhole markings.
Module 15 – Continuous Lap Placement & Blouse Sleeve Cuff
181
Step 12A Your button placement marks are positioned 1/2” away from the seamline and the fold line and 1/2” in from the finished edge. Mark the center of the button placement with an X.
182
Lesson Guide Drop Shoulder Blouse Draping: Intermediate
Module 16 – Set Sleeve & Attaching Sleeve Cuff
182
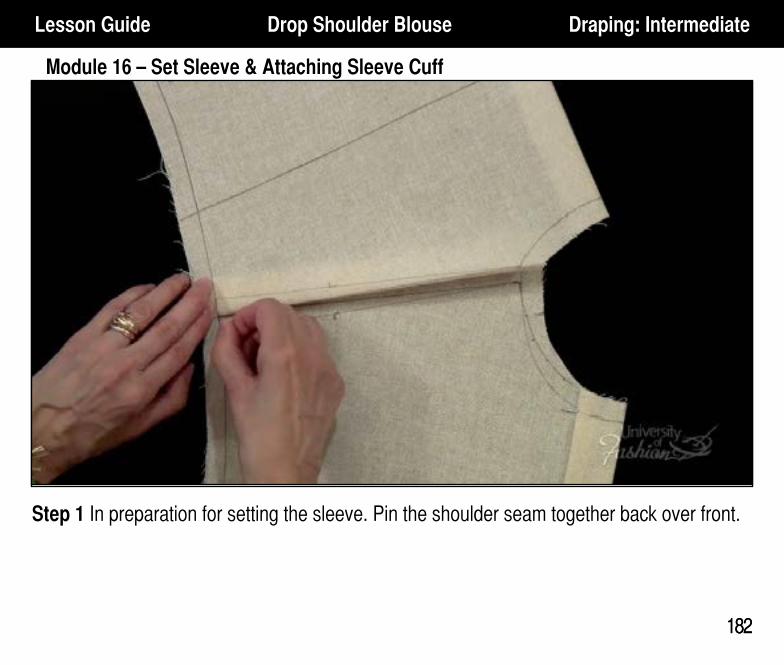
Step 1 In preparation for setting the sleeve. Pin the shoulder seam together back over front.
183
Module 16 – Set Sleeve & Attaching Sleeve Cuff
183
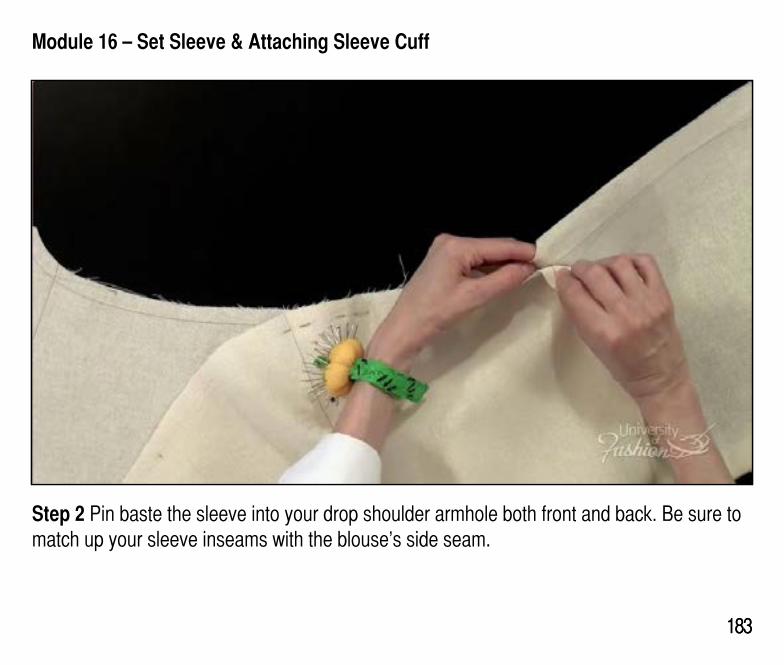
Step 2 Pin baste the sleeve into your drop shoulder armhole both front and back. Be sure to match up your sleeve inseams with the blouse’s side seam.
Module 16 – Set Sleeve & Attaching Sleeve Cuff
184
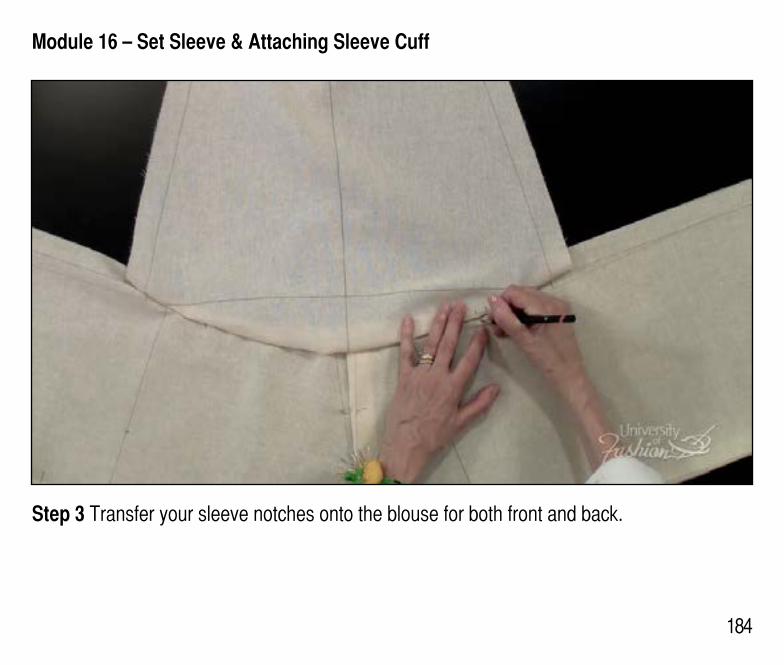
Step 3 Transfer your sleeve notches onto the blouse for both front and back.
Module 16 – Set Sleeve & Attaching Sleeve Cuff
185
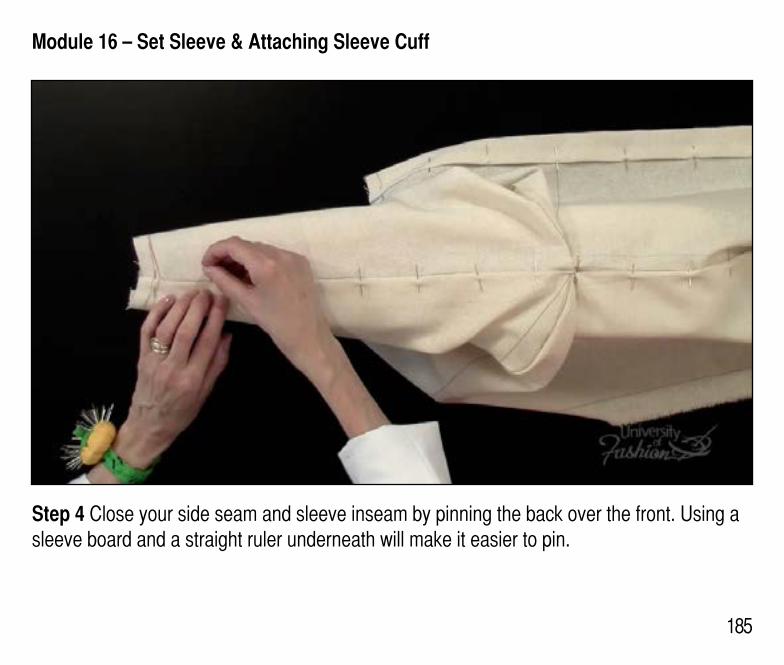
Step 4 Close your side seam and sleeve inseam by pinning the back over the front. Using a sleeve board and a straight ruler underneath will make it easier to pin.
Module 16 – Set Sleeve & Attaching Sleeve Cuff
186
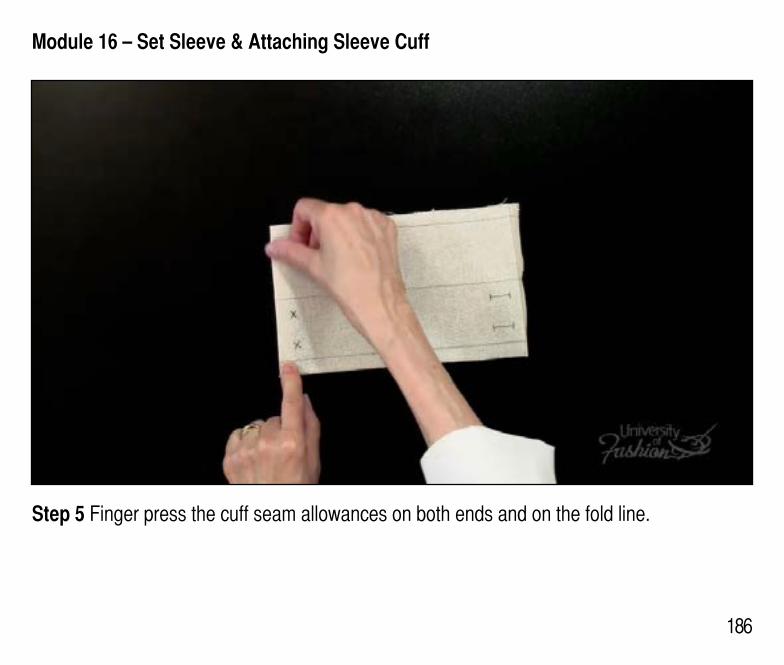
Step 5 Finger press the cuff seam allowances on both ends and on the fold line.
Module 16 – Set Sleeve & Attaching Sleeve Cuff
187
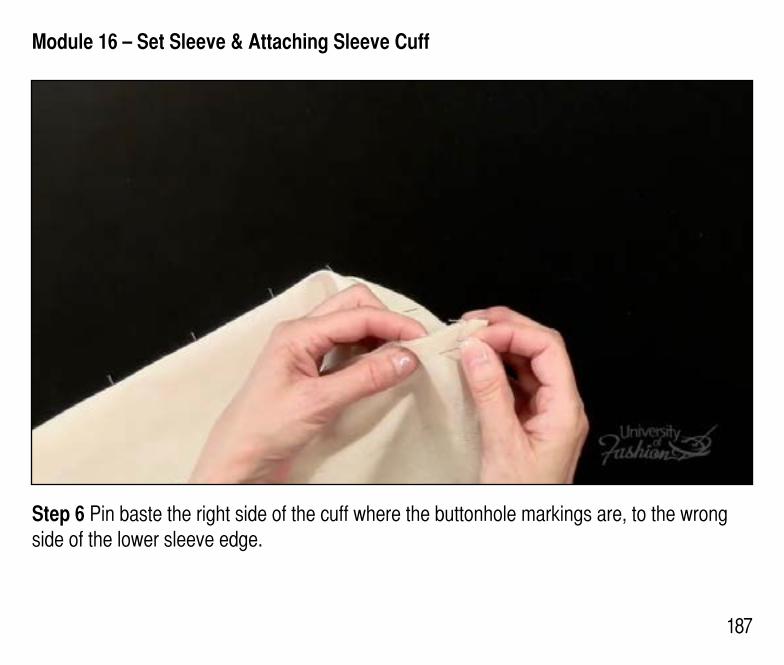
Step 6 Pin baste the right side of the cuff where the buttonhole markings are, to the wrong side of the lower sleeve edge.

Module 16 – Set Sleeve & Attaching Sleeve Cuff
188
7 Turn the cuff to the right side, fold back 1/2” seam allowance and parallel pin the cuff to the sleeve.
189
Lesson Guide Drop Shoulder Blouse Draping: Intermediate
Module 17 – Attaching the Collar
189
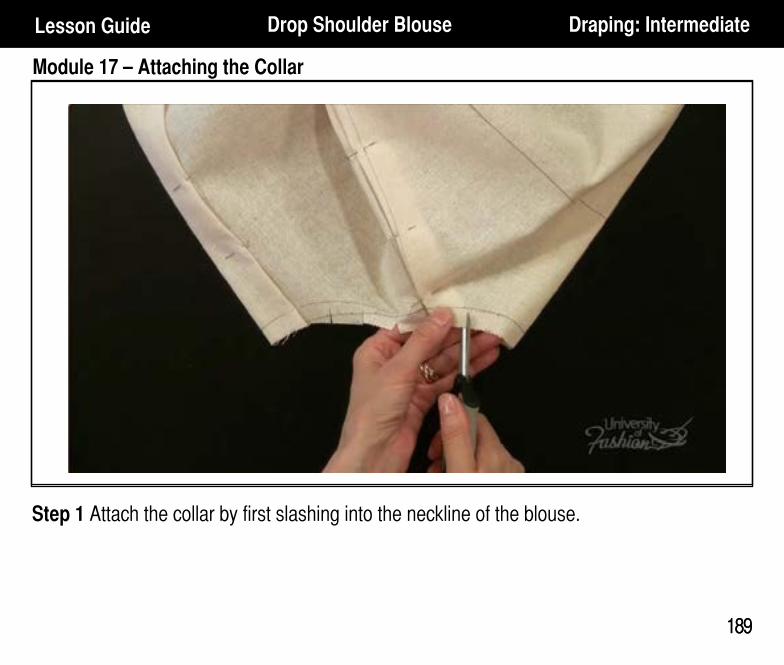
Step 1 Attach the collar by first slashing into the neckline of the blouse.
190
Module 17 – Attaching the Collar
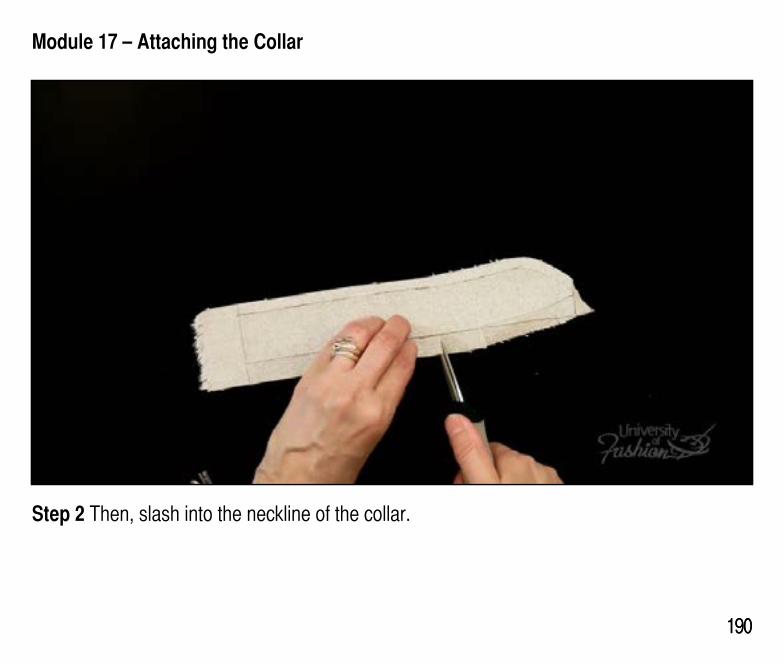
190
Step 2 Then, slash into the neckline of the collar.
Module 17 – Attaching the Collar
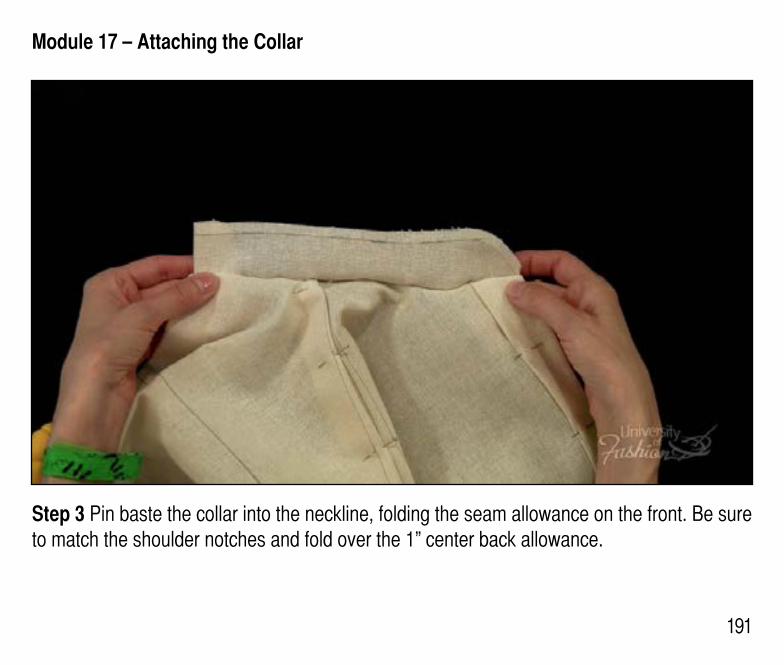
191
Step 3 Pin baste the collar into the neckline, folding the seam allowance on the front. Be sure to match the shoulder notches and fold over the 1” center back allowance.
Lesson Guide Drop Shoulder Shirt Draping: Intermediate
192
Module 18 – Planning Buttons & Buttonholes for Placket
192
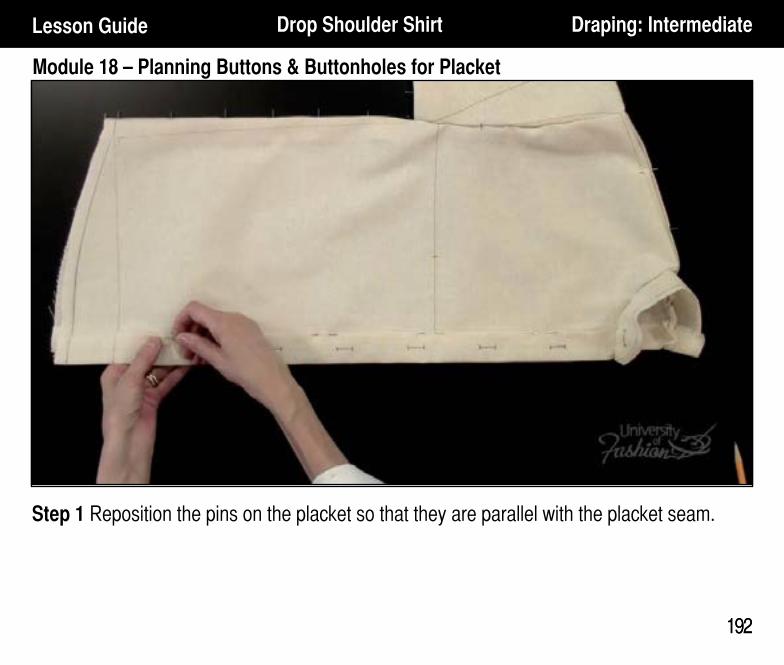
Step 1 Reposition the pins on the placket so that they are parallel with the placket seam.
193
Module 18 – Planning Buttons & Buttonholes for Placket
193
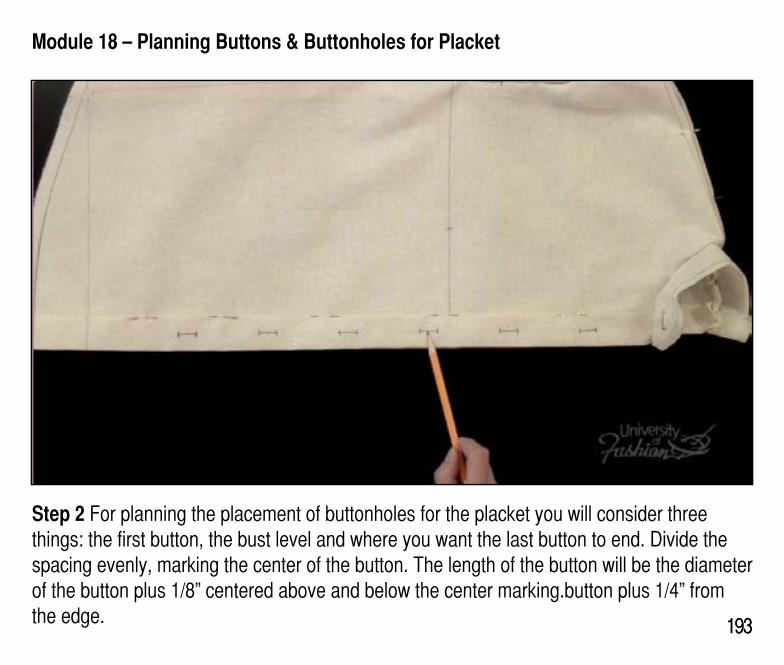
Step 2 For planning the placement of buttonholes for the placket you will consider three things: the first button, the bust level and where you want the last button to end. Divide the spacing evenly, marking the center of the button. The length of the button will be the diameter of the button plus 1/8” centered above and below the center marking.button plus 1/4” from the edge.
194
Module 18 – Planning Buttons & Buttonholes for Placket
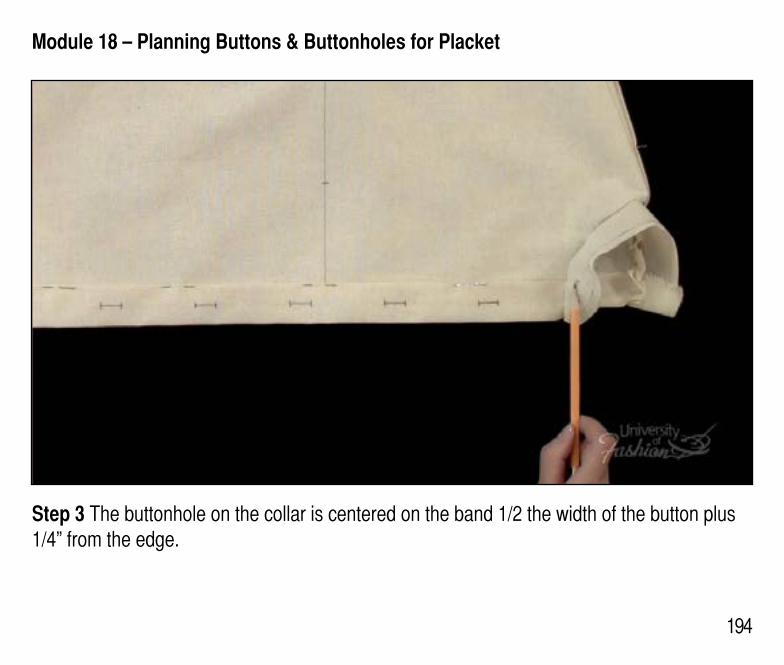
Step 3 The buttonhole on the collar is centered on the band 1/2 the width of the button plus 1/4” from the edge.
Module 18 – Planning Buttons & Buttonholes for Placket
195
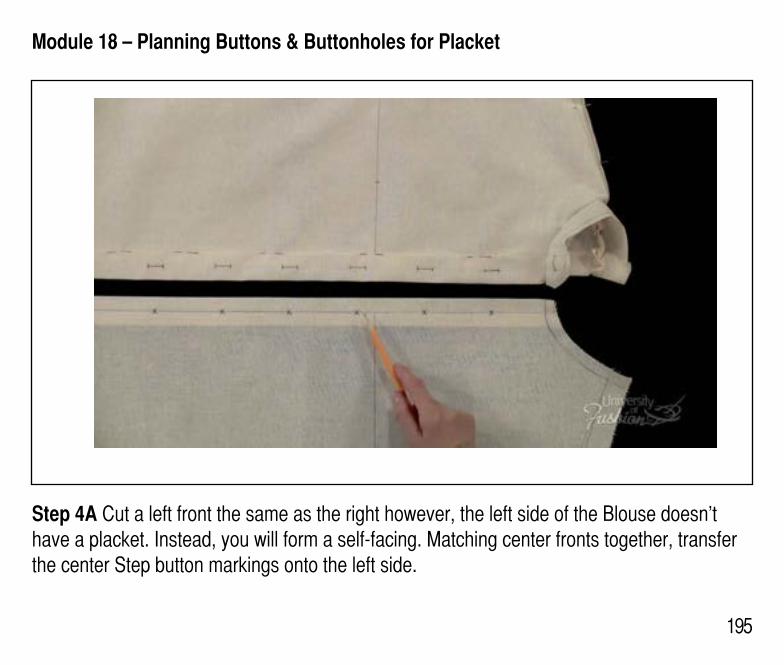
Step 4A Cut a left front the same as the right however, the left side of the Blouse doesn’t have a placket. Instead, you will form a self-facing. Matching center fronts together, transfer the center Step button markings onto the left side.

Module 18 – Planning Buttons & Buttonholes for Placket
196
Step 4B Place the drape back on the dress form.
197
Module 18 – Planning Buttons & Buttonholes for Placket
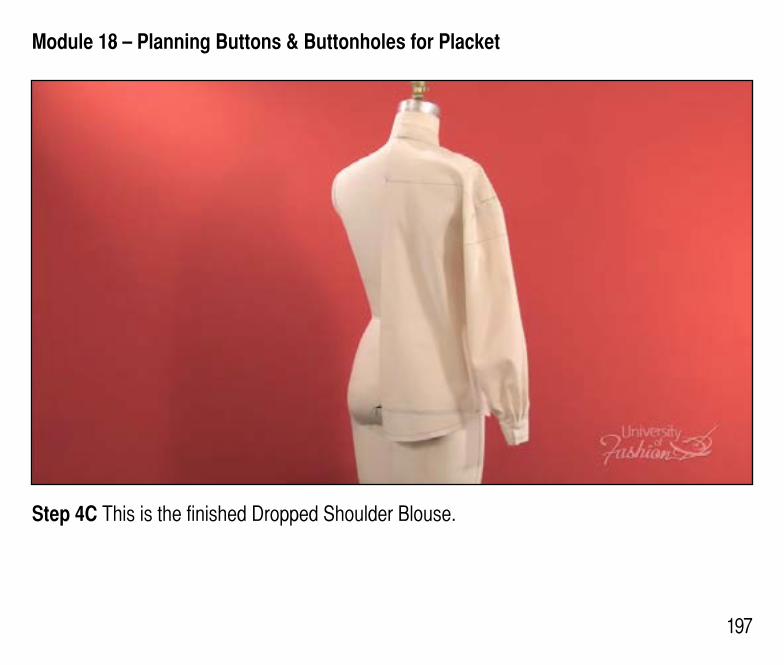
Step 4C This is the finished Dropped Shoulder Blouse.