Embed Size (px)
Citation preview

LESSON PLAN: Science- Living and Non Living Things
CONTEXTUAL DETAILS
Teacher: Lieu Nguyen School: Wandana Primary School
Year Level: 2/3 Date: 25/08/2015 Number of students: 22-24 Estimated duration of activity: 60 mins + 30 mins (or two 45-minute blocks) Location of teaching: Classroom
AREA OF LEARNING AND TOPIC
Learning Area: Science Topic: Living Things and Non-Living Things
BROAD OUTCOMES
Year Level: 2-3 Strand: Science Understanding Sub-strand: Biological Sciences Content descriptions:
- Year 2: Living things grow, change and have offspring similar to themselves (ACSSU030)
- Year 3: Living things can be grouped on the basis of observable features and can be distinguished from non-living things (ACSSU044) Elaboration:
o recognising characteristics of living things such as growing, moving, sensitivity and reproducing
o recognising the range of different living things o sorting living and non-living things based on characteristics
Achievement Standards: By the end of Year 2, students describe changes to objects, materials and living things. By the end of Year 3…They describe features common to living things.
SPECIFIC LEARNING OUTCOMES
- Students develop understanding of living and non-living things and the differences
between them - Students recognise that living things have characteristics or features that make them
different to non living things, including reproduction, growth, movement, breathing, responsiveness
- Students sort through living and non living things, placing them in the correct classification
PREPARATION / ORGANISATION
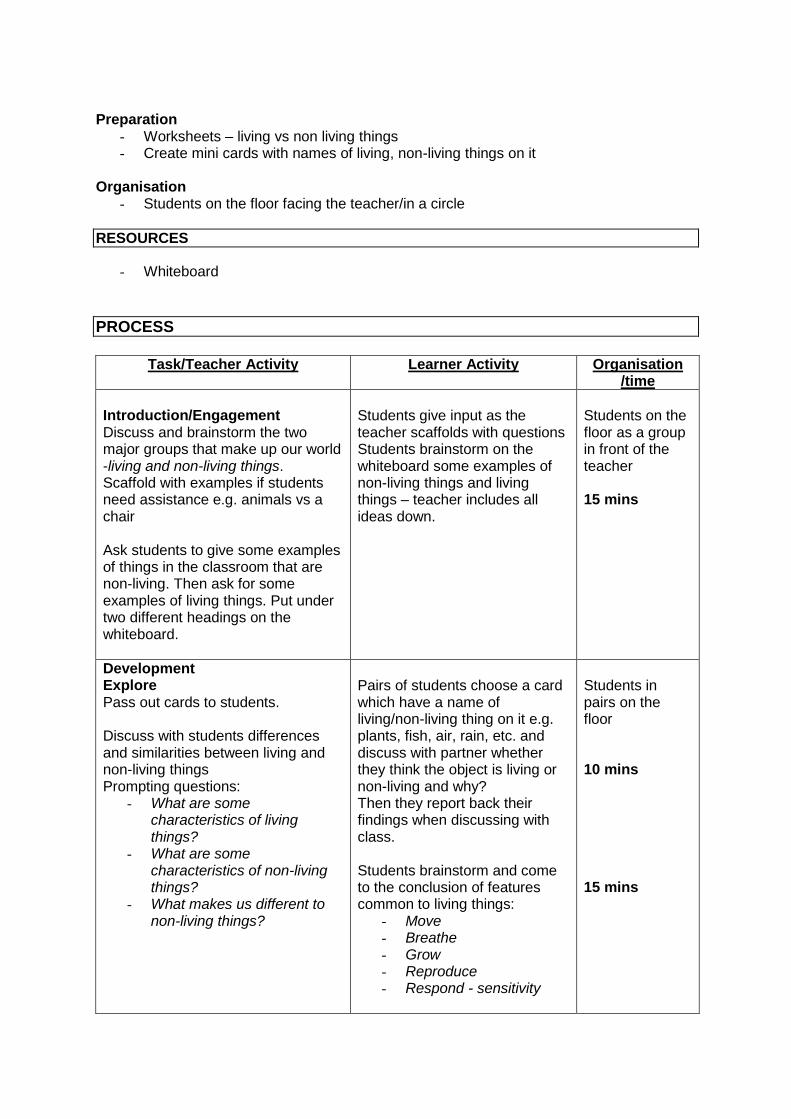
Preparation
- Worksheets – living vs non living things - Create mini cards with names of living, non-living things on it
Organisation
- Students on the floor facing the teacher/in a circle
RESOURCES
- Whiteboard
PROCESS
Task/Teacher Activity Learner Activity Organisation
/time
Introduction/Engagement Discuss and brainstorm the two major groups that make up our world -living and non-living things. Scaffold with examples if students need assistance e.g. animals vs a chair Ask students to give some examples of things in the classroom that are non-living. Then ask for some examples of living things. Put under two different headings on the whiteboard.
Students give input as the teacher scaffolds with questions Students brainstorm on the whiteboard some examples of non-living things and living things – teacher includes all ideas down.
Students on the floor as a group in front of the teacher 15 mins
Development Explore Pass out cards to students. Discuss with students differences and similarities between living and non-living things Prompting questions:
- What are some characteristics of living things?
- What are some characteristics of non-living things?
- What makes us different to non-living things?
Pairs of students choose a card which have a name of living/non-living thing on it e.g. plants, fish, air, rain, etc. and discuss with partner whether they think the object is living or non-living and why? Then they report back their findings when discussing with class. Students brainstorm and come to the conclusion of features common to living things:
- Move - Breathe - Grow - Reproduce - Respond - sensitivity
Students in pairs on the floor 10 mins 15 mins
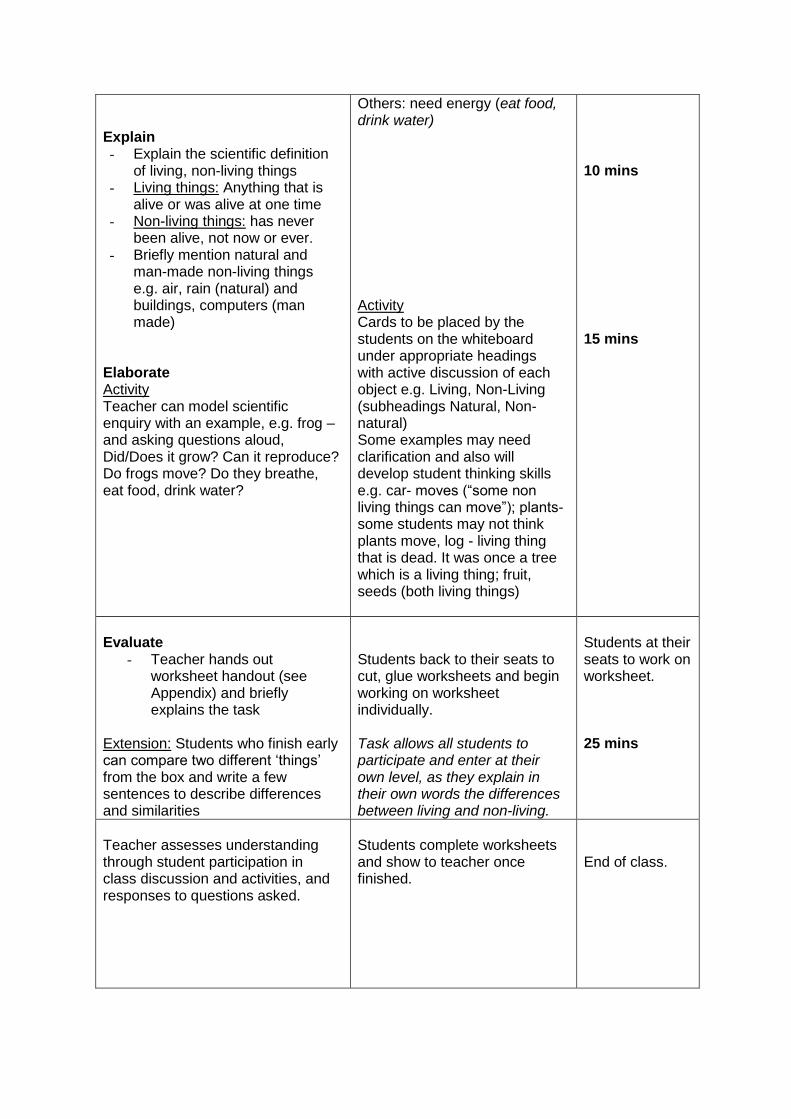
Explain - Explain the scientific definition
of living, non-living things - Living things: Anything that is
alive or was alive at one time - Non-living things: has never
been alive, not now or ever. - Briefly mention natural and
man-made non-living things e.g. air, rain (natural) and buildings, computers (man made)
Elaborate Activity Teacher can model scientific enquiry with an example, e.g. frog – and asking questions aloud, Did/Does it grow? Can it reproduce? Do frogs move? Do they breathe, eat food, drink water?
Others: need energy (eat food, drink water) Activity Cards to be placed by the students on the whiteboard under appropriate headings with active discussion of each object e.g. Living, Non-Living (subheadings Natural, Non-natural) Some examples may need clarification and also will develop student thinking skills e.g. car- moves (“some non living things can move”); plants- some students may not think plants move, log - living thing that is dead. It was once a tree which is a living thing; fruit, seeds (both living things)
10 mins 15 mins
Evaluate
- Teacher hands out worksheet handout (see Appendix) and briefly explains the task
Extension: Students who finish early can compare two different ‘things’ from the box and write a few sentences to describe differences and similarities
Students back to their seats to cut, glue worksheets and begin working on worksheet individually. Task allows all students to participate and enter at their own level, as they explain in their own words the differences between living and non-living.
Students at their seats to work on worksheet. 25 mins
Teacher assesses understanding through student participation in class discussion and activities, and responses to questions asked.
Students complete worksheets and show to teacher once finished.
End of class.

REFLECTION:
I realised once I had started the lesson, that there was a lot of content I wanted to
discuss with the students. As such, the whole lesson was actually split into 3
lessons. My mentor teacher explained that she’d rather have the lesson take longer
than expected to ensure students understand as it is a judgement call on how much
depth of understanding the students have achieved as the lesson goes on. I think my
lessons were good introductions to the Science unit and the worksheets allowed the
students to demonstrate their knowledge and understanding of the differences
between living and non-living things.


LESSON PLAN: Science- Plant Structure and Function
CONTEXTUAL DETAILS
Teacher: Lieu Nguyen School: Wandana Primary School
Year Level: 2/3 Date: 25/08/2015 Number of students: 22 Estimated duration of activity: 45 mins Location of teaching: Classroom
AREA OF LEARNING AND TOPIC
Learning Area: Science Topic: Plant Structure, Function
BROAD OUTCOMES
Year Level: 2-3 Strand: Science Understanding Sub-strand: Biological Sciences Content descriptions:
- Year 2: Living things grow, change and have offspring similar to themselves (ACSSU030)
- Year 3: Living things can be grouped on the basis of observable features and can be distinguished from non-living things (ACSSU044) Elaboration:
o recognising characteristics of living things such as growing, moving, sensitivity and reproducing
Achievement Standards: By the end of Year 2, students describe changes to objects, materials and living things. By the end of Year 3…They describe features common to living things.
SPECIFIC LEARNING OUTCOMES
- Students learn that there are four main parts of flowering plants that are required for
the plants to grow and reproduce– roots, leaves, stems and flower - Students apply thinking skills by discussing as a class the location and hence the
function that each part of the plant might have, e.g. the roots are underground so they take nutrients and water from the soil
- Students discuss what living things need to grow and compare the differences and similarities between plants and animals e.g. air, sunlight, water, nutrients (food) and relate it to which part of the plant might utilise these needs
PREPARATION / ORGANISATION
Preparation

- Draw up large picture of a plant on a poster Organisation
- Students on the floor facing the teacher
RESOURCES
- Butcher’s paper/large sheet of paper with enlarged drawing of plant (unlabelled) - Coloured markers
PROCESS
Task/Teacher Activity Learner Activity Organisation /
time
Introduction - Revision Students revise over living and their common features:
- Move - Breathe - Grow - Reproduce
By now students should realise that plants are living things just like animals (inc. humans) and that they share the same features. Discuss each concept so students understand features.
- Do plants move? - Do plants breathe? What do plants
breathe? - Do plants grow? - Do plants reproduce? How?
Students give input as the teacher scaffolds with questions Students revise over features of living things which include plants
Students on the floor as a group in front of the teacher 5 mins
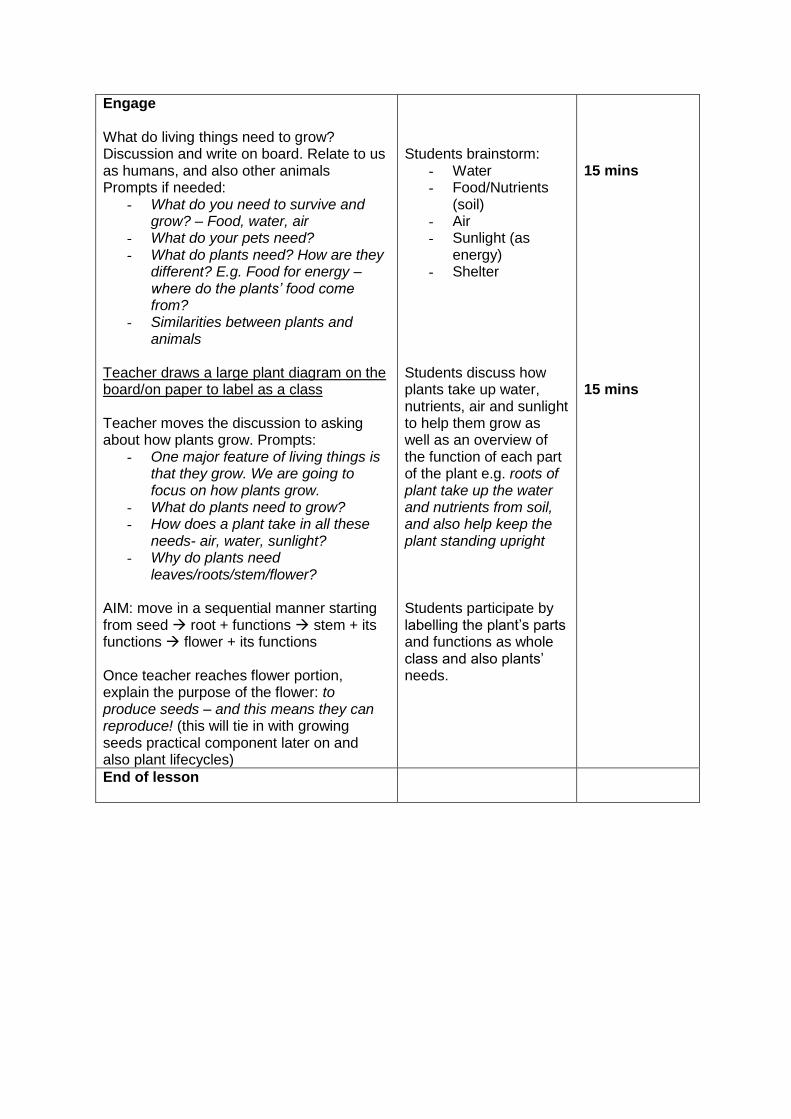
Engage What do living things need to grow? Discussion and write on board. Relate to us as humans, and also other animals Prompts if needed:
- What do you need to survive and grow? – Food, water, air
- What do your pets need? - What do plants need? How are they
different? E.g. Food for energy – where do the plants’ food come from?
- Similarities between plants and animals
Teacher draws a large plant diagram on the board/on paper to label as a class Teacher moves the discussion to asking about how plants grow. Prompts:
- One major feature of living things is that they grow. We are going to focus on how plants grow.
- What do plants need to grow? - How does a plant take in all these
needs- air, water, sunlight? - Why do plants need
leaves/roots/stem/flower? AIM: move in a sequential manner starting from seed root + functions stem + its functions flower + its functions Once teacher reaches flower portion, explain the purpose of the flower: to produce seeds – and this means they can reproduce! (this will tie in with growing seeds practical component later on and also plant lifecycles)
Students brainstorm:
- Water - Food/Nutrients
(soil) - Air - Sunlight (as
energy) - Shelter
Students discuss how plants take up water, nutrients, air and sunlight to help them grow as well as an overview of the function of each part of the plant e.g. roots of plant take up the water and nutrients from soil, and also help keep the plant standing upright Students participate by labelling the plant’s parts and functions as whole class and also plants’ needs.
15 mins 15 mins
End of lesson
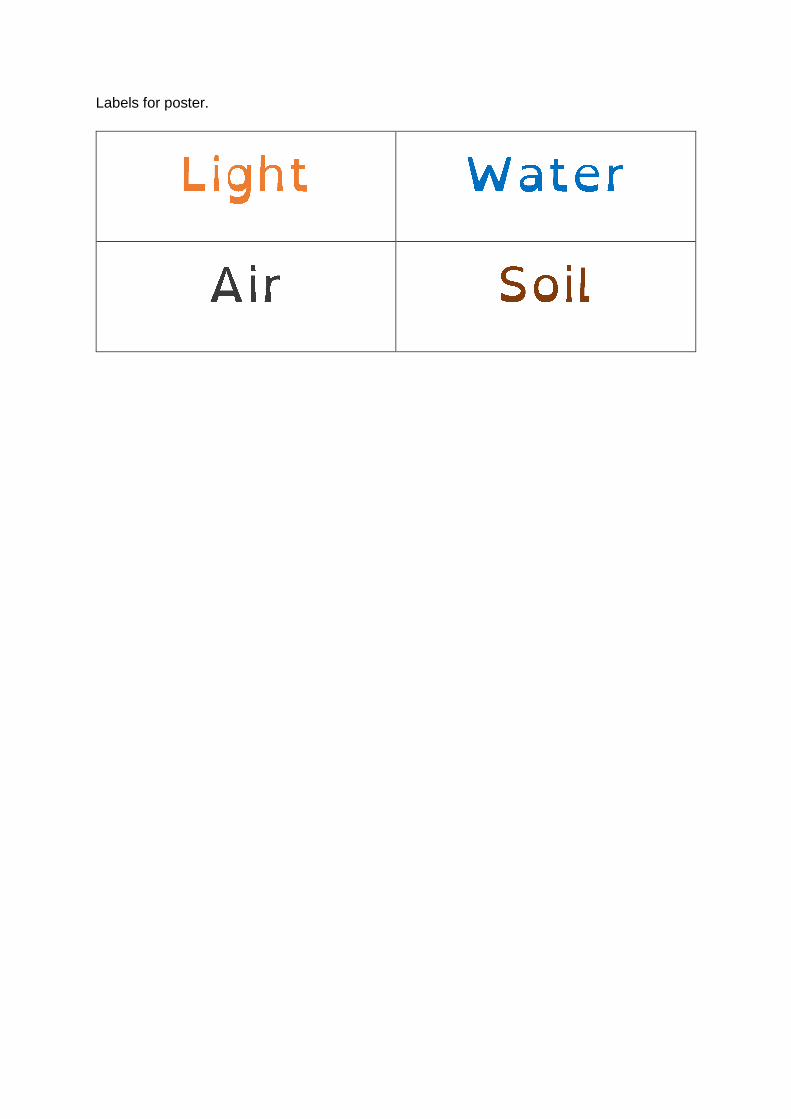
Labels for poster.

LESSON PLAN: Science- Plant Structure and Function 2
CONTEXTUAL DETAILS
Teacher: Lieu Nguyen School: Wandana Primary School
Year Level: 2/3 Date: 31/08/2015 Number of students: 22 Estimated duration of activity: 60 mins Location of teaching: Classroom
AREA OF LEARNING AND TOPIC
Learning Area: Science Topic: Plant Structure and Function
BROAD OUTCOMES
Year Level: 2-3 Strand: Science Understanding Sub-strand: Biological Sciences Content descriptions:
- Year 2: Living things grow, change and have offspring similar to themselves (ACSSU030)
Elaboration: o recognising that living things have predictable characteristics at different
stages of development Year 2: Science involves asking questions about, and describing changes in, objects and events (ACSHE034)
- Year 3: Living things can be grouped on the basis of observable features and can be distinguished from non-living things (ACSSU044)
Elaboration: o recognising characteristics of living things such as growing, moving,
sensitivity and reproducing Achievement Standards: By the end of Year 2, students describe changes to objects, materials and living things. By the end of Year 3…They describe features common to living things.
SPECIFIC LEARNING OUTCOMES
- Students revise over parts of a plant and write sentences to explain the functions of
each part of the plant - Students draw and label their own diagram of a plant to learn about observing and
labelling diagrams (in preparation for recording observations of their own plant’s growth later on in presenting observations)
PREPARATION / ORGANISATION
Preparation
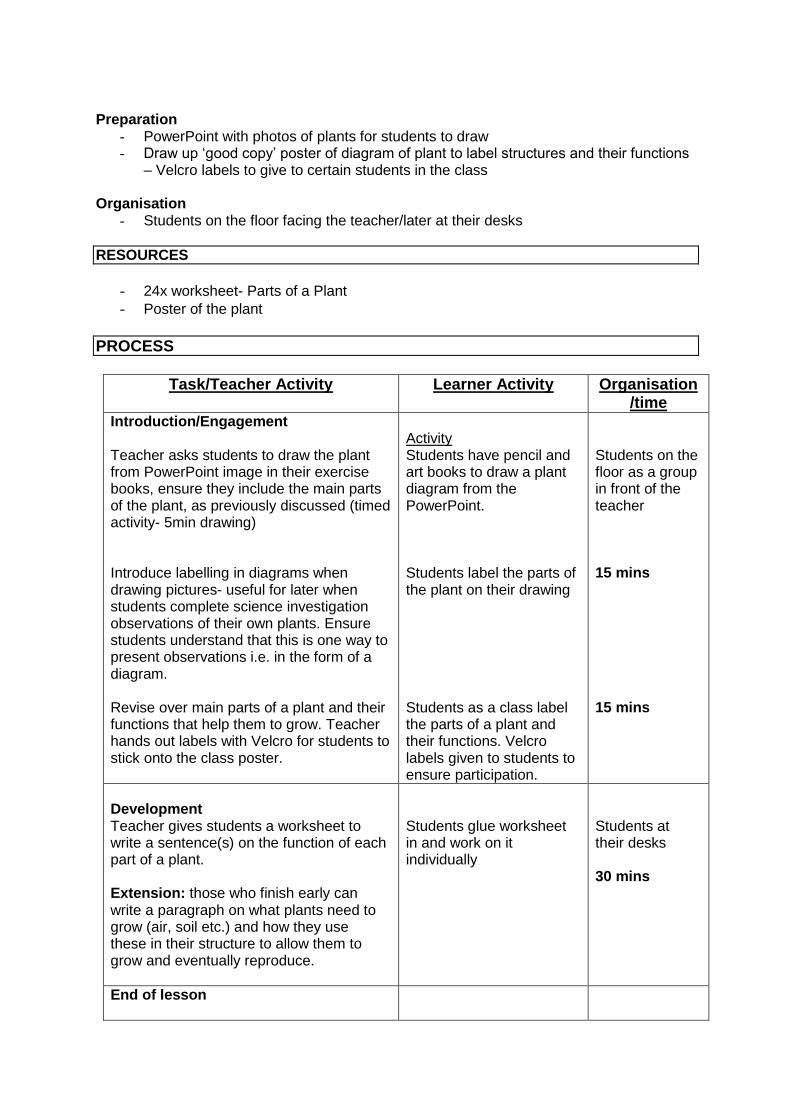
- PowerPoint with photos of plants for students to draw - Draw up ‘good copy’ poster of diagram of plant to label structures and their functions
– Velcro labels to give to certain students in the class Organisation
- Students on the floor facing the teacher/later at their desks
RESOURCES
- 24x worksheet- Parts of a Plant - Poster of the plant
PROCESS
Task/Teacher Activity Learner Activity Organisation /time
Introduction/Engagement Teacher asks students to draw the plant from PowerPoint image in their exercise books, ensure they include the main parts of the plant, as previously discussed (timed activity- 5min drawing) Introduce labelling in diagrams when drawing pictures- useful for later when students complete science investigation observations of their own plants. Ensure students understand that this is one way to present observations i.e. in the form of a diagram. Revise over main parts of a plant and their functions that help them to grow. Teacher hands out labels with Velcro for students to stick onto the class poster.
Activity Students have pencil and art books to draw a plant diagram from the PowerPoint. Students label the parts of the plant on their drawing Students as a class label the parts of a plant and their functions. Velcro labels given to students to ensure participation.
Students on the floor as a group in front of the teacher 15 mins 15 mins
Development Teacher gives students a worksheet to write a sentence(s) on the function of each part of a plant. Extension: those who finish early can write a paragraph on what plants need to grow (air, soil etc.) and how they use these in their structure to allow them to grow and eventually reproduce.
Students glue worksheet in and work on it individually
Students at their desks 30 mins
End of lesson
LESSON PLAN: Science- Planting Bean Seeds
CONTEXTUAL DETAILS
Teacher: Lieu Nguyen School: Wandana Primary School
Year Level: 2/3 Date: 31/08/2015 Number of students: 22 Estimated duration of activity: 45 mins Location of teaching: Classroom
AREA OF LEARNING AND TOPIC
Learning Area: Science Topic: Plant Structure and Function
BROAD OUTCOMES
Year Level: 2-3 Strand: Science Understanding Sub-strand: Biological Sciences Content descriptions:
- Year 2: Living things grow, change and have offspring similar to themselves (ACSSU030)
Elaboration: o recognising that living things have predictable characteristics at different
stages of development Year 2: Science involves asking questions about, and describing changes in, objects and events (ACSHE034)
- Year 3: Living things can be grouped on the basis of observable features and can be distinguished from non-living things (ACSSU044)
Elaboration: o recognising characteristics of living things such as growing, moving,
sensitivity and reproducing Achievement Standards: By the end of Year 2, students describe changes to objects, materials and living things. By the end of Year 3…They describe features common to living things.
SPECIFIC LEARNING OUTCOMES
- Students revise over the role of the flower in reproduction as part of living things and
producing seeds in fruit and flowers. - Students plant two types of bean seeds as the introduction to their plant observation
investigation using cups, soil and water. - Students observe the appearance of the seed and discuss
PREPARATION / ORGANISATION
Preparation
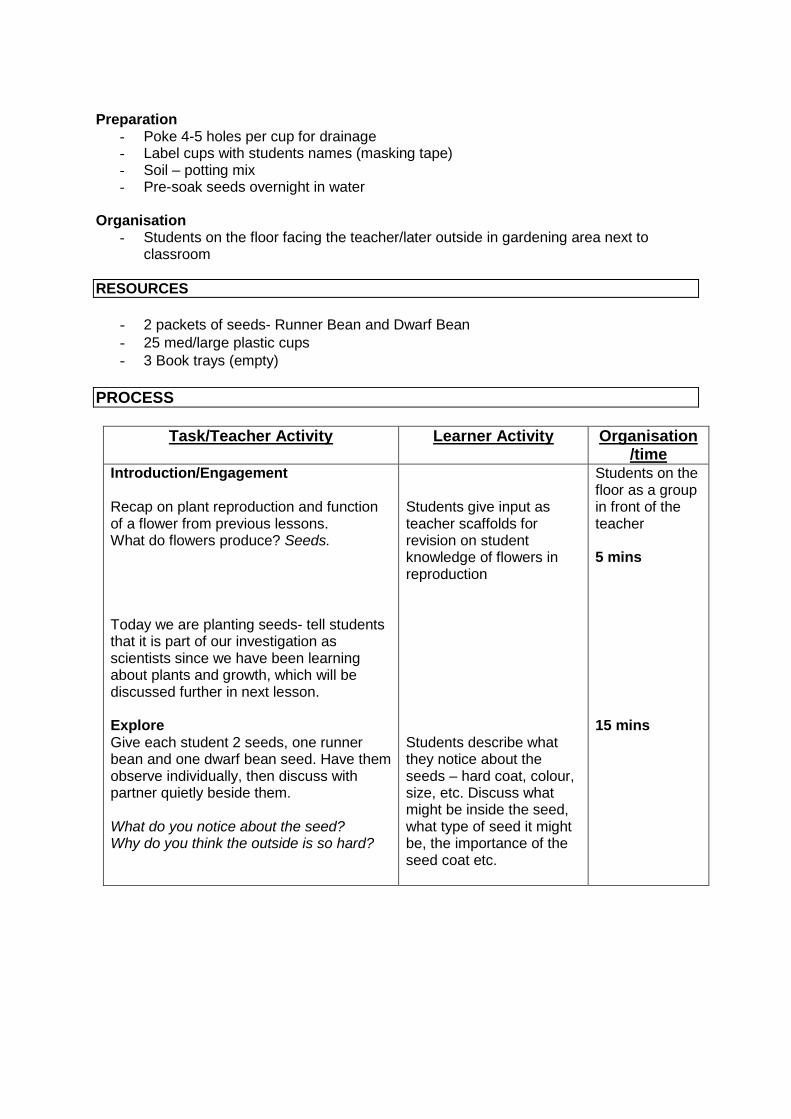
- Poke 4-5 holes per cup for drainage - Label cups with students names (masking tape) - Soil – potting mix - Pre-soak seeds overnight in water
Organisation
- Students on the floor facing the teacher/later outside in gardening area next to classroom
RESOURCES
- 2 packets of seeds- Runner Bean and Dwarf Bean - 25 med/large plastic cups - 3 Book trays (empty)
PROCESS
Task/Teacher Activity Learner Activity Organisation /time
Introduction/Engagement Recap on plant reproduction and function of a flower from previous lessons. What do flowers produce? Seeds. Today we are planting seeds- tell students that it is part of our investigation as scientists since we have been learning about plants and growth, which will be discussed further in next lesson. Explore Give each student 2 seeds, one runner bean and one dwarf bean seed. Have them observe individually, then discuss with partner quietly beside them. What do you notice about the seed? Why do you think the outside is so hard?
Students give input as teacher scaffolds for revision on student knowledge of flowers in reproduction Students describe what they notice about the seeds – hard coat, colour, size, etc. Discuss what might be inside the seed, what type of seed it might be, the importance of the seed coat etc.
Students on the floor as a group in front of the teacher 5 mins 15 mins

Development Explain that each student will be given a cup to grow their plant in Review what plants and living things need to grow. Relate to needs of seeds.
- Food (soil-nutrients), water, air, sunlight
Explain that a seed is very similar to plants in that they have the same needs. Which ones are most important for the seed? Ask students what they might fill their cup with? Why? Give each student their cup and ask them to form a line as you call out their name. Give students soil, ask them to make two holes in soil and place a seed into each hole. Then cover the seed up with soil. May need to demonstrate this.
Students describe what plants need to grow, recapping on previously learnt knowledge. Once planted, students line up with their cups to go back to class Students place cup in trays (1 tray per table group) lined up near the window in the classroom.
10 mins Students line up and walk outside to gardening area with their seeds 10 mins
Ask students what we might do next with the seeds and soil now? Water the plants- because living things need water to survive. Why is the plant placed close to the windowsill? Choose a monitor per table group (change over every few days) to water their table’s tray every morning.
Students participate in discussion.
Back on the floor in class. 5 mins End of lesson
LESSON PLAN: Science- Flower Structure and Function
CONTEXTUAL DETAILS
Teacher: Lieu Nguyen School: Wandana Primary School
Year Level: 2/3 Date: 01/09/2015 Number of students: 22 Estimated duration of activity: 50 mins Location of teaching: Classroom
AREA OF LEARNING AND TOPIC
Learning Area: Science Topic: Flower Structure and Function
BROAD OUTCOMES
Year Level: 2-3 Strand: Science Understanding Sub-strand: Biological Sciences Content descriptions:
- Year 2: Living things grow, change and have offspring similar to themselves (ACSSU030) Elaboration:
o recognising that living things have predictable characteristics at different stages of development
- Year 3: Living things can be grouped on the basis of observable features and can be distinguished from non-living things (ACSSU044) Elaboration:
o recognising characteristics of living things such as growing, moving, sensitivity and reproducing
Achievement Standards: By the end of Year 2, students describe changes to objects, materials and living things. By the end of Year 3…They describe features common to living things.
SPECIFIC LEARNING OUTCOMES
- Students identify the main parts of a flower and demonstrate their understanding by
identifying it on their own flower and deconstructing each part piece by piece - Students learn the function of each part of the flower to understand how reproduction
occurs - Students brainstorm ideas of why plant reproduction might be important – e.g.
relationship between other living things, to provide food, for plants to continue to grow
PREPARATION / ORGANISATION
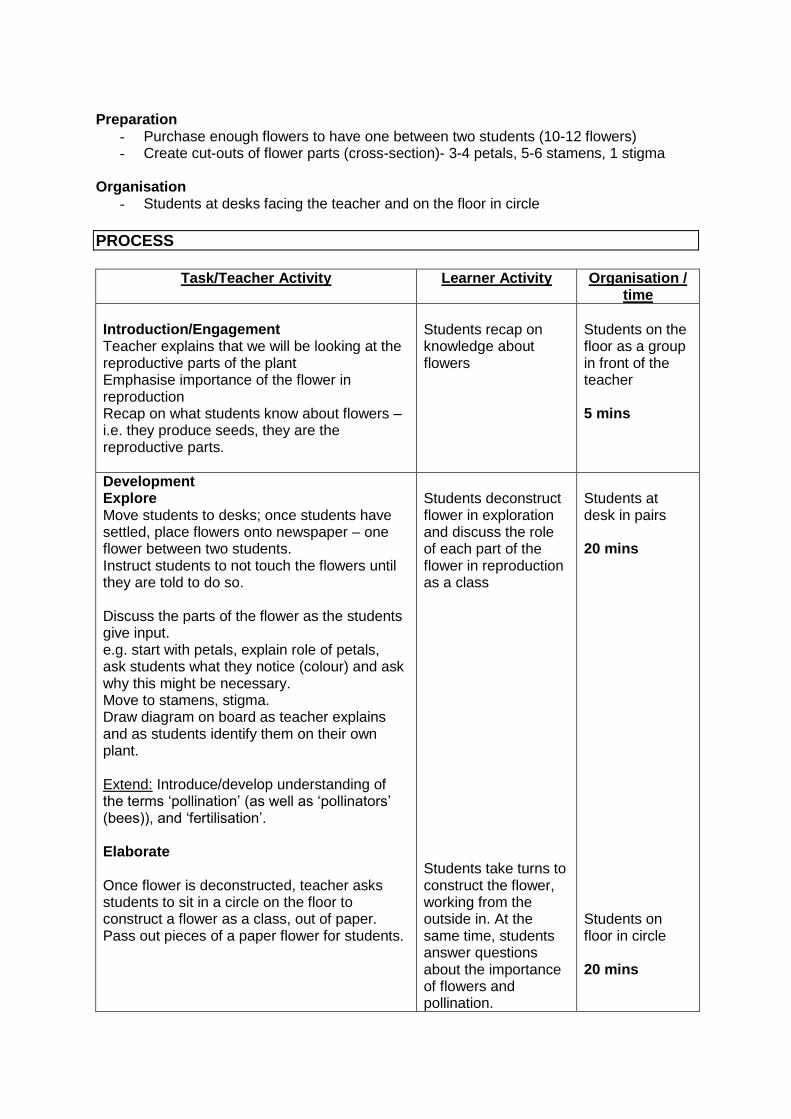
Preparation
- Purchase enough flowers to have one between two students (10-12 flowers) - Create cut-outs of flower parts (cross-section)- 3-4 petals, 5-6 stamens, 1 stigma
Organisation
- Students at desks facing the teacher and on the floor in circle
PROCESS
Task/Teacher Activity Learner Activity Organisation /
time
Introduction/Engagement Teacher explains that we will be looking at the reproductive parts of the plant Emphasise importance of the flower in reproduction Recap on what students know about flowers – i.e. they produce seeds, they are the reproductive parts.
Students recap on knowledge about flowers
Students on the floor as a group in front of the teacher 5 mins
Development Explore Move students to desks; once students have settled, place flowers onto newspaper – one flower between two students. Instruct students to not touch the flowers until they are told to do so. Discuss the parts of the flower as the students give input. e.g. start with petals, explain role of petals, ask students what they notice (colour) and ask why this might be necessary. Move to stamens, stigma. Draw diagram on board as teacher explains and as students identify them on their own plant. Extend: Introduce/develop understanding of the terms ‘pollination’ (as well as ‘pollinators’ (bees)), and ‘fertilisation’. Elaborate Once flower is deconstructed, teacher asks students to sit in a circle on the floor to construct a flower as a class, out of paper. Pass out pieces of a paper flower for students.
Students deconstruct flower in exploration and discuss the role of each part of the flower in reproduction as a class Students take turns to construct the flower, working from the outside in. At the same time, students answer questions about the importance of flowers and pollination.
Students at desk in pairs 20 mins Students on floor in circle 20 mins

Assessment Verbal. Assess students’ understanding through questions (formative assessment) at the end of the lesson. e.g. Why are flowers important? What is pollination? Why do we need pollination? What is fertilisation? What is the male/female part called? Why are plants important for other living things like us? End of lesson
Students answer questions asked by the teacher – to develop more critical thinking of the importance of plants.
5- 10 mins
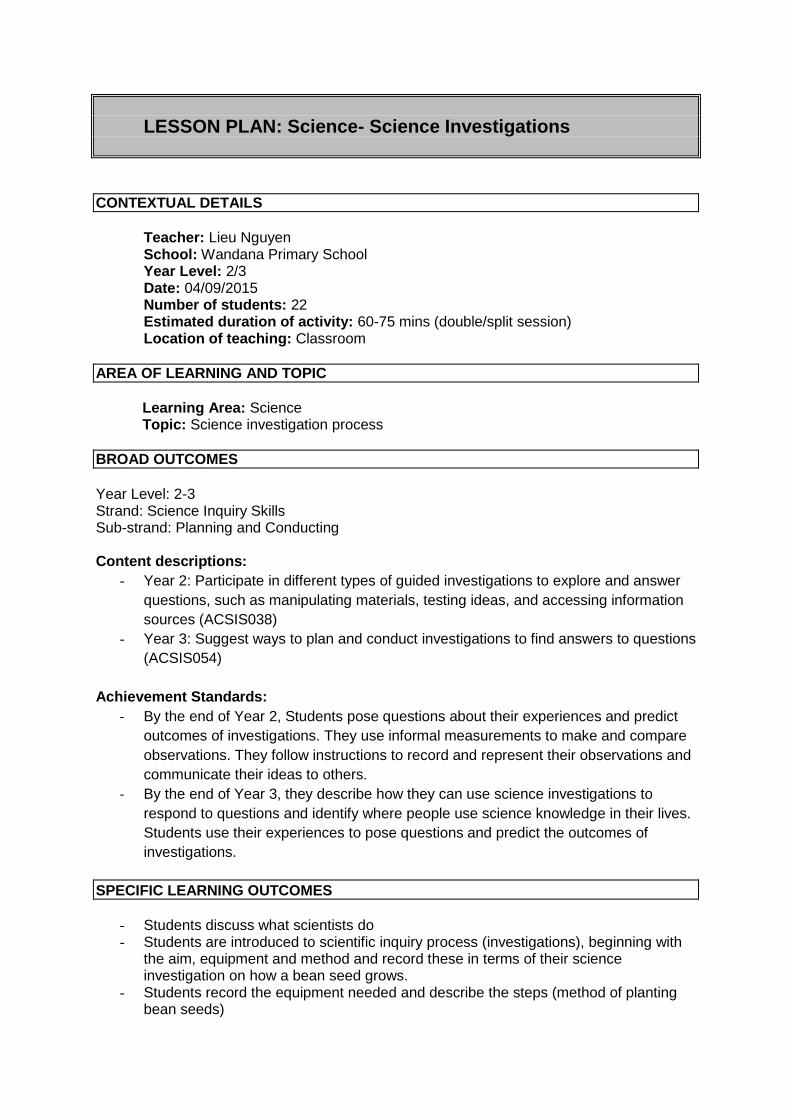
LESSON PLAN: Science- Science Investigations
CONTEXTUAL DETAILS
Teacher: Lieu Nguyen School: Wandana Primary School
Year Level: 2/3 Date: 04/09/2015 Number of students: 22 Estimated duration of activity: 60-75 mins (double/split session) Location of teaching: Classroom
AREA OF LEARNING AND TOPIC
Learning Area: Science Topic: Science investigation process
BROAD OUTCOMES
Year Level: 2-3 Strand: Science Inquiry Skills Sub-strand: Planning and Conducting Content descriptions:
- Year 2: Participate in different types of guided investigations to explore and answer
questions, such as manipulating materials, testing ideas, and accessing information
sources (ACSIS038)
- Year 3: Suggest ways to plan and conduct investigations to find answers to questions
(ACSIS054)
Achievement Standards:
- By the end of Year 2, Students pose questions about their experiences and predict
outcomes of investigations. They use informal measurements to make and compare
observations. They follow instructions to record and represent their observations and
communicate their ideas to others.
- By the end of Year 3, they describe how they can use science investigations to
respond to questions and identify where people use science knowledge in their lives.
Students use their experiences to pose questions and predict the outcomes of
investigations.
SPECIFIC LEARNING OUTCOMES
- Students discuss what scientists do - Students are introduced to scientific inquiry process (investigations), beginning with
the aim, equipment and method and record these in terms of their science investigation on how a bean seed grows.
- Students record the equipment needed and describe the steps (method of planting bean seeds)
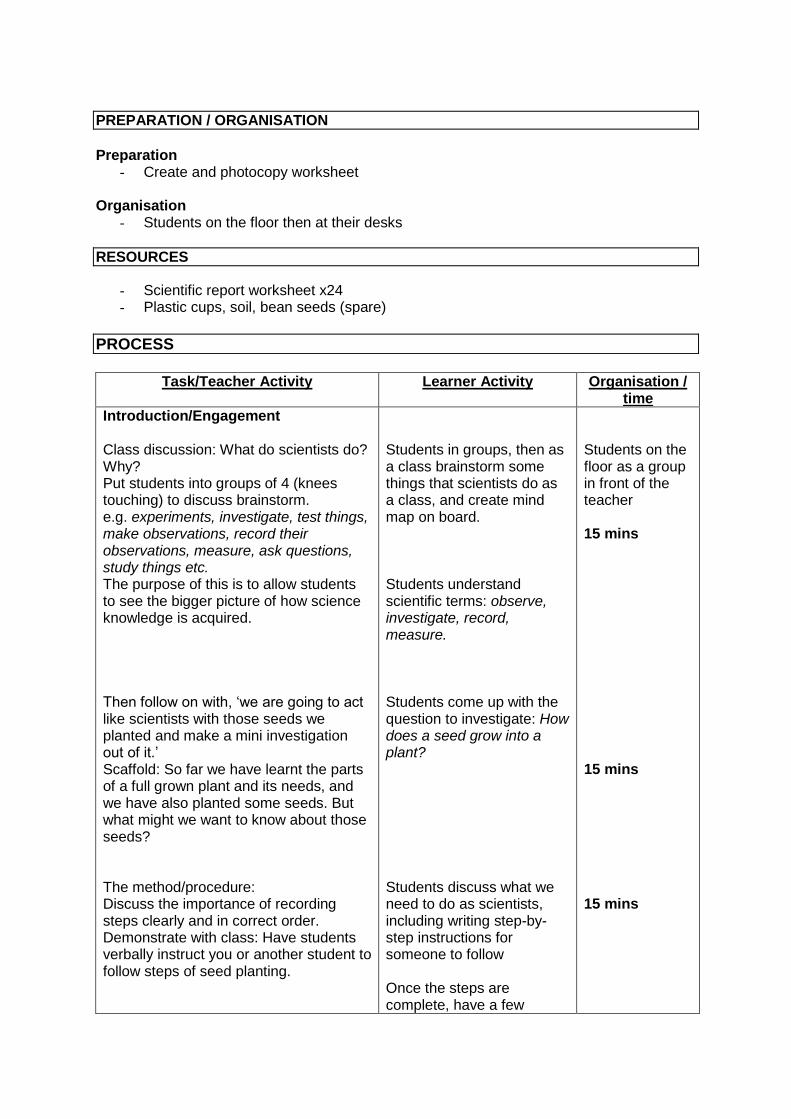
PREPARATION / ORGANISATION
Preparation
- Create and photocopy worksheet Organisation
- Students on the floor then at their desks
RESOURCES
- Scientific report worksheet x24 - Plastic cups, soil, bean seeds (spare)
PROCESS
Task/Teacher Activity Learner Activity Organisation /
time
Introduction/Engagement Class discussion: What do scientists do? Why? Put students into groups of 4 (knees touching) to discuss brainstorm. e.g. experiments, investigate, test things, make observations, record their observations, measure, ask questions, study things etc. The purpose of this is to allow students to see the bigger picture of how science knowledge is acquired. Then follow on with, ‘we are going to act like scientists with those seeds we planted and make a mini investigation out of it.’ Scaffold: So far we have learnt the parts of a full grown plant and its needs, and we have also planted some seeds. But what might we want to know about those seeds? The method/procedure: Discuss the importance of recording steps clearly and in correct order. Demonstrate with class: Have students verbally instruct you or another student to follow steps of seed planting.
Students in groups, then as a class brainstorm some things that scientists do as a class, and create mind map on board. Students understand scientific terms: observe, investigate, record, measure. Students come up with the question to investigate: How does a seed grow into a plant? Students discuss what we need to do as scientists, including writing step-by-step instructions for someone to follow Once the steps are complete, have a few
Students on the floor as a group in front of the teacher 15 mins 15 mins 15 mins

students stand in the front of class and follow the instructions using cups, soil and beans to demonstrate to class why it is important to have clear steps.
Development Teacher hands out worksheet and explains what students need to do
Students stick in the worksheet and work on it. This is the first page of their scientific report.
Students at desks 30 mins
Assessment Assess students’ understanding of the scientific process by assessing how well they answered the questions – Do they know what they are trying to find out (aim) in the investigation? Etc.
Students complete worksheet and put their hands up once completed. Early finishers can continue with unfinished work from last week.
End of lesson

LESSON PLAN: Science- Science Investigations Observations
CONTEXTUAL DETAILS
Teacher: Lieu Nguyen School: Wandana Primary School
Year Level: 2/3 Date: 5/09/2015 Number of students: 22 Estimated duration of activity: 50-70 mins (carry on after recess) Location of teaching: Classroom
AREA OF LEARNING AND TOPIC
Learning Area: Science Topic: Science Investigation - Observations
BROAD OUTCOMES
Year Level: 2-3 Strand: Science Inquiry Skills Sub-strand: Communicating Content descriptions:
- Year 2: Represent and communicate observations and ideas in a variety of ways such as oral and written language, drawing and role play (ACSIS042) Elaborations: discussing with others what was discovered from an investigation
- Year 3: Represent and communicate ideas and findings in a variety of ways such as diagrams, physical representations and simple reports (ACSIS060) Elaborations: exploring different ways to show processes and relationships through diagrams, models and role play
Achievement Standards: - By the end of Year 2…. They use informal measurements to make and compare
observations. They follow instructions to record and represent their observations and communicate their ideas to others.
- By the end of Year 3 …They make formal measurements and follow procedures to collect and present observations in a way that helps to answer the investigation questions.
SPECIFIC LEARNING OUTCOMES
- Students learn that observing is part of the investigation process and the importance
of recording their observations by discussing as a class the need to observe changes to understand how something changes
- Students draw and label diagrams of their observations and write descriptions of their observations
- Students receive first-hand experience by observing the growth of their own plants which allows for more active learning and developing skills in communicating their observations in written words

PREPARATION / ORGANISATION
Preparation
- Grow spare seeds in cotton wool to demonstrate different stages seed, sprout/germination, seedling, plant. 4 different stations at 4 different tables.
- Create and photocopy Observations worksheet Organisation
- Students on the floor then at their desks
RESOURCES
- Observations worksheet x24 - Photo of bean seed on the Smartboard
PROCESS
Task/Teacher Activity Learner Activity Organisation /
time
Introduction/Engagement Recap on what we are trying to find out (aim) in this investigation, how will I find it out? – grow the bean seed and observe what is happening. Teacher asks students to walk around classroom observing the different stations at the desks of the seeds at their different stages of growth
- No touching - No crowding around one table,
move along. - Can get up close to the seed to
have a look - Take note of what is growing at
each stage
Students revise over what their investigation was about and discuss how they will find out. Students observe seeds at different stages. Discuss with others what they see, what is growing first etc.
Students on the floor as a group in front of the teacher 5 mins Students walking around classroom observing seeds 15 mins
Recap on what scientists do during investigations e.g. record/make notes, observe Explain what observe means We observed at different stations how a seed grew into a plant Discuss the importance of making observations- to recognise changes in
Students discuss the importance of observing and recording their observations or making notes when investigating especially in this investigation aimed at trying to find out exactly how bean seeds become plants
Students return to floor 15 mins

events, in this case, the bean seed’s growth. Why is it important to keep a record of what we are doing/observing? What if we didn’t record the changes?
Brief discussion on the different stages of plant growth In particular describe station 1 and 2 which would have occurred underneath the soil in the students’ plants. Most students’ plants would be at the early germination (station 2) stages where roots have begun to grow.
Terminology students can learn:
- Sprouting/germination - Seedling
5 mins
Teacher models how to record observation of a bean seed on day 1 (example). Have a picture of a bean seed on Smartboard
- Draw diagram and label – model this
- What can you tell me about the seed, what can you describe/see?
Emphasise importance of clear diagrams and descriptions of seed growth.
Students give input on how they might record the bean seed after observation – colour, size, what stage the plant is at.
15 mins
Development Teacher hands out worksheet and explains that students will be observing bean seeds and recording their observations over the next week or two. Teacher gives a bean seed to each student (from station 1 (seed) or 2 (germination- roots coming out)) to practice recording observations. End of lesson
Students go back to their seats to stick in the worksheet and work on it. Students practice recording observations of one of the spare seeds. Once finished, students record observations of their own plant.
20 mins Students at desks working individually
Assessment Assess students’ ability to record their observations – clear diagram, labels, full sentences, descriptive language where necessary

*students continue to record observations throughout the following weeks as there are
opportunities between other lessons to do so. Subsequently during these times, students
can be introduced to new terminology e.g. germination and seedling as their seed begins to
grow since many plants will grow and reach stages at similar times. In this way, students
develop understanding of their own plant’s growth and lifecycle as they make observations.
Evaluate: Assessment
Students complete the Results and Discussion of their plants science report. Other sections
of the report (Aim, Equipment, Methods, Observations) will have been completed earlier on.
All of this will contribute to the assessment of student understanding. Teacher explains on
the board the final part of the report to be completed by the students.