Embed Size (px)
Citation preview
GPlates Tutorial
Preparing Data in ArcGIS for GPlates
Sabin Zahirovic1
1EarthByte Research Group, School of Geosciences, University of Sydney, Australia
www.gplates.org
The vast majority of users that deal with geospatial data are likely to be using commercial or open-source
GIS packages to display and edit their data. This tutorial will help you create and prepare data in ArcGIS
(a common commercial GIS package) for viewing in GPlates1. It is important to note that GPlates will
import any shapefile (assuming it conforms to shapefile standards), and can export shapefiles for use in
other GIS platforms.
The tutorial will involve loading GPlates data into ArcGIS to familiarise the user on the file conversion
capabilities of GPlates. The later section deals with adding GPlates attributes, such as Plate IDs, to
selected geological provinces in ArcMap, in order to create a shapefile that can be loaded into GPlates and
reconstructed using the EarthByte rotation model.
Note: The shapefiles associated with this tutorial are in a WGS 84 geographic datum. If you are working
in another projection within ArcGIS, you may need to apply a geographic transformation to the
data. This is reasonably straight-forward and automatic in most GIS packages. Refer to the
manual of your GIS package for more information.
Required data:
GPlates data bundle (i.e. DataBundleForNovice folder)2
ArcGIS tutorial data bundle
Loading GPlates data in ArcGIS
1. Open a new empty map document in ArcMap.
1 Visit www.gplates.org for more information.2 Available from the provided sample data, or alternatively downloadable from the EarthByte website
http://www.earthbyte.org/Resources/earthbyte_gplates.htmlClick “Download Data Bundle for Beginners”, and unzip this folder to a local directory.
www.gplates.org 1
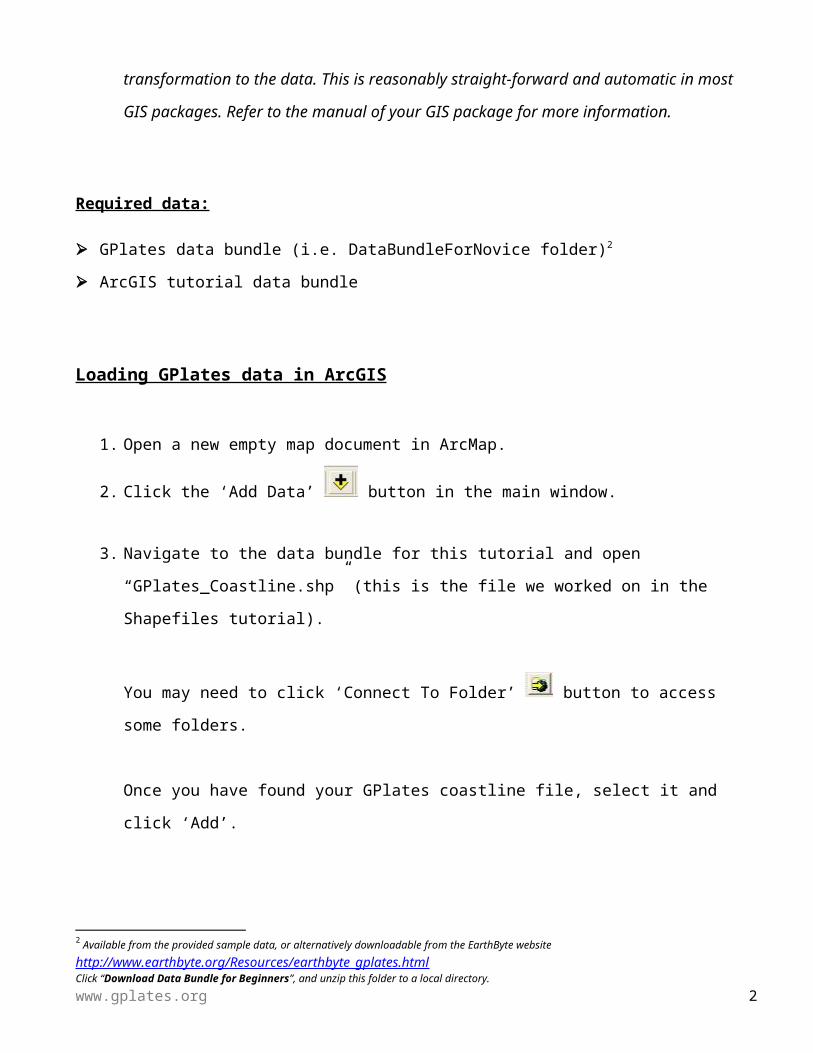
2. Click the ‘Add Data’ button in the main window.
3. Navigate to the data bundle for this tutorial and open “GPlates_Coastline.shp” (this is the file we
worked on in the Shapefiles tutorial).
You may need to click ‘Connect To Folder’ button to access some folders.
Once you have found your GPlates coastline file, select it and click ‘Add’.
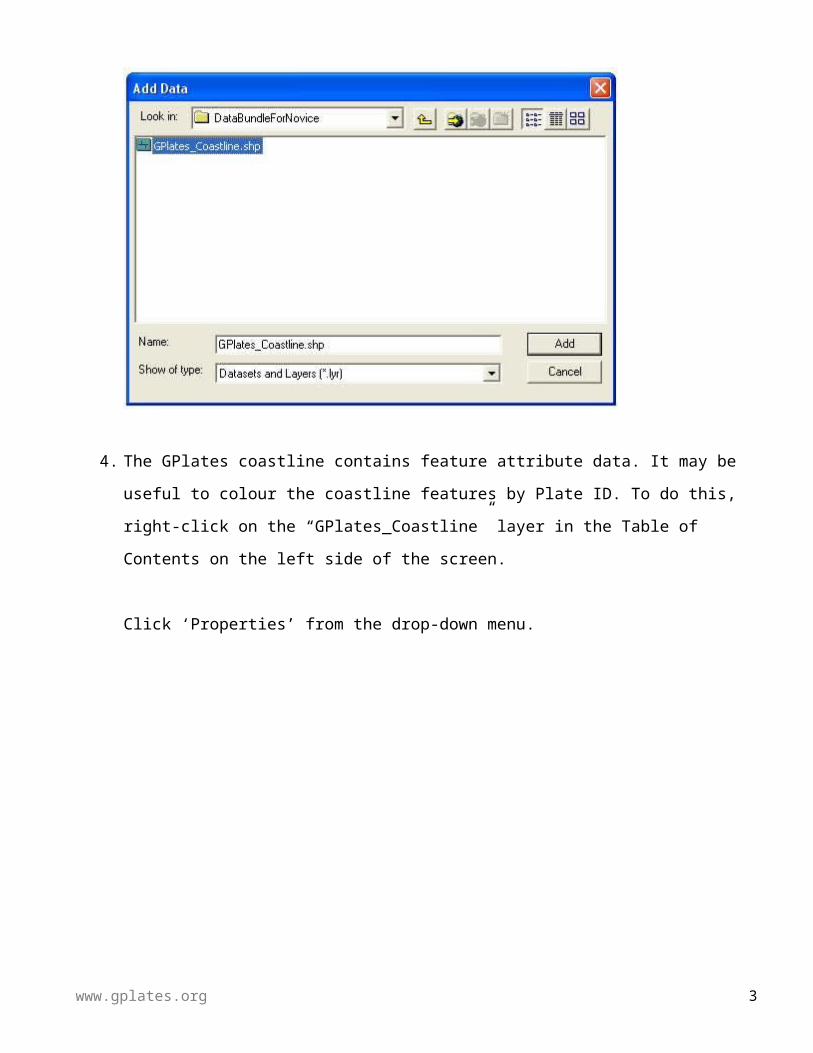
4. The GPlates coastline contains feature attribute data. It may be useful to colour the coastline
features by Plate ID. To do this, right-click on the “GPlates_Coastline” layer in the Table of
Contents on the left side of the screen.
Click ‘Properties’ from the drop-down menu.
www.gplates.org 2
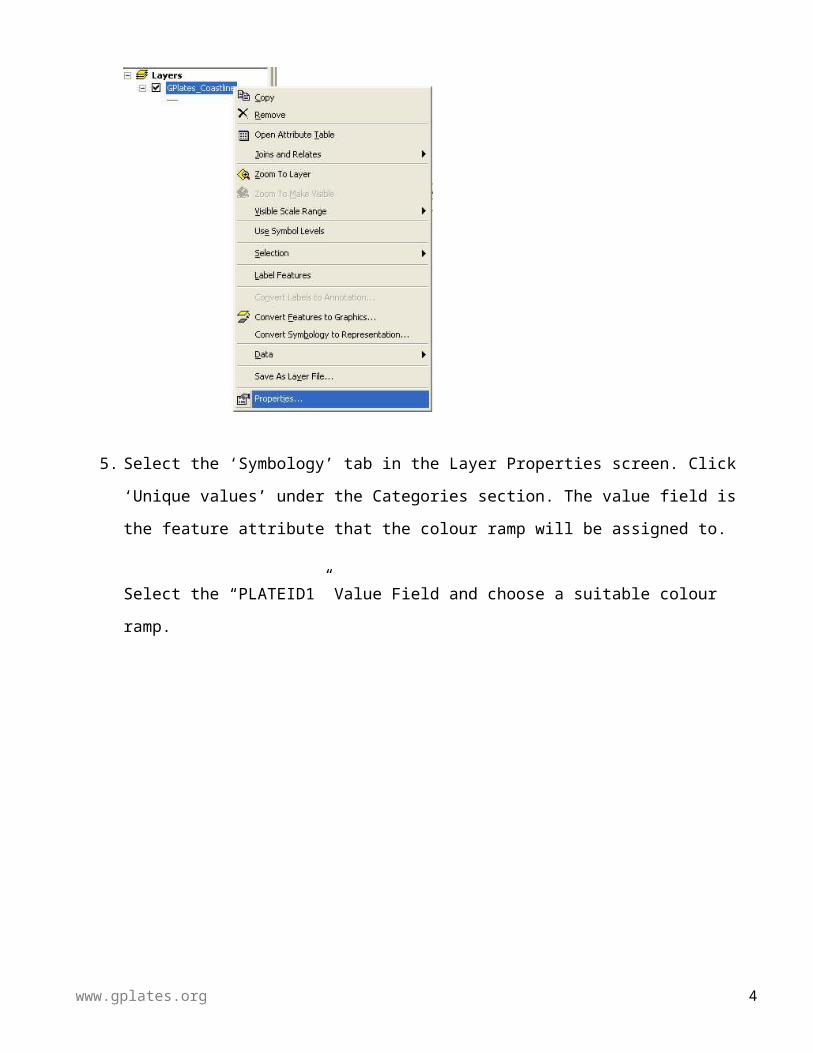
5. Select the ‘Symbology’ tab in the Layer Properties screen. Click ‘Unique values’ under the
Categories section. The value field is the feature attribute that the colour ramp will be assigned to.
Select the “PLATEID1” Value Field and choose a suitable colour ramp.
www.gplates.org 3
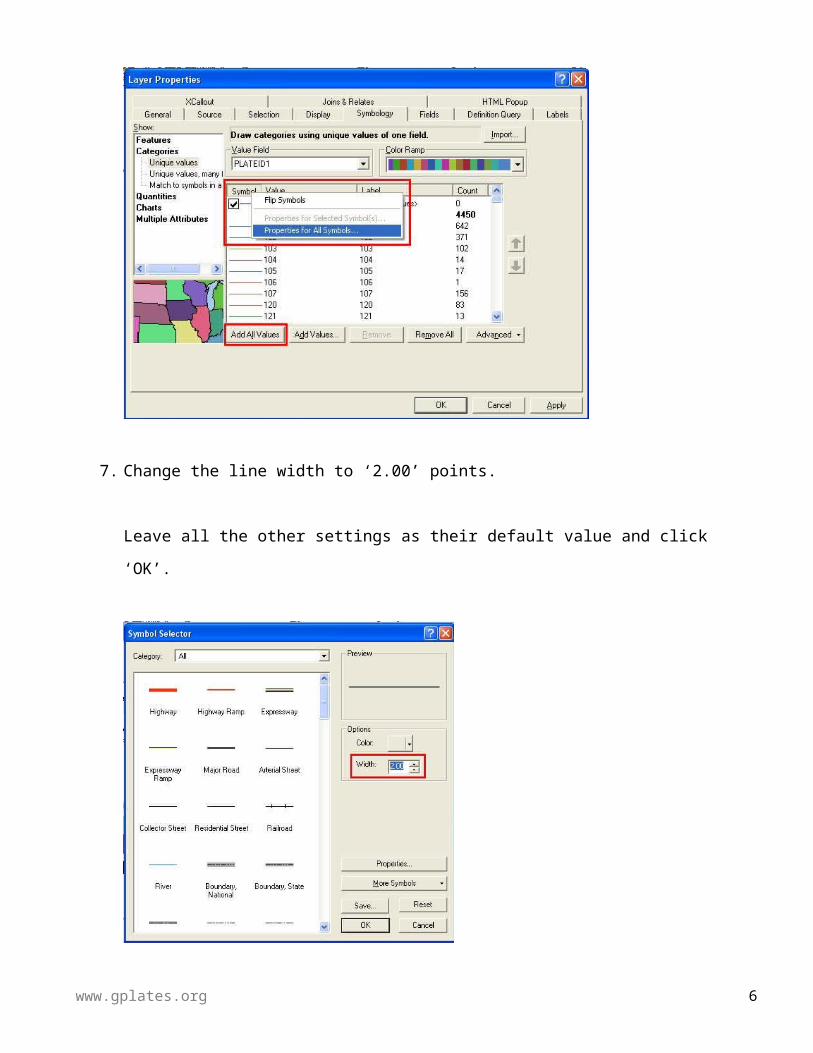
6. Click ‘Add All Values’ to load all the Plate IDs from the shapefile. The next step will be to make
the displayed lines thicker. Click the ‘Symbol’ column and select ‘Properties for All Symbols’.
7. Change the line width to ‘2.00’ points.
Leave all the other settings as their default value and click ‘OK’.
www.gplates.org 4

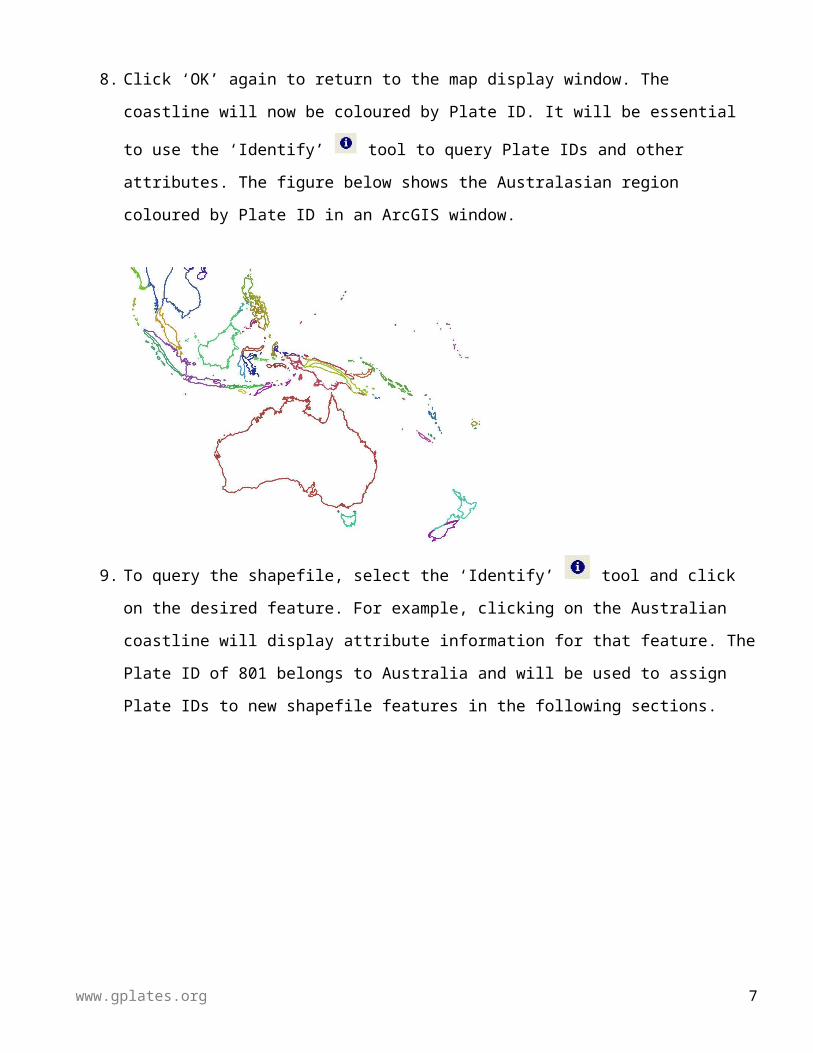
8. Click ‘OK’ again to return to the map display window. The coastline will now be coloured by
Plate ID. It will be essential to use the ‘Identify’ tool to query Plate IDs and other attributes.
The figure below shows the Australasian region coloured by Plate ID in an ArcGIS window.
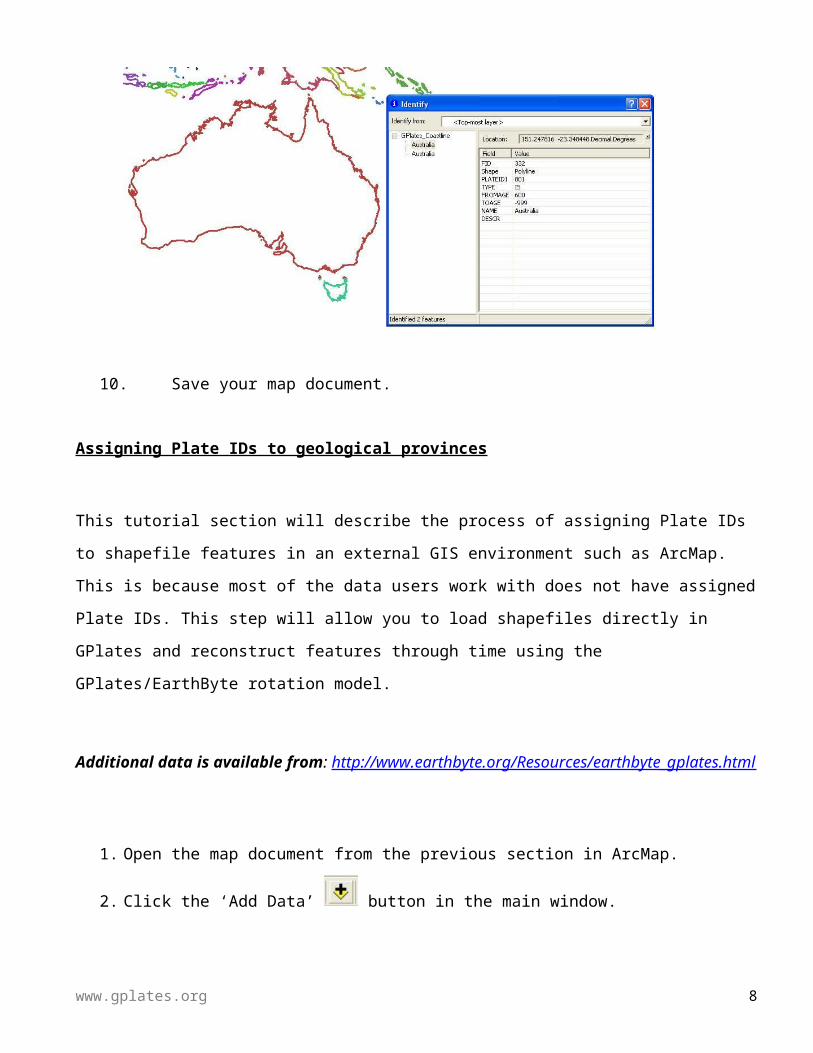
9. To query the shapefile, select the ‘Identify’ tool and click on the desired feature. For example,
clicking on the Australian coastline will display attribute information for that feature. The Plate ID
of 801 belongs to Australia and will be used to assign Plate IDs to new shapefile features in the
following sections.
www.gplates.org 5
10. Save your map document.
Assigning Plate IDs to geological provinces
This tutorial section will describe the process of assigning Plate IDs to shapefile features in an external
GIS environment such as ArcMap. This is because most of the data users work with does not have
assigned Plate IDs. This step will allow you to load shapefiles directly in GPlates and reconstruct features
through time using the GPlates/EarthByte rotation model.
Additional data is available from: http://www.earthbyte.org/Resources/earthbyte_gplates.html
1. Open the map document from the previous section in ArcMap.
2. Click the ‘Add Data’ button in the main window.
3. Once prompted, navigate to the ArcGIS Tutorial sample data folder.
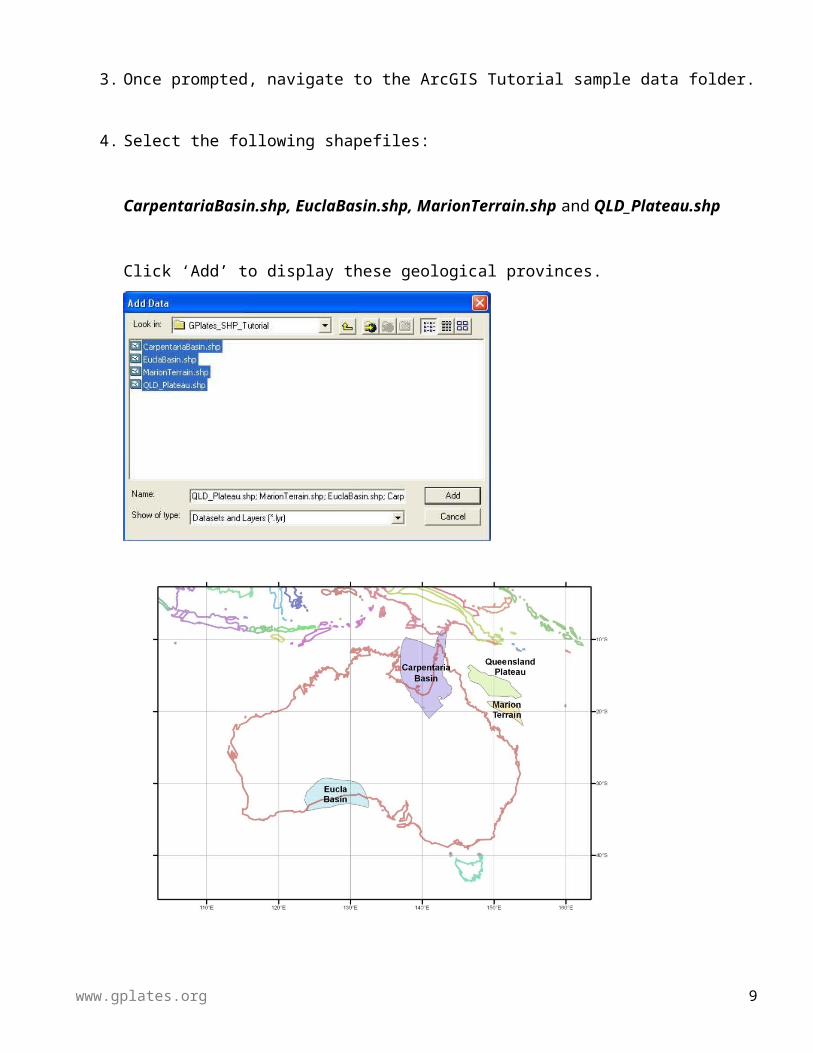
4. Select the following shapefiles:
CarpentariaBasin.shp, EuclaBasin.shp, MarionTerrain.shp and QLD_Plateau.shp
www.gplates.org 6
Click ‘Add’ to display these geological provinces.
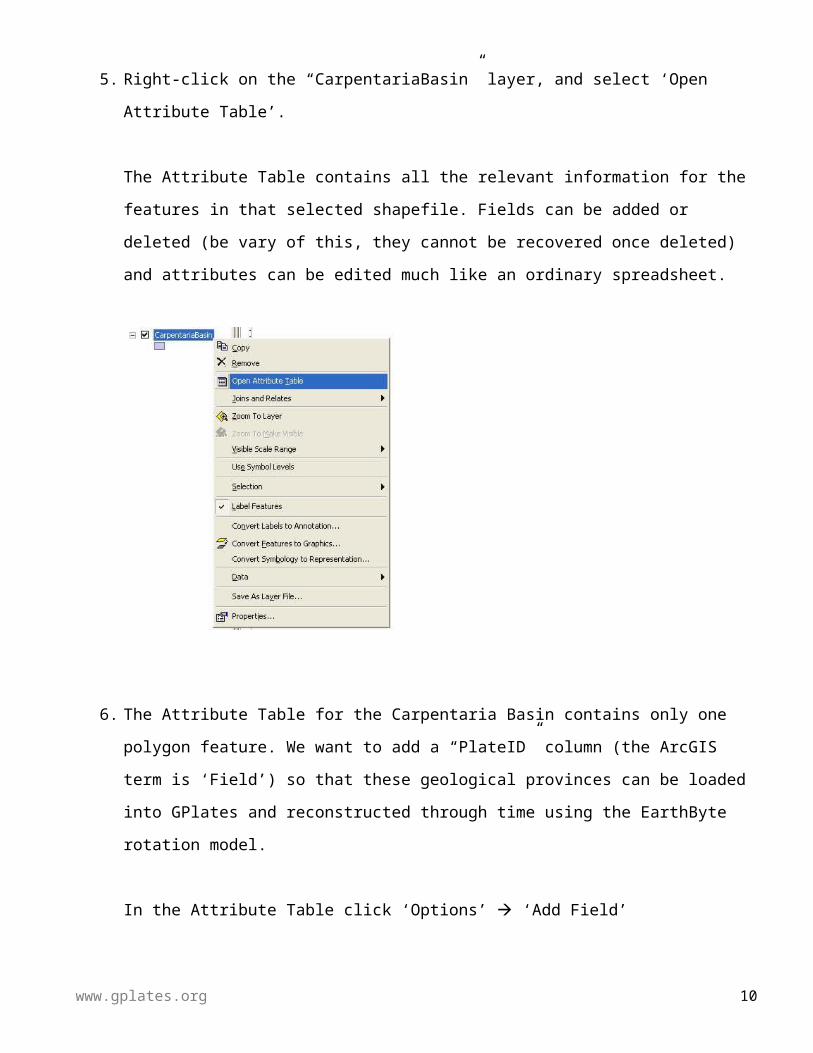
5. Right-click on the “CarpentariaBasin” layer, and select ‘Open Attribute Table’.
The Attribute Table contains all the relevant information for the features in that selected shapefile.
Fields can be added or deleted (be vary of this, they cannot be recovered once deleted) and
attributes can be edited much like an ordinary spreadsheet.
www.gplates.org 7
6. The Attribute Table for the Carpentaria Basin contains only one polygon feature. We want to add a
“PlateID” column (the ArcGIS term is ‘Field’) so that these geological provinces can be loaded
into GPlates and reconstructed through time using the EarthByte rotation model.
In the Attribute Table click ‘Options’ ‘Add Field’
7. Name the new field as “PlateID” and assign it the Short Integer data type. Click ‘OK’.
www.gplates.org 8
8. Right-click on the ‘PlateID’ column heading, and select ‘Field Calculator’ from the drop-down
menu. In the Field Calculator screen, type in 801 (without spaces) and click ‘OK’ to assign the
Plate ID. When this shapefile is loaded into GPlates, this feature will reconstruct using the rotation
entry for Plate ID 801 (Australia).
9. Repeat Steps 5-8 for the other three geological provinces, adding a PlateID field and assigning the
Plate ID of 801 to each shapefile.
Changes that are made using the Field Calculator are automatically appended to the shapefile. The
shapefiles are now ready to be loaded in GPlates and reconstructed using the EarthByte rotation
www.gplates.org 9
model.
Note: In case you want to make changes to individual records in the shapefile using the shapefile
Attribute Table in ArcMap, you will need to enter an edit session. This is outside the scope
of this tutorial – refer to the ArcGIS documentation on how to use ‘Editor’.
www.gplates.org 10