Embed Size (px)
Citation preview

ENGINEERING SOFTWARE DEVELOPMENT MADE EASY
www.amcbridge.com
Cloud Renderer
for Autodesk® Revit®
User Guide
June 21, 2017
Cloud Renderer for Autodesk Revit User Guide
Copyright © 2017 AMC Bridge 2
Contents Contents .................................................................................................................................................... 2 Welcome to Cloud Renderer for Autodesk Revit ...................................................................................... 3 Requirements and Installation .................................................................................................................. 5 Functionality.............................................................................................................................................. 8
Cloud Renderer Plug-in ......................................................................................................................... 8 Basic Settings ..................................................................................................................................... 8 Advanced Settings ........................................................................................................................... 10 Session manager ............................................................................................................................. 15 Single session view .......................................................................................................................... 17
Cloud Renderer on Microsoft® Azure® platfrom ................................................................................ 20 Getting started ................................................................................................................................ 20 Creating storage .............................................................................................................................. 20 Creating users data base ................................................................................................................. 20 Creating data base table ................................................................................................................. 21 Creating cloud service ..................................................................................................................... 21 Getting subscription ID ................................................................................................................... 22 Deploying ........................................................................................................................................ 22 Connecting ...................................................................................................................................... 23
Cloud Renderer on Amazon Web Services platfrom ........................................................................... 23 Getting started ................................................................................................................................ 23 Creating storage .............................................................................................................................. 23 Creating Dispatcher instance .......................................................................................................... 24 Configuring Dispatcher .................................................................................................................... 24 Connecting ...................................................................................................................................... 25
Uninstallation .......................................................................................................................................... 26 About AMC Bridge ................................................................................................................................... 27
Cloud Renderer for Autodesk Revit User Guide
Copyright © 2017 AMC Bridge 3
Welcome to Cloud Renderer for Autodesk Revit
Description:
Cloud Renderer is a POC add-in for Autodesk Revit that enables physically based rendering of 3D models either locally and on the Microsoft® Azure® or Amazon Web Services® cloud platform using LuxRender, physically based and unbiased rendering engine.
3D models created in Revit can be displayed in photo-realistic views or rendered with built-in photorealistic renderers. It is reasonably fast and produces high quality images. However, it does not support physically based rendering algorithms.
Physically based rendering provides images of much higher fidelity, but requires significant computational resources. For this reason, it has been beyond the reach of the mainstream 3D mechanical CAD community, and has been primarily used in the digital art and entertainment industries. However, the highly scalable computational resources available on cloud platforms open new opportunities for traditional CAD users.
AMC Bridge developed Cloud Renderer that uses advantages of cloud resources for rendering. It is a series of POC add-ins, which enables physically based rendering of 3D models on a cloud platform.
Cloud Renderer consists of two parts:
• Revit converter of 3D model data into a format appropriate for the photo-realistic LuxRender engine, an open-source format
• Cloud cluster that can be deployed on the Microsoft Azure or AWS cloud platform
Revit Converter
Conversion of 3D model data into the LuxRender format is performed locally on the user desktop. This format allows the user to store different portions of the 3D model data (geometry, materials, textures, light, camera, etc.) in separate files.
Current implementation of Revit converter is based on LuxRender version 1.6 and supports camera, geometry, lighting, light groups, materials and textures data.
Rendering Using Cloud Cluster
Microsoft Azure and AWS cloud platforms offer computing resources, data storage and other specific cloud services.
Cloud Renderer for Autodesk Revit User Guide
Copyright © 2017 AMC Bridge 4
The rendering cluster consists of following roles:
• Dispatcher: processes rendering requests from the client add-in, which includes allocating and freeing rendering nodes for each request, initializing rendering, and returning intermediate and final results back to the client;
• Worker: renders scenes and saves intermediate results to dedicated storage;
• Merger: merges intermediate rendering results and converts them into an image file of the format specified in the initiating request.
Cloud Renderer is based on Microsoft Azure SDK 2.8, AWS SDK 2.3 and is compatible with Autodesk Revit 2015 - 2018.

Cloud Renderer for Autodesk Revit User Guide
Copyright © 2017 AMC Bridge 5
Requirements and Installation
Cloud Renderer does not have any additional requirements. To install it, run installer and follow the instructions.

Cloud Renderer for Autodesk Revit User Guide
Copyright © 2017 AMC Bridge 6
Getting started
Introduction
Cloud Renderer plug-in extends the functionality of Autodesk Revit establishing a bi-directional connection between CAD environment and LuxRender rendering engine.
Plug-in features the following functions:
• Export Autodesk Revit scene to LuxRender scene format.
• Send scene to local LuxRender rendering engine.
• Send scene to cloud cluster.
• Get updates almost in real-time.
• Save rendering results as image or as *.FLM file.
• Change lights in real-time.
Access
When Cloud Renderer plug-in is installed, the Convert/Render command will appear under the 'Add-Ins' tab of the Revit ribbon toolbar:
To make add-in accessible, set Model View as 3D View:
After that, the main window of add-in becomes available.

Cloud Renderer for Autodesk Revit User Guide
Copyright © 2017 AMC Bridge 7
Cloud Renderer main window
Starting Cloud Renderer add-in, the command window will appear.
Main rendering settings such as scene camera options, cloud/local render, rendering time/required SPP (cloud render only), number of instances (cloud render only), server options (cloud render only), advanced settings are demonstrated below:

Cloud Renderer for Autodesk Revit User Guide
Copyright © 2017 AMC Bridge 8
Functionality
Cloud Renderer Plug-in
Basic Settings
Camera Options
First section in the main window is Camera Options:
Set the camera from which scene will be rendered. Changes in Revit main window will appear immediately. Set size of an image where render results will be shown (more about image see below).
Convert and Render
This section sets rendering parameters:
Choose between local rendering or cloud rendering (default). For cloud rendering previously install “LuxRender for Cloud” (see: www.cloudrenderer.amcbridge.com/packages/) on Microsoft Azure Cloud Platform (for more details see “LuxRender for Cloud” section here in below) or set up Amazon Web Services account. To use cloud rendering, set virtual machines number, it is limited by Azure/Amazon account settings. To limit rendering process, set render time or required Samples Per Point (SPP). SPP is a number of rays that LuxRender has sent to scene. Each ray that lays on the pixel makes its color more correct. Thus,

Cloud Renderer for Autodesk Revit User Guide
Copyright © 2017 AMC Bridge 9
image quality is getting better with number of spp increasing.
Server Settings
Adjust the settings for connection to cloud. They are available in Azure/Amazon account (for more details see “LuxRender for Cloud” section hereinbelow).
Cloud Renderer for Autodesk Revit User Guide
Copyright © 2017 AMC Bridge 10
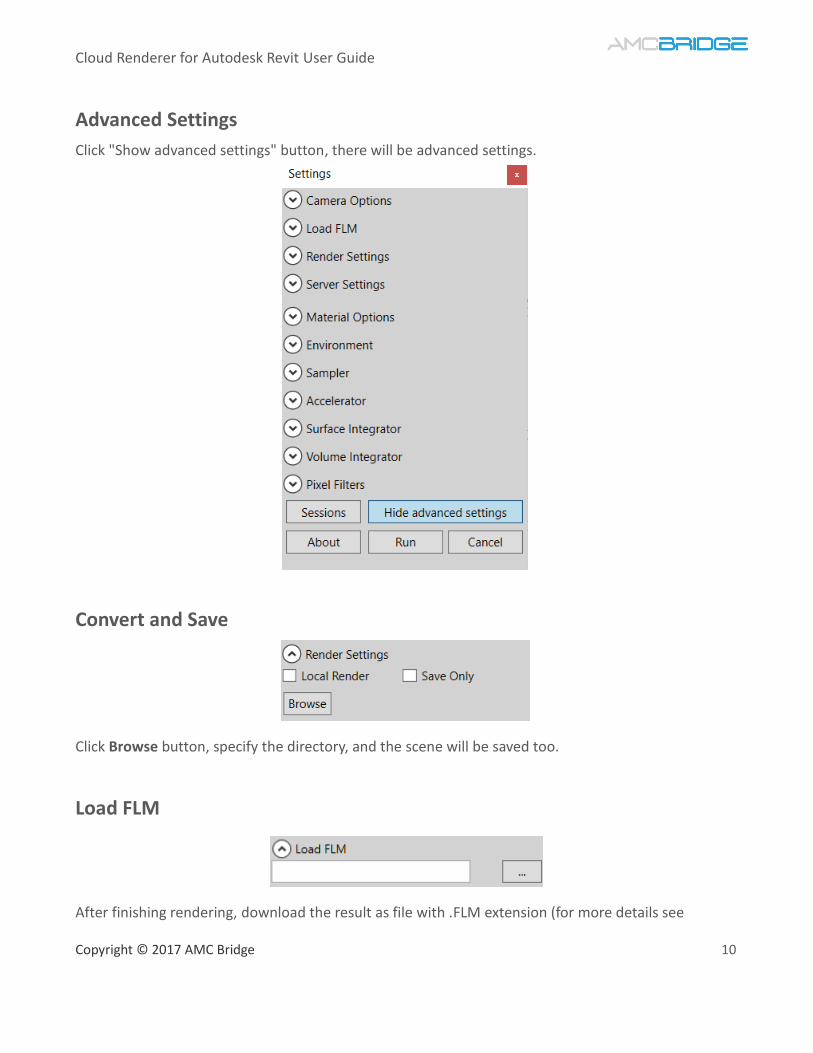
Advanced Settings
Сlick "Show advanced settings" button, there will be advanced settings.
Convert and Save
Click Browse button, specify the directory, and the scene will be saved too.
Load FLM
After finishing rendering, download the result as file with .FLM extension (for more details see

Cloud Renderer for Autodesk Revit User Guide
Copyright © 2017 AMC Bridge 11
“Preview window” section hereinbelow). “Load FLM” option gives an opportunity to load the results of rendering and work with its light settings.
Material Options
Setting chromatic dispersion to anything other than 0 will enable it. Chromatic dispersion is the splitting of the spectrum into a rainbow of colors, such as from a prism. Please note that this is an intensive effect that will increase the rendering time.
Environment
The air turbidity setting defines the clarity of the sky: setting it to two will result in a clear sky, while higher settings (up to 100) can be used to get the effect of a more cloudy sky.
Sampler
The sampler is responsible for generating all the numbers needed for a sample. A good sampler will distribute the numbers evenly (both within each sample and between samples), avoid forming predictable patterns. There are several sampler options:
• Random. The random sampler is the simplest sampler. It generates completely (pseudo-) random sample positions, resulting in low convergence speed.
• Low discrepancy. The low discrepancy sampler is a quasi-random sampler. It uses [0,2] quasi random sequences for all parts of the engine. That means it works in power of 2 sequences of samples. This can make it awkward to control, and can reduce quality when multiple

Cloud Renderer for Autodesk Revit User Guide
Copyright © 2017 AMC Bridge 12
sequences are used.
• Metropolis. The metropolis sampler uses the Metropolis-Hastings algorithm. The metropolis sampler tries to "seek the light". This makes it a good choice in almost all situations. It does this by making small random changes to an initial reference sample and checks if a new sample is more interesting, i.e. provides more light. If it is not, then the sample is discarded and a new sample is taken. If the new sample is a nice bright sample, metropolis will adopt the sample as the new reference sample.
• ERPT. The ERPT sampler is similar to the metropolis sampler and is based on an Energy Redistribution scheme. It mutates samples which show good contribution, but instead of randomly walking over samples returned, it keeps a pool of image space samples.
The "Max Consecrejects" (Maximum Consecutive Rejects) parameter controls when to generate a path mutation. The default value is 512, so if 512 samples are discarded, it generates a new path mutation (time to look somewhere else). Then the "Large Mutation Prob" parameter is used to determine the chances of generating a large path mutation (new completely random sample from somewhere else in the image) or a small path mutation (something nearby). "Use Variance" option provided by some integrators to alter sample acceptance.
Accelerator
The accelerator is used to figure out which objects do not need to be taken into account for the calculation of a ray. It is the way of "compiling" the scene into a format that can be rendered faster. Accelerator options:
• QBVH. This accelerator is a modified bounding volume hierarchy accelerator that has 4 children per node instead of two and uses SSE instructions to traverse the tree. It uses much less memory than a kd-tree while providing an equivalent or better speed. QBVH has much better SSE-optimization than KD-Tree, and as a result will be faster in almost all cases.
• Kd-tree. Also known as "tabreckdtree", this accelerator is fairly fast, but is more memory-hungry than QBVH and not as well SSE-optimized. A kd-tree uses only splitting planes that are perpendicular to one of the coordinate system axes.
Cloud Renderer for Autodesk Revit User Guide
Copyright © 2017 AMC Bridge 13
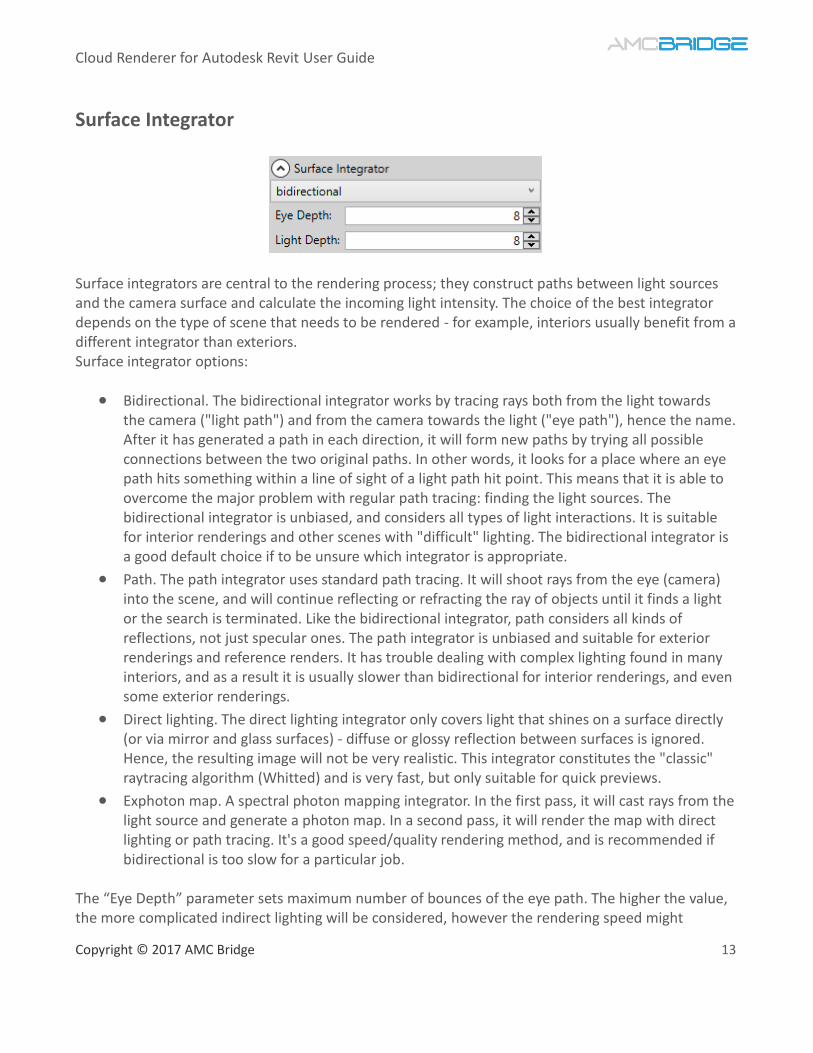
Surface Integrator
Surface integrators are central to the rendering process; they construct paths between light sources and the camera surface and calculate the incoming light intensity. The choice of the best integrator depends on the type of scene that needs to be rendered - for example, interiors usually benefit from a different integrator than exteriors. Surface integrator options:
• Bidirectional. The bidirectional integrator works by tracing rays both from the light towards the camera ("light path") and from the camera towards the light ("eye path"), hence the name. After it has generated a path in each direction, it will form new paths by trying all possible connections between the two original paths. In other words, it looks for a place where an eye path hits something within a line of sight of a light path hit point. This means that it is able to overcome the major problem with regular path tracing: finding the light sources. The bidirectional integrator is unbiased, and considers all types of light interactions. It is suitable for interior renderings and other scenes with "difficult" lighting. The bidirectional integrator is a good default choice if to be unsure which integrator is appropriate.
• Path. The path integrator uses standard path tracing. It will shoot rays from the eye (camera) into the scene, and will continue reflecting or refracting the ray of objects until it finds a light or the search is terminated. Like the bidirectional integrator, path considers all kinds of reflections, not just specular ones. The path integrator is unbiased and suitable for exterior renderings and reference renders. It has trouble dealing with complex lighting found in many interiors, and as a result it is usually slower than bidirectional for interior renderings, and even some exterior renderings.
• Direct lighting. The direct lighting integrator only covers light that shines on a surface directly (or via mirror and glass surfaces) - diffuse or glossy reflection between surfaces is ignored. Hence, the resulting image will not be very realistic. This integrator constitutes the "classic" raytracing algorithm (Whitted) and is very fast, but only suitable for quick previews.
• Exphoton map. A spectral photon mapping integrator. In the first pass, it will cast rays from the light source and generate a photon map. In a second pass, it will render the map with direct lighting or path tracing. It's a good speed/quality rendering method, and is recommended if bidirectional is too slow for a particular job.
The “Eye Depth” parameter sets maximum number of bounces of the eye path. The higher the value, the more complicated indirect lighting will be considered, however the rendering speed might
Cloud Renderer for Autodesk Revit User Guide
Copyright © 2017 AMC Bridge 14
decrease. (how much depends on the sampler used). If this value is set very low, the result may be biased. The “Light Depth” parameter sets maximum number of bounces of the light path. As with the eye depth, the higher the value, the more complicated indirect lighting will be considered, however the rendering speed will decrease. (how much depends on the sampler used). If this value is set very low, the result may be biased. If the scene contains mostly direct lighting, get a small speed boost without any detrimental effects by setting this lower than the eye depth. In most other cases, eye depth and light depth should be equal.
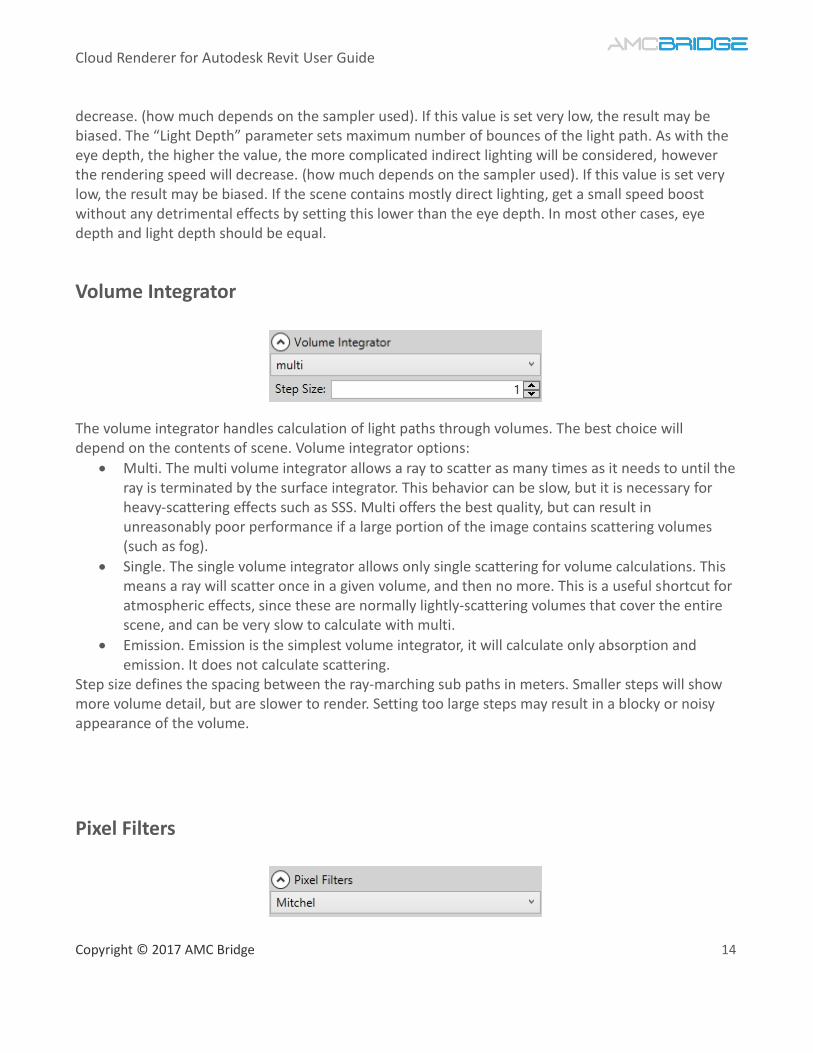
Volume Integrator
The volume integrator handles calculation of light paths through volumes. The best choice will depend on the contents of scene. Volume integrator options:
• Multi. The multi volume integrator allows a ray to scatter as many times as it needs to until the ray is terminated by the surface integrator. This behavior can be slow, but it is necessary for heavy-scattering effects such as SSS. Multi offers the best quality, but can result in unreasonably poor performance if a large portion of the image contains scattering volumes (such as fog).
• Single. The single volume integrator allows only single scattering for volume calculations. This means a ray will scatter once in a given volume, and then no more. This is a useful shortcut for atmospheric effects, since these are normally lightly-scattering volumes that cover the entire scene, and can be very slow to calculate with multi.
• Emission. Emission is the simplest volume integrator, it will calculate only absorption and emission. It does not calculate scattering.
Step size defines the spacing between the ray-marching sub paths in meters. Smaller steps will show more volume detail, but are slower to render. Setting too large steps may result in a blocky or noisy appearance of the volume.
Pixel Filters

Cloud Renderer for Autodesk Revit User Guide
Copyright © 2017 AMC Bridge 15
While calculating light samples, LuxRender treats the camera surface as a continuous surface; it does not yet take the amount of pixels of the final image into account. Once a certain number of samples have been calculated, it is necessary to decide for all samples to which pixel on the rendering they contribute. This step is executed by the filter. Typically, a sample contributes to multiple pixels, with most of it contribution being added to the pixel on which it is located and smaller amounts going to neighboring pixels. Different filters differ in the exact distribution of a sample's light contribution and furthermore filters have a setting that defines the size of the total area over which the sample's contribution is spread. Choosing the right filter influences the sharpness and smoothness of the rendering, although the difference between various filters is subtle. Differences in rendering time are negligible. Using the Mitchell filter with default settings is generally a good and safe choice. However since it has negative lobes (the filter contains negative values), it may produce artifacts if the scene contains small but strong reflections light sources. In this case the Gaussian filter may be a better choice.
Session manager
Push “Run” button in the main window of Cloud Renderer, at once it starts converting scene process and after that session manager window is being shown:
Cloud Renderer for Autodesk Revit User Guide
Copyright © 2017 AMC Bridge 16
Find the list of all currently running rendering sessions at the left side of the window and their previews at the main area. By clicking the list item or preview image, activate status bar of this specific session. By right-clicking open a context menu of the session. This menu has two options:
• “Remove” will abort rendering session and remove it from the Session manager.
• “Stop” will mark rendering session as completed. Download/save .FLM file and configure light settings as if session is completed successfully.

Cloud Renderer for Autodesk Revit User Guide
Copyright © 2017 AMC Bridge 17
Single session view
By double clicking the preview, open the Single session view. It contains more detailed information about the session. All options, available for the specific session are also located here.
More useful information on status bar:
• Rendering state (“Sending scene”, “Instances allocation”, “Rendering”, “Finish”);
• Rendering process (shows on progress bar and also in percentage);
• Samples per point (current value);
• Rendering time (local sessions only) Please keep in mind that Instances allocating phase may take up to 10 minutes and there will not be any changes during this time.
At “File” menu save the image (in *.png format) at any time during rendering or after it.
Cloud Renderer for Autodesk Revit User Guide
Copyright © 2017 AMC Bridge 18
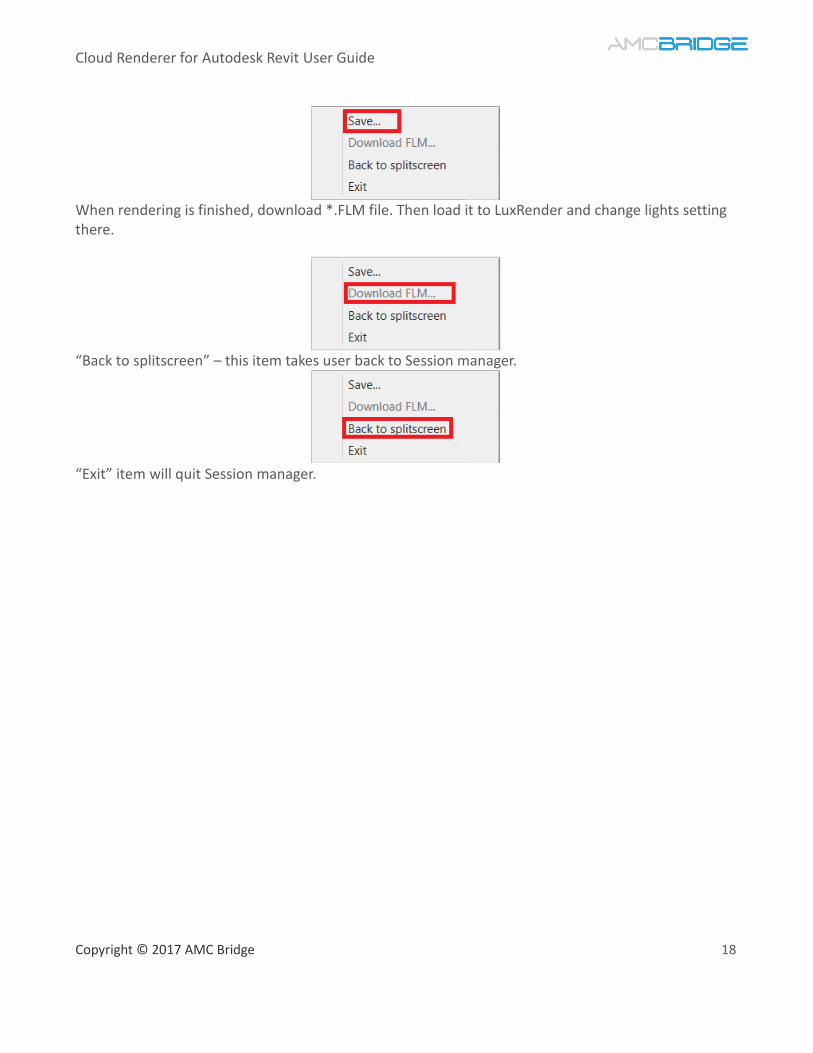
When rendering is finished, download *.FLM file. Then load it to LuxRender and change lights setting there.
“Back to splitscreen” – this item takes user back to Session manager.
“Exit” item will quit Session manager.

Cloud Renderer for Autodesk Revit User Guide
Copyright © 2017 AMC Bridge 19
When FLM is downloaded, use menu “Options” and press “Light settings”.
Set lights with light sources. They depend on scene and their number may be different. It is possible to turn off any light source.
Cloud Renderer for Autodesk Revit User Guide
Copyright © 2017 AMC Bridge 20
Cloud Renderer on Microsoft Azure Platform
Getting started
The full info for deployment process of Cloud Renderer on Azure account.
a) For successful deployment there are two files: -ServiceConfiguration.Cloud.cscfg;
-CloudRenderer.cspkg;
b) Open ServiceConfiguration.Cloud.cscfg file in the text editor. There is XML file;
c) Modify value property of each 'Setting' tag;
d) Open browser and go to https://portal.azure.com/;
Creating storage
a) At the left menu navigate to "Storage accounts", at left top corner click "Add";
b) Enter name for the new storage (it can be any, e.g. 'cloudrendererstorage'). Select the nearest
location;
c) Click "Create" and wait while it is being created;
d) Select the new created storage and at the left panel click "Access Keys". Copy "Storage
Account Name" value and navigate back to text editor; e) There are three lines that start with <Setting name="DataConnectionString"
value="DefaultEndpointsProtocol=http; … modify each of them by putting storage account
name parameter after '=http;' (e.g. <... =http;=cloudrendererstorage;" />);
f) Put "Primary Access Key" value generated by Azure (from browser window);
(e.g. <... AccountName=cloudrendererstorage;
AccountKey=17FZru6hLFR1OgrStpuTgkw4qQC9XxTTWnMI43pDrF2uphPBh+CHnrjEF69gepKGr
um389ia/L/HHTQ-=" />)
g) Whole line should look like:
<Setting name="DataConnectionString"value="DefaultEndpointsProtocol=http;
AccountName=cloudrendererstorage;
AccountKey=17FZru6hLFR1OgrStpuTgkw4qQC9XxTTWnMI43pDrF2uphPBh+CHnrjEF69gepKGr
u 389ia/L/HHTQ-=" />
Modify three lines (one per role).
Creating users data base
a) Go back to Azure Portal and at left side menu navigate to "SQL databases";
Cloud Renderer for Autodesk Revit User Guide
Copyright © 2017 AMC Bridge 21
b) Click "Add". Enter database name (it can be any e.g. 'cloudrendererdatabase'). Choose the
existing database server, otherwise select "Create a new server" and enter login name and
password. Wait while it is being created;
c) Click on the name of a new created database and thus navigate to its management portal;
d) Click “Show database connection strings”;
e) Copy "ADO.NET" connection string to ServiceConfiguration file; Put copied connection string
in each of three '<Setting name="DataBaseConnectionString" ' strings as value of attribute;
f) Change Password field to the database password from '{your_password_here}';(e.g. <Setting
name="DataBaseConnectionString"
value="Server=tcp:vndtxe9dyh.database.windows.net,1433;Database=cloudrendererdatabase
;User ID=cloudrenderersql@vndtxe9dyh; Password=mySqlPassword;
Trusted_Connection=False;Encrypt=True;Connection Timeout=30;" />)
Creating data base table
a) Go to the Azure Management Portal (classic portal). Click "MANAGE" at the bottom of the
page (install silverlite if requested). Click "YES" if asks for adding firewall exceptions;
b) Enter username and password that were used when creating database;
c) Click "Log on". Create table for users. Click "Design" at left bottom corner. Click "New table";
d) Enter "Table name", e.g. "Users". Change column name "Column1" to 'name' and "Column2"
to 'password';
e) Change column type of both columns to 'nvarchar(max)'. Click "Save" on the top of the page;
f) Navigate from "Columns" to "Data". Click "Add row". Set user name and password. Set ID of
user as a unique value (using 0,1,2,... sequence is recommended);
g) Click "Save" on the top of the page;
h) Go to ServiceConfiguration file and put values for <Setting name="DataBaseTableName" set
the name the same as previously named database table: e.g. <Setting
name="DataBaseTableName" value="Users" />;
i) Change all three strings, one per role.
Go to browser window and close all tabs related to the database.
Creating cloud service
a) On Azure management portal navigate to "Cloud services" at the left side of the page;
b) At the top left corner of the page click "Add";
c) Enter DNS name (e.g. "CloudRender") and choose the nearest location;
d) Click create cloud service. At ServiceConfiguration file put value of <Setting
name="ServiceName" as the name of the new created cloud service:
e) e.g. <Setting name="ServiceName" value="CloudRender" />;
Cloud Renderer for Autodesk Revit User Guide
Copyright © 2017 AMC Bridge 22
f) Change all three strings, one per role.
Getting subscription ID
Click on the name of your new created cloud service and copy "Subscription ID" from the “Essentials” panel to <Setting name="SubscriptionID" value; e.g. <Setting name="SubscriptionID" value="1d340b-92su-4901-x28a-1qs75918a7" /> Change all three strings, one per role.
Certificates
a) Create two self-signed certificates with *.pfx and *.cer extensions.
b) Install both certificates to your computer.
c) Go to you cloud service at the Azure portal and click on the “Certificates” button on the left panel.
d) Upload the *.pfx certificate.
e) Go to Azure management portal (classic portal) - https://manage.windowsazure.com.
f) Click “SETTINGS” at the left panel. Open the MANAGEMENT CERTIFICATES tab and hit the “UPLOAD” button at the bottom of the page. Management certificate is the certificate with the *.cer extension.
g) Navigate to the ServiceConfiguration file. At <Certificates> section fill the fields according to the first uploaded certificate.
More information is available at the Microsoft Azure documentation https://docs.microsoft.com/en-us/azure/cloud-services/cloud-services-certs-create.
Deploying
a) Close ServiceConfiguration file. On Azure management portal navigate back to "Cloud
services", click on the name of your service and then, click the “Upload” button.
b) Select storage, you have created previously;
c) Select .cspkg file and modified ServiceConfiguration.cscfg file to load on Azure;
d) Check "Deploy even if one or more roles contain a single instance" item;
e) Wait while deployment is being created;
f) At the “Essentials” panel copy "Public IP adress" to use when connecting server from Revit
add-in;
Cloud Renderer for Autodesk Revit User Guide
Copyright © 2017 AMC Bridge 23
Connecting
Use "Cloud Renderer" Revit add-in and URL from item 7 to connect to server and start rendering.
Clean-up
Once you have finished all your renderings, you should delete the deployment from cloud service. You can do it by following these steps:
a) Navigate to Azure portal page and click on the “Cloud services” button at the left panel.
b) Click on the cloud service you have created for the Cloud Renderer.
c) You will see the “Production slot” bar at the top of the page. Click on the “Delete” button at this bar.
d) You will be asked to choose whether you want to delete “Cloud service and it`s deployments” or “Product deployment”. If you are planning to run cloud renderings in the future – you should delete the deployment only.
Cloud Renderer on Amazon Web Services Platform
Getting started
This guide describes deployment process of Cloud Render for Amazon services. For successful deployment, there are three archives:
• Dispatcher
• Merger
• Slave
Merger.zip and Slave.zip must be unzipped to a bucket on S3. Same bucket will be used for logs and *.FLM files storage. Dispatcher.zip must be unpacked to a specific EC2 instance. Such instance is considered the Dispatcher and used to manage AWS resources of rendering purposes. Dispatcher creates new EC2 instances and deploys necessary software all by itself. Specify the name of a S3bucket, that stores Merger and Slave folders.
Creating storage
For details about Amazon S3 service, read this tutorial. Steps to set up a storage for Cloud Renderer:
a) Choose a bucket on S3, which will be used to store instances software, logs and *.FLM files.
Create new one if there is no bucket yet.

Cloud Renderer for Autodesk Revit User Guide
Copyright © 2017 AMC Bridge 24
b) Enter bucket and create two folders (Click “Create Folder” button on the toolbar). Folders
names must be “Merger” an “Slave”.
c) Upload files from Merger.zip and Slave.zip to the corresponding folder on the bucket.
Creating Dispatcher instance
For details about Amazon EC2 service - read this tutorial. Steps to create Dispatcher instance:
• Create a Windows-based instance.
• Connect to it via RDP.
• Upload Dispatcher.zip to the instance and unzip it anywhere. If terminate the Dispatcher after rendering, repeat all the steps above before next rendering. Not to be charged for running instance while not using it, stop the Dispatcher instead of terminating it. In this case, next time launch it and it will appear in the same state, as it has been left.
Configuring Dispatcher
Once Dispatcher.zip is uploaded to the instance and unpacked, it requires configuration. To configure the Dispatcher, follow next steps:
• Among unpacked files find the one named “Dispatcher.exe.config”
• Open it with the Notepad
• In the <appSettings> section, find Settings to configure. Each setting has two fields: “key” – the name of a setting, and “value” – corresponding value of a setting. To configure Dispatcher, fill all “value” fields.
Settings
• “Access Key ID” and “Secret Access Key” – are credentials, provided by Amazon.
• “Region Endpoint” represents endpoints available to the AWS clients. Choose the region* from the list below:
o Name: ap-northeast-1 Description: Asia Pacific (Tokyo)
o Name: ap-northeast-2 Description: Asia Pacific (Seoul)
o Name: ap-south-1 Description: Asia Pacific (Mumbai)
o Name: ap-southeast-1 Description: Asia Pacific (Singapore)
o Name: ap-southeast-2 Description: Asia Pacific (Sydney)

Cloud Renderer for Autodesk Revit User Guide
Copyright © 2017 AMC Bridge 25
o Name: ca-central-1 Description: Canada (Central)
o Name: eu-central-1 Description: EU Central (Frankfurt)
o Name: eu-west-1 Description: EU West (Ireland)
o Name: eu-west-2 Description: EU West (London)
o Name: sa-east-1 Description: South America (Sao Paulo)
o Name: us-east-1 Description: US East (Virginia)
o Name: us-east-2 Description: US East (Ohio)
o Name: us-west-1 Description: US West (N. California)
o Name: us-west-2 Description: US West (Oregon)
o Name: cn-north-1 Description: China (Beijing)
o Name: us-gov-west-1 Description: US GovCloud West (Oregon)
• “Bucket” – name of the bucket, where Merger and Slave were uploaded to.
• “Worker Instance Type” – type of instances, that will perform rendering. The list of instance types and their description are here.
• “Key Pair” – is a name of user’s key pair for Amazon EC2 service. To know more about the key pair, check this this article.
• “Login” and “Password” – are unique identifiers, aimed to authenticate connections to Dispatcher. Create password and login.
• “Port” – specifies the number of port, that Dispatcher will be listening to. “Port” setting has default value of 4000. It is not recommended to change the default value for an unexperienced user.
* Find the region in the top/right corner on the AWS Console homepage. If configuration file is correctly filled, run the Dispatcher.exe. While it is being run, cluster is ready to perform rendering.
Connecting
Use “Cloud Renderer” Revit add-in to connect to server and start rendering: In the Server Settings expander, fill the “Port”, “Login” and “Password” fields according to configuration file. “Server URL” field is the Dispatcher instance’s public IP.

Cloud Renderer for Autodesk Revit User Guide
Copyright © 2017 AMC Bridge 26
Uninstallation To uninstall this plug-in, follow the next steps:
1. Exit the Autodesk product if currently running it; 2. Open Control Panel; 3. Go to “Programs and Features” 4. Double-click the item that represents Cloud Renderer.

Cloud Renderer for Autodesk Revit User Guide
Copyright © 2017 AMC Bridge 27
About AMC Bridge AMC Bridge is a vendor of choice for software development services in the areas of computer aided design, engineering, manufacturing and construction. Since 1999 we have been delivering solutions for CAD, CAE, CAM, PDM, BIM and PLM applications. For over 15 years we have participated in the development of commercial software products and custom solutions for the engineering markets based on the variety of platforms from desktop and web to mobile and clouds.
AMC Bridge helps to improve engineering process overhead by the development of 3D and 2D modeling software products, data, document and community management technologies, CAD data interoperability, and many other aspects of software development for the engineering markets. Feel free to use wide experience of AMC Bridge team to find out all features and intricacies of software development process. Contact us any time and we will do our best to turn your ideas into reality. 303 Wyman Street, Suite 300 Waltham, MA 02451, USA +1 866-575-4791 www.amcbridge.com For all online inquiries, please contact: [email protected] Technical Support: [email protected]


![[DL輪読会]Neural 3d Mesh Renderer](https://img.pdfslide.net/doc/110x75/5aaa85d17f8b9af9198b4675/dlneural-3d-mesh-renderer.jpg)
