Embed Size (px)
Citation preview
mac access-group
LSW-57Cisco IOS LAN Switching Command Reference
November 2010
mac access-groupTo use a MAC access control list (ACL) to control the reception of incoming traffic on a Gigabit Ethernet interface, an 802.1Q VLAN subinterface, an 802.1Q-in-Q stacked VLAN subinterface, use the mac access-group command in interface or subinterface configuration mode. To remove a MAC ACL, use the no form of this command.
mac access-group access-list-number in
no mac access-group access-list-number in
Syntax Description
Defaults No access list is applied to the interface or subinterface.
Command Modes Interface configuration (config-if)Subinterface configuration (config-subif)
Command History
Usage Guidelines MAC ACLs are applied on incoming traffic on Gigabit Ethernet interfaces and VLAN subinterfaces. After a networking device receives a packet, the Cisco IOS software checks the source MAC address of the Gigabit Ethernet, 802.1Q VLAN, or 802.1Q-in-Q packet against the access list. If the MAC access list permits the address, the software continues to process the packet. If the access list denies the address, the software discards the packet and returns an Internet Control Message Protocol (ICMP) host unreachable message.
If the specified MAC ACL does not exist on the interface or subinterface, all packets are passed.
On Catalyst 6500 series switches, this command is supported on Layer 2 ports only.
Note The mac access-group command is supported on a VLAN subinterface only if a VLAN is already configured on the subinterface.
access-list-number Number of a MAC ACL to apply to an interface or subinterface (as specified by a access-list (MAC) command). This is a decimal number from 700 to 799.
in Filters on inbound packets.
Release Modification
12.0(32)S This command was introduced on the Cisco 12000 series Internet router.
12.2(33)SXH This command was integrated into Cisco IOS Release 12.2(33)SXH.
mac access-group
LSW-58Cisco IOS LAN Switching Command Reference
November 2010
Examples The following example applies MAC ACL 101 on incoming traffic received on Gigabit Ethernet interface 0:
Router> enableRouter# configure terminalRouter(config)# interface gigabitethernet 0Router(config-if)# mac access-group 101 in
Related Commands Command Description
access-list (MAC) Defines a MAC ACL.
clear mac access-list counters
Clears the counters of a MAC ACL.
ip access-group Configures an IP access list to be used for packets transmitted from the asynchronous host.
show access-group mode interface
Displays the ACL configuration on a Layer 2 interface.
show mac access-list Displays the contents of one or all MAC ACLs.
mac access-list extended
LSW-59Cisco IOS LAN Switching Command Reference
November 2010
mac access-list extendedTo create an extended MAC access control list (ACL) and define its access control entries (ACEs), use the mac access-list extended command in global configuration mode. To remove MAC ACLs, use the no form of this command.
mac access-list extended name
no mac access-list extended name
Syntax Description
Command Default No extended ACLs are defined.
Command Modes Global configuration (config)
Command History
Usage Guidelines When you enter the ACL name, follow these naming conventions:
• Maximum of 31 characters and may include a–z, A–Z, 0–9, the dash character (-), the underscore character (_), and the period character (.)
• Must start with an alpha character and must be unique across all ACLs of all types
• Case sensitive
• Cannot be a number
• Must not be a keyword; keywords to avoid are all, default-action, map, help, and editbuffer
You can configure named ACLs that filter Internet Packet Exchange (IPX), DECnet, AppleTalk, Virtual Integrated Network Service (VINES), or Xerox Network Services (XNS) traffic based on MAC addresses (IPX filtering with a MAC ACL is supported only with a Policy Feature Card 3 [PFC3]).
In systems that are configured with PFC3, if you want to classify all IPX traffic by using a MAC-access list that matches on EtherType 0x8137, use the ipx-arpa or ipx-non-arpa protocol.
name Name of the ACL to which the entry belongs.
Release Modification
12.2(14)SX Support for this command was introduced on the Supervisor Engine 720.
12.2(17b)SXA This command was changed as follows:
• Add the vlan vlan and cos value keywords and arguments.
• Add the ip keyword to the list of valid protocol names.
12.2(17d)SXB Support for this command on the Supervisor Engine 2 was extended to Release 12.2(17d)SXB.
12.2(33)SRA This command was integrated into Cisco IOS Release 12.2(33)SRA.
12.2(33)SRD The following Ethertype protocol values were added to the valid protocol list: bpdu-sap, bpdu-snap, dtp, lacp, pagp, vtp.
mac access-list extended
LSW-60Cisco IOS LAN Switching Command Reference
November 2010
Once you enter the mac access-list extended name command, use the following subset to create or delete entries in a MAC ACL:
[no] {permit | deny} {{src-mac mask | any} {dest-mac mask | any} [protocol [vlan vlan] [cos value]]}
The vlan vlan and cos value keywords and arguments are supported in PFC3BXL or PFC3B mode with Release 12.2(17b)SXA and later releases.
The vlan vlan and cos value keywords and arguments are not supported on the MAC VLAN access control lists (VACLs).
For the Cisco 7600 series platform when ES20 or ES40 line cards are used, only the {permit | deny} {src-mac mask | any} {dest-mac mask | any} part of the command syntax applies. If an extended MAC Access Control List is created using the [protocol [vlan vlan] [cos value]] options, these options are ignored.
Table 1 describes the syntax of the mac access-list extended command.
Valid entries for the protocol argument are as follows:
• 0x0-0xFFFF—Arbitrary EtherType in hexadecimal
• aarp—EtherType: AppleTalk Address Resolution Protocol (ARP)
• amber—EtherType: DEC-Amber
• appletalk—EtherType: AppleTalk/EtherTalk
• bpdu-sap—BPDU SAP encapsulated packets
• bpdu-snap—BPDU SNAP encapsulated packets
• dec-spanning—EtherType: DEC-Spanning-Tree
• decnet-iv—EtherType: DECnet Phase IV
• diagnostic—EtherType: DEC-Diagnostic
• dsm—EtherType: DEC-DSM
• dtp—DTP packets
Table 1 mac access-list extended Command Syntax
Syntax Description
no (Optional) Deletes a statement from an access list.
permit Permits access if the conditions are matched.
deny Denies access if the conditions are matched.
src-mac mask Source MAC address in the form: source-mac-address source-mac-address-mask.
any Specifies any protocol type.
dest-mac mask (Optional) Destination MAC address in the form: dest-mac-address dest-mac-address-mask.
protocol (Optional) Name or number of the protocol; see below for a list of valid entries for this argument.
vlan vlan (Optional) Specifies a VLAN ID; valid values are from 0 to 4095.
cos value (Optional) Specifies a CoS value; valid values are from 0 to 7.
mac access-list extended
LSW-61Cisco IOS LAN Switching Command Reference
November 2010
• etype-6000—EtherType: 0x6000
• etype-8042—EtherType: 0x8042
• ip—EtherType: 0x0800
• ipx-arpa—IPX Advanced Research Projects Agency (ARPA)
• ipx-non-arpa—IPX non-ARPA
• lacp—LACP encapsulated packets
• lat—EtherType: DEC-LAT
• lavc-sca—EtherType: DEC-LAVC-SCA
• mop-console—EtherType: DEC-MOP Remote Console
• mop-dump—EtherType: DEC-MOP Dump
• msdos—EtherType: DEC-MSDOS
• mumps—EtherType: DEC-MUMPS
• netbios—EtherType: DEC-NETBIOS
• pagp—PAGP encapsulated packets
• vines-echo—EtherType: VINES Echo
• vines-ip—EtherType: VINES IP
• vtp—VTP packets
• xns-idp—EtherType: XNS IDP
When you enter the src-mac mask or dest-mac mask value, note these guidelines and restrictions:
• Enter MAC addresses as three 4-byte values in dotted hexadecimal format; for example, 0030.9629.9f84.
• Enter MAC-address masks as three 4-byte values in dotted hexadecimal format. Use 1 bit as a wildcard. For example, to match an address exactly, use 0000.0000.0000 (can be entered as 0.0.0).
• For the optional protocol, you can enter either the EtherType or the keyword.
• Entries without a protocol match any protocol.
• Access lists entries are scanned in the order that you enter them. The first matching entry is used. To improve performance, place the most commonly used entries near the beginning of the access list.
• An implicit deny any any entry exists at the end of an access list unless you include an explicit permit any any entry at the end of the list.
• All new entries to an existing list are placed at the end of the list. You cannot add entries to the middle of a list.
Malformed, invalid, deliberately corrupt EtherType 0x800 IP frames are not recognized as IP traffic and are not filtered by IP ACLs.
An ACE created with the mac access-list extended command with the ip keyword filters malformed, invalid, deliberately corrupt EtherType 0x800 IP frames only; it does not filter any other IP traffic.
mac access-list extended
LSW-62Cisco IOS LAN Switching Command Reference
November 2010
Examples The following example shows how to create a MAC ACL named mac_layer that denies traffic from 0000.4700.0001, which is going to 0000.4700.0009, and permits all other traffic:
Router(config)# mac access-list extended mac_layer Router(config-ext-macl)# deny 0000.4700.0001 0.0.0 0000.4700.0009 0.0.0 dsm Router(config-ext-macl)# permit any any
Related Commands Command Description
mac access-group in Applies MAC ACLs to Ethernet service instances.
show mac-address-table Displays information about the MAC address table.
mac-address-table aging-time
LSW-63Cisco IOS LAN Switching Command Reference
November 2010
mac-address-table aging-timeTo configure the maximum aging time for entries in the Layer 2 table, use the mac-address-table aging-time command in global configuration mode. To reset maximum aging time to the default setting, use the no form of this command.
Cisco 2600 Series, Cisco 3600 Series, and Cisco 3700 Series Routers
mac-address-table aging-time seconds
no mac-address-table aging-time seconds
Cisco 7600 Series Routers
mac-address-table aging-time seconds [routed-mac | vlan vlan-id]
no mac-address-table aging-time seconds [routed-mac | vlan vlan-id]
Catalyst Switches
mac-address-table aging-time seconds [routed-mac | vlan vlan-id]
no mac-address-table aging-time seconds [routed-mac | vlan vlan-id]
Syntax Description
Command Default The default aging time is 300 seconds.
Command Modes Global configuration (config)
Command History
seconds MAC address table entry maximum age. Valid values are 0, and from 5 to 1000000 seconds. Aging time is counted from the last time that the switch detected the MAC address. The default value is 300 seconds.
vlan vlan-id (Optional) Specifies the VLAN to which the changed aging time should be applied. Valid values are from 2 to 1001.
routed-mac (Optional) Specifies the routed MAC aging interval.
vlan vlan-id (Optional) Specifies the VLAN to apply the changed aging time; valid values are from 1 to 4094.
Release Modification
12.0(7)XE This command was introduced on Catalyst 6000 series switches.
12.1(1)E This command was implemented on Catalyst 6000 series switches.
12.2(2)XT This command was introduced on Cisco 2600 series, Cisco 3600 series, and Cisco 3700 series routers.
12.2(8)T This command was integrated into Cisco IOS Release 12.2(8)T on Cisco 2600 series, Cisco 3600 series, and Cisco 3700 series routers.
12.2(11)T This command was integrated into Cisco IOS Release 12.2(11)T.
mac-address-table aging-time
LSW-64Cisco IOS LAN Switching Command Reference
November 2010
Usage Guidelines Cisco 2600 Series, Cisco 3600 Series, and Cisco 3700 Series Routers
The aging time entry will take the specified value. Valid entries are from 10 to 1000000 seconds.
This command cannot be disabled.
Catalyst Switches and Cisco 7600 Routers
If you do not enter a VLAN, the change is applied to all routed-port VLANs.
Enter 0 seconds to disable aging.
You can enter the routed-mac keyword to configure the MAC address aging time for traffic that has the routed MAC (RM) bit set.
Examples Cisco 2600 Series, Cisco 3600 Series, and Cisco 3700 Series Routers
The following example shows how to configure aging time to 300 seconds:
mac-address-table aging-time 300
Catalyst Switches and Cisco 7600 Routers
The following example shows how to configure the aging time:
mac-address-table aging-time 400
The following example shows how to change the RM aging time to 500 seconds:
mac-address-table aging-time 500 routed-mac
The following example shows how OOB affects modifying the aging-time:
mac-address-table aging-time 250 %% Vlan Aging time not changed since OOB is enabled and requires aging time to be atleast 3 times OOB interval - default: 480 seconds
The following example shows how to disable the aging time:
mac-address-table aging-time 0
12.2(14)SX This command was implemented on Catalyst switches and Cisco 7600 Internet routers with a Supervisor Engine 720.
12.2(17d)SXB This command was implemented on Cisco Catalyst switches and Cisco 7600 Internet routers with a Supervisor Engine 2.
12.2(18)SXE The routed-mac keyword was added. This keyword is supported only on a Supervisor Engine 720 in Cisco 7600 Internet routers and Catalyst 6500 switches.
12.2(18)SXF5 The minimum value for the seconds argument was changed from 10 to 5.
12.2(33)SRA This command was integrated into Cisco IOS Release 12.2(33)SRA.
12.2(33)SXI The output for this command was modified to include additional fields and explanatory text.
Release Modification
mac-address-table aging-time
LSW-65Cisco IOS LAN Switching Command Reference
November 2010
Related Commands Command Description
show mac-address-table Displays information about the MAC address table.
show mac-address-table aging-time
Displays the MAC address aging time.
mac-address-table dynamic
LSW-66Cisco IOS LAN Switching Command Reference
November 2010
mac-address-table dynamicTo add dynamic addresses to the MAC address table, use the mac-address-table dynamic command in global configuration mode. Dynamic addresses are automatically added to the address table and dropped from it when they are not in use. To remove dynamic entries from the MAC address table, use the no form of this command.
Cisco 2600 Series, Cisco 3600 Series, and Cisco 3700 Series Routers
mac-address-table dynamic hw-address interface {fa | gi} [slot/port] vlan vlan-id
no mac-address-table dynamic hw-address vlan vlan-id
Catalyst Switches
mac-address-table dynamic hw-address interface [atm slot/port] [vlan vlan-id]
no mac-address-table dynamic hw-address [vlan vlan-id]
Syntax Description hw-address MAC address added to or removed from the table.
interface Port to which packets destined for hw-address are forwarded.
fa Specifies FastEthernet.
gi Specifies GigabitEthernet.
slot (Optional) The slot (slot 1 or slot 2) to which to add dynamic addresses.
port (Optional) Port interface number. The ranges are based on type of Ethernet switch network module used:
• 0 to 15 for NM-16ESW
• 0 to 35 for NM-36ESW
• 0 to 1 for GigabitEthernet
atm slot/port (Optional) Add dynamic addresses to the ATM module in slot 1 or 2. The port is always 0 for an ATM interface.
mac-address-table dynamic
LSW-67Cisco IOS LAN Switching Command Reference
November 2010
Command Default Dynamic addresses are not added to the MAC address table.
Command Modes Global configuration (config)
Command History
vlan vlan-id Cisco 2600 Series, Cisco 3600 Series, and Cisco 3700 Series Routers
The interface and vlan parameters together specify a destination to which packets destined for hw-address are forwarded.
The vlan keyword is optional if the port is a static-access or dynamic-access VLAN port. In this case, the VLAN assigned to the port is assumed to be that of the port associated with the MAC address.
The vlan keyword is required for multi-VLAN and trunk ports. This keyword is required on trunk ports to specify to which VLAN the dynamic address is assigned.
The vlan-id is the value of the ID of the VLAN to which packets destined for hw-address are forwarded. Valid IDs are 1 to 1005; do not enter leading zeroes.
Catalyst Switches
(Optional) The interface and vlan parameters together specify a destination to which packets destined for hw-address are forwarded.
The vlan keyword is optional if the port is a static-access or dynamic-access VLAN port. In this case, the VLAN assigned to the port is assumed to be that of the port associated with the MAC address.
Note When this command is executed on a dynamic-access port, queries to the VLAN Membership Policy Server (VMPS) do not occur. The VMPS cannot verify that the address is allowed or determine to which VLAN the port should be assigned. This command should be used only for testing purposes.
The vlan keyword is required for multi-VLAN and trunk ports. This keyword is required on trunk ports to specify to which VLAN the dynamic address is assigned.
The vlan-id is the value of the ID of the VLAN to which packets destined for hw-address are forwarded. Valid IDs are 1 to 1005; do not enter leading zeroes.
Release Modification
11.2(8)SA This command was introduced.
11.2(8)SA3 The vlan keyword was added.
11.2(8)SA5 The atm keyword was added.
12.2(2)XT This command was implemented on Cisco 2600 series, Cisco 3600 series, and Cisco 3700 series routers.
12.2(8)T This command was integrated into Cisco IOS Release 12.2(8)T, on Cisco 2600 series, Cisco 3600 series, and Cisco 3700 series routers.
mac-address-table dynamic
LSW-68Cisco IOS LAN Switching Command Reference
November 2010
Usage Guidelines If the vlan-id argument is omitted and the no form of the command is used, the MAC address is removed from all VLANs.
Examples The following example shows how to add a MAC address on port fa1/1 to VLAN 4:
Switch(config)# mac-address-table dynamic 00c0.00a0.03fa fa1/1 vlan 4
Related Commands
12.2(11)T This command was integrated into Cisco IOS Release 12.2(11)T.
12.2(33)SRA This command was integrated into Cisco IOS Release 12.2(33)SRA.
12.2SX This command is supported in the Cisco IOS Release 12.2SX train. Support in a specific 12.2SX release of this train depends on your feature set, platform, and platform hardware.
Release Modification
Command Description
clear mac-address-table Deletes entries from the MAC address table.
mac-address-table aging-time Sets the length of time that a dynamic entry remains in the MAC address table after the entry is used or updated.
mac-address-table static Adds static addresses to the MAC address table.
show mac-address-table Displays the MAC address table.
mac-address-table learning
LSW-69Cisco IOS LAN Switching Command Reference
November 2010
mac-address-table learningTo enable MAC-address learning, use the mac-address-table learning command in global configuration mode. To disable learning, use the no form of this command.
[default] mac-address-table learning {vlan vlan-id | interface interface slot/port} [module num]
no mac-address-table learning {vlan vlan-id | interface interface slot/port} [module num]
Syntax Description
Defaults If you configure a VLAN on a port in a module, all the supervisor engines and Distributed Forwarding Cards (DFCs) in the Catalyst 6500 series switch are enabled to learn all the MAC addresses on the specified VLAN.
Command Modes Global configuration (config)
Command History
Usage Guidelines You can use the module num keyword and argument to specify supervisor engines or DFCs only.
You can use the vlan vlan-id keyword and argument on switch-port VLANs only. You cannot use the vlan vlan-id keyword and argument to configure learning on routed interfaces.
You can use the interface interface slot/port keyword and arguments on routed interfaces, supervisor engines, and DFCs only. You cannot use the interface interface slot/port keyword and arguments to configure learning on switch-port interfaces or non-DFC modules.
Examples This example shows how to enable MAC-address learning on a switch-port interface on all modules:
Router(config)# mac-address-table learning vlan 100 Router(config)#
default (Optional) Returns to the default settings.
vlan vlan-id Specifies the VLAN to apply the per-VLAN learning of all MAC addresses; valid values are from 1 to 4094.
interface Specifies per-interface based learning of all MAC addresses.
interface slot/port
Interface type, the slot number, and the port number.
module num (Optional) Specifies the module number.
Release Modification
12.2(18)SXE Support for this command was introduced on the Supervisor Engine 720.
12.2(33)SRA This command was integrated into Cisco IOS Release 12.2(33)SRA.

mac-address-table learning
LSW-70Cisco IOS LAN Switching Command Reference
November 2010
This example shows how to enable MAC-address learning on a switch-port interface on a specified module:
Router(config)# mac-address-table learning vlan 100 module 4Router(config)#
This example shows how to disable MAC-address learning on a specified switch-port interface for all modules:
Router(config)# no mac-address-table learning vlan 100Router(config)#
This example shows how to enable MAC-address learning on a routed interface on all modules:
Router(config)# mac-address-table learning vlan 100 Router(config)#
This example shows how to enable MAC-address learning on a routed interface for a specific module:
Router(config)# mac-address-table learning interface FastEthernet 3/48 module 4Router(config)#
This example shows how to disable MAC-address learning for all modules on a specific routed interface:
Router(config)# no mac-address-table learning interface FastEthernet 3/48Router(config)#
Related Commands Command Description
show mac-address-table learning Displays the MAC-address learning state.
mac-address-table limit
LSW-71Cisco IOS LAN Switching Command Reference
November 2010
mac-address-table limitTo enable the MAC limiting functionality and set the limit to be imposed, use the mac-address-table limit command in global configuration mode. To disable MAC limiting, use the no form of this command.
mac-address-table limit [action {warning | limit | shutdown}] [notification {syslog | trap | both}] [interface type mod/port] [maximum num] [vlan vlan] [maximum num] [action {warning | limit | shutdown}] [flood]
no mac-address-table limit [action {warning | limit | shutdown}] [notification {syslog | trap | both}] [interface type mod/port] [maximum num] [vlan vlan] [maximum num] [action {warning | limit | shutdown}] [flood]
Syntax Description
Defaults The defaults are as follows:
• maximum num is 500 MAC address entries.
• action is warning.
• notification is syslog.
Command Modes Global configuration (config)
maximum num (Optional) Specifies the maximum number of MAC entries per-VLAN per-Encoded Address Recognition Logic (EARL) allowed; valid values are from 5 to 32768 MAC-address entries.
action (Optional) Specifies the type of action to be taken when the action is violated.
warning (Optional) Specifies that the one syslog message will be sent and no further action will be taken when the action is violated.
limit (Optional) Specifies that the one syslog message will be sent and/or a corresponding trap will be generated with the MAC limit when the action is violated.
shutdown (Optional) Specifies that the one syslog message will be sent and/or the VLAN is moved to the blocked state when the action is violated.
notification (Optional) Specifies the type of notification to be sent when the action is violated.
syslog (Optional) Sends a syslog message when the action is violated.
trap (Optional) Sends trap notifications when the action is violated.
both (Optional) Sends syslog and trap notifications when the action is violated.
vlan vlan (Optional) Enables MAC limiting on a per-VLAN basis.
interface type mod/port
(Optional) Enables MAC limiting on a per-port basis.
flood (Optional) Enables unknown unicast flooding on a VLAN.
mac-address-table limit
LSW-72Cisco IOS LAN Switching Command Reference
November 2010
Command History
Usage Guidelines MAC limiting can be enabled on either a per-interface basis (that is, by specifying an interface) or on a per-VLAN basis (that is, by specifying a VLAN). However, MAC limiting must first be enabled for the router (a higher level) in global configuration mode (config).
General Points About MAC Limiting
Note the following points about enabling MAC limiting:
• The maximum number of MAC entries is determined on a per-VLAN and per-EARL basis.
• If you do not specify a maximum number, an action, or a notification, the default settings are used.
• If you enable per-VLAN MAC limiting, MAC limiting is enabled on the specified VLAN only.
• The flood keyword is supported on VLAN interfaces only.
• The flood action occurs only if the limit action is configured and is violated.
• In the shutdown state, the VLAN remains in the blocked state until you reenable it through the command syntax.
Syntax for Enabling per-VLAN MAC Limiting
The following is sample syntax that can be used to enable per-VLAN MAC limiting. Both commands must be used to properly enable per-VLAN MAC limiting.
mac-address-table limit
Note This command enables the MAC limiting functionality for the router.
mac-address-table limit [vlan vlan] [maximum num] [action {warning | limit | shutdown}] [flood]
Note This command sets the specific limit and any optional actions to be imposed at the VLAN level.
Release Modification
12.2(17b)SXA Support for this command was introduced on the Supervisor Engine 720.
12.2(17d)SXB Support for this command on the Supervisor Engine 2 was extended to Release 12.2(17d)SXB.
12.2(18)SXD1 This command was changed to include the vlan vlan keyword and argument to support per-VLAN MAC limiting.
12.2(18)SXE This command was changed to include the interface type mod/port keyword and arguments to support per-port MAC limiting.
12.2(33)SRA This command was integrated into Cisco IOS Release 12.2(33)SRA.
mac-address-table limit
LSW-73Cisco IOS LAN Switching Command Reference
November 2010
Syntax for Enabling Per-Interface MAC Limiting
The following is sample syntax that can be used to enable per-interface MAC limiting. Both commands must be used to properly enable per-interface MAC limiting.
mac-address-table limit
Note This command enables the MAC limiting functionality for the router.
mac-address-table limit [interface type mod/port] [maximum num] [action {warning | limit | shutdown}] [flood]
Note This command sets the specific limit and any optional actions to be imposed at the interface level.
Examples This example shows how to enable per-VLAN MAC limiting. The first instance of the mac-address-table limit command enables MAC limiting. The second instance of the command sets the limit and any optional actions to be imposed at the VLAN level.
Router# enableRouter# configure terminalRouter(config)# mac-address-table limitRouter(config)# mac-address-table limit vlan 501 maximum 50 action shutdownRouter(config)# end
This example shows how to enable per-interface MAC limiting. The first instance of the mac-address-table limit command enables MAC limiting. The second instance of the command sets the limit and any optional actions to be imposed at the interface level.
Router# enableRouter# configure terminalRouter(config)# mac-address-table limitRouter(config)# mac-address-table limit fastethernet0/0 maximum 50 action shutdownRouter(config)# end
Related Commands Command Description
show mac-address-table limit Displays the information about the MAC-address table.
mac-address-table notification change
LSW-74Cisco IOS LAN Switching Command Reference
November 2010
mac-address-table notification changeTo send a notification of the dynamic changes to the MAC address table, use the mac-address-table notification change command in global configuration mode. To return to the default settings, use the no form of this command.
mac-address-table notification change [history size | interval seconds]
no mac-address-table notification change
Syntax Description
Command Default The default settings are as follows:
• Disabled
• If notification of the dynamic changes to the MAC address table is enabled, the default settings are as follows:
– history size is 1 entry.
– interval value is 1 second.
Command Modes Global configuration (config)
Command History
Examples This example shows how to configure the Simple Network Management Protocol (SNMP) notification of dynamic additions to the MAC address table of addresses:
Router(config)# mac-address-table notification change interval 5 history 25
Related Commands
history size (Optional) Sets the number of entries in the history buffer; valid values are from 0 to 500 entries.
interval seconds (Optional) Sets the minimum change sending interval; valid values are from 0 to 2147483647 seconds.
Release Modification
12.2(33)SXH This command was introduced.
Command Description
show mac-address-table Displays information about the MAC address table.
snmp-server trap mac-notification
Enables the SNMP trap notification on a LAN port when MAC addresses are added to or removed from the address table.
mac-address-table notification mac-move
LSW-75Cisco IOS LAN Switching Command Reference
November 2010
mac-address-table notification mac-moveTo enable MAC-move notification, use the mac-address-table notification mac-move command in global configuration mode. To disable MAC-move notification, use the no form of this command.
mac-address-table notification mac-move [counter [syslog]]
no mac-address-table notification mac-move [counter [syslog]]
Syntax Description
Command Default MAC-move notification is not enabled.
Command Modes Global configuration (config)
Command History
Usage Guidelines MAC-move notification generates a syslog message whenever a MAC address or host moves between different switch ports.
MAC-move notification does not generate a notification when a new MAC address is added to the content-addressable memory (CAM) or when a MAC address is removed from the CAM.
MAC-move notification is supported on switch ports only.
The MAC-move counter notification generates a syslog message when the number of MAC moves in a VLAN exceeds the maximum limit. The maximum limit is 1000 MAC moves.
The MAC-move counter syslog notification counts the number of times a MAC has moved within a VLAN and the number of these instances that have occurred in the system.
Examples This example shows how to enable MAC-move notification:
Router(config)# mac-address-table notification mac-move
This example shows how to disable MAC-move notification:
Router(config)# no mac-address-table notification mac-move
counter (Optional) Specifies the MAC-move counter feature.
syslog (Optional) Specifies the syslogging facility when the MAC-move notification detects the first instance of the MAC move.
Release Modification
12.2(14)SX Support for this command was introduced on the Supervisor Engine 720.
12.2(17d)SXB Support for this command on the Supervisor Engine 2 was extended to the 12.2 SX release.
12.2(33)SXI This command was changed to add the counter and the syslog keywords.

mac-address-table notification mac-move
LSW-76Cisco IOS LAN Switching Command Reference
November 2010
This example shows how to enable MAC-move counter syslog notification:
Router(config)# mac-address-table notification mac-move counter syslog
This example shows how to disable MAC-move counter notification:
Router(config)# no mac-address-table notification mac-move counter
Related Commands Command Description
show mac-address-table notification mac-move
Displays the information about the MAC-address table.
clear mac-address-table notification mac-move
Clears the MAC-address table notification counters.
mac-address-table notification threshold
LSW-77Cisco IOS LAN Switching Command Reference
November 2010
mac-address-table notification thresholdTo enable content-addressable memory (CAM) table usage monitoring notification, use the mac-address-table notification threshold command in global configuration mode. To disable CAM table usage monitoring notification, use the no form of this command.
mac-address-table notification threshold limit percentage interval seconds
no mac-address-table notification threshold
Syntax Description
Defaults The defaults are as follows:
• Disabled.
• percentage is 50 percent.
• seconds is 120 seconds.
Command Modes Global configuration (config)
Command History
Usage Guidelines When you enable CAM table usage monitoring, the number of valid entries in the CAM table are counted and if the percentage of the CAM utilization is higher or equal to the specified threshold, a message is displayed.
Examples This example shows how to enable CAM table usage monitoring notification and use the default settings:
Router(config)# mac-address-table notification thresholdRouter(config)#
This example shows how to enable CAM table usage monitoring notification and set the threshold and interval:
Router(config)# mac-address-table notification threshold limit 20 interval 200Router(config)#
limit percentage Specifies the percentage of the CAM utilization; valid values are from 1 to 100 percent.
interval seconds Specifies the time in seconds between notifications; valid values are greater than or equal to 120 seconds.
Release Modification
12.2(18)SXE Support for this command was introduced on the Supervisor Engine 720.
12.2(33)SRA This command was integrated into Cisco IOS Release 12.2(33)SRA.
mac-address-table notification threshold
LSW-78Cisco IOS LAN Switching Command Reference
November 2010
This example shows how to disable CAM table usage monitoring notification:
Router(config)# no mac-address-table notification thresholdRouter(config)#
Related Commands Command Description
show mac-address-table notification threshold
Displays information about the MAC-address table.
mac-address-table secure
LSW-79Cisco IOS LAN Switching Command Reference
November 2010
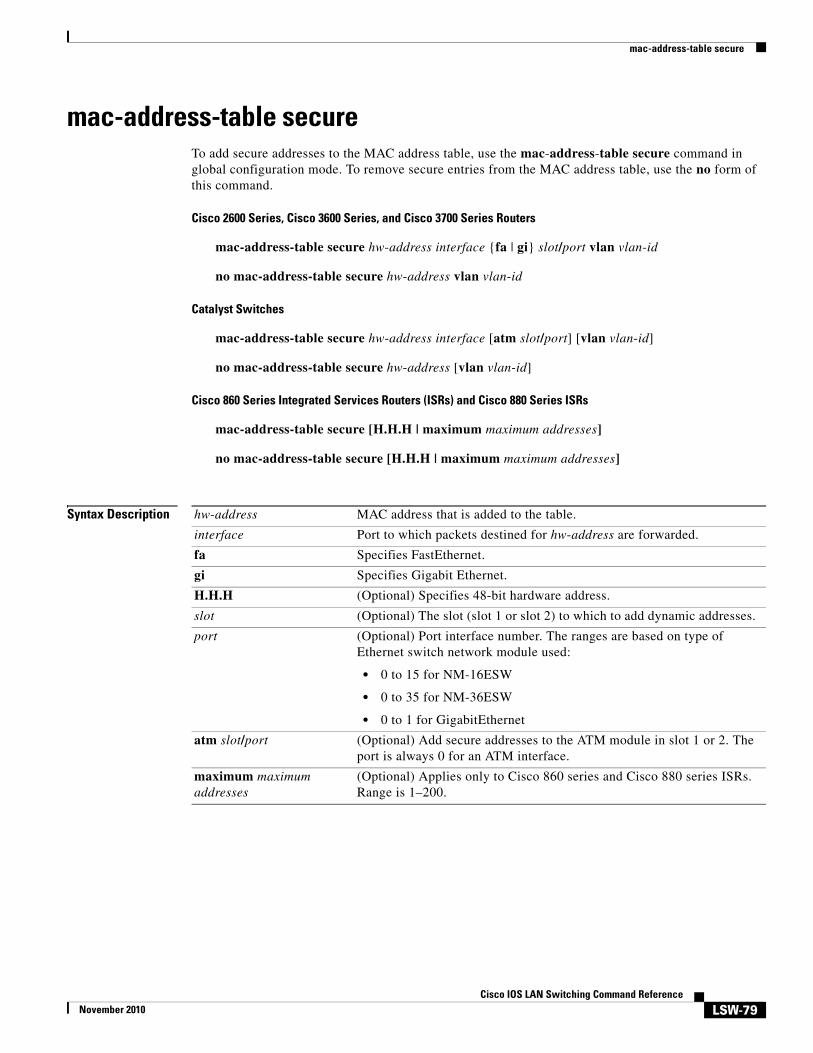
mac-address-table secureTo add secure addresses to the MAC address table, use the mac-address-table secure command in global configuration mode. To remove secure entries from the MAC address table, use the no form of this command.
Cisco 2600 Series, Cisco 3600 Series, and Cisco 3700 Series Routers
mac-address-table secure hw-address interface {fa | gi} slot/port vlan vlan-id
no mac-address-table secure hw-address vlan vlan-id
Catalyst Switches
mac-address-table secure hw-address interface [atm slot/port] [vlan vlan-id]
no mac-address-table secure hw-address [vlan vlan-id]
Cisco 860 Series Integrated Services Routers (ISRs) and Cisco 880 Series ISRs
mac-address-table secure [H.H.H | maximum maximum addresses]
no mac-address-table secure [H.H.H | maximum maximum addresses]
Syntax Description hw-address MAC address that is added to the table.
interface Port to which packets destined for hw-address are forwarded.
fa Specifies FastEthernet.
gi Specifies Gigabit Ethernet.
H.H.H (Optional) Specifies 48-bit hardware address.
slot (Optional) The slot (slot 1 or slot 2) to which to add dynamic addresses.
port (Optional) Port interface number. The ranges are based on type of Ethernet switch network module used:
• 0 to 15 for NM-16ESW
• 0 to 35 for NM-36ESW
• 0 to 1 for GigabitEthernet
atm slot/port (Optional) Add secure addresses to the ATM module in slot 1 or 2. The port is always 0 for an ATM interface.
maximum maximum addresses
(Optional) Applies only to Cisco 860 series and Cisco 880 series ISRs. Range is 1–200.
mac-address-table secure
LSW-80Cisco IOS LAN Switching Command Reference
November 2010
Command Default Secure addresses are not added to the MAC address table.
Command Modes Global configuration (config)
Command History
vlan vlan-id Cisco 2600 Series, Cisco 3600 Series, and Cisco 3700 Series Routers
The interface and vlan parameters together specify a destination to which packets destined for hw-address are forwarded.
The vlan keyword is optional if the port is a static-access VLAN port. In this case, the VLAN assigned to the port is assumed to be that of the port associated with the MAC address. This keyword is required for multi-VLAN and trunk ports.
The value of vlan-id is the ID of the VLAN to which secure entries are added. Valid IDs are 1 to 1005; do not enter leading zeroes.
Catalyst Switches
(Optional) The interface and vlan parameters together specify a destination to which packets destined for hw-address are forwarded.
The vlan keyword is optional if the port is a static-access VLAN port. In this case, the VLAN assigned to the port is assumed to be that of the port associated with the MAC address. This keyword is required for multi-VLAN and trunk ports.
The value of vlan-id is the ID of the VLAN to which secure entries are added. Valid IDs are 1 to 1005; do not enter leading zeroes.
Release Modification
11.2(8)SA This command was introduced.
11.2(8)SA3 The vlan keyword was added.
11.2(8)SA5 The atm keyword was added.
12.2(2)XT This command was implemented on Cisco 2600 series, Cisco 3600 series, and Cisco 3700 series routers.
12.2(8)T This command was integrated into Cisco IOS Release 12.2(8)T, on Cisco 2600 series, Cisco 3600 series, and Cisco 3700 series routers.
12.2(11)T This command was integrated into Cisco IOS Release 12.2(11)T.
12.2(33)SRA This command was integrated into Cisco IOS Release 12.2(33)SRA.
12.2SX This command is supported in the Cisco IOS Release 12.2SX train. Support in a specific 12.2SX release of this train depends on your feature set, platform, and platform hardware.
12.4(20)T This command with the H.H.H and maximum keyword was added for Cisco Series 860 ISRs and Cisco Series 880 ISRs.
mac-address-table secure
LSW-81Cisco IOS LAN Switching Command Reference
November 2010
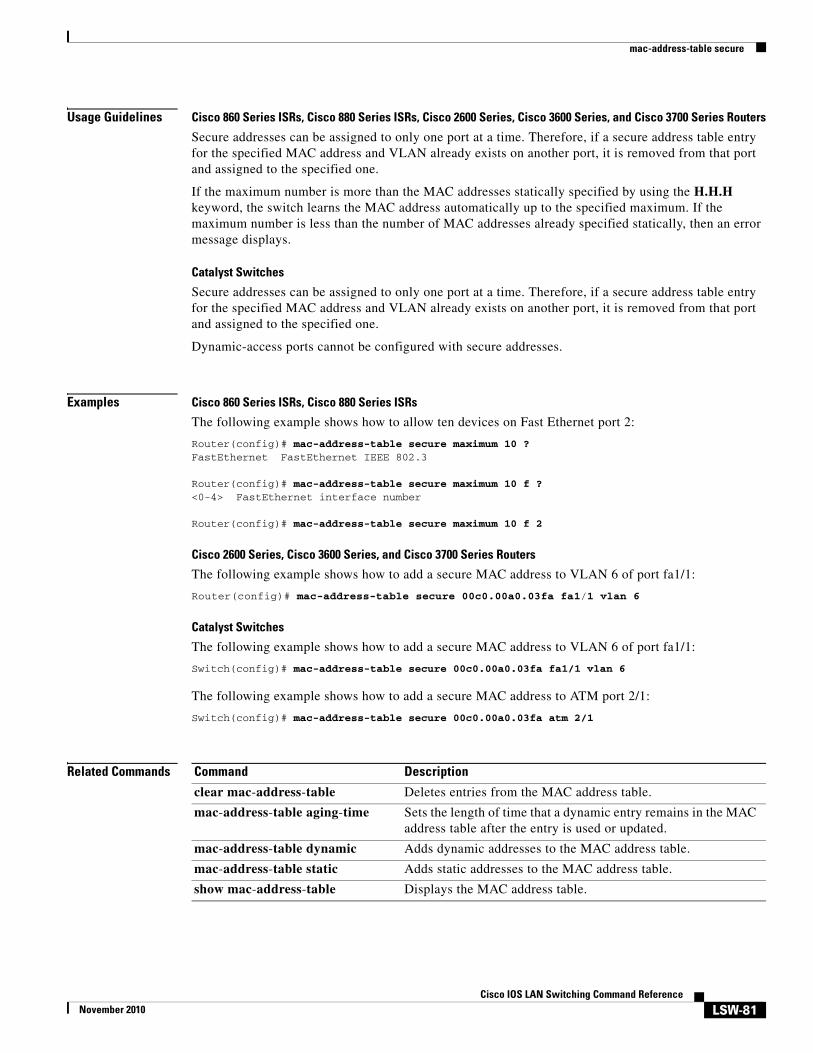
Usage Guidelines Cisco 860 Series ISRs, Cisco 880 Series ISRs, Cisco 2600 Series, Cisco 3600 Series, and Cisco 3700 Series Routers
Secure addresses can be assigned to only one port at a time. Therefore, if a secure address table entry for the specified MAC address and VLAN already exists on another port, it is removed from that port and assigned to the specified one.
If the maximum number is more than the MAC addresses statically specified by using the H.H.H keyword, the switch learns the MAC address automatically up to the specified maximum. If the maximum number is less than the number of MAC addresses already specified statically, then an error message displays.
Catalyst Switches
Secure addresses can be assigned to only one port at a time. Therefore, if a secure address table entry for the specified MAC address and VLAN already exists on another port, it is removed from that port and assigned to the specified one.
Dynamic-access ports cannot be configured with secure addresses.
Examples Cisco 860 Series ISRs, Cisco 880 Series ISRs
The following example shows how to allow ten devices on Fast Ethernet port 2:
Router(config)# mac-address-table secure maximum 10 ?FastEthernet FastEthernet IEEE 802.3
Router(config)# mac-address-table secure maximum 10 f ?<0-4> FastEthernet interface number
Router(config)# mac-address-table secure maximum 10 f 2
Cisco 2600 Series, Cisco 3600 Series, and Cisco 3700 Series Routers
The following example shows how to add a secure MAC address to VLAN 6 of port fa1/1:
Router(config)# mac-address-table secure 00c0.00a0.03fa fa1/1 vlan 6
Catalyst Switches
The following example shows how to add a secure MAC address to VLAN 6 of port fa1/1:
Switch(config)# mac-address-table secure 00c0.00a0.03fa fa1/1 vlan 6
The following example shows how to add a secure MAC address to ATM port 2/1:
Switch(config)# mac-address-table secure 00c0.00a0.03fa atm 2/1
Related Commands Command Description
clear mac-address-table Deletes entries from the MAC address table.
mac-address-table aging-time Sets the length of time that a dynamic entry remains in the MAC address table after the entry is used or updated.
mac-address-table dynamic Adds dynamic addresses to the MAC address table.
mac-address-table static Adds static addresses to the MAC address table.
show mac-address-table Displays the MAC address table.
mac-address-table static
LSW-82Cisco IOS LAN Switching Command Reference
November 2010
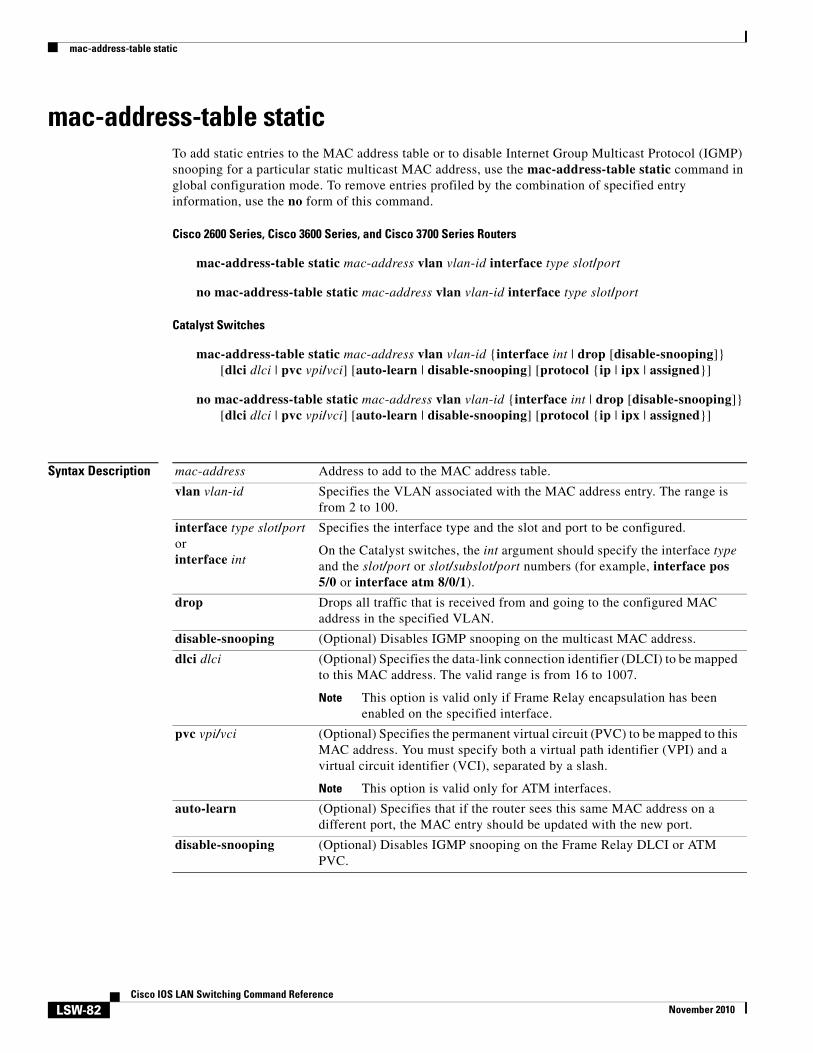
mac-address-table staticTo add static entries to the MAC address table or to disable Internet Group Multicast Protocol (IGMP) snooping for a particular static multicast MAC address, use the mac-address-table static command in global configuration mode. To remove entries profiled by the combination of specified entry information, use the no form of this command.
Cisco 2600 Series, Cisco 3600 Series, and Cisco 3700 Series Routers
mac-address-table static mac-address vlan vlan-id interface type slot/port
no mac-address-table static mac-address vlan vlan-id interface type slot/port
Catalyst Switches
mac-address-table static mac-address vlan vlan-id {interface int | drop [disable-snooping]} [dlci dlci | pvc vpi/vci] [auto-learn | disable-snooping] [protocol {ip | ipx | assigned}]
no mac-address-table static mac-address vlan vlan-id {interface int | drop [disable-snooping]} [dlci dlci | pvc vpi/vci] [auto-learn | disable-snooping] [protocol {ip | ipx | assigned}]
Syntax Description mac-address Address to add to the MAC address table.
vlan vlan-id Specifies the VLAN associated with the MAC address entry. The range is from 2 to 100.
interface type slot/portorinterface int
Specifies the interface type and the slot and port to be configured.
On the Catalyst switches, the int argument should specify the interface type and the slot/port or slot/subslot/port numbers (for example, interface pos 5/0 or interface atm 8/0/1).
drop Drops all traffic that is received from and going to the configured MAC address in the specified VLAN.
disable-snooping (Optional) Disables IGMP snooping on the multicast MAC address.
dlci dlci (Optional) Specifies the data-link connection identifier (DLCI) to be mapped to this MAC address. The valid range is from 16 to 1007.
Note This option is valid only if Frame Relay encapsulation has been enabled on the specified interface.
pvc vpi/vci (Optional) Specifies the permanent virtual circuit (PVC) to be mapped to this MAC address. You must specify both a virtual path identifier (VPI) and a virtual circuit identifier (VCI), separated by a slash.
Note This option is valid only for ATM interfaces.
auto-learn (Optional) Specifies that if the router sees this same MAC address on a different port, the MAC entry should be updated with the new port.
disable-snooping (Optional) Disables IGMP snooping on the Frame Relay DLCI or ATM PVC.

mac-address-table static
LSW-83Cisco IOS LAN Switching Command Reference
November 2010
Command Default Static entries are not added to the MAC address table.
Command Modes Global configuration (config)
Command History
Usage Guidelines Cisco 2600 Series, Cisco 3600 Series, and Cisco 3700 Series Routers
The output interface specified cannot be a switched virtual interface (SVI).
Entering the no form of this command does not remove system MAC addresses.
When you remove a MAC address, entering the interface type slot/port argument is optional. For unicast entries, the entry is removed automatically. For multicast entries, if you do not specify an interface, the entire entry is removed. You can specify the selected ports to be removed by specifying the interface.
Catalyst Switches
The output interface specified cannot be an SVI.
protocol (Optional) Specifies the protocol associated with the entry.
ip (Optional) Specifies the IP protocol.
ipx (Optional) Specifies the Internetwork Packet Exchange (IPX) protocol.
assigned (Optional) Specifies assigned protocol bucket accounts for protocols such as DECnet, Banyan VINES, and AppleTalk.
Release Modification
12.0(7)XE This command was introduced on Catalyst 6000 series switches.
12.1(1)E Support for this command on Catalyst 6000 series switches was extended to the 12.1E train.
12.1(5c)EX This command was changed to support multicast addresses.
12.2(2)XT This command was implemented on Cisco 2600 series, Cisco 3600 series, and Cisco 3700 series routers.
12.2(8)T This command was integrated into Cisco IOS Release 12.2(8)T on Cisco 2600 series, Cisco 3600 series, and Cisco 3700 series routers.
12.2(14)SX Support for this command was introduced on the Supervisor Engine 720.
12.2(17a)SX You cannot apply the mac-address-table static mac-addr vlan vlan-id drop command to a multicast MAC address.
12.2(17d)SXB Support for this command on the Supervisor Engine 2 was extended to Cisco IOS Release 12.2(17d)SXB.
12.2(18)SXE The dlci and pvc options were added to allow mapping a MAC address to a Frame Relay data-link connection identifier (DLCI) or ATM permanent virtual circuit (PVC).
12.2(33)SRA This command was integrated into Cisco IOS Release 12.2(33)SRA.
12.2(33)SRC This command was modified. Support was added to High-Speed Serial Interface (HSSI), MLPP, and serial interfaces on Cisco 7600 series routers.
mac-address-table static
LSW-84Cisco IOS LAN Switching Command Reference
November 2010
As a good practice, configure static MAC addresses on Layer 2 EtherChannels only and not on Layer 2 physical member ports of an EtherChannel. This practice does not apply to Layer 3 EtherChannels and its members.
Use the no form of this command to do the following:
• Remove entries that are profiled by the combination of specified entry information.
• Re-enable IGMP snooping for the specified address.
The dlci dlci keyword and argument are valid only if Frame Relay encapsulation has been enabled on the specified interface.
The pvc vpi/vci keyword and arguments are supported on ATM interfaces only. When specifying the pvc vpi/vci, you must specify both a VPI and a VCI, separated by a slash.
When you install a static MAC address, it is associated with a port. If the same MAC address is seen on a different port, the entry is updated with the new port if you enter the auto-learn keyword.
The output interface specified must be a Layer 2 IDB and not an SVI.
The ipx keyword is not supported.
You can enter up to 15 interfaces per command entered, but you can enter more interfaces by repeating the command.
If you do not enter a protocol type, an entry is automatically created for each of the protocol types.
Entering the no form of this command does not remove system MAC addresses.
When you remove a MAC address, entering interface int is optional. For unicast entries, the entry is removed automatically. For multicast entries, if you do not specify an interface, the entire entry is removed. You can specify the selected ports to be removed by specifying the interface.
The mac-address-table static mac-address vlan vlan-id interface int disable-snooping command disables snooping on the specified static MAC address/VLAN pair only. To re-enable snooping, first you must delete the MAC address using the no form of the command, and then you must reinstall the MAC address using the mac-address-table static mac-address vlan vlan-id interface int command, without entering the disable-snooping keyword.
The mac-address-table static mac-address vlan vlan-id drop command cannot be applied to a multicast MAC address.
Note Both the unicast MAC addresses and the multicast MAC addresses allow only one WAN interface.
Specifying a MAC Address for DLCI or PVC Circuits
To support multipoint bridging and other features, the behavior of the following command has changed for ATM and Frame Relay interfaces in Cisco IOS Release 12.2(18)SXE and later releases. In previous releases, you needed to specify a VLAN ID and an interface only.
Router(config)# mac-address-table static 000C.0203.0405 vlan 101 interface ATM6/1
In Cisco IOS Release 12.2(18)SXE, you must also specify the dlci option for Frame Relay interfaces, or the pvc option for ATM interfaces, such as in the following example:
Router(config)# mac-address-table static 000C.0203.0405 vlan 101 interface ATM6/1 pvc6/101
mac-address-table static
LSW-85Cisco IOS LAN Switching Command Reference
November 2010
Note If you omit the dlci option for Frame Relay interfaces, the MAC address is mapped to the first DLCI circuit that is configured for the specified VLAN on that interface. Similarly, if you omit the pvc option for ATM interfaces, the MAC address is mapped to the first PVC that is configured for the specified VLAN on that interface. To ensure that the MAC address is configured correctly, we recommend always using the dlci and pvc keywords on the appropriate interfaces.
Examples The following example shows how to add static entries to the MAC address table:
Router(config)# mac-address-table static 0050.3e8d.6400 vlan 100 interface fastethernet5/7
The following example shows how to configure a static MAC address with IGMP snooping disabled for a specified address:
Router(config)# mac-address-table static 0050.3e8d.6400 vlan 100 interface fastethernet5/7 disable-snooping
The following example shows how to add static entries to the MAC address table for an ATM PVC circuit and for a Frame Relay DLCI circuit:
Router(config)# mac-address-table static 0C01.0203.0405 vlan 101 interface ATM6/1 pvc 6/101 Router(config)# mac-address-table static 0C01.0203.0406 vlan 202 interface POS4/2 dlci 200
Related Commands Command Description
show mac-address-table address Displays MAC address table information for a specific MAC address.
mac-address-table synchronize
LSW-86Cisco IOS LAN Switching Command Reference
November 2010
mac-address-table synchronizeTo synchronize the Layer 2 MAC address table entries across the Policy Feature Card (PFC) and all the Distributed Forwarding Cards (DFCs), use the mac-address-table synchronize command in global configuration mode. To disable MAC address table synchronization or reset the activity timer, use the no form of this command.
mac-address-table synchronize [activity-time seconds]
no mac-address-table synchronize [activity-time seconds]
Syntax Description
Defaults The default settings are as follows:
• Layer 2 MAC address table entries are not synchronized by default.
• Enabled for WS-X6708-10GE.
• If the command is enabled, the value of the activity-time keyword is 160 seconds.
Command Modes Global configuration (config)
Command History
Usage Guidelines We recommend that you configure the activity time so that at least two activity times exist within the regular Layer 2 aging time (or within the aging time used for VLANs in distributed EtherChannels if this feature is used only for distributed EtherChannels). If at least two activity times do not exist within the aging time, then an error message is displayed.
Examples This example shows how to specify the activity timer interval :
Router(config)# mac-address-table synchronization activity time 160Router(config)#
activity-time seconds (Optional) Specifies the activity timer interval: valid values are 160, 320, and 640 seconds.
Release Modification
12.2(18)SXF This command was introduced on the Supervisor Engine 720.
12.2(18)SXF5 The default for this command was changed to enabled for the WS-X6708-10GE.
12.2(33)SRA This command was integrated into Cisco IOS Release 12.2(33)SRA.
12.2(33)SXI The output for this command was updated.
mac-address-table synchronize
LSW-87Cisco IOS LAN Switching Command Reference
November 2010
This example shows how to specify the activity timer interval when Out-of-Band (OOB) synchronization is enabled:
Router(config)# mac-address-table synchronization activity time 160% Current OOB activity time is [160] seconds% Recommended aging time for all vlans is atleast three times the activity interval and global aging time will be changed automatically if required
Router(config)#
This example shows how to display the timer interval:
Router(config)# mac-address-table synchronizationRouter(config)#
This example shows how to display the timer interval when OOB synchronization is enabled:
Router(config)# mac-address-table synchronization % Current OOB activity time is [160] seconds % Recommended aging time for all vlans is atleast three times the activity interval Router(config)#
Related Commandsa Command Description
show mac-address-table synchronize statistics
Displays information about the MAC address table.
mac-address-table unicast-flood
LSW-88Cisco IOS LAN Switching Command Reference
November 2010
mac-address-table unicast-floodTo enable unicast-flood protection, use the mac-address-table unicast-flood command in global configuration mode. To disable unicast-flood protection, use the no form of this command.
mac-address-table unicast-flood limit kfps vlan vlan-id {filter minutes | alert | shutdown}
no mac-address-table unicast-flood limit kfps vlan vlan
Syntax Description
Defaults Unicast-flood protection is not enabled.
Command Modes Global configuration (config)
Command History
Usage Guidelines This command is supported on Cisco 7600 series routers that are configured with a Supervisor Engine 2 only.
We recommend that you configure unicast-flood protection as follows:
• Set the limit kfps argument to 10 Kfps.
• Set the filter minutes argument to 5 minutes.
The shutdown keyword is supported on nontrunk ports only.
If you specify alert and unknown unicast floods exceeding the threshold are detected, a system message is displayed and no further action is taken.
If you specify shutdown and unknown unicast floods exceeding the threshold are detected, a system message is displayed. Once the system message is displayed, the port goes to err-disable mode.
limit kfps Limits the unicast floods on a per-source MAC address and per-VLAN basis; valid values are from 1 to 4000 thousand floods per second (Kfps).
vlan vlan-id Specifies the VLAN to apply the flood limit; valid values are from 1 to 4094.
filter minutes Specifies how long in minutes to filter unicast floods; valid values are from 1 to 34560 minutes.
alert Specifies when frames of unicast floods exceed the flood rate limit to send an alert.
shutdown Specifies when frames of unicast floods exceed the flood rate limit to shut down the ingress port generating the floods.
Release Modification
12.2(17d)SXB Support for this command on the Supervisor Engine 2 was extended to Release 12.2(17d)SXB.
12.2(33)SRA This command was integrated into Cisco IOS Release 12.2(33)SRA.
mac-address-table unicast-flood
LSW-89Cisco IOS LAN Switching Command Reference
November 2010
Examples This example shows how to set the flood rate limit to 3000 floods per second (fps) and display a system message when the rate limit has been exceeded:
Router(config)# mac-address-table unicast-flood limit 3 vlan 125 alertRouter(config)#
Related Commands Command Description
show mac-address-table unicast-flood Displays information about the MAC-address table.
match (VLAN access-map)
LSW-90Cisco IOS LAN Switching Command Reference
November 2010
match (VLAN access-map)To specify the match clause by selecting one or more IP, Internetwork Packet Exchange (IPX), or MAC access control lists (ACLs) for a VLAN access-map sequence for traffic filtering, use the match command in VLAN access-map configuration mode. To remove the match clause, use the no form of this command.
match {ip address {acl-number | acl-name} | ipx address {acl-number | acl-name} | mac address acl-name}
no match {ip address {acl-number | acl-name} | ipx address {acl-number | acl-name} | mac address acl-name}
Syntax Description
Defaults No match clause is specified.
Command Modes VLAN access-map configuration (config-access-map)
Command History
Usage Guidelines The match ipx address and match mac address commands are not supported for VLAN ACLs (VACLs) on WAN interfaces.
IPX ACLs that are used in VACLs can specify only the IPX protocol type, the source network, the destination network, and the destination host address.
The MAC sequence is not effective for IP or IPX packets. IP packets and IPX packets should be access controlled by IP and IPX match clauses.
You cannot configure VACLs on secondary VLANs. The secondary VLAN inherits all features that are configured on the primary VLAN.
ip address acl-number Selects one or more IP ACLs for a VLAN access-map sequence; valid values are from 1 to 199 and from 1300 to 2699.
ip address acl-name Selects an IP ACL by name.
ipx address acl-number Selects one or more IPX ACLs for a VLAN access-map sequence; valid values are from 800 to 999.
ipx address acl-name Selects an IPX ACL by name.
mac address acl-name Selects one or more MAC ACLs for a VLAN access-map sequence.
Release Modification
12.1(8a)E3 This command was introduced on the Cisco 7600 series routers.
12.2(14)SX This command was implemented on the Supervisor Engine 720.
12.2(17d)SXB This command was implemented on the Supervisor Engine 2.
12.2(33)SRA This command was integrated into Cisco IOS Release 12.2(33)SRA.
match (VLAN access-map)
LSW-91Cisco IOS LAN Switching Command Reference
November 2010
The following commands appear in the command-line interface (CLI) help but are not supported by the quality of service (QoS) as implemented on the policy feature card (PFC):
• match any
• match class-map
• match cos
• match destination-address mac
• match input-interface
• match mpls experimental
• match mpls experimental topmost
• match mpls-label
• match qos-group
• match source-address mac
Examples The following example defines a match clause for a VLAN access map:
Router(config)# vlan access-map map1 10Router(config-access-map)# match ip address 13
Related Commands Command Description
action Sets the packet action clause.
match any Configures the match criteria for a class map to be successful match criteria for all packets.
match class-map Configures a traffic class as a classification policy.
match cos Configures the device to match a packet based on a Layer 2 CoS marking.
match destination-address mac
Configures the destination MAC address as a match criterion.
match input-interface Configures a class map to use the specified input interface as a match criterion.
match mpls experimental
Configures a class map to use the specified value of the EXP field as a match criterion.
match mpls experimental topmost
Configures a class map to use the EXP value in the topmost label as a match criterion.
match mpls-label Redistributes routes that include MPLS labels if the routes meet the conditions specified in the route map.
match protocol Configures the match criteria for a class map on the basis of the specified protocol.
match qos-group Configures a specific QoS group value as a match criterion.
match source-address mac
Configures the source MAC address as a match criterion.
port access-map Creates a port access map or enters port access-map command mode.
match (VLAN access-map)
LSW-92Cisco IOS LAN Switching Command Reference
November 2010
show vlan access-map Displays the contents of a VLAN access map.
vlan access-map Creates a VLAN access map or enters VLAN access-map configuration mode.
Command Description
mls rp ip
LSW-93Cisco IOS LAN Switching Command Reference
November 2010
mls rp ipTo enable the Multilayer Switching Protocol (MLSP) and multilayer switching (MLS), use the mls rp ip command in global configuration mode. To disable MLS, use the no form of this command.
mls rp ip
no mls rp ip
Syntax Description This command has no arguments or keywords.
Command Default MLS is disabled.
Command Modes Global configuration (config)
Command History
Usage Guidelines Use this command to enable MLS, either globally or on a specific interface. MLSP is the protocol that runs between the switches and routers.
Examples The following example enables MLS:
Router(config)# mls rp ip
Related Commands
Release Modification
11.3(3) WA4(4) This command was introduced.
12.2(33)SRA This command was integrated into Cisco IOS Release 12.2(33)SRA.
12.2SX This command is supported in the Cisco IOS Release 12.2SX train. Support in a specific 12.2SX release of this train depends on your feature set, platform, and platform hardware.
Command Description
mls rp management-interface
Designates an interface as the management interface for MLSP packets.
mls rp nde-address Specifies a NetFlow Data Export address.
mls rp vlan-id Assigns a VLAN ID.
mls rp vtp-domain Selects the router interface to be Layer 3 switched and then adds that interface to a Virtual Trunking Protocol (VTP) domain.
show mls rp Displays MLS details, including specifics for MLSP.
show mls rp vtp-domain Displays MLS interfaces for a specific VTP domain.
mls rp ip (global)
LSW-94Cisco IOS LAN Switching Command Reference
November 2010
mls rp ip (global)To enable external systems to establish IP shortcuts to the Multilayer Switching Feature Card (MSFC), use the mls rp ip command in global configuration mode. To remove a prior entry, use the no form of this command.
mls rp ip [input-acl | route-map]
no mls rp ip
Syntax Description
Defaults No shortcuts are configured.
Command Modes Global configuration (config)
Command History
Examples This example shows how to allow the external systems to establish IP shortcuts with IP-input access lists:
Router(config)# mls rp ip input-aclRouter(config)#
Related Commands
input-acl (Optional) Enables the IP-input access list.
route-map (Optional) Enables the IP-route map.
Release Modification
12.2(14)SX Support for this command was introduced on the Supervisor Engine 720.
12.2(17d)SXB Support for this command on the Supervisor Engine 2 was extended to Release 12.2(17d)SXB.
12.2(33)SRA This command was integrated into Cisco IOS Release 12.2(33)SRA.
Command Description
mls ip Enables MLS IP for the internal router on the interface.
show mls ip multicast Displays the MLS IP information.
mls rp ip (interface)
LSW-95Cisco IOS LAN Switching Command Reference
November 2010
mls rp ip (interface)To enable the external systems to enable Multilayer Switching (MLS) IP on a specified interface, use the mls rp ip command in interface configuration mode. To disable MLS IP, use the no form of this command.
mls rp ip
no mls rp ip
Syntax Description This command has no arguments or keywords.
Defaults This command has no default settings.
Command Modes Interface configuration (config-if)
Command History
Examples This example shows how to enable the external systems to enable MLS IP on an interface:
Router(config-if)# mls rp ipRouter(config-if)
Related Commands
Release Modification
12.2(14)SX Support for this command was introduced on the Supervisor Engine 720.
12.2(17d)SXB Support for this command on the Supervisor Engine 2 was extended to Release 12.2(17d)SXB.
12.2(33)SRA This command was integrated into Cisco IOS Release 12.2(33)SRA.
Command Description
mls rp ip (global) Enables external systems to establish IP shortcuts to the MSFC.
show mls ip multicast Displays the MLS IP information.
mls rp ip multicast
LSW-96Cisco IOS LAN Switching Command Reference
November 2010
mls rp ip multicastTo enable IP multicast multilayer switching (MLS) (hardware switching) on an external or internal router in conjunction with Layer 3 switching hardware for the Catalyst 5000 switch, use the mls rp ip multicast command in interface configuration mode. To disable IP multicast MLS on the interface or VLAN, use the no form of this command.
mls rp ip multicast
no mls rp ip multicast
Syntax Description This command has no arguments or keywords.
Command Default IP multicast MLS is enabled.
Command Modes Interface configuration (config-if)
Command History
Usage Guidelines This command is available only on specific router platforms connected to a Catalyst 5000 switch. Use this command to reduce multicast load on the router. The switch performs the multicast packet replication and forwarding.
IP multicast MLS is enabled by default on an interface after IP multicast routing and Protocol Independent Multicast (PIM) are enabled.
Examples The following example shows how to disable IP multicast MLS:
Router(config)# interface fastethernet1/0.1Router(config-if)# no mls rp ip multicast
Related Commands
Release Modification
12.0(5)T This command was introduced.
12.2(33)SRA This command was integrated into Cisco IOS Release 12.2(33)SRA.
12.2SX This command is supported in the Cisco IOS Release 12.2SX train. Support in a specific 12.2SX release of this train depends on your feature set, platform, and platform hardware.
Command Description
mls rp ip multicast management-interface
Assigns a different interface (other than the default) to act as the management interface for MLSP.
show ip mroute Displays the contents of the IP multicast routing table.
show mls rp interface Displays hardware-switched multicast flow information about IP multicast MLS.
mls rp ip multicast management-interface
LSW-97Cisco IOS LAN Switching Command Reference
November 2010
mls rp ip multicast management-interfaceTo assign a different interface (other than the default) to act as the management interface for Multilayer Switching (MLS), use the mls rp ip multicast management-interface command in interface configuration mode. To restore the default interface as the management interface, use the no form of this command.
mls rp ip multicast management-interface
no mls rp ip multicast management-interface
Syntax Description This command has no arguments or keywords.
Command Default When IP multicast MLS is enabled, the subinterface (or VLAN interface) that has the lowest VLAN ID and is active (in the “up” state) is automatically selected as the management interface.
Command Modes Interface configuration (config-if)
Command History
Usage Guidelines When you enable IP multicast MLS, the subinterface (or VLAN interface) that has the lowest VLAN ID and is active (in the “up” state) is automatically selected as the management interface. The one-hop protocol Multilayer Switching Protocol (MLSP) is used between a router and a switch to pass messages about hardware-switched flows. MLSP packets are sent and received on the management interface. Typically, the interface in VLAN 1 is chosen (if that interface exists). Only one management interface is allowed on a single trunk link.
In most cases, we recommend that the management interface be determined by default. However, you can optionally use this command to specify a different router interface or subinterface as the management interface. We recommend using a subinterface with minimal data traffic so that multicast MLSP packets can be sent and received more quickly.
If the user-configured management interface goes down, the router uses the default interface (the active interface with the lowest VLAN ID) until the user-configured interface comes up again.
Examples The following example shows how to configure the Fast Ethernet interface as the management interface:
Router(config)# interface fastethernet1/0.1Router(config-if)# mls rp ip multicast management-interface
Release Modification
12.0(5)T This command was introduced.
12.2(33)SRA This command was integrated into Cisco IOS Release 12.2(33)SRA.
12.2SX This command is supported in the Cisco IOS Release 12.2SX train. Support in a specific 12.2SX release of this train depends on your feature set, platform, and platform hardware.
mls rp ip multicast management-interface
LSW-98Cisco IOS LAN Switching Command Reference
November 2010
Related Commands Command Description
mls rp ip multicast Enables IP multicast MLS (hardware switching) on an external or internal router in conjunction with Layer 3 switching hardware for the Catalyst 5000 switch.
mls rp ipx (global)
LSW-99Cisco IOS LAN Switching Command Reference
November 2010
mls rp ipx (global)To enable the router as a multilayer switching (MLS) IPX Route Processor (RP), or to allow the external systems to enable MLS IPX to a Multilayer Switch Feature Card (MSFC), use the mls rp ipx command in global configuration mode. To disable MLS IPX on the router or MSFC, use the no form of this command.
mls rp ipx [input-acl]
no mls rp ipx [input-acl]
Syntax Description
Command Default MLS IPX is disabled.
Command Modes Global configuration (config)
Command History
Usage Guidelines Multilayer Switching Protocol (MLSP) is the protocol that runs between the MLS switching engine and the MLS RP.
This command is not supported on Cisco 7600 series routers that are configured with a Supervisor Engine 720.
Examples The following example enables MLS IPX on the MLS RP:
Router(config)# mls rp ipx
This example shows how to allow the external systems to enable MLS IPX to the MSFC and override ACLs:
Router(config)# mls rp ipx input-aclRouter(config)#
input-acl (Optional for Cisco 7600 series only) Enables MLS IPX and overrides ACLs.
Release Modification
12.0(5)T This command was introduced.
12.2(17d)SXB This command was integrated into Cisco IOS 12.2(17d)SXB and introduced on the Supervisor Engine 2.
12.2(33)SRA This command was integrated into Cisco IOS Release 12.2(33)SRA.

mls rp ipx (global)
LSW-100Cisco IOS LAN Switching Command Reference
November 2010
Related Commands Command Description
mls rp ipx (interface) Enables MLS IPX on a router interface.
mls rp locate ipx Displays information about all switches currently shortcutting for the specified IPX flows.
mls rp management-interface
Designates an interface as the management interface for MLSP packets.
mls rp vlan-id Assigns a VLAN identification number to an MLS IPX interface.
mls rp vtp-domain Assigns an MLS interface to a specific VTP domain on the MLS RP.
show mls rp interface Displays MLS IPX details for the RP, including specific information about the MLSP.
show mls rp ipx Displays details for all MLS IPX interfaces on the MLS IPX router.
show mls rp vtp-domain
Displays MLS IPX interfaces for a specific VTP domain on the RP.
mls rp ipx (interface)
LSW-101Cisco IOS LAN Switching Command Reference
November 2010
mls rp ipx (interface)To enable multilayer switching (MLS) Internetwork Packet Exchange (IPX) on a router interface, use the mls rp ipx command in interface configuration mode. To disable MLS IPX on a router interface, use the no form of this command.
mls rp ipx
no mls rp ipx
Syntax Description This command has no arguments or keywords.
Command Default MLS IPX is disabled.
Command Modes Interface configuration (config-if)
Command History
Usage Guidelines Multilayer Switching Protocol (MLSP) is the protocol that runs between the MLS Switching Engine and the MLS RP.
This command is not supported on Cisco 7600 series routers that are configured with a Supervisor Engine 720.
Examples The following example shows how to enable MLS IPX on a router interface:
Router(config-if)# mls rp ipx
Release Modification
12.0(5)T This command was introduced.
12.2(17d)SXB This command was integrated into Cisco IOS 12.2(17d)SXB and introduced on the Supervisor Engine 2.
12.2(33)SRA This command was integrated into Cisco IOS Release 12.2(33)SRA.
mls rp ipx (interface)
LSW-102Cisco IOS LAN Switching Command Reference
November 2010
Related Commands Command Description
mls rp ipx (global) Enables the router as an MLS IPX RP, or allows the external systems to enable MLS IPX to an MSFC.
mls rp locate ipx Displays information about all switches currently shortcutting for the specified IPX flows.
mls rp management-interface
Designates an interface as the management interface for MLSP packets.
mls rp vlan-id Assigns a VLAN identification number to an MLS IPX interface.
mls rp vtp-domain Assigns an MLS interface to a specific VTP domain on the MLS RP.
show mls rp interface Displays MLS IPX details for the RP, including specific information about the MLSP.
show mls rp ipx Displays details for all MLS IPX interfaces on the MLS IPX router.
show mls rp vtp-domain Displays MLS IPX interfaces for a specific VTP domain on the RP.
mls rp locate ipx
LSW-103Cisco IOS LAN Switching Command Reference
November 2010
mls rp locate ipxTo display information about all switches currently shortcutting for the specified Internetwork Packet Exchange (IPX) flows, use the mls rp locate ipx command in privileged EXEC mode.
mls rp locate ipx destination-network.destination-node [source-network]
Syntax Description
Command Modes Privileged EXEC (#)
Command History
Examples The following example shows how to display the switch that is shortcutting routed flows to the specified IPX flow:
Router# mls rp locate ipx 30.0000.1111.2222
locator response from switch id 0010.1400.601f
Related Commands
destination-network.destination-node The destination network and destination node of IPX packet flows. The destination network address consists of 1 to 8 hexadecimal numbers in the format xxxxxxxx. The destination node address consists of 12 hexadecimal numbers in the format xxxx.xxxx.xxxx.
source-network (Optional) The source network of the IPX flow. The address of the source network consists of 1 to 8 hexadecimal numbers in the format yyyyyyyy.
Release Modification
12.0(5)T This command was introduced.
12.2(33)SRA This command was integrated into Cisco IOS Release 12.2(33)SRA.
12.2SX This command is supported in the Cisco IOS Release 12.2SX train. Support in a specific 12.2SX release of this train depends on your feature set, platform, and platform hardware.
Command Description
mls rp ipx (global) Enables the router as an IPX MLS RP.
mls rp management-interface
Designates an interface as the management interface for MLSP packets.
mls rp vlan-id Assigns a VLAN identification number to an IPX MLS interface.
mls rp vtp-domain Assigns an MLS interface to a specific VTP domain on the MLS RP.
show mls rp interface Displays IPX MLS details for the RP, including specific information about the MLSP.
show mls rp ipx Displays details for all IPX MLS interfaces on the IPX MLS router.
show mls rp vtp-domain
Displays IPX MLS interfaces for a specific VTP domain on the RP.

mls rp management-interface
LSW-104Cisco IOS LAN Switching Command Reference
November 2010
mls rp management-interfaceTo specify an interface as the management interface, use the mls rp management-interface command in interface configuration mode. To remove an interface as the management interface, use the no form of this command.
mls rp management-interface
no mls rp management-interface
Syntax Description This command has no keywords or arguments.
Command Default No interface is specified as the management interface.
Command Modes Interface configuration (config-if)
Command History
Usage Guidelines Multilayer Switching Protocol (MLSP) packets are sent and received through the management interface.
Select only one IPX multilayer switching (MLS) interface connected to the switch. If you fail to select this interface, no connection between the MLS route processor (RP) and the MLS switching engine occurs, and any routing updates or changes to access lists are not reflected on the switch.
Examples The following example shows how to select a management interface:
Router(config-if)# mls rp management-interface
Release Modification
11.3(3)WA4(4) This command was introduced.
12.2(14)SX Support for this command was introduced on the Supervisor Engine 720.
12.2(17d)SXB Support for this command on the Supervisor Engine 2 was extended to the 12.2 SX release.
12.2(33)SRA This command was integrated into Cisco IOS Release 12.2(33)SRA.
mls rp management-interface
LSW-105Cisco IOS LAN Switching Command Reference
November 2010
Related Commands Command Description
mls rp ipx (global) Enables the router as an IPX MLS RP.
mls rp locate ipx Displays information about all switches currently shortcutting for the specified IPX flows.
mls rp vlan-id Assigns a VLAN identification number to an IPX MLS interface.
mls rp vtp-domain Assigns an MLS interface to a specific VTP domain on the MLS RP.
show mls rp interface Displays IPX MLS details for the RP, including specific information about the MLSP.
show mls rp ipx Displays details for all IPX MLS interfaces on the IPX MLS router.
show mls rp vtp-domain Displays IPX MLS interfaces for a specific VTP domain on the RP.
mls rp nde-address
LSW-106Cisco IOS LAN Switching Command Reference
November 2010
mls rp nde-addressTo specify a NetFlow Data Export (NDE) address, use the mls rp nde-address command in global configuration mode. To remove the NDE address, use the no form of this command.
mls rp nde-address [ip-addr]
no mls rp nde-address [ip-addr]
Syntax Description
Command Default No NDE address is specified.
Command Modes Global configuration (config)
Command History
Usage Guidelines Use this command on a route processor (RP) to specify the NDE address for a router. If you do not specify an NDE IP address for the multilayer switching (MLS) RP, the MLS RP automatically selects one of its interface’s IP addresses and uses that IP address as its NDE IP address and its MLS IP address.
Use the following syntax to specify an IP subnet address:
• ip-subnet-addr—Short subnet address format. The trailing decimal number 00 in an IP address YY.YY.YY.00 specifies the boundary for an IP-subnet address. For example, 172.22.36.00 indicates a 24-bit subnet address (subnet mask 172.22.36.00/255.255.255.0), and 172.24.00.00 indicates a 16-bit subnet address (subnet mask 172.24.00.00/255.255.0.0). However, this format can identify only a subnet address of 8, 16, or 24 bits.
• ip-addr/subnet-mask—Long subnet address format. For example, 172.22.252.00/255.255.252.00 indicates a 22-bit subnet address. This format can specify a subnet address of any bit number. To provide more flexibility, the ip-addr is a full host address, such as 172.22.253.1/255.255.252.00.
• ip-addr/maskbits—Simplified long subnet address format. The mask bits specify the number of bits of the network masks. For example, 172.22.252.00/22 indicates a 22-bit subnet address. The ip-addr is a full host address, such as 192.168.253.1/22, which has the same subnet address as the ip-subnet-addr.
ip-address (Optional) NDE IP address.
Release Modification
11.3(3)WA4(4) This command was introduced.
12.2(14)SX Support for this command was introduced on the Supervisor Engine 720.
12.2(17d)SXB Support for this command on the Supervisor Engine 2 was extended to the 12.2(17d)SXB release.
12.2(33)SRA This command was integrated into Cisco IOS Release 12.2(33)SRA.
mls rp nde-address
LSW-107Cisco IOS LAN Switching Command Reference
November 2010
Examples The following example shows how to set the NDE address to 172.25.2.1:
Router(config)# mls rp nde-address 172.25.2.1
Related Commands Command Description
mls rp ip Enables MLSP.
mls rp management-interface
Designates an interface as the management interface for MLSP packets.
mls rp vlan-id Assigns a VLAN ID.
mls rp vtp-domain Selects the router interface to be Layer 3 switched and then adds that interface to a VTP domain.
show mls rp Displays MLS details, including specifics for MLSP.
show mls rp vtp-domain Displays MLS interfaces for a specific VTP domain.

mls rp vlan-id
LSW-108Cisco IOS LAN Switching Command Reference
November 2010
mls rp vlan-idTo assign a VLAN identification number to an interface, use the mls rp vlan-id command in interface configuration mode. To remove a VLAN identification number, use the no form of this command.
mls rp vlan-id vlanid-number
no mls rp vlan-id vlanid-number
Syntax Description
Command Default No VLAN identification number is assigned.
Command Modes Interface configuration (config-if)
Command History
Examples The following example shows how to assign the VLAN identification number to an interface:
Router(config-if)# mls rp vlan-id 23
Related Commands
vlanid-number A VLAN identification number from 1 to 4094.
Release Modification
11.3(3)WA4(4) This command was introduced.
12.2(14)SX Support for this command was introduced on the Supervisor Engine 720.
12.2(17d)SXB Support for this command on the Supervisor Engine 2 was extended to Cisco IOS Release 12.2(17d)SXB.
12.2(33)SRA This command was integrated into Cisco IOS Release 12.2(33)SRA.
Command Description
show mls rp Displays MLS details.

mls rp vtp-domain
LSW-109Cisco IOS LAN Switching Command Reference
November 2010
mls rp vtp-domainTo assign a multilayer switching (MLS) interface to a specific Virtual Trunking Protocol (VTP) domain on the MLS Route Processor (RP), use the mls rp vtp-domain command in interface configuration mode. To remove a VTP domain, use the no form of this command.
mls rp vtp-domain domain-name
no mls rp vtp-domain domain-name
Syntax Description
Command Default The interface is assigned to the null domain.
Command Modes Interface configuration (config-if)
Command History
Usage Guidelines The assigned IPX MLS interface must be either an Ethernet interface or a Fast Ethernet interface—both without subinterfaces.
Examples The following example shows how to assign the MLS interface to the VTP domain named engineering:
Router(config-if)# mls rp vtp-domain engineering
domain-name The name of the VTP domain assigned to an MLS interface and its related switches.
Release Modification
11.3(3)WA4(4) This command was introduced.
12.2(14)SX Support for this command was introduced on the Supervisor Engine 720.
12.2(17d)SXB Support for this command on the Supervisor Engine 2 was extended to the 12.2 SX release.
12.2(33)SRA This command was integrated into Cisco IOS Release 12.2(33)SRA.
mls rp vtp-domain
LSW-110Cisco IOS LAN Switching Command Reference
November 2010
Related Commands Command Description
mls rp ipx (global) Enables the router as an IPX MLS RP.
mls rp locate ipx Displays information about all switches currently shortcutting for the specified IPX flows.
mls rp management-interface
Designates an interface as the management interface for MLSP packets.
mls rp vlan-id Assigns a VLAN identification number to an IPX MLS interface.
show mls rp interface Displays IPX MLS details for the RP, including specific information about the MLSP.
vtp Configures the global VTP state.
show mls rp ipx Displays details for all IPX MLS interfaces on the IPX MLS router.
show mls rp vtp-domain Displays IPX MLS interfaces for a specific VTP domain on the RP.
mls switching
LSW-111Cisco IOS LAN Switching Command Reference
November 2010
mls switchingTo enable the hardware switching, use the mls switching command in global configuration mode. To disable hardware switching, use the no form of this command.
mls switching
no mls switching
Syntax Description This command has no arguments or keywords.
Defaults Hardware switching is not enabled.
Command Modes Global configuration (config)
Command History
Usage Guidelines This command is not supported on Cisco 7600 series routers that are configured with a Supervisor Engine 2.
Examples This example shows how to enable the hardware switching:
Router(config)# mls switchingRouter(config)#
This example shows how to disable the hardware switching:
Router(config)# no mls switchingRouter(config)#
Related Commands
Release Modification
12.2(14)SX Support for this command was introduced on the Supervisor Engine 720.
12.2(33)SRA This command was integrated into Cisco IOS Release 12.2(33)SRA.
Command Description
mls switching unicast Enables the hardware switching of the unicast traffic for an interface.
mls switching unicast
LSW-112Cisco IOS LAN Switching Command Reference
November 2010
mls switching unicastTo enable the hardware switching of the unicast traffic for an interface, use the mls switching unicast command in interface configuration mode. To disable the hardware switching of the unicast traffic for an interface, use the no form of this command.
mls switching unicast
no mls switching unicast
Syntax Description This command has no arguments or keywords.
Defaults Hardware switching of the unicast traffic for an interface is not enabled.
Command Modes Interface configuration (config-if)
Command History
Usage Guidelines This command is not supported on Cisco 7600 series routers that are configured with a Supervisor Engine 2.
Examples This example shows how to enable the hardware switching for an interface:
Router(config-if)# mls switching unicastRouter(config-if)#
This example shows how to disable the hardware switching for an interface:
Router(config-if)# no mls switching unicastRouter(config-if)#
Related Commands
Release Modification
12.2(14)SX Support for this command was introduced on the Supervisor Engine 720.
12.2(33)SRA This command was integrated into Cisco IOS Release 12.2(33)SRA.
Command Description
mls switching Enables hardware switching.

mode dot1q-in-dot1q access-gateway
LSW-113Cisco IOS LAN Switching Command Reference
November 2010
mode dot1q-in-dot1q access-gatewayTo enable a Gigabit Ethernet WAN interface to act as a gateway for 802.1Q in 802.1Q (Q-in-Q) VLAN translation, use the mode dot1q-in-dot1q access-gateway command. To disable the Q-in-Q VLAN translation on the interface, use the no form of this command.
mode dot1q-in-dot1q access-gateway
no mode dot1q-in-dot1q access-gateway
Syntax Description This command has no arguments or keywords.
Defaults A Gigabit Ethernet WAN interface does not act as a gateway for 802.1Q in 802.1Q (Q-in-Q) VLAN translation.
Command Modes Interface configuration (config-if)
Command History
Usage Guidelines This command is supported on the Gigabit Ethernet (GE) WAN interfaces on Cisco 7600 series routers that are configured with an Optical Services Module (OSM)-2+4GE-WAN+ OSM module only.
OSMs are not supported on Cisco 7600 series routers that are configured with a Supervisor Engine 32.
802.1Q provides a trunking option that tags packets with two VLAN tags to allow multiple VLANs to be trunked together across an intermediate network. This use of a double-tagged tunnel is also referred to as Q-in-Q tunneling.
The mode dot1q-in-dot1q access-gateway command enhances Q-in-Q tunneling by tagging packets with two VLAN tags to allow multiple VLANs to be trunked together across an intermediate network. This use of double-tagged tunnels performs the following functions:
• Switches packets that are tagged with two 802.1Q VLAN tags to a destination service based on the combination of VLAN tags.
• Supports traffic shaping based on the VLAN tags.
• Copies the 802.1P prioritization bits (P bits) from the inner (customer) VLAN tag to the outer (service provider) VLAN tag.
In Cisco IOS Release 12.2(18)SXE and later releases, you can also combine multiple GE-WAN interfaces into a virtual port-channel interface to enable Q-in-Q link bundling. Combining the interfaces not only simplifies the configuration, but allows the GE-WAN OSM to load balance the provider edge
Release Modification
12.2(18)SXD Support for this command was introduced on the Supervisor Engine 720.
12.2(18)SXE Support was added for Q-in-Q link bundles using virtual port-channel interfaces.
12.2(33)SRA This command was integrated into Cisco IOS Release 12.2(33)SRA.
mode dot1q-in-dot1q access-gateway
LSW-114Cisco IOS LAN Switching Command Reference
November 2010
(PE) VLANs among the physical interfaces that are members of the bundle. Also, if one interface member of the link bundle goes down, its PE VLANs are automatically reallocated to the other members of the bundle.
Note You must remove all IP addresses that have been configured on the interface before using the mode dot1q-in-dot1q access-gateway command.
After configuring the mode dot1q-in-dot1q access-gateway command, use the bridge-domain (subinterface configuration) command to configure the VLAN mapping to be used on each subinterface.
Caution Using the mode dot1q-in-dot1q access-gateway command on an interface automatically deletes all the subinterfaces that might be configured on the interface. It also releases any internal VLANs that might have been previously used on the interface and its subinterfaces, allowing them to be reused for Q-in-Q translation. The same situation occurs when using the no form of the command, which also deletes all subinterfaces and releases any VLANs that are currently being used by the interface and subinterface. We recommend that you save the interface configuration before entering the mode dot1q-in-dot1q access-gateway command.
Note Port-channel interface counters (as shown by the show counters interface port-channel and show interface port-channel counters commands) are not supported for channel groups that are using GE-WAN interfaces for Q-in-Q link bundling. The show interface port-channel {number | number.subif} command (without the counters keyword) is supported, however.
Tip The mls qos trust command has no effect on a GE-WAN interface or port-channel group that has been configured with the mode dot1q-in-dot1q access-gateway command. These interfaces and port channels always trust the VLAN class of service (CoS) bits in this configuration.
Examples This example shows a typical configuration for the mode dot1q-in-dot1q access-gateway command:
Router# configure terminal Router(config)# interface GE-WAN 4/1 Router(config-if)# mode dot1q-in-dot1q access-gateway Router(config-if)#
This example shows the system message that appears when you try to configure the mode dot1q-in-dot1q access-gateway command without first removing the IP address configuration:
Router# configure terminal Router(config)# interface GE-WAN 3/0 Router(config-if)# mode dot1q-in-dot1q access-gateway
% interface GE-WAN3/0 has IP address 192.168.100.101 configured. Please remove the IP address before configuring 'mode dot1q-in-dot1q access-gateway' on this interface.
Router(config-if)# no ip address 192.168.100.101 255.255.255 Router(config-if)# mode dot1q-in-dot1q access-gateway Router(config-if)#

mode dot1q-in-dot1q access-gateway
LSW-115Cisco IOS LAN Switching Command Reference
November 2010
This example shows how to disable QinQ mapping on an interface by using the no form of the mode dot1q-in-dot1q access-gateway command. In addition, this command automatically removes all subinterfaces on the interface and all of the subinterface QinQ mappings (configured with the bridge-domain (subinterface configuration) command) and service policies.
Router# configure terminal Router(config)# interface GE-WAN 3/0 Router(config-if)# no mode dot1q-in-dot1q access-gateway Router(config-if)#
This example shows a virtual port-channel interface that was created and assigned with two GE-WAN interfaces. The mode dot1q-in-dot1q access-gateway command is then enabled on the port-channel interface to allow it to act as a QinQ link bundle:
Router(config)# interface port-channel 20 Router(config-if)# interface GE-WAN 3/0 Router(config-if)# port-channel 20 mode on Router(config-if)# interface GE-WAN 3/1 Router(config-if)# port-channel 20 mode on Router(config-if)# interface port-channel 20 Router(config-if)# no ip address Router(config-if)# mode dot1q-in-dot1q access-gateway Router(config-if)#
This example shows the error message that appears if you attempt to enable QinQ translation on a port-channel interface that contains one or more invalid interfaces:
Router# configure terminal Router(config)# interface port-channel 30 7600-2(config-if)# mode dot1q-in-dot1q access-gateway
% 'mode dot1q-in-dot1q access-gateway' is not supported on Port-channel30 % Port-channel30 contains 2 Layer 2 Gigabit Ethernet interface(s)
Router(config-if)#
Related Commands Command Description
bridge-domain (subinterface configuration)
Binds a PVC to the specified VLAN ID.
class-map Accesses the QoS class map configuration mode to configure QoS class maps.
policy-map Accesses QoS policy-map configuration mode to configure the QoS policy map.
service-policy Attaches a policy map to an interface.
set cos cos-inner (policy-map configuration)
Sets the 802.1Q prioritization bits in the trunk VLAN tag of a Q-in-Q-translated outgoing packet with the priority value from the inner customer-edge VLAN tag.
show cwan qinq Displays the inner, outer, and trunk VLANs that are used in Q-in-Q translation.
show cwan qinq bridge-domain
Displays the provider-edge VLAN IDs that are used on a Gigabit Ethernet WAN interface for Q-in-Q translation or to show the customer-edge VLANs that are used for a specific provider-edge VLAN.
mode dot1q-in-dot1q access-gateway
LSW-116Cisco IOS LAN Switching Command Reference
November 2010
show cwan qinq interface
Displays interface statistics for IEEE Q-in-Q translation on one or all Gigabit Ethernet WAN interfaces and port-channel interfaces.
show cwtlc qinq Displays the information that is related to Q-in-Q translation and is contained in the XCM on board the supervisor engine.
Command Description

monitor session
LSW-117Cisco IOS LAN Switching Command Reference
November 2010
monitor sessionTo start a new Switched Port Analyzer (SPAN) session or add interfaces for an existing SPAN session, use the monitor session command in global configuration mode. To remove one or more source interfaces or destination interfaces from the SPAN session or delete a SPAN session, use the no form of this command.
Source Interface
monitor session session source interface type slot/port [, | - | rx | tx | both]
no monitor session session source interface type slot/port [, | - | rx | tx | both]
Destination Interface
monitor session session destination interface type slot/port [, | -]
no monitor session session destination interface type slot/port [, | -]
Removing Session
no monitor session {session | all | capture | local | range session-range | remote}
Syntax Description session Number of the SPAN session. For Cisco 2600, 3600, and 3700 series routers, valid values are 1 and 2.
source Specifies the SPAN source interface.
destination Specifies the SPAN destination interface.
interface type slot/port Specifies the interface type and number; valid values are ethernet (1 to 9), fastethernet (1 to 9), gigabitethernet (1 to 9), and port-channel; see the “Usage Guidelines” section for more details.
slot/ (Optional) Specifies the interface number; valid entries are 1 and 2.
port (Optional) Port interface number ranges are based on the type of Ethernet switch network module used:
• 0 to 15 for NM-16ESW
• 0 to 35 for NM-36ESW
• 0 to 1 for GigabitEthernet
, (Optional) Specifies a series of SPAN VLANs.
- (Optional) Specifies a range of SPAN VLANs.
rx (Optional) Specifies monitor received traffic only.
tx (Optional) Specifies monitor transmitted traffic only.
both (Optional) Specifies monitor received and transmitted traffic.
all Specifies all sessions.
capture Specifies the Capture session.
local Specifies the local session.
range session-range Specifies the range of sessions.
remote Specifies the remote session.
monitor session
LSW-118Cisco IOS LAN Switching Command Reference
November 2010
Command Default Cisco 2600 Series, Cisco 3600 Series, and Cisco 3700 Series Routers
A trunking interface monitors all VLANs and all received and transmitted traffic.
Command Modes Global configuration (config)
Command History
Usage Guidelines Cisco 2600 Series, Cisco 3600 Series, and Cisco 3700 Series Routers
The port-channel number supports six EtherChannels and eight ports in each channel.
Only one SPAN destination for a SPAN session is supported. If you attempt to add another destination interface to a session that already has a destination interface configured, you will get an error. You must first remove a SPAN destination interface before changing the SPAN destination to a different interface.
The Supervisor Engine 720 local SPAN, RSPAN, and ERSPAN session limits are listed in Table 2.
Release Modification
12.1(3a)E3 This command was modified. The number of valid values for the port-channel number was changed; see the “Usage Guidelines” section for valid values.
12.1(5c)EX This command was modified. These SPAN support restrictions were added:
• If your switch has a Switch Fabric Module installed, SPAN is supported among supervisor engines and nonfabric-enabled modules.
• If your switch does not have a Switch Fabric Module installed, SPAN is supported on all modules, including fabric-enabled modules.
• SPAN on DFC-equipped modules is not supported.
12.2(2)XT This command was implemented on the Cisco 2600 series, Cisco 3600 series, and Cisco 3700 series routers.
12.2(8)T This command was integrated into Cisco IOS Release 12.2(8)T on the Cisco 2600 series, Cisco 3600 series, and Cisco 3700 series routers.
12.2(17a)SX Support for this command was introduced on the Supervisor Engine 720.
12.2(17b)SXA This command was modified. This command was changed to support the SSO mode and change the default mode.
12.2(17d)SXB Support for this command was introduced on the Supervisor Engine 2.
12.4(15)T This command was modified. The range of valid VLAN IDs was extended. The new range is from 1 to 4094 for specified platforms.
Table 2 Supervisor Engine 720 Local SPAN, RSPAN, and ERSPAN Session Limits
Total Sessions Local SPAN, RSPAN Source, or ERSPAN Source Sessions
RSPAN Destination Sessions
ERSPAN Destination Sessions
66 2 (ingress or egress or both) 64 23
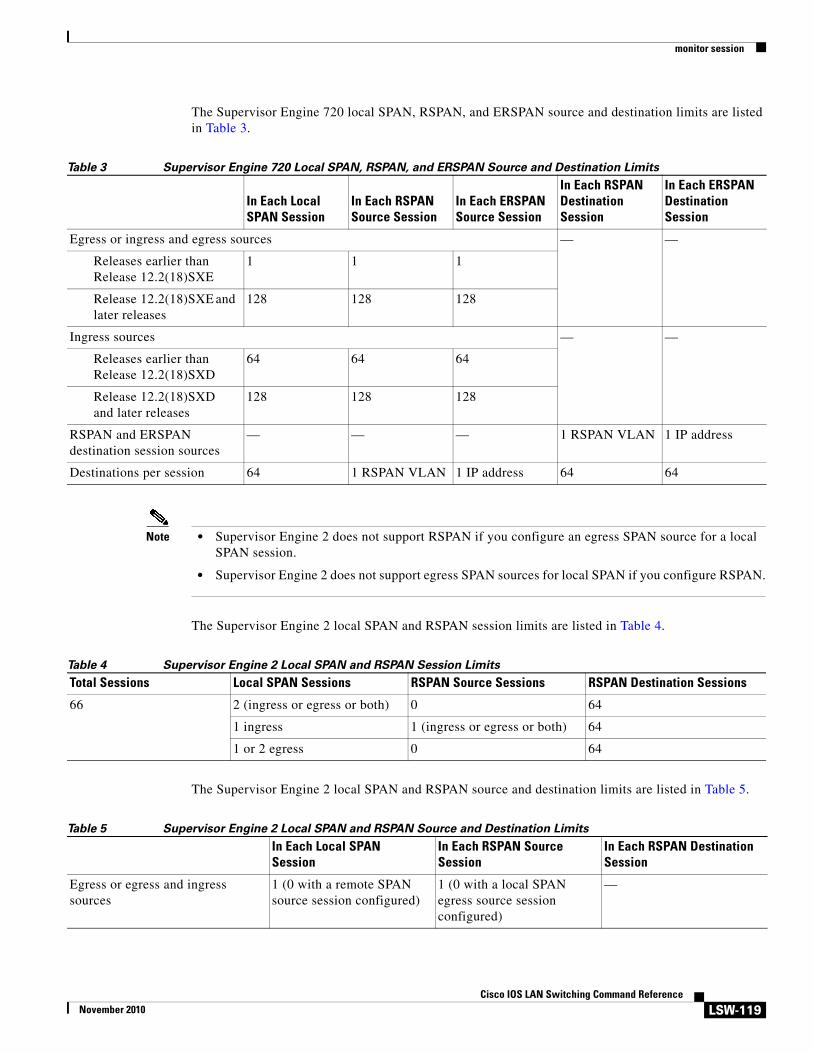
monitor session
LSW-119Cisco IOS LAN Switching Command Reference
November 2010
The Supervisor Engine 720 local SPAN, RSPAN, and ERSPAN source and destination limits are listed in Table 3.
Note • Supervisor Engine 2 does not support RSPAN if you configure an egress SPAN source for a local SPAN session.
• Supervisor Engine 2 does not support egress SPAN sources for local SPAN if you configure RSPAN.
The Supervisor Engine 2 local SPAN and RSPAN session limits are listed in Table 4.
The Supervisor Engine 2 local SPAN and RSPAN source and destination limits are listed in Table 5.
Table 3 Supervisor Engine 720 Local SPAN, RSPAN, and ERSPAN Source and Destination Limits
In Each Local SPAN Session
In Each RSPAN Source Session
In Each ERSPAN Source Session
In Each RSPAN Destination Session
In Each ERSPAN Destination Session
Egress or ingress and egress sources — —
Releases earlier than Release 12.2(18)SXE
1 1 1
Release 12.2(18)SXE and later releases
128 128 128
Ingress sources — —
Releases earlier than Release 12.2(18)SXD
64 64 64
Release 12.2(18)SXD and later releases
128 128 128
RSPAN and ERSPAN destination session sources
— — — 1 RSPAN VLAN 1 IP address
Destinations per session 64 1 RSPAN VLAN 1 IP address 64 64
Table 4 Supervisor Engine 2 Local SPAN and RSPAN Session Limits
Total Sessions Local SPAN Sessions RSPAN Source Sessions RSPAN Destination Sessions
66 2 (ingress or egress or both) 0 64
1 ingress 1 (ingress or egress or both) 64
1 or 2 egress 0 64
Table 5 Supervisor Engine 2 Local SPAN and RSPAN Source and Destination Limits
In Each Local SPAN Session
In Each RSPAN Source Session
In Each RSPAN Destination Session
Egress or egress and ingress sources
1 (0 with a remote SPAN source session configured)
1 (0 with a local SPAN egress source session configured)
—

monitor session
LSW-120Cisco IOS LAN Switching Command Reference
November 2010
Note • Supervisor Engine 2 does not support RSPAN if you configure an egress SPAN source for a local SPAN session.
• Supervisor Engine 2 does not support egress SPAN sources for local SPAN if you configure RSPAN.
The show monitor command displays the SPAN service module session only if it is allocated in the system. It also displays a list of allowed modules and a list of active modules that can use the service module session.
Examples Cisco 2600 Series, Cisco 3600 Series, and Cisco 3700 Series Routers
The following example shows how to add a destination VLAN to an existing SPAN session:
Router(config)# monitor session 1 destination interface fastEthernet 2/0
Cisco 7600 Series Routers
This example shows how to clear the configuration for all sessions:
Router(config)# no monitor session all
This example shows how to clear the configuration for all remote sessions:
Router(config)# no monitor session remote
Related Commands
Ingress sources —
Releases earlier than Release 12.2(18)SXD
64 64
Release 12.2(18)SXD and later releases
128 128
RSPAN destination session source — — 1 RSPAN VLAN
Destinations per session 64 1 RSPAN VLAN 64
Table 5 Supervisor Engine 2 Local SPAN and RSPAN Source and Destination Limits
In Each Local SPAN Session
In Each RSPAN Source Session
In Each RSPAN Destination Session
Command Description
remote-span Configures a VLAN as an RSPAN VLAN.
show monitor Displays SPAN session information.
show monitor session Displays information about the ERSPAN, SPAN, and RSPAN sessions.
monitor session (VLAN)
LSW-121Cisco IOS LAN Switching Command Reference
November 2010
monitor session (VLAN)To start a new Encapulated RSPAN (ERSPAN), Switched Port Analyzer (SPAN), or remote SPAN (RSPAN) session; add interfaces or VLANs to an existing session; filter ERSPAN, SPAN, or RSPAN traffic to specific VLANs; use the monitor session command in global configuration mode. To remove one or more source or destination interfaces from the session, remove a source VLAN from the session, remove filtering, or delete a session, use the no form of this command.
Setting the Source Interface or VLAN
monitor session session source {{interface type | vlan vlan-id} [, | - | rx | tx | both] | remote vlan rspan-vlan-id}
no monitor session session source {{interface type | vlan vlan-id} [, | - | rx | tx | both] | remote vlan rspan-vlan-id}
Setting the Destination Interface or VLAN
monitor session session destination {interface type | vlan vlan-id | remote vlan vlan-id | analysis-module slot-number | data-port port-number}
no monitor session session destination {interface type | vlan vlan-id | remote vlan vlan-id | analysis-module slot-number | data-port port-number}
Setting the Filter VLAN
monitor session session filter vlan vlan-range
no monitor session session filter vlan vlan-range
Removing Session
no monitor session {session | all | capture | local | range session-range | remote}
Syntax Description session Number of the SPAN session. For Cisco 6500/6000 and Cisco 7600 series routers, valid values are 1 to 66.
source Specifies the SPAN source.
destination Specifies the SPAN destination.
interface type Specifies the interface type. For the Cisco 6500/6000 and Cisco 7600 series routers, valid values are ethernet, fastethernet, gigabitethernet, port-channel, or tengigabitethernet; see the “Usage Guidelines” for formatting information.
vlan vlan-id Specifies the VLAN ID. Beginning with Cisco IOS Release 12.4(15)T, the valid VLAN ID range is from 1 to 4094.
For the Cisco 6500/6000 and Cisco 7600 series routers, valid values are 1 to 4094.
, (Optional) Specifies a series of SPAN VLANs.
- (Optional) Specifies a range of SPAN VLANs.
rx (Optional) Specifies monitor received traffic only.
monitor session (VLAN)
LSW-122Cisco IOS LAN Switching Command Reference
November 2010
Command Default Cisco 2600 Series, Cisco 3600 Series, and Cisco 3700 Series Routers
A trunking interface monitors all VLANs and all received and transmitted traffic.
Command Modes Global configuration (config)
Command History
tx (Optional) Specifies monitor transmitted traffic only.
both (Optional) Specifies monitor received and transmitted traffic. By default both received and transmitted traffic are monitored.
remote vlan rspan-vlan-id
Specifies the RSPAN VLAN as a destination VLAN.
analysis-module slot-number
Specifies the network analysis module number; see the “Usage Guidelines” section for additional information.
data-port port-number Specifies the data port number; see the “Usage Guidelines” section for additional information.
filter vlan vlan-range Limits SPAN-source traffic to specific VLANs.
Note The filter keyword is not supported on the Cisco 2600 series or the Cisco 3600 series routers.
all Specifies all sessions.
capture Specifies the Capture session.
local Specifies the local session.
range session-range Specifies the range of sessions.
remote Specifies the remote session.
Release Modification
12.0(7)XE This command was introduced on the Catalyst 6000 family switches.
12.1(1)E Support for this command on the Catalyst 6000 family switches was extended to Cisco IOS Release 12.1(1)E.
12.1(3a)E3 This command was modified. The number of valid values for the port-channel number was changed; see the “Usage Guidelines” section for valid values.
12.1(5c)EX This command was modified. The SPAN support restrictions were added:
• If your switch has a Switch Fabric Module installed, SPAN is supported among supervisor engines and nonfabric-enabled modules.
• If your switch does not have a Switch Fabric Module installed, SPAN is supported on all modules, including fabric-enabled modules.
• SPAN on Distributed Forwarding Card (DFC) equipped modules is not supported.
12.2(17a)SX Support for this command was introduced on the Supervisor Engine 720.
12.2(17b)SXA This command was modified. This command was changed to support the SSO mode and change the default mode.
monitor session (VLAN)
LSW-123Cisco IOS LAN Switching Command Reference
November 2010
Usage Guidelines Ciso 6500/6000 Catalyst Switches
The number of valid values for port-channel number depends on the software release. For Cisco IOS releases prior to software Release 12.1(3a)E3, valid values are from 1 to 256; for Cisco IOS Release 12.1(3a)E3, 12.1(3a)E4, and 12.1(4)E1, valid values are from 1 to 64. Cisco IOS Release 12.1(5c)EX and later support a maximum of 64 values ranging from 1 to 256.
Only one destination per SPAN session is supported. If you attempt to add another destination interface to a session that already has a destination interface configured, you get an error. You must first remove a SPAN destination interface before changing the SPAN destination to a different interface.
You can configure up to 64 SPAN destination interfaces, but have only one egress SPAN source interface and only up to 64 ingress source interfaces.
A SPAN session can monitor either VLANs or individual interfaces, but it cannot monitor both specific interfaces and specific VLANs. Configuring a SPAN session with a source interface and then trying to add a source VLAN to the same SPAN session causes an error. Configuring a SPAN session with a source VLAN and then trying to add a source interface to that session also causes an error. You must first clear any sources for a SPAN session before switching to another type of source.
If you enter the filter keyword on a monitored trunk interface, only traffic on the set of specified VLANs is monitored.
Port channel interfaces are displayed in the list of interface options if you have configured the interfaces. VLAN interfaces are not supported. However, you can span a particular VLAN by entering the monitor session session source vlan vlan-id command.
Cisco 7600 Series Routers
Use these formatting guidelines when configuring monitor sessions:
• interface and single-interface formats are type slot/port; valid values for type are ethernet, fastethernet, gigabitethernet, or tengigabitethernet.
• An interface-list is a list of interfaces that are separated by commas. Insert a space before and after each comma as shown in this example:
single-interface, single-interface, single-interface
• An interface-range is a range of interfaces that are separated by dashes. Insert a space before and after each dash. To enter multiple ranges, separate each range with a comma as shown in the following example:
type slot/first-port, last-port
12.2(17d)SXB This command was introduced on the Supervisor Engine 2.
12.2(18)SXE This command was modified. The following changes were made to this command on the Supervisor Engine 720:
• Added the type erspan-source and the type erspan-source keywords to support ERSPAN; see the monitor session type command for additional information.
• In the transmit or transmit and receive directions, you can specify up to 128 physical interfaces as the source.
12.4(15)T This command was modified. The range of valid VLAN IDs was extended.The new range is from 1 to 4094 for specified platforms.
Release Modification
monitor session (VLAN)
LSW-124Cisco IOS LAN Switching Command Reference
November 2010
• A mixed-interface-list is a mixed list of interfaces. Insert a space before and after each dash and comma as shown in the following example:
single-interface, - interface-range, ... in any order.
• A single-vlan is an ID number of a single VLAN; valid values are from 1 to 4094.
• A vlan-list is a list of VLAN IDs that are separated by commas. Here is an example:
single-vlan, single-vlan, single-vlan ...
• A vlan-range is a range of VLAN IDs that are separated by dashes. Here is an example:
first-vlan-ID - last-vlan-ID
• A mixed-vlan-list is a mixed list of VLAN IDs. Insert a space before and after each dash. To enter multiple ranges, separate each VLAN ID with a comma as shown in the following example:
single-vlan, vlan-range, ... in any order
The analysis-module slot-number and the data-port port-number keywords and arguments are supported only on NAM.
The number of valid values for port-channel number are a maximum of 64 values ranging from 1 to 256.
You cannot share the destination interfaces among SPAN sessions. For example, a single destination interface can belong to one SPAN session only and cannot be configured as a destination interface in another SPAN session.
Note Be careful when configuring SPAN-type source ports that are associated to SPAN-type destination ports because you do not configure SPAN on high-traffic interfaces. If you configure SPAN on high-traffic interfaces, you may saturate fabric channels, replication engines, and interfaces. To configure SPAN-type source ports that are associated to SPAN-type destination ports, enter the monitor session session source {interface type | vlan vlan-id [rx | tx | both] | remote vlan rspan-vlan-id} command.
The Supervisor Engine 720 local SPAN, RSPAN, and ERSPAN session limits are listed in Table 6.
The Supervisor Engine 720 local SPAN, RSPAN, and ERSPAN source and destination limits are listed in Table 7.
Table 6 Supervisor Engine 720 Local SPAN, RSPAN, and ERSPAN Session Limits
Total Sessions Local SPAN, RSPAN Source, or ERSPAN Source Sessions
RSPAN Destination Sessions
ERSPAN Destination Sessions
66 2 (ingress or egress or both) 64 23
Table 7 Supervisor Engine 720 Local SPAN, RSPAN, and ERSPAN Source and Destination Limits
In Each Local SPAN Session
In Each RSPAN Source Session
In Each ERSPAN Source Session
In Each RSPAN Destination Session
In Each ERSPAN Destination Session
Egress or ingress and egress sources — —
Releases earlier than Release 12.2(18)SXE
1 1 1
Release 12.2(18)SXE and later releases
128 128 128
monitor session (VLAN)
LSW-125Cisco IOS LAN Switching Command Reference
November 2010
Note • Supervisor Engine 2 does not support RSPAN if you configure an egress SPAN source for a local SPAN session.
• Supervisor Engine 2 does not support egress SPAN sources for local SPAN if you configure RSPAN.
The Supervisor Engine 2 local SPAN and RSPAN session limits are listed in Table 8.
The Supervisor Engine 2 local SPAN and RSPAN source and destination limits are listed in Table 9.
Ingress sources — —
Releases earlier than Release 12.2(18)SXD
64 64 64
Release 12.2(18)SXD and later releases
128 128 128
RSPAN and ERSPAN destination session sources
— — — 1 RSPAN VLAN 1 IP address
Destinations per session 64 1 RSPAN VLAN 1 IP address 64 64
Table 7 Supervisor Engine 720 Local SPAN, RSPAN, and ERSPAN Source and Destination Limits (continued)
In Each Local SPAN Session
In Each RSPAN Source Session
In Each ERSPAN Source Session
In Each RSPAN Destination Session
In Each ERSPAN Destination Session
Table 8 Supervisor Engine 2 Local SPAN and RSPAN Session Limits
Total Sessions Local SPAN Sessions RSPAN Source Sessions RSPAN Destination Sessions
66 2 (ingress or egress or both) 0 64
1 ingress 1 (ingress or egress or both) 64
1 or 2 egress 0 64
Table 9 Supervisor Engine 2 Local SPAN and RSPAN Source and Destination Limits
In Each Local SPAN SessionIn Each RSPAN Source Session
In Each RSPAN Destination Session
Egress or egress and ingress sources
1 (0 with a remote SPAN source session configured)
1 (0 with a local SPAN egress source session configured)
—
Ingress sources —
With releases earlier than Release 12.2(18)SXD
64 64
Release 12.2(18)SXD and later releases
128 128
RSPAN destination session source — — 1 RSPAN VLAN
Destinations per session 64 1 RSPAN VLAN 64
monitor session (VLAN)
LSW-126Cisco IOS LAN Switching Command Reference
November 2010
Note • Supervisor Engine 2 does not support RSPAN if you configure an egress SPAN source for a local SPAN session.
• Supervisor Engine 2 does not support egress SPAN sources for local SPAN if you configure RSPAN.
A particular SPAN session can monitor either VLANs or individual interfaces; you cannot have a SPAN session that monitors both specific interfaces and specific VLANs. If you first configure a SPAN session with a source interface and then try to add a source VLAN to the same SPAN session, you will get an error. You will also get an error if you configure a SPAN session with a source VLAN and then try to add a source interface to that session. You must first clear any sources for a SPAN session before switching to another type of source.
If you enter the filter keyword on a monitored trunk interface, only traffic on the set of specified VLANs is monitored.
The port-channel interfaces are displayed in the list of interface options if you have configured the interfaces. The VLAN interfaces are not supported. However, you can span a particular VLAN by entering the monitor session session source vlan vlan-id command.
The show monitor command displays the SPAN service module session only if it is allocated in the system. It also displays a list of allowed modules and a list of active modules that can use the service module session.
Examples Cisco 6500/6000 Catalyst Switches
The following example shows how to add a destination VLAN to an existing SPAN session:
Router(config)# monitor session 1 destination vlan 100
The following example shows how to delete a destination VLAN from an existing SPAN session:
Router(config)# no monitor session 1 destination vlan 100
The following example shows how to limit SPAN traffic to specific VLANs:
Router(config)# monitor session 1 filter vlan 100 - 304
Cisco 7600 Series Routers
This example shows how to configure multiple sources for a session:
Router(config)# monitor session 2 source interface fastethernet 5/15 , 7/3 rxRouter(config)# monitor session 2 source interface gigabitethernet 1/2 tx Router(config)# monitor session 2 source interface port-channel 102 Router(config)# monitor session 2 source filter vlan 2 - 3Router(config)# monitor session 2 destination remote vlan 901
This example shows how to configure an RSPAN destination in the final switch (RSPAN destination session):
Router(config)# monitor session 8 source remote vlan 901Router(config)# monitor session 8 destination interface fastethernet 1/2 , 2/3
This example shows how to clear the configuration for sessions 1 and 2:
Router(config)# no monitor session 1 - 2
monitor session (VLAN)
LSW-127Cisco IOS LAN Switching Command Reference
November 2010
This example shows how to clear the configuration for all sessions:
Router(config)# no monitor session all
This example shows how to clear the configuration for all remote sessions:
Router(config)# no monitor session remote
Related Commands Command Description
remote-span Configures a VLAN as an RSPAN VLAN.
show monitor Displays SPAN session information.
show monitor session Displays information about the ERSPAN, SPAN, and RSPAN sessions.
mvrp global
LSW-128Cisco IOS LAN Switching Command Reference
November 2010
mvrp globalTo enable Multiple VLAN Registration Protocol (MVRP) globally on a device and on a specified interface, use the mvrp global command in global configuration mode. To disable MRVP, use the no form of this command.
mvrp global
no mvrp global
Syntax Description This command has no arguments or keywords.
Command Default MVRP is administratively disabled.MRVP is administratively enabled on each interface.
Command Modes Global configuration (config)
Command History
Usage Guidelines MVRP is operational on an interface only if MVRP is administratively enabled both globally at the device level and at the interface level.
When MVRP is operational on an interface MVRP protocol data units (PDUs) are transmitted out the interface which must be a forwarding IEEE 802.1Q trunk. Other MVRP-related operations can then be enabled on the interface.
Examples The following example configures global MVRP on the device and interfaces:
Router> enableRouter# configure terminalRouter(config)# mvrp global%MVRP is now globally enabled. MVRP is operational on 802.1q trunk ports only.Router(config)# interface fastethernet2/1Router(config-if)# exitRouter(config)# mvrp globalRouter(config)# interface fastethernet2/2Router(config-if)# exitRouter(config)# mvrp globalRouter(config)# end
Release Modification
12.2(33)SXI This command was introduced.
mvrp global
LSW-129Cisco IOS LAN Switching Command Reference
November 2010
Related Commands Command Description
clear mvrp statistics Clears MVRP-related statistics recorded on one or all MVRP-enabled ports.
debug mvrp Displays MVRP debugging information.
mvrp mac-learning auto
Enables MVRP to provision MAC address learning.
mvrp registration Sets the registrars in a MAD instance associated with an interface.
mvrp timer Sets period timers that are used in MRP on a specified interface.
mvrp vlan create Enables an MVRP dynamic VLAN.
show mvrp interface Displays details of the administrative and operational MVRP states of all or one particular IEEE 802.1Q trunk port in the device.
show mvrp summary Displays the MVRP configuration at the device level.
mvrp mac-learning
LSW-130Cisco IOS LAN Switching Command Reference
November 2010
mvrp mac-learningTo enable automatic learning of dynamic MAC table entries, use the mvrp mac-learning command in global configuration mode. To disable automatic learning of dynamic MAC table entries, use the no form of this command.
mvrp mac-learning auto
no mvrp mac-learning auto
Syntax Description
Command Default Automatic MAC learning is disabled.
Command Modes Global configuration (config)
Command History
Usage Guidelines With this command you can allow or disallow MVRP to provision MAC learning on devices where MVRP is configured. Automatic MAC learning is disabled by default.
Examples The following example enable automatic learning of dynamic MAC table entries:
Router(config)# mvrp mac-learning auto
Related Commands
auto Enables automatic MAC learning on VLANs that are configured with Multiple VLAN Registration Protocol (MVRP).
Release Modification
12.2(33)SXI This command was introduced.
Command Description
mvrp global Enables MVRP globally on a device.
mvrp registration
LSW-131Cisco IOS LAN Switching Command Reference
November 2010
mvrp registrationTo set the registrars in a Multiple Registration Protocol (MRP) Attribute Declaration (MAD) instance associated with an interface, use the mvrp registration command in global configuration mode. To disable the registrars, use the no form of this command.
mvrp registration {normal | fixed | forbidden}
no mvrp registration
Syntax Description
Command Default Registrars are set to the normal state.
Command Modes Global configuration (config)
Command History
Usage Guidelines The mvrp registration command is operational only if MVRP is configured on an interface.
The no mvrp registration command sets the registrar state to the default (normal).
This command can be used to set the registrar in a MAD instance associated with an interface to one of the three states. This command is effective only if MVRP is operational on the interface.
Given that up to 4094 VLANs can be configured on a trunk port, there may be up to 4094 Advanced Services Module (ASM) and Route Switch Module (RSM) pairs in a MAD instance associated with that interface.
Examples The following example sets a fixed, forbidden, and normal registrar on a MAD instance:
Router(config)# mvrp global%MVRP is now globally enabled. MVRP is operational on IEEE 802.1q trunk ports only.Router(config)# interface fastethernet2/1Router(config-if)# mvrp registration fixedRouter(config-if)# interface fastethernet2/2Router(config-if)# mvrp registration forbiddenRouter(config-if)# interface fastethernet2/3Router(config-if)# no mvrp registration
normal Registrar responds normally to incoming Multiple VLAN Registration Protocol (MVRP) messages. Normal is the default state.
fixed Registrar ignores all incoming MVRP messages and remains in the IN state.
forbidden Registrar ignores all incoming MVRP messages and remains in the EMPTY (MT) state.
Release Modification
12.2(33)SRB This command was introduced.
mvrp registration
LSW-132Cisco IOS LAN Switching Command Reference
November 2010
Related Commands Command Description
clear mvrp statistics Clears MVRP-related statistics recorded on one or all MVRP-enabled ports.
debug mvrp Displays MVRP debugging information.
mvrp global Enables MVRP globally on a device and on a particular interface.
mvrp mac-learning auto
Enables automatic learning of MAC table entries by MVRP.
mvrp timer Sets period timers that are used in MRP on a given interface.
mvrp vlan create Enables an MVRP dynamic VLAN.
show mvrp interface Displays details of the administrative and operational MVRP states of all or one particular IEEE 802.1Q trunk port in the device.
show mvrp summary Displays the MVRP configuration at the device level.
mvrp timer
LSW-133Cisco IOS LAN Switching Command Reference
November 2010
mvrp timerTo set period timers that are used in Multiple VLAN Registration Protocol (MVRP) on a given interface, use the mvrp timer command in interface configuration mode. To remove the timer value, use the no form of this command.
mvrp timer {join | leave | leave-all | periodic} [centiseconds]
no mvrp timer
Syntax Description
Command Default Join timer value: 20 centisecondsLeave timer value: 60 centisecondsLeaveAll timer value: 10000 centiseconds
Command Modes Interface configuration (config-if)
Command History
Usage Guidelines The no mvrp timer command resets the timer value to the default value.
Examples The following example sets the timer levels on an interface:
Router(config)# mvrp global%MVRP is now globally enabled. MVRP is operational on IEE 802.1q trunk ports.Router(config)# interface GigabitEthernet 6/1Router(config-if)# mvrp timer join 30Router(config-if)# mvrp timer leave 70Router(config-if)# mvrp timer leaveAll 15000
join Specifies the time interval between two transmit opportunities that are applied to the Applicant State Machine (ASMs).
leave Specifies the duration time before a registrar is moved to EMPTY (MT) state from leave-all (LV) state.
leave-all Specifies the time it takes for a LeaveAll timer to expire.
periodic Sets the timer value to periodic, a fixed value of 100 centiseconds.
centiseconds Timer value measured in centiseconds.
• Join timer value range is 20 to 10000000.
• Leave timer value range is 60 to 10000000.
• LeaveAll timer value range is 10000 and 10000000.
• Periodic timer value is fixed at 100 centiseconds.
Release Modification
12.2(33)SXI This command was introduced.
mvrp timer
LSW-134Cisco IOS LAN Switching Command Reference
November 2010
Related Commands Command Description
clear mvrp statistics Clears MVRP-related statistics recorded on one or all MVRP enabled ports.
debug mvrp Displays MVRP debugging information.
mvrp global Enables MVRP globally on a device and on a particular interface.
mvrp mac-learning auto
Enables automatic learning of MAC table entries by MVRP.
mvrp registration Sets the registrars in a MAD instance associated with an interface.
mvrp vlan create Enables an MVRP dynamic VLAN.
show mvrp interface Displays details of the administrative and operational MVRP states of all or one particular IEEE 802.1q trunk port in the device.
show mvrp summary Displays the MVRP configuration at the device level.
mvrp vlan creation
LSW-135Cisco IOS LAN Switching Command Reference
November 2010
mvrp vlan creationTo enable dynamic VLAN creation on a device using Multiple VLAN Registration Protocol (MVRP), use the mvrp vlan creation command in global configuration mode. To disable dynamic VLAN creation for MVRP, use the no form of this command.
mvrp vlan creation
no mvrp vlan creation
Syntax Description This command has no arguments or keywords.
Command Default MVRP is disabled.
Command Modes Global configuration (config)
Command History
Usage Guidelines MVRP dynamic VLAN creation can be used only if Virtual Trunking Protocol (VTP) is in transparent mode.
Examples The following example shows a command sequence enabling MVRP dynamic VLAN creation. Notice that the device recognizes that the VTP mode is incorrect and rejects the request for dynamic VLAN creation. Once the VTP mode is changed, MVRP dynamic VLAN creation is allowed.
Router(config)# mvrp vlan creation%Command Rejected: VTP is in non-transparent (server) mode.Router(config)# vtp mode transparentSetting device to VTP TRANSPARENT mode.Router(config)# mvrp vlan creation%VLAN now may be dynamically created via MVRP/
Related Commands
Release Modification
12.2(33)SXI This command was introduced.
Command Description
mvrp global Enables MVRP globally on a device.
vtp mode Sets the mode for VTP mode on the device.
name (MST)
LSW-136Cisco IOS LAN Switching Command Reference
November 2010
name (MST)To set the name of a Multiple Spanning Tree (MST) region, use the name command in MST configuration submode. To return to the default name, use the no form of this command.
name name
no name name
Syntax Description
Defaults Empty string
Command Modes MST configuration (config-mst)
Command History
Usage Guidelines Two or more Cisco 7600 series routers with the same VLAN mapping and configuration version number are considered to be in different MST regions if the region names are different.
Caution Be careful when using the name command to set the name of an MST region. If you make a mistake, you can put the Catalyst 6500 series switch in a different region. The configuration name is a case-sensitive parameter.
Examples This example shows how to name a region:
Router(config-mst)# name CiscoRouter(config-mst)#
name Name to give the MST region. It can be any string with a maximum length of 32 characters.
Release Modification
12.2(14)SX Support for this command was introduced on the Supervisor Engine 720.
12.2(17d)SXB Support for this command on the Supervisor Engine 2 was extended to Release 12.2(17d)SXB.
12.2(33)SRA This command was integrated into Cisco IOS Release 12.2(33)SRA.
name (MST)
LSW-137Cisco IOS LAN Switching Command Reference
November 2010
Related Commands Command Description
instance Maps a VLAN or a set of VLANs to an MST instance.
revision Sets the revision number for the MST configuration.
show Verifies the MST configuration.
show spanning-tree mst Displays the information about the MST protocol.
spanning-tree mst configuration
Enters MST configuration submode.
pagp learn-method
LSW-138Cisco IOS LAN Switching Command Reference
November 2010
pagp learn-methodTo learn the input interface of the incoming packets, use the pagp learn-method command in interface configuration mode. To return to the default settings, use the no form of this command.
pagp learn-method {aggregation-port | physical-port}
no pagp learn-method
Syntax Description
Defaults The default is aggregation-port.
Command Modes Interface configuration (config-if)
Command History
Examples This example shows how to set the learning method to learn the address on the physical port within the bundle:
Router(config-if)# pagp learn-method physical-portRouter(config-if)#
This example shows how to set the learning method to learn the address on the port channel within the bundle:
Router(config-if)# pagp learn-method aggregation-portRouter(config-if)#
Related Commands
aggregation-port Specifies how to learn the address on the port channel.
physical-port Specifies how to learn the address on the physical port within the bundle.
Release Modification
12.2(14)SX Support for this command was introduced on the Supervisor Engine 720.
12.2(17d)SXB Support for this command on the Supervisor Engine 2 was extended to Release 12.2(17d)SXB.
12.2(33)SRA This command was integrated into Cisco IOS Release 12.2(33)SRA.
Command Description
show pagp Displays port-channel information.
pagp port-priority
LSW-139Cisco IOS LAN Switching Command Reference
November 2010
pagp port-priorityTo select a port in hot standby mode, use the pagp port-priority command in interface configuration mode. To return to the default settings, use the no form of this command.
pagp port-priority priority
no pagp port-priority
Syntax Description
Defaults priority is 128.
Command Modes Interface configuration (config-if)
Command History
Usage Guidelines The higher the priority means the better the chances are that the port will be selected in the hot standby mode.
Examples This example shows how to set the port priority:
Router(config-if)# pagp port-priority 45Router(config-if)#
Related Commands
priority Priority number; valid values are from 1 to 255.
Release Modification
12.2(14)SX Support for this command was introduced on the Supervisor Engine 720.
12.2(17d)SXB Support for this command on the Supervisor Engine 2 was extended to Release 12.2(17d)SXB.
12.2(33)SRA This command was integrated into Cisco IOS Release 12.2(33)SRA.
Command Description
pagp learn-method Learns the input interface of the incoming packets.
show pagp Displays port-channel information.
platform port-channel local-significance
LSW-140Cisco IOS LAN Switching Command Reference
November 2010
platform port-channel local-significanceTo allow more than one port-channel subinterface to use the same dot1q VLAN configuration, use the platform port-channel local-significance command in global configuration mode. To disable multiple port-channel subinterfaces from using the same dot1q VLAN configuration, use the no form of this command.
platform port-channel number local-significance
no platform port-channel number local-significance
Syntax Description
Command Default More than one port-channel subinterface cannot use the same dot1q VLAN configuration.
Command Modes Global configuration (config)
Command History
Usage Guidelines You must use this command before adding any subinterfaces. When you configure this command, the internal VLAN used by the port-channel subinterface is different from the dot1q VLAN configured on the subinterface.
Examples This example shows how to select port-channels 18 and 19 to use the identical dot1q VLAN configuration:
Router(config)# platform port-channel 18 local-significanceRouter(config)# platform port-channel 19 local-significance
Related Commands
number Port-channel number. The valid range for port-channel numbers is 1 to 512.
Release Modification
12.2(33)SRD3 This command was introduced for ES+ line cards only.
Command Description
interface port-channel Accesses or creates the port-channel interface.
port-channel load-defer
LSW-141Cisco IOS LAN Switching Command Reference
November 2010
port-channel load-deferTo configure the port load share deferral interval for all port channels, use the port-channel load-defer command in global configuration mode. To reset the port defer interval to the default setting, use the no form of this command.
port-channel load-defer seconds
no port-channel load-defer
Syntax Description
Defaults The port defer interval is 120 seconds.
Command Modes Global configuration (config)
Command History
Usage Guidelines To reduce data loss following a stateful switchover (SSO), port load share deferral can be enabled by entering the port-channel port load-defer command on a port channel of a switch that is connected by a multichassis EtherChannel (MEC) to a virtual switching system (VSS). Port load share deferral temporarily prevents the switch from forwarding data traffic to MEC member ports on a failed chassis of the VSS while the VSS recovers from the SSO.
The load share deferral interval is determined by a single global timer configurable by the port-channel load-defer command. After an SSO switchover, a period of several seconds to several minutes can be required for the reinitialization of line cards and the reestablishment of forwarding tables, particularly multicast topologies.
The valid range of seconds is 1 to 1800 seconds; the default is 120 seconds.
Examples This example shows how to set the global port deferral interval to 60 seconds:
Router(config)# port-channel load-defer 60Router(config)#
This example shows how to verify the configuration of the port deferral interval on a port channel:
Router# show etherchannel 50 port-channel
Port-channels in the group: ----------------------
Port-channel: Po50 (Primary Aggregator)
seconds Sets the time interval in seconds by which load sharing will be deferred on the switch. Valid range is from 1 to 1800 seconds. The default deferal interval is 120 seconds
Release Modification
12.2(33)SXH This command was introduced.
port-channel load-defer
LSW-142Cisco IOS LAN Switching Command Reference
November 2010
------------
Age of the Port-channel = 0d:00h:22m:20sLogical slot/port = 46/5 Number of ports = 3HotStandBy port = null Port state = Port-channel Ag-Inuse Protocol = LACPFast-switchover = disabledLoad share deferral = enabled defer period = 60 sec time left = 57 sec
Router#
Related Commands Command Description
interface port-channel Creates a port channel virtual interface and enters interface configuration mode.
port-channel port load-defer
Enables the port load share deferral feature on a port channel.
show etherchannel Displays the EtherChannel information for a channel.
port-channel port load-defer
LSW-143Cisco IOS LAN Switching Command Reference
November 2010
port-channel port load-deferTo enable the temporary deferral of port load sharing during the connection or reconnection of a port channel, use the port-channel port load-defer command in interface configuration mode. To disable the deferral of port load sharing on a port channel, use the no form of this command.
port-channel port load-defer
no port-channel port load-defer
Syntax Description This command has no keywords or arguments.
Defaults The port load share deferral feature is not enabled on a port channel.
Command Modes Interface configuration (config-if)
Command History
Usage Guidelines To reduce data loss following a stateful switchover (SSO), a port load share deferral can be enabled on a port channel of a switch that is connected by a multichassis EtherChannel (MEC) to a virtual switching system (VSS). The load share deferral interval prevents the switch from forwarding data traffic to MEC member ports on a failed chassis of the VSS while the VSS recovers from the SSO.
When load share deferral is enabled on a port channel, the assignment of a member port’s load share is delayed for a period that is configurable globally by the port-channel load-defer command. During the deferral period, the load share of a deferred member port is set to 0. In this state, the deferred port is capable of receiving data and control traffic, and of sending control traffic, but the port is prevented from sending data traffic over the MEC to the VSS. Upon expiration of the global deferral timer, the deferred member port exits the deferral state and the port assumes its normal configured load share.
Load share deferral is applied only if at least one other member port of the port channel is currently active with a nonzero load share. If a port enabled for load share deferral is the first member bringing up the EtherChannel, the deferral feature does not apply and the port will forward traffic immediately.
The load share deferral interval is determined by a single global timer configurable from 1 to 1800 seconds by the port-channel load-defer command. The default interval is 120 seconds. After an SSO switchover, a period of several seconds to several minutes can be required for the reinitialization of line cards and the reestablishment of forwarding tables, particularly multicast topologies.
Release Modification
12.2(33)SXH This command was introduced.

port-channel port load-defer
LSW-144Cisco IOS LAN Switching Command Reference
November 2010
Examples This example shows how to enable the load share deferral feature on port channel 50 of a switch that is an MEC peer to a VSS:
Router(config)# interface port-channel 50Router(config-if)# port-channel port load-defer This will enable the load share deferral feature on this port-channel.The port-channel should connect to a Virtual Switch (VSS).Do you wish to proceed? [yes/no]: yesRouter(config-if)#
This example shows how to verify the state of the port deferral feature on a port channel:
Router# show etherchannel 50 port-channel
Port-channels in the group: ----------------------
Port-channel: Po50 (Primary Aggregator)
------------
Age of the Port-channel = 0d:00h:22m:20sLogical slot/port = 46/5 Number of ports = 3HotStandBy port = null Port state = Port-channel Ag-Inuse Protocol = LACPFast-switchover = disabledLoad share deferral = enabled defer period = 120 sec time left = 57 sec
Router#
Related Commands Command Description
interface port-channel Creates a port channel virtual interface and enters interface configuration mode.
port-channel load-defer
Configures the global port load share deferral time interval for port channels.
show etherchannel Displays the EtherChannel information for a channel.
private-vlan
LSW-145Cisco IOS LAN Switching Command Reference
November 2010
private-vlanTo configure private VLANs (PVLANs), use the private-vlan command in VLAN configuration mode. To remove the PVLAN configuration, use the no form of this command.
private-vlan {isolated | community | primary}
no private-vlan {isolated | community | primary}
Syntax Description
Command Default No PVLANs are configured.
Command Modes VLAN configuration (config-vlan)
Command History
Usage Guidelines You cannot configure PVLANs on a port-security port. If you enter the pvlan command on a port-security port, the following error message is displayed:
Command rejected: Gix/y is Port Security enabled port.
Within groups of 12 ports (1–12, 13–24, 25–36, and 37–48), if one of the ports is a trunk, a Switch Port Analyzer (SPAN) destination, or a promiscuous PVLAN port, then do not configure the ports as isolated or as community VLAN ports. If so, any isolated or community VLAN configuration for the other ports within the 12 ports is inactive. To reactivate the ports, remove the isolated or community VLAN port configuration and enter the shutdown and no shutdown commands.
Caution If you enter the shutdown command and then the no shutdown command in the VLAN configuration mode on a PVLAN (primary or secondary), the PVLAN type and association information can be deleted. Ensure to reconfigure the VLAN as a PVLAN.
isolated Designates the VLAN as an isolated PVLAN.
community Designates the VLAN as a community PVLAN.
primary Designates the VLAN as the primary PVLAN.
Release Modification
12.2(14)SX This command was introduced on the Supervisor Engine 720.
12.2(17a)SX This command was modified. A configuration restriction was added. See the “Usage Guidelines” section for additional information.
12.2(17d)SXB This command was modified. Support for this command on the Supervisor Engine 2 was extended to Release 12.2(17d)SXB.
12.2(33)SRA This command was integrated into Cisco IOS Release 12.2(33)SRA.
15.0(1)M This command was integrated into Cisco IOS Release 15.0(1)M.
private-vlan
LSW-146Cisco IOS LAN Switching Command Reference
November 2010
Note In Release 12.2(17a)SX, this restriction applies to Ethernet 10 Mb, 10/100 Mb, and 100 Mb modules except WS-X6548-RJ-45 and WS-X6548-RJ-21. In releases earlier than Release 12.2(17a)SX, this restriction applies to Ethernet 10 Mb, 10/100 Mb, and 100 Mb modules.
You cannot configure VLAN 1 or VLANs 1001 to 1005 as PVLANs.
VLAN Trunking Protocol (VTP) does not propagate PVLAN configuration. Each protected or private port is associated with a PVLAN, that is not supported through VTP. Therefore, you must configure PVLANs on each device where you require PVLAN ports.
A promiscuous port is a private port that is assigned to a primary VLAN.
An isolated VLAN is a VLAN that is used by isolated ports to communicate with promiscuous ports. The traffic from an isolated VLAN is blocked on all other private ports in the same VLAN. This traffic can only be received by standard trunking ports and promiscuous ports that are assigned to the corresponding primary VLAN.
A primary VLAN is the VLAN that is used to carry the traffic from the routers to customer end stations on private ports.
A community VLAN is the VLAN that carries the traffic among community ports, and from community ports to the promiscuous ports on the corresponding primary VLAN.
You can specify only one isolated vlan-id in the vlan command, while multiple community VLANs are allowed. Isolated and community VLANs can only be associated with one VLAN. The associated VLAN list must not contain primary VLANs. You cannot configure a VLAN that is already associated to a primary VLAN as a primary VLAN.
The private-vlan commands do not take effect until you exit the VLAN configuration mode.
If you delete either the primary or secondary VLAN, the ports that are associated with the VLAN become inactive.
See the Cisco 7600 Series Router Cisco IOS Software Configuration Guide for additional configuration guidelines.
Examples The following example shows how to configure VLAN 303 as a community LAN:
Router# configure terminalRouter(config)# vlan 303Router(config-vlan)# private-vlan communityRouter(config-vlan)# end
The following example shows how to configure VLAN 440 as an isolated VLAN:
Router# configure terminalRouter(config)# vlan 440Router(config-vlan)# private-vlan isolatedRouter(config-vlan)# end
The following example shows how to configure VLAN 233 as a primary LAN:
Router# configure terminalRouter(config)# vlan 233Router(config-vlan)# private-vlan primaryRouter(config-vlan)# end
private-vlan
LSW-147Cisco IOS LAN Switching Command Reference
November 2010
The following example shows how to remove a PVLAN relationship and delete the primary VLAN. The associated secondary VLANs are not deleted.
Router(config-vlan)# no private-vlan
Related Commands Command Description
private-vlan association Creates an association between PVLANs.
show vlan Displays VLAN information.
show vlan private-vlan Displays PVLAN information.
vlan (VLAN) Configures a specific VLAN.
private-vlan association
LSW-148Cisco IOS LAN Switching Command Reference
November 2010
private-vlan associationTo create an association between private VLANs (PVLANs), use the private-vlan association command in VLAN configuration mode. To remove the association, use the no form of this command.
private-vlan association {private-vlan-list | add private-vlan-list | remove private-vlan-list}
no private-vlan association
Syntax Description
Command Default No PVLANs are associated.
Command Modes VLAN configuration (config-vlan)
Command History
Usage Guidelines You cannot configure PVLANs on a port-security port. If you enter the pvlan command on a port-security port, the following error message is displayed:
Command rejected: Gix/y is Port Security enabled port.
Within groups of 12 ports (1–12, 13–24, 25–36, and 37–48), if one of the ports is a trunk, a Switch Port Analyzer (SPAN) destination, or a promiscuous PVLAN port, then do not configure the ports as isolated or as community VLAN ports. If so, any isolated or community VLAN configuration for the other ports within the 12 ports is inactive. To reactivate the ports, remove the isolated or community VLAN port configuration and enter the shutdown and no shutdown commands.
Caution If you enter the shutdown command and then the no shutdown command in the VLAN configuration mode on a PVLAN (primary or secondary), the PVLAN type and association information can be deleted. Be sure to reconfigure the VLAN as a PVLAN.
private-vlan-list VLAN ID of the PVLANs.
add Associates a PVLAN with another PVLAN.
remove Clears the association between PVLANs.
Release Modification
12.2(14)SX This command was introduced on the Supervisor Engine 720.
12.2(17a)SX This command was modified. A configuration restriction was added. See the “Usage Guidelines” section for additional information.
12.2(17d)SXB This command was modified. Support for this command on the Supervisor Engine 2 was extended to Release 12.2(17d)SXB.
12.2(33)SRA This command was integrated into Cisco IOS Release 12.2(33)SRA.
15.0(1)M This command was integrated into Cisco IOS Release 15.0(1)M.
private-vlan association
LSW-149Cisco IOS LAN Switching Command Reference
November 2010
Note In Release 12.2(17a)SX, this restriction applies to Ethernet 10 Mb, 10/100 Mb, and 100 Mb modules except WS-X6548-RJ-45 and WS-X6548-RJ-21. In releases earlier than Release 12.2(17a)SX, this restriction applies to Ethernet 10 Mb, 10/100 Mb, and 100 Mb modules.
VLAN 1 or VLANs ranging from 1002 to 1005 cannot be configured as PVLANs. Extended VLANs (VLAN IDs 1006 to 4094) can belong to PVLANs.
A PVLAN is a set of private ports that are characterized by using a common set of VLAN number pairs. Each pair is made up of at least two special unidirectional VLANs, and it is used by isolated ports, or by a community of ports to communicate with routers, or both.
VLAN Trunking Protocol (VTP) must be set to transparent mode to support PVLANs. After the PVLAN configuration, you must not change the VTP mode to client or server mode. VTP does not propagate PVLAN configuration. Each protected or private port is associated with a PVLAN, which is not supported through VTP. Therefore, you must configure PVLANs on each device where you require PVLAN ports.
A primary VLAN can contain one isolated VLAN and multiple community VLANs associated with it. An isolated or community VLAN can have only one primary VLAN associated with it.
Note The private-vlan association command does not take effect until you exit the VLAN configuration mode.
If you delete either the primary or secondary VLAN, the ports that are associated with the VLAN become inactive.
See the Cisco 7600 Series Router Cisco IOS Software Configuration Guide for additional configuration guidelines.
Examples The following example shows how to create a PVLAN relationship between the primary VLAN 14, the isolated VLAN 19, and the community VLANs 20 and 21:
Router(config)# vlan 19Router(config-vlan)# private-vlan isolatedRouter(config-vlan)# exitRouter(config)# vlan 20Router(config-vlan)# private-vlan communityRouter(config-vlan)# exitRouter(config)# vlan 21Router(config-vlan)# private-vlan communityRouter(config-vlan)# exitRouter(config)# vlan 14Router(config-vlan)# private-vlan primaryRouter(config-vlan)# private-vlan association 19-21
The following example shows how to remove an isolated VLAN 19 and community VLAN 20 from the PVLAN association:
Router(config)# vlan 14Router(config-vlan)# private-vlan association remove 19,20
private-vlan association
LSW-150Cisco IOS LAN Switching Command Reference
November 2010
Related Commands Command Description
private-vlan Configures PVLANS.
show vlan Displays VLAN information.
show vlan private-vlan Displays PVLAN information.
vlan (VLAN) Configures a specific VLAN.

private-vlan mapping
LSW-151Cisco IOS LAN Switching Command Reference
November 2010
private-vlan mappingTo create a mapping between the primary and the secondary VLANs so that both VLANs share the same primary VLAN switched virtual interface (SVI), use the private-vlan mapping command in interface configuration mode. To remove all private VLAN (PVLAN) mappings from the SVI, use the no form of this command.
private-vlan mapping [secondary-vlan-list | add secondary-vlan-list | remove secondary-vlan-list]
no private-vlan mapping
Syntax Description
Defaults No PVLAN SVI mapping is configured.
Command Modes Interface configuration (config-if)
Command History
Usage Guidelines The private-vlan mapping command affects traffic that is switched in the software on the Multilayer Switching Feature Card (MSFC) or MSFC2. The private-vlan mapping command does not configure Layer 3 switching on the Policy Feature Card (PFC) or PFC2.
The secondary-vlan-list argument cannot contain spaces; it can contain multiple comma-separated items. Each item can be a single PVLAN ID or a hyphenated range of PVLAN IDs.
This command is valid in the interface configuration mode of the primary VLAN.
The SVI of the primary VLAN is created at Layer 3.
Traffic that is received on the secondary VLAN is routed by the SVI of the primary VLAN.
The SVIs of existing secondary VLANs do not function and are considered as down after you enter this command.
A secondary SVI can only be mapped to one primary SVI. If you configure the primary VLAN as a secondary VLAN, all the SVIs that are specified in this command are brought down.
If you configure a mapping between two VLANs that do not have a valid Layer 2 association, the mapping configuration does not take effect.
secondary-vlan-list (Optional) VLAN IDs of the secondary VLANs to map to the primary VLAN.
add (Optional) Maps the secondary VLAN to the primary VLAN.
remove (Optional) Removes the mapping between the secondary VLAN and the primary VLAN.
Release Modification
12.2(14)SX Support for this command was introduced on the Supervisor Engine 720.
12.2(17d)SXB Support for this command on the Supervisor Engine 2 was extended to the 12.2 SX release.
12.2(33)SRA This command was integrated into Cisco IOS Release 12.2(33)SRA.
private-vlan mapping
LSW-152Cisco IOS LAN Switching Command Reference
November 2010
Examples This example shows how to permit routing of secondary VLAN-ingress traffic from PVLANs 303 through 307, 309, and 440 and verify the configuration:
Router# configure terminal Router(config)# interface vlan 202 Router(config-if)# private-vlan mapping add 303-307,309,440 Router(config-if)# end Router# show interfaces private-vlan mapping
Interface Secondary VLAN Type--------- -------------- -----------------vlan202 303 communityvlan202 304 communityvlan202 305 communityvlan202 306 communityvlan202 307 communityvlan202 309 communityvlan202 440 isolatedRouter#
This example shows the displayed error message if the VLAN that you are adding is already mapped to the SVI of VLAN 19. You must delete the mapping from the SVI of VLAN 19 first.
Router(config)# interface vlan 19Router(config-if)# private-vlan mapping 19 add 21
Command rejected: The interface for VLAN 21 is already mapped as s secondary.Router(config-if)#
This example shows how to remove all PVLAN mappings from the SVI of VLAN 19:
Router(config)# interface vlan 19Router(config-if)# no private-vlan mappingRouter(config-if)#
Related Commands Command Description
show interfaces private-vlan mapping
Displays the information about the PVLAN mapping for VLAN SVIs.
show vlan Displays VLAN information.
show vlan private-vlan Displays PVLAN information.
private-vlan synchronize
LSW-153Cisco IOS LAN Switching Command Reference
November 2010
private-vlan synchronizeTo map the secondary VLANs to the same instance as the primary VLAN, use the private-vlan synchronize command in MST configuration submode.
private-vlan synchronize
Syntax Description This command has no arguments or keywords.
Defaults The secondary VLANs are not mapped to the same instance as the primary VLAN.
Command Modes MST configuration (config-mst)
Command History
Usage Guidelines If you do not map VLANs to the same instance as the associated primary VLAN when you exit the Multiple Spanning Tree (802.1s) (MST) configuration submode, a warning message displays and lists the secondary VLANs that are not mapped to the same instance as the associated primary VLAN. The private-vlan synchronize command automatically maps all secondary VLANs to the same instance as the associated primary VLANs.
Examples This example assumes that a primary VLAN 2 and a secondary VLAN 3 are associated to VLAN 2, and that all VLANs are mapped to the Common and Internal Spanning Tree (CIST) instance 1. This example also shows the output if you try to change the mapping for the primary VLAN 2 only:
Router(config)# spanning-tree mst configuration Router(config-mst)# instance 1 vlan 2Router(config-mst)# exit
These secondary vlans are not mapped to the same instance as their primary:-> 3
This example shows how to initialize private VLAN (PVLAN) synchronization:
Router(config-mst)# private-vlan synchronizeRouter(config-mst)#
Release Modification
12.2(14)SX Support for this command was introduced on the Supervisor Engine 720.
12.2(17d)SXB Support for this command on the Supervisor Engine 2 was extended to Release 12.2(17d)SXB.
12.2(33)SRA This command was integrated into Cisco IOS Release 12.2(33)SRA.
private-vlan synchronize
LSW-154Cisco IOS LAN Switching Command Reference
November 2010
Related Commands Command Description
show Verifies the MST configuration.
show spanning-tree mst Displays information about the MST protocol.
rep admin vlan
LSW-155Cisco IOS LAN Switching Command Reference
November 2010
rep admin vlanTo configure a Resilient Ethernet Protocol (REP) administrative VLAN for REP to transmit hardware flood layer (HFL) messages, use the rep admin vlan command in global configuration mode. To return to the default configuration with VLAN 1 as the administrative VLAN, use the no form of this command.
rep admin vlan vlan-id
no rep admin vlan
Syntax Description
Defaults The administrative VLAN is VLAN 1.
Command Modes Global configuration (config)
Command History
Usage Guidelines If the VLAN does not already exist, this command does not create the VLAN.
To avoid the delay introduced by relaying messages in software for link-failure or VLAN-blocking notification during load balancing, REP floods packets at the HFL to a regular multicast address. These messages are flooded to the whole network, not just the REP segment. Switches that do not belong to the segment treat them as data traffic. Configuring an administrative VLAN for the whole domain can control flooding of these messages.
If no REP administrative VLAN is configured, the default is VLAN 1.
There can be only one administrative VLAN on a switch and on a segment.
The administrative VLAN cannot be the RSPAN VLAN.
Examples This example shows how to configure VLAN 100 as the REP administrative VLAN:
Router(config)# rep admin vlan 100
You can verify your settings by entering the show interfaces rep detail privileged EXEC command.
vlan-id The VLAN ID range is from 1 to 4094. The default is VLAN 1; the range to configure is 2 to 4094.
Release Modification
12.2(40)SE This command was introduced.
12.2(33)SRC This command was implemented on the Cisco 7600 series router.
Cisco IOS XE Release 2.2
This command was implemented on the Cisco ASR 1000 Series Aggregation Services Router.
rep admin vlan
LSW-156Cisco IOS LAN Switching Command Reference
November 2010
Related Commands Command Description
show interfaces rep detail
Displays detailed REP configuration and status for all interfaces or the specified interface, including the administrative VLAN.
rep block port
LSW-157Cisco IOS LAN Switching Command Reference
November 2010
rep block portTo configure Resilient Ethernet Protocol (REP) VLAN load balancing on the REP primary edge port, use the rep block port command in interface configuration mode. To return to the default configuration, use the no form of this command.
rep block port {id port-id | neighbor-offset | preferred} vlan {vlan-list | all}
no rep block port {id port-id | neighbor-offset | preferred}
Syntax Description
Defaults The default behavior after you enter the rep preempt segment privileged EXEC command (for manual preemption) is to block all VLANs at the primary edge port. This behavior remains until you configure the rep block port command.
If the primary edge port cannot determine which port is to be the alternate port, the default action is no preemption and no VLAN load balancing.
Command Modes Interface configuration (config-if)
Command History
id port-id Identify the VLAN blocking alternate port by entering the unique port ID that is automatically generated when REP is enabled. The REP port ID is a 16-character hexadecimal value. You can display the port ID for an interface by entering the show interface interface-id rep detail command.
neighbor-offset Identify the VLAN blocking alternate port by entering the offset number of a neighbor. The range is –256 to +256; a value of 0 is invalid. The primary edge port has an offset number of 1; positive numbers above 1 identify downstream neighbors of the primary edge port. Negative numbers identify the secondary edge port (offset number –1) and its downstream neighbors.
preferred Identify the VLAN blocking alternate port as the segment port on which you entered the rep segment segment-id preferred interface configuration command.
Note Entering the preferred keyword does not ensure that the preferred port is the alternate port; it gives it preference over other similar ports.
vlan Identify the VLANs to be blocked.
vlan-list The VLAN ID or range of VLAN IDs to be displayed. Enter a VLAN ID from 1 to 4094 or a range or sequence of VLANs (such as 1-3, 22, 41-44) of VLANs to be blocked.
all Enter to block all VLANs.
Release Modification
12.2(40)SE This command was introduced.
12.2(33)SRC This command was implemented on the Cisco 7600 series router.
Cisco IOS XE Release 2.2
This command was implemented on the Cisco ASR 1000 Series Aggregation Services Router.
rep block port
LSW-158Cisco IOS LAN Switching Command Reference
November 2010
Usage Guidelines You must enter this command on the REP primary edge port.
When you select an alternate port by entering an offset number, this number identifies the downstream neighbor port of an edge port. The primary edge port has an offset number of 1; positive numbers above 1 identify downstream neighbors of the primary edge port. Negative numbers identify the secondary edge port (offset number –1) and its downstream neighbors. You would never enter an offset value of 1 because that is the offset number of the primary edge port itself.
If you have configured a preempt delay time by entering the rep preempt delay seconds interface configuration command and a link failure and recovery occurs, VLAN load balancing begins after the configured preemption time period elapses without another link failure. The alternate port specified in the load-balancing configuration blocks the configured VLANs and unblocks all other segment ports. If the primary edge port cannot determine the alternate port for VLAN balancing, the default action is no preemption.
Each port in a segment has a unique port ID. The port ID format is similar to the one used by the spanning tree algorithm: a port number (unique on the bridge) associated to a MAC address (unique in the network). To determine the port ID of a port, enter the show interfaces interface-id rep detail privileged EXEC command.
Examples This example shows how to configure REP VLAN load balancing on the Router B primary edge port (Gigabit Ethernet port 1/0/1) and to configure Gigabit Ethernet port 1/0/2 of Router A as the alternate port to block VLANs 1 to 100. The alternate port is identified by its port ID, shown in bold in the output of the show interfaces rep detail command for the Router A port.
RouterA# show interfaces gigabitethernet0/2 rep detail
GigabitEthernet0/2 REP enabledSegment-id: 2 (Segment)PortID: 0080001647FB1780Preferred flag: NoOperational Link Status: TWO_WAYCurrent Key: 007F001647FB17800EEEPort Role: OpenBlocked Vlan: <empty>Admin-vlan: 1Preempt Delay Timer: 35 secLoad-balancing block port: noneLoad-balancing block vlan: noneSTCN Propagate to: PDU/TLV statistics:LSL PDU rx: 107122, tx: 192493
RouterB# configure terminalRouter(config)# interface gigabitethernet1/0/1Router(config-if)# rep block port id 0080001647FB1780 vlan 1-100Router(config-if)# exit
This example shows how to configure VLAN load balancing by using a neighbor offset number and how to verify the configuration by entering the show interfaces rep detail privileged EXEC command:
Router# configure terminalRouter#(config)# interface gigabitethernet1/0/2Router#(config-if)# rep block port 6 vlan 1-110Router#(config-if)# end
Router# show interface gigabitethernet1/0/2 rep detail
GigabitEthernet0/2 REP enabled
rep block port
LSW-159Cisco IOS LAN Switching Command Reference
November 2010
Segment-id: 2 (Segment)PortID: 0080001647FB1780Preferred flag: NoOperational Link Status: TWO_WAYCurrent Key: 007F001647FB178009C3Port Role: OpenBlocked Vlan: <empty>Admin-vlan: 3Preempt Delay Timer: 35 secLoad-balancing block port: 6Load-balancing block vlan: 1-110STCN Propagate to: noneLSL PDU rx: 1466780, tx: 3056637HFL PDU rx: 2, tx: 0BPA TLV rx: 1, tx: 2119695BPA (STCN, LSL) TLV rx: 0, tx: 0BPA (STCN, HFL) TLV rx: 0, tx: 0EPA-ELECTION TLV rx: 757406, tx: 757400EPA-COMMAND TLV rx: 1, tx: 1EPA-INFO TLV rx: 178326, tx: 178323
Related Commands Command Description
rep preempt delay Configures a waiting period after a segment port failure and recovery before REP VLAN load balancing is triggered.
rep preempt segment Manually starts REP VLAN load balancing on a segment.
show interfaces rep detail
Displays REP detailed configuration and status for all interfaces or the specified interface, including the administrative VLAN.
rep lsl-age-timer
LSW-160Cisco IOS LAN Switching Command Reference
November 2010
rep lsl-age-timerTo configure the Resilient Ethernet Protocol (REP) link status layer (LSL) age-out timer value, use the rep lsl-age-timer command in interface configuration mode. To restore the default age-out timer value, use the no form of this command.
rep lsl-age-timer milliseconds
no rep lsl-age-timer milliseconds
Syntax Description
Command Default The default LSL age-out timer value is 5 ms.
Command Modes Interface configuration (config-if)
Command History
Usage Guidelines REP is a Cisco proprietary protocol that provides functionality to:
• Control network loops
• Handle link failures
• Improve convergence time
The rep lsl-age-timer command is used to configure the REP LSL age-out timer value.
Examples The following example shows how to configure the REP LSL age-out timer value.
Router# enableRouter# configure terminalRouter(config)# interface gigabitethernet 5/3Router(config-if)# rep segment 1 edge primaryRouter(config-if)# rep lsl-age-timer 2000Router(config-if)# exit
Related Commands
milliseconds Defines the REP LSL age-out timer value in milliseconds (ms). Range is from 120 ms to 10000 ms in multiples of 40 ms. The default is 5 ms.
Release Modification
15.0(1)S This command was introduced on the Cisco 7600 series routers.
Command Description
rep lsl-retries Configures the number of retries before the REP link is disabled.
rep lsl-retries
LSW-161Cisco IOS LAN Switching Command Reference
November 2010
rep lsl-retriesTo configure the Resilient Ethernet Protocol (REP) link status layer (LSL) number of retries, use the rep lsl-retries command in interface configuration mode. To restore the default number of retries, use the no form of this command.
rep lsl-retries number-of-retries
no rep lsl-retries number-of-retries
Syntax Description
Command Default The default number of retries is 5.
Command Modes Interface configuration (config-if)
Command History
Usage Guidelines REP is a Cisco proprietary protocol that provides functionality to:
• Control network loops
• Handle link failures
• Improve convergence time
The rep lsl-retries command is used to configure the number of retries before the REP link is disabled.
Examples This example shows how to configure REP link status layer number of retries.
Router# enableRouter# configure terminalRouter(config)# interface gigabitethernet 2/5Router(config-if)# rep segment 2 edge primaryRouter(config-if)# rep lsl-retries 4Router(config-if)# exit
Related Commands
number-of-retries The number of LSL retries. The acceptable range is between 3 and 10 retries. The default number of retries is 5.
Release Modification
15.0(1)S This command was introduced on the Cisco 7600 series routers.
Command Description
rep lsl-age-timer Configures the REP link status layer age-out timer value.
rep preempt delay
LSW-162Cisco IOS LAN Switching Command Reference
November 2010
rep preempt delayTo configure a waiting period after a segment port failure and recovery before Resilient Ethernet Protocol (REP) VLAN load balancing is triggered, use the rep preempt delay command in interface configuration mode. To remove the configured delay, use the no form of this command.
rep preempt delay seconds
no rep preempt delay
Syntax Description
Defaults No preemption delay is set. If you do not enter the rep preempt delay command, the default is manual preemption with no delay.
Command Modes Interface configuration (config-if)
Command History
Usage Guidelines You must enter this command on the REP primary edge port.
You must enter this command and configure a preempt time delay if you want VLAN load balancing to automatically trigger after a link failure and recovery.
If VLAN load-balancing is configured, after a segment port failure and recovery, the REP primary edge port starts a delay timer before VLAN load balancing occurs. Note that the timer restarts after each link failure. When the timer expires, the REP primary edge alerts the alternate port to perform VLAN load-balancing (configured by using the rep block port interface configuration command) and prepares the segment for the new topology. The configured VLAN list is blocked at the alternate port, and all other VLANs are blocked at the primary edge port.
Examples This example shows how to configure a REP preemption time delay of 100 seconds on the primary edge port:
Router(config)# interface gigabitethernet1/0/1Router(config-if)# rep preempt delay 100Router(config-if)# exit
You can verify your settings by entering the show interfaces rep privileged EXEC command.
seconds The number of seconds to delay REP preemption. The range is 15 to 300.
Release Modification
12.2(40)SE This command was introduced.
12.2(33)SRC This command was implemented on the Cisco 7600 series router.
Cisco IOS XE Release2.2
This command was implemented on the Cisco ASR 1000 Series Aggregation Services Router.
rep preempt delay
LSW-163Cisco IOS LAN Switching Command Reference
November 2010
Related Commands Command Description
rep block port Configures VLAN load balancing.
show interfaces rep Displays REP configuration and status for all interfaces or the specified interface.
rep preempt segment
LSW-164Cisco IOS LAN Switching Command Reference
November 2010
rep preempt segmentTo manually start Resilient Ethernet Protocol (REP) VLAN load balancing on a segment, use the rep preempt segment command in privileged EXEC mode.
rep preempt segment segment-id
Syntax Description
Defaults Manual preemption is the default behavior.
Command Modes Privileged EXEC (#)
Command History
Usage Guidelines After you enter the rep preempt segment segment-id command, a confirmation message appears before the command is executed because preemption can cause network disruption.
Enter this command on the router on the segment that has the primary edge port.
If you do not configure VLAN load balancing, entering this command results in the default behavior—the primary edge port blocks all VLANs.
You configure VLAN load balancing by entering the rep block port {id port-id | neighbor-offset | preferred} vlan {vlan-list | all} interface configuration command on the REP primary edge port before you manually start preemption.
There is not a no version of this command.
Examples This example shows how to manually trigger REP preemption on segment 100 with the confirmation message:
Router# rep preempt segment 100The command will cause a momentary traffic disruption.Do you still want to continue? [confirm]
segment-id ID of the REP segment. The range is from 1 to 1024.
Release Modification
12.2(40)SE This command was introduced.
12.2(33)SRC This command was implemented on the Cisco 7600 series router.
Cisco IOS XE Release 2.2
This command was implemented on the Cisco ASR 1000 Series Aggregation Services Router.
rep preempt segment
LSW-165Cisco IOS LAN Switching Command Reference
November 2010
Related Commands Command Description
rep block port Configures VLAN load balancing.
show interfaces rep Displays REP configuration and status for all interfaces or the specified interface.
rep segment
LSW-166Cisco IOS LAN Switching Command Reference
November 2010
rep segmentTo enable Resilient Ethernet Protocol (REP) on the interface and to assign a segment ID to the interface, use the rep segment command in interface configuration mode. To disable REP on the interface, use the no form of this command.
rep segment segment-id [edge [no-neighbor] [primary]] [preferred]
no rep segment
Syntax Description
Defaults REP is disabled on the interface.When REP is enabled on an interface, the default is for the port to be a regular segment port.
Command Modes Interface configuration (config-if)
Command History
segment-id The segment for which REP will be enabled. Assign a segment ID to the interface. The range is from 1 to 1024.
edge (Optional) Identify the interface as one of the two REP edge ports. Entering the edge keyword without the primary keyword configures the port as the secondary edge port.
primary (Optional) On an edge port, specify that the port is the primary edge port. A segment has only one primary edge port. If you configure two ports in a segment as the primary edge port (for example, ports on different switches) the REP selects one of them to serve as the segment primary edge port.
no-neighbor (Optional) On an edge port, specify the segment edge as one with no external REP neighbor.
preferred (Optional) Specify that the port is the preferred alternate port or the preferred port for VLAN load balancing.
Note Configuring a port as preferred does not guarantee that it becomes the alternate port; it merely gives it a slight edge among equal contenders. The alternate port is usually a previously failed port.
Release Modification
12.2(40)SE This command was introduced.
12.2(33)SRC This command was implemented on the Cisco 7600 series router.
Cisco IOS XE Release 2.2
This command was implemented on the Cisco ASR 1000 Series Aggregation Services Router.
15.1(01)S This command was changed to add the no-neighbor keyword.
rep segment
LSW-167Cisco IOS LAN Switching Command Reference
November 2010
Usage Guidelines REP ports must be Layer 2 trunk ports. A non-Ethernet Services (ES) REP port can be either an IEEE 802.1Q trunk port or an ISL trunk port.
REP ports should not be configured as one of these port types:
• Access port
• Private VLAN port
• Switched Port Analyzer (SPAN) destination port
• Tunnel port
You must configure two edge ports on each REP segment, a primary edge port and a port to act as a secondary edge port. If you configure two ports in a segment as the primary edge port (for example, ports on different switches) the configuration is allowed, but the REP selects one of them to serve as the segment primary edge port.
REP Edge No Neighbor
You can configure the non-rep switch facing ports as edge no- neighbor ports. These ports inherit the properties of edge ports, and overcome the limitation of not being able to converge quickly during a failure.
REP on EtherChannels
REP is supported on EtherChannels, but not on an individual port that belongs to an EtherChannel.
REP Enabled on Two Ports
If you enable REP on two ports on a switch, the ports must both be either regular segment ports or edge ports. REP ports follow these rules:
• If only one port on a switch is configured in a segment, the port should be an edge port.
• If two ports on a switch belong to the same segment, both ports must be edge ports, or both ports must be regular segment ports.
• If two ports on a switch belong to the same segment and one is configured as an edge port and one as a regular segment port (a misconfiguration), the edge port is treated as a regular segment port.
If you configure two ports in a segment as the primary edge port (for example, ports on different switches) the REP selects one of them to serve as the segment primary edge port. Enter the show rep topology privileged EXEC command on a port in the segment to verify which port is the segment primary edge port.
REP Interfaces
REP interfaces come up in a blocked state and remain in a blocked state until notified that it is safe to unblock. You need to be aware of this to avoid sudden connection losses.
REP in Networks with Redundancy
You should configure REP only in networks with redundancy. Configuring REP in a network without redundancy causes loss of connectivity.
Examples REP Enabled on a Nonedge Segment Port
This example shows how to enable REP on a regular (nonedge) segment port:
Router(config)# interface gigabitethernet0/1Router(config-if)# rep segment 100

rep segment
LSW-168Cisco IOS LAN Switching Command Reference
November 2010
REP Enabled as Primary Edge Port
This example shows how to enable REP on a port and identify the port as the REP primary edge port:
Router(config)# interface gigabitethernet0/2Router(config-if)# rep segment 100 edge primary
REP as Secondary Edge Port
This example shows how to enable REP on a port and identify the port as the REP secondary edge port:
Router(config)# interface gigabitethernet0/2Router(config-if)# rep segment 100 edge
REP as Edge No-Neighbor Port
This example shows how to enable REP as an edge no-neighbor port:Router(config)# interface gigabitethernet0/2
Router(config-if)# rep segment 1 edge no-neighbor primary
Verify Settings with the show interfaces rep Command
You can verify your settings by entering the show interfaces rep privileged EXEC command. To verify which port in the segment is the primary edge port, enter the show rep topology privileged EXEC command.
Related Commands Command Description
show interfaces rep Displays REP configuration and status for all interfaces or the specified interface.
show rep topology Displays information about all ports in the segment, including which one was configured and selected as the primary edge port.
rep stcn
LSW-169Cisco IOS LAN Switching Command Reference
November 2010
rep stcnTo configure a Resilient Ethernet Protocol (REP) edge port to send REP segment topology change notifications (STCNs) to another interface, to other segments, or to Spanning Tree Protocol (STP) networks, use the rep stcn command in interface configuration mode. To disable the sending of STCNs to the interface, segment, or STP network, use the no form of this command.
rep stcn {interface interface-id | segment id-list | stp}
no rep stcn {interface | segment | stp}
Syntax Description
Defaults Transmission of STCNs to other interfaces, segments, or STP networks is disabled.
Command Modes Interface configuration (config-if)
Command History
Usage Guidelines Enter this command on a segment edge port.
You use this command to notify other portions of the Layer 2 network of topology changes that occur in the local REP segment. This removes obsolete entries in the Layer 2 forwarding table in other parts of the network, which allows faster network convergence.
Examples This example shows how to configure a REP edge port to send STCNs to segments 25 to 50:
Router(config)# interface gigabitethernet1/0/2Router(config-if)# rep stcn segment 25-50Router(config-if)# exit
You can verify your settings by entering the show interfaces rep detail privileged EXEC command.
interface interface-id Identify a physical interface or port channel to receive STCNs.
segment id-list Identify one REP segment or a list of segments to receive STCNs. The range is 1 to 1024. You can also configure a sequence of segments (for example 3-5, 77, 100).
stp Send STCNs to an STP network.
Release Modification
12.2(40)SE This command was introduced.
12.2(33)SRC This command was implemented on the Cisco 7600 series router.
Cisco IOS XE Release 2.2
This command was implemented on the Cisco ASR 1000 Series Aggregation Services Router.
rep stcn
LSW-170Cisco IOS LAN Switching Command Reference
November 2010
Related Commands Command Description
show interfaces rep Displays REP configuration and status for all interfaces or the specified interface.
revision
LSW-171Cisco IOS LAN Switching Command Reference
November 2010
revisionTo set the revision number for the Multiple Spanning Tree (802.1s) (MST) configuration, use the revision command in MST configuration submode. To return to the default settings, use the no form of this command.
revision version
no revision
Syntax Description
Defaults version is 0.
Command Modes MST configuration (config-mst)
Command History
Usage Guidelines Two Cisco 7600 series routers that have the same configuration but different revision numbers are considered to be part of two different regions.
Caution Be careful when using the revision command to set the revision number of the MST configuration because a mistake can put the switch in a different region.
Examples This example shows how to set the revision number of the MST configuration:
Router(config-mst)# revision 5Router(config-mst)#
Related Commands
version Revision number for the configuration; valid values are from 0 to 65535.
Release Modification
12.2(14)SX Support for this command was introduced on the Supervisor Engine 720.
12.2(17d)SXB Support for this command on the Supervisor Engine 2 was extended to Release 12.2(17d)SXB.
12.2(33)SRA This command was integrated into Cisco IOS Release 12.2(33)SRA.
Command Description
instance Maps a VLAN or a set of VLANs to an MST instance.
name (MST configuration submode) Sets the name of an MST region.
show Verifies the MST configuration.
show spanning-tree Displays information about the spanning-tree state.
spanning-tree mst configuration Enters MST-configuration submode.

revision
LSW-172Cisco IOS LAN Switching Command Reference
November 2010