Embed Size (px)
Citation preview
Make your own zero clearance throat plate.
A picture tutorial
By Wayne Breshears
One of the more important table saw accessories you can have is a zero
clearance insert or throat plate. The close tolerance of the zero clearance
insert does increase safety and accuracy. It is particularly good for preventing thin cuts getting lodged in the blade opening and for supporting dados. The feature I like the best, is it will reduce tear outs on crosscuts when using a
combo blade.
You can buy the blank inserts for most late model saws for around $20. Of coarse, that is for only one and a well setup shop should have an insert to match each blade and dado width. The commercial inserts are not available for a
lot of older saws. No problem! You can build your own for $0 out of scrap flat stock. The difficulty level is on par with a hand cut tenon, the “mortise” is
already provided by the saw’s tabletop. This is easy wood machining with tools most woodworkers already own. Many procedures will work; it is not tied to specific tools and machines.
Materials: Flat stock, includes hardboard (masonite), MDF (Medium Density
Fiberboard), Plywood, High Density Plastic, or even Laminate Flooring
Tools: A saw, you already have a table saw or you wouldn't have a need for an insert.
A second saw capable of cutting curves, bandsaw, saber saw, jigsaw, or a fret saw.
A sander: belt, disk, oscillating drum or even files, rasps
and a sanding block
A drill and a 3/4" bit
A chisel or a router and straight bit
(Optional) A router table and a ball bearing flush trim bit
Time to complete: 45 minutes for the first one and 10-15 minutes for each additional plate after you are setup. Take a couple hours and build a half
dozen. You can then just change plates with different dado widths and miters, and not just keep chopping up the same insert until it is suitable
for nothing. (That is the voice of experience you heard.) Major assumption: You have the original big hole throat plate. If you
don't, it adds a step that I will cover later.
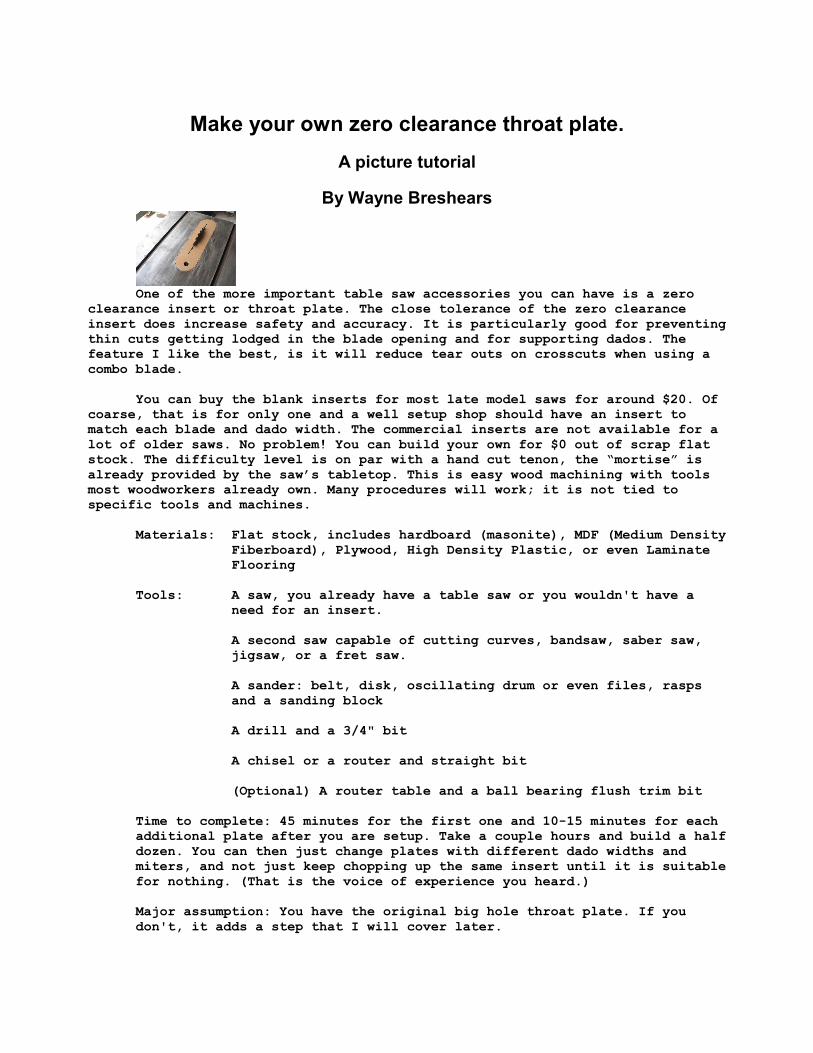
First step: Determine max thickness that will fit the hole. This is
measured from the table surface to the flanges that the plate sits on (usually where the level adjusting screws are)
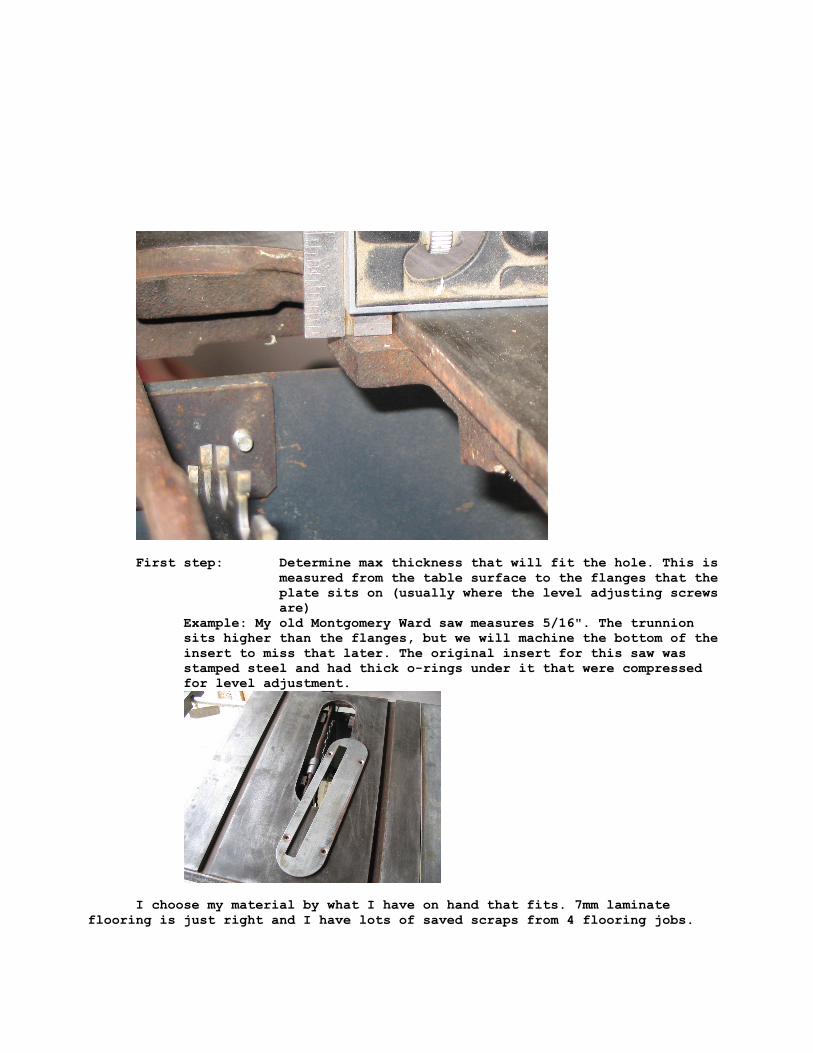
Example: My old Montgomery Ward saw measures 5/16". The trunnion sits higher than the flanges, but we will machine the bottom of the
insert to miss that later. The original insert for this saw was stamped steel and had thick o-rings under it that were compressed for level adjustment.
I choose my material by what I have on hand that fits. 7mm laminate
flooring is just right and I have lots of saved scraps from 4 flooring jobs.
Disclaimer on laminate flooring: Laminate flooring is a nasty material to work. It is hard on tool edges. It has
terrible stuff in the dust that you do not want in your lungs and it throws off tiny
chips when cutting on the table saw that sting and can take out an eye. Dust mask and goggles are an absolute
necessity. That being said, it is still an excellent choice because of its density and
hardness. Just use enough protection that you don't mess up your day. Don't even waste your time trying to use HSS router bits.
Either use carbide bits or use the saw and sand method of shaping the insert and a
chisel to relieve any points that touch the trunnion.
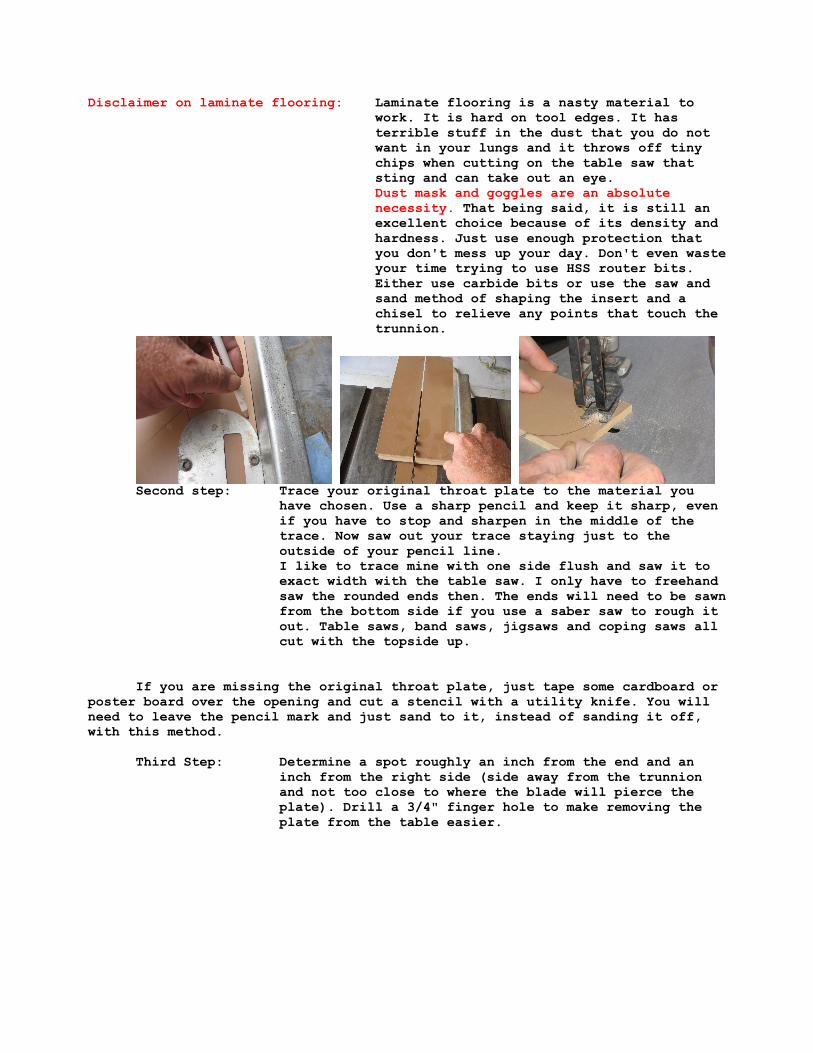
Second step: Trace your original throat plate to the material you
have chosen. Use a sharp pencil and keep it sharp, even
if you have to stop and sharpen in the middle of the trace. Now saw out your trace staying just to the
outside of your pencil line. I like to trace mine with one side flush and saw it to exact width with the table saw. I only have to freehand
saw the rounded ends then. The ends will need to be sawn from the bottom side if you use a saber saw to rough it
out. Table saws, band saws, jigsaws and coping saws all cut with the topside up.
If you are missing the original throat plate, just tape some cardboard or
poster board over the opening and cut a stencil with a utility knife. You will need to leave the pencil mark and just sand to it, instead of sanding it off, with this method.
Third Step: Determine a spot roughly an inch from the end and an
inch from the right side (side away from the trunnion and not too close to where the blade will pierce the plate). Drill a 3/4" finger hole to make removing the
plate from the table easier.
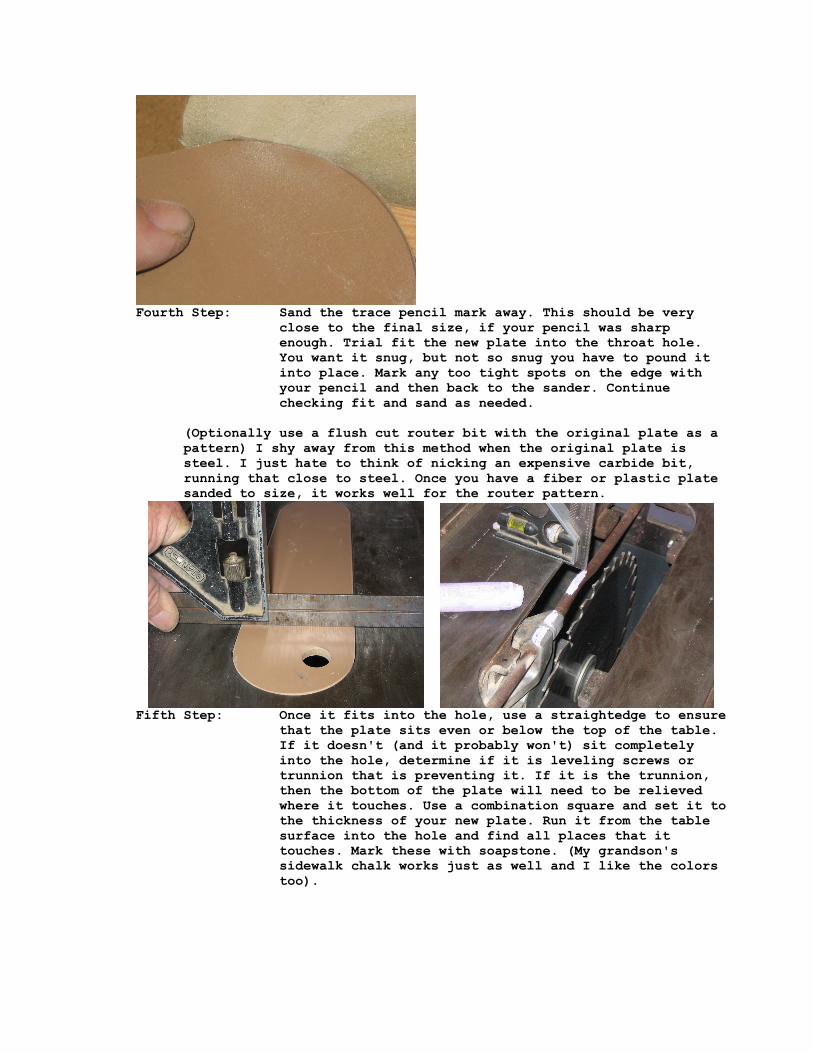
Fourth Step: Sand the trace pencil mark away. This should be very
close to the final size, if your pencil was sharp enough. Trial fit the new plate into the throat hole. You want it snug, but not so snug you have to pound it
into place. Mark any too tight spots on the edge with your pencil and then back to the sander. Continue
checking fit and sand as needed.
(Optionally use a flush cut router bit with the original plate as a
pattern) I shy away from this method when the original plate is steel. I just hate to think of nicking an expensive carbide bit,
running that close to steel. Once you have a fiber or plastic plate sanded to size, it works well for the router pattern.
Fifth Step: Once it fits into the hole, use a straightedge to ensure
that the plate sits even or below the top of the table. If it doesn't (and it probably won't) sit completely
into the hole, determine if it is leveling screws or trunnion that is preventing it. If it is the trunnion, then the bottom of the plate will need to be relieved
where it touches. Use a combination square and set it to the thickness of your new plate. Run it from the table
surface into the hole and find all places that it touches. Mark these with soapstone. (My grandson's sidewalk chalk works just as well and I like the colors
too).
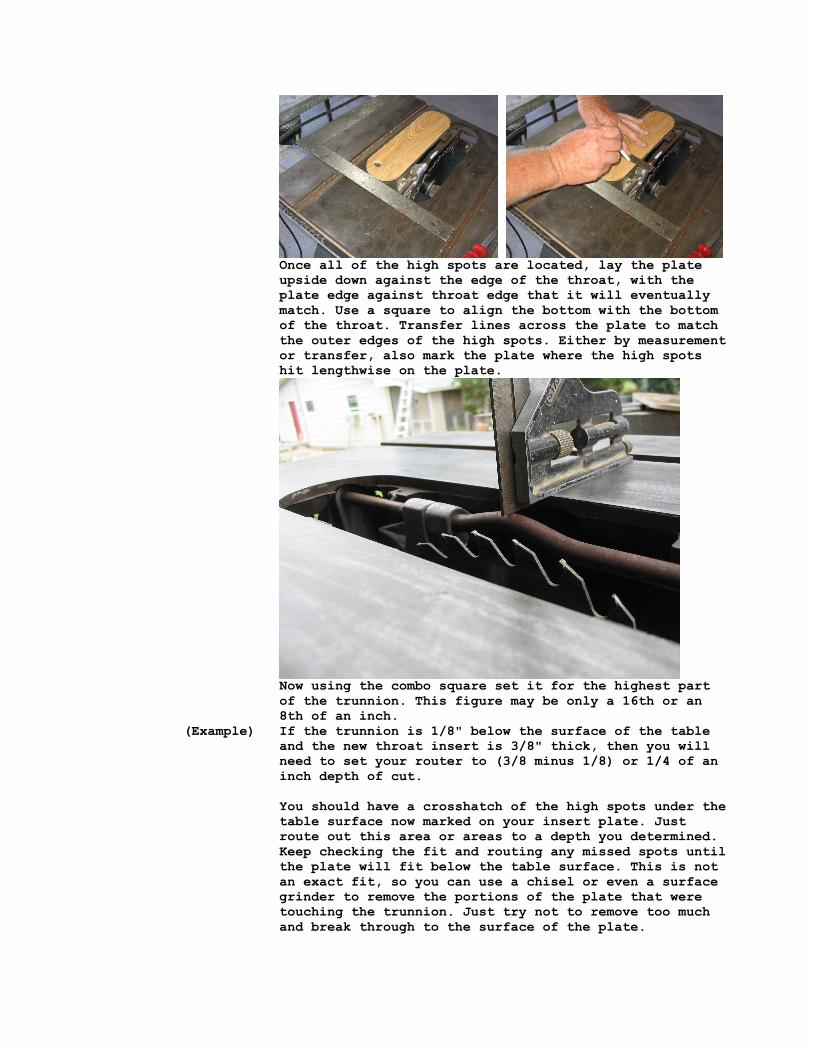
Once all of the high spots are located, lay the plate upside down against the edge of the throat, with the plate edge against throat edge that it will eventually
match. Use a square to align the bottom with the bottom of the throat. Transfer lines across the plate to match
the outer edges of the high spots. Either by measurement or transfer, also mark the plate where the high spots hit lengthwise on the plate.
Now using the combo square set it for the highest part
of the trunnion. This figure may be only a 16th or an 8th of an inch.
(Example) If the trunnion is 1/8" below the surface of the table and the new throat insert is 3/8" thick, then you will need to set your router to (3/8 minus 1/8) or 1/4 of an
inch depth of cut.
You should have a crosshatch of the high spots under the table surface now marked on your insert plate. Just route out this area or areas to a depth you determined.
Keep checking the fit and routing any missed spots until the plate will fit below the table surface. This is not
an exact fit, so you can use a chisel or even a surface grinder to remove the portions of the plate that were touching the trunnion. Just try not to remove too much
and break through to the surface of the plate.
Sixth Step: I like to just break the top edge of the plate by sanding a slight bevel. This ensures that boards being
sawn, won't catch the plate and maybe knock it out of the hole.
By trial and error set your plate leveling screws to just keep the top of the plate flush with the top of the table. You will quickly see why we drilled the finger
hole. If your original plate was leveled with setscrews in the
plate, you will either have to drill and tap the new plate or I have used a dab of hot glue at each leveling tab to set the level. Easily done if you only set one
end at a time. The hot glue will stick to the plate, but not the cast iron and you will have permanent level even
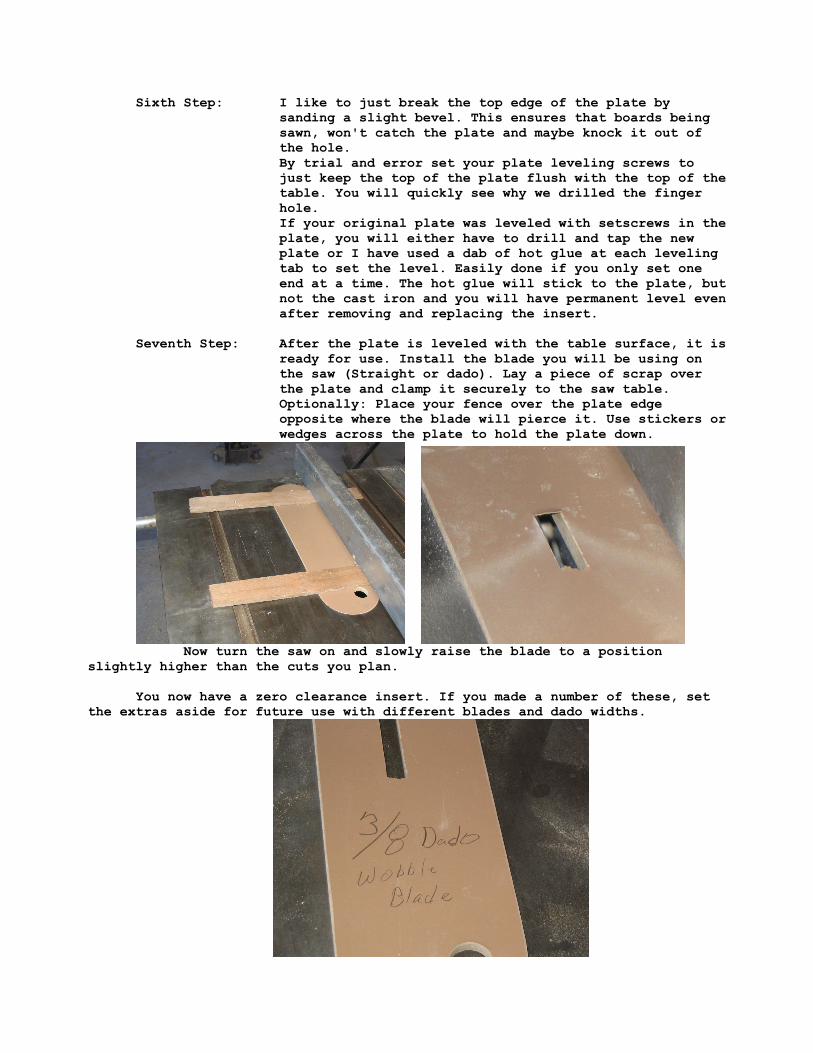
after removing and replacing the insert. Seventh Step: After the plate is leveled with the table surface, it is
ready for use. Install the blade you will be using on the saw (Straight or dado). Lay a piece of scrap over
the plate and clamp it securely to the saw table. Optionally: Place your fence over the plate edge opposite where the blade will pierce it. Use stickers or
wedges across the plate to hold the plate down.
Now turn the saw on and slowly raise the blade to a position
slightly higher than the cuts you plan.
You now have a zero clearance insert. If you made a number of these, set the extras aside for future use with different blades and dado widths.

Just mark the insert plates with the dado sizes to make finding the correct one easier each time you change blades. Depending on your blade storage
method, the finger hole will hang the proper insert with the proper blade. Simple enough, even us old wood hacks can find them.