Embed Size (px)
Citation preview

Making a PowerPoint Slide
By
Ms. Wesley
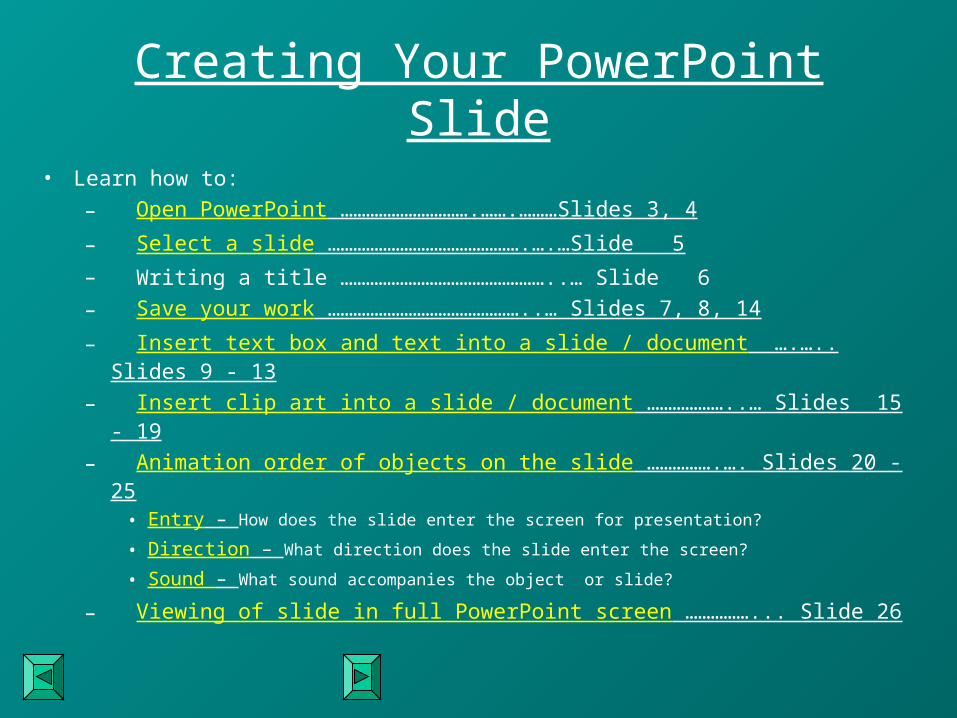
Creating Your PowerPoint Slide
• Learn how to:
– Open PowerPoint ………………………….…….………Slides 3, 4
– Select a slide ……………………………………….….…Slide 5
– Writing a title …………………………………………..… Slide 6
– Save your work ………………………………………..… Slides 7, 8, 14
– Insert text box and text into a slide / document ….….. Slides 9 - 13
– Insert clip art into a slide / document ………………..… Slides 15 - 19
– Animation order of objects on the slide …………….…. Slides 20 - 25• Entry – How does the slide enter the screen for presentation?
• Direction – What direction does the slide enter the screen?
• Sound – What sound accompanies the object or slide?
– Viewing of slide in full PowerPoint screen ……………... Slide 26

Opening PowerPoint
Using the mouse or touch pad > move the curser to:
1. > Start > Click >
2. Move Curser > Programs
3. Move Curser > Microsoft PowerPoint >
4. > Click > to open1)
3)
2)
Content Page 3
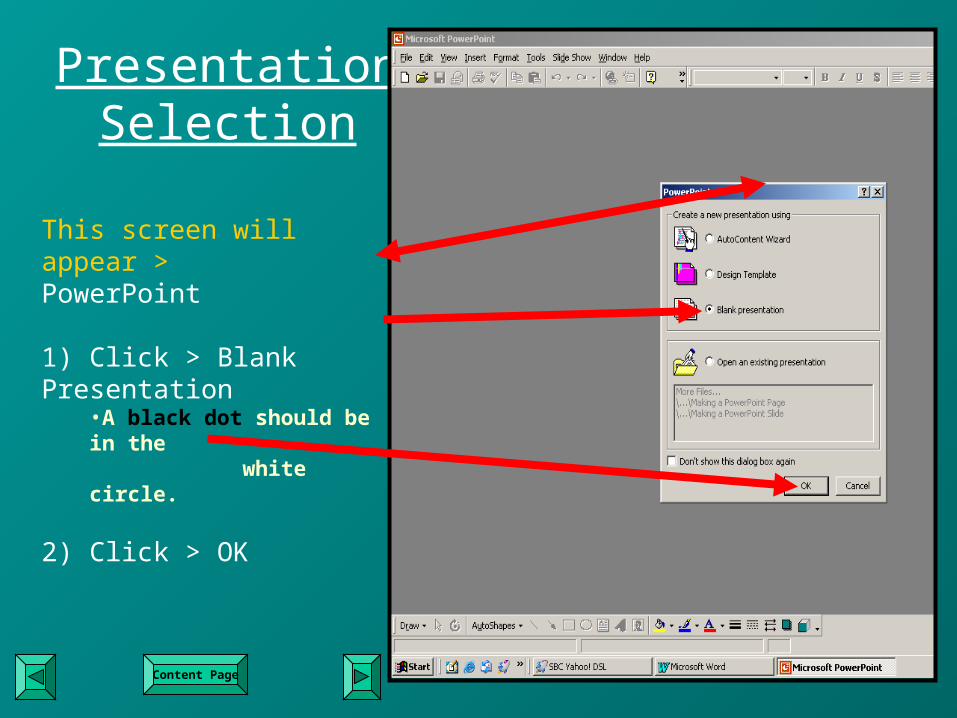
Presentation Selection
This screen will appear > PowerPoint
1) Click > Blank Presentation •A black dot should be in the white circle.
2) Click > OK
Content Page
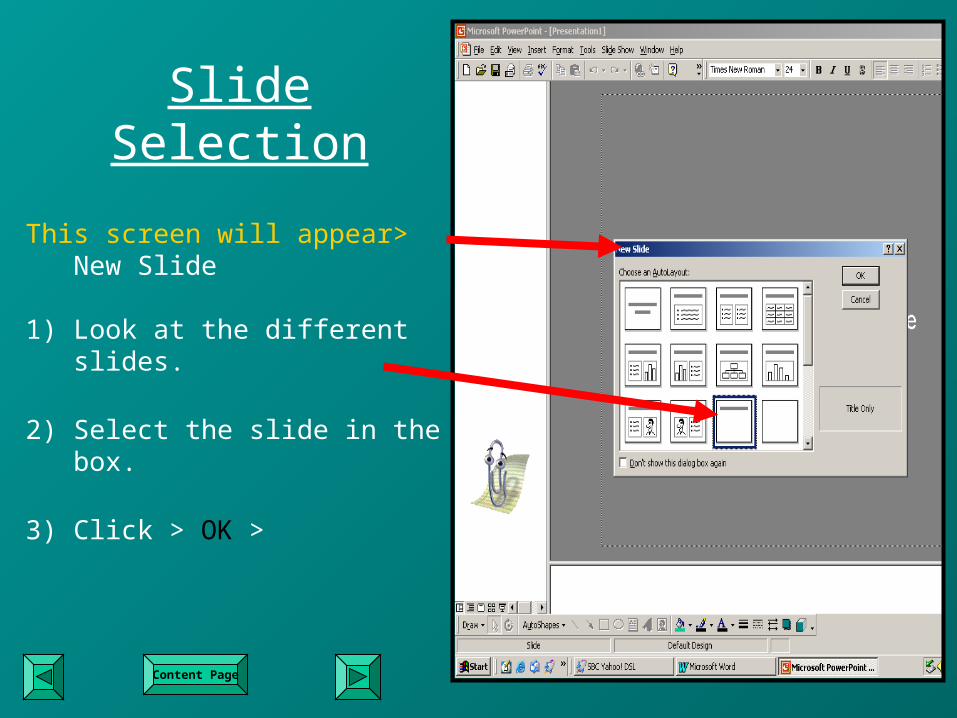
Slide Selection
This screen will appear> New Slide
1) Look at the different slides.
2) Select the slide in the box.
3) Click > OK >
Content Page

Creating a Title
This screen will appear >
1) In the box > Click to add title
2) Highlight the words
3) Type the name of your Core Democratic Value,
(CDV), in the box.
4) Save your work: Next screen
Content Page
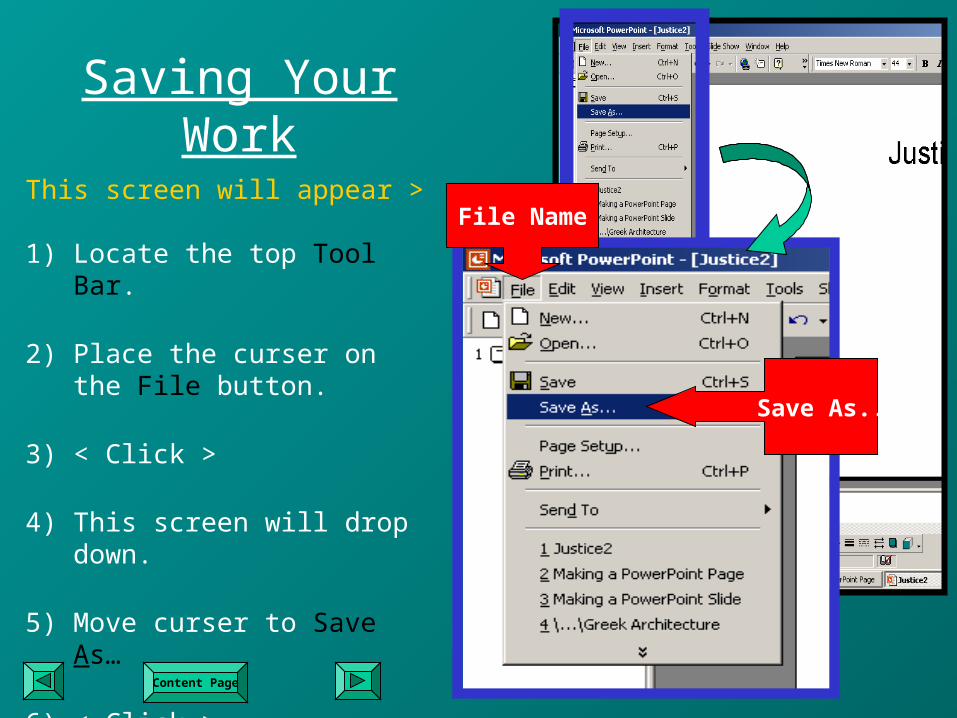
Saving Your Work
This screen will appear >
1) Locate the top Tool Bar.
2) Place the curser on the File button.
3) < Click >
4) This screen will drop down.
5) Move curser to Save As…
6) < Click >
File Name
Save As..
Content Page
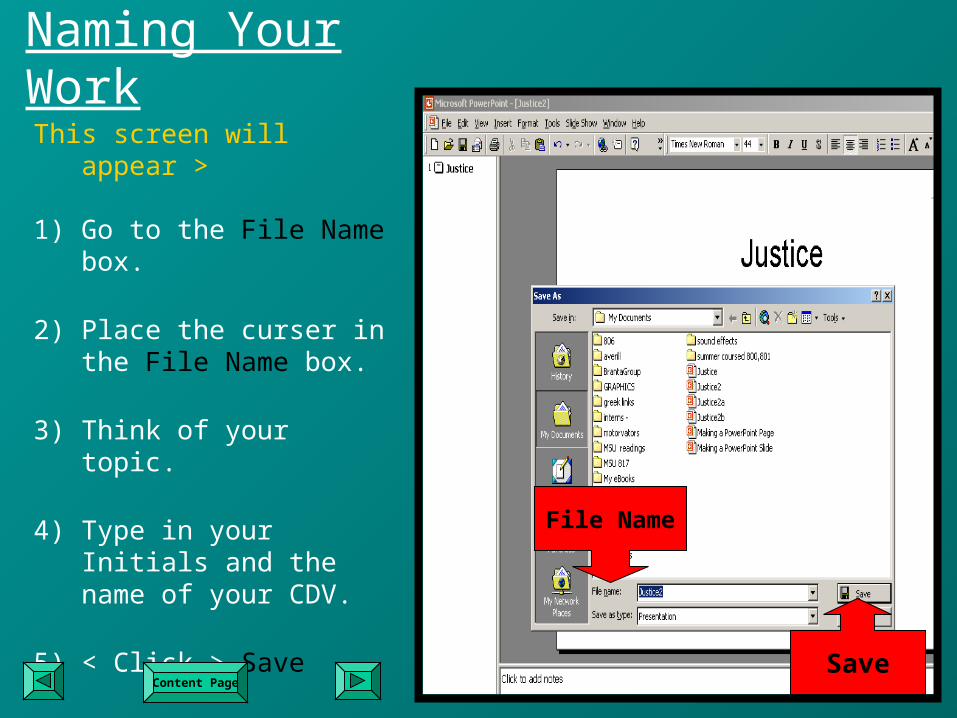
Naming Your Work
This screen will appear >
1) Go to the File Name box.
2) Place the curser in the File Name box.
3) Think of your topic.
4) Type in your Initials and the name of your CDV.
5) < Click > Save
6) Continue working on creating your slide.
File Name
SaveContent Page
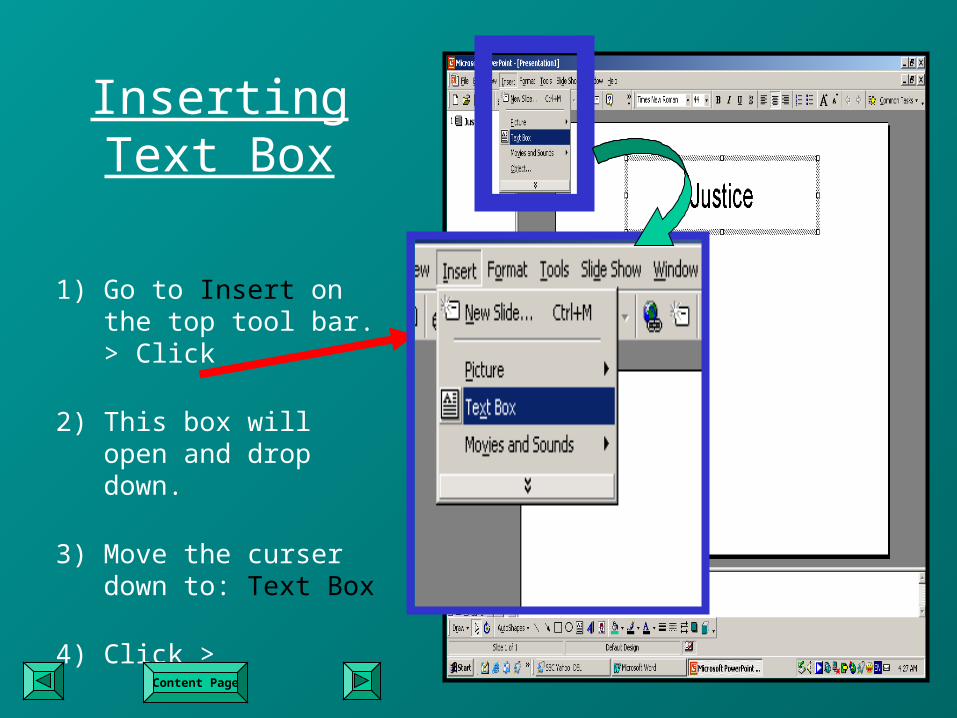
Inserting Text Box
1) Go to Insert on the top tool bar. > Click
2) This box will open and drop down.
3) Move the curser down to: Text Box
4) Click >
Content Page
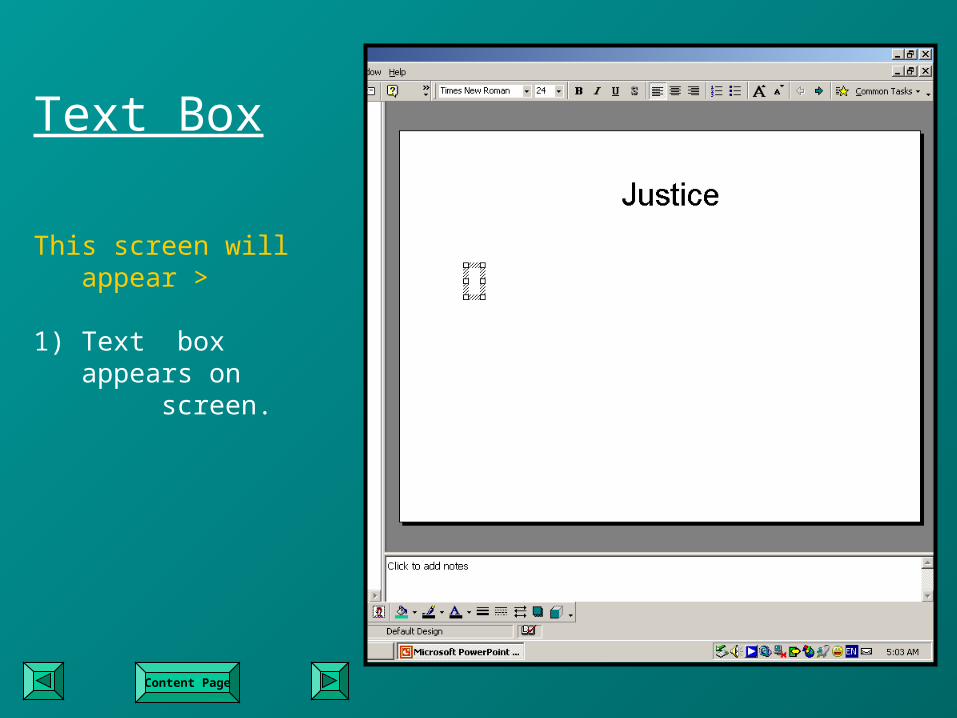
Text Box
This screen will appear >
1) Text box appears on screen.
Content Page

Increase Text Box Size
1) Locate the small boxes around
the square.
2) Click on the middle box.Click
Drag to the right.
3) Drag the box to the right > Increasing the size of the box
Text box
Content Page
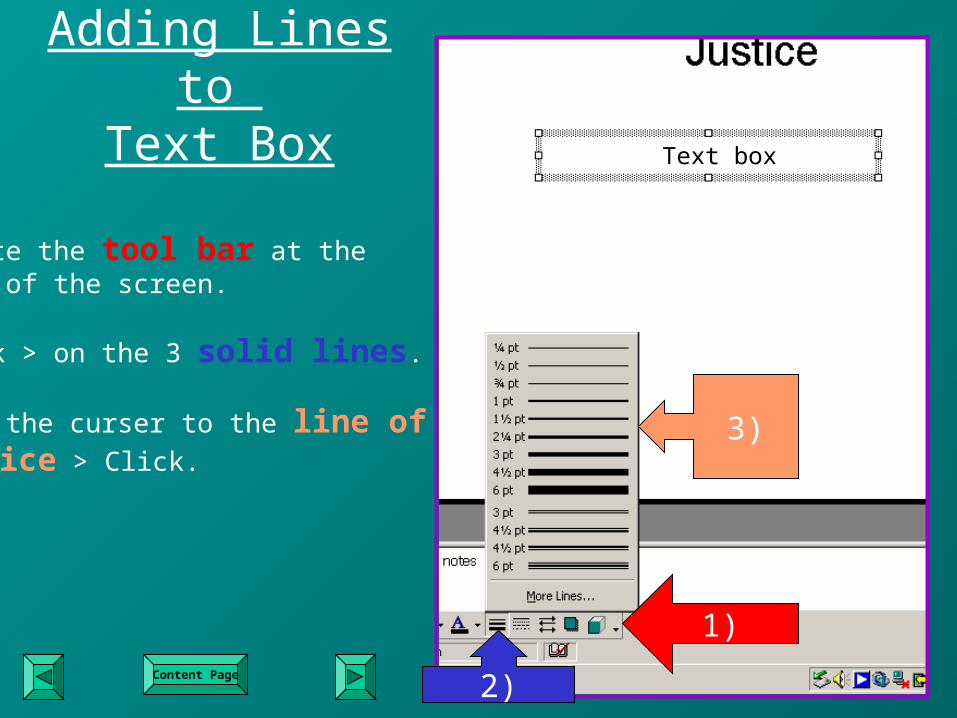
Adding Lines to Text Box
1) Locate the tool bar at the bottom of the screen.
2) Click > on the 3 solid lines.
3) Move the curser to the line of
choice > Click.3)
1)
2)
Text box
Content Page
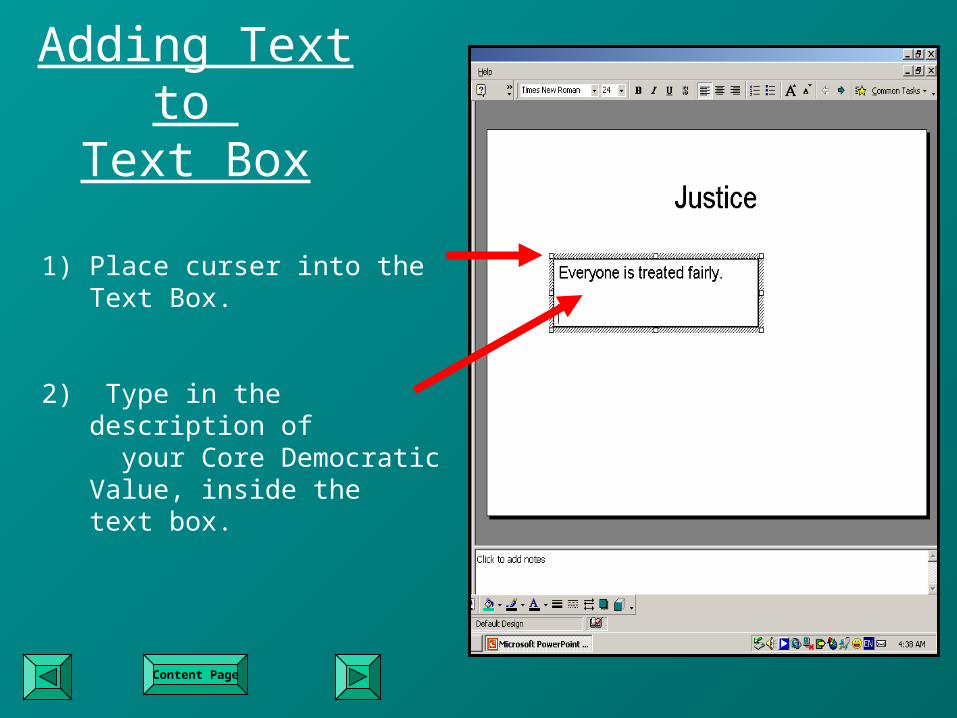
Adding Text to Text Box
1) Place curser into the Text Box.
2) Type in the description of your Core Democratic Value,
inside the text box.
Content Page

Saving - Again
When you finish adding new objects to the slide, “Save your work”.
1) Locate the top Tool Bar.
2) Locate the icon.
3) < Click >
4) Your work is automatically saved.
5) Continue working on your slide.
New Entry
Content Page
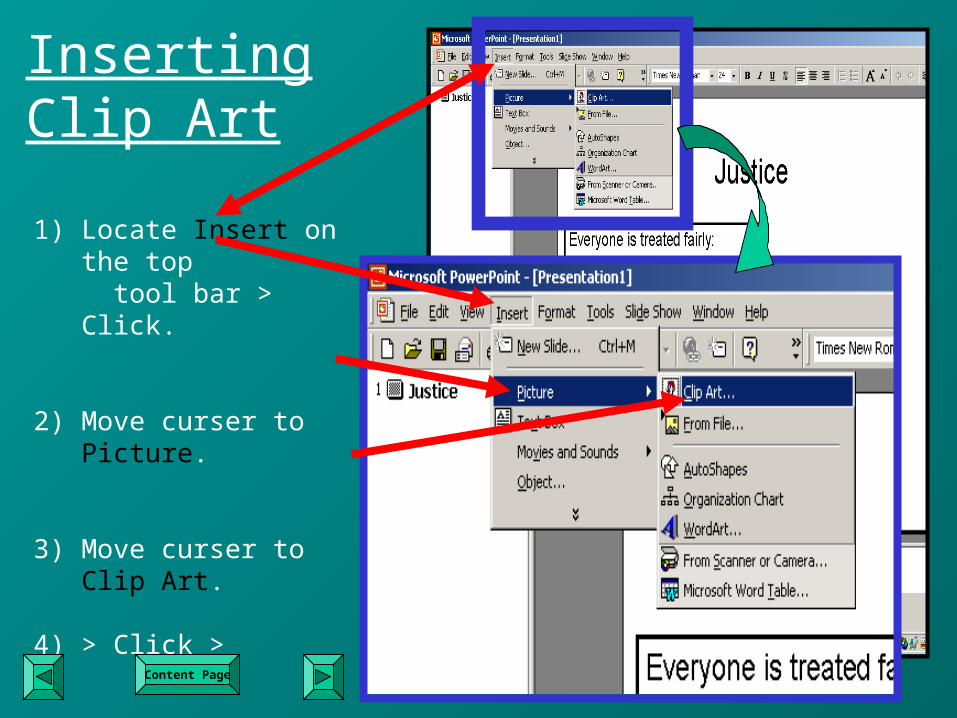
Inserting Clip Art
1) Locate Insert on the top tool bar > Click.
2) Move curser to Picture.
3) Move curser to Clip Art.
4) > Click >
Content Page
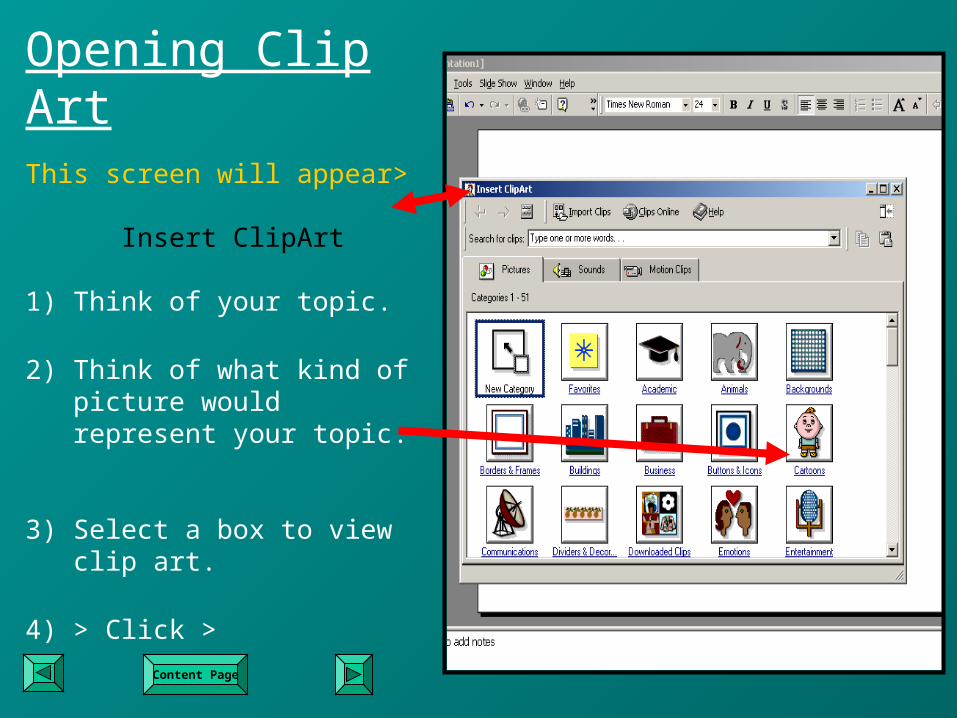
Opening Clip Art
This screen will appear> Insert ClipArt
1) Think of your topic.
2) Think of what kind of picture would represent your topic.
3) Select a box to view clip art.
4) > Click >
Content Page
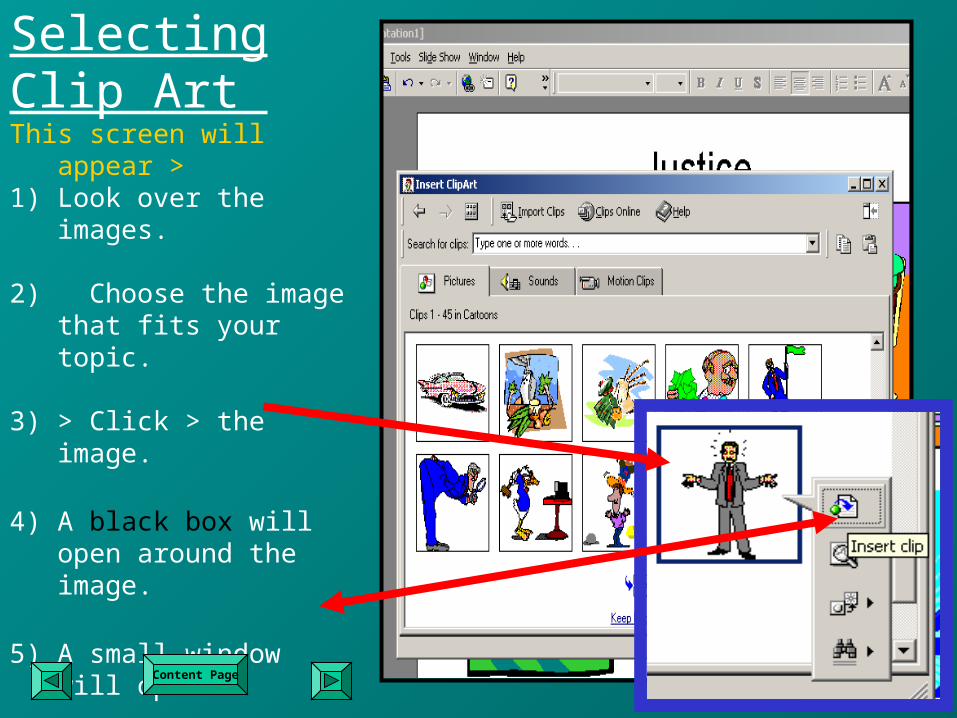
Selecting Clip Art This screen will appear >1) Look over the images.
2) Choose the image that fits your topic.
3) > Click > the image.
4) A black box will open around the image.
5) A small window will open.
6) > Click > the top box > Insert clip
Content Page
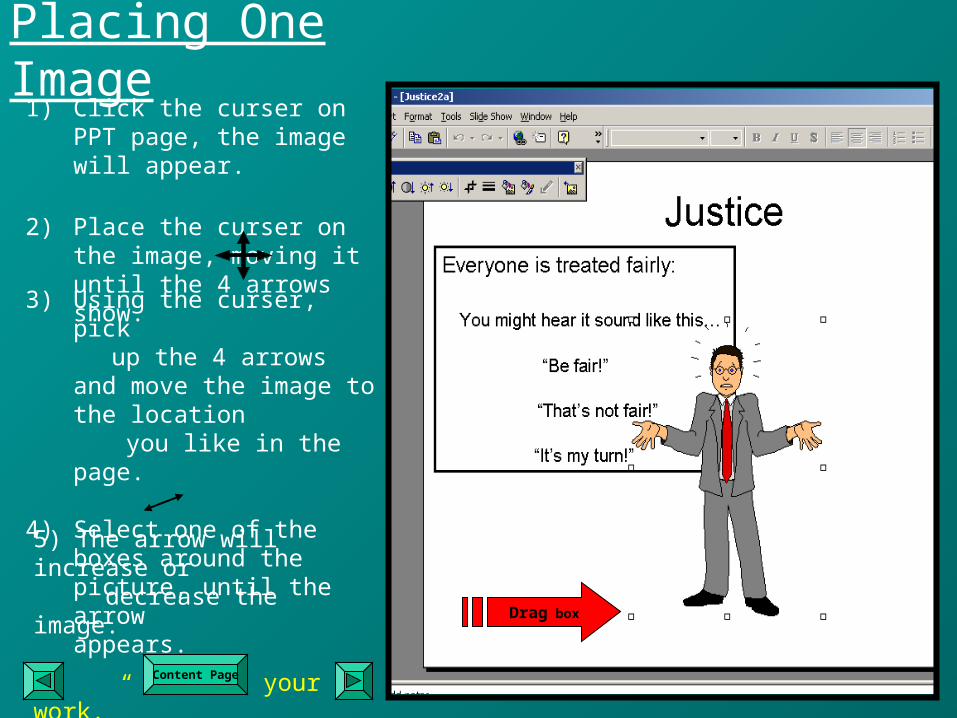
Placing One Image1) Click the curser on PPT page,
the image will appear.
2) Place the curser on the image, moving it until the 4 arrows show.
3) Using the curser, pick up the 4 arrows and move the
image to the location you like in the page.
4) Select one of the boxes around the picture, until the arrow appears.
5) The arrow will increase or decrease the image.
“Save your work.”
Content Page
Drag box
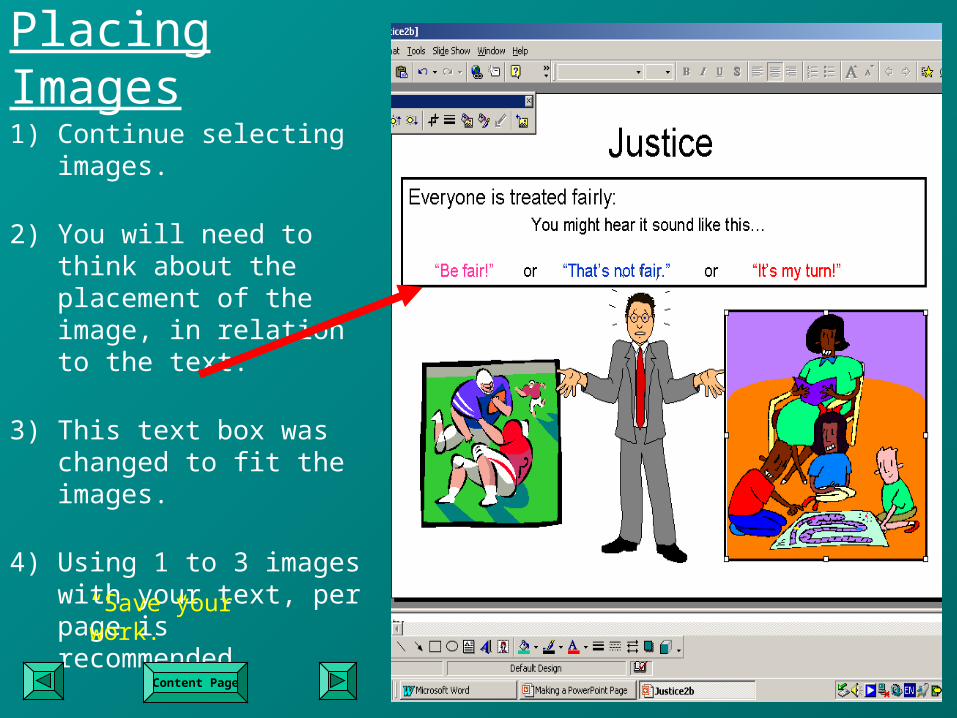
Placing Images
1) Continue selecting images.
2) You will need to think about the placement of the image, in relation to the text.
3) This text box was changed to fit the images.
4) Using 1 to 3 images with your text, per page is recommended.
“Save your work.”
Content Page
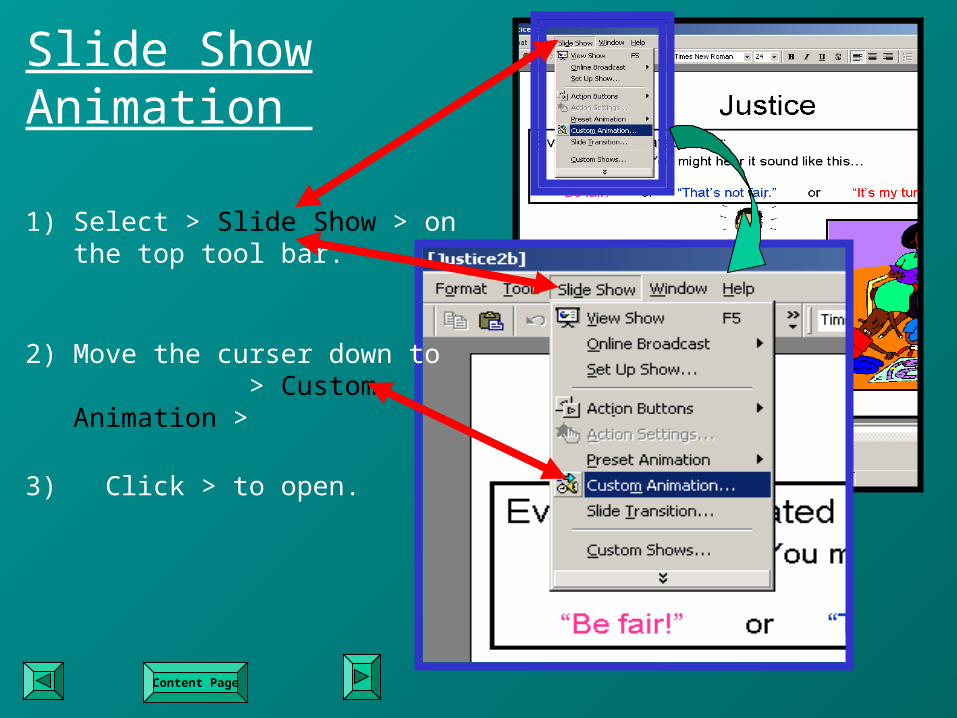
Slide Show Animation
1) Select > Slide Show > on the top tool bar.
2) Move the curser down to > Custom Animation >
3) Click > to open.
Content Page
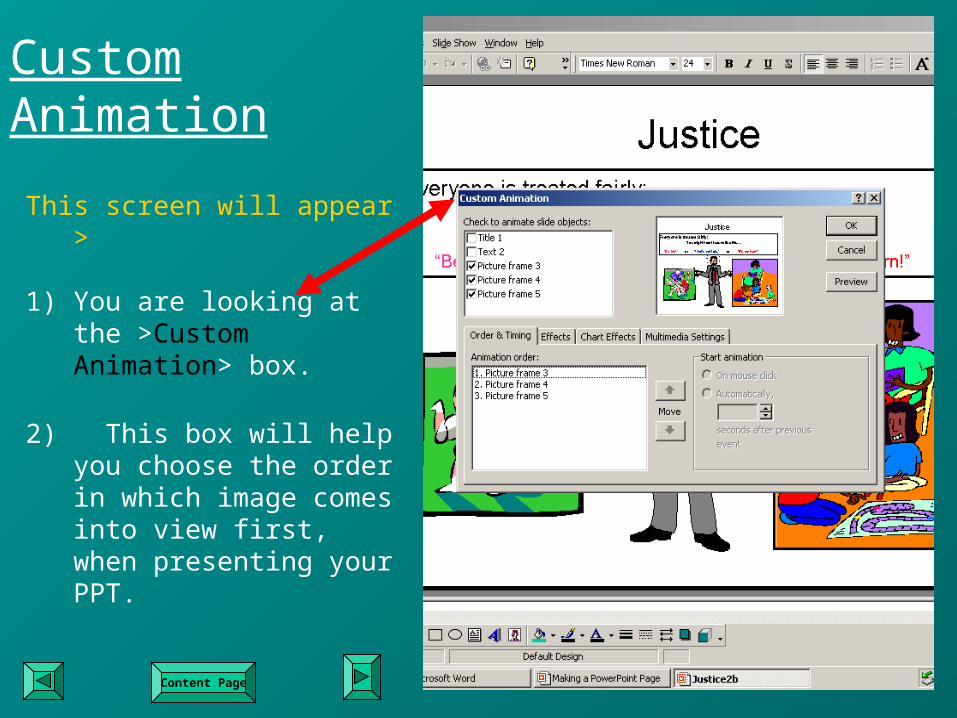
Custom Animation
This screen will appear >
1) You are looking at the >Custom Animation> box.
2) This box will help you choose the order in which image comes into view first, when presenting your PPT.
Content Page
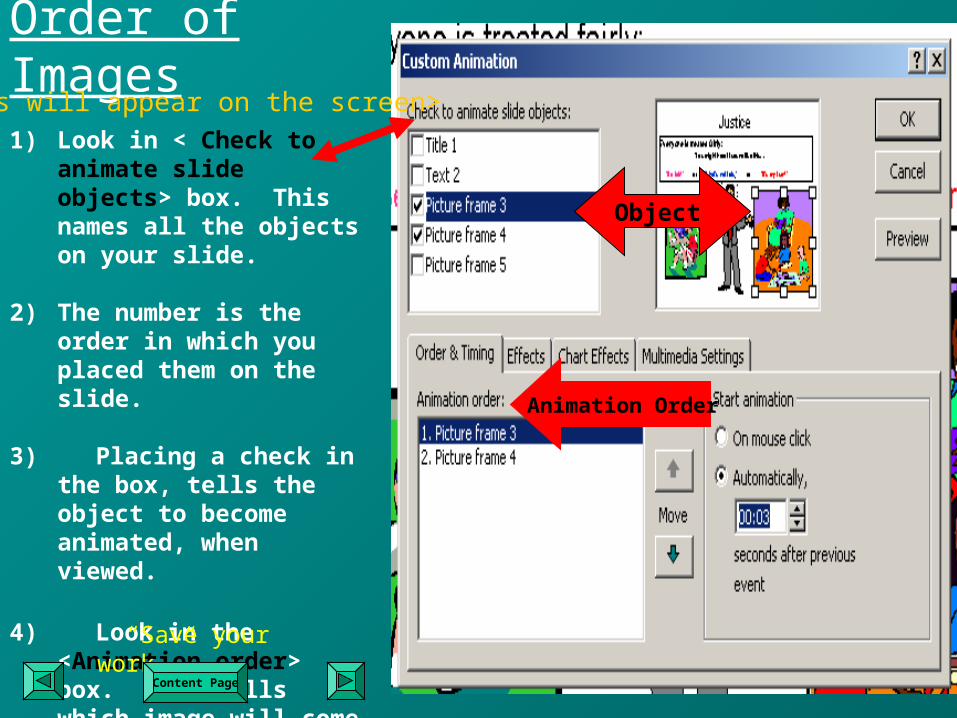
Order of Images
1) Look in < Check to animate slide objects> box. This names all the objects on your slide.
2) The number is the order in which you placed them on the slide.
3) Placing a check in the box, tells the object to become animated, when viewed.
4) Look in the <Animation order> box. This tells which image will come into view first.
This will appear on the screen>
Animation Order
Object
“Save your work.”
Content Page
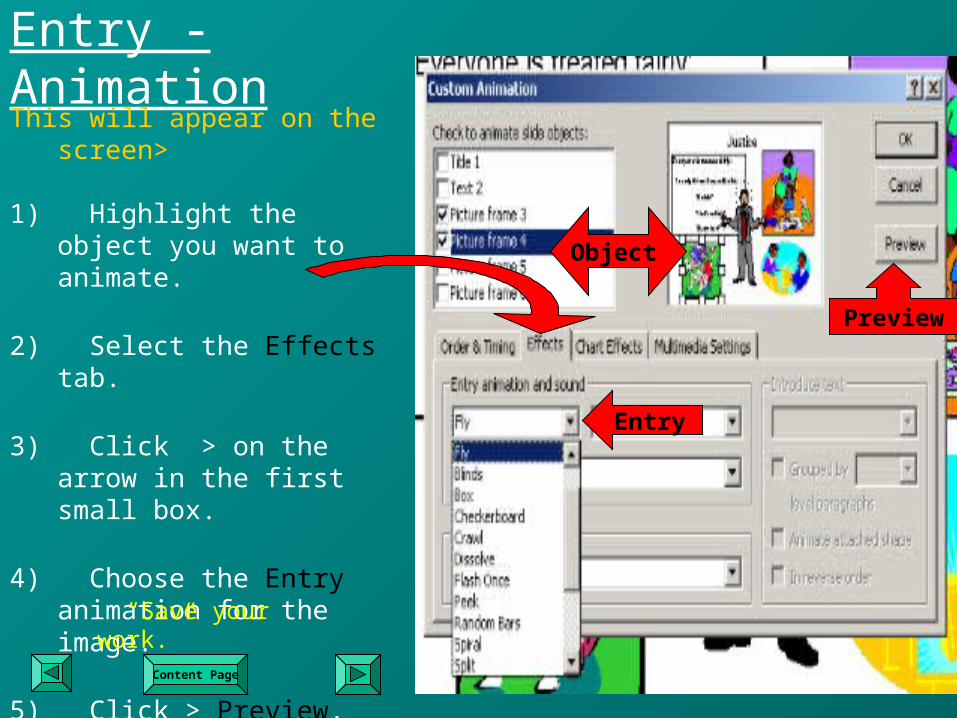
Entry - AnimationThis will appear on the screen>
1) Highlight the object you want to animate.
2) Select the Effects tab.
3) Click > on the arrow in the first small box.
4) Choose the Entry animation for the image.
5) Click > Preview, checking the effect.
Entry
Preview
Object
“Save your work.”
Content Page
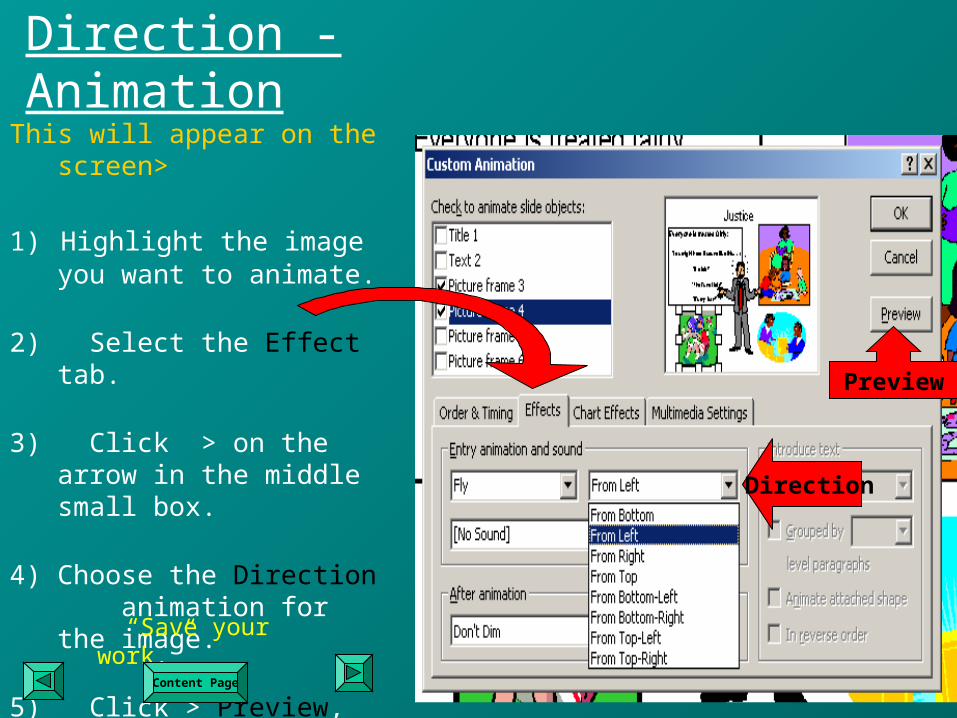
Direction - AnimationThis will appear on the screen>
1) Highlight the image you want to animate.
2) Select the Effect tab.
3) Click > on the arrow in the middle small box.
4) Choose the Direction animation for the image.
5) Click > Preview, checking the effect.
Direction
Preview
“Save your work.”
Content Page
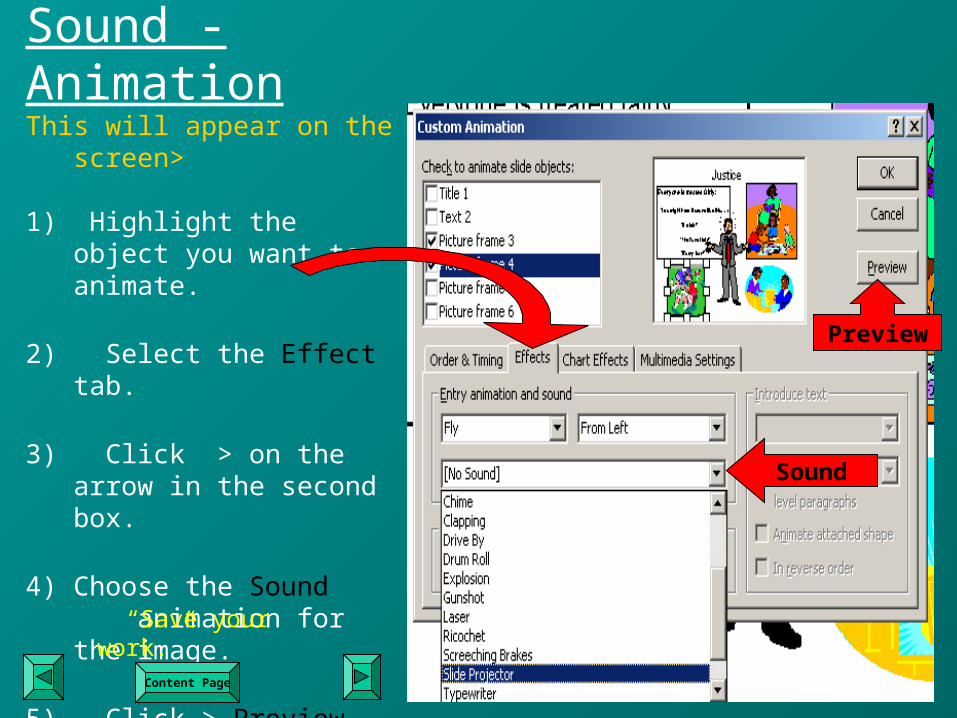
Sound - AnimationThis will appear on the screen>
1) Highlight the object you want to animate.
2) Select the Effect tab.
3) Click > on the arrow in the second box.
4) Choose the Sound animation for the image.
5) Click > Preview, checking the effect.
Sound
Preview
“Save your work.”
Content Page
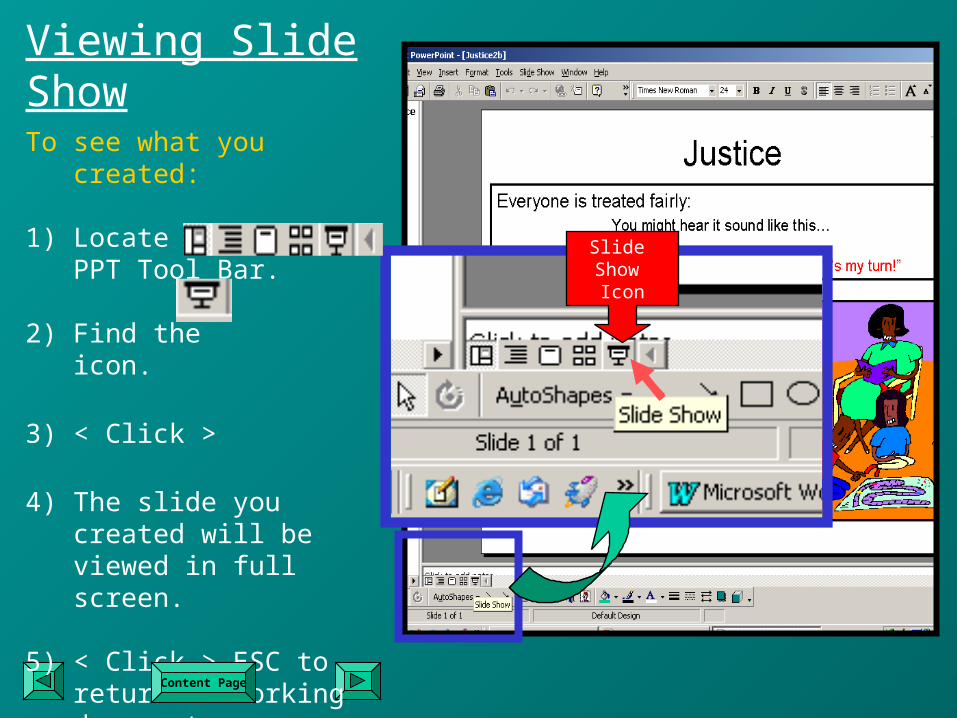
Viewing Slide Show
To see what you created:
1) Locate the bottom PPT Tool Bar.
2) Find the icon.
3) < Click >
4) The slide you created will be viewed in full screen.
5) < Click > ESC to return to
working document.
“EXCELLENT WORK!”
Content Page
Slide Show Icon