Embed Size (px)
Citation preview
Brace bits -- Center Bit
We don't see brace bits much anymore, except perhaps in antique shops, old farm auctions, or in the rare traditional woodworking shop. When I was a kid, electric drills were a rarity. If you wanted to drill a hole, you used a brace and bit:
A brace and bit does an excellent job of drilling holes. The batteries never die, the motor never burns out, and the bits are easy to sharpen. An electric drill is like an electric razor: advertisers have convinced most people dispense with the old and buy the new -- even if it doesn't work any better.
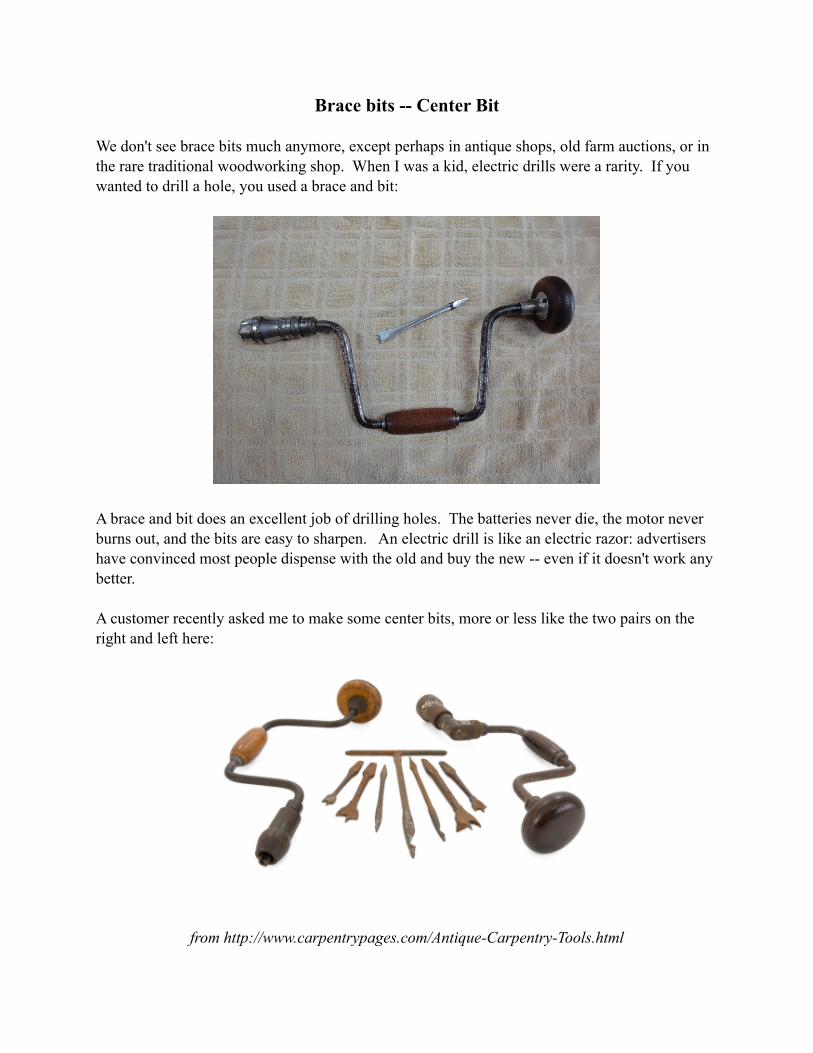
A customer recently asked me to make some center bits, more or less like the two pairs on the right and left here:
from http://www.carpentrypages.com/Antique-Carpentry-Tools.html

A Google search turned up practically no information on how to make them. Flipping through pages in the Incandescent Ironworks library turned up a few useful references, but not enough to constitute what could be called "instructions". The closest was:
Alexander G. Weygers, The Modern Blacksmith, 1974 So, I grabbed a rod of mild steel, heated it and started hammering, to see if I could make something that had the right shape. If that worked, the next step would be to use a decent tool steel. Actually, it went very well, so I tried it in W-2 steel, starting with a 3/8" rod.
Here is the procedure:
Step 1-- Upset the end.Heat the end of the rod to bright orange. Grip the rod very firmly in your vise with about 1.5" sticking out, and give it two or three heavy blows as straight along the axis as you can. Remove it from the vise and straighten.
On the next heat, again go to bright orange. This time, knock the edges in to provide a slight bevel. Try to keep the bevel symmetrical, because otherwise it will have a worse tendency to bend while you're upsetting. Cool just the tip in water. Put it in the vise again, and give it a few more heavy blows straight along the axis.

Repeat, beveling the end each time, until the upset portion is about 1/2" diameter and 1/2" long. Three or four heats should be enough. It will look something like this:
Step 2-- Taper the end.Make a four-sided pyramidal taper, down to about 1/8" square. The taper should be about 1-1/8" long, and the fat part of the taper should be 3/8" square. A good way to do this is with "stroking blows" near the edge of your anvil. One heat to form the taper, and at most one more heat to make the shape perfect.
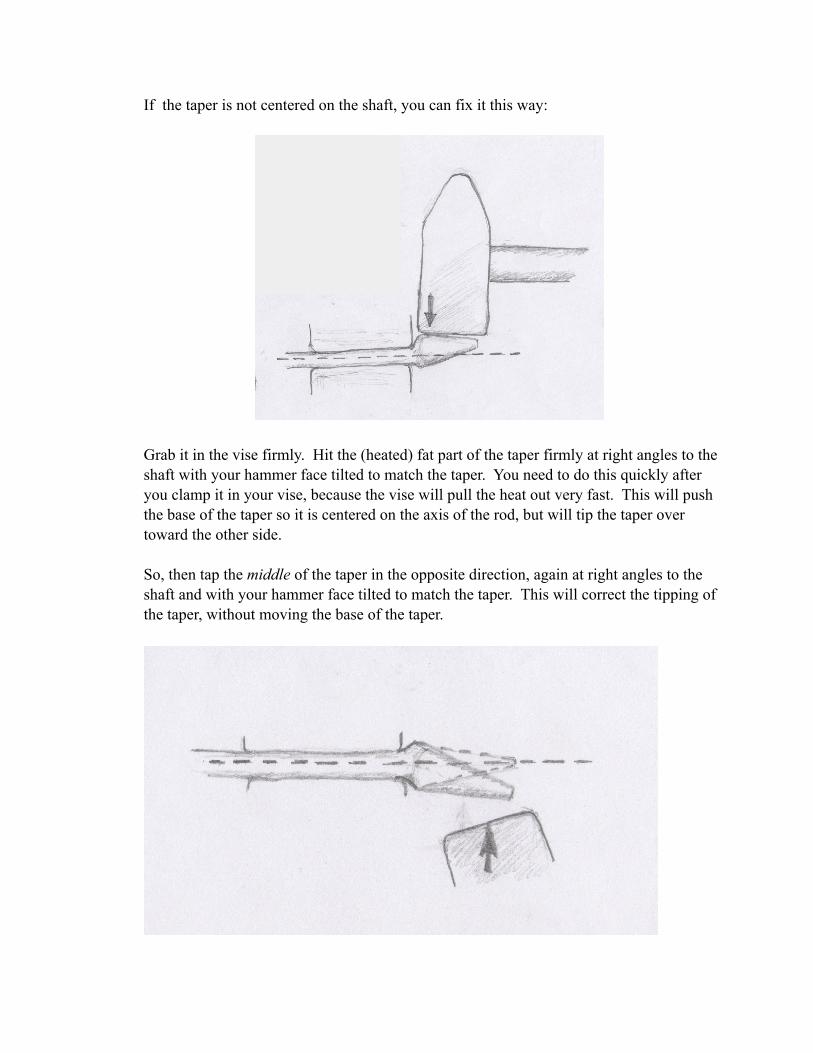
If the taper is not centered on the shaft, you can fix it this way:
Grab it in the vise firmly. Hit the (heated) fat part of the taper firmly at right angles to the shaft with your hammer face tilted to match the taper. You need to do this quickly after you clamp it in your vise, because the vise will pull the heat out very fast. This will push the base of the taper so it is centered on the axis of the rod, but will tip the taper over toward the other side.
So, then tap the middle of the taper in the opposite direction, again at right angles to the shaft and with your hammer face tilted to match the taper. This will correct the tipping of the taper, without moving the base of the taper.

Step 3-- Draw out the shaft If your hammer accuracy is good, you can draw out the shaft on the edge of your anvil. Or, you can do it using a spring fuller. The only really important part of this step is to end up with a relatively straight, uniformly tapered shaft. You also need to be sure not to draw down the portion that will become the flat blade of the bit.
I use a hardie tool to provide a narrow "anvil" on which to clean up the shape and taper of the shaft, because it can be hard to find a narrow enough part on your anvil face.

Step 4-- Cut the rodCut the rod about 1/2" to 3/4" into the untouched part of your rod. A hot cutter is quick and easy. You'll be grinding the end of the blade anyhow, so the taper or burr due to hot cutting will not be a problem.
Step 5-- Flatten and draw out the bladeBash the blade end flat, down to a thickness a bit less than 1/8". It can taper slightly, but should be no thinner than 3/32" at the end. Correct the edges so they are parallel to the axis of the bit. Straighten and un-twist the shaft if necessary, and make sure everything is aligned along the axis. Grind or file off any ragged or thin material on the end.
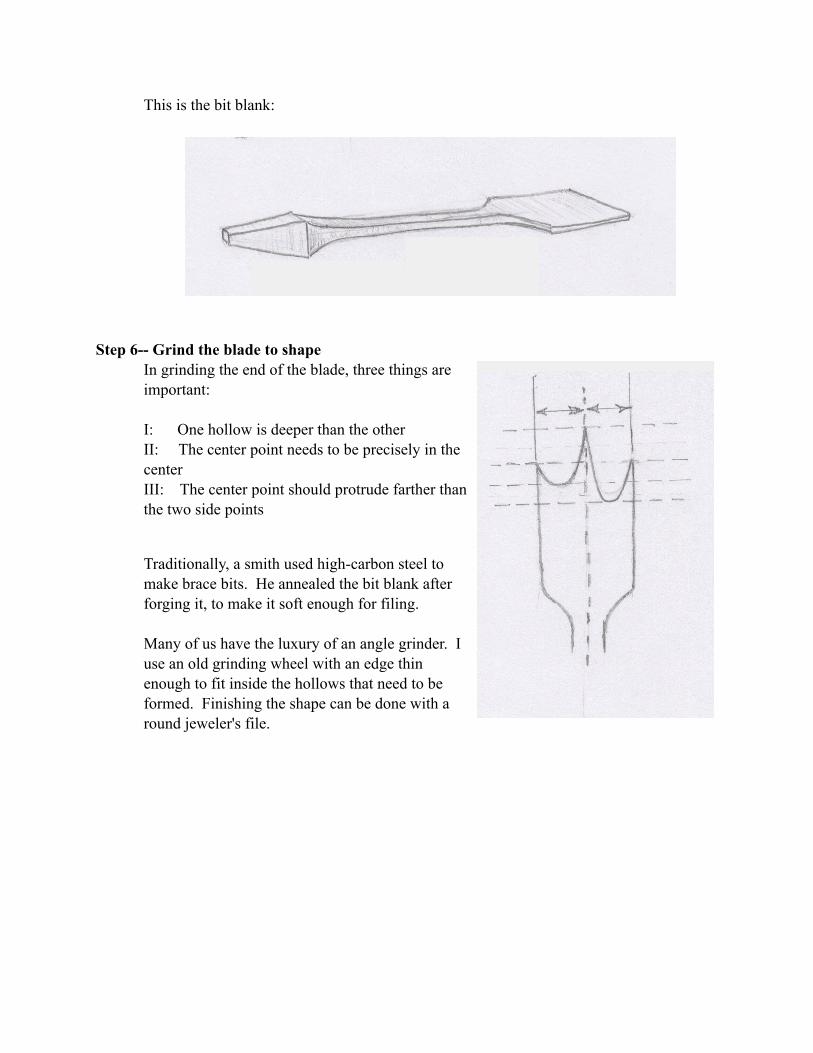
This is the bit blank:
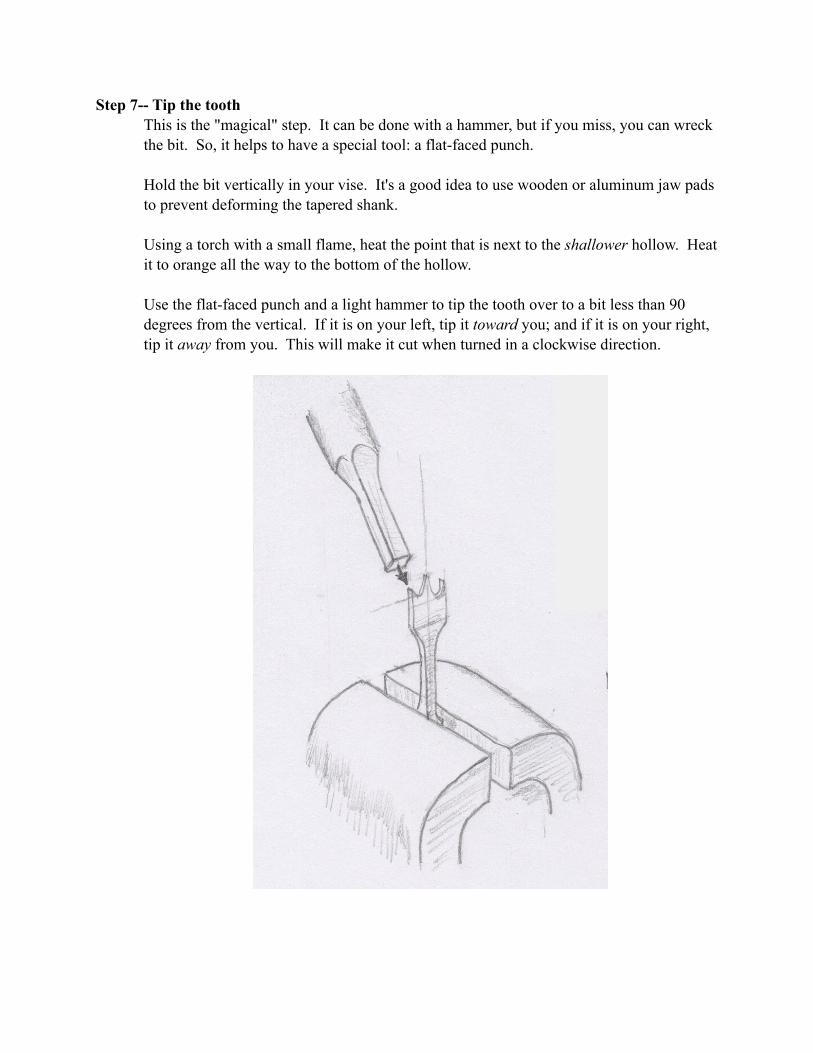
Step 6-- Grind the blade to shapeIn grinding the end of the blade, three things are important:
I: One hollow is deeper than the otherII: The center point needs to be precisely in the centerIII: The center point should protrude farther than the two side points
Traditionally, a smith used high-carbon steel to make brace bits. He annealed the bit blank after forging it, to make it soft enough for filing.
Many of us have the luxury of an angle grinder. I use an old grinding wheel with an edge thin enough to fit inside the hollows that need to be formed. Finishing the shape can be done with a round jeweler's file.
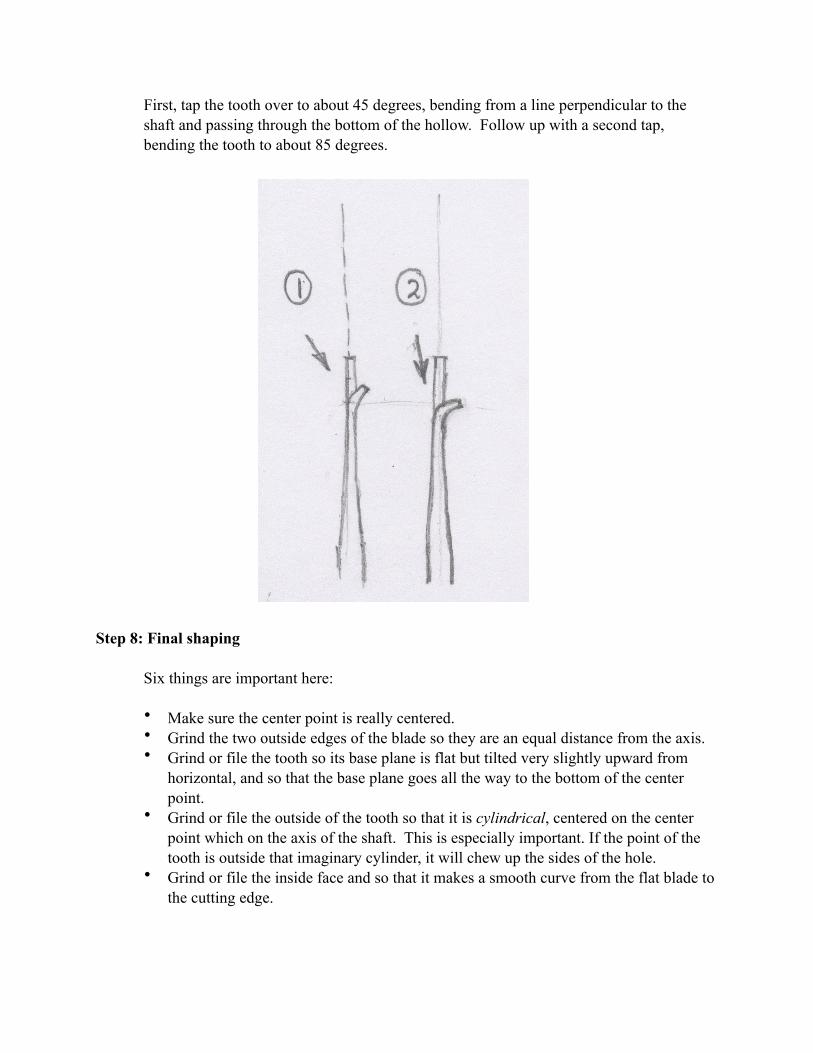
Step 7-- Tip the tooth This is the "magical" step. It can be done with a hammer, but if you miss, you can wreck the bit. So, it helps to have a special tool: a flat-faced punch.
Hold the bit vertically in your vise. It's a good idea to use wooden or aluminum jaw pads to prevent deforming the tapered shank.
Using a torch with a small flame, heat the point that is next to the shallower hollow. Heat it to orange all the way to the bottom of the hollow.
Use the flat-faced punch and a light hammer to tip the tooth over to a bit less than 90 degrees from the vertical. If it is on your left, tip it toward you; and if it is on your right, tip it away from you. This will make it cut when turned in a clockwise direction.
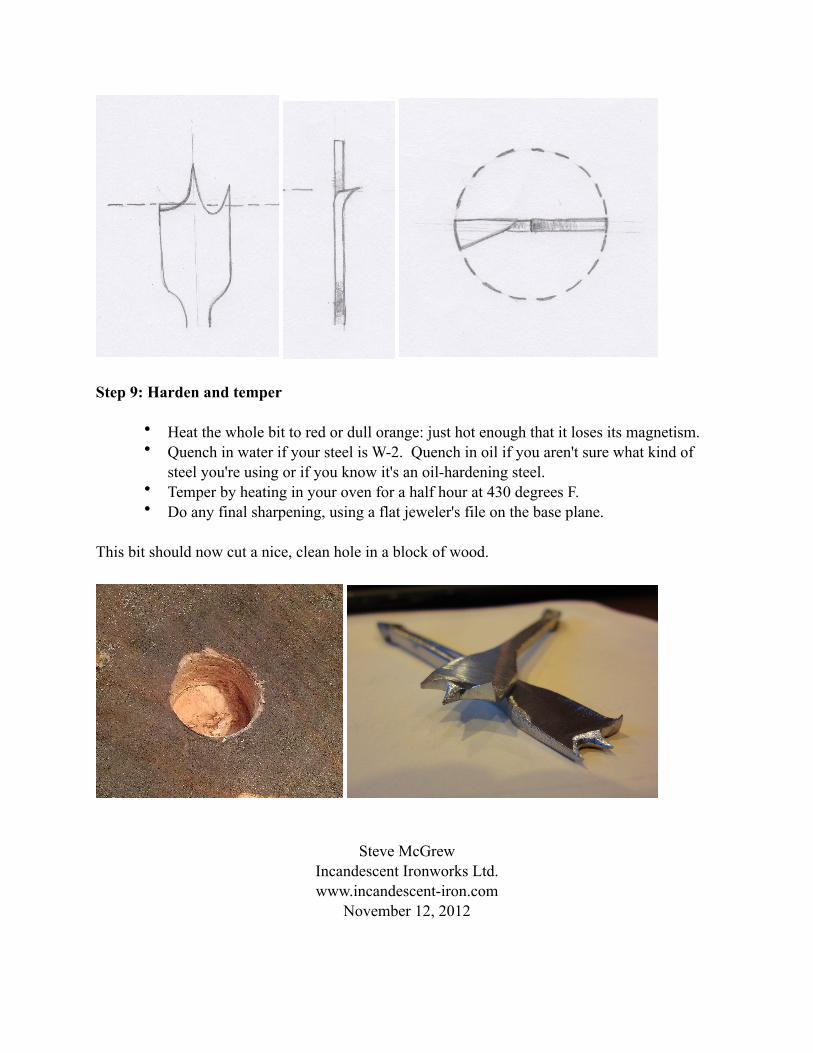
First, tap the tooth over to about 45 degrees, bending from a line perpendicular to the shaft and passing through the bottom of the hollow. Follow up with a second tap, bending the tooth to about 85 degrees.
Step 8: Final shaping
Six things are important here:
• Make sure the center point is really centered.• Grind the two outside edges of the blade so they are an equal distance from the axis.• Grind or file the tooth so its base plane is flat but tilted very slightly upward from
horizontal, and so that the base plane goes all the way to the bottom of the center point.
• Grind or file the outside of the tooth so that it is cylindrical, centered on the center point which on the axis of the shaft. This is especially important. If the point of the tooth is outside that imaginary cylinder, it will chew up the sides of the hole.
• Grind or file the inside face and so that it makes a smooth curve from the flat blade to the cutting edge.
Step 9: Harden and temper
• Heat the whole bit to red or dull orange: just hot enough that it loses its magnetism. • Quench in water if your steel is W-2. Quench in oil if you aren't sure what kind of
steel you're using or if you know it's an oil-hardening steel.• Temper by heating in your oven for a half hour at 430 degrees F.• Do any final sharpening, using a flat jeweler's file on the base plane.
This bit should now cut a nice, clean hole in a block of wood.
Steve McGrewIncandescent Ironworks Ltd.www.incandescent-iron.com
November 12, 2012