Embed Size (px)
Citation preview
Making it Easy with
Evernote

What is it?• a suite of software and services
designed for notetaking and archiving.
• a "note" can be a piece of formatted
text, a full webpage or webpage
excerpt, a photograph, a voice memo,
or a handwritten "ink" note.
• Notes can be sorted into folders, then
tagged, annotated, edited, given
comments, searched and exported as
part of a notebook.

What makes is
special?
• You can synchronize all this information
across multiple devices.
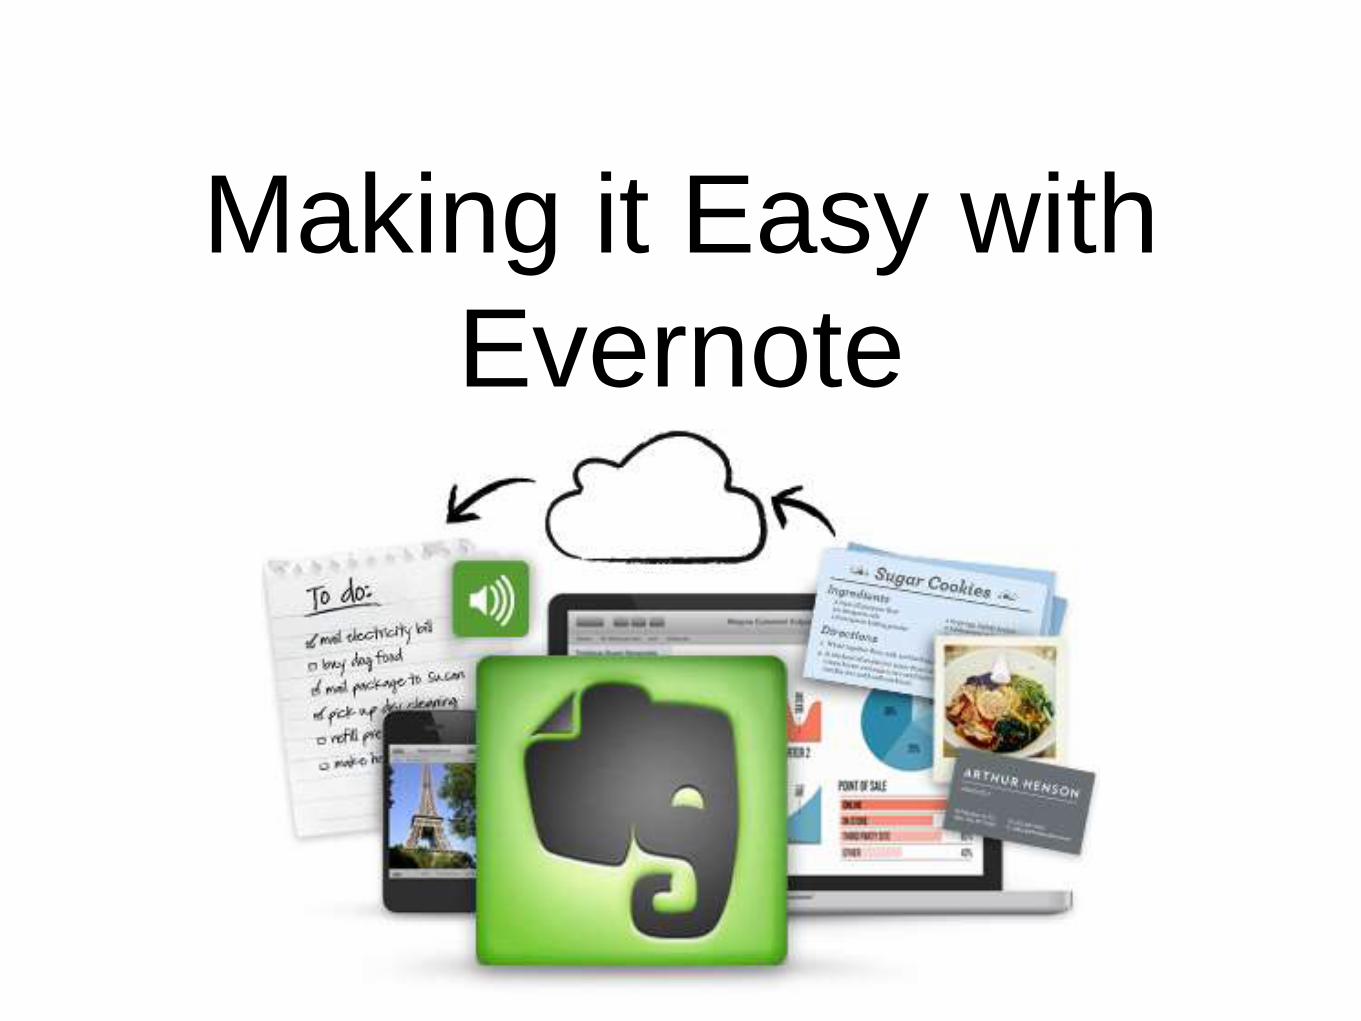
What could you use it
for?• Keep anecdotal records of
assessments/learning skills/behaviour
• Create digital portfolios of student work
• Record conferences
• Organize research for lesson plans
• Provide multimodal feedback on
student work and share with
parents/students using a url

Getting Started
• Note: a simple item stored in Evernote


Getting Started
• Notebook: A container for notes


Step 1
• Install Evernote on your computer. It’s a
free download www.evernote.com
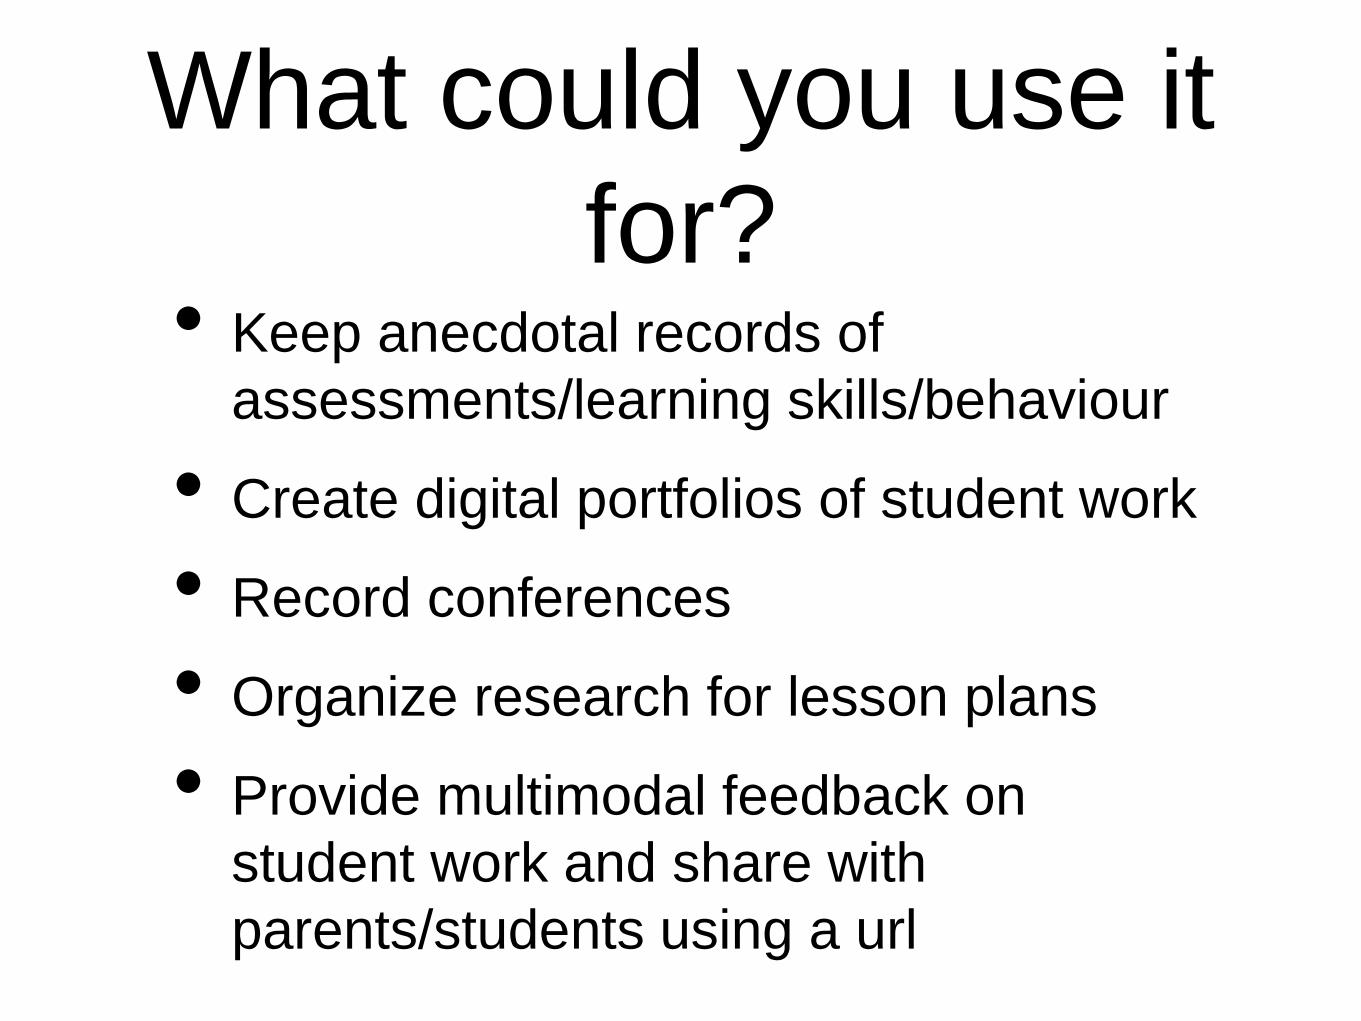
Step 2
• Create a user account (you will be
prompted to do this the first time you
open Evernote)
• The account is necessary to keep notes
synchronized across devices
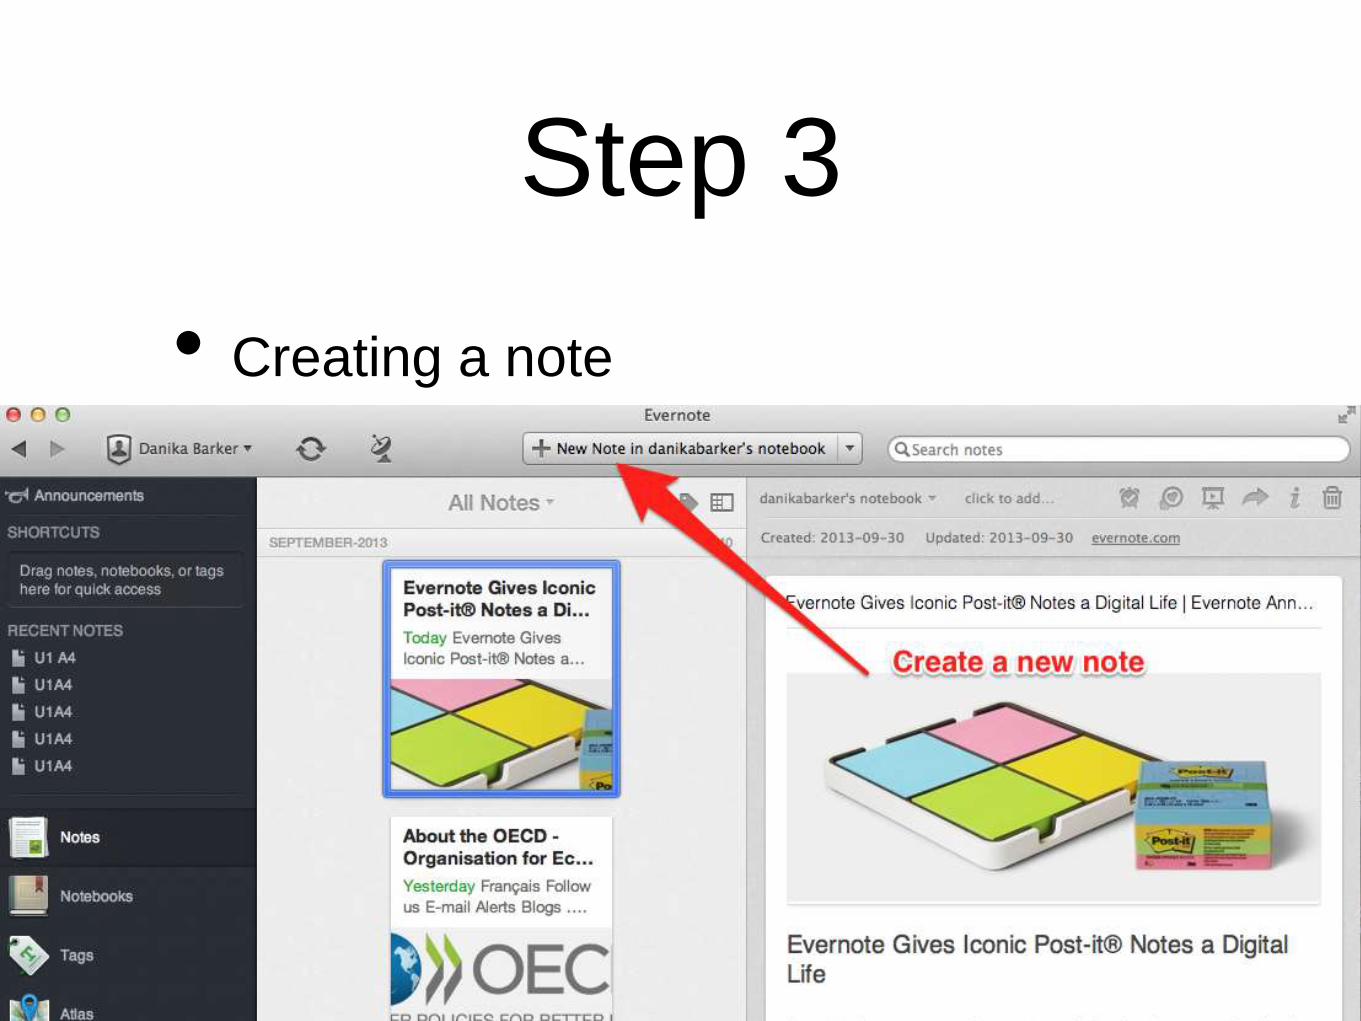
Step 3
• Creating a note


Step 3
• Once you’ve created that note you
can access it anywhere you have
access to the internet. (If you buy the
Premium version you can access it
offline.
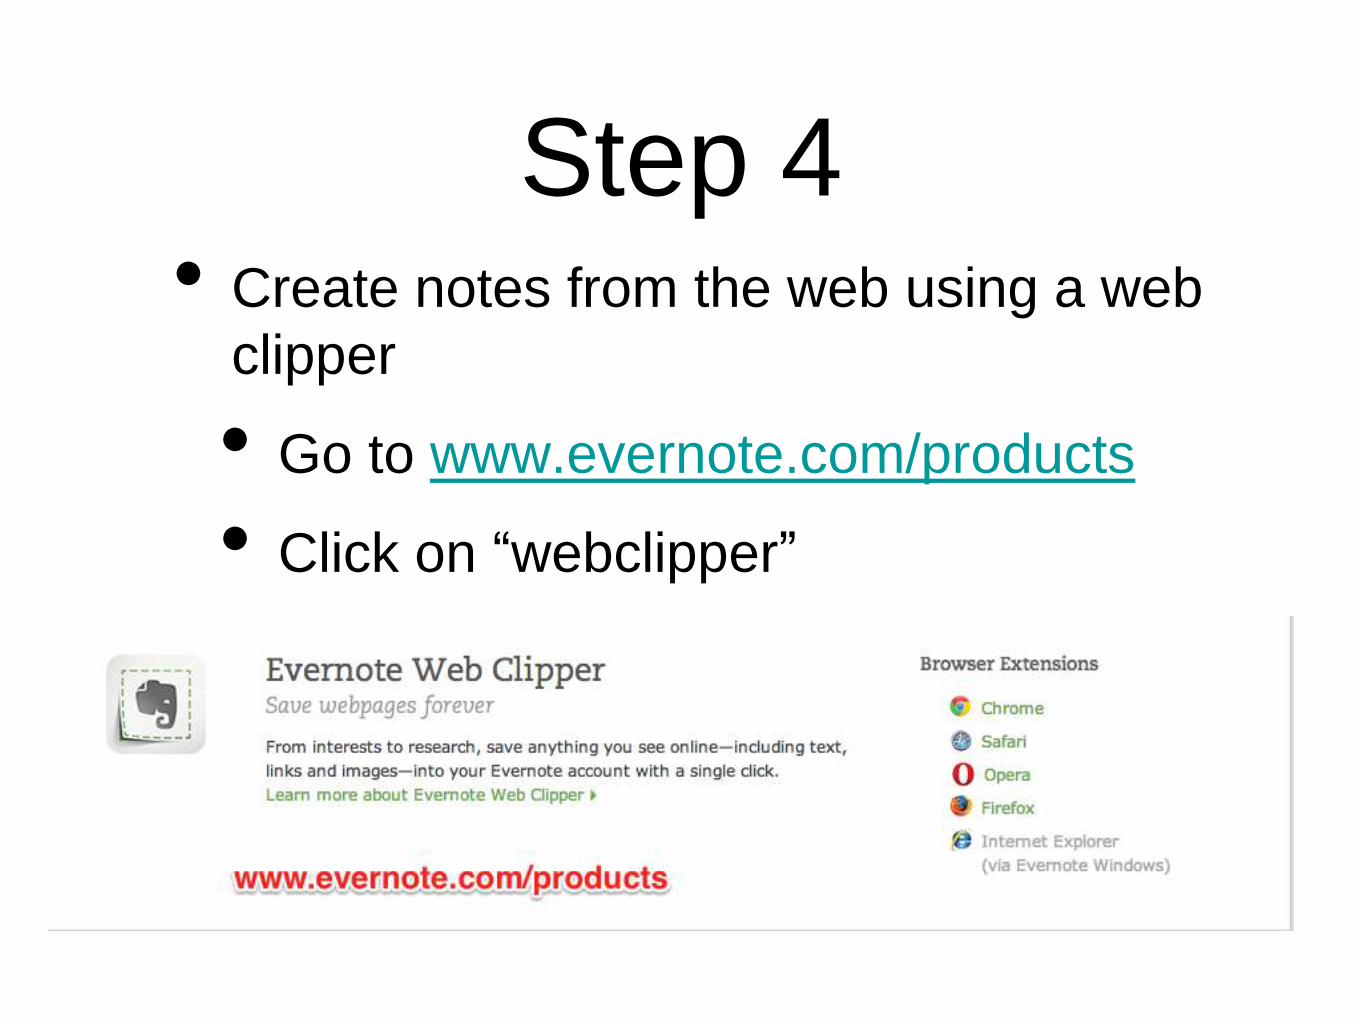
Step 4• Create notes from the web using a web
clipper
• Go to www.evernote.com/products
• Click on “webclipper”

Step 4
• This will install a button in your browser
you can use to clip webpages or
portions of webpages
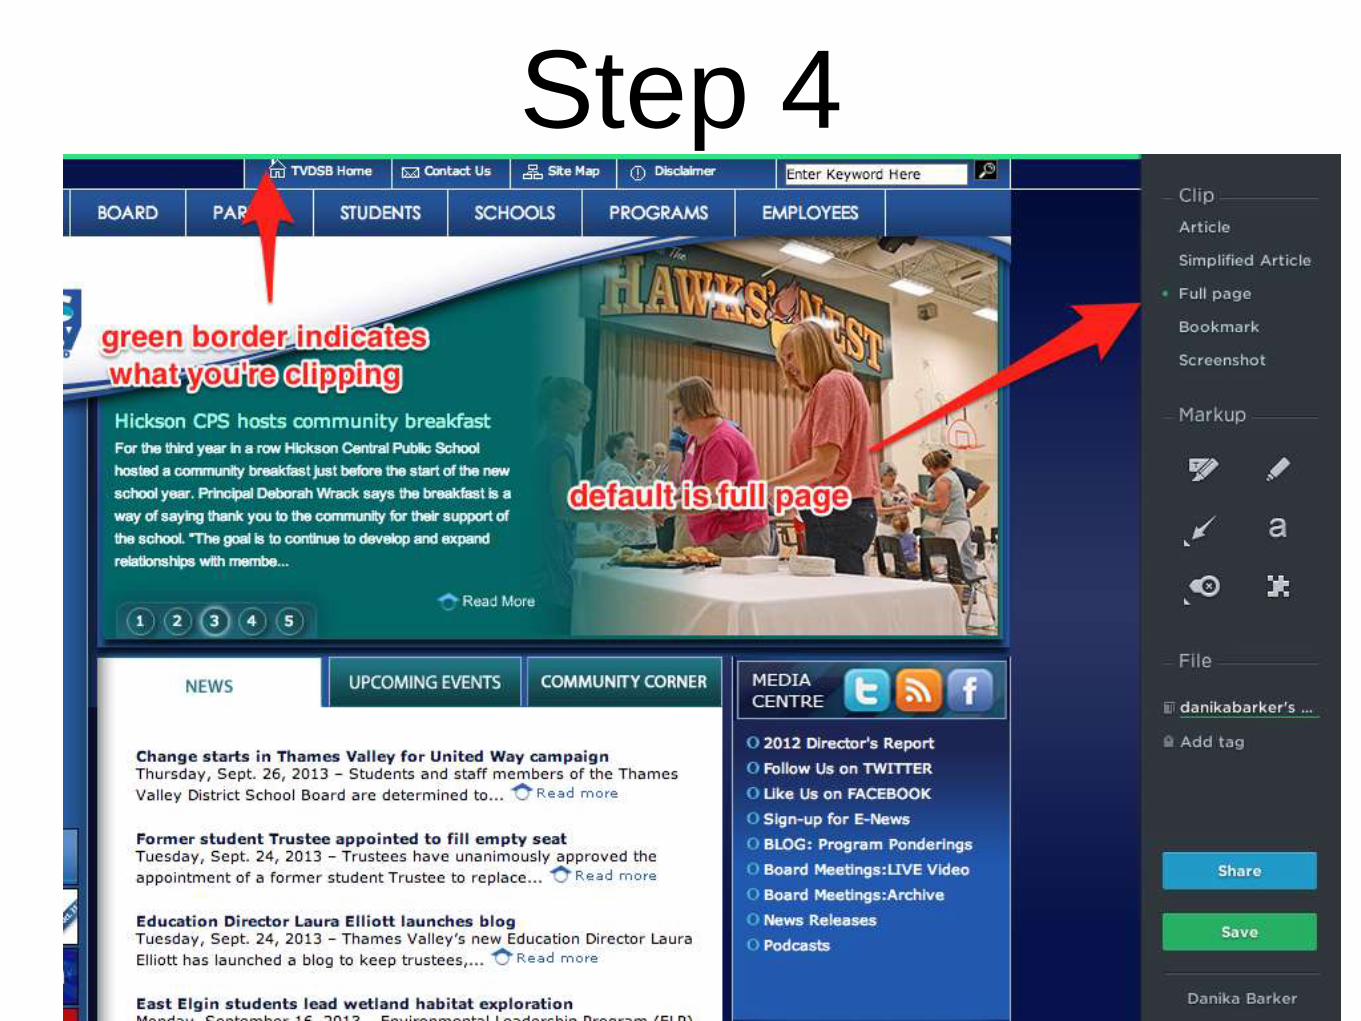
Step 4
Using Evernote to
Provide Feedback

Step 1
• Create a
notebook for
each student

Step 2• Once you’ve
created each
one, drag each
name on top of
the next to
create a
“notebook stack”
• You can rename
the notebook
stack

Step 4• To create a new note for a specific student,
open up the student’s notebook and create
new note

Step 4• But what if you want to record a
conference?

Step 5• Importing files to record multimodal
feedback

Step 5
• Evernote will create
the new note for you
in the student’s
notebook

Click on
the Skitch
app to
annotate
the
assignmen
t. It will
save a new
version as
a PDF with
your
annotation
s
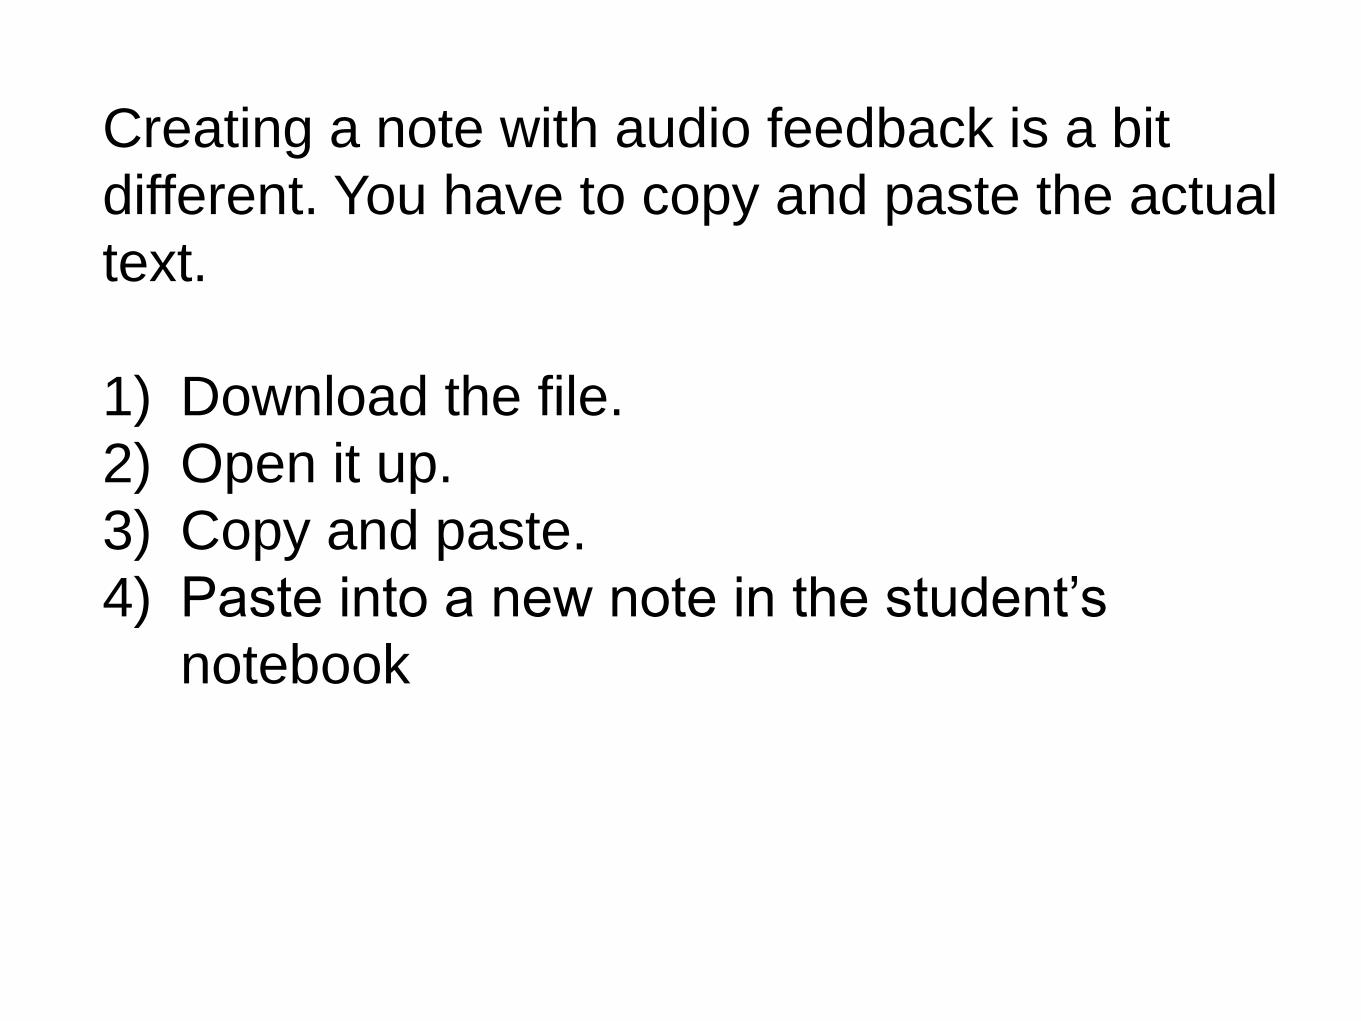
Creating a note with audio feedback is a bit
different. You have to copy and paste the actual
text.
1) Download the file.
2) Open it up.
3) Copy and paste.
4) Paste into a new note in the student’s
notebook
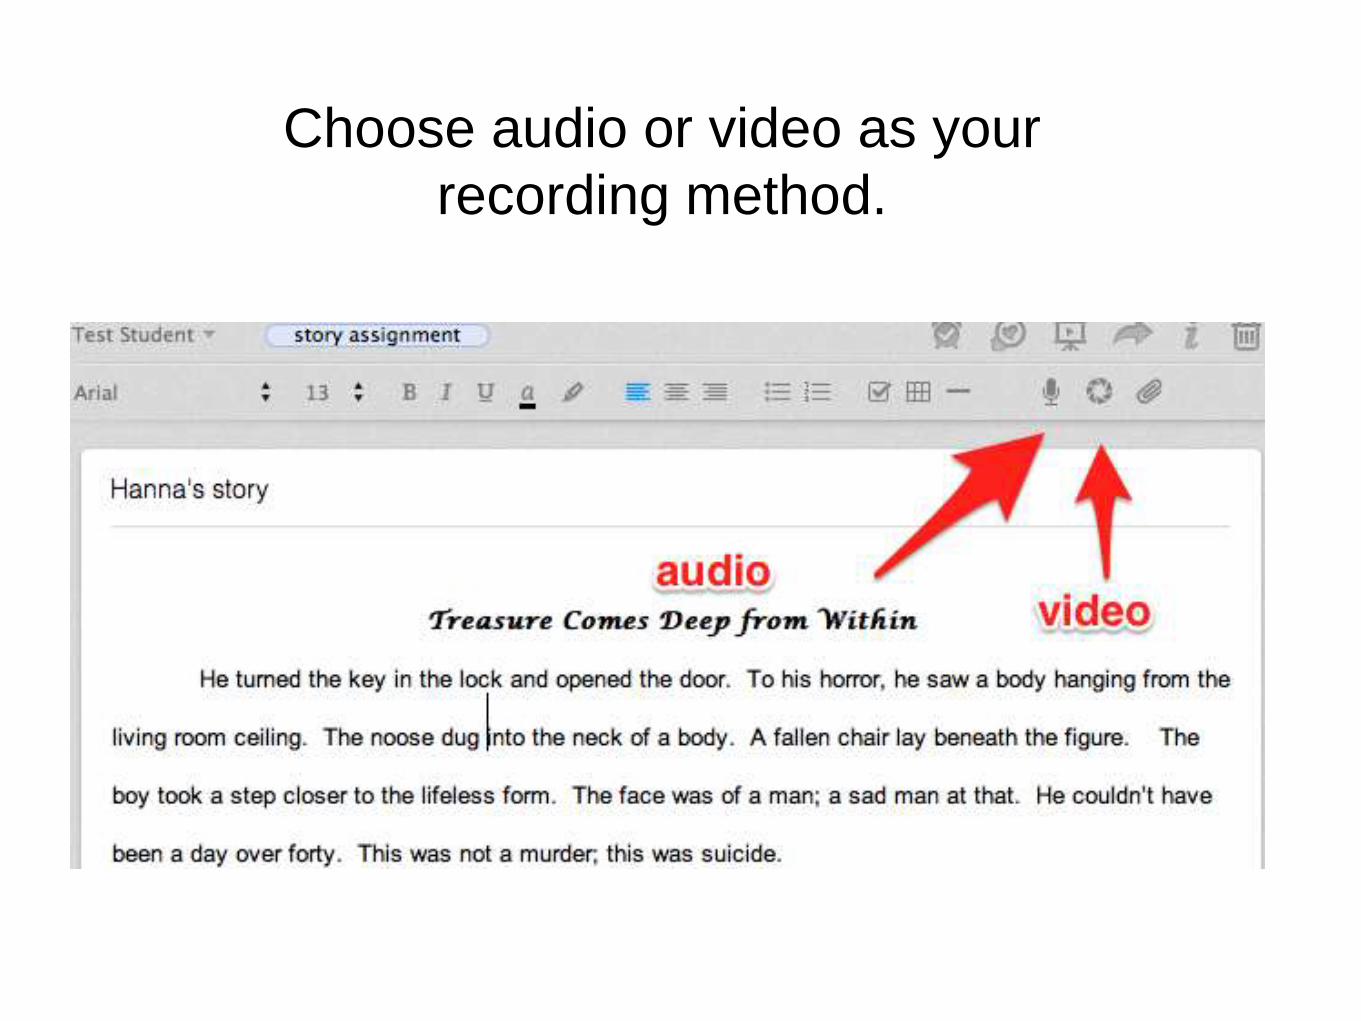
Choose audio or video as your
recording method.

My preferred method is to:
1) Copy and paste the text to create a new
note.
2) Highlight errors, or anything else I want
to talk about them.
3) Make a recording where I explain what
I’ve highlighted.
4) Share the note with the student.

Share URL with student. They don’t need to have
Evernote
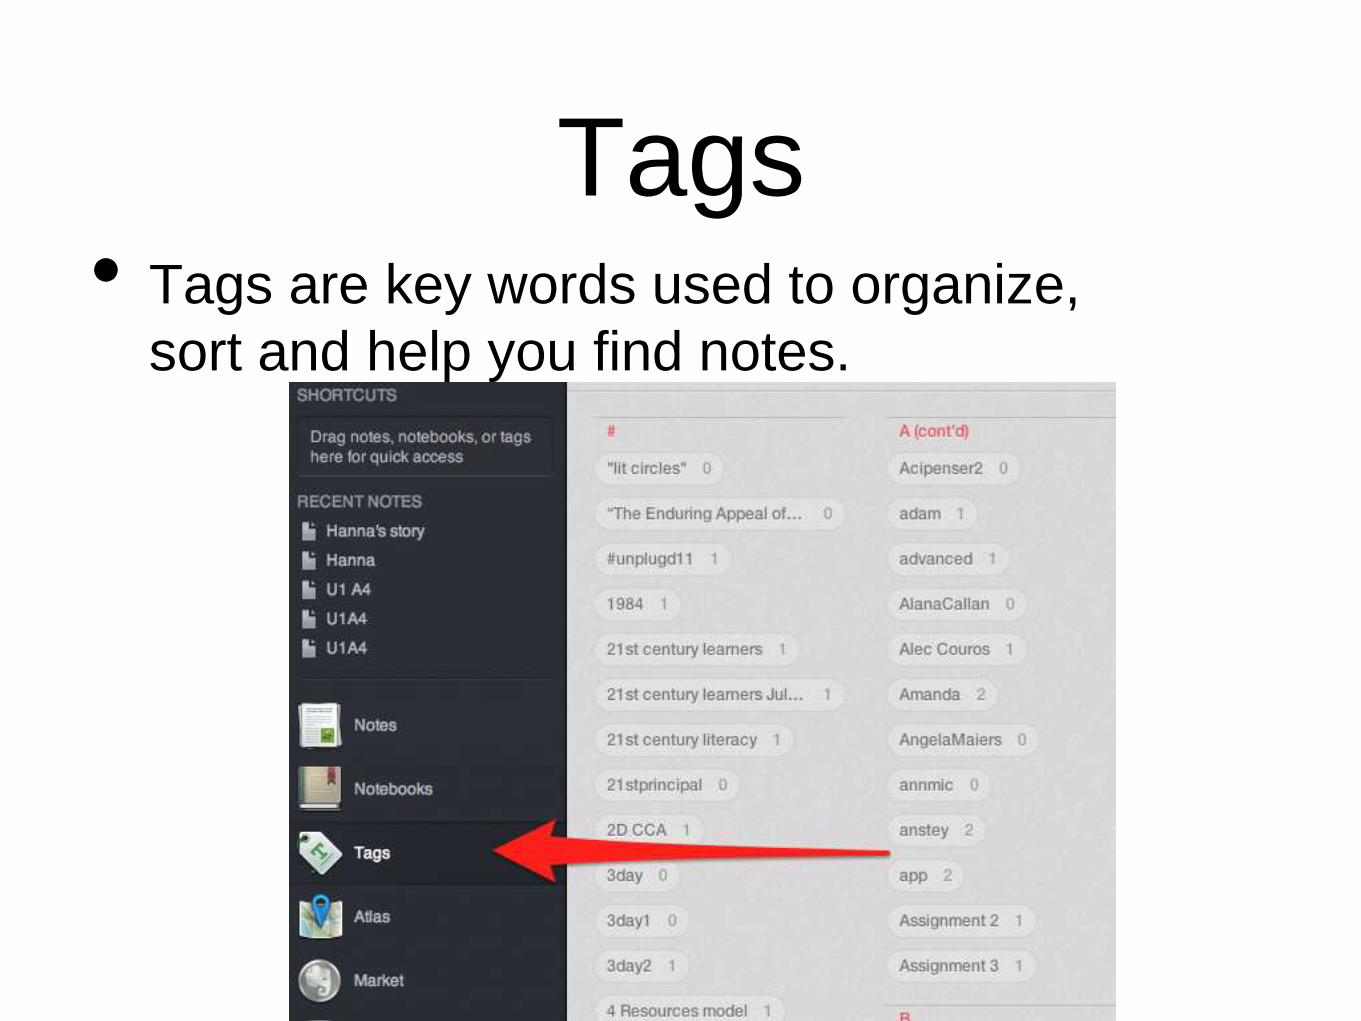
Tags• Tags are key words used to organize,
sort and help you find notes.

Next steps• Using Evernote on mobile Devices

On your phone, it looks
a little different but it’s
easier to take multi-
modal notes.
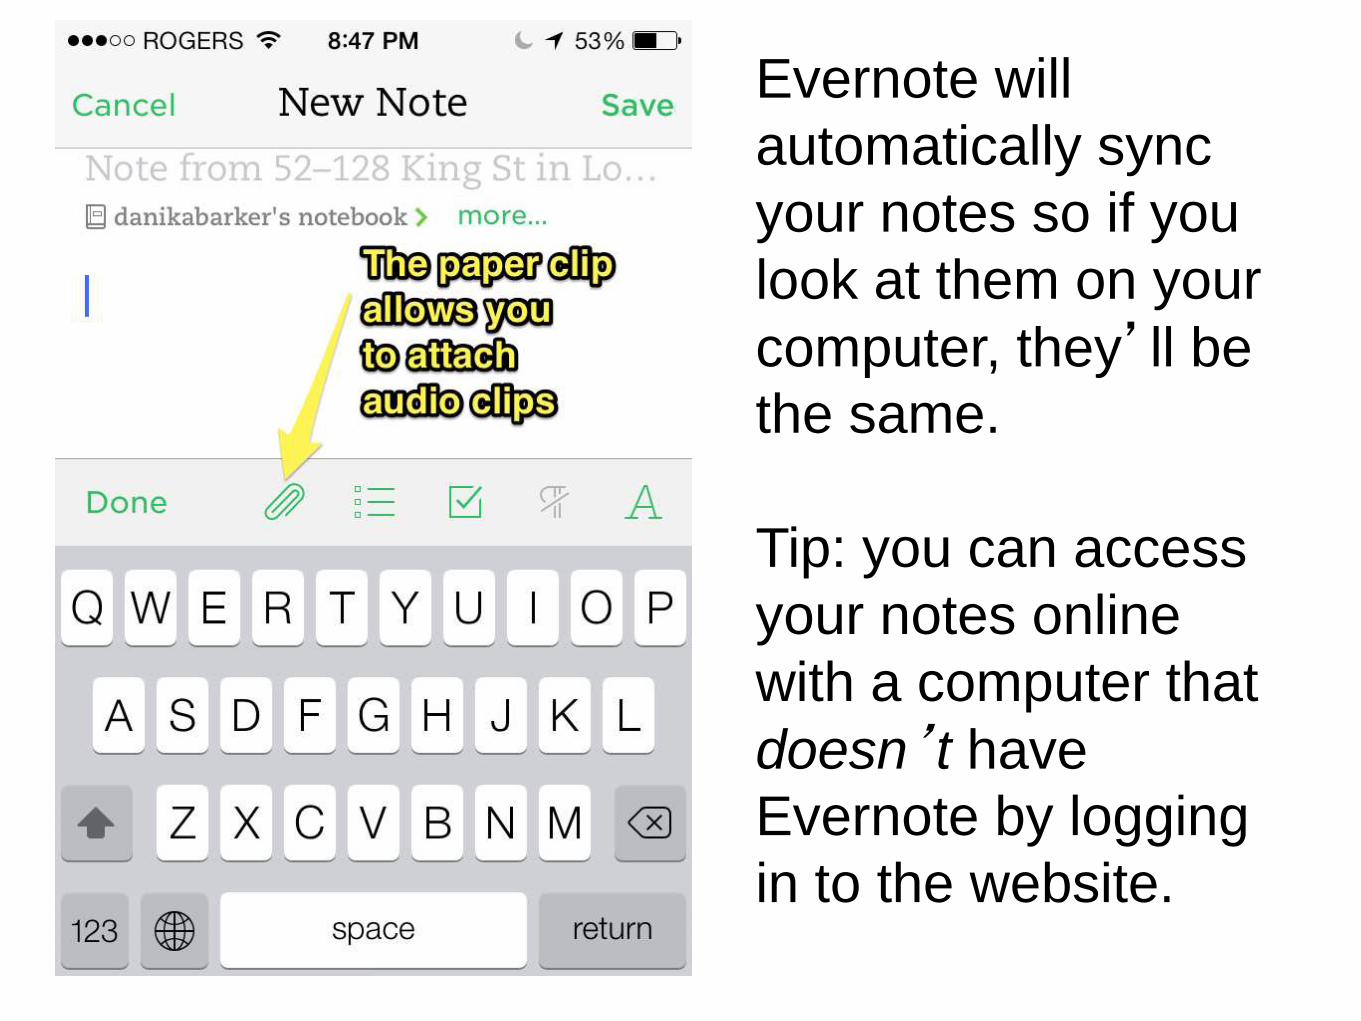
Evernote will
automatically sync
your notes so if you
look at them on your
computer, they’ll be
the same.
Tip: you can access
your notes online
with a computer that
doesn’t have
Evernote by logging
in to the website.
Privacy
• Don’t store highly sensitive data in
Evernote. Consider giving students
code names or use first name and last
initial
• Your account is password protected but
it’s better to be safe

Your Thoughts?
• How could you use Evernote?
• What questions do you still have?