Embed Size (px)
Citation preview
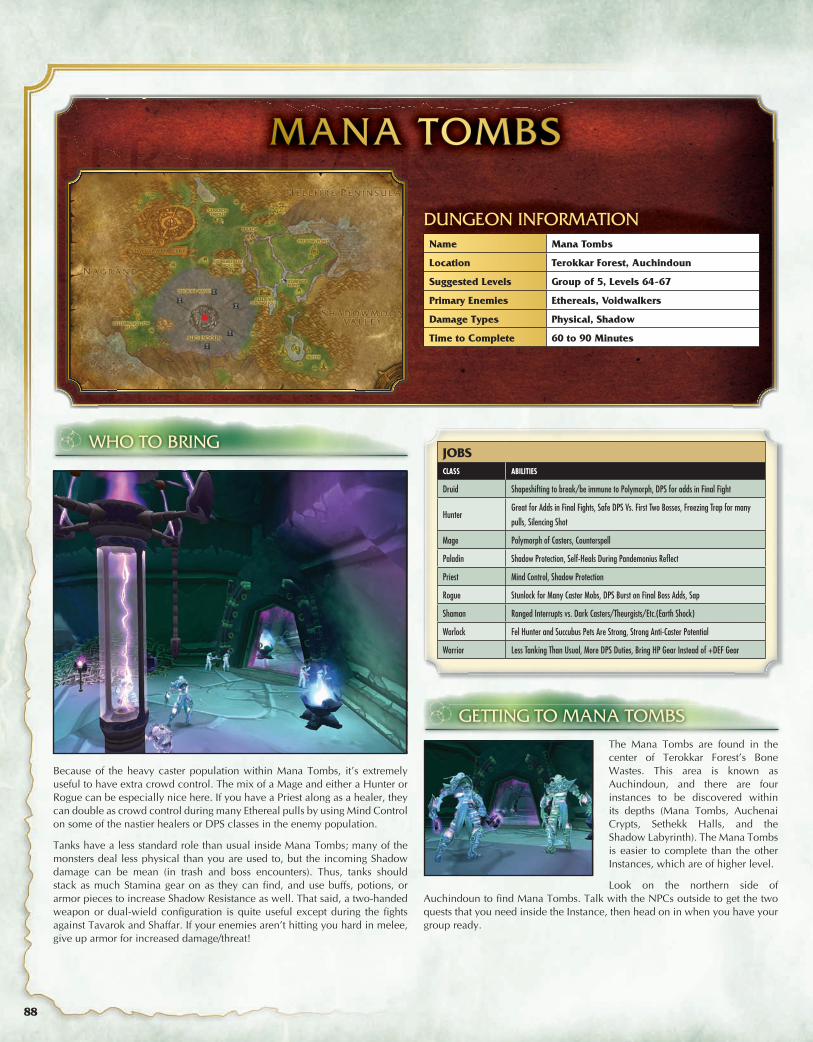
The Mana Tombs are found in the center of Terokkar Forest’s Bone Wastes. This area is known as Auchindoun, and there are four instances to be discovered within its depths (Mana Tombs, Auchenai Crypts, Sethekk Halls, and the Shadow Labyrinth). The Mana Tombs is easier to complete than the other Instances, which are of higher level.
Look on the northern side of Auchindoun to fi nd Mana Tombs. Talk with the NPCs outside to get the two quests that you need inside the Instance, then head on in when you have your group ready.
MANA TOMBS
DUNGEON INFORMATIONName Mana Tombs
Location Terokkar Forest, Auchindoun
Suggested Levels Group of 5, Levels 64-67
Primary Enemies Ethereals, Voidwalkers
Damage Types Physical, Shadow
Time to Complete 60 to 90 Minutes
WHO TO BRING
Because of the heavy caster population within Mana Tombs, it’s extremely useful to have extra crowd control. The mix of a Mage and either a Hunter or Rogue can be especially nice here. If you have a Priest along as a healer, they can double as crowd control during many Ethereal pulls by using Mind Control on some of the nastier healers or DPS classes in the enemy population.
Tanks have a less standard role than usual inside Mana Tombs; many of the monsters deal less physical than you are used to, but the incoming Shadow damage can be mean (in trash and boss encounters). Thus, tanks should stack as much Stamina gear on as they can fi nd, and use buffs, potions, or armor pieces to increase Shadow Resistance as well. That said, a two-handed weapon or dual-wield confi guration is quite useful except during the fi ghts against Tavarok and Shaffar. If your enemies aren’t hitting you hard in melee, give up armor for increased damage/threat!
JOBSCLASS ABILITIES
Druid Shapeshifting to break/be immune to Polymorph, DPS for adds in Final Fight
HunterGreat for Adds in Final Fights, Safe DPS Vs. First Two Bosses, Freezing Trap for many
pulls, Silencing Shot
Mage Polymorph of Casters, Counterspell
Paladin Shadow Protection, Self-Heals During Pandemonius Refl ect
Priest Mind Control, Shadow Protection
Rogue Stunlock for Many Caster Mobs, DPS Burst on Final Boss Adds, Sap
Shaman Ranged Interrupts vs. Dark Casters/Theurgists/Etc.(Earth Shock)
Warlock Fel Hunter and Succubus Pets Are Strong, Strong Anti-Caster Potential
Warrior Less Tanking Than Usual, More DPS Duties, Bring HP Gear Instead of +DEF Gear
GETTING TO MANA TOMBS
88
02g_912-X_Manatombs.indd 88 8/28/07 11:09:51 AM
REPUTATION GAINS
ACTION FACTION REPUTATION GAIN END POINT
Kill Trash Mobs Consortium 2-12 Points Honored
Kill Bosses Consortium 91 Points Honored
Quest: Safety is Job One Consortium 350 N/A
Quest: Someone Else’s
Hard Work Pays Off
Consortium 500 N/A
Quest: Undercutting the Competition
Consortium 500 N/A
WHAT STIRS WITHIN THE TOMBS
ETHEREAL CRYPT RAIDERNotes: Soul Strike Acts as a Mortal Strike, Charge, Battle Shout
ETHEREAL DARKCASTERNotes: Very Nasty Shadow Word: Pain, Ranged Mana Burn for Extremely High Damage, Shadowform
ETHEREAL PRIESTNotes: Holy Nova, Heal, Power Word: Shield
ETHEREAL SCAVENGERNotes: Singe, Strike, Shield Bash
ETHEREAL SORCERERNotes: Arcane Missile, Low HPs, Summon Arcane Fiends (2); Arcane Fiends have Low Health, Arcane Explosion, Slow
ETHEREAL SPELLBINDERNotes: Summon Ethereal Wraiths (2, which have Shadow Volley), Immolate (18-Second Fire DOT), Counterspell
ETHEREAL THEURGISTNotes: Polymorph (20 seconds), Strike, Blast Wave
MANA LEECHNotes: Arcane Explosion, Faerie Fire (Standard Armor Debuff), Mana Burn
NEXUS STALKERNotes: Gouge, Rend, Phantom Strike (Increases Casting, Ranged, and Melee time by 50%) + Nature Damage every 3 seconds
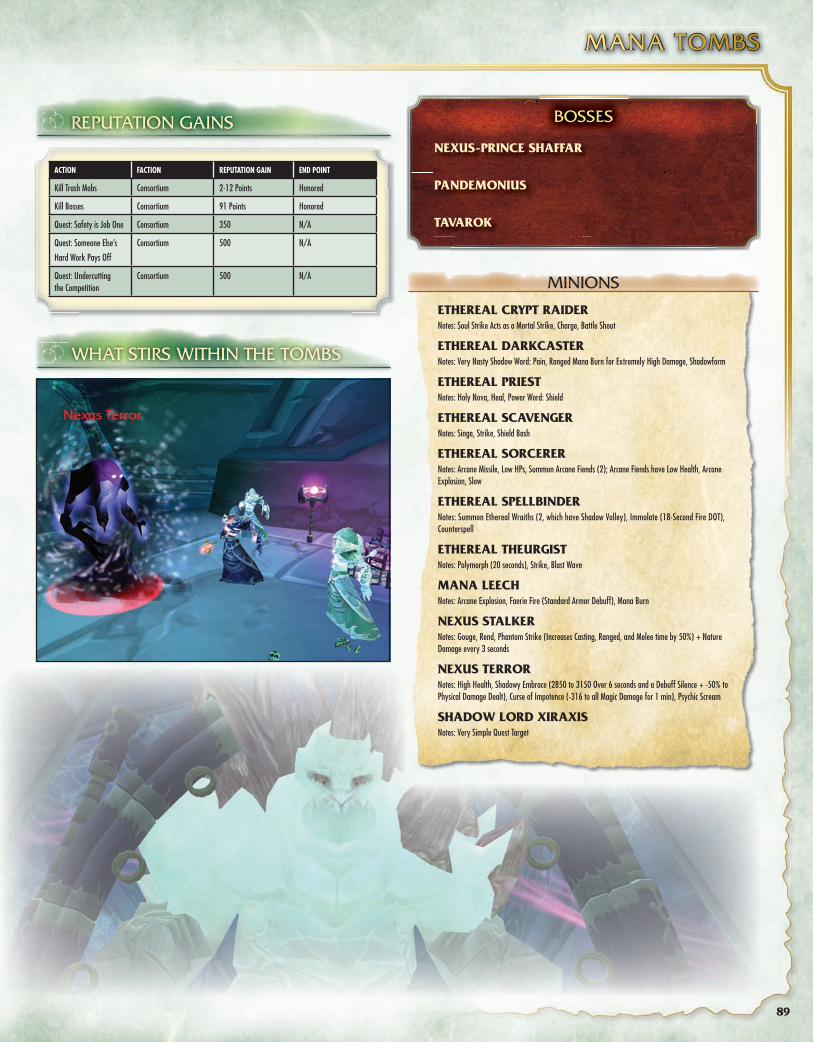
NEXUS TERRORNotes: High Health, Shadowy Embrace (2850 to 3150 Over 6 seconds and a Debuff Silence + -50% to Physical Damage Dealt), Curse of Impotence (-316 to all Magic Damage for 1 min), Psychic Scream
SHADOW LORD XIRAXISNotes: Very Simple Quest Target
MINIONS
BOSSES
NEXUS-PRINCE SHAFFAR
PANDEMONIUS
TAVAROK
89
MANA TOMBS
02g_912-X_Manatombs.indd 89 8/28/07 11:10:09 AM
QUEST LISTING
SAFETY IS JOB ONE
Level Requirement 64
Quest Giver Artifi cier Morphalius (Outside of Mana Tombs)
Quest GoalKill 10 Ethereal Crypt Raiders, 5 Nexus Stalkers, 5 Ethereal Sorcerers,
and 5 Ethereal Spellbinders
Experience Reward 14,150
Additional Rewards Chains to Someone Else’s Hard Work Pays Off
The quest giver for this important quest is just outside of Mana Tombs. Talk to Artifi cier Morphalius on the way in, then kill all of the targets that are on the way toward the fi nal boss. There are always enough spawns to complete your goals.
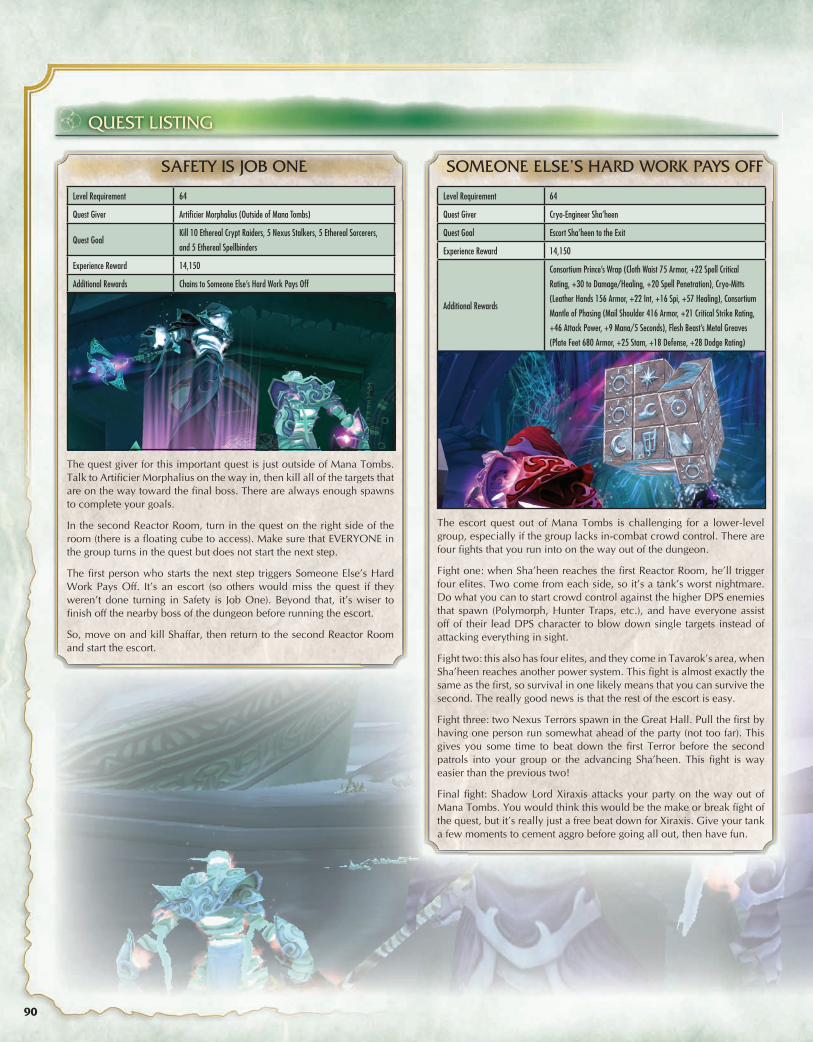
In the second Reactor Room, turn in the quest on the right side of the room (there is a fl oating cube to access). Make sure that EVERYONE in the group turns in the quest but does not start the next step.
The fi rst person who starts the next step triggers Someone Else’s Hard Work Pays Off. It’s an escort (so others would miss the quest if they weren’t done turning in Safety is Job One). Beyond that, it’s wiser to fi nish off the nearby boss of the dungeon before running the escort.
So, move on and kill Shaffar, then return to the second Reactor Room and start the escort.
SOMEONE ELSE’S HARD WORK PAYS OFF
Level Requirement 64
Quest Giver Cryo-Engineer Sha’heen
Quest Goal Escort Sha’heen to the Exit
Experience Reward 14,150
Additional Rewards
Consortium Prince’s Wrap (Cloth Waist 75 Armor, +22 Spell Critical
Rating, +30 to Damage/Healing, +20 Spell Penetration), Cryo-Mitts
(Leather Hands 156 Armor, +22 Int, +16 Spi, +57 Healing), Consortium
Mantle of Phasing (Mail Shoulder 416 Armor, +21 Critical Strike Rating,
+46 Attack Power, +9 Mana/5 Seconds), Flesh Beast’s Metal Greaves
(Plate Feet 680 Armor, +25 Stam, +18 Defense, +28 Dodge Rating)
The escort quest out of Mana Tombs is challenging for a lower-level group, especially if the group lacks in-combat crowd control. There are four fi ghts that you run into on the way out of the dungeon.
Fight one: when Sha’heen reaches the fi rst Reactor Room, he’ll trigger four elites. Two come from each side, so it’s a tank’s worst nightmare. Do what you can to start crowd control against the higher DPS enemies that spawn (Polymorph, Hunter Traps, etc.), and have everyone assist off of their lead DPS character to blow down single targets instead of attacking everything in sight.
Fight two: this also has four elites, and they come in Tavarok’s area, when Sha’heen reaches another power system. This fi ght is almost exactly the same as the fi rst, so survival in one likely means that you can survive the second. The really good news is that the rest of the escort is easy.
Fight three: two Nexus Terrors spawn in the Great Hall. Pull the fi rst by having one person run somewhat ahead of the party (not too far). This gives you some time to beat down the fi rst Terror before the second patrols into your group or the advancing Sha’heen. This fi ght is way easier than the previous two!
Final fi ght: Shadow Lord Xiraxis attacks your party on the way out of Mana Tombs. You would think this would be the make or break fi ght of the quest, but it’s really just a free beat down for Xiraxis. Give your tank a few moments to cement aggro before going all out, then have fun.
90
02g_912-X_Manatombs.indd 90 8/28/07 11:10:35 AM
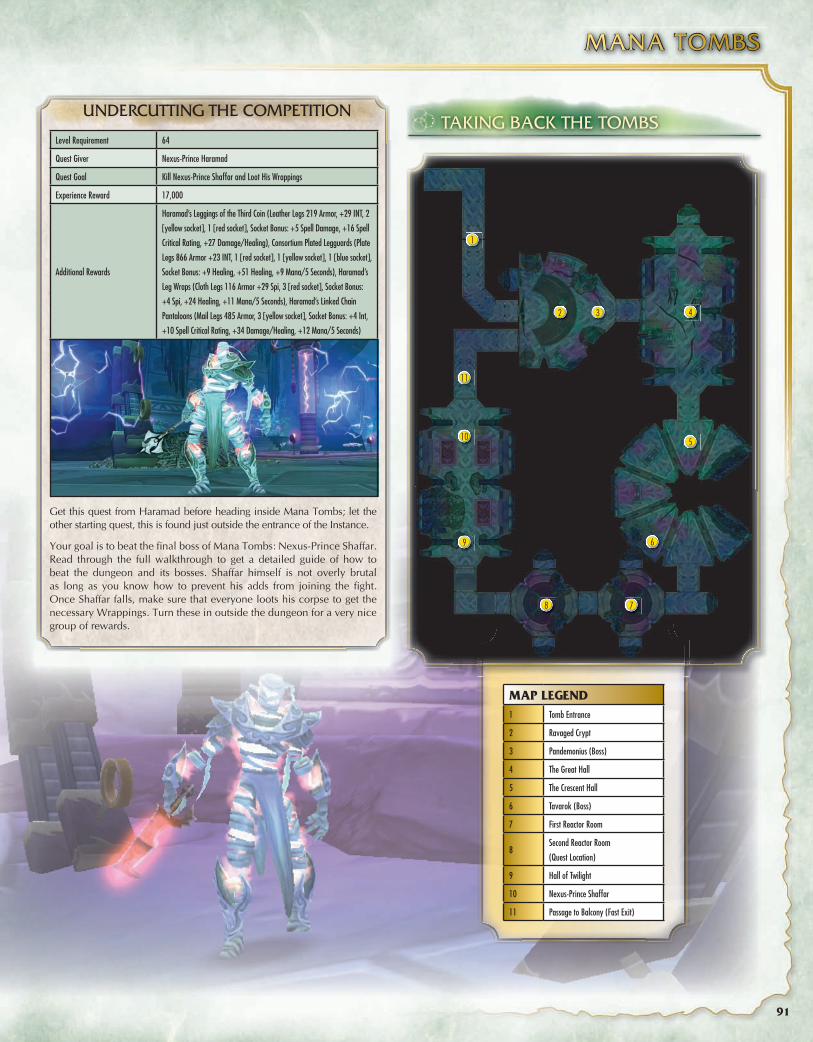
UNDERCUTTING THE COMPETITION
Level Requirement 64
Quest Giver Nexus-Prince Haramad
Quest Goal Kill Nexus-Prince Shaffar and Loot His Wrappings
Experience Reward 17,000
Additional Rewards
Haramad’s Leggings of the Third Coin (Leather Legs 219 Armor, +29 INT, 2
[yellow socket], 1 [red socket], Socket Bonus: +5 Spell Damage, +16 Spell
Critical Rating, +27 Damage/Healing), Consortium Plated Legguards (Plate
Legs 866 Armor +23 INT, 1 [red socket], 1 [yellow socket], 1 [blue socket],
Socket Bonus: +9 Healing, +51 Healing, +9 Mana/5 Seconds), Haramad’s
Leg Wraps (Cloth Legs 116 Armor +29 Spi, 3 [red socket], Socket Bonus:
+4 Spi, +24 Healing, +11 Mana/5 Seconds), Haramad’s Linked Chain
Pantaloons (Mail Legs 485 Armor, 3 [yellow socket], Socket Bonus: +4 Int,
+10 Spell Critical Rating, +34 Damage/Healing, +12 Mana/5 Seconds)
Get this quest from Haramad before heading inside Mana Tombs; let the other starting quest, this is found just outside the entrance of the Instance.
Your goal is to beat the fi nal boss of Mana Tombs: Nexus-Prince Shaffar. Read through the full walkthrough to get a detailed guide of how to beat the dungeon and its bosses. Shaffar himself is not overly brutal as long as you know how to prevent his adds from joining the fi ght. Once Shaffar falls, make sure that everyone loots his corpse to get the necessary Wrappings. Turn these in outside the dungeon for a very nice group of rewards.
TAKING BACK THE TOMBS
MAP LEGEND1 Tomb Entrance
2 Ravaged Crypt
3 Pandemonius (Boss)
4 The Great Hall
5 The Crescent Hall
6 Tavarok (Boss)
7 First Reactor Room
8Second Reactor Room
(Quest Location)
9 Hall of Twilight
10 Nexus-Prince Shaffar
11 Passage to Balcony (Fast Exit)
1
11
10
9
2 3 4
5
6
78
91
MANA TOMBS
02g_912-X_Manatombs.indd 91 8/28/07 11:11:03 AM
The room ahead has several pulls and a boss encounter. For the fi rst few fi ghts, it’s best to stay in the initial hallway where the possibility of adds is at a minimum. Watch for the room’s one patrol group (an Ethereal Sorcerer and an Ethereal Raider), then pull the fi rst fi ght when they are not close by.
The fi rst fi ght is your fi rst group of three enemies in Mana Tombs.
Your fi rst Sorcerer is in there as well, so now you get a look at the Instance’s casters. Sorcerers rely mostly on channeled Arcane Missiles, so they are quite interruptible. None-the-less, they are the best target in this group for crowd control. Deal with the melee enemies as long as the Sorcerer is out of combat, then slam the Sorcerer when it is by itself.
If you are lacking in crowd control, or want to ensure that the Sorcerer does not get to break out of shorter effects (such as a Hunter Trap), deal with the Sorcerer fi rst. These casters are low on health, so they make for fast victories when the group focuses fi re.
Pull the patrolling Sorcerer/Raider duo back into the hallway and deal with them. This makes the room nice and clean for continued pulls.
The remaining three groups in the room are on the left (usually a couple Scavengers and a Sorcerer), the right (Raider, Scavenger, Sorcerer), and at the far right side of the room (just a Sorcerer and a Raider).
If you are comfortable with this fi ghting, clear the enemies from the doorway instead of back in the hall (this makes for shorter pulls and less wasted time). However, if your group is still a tad shaky, stay in the hall and use the structure and cover that it provides to keep these pulls clean.
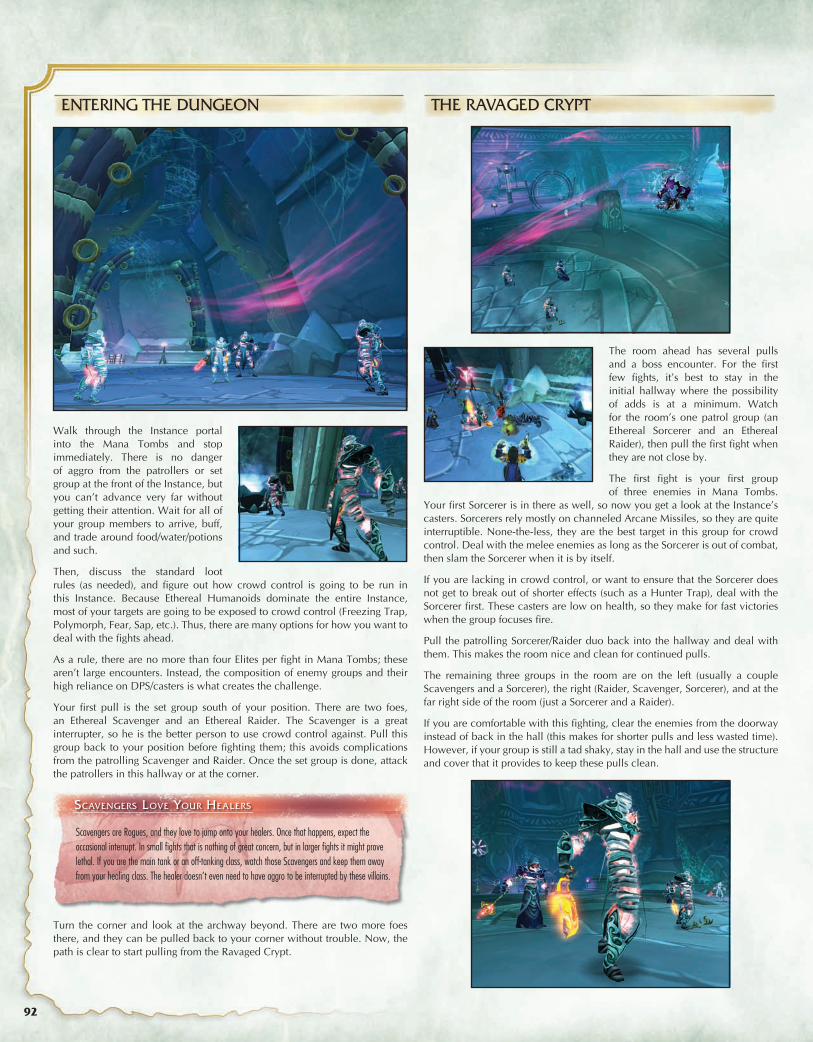
Walk through the Instance portal into the Mana Tombs and stop immediately. There is no danger of aggro from the patrollers or set group at the front of the Instance, but you can’t advance very far without getting their attention. Wait for all of your group members to arrive, buff, and trade around food/water/potions and such.
Then, discuss the standard loot rules (as needed), and fi gure out how crowd control is going to be run in this Instance. Because Ethereal Humanoids dominate the entire Instance, most of your targets are going to be exposed to crowd control (Freezing Trap, Polymorph, Fear, Sap, etc.). Thus, there are many options for how you want to deal with the fi ghts ahead.
As a rule, there are no more than four Elites per fi ght in Mana Tombs; these aren’t large encounters. Instead, the composition of enemy groups and their high reliance on DPS/casters is what creates the challenge.
Your fi rst pull is the set group south of your position. There are two foes, an Ethereal Scavenger and an Ethereal Raider. The Scavenger is a great interrupter, so he is the better person to use crowd control against. Pull this group back to your position before fi ghting them; this avoids complications from the patrolling Scavenger and Raider. Once the set group is done, attack the patrollers in this hallway or at the corner.
ENTERING THE DUNGEON
SCAVENGERS LOVE YOUR HEALERS
Scavengers are Rogues, and they love to jump onto your healers. Once that happens, expect the occasional interrupt. In small fi ghts that is nothing of great concern, but in larger fi ghts it might prove lethal. If you are the main tank or an off-tanking class, watch those Scavengers and keep them away from your healing class. The healer doesn’t even need to have aggro to be interrupted by these villains.
Turn the corner and look at the archway beyond. There are two more foes there, and they can be pulled back to your corner without trouble. Now, the path is clear to start pulling from the Ravaged Crypt.
THE RAVAGED CRYPT
PANDEMONIUS
92
02g_912-X_Manatombs.indd 92 8/28/07 11:11:20 AM
RANGED INTERRUPTS AND USE OF COVER
For these encounters and for future ones in Mana Tombs, it’s good to practice interrupting casters at range. There are many different types of casting monsters in the dungeon, and you want to be very good at bringing them back to the group (sometimes in a hurry). To do this, interrupt them if they stop to cast spells before you have them where you want.
Silencing Shot, Counterspell, and Earthshock are all good choices because of their speed and use from range. If you don’t have a Hunter, Mage, or Shaman hanging around, use the cover of walls to force casters to you. If they cannot keep line of sight on their target, they have to stop casting and move forward eventually.
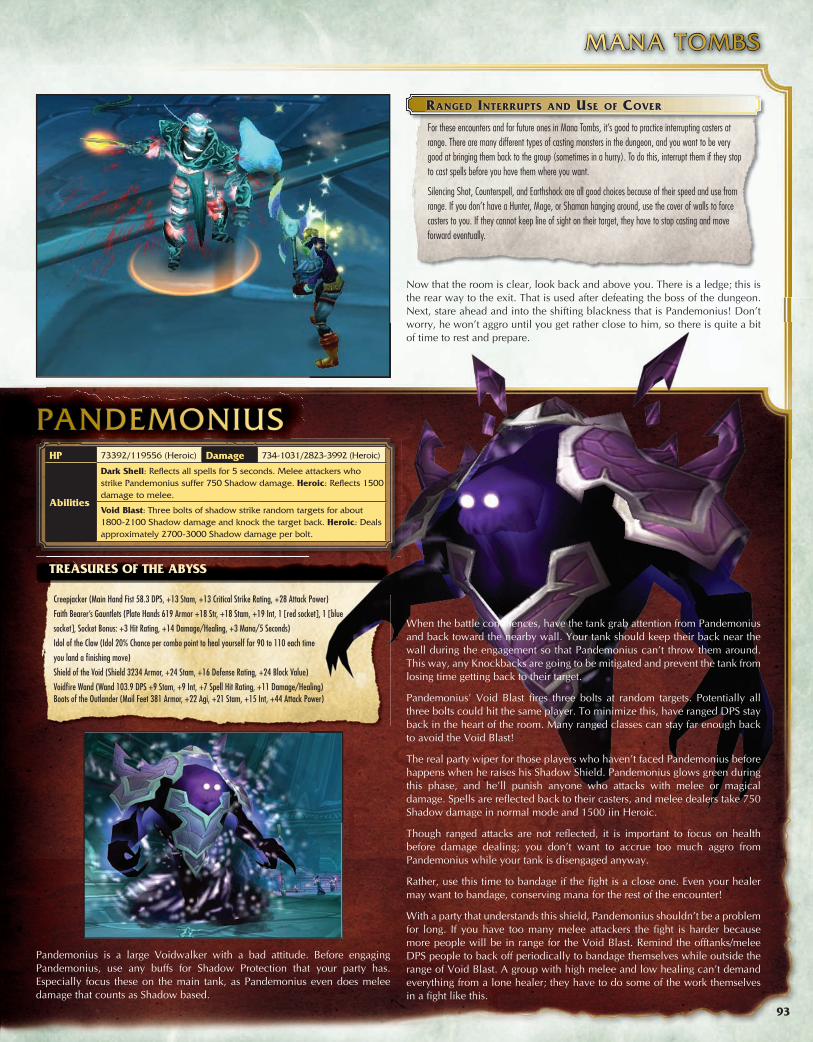
PANDEMONIUS
TREASURES OF THE ABYSS
Pandemonius is a large Voidwalker with a bad attitude. Before engaging Pandemonius, use any buffs for Shadow Protection that your party has. Especially focus these on the main tank, as Pandemonius even does melee damage that counts as Shadow based.
When the battle commences, have the tank grab attention from Pandemonius and back toward the nearby wall. Your tank should keep their back near the wall during the engagement so that Pandemonius can’t throw them around. This way, any Knockbacks are going to be mitigated and prevent the tank from losing time getting back to their target.
Pandemonius’ Void Blast fi res three bolts at random targets. Potentially all three bolts could hit the same player. To minimize this, have ranged DPS stay back in the heart of the room. Many ranged classes can stay far enough back to avoid the Void Blast!
The real party wiper for those players who haven’t faced Pandemonius before happens when he raises his Shadow Shield. Pandemonius glows green during this phase, and he’ll punish anyone who attacks with melee or magical damage. Spells are refl ected back to their casters, and melee dealers take 750 Shadow damage in normal mode and 1500 iin Heroic.
Though ranged attacks are not refl ected, it is important to focus on health before damage dealing; you don’t want to accrue too much aggro from Pandemonius while your tank is disengaged anyway.
Rather, use this time to bandage if the fi ght is a close one. Even your healer may want to bandage, conserving mana for the rest of the encounter!
With a party that understands this shield, Pandemonius shouldn’t be a problem for long. If you have too many melee attackers the fi ght is harder because more people will be in range for the Void Blast. Remind the offtanks/melee DPS people to back off periodically to bandage themselves while outside the range of Void Blast. A group with high melee and low healing can’t demand everything from a lone healer; they have to do some of the work themselves in a fi ght like this.
HP 73392/119556 (Heroic) Damage 734-1031/2823-3992 (Heroic)
Abilities
Dark Shell: Refl ects all spells for 5 seconds. Melee attackers who strike Pandemonius suffer 750 Shadow damage. Heroic: Refl ects 1500 damage to melee.
Void Blast: Three bolts of shadow strike random targets for about 1800-2100 Shadow damage and knock the target back. Heroic: Deals approximately 2700-3000 Shadow damage per bolt.
Now that the room is clear, look back and above you. There is a ledge; this is the rear way to the exit. That is used after defeating the boss of the dungeon. Next, stare ahead and into the shifting blackness that is Pandemonius! Don’t worry, he won’t aggro until you get rather close to him, so there is quite a bit of time to rest and prepare.
Creepjacker (Main Hand Fist 58.3 DPS, +13 Stam, +13 Critical Strike Rating, +28 Attack Power)
Faith Bearer’s Gauntlets (Plate Hands 619 Armor +18 Str, +18 Stam, +19 Int, 1 [red socket], 1 [blue
socket], Socket Bonus: +3 Hit Rating, +14 Damage/Healing, +3 Mana/5 Seconds)
Idol of the Claw (Idol 20% Chance per combo point to heal yourself for 90 to 110 each time
you land a fi nishing move)
Shield of the Void (Shield 3234 Armor, +24 Stam, +16 Defense Rating, +24 Block Value)
Voidfi re Wand (Wand 103.9 DPS +9 Stam, +9 Int, +7 Spell Hit Rating, +11 Damage/Healing)Boots of the Outlander (Mail Feet 381 Armor, +22 Agi, +21 Stam, +15 Int, +44 Attack Power)
93
MANA TOMBS
02g_912-X_Manatombs.indd 93 8/28/07 11:11:43 AM
Loot Pandemonius after he falls, then walk east toward the Great Hall. There are two fi ghts to control the hallway. The fi rst is a two-enemy pull, but the second fi ght has four Elites! Look over the group and spot all of your targets before the fi ght begins. It’s a mixed group, with a Scavenger, a Sorcerer, a Raider, and a Priest.
Priests have Holy Nova, and deal a moderate amount of damage. You
won’t want one of those to rampage through your group while the other enemies are active, so your best crowd control should go onto the Priest. After that, it’s a matter of fast killing against the Sorcerer, the Scavenger, and fi nally the Raider.
HEADING TOWARD THE GREAT HALL
MIND CONTROLLING THE PRIESTS
As with many pulls of this type, you won’t want to move forward to engage the group of four. A Fear when your party is so close to the Great Hall would risk a wipe from adds. Instead, pull the fi ghting back to the Ravaged Crypt.
Now the pulls start to focus even more on casters. Look for the nearby group of three as your fi rst target. There should be two Sorcerers and a Priest. Control the Priest and blow down the Sorcerers; do this back in the hallway to the Crypt.
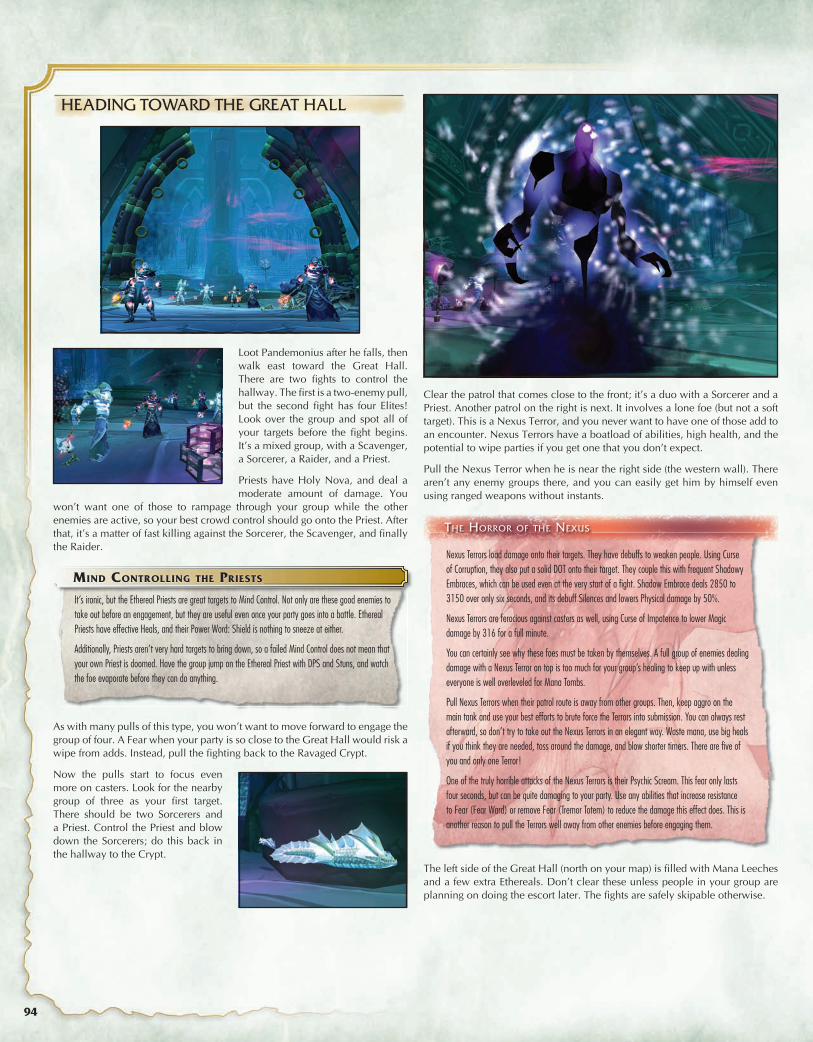
Clear the patrol that comes close to the front; it’s a duo with a Sorcerer and a Priest. Another patrol on the right is next. It involves a lone foe (but not a soft target). This is a Nexus Terror, and you never want to have one of those add to an encounter. Nexus Terrors have a boatload of abilities, high health, and the potential to wipe parties if you get one that you don’t expect.
Pull the Nexus Terror when he is near the right side (the western wall). There aren’t any enemy groups there, and you can easily get him by himself even using ranged weapons without instants.
THE HORROR OF THE NEXUS
Nexus Terrors load damage onto their targets. They have debuffs to weaken people. Using Curse of Corruption, they also put a solid DOT onto their target. They couple this with frequent Shadowy Embraces, which can be used even at the very start of a fi ght. Shadow Embrace deals 2850 to 3150 over only six seconds, and its debuff Silences and lowers Physical damage by 50%.
Nexus Terrors are ferocious against casters as well, using Curse of Impotence to lower Magic damage by 316 for a full minute.
You can certainly see why these foes must be taken by themselves. A full group of enemies dealing damage with a Nexus Terror on top is too much for your group’s healing to keep up with unless everyone is well overleveled for Mana Tombs.
Pull Nexus Terrors when their patrol route is away from other groups. Then, keep aggro on the main tank and use your best efforts to brute force the Terrors into submission. You can always rest afterward, so don’t try to take out the Nexus Terrors in an elegant way. Waste mana, use big heals if you think they are needed, toss around the damage, and blow shorter timers. There are fi ve of you and only one Terror!
One of the truly horrible attacks of the Nexus Terrors is their Psychic Scream. This fear only lasts four seconds, but can be quite damaging to your party. Use any abilities that increase resistance to Fear (Fear Ward) or remove Fear (Tremor Totem) to reduce the damage this effect does. This is another reason to pull the Terrors well away from other enemies before engaging them.
The left side of the Great Hall (north on your map) is fi lled with Mana Leeches and a few extra Ethereals. Don’t clear these unless people in your group are planning on doing the escort later. The fi ghts are safely skipable otherwise.
It’s ironic, but the Ethereal Priests are great targets to Mind Control. Not only are these good enemies to take out before an engagement, but they are useful even once your party goes into a battle. Ethereal Priests have effective Heals, and their Power Word: Shield is nothing to sneeze at either.
Additionally, Priests aren’t very hard targets to bring down, so a failed Mind Control does not mean that your own Priest is doomed. Have the group jump on the Ethereal Priest with DPS and Stuns, and watch the foe evaporate before they can do anything.
94
02g_912-X_Manatombs.indd 94 8/28/07 11:11:59 AM
If you are doing the quests in Mana Tombs, clear the northern part of the room now to avoid complications later. There are three fi ghts involved; the fi rst is against two Sorcerers and a Priest. Then other two are against groups of Mana Leeches, with three in the fi rst group and fi ve in the rear group.
Use the fi ght against three Mana Leeches to get a feel for what they are
capable of doing. These are not a standard non-Elite target you blast away with caster AoEs to defeat. Instead, have your tank agro all of the Mana Leeches and use abilities to build threat from as many targets as possible. Keep the group’s DPS on a single target at a time.
If you try a standard AoE fi ght, the Mana Leeches get to explode all over your casters. You see, they are the ones with the area-of-effect powers in these scuffl es! Your tank may survive this, but your casters can’t. A fl ood of incoming damage might overwhelm the healer(s) in your group if several Mana Leeches die at once.
When your group starts pushing south, there are three more fi ghts in the Crypt. Wait for the Sorcerer/Priest patrol fi rst, and kill them when they are as far forward as they come.
Then, jump the full caster group on the right side and the fi nal casters group by the hallway. Both of those fi ghts are against a mere three Elites, but the high prevalence of casting ensures that you have your work cut out if crowd control isn’t properly used.
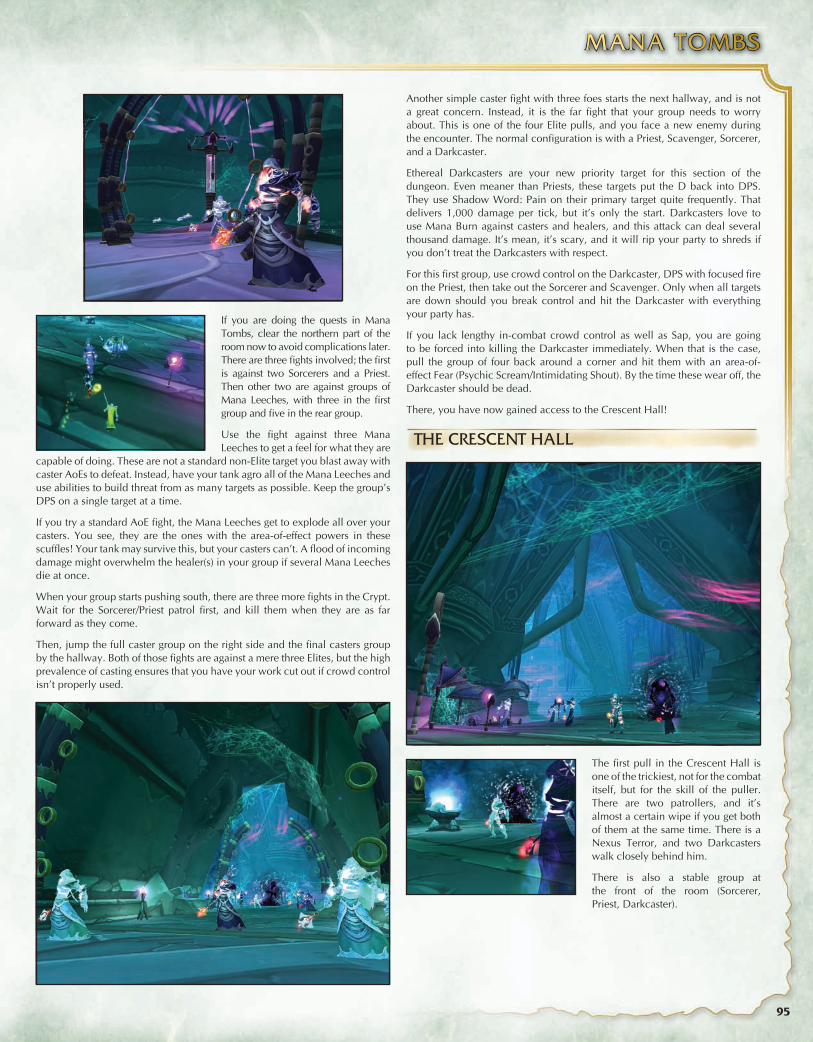
Another simple caster fi ght with three foes starts the next hallway, and is not a great concern. Instead, it is the far fi ght that your group needs to worry about. This is one of the four Elite pulls, and you face a new enemy during the encounter. The normal confi guration is with a Priest, Scavenger, Sorcerer, and a Darkcaster.
Ethereal Darkcasters are your new priority target for this section of the dungeon. Even meaner than Priests, these targets put the D back into DPS. They use Shadow Word: Pain on their primary target quite frequently. That delivers 1,000 damage per tick, but it’s only the start. Darkcasters love to use Mana Burn against casters and healers, and this attack can deal several thousand damage. It’s mean, it’s scary, and it will rip your party to shreds if you don’t treat the Darkcasters with respect.
For this fi rst group, use crowd control on the Darkcaster, DPS with focused fi re on the Priest, then take out the Sorcerer and Scavenger. Only when all targets are down should you break control and hit the Darkcaster with everything your party has.
If you lack lengthy in-combat crowd control as well as Sap, you are going to be forced into killing the Darkcaster immediately. When that is the case, pull the group of four back around a corner and hit them with an area-of-effect Fear (Psychic Scream/Intimidating Shout). By the time these wear off, the Darkcaster should be dead.
There, you have now gained access to the Crescent Hall!
THE CRESCENT HALL
The fi rst pull in the Crescent Hall is one of the trickiest, not for the combat itself, but for the skill of the puller. There are two patrollers, and it’s almost a certain wipe if you get both of them at the same time. There is a Nexus Terror, and two Darkcasters walk closely behind him.
There is also a stable group at the front of the room (Sorcerer, Priest, Darkcaster).
95
MANA TOMBS
02g_912-X_Manatombs.indd 95 8/28/07 11:12:13 AM
There is a mean fi ght on the left with two Darkcasters and an Ethereal Priest. Pull them far back and around the corner to avoid Fear issues, and use the best crowd control you can.
The pair on the right is a double Darkcaster group, but they don’t have a Priest to help out, so it should be easy.
On the southern side of the Crescent is a patrolling Nexus Terror. You have tons of room to grab him. Afterward, kill the two Darkcasters on the inside of the curve and get some rest.
If you pull very quickly, and can get out of casting range, the stable group is good to grab fi rst. Run back and around the corner to force the enemies to you before they can agro the patrols.
Optionally, you can pull the Nexus Terror when it’s on the left side of the hall. Have the puller run back to the group, but you won’t have to worry about interrupting the Terror, as they don’t stop for anything.
There really isn’t a specifi c order in how to defeat these three groups. The key issue is in precise pulling of whichever group you decide to take fi rst. If you don’t have ranged interrupts, the Nexus Terror is probably the easiest choice. If you do have ranged interrupts, the stable group is the best (just note that you don’t have a big window to pull those guys after the Darkcaster patrol leaves).
Now with some breathing room, walk to the west and look around the side of the rubble there for a Sorcerer and a Dark Caster. They are by themselves, so it’s a trivial pull. Just don’t wander into them; it’s always harder to control a fi ght when you agro with proximity as opposed to purpose.
Around the bend is a series of encounters. It looks like some tricky pulling, as the groups are close together, but the groups aren’t as dangerous to grab as it seems. Stay on the west wall and pull the three Mana Leeches that are in the center. Once they are dealt with the pulls for the other two groups can be made very safely.
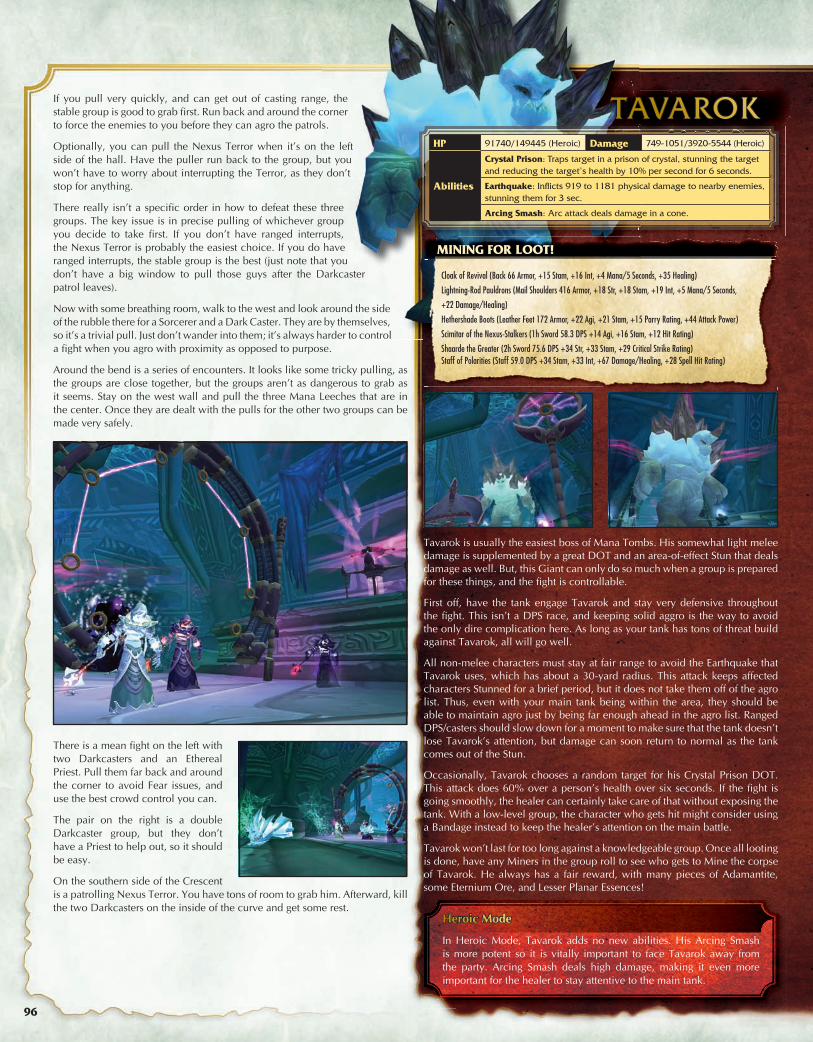
Tavarok is usually the easiest boss of Mana Tombs. His somewhat light melee damage is supplemented by a great DOT and an area-of-effect Stun that deals damage as well. But, this Giant can only do so much when a group is prepared for these things, and the fi ght is controllable.
First off, have the tank engage Tavarok and stay very defensive throughout the fi ght. This isn’t a DPS race, and keeping solid aggro is the way to avoid the only dire complication here. As long as your tank has tons of threat build against Tavarok, all will go well.
All non-melee characters must stay at fair range to avoid the Earthquake that Tavarok uses, which has about a 30-yard radius. This attack keeps affected characters Stunned for a brief period, but it does not take them off of the agro list. Thus, even with your main tank being within the area, they should be able to maintain agro just by being far enough ahead in the agro list. Ranged DPS/casters should slow down for a moment to make sure that the tank doesn’t lose Tavarok’s attention, but damage can soon return to normal as the tank comes out of the Stun.
Occasionally, Tavarok chooses a random target for his Crystal Prison DOT. This attack does 60% over a person’s health over six seconds. If the fi ght is going smoothly, the healer can certainly take care of that without exposing the tank. With a low-level group, the character who gets hit might consider using a Bandage instead to keep the healer’s attention on the main battle.
Tavarok won’t last for too long against a knowledgeable group. Once all looting is done, have any Miners in the group roll to see who gets to Mine the corpse of Tavarok. He always has a fair reward, with many pieces of Adamantite, some Eternium Ore, and Lesser Planar Essences!
Heroic Mode
In Heroic Mode, Tavarok adds no new abilities. His Arcing Smash is more potent so it is vitally important to face Tavarok away from the party. Arcing Smash deals high damage, making it even more important for the healer to stay attentive to the main tank.
Cloak of Revival (Back 66 Armor, +15 Stam, +16 Int, +4 Mana/5 Seconds, +35 Healing)
Lightning-Rod Pauldrons (Mail Shoulders 416 Armor, +18 Str, +18 Stam, +19 Int, +5 Mana/5 Seconds,
+22 Damage/Healing)
Hethershade Boots (Leather Feet 172 Armor, +22 Agi, +21 Stam, +15 Parry Rating, +44 Attack Power)
Scimitar of the Nexus-Stalkers (1h Sword 58.3 DPS +14 Agi, +16 Stam, +12 Hit Rating)
Shaarde the Greater (2h Sword 75.6 DPS +34 Str, +33 Stam, +29 Critical Strike Rating)Staff of Polarities (Staff 59.0 DPS +34 Stam, +33 Int, +67 Damage/Healing, +28 Spell Hit Rating)
MINING FOR LOOT!
HP 91740/149445 (Heroic) Damage 749-1051/3920-5544 (Heroic)
Abilities
Crystal Prison: Traps target in a prison of crystal, stunning the target and reducing the target’s health by 10% per second for 6 seconds.
Earthquake: Infl icts 919 to 1181 physical damage to nearby enemies, stunning them for 3 sec.
Arcing Smash: Arc attack deals damage in a cone.
TAVAROK
96
02g_912-X_Manatombs.indd 96 8/28/07 11:12:39 AM
If the Mana Wraiths do arrive, have the main tank use any area-of-effect aggro generator to get their attention (Demoralizing Shout works just fi ne). DPS characters should fi nish off the Spellbinder, who is probably almost down by now. The tank can start on the Mana Wraiths, and the group will shift to them as soon as the Spellbinder falls.
The next Reactor Room has a Nexus Terror in front. Pull it back and fi ght in the hallway for safety. Creep out and pull the group on the right; this one has three Elites (two Spellbinders and a Nexus Stalker). Use crowd control on one of the Spellbinders, or two of them if you are lucky! Then, clear the left, which has a trio of Elites as well.
Yet another Nexus Terror waits in the back, and he is safe to destroy once the other Elites are gone. Safety is Job One can be turned in here, on the northern side of the room. Use the cube there and have each person with the quest turn in the fi rst step. Do not start the second stage yet, as that is better to do after the fi nal boss has been defeated. If anyone starts the escort phase you have to do that now. To learn more, read about Someone Else’s Hard Work Pays Off in the quest listing.
Use the western hallway to approach the Hall of Twilight. The fi rst fi ght in there is a tricky one, with two melee targets, a Spellbinder, and a Priest. Get that Spellbinder controlled and focus fi re on the Priest.
Dispatch another Nexus Terror at the northern turn in the passage, then enter the next room.
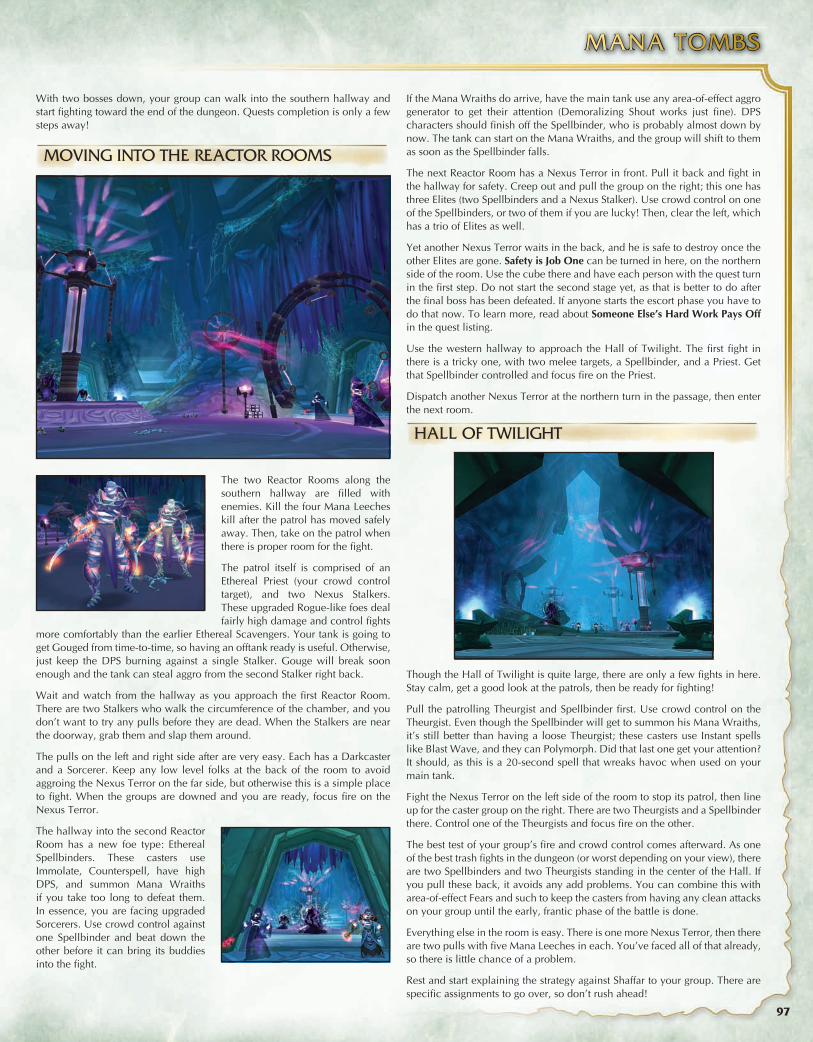
The two Reactor Rooms along the southern hallway are fi lled with enemies. Kill the four Mana Leeches kill after the patrol has moved safely away. Then, take on the patrol when there is proper room for the fi ght.
The patrol itself is comprised of an Ethereal Priest (your crowd control target), and two Nexus Stalkers. These upgraded Rogue-like foes deal fairly high damage and control fi ghts
more comfortably than the earlier Ethereal Scavengers. Your tank is going to get Gouged from time-to-time, so having an offtank ready is useful. Otherwise, just keep the DPS burning against a single Stalker. Gouge will break soon enough and the tank can steal aggro from the second Stalker right back.
Wait and watch from the hallway as you approach the fi rst Reactor Room. There are two Stalkers who walk the circumference of the chamber, and you don’t want to try any pulls before they are dead. When the Stalkers are near the doorway, grab them and slap them around.
The pulls on the left and right side after are very easy. Each has a Darkcaster and a Sorcerer. Keep any low level folks at the back of the room to avoid aggroing the Nexus Terror on the far side, but otherwise this is a simple place to fi ght. When the groups are downed and you are ready, focus fi re on the Nexus Terror.
The hallway into the second Reactor Room has a new foe type: Ethereal Spellbinders. These casters use Immolate, Counterspell, have high DPS, and summon Mana Wraiths if you take too long to defeat them. In essence, you are facing upgraded Sorcerers. Use crowd control against one Spellbinder and beat down the other before it can bring its buddies into the fi ght.
With two bosses down, your group can walk into the southern hallway and start fi ghting toward the end of the dungeon. Quests completion is only a few steps away!
MOVING INTO THE REACTOR ROOMS
HALL OF TWILIGHT
Though the Hall of Twilight is quite large, there are only a few fi ghts in here. Stay calm, get a good look at the patrols, then be ready for fi ghting!
Pull the patrolling Theurgist and Spellbinder fi rst. Use crowd control on the Theurgist. Even though the Spellbinder will get to summon his Mana Wraiths, it’s still better than having a loose Theurgist; these casters use Instant spells like Blast Wave, and they can Polymorph. Did that last one get your attention? It should, as this is a 20-second spell that wreaks havoc when used on your main tank.
Fight the Nexus Terror on the left side of the room to stop its patrol, then line up for the caster group on the right. There are two Theurgists and a Spellbinder there. Control one of the Theurgists and focus fi re on the other.
The best test of your group’s fi re and crowd control comes afterward. As one of the best trash fi ghts in the dungeon (or worst depending on your view), there are two Spellbinders and two Theurgists standing in the center of the Hall. If you pull these back, it avoids any add problems. You can combine this with area-of-effect Fears and such to keep the casters from having any clean attacks on your group until the early, frantic phase of the battle is done.
Everything else in the room is easy. There is one more Nexus Terror, then there are two pulls with fi ve Mana Leeches in each. You’ve faced all of that already, so there is little chance of a problem.
Rest and start explaining the strategy against Shaffar to your group. There are specifi c assignments to go over, so don’t rush ahead!
Heroic Mode
In Heroic Mode, Tavarok adds no new abilities. His Arcing Smash is more potent so it is vitally important to face Tavarok away from the party. Arcing Smash deals high damage, making it even more important for the healer to stay attentive to the main tank.
HP 91740/149445 (Heroic) Damage 749-1051/3920-5544 (Heroic)
Abilities
Crystal Prison: Traps target in a prison of crystal, stunning the target and reducing the target’s health by 10% per second for 6 seconds.
Earthquake: Infl icts 919 to 1181 physical damage to nearby enemies, stunning them for 3 sec.
Arcing Smash: Arc attack deals damage in a cone.
TAVAROK
97
MANA TOMBS
02g_912-X_Manatombs.indd 97 8/28/07 11:12:50 AM
A PRINCE’S RANSOM
The idea here is to have the main tank start the engagement by going after Shaffar directly. Not terribly much healing will be required, especially if your tank is a Warrior who is good at using Spell Refl ect.
While the tank does some damage to Shaffar and keeps his attention, the other characters destroy all of the Beacons. Not only do these Beacons deal damage on their own; they turn into Ethereal Apprentices if the players take too long.
When one DPS character fi nishes a Beacon, their job is to switch and help with the other Beacons. Only when all Beacons are down should the others switch to hurting Shaffar. Even then it is essential to keep an eye out for newly-created Beacons, as they will continue to arrive during the fi ght. Any DPS must switch to these as they appear.
The main tank is free to stay only on Shaffar. If the tank has a Trinket for escaping from root, that is always nice. Druids do especially well here, as Shaffar’s Frost Novas mean very little to a Shapeshifting Druid tank.
Shaffar’s repertoire consists of Blink, Frost Nova, and Frost/Fire spells. Without adds, he is a nice little fi ght. Control the Beacons and you win. Let the Beacons start to summon add and you are fi ghting a losing battle.
If DPS lets control of the Beacons slip when the Prince is at very low health, you can turn on full damage and have everyone beat him into oblivion. The adds remain, but once you’ve won, you’ve won. Under this circumstance, even the tank should probably switch into a more aggressive role and do everything possible to kill Shaffar. Once the adds build up, it’s a total DPS race. Try to avoid that scenario.
Mine any Adamantite Veins that remain in the dungeon, return to the second Reactor Room and run the escort quest if you need to, and take a fun look around. To hurry out of Mana Tombs, take the hallway behind Shaffar’s body to jump back out into the fi rst room from the balcony you saw earlier.
Turn in your quests outside and congratulate yourself on another great Instance run. Fine work!
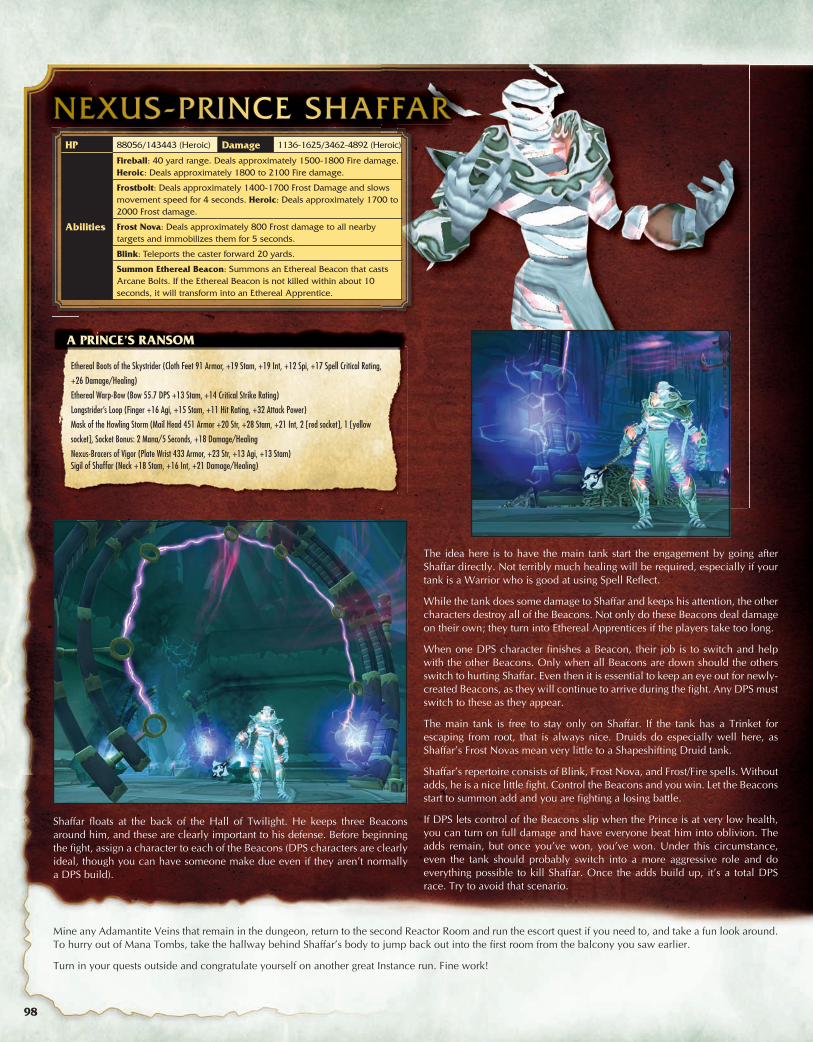
NEXUS-PRINCE SHAFFARHP 88056/143443 (Heroic) Damage 1136-1625/3462-4892 (Heroic)
Abilities
Fireball: 40 yard range. Deals approximately 1500-1800 Fire damage. Heroic: Deals approximately 1800 to 2100 Fire damage.
Frostbolt: Deals approximately 1400-1700 Frost Damage and slows movement speed for 4 seconds. Heroic: Deals approximately 1700 to 2000 Frost damage.
Frost Nova: Deals approximately 800 Frost damage to all nearby targets and immobilizes them for 5 seconds.
Blink: Teleports the caster forward 20 yards.
Summon Ethereal Beacon: Summons an Ethereal Beacon that casts Arcane Bolts. If the Ethereal Beacon is not killed within about 10 seconds, it will transform into an Ethereal Apprentice.
Shaffar fl oats at the back of the Hall of Twilight. He keeps three Beacons around him, and these are clearly important to his defense. Before beginning the fi ght, assign a character to each of the Beacons (DPS characters are clearly ideal, though you can have someone make due even if they aren’t normally a DPS build).
Ethereal Boots of the Skystrider (Cloth Feet 91 Armor, +19 Stam, +19 Int, +12 Spi, +17 Spell Critical Rating,
+26 Damage/Healing)
Ethereal Warp-Bow (Bow 55.7 DPS +13 Stam, +14 Critical Strike Rating)
Longstrider’s Loop (Finger +16 Agi, +15 Stam, +11 Hit Rating, +32 Attack Power)
Mask of the Howling Storm (Mail Head 451 Armor +20 Str, +28 Stam, +21 Int, 2 [red socket], 1 [yellow
socket], Socket Bonus: 2 Mana/5 Seconds, +18 Damage/Healing
Nexus-Bracers of Vigor (Plate Wrist 433 Armor, +23 Str, +13 Agi, +13 Stam)Sigil of Shaffar (Neck +18 Stam, +16 Int, +21 Damage/Healing)
98
02g_912-X_Manatombs.indd 98 8/28/07 11:13:17 AM


![Clinical Pharmacokinetics Samplechapter[1]](https://img.pdfslide.net/doc/110x75/577d34e41a28ab3a6b8f1c1d/clinical-pharmacokinetics-samplechapter1.jpg)