Embed Size (px)
Citation preview
Report
Qt Tutorial
Author:Manohar Kusehttp://kusemanohar.wordpress.com
Jan 25, 2012

Contents
1 Introduction 31.1 About Qt . . . . . . . . . . . . . . . . . . . . . . . . . . . . . 31.2 Brief History of Qt . . . . . . . . . . . . . . . . . . . . . . . . 31.3 Supported Platform . . . . . . . . . . . . . . . . . . . . . . . 41.4 Modules . . . . . . . . . . . . . . . . . . . . . . . . . . . . . . 51.5 Tools for Working with Qt . . . . . . . . . . . . . . . . . . . . 61.6 Licensing . . . . . . . . . . . . . . . . . . . . . . . . . . . . . 61.7 Softwares that Use Qt . . . . . . . . . . . . . . . . . . . . . . 6
2 Installation 72.1 Installation . . . . . . . . . . . . . . . . . . . . . . . . . . . . 72.2 Hello World with Qt . . . . . . . . . . . . . . . . . . . . . . . 7
3 Developing Applications with Qt Creator 103.1 Introduction . . . . . . . . . . . . . . . . . . . . . . . . . . . . 103.2 Creating a Hello Application . . . . . . . . . . . . . . . . . . 10
3.2.1 New Project . . . . . . . . . . . . . . . . . . . . . . . 113.2.2 Design a Form . . . . . . . . . . . . . . . . . . . . . . 123.2.3 Defining Slots . . . . . . . . . . . . . . . . . . . . . . . 12
4 Layouts and Tab Order 144.1 Layouts in Qt . . . . . . . . . . . . . . . . . . . . . . . . . . . 14
4.1.1 Example Layout with Qt Designer . . . . . . . . . . . 144.2 Tab Order . . . . . . . . . . . . . . . . . . . . . . . . . . . . . 16
4.2.1 Setting Tab Order with Qt Creator . . . . . . . . . . . 17
5 Signals and Slots 185.1 Class Design . . . . . . . . . . . . . . . . . . . . . . . . . . . 18
5.1.1 Example Class Definition . . . . . . . . . . . . . . . . 195.2 Signals and Slots . . . . . . . . . . . . . . . . . . . . . . . . . 19
1

Document by Manohar Kuse. http://kusemanohar.wordpress.com
5.2.1 Example with Slots . . . . . . . . . . . . . . . . . . . . 20
Page 2 of 21

Chapter 1
Introduction
1.1 About Qt
Qt is a a cross-platform application framework that is widely used for de-veloping application software with a graphical user interface (GUI). Qt usesa “write once, compile anywhere” with an Object Oriented approach. Qtlets programmers use a single source tree for applications that will run onWindows 98 to XP, Mac OS X, Linux, Solaris, HP-UX, and many otherversions of Unix with X11.
It is produced by Nokia’s Qt Development Frameworks division, whichcame into being after Nokia’s acquisition of the Norwegian company Troll-tech, the original producer of Qt.
Qt uses standard C++ but makes extensive use of a special code genera-tor (called the Meta Object Compiler, or moc) together with several macrosto enrich the language. Qt can also be used in several other programminglanguages via language bindings. Which means Qt can be used with otherlanguages such as C#, Java, Perl, Python, Ruby etc in addition to nativeC++. It runs on all major platforms and has extensive internationalizationsupport. Non-GUI features include SQL database access, XML parsing,thread management, network support, and a unified cross-platform API forfile handling.
1.2 Brief History of Qt
Haavard Nord and Eirik Chambe-Eng (the original developers of Qt and theCEO and President, respectively, of Trolltech) began development of “Qt”in 1991, three years before the company was incorporated as Quasar Tech-
3

Document by Manohar Kuse. http://kusemanohar.wordpress.com
nologies, then changed the name to Troll Tech and then to Trolltech. Theyear 1994 began inauspiciously with the two young programmers wanting toenter a well-established market, with no customers, an unfinished product,and no money. Eirik and Haavard expected to need to develop the productand start earning an income. [6]
The toolkit was called Qt because the letter Q looked appealing inHaavard’s Emacs font, and ”t” was inspired by Xt, the X toolkit. The firsttwo versions of Qt had only two flavors: Qt/X11 for Unix and Qt/Windowsfor Windows. The Windows platform was only available under a propri-etary license, which meant free/open source applications written in Qt forX11 could not be ported to Windows without purchasing the proprietaryedition. At the end of 2001, Trolltech released Qt 3.0, which added supportfor Mac OS X. The Mac OS X support was available only in the propri-etary license until June 2003, when Trolltech released Qt 3.2 with Mac OSX support available under the GPL. In June 2005, Trolltech released Qt 4.0.[1]
Nokia acquired Trolltech ASA on June 17, 2008 and changed the namefirst to Qt Software, then to Qt Development Frameworks. Since then itfocused on Qt development to turn it into the main development platformfor its devices, including a port to the Symbian S60 platform. Version 1.0of the Nokia Qt SDK was released on 23 June 2010. [4]
Since Trolltech’s birth, Qt’s popularity has grown unabated and contin-ues to grow to this day. This success is a reflection both of the quality of Qtand of how enjoyable it is to use. In the last decade, Qt has gone from beinga product used by a select few “in the know” to one that is used daily bythousands of cus- tomers and tens of thousands of open source developersall around the world.
1.3 Supported Platform
Qt is released by Nokia on the following platforms:
Linux/X11 Qt for X Window System (GNU/Linux, FreeBSD, HP-UX,Solaris, AIX, etc.)
Mac OS X Qt for Apple Mac OS X. Support for applications on top ofCocoa APIs.
Windows Qt for Microsoft Windows Platform.
Embedded Linux Qt for embedded platforms (PDA, Smartphone, etc.)
Page 4 of 21

Document by Manohar Kuse. http://kusemanohar.wordpress.com
Windows CE / Mobile Qt for Windows CE.
Symbian Qt for the Symbian platform. Symbian is the OS for modernNokia phones.
Maemo There are many applications already written for Maemo basedon the previous Internet Tablets (touch screen mini-computers). TheNokia N900 also supports Qt.
Other than the above meintioned official platforms, third party portsare also available for OpenSolaris (OS by Sun Microsystems), OS/2 (OS forATMs), I-Phone, Android, Amazon Kindle.
1.4 Modules
Following are the important modules which are part of Qt framework :
QtCore QtCore contains the core non-GUI classes, including the eventloop and Qt’s signal and slot mechanism. It also includes platformindependent abstractions for Unicode, threads, mapped files, sharedmemory, regular expressions, and user and application settings.
QtGui QtGui module contains the majority of the GUI classes. Theseinclude a number of table, tree and list classes based on the model-view-controller design pattern. Also provided is a sophisticated 2Dcanvas widget capable of storing thousands of items including ordinarywidgets.
QtMultimedia QtMultimedia module implements low-level multimedia func-tionality.
QtNetwork QtNetwork module contains classes for writing UDP and TCPclients and servers. It includes classes that implement FTP and HTTPclients and support DNS lookups. Network events are integrated withthe event loop making it very easy to develop networked applications.
QtOpenGL QtOpenGL module contains classes that enable the use ofOpenGL in rendering 3D graphics.
QtSql QtSql module contains classes that integrate with open-source andproprietary SQL databases. It includes editable data models for databasetables that can be used with GUI classes.
Page 5 of 21

Document by Manohar Kuse. http://kusemanohar.wordpress.com
QtXml QtXml module implements SAX and DOM interfaces to Qt’s XMLparser.
1.5 Tools for Working with Qt
Qt Assistant The Qt Help system. Contains class descriptions of all theQt modules and a mini how to use.
Qt Designer To design layouts of the user interfaces.
Qt Creator An IDE (Integrated Development Enviornment) for develop-ing Qt.
Qt Linguist Assists the developer for translating the application programto other languages like French, Dutch, German, Japnese etc.
1.6 Licensing
3 types of licenses main clause and cost
1.7 Softwares that Use Qt
Qt is a very popular, robust and multi-platform framework. This makes it avery good choice as a tool-kit of choice for many software products. Few ofthe popular software applications using Qt are – Adobe Photoshop Album,Autodesk Maya, Doxygen, Google Earth, K3b, KBounce, Kate, Kile, QtCreator, Qt Designer, Qt Linguist, Qt Assistant, Scribus, Skype, OracleVirtualBox, VLC Media Player.
There are over 20,000 software products developed by Nokia alone andmany thousands developed by individuals, various software compaines andso on. To get a bigger list of softwares in Qt, the reader may like to refer to[7].
Page 6 of 21

Chapter 2
Installation
This chapter explains the reader the basics of installation of Qt developmentsuit. In specific, this chapter gives the instructions to install Qt Creator, QtLinguist, Qt Designer and Qt Assistant and also help you run your first Qtprogram. The author of this document has used Linux (Ubuntu 10.04) fortesting. However, running Qt on Microsoft Windows and OS X is almostsimilar.
2.1 Installation
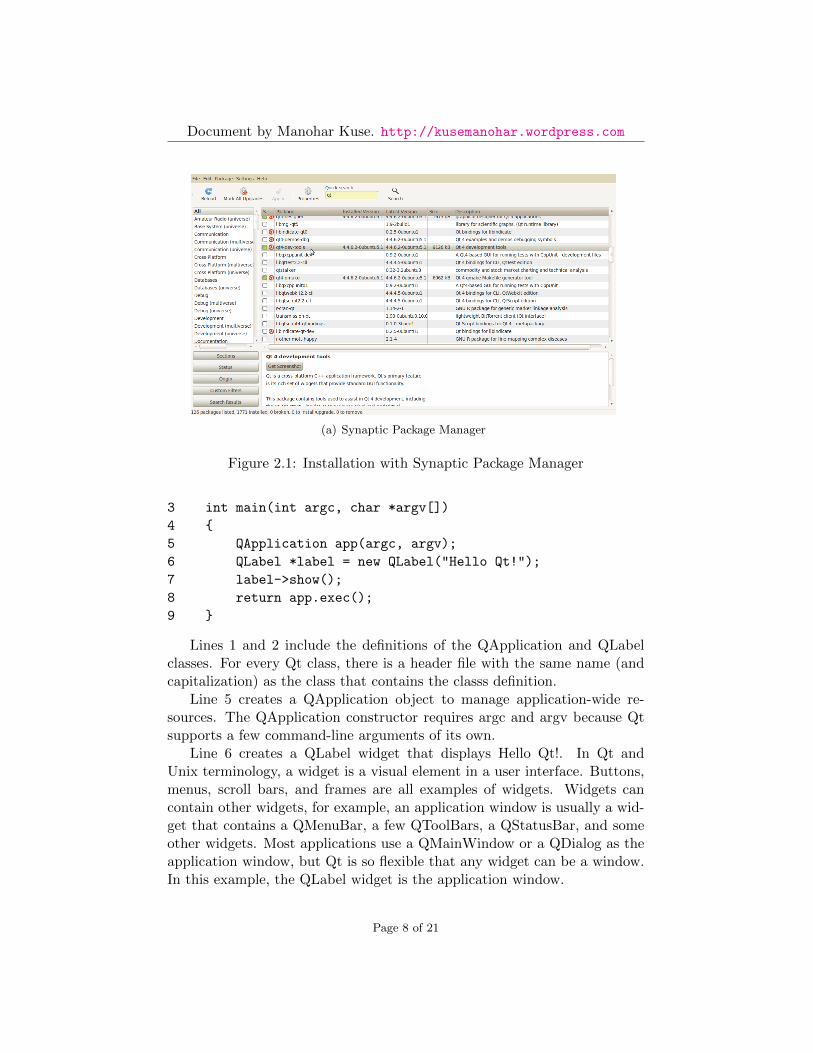
The latest version of Qt Creator can be downloaded from Qt download page[7]. Download the approriate version for your platform. In case you areusing Ubuntu, Qt development packages can also be installed with ‘SynapticPackage Manager’. The name of the package is ‘qt4-dev-tools’. Incase thepackage is not displayed in the list try ‘Reload’. With this the installationis complete. Incase, you have any other issue refer to the Official Qt Forumfor helping [2].
2.2 Hello World with Qt
Once the installation is complete, you are ready to run your first Qt GuiProgram. In a text editor like gedit, paste the following code. Save the fileas, for example ‘main.cpp’ Make sure, you make a new directory for it.
1 #include <QApplication>
2 #include <QLabel>
7
Document by Manohar Kuse. http://kusemanohar.wordpress.com
(a) Synaptic Package Manager
Figure 2.1: Installation with Synaptic Package Manager
3 int main(int argc, char *argv[])
4 {
5 QApplication app(argc, argv);
6 QLabel *label = new QLabel("Hello Qt!");
7 label->show();
8 return app.exec();
9 }
Lines 1 and 2 include the definitions of the QApplication and QLabelclasses. For every Qt class, there is a header file with the same name (andcapitalization) as the class that contains the classs definition.
Line 5 creates a QApplication object to manage application-wide re-sources. The QApplication constructor requires argc and argv because Qtsupports a few command-line arguments of its own.
Line 6 creates a QLabel widget that displays Hello Qt!. In Qt andUnix terminology, a widget is a visual element in a user interface. Buttons,menus, scroll bars, and frames are all examples of widgets. Widgets cancontain other widgets, for example, an application window is usually a wid-get that contains a QMenuBar, a few QToolBars, a QStatusBar, and someother widgets. Most applications use a QMainWindow or a QDialog as theapplication window, but Qt is so flexible that any widget can be a window.In this example, the QLabel widget is the application window.
Page 8 of 21
Document by Manohar Kuse. http://kusemanohar.wordpress.com
Line 7 makes the label visible. Widgets are always created hidden, sothat we can customize them before showing them, thereby avoiding flicker.Line 8 passes control of the application on to Qt. At this point, the programenters the event loop. This is a kind of stand-by mode where the programwaits for user actions such as mouse clicks and key presses. User actionsgenerate events (also called “messages”) to which the program can respond,usually by executing one or more functions. For example, when the userclicks a widget, a “mouse press” and a “mouse release” event are generated.In this respect, GUI applications differ drastically from conventional batchprograms, which typically process input, produce results, and terminatewithout human intervention.
To compile the program through command-line do,
qmake -project
With this, ‘qmake’ tries to generate a ‘.pro’ (Project) file. Next do,
qmake
This command generates an automatic makefile for the project. Now toactually compile the program do,
make
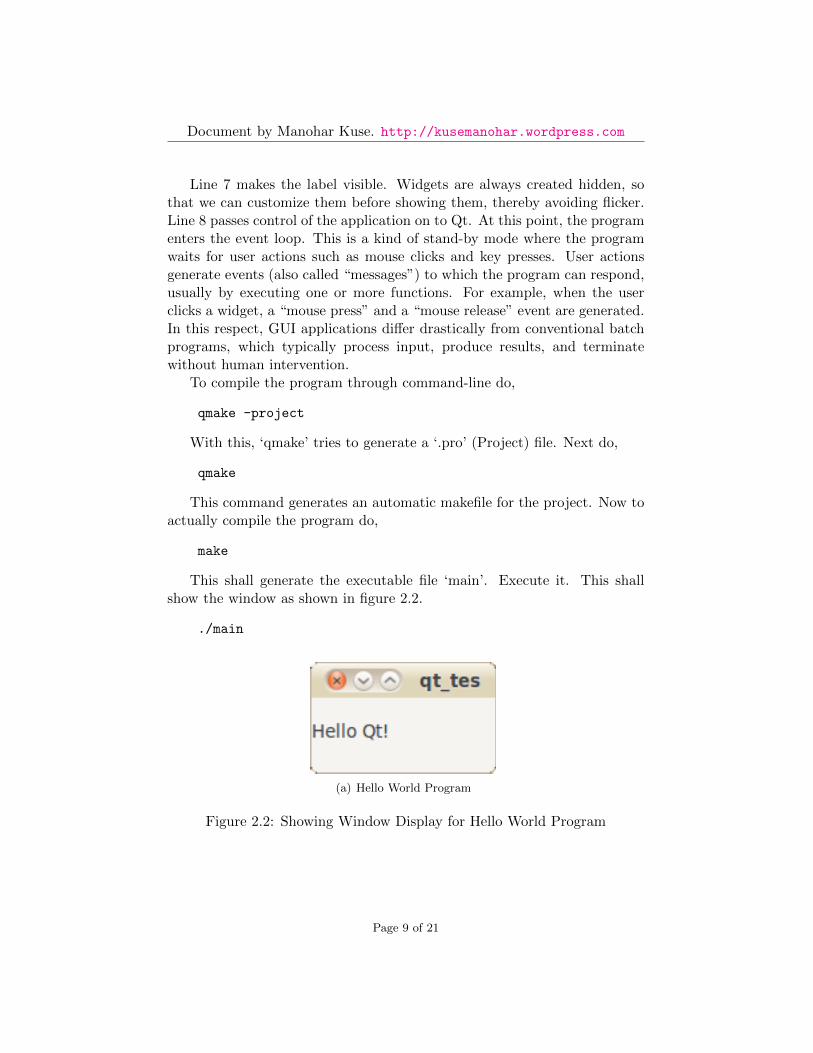
This shall generate the executable file ‘main’. Execute it. This shallshow the window as shown in figure 2.2.
./main
(a) Hello World Program
Figure 2.2: Showing Window Display for Hello World Program
Page 9 of 21

Chapter 3
Developing Applicationswith Qt Creator
3.1 Introduction
Qt Creator is a cross-platform C++ integrated development environmentwhich is part of the Qt SDK. It includes a visual debugger and an inte-grated GUI layout and forms designer. The editor’s features includes syntaxhighlighting and auto-completion. Qt Creator uses the C++ compiler fromthe GNU Compiler Collection on Linux and FreeBSD. On Windows it canuse MinGW or MSVC with the default install and can also use cdb whencompiled from source.
This chapter helps you to use the creator to develop basic GUI appli-cations and also explains the concepts behind them. In the opinion of theauthor, creating Qt GUI application is much easier with Qt creator with itsform designer compared to hand coded applications.
Qt being a C++ based Object Oriented Frame-work, basics knowledgeabout concepts of object oriented programming would be helpful. Howeverthose users not acquainted with concepts like ‘class’, ‘inheritance’, ‘encap-sulation’ may get basic information and syntax in C++ by following theappendix on C++ programming. Readers may also get themselves familiarwith C++ by following the web tutorial [5].
3.2 Creating a Hello Application
This section serves as an guided tour for creating a simple GUI applicationin Qt with the help of Qt creator. The application shall have a text-box,
10

Document by Manohar Kuse. http://kusemanohar.wordpress.com
(a) Qt Creator
Figure 3.1: Qt Creator
wherein the user has to enter his name. There would be four buttons saying‘Good Morning Qt’, ‘Good Afternoon Qt’, ‘Good Evening Qt’ and ‘GoodNight Qt’. The application shall wish the same to the user by his name.For example, when the user(name of the user is Manohar) clicks the button‘Good Morning Qt’ there could be a message-box which shall say ‘GoodMorning Manohar’. Appropriate error message shall be shown, if the userdoes not enter his/her name.
3.2.1 New Project
Each GUI application is made as a project in Qt Creator. The start screenof Qt creator would look as in figure 3.1. Click on menu ‘File’ followed by‘New File or Project’. In the dialog box select, ‘Qt GUI Application’. Inthe next step give a project name and location for project. In the ‘SelectModules’ do not select anything, just click next. These shall be useful whenyou learn to use more modules for example to connect to MySql Databaseor Network Programming. Give an appropriate class name and select baseclass as ‘QWidget’. After this step, your project should be created. Nowwe can start implementing it. Let us assume that, the class name was given‘MainWindow’
Page 11 of 21
Document by Manohar Kuse. http://kusemanohar.wordpress.com
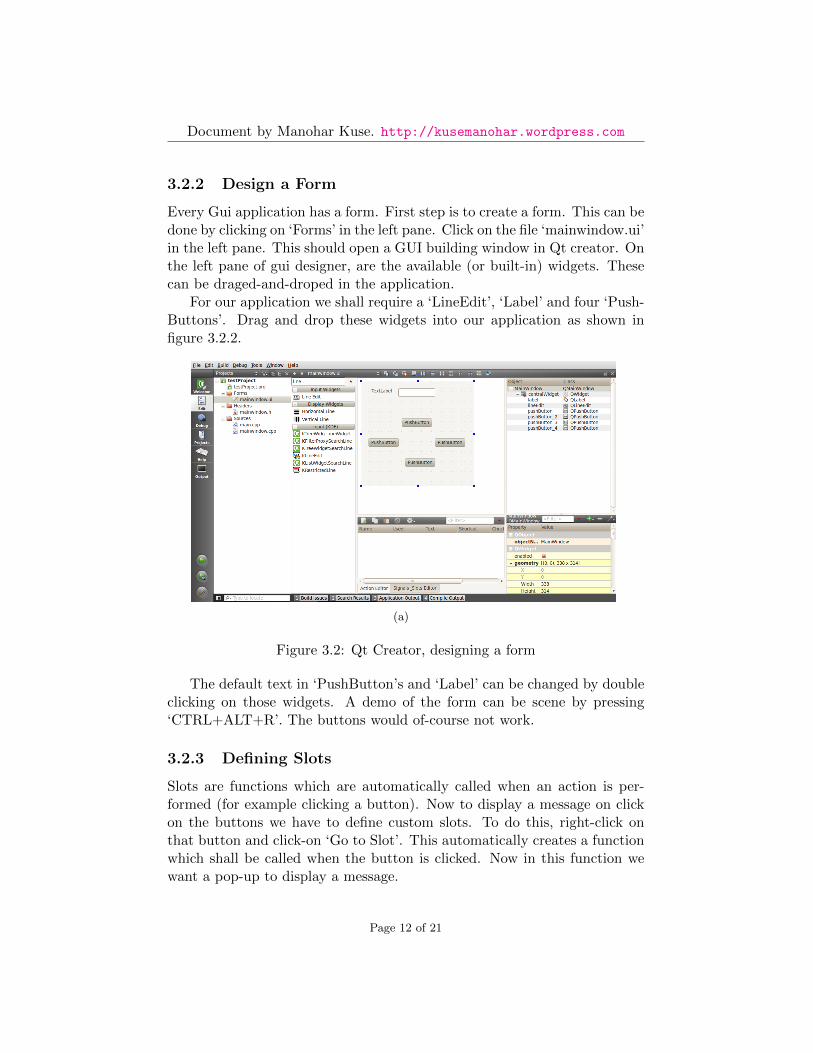
3.2.2 Design a Form
Every Gui application has a form. First step is to create a form. This can bedone by clicking on ‘Forms’ in the left pane. Click on the file ‘mainwindow.ui’in the left pane. This should open a GUI building window in Qt creator. Onthe left pane of gui designer, are the available (or built-in) widgets. Thesecan be draged-and-droped in the application.
For our application we shall require a ‘LineEdit’, ‘Label’ and four ‘Push-Buttons’. Drag and drop these widgets into our application as shown infigure 3.2.2.
(a)
Figure 3.2: Qt Creator, designing a form
The default text in ‘PushButton’s and ‘Label’ can be changed by doubleclicking on those widgets. A demo of the form can be scene by pressing‘CTRL+ALT+R’. The buttons would of-course not work.
3.2.3 Defining Slots
Slots are functions which are automatically called when an action is per-formed (for example clicking a button). Now to display a message on clickon the buttons we have to define custom slots. To do this, right-click onthat button and click-on ‘Go to Slot’. This automatically creates a functionwhich shall be called when the button is clicked. Now in this function wewant a pop-up to display a message.
Page 12 of 21

Document by Manohar Kuse. http://kusemanohar.wordpress.com
In Qt a pop-up can be displayed by use of the in-built class ‘QMessage-Box’. To do this go to the file ‘mainwindow.h’ and at the top,
#include <QMessageBox>
Now come back to the slot and write the following code,
1 QString str = ui->lineEdit->text();
2 if( str.length() == 0 )
3 {
4 QMessageBox::critical(this, tr("Error"),
tr("Please enter your name"));
5 }
6 else
7 {
8 QMessageBox::information(this, tr("Hello"),
tr("Good Morning ")+str );
9 }
Similar step has to be done with all the buttons. Line 1 of this code-snippet defines a string. This string loads the text from the line-edit. Allthe Gui elements are encapsulated in the variable ‘ui’. Then, on line 2,if length is zero (0) we show an error message or else we show the ‘GoodMorning’ along with the name of the user. The application would run asshown in figure 3.2.3. To compile and run the application, click on the green
(a) (b)
Figure 3.3: Qt Creator, designing a form
colored forward arrow button on bottom left side of Qt creator. With this,the application is built and the executable is run.
Page 13 of 21

Chapter 4
Layouts and Tab Order
This chapter introduces the reader about layouts in Qt. It also goes on toexplain how to set layouts and how to manage layouts with ‘Form Editor inQt Creator’ (or ‘Qt Designer’). The later part of the chapter also explainshow to set tab order for the widgets with ‘Form Editor in Qt Creator’ (or‘Qt Designer’).
4.1 Layouts in Qt
The Qt layout system provides a simple and powerful way of automaticallyarranging child widgets within a widget to ensure that they make good use ofthe available space. Qt includes a set of layout management classes that areused to describe how widgets are laid out in an application’s user interface.These layouts automatically position and resize widgets when the amountof space available for them changes, ensuring that they are consistentlyarranged and that the user interface as a whole remains usable. The Qtlayout system provides four layout classes, viz. Horizontal Layout (figure4.1(a)), Vertical Layout (figure 4.1(b)), Grid Layout (figure 4.1(c)) and FormLayout (4.1(d)).
4.1.1 Example Layout with Qt Designer
This section shall demonstrate to the reader a layout for the simple applica-tion developed in previous chapter. We shall have four horizontal layouts putinto a vertical layout. Spacer widgets are used as space occupier wheneverrequired. To achieve it, apply the following steps :
14

Document by Manohar Kuse. http://kusemanohar.wordpress.com
(a) Horizontal Layout
(b) Vertical Lay-out
(c) Grid Layout
(d) Form Layout
Figure 4.1: Available Layouts in Qt Layout System
1. Place the widget approximate as shown in figure 4.2(a). Don’t worryabout exact position.
2. Select the two items in a row. Right click, select ‘layout’ then ‘hori-zontal layout’.
3. Repeat this process, for each of the items in a row. After this is donefor each row, the form editor should look as in figure 4.2(b)
4. Now, arrange these four horizontal layout into one vertical layout. Thiscan be achieved by holding CTRL and clicking each of these. Thenright click, layout, vertical layout.
5. Next step is to arrange this vertical layout as a single layout for the
Page 15 of 21

Document by Manohar Kuse. http://kusemanohar.wordpress.com
background. This has to be achieved by right-click the backgroundthen click layout and then horizontal layout.
(a) Approximate Layout
(b) After step 3
Figure 4.2: Step by step example layout
By following the above steps, the reader should be able to make use ofthe layout system in Qt Creator. It might be interesting to mention thatlayouts can be thought as containers for widget and the idea is to put allthe widget and layout into a big container. Another point note worthy isthe use for spacers (vertical and horizontal spacers) for putting a free spacewherever required.
4.2 Tab Order
Many users expect to be able to navigate between widgets and controls usingonly the keyboard. Qt lets the user navigate between input widgets withthe Tab and Shift+Tab keyboard shortcuts. The default tab order is basedon the order in which widgets are constructed. Although this order may be
Page 16 of 21

Document by Manohar Kuse. http://kusemanohar.wordpress.com
sufficient for many users, it is often better to explicitly specify the tab orderto make your application easier to use.
4.2.1 Setting Tab Order with Qt Creator
To enter tab order editing mode, open the Edit menu and select Edit TabOrder. In this mode, each input widget in the form is shown with a numberindicating its position in the tab order. So, if the user gives the first inputwidget the input focus and then presses the tab key, the focus will move tothe second input widget, and so on.
The tab order is defined by clicking on each of the numbers in the correctorder. The first number you click will change to red, indicating the currentlyedited position in the tab order chain (refer figure 5.2.1). The widget as-sociated with the number will become the first one in the tab order chain.Clicking on another widget will make it the second in the tab order, and soon.
Repeat this process until you are satisfied with the tab order in the form– you do not need to click every input widget if you see that the remainingwidgets are already in the correct order. Numbers, for which you alreadyset the order, change to green, while those which are not clicked yet, remainblue.
(a)
Figure 4.3: Tab Order
If you make a mistake, simply double click outside of any number orchoose Restart from the form’s context menu to start again. If you havemany widgets on your form and would like to change the tab order in themiddle or at the end of the tab order chain, you can edit it at any position.Press Ctrl and click the number from which you want to start. Alternatively,choose Start from Here in the context menu.
Page 17 of 21

Chapter 5
Signals and Slots
This chapter teaches the reader the scene behind the screens in developing afull-fledged Qt Application. This chapter requires the reader to be familiarwith terms and usage of object oriented programming especially – classes,inheritance, access modifiers (public, private), constructor and destructorand virtual functions. This chapter also involves writing of code.
This chapter starts with the class design for the Qt Application (multipleinheritance approach [3]). Then the chapter shall go on to explain in depththe concept about signals and slots in Qt. Toward the end of the chapter,mouse and keyboard event usage tutorial is presented.
5.1 Class Design
This section walks you through the multiple inheritance approach to design-ing an application in Qt. This is not the only approach. Other approachescan be seen as described in [3]. However, in the opinion of the author, QtApplication design by means of multiple inheritance is a better and clearerapproach. The advantage being that, all the widgets used in the form areencapsulated as an object (this object is name ‘ui’ by Qt Creator) in theparent class and can be accessed from the derived class.
Forms created with Qt Designer can be sub-classed (inheritance) alongwith a standard QWidget-based class. This approach makes all the user in-terface components defined in the form directly accessible within the scope ofthe subclass, and enables signal and slot connections to be made in the usualway with the connect() function. The Qt creator does this automatically.This new class is created as files ‘mainwindow.h’ and ‘mainwindow.cpp’.This can be edited to create your own custom Qt application. The header
18

Document by Manohar Kuse. http://kusemanohar.wordpress.com
files have the definitions for the functions and variables of the class. Andthe ‘.cpp’ file has the implementation. As a Qt application programmer,you have to make definitions of your own function (also slots) and connectthese slots to the signals emitted by the objects in ‘ui’ or any other object.
5.1.1 Example Class Definition
Lets us try writing some code now. We shall try to programatically settext in the lineEdit. Since line-edit is a object (object name can be setfrom Form Editor in Qt Creator) of the class QLineEdit, we have to lookupa function to achieve this in Qt Assistant. The function ‘setText()’ is amember function of QLineEdit class.
In the constructor of out derived class (mainwindow.cpp) insert the fol-lowing line of code.
ui->lineEdit->setText("Hello Text");
Now run the program to see, the text is already set when the programexecutes. The user is suggested to experiment with other such functions ofthe QLineEdit or any other object. The functions along with their usagenot can be found in Qt Assistant.
5.2 Signals and Slots
The signals and slots mechanism is fundamental to Qt programming. Itenables the application programmer to bind objects together without theobjects knowing anything about each other. This chapter shall give a high-light at the mechanism more closely.
Slots are almost identical to ordinary C++ member functions. Theycan be virtual, they can be overloaded, they can be public, protected, orprivate, they can be directly invoked like any other C++ member functions,and their parameters can be of any types. The difference is that a slot canalso be connected to a signal, in which case it is automatically called eachtime the signal is emitted. The signals and slots are generally connected inthe constructor of the class. The syntax for connect() is
connect(sender, SIGNAL(signal), receiver, SLOT(slot));
‘sender’ is the pointer to the object which sends the ‘signal’. ‘receiver’is the pointer to the object which catches the signal and the ‘slot‘ is calledautomatically.
Page 19 of 21

Document by Manohar Kuse. http://kusemanohar.wordpress.com
5.2.1 Example with Slots
In this example, we shall make a button which shall serve as a reset button.Which mean, when the button is clicked we need to set the text in line-editto blank.
To achieve this, we shall create a custom slot (named clearLineEdit())and connect it to the signal ‘clicked()’ which is emitted by the button whenthe button is clicked. We shall have to make a new PushButton and changeit’s object name to ‘resetButton’ (This can be easily done with Form Editor).
Following code goes in the header file as part of class declaration.
//class declaration
private slots:
void clearLineEdit();
Following code goes in the ‘.cpp’ file as part of function definition.
//slot defination
void MainWindow::clearLineEdit()
{
ui->lineEdit->setText("");
}
Following code goes in the constructor of the class.
connect( ui->resetButton, SIGNAL(clicked()),
this, SLOT(clearLineEdit()));
Now, the program is ready and when run, we see that the text in line-editgets cleared when we click the ‘Reset’ button.
(a)
Figure 5.1: Reset Button
Page 20 of 21

Bibliography
[1] Jasmin Blanchette and Mark Summerfield. C++ GUI Programming withQt 4. Prentice Hall.
[2] Qt Forum. Qt forum installation problems. http:
//www.qtforum.org/forum/54/installing-qt.html?s=
e674082d31c324ffbdd38388558ce22bfb3c2af3.
[3] TrollTech INC. Using a component in your qt application.http://doc.trolltech.com/4.2/designer-using-a-component.
html#the-multiple-inheritance-approach.
[4] Qt Official Site. Qt official news. http://qt.nokia.com/about/news.
[5] Juan Soulie. C++ tutorial. http://www.cplusplus.com/doc/
tutorial/.
[6] Wikipedia. Qt (framework). http://en.wikipedia.org/wiki/Qt_
(framework).
[7] Wikipedia. Software that uses qt. http://en.wikipedia.org/wiki/
Category:Software_that_uses_Qt.
21