Embed Size (px)
Citation preview
MANUAL DE INSTRUCCIONES TELEVISOR LCD PORTÁTIL (7")
TV-3704TFT
ESTIMADO CLIENTE Con el fin de que obtenga el mayor desempeño de su producto, por favor lea este manual de instrucciones cuidadosamente antes de comenzar a utilizarlo, y guárdelo para su futura referencia. Si necesita soporte adicional, no dude en escribir a: [email protected]
P-1
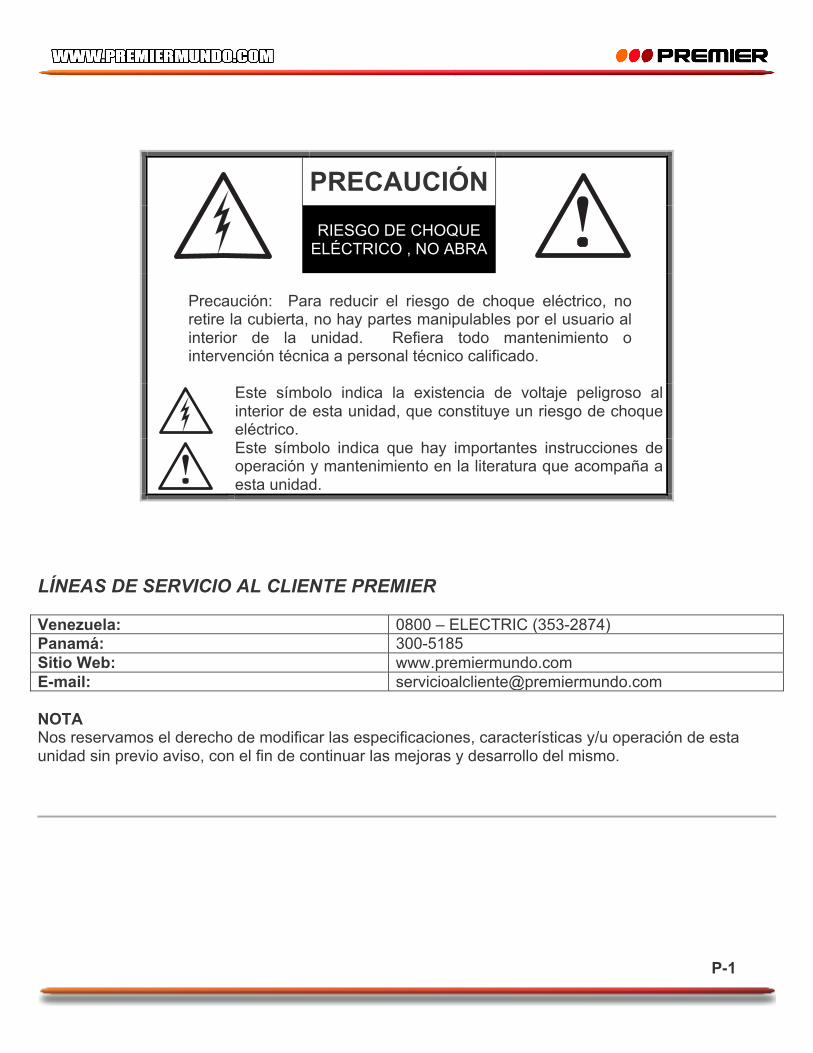
PRECAUCIÓN
RIESGO DE CHOQUE
ELÉCTRICO , NO ABRA
Precaución: Para reducir el riesgo de choque eléctrico, no retire la cubierta, no hay partes manipulables por el usuario al interior de la unidad. Refiera todo mantenimiento o intervención técnica a personal técnico calificado.
Este símbolo indica la existencia de voltaje peligroso al interior de esta unidad, que constituye un riesgo de choque eléctrico.
Este símbolo indica que hay importantes instrucciones de operación y mantenimiento en la literatura que acompaña a esta unidad.
LÍNEAS DE SERVICIO AL CLIENTE PREMIER Venezuela: 0800 – ELECTRIC (353-2874) Panamá: 300-5185 Sitio Web: www.premiermundo.com E-mail: [email protected] NOTA Nos reservamos el derecho de modificar las especificaciones, características y/u operación de esta unidad sin previo aviso, con el fin de continuar las mejoras y desarrollo del mismo.
P-2
CONTENIDO DESCRIPCIÓN DE LA UNIDAD ................................................................................................................ 3 PANEL DE CONTROL ............................................................................................................................... 4 BOTONES DEL CONTROL REMOTO ...................................................................................................... 4 INSTRUCCIONES DE OPERACIÓN ......................................................................................................... 5 OPERACIÓN DEL MENÚ .......................................................................................................................... 6 RECOMENDACIONES .............................................................................................................................. 7 MODO CARD ............................................................................................................................................. 7 INSTRUCCIONES GENERALES ............................................................................................................... 9 AJUSTES ................................................................................................................................................... 9 PRECAUCIONES ....................................................................................................................................... 9 RESOLUCIÓN DE PROBLEMAS ............................................................................................................ 11 PARÁMETROS TÉCNICOS ..................................................................................................................... 12
P-3
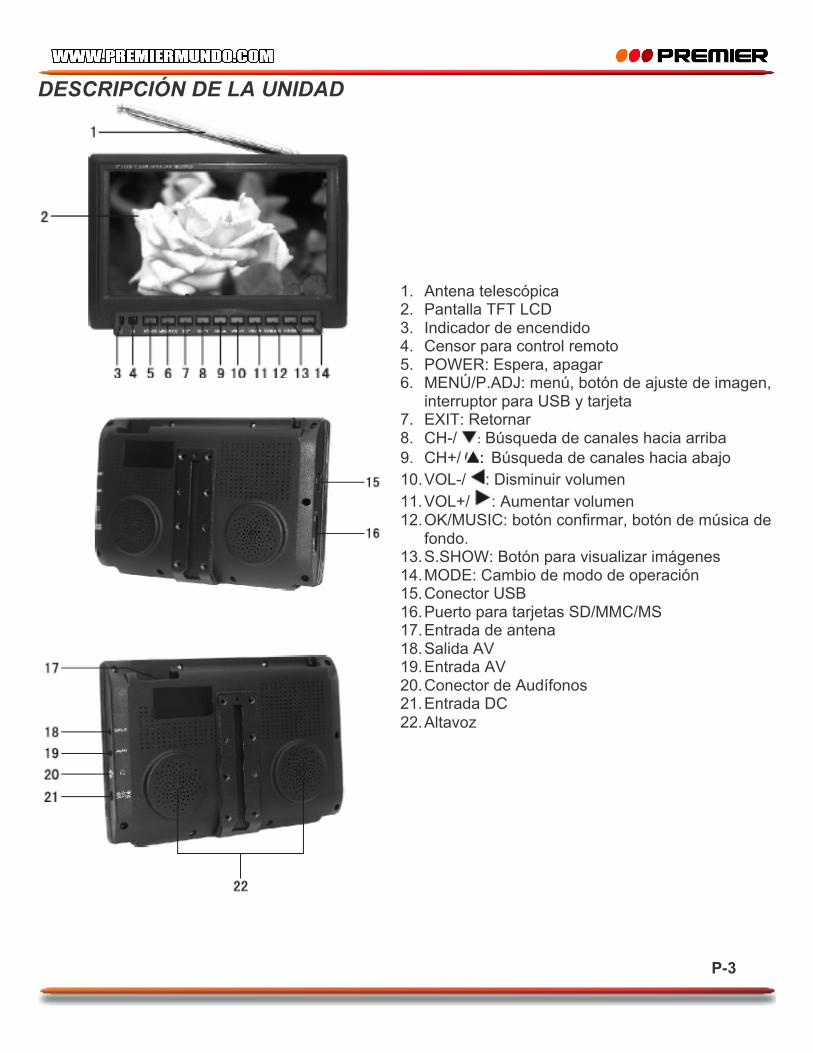
DESCRIPCIÓN DE LA UNIDAD
1. Antena telescópica 2. Pantalla TFT LCD 3. Indicador de encendido 4. Censor para control remoto 5. POWER: Espera, apagar 6. MENÚ/P.ADJ: menú, botón de ajuste de imagen,
interruptor para USB y tarjeta 7. EXIT: Retornar 8. CH-/ : Búsqueda de canales hacia arriba 9. CH+/ : Búsqueda de canales hacia abajo 10. VOL-/ : Disminuir volumen 11. VOL+/ : Aumentar volumen 12. OK/MUSIC: botón confirmar, botón de música de
fondo. 13. S.SHOW: Botón para visualizar imágenes 14. MODE: Cambio de modo de operación 15. Conector USB 16. Puerto para tarjetas SD/MMC/MS 17. Entrada de antena 18. Salida AV 19. Entrada AV 20. Conector de Audífonos 21. Entrada DC 22. Altavoz
P-4
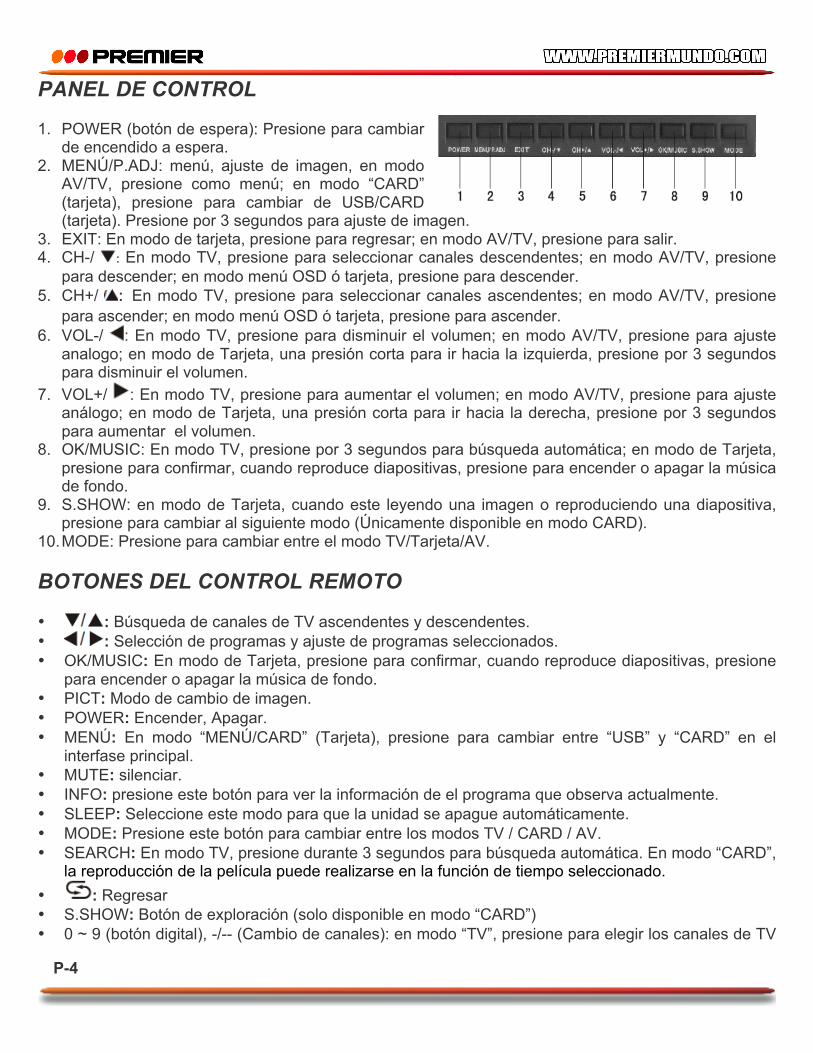
PANEL DE CONTROL
1. POWER (botón de espera): Presione para cambiar de encendido a espera.
2. MENÚ/P.ADJ: menú, ajuste de imagen, en modo AV/TV, presione como menú; en modo “CARD” (tarjeta), presione para cambiar de USB/CARD (tarjeta). Presione por 3 segundos para ajuste de imagen.
3. EXIT: En modo de tarjeta, presione para regresar; en modo AV/TV, presione para salir. 4. CH-/ : En modo TV, presione para seleccionar canales descendentes; en modo AV/TV, presione
para descender; en modo menú OSD ó tarjeta, presione para descender. 5. CH+/ : En modo TV, presione para seleccionar canales ascendentes; en modo AV/TV, presione
para ascender; en modo menú OSD ó tarjeta, presione para ascender. 6. VOL-/ : En modo TV, presione para disminuir el volumen; en modo AV/TV, presione para ajuste
analogo; en modo de Tarjeta, una presión corta para ir hacia la izquierda, presione por 3 segundos para disminuir el volumen.
7. VOL+/ : En modo TV, presione para aumentar el volumen; en modo AV/TV, presione para ajuste análogo; en modo de Tarjeta, una presión corta para ir hacia la derecha, presione por 3 segundos para aumentar el volumen.
8. OK/MUSIC: En modo TV, presione por 3 segundos para búsqueda automática; en modo de Tarjeta, presione para confirmar, cuando reproduce diapositivas, presione para encender o apagar la música de fondo.
9. S.SHOW: en modo de Tarjeta, cuando este leyendo una imagen o reproduciendo una diapositiva, presione para cambiar al siguiente modo (Únicamente disponible en modo CARD).
10. MODE: Presione para cambiar entre el modo TV/Tarjeta/AV. BOTONES DEL CONTROL REMOTO • : Búsqueda de canales de TV ascendentes y descendentes. • : Selección de programas y ajuste de programas seleccionados. • OK/MUSIC: En modo de Tarjeta, presione para confirmar, cuando reproduce diapositivas, presione
para encender o apagar la música de fondo. • PICT: Modo de cambio de imagen. • POWER: Encender, Apagar. • MENÚ: En modo “MENÚ/CARD” (Tarjeta), presione para cambiar entre “USB” y “CARD” en el
interfase principal. • MUTE: silenciar. • INFO: presione este botón para ver la información de el programa que observa actualmente. • SLEEP: Seleccione este modo para que la unidad se apague automáticamente. • MODE: Presione este botón para cambiar entre los modos TV / CARD / AV. • SEARCH: En modo TV, presione durante 3 segundos para búsqueda automática. En modo “CARD”,
la reproducción de la película puede realizarse en la función de tiempo seleccionado. • : Regresar • S.SHOW: Botón de exploración (solo disponible en modo “CARD”) • 0 ~ 9 (botón digital), -/-- (Cambio de canales): en modo “TV”, presione para elegir los canales de TV
P-5
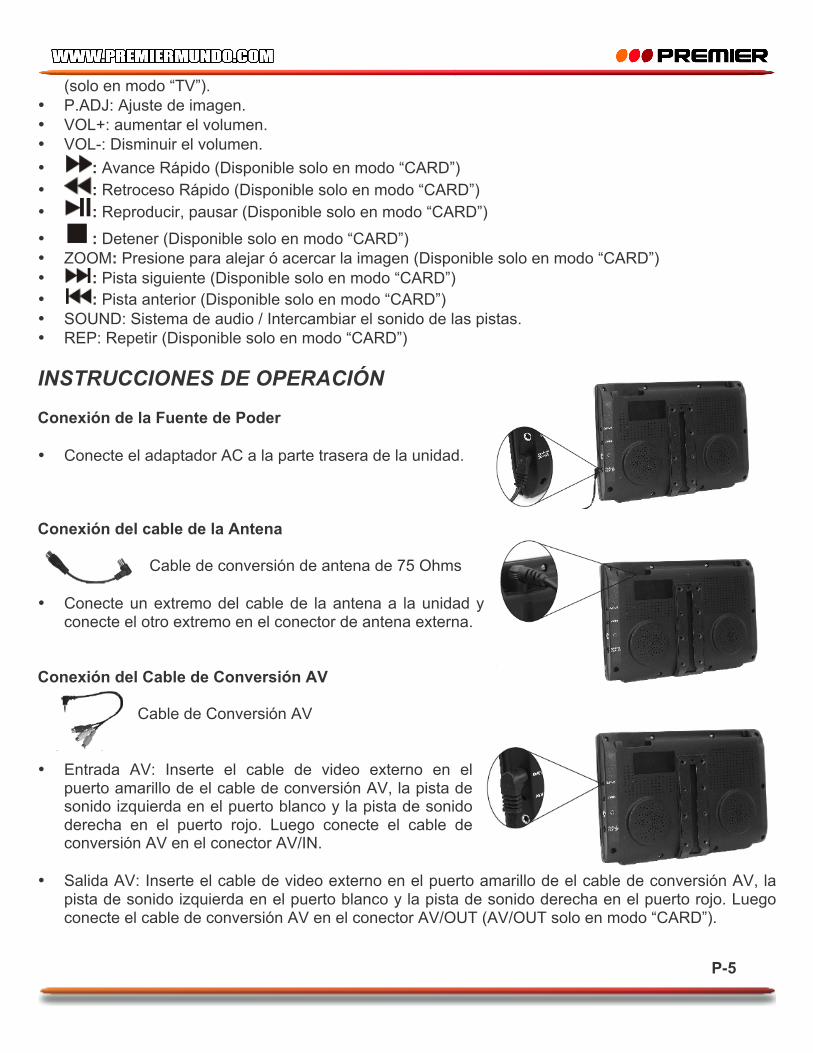
(solo en modo “TV”). • P.ADJ: Ajuste de imagen. • VOL+: aumentar el volumen. • VOL-: Disminuir el volumen. • : Avance Rápido (Disponible solo en modo “CARD”) • : Retroceso Rápido (Disponible solo en modo “CARD”) • : Reproducir, pausar (Disponible solo en modo “CARD”) • : Detener (Disponible solo en modo “CARD”) • ZOOM: Presione para alejar ó acercar la imagen (Disponible solo en modo “CARD”) • : Pista siguiente (Disponible solo en modo “CARD”) • : Pista anterior (Disponible solo en modo “CARD”) • SOUND: Sistema de audio / Intercambiar el sonido de las pistas. • REP: Repetir (Disponible solo en modo “CARD”) INSTRUCCIONES DE OPERACIÓN Conexión de la Fuente de Poder • Conecte el adaptador AC a la parte trasera de la unidad.
Conexión del cable de la Antena
Cable de conversión de antena de 75 Ohms
• Conecte un extremo del cable de la antena a la unidad y conecte el otro extremo en el conector de antena externa.
Conexión del Cable de Conversión AV
Cable de Conversión AV
• Entrada AV: Inserte el cable de video externo en el puerto amarillo de el cable de conversión AV, la pista de sonido izquierda en el puerto blanco y la pista de sonido derecha en el puerto rojo. Luego conecte el cable de conversión AV en el conector AV/IN.
• Salida AV: Inserte el cable de video externo en el puerto amarillo de el cable de conversión AV, la pista de sonido izquierda en el puerto blanco y la pista de sonido derecha en el puerto rojo. Luego conecte el cable de conversión AV en el conector AV/OUT (AV/OUT solo en modo “CARD”).
P-6
OPERACIÓN DEL MENÚ Al presionar MENÚ le aparecerán las siguientes opciones: • PICTURE (Imagen): Muestra “Contraste” (Contrast), “Brillo” (Bright), “Color” (Color), “Nitidez”
(Sharp) y “Tinte” (Tint) en pantalla; Presione ó para seleccionar el ítem y presione ó para ajustarlo. NOTA: Solo cuando muestra la imagen de sistema NTSC, mostrara la opción “Tinte” en el menú de imagen.
• OPTION (Opciones): Muestra el idioma en la pantalla; presione ó para seleccionar multi-idioma OSD.
• CLOCK (Reloj): Muestra “Tiempo” (Time), “Tiempo de encendido” (On-Time), “Tiempo de apagado” (Off-Time), “Atención” (Attention), “Sintonía programada” (Bespoke Time) y “Posición” (Position) en pantalla ; Presione ó para seleccionar el ítem y presione ó para ajustarlo.
• NOTA: Si desea ajustar otro ítem, “Tiempo” debe ser ajustado.
• SYSTEM (Sistema): Muestra “Sistema de color” (Color-Sys), “Sistema de sonido” (Sound-Sys), “Fondo Azul” (Blue Back), “Horizontal”, “Vertical” y “Zoom” en pantalla;
• Presione ó para seleccionar el ítem “Sistema de Color”, luego presione para cambiar la pantalla a AUTO, PAL M, PAL N y NTSC. Tenga cuidado de que la elección de estos sistemas sea la correcta. Se recomienda seleccionar la posición AUTO.
• Presione ó para seleccionar el ítem de “Sistema de sonido”, luego presione , y aparecerá el sistema de sonido en el orden de BG5.5M, M4.5M, I6.0M, DK6.5M y L6.5M (El sistema puede variar dependiendo del país). Notas: Ajuste al sistema de sonido local. Si aparecen imágenes sin sonido o con ruido, asegúrese que el Sistema de sonido este correctamente ajustado.
• Presione ó para seleccionar el ítem “Fondo azul”, presionando ó puede encender o apagar el fondo azul si no hay señal.
• Presione ó para seleccionar el ítem “Horizontal”, presionando ó puede cambiar a Horizontal, presione de nuevo para reanudar la imagen.
• Presione ó para seleccionar el ítem “Vertical”, presionando ó puede realizar un giro Vertical, presione de nuevo para reanudar la imagen.
• Presione ó para seleccionar el ítem “Zoom”, presionando ó puede realizar la selección de modos de imagen; modo 4:3 y modo 16:9.
• PRESET (Programar): Mostrara en pantalla “Posición” (Position), “Recordar” (Remember), “Banda” (Band), “Intercambiar” (swap), “Fino” (Fine), “Búsqueda” (Search) y “Búsqueda Automática” (Auto-Search);
• Presione ó para seleccionar “Posición”, y presione ó para determinar. • Presione ó para seleccionar “Recordar”, presione ó para seleccionar encender, este
canal será mostrado después de seleccionado. Cuando la función Recordar esta apagada este canal no será mostrado.
P-7
• Presione ó para seleccionar “Banda”. Luego presione ó para intercambiar de V-L, V-H y U.
• Presione ó para seleccionar “Intercambiar”, Luego presione ó para seleccionar el número de canal. Presione MENÚ para confirmar.
• Presione ó para seleccionar “Fino”, Luego presione ó para ajustar la frecuencia del canal a poco.
• Presione ó para seleccionar “Búsqueda”, Luego presione ó para iniciar la busque hacia delante o hacia atrás. La barra indicadora de búsqueda de canales cambiara de roja a verde luego de buscar señal de TV. El sistema de almacenamiento de TV identificara con falta de señal a los canales que tengan una señal demasiado débil.
• Presione ó para seleccionar “Búsqueda automática”, presionando ó inicia la Búsqueda Automática de canales desde 0 en turnos de V-L, V-H y UHF. Estaciones de suficiente fuerza serán memorizadas y se detendrá la búsqueda.
RECOMENDACIONES 1. Ajuste el idioma OSD presionando LANG. 2. Asegúrese desde el Menú de “COLOR-SYS” que los sistemas de color y sonido están
correctamente. 3. Seleccione Búsqueda automática en el menú “PRESET”, y empiece la búsqueda automática de la
señal de TV. 4. Ajuste adecuadamente la antena telescópica para que obtenga una optima imagen. AVISO: En caso de que la señal este demasiado débil, la imagen se verá borrosa aunque la antena se encuentre en una posición adecuada, se presentará además una ola de ruido causada por la baja señal, esto no significa que el TV tenga una falla. Si la imagen permanece borrosa aun cuando esta usando la antena telescópica, use la antena externa o CATV. MODO CARD Uso de Memoria (USB y CARD) La unidad soporta USB, Tarjeta Multi Media (MMC), SD, Memoria de Almacenamiento (MS). • La unidad soporta varios tipos de USB y CARD entre 4G (USB o Tarjetas con mayor capacidad
puede que no funcionen de manera adecuada) • La unidad soporta JPEG, MP3, WMA, VCD, AVI etc. AVISO:
1. Se desempeña muy suavemente cuando la secuencia de datos es inferior a 2000KBP/S, y pueden producirse algunas pausas cuando la secuencia de datos es superior a 2000KBP/S.
2. Se recomiendan imágenes entre 12M, ya que la unidad puede que no soporte imágenes demasiado grandes.
3. El conector USB de la unidad no soporta dispositivos multi-media tales como lector de Tarjeta, Disco duro portátil, MP3, MP4.
4. Cuando encuentre problemas desde el dispositivo, desconéctelo durante 5 segundos y luego restablézcalo.
P-8
ARCHIVOS MULTI-MEDIA Presione “MODE”, cambie a modo “CARD”, en el interfase aparecen 5 funciones (Imagen, Música, video, presentación de diapositivas y Instalación). Inserte USB o CARD, si inserta ambas al tiempo, presione MENÚ para intercambiar entre “USB” o “CARD” en el interfase. LECTURA DE IMÁGENES Presione el botón de dirección para seleccionar “PHOTO”, luego presione “OK” para abrir el archivo; presione Hacia arriba / Hacia abajo para seleccionar la imagen, presione “OK” para leerla. Cuando este viendo imágenes, presione “S.SHOW” una vez para intercambiar a modo de “Visualizar imágenes”. Cuando este leyendo el archivo de imágenes, presione los botones de dirección , para operación rápida de las siguientes funciones: • Botón de dirección izquierda: Contrario a las agujas del reloj 90º • Botón de dirección derecha: en dirección de las agujas del reloj 90º • Botón de dirección arriba: Espejo arriba / Abajo / izquierda / derecha • Botón de dirección abajo: Espejo arriba / Abajo / izquierda / derecha • Después de la operación de rotación o espejo, presione para continuar reproduciendo. NOTA: la música de fondo no puede abrirse mientras esta leyendo imágenes, otras funciones no trabajarán cuando use la función “Zoom”. REPRODUCCIÓN DE MÚSICA Presione los botones de dirección para seleccionar el ítem “MUSIC”, Presione “OK” para abrir los archivos almacenados; presione para seleccionar el archivo, y luego presione “OK” para reproducir la música. REPRODUCCIÓN DE PELÍCULA Presione los botones de dirección para seleccionar el ítem “VIDEO”, Presione “OK” para abrir los archivos almacenados, presione para seleccionar los archivos, luego presione “OK” para reproducir la película. PRESENTACIÓN DE DIAPOSITIVAS Presione los botones de dirección para seleccionar el ítem “SLIDE SHOW”, Presione “OK” para abrir los archivos almacenados, presione para seleccionar los archivos, luego presione “OK” para reproducir. Mientras reproduce, presione “OK” para apagar o encender la música de fondo. NOTA: La pantalla puede mostrar caracteres dependiendo de la compatibilidad con el idioma seleccionado.

P-9
INSTRUCCIONES GENERALES
: Reproducir, pausar. : Detener
: Avance rápido : Retroceso rápido
ZOOM: Mientras reproduce, presione “ZOOM” para alejar la imagen que esta observando. REP: Mientras reproduce, presione el botón “repeat” para realizar las siguientes funciones: Repetición simple, repetir todo, cancelar. SOUND: Cambiar pista (Excluyendo archivos no soportados) EXIT: Mientras reproduce, presione para detener, luego presione de nuevo para retornar al interfase principal, o presione para retornar al interfase principal directamente. AJUSTES Presione los botones de dirección para seleccionar el ítem “SETUP”, presione para seleccionar “Arriba / abajo”, luego presione “OK” para confirmar. AJUSTES COMUNES Idiomas: Chino, Inglés y otros idiomas están disponibles. Sonido: Seleccione su idioma favorito para reproducir cuando varios idiomas de sonido esten soportados por algunos videos. Subtítulos: Seleccione su idioma favorito para reproducir cuando multiples idiomas de subtítulos esten soportados por algunos videos. Valor Predeterminado: predeterminado por fabrica. Sistemas de TV: Cuando conecte la salida de video, la salida de sistema del producto y del sistema de TV deben corresponder, de otra manera no mostrara color. Anormal, NTSC y PAL están disponibles para elegir; el valor por defecto es “NTSC”. Pagina de inicio: Regreso a la función de ajuste de pagina. PRECAUCIONES ALMACENAMIENTO • Mantenga la unidad alejada de fuentes de frío o calor extremos. La temperatura de almacenamiento
debe ser de 20ºC a 60ºC y la temperatura de funcionamiento de -5ºC a 40ºC. • Evite usar la unidad en lugares húmedos, tales como baños, cocinas, piscinas o lugares similares. • Evite que la unidad este expuesta a humedad, polvo, etc. • Evite que la unidad se golpee fuertemente. • Evite someter este dispositivo a vibraciones fuertes, golpes o colisiones. • Evite frotar la unidad con objetos afilados.
P-10
MANTENIMIENTO • Antes de limpiar la unidad desconecte todos lo cables. • Limpie la superficie, pantalla y teclado de la unidad usando un paño con un poco de detergente
suave. • Evite usar solventes ó detergentes fuertes para limpiar la unidad.
AVISO • Evite ver programas de televisión u operar la unidad mientras maneja, ya que esto puede poner en
riesgo su seguridad y la de su familia. NOTA ESPECIAL • Es completamente normal que aparezcan puntos oscuros o brillantes en la pantalla, esto puede
estar asociado con la actividad de la tecnología matriz de la pantalla, por lo tanto no es una señal de mal funcionamiento.
• Ante cualquier falla en la unidad, puede contactarnos o dirigirse a un centro especializado. Evite abrir o alterar la unidad usted mismo, ya que puede causar daños en la misma.
ACCESORIOS Asegúrese que los siguientes accesorios están incluidos al interior del empaque. 1. Adaptador para auto 2. Adaptador AC 3. Cable de conversión de antena 75 Ohm 4. Cable de Conversión AV 5. Control remoto 6. Antena telescópica
P-11
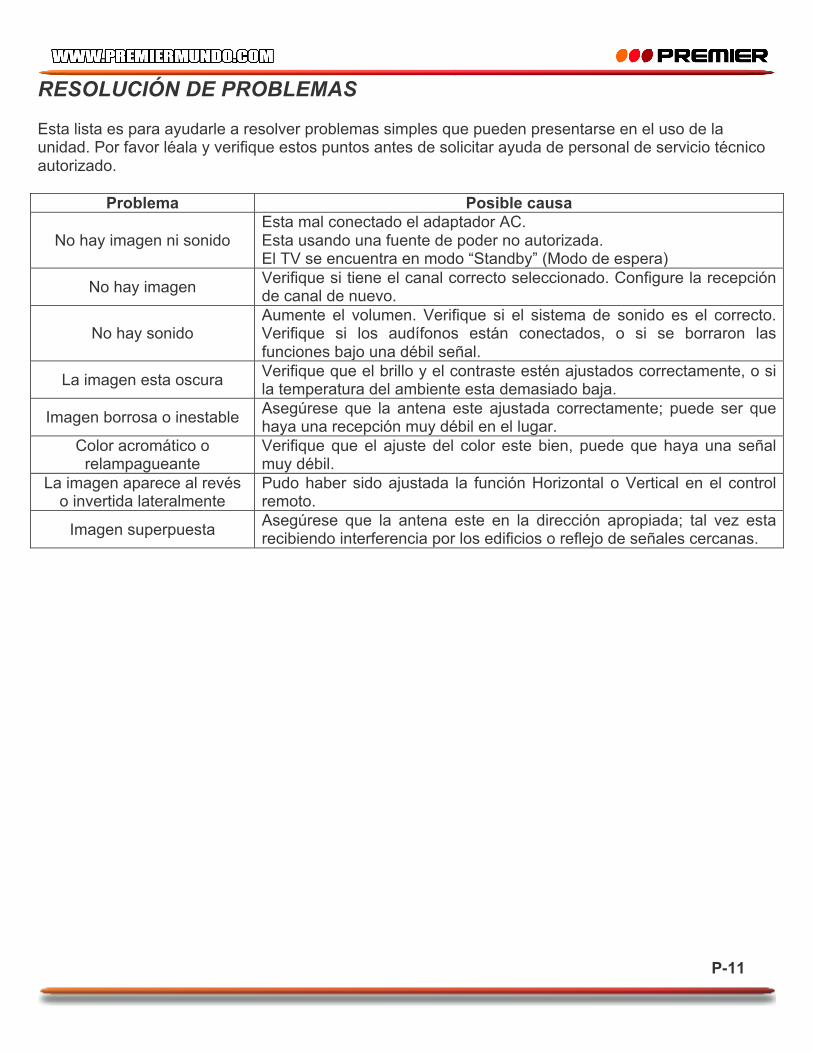
RESOLUCIÓN DE PROBLEMAS Esta lista es para ayudarle a resolver problemas simples que pueden presentarse en el uso de la unidad. Por favor léala y verifique estos puntos antes de solicitar ayuda de personal de servicio técnico autorizado.
Problema Posible causa
No hay imagen ni sonido Esta mal conectado el adaptador AC. Esta usando una fuente de poder no autorizada. El TV se encuentra en modo “Standby” (Modo de espera)
No hay imagen Verifique si tiene el canal correcto seleccionado. Configure la recepción de canal de nuevo.
No hay sonido Aumente el volumen. Verifique si el sistema de sonido es el correcto. Verifique si los audífonos están conectados, o si se borraron las funciones bajo una débil señal.
La imagen esta oscura Verifique que el brillo y el contraste estén ajustados correctamente, o si la temperatura del ambiente esta demasiado baja.
Imagen borrosa o inestable Asegúrese que la antena este ajustada correctamente; puede ser que haya una recepción muy débil en el lugar.
Color acromático o relampagueante
Verifique que el ajuste del color este bien, puede que haya una señal muy débil.
La imagen aparece al revés o invertida lateralmente
Pudo haber sido ajustada la función Horizontal o Vertical en el control remoto.
Imagen superpuesta Asegúrese que la antena este en la dirección apropiada; tal vez esta recibiendo interferencia por los edificios o reflejo de señales cercanas.
P-12
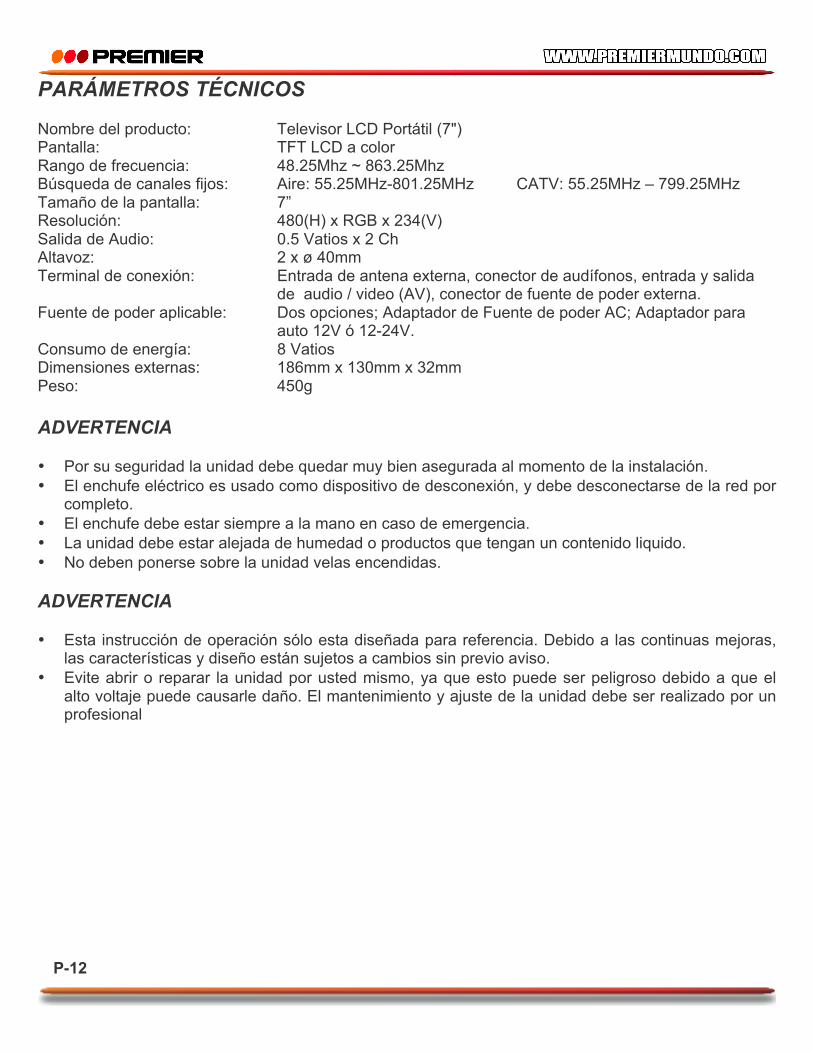
PARÁMETROS TÉCNICOS Nombre del producto: Televisor LCD Portátil (7") Pantalla: TFT LCD a color Rango de frecuencia: 48.25Mhz ~ 863.25Mhz Búsqueda de canales fijos: Aire: 55.25MHz-801.25MHz CATV: 55.25MHz – 799.25MHz Tamaño de la pantalla: 7” Resolución: 480(H) x RGB x 234(V) Salida de Audio: 0.5 Vatios x 2 Ch Altavoz: 2 x ø 40mm Terminal de conexión: Entrada de antena externa, conector de audífonos, entrada y salida de audio / video (AV), conector de fuente de poder externa. Fuente de poder aplicable: Dos opciones; Adaptador de Fuente de poder AC; Adaptador para auto 12V ó 12-24V. Consumo de energía: 8 Vatios Dimensiones externas: 186mm x 130mm x 32mm Peso: 450g ADVERTENCIA
• Por su seguridad la unidad debe quedar muy bien asegurada al momento de la instalación. • El enchufe eléctrico es usado como dispositivo de desconexión, y debe desconectarse de la red por
completo. • El enchufe debe estar siempre a la mano en caso de emergencia. • La unidad debe estar alejada de humedad o productos que tengan un contenido liquido. • No deben ponerse sobre la unidad velas encendidas.
ADVERTENCIA • Esta instrucción de operación sólo esta diseñada para referencia. Debido a las continuas mejoras,
las características y diseño están sujetos a cambios sin previo aviso. • Evite abrir o reparar la unidad por usted mismo, ya que esto puede ser peligroso debido a que el
alto voltaje puede causarle daño. El mantenimiento y ajuste de la unidad debe ser realizado por un profesional
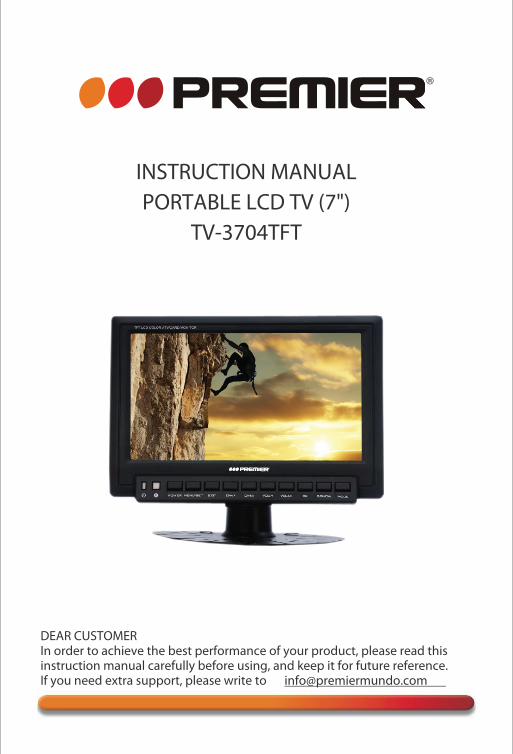
INSTRUCTION MANUALPORTABLE LCD TV (7")
TV-3704TFT
DEAR CUSTOMERIn order to achieve the best performance of your product, please read this instruction manual carefully before using, and keep it for future reference.If you need extra support, please write to [email protected]

0800 ELECTRIC (353-2874)
Caution: To reduce the risk of electric shock do not open this device, there are not serviceable parts for customers. Please refer any maintenance or repair to qualified personnel.
CAUTION
RISK OF ELECTRIC SHOCK, DO NOT
OPEN
This sign means the existence of dangerous voltage atthe inside of the unit, which states a risk of electric shock.
This sign means that there are important instructions ofoperation and handling in the manual that comes with thisDevice.
NOTE
PREMIER CUSTOMER SERVICE
Venezuela:
www.premiermundo.com300-5185Panama:
Website
E-mail:
This unit may be submitted to changes in specifications, characteristics and/or operation without prior notice to the user, in order to continue improving and developing its technology.
Table of Contents
1. Precautions
2. Accessories
3. Appearance
4. Description of Panel Buttons
5. Description of Buttons on Remote Control
6. Basic Operation Methods
7. Menu Operation
7.1. PICTURE
7.3. CLOCK
7.4. SYSTEM
7.5. PRESET
7.6. PRESET
8.
10. Before you request for repair
11. Technical Parameters
7.2. OPTION
In order to watch TV properly
9. CARD mode operation
1
1
2
3
4
5
6
6
6
6
6
7
7
7
8
10
11
2. Accessories
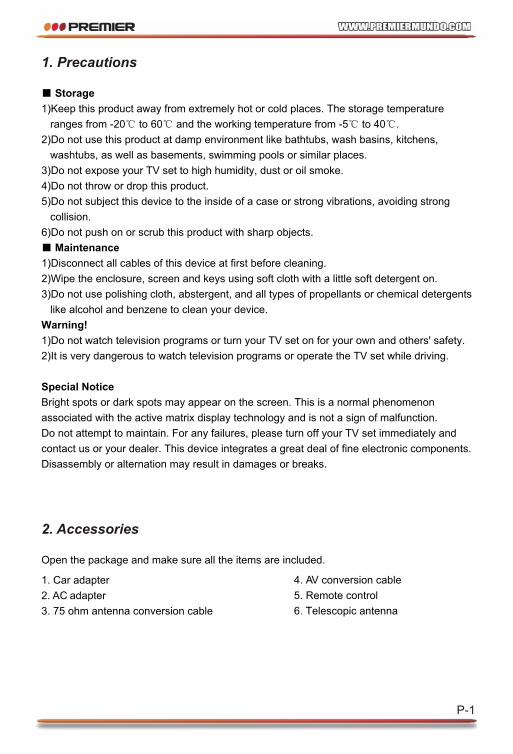
4. AV conversion cable
5. Remote control
6 Telescopic antenna.
1. Car adapter
2. AC adapter
3. 75 ohm antenna conversion cable
Open the package and make sure all the items are included.
P-1
Storage
1)Keep this product away from extremely hot or cold places. The storage temperature
ranges from -20 to 60 and the working temperature from -5 to 40 .
2)Do not use this product at damp environment like bathtubs, wash basins, kitchens,
washtubs, as well as basements, swimming pools or similar places.
3)Do not expose your TV set to high humidity, dust or oil smoke.
4)Do not throw or drop this product.
5)Do not subject this device to the inside of a case or strong vibrations, avoiding strong
collision.
6)Do not push on or scrub this product with sharp objects.
Maintenance
1)Disconnect all cables of this device at first before cleaning.
2)Wipe the enclosure, screen and keys using soft cloth with a little soft detergent on.
3)Do not use polishing cloth, abstergent, and all types of propellants or chemical detergents
like alcohol and benzene to clean your device.
Warning!
1)Do not watch television programs or turn your TV set on for your own and others' safety.
2)It is very dangerous to watch television programs or operate the TV set while driving.
Special Notice
Bright spots or dark spots may appear on the screen. This is a normal phenomenon
associated with the active matrix display technology and is not a sign of malfunction.
Do not attempt to maintain. For any failures, please turn off your TV set immediately and
contact us or your dealer. This device integrates a great deal of fine electronic components.
Disassembly or alternation may result in damages or breaks.
1. Precautions
P-2
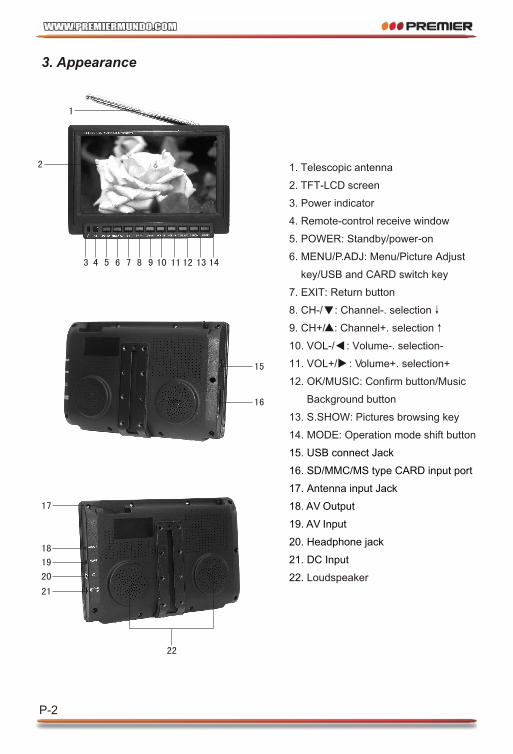
3. Appearance
1. Telescopic antenna
2. TFT-LCD screen
3. Power indicator
4. Remote-control receive window
5. POWER: Standby/power-on
6. MENU/P.ADJ: Menu/Picture Adjust
key/USB and CARD switch key
7. EXIT: Return button
8. CH-/ : Channel-. selection
9. CH+/ : Channel+. selection
10. VOL-/ : Volume-. selection-
11. VOL+/ : Volume+. selection+
12. OK/MUSIC: Confirm button/Music
Background button
13. S.SHOW: Pictures browsing key
14. MODE: Operation mode shift button
15. USB connect Jack
16. SD/MMC/MS type CARD input port
17. Antenna input Jack
18. AV Output
19. AV Input
20. Headphone jack
21. DC Input
22. Loudspeaker
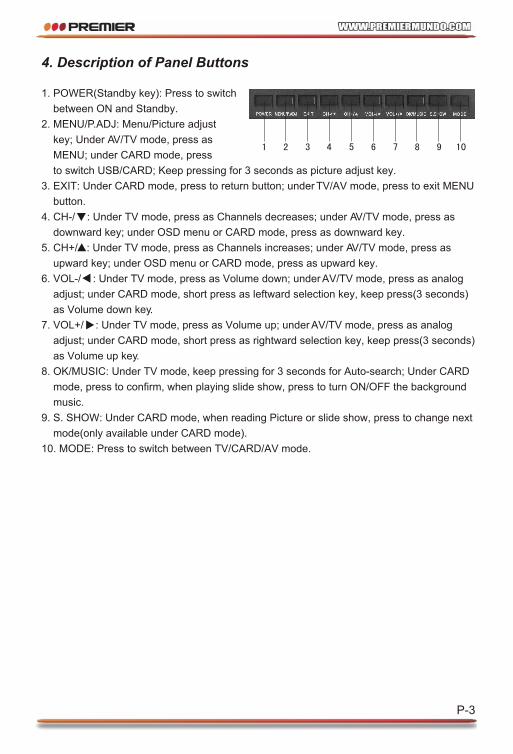
4. Description of Panel Buttons
1. POWER(Standby key): Press to switch
between ON and Standby.
2. MENU/P.ADJ: Menu/Picture adjust
key; Under AV/TV mode, press as
MENU; under CARD mode, press
to switch USB/CARD; Keep pressing for 3 seconds as picture adjust key.
3. EXIT: Under CARD mode, press to return button; under TV/AV mode, press to exit MENU
button.
4. CH-/ : Under TV mode, press as Channels decreases; under AV/TV mode, press as
downward key; under OSD menu or CARD mode, press as downward key.
5. CH+/ : Under TV mode, press as Channels increases; under AV/TV mode, press as
upward key; under OSD menu or CARD mode, press as upward key.
6. VOL-/ : Under TV mode, press as Volume down; under AV/TV mode, press as analog
adjust; under CARD mode, short press as leftward selection key, keep press(3 seconds)
as Volume down key.
7. VOL+/ : Under TV mode, press as Volume up; under AV/TV mode, press as analog
adjust; under CARD mode, short press as rightward selection key, keep press(3 seconds)
as Volume up key.
8. OK/MUSIC: Under TV mode, keep pressing for 3 seconds for Auto-search; Under CARD
mode, press to confirm, when playing slide show, press to turn ON/OFF the background
music.
9. S. SHOW: Under CARD mode, when reading Picture or slide show, press to change next
mode(only available under CARD mode).
10. MODE: Press to switch between TV/CARD/AV mode.
P-3
5. Description of Buttons on Remote Control
/
: the number of TV channel increases.
: the number of TV channel decreases
/ : To select program and adjust for selected program.
OK/MUSIC: Under CARD mode, press to confirm, when playing slide show, press as ON/
OFF for the background music.
PICT: Picture mode shift.
POWER: Power on/off.
MENU: Under MENU/CARD mode, press to switch between USB and CARD in main
interface.
MUTE: Mute button.
INFO: Press this button to display the character of program currently watching.
SLEEP: Selecting the switch off time within 120 minutes.
MODE: Press this button to switch between TV/CARD/ AV mode.
SEARCH: Under TV mode, keep pressing (3 seconds) to Auto search. Under card mode,
the movie playing can realize time selected function.
: Return button.
S.SHOW: Scan button (only available under CARD mode).
0 9 (Digital key), -/--(Channel shift):
On TV mode, use to choose the TV channel (TV mode only).
P. ADJ: Picture adjust.
VOL+: Volume +.
VOL-: Volume -.
: Fast forward(only available under CARD mode).
: Fast backward(only available under CARD mode).
: Play/pause(only available under CARD mode).
: Stop (only available under CARD mode)..
ZOOM: Press to zoom in/out the image(only available under CARD mode).
: Next track(only available under CARD mode).
: Previous track(only available under CARD mode).
SOUND: Audio system/sound tracks switch.
REP: Repeat(only available under CARD mode).
P-4
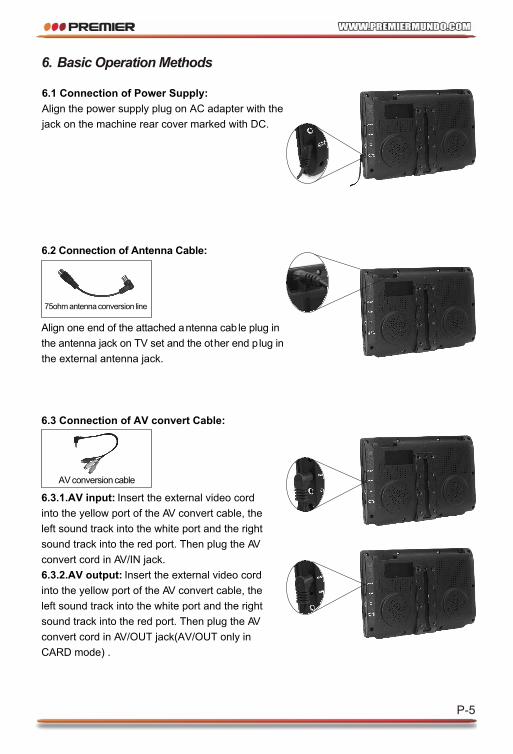
6. Basic Operation Methods
6.1 Connection of Power Supply:
Align the power supply plug on AC adapter with the
jack on the machine rear cover marked with DC.
6.2 Connection of Antenna Cable:
Align one end of the attached antenna cab le plug in
the antenna jack on TV set and the other end p lug in
the external antenna jack.
75ohm antenna conversion line
6.3 Connection of AV convert Cable:
6.3.1.AV input: Insert the external video cord
into the yellow port of the AV convert cable, the
left sound track into the white port and the right
sound track into the red port. Then plug the AV
convert cord in AV/IN jack.
6.3.2.AV output: Insert the external video cord
into the yellow port of the AV convert cable, the
left sound track into the white port and the right
sound track into the red port. Then plug the AV
convert cord in AV/OUT jack(AV/OUT only in
CARD mode) .
AV conversion cable
P-5
7. Menu Operation
Press MENU to display options as follows:
PICTURE OPTION CLOCK SYSTEM PRESET
7.1. PICTURE
CONTRAST, BRIGHT, COLOR, SHARP and TINT displays on the screen as below description:
Press or to select the item, Press or to adjust.
Notice: Only when displaying the picture of NTSC system, it will show the character of
TINT in the Picture menu.
7.2. OPTION
LANGUAGE displays on the screen as below description:
Press to select multi language of OSD. or
7.3. CLOCK
TIME, ON-TIME, OFF-TIME, ATTENTION, BESPOKE TIME and POSITION will display on the
screen as below description:
Press or to select item, Press or to setup.
Notice:
If you wish to setup other item, TIME must be setup. All items is 24 hours the most.
7.4. SYSTEM
COLOR-SYS, BLUE BACK, HORIZONTAL, VERTICAL and ZOOM displays on the screen
as below description:
7.4.1.Press or to select the item COLOR-SYS:
Then press to revolve the screen in the order of AUTO, NTSC, PAL-M and PAL-N. Please
choose carefully this system correctly. Otherwise, it may cause achromatic or inferior color.
It is recommended to select on AUTO position.
7.4.2.Press or to select the item BLUE BACK:
Press or can realize the ON/OFF of BLUE BACK under no signal.
7.4.3.Press or to select the item HORIZONTAL:
Press or can realize HORIZONTAL, press again to resume the picture.
7.4.4.Press or to select the item VERTICAL:
Press or can realize VERTICAL flip, press again to resume the picture.
7.4.5.Press or to select the item ZOOM:
or Press can realize the selection of picture modes:4:3 mode, and 16:9 mode.
P-6
7.6. PRESET
POSITION, REMEMBER, ANTENNA, and AUTO-SEARCH will display on the
screen as below description:
7.6.1..Press or to select REMEMBER, and press or to select ON, this
channel will be displayed when selected. When REMEMBER is OFF, this channel
will not be displayed.
7.6.2.Press or to select "ANTENNA" :Press or to select "AIR, CATV-STD,
CATV-HRC, CATV-IRC".
7.6.3.Press or to select AUTO-SEARCH: Press or to start auto searching. Station
of sufficient strength will be memorized and searching stops.
1 .Set the desired OSD language by pressing LANG.
2. Ensure the COLOR-SYS is correct by checking from SYSTEM menu.
3. Select AUTO-SEARCH in PRESET menu, and start auto search TV signal.
4. Adjust the length, angle and direction of the telescopic antenna to obtain optimum image.
In case the signal intensity is too weak, the image will remain inferior whatever you adjust
the antenna, and cause loud noise wave, shaking image and inferior sound, etc., which is
not TV fault. If the image remains inferior when using telescopic antenna, please try to use
the external antenna or CATV.
Notice:
8. In order to watch TV properly
P-7
7.5.7. or or Press to select AUTO-SEARCH. Press to start auto searching from
channel 0 in turns of V-L , V-H and UHF. Station of sufficient strength will be memorized and
searching stops.
7.5.6. or or Press to select SEARCH. Then press to start searching forthward or
backward.TV searching indicater bar will turn to green from red after search TV signal.
TV storage system will identify as no signal if TV channel are on too weak signal.
7.5. PRESET
POSITION, REMEMBER, BAND, SWAP, FINE, SEARCH and AUTO-SEARCH will display on
the screen as below description:
7.5.1.Press or to select POSITION, and press to set. or
7.5.2.Press or to select REMEMBER, and press or to select ON, this channel will
be displayed when selected. When REMEMBER is OFF, this channel will not be displayed.
7.5.3. or or Press to select BAND ,and then press to switch of V-L,V-H and U.
7.5.5. or to or Press select FINE. Then press to adjust channel frenquency by little.
7.5.4. or or Press to select SWAP, then press to select the channel No. Press
MENU to confirm SWAP.
9. CARD mode operation
1.Usage of memory facility (USB&CARD)
This product supports almost all types of USB, Multi Media Card (MMC), SD, Memory Stick
(MS) in the market.
1)This product supports various USB & CARD within 4G (beyond the capacity, some
abnormal phenomenon may occur. )
2)This product supports JPEG, MP3, WMA, VCD, AVI ect. (some substandard files, like
DIVX3 and compress formats, are not available and Black screen may occur.)
Notice:
1)Able to play very smoothly when data stream is below 2000KBP/S, it might pause when
the data stream is above 2000KBP/S.
2)The product may be not available to play or may need to restart once browsing pictures
too big. It is suggested within 12M.
3)The USB plug of this device do not support Multi-media devices such as Card reader,
portable hard drive, MP3, MP4.
4)When facing problems from the device, please unplug the device for 5 seconds then
re-start (reset).
2. Playing multi-media files
Press 'MODE', switch to CARD mode, in the interface five functions ('PHOTO', 'MUSIC',
'VIDEO', 'SLIDE SHOW' and 'SETUP') are available. Insert USB or CARD (Once occur at
the same time, press MENU to switch between USB or CARD in the interface).
2.1. Browse Picture
Press direction key to select 'PHOTO', then click 'OK' to open file; press upward/downward
key to select picture, click 'OK' to read. When browsing pictures, press 'S.SHOW' once to
switch a mode of pictures displaying.
When reading picture files, press direction key for fast operation of the following
functions:
Left direction key: anticlockwise 90 Up direction key: up/down/left/right mirror
Right direction key: clockwise 90 Down direction key: up/down/left/right mirror
After the operation of rotation or mirroring, press " " key to continue playing.
Notice: Background music can not be open while reading picture, other function will
not work when using zoom function.
2.2 Play music
Press direction key to select 'MUSIC' item, press 'OK' to open file from storage; press
direction key to select the file, and then press 'OK' to play music.
2.3 Play movie
Press direction key to select 'VIDEO' item, press 'OK' to open the file from storage, press
direction key to select file, then press 'OK' to play movie.
2.4 Slide show
Press direction key to select 'SLIDE SHOW' item, press 'OK' to open file from storage; press
direction key to select file, press 'OK' to play. While playing, press 'OK' to turn ON/OFF
background music.
P-8
Note: The display languages of file or movie named are to be simplified Chinese and
international standard character. If languages displayed are not the above character or
character over 8 digits, disorder characters may occur.
2.5 Common functions' operation instruction
: Play/pause : Fast forward : Forward file
: Stop : Fast backward : Backward file
ZOOM: When playing, press "ZOOM" to zoom out the picture to browse.
REP: When playing, press repeat key to realize the following functions: "single repeat", "all repeat,"
"cancel".
SOUND: Track switch (excluded unsupported file).
EXIT: When playing, press " " to stop, then repress " " to return main interface, or press the
" " to return main interface directly.
2.6 Setting
Press direction key to select 'SETUP' item, press / to select upward/downward file, then press
'OK' to confirm.
2.6.1 Common Setting
Languages: Chinese, English and other multi-languages are available.
Sound: Select your favor language to play when various sound languages are supported for some
videos.
Subtitle: Select your favor language to play when multiple subtitles languages are supported for
some videos.
Default Value: factory reset
Home Page: return functions setting page
2.6.2 Video Setting Page
TV systems: when connecting video output, the output system of the product and the system of TV
should corresponding match, otherwise no color shows. Abnormal, "NTSC" and "PAL"
are available to choose; the default value is "NTSC".
Home Page: return functions setting page
P-9
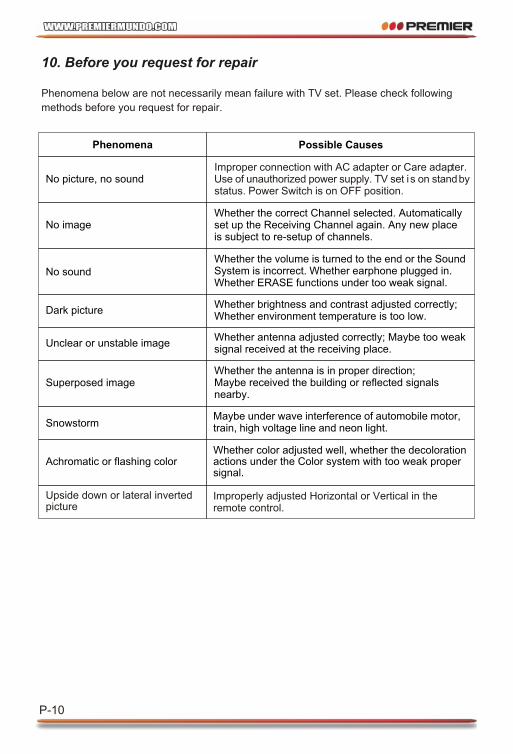
10. Before you request for repair
Phenomena below are not necessarily mean failure with TV set. Please check following
methods before you request for repair.
Whether the volume is turned to the end or the Sound System is incorrect. Whether earphone plugged in. Whether ERASE functions under too weak signal.
Phenomena Possible Causes
No picture, no soundImproper connection with AC adapter or Care adapter. Use of unauthorized power supply. TV set i s on standby status. Power Switch is on OFF position.
No imageWhether the correct Channel selected. Automatically set up the Receiving Channel again. Any new place is subject to re-setup of channels.
No sound
Dark pictureWhether brightness and contrast adjusted correctly;Whether environment temperature is too low.
Unclear or unstable imageWhether antenna adjusted correctly; Maybe too weak signal received at the receiving place.
Superposed imageWhether the antenna is in proper direction; Maybe received the building or reflected signals nearby.
SnowstormMaybe under wave interference of automobile motor, train, high voltage line and neon light.
Whether color adjusted well, whether the decoloration actions under the Color system with too weak proper signal.
Achromatic or flashing color
Improperly adjusted Horizontal or Vertical in the remote control.
Upside down or lateral inverted picture
P-10
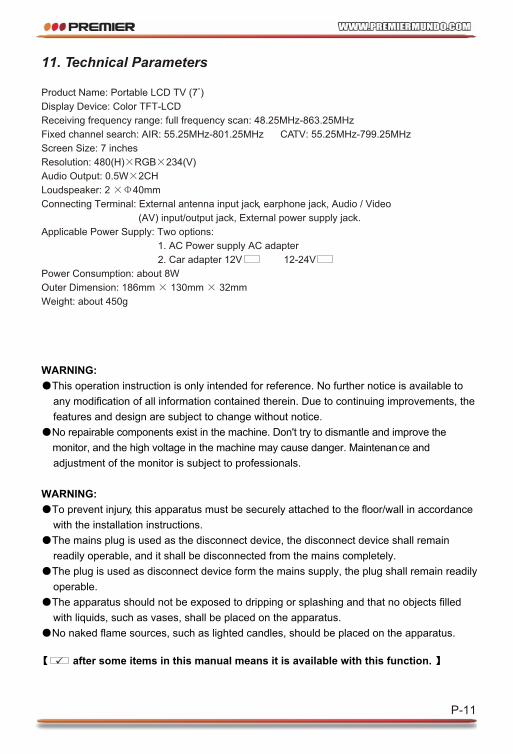
11. Technical Parameters
WARNING:
This operation instruction is only intended for reference. No further notice is available to
any modification of all information contained therein. Due to continuing improvements, the
features and design are subject to change without notice.
No repairable components exist in the machine. Don't try to dismantle and improve the
monitor, and the high voltage in the machine may cause danger. Maintenance and
adjustment of the monitor is subject to professionals.
WARNING:
To prevent injury, this apparatus must be securely attached to the floor/wall in accordance
with the installation instructions.
The mains plug is used as the disconnect device, the disconnect device shall remain
readily operable, and it shall be disconnected from the mains completely.
The plug is used as disconnect device form the mains supply, the plug shall remain readily
operable.
The apparatus should not be exposed to dripping or splashing and that no objects filled
with liquids, such as vases, shall be placed on the apparatus.
No naked flame sources, such as lighted candles, should be placed on the apparatus.
after some items in this manual means it is available with this function.
P-11
Product Name: Portable LCD TV (7 )
Display Device: Color TFT-LCD
Receiving frequency range: full frequency scan: 48.25MHz-863.25MHz
Fixed channel search: AIR: 55.25MHz-801.25MHz CATV: 55.25MHz-799.25MHz
Screen Size: 7 inches
Resolution: 480(H) RGB 234(V)
Audio Output: 0.5W 2CH
Loudspeaker: 2 40mm
Connecting Terminal: External antenna input jack, earphone jack, Audio / Video
(AV) input/output jack, External power supply jack.
Applicable Power Supply: Two options:
1. AC Power supply AC adapter
2. Car adapter 12V 12-24V
Power Consumption: about 8W
Outer Dimension: 186mm 130mm 32mm
Weight: about 450g