Embed Size (px)
Citation preview
Name of the Document Installing CA Root Certificates and User Digital Certificate
Platform Windows 7 Audience NICNET VPN service user
Version 1.3 Date of last change 7 Mar 2013
Manual for Installing CA Root Certificates and User Digital
Certificate
A. Installing the CA root certificate
1. Download the CCA, NICCA, NIC Sub CA and VPNCA root certificates from the
website http://vpn.nic.in as shown below and save it to your computer.
2. Open the downloaded root certificate and click Install Certificate button as shown in
the figure below.
Name of the Document Installing CA Root Certificates and User Digital Certificate
Platform Windows 7 Audience NICNET VPN service user
Version 1.3 Date of last change 7 Mar 2013
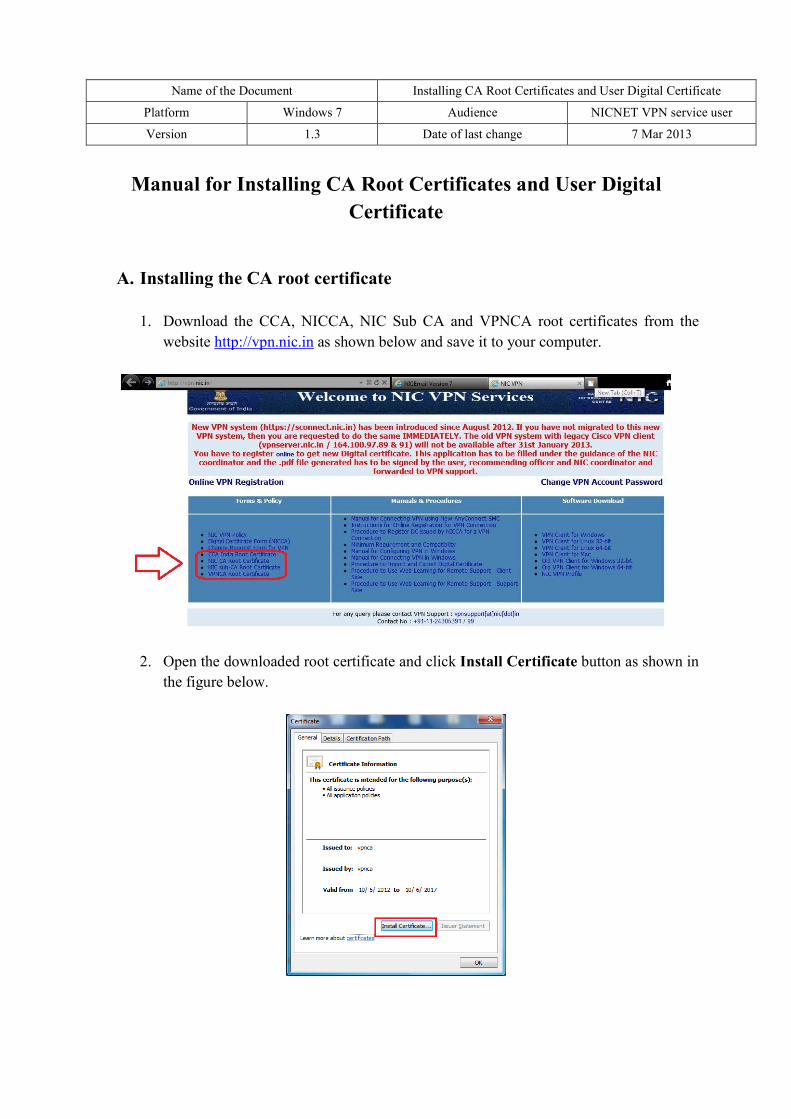
3. Click Next as shown in the figure below.
4. Check on Place all certificates in the following store and then click Browse and
select Trusted Root Certification Authorities and click OK.
Name of the Document Installing CA Root Certificates and User Digital Certificate
Platform Windows 7 Audience NICNET VPN service user
Version 1.3 Date of last change 7 Mar 2013
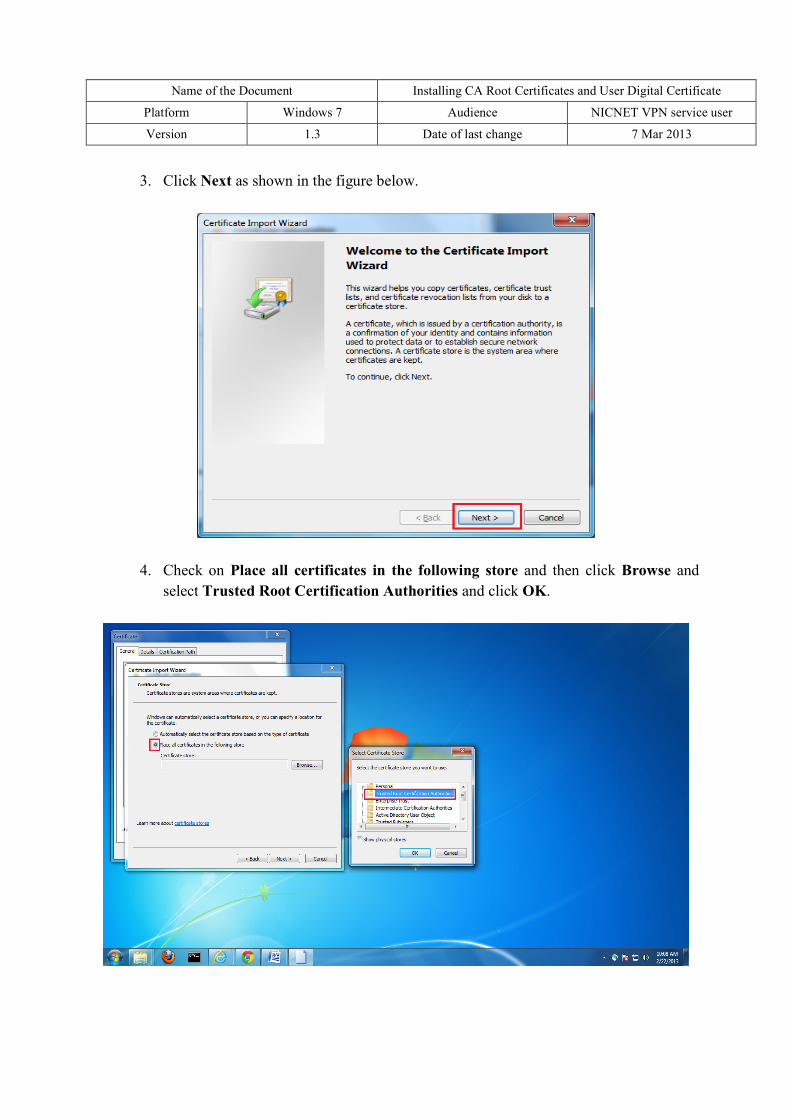
5. Click Next as shown below.
6. Click Finish as shown below.
7. Click Yes as shown below.
Name of the Document Installing CA Root Certificates and User Digital Certificate
Platform Windows 7 Audience NICNET VPN service user
Version 1.3 Date of last change 7 Mar 2013
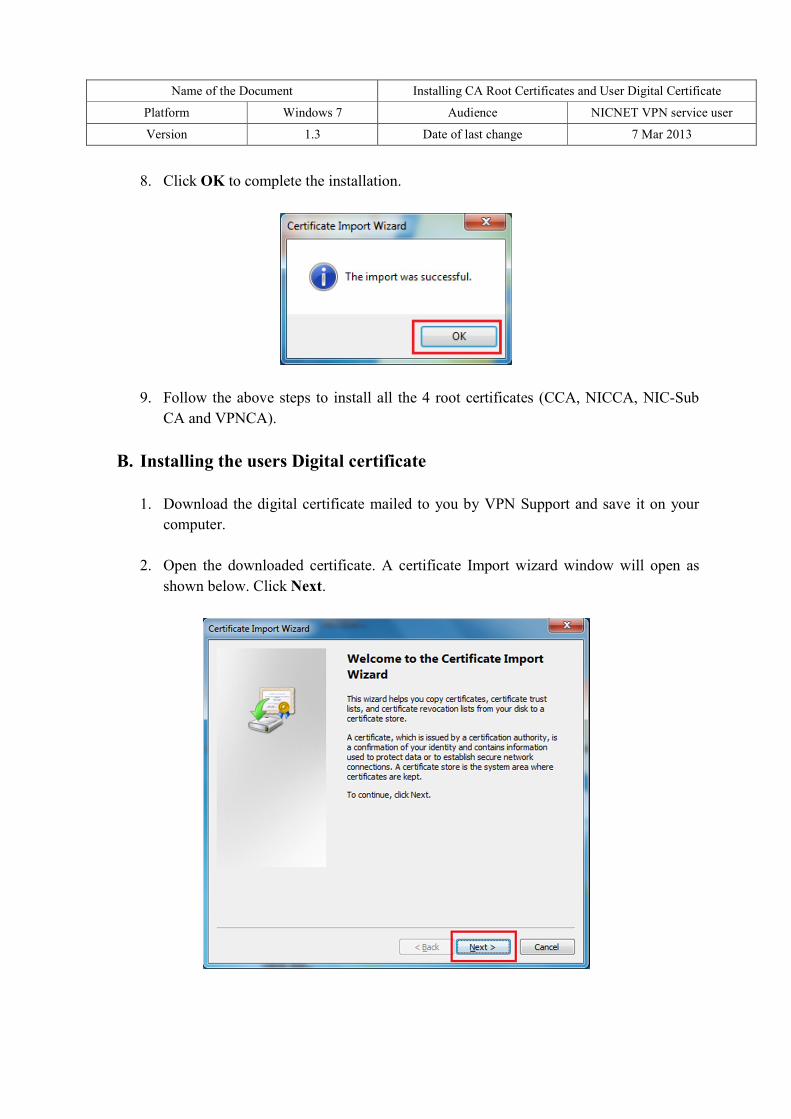
8. Click OK to complete the installation.
9. Follow the above steps to install all the 4 root certificates (CCA, NICCA, NIC-Sub
CA and VPNCA).
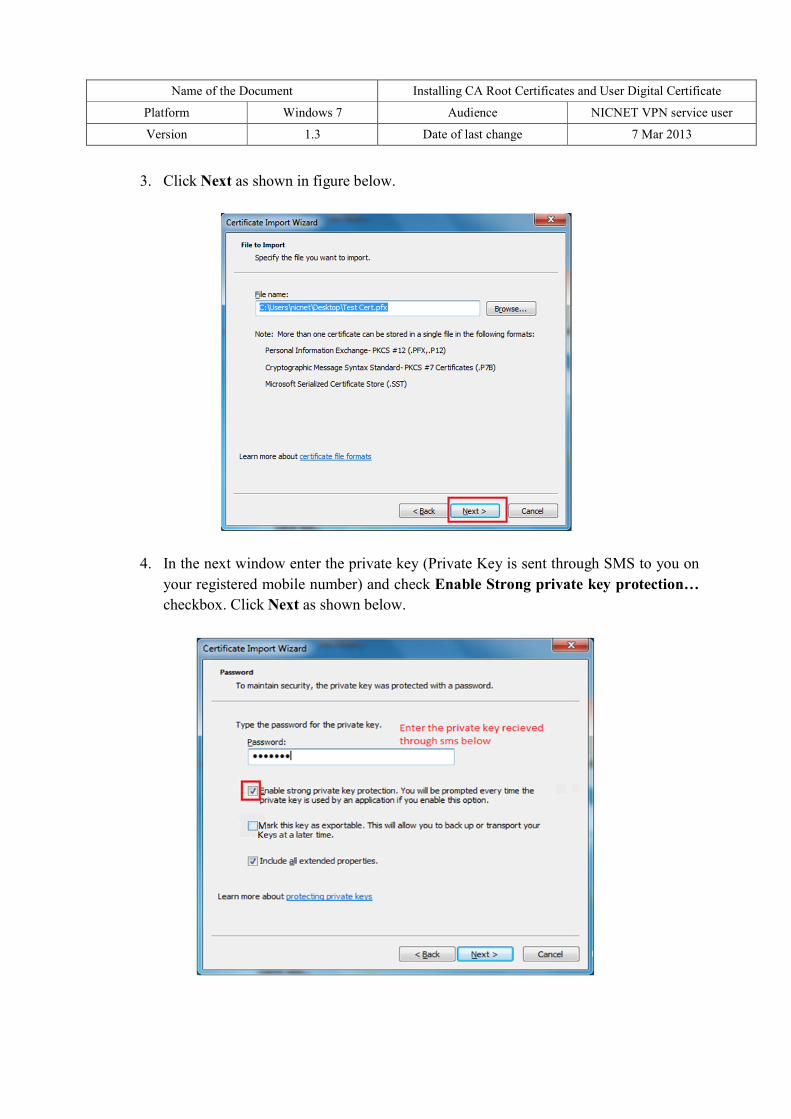
B. Installing the users Digital certificate
1. Download the digital certificate mailed to you by VPN Support and save it on your
computer.
2. Open the downloaded certificate. A certificate Import wizard window will open as
shown below. Click Next.
Name of the Document Installing CA Root Certificates and User Digital Certificate
Platform Windows 7 Audience NICNET VPN service user
Version 1.3 Date of last change 7 Mar 2013
3. Click Next as shown in figure below.
4. In the next window enter the private key (Private Key is sent through SMS to you on
your registered mobile number) and check Enable Strong private key protection…
checkbox. Click Next as shown below.
Name of the Document Installing CA Root Certificates and User Digital Certificate
Platform Windows 7 Audience NICNET VPN service user
Version 1.3 Date of last change 7 Mar 2013
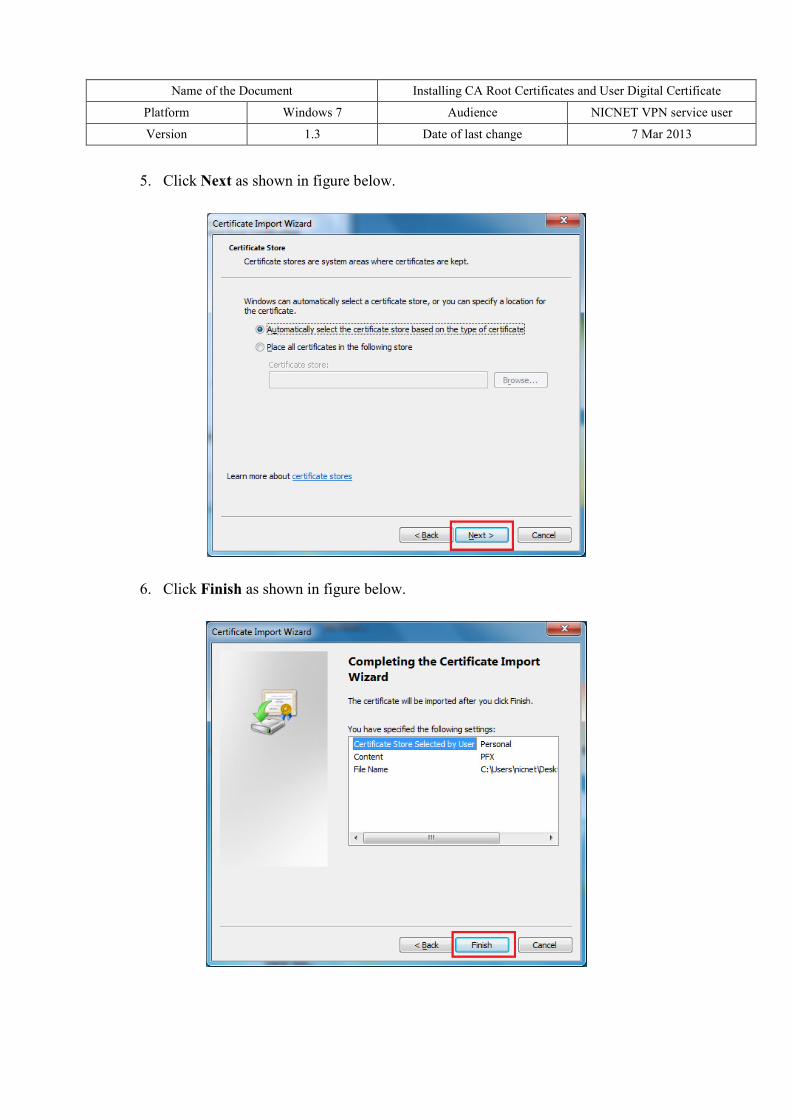
5. Click Next as shown in figure below.
6. Click Finish as shown in figure below.
Name of the Document Installing CA Root Certificates and User Digital Certificate
Platform Windows 7 Audience NICNET VPN service user
Version 1.3 Date of last change 7 Mar 2013
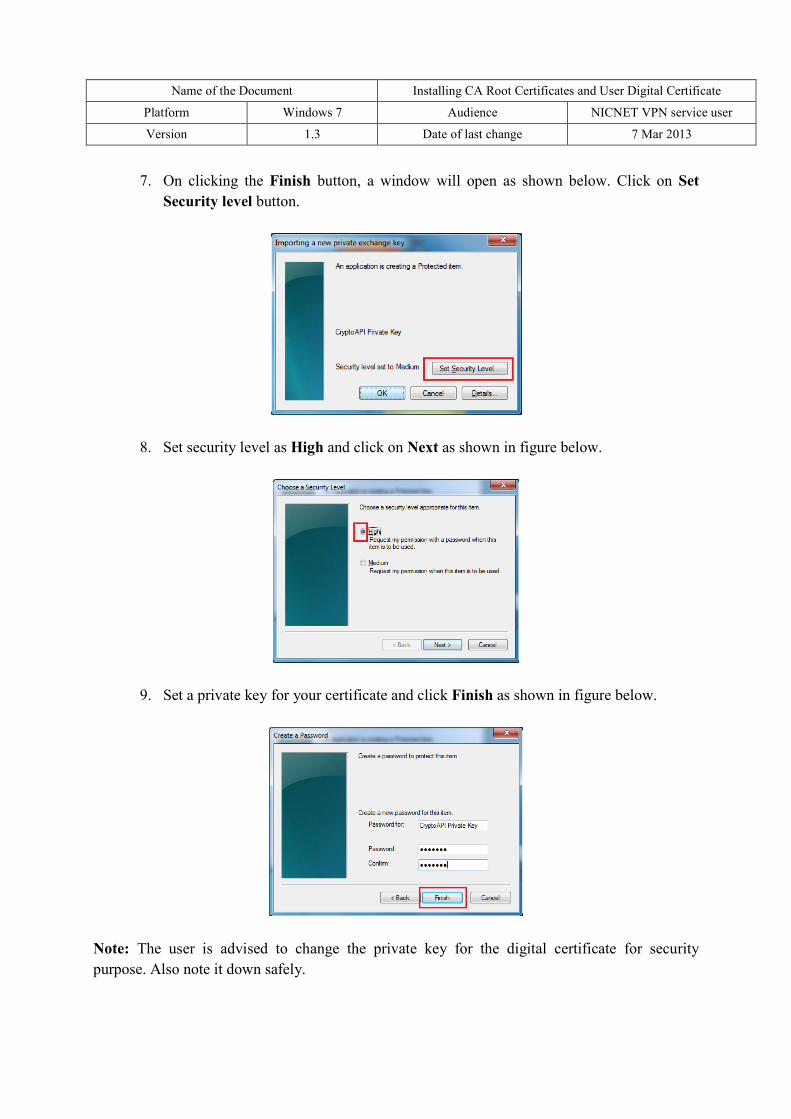
7. On clicking the Finish button, a window will open as shown below. Click on Set
Security level button.
8. Set security level as High and click on Next as shown in figure below.
9. Set a private key for your certificate and click Finish as shown in figure below.
Note: The user is advised to change the private key for the digital certificate for security
purpose. Also note it down safely.
Name of the Document Installing CA Root Certificates and User Digital Certificate
Platform Windows 7 Audience NICNET VPN service user
Version 1.3 Date of last change 7 Mar 2013
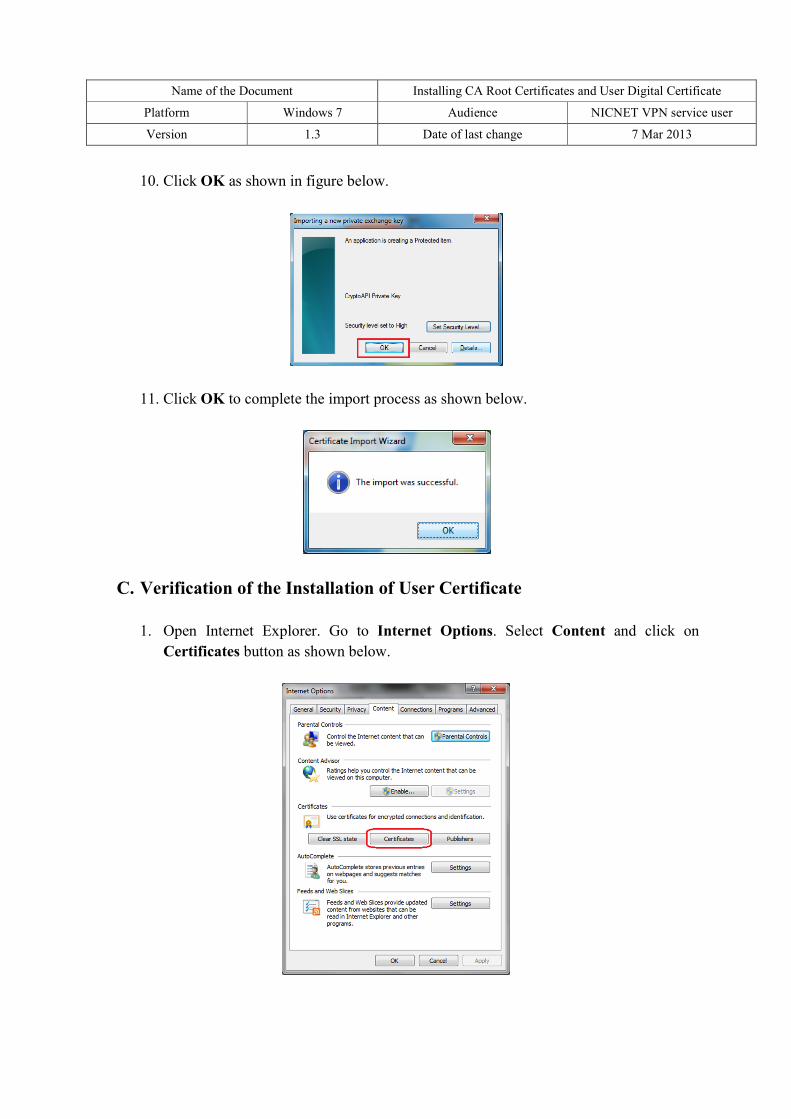
10. Click OK as shown in figure below.
11. Click OK to complete the import process as shown below.
C. Verification of the Installation of User Certificate
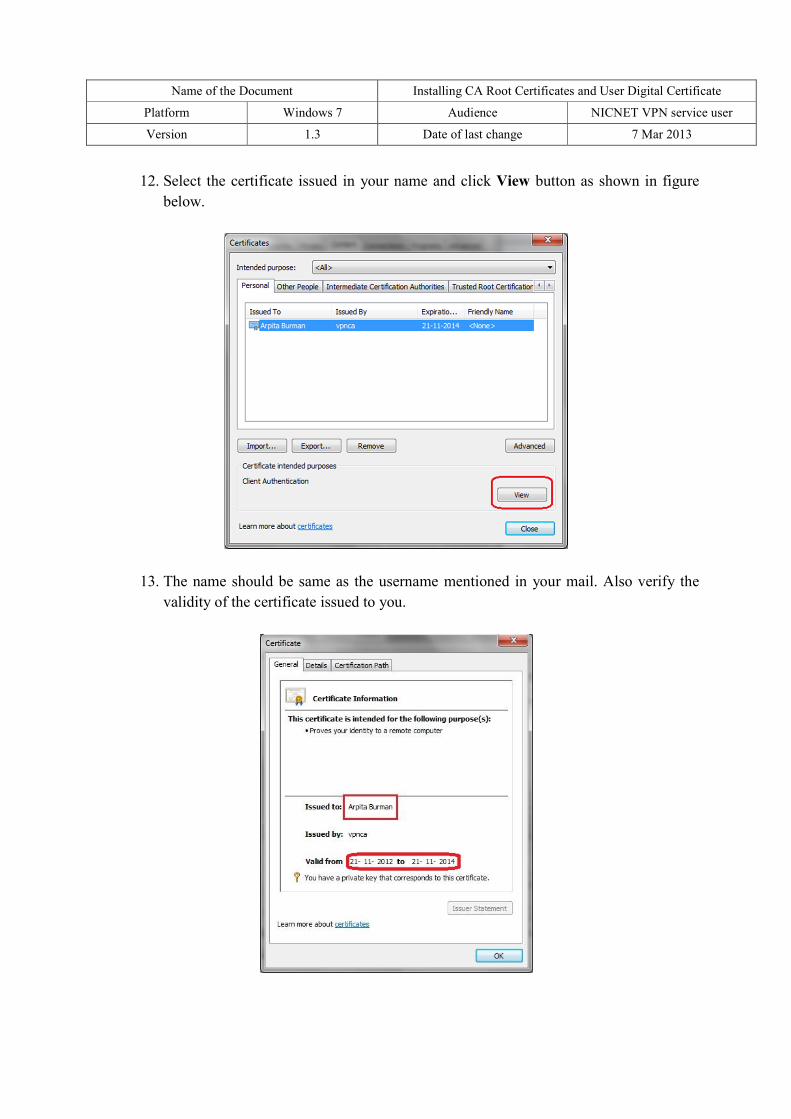
1. Open Internet Explorer. Go to Internet Options. Select Content and click on
Certificates button as shown below.
Name of the Document Installing CA Root Certificates and User Digital Certificate
Platform Windows 7 Audience NICNET VPN service user
Version 1.3 Date of last change 7 Mar 2013
12. Select the certificate issued in your name and click View button as shown in figure
below.
13. The name should be same as the username mentioned in your mail. Also verify the
validity of the certificate issued to you.


![[IT DOCUMENT] · Installing Nagios 4 with SSL certificate of Nrpe 2.16RC2. Title: Installing Nagios 4 with SSL certificate of Nrpe 2.16RC2 1 Author: Juri Calleri Version: 2 TABLE](https://img.pdfslide.net/doc/110x75/5f7465be19c46e3ffd2de0d9/it-document-installing-nagios-4-with-ssl-certificate-of-nrpe-216rc2-title-installing.jpg)