Embed Size (px)
Citation preview
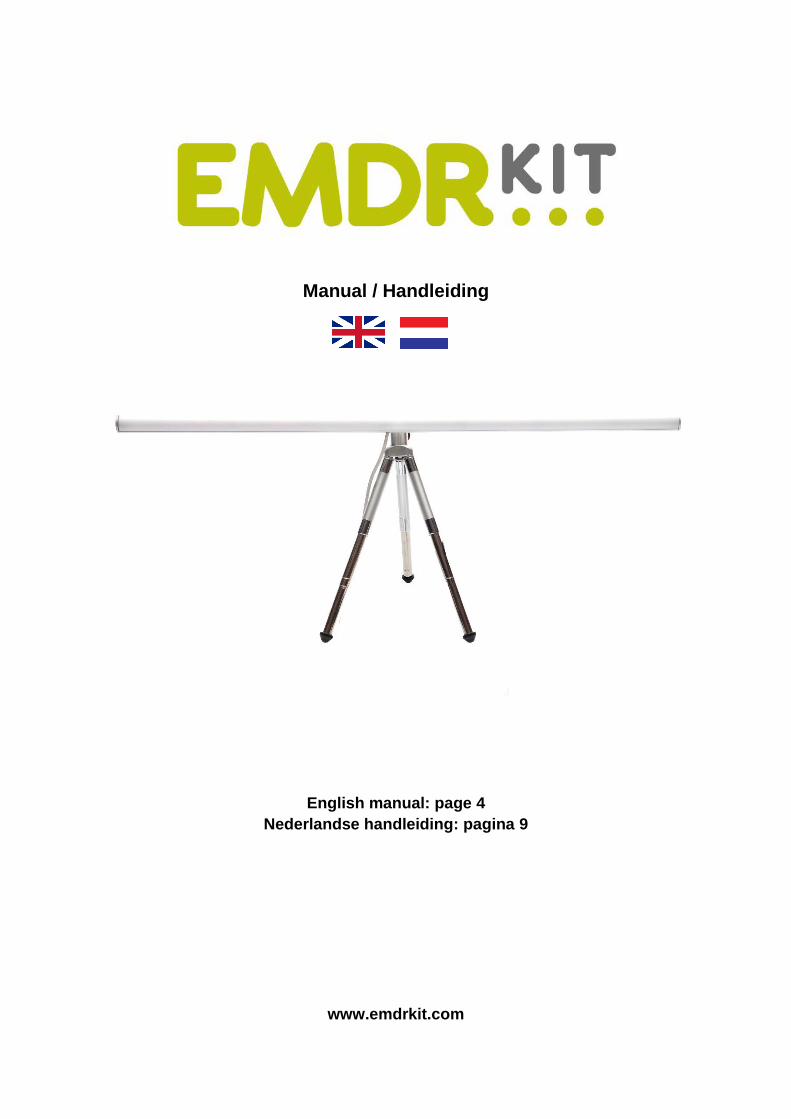
Manual / Handleiding
English manual: page 4
Nederlandse handleiding: pagina 9
www.emdrkit.com

2
www.emdrkit.com
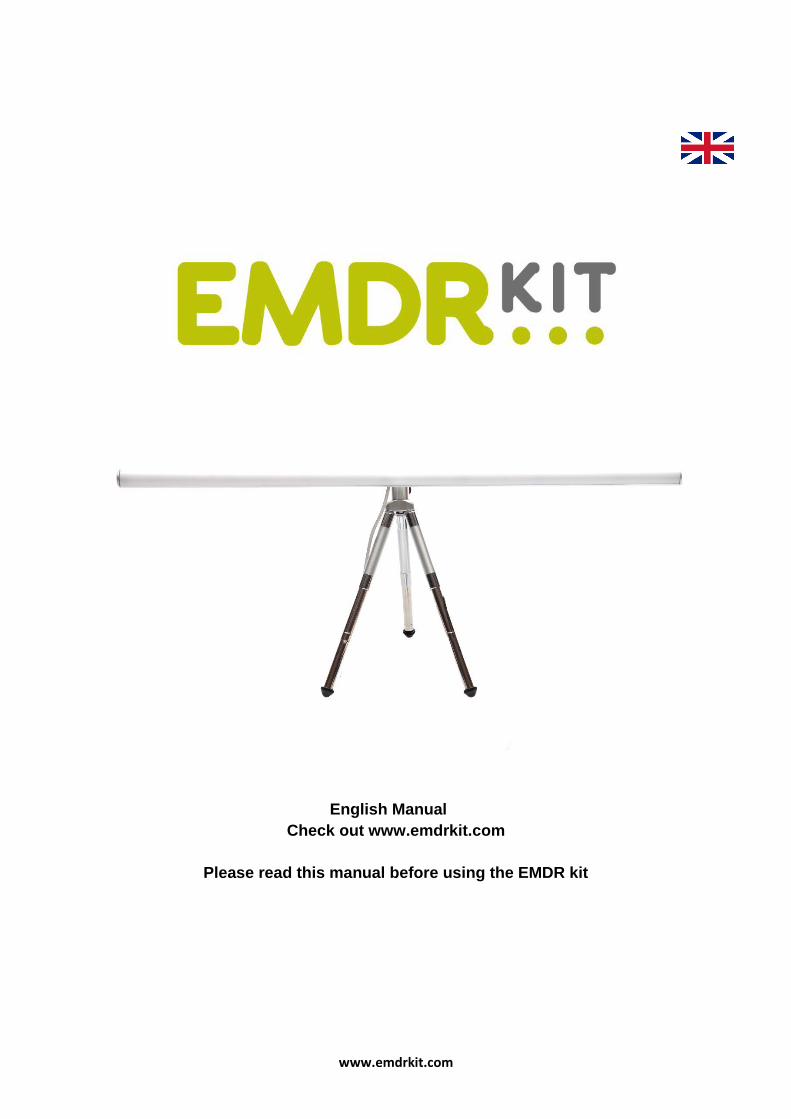
English Manual
Check out www.emdrkit.com
Please read this manual before using the EMDR kit

4 www.emdrkit.com
Table of contents
1 The Controller ....................................................................................................................................... 5
1.1 On/Off ............................................................................................................................................ 5
1.2 Starting .......................................................................................................................................... 5
1.3 Pausing .......................................................................................................................................... 5
2 Basic operations of the functions ......................................................................................................... 6
2.1 Using the Light Tube ..................................................................................................................... 6
2.2 Using the Pulsators ....................................................................................................................... 6
2.3 Using the Headphone .................................................................................................................... 6
3 Music function (irregular clicks) ............................................................................................................ 6
4 Advanced operations ............................................................................................................................ 7
4.1 Changing the settings for the Light Tube and Music ..................................................................... 7
4.2 Changing the number of lights of the Light Tube .......................................................................... 7
4.3 Changing the colors of the Light Tube .......................................................................................... 7
4.4 Changing the pitch of the clicks of the head set ............................................................................ 7
5 Recharging the battery ......................................................................................................................... 7
Appendix 1 Liability .................................................................................................................................. 8
Appendix 2 Warranty ............................................................................................................................... 8
Appendix 3 Troubleshooting .................................................................................................................... 8
Attention: There is a layer of film attached to the lightbar and on the display of the
controller: remove these carefully.
5 www.emdrkit.com
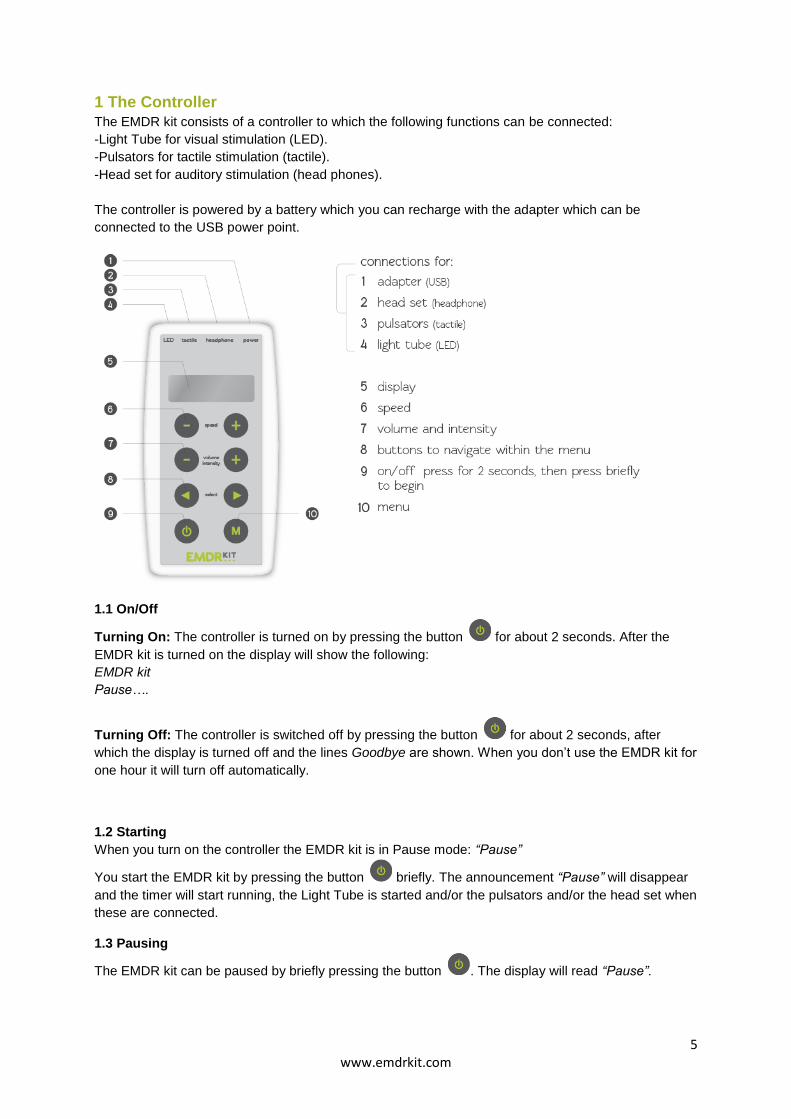
1 The Controller
The EMDR kit consists of a controller to which the following functions can be connected:
-Light Tube for visual stimulation (LED).
-Pulsators for tactile stimulation (tactile).
-Head set for auditory stimulation (head phones).
The controller is powered by a battery which you can recharge with the adapter which can be
connected to the USB power point.
1.1 On/Off
Turning On: The controller is turned on by pressing the button for about 2 seconds. After the
EMDR kit is turned on the display will show the following:
EMDR kit
Pause….
Turning Off: The controller is switched off by pressing the button for about 2 seconds, after
which the display is turned off and the lines Goodbye are shown. When you don’t use the EMDR kit for
one hour it will turn off automatically.
1.2 Starting
When you turn on the controller the EMDR kit is in Pause mode: “Pause”
You start the EMDR kit by pressing the button briefly. The announcement “Pause” will disappear
and the timer will start running, the Light Tube is started and/or the pulsators and/or the head set when
these are connected.
1.3 Pausing
The EMDR kit can be paused by briefly pressing the button . The display will read “Pause”.
6 www.emdrkit.com
2 Basic operations of the functions You can connect the wires from the light bar, pulsators and headphone to the controller (you can
connect several functions at the same time):
1. Light Tube: you put the cord of the Light Tube into the connection of LED.
2. Pulsators: you put the cord of the pulsators into the connection of tactile.
3. Headphone: you put the cord of the head set into the connection of headphone.
2.1 Using the Light Tube
1. Connect the wire of the Light Tube to the controller at the socket of LED
2. You turn on the EMDR kit and the display of the controller will read: ”Pause…”
3. You briefly press the button , the lights will start moving and the timer in the display will start
running.
4. By pressing or at speed, the lights in the Light bar will move faster or slower.
5. You can make the lights of the Light Tube shine brighter by pressing of the button
volume/intensity.
2.2 Using the Pulsators
1. You connect the pulsators to the controller at the socket of “tactile”.
2. After you switch on the EMDR kit the display will read: “Pause…”.
3. You briefly press the button , the pulsators will now start vibrating and the timer in the display
will start running.
4. By pressing or at speed, the pulsators will speed up and down.
5. You can make the Pulsators vibrate more intensely by pressing at volume/intensity.
2.3 Using the Headphone
1. You connect the headphone to the controller at the socket of “headphone”
2. After you switched on the EMDR kit the display will read: “Pause…”.
3. Briefly press the button and the clicks will be audible and the timer in the display will start
running
4. By pressing or at speed, the clicks will increase going to and fro
5. You can make the clicks louder by pressing at the button volume/intensity.
3 Music function (irregular clicks) The controller has a built in mp3 player. The irregular clicks are installed here as a standard. (track 1).
To go the Music mode press one time briefly until “Mode” is shown (with the actual mode). Next
you can select the Music mode by pressing and .
When the Music mode is selected and the music is playing it is possible to jump from the starting
screen to the following track by pressing the button . The actual track or the beginning of the title
will become visible in the display.
7 www.emdrkit.com
You can also add your own music files by connecting the controller by means of a USB cable to your
computer.
4 Advanced operations
Through the button on the controller it is possible to change a number of settings.
By pressing the button several times briefly, the various settings are shown and finally you will
return to the starting screen. After 5 seconds the starting screen will automatically be shown.
4.1 Changing the settings for the Light Tube and Music
The EMDR kit supports two different kinds of settings for the Light Tube and the Music option:
1. Sweeping: the lights of the Light Tube move from left to right.
2. Blinking: the lights of the Light Tube jump from left to richt
3. Music: music is being played.
To change the settings press the button one time briefly until “Mode” is displayed (with the actual
setting). Next you can use the button and to select another setting.
4.2 Changing the number of lights of the Light Tube
The number of lights burning simultaneously is adjustable. To change the number of lights press the
button twice briefly until “Width” appears in the display indicating the actual width. Next you can
select another width with the buttons and , in this way you can adjust the width in 40 steps.
4.3 Changing the colors of the Light Tube
The colors of the Light Tube are adjustable. To change the colors press the button three times
briefly until the display reads “Color”, indicating the actual color. Next you can select another color by
pressing and making 8 colors available: 1. White, 2. Red, 3. Yellow, 4. Green, 5. Cyan, 6.
Blue, 7. Magenta and 8. Random (different colors alternating).
4.4 Changing the pitch of the clicks of the head set
The pitch is adjustable. To change the pitch press on the controller four times briefly until the
display reads “Tone” indicating the actual pitch. Next you can select a different pitch by pressing the
buttons and , in this way you can adjust the pitch in 8 steps.
5 Recharging the battery The starting screen shows a battery indicator in the top right hand side. The meaning of the different
icons are as follows:
Icon Icon Meaning
Charging
Chargin ready: battery is full and power is connected
No power connected: battery is in use
8 www.emdrkit.com
Battery is almost empty
No icon Problem with power or battery
Appendix 1 Liability
The EMDR kit is designed to support the EMDR therapist during the EMDR treatment. The therapist
him/herself is at all times fully responsible for the results of the treatment when using the EMDR kit.
Neither developer nor salesman of the EMDR kit accepts liability for the results of the treatment or any
complaints by the client.
Appendix 2 Warranty
There is a two year warranty period for the controller, Light Tube and Pulsators. For the cords, head
set and adapter a warranty period of 6 months is valid. Warranty starts on the day of purchase. Keep
the invoice.
Excluded from warranty:
1. The warranty does not hold for a) normal wear and tear b) defects caused by rough handling of
the product c) defects or damage caused by improper use of the product, including the use
contrary to the instructions as provided by the EMDR kit and/or d) other actions for which the
EMDR kit cannot be accounted for in fairness.
2. The warranty does not hold for defects or supposed defects caused by using the product in
combination with or connected to products accessories, software not produced or made by EMDR
Kit and/or services or use in any other way than what it is meant for.
3. The warranty is not in force when the product was opened, changed or repaired by an
unauthorized maintenance company or repaired with the use of noncertified parts.
4. The warranty is not in force when the products is exposed to moisture, wetness or extreme
temperatures or surroundings or quick changes in similar conditions, corrosion, oxidation, spilling
of food or liquids.
Appendix 3 Troubleshooting
Should you meet with any problems using the EMDR kit please contact emdrshop.com
Possible causes of problems:
1. Check whether the controller is fully charged and/or connected to adapter.
2. Check whether EMDR Kit is in pause mode.
3. Make sure the various functions are connected to the right sockets (Light Tube, Pulsators or Head
Set).
9 www.emdrkit.com
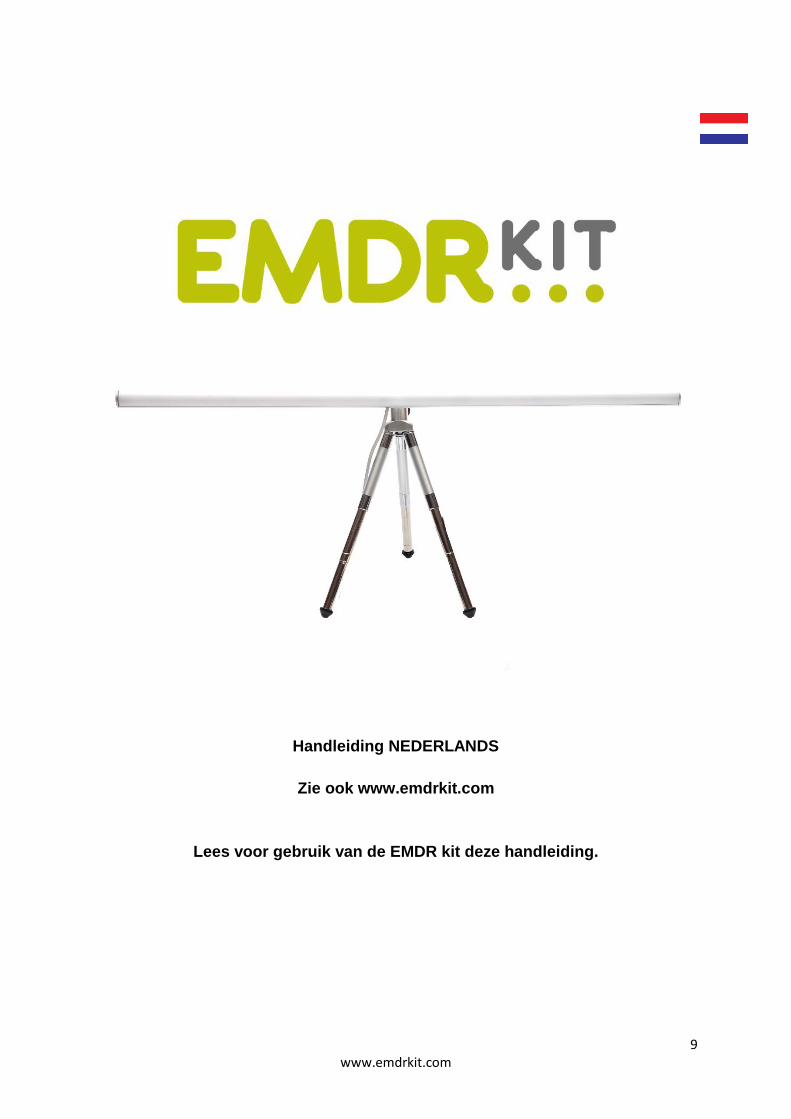
Handleiding NEDERLANDS
Zie ook www.emdrkit.com
Lees voor gebruik van de EMDR kit deze handleiding.

10 www.emdrkit.com
Inhoudsopgave
Inhoudsopgave ...................................................................................................................................... 10
1 De controller ....................................................................................................................................... 11
1.1 Aan/uit.......................................................................................................................................... 11
1.2 Starten ......................................................................................................................................... 11
1.3 Pauzeren ..................................................................................................................................... 11
2 Basisbediening functies ...................................................................................................................... 12
2.1 Lichtbalk gebruiken ...................................................................................................................... 12
2.2 Trillers gebruiken ......................................................................................................................... 12
2.3 Koptelefoon gebruiken................................................................................................................. 12
3 Muziek functie (onregelmatige tikjes) ................................................................................................. 12
4 Geavanceerde bediening ................................................................................................................... 13
4.1 Wijzigen stand bij Lichtbalk en Music .......................................................................................... 13
4.2 Wijzigen aantal lampjes van de Lichtbalk .................................................................................... 13
4.3 Wijzigen van kleuren van de Lichtbalk ........................................................................................ 13
4.4 Wijzigen toonhoogte tikjes van de Koptelefoon .......................................................................... 13
5 Batterij opladen ................................................................................................................................... 13
Bijlage 1 Aansprakelijkheid.................................................................................................................... 14
Bijlage 2 Garantie .................................................................................................................................. 14
Bijlage 3 Problemen .............................................................................................................................. 14
Let op: Er zit folie op de lichtbalk en op de display van de controller. Verwijder dit
voorzichtig.
11 www.emdrkit.com
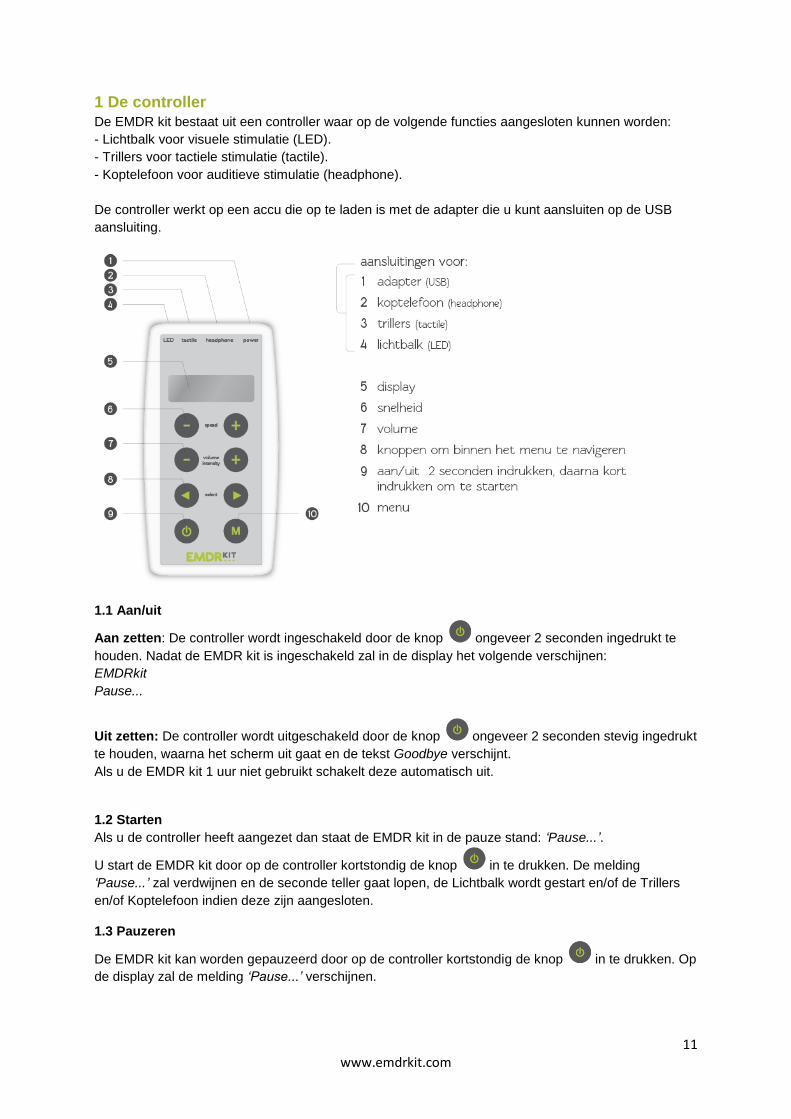
1 De controller
De EMDR kit bestaat uit een controller waar op de volgende functies aangesloten kunnen worden:
- Lichtbalk voor visuele stimulatie (LED).
- Trillers voor tactiele stimulatie (tactile).
- Koptelefoon voor auditieve stimulatie (headphone).
De controller werkt op een accu die op te laden is met de adapter die u kunt aansluiten op de USB
aansluiting.
1.1 Aan/uit
Aan zetten: De controller wordt ingeschakeld door de knop ongeveer 2 seconden ingedrukt te
houden. Nadat de EMDR kit is ingeschakeld zal in de display het volgende verschijnen:
EMDRkit
Pause...
Uit zetten: De controller wordt uitgeschakeld door de knop ongeveer 2 seconden stevig ingedrukt
te houden, waarna het scherm uit gaat en de tekst Goodbye verschijnt.
Als u de EMDR kit 1 uur niet gebruikt schakelt deze automatisch uit.
1.2 Starten
Als u de controller heeft aangezet dan staat de EMDR kit in de pauze stand: ‘Pause...’.
U start de EMDR kit door op de controller kortstondig de knop in te drukken. De melding
‘Pause...’ zal verdwijnen en de seconde teller gaat lopen, de Lichtbalk wordt gestart en/of de Trillers
en/of Koptelefoon indien deze zijn aangesloten.
1.3 Pauzeren
De EMDR kit kan worden gepauzeerd door op de controller kortstondig de knop in te drukken. Op
de display zal de melding ‘Pause...’ verschijnen.
12 www.emdrkit.com
2 Basisbediening functies U sluit de functie aan op de controller die u wilt gebruiken (u kunt meerdere functies tegelijkertijd
aansluiten):
1. Lichtbalk: U sluit het snoer van de Lichtbalk aan bij de aansluiting LED.
2. Trillers: U sluit het snoer van de Trillers aan bij de aansluiting tactile.
3. Koptelefoon: U sluit het snoer van de Koptelefoon aan bij de aansluiting headphone.
2.1 Lichtbalk gebruiken
6. U sluit de Lichtbalk aan op de controller bij de aansluiting LED.
7. De EMDR kit heeft u aangezet en in de display op de controller verschijnt ‘Pause...’.
8. U drukt kortstondig de knop , de lampjes starten met bewegen en de seconden in de display
beginnen te lopen.
9. Door op de of bij speed te drukken, gaan de lampjes in de Lichtbalk langzamer of sneller
heen er weer.
10. U kunt de lampjes van de Lichtbalk feller laten schijnen door op bij de knop volume/intensiteit
te drukken.
2.2 Trillers gebruiken
6. U sluit de Trillers aan op de controller bij de aansluiting ‘tactile’.
7. De EMDR kit heeft u aangezet en in de display op de controller verschijnt ‘Pause...’.
8. U drukt kortstondig de knop , de Trillers starten met trillen en de seconden in de display
beginnen te lopen.
9. Door op de of bij speed te drukken, gaan de trillers sneller heen en weer.
10. U kunt de Trillers intensiever laten trillen door op bij volume/intensiteit te drukken.
2.3 Koptelefoon gebruiken
6. U sluit de Koptelefoon aan op de controller bij de aansluiting ‘headphone’.
7. De EMDR kit heeft u aangezet en in de display op de controller verschijnt ‘Pause...’.
8. U drukt kortstondig de knop en de tikjes zijn hoorbaar en de seconden in de display beginnen
te lopen.
9. Door op de of bij speed te drukken, gaan de tikjes sneller heen er weer.
10. U kunt de tikjes harder zetten door op bij de knop volume/intensiteit te drukken.
3 Muziek functie (onregelmatige tikjes) In de controller is een mp3 speler ingebouwd. Standaard zijn hier de onregelmatige tikjes
geïnstalleerd (track 1).
Om de naar de stand Music te gaan, drukt u één keer kort de in totdat ‘Mode:’ wordt getoond
(met daarbij de huidige stand). Vervolgens kunt u met de knoppen en de stand Music
selecteren.
Als de muziekstand is gekozen en de muziek speelt dan is het mogelijk om vanuit het beginscherm
met de knop naar het volgende nummer te springen. Het huidige nummer, of het begin van de
titel, is zichtbaar in de display.

13 www.emdrkit.com
U kunt ook zelf een muziekbestand toevoegen door de controller middels een USB kabel aan uw
computer te verbinden.
4 Geavanceerde bediening
Via de knop op de controller is het mogelijk een aantal instellingen te wijzigen. Door
achtereenvolgens de knop kort in te drukken, worden de diverse instellingen getoond, en tot slot
wordt weer teruggegaan naar het beginscherm. Na vijf seconden zal automatisch het beginscherm
worden getoond.
4.1 Wijzigen stand bij Lichtbalk en Music
De EMDR kit ondersteunt twee verschillende standen bij de Lichtbalk en de Music-optie:
1. Sweeping: De lampjes van de Lichtbalk bewegen van links naar rechts.
2. Blinking: De lampjes van de Lichtbalk verspringen van links en rechts.
3. Music: Muziek wordt afgespeeld.
Om de stand te wijzigen drukt u één keer kort de knop in totdat ‘Mode:’ verschijnt (met daarbij de
huidige stand). Vervolgens kunt u met de knoppen en een andere stand selecteren.
4.2 Wijzigen aantal lampjes van de Lichtbalk
Het aantal lampjes dat tegelijkertijd brandt, is instelbaar. Om het aantal lampjes te wijzigen drukt u
twee keer kort de knop totdat ‘Width:’ in de display verschijnt die de huidige breedte aangeeft.
Daarna kunt u met de knoppen en een andere breedte selecteren, waarbij de breedte in 40
stappen is te regelen.
4.3 Wijzigen van kleuren van de Lichtbalk
De kleur van de Lichtbalk is instelbaar. Om de kleur te wijzigen drukt u drie keer kort op de controller
de knop in totdat ‘Color:’ in de display verschijnt, die de huidige kleur aangeeft. Daarna kunt u
met de knoppen en een andere kleur selecteren, waarbij 8 kleuren mogelijk zijn: 1. Wit, 2.
Rood, 3. Geel, 4. Groen, 5. Cyaan, 6. Blauw, 7. Magenta en 8. Random (verschillende kleuren
wisselen elkaar af).
4.4 Wijzigen toonhoogte tikjes van de Koptelefoon
De toonhoogte is instelbaar. Om de toonhoogte te wijzigen drukt u op de controller vier keer kort de
knop in totdat ‘Tone:’ in de display verschijnt, die de huidige toonhoogte aangeeft. Daarna kunt u
met de knoppen en een andere toonhoogte selecteren, waarbij de toonhoogte in 8 stappen
is te regelen.
5 Batterij opladen
Het beginscherm is rechts bovenin voorzien van een batterij indicatie. De betekenis van de
verschillende iconen is als volgt:
Icoon Betekenis
Bezig met laden
Klaar met laden: batterij is vol en voeding is aangesloten
Geen voeding aangesloten: batterij is in gebruik

14 www.emdrkit.com
Batterij is bijna leeg
Geen Probleem met lader of batterij
Bijlage 1 Aansprakelijkheid
De EMDR kit is ontworpen om de EMDR behandelaar te ondersteunen bij de EMDR behandeling. De
behandelaar is te allen tijde zelf verantwoordelijk voor het resultaat van de behandeling waarbij de
EMDR kit wordt ingezet. De ontwikkelaar dan wel verkoper van de EMDR kit kan niet aansprakelijk
worden gesteld voor resultaten van de behandeling en eventuele klachten van de cliënt.
Bijlage 2 Garantie Voor de Controller, Lichtbalk en de Trillers geldt een garantieperiode van 2 jaar. Op de snoeren,
koptelefoon en adapter geldt een garantie van een half jaar. De garantie gaat in op de dag van
aanschaf. Bewaar uw factuur.
Wat valt niet onder de garantie:
1. De garantie geldt niet voor a) normale slijtage, b) gebreken veroorzaakt door ruw omgaan met het
Product, c) gebreken of schade veroorzaakt door oneigenlijk gebruik van het Product, waaronder
mede begrepen gebruik in strijd met de door EMDR kit gegeven instructies en/of d) andere
handelingen die de EMDR kit redelijkerwijs niet kunnen worden aangerekend.
2. De garantie geldt niet voor gebreken of vermeende gebreken die het gevolg zijn van het gebruik
van het Product in combinatie met of aangesloten op niet door EMDR kit geproduceerde of
geleverde producten, accessoires, software en/of service of gebruikt werd op andere wijze dan
waarvoor het is bedoeld.
3. De garantie is niet afdwingbaar als het Product geopend, gewijzigd of gerepareerd is door een
niet-erkend onderhoudsbedrijf of is gerepareerd met gebruikmaking van niet-erkende onderdelen.
4. De garantie is niet afdwingbaar als het Product blootgesteld is geweest aan vocht, damp of
extreme temperaturen of omgevingscondities of snelle wisselingen in dergelijke condities,
corrosie, oxidatie, morsen van voedsel of vloeistof.
Bijlage 3 Problemen
Mocht u problemen ondervinden met het gebruik van de EMDR kit dan kunt u contact opnemen met
de EMDRshop.com.
Mogelijke oorzaken probleem:
1. Controleer of de controller is opgeladen en/of is aangesloten op de adapter. Gebruik hiervoor
uitsluitend de bijgeleverde adapter.
2. Controleer of de EMDR kit niet op de pauze stand staat.
3. Zorg ervoor dat de verschillende functies (Lichtbalk, Trillers of Koptelefoon) in de juiste
aansluitingen zitten.

www.emdrkit.com

www.emdrkit.com