Embed Size (px)
Citation preview


MediaSwift
Administration and Installation Guide


Important Notice
MediaSwift Admin & Install Guide iii
Important Notice Allot Communications Ltd. ("Allot") is not a party to the purchase agreement under which Service Gateway was purchased, and will not be liable for any damages of any kind whatsoever caused to the end users using this manual, regardless of the
form of action, whether in contract, tort (including negligence), strict liability or otherwise.
SPECIFICATIONS AND INFORMATION CONTAINED IN THIS MANUAL ARE FURNISHED FOR INFORMATIONAL USE ONLY, AND ARE SUBJECT TO CHANGE AT ANY TIME WITHOUT NOTICE, AND
SHOULD NOT BE CONSTRUED AS A COMMITMENT BY ALLOT OR ANY OF ITS SUBSIDIARIES. ALLOT ASSUMES NO RESPONSIBILITY OR LIABILITY FOR ANY ERRORS OR INACCURACIES THAT MAY APPEAR IN
THIS MANUAL, INCLUDING THE PRODUCTS AND SOFTWARE DESCRIBED IN IT.
Please read the End User License Agreement and Warranty Certificate provided with this product before using the product. Please note that using the products indicates that you accept the terms of the End User License Agreement and Warranty
Certificate.
WITHOUT DEROGATING IN ANY WAY FROM THE AFORESAID, ALLOT WILL NOT BE LIABLE FOR ANY SPECIAL, EXEMPLARY, INDIRECT, INCIDENTAL OR CONSEQUENTIAL DAMAGES OF ANY KIND,
REGARDLESS OF THE FORM OF ACTION WHETHER IN CONTRACT, TORT (INCLUDING NEGLIGENCE),
STRICT LIABILITY OR OTHERWISE, INCLUDING, BUT NOT LIMITED TO, LOSS OF REVENUE OR ANTICIPATED PROFITS, OR LOST BUSINESS, EVEN IF ADVISED OF THE POSSIBILITY OF SUCH DAMAGES.
Copyright Copyright © 1997-2010 Allot Communications. All rights reserved. No part of this document may be reproduced, photocopied, stored on a retrieval system, transmitted, or translated into any other language without a written permission and
specific authorization from Allot Communications Ltd.
Trademarks Products and corporate names appearing in this manual may or may not be registered trademarks or copyrights of their
respective companies, and are used only for identification or explanation and to the owners' benefit, without intent to infringe.
Allot and the Allot Communications logo are registered trademarks of Allot Communications Ltd.
NOTE: This equipment has been tested and found to comply with the limits for a Class A digital device, pursuant to Part 15 of the FCC Rules. These limits are designed to provide reasonable protection against harmful interference when the equipment
is operated in a commercial environment. This equipment generates, uses, and can radiate radio frequency energy and, if not
installed and used in accordance with the instruction manual, may cause harmful interference to radio communications. Operation of this equipment in a residential area is likely to cause harmful interference in which case the user will be
required to correct the interference at his own expense.
Changes or modifications not expressly approved by Allot Communication Ltd. could void the user's authority to operate the equipment.

Important Notice
MediaSwift Admin & Install Guide iv
Version History
Doc Version
Product Date Revision
v2b1 MS3.0 13.09.2010 Initial Draft
v2b2 MS3.0 15.09.2010 Reworking of Ch1 and Ch2
v2b3 MS3.0 19.09.2010 CLI and Configuration revisions
v2b4 MS3.0 19.09.2010 Updating Field Installation
v2b5 MS3.0 28.09.2010 Editing
v2b6 MS3.0 17.11.2010 Added full MSW-INT installation
procedure; Updated NX configuration
v2b7 MS3.0 15.12.2010 Add note about port usage on 1GE Sigma
installed with internal MediaSwift


MediaSwift Admin & Install Guide v
Table of Contents
Important Notice .......................................................................................................................... iii Table of Contents ........................................................................................................................... v Table of Figures ............................................................................................................................ ix
CHAPTER 1: OVERVIEW ................................................................................ 1-1 Solution Building Blocks ............................................................................................................ 1-2
NetEnforcer or Service Gateway .............................................................................................. 1-2 Cache Engine ............................................................................................................................ 1-3 Storage Array ............................................................................................................................ 1-4 Management Server .................................................................................................................. 1-5
Hardware Architecture .............................................................................................................. 1-6 MediaSwift External (Standalone) ............................................................................................ 1-6 MediaSwift External (Grid) ...................................................................................................... 1-7 MediaSwift Internal .................................................................................................................. 1-8
Software Architecture .............................................................................................................. 1-10
CHAPTER 2: INSTALLING MEDIASWIFT ...................................................... 2-1 MediaSwift External (Standalone) ............................................................................................ 2-1
Physical Connectivity ............................................................................................................... 2-1 Post Installation Steps ............................................................................................................... 2-5
MediaSwift External (Grid)..................................................................................................... 2-11 Physical Connectivity ............................................................................................................. 2-11 Post Installation Steps ............................................................................................................. 2-20
MediaSwift Internal ................................................................................................................. 2-27 Stage 1: Configuring NetXplorer to Steer Traffic .................................................................. 2-28 Stage 2: Connect and PowerUp the D-Link Switch ................................................................ 2-34 Stage 3: Connect the Storage to the D-Link Switch ............................................................... 2-35 Stage 4: Integrate MediaSwift Storage into your Management Network ............................... 2-36 Stage 5: Inserting the MediaSwift Blades ............................................................................... 2-40 Stage 6: Changing the MediaSwift Management Blade IP Address ...................................... 2-42
CHAPTER 3: WORKING WITH MEDIASWIFT MANAGEMENT TOOLS .......3-46 Working with the CLI .............................................................................................................. 3-46
Management Connectivity ...................................................................................................... 3-47 Getting Started with the CLI ................................................................................................... 3-47 CLI Command Editing Features ............................................................................................. 3-48 CLI Modes .............................................................................................................................. 3-49
Working with the TFTP Server .............................................................................................. 3-51 Working with the Configuration Files .................................................................................... 3-51
Configuration File Sections .................................................................................................... 3-53

MediaSwift Admin & Install Guide vi
Working with SNMP ................................................................................................................ 3-54
CHAPTER 4: CONFIGURING MEDIASWIFT .................................................. 4-1 MediaSwift Platform Features .................................................................................................. 4-3
Caching Specific Features ........................................................................................................ 4-3 System Load Monitoring .......................................................................................................... 4-6 Platform Specific Features ........................................................................................................ 4-6 Platform Operational Specific Features .................................................................................... 4-7 Traffic Specific Features ......................................................................................................... 4-10
CLI-based Configuration ......................................................................................................... 4-10 Configuring Passwords ........................................................................................................... 4-10 Recovering Passwords ............................................................................................................ 4-10 Configuring Management Network ........................................................................................ 4-11 Configuring Local Time ......................................................................................................... 4-11 Managing the Caching Service (Grid Only) ........................................................................... 4-12 Managing Servers ................................................................................................................... 4-13 Resetting Management Service .............................................................................................. 4-13
File-based Configuration ......................................................................................................... 4-13 Configuring SNMP ................................................................................................................. 4-13 Confirming MediaSwift Interaction with NetEnforcer/Service Gateway ............................... 4-14 Configuring P2P Protocols ..................................................................................................... 4-14 Configuring Bandwidth Management..................................................................................... 4-14 Configuring Traffic Forwarding Options ................................................................................ 4-15 Configuring Caching Policies ................................................................................................. 4-15 Configuring Virtual IP Address .............................................................................................. 4-16 Configuring Server Data IP Address ...................................................................................... 4-16 Configuring HTTP Hosts Not to be Cached ........................................................................... 4-16 Configuring Traffic Categories (Internal Only) ...................................................................... 4-16 Applying the Configuration Changes ..................................................................................... 4-17
Upgrading the System .............................................................................................................. 4-19 Upgrading MediaSwift Software ............................................................................................ 4-19 Upgrading MediaSwift License .............................................................................................. 4-19
CHAPTER 5: USING CLI COMMANDS ........................................................... 5-1 Standalone Configuration .......................................................................................................... 5-2
Regular Mode Commands ........................................................................................................ 5-2 arp .......................................................................................................................................... 5-2 direction ................................................................................................................................ 5-3 dmesg .................................................................................................................................... 5-3 dstat ....................................................................................................................................... 5-4 enable .................................................................................................................................... 5-5 exit ......................................................................................................................................... 5-7 help ........................................................................................................................................ 5-7 ifconfig .................................................................................................................................. 5-8 iostat .................................................................................................................................... 5-10

MediaSwift Admin & Install Guide vii
jumbo .................................................................................................................................. 5-18 ping ...................................................................................................................................... 5-19 show .................................................................................................................................... 5-20 tcpdump ............................................................................................................................... 5-27 traceroute ............................................................................................................................. 5-28 who ...................................................................................................................................... 5-30
Enable Mode Commands ........................................................................................................ 5-30 access .................................................................................................................................. 5-31 apache_restart ...................................................................................................................... 5-32 cache .................................................................................................................................... 5-33 config .................................................................................................................................. 5-38 downgrade ........................................................................................................................... 5-49 eventlog ............................................................................................................................... 5-49 license .................................................................................................................................. 5-51 oper ...................................................................................................................................... 5-52 reset ..................................................................................................................................... 5-54 show .................................................................................................................................... 5-54 upgrade ................................................................................................................................ 5-58 vlan ...................................................................................................................................... 5-60
Grid Configuration ................................................................................................................... 5-61 Regular Mode Commands ...................................................................................................... 5-61
arp ........................................................................................................................................ 5-61 cache .................................................................................................................................... 5-63 direction .............................................................................................................................. 5-66 dmesg .................................................................................................................................. 5-66 dstat ..................................................................................................................................... 5-68 enable .................................................................................................................................. 5-69 eventlog ............................................................................................................................... 5-70 exit ....................................................................................................................................... 5-74 help ...................................................................................................................................... 5-74 ifconfig ................................................................................................................................ 5-75 iostat .................................................................................................................................... 5-77 jumbo .................................................................................................................................. 5-78 ping ...................................................................................................................................... 5-79 show .................................................................................................................................... 5-80 tcpdump ............................................................................................................................... 5-88 traceroute ............................................................................................................................. 5-89 who ...................................................................................................................................... 5-91
Enable Mode Commands ........................................................................................................ 5-91 access .................................................................................................................................. 5-92 apache_restart ...................................................................................................................... 5-93 cache .................................................................................................................................... 5-94 config .................................................................................................................................. 5-99 eventlog ............................................................................................................................. 5-111 license ................................................................................................................................ 5-113 oper .................................................................................................................................... 5-115

MediaSwift Admin & Install Guide viii
reset ................................................................................................................................... 5-135 rollback .............................................................................................................................. 5-135 show .................................................................................................................................. 5-136 upgrade .............................................................................................................................. 5-139 vlan .................................................................................................................................... 5-141
CHAPTER 6: MONITORING MEDIASWIFT .................................................... 6-1 Standalone Configuration .......................................................................................................... 6-1 Grid Configuration ..................................................................................................................... 6-2
CHAPTER 7: CLI REFERENCE....................................................................... 7-1 Regular Mode ............................................................................................................................. 7-1 Enable Mode ............................................................................................................................... 7-2 Configuration Mode ................................................................................................................... 7-5 Server Mode (Grid Only) ........................................................................................................... 7-5

MediaSwift Admin & Install Guide ix
Table of Figures
Figure 1-1: MediaSwift Components ........................................................................................... 1-1
Figure 1-2: NetEnforcer AC-3040 ................................................................................................ 1-2
Figure 1-3: External Cache engine ............................................................................................... 1-3
Figure 1-4: Internal Cache engine Blade (NSS-MS) .................................................................... 1-3
Figure 1-5: MediaSwift Storage Enclosure .................................................................................. 1-4
Figure 1-6: MSW-LITE ................................................................................................................ 1-6
Figure 1-7: MSW-01-S ................................................................................................................. 1-7
Figure 1-8: SG-Sigma with 4 Cache engine Blades ..................................................................... 1-8
Figure 1-9: MediaSwift Software Architecture .......................................................................... 1-11
Figure 2-1: Network Connectivity – MSW-LITE (All-in-one solution) ...................................... 2-1
Figure 2-2: Network Interfaces on MSW-LITE ........................................................................... 2-2
Figure 2-3: Network Connectivity – MSW-01-S (Standalone Solution) ..................................... 2-3
Figure 2-4: SAS Data Cable ......................................................................................................... 2-3
Figure 2-5: MD1000 Data and Power Cables Wiring Scheme for MSW-01-S............................ 2-4
Figure 2-6: Network Interfaces on MSW-01-S Cache Engine ..................................................... 2-4
Figure 2-7: Configuring Port Usage on an AC-3040 for External Direct Redirection ................. 2-6
Figure 2-8: AC-3040 Service Ports Configured for Direct Redirection ....................................... 2-7
Figure 2-9: Local Service Catalog Entry for Steering from AC-3040 ......................................... 2-8
Figure 2-10: Adding a MediaSwift Server when Steering from an SG-Sigma ............................ 2-9
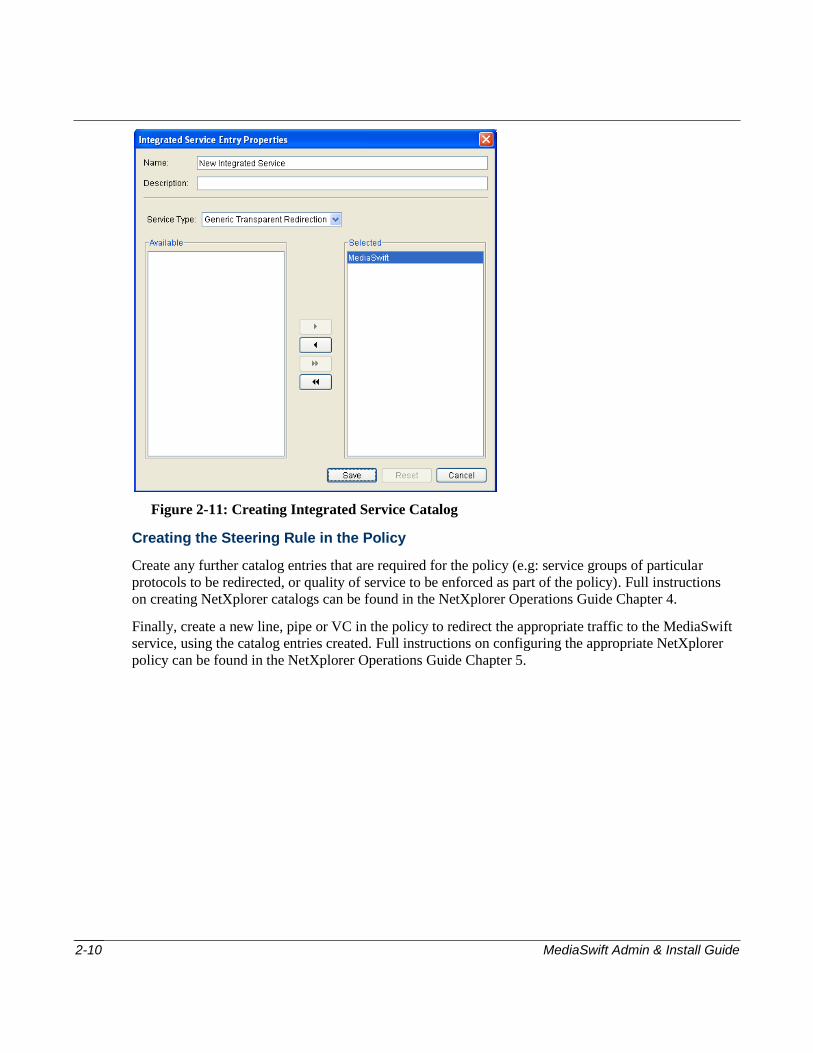
Figure 2-11: Creating Integrated Service Catalog ...................................................................... 2-10
Figure 2-12: Network Connectivity – MSW-08-E (Grid Configuration) ................................... 2-11
Figure 2-13: External (Grid) General Cabling Scheme .............................................................. 2-12
Figure 2-14: External (Grid) Management Server Connections ................................................ 2-13
Figure 2-15: External (Grid) Cache Server Connections ........................................................... 2-14
Figure 2-16: External (Grid) Storage Connections..................................................................... 2-15
Figure 2-17: Configuring Port Usage on an AC-3040 for External Switched Redirection ........ 2-21

MediaSwift Admin & Install Guide x
Figure 2-18: Configuring Port Usage on an SG-Sigma for External Switched Redirection ...... 2-22
Figure 2-19: Local Service Catalog Entry .................................................................................. 2-23
Figure 2-20: Adding a MediaSwift Server when Steering from an SG-Sigma .......................... 2-24
Figure 2-21: Creating Integrated Service Catalog ...................................................................... 2-25
Figure 2-22: Network Connectivity – MSW-01-INT (Internal Solution) .................................. 2-27
Figure 2-23: New Local Service Catalog Entry ......................................................................... 2-28
Figure 2-24: Adding A Cache Engine Blade .............................................................................. 2-29
Figure 2-25: Warning Message .................................................................................................. 2-29
Figure 2-26: Details of MS Blade .............................................................................................. 2-30
Figure 2-27: Entering Blade Details ........................................................................................... 2-30
Figure 2-28: New Integrated Service Catalog ............................................................................ 2-31
Figure 2-29: Integrated Service Entry Properties ....................................................................... 2-32
Figure 2-30: Service Gateway Configuration ............................................................................. 2-33
Figure 2-31: Configuring SG-Sigma NICs ................................................................................. 2-33
Figure 2-32: Port Usage ............................................................................................................. 2-34
Figure 2-33: Hardware Connections for the MD3000i Storage ................................................. 2-35
Figure 2-34: Adding New Managed Storage Device ................................................................. 2-36
Figure 2-35: No Managed Devices Dialog ................................................................................. 2-37
Figure 2-36: Add New Storage Array - Manual Dialog ............................................................. 2-37
Figure 2-37: Storage Array Added Dialog ................................................................................. 2-38
Figure 2-38: Modular Disk Storage Manager GUI .................................................................... 2-38
Figure 2-39: Configuring Ethernet Management Ports .............................................................. 2-39
Figure 2-40: Confirm Change Network Configuration Dialog .................................................. 2-39
Figure 2-41: NSS-MS Management Server Blade Indicator Sticker ......................................... 2-40
Figure 2-42: Lower Ejector Handle in Closed Position ............................................................. 2-41

MediaSwift Admin & Install Guide 1-1
Chapter 1: Overview
Allot MediaSwift is a carrier-class media caching and video acceleration service that is fully integrated
with Allot‟s DART-based platforms. This synergy enables service providers to ensure subscriber
quality of experience and dramatically reduce the operational costs associated with delivery of P2P and
Internet video traffic. This synergy also facilitates the creation of personalized broadband service
packages that enhance subscriber satisfaction and provider revenue.
Simultaneous HTTP and P2P caching provides a single solution to accelerate the delivery of the
following three categories of traffic, which together make up the overwhelming majority of traffic on
the Internet:
HTTP streaming video
HTTP file downloads
P2P downloads
MediaSwift‟s intelligent caching focuses on large media/video files that consume the most bandwidth,
and stores them based on content popularity, frequency of use, cost of bandwidth and infrastructure
efficiency.
The synergy of MediaSwift with application awareness increases cache hit rates and reduces the cost of
cache deployment as Allot DART platforms inspect traffic at wire speed and steer only the relevant
traffic to the caching service. Likewise, its synergy with policy enforcement reduces link congestion
and improves QoE as Allot‟s Quality of Service (QoS) mechanism optimizes utilization of the
bandwidth saved by caching.
The transparent caching system does not operate as a “super peer” or proxy and has no public IP
address. Transparency ensures service provider anonymity and preserves peer ratings for P2P clients
and click-throughs for popular web sites.
The solution can be deployed together with Allot NetEnforcer bandwidth management devices or as an
integrated blade in Allot Service Gateway platforms.
Figure 1-1: MediaSwift Components

MediaSwift Admin & Install Guide 1-2
Solution Building Blocks The MediaSwift solution is built on four key elements, which together provide the optimal answer to
your needs. These elements are carrier grade, providing redundancy at all levels:
NetEnforcer or Service Gateway
Cache engine
Storage Array
Management Server* (only required in some configurations)
NetEnforcer or Service Gateway
The NetEnforcer or Service Gateway, which is placed seamlessly into the existing network, is
responsible for the steering of P2P and/or HTTP traffic to the cache engine. Allot‟s DART technology
first of all identifies the desired protocols are then ensures that this traffic and only this traffic
selectively, is forwarded to the cache engine.
Figure 1-2: NetEnforcer AC-3040
Selective steering of traffic and subscribers to MediaSwift is supported on the following NetEnforcer
and Service Gateways:
AC-3040 (from AOS11.1)
SG-Sigma (from AOS10.2.1)
A more limited, port based steering is also supported on the following legacy platforms:
SG-Omega
AC-2540
Regular functionality of the NetEnforcer or Service Gateway can also be applied to the traffic, giving
the service provider full application, subscriber and topology awareness and the ability to enforce
traffic and subscriber policies.

MediaSwift Admin & Install Guide 1-3
Cache Engine
The heart of the MediaSwift caching solution is its cache engine. The cache engine analyzes P2P and
HTTP traffic and is in charge of the actual bandwidth savings achieved by caching and retrieving files
from the centralized storage array.
Figure 1-3: External Cache engine
In a Grid configuration, the Cache engine is based on modular technology and provides multiple I/O
processing modules which can scale to a multiGigabit solution. These cache engines can be deployed
as external devices (as in Figure 1-3 above) or as blades in the SG-Sigma (as in Figure 1-4 below)
Figure 1-4: Internal Cache engine Blade (NSS-MS)

MediaSwift Admin & Install Guide 1-4
Storage Array
The storage array is a high performance system that answers the extreme demands posed by P2P and
streamed HTTP traffic. MediaSwift can be configured to use one of the following types of storage
devices, depending on specific customer requirements:
Integrated Storage – Where the disks are hosted inside the cache engine, used for
MediaSwift Lite configuration (MSW-LITE)
Direct-Attached Storage (DAS) – Dell PowerVault MD1000, used for MediaSwift
Standalone configuration (MSW-01-S)
Network Array Storage (NAS) – Dell PowerVault MD3000i, used for MediaSwift
Grid configurations (MSW-XY-E and MSW-INT)
In Grid configuration, the centralized storage eliminates content duplication, providing a scalable
platform for increased bandwidth.
Figure 1-5: MediaSwift Storage Enclosure
MediaSwift Admin & Install Guide 1-5
Management Server
MediaSwift is managed through an out-of-band network that is separate from the data flow, providing
ultimate security. The management component differs, depending on the MediaSwift Configuration
The MediaSwift Standalone and MediaSwift LITE configurations utilize a management component
within the host, so there is no need for a dedicated management server. The management component is
responsible for configuration, monitoring, and data collection from the cache engine and the storage
module.
The External MediaSwift Grid configuration utilizes a centralized management system with a
dedicated management server. The management server is responsible for configuration, monitoring,
and data collection from all the elements within the solution (switches, storage, I/O servers, chassis).
For the Internal MediaSwift configuration (MSW-INT), one of the NSS-MS cache engine blades on the
SG-Sigma acts as the management server, in addition to its function as a cache engine.
NOTE If the management server blade fails, there will be no management connectivity until it is replaced with a new blade or one of the working blades is changed to be the server. Changing the role of a cache engine blade to become a server cannot be done in run time and requires assistance from Allot Customer Support.
The server blade communicates with other Media Swift blades in the chassis, the SGSV-110 blade, an
external terminal for CLI access and different storage elements.
For each of these configurations, there are two ways to interact with the management system
(centralized management system in Grid configuration):
CLI – A familiar context-based interface for easy configuration and basic monitoring.
The CLI is accessible via a text-based interface via the console cable and remote SSH
(v2).
SNMP –MediaSwift provides a private MIB (SNMP v2) for easy access to all the
counters and information provided by MediaSwift. This is especially useful for
customers who prefer using existing 3rd
party software solutions. Monitoring via the
private MIB offers centralized access to MediaSwift.
Configuration management also uses IPMI (Intelligent Platform Management Interface). IPMI
provides autonomous monitoring and recovery features implemented directly in platform management
hardware and firmware. The key characteristic of IPMI is that inventory, monitoring, logging, and
recovery control functions are available independent of the main processors, BIOS, and operating
system. Platform management functions can also be made available when the system is in a powered
down state.
IPMI capabilities are a key component in providing management for high-availability systems.
Platform status information can be obtained and recovery actions initiated in situations where system
management software and normal in-band management mechanisms are unavailable.

MediaSwift Admin & Install Guide 1-6
Hardware Architecture Allot MediaSwift has 3 different architecture types:
MediaSwift Standalone (External)
MediaSwift Grid (External)
MediaSwift Internal
MediaSwift External (Standalone)
There are two types of MediaSwift standalone solutions:
MSW-LITE
MSW-01-S
MSW-LITE (All-In-One)
MediaSwift LITE (MSW-LITE) is an all in one appliance, including a cache engine and internal
storage component which both share the same enclosure. This configuration was specifically created to
address price performance requirements. The platform is equipped with a single operating system hard
drive and five 1TB drives.
Figure 1-6: MSW-LITE
MSW-LITE supports a maximum throughput of 500Mbps and has a maximum cache productivity of
80Mbps
MSW-01-S (Standalone)
The MediaSwift Standalone configuration (MSW-01-S) consists of a single cache engine with a
directly attached storage enclosure. This configuration has been built using Direct-Attached Storage
(DAS), and, as such, MediaSwift host and MediaSwift storage hardware components are connected
using Serial Attached SCSI (SAS). This provides a 3.0 Gbps SAS between the storage PERC 6/E
controller residing on the host and the storage.

MediaSwift Admin & Install Guide 1-7
Figure 1-7: MSW-01-S
MSW-01-S supports a maximum throughput of 1.2Gbps and has a maximum cache productivity of
300Mbps. The storage capacity of the MSW-01-S is 15TB.
MediaSwift External (Grid)
The MediaSwift Grid-ready configuration uses Storage Area Network (SAN) – Dell PowerVault
MD3000i. The storage devices are connected through a 1 Gbps network adaptor, via a dedicated
VLAN on the MediaSwift platform communication switch. The Dell PowerVault MD3000i uses the
iSCSI protocol for communication and management.
There are four different models of the external grid solution:
MSW-02-E
MSW-04-E
MSW-08-E
MSW-16-E
MSW-02-E has 2 cache engines which enables 2.5Gbps throughput and 1Gbps maximum cache
productivity. This configuration also comes with 2 storage enclosures. As each storage enclosure offers
15 x 400GB disks, the MSW-02-E provides up to 12TB of storage capacity in total. The kit includes a
separate management server and two data switches.
MSW-04-E has 4 cache engines which enables 5Gbps throughput and 2Gbps maximum cache
productivity. This configuration also comes with 3 storage enclosures. As each storage enclosure offers
15 x 400GB disks, the MSW-04-E provides up to 18TB of storage capacity in total. The kit includes a
separate management server, two data switches and a management switch.
MSW-08-E has 8 cache engines which enables 10Gbps throughput and 3.2Gbps maximum cache
productivity. This configuration also comes with 4 storage enclosures. As each storage enclosure offers
15 x 400GB disks, the MSW-08-E provides up to 24TB of storage capacity in total. The kit includes a
separate management server, two data switches and a management switch.

MediaSwift Admin & Install Guide 1-8
Finally, MSW-16-E has 16 cache engines which enables 20Gbps throughput and 5Gbps maximum
cache productivity. This configuration also comes with 6 storage enclosures. As each storage enclosure
offers 15 x 400GB disks, the MSW-16-E provides up to 36TB of storage capacity in total. The kit
includes a management server, two data switches and two management switches.
MediaSwift Internal
The internal MediaSwift configuration (MSW-01-INT) is an integrated blade solution for the SG-
Sigma. The MSW-01-INT kit comes with a single cache engine blade (NSS-MS), a single storage
enclosure and a data switch.
The configuration is expandable, with the SG-Sigma able to handle up to 4 such cache engine blades.
Figure 1-8: SG-Sigma with 4 Cache engine Blades
Also included in the MSW-01-INT kit are a Multi Mode duplex cable to connect between the SFC-200
and the data switch and 3 x CAT6 cross cables.

MediaSwift Admin & Install Guide 1-9
The table below summarizes the different models and configurations of MediaSwift platforms.
Models MSW-LITE MSW-01-S MSW-02-E MSW-04-E MSW-08-E MSW-16-E
Systems Descriptions
500 Mbps Standalone
caching system with internal storage
1.2 Gbps Standalone caching system with
external direct- attached storage
2.5 Gbps Grid
caching system with iSCSI storage
5 Gbps Grid
caching system with iSCSI storage
10 Gbps Grid
caching system with iSCSI storage
20 Gbps Grid
caching system with iSCSI storage
Cache Server and Storage Arrays
Number of Cache Engines 1 1 2 4 8 16
Cache Engine Description
2 x 4 core Intel Xeon processers and 12GB RAM
2 x 4 core Intel Xeon processers and 12GB RAM
2 x 4 core Intel Xeon processers and 12GB RAM
2 x 4 core Intel Xeon processers and
12GB RAM
2 x 4 core Intel Xeon processers and
12GB RAM
2 x 4 core Intel Xeon processers and
12GB RAM
Storage Enclosures 0 1 2 3 4 6
Storage 5 TB (SATA)
internal storage (5x1 TB disks)
15 TB (SATA) external direct-
attached storage (15 x 1TB disks)
12TB (SAS) iSCSI SAN 2 x
(15 x 400GB disks)
18TB (SAS) iSCSI SAN 3 x
(15 x 400GB disks)
24TB (SAS) iSCSI SAN 4 x
(15 x 400GB disks)
36TB (SAS) iSCSI SAN 6 x
(15 x 400GB disks)
Management Server 0 0 1 1 1 1
Switches and Network Interfaces
Data Switches 0 0 2 2 2 2
Catalyst 10/100/1000 Data Switch, Enhanced Mode
N/A N/A
3560G-24TS, 24 ports,
4 SFP-based GBE, Cisco item
WS-C3560G-24TS-E
3560G-24TS, 24 ports,
4 SFP-based GBE, Cisco item
WS-C3560G-24TS-E
3560E-24TD, 24 ports + 2X10G,
WS-C3560E-24TD-E + 2 x 10 Gb SFPs for
10Gb networks
3560E-48TD, 48 ports + 2X10G,
WS-C3560E-48TD-E + 2 x 10 Gb SFPs for
10Gb networks
Management Switches 0 0 0 1 1 2
Management Switch Description
N/A N/A N/A
Catalyst 2960 48x10/100/1000,
4 T/SFP Base Image WS-C2960G-48TC-L
Catalyst 2960 48x10/100/1000,
4 T/SFP Base Image WS-C2960G-48TC-L with 10 Gbps SFPs
Catalyst 2960 48x10/100/1000,
4 T/SFP Base Image WS-C2960G-48TC-L with 10 Gbps SFPs
Network Interface Cards
Default: Quad port copper Gigabit
NIC server bypass Optional: Quad port
fiber-SX NIC server bypass
Default: Quad port copper Gigabit
NIC server bypass Optional: Quad port
fiber-SX NIC server bypass
Default: Quad port copper Gigabit
NIC server bypass Optional: Quad port fiber-SX NIC server
bypass
Default: Quad port copper Gigabit
NIC server bypass Optional: Quad port
fiber-SX NIC server bypass
Default: Quad port copper Gigabit
NIC server bypass Optional: Quad port
fiber-SX NIC server bypass
Default: Quad port copper Gigabit
NIC server bypass Optional: Quad port
fiber-SX NIC server bypass
Power and Chassis
Power - Cache Engine
AC-Power 110-220V, High output redundant power
supply (2 PSU)870W
AC-Power 110-220V, High Output
redundant power supply (2 PSU)717W
AC-Power 110-220V, High output
redundant power supply (2 PSU) 717W
AC-Power 110-220V, High output
redundant power supply (2 PSU)717W
AC-Power 110-220V, High output
redundant power supply (2 PSU)717W
AC-Power 110-220V, High output
redundant power supply (2 PSU)717W
Power Storage Enclosure Voltages: 100-240 V rated 90-264V; Fr: 47-63 Hz
N/A
MD1000: 488W max, continuous; 550W peak;
7.2A @ 100V; 3.6A @ 200V
MD3000i: 478W max, continuous; 550 W peak;
7.93A @ 100V; 3.96A @ 200V
MD3000i: 478W max, continuous; 550W peak;
7.93A @ 100V; 3.96A @ 200V
MD3000i: 478W max, continuous; 550W peak;
7.93A @ 100V; 3.96A @ 200V
MD3000i: 478W max, continuous; 550W peak;
7.93A @ 100V; 3.96A @ 200V
NOTE: Configuration components may change from time to time. Contact [email protected] for updated configuration information.

MediaSwift Admin & Install Guide 1-10
Software Architecture There are four distinct layers in the MediaSwift software architecture:
The networking layer
The application layer
The storage layer
The distributed file system
The network layer consists of the layer 7 aware classifier function and the forwarder. The classifier
manages the TCP sessions and is capable of basic detection of P2P and HTTP protocols. In case non-
P2P and non-HTTP sessions are forwarded by the NetEnforcer or Service Gateway, these are
forwarded transparently.
The application layer consists of the inspection module and the caching module. The inspection
module works hand-in-hand with the classifier, defining how to treat each session. This module is
protocol aware. Once a session has been established, the classifier then directs the session to the
caching module, which either saves the data to disk and continues forwarding it to the client, or
intercepts the connection and serves the content from disk.
The storage layer is responsible for saving and retrieving data from the distributed file system. The
disk manager decides what to save and maintains a local database. In Grid configurations, the local
database is synchronized with the available content of all the other caching servers.
Finally, the distributed file system is where the files themselves are stored.
All four layers are accessible via a management API and are centrally controlled. In Grid
configuration, the four layers are controlled by the management server. In Standalone configuration,
the four layers are controlled by the management software component running on the same host.

MediaSwift Admin & Install Guide 1-11
Figure 1-9: MediaSwift Software Architecture


MediaSwift Admin & Install Guide 2-1
Chapter 2: Installing MediaSwift
MediaSwift External (Standalone) In this section we will see how to physically connect and perform initial field configuration for MSW-
LITE and MSW-01-S
Physical Connectivity
Separate procedures for connecting the MSW-LITE and MSW-01-S to the network are described
below.
MSW-LITE
MSW-LITE is a single “all-in-one” solution based on a Dell PowerEdge R710 machine.
Figure 2-1: Network Connectivity – MSW-LITE (All-in-one solution)
Connecting MSW-LITE to the NetEnforcer
The MSW-LITE should be directly connected to two of the copper service ports on the front panel of
the AC-3040. You can select which two copper service ports to use on the AC-3040. Refer to the table
below to see which ports to connect to on the rear panel of MSW-LITE.

MediaSwift Admin & Install Guide 2-2
Figure 2-2: Network Interfaces on MSW-LITE
INTERFACE INTERFACE NAME
PURPOSE
1 eth0 Connects the management network interface to the management switch
2 eth1 Not used
3 eth2 Not used
4 eth3 Not used
5 eth4 Connect to the ISP network. (Copper Connection to NE Service port 1)
6 eth5 Connect to World network. (Copper Connection to NE Service port 2)
7 eth6 Not used
8 eth7 Not used
Power Cabling for MSW-LITE
Use standard power cables to connect both PSUs on the rear of the MSW-LITE to the rack PDU.

MediaSwift Admin & Install Guide 2-3
MSW-01-S
MSW-01-S consists of a Dell R610 machine which serves as the MediaSwift cache engine, directly
connected to an external storage device (based on DellVault MD1000).
Figure 2-3: Network Connectivity – MSW-01-S (Standalone Solution)
Connecting between MSW-01-S Cache Engine and Storage
Use the SAS data cable shown in Figure 2-4 below to connect the MSW-01-S cache engine PERC 6/E
interface connector A to the DELL MD1000 storage connector A (left connector to left connector), as
shown in Figure 2-5.
Figure 2-4: SAS Data Cable

MediaSwift Admin & Install Guide 2-4
Figure 2-5: MD1000 Data and Power Cables Wiring Scheme for MSW-01-S
WARNING Do not connect a second cable from the MediaSwift server PERC 6/E interface connector B to the DELL MD1000 storage connector B (right connector to right connector).
Connecting between MSW-01-S Cache Engine and NetEnforcer
The MSW-01-S should be directly connected to two of the copper service ports on the front panel of
the AC-3040. You can select which two copper service ports to use on the AC-3040. Refer to the table
below to see which ports to connect to on the rear panel of the cache engine (referring to Figure 2-6
below)
Figure 2-6: Network Interfaces on MSW-01-S Cache Engine
INTERFACE INTERFACE NAME
PURPOSE
1 eth0 Connects the management network interface to the management switch
2 eth1 Not used
3 eth2 Not used

MediaSwift Admin & Install Guide 2-5
INTERFACE INTERFACE NAME
PURPOSE
4 eth3 Not used
5 eth4 Connect to the ISP network. (Copper Connection to NE Service port 1)
6 eth5 Connect to World network. (Copper Connection to NE Service port 2)
7 eth6 Not used
8 eth7 Not used
NOTE A PCIx Quad NIC adaptor is used for the ISP net traffic. This adaptor is usually installed in each cache engine server. If it is not installed on the servers you received, please obtain the adaptor required per Allot specifications and install the adaptor in each cache engine. Use the server PCIx slot number 1 to host the adaptor
Power Cabling for MSW-01-S
Use standard power cables to connect both PSUs on the rear of the cache engine and both PSUs on the
rear of the storage unit to the rack PDU.
Post Installation Steps
Perform the following steps after connecting the MediaSwift External (Standalone).
Post-Installation Steps in the MediaSwift CLI
For more information about the CLI, see Using CLI Commands below.
1. After the installation is complete, connect to the CLI using the MGMT_IP that you
configured:
Use the ssh command to connect to the management IP, as you configured.
Log in using the admin username. The default password should match the system ID. For
example: JDQGS1J
2. Use the show systemid CLI command to see a list of chassis IDs to set in the
license.
3. Obtain a license file and apply it to the system using the CLI interface. See Using
CLI Commands for more details
4. Modify the cluster_conf.xml file with the system settings.
5. After PANG is in Enabled mode, reset the graphs:
cd /srv/www/htdocs/graphs; ./reset_graphs.sh;
./run_ubview.sh

MediaSwift Admin & Install Guide 2-6
6. The installation process is now complete!
Post Installation Steps in NetXplorer GUI
The NetXplorer Administrator will need to configure a traffic policy which steers the appropriate
traffic from the NetEnforcer to the MediaSwift (external) standalone solution. The NetXplorer
administrator should follow the steps below:
Check the NetXplorer License
Ensure that the NetXplorer license includes traffic steering. You can verify this by selecting Tools >
NetXplorer Application Server Registration from the NetXplorer Menu bar
Configure Port Usage on the NE
Port usage is configured by right-clicking the NetEnforcer in the NetXplorer GUI network tree,
selecting configuration and choosing the NIC tab. Your selection will depend on how MediaSwift is
connected.
When steering traffic from an AC-3040 to MediaSwift Standalone you can connect directly between
the NetEnforcer and the MSW-LITE device or the cache engine of the MSW-01-S. For this purpose
you can utilize:
Any two of the 4 copper service ports OR
Any two of the copper network ports which are currently not in use (if the AC-3040 was
ordered with copper network ports)
For each of the two ports, set the port properties to “external direct redirection” as shown for example
in Figure 2-7 below for the Service1 port.
Figure 2-7: Configuring Port Usage on an AC-3040 for External Direct Redirection
After configuring the ports, the NIC tab of the NetEnforcer Configuration menu will show the
configuration of the two service ports you have chosen as shown in below.

MediaSwift Admin & Install Guide 2-7
Figure 2-8: AC-3040 Service Ports Configured for Direct Redirection
Adding a New Local Service
For every instance where a NetEnforcer is steering traffic to MediaSwift, you should define a local
service. These local services are then combined into a single Integrated Service.
From the “Service Activation” catalog add a “New Local service”. An example of how the Local
Service Catalog Entry should look can be seen in Figure 2-9 below.

MediaSwift Admin & Install Guide 2-8
Figure 2-9: Local Service Catalog Entry for Steering from AC-3040
Set the Service Type field to “Generic Transparent Redirection”.
NOTE: For the sake of clarification, when steering to an external MediaSwift server, you should
set the service type field to “Generic Transparent Redirection”, and not “MediaSwift”
In the “device name” field, select the NetEnforcer from which traffic will be steered. The tracking
method should be set to BFD, and the tracking source IP (Local IP address Internal and Local IP
address External) should not be used.
Adding a Server to the Local Service
Choose “add” to add a server for the MediaSwift service. A typical configuration can be seen in Figure
2-10 below, where traffic is steered from Service port S1 on an AC-3040 and re-enters the AC-3040
via Service port S2

MediaSwift Admin & Install Guide 2-9
Figure 2-10: Adding a MediaSwift Server when Steering from an SG-Sigma
The VLAN Tag field will be greyed out as we are using a “direct” connection from the AC-3040 to the
MediaSwift server. As we are working with BDF tracking, the “Monitoring IP” fields should be left
blank. The Mac address of the MediaSwift server should be entered for differentiating between traffic
returning from the cache and internet traffic.
Creating “New Integrated Service”
Local Service Catalog entries are grouped together to form a single integrated service catalog which
will serve as the action for one or more rules in your policy.
From the “Service Activation” catalog add a “New Integrated Service”. Set the “Service Type” to be
“Generic Transparent Redirection” and select the relevant services from the list of available local
services as shown in Figure 2-11 below.
MediaSwift Admin & Install Guide 2-10
Figure 2-11: Creating Integrated Service Catalog
Creating the Steering Rule in the Policy
Create any further catalog entries that are required for the policy (e.g: service groups of particular
protocols to be redirected, or quality of service to be enforced as part of the policy). Full instructions
on creating NetXplorer catalogs can be found in the NetXplorer Operations Guide Chapter 4.
Finally, create a new line, pipe or VC in the policy to redirect the appropriate traffic to the MediaSwift
service, using the catalog entries created. Full instructions on configuring the appropriate NetXplorer
policy can be found in the NetXplorer Operations Guide Chapter 5.
MediaSwift Admin & Install Guide 2-11
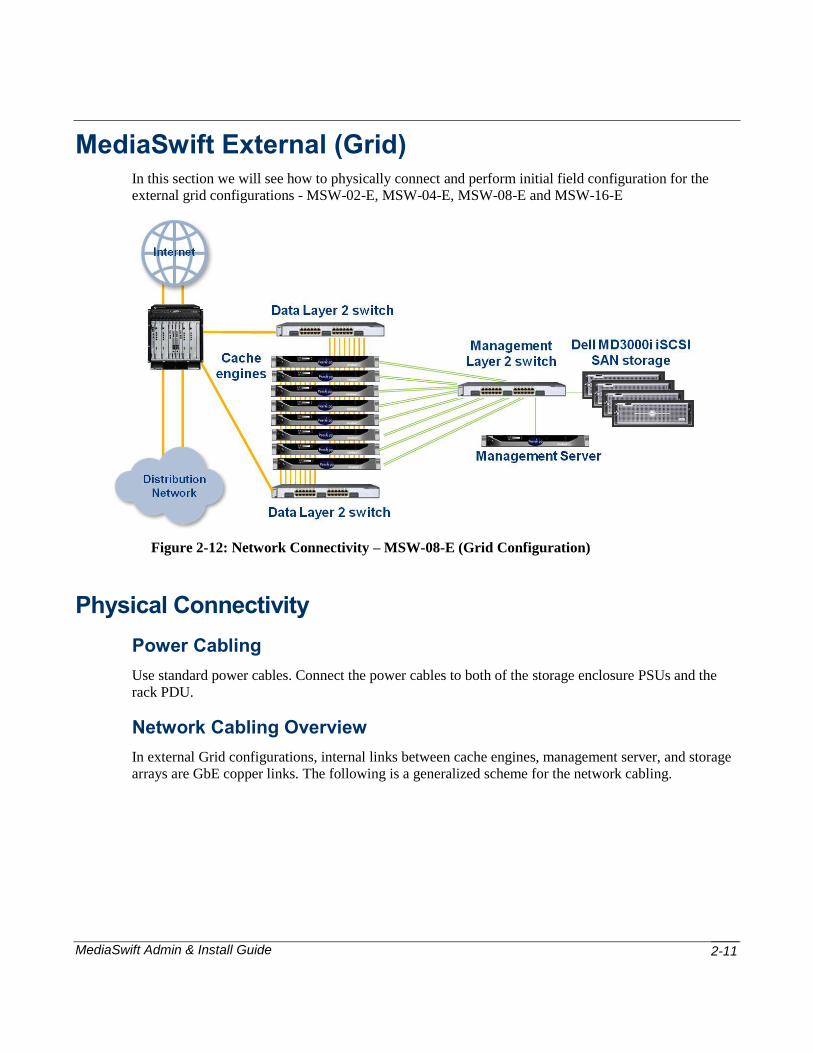
MediaSwift External (Grid) In this section we will see how to physically connect and perform initial field configuration for the
external grid configurations - MSW-02-E, MSW-04-E, MSW-08-E and MSW-16-E
Figure 2-12: Network Connectivity – MSW-08-E (Grid Configuration)
Physical Connectivity
Power Cabling
Use standard power cables. Connect the power cables to both of the storage enclosure PSUs and the
rack PDU.
Network Cabling Overview
In external Grid configurations, internal links between cache engines, management server, and storage
arrays are GbE copper links. The following is a generalized scheme for the network cabling.

MediaSwift Admin & Install Guide 2-12
Figure 2-13: External (Grid) General Cabling Scheme
NOTE A logical switch can vary, ranging from three different physical switches (for data, management, and iSCSI) to one physical switch with three VLANs (for data, management, and iSCSI)
NOTE An additional VLAN should be defined to work around a problem with the Dell MD3000i management software. To prevent the storage management ports from flooding the whole management network, they should be isolated in the management switch with a dedicated VLAN

MediaSwift Admin & Install Guide 2-13
Management Server Connections
The rear of the management server is illustrated in Figure 2-14 below. The management server is
equipped with four onboard NICs, where only the first NIC is used - NIC #1 (eth0), which is labeled 4
in the diagram below. Connect the Interface #1 (eth0) network connection on the management server to
the management switch.
Figure 2-14: External (Grid) Management Server Connections
The table below shows the required wiring to each of the interfaces listed in Figure 2-14 above.
Port Description Wire Connection
1 Monitor connection ---
2 USB port – keyboard ---
3 Dedicated iDRAC NIC ---
4 NIC1 connector – management port Man 1 Man
5 NIC2 connector ---
6 NIC3 connector ---
7 NIC4 connector ---
8 Power supply 1 PDU A
9 Power supply 2 PDU B

MediaSwift Admin & Install Guide 2-14
Cache Server Connections
The rear of the cache server is illustrated in Figure 2-15.
Figure 2-15: External (Grid) Cache Server Connections
The table below shows the required wiring to each of the interfaces listed in Figure 2-15 above.
Port Description Wire Connection Wire Color Notes
1 NIC2 connector Eth4 ServX Green Eth4 ServX X=1 to 13 - connected to 3560 1 M
2 NIC3 connector Eth5 ServX Green Eth5 ServX X=1 to 13 - connected to 3560 2 M
3 NIC2 connector Eth6 ServX Green Eth6 ServX X=1 to 13 - connected to 3560 1 R
4 NIC3 connector Eth7 ServX Green Eth7 ServX X=1 to 13 - connected to 3560 1 R
5 USB port – keyboard --- --- ---
6 NIC0 connector – management port
Man1 ServX Yellow Man1 ServX - X=1 to 13
7 NIC1 connector – iSCSI port
iSCSI ServX Blue iSCSI ServX X = 1 – 13
8 Power supply 1 PDU A --- ---
9 Power supply 2 PDU B --- ---
10 Monitor Connection --- --- Use when required

MediaSwift Admin & Install Guide 2-15
Storage Connections
The rear of a grid storage enclosure is illustrated in Figure 2-16
Figure 2-16: External (Grid) Storage Connections
The table below shows the required wiring to each of the interfaces listed in Figure 2-16Figure 2-15
above.
Port Description Wire Connection Wire Color Notes
1 iSCSI in 0 iSCSI StoX Green iSCSI StoX X = 1 to 6
2 NIC1 connector – management 1
Man1 StoX Yellow Man1 StoX X = 1 to 6
3 NIC2 connector – management 2
Man2 StoX Yellow Man2 StoX X = 1 to 6
4 Power supply 1 PDU A --- ---
5 Power supply 2 PDU B --- ---
L2 Data Switch Cabling
The L2 Data Switch comes with 2 x 10GE fiber ports and 24 x 1GE copper ports. Connect the reserved
ports on the data switch to the appropriate port on the NetEnforcer or Service Gateway.
AC-3040: Select two fiber network ports which are not in use. Connect one fiber port to
one of the L2 data switches. Connect the second fiber port to the second L2 data switch.

MediaSwift Admin & Install Guide 2-16
SG-Omega/AC-2540: Select two fiber network ports which are not in use. Connect one
fiber port to one of the L2 data switches. Connect the second fiber port to the second L2
data switch. The ports connected will depend on the port redirection scheme.
SG-Sigma: Connect two of the 10GE fiber ports on the SFC-200 blade (depending on
port usage scheme – see SG-Sigma Hardware Guide). One port will connect to a 10GE
port on one of the L2 Data Switches. The second port will connect to a 10GE port on the
second switch.
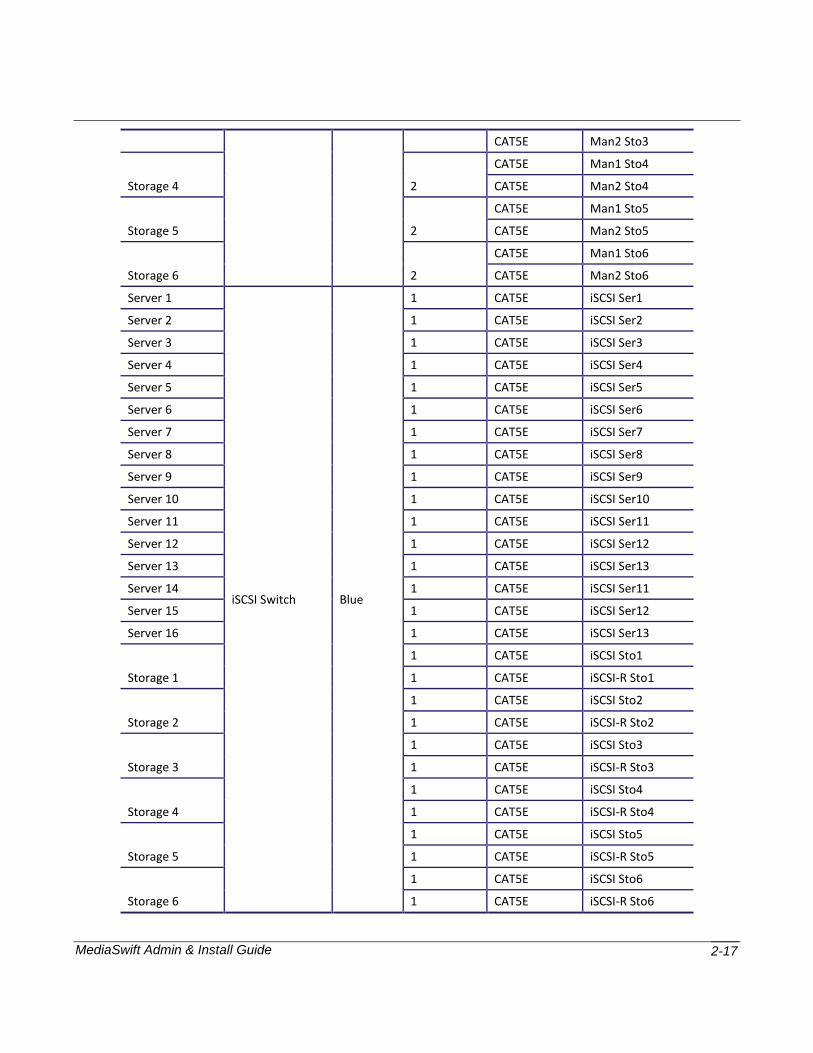
Wiring List Summary (MSW-16-E)
See below for a summary of the connections required for a MSW-16-E:
Cable From Cable To Color Quantity Cable Type Label (on both ends)
Server 1
Management Switch
Yellow
1 CAT5E Man1 Serv1
Server 2 1 CAT5E Man1 Serv2
Server 3 1 CAT5E Man1 Serv3
Server 4 1 CAT5E Man1 Serv4
Server 5 1 CAT5E Man1 Serv5
Server 6 1 CAT5E Man1 Serv6
Server 7 1 CAT5E Man1 Serv7
Server 8 1 CAT5E Man1 Serv8
Server 9 1 CAT5E Man1 Serv9
Server 10 1 CAT5E Man1 Serv10
Server 11 1 CAT5E Man1 Serv11
Server 12 1 CAT5E Man1 Serv12
Server 13 1 CAT5E Man1 Serv13
Server 14 1 CAT5E Man1 Serv14
Server 15 1 CAT5E Man1 Serv15
Server 16 1 CAT5E Man1 Serv16
Management Server 1 CAT5E Man1 Man
Storage 1 2
CAT5E Man1 Sto1
CAT5E Man2 Sto1
Storage 2 2
CAT5E Man1 Sto2
CAT5E Man2 Sto2
Storage 3 2 CAT5E Man1 Sto3
MediaSwift Admin & Install Guide 2-17
CAT5E Man2 Sto3
Storage 4 2
CAT5E Man1 Sto4
CAT5E Man2 Sto4
Storage 5 2
CAT5E Man1 Sto5
CAT5E Man2 Sto5
Storage 6 2
CAT5E Man1 Sto6
CAT5E Man2 Sto6
Server 1
iSCSI Switch Blue
1 CAT5E iSCSI Ser1
Server 2 1 CAT5E iSCSI Ser2
Server 3 1 CAT5E iSCSI Ser3
Server 4 1 CAT5E iSCSI Ser4
Server 5 1 CAT5E iSCSI Ser5
Server 6 1 CAT5E iSCSI Ser6
Server 7 1 CAT5E iSCSI Ser7
Server 8 1 CAT5E iSCSI Ser8
Server 9 1 CAT5E iSCSI Ser9
Server 10 1 CAT5E iSCSI Ser10
Server 11 1 CAT5E iSCSI Ser11
Server 12 1 CAT5E iSCSI Ser12
Server 13 1 CAT5E iSCSI Ser13
Server 14 1 CAT5E iSCSI Ser11
Server 15 1 CAT5E iSCSI Ser12
Server 16 1 CAT5E iSCSI Ser13
Storage 1
1 CAT5E iSCSI Sto1
1 CAT5E iSCSI-R Sto1
Storage 2
1 CAT5E iSCSI Sto2
1 CAT5E iSCSI-R Sto2
Storage 3
1 CAT5E iSCSI Sto3
1 CAT5E iSCSI-R Sto3
Storage 4
1 CAT5E iSCSI Sto4
1 CAT5E iSCSI-R Sto4
Storage 5
1 CAT5E iSCSI Sto5
1 CAT5E iSCSI-R Sto5
Storage 6
1 CAT5E iSCSI Sto6
1 CAT5E iSCSI-R Sto6

MediaSwift Admin & Install Guide 2-18
Server 1
Traffic Switch Green
1 CAT5E Eth4 Sev1
1 CAT5E Eth5 Sev1
1 CAT5E Eth6 Sev1
1 CAT5E Eth7 Sev1
Server 2
1 CAT5E Eth4 Sev2
1 CAT5E Eth5 Sev2
1 CAT5E Eth6 Sev2
1 CAT5E Eth7 Sev2
Server 3
1 CAT5E Eth4 Sev3
1 CAT5E Eth5 Sev3
1 CAT5E Eth6 Sev3
1 CAT5E Eth7 Sev3
Server 4
1 CAT5E Eth4 Sev2
1 CAT5E Eth5 Sev2
1 CAT5E Eth6 Sev2
1 CAT5E Eth7 Sev2
Server 5
1 CAT5E Eth4 Sev3
1 CAT5E Eth5 Sev3
1 CAT5E Eth6 Sev3
1 CAT5E Eth7 Sev3
Server 6
1 CAT5E Eth4 Sev4
1 CAT5E Eth5 Sev4
1 CAT5E Eth6 Sev4
1 CAT5E Eth7 Sev4
Server 7
1 CAT5E Eth4 Sev3
1 CAT5E Eth5 Sev3
1 CAT5E Eth6 Sev3
1 CAT5E Eth7 Sev3
Server 8
1 CAT5E Eth4 Sev4
1 CAT5E Eth5 Sev4
1 CAT5E Eth6 Sev4
1 CAT5E Eth7 Sev4
Server 9
1 CAT5E Eth4 Sev5
1 CAT5E Eth5 Sev5
1 CAT5E Eth6 Sev5

MediaSwift Admin & Install Guide 2-19
1 CAT5E Eth7 Sev5
Server 10
1 CAT5E Eth4 Sev4
1 CAT5E Eth5 Sev4
1 CAT5E Eth6 Sev4
1 CAT5E Eth7 Sev4
Server 11
1 CAT5E Eth4 Sev5
1 CAT5E Eth5 Sev5
1 CAT5E Eth6 Sev5
1 CAT5E Eth7 Sev5
Server 12
1 CAT5E Eth4 Sev6
1 CAT5E Eth5 Sev6
1 CAT5E Eth6 Sev6
1 CAT5E Eth7 Sev6
Server 13
1 CAT5E Eth4 Sev5
1 CAT5E Eth5 Sev5
1 CAT5E Eth6 Sev5
1 CAT5E Eth7 Sev5
Server 14
1 CAT5E Eth4 Sev6
1 CAT5E Eth5 Sev6
1 CAT5E Eth6 Sev6
1 CAT5E Eth7 Sev6
Server 15
1 CAT5E Eth4 Sev7
1 CAT5E Eth5 Sev7
1 CAT5E Eth6 Sev7
1 CAT5E Eth7 Sev7
Server 16
1 CAT5E Eth4 Sev6
1 CAT5E Eth5 Sev6
1 CAT5E Eth6 Sev6
1 CAT5E Eth7 Sev6
Management cables for switch Switch
Management Purple
3
CAT5E SW1 man
CAT5E SW2 man
CAT5E SW3 man
Management cables for switch 3
CAT5E SW4 man
CAT5E SW5 man
CAT5E SW6 man

MediaSwift Admin & Install Guide 2-20
PDU
Orange
2 CAT5E
PDU 2 CAT5E
PDU 2 CAT5E
PDU 2 CAT5E
Post Installation Steps
Perform the following steps after connecting the MediaSwift External (Grid).
Post Installation Steps in MediaSwift CLI
For more information about the CLI, see Using CLI Commands below.
To run the post installation steps:
1. As the network configuration is already complete, connect to the known
management IP address using an ssh capable client.
2. Log in using the admin username. The default password should match the system
ID. For example: JDQGS1J. Use the show systemid CLI command to see a list
of chassis IDs to set in the license.
3. Obtain a license file and apply it to the system using the CLI interface.
4. Modify the cluster_conf.xml file with the appropriate settings, such as time-
zone, VLANS and IP addresses – as fits the network configuration and system
settings.
5. Use the import and apply CLI command to apply the new cluster_conf.xml file
onto the platform. For more information see Configuring MediaSwift below.
6. After PANG is in Enabled mode, reset the graphs:
cd /srv/www/htdocs/graphs; ./reset_graphs.sh; ./run_ubview.sh
Post-Installation Steps in the NetXplorer GUI
The NetXplorer Administrator will need to configure a traffic policy which steers the appropriate
traffic from the NetEnforcer or Service Gateway to MediaSwift. The NetXplorer administrator should
follow the steps below:
Check the NetXplorer License
Ensure that the NetXplorer license includes traffic steering. You can verify this by selecting Tools >
NetXplorer Application Server Registration from the NetXplorer Menu bar
Configure Port Usage on the NE/SG

MediaSwift Admin & Install Guide 2-21
Port usage is configured by right-clicking the NE/SG, selecting configuration and choosing the NIC
tab. Your selection will depend on how MediaSwift is connected.
Steering from an AC-3040:
When steering traffic from an AC-3040 to a MediaSwift external grid, you will need to connect
between 2 fiber ports which are not in use for network links and the data switch or switches of the
external grid. There are two ways in which you can configure this connection:
Configure the connection as “external direct redirection”. In this case, the 1GE port on the switch to which you connect should be set to “access”
Configure the connection as “external switched redirection”. In this case, the 1GE port on the switch to which you connect should be set to “trunk”
In the example shown in Figure 2-7 below, the port usage for external port 2 on the AC-3040 is set to
“external switched redirection”
Figure 2-17: Configuring Port Usage on an AC-3040 for External Switched Redirection
Steering from an SG-Sigma:
When steering traffic from an SG-Sigma the port usage must be set to “external switched redirection”
as shown for example in Figure 2-7 below

MediaSwift Admin & Install Guide 2-22
Figure 2-18: Configuring Port Usage on an SG-Sigma for External Switched Redirection
Adding a New Local Service
For every instance where a NetEnforcer or Service Gateway is steering traffic to MediaSwift, you
should define a local service. These local services are then combined into a single Integrated Service.
From the “Service Activation” catalog add a “New Local service”. An example of how the Local
Service Catalog Entry should look when steering from an SG-Sigma to an external MediaSwfit grid
can be seen in Figure 2-19 below.

MediaSwift Admin & Install Guide 2-23
Figure 2-19: Local Service Catalog Entry
Set the Service Type field to “Generic Transparent Redirection”.
NOTE: For the sake of clarification, when steering to an external MediaSwift server, you should
set the service type field to “Generic Transparent Redirection”, and not “MediaSwift”
In the “device name” field, select the NetEnforcer or Service Gateway from which traffic will be
steered. The tracking method should be set to BFD, and the tracking source IP (Local IP address
Internal and Local IP address External) should not be used.

MediaSwift Admin & Install Guide 2-24
Adding a Server to the Local Service
Each of the cache engine servers needs to be configured separately. Choose “add” to add a server for
each one. A typical configuration can be seen in Figure 2-20Figure 2-10 below, where traffic is steered
from port L5 on an SG-Sigma to one of the fata switches and re-enters the SG-Sigma in port L6 from
the other data switch.
NOTE: It is also possible, where working with a single data switch, for the connection between
the SG-Sigma and the switch to be a single trunked connection, connected to one port
only on the SFC-200 blade, but with different VLANs to distinguish between the
direction in each case.
Figure 2-20: Adding a MediaSwift Server when Steering from an SG-Sigma

MediaSwift Admin & Install Guide 2-25
Creating “New Integrated Service”
Local Service Catalog entries are grouped together to form a single integrated service catalog which
will serve as the action for one or more rules in your policy.
From the “Service Activation” catalog add a “New Integrated Service”. Set the “Service Type” to be
“Generic Transparent Redirection” and select from the relevant services from the list of available local
services as shown in Figure 2-11 below.
Figure 2-21: Creating Integrated Service Catalog
Creating the Steering Rule in the Policy
Create any further catalog entries that are required for the policy (e.g: service groups of particular
protocols to be redirected, or quality of service to be enforced as part of the policy). Full instructions
on creating NetXplorer catalogs can be found in the NetXplorer Operations Guide Chapter 4.

MediaSwift Admin & Install Guide 2-26
Finally, create a new line, pipe or VC in the policy to redirect the appropriate traffic to the MediaSwift
service, using the catalog entries created. Full instructions on configuring the appropriate NetXplorer
policy can be found in the NetXplorer Operations Guide Chapter 5.
MediaSwift Admin & Install Guide 2-27
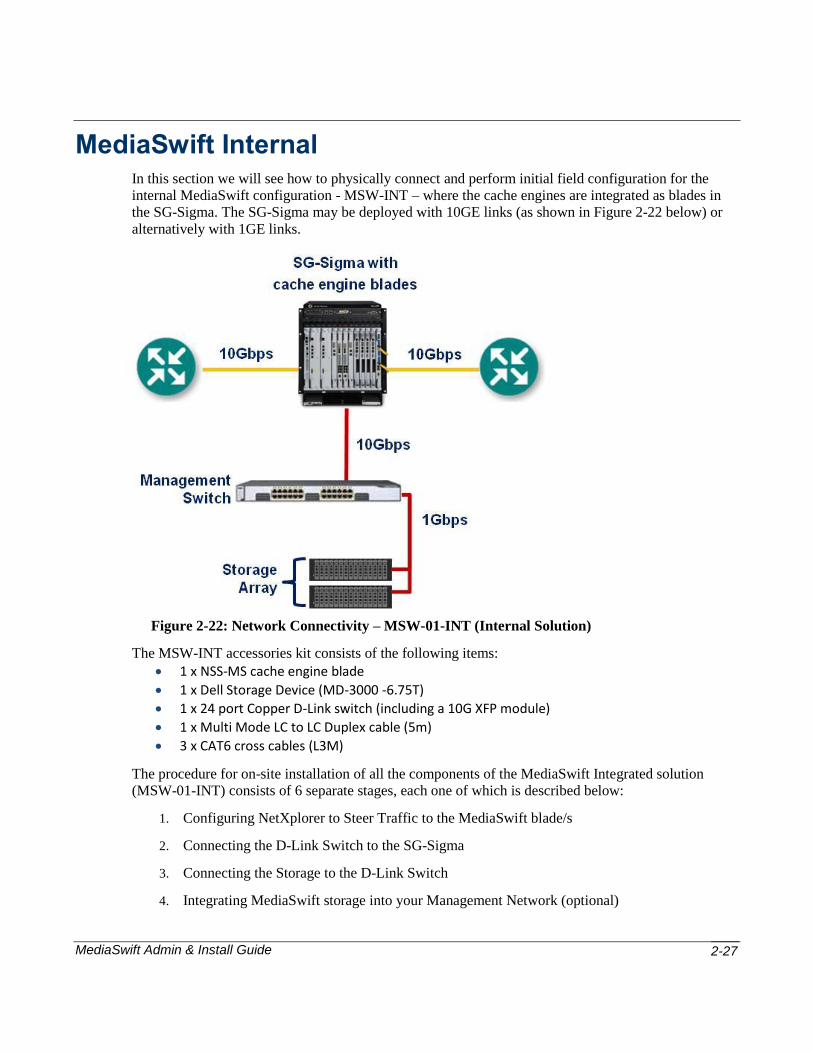
MediaSwift Internal In this section we will see how to physically connect and perform initial field configuration for the
internal MediaSwift configuration - MSW-INT – where the cache engines are integrated as blades in
the SG-Sigma. The SG-Sigma may be deployed with 10GE links (as shown in Figure 2-22 below) or
alternatively with 1GE links.
Figure 2-22: Network Connectivity – MSW-01-INT (Internal Solution)
The MSW-INT accessories kit consists of the following items:
1 x NSS-MS cache engine blade
1 x Dell Storage Device (MD-3000 -6.75T)
1 x 24 port Copper D-Link switch (including a 10G XFP module)
1 x Multi Mode LC to LC Duplex cable (5m)
3 x CAT6 cross cables (L3M)
The procedure for on-site installation of all the components of the MediaSwift Integrated solution
(MSW-01-INT) consists of 6 separate stages, each one of which is described below:
1. Configuring NetXplorer to Steer Traffic to the MediaSwift blade/s
2. Connecting the D-Link Switch to the SG-Sigma
3. Connecting the Storage to the D-Link Switch
4. Integrating MediaSwift storage into your Management Network (optional)

MediaSwift Admin & Install Guide 2-28
5. Inserting and Integrating the MediaSwift Blades
6. Changing the MediaSwift Management Blade IP Address
Stage 1: Configuring NetXplorer to Steer Traffic
The NetXplorer Administrator will need to configure a traffic policy which steers the appropriate
traffic from the NetEnforcer or Service Gateway to MediaSwift.
Before creating the steering policy, the NetXplorer administrator should login to the NetXplorer server
and ensure that the SG-Sigma in which the MSW blade/s are to be inserted has already been added to
the NetXplorer. Instructions for doing this can be found in the NetXplorer Operations Guide.
The NetXplorer administrator should follow the steps below:
NOTE: Full instructions on creating NetXplorer catalogs can be found in the NetXplorer
Operations Guide Chapter 4
WARNING: CLI access to the NSS-MS management blade is only possible once a policy has been
created in the NetXplorer which steers MediaSwift traffic to the NSS-MS blade!
NOTE: When steering to an internal or external MediaSwift service, L6 on SFC-A (slot 7) must
be kept free. When steering to an internal MediaSwift service from an SG-Sigma
supporting 1GE interfaces, all of the ports on the SFC-A (slot 7) must be kept free.
Network interfaces should be connected to SFC-B (Slot 8). A full set of guidelines on
port usage for the SFC-200 blades on the SG-Sigma can be found in the SG-Sigma
Hardware Guide, Chapter 5.
1. Create a new local service catalog entry from the service activation catalog. This
catalog entry will include details of the external MediaSwift service to which
traffic will be redirected
Figure 2-23: New Local Service Catalog Entry

MediaSwift Admin & Install Guide 2-29
2. Chose a name for the local service (e.g: MediaSwiftService)
3. Select “MediaSwift” as the service type. The “tracking method” should be
automatically set to “BFD” (bidirectional forwarding detection)
4. Click on the “Add” button to add a cache engine blade to the service
Figure 2-24: Adding A Cache Engine Blade
5. If the message shown in Figure 2-25 below appears, click “OK”
Figure 2-25: Warning Message
6. Choose an appropriate name for the blade (e.g: “MS12” for a cache engine blade
in slot 12)
7. Enter the appropriate slot for the blade in the “server slot” field, as shown in
Figure 2-27 below. Click OK.

MediaSwift Admin & Install Guide 2-30
Figure 2-26: Details of MS Blade
8. Repeat steps 4-7 for each MediaSwift blade
9. After adding all of the blades to the catalog validate all MediaSwift blades appear
in the servers list (as in Figure 2-27 below). Click the “Save” button.
Figure 2-27: Entering Blade Details

MediaSwift Admin & Install Guide 2-31
10. Create an integrated service catalog as shown in Figure 2-28 below.
Figure 2-28: New Integrated Service Catalog
1. Choose another name for the service. This name must be unique and different
from the local service (E.g: “MediaSwiftIntegrated”)
2. Select Media Swift as “Service Type”.
3. Click the available “Media Swift” local service catalog you created and click the
right arrow to move it the selected list as shown in Figure 2-29 below. Click
Save.

MediaSwift Admin & Install Guide 2-32
Figure 2-29: Integrated Service Entry Properties
4. Create any further catalog entries that are required for the policy (e.g: service
groups of particular protocols to be redirected, or quality of service to be
enforced as part of the policy)
5. Create a new line, pipe or VC in the policy to redirect the appropriate traffic to
the MediaSwift service, using the catalog entries created. Choose the Integrated
Service catlog you created as the rule‟s action. Full instructions on configuring
the appropriate NetXplorer policy can be found in the NetXplorer Operations
Guide Chapter 5.
6. Finally, to configure the SG-Sigma “port usage”, from the network tree, right
click the relevant SG-Sigma and choose “configuration” as shown in Figure 2-30
below.

MediaSwift Admin & Install Guide 2-33
Figure 2-30: Service Gateway Configuration
7. If you are working with an SG-Sigma with 10GE interfaces, the external switch
is connected to L4 on the SFC in slot 7 (SFC_A). If you are working with 1GE
interfaces, the external switch is connected to L3 on the SFC in slot 7 (SFC_A).
From the “NIC” tab, choose the SFC_A_L4 port from the list (or SFC_A_L3 if
working with a 1GE SG-Sigma) and click the “Edit” button as shown in Figure
2-31 below.
Figure 2-31: Configuring SG-Sigma NICs
8. Select “Media Swift Storage” as the port usage and click the “Apply” button.

MediaSwift Admin & Install Guide 2-34
Figure 2-32: Port Usage
9. Click the “Save” button.
Stage 2: Connect and PowerUp the D-Link Switch
Follow the instructions below to connect the D-Link switch to the SG-Sigma and to power the switch
up. The D-Link switch is shipped from Allot, preconfigured with the VLANs required to map between
the SG-Sigma (port 25) and the storage device (port 24).
NOTE: Allot supplies an SFP+ 10GBase SR transceiver as part of the accessory kit, together with the
multimode fiber optic cable.
1. Make sure that you have the SFP+ 10GBase SR transceiver inserted into L4 on
the SFC-200 in slot 7. (or L3 if you are working with a 1GE SG-Sigma) In cases
where the port is already populated with a 1G Ethernet transceiver, you must
replace this with the supplied transceiver.
2. Connect the appropriate port on the SFC-200 in slot 7 to the 10G Ethernet port
labeled 25 on the rear of the D-Link switch. Use the multimode fiber cable
supplied in the accessory kit.
3. Power up the D-Link Switch by inserting the power cable on the rear side and
wait for the powerup sequence to be completed
4. Verify that the LINK LED associated to port 25 is lit
5. Verify that the LINK LED for L4 (or L3 if working with a 1GE SG-Sigma) on
the SFC-200 in Slot 7 is green

MediaSwift Admin & Install Guide 2-35
Stage 3: Connect the Storage to the D-Link Switch
Connection to the storage device is via a 1GE copper interface. A direct copper connection between the
SFC-200 and the Storage device is not possible, so an intermediate switch is required, even if
connectivity to only one storage entity is required. Follow the instructions below to connect the Dell
MD3000i storage to the D-Link switch and to change the IP address on the Storage for management
purposes.
NOTE: Before powering up the storage device, make sure that the D-Link switch is not connected to
your management network
Figure 2-33: Hardware Connections for the MD3000i Storage
1. Connect the iSCSI interface (labeled 1 in Figure 2-33 above) to port 24 of the D-
Link switch using a copper Ethernet cable (supplied).
2. The storage has two power feeds for redundancy. Connect to two different power
sources to enable power redundancy. Power up the storage by connecting power
cables to the rear side (labeled 4 and 5 in Figure 2-33 above) and toggling the two
power switches on the rear side of the unit.
3. Verify power is up by checking that the power LEDs on each power supply are
lit.

MediaSwift Admin & Install Guide 2-36
Stage 4: Integrate MediaSwift Storage into your Management Network
This is an optional stage for storage maintenance purposes only. The instructions below show how to
change the IP address of the storage so that you can manage it on your management network. In order
to complete this stage you will need to install Dell‟s “Modular Disk Storage Manager” application on
your management station.
NOTE: The storage is shipped pre-configured with IP address 10.200.128.101 for port 0 (labeled 2 in
Figure 2-33 above) and 10.200.128.102 for port 1 (labeled 3 in Figure 2-33 above)
1. Configure your laptop to share the same subnet as the storage management
network. For example: 10.200.128.xxx
2. Connect both management ports (labeled 2 and 3 in Figure 2-33 above) to the D-
Link switch using any port on the front panel other than port 24 and 23.
3. Connect an Ethernet port from your laptop to the D-Link swith using any port on
the front panel except ports 24 and 23.
4. Check connectivity to the storage management by pinging the storage
management interfaces 10.200.128.101 and 10.200.128.102
5. Install “Modular Disk Storage Manager” application on your laptop. The
application can be downloaded from http://support.dell.com
6. Open the Modular Disk Storage Manger GUI and choose the “New” option as
shown in Figure 2-34 below
Figure 2-34: Adding New Managed Storage Device
7. A “no managed devices” dialog will open as shown in Figure 2-35 below.
Choose “manual” and click OK.

MediaSwift Admin & Install Guide 2-37
Figure 2-35: No Managed Devices Dialog
8. The “Add New Storage Array – Manual” Dialog will open as shown in Figure
2-36 below. Fill in the current management IP addresses of the controllers
10.200.128.101, 10.200.128.102 in the “Raid Controller module” address text
boxes and click “Add”.
Figure 2-36: Add New Storage Array - Manual Dialog
9. You will be prompted if you wish to add another storage array, as shown in
Figure 2-37 below. Click “No”.

MediaSwift Admin & Install Guide 2-38
Figure 2-37: Storage Array Added Dialog
10. In order to change the Ethernet management ports, from the “Tools” tab, select
“Configure Ethernet Management ports” as shown in Figure 2-38 below.
Figure 2-38: Modular Disk Storage Manager GUI
11. The “Configure Ethernet Management Ports” page will appear, as shown in
Figure 2-39 below. From the “Ethernet Port” dropdown list, select port
“Controller 0, Port 1“.
12. Configure the required IP address which matches your management network:
XX.XX.XX.XX0. The subnet mask should be 255.255.0.0
13. Now select port “Controller 1, Port 1“ from the “Ethernet Port” dropdown list.

MediaSwift Admin & Install Guide 2-39
14. Again, configure the required IP address of the management interface on the
second controller - IP XX.XX.XX.XX1. Again, the subnet mask should be
255.255.0.0
15. Click the “OK” Button.
Figure 2-39: Configuring Ethernet Management Ports
16. You will be asked if you wish to continue as shown in Figure 2-40 below. Click
“Yes”.
Figure 2-40: Confirm Change Network Configuration Dialog

MediaSwift Admin & Install Guide 2-40
17. Disconnect the management ports (labeled 2 and 3 in Figure 2-33 above) from
the D-Link switch and connect them to your local management network.
Connecting both these ports enables storage management redundancy.
Stage 5: Inserting the MediaSwift Blades
In this stage we will insert the MediaSwift blades into the chassis and integrate them into the system.
MediaSwift (NSS-MS) blades may only be inserted in slots 13, 12, 11 or 10 of the Service Gateway
chassis, starting from the right-hand side. One to four NSS-MS blades may be installed depending on
the available slots and your requirements.
One of the blades must have the management server installed on it and this blade is marked with a
sticker as shown in Figure 2-41 below. This blade MUST be installed in slot 13 (second from the right
when facing the chassis).
Figure 2-41: NSS-MS Management Server Blade Indicator Sticker
Each of the other NSS-MS blades includes a sticker indicating into which slot it should be inserted.
WARNING: Each cache engine blade should only be inserted into the slot specified on the sticker.
1. Verify that there is Ethernet cable connected to SG-Sigma Management port M1
on SFC-200 on slot #7.
2. If the configuration consists of more than one blade, begin by inserting each of
the cache engine blades (from right to left, not including the management blade).
For each cache engine blade which you insert, follow steps 3 and 4 below. After
completing this procedure for each cache engine blade, carry out the same
procedure for the management blade in slot 13.
3. Insert the cache engine blade into the chassis according to its slot marking. Each
NSS-MS blade has two ejector handles that help to insert and eject the board
from the chassis and make sure that the board is properly seated. When you insert
(or replace) the blade and the ejector handles slide into the upper and lower

MediaSwift Admin & Install Guide 2-41
notches in the chassis, be sure that you push both ejector handles toward the
faceplate of the board until the handles click into place.. There is a microswitch
located behind the faceplate of the blade that holds the blade in the closed
position when it is fully inserted.
Figure 2-42: Lower Ejector Handle in Closed Position
The ejector handles need to be fully closed in order for the board to boot up.
NOTE When inserting (or replacing) a blade, if the In Service LCD does not show Green, push the bottom handle towards the faceplate until you hear a click. When you slide the blade into the chassis and engage the right handle, you enable the Microswitch. Be sure that the lower ejector handle is properly engaged.
4. Wait for the blade to complete booting. The power sequence ends when the Hot
Swap Blue LED turns off. Then verify that the Hard Drive LED for this blade has
stopped blinking
5. In the SG-Sigma, open an SSH session to the SFC-200 in slot 7, by entering ssh
11.11.11.70. Enter ac_reboot to reboot the blade. Reboot SFC-200 blade on slot
#7, and wait for 5 minutes until the blade completed booting. Wait for command
prompt.
ac_reboot
6. Reboot the Sigma SGSV-110 Blade (11.11.11.10), and wait for command
prompt.
ac_reboot
7. Verify that there is connection between the Sigma SGSV-110 blade to all MS
blades in the chassis. Run a ping test for each blade, according to the syntax
below, where XX = slot Number (13, 12, 11 or 10)
ping 11.11.11.XX0

MediaSwift Admin & Install Guide 2-42
Stage 6: Changing the MediaSwift Management Blade IP Address
The MediaSwift management blade, inserted in slot 13, has a default IP address of 10.200.5.32. In
order to enable access to the MediaSwift GUI, you will need to change this IP address to an address on
your management network. To change the default IP address, follow the instructions below:
1. Login to the MediaSwift management blade as a root user via padmin. This is
done by opening an SSH session to the SG-Sigma and entering the following:
password:$allot
su –
password:$allot
2. In the /tmp folder on the hard drive, you will find two relevant configuration files
for the management blade:
Allot_conf_for_slot13.xml
Allot_conf_for_slot12.xml
Depending on which slot you will be inserting the management blade, save a
local copy of Allot_conf_for_slotXX.xml as Allot_conf.xml. This can be done
for example by entering the command below:
cp /tmp/Allot_conf_for_slot13.xml /tftpboot/Allot_conf.xml
3. Edit Allot_conf.xml, inserting the IP addresses to be used in this specific MS
configuration. In the example below, all of the fields that need to be edited in the
allot_conf.xml file are highlighted in Gray

MediaSwift Admin & Install Guide 2-43
In the example above, 10.200.5.32 should be substituted with the management interface of the NSS-
MS manager blade. The default alert-email address [email protected] should be substituted with a
valid system admin email. The 2 controller IP addresses 10.200.128.101 and 10.200.128.102 should be
substituted with the storage management interface IP addresses.
4. Look for the "blades" section in the file, and set the number of blades to meet the
number of all NSS-MS blades (including the Management blade) installed in the
target system. This number should be 1 if a MS Manager only is used, and may
be up to 4 blades:
<blades>4</blades>
5. Delete the sections showing the irrelevant blades. The default file should contain 4 blades, numbered from 4 to 1 (4..3..2..1) . For example - if the target system contains two blades (one management and one cache engine) - you should delete blades 4 and blade 3 and leave blade 2 and blade 1.
Locate the following section and change the relevant values as
relevant, to meet the field configuration:
<mgmt-config>
<ipaddr>10.200.5.32</ipaddr>
<netmask>255.255.0.0</netmask>
<default-gw>10.200.0.1</default-gw>
<nameserver>0.0.0.0</nameserver>
<alert-email>[email protected]</alert-email>
<site_name>UB500000 Allot sigma integration</site_name>
</mgmt-config>
<web-config>
<controller>
<ip>10.200.128.101</ip>
</controller>
<controller>
<ip>10.200.128.102</ip>
</controller>
</web-config>
<common>
<ntp>
<server-ip>11.11.11.250</server-ip>
<timezone>GMT+2</timezone>
</ntp>
<snmp>
<trap-ip>10.11.12.1</trap-ip>

MediaSwift Admin & Install Guide 2-44
6. Access the MediaSwift management blade and login as follows:
su –
password:$allot
su – admin
PeerApp management:
Cli version - 3.1.462
Snmp version - PeerApp management node software version 3.1.462
7. In order to login to the CLI in enable mode, you will need to enter the system ID
as your password. In the example below, use the string that appears after the
asterisk for the password, avoid copying the *
console> show systemid
*A431EA3003
A431EA3005
console> enable
Password: A431EA3003
8. Now enter config mode by entering the command “config” and apply the
configuration file by entering the command below:
console> config
import localhost Allot_conf.xml
apply
exit
9. Run the command below and wait 5 minutes.
<blade id="4">
<cache-engine>
<service>
<net>
<network_interfaces number="4">
<nic nic_index="0">
<name>eth4.3498</name>
</nic>
<nic nic_index="1">
<name>eth4.3496</name>
</nic>
<nic nic_index="2">
<name>eth4.3499</name>
</nic>
<nic nic_index="3">
<name>eth4.3497</name>
</nic>
</network_interfaces>
</net>
</service>
</cache-engine>
</blade>

MediaSwift Admin & Install Guide 2-45
oper service start
exit
exit

MediaSwift Admin & Install Guide 3-46
Chapter 3: Working with MediaSwift Management Tools
This chapter describes how to use the management tools provided by MediaSwift, including the CLI,
file upload and download capabilities, configuration file, and SNMP. The information provided in this
chapter is required to perform the tasks explained in this guide.
MediaSwift uses a number of different tools to help you configure, manage, and monitor its
performance. Some management tasks allow you a choice of tools. For instance, you can view statistics
using both SNMP and using CLI.
The table below lists the different MediaSwift management tools that are explained in this chapter.
MANAGEMENT TOOL DESCRIPTION
Command-Line Interface
(CLI)
Performs the bulk of configuration and management tasks.
For a complete description of MediaSwift CLI commands,
refer to CLI Reference on page 7-1.
TFTP Allot provides license and software upgrades utilizing upgrade
files downloaded to MediaSwift via a TFTP server.
In addition, configuration is modified by downloading a
configuration file via TFTP.
Configuration File Configures operational modes, caching, and SNMP settings.
SNMP For monitoring or viewing MediaSwift operational statistics.
Working with the CLI The Command-Line Interface (CLI) can be used to perform configuration, management, and
monitoring tasks, such as:
Configuring management settings, including:
Configuring passwords.
Configuring management IP addresses.
Configuring local time.
Performing system maintenance, including:
Managing the caching service.

MediaSwift Admin & Install Guide 3-47
Managing servers (Grid Configuration only).
Monitoring the system (You can also use SNMP for this purpose)
Upgrading the system, including:
Upgrading software.
Upgrading licenses.
NOTE Upgrading the system software or license is performed by downloading a new software or license file to MediaSwift.
Management Connectivity
MediaSwift provides three physical means of connection to the management system:
RS-232 – Console connection to the CLI – text based configuration and monitoring
system.
Out-of-band Ethernet – TCP connectivity to the management system. Grid
configuration also provides UDP connectivity to the management system. Remote
access is via SSH V2 (CLI) or SNMP.
In an out-of-band management network, the network access control should allow access
to the following ports for complete management functionality:
TCP 22 (SSH), 161 (SNMP).
UDP 161(SNMP).
Serial Over LAN (SOL) – Remote console connection to the CLI-text based
configuration and monitoring system that is redirected via an IPMI session over IP. This
means of connection is provided by the Standalone configuration only.
Getting Started with the CLI
There are two ways to access the system CLI:
Serial console – The serial console is used to access the Regular CLI and the Rescue
CLI.
The Rescue CLI is used for entering the basic network and login information that you
need in order to get the system up and running and is only available from the serial
console.
To access the Regular CLI, log in as admin.
To access the Rescue CLI, log in as rescue.

MediaSwift Admin & Install Guide 3-48
External MediaSwift models ship with default passwords for both admin and rescue
users matching the specific system serial number. Make sure to change them..
Internal MediaSwift models will by default have root and admin passwords of $allot
Local area network (LAN) connection using SSH.
Use SSH to connect to the CLI over a LAN connection for regular access to the CLI.
When accessing the CLI using a LAN connection, use the login admin.
Before configuring the network settings for MediaSwift, or if you have changed your
network settings so that MediaSwift is inaccessible from outside, you must use the serial
console connection.
To log into the CLI using the serial console:
1. Connect to the USB port on the leftmost server in the chassis using USB-to-serial
dongle. Use the following serial settings: 57600,N,1; hardware and software
flow control disabled.
A login window appears
2. Enter your maintenance rescue login and press Enter.
3. Enter your rescue user password and press Enter. Wait as the setup script
completes, and the system automatically logs out.
To log into the CLI using SSH over a LAN connection:
1. Connect to MediaSwift using ssh from anywhere on your LAN. A login prompt
appears.
2. Enter admin and press Enter.
3. Enter the password and press Enter. The CLI prompt <console> appears.
To open help in the CLI and view the list of commands:
1. In the CLI, enter help or press ?.
To log out of the system:
1. In the CLI, enter exit.
CLI Command Editing Features
You can edit CLI commands using the following keyboard keys:
Press the TAB key to auto-complete a command. If multiple choices are available, they
are displayed, option per line.

MediaSwift Admin & Install Guide 3-49
Press ? to display a command and its parameter hints. If a basic command is incomplete,
press this key to display multiple completion options and descriptions, one per line.
After a command completes, you can displays the next parameter hint by pressing
SPACEBAR+?.
Use the UP and DOWN ARROW keys to navigate in the commands history
CLI Modes
MediaSwift supports the following CLI modes:
Regular Mode – Allows you to view system configuration and statistics without
changing the settings.
In Regular mode, the CLI regular prompt appears: console, and you can enter Enable
mode or exit the CLI.
Enable Mode – Allows you to update the license or software, set the date, and
configure the login name and password.
In Enable mode the CLI enable prompt appears: console#, and you can enter
Configuration mode, or return to Regular mode using the exit command.
Configuration Mode – Allows you to configure any settings on the system.
In Configuration mode the CLI prompt appears: configuration#, and you can return
to Enable mode using the exit command.
NOTE Configuration mode can only be used by a single user at a given time. If you exit Configuration mode without applying your changes, these changes are lost
Server Mode (Grid Configuration Only) – Allows you to start, stop, or restart an
individual server, and set the server‟s log level.
In Server mode the CLI server appears: oper server <server number> # (for
example: oper server 1#), and you can return to Enable mode using the exit
command.
Rescue CLI – In addition to the Regular CLI modes, the Rescue CLI allows you to
recover incorrect management network configuration, and lost or forgotten CLI
passwords.
In Rescue CLI mode the CLI rescue prompt appears: rescue@ce-1#, and you can
execute the following commands:
access – Reset the white and black management access lists.
passwords – Reset the admin and rescue passwords.

MediaSwift Admin & Install Guide 3-50
network – Configure the following network parameters: IP address, netmask,
default gateway, and DNS server.
exit – Exit the Rescue CLI mode.
help – Print a list of Rescue CLI commands. This command can also be
executed by entering ? at the CLI rescue prompt.
After executing these commands, you can immediately perform another one, or exit.
To switch from Regular mode to Enable mode:
1. At the CLI prompt, enter enable. A password prompt appears.
2. Enter the Enable mode password and press Enter. You are now logged in to
Enable mode. The CLI enable prompt appears: console#.
NOTE Your system serial number serves as the default password for the Enable mode. Make sure you change it upon installation.
3. While logged into Enable mode, you may sometimes need to run configuration
commands. To do this you must switch to Configuration mode.
To switch to Configuration mode:
At the CLI prompt, enter config. You are now in Configuration mode.
To exit Configuration mode:
At the CLI config prompt, enter exit. You are returned to Enable mode.
To switch to Server mode:
At the CLI enable prompt, enter oper server <server number>, where
<server number> is the number of the server you want to control (for example: 1).
The CLI server prompt appears: oper server <server number> # (for example:
oper server 1#)
To exit Server mode:
At the CLI server prompt, enter exit. You are returned to Enable mode.
To switch from enabled user to normal user:
At the CLI enable prompt, enter exit. You are returned to the Regular mode.

MediaSwift Admin & Install Guide 3-51
Working with the TFTP Server To set up MediaSwift for files uploading and downloading when using Standalone configuration, you
must have an external TFTP server. In Standalone configuration, MediaSwift uses a TFTP server in
order to:
Update MediaSwift software.
Update MediaSwift license.
Update the configuration by means of changes to the configuration file.
Before downloading a file to MediaSwift, place the file onto the TFTP server.
No TFTP Server is required when MediaSwift is in Grid configuration.
NOTE You can also upload files to MediaSwift using the MediaSwift GUI. This eliminates the need of working with an external TFTP server.
Working with the Configuration Files Configuration files are used to configure different aspect of the platform‟s operation. Each file is
responsible for different operational activities, as follows:
Operational modes, cache settings, and SNMP settings for MediaSwift. The
configuration file is an XML file.
Traffic categorization rules are defined in two distinct files. Major categories, refered to
as groups, are listed the first file, and their sub-categories, referd to as signatures, aer
listed in the second file. For example, a major category listed in the first file can be
Video Streaming, and its sub-categories can be youtube, google.video, video.facebook,
defined in the second file.
Configurations are saved in text format and can be backed up on remote servers via TFTP. In
Standalone configuration, the text based configuration files may be manipulated remotely and then
downloaded to the appliance. In Grid configuration, the text based configuration files may be
manipulated remotely and then downloaded to MediaSwift management server, providing a means of
easily maintaining and altering configurations of multiple appliances (this procedure is not
recommended for either configuration.)
To change the configuration file and apply changes:
1. Upload the current configuration file:

MediaSwift Admin & Install Guide 3-52
CONFIGURATION FILE RESPONSIBLE FOR:
OPERATION OPERATIONAL MODES, CACHE SETTINGS, AND SNMP SETTINGS
TRAFFIC CATEGORIZATION RULES
Export (upload)
existing configuration
file
configuration# export <IP address>
<filename>
where <IP address> is the IP address
of your TFTP server and <filename> is
the name of the file to which to write
the current configuration.
console# detection_rules
export_groups <IP address>
<filename>
console# export signatures <IP
address> <filename>
where <IP address> is the IP
address of your TFTP server and
<filename> is the name of the major
categories configuration file
(groups), or sub-category
configuration file (signature).
2. The configuration file is then uploaded to your TFTP server.
3. Edit the configuration file using a text or XML editor.
NOTE When editing the configuration file, edit the field values only and do not change or erase the XML markup tags. If XML tags are changed, configuration will be rejected upon loading.
4. After editing the file, save your changes.
5. Download this new configuration file to MediaSwift. Make sure the new
configuration file is located on your TFTP server.
CONFIGURATION FILE RESPONSIBLE FOR:
OPERATION OPERATIONAL MODES, CACHE SETTINGS, AND SNMP SETTINGS
TRAFFIC CATEGORIZATION RULES
Import new
configuration configuration# import <IP address>
<filename>
where <IP address> is the IP address
of your TFTP server and <filename> is
the name of the new configuration file.
console# detection_rules
import_groups <IP address>
<filename>
console# import signatures <IP
address> <filename>
where <IP address> is the IP
address of your TFTP server and
<filename> is the name of the major
categories configuration file
(groups), or sub-category
configuration file (signature).
6. For each configuration type, at the CLI prompt, enter the following:
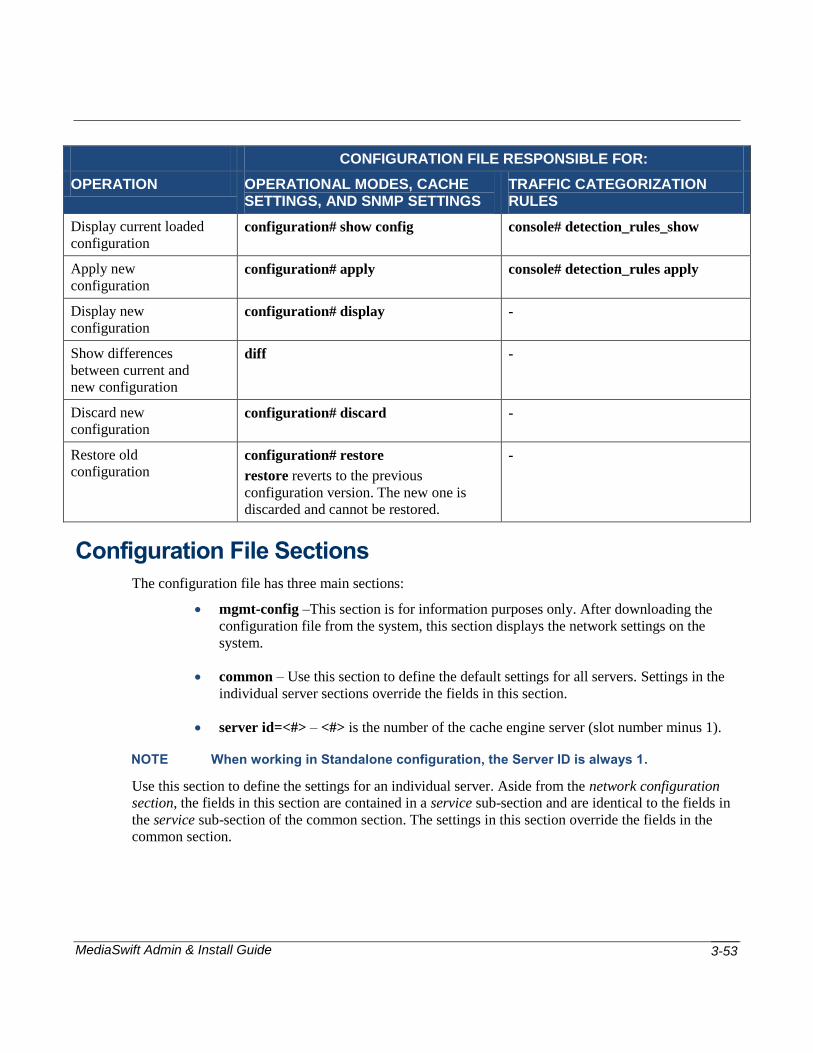
MediaSwift Admin & Install Guide 3-53
CONFIGURATION FILE RESPONSIBLE FOR:
OPERATION OPERATIONAL MODES, CACHE SETTINGS, AND SNMP SETTINGS
TRAFFIC CATEGORIZATION RULES
Display current loaded
configuration
configuration# show config console# detection_rules_show
Apply new
configuration
configuration# apply console# detection_rules apply
Display new
configuration
configuration# display -
Show differences
between current and
new configuration
diff -
Discard new
configuration
configuration# discard -
Restore old
configuration configuration# restore
restore reverts to the previous
configuration version. The new one is
discarded and cannot be restored.
-
Configuration File Sections
The configuration file has three main sections:
mgmt-config –This section is for information purposes only. After downloading the
configuration file from the system, this section displays the network settings on the
system.
common – Use this section to define the default settings for all servers. Settings in the
individual server sections override the fields in this section.
server id=<#> – <#> is the number of the cache engine server (slot number minus 1).
NOTE When working in Standalone configuration, the Server ID is always 1.
Use this section to define the settings for an individual server. Aside from the network configuration
section, the fields in this section are contained in a service sub-section and are identical to the fields in
the service sub-section of the common section. The settings in this section override the fields in the
common section.

MediaSwift Admin & Install Guide 3-54
Working with SNMP MediaSwift provides the ability to remotely monitor the system, via the CLI when the user is online, or
via a third party monitoring system, using SNMP and SNMP traps. There are three types of available
SNMP information:
SNMP – Provides access to all the statistics and environmental information in real-time.
SNMP Traps – Provides alarm triggered notification, including hardware failures (fans,
temperature, power, physical interfaces) and performance thresholds such as CPU
utilization, and bandwidth consumption.
iDRACK Trap Forwarding – Provides Dell iDRACK hardware SNMP traps
forwarding, from the blades to management system, such as Dell Open Manage IT
Assistant.
SNMP status information can be monitored using any standard SNMP tool. All status information
available via SNMP is also available using status commands in the CLI. The SNMP is provided using a
private MIB (SNMP v2) environment.

MediaSwift Admin & Install Guide 4-1
Chapter 4: Configuring MediaSwift
This chapter describes the steps necessary to configure and perform maintenance on the system if
changes are required on a running platform. Configuration types described in this chapter include the
following:
Main operational features (Quick Jumpstart).
CLI-based configuration:
Configuring Passwords.
Configuring Management Network.
Configuring Local Time.
File-based configuration:
Configuring SNMP.
Confirming MediaSwift Interaction with NetEnforcer/Service Gateway
To confirm NetEnforcer/Service Gateway Interaction:
In the configuration file, confirm the following field reads as indicated:
common (or server<#>) service net L7
If the field indicates any layer other than L7 (i.e. L4), edit it to read L7.
Configuring P2P Protocols.
Configuring Bandwidth Management.
Configuring Traffic Forwarding Options.
Configuring Caching Policies.
Configuring Virtual IP Address.
Configuring Server Data IP Address.
Configuring HTTP Hosts Not to be Cached.
Configuring Traffic Categories (Internal Only)

MediaSwift Admin & Install Guide 4-2
Traffic categorization rules are defined in two distinct files. Major categories, refered to as groups, are
listed the first file, and their sub-categories, referd to as signatures, aer listed in the second file. For
example, a major category listed in the first file can be Video Streaming, and its sub-categories can be
youtube, google.video, video.facebook, defined in the second file.
Edit the downloaded categories (groups) configuration file, and insert the new group. Pay attention to
its sub-category types (signatures) contained in the signatures configuration file.
NOTE Each sub-category (signature) must include both the flowing definitions:
All rules involved in this signature.
The signature itself.
For example, streaming is entered as a category (group) in the category configuration file:
<Group id="streaming">
<names>youtube.video </names>
</Group>
For example, for the streaming category (group) youtube uis added as a sub-category (signature)
in the sub-category configuration file. The rules are first defined, and then the signature is stated:
<Rule id="youtube">
<Location>DOMAIN</Location>
<Match>youtube.com</Match>
</Rule>
<Rule id="youtube.videoplayback">
<Location>URI</Location>
<Match>videoplayback?</Match>
</Rule>
<Rule id="youtube.getvideo">
<Location>URI</Location>
<Match>get_video?</Match>
</Rule>
<Signature id="youtube.video">
<Rules_list>youtube youtube.videoplayback</Rules_list>
<Rules_list>youtube youtube.getvideo</Rules_list>
</Signature>
NOTE For each sub-category (signature), the following must apply:
All rules must be met in each rules list.
A signature is detected by at least one rules list that is met.
Applying the Configuration Changes.

MediaSwift Admin & Install Guide 4-3
MediaSwift Platform Features The following is a list of system features that are available on MediaSwift. Some of these features are
configurable using the platform configuration file and some through the CLI.
Caching Specific Features Black list of hashes – Specific hashes can be black-listed as non-cacheable, and are then not cached
or provided again to users, if already cached. The black list is maintained using CLI, allowing
administrators to add, remove or view the list of hash ID(s) on the black list.
Selective caching – Deals with the ability to control and dynamically change the popularity
decisions related to file caching. Stages will be changed dynamically as oppose to fixing a decision
through a static configuration.
Small memory buffer – When traffic is very low due to shaper configuration, the memory buffer
size might be too large (in memory) for this shaper. This feature allows control over the buffer size,
to optimize memory use and tailor it to the way the traffic is shaped. If the buffer size does not
match the shaped traffic size – the cache will be filled-up too slowly.
To control the buffer:
In the cluster.conf file, add:
<memory>
<small_io_blocks>8000</small_io_blocks>
</memory>
Bandwidth-per-connection management – Controls the cache-out sessions (bandwidth -
management), allowing a top limitation to be placed on the cache-out sessions.
To control cache-out sessions:
In the cluster.conf file, enter:
<bandwidth-management>
<enable-bandwidth-management>1<enable-bandwidth-management>
<bandwidth-per-connection>100000<bandwidth-per-connection>
</bandwidth-management>
Administrative state Locked – Locks a specific server from handling traffic.
To lock a server from handling traffic:
In the cluster.conf file, enter:
<cache-engine>
<admin_states> locked</admin_states>
</cache-engine>
Upstream caching – Last mile architecture suffers from limited upstream resources which are
gravely affected from peer-to-peer symmetrical traffic pattern. Upstream caching relieves network
MediaSwift Admin & Install Guide 4-4
congestion by providing cached pieces to peers in other “zones”, directly from the cache instead of
the last mile user.
HTTP caching –MediaSwift caches any large HTTP documents (such as, video files, video
streaming and images) in order to reduce bandwidth usage, and to improve user experience through
accelerated document download time. Transparent HTTP caching is implemented; therefore any
standard HTTP contained document can be cashed regardless of the URL associated with it.
To support the HTTP protocol:
In the cluster.conf file, <protocols> section, add:
<enable-http>1</enable-http>
ARES protocol support – Ares Galaxy is an open source P2P file sharing application and protocol
that uses its own decentralized supernode/leaf network.
To support the ARES protocol:
In the cluster.conf file, <protocols> section, add:
<enable-ares>1</enable-ares>
PANDO support –MediaSwift platform supports the Pando protocol. Pando is proprietary software
for P2P file sharing. It is mainly intended for sending files using both peer-to-peer and client-server
architectures that would normally be too large to send via more conventional means.
Pando uses a 256-bit end-to-end encryption method to secure communication among peers.
In comparison with traditional BitTorrent file transfer operation, here a copy of the shared file is
uploaded to Pando servers and remains there for a limited time, seeding it. This way, the file remains
available even after the original sender goes offline.
To support Pando protocol:
In the cluster.conf file, <protocols> section, add:
<enable-pando>1</enable-pando>
Block specific URL/HOST/subnet caching – Configure MediaSwift to not cache specific
URLs/HOSTs or subnets. Each URL seen in a GET request that floats through the platform is
compared to all the entries in the URLs/HOSTs set or subnet within this configuration section.
When a match is found, the cache-in and cache-out are skipped, and the request is forwarded as is.
NOTE The entry number is limited to 64 in this configuration option. Use this option with caution. It imposes an extra burden on MediaSwift, since it compares all the entries in the table with each URL floating through the system.
Configuration statements:
The following <no_cache_host_list> matchs a specific host name or specific IP address.

MediaSwift Admin & Install Guide 4-5
<policy>
<no_cache_host_list>
<host_no_cache>shop.offlineshoppppping.com</host_no_cache>
<host_no_cache>202.202.1.16</host_no_cache>
</no_cache_host_list>
</policy>
The host_no_cache option supports wildcard configuration on both a host domain-name and an IP address. The following will match any host on a specific domain (*.offlineshopping.com), specific host name, and any host in a 202.202.1.* network.
<policy>
<no_cache_host_list>
<host_no_cache>offlineshopping.com</host_no_cache>
<host_no_cache>202.202.1</host_no_cache>
</no_cache_host_list>
</policy>
Will match the following:
aaa.offlineshopping.com
123456offlineshopping.com
jjj.offlineshoping.com.au
122.202.202.1
202.202.1.3
The following <no_cache_url_list> matchs a URL that contains the specified string:
<policy>
<no_cache_url_list>
<url_no_cache>video_id</url_no_cache>
<url_no_cache>videoplayback</url_no_cache>
</no_cache_url_list>
</policy>
Will match the following:
www.thegame.com/video_id/movie=8979
www.thegame.com/video_id/movie=349587?speed=4
Will not match:
www.thegame.com/playvideo/video_id=89779
as the video_id pattern does not match the beginning of the URL, but starts after playvideo/.
The following <no_cache_subnet_list> matchs any L4 IP address associated with either the
client requesting the content or the server servicing the request. Hence, if one of the IP addresses
associated with a specific session falls into the subnet category specified in this policy, the information
will not be cached-in or cached-out :
<policy>
<no_cache_subnet_list>
<subnet_no_cache>192.168.0.150</subnet_no_cache>
<subnet_no_cache>192.168.1.0/24</subnet_no_cache>

MediaSwift Admin & Install Guide 4-6
<subnet_no_cache>192.168.2.150-
192.168.2.158</subnet_no_cache>
</no_cache_subnet_list >
</policy>
To disable traffic generation, you can configure Forward Only mode:
<p2p-testing>
<out_mode>CACHE_IN</out_mode>
</p2p-testing>
System Load Monitoring Check overload interval – Defines the schedule in which the NICs are polled for packet drop.
Within this time, the packet delay measured for all NICs is also polled. It is calculated for all NICs
and not per single NIC.
overload_drop_percent – Any packet drop above 2.55 of the traffic an action is taken
(should happen several times, per: DEFAULTVAL_failed_overload_tests)
overload_packet_delay – Defines the number of milliseconds after which a packet delay
is triggered (should happen multiple times, per:
DEFAULTVAL_failed_overload_tests)
failed_overload_test – Defines the number of consecutive repeating triggered criteria
appearing, after which the test is considered: falied.
overload_action – can be one of the following: packet delay calculated on all
interfaces, packet drop per interface, and options are NOTHING, TRAP_ONLY
and DISABLE.
Sample Use
<policy>
<check_overload_interval>12</check_overload_interval>
<overload_drop_percent>1.22</overload_drop_percent>
<overload_packet_delay>500</overload_packet_delay>
<failed_overload_test>3</failed_overload_test>
<overload_action>DISABLE</overload_action>
</policy>
Platform Specific Features Cluster File System (CFS) – A distributed file-system, which can operate seamlessly over n-times
storage devices/disks. This provides a very large storage for each cache engine, enabling very fast
data retrieval of cached data. The CFS is a content aware file-system, optimized specifically for the
content it stores. It uses less I/O operations to service the amount of cached information it serves.
Faster data throughput is achieved. When MediaSwift operates in a Standalone or Grid-ready
configuration, the CFS is used by the active cache-engine only (in cases where the platform is
equipped with only one cache-engine).

MediaSwift Admin & Install Guide 4-7
Platform Operational Specific Features
Duplicate logs to external syslog
The eventlog sent to syslog is duplicated and transfers the information to a syslog external server,
while the system is running.
To configure duplication of logs to external syslog:
In the cluster.conf file, configure the IP of the external syslog in the cluster. Enter:
<mgmt-config>
<external_syslog_ip>192.168.0.154</external_syslog_ip>
</mgmt-config>
You can start or stop forwarding using a CLI command. Refer to eventlog forward/stop in Enable
Mode Commands, page 5-30.
Management ACL (Access Control List)
Provides an approved (white-list) and a denied (black-list) of the platform‟s system management
features. These are the CLI and the Web (MediaSwift) management interfaces. This is done using IP
subnet ranges (added/removed through the Linux firewall), and can be specified by either allowing
some IP address and blocking the rest, or blocking some IPs and allowing the rest.
To specify ACLs by allowing some IP address and blocking the rest:
This can be done by defining some good IPs in the white list, and blocking the rest.
In the cluster.conf file, enter:
<white_access_list>
<access_entry>192.168.1.1</access_entry>
<access_entry>192.168.1.2</access_entry>
</white_access_list>
To specify ACLs by blocking some IP address and allowing the rest:
In the cluster.conf file, enter:
<black_access_list>
<access_entry>80.122.12.1</access_entry>
<access_entry>80.122.12.2</access_entry>
</black_access_list>
SNMP Traps Forwarding
The platform generates SNMP traps for certain events, and you can forward these traps to an external
server.
To control the traps forwarding:
1. In the clusted.conf file, enter the following statements related to the IP of the
traps server, SNMP communities, etc:

MediaSwift Admin & Install Guide 4-8
<snmp>
<trap-ip>10.11.12.1</trap-ip>
<snmp-read-community>gdcbhv</snmp-read-community>
<snmp-write-community>nkppui</snmp-write-community>
<snmp-trap-community>ffff</snmp-trap-community>
</snmp>
2. Download a SNMP monitoring system, such as the Dell Open Manage IT
Assistant.
3. In the pang.conf enable the trap forwarding to a machine that has the Dell Open
Manage IT Assistant installed.
4. Connect to the management blade using your VNC, and run Firefox.
5. In Firefox, browse to the following address:
https://bmc-1, 2, 3 ..
6. On the Alert Managment tab, Platform Events page, check the Enable
Platform Event Filter Alerts checkbox, and then scroll down to click Apply
Changes.
7. Select the Trap Settings page, scroll down to Community String, enter Public,
and then click Apply Changes.
8. On the Trap Settings page, do the following:
In the IPv4 Destination List select Destination 1
Enter the address: 10.11.12.1
Check the Enable Destination checkbox
Click Send Test Trap
Click Apply Changes.
9. Wait as the process completes, until test trap is visible on the machine running
the Dell IT Assistant.
Email alerts
In addition to SNMP traps, it is possible to forward critical platform alerts to a specific email server.
To forward critical platform alerts to a specific email server:
In the cluster.conf file, enter:
<mgmt-config>
<nameserver>194.90.1.5</nameserver>
<alert-email>[email protected]</alert-email>
</mgmt-config>
The <nameserver> parameter must point to the DNS server able to resolve the domain name to
which the email should be sent.

MediaSwift Admin & Install Guide 4-9
Export CDR
The platform tracks each cache-out session and writes out a CDR record related to the session when it
ends. The CDR recording files are created periodically and can be retrieved using FTP with
„anonymous‟ as the user-id. No password is required, even if prompted.
The set of CDR files are created and managed periodically. The following is a sample CDR record:
Time Protocol
07-02-10 19:45:11.712, HTTP
HASH-id
311ED3C3CB36B10AE1110A9F597A6ED859BF4EE4,
URL reason for closure
http:www.morefiles.com/d/k/f878.zip, TIMEOUT,
bytes sent session length (sec)
1635576, 95,
Downloader ip:port uploader ip:port
10.150.185.57:36619, 192.168.106.254:80
CDR record parameters are explained below:
PARAMETER DESCRIPTION
Time The moment at which the session terminated.
Protocol Session protocol, such as HTTP, BT, EDK, ARES, Gnuttela.
HASH-id The hashes of the data blocks in the session file or set of files.
URL Only for HTTP: file address.
Reason for closure The cause for session termination. Can be one of the following:
Session_Ended – file delivery completed successfully.
CMDB_MISS – requested range (in P2P) or file (in HTTP) does
not reside in the cache.
Downloader – downloader terminated the session.
UPloader – uploader has terminated the session.
Error – platform failure teminated the session.
Timeout – session terminated due to other reasons.
Bytes sent The number of bites served in the session.
Session length
(sec)
The duration of the session measured in seconds.
Downloader ip:
port
The downloader‟s address and port name.
Uploader ip: port The uploader‟s address and port name.
MediaSwift using iSCSI and Dell PowerVault MD3000i

MediaSwift Admin & Install Guide 4-10
MediaSwift platform is now fully integrated with the Dell MD3000i SAN storage solution. The Dell
PowerVault MD3000i can consolidate up to sixteen (16) fully redundant hosts, expand to support up to
5.7TB of data (using 380GB SAS drives), and provides wizard based installation, intuitive
management, and advanced data protection software.
Supporting the PowerVault MD3000i increases the storage capacity of MediaSwift platform and
allows the creation of a clustered file-system (using two or more MediaSwift platforms).
Traffic Specific Features TOS coloring support allows you to color packets, enabling shaper and other network entities to
follow these indicators, for example: not shape these packets.
Here is an example of how to color only CACHE_OUT with “8”:
<tos_markup>
<tos_overwrite>0</tos_overwrite>
<class name="cache-out">
<out_mode>CACHE_OUT</out_mode>
</class>
<action name="mark-with-8">
<dscp>8</dscp>
</action>
<rule id="1">
<enable_rule>1</enable_rule>
<priority>20</priority>
<class_name>cache-out</class_name>
<action_name> mark-with-8</action_name>
</rule>
</tos_markup>
CLI-based Configuration
Configuring Passwords
To change the password required to log in to the CLI:
At the CLI enable prompt, enter access user-password <new password>
where <new password> is the new password for the ordinary user.
Password is changed.
To change the password required to access Enable mode:
At the CLI enable prompt, enter access enable-password <new password>
where <new password> is the new password for the enabled user.
Password is changed.
Recovering Passwords
If you lose or forget the initial CLI password or Enable mode password, you can reset them to their
default values using the special Rescue CLI. The Rescue CLI is available from serial consoles only.

MediaSwift Admin & Install Guide 4-11
Configuring Management Network
You must configure the IP address, netmask, and gateway address for the management server in order
to access the CLI using a LAN connection.
To set up an IP address:
1. At the CLI config prompt, enter network ip <IP address> <netmask>
where <IP address> is the IP address you want to use for MediaSwift, and
<netmask> is the netmask in xxx.xxx.xxx.xxx. notation.
2. At the CLI config prompt, enter network default_gw <gateway address>
where <gateway address> is the IP address of the desired gateway.
3. IP networking is set up for the management server.
To test the IP setup:
1. At the CLI enable prompt, enter ping <IP address>
where <IP address> is an IP address on your local area network.
This tests the connectivity between MediaSwift and the entered IP address. If you
are unable to reach the destination, check your IP address and netmask settings.
2. At the CLI enable prompt, enter traceroute <IP address>
where <IP address> is an IP address to which you want to trace a
connection.
This shows the network routing between the management interface of
MediaSwift and the entered IP address. If you are unable to reach the desired
destination, check your IP address and gateway address settings.
Configuring Local Time
You can configure local time on MediaSwift either manually or through the use of a Network Time
Server via NTP.
To view the time on the system:
At the CLI prompt, enter <show time>. The time appears on the system.
To configure local time manually:
At the CLI configuration# prompt, enter time <MMDDYYhhmm>
where <MMDDYYhhmm> is the new date and time (two digits represent each month, date, year, hours,
and minutes). The date and time are set.
NOTE Note that the CLI configuration# prompt requires Enabled mode privileges.
MediaSwift Admin & Install Guide 4-12
Configuring Local Time Using NTP
You can configure NTP by using the CLI or the configuration file.
To configure local time using the CLI:
1. At the CLI enable prompt, enter config. You are now in Configuration mode.
2. At the CLI config prompt, enter ntp server-ip <IP address>
where <IP address> is the IP address of the NTP server.
NOTE For the local server, you can enter <127.127.1.0> instead of <IP address>.
3. At the CLI config prompt, enter ntp timezone <timezone>
where <timezone> is the local time zone according to its GMT offset.
4. Apply configuration using apply.
5. NTP is configured.
Or,
To configure local time using the configuration file:
1. In the configuration file, edit the following fields:
common ntp server-ip
The IP address of the NTP server.
common ntp timezone
The time zone according to its GMT offset.
2. NTP is configured.
Managing the Caching Service (Grid Only)
To stop, start, or restart
1. At the CLI enable prompt, enter oper service <stop|start|restart>
where:
stop stops the caching service.
start starts the service after it has been stopped.
restart performs a soft restart of the caching service by stopping and restarting. Use
this option to restart caching service with minimal impact to the transit traffic.
2. The caching service stops, starts, or restarts, as specified.

MediaSwift Admin & Install Guide 4-13
Managing Servers
To stop, start, or reset a single server
1. At the CLI server prompt, enter stop, start, or restart, where:
stop stops the server‟s operation.
start starts the server after it has been stopped.
restart performs a soft reload of the caching service by stopping and restarting. Use
this option to restart caching service with minimal impact to the transit traffic.
2. The caching server stops, starts, or restarts, as specified.
Resetting Management Service
In Configuration mode, only one user can perform a configuration operation at a given time.
If this user's terminal does not respond, in order to recover the ability to configure the system,
management service must be reset. Use this option with caution.
To reset MediaSwift:
At the CLI prompt, enter reset. All active CLI sessions in the system are reset.
File-based Configuration When configuring software settings in the configuration file, you can set fields in the common section
or in the server section. The fields in the server‟s section override the fields in the common section.
Configuring SNMP
To set up SNMP
In the configuration file, edit the following fields:
common snmp trap-ip
The IP address of the SNMP trap server to which to forward traps.
common snmp snmp-read-community
The SNMP read community name, for viewing network status and statistics.
common snmp snmp-write-community
The SNMP write community name, for executing commands on the system.
common snmp snmp-trap-community
The SNMP trap community name of the server to which traps are forwarded.
MediaSwift Admin & Install Guide 4-14
Confirming MediaSwift Interaction with NetEnforcer/Service Gateway
To confirm NetEnforcer/Service Gateway Interaction:
In the configuration file, confirm the following field reads as indicated:
common (or server<#>) service net L7
If the field indicates any layer other than L7 (i.e. L4), edit it to read L7.
Configuring P2P Protocols
To configure P2P protocols:
In the configuration file, edit the following fields:
common (or server<1>) service proto enable-
bittorrent –
Enables or disables the BitTorrent protocol. 1: enabled, 0: disabled.
common (or server<1>) service proto enable-edk –
Enables or disables the eDonkey protocol. 1: enabled, 0: disabled.
common (or server<1>) service proto enable-gnutella
–
Enables or disables the gnutella protocol. 1: enabled, 0: disabled.
common (or server<1>) service proto enable-ares –
Enables or disables the Ares protocol. 1: enabled, 0: disabled.
common (or server<1>) service proto enable-http –
Enables or disables the HTTP protocol. 1: enabled, 0: disabled.
Configuring Bandwidth Management
To configure bandwidth management:
In the configuration file, edit the following field:
common (or server<1>) service bandwidth-management
enable-bandwidth-management
Enables or disables the bandwidth management service. 1: enabled, 0: disabled.

MediaSwift Admin & Install Guide 4-15
common (or server<1>) service bandwidth-management
bandwidth-per-connection
Sets the maximum bandwidth per connection, in bytes/second.
Configuring Traffic Forwarding Options
These options must match your network configuration, and should not be changed unless you change
gateway configuration on your network.
MediaSwift supports the following traffic forwarding modes:
FORWARDING MODE
CORRESPONDING TOPOLOGY NOTES
PROMISCUOUS The NetEnforcer or Service Gateway forwards traffic via
two dedicated ports without changing L2 addresses (as-is)
BOUNCE The platform sends packets back using the same interface
while swapping the source and destination MAC addresses
Not supported in
MSW-INT
To configure traffic forwarding options
In the configuration file, edit the following field:
common (or server<1>) service net fwd-mode
The forwarding mode is as described above.
Configuring Caching Policies
The following general caching policy settings can also be set in the configuration file.
To configure caching policies
In the configuration file, edit the following field:
common (or server<#>) service policy
upload_cache_out –
Indicates the percentage of upstream P2P traffic that must come from the internal
cache:
0% – Disabled (all the upstream traffic can come from local peers).
1-99% –Specified percentage of the upstream traffic must come from the MediaSwift
cache storage and the remainder can come from local peers.
100% – Upstream traffic can only come from the internal cache.

MediaSwift Admin & Install Guide 4-16
Configuring Virtual IP Address
MediaSwift host has a virtual IP address that must match the IP address in the NetEnforcer or Service
Gateway. This IP is used for health monitoring and forwarding from the NetEnforcer or Service
Gateway.
NetEnforcers or Service Gateways running AOS software can use virtual IP addresses to query cache
server health. While the NetEnforcers or Service Gateway receives responses on this virtual IP address,
it can also redirect traffic there. Therefore, defining a number of virtual IP addresses per server
regulates the amount of redirected traffic by dividing the traffic into manageable chunks.
To set the virtual IP address:
In the configuration file, edit the field server<1> vip – The virtual IP address.
Configuring Server Data IP Address
The cache engine has a data IP address that must be in the same subnet as the gateways.
Edit the following fields in the configuration file:
server<1> ipaddr
The IP address of data interface.
server<1> netmask
The IP netmask of data interface.
Configuring HTTP Hosts Not to be Cached
You can configure the URLs of hosts you do not want cached.
To configure HTTP cashed hosts:
Edit the downloaded cluster_conf.xml configuration file, and insert the new URL in the
no_cache_host_list section as follows:
<policy>
<no_cache_host_list>
<host_no_cache>your.new.url.com</host_no_cache>
<host_no_cache>ees.elsevier.com</host_no_cache>
</no_cache_host_list>
<http_min_file_size>32768</http_min_file_size>
<inspector_q_limit>15000</inspector_q_limit>
</policy>
Configuring Traffic Categories (Internal Only)
Traffic categorization rules are defined in two distinct files. Major categories, refered to as groups, are
listed the first file, and their sub-categories, referd to as signatures, aer listed in the second file. For
example, a major category listed in the first file can be Video Streaming, and its sub-categories can be
youtube, google.video, video.facebook, defined in the second file.

MediaSwift Admin & Install Guide 4-17
Edit the downloaded categories (groups) configuration file, and insert the new group. Pay attention to
its sub-category types (signatures) contained in the signatures configuration file.
NOTE Each sub-category (signature) must include both the flowing definitions:
All rules involved in this signature.
The signature itself.
For example, streaming is entered as a category (group) in the category configuration file:
<Group id="streaming">
<names>youtube.video </names>
</Group>
For example, for the streaming category (group) youtube uis added as a sub-category (signature)
in the sub-category configuration file. The rules are first defined, and then the signature is stated:
<Rule id="youtube">
<Location>DOMAIN</Location>
<Match>youtube.com</Match>
</Rule>
<Rule id="youtube.videoplayback">
<Location>URI</Location>
<Match>videoplayback?</Match>
</Rule>
<Rule id="youtube.getvideo">
<Location>URI</Location>
<Match>get_video?</Match>
</Rule>
<Signature id="youtube.video">
<Rules_list>youtube youtube.videoplayback</Rules_list>
<Rules_list>youtube youtube.getvideo</Rules_list>
</Signature>
NOTE For each sub-category (signature), the following must apply:
All rules must be met in each rules list.
A signature is detected by at least one rules list that is met.
Applying the Configuration Changes
After configuring the cluster.conf file as required, you can now activate the new configuration.

MediaSwift Admin & Install Guide 4-18
To activate the new configuration file:
1. Upload the file to MediaSwift using MediaSwift user-interface file management
option.
2. Open an SSH session to MediaSwift platform management environment and log
in using the username admin.
3. At the CLI prompt, enter enable to enter Enable mode.
4. At the CLI prompt, enter config to access Configuration mode.
5. At the CLI prompt, enter import localhost <filename>
Where <filename> is the name of the new configuration file uploaded using
the MediaSwift file manipulation option.
NOTE After performing this step, the new configuration is downloaded to the system, but it is not yet applied. The new configuration is applied only after all the activation steps are completed, and the system is restarted.
6. The following options are available for displaying, applying, or discarding the
new configuration, or for restoring an old configuration:
To display the currently loaded configuration, at the CLI prompt, enter show config.
To display the new configuration that was loaded, but not yet applied, at the CLI
prompt, enter display.
To show the differences between the current configuration and the new configuration, at
the CLI prompt, enter diff.
To apply the new configuration in place of the current configuration, at the CLI config
prompt, enter apply.
To discard the new configuration without making any changes to the current
configuration, at the CLI config prompt, enter discard.
To restore the old configuration after applying a new configuration, at the CLI config
prompt, enter restore.
7. When the apply command reports a positive response, restart MediaSwift
service, as follows:
Exit the configuration mode using the exit command.
Restart MediaSwift service using the oper service powercycle command.
NOTE The new configuration is applied only after all the activation steps are completed, and the system is restarted.
8. Exit the CLI enabled session and the CLI standard session using the exit
command (twice).

MediaSwift Admin & Install Guide 4-19
9. The configuration session is complete.
Upgrading the System MediaSwift has two levels of software which are maintained – the OS and application. In Grid
configuration, OS upgrades are infrequently required and usually contain security patches.
This section describes how to upgrade MediaSwift in the following cases:
New software –Download new software versions of MediaSwift, which are delivered as
a file.
New software license – Download new versions of MediaSwift software license, which
are delivered as a file.
Upgrading MediaSwift Software
To install a new software version:
1. At the CLI prompt, enter show systemid. The system serial number is
displayed.
2. Send a request by email for a software upgrade along with the serial number to
Allot. Allot will send you a software upgrade file.
3. Place the new software upgrade file on your TFTP server.
4. At the CLI enable prompt, enter upgrade <TFTP server> <file> where <TFTP server> is the IP address of your TFTP server and <file> is
the name of the new software upgrade file.
An automatic upgrade process starts.
5. After PANG is in Enabled mode, reset the graphs:
cd /srv/www/htdocs/graphs; ./reset_graphs.sh;
./run_ubview.sh
6. After system upgrading, exit CLI and reenter to access the new CLI version.
NOTE If the management service is running, it is automatically restarted after the upgrade process is complete.
Upgrading MediaSwift License
To view information about your installed license:
At the CLI prompt, enter show license. Information about the installed license is displayed,
including the version number and enabled features.
To install a new software license:
1. Place the new license file on your TFTP server.

MediaSwift Admin & Install Guide 4-20
2. At the CLI enable prompt, enter license import <TFTP server> <file>
where <TFTP server> is the IP address of your TFTP server and <file> is
the name of the new license file.
3. Enter license activate to apply the license.

MediaSwift Admin & Install Guide 5-1
Chapter 5: Using CLI Commands
MediaSwift platform is controlled using a set of CLI commands, allowing full control over its
operational modes. The CLI commands are divided into two categories:
Regular mode commands – Provides the ability to display versioning/licensing
information and to access/manipulate the system log. This mode does not support
system configuration changes.
Enable mode commands – Provides full control over the system configuration, cache
content manipulation, networking behavior, licensing, platform operation state, and
managing the software version on which the system runs.
This CLI interpreter is accessible through a unique username and password. The username is “admin”
and the password is platform specific.
The following is a sample authentication session:
Using username "admin".
Using keyboard-interactive authentication.
Password:
PeerApp management:
Cli version - 3.0.87
Snmp version - PeerApp management node software version 3.0.87
console>
This chapter provides a reference for all CLI commands. Refer to CLI Reference, page 7-1 for a full list
of available CLI commands.

MediaSwift Admin & Install Guide 5-2
Standalone Configuration
Regular Mode Commands
The following commands are accessible in Regular mode and Enable mode.
Table 1: Regular Mode Commands
COMMAND DESCRIPTION
arp Displays ARP table
direction Calculates the visible subnets on the interface
dmesg Displays the dmesg
dstat Displays the Report Central Processing Unit
(CPU), physical disks, network, paging and
operating-system statistics, and I/O statistics
enable Enters Enable mode
eventlog Provides access to event log operations
exit Exits the current mode
help Displays the list of Regular mode commands
ifconfig Displays the interface(s)
iostat Displays extended I/O statistics
jumbo Sends jumbo echo messages
ping Sends echo messages
show Displays run-time information
tcpdump Dumps the traffic on the appropriate network
interface
traceroute Displays the route used by the packet to reach its
destination
who Displays the list of users who are currently logged
on
arp
The arp command displays the ARP table.
Command Parameters
None.

MediaSwift Admin & Install Guide 5-3
Sample Use
Display the ARP table.
console> arp
Address HWtype HWaddress Flags Mask Iface
192.168.0.2 ether 00:17:65:C7:10:42 C eth0
console>
direction
The direction command calculates the visible subnets on the specified interface.
Command Parameters
interface name – The interface for which to display the subnets.
Sample Use
Display the visible subnets on the interface eth0.
console> direction eth0
tcpdump: WARNING: eth0: no IPv4 address assigned
tcpdump: verbose output suppressed, use -v or -vv for full protocol
decode
listening on eth0, link-type EN10MB (Ethernet), capture size 96 bytes
10 packets captured
10 packets received by filter
0 packets dropped by kernel
console>
dmesg
The dmesg command displays the message buffer of the kernel (dmesg).
Command Parameters
None.
Sample Use
Display the dmesg.
console> dmesg
Ending clean XFS mount for filesystem: sdl2
XFS mounting filesystem sdm3
Ending clean XFS mount for filesystem: sdm3
XFS mounting filesystem sdm2
Ending clean XFS mount for filesystem: sdm2
XFS mounting filesystem sdk3

MediaSwift Admin & Install Guide 5-4
Ending clean XFS mount for filesystem: sdk3
XFS mounting filesystem sdk2
Ending clean XFS mount for filesystem: sdk2
XFS mounting filesystem sdo3
Ending clean XFS mount for filesystem: sdo3
FS mounting filesystem sdo2
Ending clean XFS mount for filesystem: sdo2
XFS mounting filesystem sdn3
Ending clean XFS mount for filesystem: sdn3
XFS mounting filesystem sdn2
Ending clean XFS mount for filesystem: sdn2
monitor[19319]: segfault at 1500 ip 00007fcc02938d9b sp 00007fcbff400040
error 4 in ld-2.9.so[7fcc02930000+1e000]
device eth0 entered promiscuous mode
device eth0 left promiscuous mode
device eth0 entered promiscuous mode
device eth0 left promiscuous mode
dstat
The dstat command displays a report of the Central Processing Unit (CPU), physical disks, network,
paging and operating-system statistics, and I/O statistics.
Command Parameters
[-N <ethx,total>] [<count>]
Where:
ethx – A physical Ethernet interface on the server that runs the dstat command (i.e., the management
server). For example: eth0, eth1, or eth2.
total – The accumulated traffic on all Ethernet interfaces on the server.
count – The number of updates to display before exiting. If omitted, the output will continue to
display until stopped by pressing CTRL+C.
Sample Use
Display the accumulated traffic on all Ethernet interfaces on the server.
console> dstat
----total-cpu-usage---- -dsk/total- -net/total- ---paging-- ---system--
usr sys idl wai hiq siq| read writ| recv send| in out | int csw
13 11 67 5 1 3| 146M 5624k| 0 0 | 0 0 | 93k 132k
17 18 55 5 1 5| 154M 19M| 99M 177M| 0 0 | 129k 162k
15 17 58 5 1 4| 161M 2350k| 94M 172M| 0 0 | 127k 158k
19 17 55 5 1 4| 163M 30M| 91M 174M| 0 0 | 131k 165k
15 15 60 5 1 4| 167M 15M| 86M 171M| 0 0 | 126k 167k
15 16 59 5 1 4| 165M 1345k| 87M 171M| 0 0 | 125k 165k
16 18 56 5 1 4| 163M 1483k| 97M 176M| 0 0 | 132k 170k

MediaSwift Admin & Install Guide 5-5
15 15 62 4 1 4| 166M 3356k| 87M 172M| 0 0 | 126k 159k
console>
enable
The enable command allows you to switch to Enable mode, where you can access CLI commands and
make configuration changes. These changes include cache content manipulation, networking behavior,
licensing, and managing the software version on which the system runs.
Command Parameters
None.
The user is prompted for a password.
NOTE The default password for the enable command is configured upon system installation and defaults to the system-id. You can view the system-id by using the show systemid command. It is strongly recommended to change the default enable command password immediately after the initial installation.
Sample Use
Switch to Enable mode.
console> enable
Password:
console#
eventlog
The eventlog command enables the user to view or export the content of the event log. The event log
lists all log messages sent to the system log by all MediaSwift service components (applications, CLI
and SNMP).
Command Parameters
[<export>] [<show>] [<tail>]
Where:
date – Displays the eventlog for the specified date.
export – Exports event log content to a TFTP server, where the server name and file location are
specified as: <TFTP server address> <filename>.
NOTE The file to which the content is exported must exist, and must have write access to all.
show – Displays the event log entries.
NOTE Additional parameters for this command are available in Enable mode. Refer to eventlog, page 5-49 for a description of the Enable mode parameters.
tail – Displays the online event log entries.

MediaSwift Admin & Install Guide 5-6
Sample Use
Export event log content to a file on a TFTP server.
console> eventlog export 192.168.77.14 eventlog-exported
console>
Display event log content.
console> eventlog show
Aug 18 12:29:07 ce-1 pang[21134]: /mnt/vol9 mounted
active ce-1 678 401 276 40.80
Aug 18 12:29:07 ce-1 pang[21134]: /mnt/vol10 mounted
active ce-1 678 417 261 38.48
Aug 18 12:29:07 ce-1 pang[21134]: /mnt/vol11 mounted
active ce-1 678 457 220 32.55
Aug 18 12:29:07 ce-1 pang[21134]: /mnt/vol12 mounted
active ce-1 678 397 281 41.43
Aug 18 12:29:07 ce-1 pang[21134]: /mnt/vol13 mounted
active ce-1 678 413 265 39.06
Aug 18 12:29:07 ce-1 pang[21134]: /mnt/vol14 mounted
active ce-1 678 403 274 40.52
Aug 18 12:29:07 ce-1 pang[21134]: /mnt/vol15 mounted
active ce-1 678 401 277 40.84
Aug 18 12:36:06 ce-1 pang[21134]: volume state
availability owner total free used usage
Aug 18 12:36:06 ce-1 pang[21134]: /mnt/vol1 mounted
active ce-1 678 403 274 40.50
Aug 18 12:36:06 ce-1 pang[21134]: /mnt/vol2 mounted
active ce-1 678 381 296 43.71
Aug 18 12:36:06 ce-1 pang[21134]: /mnt/vol3 mounted
active ce-1 678 395 282 41.70
Aug 18 12:36:06 ce-1 pang[21134]: /mnt/vol4 mounted
active ce-1 678 416 262 38.67
Aug 18 12:36:06 ce-1 pang[21134]: /mnt/vol5 mounted
active ce-1 678 394 283 41.82
Aug 18 12:36:06 ce-1 pang[21134]: /mnt/vol6 mounted
active ce-1 678 399
(END)
Display event log online entries.
console> eventlog tail
Aug 18 12:50:05 ce-1 pang[21134]: /mnt/vol6 mounted
active ce-1 678 399 278 41.09
Aug 18 12:50:05 ce-1 pang[21134]: /mnt/vol7 mounted
active ce-1 678 394 283 41.82
Aug 18 12:50:05 ce-1 pang[21134]: /mnt/vol8 mounted
active ce-1 678 416 261 38.54
Aug 18 12:50:05 ce-1 pang[21134]: /mnt/vol9 mounted
active ce-1 678 401 276 40.81
Aug 18 12:50:05 ce-1 pang[21134]: /mnt/vol10 mounted
active ce-1 678 417 261 38.50
Aug 18 12:50:05 ce-1 pang[21134]: /mnt/vol11 mounted
active ce-1 678 457 220 32.57
Aug 18 12:50:05 ce-1 pang[21134]: /mnt/vol12 mounted
active ce-1 678 397 281 41.44

MediaSwift Admin & Install Guide 5-7
Aug 18 12:50:05 ce-1 pang[21134]: /mnt/vol13 mounted
active ce-1 678 413 265 39.08
Aug 18 12:50:05 ce-1 pang[21134]: /mnt/vol14 mounted
active ce-1 678 403 275 40.53
Aug 18 12:50:05 ce-1 pang[21134]: /mnt/vol15 mounted
active ce-1 678 401 277 40.85
console>
exit
The exit command exits the current CLI session and mode. In Enable mode, this command returns the
session to Regular mode. In Regular mode, the session terminates and the user is logged out of the
current session.
Command Parameters
None.
Sample Use
Exit the current CLI session.
console> exit
>
help
The help command displays the CLI commands with a short description of the current mode. For
example, in Regular mode, then the help command displays the Regular mode commands with a short
description of each command.
The help command can also be accessed by typing “<space> + ?”. The “?” is not echoed on the screen.
Command Parameters
None.
Sample Use
Display the list of CLI commands that are available in Regular mode.
console> help
arp Show arp table
direction Calculate seen subnets on interface
dmesg Display dmesg
dstat Display IO statistics
enable Enter privileged mode
eventlog Event log commands
exit Exit current mode
help Commands description

MediaSwift Admin & Install Guide 5-8
ifconfig Display interface(s)
iostat Display IO statistics
jumbo Send jumbo echo messages
ping Send echo messages
show Show run-time information
tcpdump Dump traffic on appropriate network interface
traceroute Print the route packets take to network host
who Show currently logged users
console>
ifconfig
The ifconfig command displays details of the interface(s).
Command Parameters
None.
Sample Use
Display the interface details.
console> ifconfig
eth0 Link encap:Ethernet HWaddr 00:22:19:5A:2C:94
UP BROADCAST RUNNING MULTICAST MTU:1500 Metric:1
RX packets:2113337 errors:0 dropped:0 overruns:0 frame:0
TX packets:1781518 errors:0 dropped:0 overruns:0 carrier:0
collisions:0 txqueuelen:1000
RX bytes:401725610 (383.1 Mb) TX bytes:590225720 (562.8 Mb)
Interrupt:36 Memory:d6000000-d6012800
eth0:1 Link encap:Ethernet HWaddr 00:22:19:5A:2C:94
inet addr:192.168.0.202 Bcast:192.168.0.255
Mask:255.255.255.0
UP BROADCAST RUNNING MULTICAST MTU:1500 Metric:1
Interrupt:36 Memory:d6000000-d6012800
eth1 Link encap:Ethernet HWaddr 00:22:19:5A:2C:96
UP BROADCAST MULTICAST MTU:9000 Metric:1
RX packets:0 errors:0 dropped:0 overruns:0 frame:0
TX packets:0 errors:0 dropped:0 overruns:0 carrier:0
collisions:0 txqueuelen:1000
RX bytes:0 (0.0 b) TX bytes:0 (0.0 b)
Interrupt:48 Memory:d8000000-d8012800
eth2 Link encap:Ethernet HWaddr 00:22:19:5A:2C:98
UP BROADCAST MULTICAST MTU:1500 Metric:1
RX packets:0 errors:0 dropped:0 overruns:0 frame:0
TX packets:0 errors:0 dropped:0 overruns:0 carrier:0
collisions:0 txqueuelen:1000
RX bytes:0 (0.0 b) TX bytes:0 (0.0 b)
Interrupt:32 Memory:da000000-da012800

MediaSwift Admin & Install Guide 5-9
eth3 Link encap:Ethernet HWaddr 00:22:19:5A:2C:9A
UP BROADCAST MULTICAST MTU:1500 Metric:1
RX packets:0 errors:0 dropped:0 overruns:0 frame:0
TX packets:0 errors:0 dropped:0 overruns:0 carrier:0
collisions:0 txqueuelen:1000
RX bytes:0 (0.0 b) TX bytes:0 (0.0 b)
Interrupt:42 Memory:dc000000-dc012800
eth4 Link encap:Ethernet HWaddr 00:E0:ED:13:73:F0
UP BROADCAST RUNNING PROMISC MULTICAST MTU:1560 Metric:1
RX packets:3389994453 errors:0 dropped:0 overruns:0 frame:0
TX packets:10688688243 errors:0 dropped:0 overruns:0 carrier:0
collisions:0 txqueuelen:4096
RX bytes:228062860860 (217497.6 Mb) TX bytes:15289767463415
(14581458.5 Mb)
eth5 Link encap:Ethernet HWaddr 00:E0:ED:13:73:F1
UP BROADCAST RUNNING PROMISC MULTICAST MTU:1560 Metric:1
RX packets:3903194401 errors:0 dropped:0 overruns:0 frame:0
TX packets:2558515148 errors:0 dropped:0 overruns:0 carrier:0
collisions:0 txqueuelen:4096
RX bytes:5851310849197 (5580244.8 Mb) TX bytes:159349864841
(151967.8 Mb)
eth6 Link encap:Ethernet HWaddr 00:E0:ED:13:73:F2
UP BROADCAST RUNNING PROMISC MULTICAST MTU:1560 Metric:1
RX packets:17568418070 errors:0 dropped:14 overruns:0 frame:0
TX packets:25063899697 errors:0 dropped:0 overruns:0 carrier:0
collisions:0 txqueuelen:4096
RX bytes:9911089420022 (9451951.4 Mb) TX bytes:27866426447526
(26575495.1 Mb)
eth7 Link encap:Ethernet HWaddr 00:E0:ED:13:73:F3
UP BROADCAST RUNNING PROMISC MULTICAST MTU:1560 Metric:1
RX packets:10187822651 errors:0 dropped:34 overruns:0 frame:0
TX packets:9522095420 errors:0 dropped:0 overruns:0 carrier:0
collisions:0 txqueuelen:4096
RX bytes:10008367704045 (9544723.2 Mb) TX bytes:9401775272615
(8966231.6 Mb)
lo Link encap:Local Loopback
inet addr:127.0.0.1 Mask:255.0.0.0
UP LOOPBACK RUNNING MTU:16436 Metric:1
RX packets:213696122 errors:0 dropped:0 overruns:0 frame:0
TX packets:213696122 errors:0 dropped:0 overruns:0 carrier:0
collisions:0 txqueuelen:0
RX bytes:21262025329 (20277.0 Mb) TX bytes:21262025329
(20277.0 Mb)

MediaSwift Admin & Install Guide 5-10
console>
iostat
The iostat command reports Central Processing Units (CPU) statistics and input/output statistics for
devices and partitions.
Command Parameters
[-t <interval> [-k <count>]]
Where:
interval – The amount of time in seconds between each report. The default is 5.
count – Used in conjunction with the interval parameter. If the count parameter is specified, the
count determines the number of reports generated at the specified interval. If the interval parameter
is specified without the count parameter, the iostat command generates reports continuously.
Sample Use
Display the I/O statistics.
console> iostat -t 2 -k 2
Linux 2.6.27.7-llpf-9-default (ce-1) 08/18/09 _x86_64_
Time: 12:57:39
avg-cpu: %user %nice %system %iowait %steal %idle
13.32 0.00 17.96 5.03 0.00 66.93
Device: rrqm/s wrqm/s r/s w/s rkB/s wkB/s avgrq-
sz avgqu-sz await svctm %util
sda 0.01 0.00 12.78 1.08 802.07 34.63
120.67 0.15 10.80 4.95 6.86
sda1 0.00 0.00 0.00 0.00 0.00 0.00
39.76 0.00 4.84 3.40 0.00
sda2 0.00 0.00 0.00 0.00 0.01 0.00
10.66 0.00 1.48 1.36 0.00
sda3 0.01 0.00 0.24 0.58 3.96 2.42
15.55 0.00 4.42 3.93 0.32
sda4 0.00 0.00 12.54 0.51 798.10 32.21
127.30 0.15 11.20 5.23 6.82
sdb 0.01 0.00 111.63 1.06 7095.08 32.91
126.51 2.67 23.68 5.73 64.53

MediaSwift Admin & Install Guide 5-11
sdb1 0.00 0.00 0.00 0.00 0.00 0.00
42.42 0.00 4.97 2.90 0.00
sdb2 0.00 0.00 0.00 0.00 0.01 0.00
13.85 0.00 1.60 1.32 0.00
sdb3 0.00 0.00 0.46 0.58 2.20 2.41
8.86 0.02 15.72 12.90 1.34
sdb4 0.01 0.00 111.16 0.48 7092.86 30.50
127.61 2.65 23.76 5.77 64.45
sdc 0.01 0.00 48.38 1.03 3045.81 33.49
124.64 0.23 4.65 3.41 16.87
sdc1 0.00 0.00 0.00 0.00 0.00 0.00
46.14 0.00 3.93 3.09 0.00
sdc2 0.00 0.00 0.01 0.00 0.02 1.39
260.46 0.00 91.08 1.34 0.00
sdc3 0.00 0.00 0.46 0.56 2.18 2.34
8.89 0.00 2.19 1.95 0.20
sdc4 0.00 0.00 47.92 0.47 3043.61 29.76
127.04 0.23 4.68 3.46 16.76
sdd 0.01 0.00 99.44 1.17 6315.11 36.62
126.26 2.20 21.85 6.52 65.65
sdd1 0.00 0.00 0.00 0.00 0.00 0.00
42.42 0.00 4.65 3.94 0.00
sdd2 0.00 0.00 0.01 0.00 0.02 0.01
7.83 0.00 0.86 0.79 0.00
sdd3 0.00 0.00 0.43 0.64 2.05 2.67
8.86 0.02 14.72 12.24 1.30
sdd4 0.00 0.00 99.01 0.53 6313.04 33.94
127.52 2.18 21.93 6.59 65.57
sde 0.01 0.00 107.53 1.05 6832.20 32.41
126.45 1.70 15.64 5.18 56.26
sde1 0.00 0.00 0.00 0.00 0.00 0.00
38.68 0.00 2.35 1.71 0.00
sde2 0.00 0.00 0.00 0.00 0.02 0.01
25.27 0.00 2.19 1.95 0.00
sde3 0.00 0.00 0.46 0.57 2.19 2.37
8.86 0.01 13.43 10.73 1.10
sde4 0.00 0.00 107.07 0.47 6829.99 30.03
127.57 1.68 15.66 5.22 56.18
sdf 0.01 0.00 103.39 1.12 6566.91 35.05
126.34 2.06 19.70 5.76 60.19
sdf1 0.00 0.00 0.00 0.00 0.00 0.00
46.96 0.00 5.86 5.43 0.00
sdf2 0.00 0.00 0.00 0.00 0.02 0.01
13.86 0.00 1.37 1.15 0.00

MediaSwift Admin & Install Guide 5-12
sdf3 0.00 0.00 0.45 0.61 2.19 2.56
8.91 0.01 10.83 9.32 0.99
sdf4 0.00 0.00 102.93 0.51 6564.70 32.49
127.55 2.05 19.79 5.81 60.11
sdg 0.01 0.00 102.57 1.08 6514.14 33.67
126.34 1.52 14.64 5.24 54.33
sdg1 0.00 0.00 0.00 0.00 0.00 0.00
46.14 0.00 3.86 3.44 0.00
sdg2 0.00 0.00 0.00 0.00 0.02 0.01
13.83 0.00 1.16 1.06 0.00
sdg3 0.00 0.00 0.46 0.59 2.19 2.48
8.92 0.01 8.71 7.53 0.79
sdg4 0.00 0.00 102.11 0.49 6511.92 31.19
127.55 1.51 14.70 5.29 54.25
sdh 0.01 0.00 61.22 1.16 3868.87 36.42
125.21 0.32 5.20 3.58 22.30
sdh1 0.00 0.00 0.00 0.00 0.00 0.00
42.42 0.00 4.26 3.23 0.00
sdh2 0.00 0.00 0.00 0.00 0.02 0.01
25.27 0.00 1.94 1.78 0.00
sdh3 0.00 0.00 0.42 0.63 2.02 2.65
8.88 0.00 2.64 2.42 0.25
sdh4 0.00 0.00 60.79 0.53 3866.82 33.76
127.21 0.32 5.25 3.62 22.20
sdi 0.01 0.00 88.01 1.13 5581.84 35.06
126.03 0.55 6.15 3.41 30.38
sdi1 0.00 0.00 0.00 0.00 0.00 0.00
45.34 0.00 4.55 3.79 0.00
sdi2 0.00 0.00 0.00 0.00 0.02 0.01
25.24 0.00 2.00 1.84 0.00
sdi3 0.00 0.00 0.46 0.62 2.19 2.58
8.86 0.00 2.89 2.63 0.28
sdi4 0.00 0.00 87.55 0.51 5579.63 32.47
127.47 0.54 6.19 3.44 30.28
sdj 0.01 0.00 92.78 1.15 5888.72 36.06
126.16 0.83 8.82 4.35 40.82
sdj1 0.00 0.00 0.00 0.00 0.00 0.00
43.11 0.00 3.41 2.36 0.00
sdj2 0.00 0.00 0.00 0.00 0.02 0.01
25.27 0.00 2.00 1.80 0.00
sdj3 0.00 0.00 0.42 0.63 2.01 2.63
8.85 0.01 4.99 4.55 0.48
sdj4 0.00 0.00 92.35 0.53 5886.68 33.43
127.48 0.82 8.86 4.39 40.73
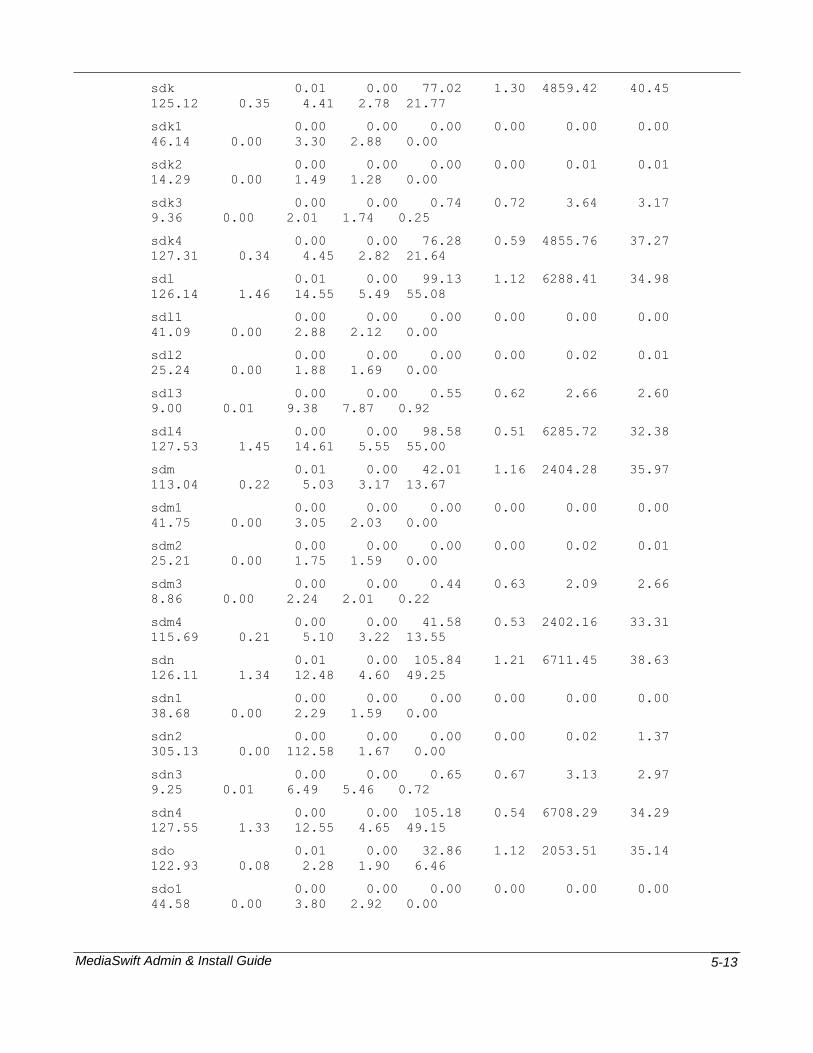
MediaSwift Admin & Install Guide 5-13
sdk 0.01 0.00 77.02 1.30 4859.42 40.45
125.12 0.35 4.41 2.78 21.77
sdk1 0.00 0.00 0.00 0.00 0.00 0.00
46.14 0.00 3.30 2.88 0.00
sdk2 0.00 0.00 0.00 0.00 0.01 0.01
14.29 0.00 1.49 1.28 0.00
sdk3 0.00 0.00 0.74 0.72 3.64 3.17
9.36 0.00 2.01 1.74 0.25
sdk4 0.00 0.00 76.28 0.59 4855.76 37.27
127.31 0.34 4.45 2.82 21.64
sdl 0.01 0.00 99.13 1.12 6288.41 34.98
126.14 1.46 14.55 5.49 55.08
sdl1 0.00 0.00 0.00 0.00 0.00 0.00
41.09 0.00 2.88 2.12 0.00
sdl2 0.00 0.00 0.00 0.00 0.02 0.01
25.24 0.00 1.88 1.69 0.00
sdl3 0.00 0.00 0.55 0.62 2.66 2.60
9.00 0.01 9.38 7.87 0.92
sdl4 0.00 0.00 98.58 0.51 6285.72 32.38
127.53 1.45 14.61 5.55 55.00
sdm 0.01 0.00 42.01 1.16 2404.28 35.97
113.04 0.22 5.03 3.17 13.67
sdm1 0.00 0.00 0.00 0.00 0.00 0.00
41.75 0.00 3.05 2.03 0.00
sdm2 0.00 0.00 0.00 0.00 0.02 0.01
25.21 0.00 1.75 1.59 0.00
sdm3 0.00 0.00 0.44 0.63 2.09 2.66
8.86 0.00 2.24 2.01 0.22
sdm4 0.00 0.00 41.58 0.53 2402.16 33.31
115.69 0.21 5.10 3.22 13.55
sdn 0.01 0.00 105.84 1.21 6711.45 38.63
126.11 1.34 12.48 4.60 49.25
sdn1 0.00 0.00 0.00 0.00 0.00 0.00
38.68 0.00 2.29 1.59 0.00
sdn2 0.00 0.00 0.00 0.00 0.02 1.37
305.13 0.00 112.58 1.67 0.00
sdn3 0.00 0.00 0.65 0.67 3.13 2.97
9.25 0.01 6.49 5.46 0.72
sdn4 0.00 0.00 105.18 0.54 6708.29 34.29
127.55 1.33 12.55 4.65 49.15
sdo 0.01 0.00 32.86 1.12 2053.51 35.14
122.93 0.08 2.28 1.90 6.46
sdo1 0.00 0.00 0.00 0.00 0.00 0.00
44.58 0.00 3.80 2.92 0.00

MediaSwift Admin & Install Guide 5-14
sdo2 0.00 0.00 0.00 0.00 0.02 0.01
14.00 0.00 1.50 1.29 0.00
sdo3 0.00 0.00 0.45 0.61 2.14 2.56
8.89 0.00 1.51 1.32 0.14
sdo4 0.00 0.00 32.41 0.51 2051.35 32.58
126.60 0.08 2.31 1.93 6.35
sdp 0.49 547.09 0.11 22.97 5.51 2281.04
198.19 0.50 21.77 0.94 2.18
sdp1 0.00 0.00 0.00 0.00 0.00 0.00
56.26 0.00 3.56 3.11 0.00
sdp2 0.47 541.39 0.09 11.66 4.36 2211.60
377.26 0.40 34.31 1.17 1.38
sdp3 0.00 0.35 0.01 0.47 0.15 3.94
17.28 0.01 13.24 12.45 0.59
sdp4 0.01 5.34 0.01 10.84 0.99 65.50
12.25 0.09 8.57 0.77 0.84
Time: 12:57:41
avg-cpu: %user %nice %system %iowait %steal %idle
15.94 0.00 24.26 5.15 0.00 59.33
Device: rrqm/s wrqm/s r/s w/s rkB/s wkB/s avgrq-
sz avgqu-sz await svctm %util
sda 0.00 0.00 64.50 7.50 4084.75 224.00
119.69 0.46 6.42 4.75 34.20
sda1 0.00 0.00 0.00 0.00 0.00 0.00
0.00 0.00 0.00 0.00 0.00
sda2 0.00 0.00 0.00 0.00 0.00 0.00
0.00 0.00 0.00 0.00 0.00
sda3 0.00 0.00 0.00 4.00 0.00 14.25
7.12 0.00 1.00 1.00 0.40
sda4 0.00 0.00 64.50 3.50 4084.75 209.75
126.31 0.46 6.74 5.03 34.20
sdb 0.00 0.00 115.00 15.50 7341.50 510.25
120.33 2.05 15.36 5.53 72.20
sdb1 0.00 0.00 0.00 0.00 0.00 0.00
0.00 0.00 0.00 0.00 0.00
sdb2 0.00 0.00 0.00 0.00 0.00 0.00
0.00 0.00 0.00 0.00 0.00
sdb3 0.00 0.00 0.00 8.00 0.00 30.25
7.56 0.10 13.00 13.00 10.40
sdb4 0.00 0.00 115.00 7.50 7341.50 480.00
127.70 1.95 15.51 5.89 72.20

MediaSwift Admin & Install Guide 5-15
sdc 0.00 0.00 67.50 15.50 4305.75 510.25
116.05 0.56 6.82 4.07 33.80
sdc1 0.00 0.00 0.00 0.00 0.00 0.00
0.00 0.00 0.00 0.00 0.00
sdc2 0.00 0.00 0.00 0.00 0.00 0.00
0.00 0.00 0.00 0.00 0.00
sdc3 0.00 0.00 0.00 8.00 0.00 30.25
7.56 0.04 5.25 5.25 4.20
sdc4 0.00 0.00 67.50 7.50 4305.75 480.00
127.62 0.52 6.99 4.48 33.60
sdd 0.00 0.00 111.00 0.00 7089.75 0.00
127.74 5.87 51.51 8.85 98.20
sdd1 0.00 0.00 0.00 0.00 0.00 0.00
0.00 0.00 0.00 0.00 0.00
sdd2 0.00 0.00 0.00 0.00 0.00 0.00
0.00 0.00 0.00 0.00 0.00
sdd3 0.00 0.00 0.00 0.00 0.00 0.00
0.00 0.00 0.00 0.00 0.00
sdd4 0.00 0.00 111.00 0.00 7089.75 0.00
127.74 5.87 51.51 8.85 98.20
sde 0.00 0.00 115.00 0.00 7323.00 0.00
127.36 1.64 14.30 5.97 68.60
sde1 0.00 0.00 0.00 0.00 0.00 0.00
0.00 0.00 0.00 0.00 0.00
sde2 0.00 0.00 0.00 0.00 0.00 0.00
0.00 0.00 0.00 0.00 0.00
sde3 0.00 0.00 0.00 0.00 0.00 0.00
0.00 0.00 0.00 0.00 0.00
sde4 0.00 0.00 115.00 0.00 7323.00 0.00
127.36 1.64 14.30 5.97 68.60
sdf 0.00 0.00 138.00 0.00 8832.00 0.00
128.00 4.60 32.77 6.64 91.60
sdf1 0.00 0.00 0.00 0.00 0.00 0.00
0.00 0.00 0.00 0.00 0.00
sdf2 0.00 0.00 0.00 0.00 0.00 0.00
0.00 0.00 0.00 0.00 0.00
sdf3 0.00 0.00 0.00 0.00 0.00 0.00
0.00 0.00 0.00 0.00 0.00
sdf4 0.00 0.00 138.00 0.00 8832.00 0.00
128.00 4.60 32.77 6.64 91.60
sdg 0.00 0.00 60.50 18.00 3825.00 556.25
111.62 0.66 8.20 5.45 42.80
sdg1 0.00 0.00 0.00 0.00 0.00 0.00
0.00 0.00 0.00 0.00 0.00

MediaSwift Admin & Install Guide 5-16
sdg2 0.00 0.00 0.00 0.00 0.00 0.00
0.00 0.00 0.00 0.00 0.00
sdg3 0.00 0.00 0.00 10.00 0.00 44.25
8.85 0.03 3.40 3.40 3.40
sdg4 0.00 0.00 60.50 8.00 3825.00 512.00
126.63 0.62 8.91 6.25 42.80
sdh 0.00 0.00 74.00 1.00 4693.50 8.00
125.37 0.27 3.60 2.85 21.40
sdh1 0.00 0.00 0.00 0.00 0.00 0.00
0.00 0.00 0.00 0.00 0.00
sdh2 0.00 0.00 0.00 0.00 0.00 0.00
0.00 0.00 0.00 0.00 0.00
sdh3 0.00 0.00 0.00 1.00 0.00 8.00
16.00 0.00 0.00 0.00 0.00
sdh4 0.00 0.00 74.00 0.00 4693.50 0.00
126.85 0.27 3.65 2.89 21.40
sdi 0.00 0.00 121.50 0.00 7762.00 0.00
127.77 0.69 5.65 3.26 39.60
sdi1 0.00 0.00 0.00 0.00 0.00 0.00
0.00 0.00 0.00 0.00 0.00
sdi2 0.00 0.00 0.00 0.00 0.00 0.00
0.00 0.00 0.00 0.00 0.00
sdi3 0.00 0.00 0.00 0.00 0.00 0.00
0.00 0.00 0.00 0.00 0.00
sdi4 0.00 0.00 121.50 0.00 7762.00 0.00
127.77 0.69 5.65 3.26 39.60
sdj 0.00 0.50 61.00 2.00 3889.50 8.25
123.74 0.40 6.51 4.22 26.60
sdj1 0.00 0.00 0.00 0.00 0.00 0.00
0.00 0.00 0.00 0.00 0.00
sdj2 0.00 0.00 0.00 0.00 0.00 0.00
0.00 0.00 0.00 0.00 0.00
sdj3 0.00 0.50 0.00 2.00 0.00 8.25
8.25 0.00 0.00 0.00 0.00
sdj4 0.00 0.00 61.00 0.00 3889.50 0.00
127.52 0.40 6.72 4.36 26.60
sdk 0.00 0.00 99.50 0.00 6306.75 0.00
126.77 0.53 5.39 3.36 33.40
sdk1 0.00 0.00 0.00 0.00 0.00 0.00
0.00 0.00 0.00 0.00 0.00
sdk2 0.00 0.00 0.00 0.00 0.00 0.00
0.00 0.00 0.00 0.00 0.00
sdk3 0.00 0.00 0.00 0.00 0.00 0.00
0.00 0.00 0.00 0.00 0.00

MediaSwift Admin & Install Guide 5-17
sdk4 0.00 0.00 99.50 0.00 6306.75 0.00
126.77 0.53 5.39 3.36 33.40
sdl 0.00 0.00 96.00 0.00 6115.50 0.00
127.41 0.89 9.44 5.62 54.00
sdl1 0.00 0.00 0.00 0.00 0.00 0.00
0.00 0.00 0.00 0.00 0.00
sdl2 0.00 0.00 0.00 0.00 0.00 0.00
0.00 0.00 0.00 0.00 0.00
sdl3 0.00 0.00 0.00 0.00 0.00 0.00
0.00 0.00 0.00 0.00 0.00
sdl4 0.00 0.00 96.00 0.00 6115.50 0.00
127.41 0.89 9.44 5.62 54.00
sdm 0.00 0.00 92.00 0.00 3809.50 0.00
82.82 1.40 15.39 7.33 67.40
sdm1 0.00 0.00 0.00 0.00 0.00 0.00
0.00 0.00 0.00 0.00 0.00
sdm2 0.00 0.00 0.00 0.00 0.00 0.00
0.00 0.00 0.00 0.00 0.00
sdm3 0.00 0.00 0.00 0.00 0.00 0.00
0.00 0.00 0.00 0.00 0.00
sdm4 0.00 0.00 92.00 0.00 3809.50 0.00
82.82 1.40 15.39 7.33 67.40
sdn 0.00 0.00 98.50 0.00 6238.50 0.00
126.67 0.63 6.44 3.63 35.80
sdn1 0.00 0.00 0.00 0.00 0.00 0.00
0.00 0.00 0.00 0.00 0.00
sdn2 0.00 0.00 0.00 0.00 0.00 0.00
0.00 0.00 0.00 0.00 0.00
sdn3 0.00 0.00 0.00 0.00 0.00 0.00
0.00 0.00 0.00 0.00 0.00
sdn4 0.00 0.00 98.50 0.00 6238.50 0.00
126.67 0.63 6.44 3.63 35.80
sdo 0.00 0.00 38.50 15.50 2435.75 510.25
109.11 0.08 1.52 1.33 7.20
sdo1 0.00 0.00 0.00 0.00 0.00 0.00
0.00 0.00 0.00 0.00 0.00
sdo2 0.00 0.00 0.00 0.00 0.00 0.00
0.00 0.00 0.00 0.00 0.00
sdo3 0.00 0.00 0.00 8.00 0.00 30.25
7.56 0.01 0.75 0.75 0.60
sdo4 0.00 0.00 38.50 7.50 2435.75 480.00
126.77 0.08 1.65 1.52 7.00
sdp 0.00 0.00 0.00 0.00 0.00 0.00
0.00 0.00 0.00 0.00 0.00

MediaSwift Admin & Install Guide 5-18
sdp1 0.00 0.00 0.00 0.00 0.00 0.00
0.00 0.00 0.00 0.00 0.00
sdp2 0.00 0.00 0.00 0.00 0.00 0.00
0.00 0.00 0.00 0.00 0.00
sdp3 0.00 0.00 0.00 0.00 0.00 0.00
0.00 0.00 0.00 0.00 0.00
sdp4 0.00 0.00 0.00 0.00 0.00 0.00
0.00 0.00 0.00 0.00 0.00
console>
jumbo
The jumbo command sends jumbo echo messages.
Command Parameters
[-c <counter>] [-I <ip|interface>] dest
Where:
counter – The number of times the request is generated.
interface – Interface IP or name from which to send an echo request to a destination.
Sample Use
Send jumbo echo messages.
console> jumbo -I eth0 192.168.0.202
PING 192.168.0.202 (192.168.0.202) from 192.168.0.202 eth0: 8972(9000)
bytes of data.
8980 bytes from 192.168.0.202: icmp_seq=1 ttl=64 time=0.041 ms
8980 bytes from 192.168.0.202: icmp_seq=2 ttl=64 time=0.049 ms
8980 bytes from 192.168.0.202: icmp_seq=3 ttl=64 time=0.032 ms
8980 bytes from 192.168.0.202: icmp_seq=4 ttl=64 time=0.033 ms
8980 bytes from 192.168.0.202: icmp_seq=5 ttl=64 time=0.030 ms
--- 192.168.0.202 ping statistics ---
5 packets transmitted, 5 received, 0% packet loss, time 3997ms
rtt min/avg/max/mdev = 0.030/0.037/0.049/0.007 ms
Send two jumbo echo messages.
console> jumbo -c 2 -I eth0 192.168.0.202

MediaSwift Admin & Install Guide 5-19
PING 192.168.0.202 (192.168.0.202) from 192.168.0.202 eth0: 8972(9000)
bytes of data.
8980 bytes from 192.168.0.202: icmp_seq=1 ttl=64 time=0.041 ms
8980 bytes from 192.168.0.202: icmp_seq=2 ttl=64 time=0.049 ms
--- 192.168.0.202 ping statistics ---
2 packets transmitted, 2 received, 0% packet loss, time 3997ms
rtt min/avg/max/mdev = 0.030/0.037/0.049/0.007 ms
ping
The ping command uses the ICMP protocol's mandatory ECHO_REQUEST datagram to elicit an
ICMP ECHO_RESPONSE from a host or gateway, and displays the round-trip time for the echo
response to arrive back to the server on which the command was issued.
NOTE To abort the ping command, press Ctrl+C.
Command Parameters
[-c count] [-I interface or address] destination
Where:
count – Represents the number of icmp echo requests to be sent to the destination server.
interface or address – Sets source address to specified interface address. Argument may be numeric
IP address or name of device.
destination – Sets destination address to specified interface address. Argument may be numeric IP
address or name of device.
Sample Use
Ping a remote server.
console> ping -I eth0 192.168.0.202
PING 192.168.0.202 (192.168.0.202) from 192.168.0.202 eth0: 56(84) bytes
of data.
64 bytes from 192.168.0.202: icmp_seq=1 ttl=64 time=0.023 ms
64 bytes from 192.168.0.202: icmp_seq=2 ttl=64 time=0.035 ms
64 bytes from 192.168.0.202: icmp_seq=3 ttl=64 time=0.028 ms
64 bytes from 192.168.0.202: icmp_seq=4 ttl=64 time=0.020 ms
64 bytes from 192.168.0.202: icmp_seq=5 ttl=64 time=0.029 ms
64 bytes from 192.168.0.202: icmp_seq=6 ttl=64 time=0.030 ms
64 bytes from 192.168.0.202: icmp_seq=7 ttl=64 time=0.032 ms

MediaSwift Admin & Install Guide 5-20
64 bytes from 192.168.0.202: icmp_seq=8 ttl=64 time=0.029 ms
64 bytes from 192.168.0.202: icmp_seq=9 ttl=64 time=0.030 ms
64 bytes from 192.168.0.202: icmp_seq=10 ttl=64 time=0.030 ms
64 bytes from 192.168.0.202: icmp_seq=11 ttl=64 time=0.027 ms
64 bytes from 192.168.0.202: icmp_seq=12 ttl=64 time=0.031 ms
64 bytes from 192.168.0.202: icmp_seq=13 ttl=64 time=0.022 ms
64 bytes from 192.168.0.202: icmp_seq=14 ttl=64 time=0.019 ms
64 bytes from 192.168.0.202: icmp_seq=15 ttl=64 time=0.037 ms
64 bytes from 192.168.0.202: icmp_seq=16 ttl=64 time=0.019 ms
64 bytes from 192.168.0.202: icmp_seq=17 ttl=64 time=0.023 ms
64 bytes from 192.168.0.202: icmp_seq=18 ttl=64 time=0.035 ms
64 bytes from 192.168.0.202: icmp_seq=19 ttl=64 time=0.021 ms
64 bytes from 192.168.0.202: icmp_seq=20 ttl=64 time=0.026 ms
--- 192.168.0.202 ping statistics ---
20 packets transmitted, 20 received, 0% packet loss, time 19023ms
rtt min/avg/max/mdev = 0.019/0.027/0.037/0.006 ms
console>
show
The show command displays run-time information related to the operational environment of
MediaSwift.
Command Parameters
Depending on the parameters, the show command displays the following information:
bypass – Displays the eth status.
eventlog – Displays the platform event log (same result as the eventlog show command).
leader – Displays the hostname of the current cluster leader. The cluster leader manages resources
used by MediaSwift.
mount – Displays the currently mounted file-system volumes on the server on which the command
is run.
process – Displays the status of MediaSwift components (pang, spread, apache, and ntp) as they run
on the platform. The output of this command is relevant for maintenance engineers. An equivalent
Server mode command is available for each of the servers that are part of the MediaSwift cluster:
process_server.

MediaSwift Admin & Install Guide 5-21
status – Displays the cluster administrative and application status.
systemid – Displays the system serial number.
time – Displays the system date and time.
uptime – Displays the cluster uptime.
version – Displays the software version.
volumes – Displays the mounted volumes.
NOTE Additional parameters for this command are available in Enable mode. Refer to the show command in Enable mode for a description of these parameters.
Sample Use
Display eth status.
console> show bypass
Blade eth1 eth2 eth3 eth4 eth5
ce-1 DOWN BYPASS BYPASS DOWN BYPASS
console>
Display platform event log.
console> show eventlog
Apr 22 09:57:11 ce-1 pang[29533]: /mnt/vol9 mounted
active ce-1 678 546 131 19.37
Apr 22 09:57:11 ce-1 pang[29533]: /mnt/vol10 mounted
active ce-1 678 548 129 19.15
Apr 22 09:57:11 ce-1 pang[29533]: /mnt/vol11 mounted
active ce-1 678 546 132 19.51
Apr 22 09:57:11 ce-1 pang[29533]: /mnt/vol12 mounted
active ce-1 678 546 131 19.44
Apr 22 09:57:11 ce-1 pang[29533]: /mnt/vol13 mounted
active ce-1 678 546 132 19.49
Apr 22 09:57:11 ce-1 pang[29533]: /mnt/vol14 mounted
active ce-1 678 544 134 19.76
Apr 22 09:57:11 ce-1 pang[29533]: /mnt/vol15 mounted
active ce-1 678 543 135 19.94
Apr 22 10:06:59 ce-1 pang[29533]: volume state
availability owner total free used usage
Apr 22 10:06:59 ce-1 pang[29533]: /mnt/vol1 mounted
active ce-1 678 533 144 21.31
Apr 22 10:06:59 ce-1 pang[29533]: /mnt/vol2 mounted
active ce-1 678 551 127 18.74

MediaSwift Admin & Install Guide 5-22
Apr 22 10:06:59 ce-1 pang[29533]: /mnt/vol3 mounted
active ce-1 678 541 136 20.17
Apr 22 10:06:59 ce-1 pang[29533]: /mnt/vol4 mounted
active ce-1 678 540 137 20.32
Apr 22 10:06:59 ce-1 pang[29533]: /mnt/vol5 mounted
active ce-1 678 544 134 19.79
Apr 22 10:06:59 ce-1 pang[29533]: /mnt/vol6 mounted
active ce-1 678 543 134 19.88
Apr 22 10:06:59 ce-1 pang[29533]: /mnt/vol7 mounted
active ce-1 678 544 134 19.78
Apr 22 10:06:59 ce-1 pang[29533]: /mnt/vol8 mounted
active ce-1 678 546 132 19.50
Apr 22 10:06:59 ce-1 pang[29533]: /mnt/vol9 mounted
active ce-1 678 546 131 19.37
Apr 22 10:06:59 ce-1 pang[29533]: /mnt/vol10 mounted
active ce-1 678 548 129 19.15
Apr 22 10:06:59 ce-1 pang[29533]: /mnt/vol11 mounted
active ce-1 678 546 132 19.51
Apr 22 10:06:59 ce-1 pang[29533]: /mnt/vol12 mounted
active ce-1 678 546 131 19.44
Apr 22 10:06:59 ce-1 pang[29533]: /mnt/vol13 mounted
active ce-1 678 546 132 19.49
Apr 22 10:06:59 ce-1 pang[29533]: /mnt/vol14 mounted
active ce-1 678 544 134 19.76
Apr 22 10:06:59 ce-1 pang[29533]: /mnt/vol15 mounted
active ce-1 678 543 135 19.94
Apr 22 10:16:46 ce-1 pang[29533]: volume state
availability owner total free used usage
Apr 22 10:16:46 ce-1 pang[29533]: /mnt/vol1 mounted
active ce-1 678 533 144 21.31
Apr 22 10:16:46 ce-1 pang[29533]: /mnt/vol2 mounted
active ce-1 678 551 127 18.74
Apr 22 10:16:46 ce-1 pang[29533]: /mnt/vol3 mounted
active ce-1 678 541 136 20.17
Apr 22 10:16:46 ce-1 pang[29533]: /mnt/vol4 mounted
active ce-1 678 540 137 20.32
Apr 22 10:16:46 ce-1 pang[29533]: /mnt/vol5 mounted
active ce-1 678 544 134 19.79
Apr 22 10:16:46 ce-1 pang[29533]: /mnt/vol6 mounted
active ce-1 678 543 134 19.88
Apr 22 10:16:46 ce-1 pang[29533]: /mnt/vol7 mounted
active ce-1 678 544 134 19.78
Apr 22 10:16:46 ce-1 pang[29533]: /mnt/vol8 mounted
active ce-1 678 546 132 19.50

MediaSwift Admin & Install Guide 5-23
Apr 22 10:16:46 ce-1 pang[29533]: /mnt/vol9 mounted
active ce-1 678 546 131 19.37
Apr 22 10:16:46 ce-1 pang[29533]: /mnt/vol10 mounted
active ce-1 678 548 129 19.15
Apr 22 10:16:46 ce-1 pang[29533]: /mnt/vol11 mounted
active ce-1 678 546 132 19.51
Apr 22 10:16:46 ce-1 pang[29533]: /mnt/vol12 mounted
active ce-1 678 546 131 19.44
Apr 22 10:16:46 ce-1 pang[29533]: /mnt/vol13 mounted
active ce-1 678 546 132 19.49
Apr 22 10:16:46 ce-1 pang[29533]: /mnt/vol14 mounted
active ce-1 678 544 134 19.76
Apr 22 10:16:46 ce-1 pang[29533]: /mnt/vol15 mounted
active ce-1 678 543 135 19.95
Apr 22 10:26:37 ce-1 pang[29533]: volume state
availability owner total free used usage
Apr 22 10:26:37 ce-1 pang[29533]: /mnt/vol1 mounted
active ce-1 678 533 144 21.31
Apr 22 10:26:37 ce-1 pang[29533]: /mnt/vol2 mounted
active ce-1 678 551 127 18.74
Apr 22 10:26:37 ce-1 pang[29533]: /mnt/vol3 mounted
active ce-1 678 541 136 20.17
Apr 22 10:26:37 ce-1 pang[29533]: /mnt/vol4 mounted
active ce-1 678 540 137 20.32
Apr 22 10:26:37 ce-1 pang[29533]: /mnt/vol5 mounted
active ce-1 678 544 134 19.79
Apr 22 10:26:37 ce-1 pang[29533]: /mnt/vol6 mounted
active ce-1 678 543 134 19.88
Apr 22 10:26:37 ce-1 pang[29533]: /mnt/vol7 mounted
active ce-1 678 544 134 19.78
Apr 22 10:26:37 ce-1 pang[29533]: /mnt/vol8 mounted
active ce-1 678 546 132 19.50
Apr 22 10:26:37 ce-1 pang[29533]: /mnt/vol9 mounted
active ce-1 678 546 131 19.37
Apr 22 10:26:37 ce-1 pang[29533]: /mnt/vol10 mounted
active ce-1 678 548 129 19.15
Apr 22 10:26:37 ce-1 pang[29533]: /mnt/vol11 mounted
active ce-1 678 546 132 19.51
Apr 22 10:26:37 ce-1 pang[29533]: /mnt/vol12 mounted
active ce-1 678 546 131 19.44
Apr 22 10:26:37 ce-1 pang[29533]: /mnt/vol13 mounted
active ce-1 678 546 132 19.49
Apr 22 10:26:37 ce-1 pang[29533]: /mnt/vol14 mounted
active ce-1 678 544 134 19.76

MediaSwift Admin & Install Guide 5-24
Apr 22 10:26:37 ce-1 pang[29533]: /mnt/vol15 mounted
active ce-1 678 543 135 19.95
Display current cluster leader.
console> show leader
ce-1
Display currently mounted file-system volumes.
console> show mount
rootfs / rootfs rw 0 0
udev /dev tmpfs rw,mode=755 0 0
/dev/sdp2 / ext3 rw,errors=continue,user_xattr,acl,barrier=1,data=ordered
0 0
/proc /proc proc rw 0 0
sysfs /sys sysfs rw 0 0
debugfs /sys/kernel/debug debugfs rw 0 0
devpts /dev/pts devpts rw,gid=5,mode=620 0 0
/dev/sdp4 /opt ext3
rw,errors=continue,user_xattr,acl,barrier=1,data=ordered 0 0
/dev/sdp3 /var ext3
rw,errors=continue,user_xattr,acl,barrier=1,data=ordered 0 0
fusectl /sys/fs/fuse/connections fusectl rw 0 0
securityfs /sys/kernel/security securityfs rw 0 0
none /proc/sys/fs/binfmt_misc binfmt_misc rw 0 0
/dev/sda3 /mnt/vol1 xfs rw,noatime,nodiratime,rtdev=/dev/sda4,noquota 0 0
/dev/sdd3 /mnt/vol4 xfs rw,noatime,nodiratime,rtdev=/dev/sdd4,noquota 0 0
/dev/sdd2 /mnt/vol4cmdb xfs rw,noquota 0 0
/dev/sdc3 /mnt/vol3 xfs rw,noatime,nodiratime,rtdev=/dev/sdc4,noquota 0 0
/dev/sdc2 /mnt/vol3cmdb xfs rw,noquota 0 0
/dev/sdb3 /mnt/vol2 xfs rw,noatime,nodiratime,rtdev=/dev/sdb4,noquota 0 0
/dev/sdb2 /mnt/vol2cmdb xfs rw,noquota 0 0
/dev/sdf3 /mnt/vol6 xfs rw,noatime,nodiratime,rtdev=/dev/sdf4,noquota 0 0
/dev/sdf2 /mnt/vol6cmdb xfs rw,noquota 0 0
/dev/sde3 /mnt/vol5 xfs rw,noatime,nodiratime,rtdev=/dev/sde4,noquota 0 0
/dev/sde2 /mnt/vol5cmdb xfs rw,noquota 0 0
/dev/sdg3 /mnt/vol7 xfs rw,noatime,nodiratime,rtdev=/dev/sdg4,noquota 0 0
/dev/sdg2 /mnt/vol7cmdb xfs rw,noquota 0 0
/dev/sdh3 /mnt/vol8 xfs rw,noatime,nodiratime,rtdev=/dev/sdh4,noquota 0 0
/dev/sdh2 /mnt/vol8cmdb xfs rw,noquota 0 0
/dev/sdi3 /mnt/vol9 xfs rw,noatime,nodiratime,rtdev=/dev/sdi4,noquota 0 0

MediaSwift Admin & Install Guide 5-25
/dev/sdi2 /mnt/vol9cmdb xfs rw,noquota 0 0
/dev/sdj3 /mnt/vol10 xfs rw,noatime,nodiratime,rtdev=/dev/sdj4,noquota 0
0
/dev/sdj2 /mnt/vol10cmdb xfs rw,noquota 0 0
/dev/sdl3 /mnt/vol12 xfs rw,noatime,nodiratime,rtdev=/dev/sdl4,noquota 0
0
/dev/sdl2 /mnt/vol12cmdb xfs rw,noquota 0 0
/dev/sdm3 /mnt/vol13 xfs rw,noatime,nodiratime,rtdev=/dev/sdm4,noquota 0
0
/dev/sdm2 /mnt/vol13cmdb xfs rw,noquota 0 0
/dev/sdk3 /mnt/vol11 xfs rw,noatime,nodiratime,rtdev=/dev/sdk4,noquota 0
0
/dev/sdk2 /mnt/vol11cmdb xfs rw,noquota 0 0
/dev/sdo3 /mnt/vol15 xfs rw,noatime,nodiratime,rtdev=/dev/sdo4,noquota 0
0
/dev/sdo2 /mnt/vol15cmdb xfs rw,noquota 0 0
/dev/sdn3 /mnt/vol14 xfs rw,noatime,nodiratime,rtdev=/dev/sdn4,noquota 0
0
/dev/sdn2 /mnt/vol14cmdb xfs rw,noquota 0 0
console>
Display status of MediaSwift components.
console> show process
admin 2243 1 0 Aug13 ? 00:00:00 -pang_cli
admin 3379 3378 0 12:58 pts/0 00:00:00 -pang_cli
admin 3865 3864 0 10:31 pts/1 00:00:00 -pang_cli
root 5762 1 0 Aug13 ? 00:00:06 /usr/sbin/httpd2-prefork
-f /etc/apache2/httpd.conf
wwwrun 6192 5762 0 Aug16 ? 00:00:08 /usr/sbin/httpd2-prefork
-f /etc/apache2/httpd.conf
spread 6375 1 0 Aug13 ? 00:28:53 /usr/bin/spread -n ce-1 -
c /etc/spread.conf
wwwrun 8720 5762 0 Aug16 ? 00:00:08 /usr/sbin/httpd2-prefork
-f /etc/apache2/httpd.conf
wwwrun 8993 5762 0 Aug17 ? 00:00:04 /usr/sbin/httpd2-prefork
-f /etc/apache2/httpd.conf
wwwrun 9006 5762 0 Aug17 ? 00:00:04 /usr/sbin/httpd2-prefork
-f /etc/apache2/httpd.conf
wwwrun 9007 5762 0 Aug17 ? 00:00:04 /usr/sbin/httpd2-prefork
-f /etc/apache2/httpd.conf
root 9786 1 0 Aug13 ? 00:00:03 /sbin/syslog-ng -f
/etc/syslog-ng/syslog-ng.conf -a /var/lib/ntp/dev/log

MediaSwift Admin & Install Guide 5-26
wwwrun 11867 5762 0 Aug16 ? 00:00:07 /usr/sbin/httpd2-prefork
-f /etc/apache2/httpd.conf
wwwrun 13669 5762 0 Aug16 ? 00:00:08 /usr/sbin/httpd2-prefork
-f /etc/apache2/httpd.conf
root 19290 1 0 Aug17 ? 00:00:00
/opt/pang/mgmt/avalon/sbin/snmptrapd -f -Osq -Ls user -c
/opt/pang/mgmt/avalon/sbin/snmptrapd.conf 127.0.0.1
root 20933 1 0 Aug17 ? 00:04:31
/opt/pang/mgmt/avalon/sbin/snmpd -f -A -LF e
/opt/pang/mgmt/avalon/var/log/snmpd.log -LS c u 192.168.0.202
root 20984 1 2 Aug17 ? 00:31:32
/opt/pang/cache/avalon/sbin/snmpd -f -A -LF e
/opt/pang/cache/avalon/var/log/snmpd.log -LS c u 127.0.0.1:10161
root 21134 1 99 Aug17 ? 3-13:27:17 /opt/pang/bin/pang -d -
f /opt/pang/conf/pang.conf
wwwrun 27907 5762 0 10:25 ? 00:00:00 /usr/sbin/httpd2-prefork
-f /etc/apache2/httpd.conf
root 30012 1 0 Aug17 ? 00:03:49
/opt/pang/mgmt/bin/monitor -i lo
wwwrun 31197 5762 0 Aug16 ? 00:00:07 /usr/sbin/httpd2-prefork
-f /etc/apache2/httpd.conf
wwwrun 31306 5762 0 Aug16 ? 00:00:07 /usr/sbin/httpd2-prefork
-f /etc/apache2/httpd.conf
Display cluster administrative and application status.
Console> show status
Operational state Device state Administrative state
enabled started unlocked
=
Display system serial number.
console> show systemid
*8GB9C4J
Display system date and time.
console> show time
Tue Aug 18 2009 13:13:46 GMT+0000
Display cluster uptime.
console> show uptime
20h:12m:23s.00th
Display software version.

MediaSwift Admin & Install Guide 5-27
console> show version
management PeerApp management cli version 3.0.87
management PeerApp management node software version 3.0.87
PANG 3.0.87 2.6.27.7-llpf-9-default LLPF Version
1.9.13
Display mounted volumes.
console> show volumes
Volume name State Owner
/mnt/vol1 mounted ce-1
/mnt/vol2 mounted ce-1
/mnt/vol3 mounted ce-1
/mnt/vol4 mounted ce-1
/mnt/vol5 mounted ce-1
/mnt/vol6 mounted ce-1
/mnt/vol7 mounted ce-1
/mnt/vol8 mounted ce-1
/mnt/vol9 mounted ce-1
/mnt/vol10 mounted ce-1
/mnt/vol11 mounted ce-1
/mnt/vol12 mounted ce-1
/mnt/vol13 mounted ce-1
/mnt/vol14 mounted ce-1
/mnt/vol15 mounted ce-1
console>
tcpdump
The tcpdump command dumps traffic on the appropriate network interface.
NOTE It is not recommended to use this command on a production platform that processes more than a total of 250Mbps of traffic as this may cause the traffic to slow down.
Command Parameters
-i <interface> -c <count> -r <cidr_range>
Where:
Interface – The network interface for which to display the traffic.
count – The number of reports to generate.

MediaSwift Admin & Install Guide 5-28
cidr_range –This option outlines the range of the subnets for you wish to get the dump. This
parameter is mandatory.
Sample Use
Display two reports for the traffic on eth0.
console> tcpdump -i eth0 -c 2 –r 10.1.1.73/24
tcpdump: WARNING: eth0: no IPv4 address assigned
tcpdump: verbose output suppressed, use -v or -vv for full protocol
decode
listening on eth0, link-type EN10MB (Ethernet), capture size 65535 bytes
2 packets captured
5 packets received by filter
0 packets dropped by kernel
10:39:12.915394 IP 192.168.0.73.22 > 10.1.1.73.2305: P
4092557387:4092557503(116) ack 1184594112 win 10720
10:39:12.915400 IP 192.168.0.73.22 > 10.1.1.73.2305: P 116:232(116) ack 1
win 10720
traceroute
The traceroute command tracks a packet‟s route across a TCP/IP network on its way to a given host. It
utilizes the IP protocol's time to live (TTL) field and attempts to elicit an ICMP TIME_EXCEEDED
response from each gateway along the path to the host/destination.
Command Parameters
[-n] destination
Where:
-n – Forces the traceroute command to avoid mapping IP addresses to host names when displaying
them.
destination – The name or IP address of the destination.
Sample Use
Traceroute to a remote destination/host.
console> traceroute 213.25.17.65
traceroute to 213.25.17.65 (213.25.17.65), 30 hops max, 40 byte packets
1 192.168.0.2 (192.168.0.2) 1.316 ms 1.485 ms 1.292 ms
2 10.1.2.253 (10.1.2.253) 0.656 ms 0.372 ms 0.747 ms

MediaSwift Admin & Install Guide 5-29
3 212.150.66.65 (212.150.66.65) 1.481 ms 1.210 ms 1.044 ms
4 212.150.6.137 (212.150.6.137) 5.517 ms 6.398 ms 6.574 ms
5 gig0-1-gw1.thc.nv.net (212.143.200.33) 10.862 ms 10.842 ms
10.668 ms
6 * coresw1-hfa-gw1.thc.nv.net (212.143.200.1) 6.721 ms 6.895 ms
7 teng2-1-0.gw2.hfa.nv.net (212.143.8.196) 5.959 ms 9.117 ms 8.460
ms
8 pos0-1-1.brdr2.lnd.nv.net (212.143.12.57) 77.423 ms * 75.177 ms
9 GigabitEthernet3-1.GW1.LND9.ALTER.NET (146.188.55.61) 73.425 ms
69.143 ms 70.365 ms
10 * so-3-0-0.CR2.LND9.ALTER.NET (158.43.150.145) 157.824 ms 153.850
ms
11 so-0-3-0.XT2.LND2.ALTER.NET (146.188.15.245) 69.099 ms 69.834 ms *
12 GigabitEthernet1-0-0.BR1.LND18.ALTER.NET (146.188.4.42) 73.002 ms
72.350 ms 78.342 ms
13 GE.LND.opentransit.net (146.188.112.82) 70.164 ms 69.356 ms
69.688 ms
14 tengige0-8-0-0.lontr1.London.opentransit.net (193.251.129.81) 80.167
ms 80.134 ms 79.107 ms
15 xe-0-0-1-0.ffttr2.Frankfurt.opentransit.net (193.251.129.41) 92.546
ms 95.034 ms 94.282 ms
16 * * *
17 do.wro-ar3.z.wro-r1.tpnet.pl (213.25.5.154) 120.296 ms do.wro-
ar3.z.wro-r2.tpnet.pl (213.25.12.154) 134.187 ms 130.254 ms
18 * z-easy-com.wro-ar1.tpnet.pl (80.50.233.62) 236.345 ms 235.563 ms
19 z-easy-com.wro-ar1.tpnet.pl (80.50.233.62) 124.651 ms 125.124 ms
126.872 ms
console> traceroute -n 213.25.17.65
traceroute to 213.25.17.65 (213.25.17.65), 30 hops max, 40 byte packets
1 192.168.0.2 (192.168.0.2) 1.307 ms 2.133 ms 2.832 ms
2 10.1.2.253 (10.1.2.253) 0.472 ms 0.477 ms 0.438 ms
3 212.150.66.65 (212.150.66.65) 1.150 ms 1.391 ms 2.616 ms
4 212.150.6.137 (212.150.6.137) 6.146 ms * 4.927 ms
5 212.143.200.33 (212.143.200.33) 5.112 ms 5.374 ms 5.457 ms
6 212.143.200.1 (212.143.200.1) 6.348 ms 7.459 ms 6.200 ms
7 212.143.8.196 (212.143.8.196) 6.269 ms 6.208 ms 6.420 ms
8 212.143.12.57 (212.143.12.57) 75.146 ms 74.670 ms 74.082 ms
9 146.188.55.61 (146.188.55.61) 68.022 ms 68.586 ms 69.261 ms
10 158.43.150.145 (158.43.150.145) 76.673 ms * 76.009 ms

MediaSwift Admin & Install Guide 5-30
11 146.188.15.245 (146.188.15.245) 68.753 ms * 67.996 ms
12 146.188.4.42 (146.188.4.42) 70.045 ms * 71.441 ms
13 * * 146.188.112.82 (146.188.112.82) 69.605 ms
14 * 193.251.129.81 (193.251.129.81) 75.391 ms 74.884 ms
15 193.251.129.41 (193.251.129.41) 93.854 ms 169.094 ms 165.100 ms
16 * * *
17 213.25.5.154 (213.25.5.154) 118.610 ms 213.25.12.154 (213.25.12.154)
122.907 ms 122.927 ms
18 80.50.233.62 (80.50.233.62) 218.868 ms 218.119 ms *
19 80.50.233.62 (80.50.233.62) 123.890 ms 125.167 ms 124.627 ms
console>
who
The who command displays the users who are currently logged on.
NOTE You must be logged on using an administrator username and password to view the output of the who command.
Command Parameters
None.
Sample Use
Display a list of users currently logged on to the system.
console> who
admin pts/1 Aug 18 10:31 (10.1.1.101)
console>
Enable Mode Commands
The following commands are accessible in Enable mode.
Regular mode commands are also available in Enable mode. Refer to Standalone Configuration
Regular Mode Commands, page 5-2 for a list and description of Regular mode commands.
You must have a username and password to access Enable mode commands. Refer to enable, page 5-5
for more information.
Table 2: Enable Mode Commands
COMMAND DESCRIPTION
access Enables users to manage system access parameters

MediaSwift Admin & Install Guide 5-31
COMMAND DESCRIPTION
apache_restart Restarts apache
cache Enables users to manage additional cache operations
config Enters Configuration mode
downgrade Rolls back to the last good version
eventlog Provides access to eventlog Enable mode commands
help Displays commands available in Enable mode
license Enables users to manage the system license
oper Provides access to system management operations
reset Resets management services
show Provides access to additional show Enable mode
commands
smartfilter Manages Smartfilter options.
upgrade Downloads and installs software image file
vlan Add/remove vlans from the interface
access
The access command enables the user to manage system access parameters, such as:
enable-password – Sets the Enable mode password.
NOTE The default password for the enable command is set upon system installation and defaults to the system-id. The system-id is viewable using the show systemid command. It is strongly recommended to change the default enable command password immediately after initial installation.
idle-session-timeout – Sets the timeout after which the telnet session is terminated (both for the
Enable mode and the Regular mode commands).
The default timeout value is NO timeout – i.e., the sessions are always available and will never be
terminated.
user-password – Sets the Regular mode command user password.
Command Parameters
enable-password – When used, the CLI prompts the user for a new password, and then requests the
user to re-enter the new password for verification. If both passwords match, the enable-password is
modified to the new password. The new password should be at least four characters long.

MediaSwift Admin & Install Guide 5-32
idle-session-timeout – Sets the idle-session timeout value. This command requires the following
parameter:
<timeout value (secs)> – the value, in seconds, for the new idle-timeout value. The
default value is zero seconds which disables the timeout.
user-password – When used, the CLI prompts the user for the new password, and then requests the
user to re-enter the new password for verification. If both passwords match, the user-password is
modified to the new password. The new password should be at least four characters long, and is then
verified against a set of rules which forces a complex password standard.
Sample Use
Change the Enable mode password.
console# access enable-password
New password:
Re-enter new password:
console#
Change the idle session timeout.
console# access idle-session-timeout 32768
console#
Change the user password.
console# access user-password
Changing password for admin.
Old Password:
New Password:
Bad password: too simple
New Password:
Reenter New Password:
Password changed.
console#
apache_restart
The apache_restart command restarts the apache server.
Command Parameters
None.
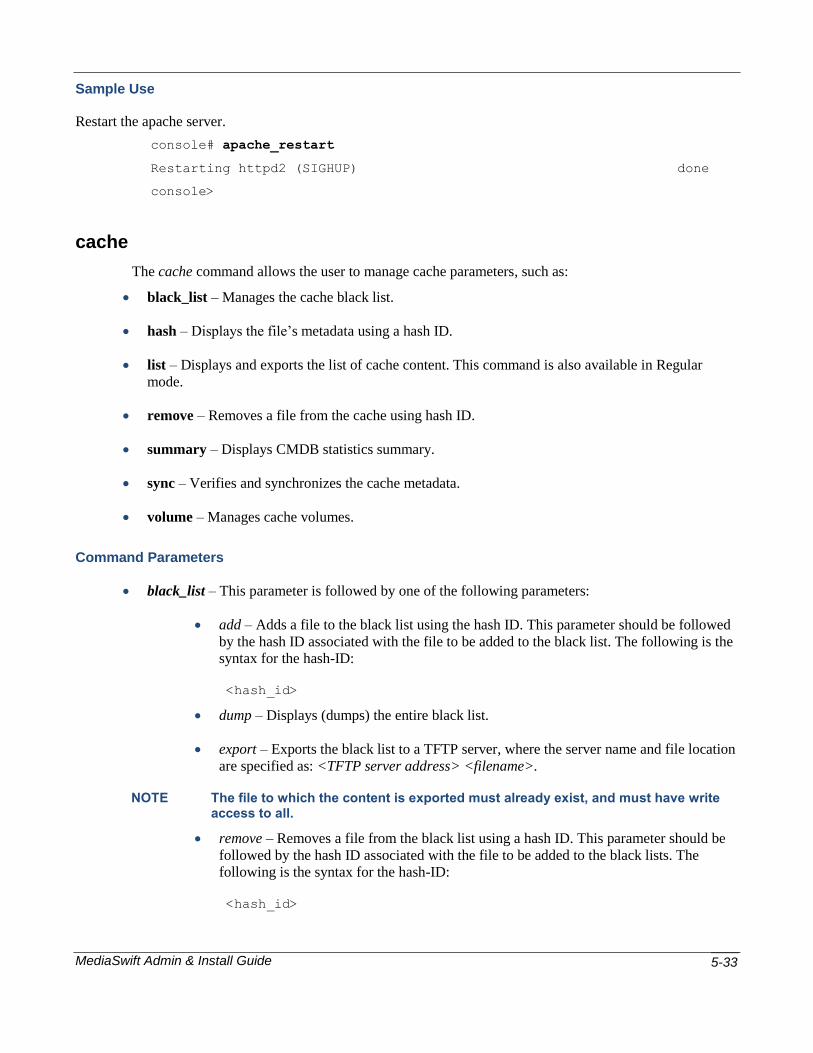
MediaSwift Admin & Install Guide 5-33
Sample Use
Restart the apache server.
console# apache_restart
Restarting httpd2 (SIGHUP) done
console>
cache
The cache command allows the user to manage cache parameters, such as:
black_list – Manages the cache black list.
hash – Displays the file‟s metadata using a hash ID.
list – Displays and exports the list of cache content. This command is also available in Regular
mode.
remove – Removes a file from the cache using hash ID.
summary – Displays CMDB statistics summary.
sync – Verifies and synchronizes the cache metadata.
volume – Manages cache volumes.
Command Parameters
black_list – This parameter is followed by one of the following parameters:
add – Adds a file to the black list using the hash ID. This parameter should be followed
by the hash ID associated with the file to be added to the black list. The following is the
syntax for the hash-ID:
<hash_id>
dump – Displays (dumps) the entire black list.
export – Exports the black list to a TFTP server, where the server name and file location
are specified as: <TFTP server address> <filename>.
NOTE The file to which the content is exported must already exist, and must have write access to all.
remove – Removes a file from the black list using a hash ID. This parameter should be
followed by the hash ID associated with the file to be added to the black lists. The
following is the syntax for the hash-ID:
<hash_id>
MediaSwift Admin & Install Guide 5-34
hash – Dump the file‟s metadata using the hash ID.
list – Displays and exports the list of cache content. This parameter is followed by one of the
following parameters:
display – Displays a full list of cache content.
export – Exports the cache content to TFTP server. This command should be followed
by the TFTP server IP-address and the filename to which the information is to be saved.
short – Displays the Least Recently Used (LRU) cached hash IDs.
remove – Removes a file from cache using a hash ID. Add the hash ID to this parameter using the
following syntax:
hash <hash_id> – Where the hash ID should match a hash ID that exists in the system
cache. For a list of hash IDs stored in the system, use the cache list command.
summary – Display the CMDB statistics summary.
sync – Verifies and synchronizes the cache metadata. The platform is fully accessible during this
process. Note that synching the cache can take a few hours.
volume – Manipulates the cache file system volumes. Using this command you can activate,
deactivate, and remove file system volumes. These sets of commands are mainly used for
maintenance purposes – usually for hard drive maintenance.
You can use the show volume command for a list of currently used volumes.
The volumes that can be used for these commands can be viewed using the show volume command.
When the volume command is used, it should be followed by one of the following parameters:
activate – Request the system to activate a cache volume.
deactivate – Request the platform to stop using a specific volume for caching.
remove – Remove all hash IDs associated with the specific volume from within the
configuration management database (CMDB), so that the system will not cache these
hash IDs anymore. This command removes ALL information cached on this volume
from the CMDB, which is a non-reversible process.
Following these parameters, a volume number should be added, which has the following
syntax:
<1-15> – Represents the volume number to be used for this command.
Sample Use
Black List Manipulation:
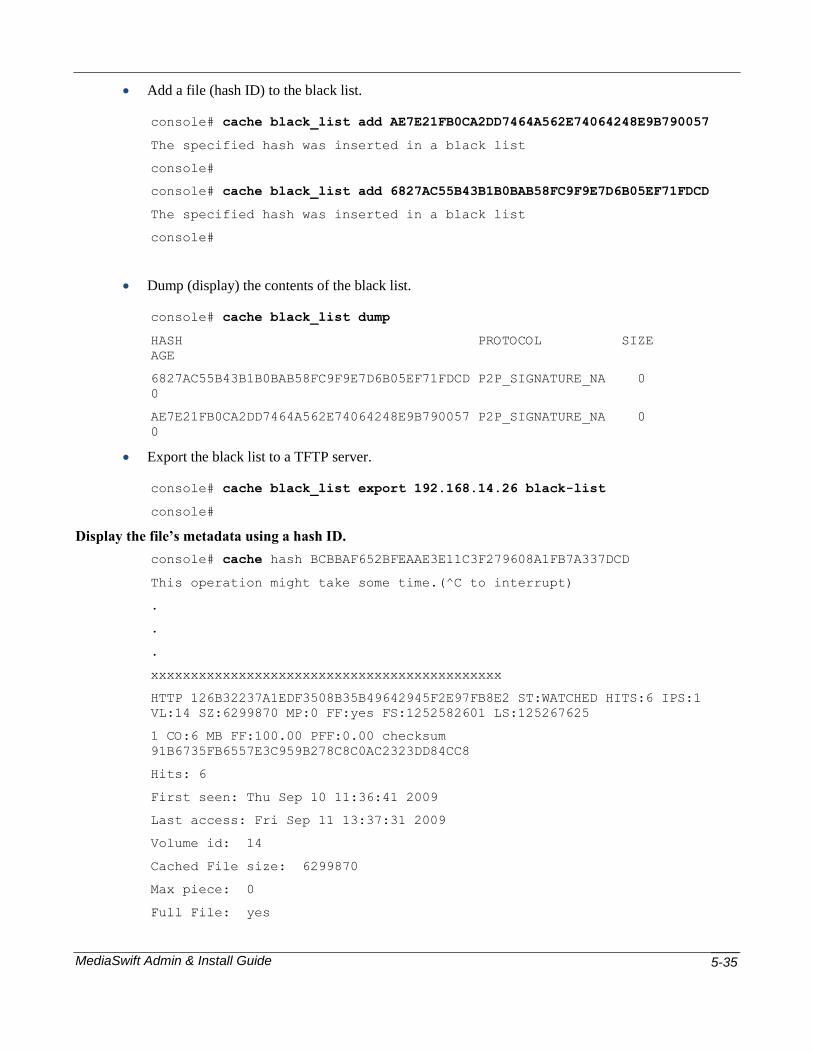
MediaSwift Admin & Install Guide 5-35
Add a file (hash ID) to the black list.
console# cache black_list add AE7E21FB0CA2DD7464A562E74064248E9B790057
The specified hash was inserted in a black list
console#
console# cache black_list add 6827AC55B43B1B0BAB58FC9F9E7D6B05EF71FDCD
The specified hash was inserted in a black list
console#
Dump (display) the contents of the black list.
console# cache black_list dump
HASH PROTOCOL SIZE
AGE
6827AC55B43B1B0BAB58FC9F9E7D6B05EF71FDCD P2P_SIGNATURE_NA 0
0
AE7E21FB0CA2DD7464A562E74064248E9B790057 P2P_SIGNATURE_NA 0
0
Export the black list to a TFTP server.
console# cache black_list export 192.168.14.26 black-list
console#
Display the file’s metadata using a hash ID.
console# cache hash BCBBAF652BFEAAE3E11C3F279608A1FB7A337DCD
This operation might take some time.(^C to interrupt)
.
.
.
xxxxxxxxxxxxxxxxxxxxxxxxxxxxxxxxxxxxxxxxxxxx
HTTP 126B32237A1EDF3508B35B49642945F2E97FB8E2 ST:WATCHED HITS:6 IPS:1
VL:14 SZ:6299870 MP:0 FF:yes FS:1252582601 LS:125267625
1 CO:6 MB FF:100.00 PFF:0.00 checksum
91B6735FB6557E3C959B278C8C0AC2323DD84CC8
Hits: 6
First seen: Thu Sep 10 11:36:41 2009
Last access: Fri Sep 11 13:37:31 2009
Volume id: 14
Cached File size: 6299870
Max piece: 0
Full File: yes

MediaSwift Admin & Install Guide 5-36
Full File Size: 6299870
BT_last_start: 0
BT_last_end: 6299870
max known bt piece size 0
cache out in MB 6
File fill factor 100.00
total full pieces 0 (0.00)
HTTP checksum is 91B6735FB6557E3C959B278C8C0AC2323DD84CC8
piece bit mask 0x2
RANGES -------------- RANGES
console#
Display and export the cache content options.
console# cache list display
This operation might take some time as the whole storage-index is
scanned.(^C to interrupt)
HASH PROTOCOL SIZE AGE
D35D8E3D8EEE3BF82D7B8F783FD4D2380A216C67 HTTP 6276762 42
208FD9F7E7C42473291C503931EF22269657285A HTTP 6286497 30
5A88AC47F6B636E5FF6C462D9DE15691A53B26C3 HTTP 6297586 29
26D26351170461CDD3B5680ED0417254C4FA43C1 HTTP 6291394 26
86BA4AC4E0E818C18BD2B9040D7A5E3F19E70776 HTTP 6276664 43
9ADB98FC073B05866EFFBC1159522E9E42261669 HTTP 6295830 43
.
Export the full list of hash IDs to a TFTP server:
console# cache list export 192.168.5.117 cache-list
This operation will take about 2 minutes.(CTRL+C to interrupt). Display the top 1000 least recently
used hash IDs:
console# cache list short
This operation might take some time as the whole storage-index is
scanned.(^C to interrupt)
HASH PROTOCOL SIZE AGE
D35D8E3D8EEE3BF82D7B8F783FD4D2380A216C67 HTTP 6276762 42
208FD9F7E7C42473291C503931EF22269657285A HTTP 6286497 30
5A88AC47F6B636E5FF6C462D9DE15691A53B26C3 HTTP 6297586 29
26D26351170461CDD3B5680ED0417254C4FA43C1 HTTP 6291394 26

MediaSwift Admin & Install Guide 5-37
86BA4AC4E0E818C18BD2B9040D7A5E3F19E70776 HTTP 6276664 43
9ADB98FC073B05866EFFBC1159522E9E42261669 HTTP 6295830 43
94611C230B77D73205BC3090FA2A6104BAEE7990 HTTP 6297222 31
.
Remove a file (hash ID) from the black list.
console# cache black_list remove AE7E21FB0CA2DD7464A562E74064248E9B790057
The specified hash was deleted from a black list
console#
console# cache black_list remove 6827AC55B43B1B0BAB58FC9F9E7D6B05EF71FDCD
The specified hash was deleted from a black list
console#
Remove a hash ID Stored in the Cache.
console# cache remove hash F753B1C31107981BC86D87CF5F7B9EEFD5F5A28B
The specified hash will be deleted in a few minutes
console#
Cache Synchronization and Verification:
This process may take several hours to complete.
Start a cache verification and synchronization process.
console# cache sync
Proceeding cache to metadata sync. Some data in the cache might be lost.
Are you sure (y/n)? y
Starting cache synchronization...
Volume Manipulation Commands:
Activate a specific volume.
console# cache volume activate 4
activating volume 4
console#
Deactivate a specific volume.
console# cache volume deactivate 4
deactivating volume 4
console#
Remove a specific volume content from the CMDB.
console# cache volume remove 4

MediaSwift Admin & Install Guide 5-38
Are you sure? This will remove all hashes from volume 4.
[yes|no] no
Removing volume 4 has been cancelled
console#
config
The config command enters Configuration mode, the user prompt appears: configuration#, and
you can make platform configuration changes. Changes you make are stored but will only be
implemented upon using the apply command. Use the exit command to exit Configuration mode.
Configuration changes can include:
Cluster configuration.
Management network interface configuration.
Management NTP configuration.
In Configuration mode, you can request configuration changes using the following set of commands:
apply – Applies the configuration changes requested until now.
diff – Shows the pending configuration changes.
discard – Discards the pending changes.
display – Displays the current configuration.
exit – Exits Configuration mode.
export – Exports the cluster configuration to the TFTP server.
help – Displays the command syntax for each configuration command.
import – Imports the cluster configuration from the TFTP server.
network – Configures the management network interface.
ntp – Configures the management NTP parameters.
restore – Restores the last good configuration.
time – Sets the system date and time.

MediaSwift Admin & Install Guide 5-39
Configuration Commands and Parameters
apply – This command has no parameters. It immediately applies the configuration changes to the
live platform.
diff – This command does not have parameters. It displays the proposed configuration changes. The
new configuration parameters are indicated by a + sign as the first character on the line, while the
current configuration parameters are indicated by a - sign as the first character on the line. See the
sample below.
discard – This command has no parameters. It immediately discards any configuration change
requested since entering Configuration mode.
display – This command has no parameters. It immediately displays the current configuration.
exit – This command has no parameters. It immediately exits Configuration mode and returns to
Enable mode. If you created any configuration change but did not use the apply command to
implement the changes, a warning message appears as follows:
Exiting configuration mode without apply, will discard changes.
Are you sure? [N/y] n
export – Exports the current configuration to a TFTP server, where the server name and file location
are specified as: <TFTP server address> <filename>.
NOTE The file to which the configuration is exported must already exist, and must have write access to all.
If localhost is used as the <TFTP server address> parameter, then the file is located under the
/TFTPboot/ folder.
help – This command has no parameters. It displays help for all the CLI Configuration mode
commands.
import – Import the configuration from a TFTP server, where the server name and file location are
specified as: <TFTP server address> <filename>.
NOTE The file to which the configuration is imported must already exist, and must have write access to all.
If localhost is used as the <TFTP server address> parameter, then the file must be located under the
/TFTPboot/ folder.
network – Change the configuration default gateway or the configuration management network IP
address. The command has the following parameters:
default_gw – Configures the default gateway. The IP address of the default gateway
should follow.

MediaSwift Admin & Install Guide 5-40
NOTE Note that changing the default gateway could be dangerous, since if done from a telnet session to a remote MediaSwift server, it might destroy the connection with which you are currently working.
ip – Changes the management network interface. Specify the IP address using the
following syntax:
<ip address> <netmask>
ntp – Modifies the IP address associated with the NTP server or the time zone where MediaSwift
server is located. The additional parameters for this command are one of the following:
server – The IP address where an NTP server is running or a specific address for using
the localhost as the NTP server. The following syntax applies:
<ip address or 127.127.1.0 for local>
timezone – Followed by the time zone name. From the “/usr/share/zoneinfo” folder,
select the correct time zone name that fits the time zone in which the system is located.
For example:
New Zealand – “Pacific/Auckland”.
Chicago – “America/Chicago”.
NOTE An up-to-date timezone table can easily be found on the Internet, by searching for “list of zoneinfo timezones” and using the value displayed in the TZ environment variable that matches your timezone.
restore – Restores the latest configuration before the last changes were applied. You must still use
the apply command to apply the restored configuration to the system, or use the discard command to
discard the restored configuration.
time – Enables you to modify the system time. The command should be followed by the current
time, using the <MMDDYYhhmm> format.
Sample Use
Apply configuration changes.
configuration# apply
Configurations are identical
configuration#
.
.. perform some configuration changes
..
configuration# apply
applying configuration...
Configuration applied

MediaSwift Admin & Install Guide 5-41
configuration#
configuration# export 192.168.0.97 current-config
configuration#
Display the new configuration.
configuration# diff
<?xml version="1.0" encoding="UTF-8" standalone="no" ?>
<cluster xmlns:xsi='http://www.w3.org/2001/XMLSchema-instance'
xsi:noNamespaceSchemaLocation='cluster_conf.xsd'>
<mgmt-config>
<ipaddr>192.168.0.202</ipaddr>
<netmask>255.255.255.0</netmask>
<default-gw>192.168.0.2</default-gw>
<nameserver>10.1.1.235</nameserver>
<alert-email>[email protected]</alert-email>
<site_name>>192.168.0.202 </site_name>
<external_syslog_ip>127.0.0.1</external_syslog_ip>
</mgmt-config>
<web-config></web-config>
<common>
<ntp>
<server-ip>127.127.1.0</server-ip>
- <timezone>America/Chicago</timezone>
+ <timezone>Pacific/Auckland</timezone>
</ntp>
<snmp>
<trap-ip>aa.bb.cc.dd</trap-ip>
<snmp-read-community>gdcbhv</snmp-read-community>
<snmp-write-community>nkppui</snmp-write-community>
<snmp-trap-community>nkppui</snmp-trap-community>
</snmp>
<service>
<protocols>
<enable-bittorent>1</enable-bittorent>
<enable-edk>1</enable-edk>

MediaSwift Admin & Install Guide 5-42
<enable-gnutella>1</enable-gnutella>
<enable-http>1</enable-http>
<enable-ares>1</enable-ares>
</protocols>
<net>
<fwd-mode>PROMISC</fwd-mode>
<bridge id='0'>
<interface-world>iff2</interface-world>
<interface-isp>iff1</interface-isp>
</bridge>
</net>
</service>
</common>
<blades>1</blades>
<blade id='1'>
<cache-engine>
<network></network>
</cache-engine>
</blade>
</cluster>
Discard a set of configuration changes.
configuration# discard
configuration#
Display the current configuration.
configuration# display
<?xml version="1.0" encoding="UTF-8" standalone="no" ?>
<cluster xmlns:xsi='http://www.w3.org/2001/XMLSchema-instance'
xsi:noNamespaceSchemaLocation='cluster_conf.xsd'>
<mgmt-config>
<ipaddr>192.168.0.202</ipaddr>
<netmask>255.255.255.0</netmask>
<default-gw>192.168.0.2</default-gw>
<nameserver>10.1.1.235</nameserver>
<alert-email>[email protected]</alert-email>

MediaSwift Admin & Install Guide 5-43
<site_name>192.168.0.202 </site_name>
<external_syslog_ip>127.0.0.1</external_syslog_ip>
<secure-computing>
<host_name>list.smartfilter.com</host_name>
<path_on_host>cgi-bin/updatelist</path_on_host>
<sfversion>3.1.56</sfversion>
<serial_number>AAAA-BBBB-CCCC-DDDD</serial_number>
</secure-computing>
</mgmt-config>
<web-config></web-config>
<common>
<ntp>
<server-ip>127.127.1.0</server-ip>
<timezone>Pacific/Aukland</timezone>
</ntp>
<snmp>
<trap-ip>10.11.12.1</trap-ip>
<snmp-read-community>gdcbhv</snmp-read-community>
<snmp-write-community>nkppui</snmp-write-community>
<snmp-trap-community>nkppui</snmp-trap-community>
</snmp>
<service>
<protocols>
<enable-bittorent>1</enable-bittorent>
<enable-edk>1</enable-edk>
<enable-gnutella>1</enable-gnutella>
<enable-http>1</enable-http>
<enable-ares>1</enable-ares>
<enable-smartfilter>1</enable-smartfilter>
</protocols>
<net>
<fwd-mode>PROMISC</fwd-mode>
<bridge id='0'>
<interface-world>iff2</interface-world>
<interface-isp>iff1</interface-isp>
</bridge>

MediaSwift Admin & Install Guide 5-44
</net>
</service>
<content_filtering>
<custom-smartfilter-category name='Joe'>
<url-map name='custom-Joe-name'>
<url>http://164.90.0.2/block/</url>
<url>http://164.90.0.2/redirect/</url>
<url>http://www.espn.com</url>
</url-map>
</custom-smartfilter-category>
<custom-smartfilter-category name='jones'>
<url-map name='custom-jones-name'>
<url>http://www.sex4free.com</url>
<url>http://www.cnn.com/</url>
<url>http://www.one.com/cat/live</url>
</url-map>
</custom-smartfilter-category>
<content_class name='Joe'>
<smartfilter-category name='Joe' />
<content-action name='block'>
<http-action>BLOCK</http-action>
<http-response-code>404</http-response-code>
</content-action>
</content_class>
<content_class name='jones'>
<smartfilter-category name='jones' />
<content-action name='redirect'>
<http-action>REDIRECT</http-action>
<redirect-url>http://www.teatime.com</redirect-url>
</content-action>
</content_class>
<content_class name='Pornography'>
<smartfilter-category name='Pornography' />
<content-action name='block'>
<http-action>BLOCK</http-action>
</content-action>

MediaSwift Admin & Install Guide 5-45
</content_class>
<content_class name='Shareware'>
<smartfilter-category name='Shareware/Freeware' />
<content-action name='redirect'>
<http-action>REDIRECT</http-action>
<redirect-url>http://www.aaa.com</redirect-url>
</content-action>
</content_class>
</content_filtering>
</common>
<blades>1</blades>
<blade id='1'>
<cache-engine>
<network></network>
</cache-engine>
</blade>
</cluster>
configuration#
Exit the configuration session.
configuration# exit
console#
Export the current configuration onto a TFTP server.
configuration# export 192.168.0.97 current-config
configuration#
Display the list of all Configuration mode commands.
configuration# help
apply Apply config changes
diff Show pending changes
discard Discard pending changes
display Display pending configuration
exit Exit current mode
export Export cluster configuration to TFTP server
help Commands description
import Import cluster configuration from TFTP server
network Configure management network interface
ntp Configure management NTP parameters

MediaSwift Admin & Install Guide 5-46
restore Restore last good configuration
time Set system date and time
configuration#
Import a configuration file and place it as a new configuration ready to be “applied”.
configuration# import 192.168.0.97 current-config
configuration# diff
<?xml version="1.0" encoding="UTF-8" standalone="no" ?>
<cluster xmlns:xsi='http://www.w3.org/2001/XMLSchema-instance'
xsi:noNamespaceSchemaLocation='cluster_conf.xsd'>
<mgmt-config>
<ipaddr>192.168.0.97</ipaddr>
<netmask>255.255.255.0</netmask>
- <default-gw>192.168.0.1</default-gw>
+ <default-gw>192.168.0.2</default-gw>
<nameserver>194.90.1.5</nameserver>
<alert-email>[email protected]</alert-email>
<site_name>UB1K office - promisc </site_name>
</mgmt-config>
<web-config></web-config>
<common>
<ntp>
- <server-ip>127.127.1.0</server-ip>
+ <server-ip>192.43.244.18</server-ip>
<timezone>America/Chicago</timezone>
</ntp>
..
Modify the default GW for this server. In addition, modify the configure management network interface address.
configuration# network default_gw 192.168.0.2
configuration#
configuration# network ip 192.168.0.97 255.255.255.0
configuration#
Change the current time server used by the platform as the source for its time synchronization. In addition,
modify the time zone where the platform is located.
configuration# ntp server
ntp server-ip: 127.127.1.0

MediaSwift Admin & Install Guide 5-47
configuration# ntp server 127.127.1.0
configuration# ntp timezone "Pacific/Auckland"
configuration# diff
<?xml version="1.0" encoding="UTF-8" standalone="no" ?>
<cluster xmlns:xsi='http://www.w3.org/2001/XMLSchema-instance'
xsi:noNamespaceSchemaLocation='cluster_conf.xsd'>
<mgmt-config>
<ipaddr>192.168.0.202</ipaddr>
<netmask>255.255.255.0</netmask>
<default-gw>192.168.0.2</default-gw>
<nameserver>10.1.1.235</nameserver>
<alert-email>[email protected]</alert-email>
<site_name>192.168.0.202 </site_name>
<external_syslog_ip>127.0.0.1</external_syslog_ip>
</mgmt-config>
<web-config></web-config>
<common>
<ntp>
<server-ip>127.127.1.0</server-ip>
- <timezone>GMT0</timezone>
+ <timezone>Pacific/Auckland</timezone>
</ntp>
<snmp>
<trap-ip>10.11.12.1</trap-ip>
<snmp-read-community>gdcbhv</snmp-read-community>
<snmp-write-community>nkppui</snmp-write-community>
<snmp-trap-community>nkppui</snmp-trap-community>
</snmp>
<service>
<protocols>
<enable-bittorent>1</enable-bittorent>
<enable-edk>1</enable-edk>
<enable-gnutella>1</enable-gnutella>
<enable-http>1</enable-http>
<enable-ares>1</enable-ares>
<enable-thunder>1</enable-thunder>
</protocols>

MediaSwift Admin & Install Guide 5-48
<net>
<fwd-mode>PROMISC</fwd-mode>
</net>
</service>
</common>
<blades>1</blades>
<blade id='1'>
<cache-engine>
<network></network>
<service></service>
</cache-engine>
</blade>
</cluster>
configuration#
Restore the previous configuration. Note that restoring the configuration still requires the use of the apply
command to implement the previous.
configuration# restore
configuration# diff
<?xml version="1.0" encoding="UTF-8" standalone="no" ?>
<cluster xmlns:xsi='http://www.w3.org/2001/XMLSchema-instance'
xsi:noNamespaceSchemaLocation='cluster_conf.xsd'>
<mgmt-config>
<ipaddr>192.168.0.202</ipaddr>
<netmask>255.255.255.0</netmask>
<default-gw>192.168.0.2</default-gw>
<nameserver>10.1.1.235</nameserver>
<alert-email>[email protected]</alert-email>
<site_name>192.168.0.202 </site_name>
<external_syslog_ip>127.0.0.1</external_syslog_ip>
</mgmt-config>
<web-config></web-config>
<common>
<ntp>
- <server-ip>192.43.244.18</server-ip>
- <timezone>Pacific/Auckland</timezone>
+ <server-ip>127.127.1.0</server-ip>
+ <timezone>America/Chicago</timezone>
Current configuration
New configuration

MediaSwift Admin & Install Guide 5-49
</ntp>
.
.
configuration# apply
applying configuration...
Configuration applied
configuration#
Change the current time and date.
configuration# time
Please enter date in format: MMDDYYhhmm
configuration# time 0526081027
Mon May 26 10:27:00 NZST 2008
configuration#
downgrade
The downgrade command enables you to rollback to the last good version of the software.
NOTE During the rollback to the previous version, some data might be lost.
Command Parameters
None.
Sample Use
Rollback to the last good version of the software.
console> downgrade
During the rollback to the previous version a part of data might be lost.
Proceed? (y/n)[n] y
console>
eventlog
The eventlog command enables you to view or export the content of the event log. The term event log
refers to all log messages sent to the system log by all MediaSwift service components (applications,
CLI, and SNMP).
Enable mode eventlog commands include the additional parameters shown here. These are used
specifically when duplicating the event log information to an external SYSLOG server. The syslog
server is configured within the system configuration file. You can add an external syslog server to the
platform by adding the following statements to the system configuration:

MediaSwift Admin & Install Guide 5-50
<mgmt-config>
<external_syslog_ip>192.168.0.154</external_syslog_ip>
</mgmt-config>
The IP address associated with the external syslog server should replace the IP address shown above.
To obtain system configuration:
Export the system configuration to a TFTP server and edit it manually using the
Configuration mode export command.
Add the above statements with the IP address associated with the syslog server to the
<mgmt-config> section and save the file.
Import the configuration file back to the system using the Configuration mode import
command.
Apply the new configuration to the system use the Configuration mode apply command.
Command Parameters
For the parameters available in Regular mode, refer to
eventlog, page 5-5. The following are the parameters available in Enable mode:
date – Enables you to choose a log from a specific date. This parameter is followed by the required
date.
export – Exports the eventlog to TFTP server.
forward – Starts event log forwarding to a previously configured syslog server.
stop – Stops event log forwarding to a previously configured syslog server.
show – Displays the current event log up to this moment.
tail – Monitors the event log growth.
Sample Use
Start forwarding event log messages to the configured syslog server.
console# eventlog forward
console#
Display event log from the specified date.
console# eventlog date
DD-MM-YYYY
Stop forwarding event log messages to the configured syslog server.
console# eventlog stop

MediaSwift Admin & Install Guide 5-51
console#
license
The license command enables you to manage MediaSwift system license. This license controls
operational parameters, such as the supported protocols and features, and the maximum cache
bandwidth.
Command Parameters
The license command must have one of the following parameters associated with it:
activate – Activates the system license.
import – Imports a license from the TFTP server where the server name and file location are
specified as: <TFTP server><file>.
show – Displays the currently licensed operational parameters.
Sample Use
Activate the installed license.
console# license activate
Licensed chassis serial number: DGB9C4J
EDK enabled: 1
Bittorent enabled: 1
Kazaa enabled: 1
Gnutella enabled: 1
Ares enabled: 1
Http enabled: 1
Pando enabled: 1
Thunder enabled: 0
Smartfilter enabled: 0
Storage volumes: 15
Controllers: 0
Evaluaton ends on: 3-10-2009
Max bandwidth: 1000 Mbps
console#
Import the license from the TFTP server.
console# license import 10.1.1.65 SF-PALicense.xml
Licensed chassis serial number: DGB9C4J

MediaSwift Admin & Install Guide 5-52
EDK enabled: 1
Bittorent enabled: 1
Kazaa enabled: 1
Gnutella enabled: 1
Ares enabled: 1
Http enabled: 1
Pando enabled: 1
Thunder enabled: 0
Smartfilter enabled: 0
Storage volumes: 15
Controllers: 0
Evaluaton ends on: 3-10-2009
Max bandwidth: 1000 Mbps
console#
Display the installed licensed operational parameters.
console# license show
Licensed chassis serial number: DGB9C4J
EDK enabled: 1
Bittorent enabled: 1
Kazaa enabled: 1
Gnutella enabled: 1
Ares enabled: 1
Http enabled: 1
Pando enabled: 1
Thunder enabled: 1
Smartfilter enabled: 0
Storage volumes: 15
Controllers: 0
Evaluaton ends on: 3-10-2009
Max bandwidth: 1000 Mbps
console#
oper
The oper command controls the running state of the platform, including starting, stopping, or restarting
the platform software and all its services.
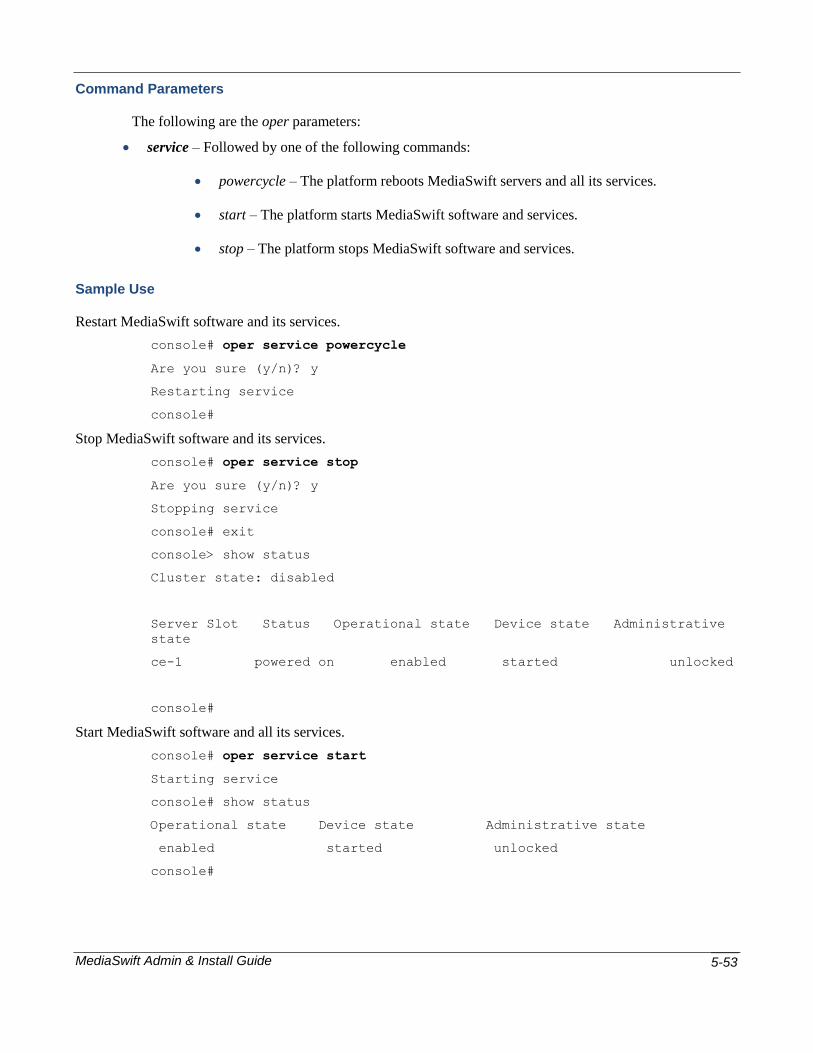
MediaSwift Admin & Install Guide 5-53
Command Parameters
The following are the oper parameters:
service – Followed by one of the following commands:
powercycle – The platform reboots MediaSwift servers and all its services.
start – The platform starts MediaSwift software and services.
stop – The platform stops MediaSwift software and services.
Sample Use
Restart MediaSwift software and its services.
console# oper service powercycle
Are you sure (y/n)? y
Restarting service
console#
Stop MediaSwift software and its services.
console# oper service stop
Are you sure (y/n)? y
Stopping service
console# exit
console> show status
Cluster state: disabled
Server Slot Status Operational state Device state Administrative
state
ce-1 powered on enabled started unlocked
console#
Start MediaSwift software and all its services.
console# oper service start
Starting service
console# show status
Operational state Device state Administrative state
enabled started unlocked
console#

MediaSwift Admin & Install Guide 5-54
reset
The reset command resets the management services. Note that resetting the management services will
disconnect YOUR current administration session, and you will have to login again.
Command Parameters
None.
Sample Use
Restart MediaSwift management software and all its services.
console# reset
Are you sure (y/n)? y
.
.Connection terminated
.
show
The show command displays runtime information related to the operational environment of
MediaSwift software.
The Enable mode show command includes the parameters available in the Regular mode show
command (refer to show, page 5-20) and the following additional parameters.
Command Parameters
The following parameters are only available in Enable mode:
config – Display running configuration.
license – Display system license information.
Sample Use
Display the system running configuration.
console# show config
<?xml version="1.0" encoding="UTF-8" standalone="no" ?>
<cluster xmlns:xsi='http://www.w3.org/2001/XMLSchema-instance'
xsi:noNamespaceSchemaLocation='cluster_conf.xsd'>
<mgmt-config>
<ipaddr>192.168.0.202</ipaddr>

MediaSwift Admin & Install Guide 5-55
<netmask>255.255.255.0</netmask>
<default-gw>192.168.0.2</default-gw>
<nameserver>10.1.1.235</nameserver>
<alert-email>[email protected]</alert-email>
<site_name>192.168.0.202 </site_name>
<external_syslog_ip>127.0.0.1</external_syslog_ip>
<secure-computing>
<host_name>list.smartfilter.com</host_name>
<path_on_host>cgi-bin/updatelist</path_on_host>
<sfversion>3.1.56</sfversion>
<serial_number>AAAA-BBBB-CCCC-DDDD</serial_number>
</secure-computing>
</mgmt-config>
<web-config></web-config>
<common>
<ntp>
<server-ip>127.127.1.0</server-ip>
<timezone>Pacific/Aukland</timezone>
</ntp>
<snmp>
<trap-ip>10.11.12.1</trap-ip>
<snmp-read-community>gdcbhv</snmp-read-community>
<snmp-write-community>nkppui</snmp-write-community>
<snmp-trap-community>nkppui</snmp-trap-community>
</snmp>
<service>
<protocols>
<enable-bittorent>1</enable-bittorent>
<enable-edk>1</enable-edk>
<enable-gnutella>1</enable-gnutella>
<enable-http>1</enable-http>
<enable-ares>1</enable-ares>
<enable-smartfilter>1</enable-smartfilter>
</protocols>
<net>
<fwd-mode>PROMISC</fwd-mode>

MediaSwift Admin & Install Guide 5-56
<bridge id='0'>
<interface-world>iff2</interface-world>
<interface-isp>iff1</interface-isp>
</bridge>
</net>
</service>
<content_filtering>
<custom-smartfilter-category name='Joe'>
<url-map name='custom-Joe-name'>
<url>http://164.90.0.2/block/</url>
<url>http://164.90.0.2/redirect/</url>
<url>http://www.espn.com</url>
</url-map>
</custom-smartfilter-category>
<custom-smartfilter-category name='jones'>
<url-map name='custom-jones-name'>
<url>http://www.sex4free.com</url>
<url>http://www.cnn.com/</url>
<url>http://www.one.com/cat/live</url>
</url-map>
</custom-smartfilter-category>
<content_class name='Joe'>
<smartfilter-category name='Joe' />
<content-action name='block'>
<http-action>BLOCK</http-action>
<http-response-code>404</http-response-code>
</content-action>
</content_class>
<content_class name='jones'>
<smartfilter-category name=jones />
<content-action name='redirect'>
<http-action>REDIRECT</http-action>
<redirect-url>http://www.teatime.com</redirect-url>
</content-action>
</content_class>
<content_class name='Pornography'>

MediaSwift Admin & Install Guide 5-57
<smartfilter-category name='Pornography' />
<content-action name='block'>
<http-action>BLOCK</http-action>
</content-action>
</content_class>
<content_class name='Shareware'>
<smartfilter-category name='Shareware/Freeware' />
<content-action name='redirect'>
<http-action>REDIRECT</http-action>
<redirect-url>http://www.aaa.com</redirect-url>
</content-action>
</content_class>
</content_filtering>
</common>
<blades>1</blades>
<blade id='1'>
<cache-engine>
<network></network>
</cache-engine>
</blade>
</cluster>
Display system license information.
console# show license
Licensed chassis serial number: DGB9C4J
EDK enabled: 1
Bittorent enabled: 1
Kazaa enabled: 1
Gnutella enabled: 1
Ares enabled: 1
Http enabled: 1
Pando enabled: 1
Thunder enabled: 0
Smartfilter enabled: 0
Storage volumes: 15
Controllers: 0
Evaluaton ends on: 3-10-2009
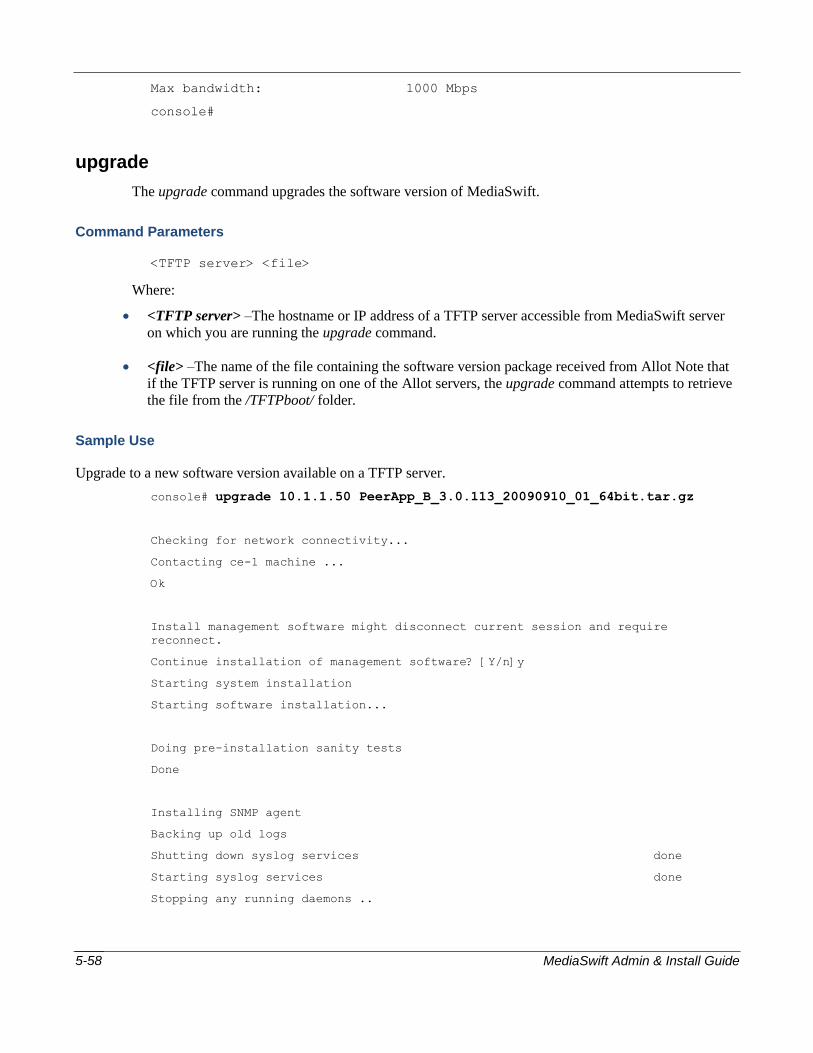
MediaSwift Admin & Install Guide 5-58
Max bandwidth: 1000 Mbps
console#
upgrade
The upgrade command upgrades the software version of MediaSwift.
Command Parameters
<TFTP server> <file>
Where:
<TFTP server> –The hostname or IP address of a TFTP server accessible from MediaSwift server
on which you are running the upgrade command.
<file> –The name of the file containing the software version package received from Allot Note that
if the TFTP server is running on one of the Allot servers, the upgrade command attempts to retrieve
the file from the /TFTPboot/ folder.
Sample Use
Upgrade to a new software version available on a TFTP server.
console# upgrade 10.1.1.50 PeerApp_B_3.0.113_20090910_01_64bit.tar.gz
Checking for network connectivity...
Contacting ce-1 machine ...
Ok
Install management software might disconnect current session and require
reconnect.
Continue installation of management software? [Y/n]y
Starting system installation
Starting software installation...
Doing pre-installation sanity tests
Done
Installing SNMP agent
Backing up old logs
Shutting down syslog services done
Starting syslog services done
Stopping any running daemons ..
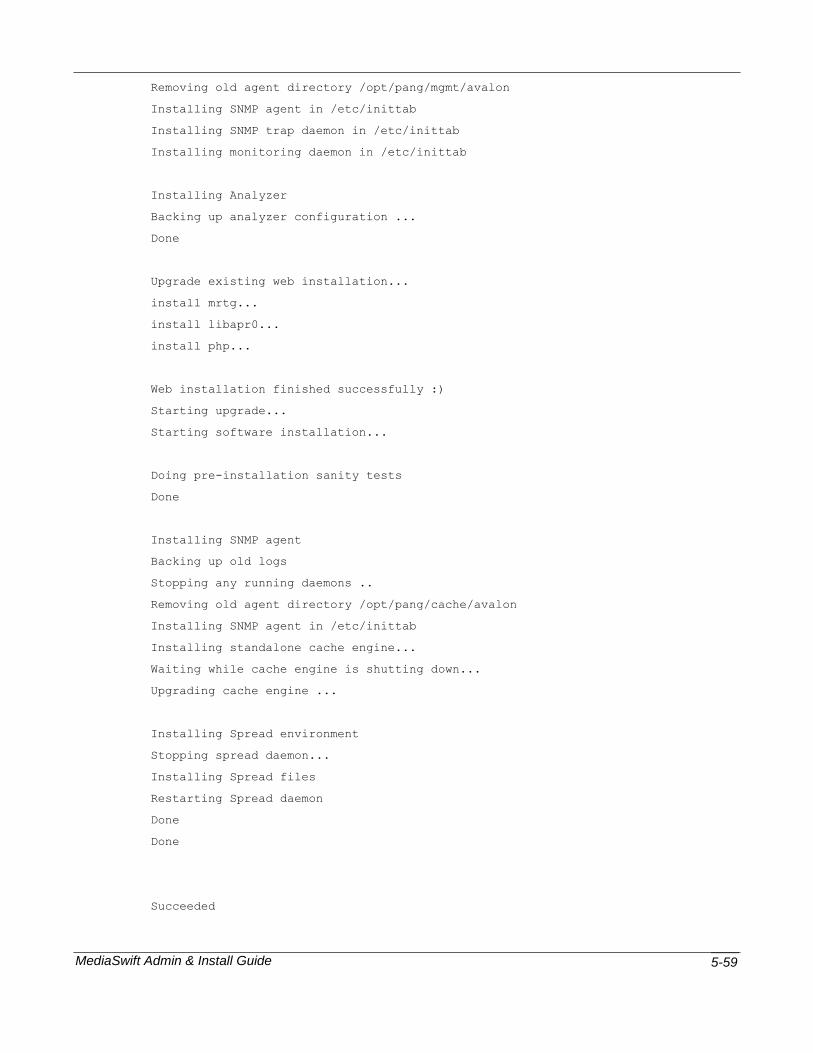
MediaSwift Admin & Install Guide 5-59
Removing old agent directory /opt/pang/mgmt/avalon
Installing SNMP agent in /etc/inittab
Installing SNMP trap daemon in /etc/inittab
Installing monitoring daemon in /etc/inittab
Installing Analyzer
Backing up analyzer configuration ...
Done
Upgrade existing web installation...
install mrtg...
install libapr0...
install php...
Web installation finished successfully :)
Starting upgrade...
Starting software installation...
Doing pre-installation sanity tests
Done
Installing SNMP agent
Backing up old logs
Stopping any running daemons ..
Removing old agent directory /opt/pang/cache/avalon
Installing SNMP agent in /etc/inittab
Installing standalone cache engine...
Waiting while cache engine is shutting down...
Upgrading cache engine ...
Installing Spread environment
Stopping spread daemon...
Installing Spread files
Restarting Spread daemon
Done
Done
Succeeded

MediaSwift Admin & Install Guide 5-60
console#
vlan
The vlan command enables you to add or remove a vlan to and from an interface.
Command Parameters
[add <interface name> <vlan id> <ip> [mask]]| [remove <interface name>
<vlan id>]
where:
add – adds a new vlan to an interface
remove – removes a vlan from an interface
Sample Use
Add vlan 10 to eth0 with IP address 10.11.12.15 and netmask 255.255.255
console# vlan add eth0 10 10.11.12.15 255.255.255
Set name-type for VLAN subsystem. Should be visible in
/proc/net/vlan/config
Added VLAN with VID == 10 to IF -:eth0:-
interface eth0.10 is up
Remove vlan 10 from eth0
console# vlan remove eth0 10
Removed VLAN -:eth0.10:-
eth0.10 removed
console#

MediaSwift Admin & Install Guide 5-61
Grid Configuration
Regular Mode Commands
The following commands are accessible in Regular mode and Enable mode.
Table 3: Regular Mode Commands - Grid
COMMAND DESCRIPTION
arp Displays ARP table.
cache Display the cache metadata
direction Calculates the visible subnets on the interface.
dmesg Displays the dmesg.
dstat Displays the Report Central Processing Unit
(CPU), physical disks, network, paging and
operating-system statistics, and I/O statistics.
enable Enters Enable mode.
eventlog Provides access to event log operations.
exit Exits the current mode.
help Displays the list of Regular mode commands.
ifconfig Displays the interface(s).
iostat Displays extended I/O statistics.
jumbo Sends jumbo echo messages.
ping Sends echo messages.
show Displays run-time information.
tcpdump Dumps the traffic on the appropriate network
interface.
traceroute Displays the route used by the packet to reach its
destination.
who Displays the list of users who are currently logged
in.
arp
The arp command displays the ARP table.
Command Parameters
None.
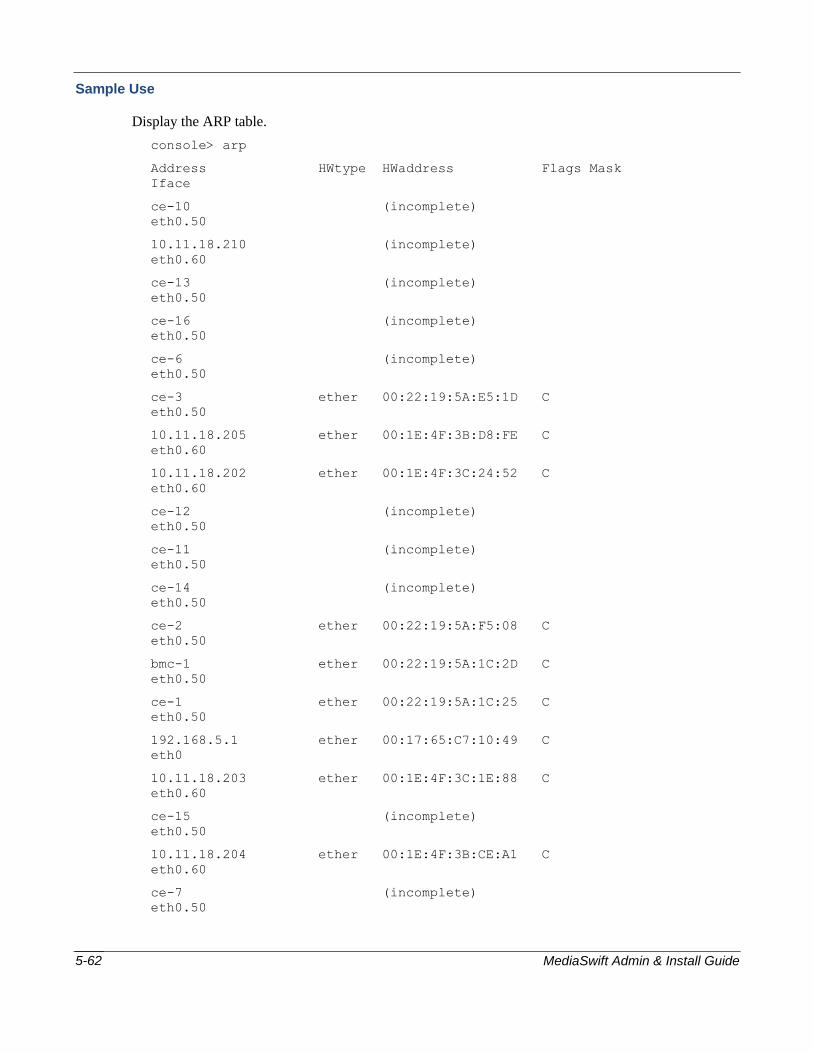
MediaSwift Admin & Install Guide 5-62
Sample Use
Display the ARP table.
console> arp
Address HWtype HWaddress Flags Mask
Iface
ce-10 (incomplete)
eth0.50
10.11.18.210 (incomplete)
eth0.60
ce-13 (incomplete)
eth0.50
ce-16 (incomplete)
eth0.50
ce-6 (incomplete)
eth0.50
ce-3 ether 00:22:19:5A:E5:1D C
eth0.50
10.11.18.205 ether 00:1E:4F:3B:D8:FE C
eth0.60
10.11.18.202 ether 00:1E:4F:3C:24:52 C
eth0.60
ce-12 (incomplete)
eth0.50
ce-11 (incomplete)
eth0.50
ce-14 (incomplete)
eth0.50
ce-2 ether 00:22:19:5A:F5:08 C
eth0.50
bmc-1 ether 00:22:19:5A:1C:2D C
eth0.50
ce-1 ether 00:22:19:5A:1C:25 C
eth0.50
192.168.5.1 ether 00:17:65:C7:10:49 C
eth0
10.11.18.203 ether 00:1E:4F:3C:1E:88 C
eth0.60
ce-15 (incomplete)
eth0.50
10.11.18.204 ether 00:1E:4F:3B:CE:A1 C
eth0.60
ce-7 (incomplete)
eth0.50

MediaSwift Admin & Install Guide 5-63
ce-5 (incomplete)
eth0.50
ce-8 (incomplete)
eth0.50
ce-9 (incomplete)
eth0.50
ce-4 ether 00:22:19:5B:5B:5E C
eth0.50
console>
cache
Command Parameters
hash – Displays the cache metadata using a hash ID.
list – Displays cache content in one of the following modes:
display – Displays cache content.
export – Exports cache content to a TFTP server, where the server name and file
location are specified as: <TFTP server address> <filename>.
NOTE The file to which the content is exported must exist, and must have write access to all.
If localhost is used as the <TFTP server address> parameter, then the file will be located under the
/TFTPboot/ folder. You can only use localhost if you have root access on the localhost server.
Otherwise, you must use an external TFTP server and not the caching server.
NOTE Additional parameters for this command are available in Enable mode. Refer to , page 5-94 for a description of the Enable mode parameters.
– Displays CMDB statistics summary.
Sample Use
Display the cache metadata using a hash ID.
console>
xxxxxxxxxxxxxxxxxxxxxxxxxxxxxxxxxxxxxxxxxxxx
HTTP 8486EE794FCA431669A7B504E525D151819F1C78 ST:WATCHED HITS:4 IPS:1
VL:9 SZ:10491894 MP:0 FF:yes FS:1221182430 LS:1221399563 CO:10 MB
FF:100.00 PFF:0.00 ch
ecksum 2184D853EED84F9B752C8A70D31E602B2C82B4DA
Hits: 4
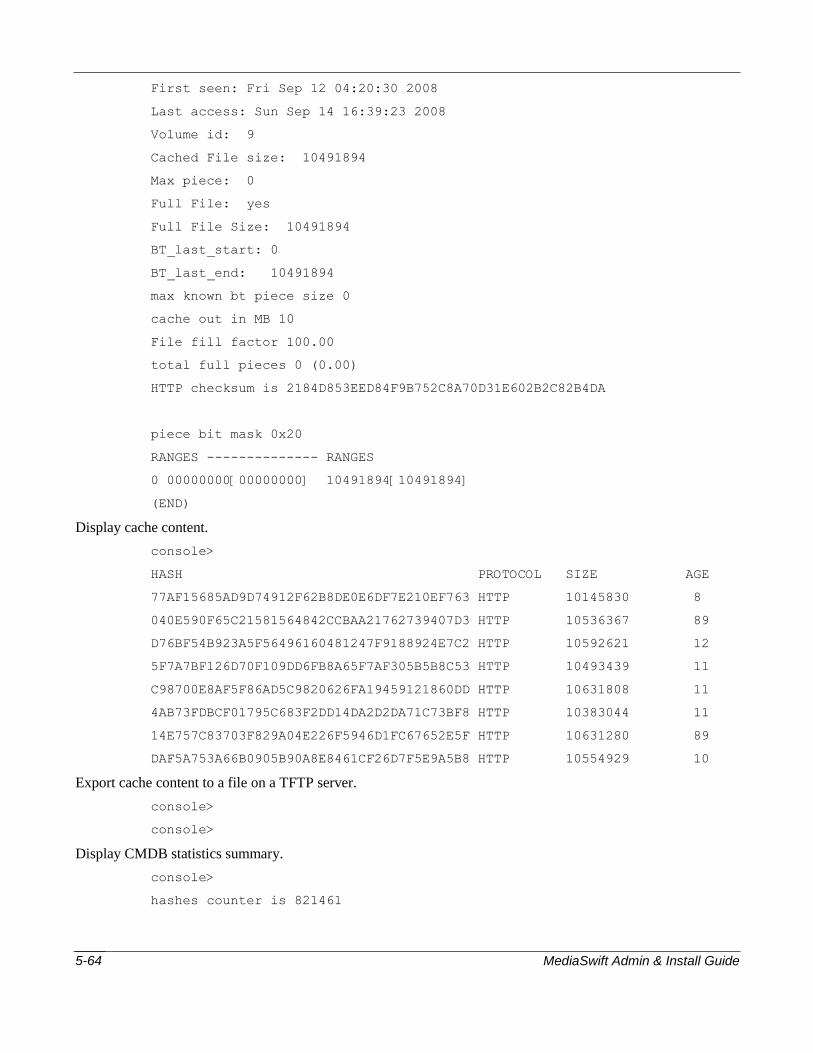
MediaSwift Admin & Install Guide 5-64
First seen: Fri Sep 12 04:20:30 2008
Last access: Sun Sep 14 16:39:23 2008
Volume id: 9
Cached File size: 10491894
Max piece: 0
Full File: yes
Full File Size: 10491894
BT_last_start: 0
BT_last_end: 10491894
max known bt piece size 0
cache out in MB 10
File fill factor 100.00
total full pieces 0 (0.00)
HTTP checksum is 2184D853EED84F9B752C8A70D31E602B2C82B4DA
piece bit mask 0x20
RANGES -------------- RANGES
0 00000000[00000000] 10491894[10491894]
(END)
Display cache content.
console>
HASH PROTOCOL SIZE AGE
77AF15685AD9D74912F62B8DE0E6DF7E210EF763 HTTP 10145830 8
040E590F65C21581564842CCBAA21762739407D3 HTTP 10536367 89
D76BF54B923A5F56496160481247F9188924E7C2 HTTP 10592621 12
5F7A7BF126D70F109DD6FB8A65F7AF305B5B8C53 HTTP 10493439 11
C98700E8AF5F86AD5C9820626FA19459121860DD HTTP 10631808 11
4AB73FDBCF01795C683F2DD14DA2D2DA71C73BF8 HTTP 10383044 11
14E757C83703F829A04E226F5946D1FC67652E5F HTTP 10631280 89
DAF5A753A66B0905B90A8E8461CF26D7F5E9A5B8 HTTP 10554929 10
Export cache content to a file on a TFTP server.
console>
console>
Display CMDB statistics summary.
console>
hashes counter is 821461

MediaSwift Admin & Install Guide 5-65
Version Verify success
**********************************************
#########################################################
Total size in DB: EDK 0 bytes [0.00 MB] [0.00 GB]
Total size in DB: BTR 0 bytes [0.00 MB] [0.00 GB]
Total size in DB: PANDO 0 bytes [0.00 MB] [0.00 GB]
Total size in DB: GNUTL 0 bytes [0.00 MB] [0.00 GB]
Total size in DB: ARES 0 bytes [0.00 MB] [0.00 GB]
Total size in DB: HTTP 8484469097815 bytes [8091420.27 MB] [7901.78 GB]
Total size in DB: KAZ 0 bytes [0.00 MB] [0.00 GB]
#########################################################
EDK: Number of total hashes 0 Number of files 0
BTR: Number of total hashes 0 Number of files 0
PANDO: Number of total hashes 0 Number of files 0
GNUTL: Number of total hashes 0 Number of files 0
ARES: Number of total hashes 0 Number of files 0
HTTP: Number of total hashes 821460 Number of files 821460
KAZ: Number of total hashes 0 Number of files 0
#########################################################
Avarage file size in storage HTTP: 10328523.72 bytes [9.85 MB]
#########################################################
Full file size in cmdb: EDK 0
Full file size in cmdb: BTR 0
Full file size in cmdb: PANDO 0
Full file size in cmdb: GNUTL 0
Full file size in cmdb: ARES 0
Full file size in cmdb: HTTP 798356
Full file size in cmdb: KAZ 0
#########################################################
EDK average age of: hashes none stored files none
BTR average age of: hashes none stored files none
PANDO average age of: hashes none stored files none
GNUT average age of: hashes none stored files none
ARES average age of: hashes none stored files none
HTTP average age of: hashes 369844 stored files 369844
KAZ average age of: hashes none stored files none

MediaSwift Admin & Install Guide 5-66
#########################################################
BTR: Max piece 0 average pieces per file none
#########################################################
console>
direction
The direction command calculates the visible subnets on the specified interface.
Command Parameters
interface name – The interface for which to display the subnets.
Sample Use
Display the visible subnets on the interface eth0.
console> direction eth0
tcpdump: WARNING: eth0: no IPv4 address assigned
tcpdump: verbose output suppressed, use -v or -vv for full protocol
decode
listening on eth0, link-type EN10MB (Ethernet), capture size 96 bytes
10 packets captured
25 packets received by filter
0 packets dropped by kernel
tcpdump: WARNING: eth0: no IPv4 address assigned
tcpdump: verbose output suppressed, use -v or -vv for full protocol
decode
listening on eth0, link-type EN10MB (Ethernet), capture size 96 bytes
1000 packets captured
2001 packets received by filter
0 packets dropped by kernel
4 00:17:65:c7:10:49
996 00:1d:09:6d:3e:4d
dmesg
The dmesg command displays the message buffer of the kernel (dmesg).
Command Parameters
None.

MediaSwift Admin & Install Guide 5-67
Sample Use
Display the dmesg.
console> dmesg
usb 3-1.1: Manufacturer: ATEN International Co. Ltd
usb 3-1.1: configuration #1 chosen from 1 choice
input: ATEN International Co. Ltd CS1716A V1.0.098 as /class/input/input9
input: USB HID v1.00 Keyboard [ATEN International Co. Ltd CS1716A
V1.0.098] on usb-0000:00:1d.1-1.1
input: ATEN International Co. Ltd CS1716A V1.0.098 as
/class/input/input10
input: USB HID v1.00 Device [ATEN International Co. Ltd CS1716A V1.0.098]
on usb-0000:00:1d.1-1.1
input: ATEN International Co. Ltd CS1716A V1.0.098 as
/class/input/input11
input: USB HID v1.10 Mouse [ATEN International Co. Ltd CS1716A V1.0.098]
on usb-0000:00:1d.1-1.1
usb 1-5.2: USB disconnect, address 6
usb 1-5.1: new high speed USB device using ehci_hcd and address 8
usb 1-5.1: new device found, idVendor=0781, idProduct=5406
usb 1-5.1: new device strings: Mfr=1, Product=2, SerialNumber=3
usb 1-5.1: Product: U3 Cruzer Micro
usb 1-5.1: Manufacturer: SanDisk
usb 1-5.1: SerialNumber: 40549102FB103472
usb 1-5.1: configuration #1 chosen from 1 choice
scsi3 : SCSI emulation for USB Mass Storage devices
usb-storage: device found at 8
usb-storage: waiting for device to settle before scanning
scsi 3:0:0:0: Direct-Access SanDisk U3 Cruzer Micro 8.02 PQ: 0
ANSI: 0 CCS
sd 3:0:0:0: Attached scsi removable disk sdc
sd 3:0:0:0: Attached scsi generic sg3 type 0
usb-storage: device scan complete
usb 1-5.1: USB disconnect, address 8
usb 1-4: new high speed USB device using ehci_hcd and address 9
usb 1-4: new device found, idVendor=0781, idProduct=5406
usb 1-4: new device strings: Mfr=1, Product=2, SerialNumber=3
usb 1-4: Product: U3 Cruzer Micro
usb 1-4: Manufacturer: SanDisk

MediaSwift Admin & Install Guide 5-68
usb 1-4: SerialNumber: 40549102FB103472
usb 1-4: configuration #1 chosen from 1 choice
scsi4 : SCSI emulation for USB Mass Storage devices
usb-storage: device found at 9
usb-storage: waiting for device to settle before scanning
scsi 4:0:0:0: Direct-Access SanDisk U3 Cruzer Micro 8.02 PQ: 0
ANSI: 0 CCS
sd 4:0:0:0: Attached scsi removable disk sdc
sd 4:0:0:0: Attached scsi generic sg3 type 0
usb-storage: device scan complete
SCSI device sdc: 31301631 512-byte hdwr sectors (16026 MB)
sdc: Write Protect is off
sdc: Mode Sense: 45 00 00 08
sdc: assuming drive cache: write through
SCSI device sdc: 31301631 512-byte hdwr sectors (16026 MB)
sdc: Write Protect is off
sdc: Mode Sense: 45 00 00 08
sdc: assuming drive cache: write through
sdc: sdc1
device eth0 entered promiscuous mode
audit(1250604820.505:2): dev=eth0 prom=256 old_prom=0 auid=4294967295
device eth0 left promiscuous mode
audit(1250604820.517:3): dev=eth0 prom=0 old_prom=256 auid=4294967295
device eth0 entered promiscuous mode
audit(1250604820.537:4): dev=eth0 prom=256 old_prom=0 auid=4294967295
device eth0 left promiscuous mode
audit(1250604820.813:5): dev=eth0 prom=0 old_prom=256 auid=4294967295
dstat
The dstat command displays a report of the Central Processing Unit (CPU), physical disks, network,
paging and operating-system statistics, and I/O statistics.
Command Parameters
[-N <ethx,total>] [<count>]
Where:
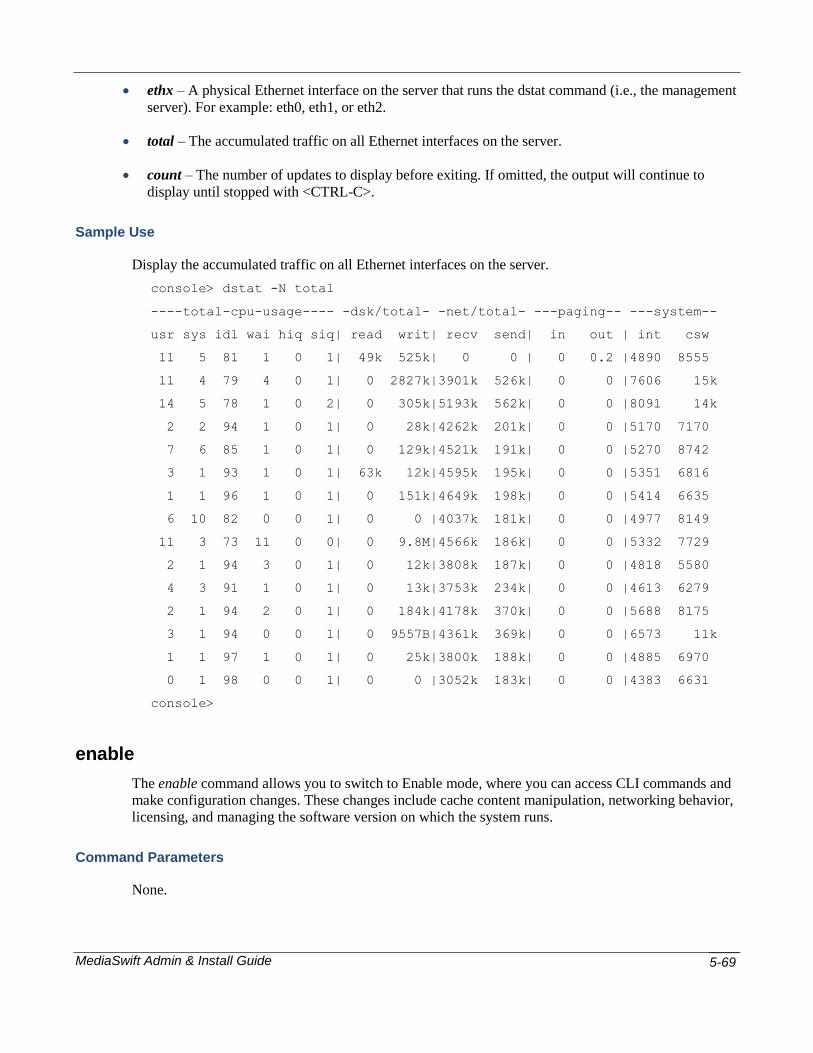
MediaSwift Admin & Install Guide 5-69
ethx – A physical Ethernet interface on the server that runs the dstat command (i.e., the management
server). For example: eth0, eth1, or eth2.
total – The accumulated traffic on all Ethernet interfaces on the server.
count – The number of updates to display before exiting. If omitted, the output will continue to
display until stopped with <CTRL-C>.
Sample Use
Display the accumulated traffic on all Ethernet interfaces on the server.
console> dstat -N total
----total-cpu-usage---- -dsk/total- -net/total- ---paging-- ---system--
usr sys idl wai hiq siq| read writ| recv send| in out | int csw
11 5 81 1 0 1| 49k 525k| 0 0 | 0 0.2 |4890 8555
11 4 79 4 0 1| 0 2827k|3901k 526k| 0 0 |7606 15k
14 5 78 1 0 2| 0 305k|5193k 562k| 0 0 |8091 14k
2 2 94 1 0 1| 0 28k|4262k 201k| 0 0 |5170 7170
7 6 85 1 0 1| 0 129k|4521k 191k| 0 0 |5270 8742
3 1 93 1 0 1| 63k 12k|4595k 195k| 0 0 |5351 6816
1 1 96 1 0 1| 0 151k|4649k 198k| 0 0 |5414 6635
6 10 82 0 0 1| 0 0 |4037k 181k| 0 0 |4977 8149
11 3 73 11 0 0| 0 9.8M|4566k 186k| 0 0 |5332 7729
2 1 94 3 0 1| 0 12k|3808k 187k| 0 0 |4818 5580
4 3 91 1 0 1| 0 13k|3753k 234k| 0 0 |4613 6279
2 1 94 2 0 1| 0 184k|4178k 370k| 0 0 |5688 8175
3 1 94 0 0 1| 0 9557B|4361k 369k| 0 0 |6573 11k
1 1 97 1 0 1| 0 25k|3800k 188k| 0 0 |4885 6970
0 1 98 0 0 1| 0 0 |3052k 183k| 0 0 |4383 6631
console>
enable
The enable command allows you to switch to Enable mode, where you can access CLI commands and
make configuration changes. These changes include cache content manipulation, networking behavior,
licensing, and managing the software version on which the system runs.
Command Parameters
None.

MediaSwift Admin & Install Guide 5-70
The user is prompted for a password.
NOTE The default password for the enable command is configured upon system installation and defaults to the system-id. You can view the system-id by using the show systemid command. It is strongly recommended to change the default enable command password immediately after the initial installation.
Sample Use
Switch to Enable mode.
console> enable
Password:
console#
eventlog
The eventlog command enables the user to view or export the content of the event log. The event log
lists all log messages sent to the system log by all MediaSwift service components (applications, CLI
and SNMP).
Command Parameters
[<export>] [<show>] [<tail>]
Where:
date – Displays the eventlog for the specified date.
export – Exports event log content to a TFTP server, where the server name and file location are
specified as: <TFTP server address> <filename>.
NOTE The file to which the content is exported must exist, and must have write access to all.
show – Displays the event log entries.
NOTE Additional parameters for this command are available in Enable mode. Refer to eventlog, page 5-111 for a description of the Enable mode parameters.
tail – Displays the online event log entries.
Sample Use
Export event log content to a file on a TFTP server.
console> eventlog export 192.168.77.14 eventlog-exported
console>
Display event log content.
console> eventlog show

MediaSwift Admin & Install Guide 5-71
Aug 18 14:10:01 ce-1 pang[26997]: /mnt/vol15 mounted_cmdb
active ce-1 352 24 327 92.90
Aug 18 14:10:01 ce-1 pang[26997]: /mnt/vol25 mounted
active ce-1 352 26 325 92.42
Aug 18 14:10:01 ce-1 pang[26997]: /mnt/vol27 mounted
active ce-1 352 18 334 0.00
Aug 18 14:10:01 ce-1 pang[26997]: /mnt/vol29 mounted
active ce-1 352 15 336 95.61
Aug 18 14:10:01 ce-1 pang[26997]: /mnt/vol33 mounted
active ce-1 259 11 247 95.59
Aug 18 14:14:01 ce-1 pang[26997]: Interface eth5 is down
Aug 18 14:14:01 ce-1 pang[26997]: Interface eth4 is down
Aug 18 14:14:01 ce-1 pang[26997]: Interface eth7 is down
Aug 18 14:14:01 ce-1 pang[26997]: Interface eth6 is down
Aug 18 14:14:01 ce-1 pang[26997]: all bridges (2) are down , will go to
disable mode
Aug 18 14:14:01 ce-1 pang[26997]: Operational state has been set to
disabled
Aug 18 14:14:01 ce-1 pang[26997]: detected major: operational mode
has been changed
Aug 18 14:14:23 mg-1 snmpd[17343]: cluster has been degraded
Aug 18 14:14:30 ce-3 pang[7806]: volume state
availability owner total free used usage
Aug 18 14:14:30 ce-3 pang[7806]: /mnt/vol8 mounted active
ce-3 352 18 333 94.73
Aug 18 14:14:30 ce-3 pang[7806]: /mnt/vol10 mounted active
ce-3 352 18 334 94.87
Aug 18 14:14:30 ce-3 pang[7806]: /mnt/vol12 mounted active
ce-3 352 17 334 94.94
Aug 18 14:14:30 ce-3 pang[7806]: /mnt/vol14 mounted active
ce-3 352 22 330 93.67
Aug 18 14:14:30 ce-3 pang[7806]: /mnt/vol24 mounted active
ce-3 352 29 322 91.59
Aug 18 14:14:30 ce-3 pang[7806]: /mnt/vol26 mounted active
ce-3 352 18 333 94.64
Aug 18 14:14:30 ce-3 pang[7806]: /mnt/vol28 mounted active
ce-3 352 16 336 95.42
Aug 18 14:14:30 ce-3 pang[7806]: /mnt/vol30 mounted active
ce-3 352 28 324 92.03
Aug 18 14:14:30 ce-3 pang[7806]: /mnt/vol34 mounted active
ce-3 259 12 246 95.29
Aug 18 14:14:30 ce-3 pang[7806]: /mnt/vol36 mounted active
ce-3 259 10 248 96.00

MediaSwift Admin & Install Guide 5-72
Aug 18 14:14:30 ce-3 pang[7806]: /mnt/vol39 mounted_cmdb
active ce-3 259 12 246 95.26
Aug 18 14:14:30 ce-3 pang[7806]: /mnt/vol41 mounted active
ce-3 259 10 248 95.95
Aug 18 14:14:30 ce-3 pang[7806]: /mnt/vol42 mounted active
ce-3 259 10 248 95.88
Aug 18 14:14:30 ce-3 pang[7806]: /mnt/vol45 mounted active
ce-3 259 8 250 96.56
Aug 18 14:16:16 ce-2 pang[7769]: volume state
availability owner total free used usage
Aug 18 14:16:16 ce-2 pang[7769]: /mnt/vol1 mounted active
ce-2 352 30 322 91.41
Aug 18 14:16:16 ce-2 pang[7769]: /mnt/vol2 mounted active
ce-2 352 29 322 91.64
Aug 18 14:16:16 ce-2 pang[7769]: /mnt/vol3 mounted active
ce-2 352 27 324 92.05
Aug 18 14:16:16 ce-2 pang[7769]: /mnt/vol4 mounted active
ce-2 352 28 324 92.03
Aug 18 14:16:16 ce-2 pang[7769]: /mnt/vol5 mounted active
ce-2 352 29 323 91.73
Aug 18 14:16:16 ce-2 pang[7769]: /mnt/vol6 mounted active
ce-2 352 28 324 91.98
Aug 18 14:16:16 ce-2 pang[7769]: /mnt/vol16 mounted active
ce-2 352 28 323 91.80
Aug 18 14:16:16 ce-2 pang[7769]: /mnt/vol17 mounted active
ce-2 352 28 324 92.02
Aug 18 14:16:16 ce-2 pang[7769]: /mnt/vol18 mounted active
ce-2 352 29 322 91.56
Aug 18 14:16:16 ce-2 pang[7769]: /mnt/vol19 mounted_cmdb
active ce-2 352 27 324 92.08
Aug 18 14:16:16 ce-2 pang[7769]: /mnt/vol20 mounted active
ce-2 352 27 324 92.19
Aug 18 14:16:16 ce-2 pang[7769]: /mnt/vol21 mounted active
ce-2 352 27 324 92.16
Aug 18 14:16:16 ce-2 pang[7769]: /mnt/vol22 mounted active
ce-2 352 28 323 91.86
Aug 18 14:16:16 ce-2 pang[7769]: /mnt/vol23 mounted active
ce-2 352 33 318 90.44
Aug 18 14:17:01 ce-1 pang[26997]: volume state
availability owner total free used usage
Aug 18 14:17:01 ce-1 pang[26997]: /mnt/vol7 mounted
active ce-1 352 20 331 94.04
Aug 18 14:17:01 ce-1 pang[26997]: /mnt/vol9 mounted
active ce-1 352 18 333 94.72

MediaSwift Admin & Install Guide 5-73
Aug 18 14:17:01 ce-1 pang[26997]: /mnt/vol11 mounted
active ce-1 352 17 334 94.96
Aug 18 14:17:01 ce-1 pang[26997]: /mnt/vol15 mounted_cmdb
active ce-1 352 24 327 92.92
Aug 18 14:17:01 ce-1 pang[26997]: /mnt/vol25 mounted
active ce-1 352 26 325 92.47
Aug 18 14:17:01 ce-1 pang[26997]: /mnt/vol27 mounted
active ce-1 352 17 334 94.92
Aug 18 14:17:01 ce-1 pang[26997]: /mnt/vol29 mounted
active ce-1 352 15 337 95.66
Aug 18 14:17:01 ce-1 pang[26997]: /mnt/vol33 mounted
active ce-1 259 11 247 95.63
Aug 18 14:17:01 ce-1 pang[26997]: /mnt/vol35 mounted
active ce-1 259 10 248 95.77
Aug 18 14:17:01 ce-1 pang[26997]: /mnt/vol37 mounted
active ce-1 259 10 248 95.78
Aug 18 14:17:01 ce-1 pang[26997]: /mnt/vol40 mounted
active ce-1 259 11 247 0.00
Display event log online entries.
console> eventlog tail
ug 18 14:17:01 ce-1 pang[26997]: /mnt/vol11 mounted
active ce-1 352 17 334 94.96
Aug 18 14:17:01 ce-1 pang[26997]: /mnt/vol15 mounted_cmdb
active ce-1 352 24 327 92.92
Aug 18 14:17:01 ce-1 pang[26997]: /mnt/vol25 mounted
active ce-1 352 26 325 92.47
Aug 18 14:17:01 ce-1 pang[26997]: /mnt/vol27 mounted
active ce-1 352 17 334 94.92
Aug 18 14:17:01 ce-1 pang[26997]: /mnt/vol29 mounted
active ce-1 352 15 337 95.66
Aug 18 14:17:01 ce-1 pang[26997]: /mnt/vol33 mounted
active ce-1 259 11 247 95.63
Aug 18 14:17:01 ce-1 pang[26997]: /mnt/vol35 mounted
active ce-1 259 10 248 95.77
Aug 18 14:17:01 ce-1 pang[26997]: /mnt/vol37 mounted
active ce-1 259 10 248 95.78
Aug 18 14:17:01 ce-1 pang[26997]: /mnt/vol40 mounted
active ce-1 259 11 247 0.00
Aug 18 14:19:17 ce-2 pang[7769]: Current leader is me (#5053416419#ce-2)!
Num members = 2

MediaSwift Admin & Install Guide 5-74
exit
The exit command exits the current CLI session and mode. In Enable mode, this command returns the
session to Regular mode. In Regular mode, the session terminates and the user is logged out of the
current session.
Command Parameters
None.
Sample Use
Exit the current CLI session.
console> exit
>
help
The help command displays the CLI commands with a short description of the current mode. For
example, in Regular mode, the help command displays the Regular mode commands with a short
description of each command.
The help command can also be accessed by typing “<space> + ?”. The “?” is not echoed on the screen.
Command Parameters
None.
Sample Use
Display the list of CLI commands that are available in Regular mode.
console> help
arp Show arp table
direction Calculate seen subnets on interface
dmesg Display dmesg
dstat Display IO statistics
enable Enter privileged mode
eventlog Event log commands
exit Exit current mode
help Commands description
ifconfig Display interface(s)
iostat Display IO statistics
jumbo Send jumbo echo messages

MediaSwift Admin & Install Guide 5-75
ping Send echo messages
show Show run-time information
tcpdump Dump traffic on appropriate network interface
traceroute Print the route packets take to network host
who Show currently logged users
ifconfig
The ifconfig command displays details of the interface(s).
Command Parameters
None.
Sample Use
Display the interface details.
console> ifconfig
eth0 Link encap:Ethernet HWaddr 00:1D:09:6D:3E:4D
inet6 addr: fe80::21d:9ff:fe6d:3e4d/64 Scope:Link
UP BROADCAST RUNNING MULTICAST MTU:1500 Metric:1
RX packets:2553658318 errors:0 dropped:0 overruns:0 frame:0
TX packets:1440862888 errors:0 dropped:0 overruns:0 carrier:0
collisions:0 txqueuelen:1000
RX bytes:545186734053 (519930.5 Mb) TX bytes:134975861262
(128723.0 Mb)
Interrupt:16 Memory:f8000000-f8012100
eth0.50 Link encap:Ethernet HWaddr 00:1D:09:6D:3E:4D
inet addr:10.11.12.1 Bcast:10.11.12.255 Mask:255.255.255.0
inet6 addr: fe80::21d:9ff:fe6d:3e4d/64 Scope:Link
UP BROADCAST RUNNING MULTICAST MTU:1500 Metric:1
RX packets:2545663975 errors:0 dropped:0 overruns:0 frame:0
TX packets:1431461214 errors:0 dropped:0 overruns:0 carrier:0
collisions:0 txqueuelen:0
RX bytes:487230272604 (464658.9 Mb) TX bytes:120750365728
(115156.5 Mb)
eth0.60 Link encap:Ethernet HWaddr 00:1D:09:6D:3E:4D

MediaSwift Admin & Install Guide 5-76
inet addr:10.11.18.1 Bcast:10.11.18.255 Mask:255.255.255.0
inet6 addr: fe80::21d:9ff:fe6d:3e4d/64 Scope:Link
UP BROADCAST RUNNING MULTICAST MTU:1500 Metric:1
RX packets:3110768 errors:0 dropped:0 overruns:0 frame:0
TX packets:3671250 errors:0 dropped:0 overruns:0 carrier:0
collisions:0 txqueuelen:0
RX bytes:519962862 (495.8 Mb) TX bytes:278366764 (265.4 Mb)
eth0:1 Link encap:Ethernet HWaddr 00:1D:09:6D:3E:4D
inet addr:192.168.5.117 Bcast:192.168.5.255
Mask:255.255.255.0
UP BROADCAST RUNNING MULTICAST MTU:1500 Metric:1
Interrupt:16 Memory:f8000000-f8012100
eth1 Link encap:Ethernet HWaddr 00:1D:09:6D:3E:4F
UP BROADCAST MULTICAST MTU:1500 Metric:1
RX packets:0 errors:0 dropped:0 overruns:0 frame:0
TX packets:0 errors:0 dropped:0 overruns:0 carrier:0
collisions:0 txqueuelen:1000
RX bytes:0 (0.0 b) TX bytes:0 (0.0 b)
Interrupt:17 Memory:f4000000-f4012100
lo Link encap:Local Loopback
inet addr:127.0.0.1 Mask:255.0.0.0
inet6 addr: ::1/128 Scope:Host
UP LOOPBACK RUNNING MTU:16436 Metric:1
RX packets:822542308 errors:0 dropped:0 overruns:0 frame:0
TX packets:822542308 errors:0 dropped:0 overruns:0 carrier:0
collisions:0 txqueuelen:0
RX bytes:117163652319 (111735.9 Mb) TX bytes:117163652319
(111735.9 Mb)

MediaSwift Admin & Install Guide 5-77
iostat
The iostat command reports Central Processing Units (CPU) statistics and input/output statistics for
devices and partitions.
Command Parameters
[-t <interval> [-k <count>]]
Where:
interval – The amount of time in seconds between each report. The default is 5.
count – Used in conjunction with the interval parameter. If the count parameter is specified, the
count determines the number of reports generated at the specified interval. If the interval parameter
is specified without the count parameter, the iostat command generates reports continuously.
Sample Use
Display the I/O statistics.
console> iostat -t 2 -k 4
Linux 2.6.21-affined-8-default (mg-1) 04/22/09
Time: 13:18:42
avg-cpu: %user %nice %system %iowait %steal %idle
11.29 0.03 6.02 1.38 0.00 81.28
Device: rrqm/s wrqm/s r/s w/s rsec/s wsec/s rkB/s wkB/s
avgrq-sz avgqu-sz await svctm %util
sda 0.50 120.18 0.62 9.44 98.11 1050.22 49.06 525.11
114.11 0.68 67.44 5.78 5.82
Time: 13:18:46
avg-cpu: %user %nice %system %iowait %steal %idle
9.48 0.00 6.11 1.68 0.00 82.73
Device: rrqm/s wrqm/s r/s w/s rsec/s wsec/s rkB/s wkB/s
avgrq-sz avgqu-sz await svctm %util
sda 0.00 41.79 0.00 10.95 0.00 429.85 0.00 214.93
39.27 0.13 11.82 6.36 6.97
Time: 13:18:50
avg-cpu: %user %nice %system %iowait %steal %idle

MediaSwift Admin & Install Guide 5-78
10.38 0.00 6.25 1.25 0.00 82.12
Device: rrqm/s wrqm/s r/s w/s rsec/s wsec/s rkB/s wkB/s
avgrq-sz avgqu-sz await svctm %util
sda 0.00 27.50 0.00 8.75 0.00 298.00 0.00 149.00
34.06 0.10 11.66 6.51 5.70
Time: 13:18:54
avg-cpu: %user %nice %system %iowait %steal %idle
9.05 0.00 6.05 1.00 0.00 83.90
Device: rrqm/s wrqm/s r/s w/s rsec/s wsec/s rkB/s wkB/s
avgrq-sz avgqu-sz await svctm %util
sda 0.00 30.67 0.00 7.98 0.00 313.22 0.00 156.61
39.25 0.10 12.00 5.25 4.19
console>
jumbo
The jumbo command sends jumbo echo messages.
Command Parameters
[-c <counter>] [-I <ip|interface>] dest
Where:
counter – The number of times the request is generated.
interface – Interface IP or name from which to send an echo request to a destination.
Sample Use
Send jumbo echo messages.
console> jumbo -I eth0 192.168.5.117
PING 192.168.5.117 (192.168.5.117) from 192.168.5.117 eth0: 8972(9000)
bytes of data.
8980 bytes from 192.168.5.117: icmp_seq=1 ttl=64 time=0.043 ms
8980 bytes from 192.168.5.117: icmp_seq=2 ttl=64 time=0.024 ms
8980 bytes from 192.168.5.117: icmp_seq=3 ttl=64 time=0.028 ms
8980 bytes from 192.168.5.117: icmp_seq=4 ttl=64 time=0.033 ms

MediaSwift Admin & Install Guide 5-79
8980 bytes from 192.168.5.117: icmp_seq=5 ttl=64 time=0.039 ms
--- 192.168.5.117 ping statistics ---
5 packets transmitted, 5 received, 0% packet loss, time 3998ms
rtt min/avg/max/mdev = 0.024/0.033/0.043/0.008 ms
Send two jumbo echo messages.
console> jumbo -c 2 -I eth0 192.168.3.170
PING 192.168.3.170 (192.168.3.170) from 192.168.5.117 eth0: 8972(9000)
bytes of data.
From 192.168.5.117 icmp_seq=1 Frag needed and DF set (mtu = 1500)
From 192.168.5.117 icmp_seq=1 Frag needed and DF set (mtu = 1500)
--- 192.168.3.170 ping statistics ---
0 packets transmitted, 0 received, +2 errors
ping
The ping command uses the ICMP protocol's mandatory ECHO_REQUEST datagram to elicit an
ICMP ECHO_RESPONSE from a host or gateway, and displays the round-trip time for the echo
response to arrive back to the server on which the command was issued.
NOTE To abort the ping command, press Ctrl+C.
Command Parameters
[-c count] [-I interface or address] destination
Where:
count –The number of icmp echo requests to be sent to the destination server.
interface or address – Sets source address to specified interface address. Argument may be numeric
IP address or name of device.
Sample Use
Ping a remote server.
console> ping -I eth0 192.168.5.117
PING 192.168.5.117 (192.168.5.117) from 192.168.5.117 eth0: 56(84) bytes
of data.
64 bytes from 192.168.5.117: icmp_seq=1 ttl=64 time=0.019 ms
64 bytes from 192.168.5.117: icmp_seq=2 ttl=64 time=0.012 ms

MediaSwift Admin & Install Guide 5-80
64 bytes from 192.168.5.117: icmp_seq=3 ttl=64 time=0.015 ms
64 bytes from 192.168.5.117: icmp_seq=4 ttl=64 time=0.012 ms
64 bytes from 192.168.5.117: icmp_seq=5 ttl=64 time=0.015 ms
64 bytes from 192.168.5.117: icmp_seq=6 ttl=64 time=0.014 ms
64 bytes from 192.168.5.117: icmp_seq=7 ttl=64 time=0.021 ms
64 bytes from 192.168.5.117: icmp_seq=8 ttl=64 time=0.011 ms
64 bytes from 192.168.5.117: icmp_seq=9 ttl=64 time=0.012 ms
64 bytes from 192.168.5.117: icmp_seq=10 ttl=64 time=0.012 ms
64 bytes from 192.168.5.117: icmp_seq=11 ttl=64 time=0.014 ms
64 bytes from 192.168.5.117: icmp_seq=12 ttl=64 time=0.012 ms
--- 192.168.5.117 ping statistics ---
12 packets transmitted, 12 received, 0% packet loss, time 11013ms
rtt min/avg/max/mdev = 0.011/0.014/0.021/0.003 ms
show
The show command displays run-time information related to the operational environment of
MediaSwift.
Command Parameters
Depending on the parameters, the show command displays the following information:
bypass – Displays the eth status.
connectivity – Display the iSCSI connectivity information.
eventlog – Displays the platform event log (same result as the eventlog show command).
leader – Displays the hostname of the current cluster leader. The cluster leader manages resources
used by MediaSwift.
mount – Displays the currently mounted file-system volumes on the server on which the command
is run.
process – Displays the status of MediaSwift components (pang, spread, apache, and ntp) as they run
on the platform. The output of this command is relevant for maintenance engineers.
status – Displays the cluster administrative and application status.
systemid – Displays the system serial number.
time – Displays the system date and time.
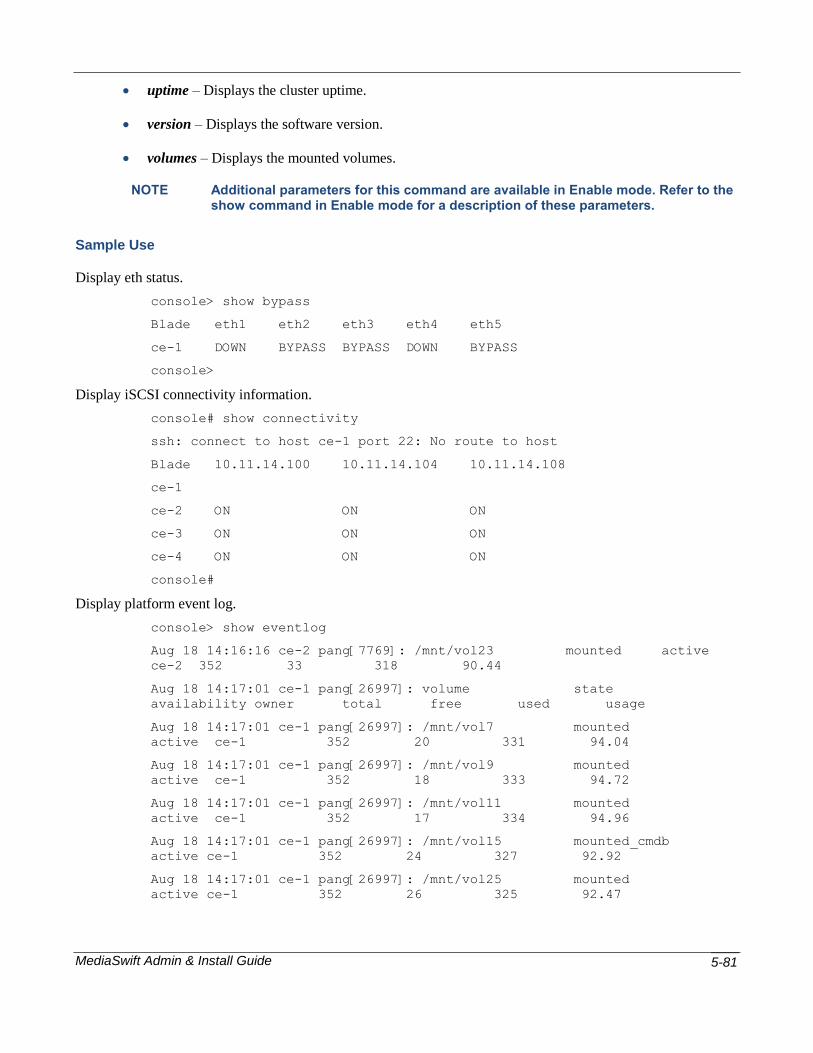
MediaSwift Admin & Install Guide 5-81
uptime – Displays the cluster uptime.
version – Displays the software version.
volumes – Displays the mounted volumes.
NOTE Additional parameters for this command are available in Enable mode. Refer to the show command in Enable mode for a description of these parameters.
Sample Use
Display eth status.
console> show bypass
Blade eth1 eth2 eth3 eth4 eth5
ce-1 DOWN BYPASS BYPASS DOWN BYPASS
console>
Display iSCSI connectivity information.
console# show connectivity
ssh: connect to host ce-1 port 22: No route to host
Blade 10.11.14.100 10.11.14.104 10.11.14.108
ce-1
ce-2 ON ON ON
ce-3 ON ON ON
ce-4 ON ON ON
console#
Display platform event log.
console> show eventlog
Aug 18 14:16:16 ce-2 pang[7769]: /mnt/vol23 mounted active
ce-2 352 33 318 90.44
Aug 18 14:17:01 ce-1 pang[26997]: volume state
availability owner total free used usage
Aug 18 14:17:01 ce-1 pang[26997]: /mnt/vol7 mounted
active ce-1 352 20 331 94.04
Aug 18 14:17:01 ce-1 pang[26997]: /mnt/vol9 mounted
active ce-1 352 18 333 94.72
Aug 18 14:17:01 ce-1 pang[26997]: /mnt/vol11 mounted
active ce-1 352 17 334 94.96
Aug 18 14:17:01 ce-1 pang[26997]: /mnt/vol15 mounted_cmdb
active ce-1 352 24 327 92.92
Aug 18 14:17:01 ce-1 pang[26997]: /mnt/vol25 mounted
active ce-1 352 26 325 92.47

MediaSwift Admin & Install Guide 5-82
Aug 18 14:17:01 ce-1 pang[26997]: /mnt/vol27 mounted
active ce-1 352 17 334 94.92
Aug 18 14:17:01 ce-1 pang[26997]: /mnt/vol29 mounted
active ce-1 352 15 337 95.66
Aug 18 14:17:01 ce-1 pang[26997]: /mnt/vol33 mounted
active ce-1 259 11 247 95.63
Aug 18 14:17:01 ce-1 pang[26997]: /mnt/vol35 mounted
active ce-1 259 10 248 95.77
Aug 18 14:17:01 ce-1 pang[26997]: /mnt/vol37 mounted
active ce-1 259 10 248 95.78
Aug 18 14:17:01 ce-1 pang[26997]: /mnt/vol40 mounted
active ce-1 259 11 247 0.00
Aug 18 14:19:17 ce-2 pang[7769]: Current leader is me (#5053416419#ce-2)!
Num members = 2
Aug 18 14:21:04 ce-1 iscsid: iSCSI daemon with pid=4916 started!
Aug 18 14:21:28 ce-3 pang[7806]: volume state
availability owner total free used usage
Aug 18 14:21:28 ce-3 pang[7806]: /mnt/vol8 mounted active
ce-3 352 18 333 94.75
Aug 18 14:21:28 ce-3 pang[7806]: /mnt/vol10 mounted active
ce-3 352 18 334 94.88
Aug 18 14:21:28 ce-3 pang[7806]: /mnt/vol12 mounted active
ce-3 352 17 334 94.97
Aug 18 14:21:28 ce-3 pang[7806]: /mnt/vol14 mounted active
ce-3 352 22 330 93.68
Aug 18 14:21:28 ce-3 pang[7806]: /mnt/vol24 mounted active
ce-3 352 29 322 91.64
Aug 18 14:21:28 ce-3 pang[7806]: /mnt/vol26 mounted active
ce-3 352 18 333 94.69
Aug 18 14:21:28 ce-3 pang[7806]: /mnt/vol28 mounted active
ce-3 352 15 336 95.45
Aug 18 14:21:28 ce-3 pang[7806]: /mnt/vol30 mounted active
ce-3 352 27 324 92.08
Aug 18 14:21:28 ce-3 pang[7806]: /mnt/vol34 mounted active
ce-3 259 12 247 95.31
Aug 18 14:21:28 ce-3 pang[7806]: /mnt/vol36 mounted active
ce-3 259 10 248 96.03
Aug 18 14:21:28 ce-3 pang[7806]: /mnt/vol39 mounted_cmdb
active ce-3 259 12 246 95.28
Aug 18 14:21:28 ce-3 pang[7806]: /mnt/vol41 mounted active
ce-3 259 10 248 95.99
Aug 18 14:21:28 ce-3 pang[7806]: /mnt/vol42 mounted active
ce-3 259 10 248 95.91

MediaSwift Admin & Install Guide 5-83
Aug 18 14:21:28 ce-3 pang[7806]: /mnt/vol45 mounted active
ce-3 259 8 250 96.60
Aug 18 14:21:35 ce-1 snmpd[7133]: peerapp snmp agent has been restarted:
0 self-reboots till now , since 18-08-09 13:23:33
Aug 18 14:22:05 mg-1 pang_cli[30998]: Blade ce-1 operation by padmin
pts/12 (sasha-pc.peerapp.com) : trying start
Aug 18 14:22:05 mg-1 pang_cli[30998]: Blade ce-1:10161 operation by
padmin pts/12 (sasha-pc.peerapp.com) : trying persistant operation state
apply... success
Aug 18 14:22:36 mg-1 pang_cli[13602]: Enter enable mode
Aug 18 14:22:42 mg-1 pang_cli[13602]: Blade ce-1 operation by padmin
pts/12 (sasha-pc.peerapp.com) : trying stop
Aug 18 14:22:43 mg-1 pang_cli[13602]: Blade ce-1:10161 operation by
padmin pts/12 (sasha-pc.peerapp.com) : trying persistant operation state
apply... success
Aug 18 14:23:00 ce-1 snmpd[7655]: peerapp snmp agent has been restarted:
0 self-reboots till now , since 18-08-09 13:23:33
Aug 18 14:23:05 mg-1 pang_cli[13602]: Blade ce-1 operation by padmin
pts/12 (sasha-pc.peerapp.com) : trying stop
Aug 18 14:23:07 mg-1 pang_cli[13602]: Blade ce-1:10161 operation by
padmin pts/12 (sasha-pc.peerapp.com) : trying persistant operation state
apply... success
Aug 18 14:23:16 ce-2 pang[7769]: volume state
availability owner total free used usage
Aug 18 14:23:16 ce-2 pang[7769]: /mnt/vol1 mounted active
ce-2 352 30 322 91.43
Aug 18 14:23:16 ce-2 pang[7769]: /mnt/vol2 mounted active
ce-2 352 29 322 91.65
Aug 18 14:23:16 ce-2 pang[7769]: /mnt/vol3 mounted active
ce-2 352 27 324 92.07
Aug 18 14:23:16 ce-2 pang[7769]: /mnt/vol4 mounted active
ce-2 352 27 324 92.05
Aug 18 14:23:16 ce-2 pang[7769]: /mnt/vol5 mounted active
ce-2 352 29 323 91.76
Aug 18 14:23:16 ce-2 pang[7769]: /mnt/vol6 mounted active
ce-2 352 28 324 92.01
Aug 18 14:23:16 ce-2 pang[7769]: /mnt/vol16 mounted active
ce-2 352 28 323 91.82
Aug 18 14:23:16 ce-2 pang[7769]: /mnt/vol17 mounted active
ce-2 352 27 324 92.06
Aug 18 14:23:16 ce-2 pang[7769]: /mnt/vol18 mounted active
ce-2 352 29 322 91.58
Aug 18 14:23:16 ce-2 pang[7769]: /mnt/vol19 mounted_cmdb
active ce-2 352 27 324 92.15

MediaSwift Admin & Install Guide 5-84
Aug 18 14:23:16 ce-2 pang[7769]: /mnt/vol20 mounted active
ce-2 352 27 324 92.24
Aug 18 14:23:16 ce-2 pang[7769]: /mnt/vol21 mounted active
ce-2 352 27 324 92.23
Aug 18 14:23:16 ce-2 pang[7769]: /mnt/vol22 mounted active
ce-2 352 28 323 91.91
Aug 18 14:23:16 ce-2 pang[7769]: /mnt/vol23 mounted active
ce-2 352 33 318 90.49
Aug 18 14:24:13 ce-2 pang[7769]: Current leader is me (#5053416419#ce-2)!
Num members = 3
Display current cluster leader.
console> show leader
ce-2
Display currently mounted file-system volumes.
console> show mount
rootfs / rootfs rw 0 0
udev /dev tmpfs rw 0 0
/dev/sda4 / ext3 rw,data=ordered 0 0
proc /proc proc rw 0 0
sysfs /sys sysfs rw 0 0
debugfs /sys/kernel/debug debugfs rw 0 0
devpts /dev/pts devpts rw 0 0
/dev/sda2 /opt ext3 rw,data=ordered 0 0
/dev/sda3 /var ext3 rw,data=ordered 0 0
/dev/sda2 /srv/ftp/cdrs ext3 rw,data=ordered 0 0
nfsd /proc/fs/nfsd nfsd rw 0 0
/dev/sdb1 /media/pa-install vfat
rw,fmask=0022,dmask=0022,codepage=cp437,iocharset=iso8859-1 0 0
/dev/sdc1 /media/pa-install vfat
rw,fmask=0022,dmask=0022,codepage=cp437,iocharset=iso8859-1 0 0
console>
Display status of MediaSwift components.
console> show process
admin 882 880 0 11:41 pts/14 00:00:00 -pang_cli
wwwrun 981 5759 0 12:38 ? 00:00:00 /usr/sbin/httpd2-prefork
-f /etc/apache2/httpd.conf
wwwrun 1365 5759 0 Aug17 ? 00:00:03 /usr/sbin/httpd2-prefork
-f /etc/apache2/httpd.conf
root 3994 1 0 Aug09 ? 00:00:20 /sbin/syslog-ng -f
/etc/syslog-ng/syslog-ng.conf -a /var/lib/ntp/dev/log

MediaSwift Admin & Install Guide 5-85
ntp 4481 1 0 Aug09 ? 00:00:00 /usr/sbin/ntpd -p
/var/lib/ntp/var/run/ntp/ntpd.pid -u ntp -i /var/lib/ntp
admin 4935 4932 0 Aug17 ? 00:00:00 pang_cli
wwwrun 5312 5759 0 12:58 ? 00:00:00 /usr/sbin/httpd2-prefork
-f /etc/apache2/httpd.conf
root 5547 1 0 Aug17 ? 00:00:00
/opt/pang/mgmt/avalon/sbin/snmptrapd -f -Osq -Ls user -c
/opt/pang/mgmt/avalon/sbin/snmptrapd.conf 10.11.12.1
root 5566 1 1 Aug17 ? 00:14:55
/opt/pang/mgmt/bin/monitor
root 5759 1 0 Aug12 ? 00:00:00 /usr/sbin/httpd2-prefork
-f /etc/apache2/httpd.conf
admin 13602 13601 0 14:22 pts/12 00:00:00 pang_cli
root 17343 1 0 08:56 ? 00:01:24
/opt/pang/mgmt/avalon/sbin/snmpd -f -A -LF e
/opt/pang/mgmt/avalon/var/log/snmpd.log -LS c u 192.168.5.117
wwwrun 18567 5759 0 Aug17 ? 00:00:03 /usr/sbin/httpd2-prefork
-f /etc/apache2/httpd.conf
admin 19599 19598 0 10:13 pts/1 00:00:00 -pang_cli
admin 20139 20138 0 10:29 pts/2 00:00:00 -pang_cli
root 20990 3994 0 Aug16 ? 00:00:00 /bin/bash
/opt/pang/mgmt/bin/mailer.sh
admin 23843 23841 0 14:28 pts/2 00:00:00 /bin/grep -E
(pang)|(spread)|(apache)|(ntp)
wwwrun 24594 5759 0 13:40 ? 00:00:00 /usr/sbin/httpd2-prefork
-f /etc/apache2/httpd.conf
wwwrun 28286 5759 0 12:34 ? 00:00:00 /usr/sbin/httpd2-prefork
-f /etc/apache2/httpd.conf
wwwrun 29354 5759 0 12:08 ? 00:00:00 /usr/sbin/httpd2-prefork
-f /etc/apache2/httpd.conf
wwwrun 30163 5759 0 12:53 ? 00:00:00 /usr/sbin/httpd2-prefork
-f /etc/apache2/httpd.conf
spread 30818 1 4 03:45 ? 00:26:25 /usr/bin/spread -n mg-1 -
c /etc/spread.conf
wwwrun 31260 5759 0 13:13 ? 00:00:00 /usr/sbin/httpd2-prefork
-f /etc/apache2/httpd.conf
wwwrun 31533 5759 0 12:23 ? 00:00:00 /usr/sbin/httpd2-prefork
-f /etc/apache2/httpd.conf
console>
Display cluster administrative and application status.
console> show status
Cluster state: degraded

MediaSwift Admin & Install Guide 5-86
Blade Slot Status Operational state Device state Administrative
state
ce-1 powered on enabled starting
unlocked
ce-2 powered on enabled started
unlocked
ce-3 powered on enabled started
unlocked
ce-4 powered on N/A stopped
unlocked
console>
console>
Display system serial number.
console> show systemid
*H6L1K3J
7GB9C4J
3GB9C4J
9GB9C4J
4GB9C4J
console>
Display system date and time.
console> show time
Tue Aug 18 2009 14:30:05 GMT+0000
Display cluster uptime.
console> show uptime
cluster 19h:53m:57s.00th
ce-1 0h:01m:23s.00th
ce-2 19h:53m:57s.00th
ce-3 1h:04m:22s.00th
ce-4 0h:00m:00s.00th
console>
Display software version.
console> show version
management PeerApp management cli version 3.0.88
management PeerApp management node software version 3.0.88
ce-1 3.0.88 2.6.27.7-llpf-xfsdebug-9-default LLPF Version
1.9.13
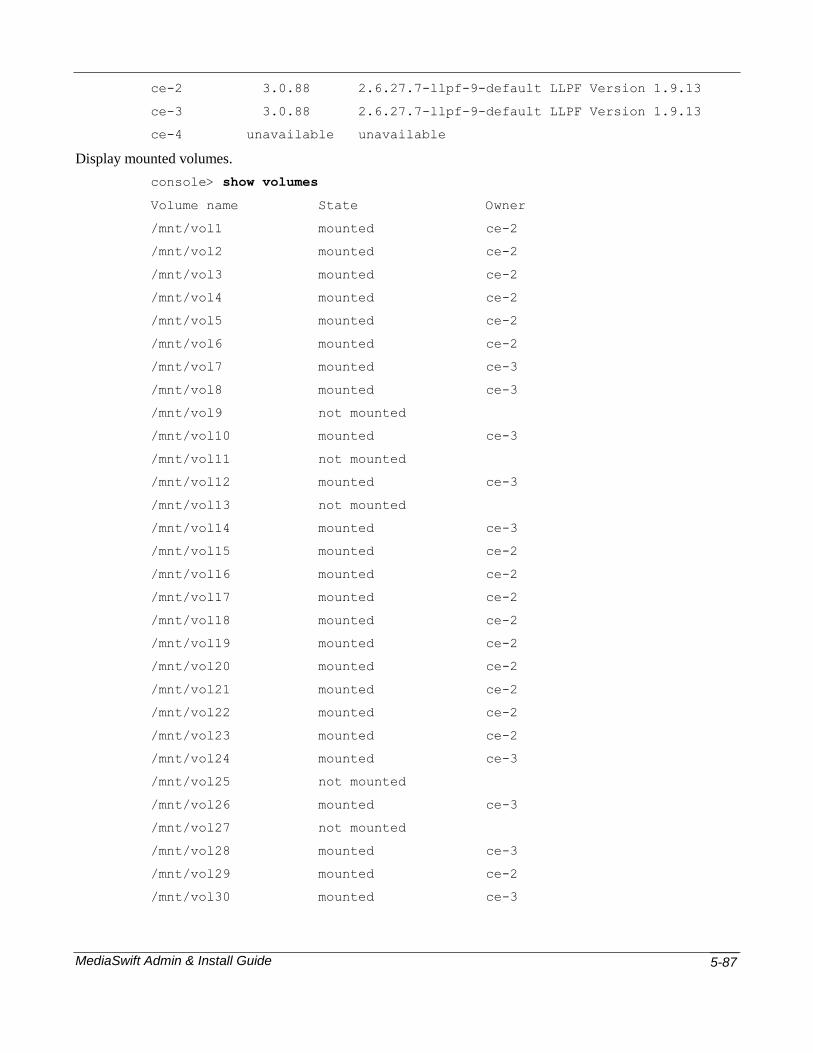
MediaSwift Admin & Install Guide 5-87
ce-2 3.0.88 2.6.27.7-llpf-9-default LLPF Version 1.9.13
ce-3 3.0.88 2.6.27.7-llpf-9-default LLPF Version 1.9.13
ce-4 unavailable unavailable
Display mounted volumes.
console> show volumes
Volume name State Owner
/mnt/vol1 mounted ce-2
/mnt/vol2 mounted ce-2
/mnt/vol3 mounted ce-2
/mnt/vol4 mounted ce-2
/mnt/vol5 mounted ce-2
/mnt/vol6 mounted ce-2
/mnt/vol7 mounted ce-3
/mnt/vol8 mounted ce-3
/mnt/vol9 not mounted
/mnt/vol10 mounted ce-3
/mnt/vol11 not mounted
/mnt/vol12 mounted ce-3
/mnt/vol13 not mounted
/mnt/vol14 mounted ce-3
/mnt/vol15 mounted ce-2
/mnt/vol16 mounted ce-2
/mnt/vol17 mounted ce-2
/mnt/vol18 mounted ce-2
/mnt/vol19 mounted ce-2
/mnt/vol20 mounted ce-2
/mnt/vol21 mounted ce-2
/mnt/vol22 mounted ce-2
/mnt/vol23 mounted ce-2
/mnt/vol24 mounted ce-3
/mnt/vol25 not mounted
/mnt/vol26 mounted ce-3
/mnt/vol27 not mounted
/mnt/vol28 mounted ce-3
/mnt/vol29 mounted ce-2
/mnt/vol30 mounted ce-3

MediaSwift Admin & Install Guide 5-88
/mnt/vol31 not mounted
/mnt/vol32 not mounted
/mnt/vol33 mounted ce-1
/mnt/vol34 mounted ce-3
/mnt/vol35 not mounted
/mnt/vol36 mounted ce-3
/mnt/vol37 not mounted
/mnt/vol38 not mounted
/mnt/vol39 mounted ce-3
/mnt/vol40 not mounted
/mnt/vol41 mounted ce-3
/mnt/vol42 mounted ce-3
/mnt/vol43 not mounted
/mnt/vol44 not mounted
console>
tcpdump
The tcpdump command dumps traffic on the appropriate network interface. This command should be
used on the management-server only, since it generates the dump on the management servers and not
the cache-engines.
In order to generate a dump using one of the cache-engines, you should select the server (with the
oper server x command and then use the tcpdump_server command.
NOTE It is not recommended to use this command on a production platform that processes more than a total of 250Mbps of traffic as this may cause the traffic to slow down.
Command Parameters
-i <interface> -c <count> -r<cidr_range>
Where:
Interface – The network interface for which to display the traffic.
count – The number of reports to generate.
cidr_range – This option outlines the range of the subnets for you wish to get the dump. This
parameter is mandatory.
Sample Use
Display two reports for the traffic on eth0.

MediaSwift Admin & Install Guide 5-89
console> tcpdump -i eth0 -c 2 –r 10.1.1.73/24
tcpdump: WARNING: eth0: no IPv4 address assigned
tcpdump: verbose output suppressed, use -v or -vv for full protocol
decode
listening on eth0, link-type EN10MB (Ethernet), capture size 65535 bytes
2 packets captured
7 packets received by filter
0 packets dropped by kernel
12:28:20.424909 IP 192.168.5.117.22 > 10.1.1.73.2297: P
1721324056:1721324156(100) ack 3208513443 win 12864
12:28:20.424922 IP 192.168.5.117.22 > 10.1.1.73.2297: P 100:296(196) ack
1 win 12864
traceroute
The traceroute command tracks a packet‟s route across a TCP/IP network on its way to a given host. It
utilizes the IP protocol's time to live (TTL) field and attempts to elicit an ICMP TIME_EXCEEDED
response from each gateway along the path to the host/destination.
Command Parameters
[-n] destination
Where:
-n – Forces the traceroute command to avoid mapping IP addresses to host names when displaying
them.
destination – The name or IP address of the destination.
Sample Use
Traceroute to a remote destination/host.
console> traceroute 213.25.17.65
traceroute to 213.25.17.65 (213.25.17.65), 30 hops max, 40 byte packets
1 192.168.5.1 (192.168.5.1) 1.301 ms 1.279 ms 1.292 ms
2 10.1.2.253 (10.1.2.253) 0.201 ms 0.237 ms 0.177 ms
3 212.150.66.65 (212.150.66.65) 0.990 ms 1.045 ms 0.821 ms
4 212.150.6.137 (212.150.6.137) 4.394 ms 4.411 ms 4.267 ms
5 gig0-1-gw1.thc.nv.net.il (212.143.200.33) 4.321 ms 4.281 ms
4.927 ms
6 coresw1-hfa-gw1.thc.nv.net.il (212.143.200.1) 5.146 ms 5.578 ms
5.657 ms

MediaSwift Admin & Install Guide 5-90
7 gi0-1-0.gw1.hfa.nv.net.il (212.143.8.193) 5.027 ms 6.523 ms
6.389 ms
8 pos1-3-0.gw1.lnd.nv.net.il (212.143.12.81) 98.327 ms 102.262 ms
101.749 ms
9 ten3-1.brdr1.lnd.nv.net.il (212.143.14.137) 86.039 ms 89.152 ms
89.150 ms
10 10.50.1.1 (10.50.1.1) 94.458 ms 90.483 ms 90.919 ms
11 ldn-b2-link.telia.net (213.248.72.125) 88.340 ms 88.606 ms
99.483 ms
12 ldn-tch-i1-link.telia.net (80.91.250.217) 95.796 ms 91.841 ms
92.334 ms
13 ldn-b5-link.telia.net (80.91.250.209) 95.562 ms 92.757 ms 93.582
ms
14 * * *
15 xe-1-0-1-0.ffttr2.Frankfurt.opentransit.net (193.251.129.45) 190.518
ms 184.738 ms 180.753 ms
16 * * *
17 do.wro-ar3.z.wro-r1.tpnet.pl (213.25.5.154) 138.287 ms 134.848 ms
do.wro-ar3.z.wro-r2.tpnet.pl (213.25.12.154) 132.107 ms
18 z-easy-com.wro-ar1.tpnet.pl (80.50.233.62) 138.366 ms 134.411 ms
135.860 ms
19 z-easy-com.wro-ar1.tpnet.pl (80.50.233.62) 137.239 ms 133.277 ms
134.191 ms
console> traceroute -n 213.25.17.65
traceroute to 213.25.17.65 (213.25.17.65), 30 hops max, 40 byte packets
1 192.168.5.1 (192.168.5.1) 1.394 ms 2.709 ms 3.127 ms
2 10.1.2.253 (10.1.2.253) 0.473 ms 0.201 ms 0.194 ms
3 212.150.66.65 (212.150.66.65) 1.465 ms 1.418 ms 1.294 ms
4 212.150.6.137 (212.150.6.137) 4.678 ms 4.454 ms 4.632 ms
5 212.143.200.33 (212.143.200.33) 4.806 ms 5.186 ms 4.758 ms
6 212.143.200.1 (212.143.200.1) 4.504 ms 5.589 ms 5.470 ms
7 212.143.8.193 (212.143.8.193) 5.066 ms 5.346 ms 5.077 ms
8 212.143.12.81 (212.143.12.81) 100.799 ms 100.449 ms 99.942 ms
9 212.143.14.137 (212.143.14.137) 88.570 ms 88.802 ms 88.797 ms
10 10.50.1.1 (10.50.1.1) 88.024 ms 88.830 ms 90.686 ms
11 213.248.72.125 (213.248.72.125) 86.724 ms 87.532 ms 89.046 ms
12 80.91.250.217 (80.91.250.217) 89.407 ms 86.534 ms 87.078 ms
13 80.91.250.209 (80.91.250.209) 87.804 ms 88.933 ms 84.935 ms
14 * * *

MediaSwift Admin & Install Guide 5-91
15 193.251.129.45 (193.251.129.45) 101.324 ms 104.689 ms 100.905 ms
16 * * *
17 213.25.5.154 (213.25.5.154) 138.363 ms 140.932 ms 213.25.12.154
(213.25.12.154) 133.100 ms
18 80.50.233.62 (80.50.233.62) 136.797 ms 133.117 ms 136.069 ms
19 80.50.233.62 (80.50.233.62) 133.612 ms 135.052 ms 134.800 ms
console>
who
The who command displays the users who are currently logged in.
NOTE You must be logged in using an admin username and password to view the output of the who command.
Command Parameters
None.
Sample Use
Display a list of users who are currently logged into the system.
console> who
admin pts/0 Feb 18 11:32 (AdminLaptop.peerapp.com)
console>
Enable Mode Commands
The following commands are accessible in Enable mode.
Regular mode commands are also available in Enable mode. Refer to Regular Mode Commands,
page 5-61 for a list and description of Regular mode commands.
You must have a username and password to access Enable mode commands. Refer to enable, page 5-
69 for more information.
Table 4: Enable Mode Commands
COMMAND DESCRIPTION
access Enables users to manage system access parameters
apache_restart Restarts apache
cache Enables users to manage additional cache operations
config Enters Configuration mode
eventlog Provides access to eventlog Enable mode commands

MediaSwift Admin & Install Guide 5-92
COMMAND DESCRIPTION
help Displays commands available in Enable mode
license Enables users to manage the system license
oper Provides access to system management operations
reset Resets management services
rollback Rolls back to the last good software version of
MediaSwift
show Provides access to additional show Enable mode
commands
smartfilter Manages the SmartFilter options
upgrade Downloads and installs software image file
vlan Add/remove vlans from the interface
access
The access command enables the user to manage system access parameters, such as:
enable-password – Sets the Enable mode password.
NOTE The default password for the enable command is set upon system installation and defaults to the system-id. The system-id is viewable using the show systemid command. It is strongly recommended to change the default enable command password immediately after initial installation.
idle-session-timeout – Sets the timeout after which the telnet session is terminated (both for the
Enable mode and the Regular mode commands).
The default timeout value is NO timeout – i.e., the sessions are always available and will never be
terminated.
user-password – Sets the Regular mode command user password.
Command Parameters
enable-password – When used, the CLI prompts the user for a new password, and then requests the
user to re-enter the new password for verification. If both passwords match, the enable-password is
modified to the new password. The new password should be at least four characters long.
idle-session-timeout – Sets the idle-session timeout value. This command requires the following
parameter:
<timeout value (secs)> – The value, in seconds, for the new idle-timeout value. The
default value is zero seconds which disables the timeout.

MediaSwift Admin & Install Guide 5-93
user-password – When used, the CLI prompts the user for the new password, and then requests the
user to re-enter the new password for verification. If both passwords match, the user-password is
modified to the new password. The new password should be at least four characters long, and is then
verified against a set of rules which forces a complex password standard.
Sample Use
Change the Enable mode password.
console# access enable-password
New password:
Re-enter new password:
console#
Change the idle session timeout.
console# access idle-session-timeout 32768
console#
Change the user password.
console# access user-password
Changing password for admin.
Old Password:
New Password:
Bad password: too simple
New Password:
Reenter New Password:
Password changed.
console#
apache_restart
The apache_restart command restarts the apache server.
Command Parameters
None.
Sample Use
Restart the apache server.
Console# apache_restart
Restarting httpd2 (SIGHUP) done
Console#

MediaSwift Admin & Install Guide 5-94
cache
The cache command allows the user to manage cache parameters, such as:
active_sessions – Show active sessions for a given IP address.
black_list – Manages the cache black list.
hash – Displays the file‟s metadata using a hash ID.
list – Displays and exports the list of cache content. This command is also available in Regular
mode.
remove – Removes a file from the cache using hash ID.
summary – Displays CMDB statistics summary.
sync – Verifies and synchronizes the cache metadata.
volume – Manages cache volumes.
Command Parameters
active_sessions – This parameter is followed by the required IP address.
black_list – This parameter is followed by one of the following parameters:
add – Adds a file to the black list using the hash ID. This parameter should be followed
by the hash ID associated with the file to be added to the black list. The following is the
syntax for the hash-ID:
<hash_id>
dump – Displays (dumps) the entire black list.
export – Exports the black list to a TFTP server, where the server name and file location
are specified as: <TFTP server address> <filename>.
NOTE The file to which the content is exported must already exist, and must have write access to all.
remove – Removes a file from the black list using a hash ID. This parameter should be
followed by the hash ID associated with the file to be added to the black list. The
following is the syntax for the hash-ID:
<hash_id>
hash – dump the file‟s metadata using the hash ID.
list – Displays and exports the list of cache content. This parameter is followed by one of the
following parameters:

MediaSwift Admin & Install Guide 5-95
display – Displays a full list of cache content.
export – Exports the cache content to TFTP server. This command should be followed
by the TFTP server IP-address and the filename to which the information is to be saved.
short – Displays the Least Recently Used (LRU) cached hash IDs.
remove – Removes a file from cache using a hash ID. Add the hash ID to this parameter using the
following syntax:
hash <hash_id> – Where the hash ID should match a hash ID that exists in the system
cache. For a list of hash IDs stored in the system, use the cache list command.
summary – Display the CMDB statistics summary.
sync – Verifies and synchronizes the cache metadata. The platform is fully accessible during this
process. Note that synching the cache can take a few hours.
volume – Manipulates the cache file system volumes. Using this command you can activate,
deactivate, and remove file system volumes. These sets of commands are mainly used for
maintenance purposes – usually for hard drive maintenance.
You can use the show volume command for a list of currently used volumes.
The volumes that can be used for these commands can be viewed using the show volume command.
When the volume command is used, it should be followed by one of the following parameters:
activate – Request the system to activate a cache volume.
deactivate – Request the platform to stop using a specific volume for caching.
remove – Remove all hash IDs associated with the specific volume from within the
configuration management database (CMDB), so that the system will not cache these
hash IDs anymore. This command removes ALL information cached on this volume
from the CMDB, which is a non-reversible process.
Following these parameters, a volume number should be added, which has the following
syntax:
<1-15> – Represents the volume number to be used for this command.
Sample Use
Black List Manipulation:
Add a file (hash ID) to the black list.
console# cache black_list add AE7E21FB0CA2DD7464A562E74064248E9B790057
The specified hash was inserted in a black list

MediaSwift Admin & Install Guide 5-96
console#
console# cache black_list add 6827AC55B43B1B0BAB58FC9F9E7D6B05EF71FDCD
The specified hash was inserted in a black list
console#
Dump (display) the contents of the black list.
console# cache black_list dump
HASH PROTOCOL SIZE
AGE
6827AC55B43B1B0BAB58FC9F9E7D6B05EF71FDCD P2P_SIGNATURE_NA 0
0
AE7E21FB0CA2DD7464A562E74064248E9B790057 P2P_SIGNATURE_NA 0
0
Export the black list to a TFTP server.
console# cache black_list export 192.168.14.26 black-list
console#
Display the file’s metadata using a hash ID.
console# cache hash BCBBAF652BFEAAE3E11C3F279608A1FB7A337DCD
This operation might take some time.(^C to interrupt)
.
.
xxxxxxxxxxxxxxxxxxxxxxxxxxxxxxxxxxxxxxxxxxxx
HTTP 126B32237A1EDF3508B35B49642945F2E97FB8E2 ST:WATCHED HITS:6 IPS:1
VL:14 SZ:6299870 MP:0 FF:yes FS:1252582601 LS:125267625
1 CO:6 MB FF:100.00 PFF:0.00 checksum
91B6735FB6557E3C959B278C8C0AC2323DD84CC8
Hits: 6
First seen: Thu Sep 10 11:36:41 2009
Last access: Fri Sep 11 13:37:31 2009
Volume id: 14
Cached File size: 6299870
Max piece: 0
Full File: yes
Full File Size: 6299870
BT_last_start: 0
BT_last_end: 6299870
max known bt piece size 0

MediaSwift Admin & Install Guide 5-97
cache out in MB 6
File fill factor 100.00
total full pieces 0 (0.00)
HTTP checksum is 91B6735FB6557E3C959B278C8C0AC2323DD84CC8
piece bit mask 0x2
RANGES -------------- RANGES
console#
Display and export the cache content options.
console# cache list display
This operation might take some time as the whole storage-index is
scanned.(^C to interrupt)
HASH PROTOCOL SIZE AGE
D35D8E3D8EEE3BF82D7B8F783FD4D2380A216C67 HTTP 6276762 42
208FD9F7E7C42473291C503931EF22269657285A HTTP 6286497 30
5A88AC47F6B636E5FF6C462D9DE15691A53B26C3 HTTP 6297586 29
26D26351170461CDD3B5680ED0417254C4FA43C1 HTTP 6291394 26
86BA4AC4E0E818C18BD2B9040D7A5E3F19E70776 HTTP 6276664 43
9ADB98FC073B05866EFFBC1159522E9E42261669 HTTP 6295830 43
.
Export the full list of hash IDs to a TFTP server:
console# cache list export 192.168.5.117 cache-list
This operation will take about 2 minutes.(CNTR+C to interrupt). Display the top 1000 least recently
used hash IDs:
console# cache list short
This operation might take some time as the whole storage-index is
scanned.(^C to interrupt)
HASH PROTOCOL SIZE AGE
D35D8E3D8EEE3BF82D7B8F783FD4D2380A216C67 HTTP 6276762 42
208FD9F7E7C42473291C503931EF22269657285A HTTP 6286497 30
5A88AC47F6B636E5FF6C462D9DE15691A53B26C3 HTTP 6297586 29
26D26351170461CDD3B5680ED0417254C4FA43C1 HTTP 6291394 26
86BA4AC4E0E818C18BD2B9040D7A5E3F19E70776 HTTP 6276664 43
9ADB98FC073B05866EFFBC1159522E9E42261669 HTTP 6295830 43
94611C230B77D73205BC3090FA2A6104BAEE7990 HTTP 6297222 31
.

MediaSwift Admin & Install Guide 5-98
Remove a file (hash ID) from the black list.
console# cache black_list remove AE7E21FB0CA2DD7464A562E74064248E9B790057
The specified hash was deleted from a black list
console#
console# cache black_list remove 6827AC55B43B1B0BAB58FC9F9E7D6B05EF71FDCD
The specified hash was deleted from a black list
console#
Remove a hash ID Stored in the Cache.
console# cache remove hash F753B1C31107981BC86D87CF5F7B9EEFD5F5A28B
The specified hash will be deleted in a few minutes
console#
Cache Synchronization and Verification:
NOTE This process may take several hours to complete.
Start a cache verification and synchronization process.
console# cache sync
Proceeding cache to metadata sync. Some data in the cache might be lost.
Are you sure (y/n)? y
Starting cache synchronization...
Volume Manipulation Commands:
Activate a specific volume.
console# cache volume activate 4
activating volume 4
console#
Deactivate a specific volume.
console# cache volume deactivate 4
deactivating volume 4
console#
Remove a specific volume content from the CMDB.
console# cache volume remove 4
Are you sure? This will remove all hashes from volume 4.
[yes|no] no
Removing volume 4 has been cancelled
console#

MediaSwift Admin & Install Guide 5-99
config
The config command enters Configuration mode, the user prompt appears: configuration#, and
you can make platform configuration changes. Changes you make are stored but will only be
implemented upon using the apply command. Use the exit command to exit Configuration mode.
Configuration changes can include:
Cluster configuration.
Management network interface configuration.
Management NTP configuration.
In Configuration mode, you can request configuration changes using the following set of commands:
apply – Applies the configuration changes requested until now.
diff – Shows the pending configuration changes.
discard – Discards the pending changes.
display – Displays the current configuration.
exit – Exits Configuration mode.
export – Exports the cluster configuration to the TFTP server.
help – Displays the command syntax for each configuration command.
import – Imports the cluster configuration from the TFTP server.
network – Configures the management network interface.
ntp – Configures the management NTP parameters.
restore – Restores the last good configuration.
time – Sets the system date and time.
Configuration Commands and Parameters
apply – This command has no parameters. It immediately applies the configuration changes to the
live platform.
diff – This command does not have parameters. It displays the proposed configuration changes. The
new configuration parameters are indicated by a + sign as the first character on the line, while the
current configuration parameters are indicated by a - sign as the first character on the line. See the
sample below.

MediaSwift Admin & Install Guide 5-100
discard – This command has no parameters. It immediately discards any configuration change
requested since entering Configuration mode.
display – This command has no parameters. It immediately displays the current configuration.
exit – This command has no parameters. It immediately exits Configuration mode and returns to
Enable mode. If you created any configuration change but did not use the apply command to
implement the changes, a warning message appears as follows:
Exiting configuration mode without apply, will discard changes.
Are you sure? [N/y] n
export – Exports the current configuration to a TFTP server, where the server name and file location
are specified as: <TFTP server address> <filename>.
NOTE The file to which the configuration is exported must already exist, and must have write access to all.
If localhost is used as the <TFTP server address> parameter, then the file is located under the
/TFTPboot/ folder.
help – This command has no parameters. It displays help for all the CLI Configuration mode
commands.
import – Imports the configuration from a TFTP server, where the server name and file location are
specified as: <TFTP server address> <filename>.
NOTE The file to which the configuration is imported must already exist, and must have write access to all.
If localhost is used as the <TFTP server address> parameter, then the file must be located under the
/TFTPboot/ folder.
network – Changes the configuration default gateway or the configuration management network IP
address. The command has the following parameters:
default_gw – Configures the default gateway. The IP address of the default gateway
should follow. Note that changing the default gateway could be dangerous, since if done
from a telnet session to a remote MediaSwift server, it might destroy the connection
with which you are currently working.
ip – Changes the management network interface. Specify the IP address using the
following syntax:
<ip address> <netmask>
ntp – Modifies the IP address associated with the NTP server or the time zone where the MediaSwift
server is located. The additional parameters for this command are one of the following:
server – The IP address where an NTP server is running or a specific address for using
the localhost as the NTP server. The following syntax applies:

MediaSwift Admin & Install Guide 5-101
<ip address or 127.127.1.0 for local>
timezone – Followed by the time zone name. From the “/usr/share/zoneinfo” folder,
select the correct time zone name that fits the time zone in which the system is located.
For example:
New Zealand – “Pacific/Auckland”.
Chicago – “America/Chicago”.
NOTE An up-to-date timezone table can easily be found on the Internet, by searching for “list of zoneinfo timezones” and using the value displayed in the TZ environment variable that matches your timezone.
restore – Restores the latest configuration before the last changes were applied. You must still use
the apply command to apply the restored configuration to the system, or use the discard command to
discard the restored configuration.
time – Enables you to modify the system time. The command should be followed by the current
time, using the <MMDDYYhhmm> format.
Sample Use
Apply configuration changes.
configuration# apply
Configurations are identical
configuration#
.
. perform some configuration changes
.
configuration# apply
applying configuration...
Configuration applied
configuration#
configuration# export 192.168.0.97 current-config
configuration#
Display the new configuration.
configuration# diff
<?xml version="1.0" encoding="UTF-8" standalone="no" ?>

MediaSwift Admin & Install Guide 5-102
<cluster xmlns:xsi='http://www.w3.org/2001/XMLSchema-instance'
xsi:noNamespaceSchemaLocation='cluster_conf.xsd'>
<mgmt-config>
<ipaddr>192.168.0.202</ipaddr>
<netmask>255.255.255.0</netmask>
<default-gw>192.168.0.2</default-gw>
<nameserver>10.1.1.235</nameserver>
<alert-email>[email protected]</alert-email>
<site_name>192.168.0.202</site_name>
<external_syslog_ip>127.0.0.1</external_syslog_ip>
</mgmt-config>
<web-config></web-config>
<common>
<ntp>
<server-ip>127.127.1.0</server-ip>
- <timezone>America/Chicago</timezone>
+ <timezone>Pacific/Auckland</timezone>
</ntp>
<snmp>
<trap-ip>aa.bb.cc.dd</trap-ip>
<snmp-read-community>gdcbhv</snmp-read-community>
<snmp-write-community>nkppui</snmp-write-community>
<snmp-trap-community>nkppui</snmp-trap-community>
</snmp>
<service>
<protocols>
<enable-bittorent>1</enable-bittorent>
<enable-edk>1</enable-edk>
<enable-gnutella>1</enable-gnutella>
<enable-http>1</enable-http>
<enable-ares>1</enable-ares>
<enable-smartflter>1</enable-smartfilter>
</protocols>
<net>
<fwd-mode>PROMISC</fwd-mode>
<bridge id='0'>
<interface-world>iff2</interface-world>

MediaSwift Admin & Install Guide 5-103
<interface-isp>iff1</interface-isp>
</bridge>
</net>
</service>
</common>
<blades>1</blades>
<blade id='1'>
<cache-engine>
<network></network>
</cache-engine>
</blade>
</cluster>
Discard a set of configuration changes.
configuration# discard
configuration#
Display the current configuration.
configuration# display
<?xml version="1.0" encoding="UTF-8" standalone="no" ?>
<cluster xmlns:xsi='http://www.w3.org/2001/XMLSchema-instance'
xsi:noNamespaceSchemaLocation='cluster_conf.xsd'>
<mgmt-config>
<ipaddr>192.168.5.202</ipaddr>
<netmask>255.255.255.0</netmask>
<default-gw>192.168.5.1</default-gw>
<nameserver>10.1.1.235</nameserver>
<alert-email>[email protected]</alert-email>
<site_name>192.168.0.202 </site_name>
<external_syslog_ip>127.0.0.1</external_syslog_ip>
<secure-computing>
<host_name>list.smartfilter.com</host_name>
<path_on_host>cgi-bin/updatelist</path_on_host>
<sfversion>3.1.56</sfversion>
<serial_number>SFZF-A3WX-G7SU-HU02</serial_number>
</secure-computing>
</mgmt-config>

MediaSwift Admin & Install Guide 5-104
<web-config>
<controller>
<ip>10.11.18.200</ip>
</controller>
<controller>
<ip>10.11.18.201</ip>
</controller>
<controller>
<ip>10.11.18.202</ip>
</controller>
<controller>
<ip>10.11.18.202</ip>
</controller>
<controller>
<ip>10.11.18.204</ip>
</controller>
<controller>
<ip>10.11.18.205</ip>
</controller>
<controller>
<ip>10.11.18.206</ip>
</controller>
<controller>
<ip>10.11.18.207</ip>
</controller>
</web-config>
<common>
<ntp>
<server-ip>127.127.1.0</server-ip>
<timezone>GMT</timezone>
</ntp>
<snmp>
<trap-ip>10.11.12.1</trap-ip>
<snmp-read-community>gdcbhv</snmp-read-community>
<snmp-write-community>nkppui</snmp-write-community>
<snmp-trap-community>ffff</snmp-trap-community>

MediaSwift Admin & Install Guide 5-105
</snmp>
<service>
<protocols>
<enable-bittorent>1</enable-bittorent>
<enable-edk>1</enable-edk>
<enable-gnutella>1</enable-gnutella>
<enable-http>1</enable-http>
<enable-ares>1</enable-ares>
<enable-smartfilter>1</enable-smartfilter>
</protocols>
<net>
<fwd-mode>PROMISC</fwd-mode>
</net>
</service>
<content_filtering>
<custom-smartfilter-category name='Joe'>
<url-map name='custom-Joe-name'>
<url>http://164.90.0.2/block/</url>
<url>http://164.90.0.5/BLOCK/</url>
<url>http://www.espn.com</url>
</url-map>
</custom-smartfilter-category>
<custom-smartfilter-category name='jones'>
<url-map name='custom-jones-name'>
<url>http://www.sex4free.com</url>
<url>http://164.90.0.1/redirect/</url>
<url>http://www.cnn.com/</url>
<url>http://www.one.com/cat/live</url>
</url-map>
</custom-smartfilter-category>
<content_class name='Joe'>
<smartfilter-category name='Joe' />
<content-action name='block'>
<http-action>BLOCK</http-action>
<http-response-code>404</http-response-code>
</content-action>

MediaSwift Admin & Install Guide 5-106
</content_class>
<content_class name='jones'>
<smartfilter-category name='jones' />
<content-action name='redirect'>
<http-action>REDIRECT</http-action>
<redirect-url>http://www.teatime.com</redirect-url>
</content-action>
</content_class>
<content_class name='Pornography'>
<smartfilter-category name='Pornography' />
<content-action name='block'>
<http-action>BLOCK</http-action>
</content-action>
</content_class>
<content_class name='Shareware'>
<smartfilter-category name='Shareware/Freeware' />
<content-action name='redirect'>
<http-action>REDIRECT</http-action>
<redirect-url>http://www.aaa.com</redirect-url>
</content-action>
</content_class>
</content_filtering>
</common>
<blades>12</blades>
<blade id='1'>
<cache-engine>
<network></network>
</cache-engine>
</blade>
<blade id='2'>
<cache-engine>
<network></network>
</cache-engine>
</blade>
<blade id='3'>
<cache-engine>

MediaSwift Admin & Install Guide 5-107
<network></network>
</cache-engine>
</blade>
<blade id='4'>
<cache-engine>
<network></network>
</cache-engine>
</blade>
<blade id='5'>
<cache-engine>
<network></network>
</cache-engine>
</blade>
<blade id='6'>
<cache-engine>
<network></network>
</cache-engine>
</blade>
<blade id='7'>
<cache-engine>
<network></network>
</cache-engine>
</blade>
<blade id='8'>
<cache-engine>
<network></network>
</cache-engine>
</blade>
<blade id='9'>
<cache-engine>
<network></network>
</cache-engine>
</blade>
<blade id='10'>
<cache-engine>
<network></network>
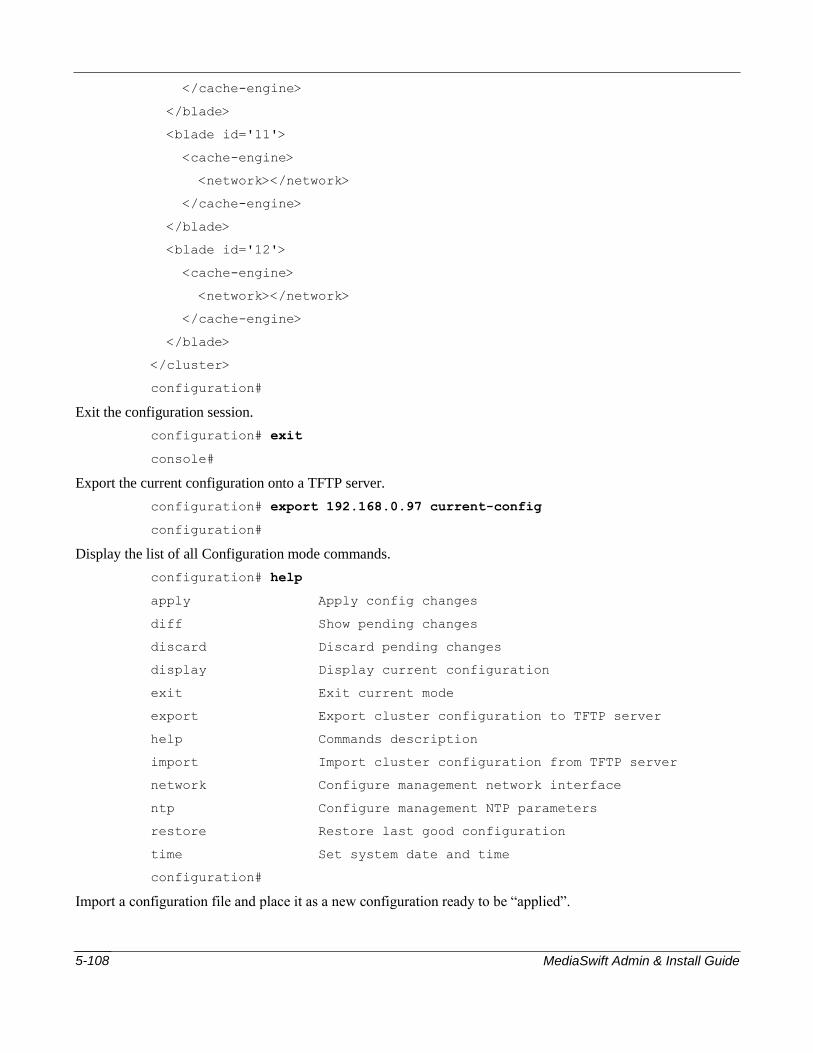
MediaSwift Admin & Install Guide 5-108
</cache-engine>
</blade>
<blade id='11'>
<cache-engine>
<network></network>
</cache-engine>
</blade>
<blade id='12'>
<cache-engine>
<network></network>
</cache-engine>
</blade>
</cluster>
configuration#
Exit the configuration session.
configuration# exit
console#
Export the current configuration onto a TFTP server.
configuration# export 192.168.0.97 current-config
configuration#
Display the list of all Configuration mode commands.
configuration# help
apply Apply config changes
diff Show pending changes
discard Discard pending changes
display Display current configuration
exit Exit current mode
export Export cluster configuration to TFTP server
help Commands description
import Import cluster configuration from TFTP server
network Configure management network interface
ntp Configure management NTP parameters
restore Restore last good configuration
time Set system date and time
configuration#
Import a configuration file and place it as a new configuration ready to be “applied”.
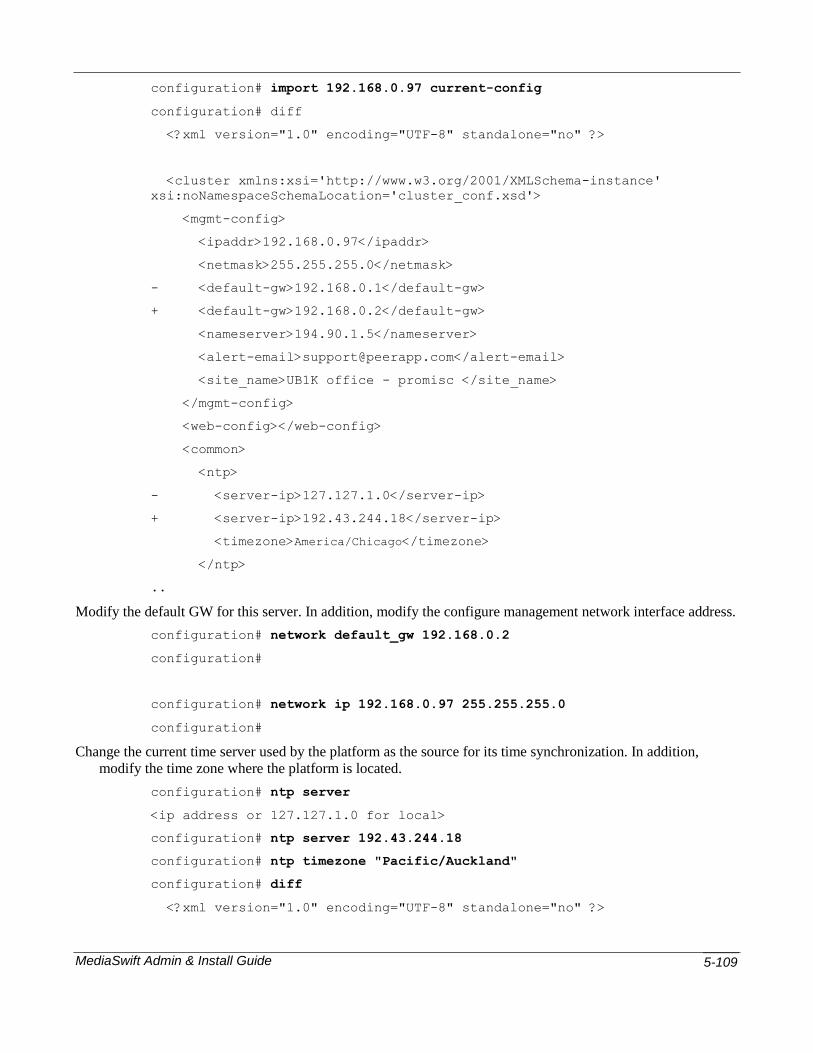
MediaSwift Admin & Install Guide 5-109
configuration# import 192.168.0.97 current-config
configuration# diff
<?xml version="1.0" encoding="UTF-8" standalone="no" ?>
<cluster xmlns:xsi='http://www.w3.org/2001/XMLSchema-instance'
xsi:noNamespaceSchemaLocation='cluster_conf.xsd'>
<mgmt-config>
<ipaddr>192.168.0.97</ipaddr>
<netmask>255.255.255.0</netmask>
- <default-gw>192.168.0.1</default-gw>
+ <default-gw>192.168.0.2</default-gw>
<nameserver>194.90.1.5</nameserver>
<alert-email>[email protected]</alert-email>
<site_name>UB1K office - promisc </site_name>
</mgmt-config>
<web-config></web-config>
<common>
<ntp>
- <server-ip>127.127.1.0</server-ip>
+ <server-ip>192.43.244.18</server-ip>
<timezone>America/Chicago</timezone>
</ntp>
..
Modify the default GW for this server. In addition, modify the configure management network interface address.
configuration# network default_gw 192.168.0.2
configuration#
configuration# network ip 192.168.0.97 255.255.255.0
configuration#
Change the current time server used by the platform as the source for its time synchronization. In addition,
modify the time zone where the platform is located.
configuration# ntp server
<ip address or 127.127.1.0 for local>
configuration# ntp server 192.43.244.18
configuration# ntp timezone "Pacific/Auckland"
configuration# diff
<?xml version="1.0" encoding="UTF-8" standalone="no" ?>

MediaSwift Admin & Install Guide 5-110
<cluster xmlns:xsi='http://www.w3.org/2001/XMLSchema-instance'
xsi:noNamespaceSchemaLocation='cluster_conf.xsd'>
<mgmt-config>
<ipaddr>192.168.0.97</ipaddr>
<netmask>255.255.255.0</netmask>
<default-gw>192.168.0.1</default-gw>
<nameserver>194.90.1.5</nameserver>
<alert-email>[email protected]</alert-email>
<site_name>UB1K office - promisc </site_name>
</mgmt-config>
<web-config></web-config>
<common>
<ntp>
- <server-ip>127.127.1.0</server-ip>
- <timezone>America/Chicago</timezone>
+ <server-ip>192.43.244.18</server-ip>
+ <timezone>Pacific/Auckland</timezone>
</ntp>
.
.
configuration# apply
applying configuration...
Configuration applied
configuration#
Restore the previous configuration. Note that restoring the configuration still requires the use of the apply
command to implement the previous configuration.
configuration# restore
configuration# diff
<?xml version="1.0" encoding="UTF-8" standalone="no" ?>
<cluster xmlns:xsi='http://www.w3.org/2001/XMLSchema-instance'
xsi:noNamespaceSchemaLocation='cluster_conf.xsd'>
<mgmt-config>
<ipaddr>192.168.0.202</ipaddr>
<netmask>255.255.255.0</netmask>
<default-gw>192.168.0.2</default-gw>
<nameserver>10.1.1.235</nameserver>
<alert-email>[email protected]</alert-email>

MediaSwift Admin & Install Guide 5-111
<site_name>192.168.0.202 </site_name>
<external_syslog_ip>127.0.0.1</external_syslog_ip>
</mgmt-config>
<web-config></web-config>
<common>
<ntp>
- <server-ip>192.43.244.18</server-ip>
- <timezone>Pacific/Auckland</timezone>
+ <server-ip>127.127.1.0</server-ip>
+ <timezone>America/Chicago</timezone>
</ntp>
.
.
configuration# apply
applying configuration...
Configuration applied
configuration#
Change the current time and date.
configuration# time
Please enter date in format: MMDDYYhhmm
configuration# time 0526081027
Mon May 26 10:27:00 NZST 2008
eventlog
The eventlog command enables you to view or export the content of the event log. The term event log
refers to all the log messages sent to the system log by all MediaSwift service components
(applications, CLI, and SNMP).
Enable mode eventlog commands include the additional parameters shown here. These are used
specifically when duplicating the event log information to an external SYSLOG server. The syslog
server is configured within the system configuration file. You can add an external syslog server to the
platform by adding the following statements to the system configuration:
<mgmt-config>
<external_syslog_ip>192.168.0.154</external_syslog_ip>
</mgmt-config>
The IP address associated with the external syslog server should replace the IP address shown above.
Current configuration
New configuration

MediaSwift Admin & Install Guide 5-112
To obtain system configuration:
1. Export the system configuration to a TFTP server and edit it manually using the
Configuration mode export command.
2. Add the above statements with the IP address associated with the syslog server to
the <mgmt-config> section and save the file.
3. Import the configuration file back to the system using the Configuration mode
import command.
4. Apply the new configuration to the system using the Configuration mode apply
command.
Command Parameters
For the parameters available in Regular mode, refer to eventlog, page 5-70. The following are the
parameters available in Enable mode:
date – Enables you to choose a log from a specific date. This parameter is followed by the required
date.
export – Exports the eventlog to TFTP server.
forward – Starts event log forwarding to a previously configured syslog server.
show – Displays the current event log up to this moment.
stop – Stops event log forwarding to a previously configured syslog server.
tail – Monitors the event log growth.
Sample Use
Display event log from the specified date.
console# eventlog date
DD-MM-YYYY
Start forwarding event log messages to the configured syslog server.
console# eventlog forward
console#
Stop forwarding event log messages to the configured syslog server.
console# eventlog stop
console#
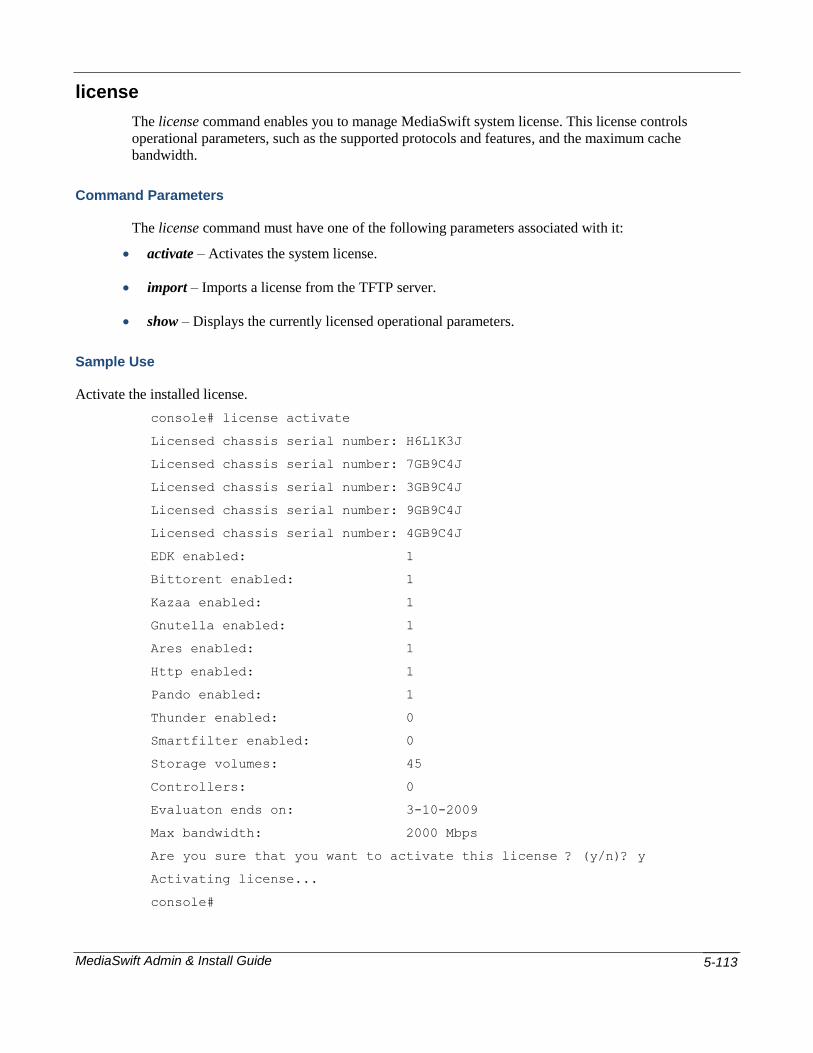
MediaSwift Admin & Install Guide 5-113
license
The license command enables you to manage MediaSwift system license. This license controls
operational parameters, such as the supported protocols and features, and the maximum cache
bandwidth.
Command Parameters
The license command must have one of the following parameters associated with it:
activate – Activates the system license.
import – Imports a license from the TFTP server.
show – Displays the currently licensed operational parameters.
Sample Use
Activate the installed license.
console# license activate
Licensed chassis serial number: H6L1K3J
Licensed chassis serial number: 7GB9C4J
Licensed chassis serial number: 3GB9C4J
Licensed chassis serial number: 9GB9C4J
Licensed chassis serial number: 4GB9C4J
EDK enabled: 1
Bittorent enabled: 1
Kazaa enabled: 1
Gnutella enabled: 1
Ares enabled: 1
Http enabled: 1
Pando enabled: 1
Thunder enabled: 0
Smartfilter enabled: 0
Storage volumes: 45
Controllers: 0
Evaluaton ends on: 3-10-2009
Max bandwidth: 2000 Mbps
Are you sure that you want to activate this license ? (y/n)? y
Activating license...
console#

MediaSwift Admin & Install Guide 5-114
Import the license from the TFTP server.
console# license import 10.1.1.65 License.xml
Licensed chassis serial number: H6L1K3J
Licensed chassis serial number: 7GB9C4J
Licensed chassis serial number: 3GB9C4J
Licensed chassis serial number: 9GB9C4J
Licensed chassis serial number: 4GB9C4J
EDK enabled: 1
Bittorent enabled: 1
Kazaa enabled: 1
Gnutella enabled: 1
Ares enabled: 1
Http enabled: 1
Pando enabled: 1
Thunder enabled: 0
Smartfilter enabled: 0
Storage volumes: 45
Controllers: 0
Evaluaton ends on: 3-10-2009
Max bandwidth: 2000 Mbps
Display the installed licensed operational parameters.
console# license show
Licensed chassis serial number: H6L1K3J
Licensed chassis serial number: 7GB9C4J
Licensed chassis serial number: 3GB9C4J
Licensed chassis serial number: 9GB9C4J
Licensed chassis serial number: 4GB9C4J
EDK enabled: 1
Bittorent enabled: 1
Kazaa enabled: 1
Gnutella enabled: 1
Ares enabled: 1
Http enabled: 1
Pando enabled: 1
Thunder enabled: 0
Smartfilter enabled: 0

MediaSwift Admin & Install Guide 5-115
Storage volumes: 45
Controllers: 0
Evaluaton ends on: 3-10-2009
Max bandwidth: 2000 Mbps
console#
oper
The oper command controls the running state of the platform, including starting, stopping, or restarting
the platform software and all its services. In addition, this command provides server specific
operational status changes.
Command Parameters
The following are the oper parameters:
server – Goes into a server specific command mode, allowing the operations command to go
directly to the specific server. The command uses <server number> as a parameter, and the
prompt appears as <oper server x# >, where x indicates the server number.
NOTE In MediaSwift 2000, the command is oper blade instead of oper server.
Within Oper server mode, the following commands are supported:
arp_server – Show server's arp table.
direction_server – Calculate visible subnets on interface.
dmesg_server – Display dmesg.
dstat_server – Display I/O / CPU / Networking statistics.
exit – Exit current mode.
fdisk_server – Display available caching block devices.
help – Commands description.
ifconfig_server – Display interface(s).
iostat_server – Display I/O statistics.
jumbo_server – Echoing Jumbo packets.
lock – Locks the server in Out of Service mode. The server remains locked even when
the system is rebooted, until an unlock command is used to bring it back to In Service
mode.

MediaSwift Admin & Install Guide 5-116
powercycle – Gracefully shutdown server.
process_server – Display process status for pang, spread, apache, ntp.
restart – Restarts the server MediaSwift application (without rebooting).
start – Starts the server MediaSwift application (without rebooting).
stop – Stops the server MediaSwift application (without rebooting).
systemid_server – Shows chassis ID.
tcpdump_server – Tcpdump on appropriate server.
unlock – Unlocks the server mode from Out of State and returns it to In Service mode.
service – Followed by one of the following commands allowing:
start – Starts MediaSwift software and services.
stop – Stops MediaSwift software and all its services.
Sample Use
oper server Commands
Calculate the visible subnets on the eth0 interface.
oper server 1# direction_server eth0
358 00:1d:09:6d:3e:4d
55 00:22:19:5a:e5:1d
587 00:22:19:5a:f5:08
oper server 1#
Display I/O/CPU/Networking statistics.
oper server 2# dstat_server
----total-cpu-usage---- -dsk/total- -net/total- ---paging-- ---system--
usr sys idl wai hiq siq| read writ| recv send| in out | int csw
14 11 61 6 2 5| 101M 12M| 0 0 | 0 0 | 184k 221k
18 22 48 6 2 5| 77M 25M| 92M 102M| 0 0 | 204k 276k
19 21 47 6 2 5| 74M 27M| 93M 105M| 0 0 | 205k 263k
19 21 48 6 2 5| 81M 25M| 90M 101M| 0 0 | 197k 285k
15 13 56 8 3 5| 85M 27M| 98M 107M| 0 0 | 193k 237k
13 13 60 7 2 5| 64M 29M| 88M 99M| 0 0 | 417k 188k
10 17 64 4 2 4| 36M 11M| 76M 80M| 0 0 | 827k 138k

MediaSwift Admin & Install Guide 5-117
14 14 58 6 3 6| 72M 32M| 97M 111M| 0 0 | 502k 198k
11 17 61 3 2 5| 40M 15M| 88M 89M| 0 0 | 808k 153k
14 15 58 5 2 5| 69M 18M| 96M 103M| 0 0 | 588k 199k
13 11 62 5 3 5| 83M 17M| 100M 108M| 0 0 | 288k 203k
14 12 61 6 3 5| 82M 22M| 103M 112M| 0 0 | 293k
212koper server 2#
Exit Server mode.
console# oper server
Invalid server number, allowed range 1-4
console# oper server 2
oper server 2# exit
console#
Display list of supported commands.
oper server 2# help
arp_server Show server's arp table
direction_server Calculate seen subnets on interface
dmesg_server Display dmesg
dstat_server Display IO/CPU/Networking statistics
exit Exit current mode
fdisk_server Display available for caching block devices
help Commands description
ifconfig_server Display interface(s)
iostat_server Display IO statistics
jumbo_server Echoing Jumbo packets
lock Lock service on server
powercycle Reboot server
process_server Display porcess status for pang,spread,apache,ntp
restart Server restart
start Server start
stop Server stop
systemid_server Show chassis id
tcpdump_server tcpdump on appropriate server
unlock Unlock service on server
oper server 2#
Display interfaces.
oper server 2# ifconfig_server

MediaSwift Admin & Install Guide 5-118
eth0 Link encap:Ethernet HWaddr 00:22:19:5A:F5:08
inet addr:10.11.12.3 Bcast:10.11.12.255 Mask:255.255.255.0
UP BROADCAST RUNNING MULTICAST MTU:1500 Metric:1
RX packets:191979894 errors:0 dropped:0 overruns:0 frame:0
TX packets:156167870 errors:0 dropped:0 overruns:0 carrier:0
collisions:0 txqueuelen:1000
RX bytes:38183505607 (36414.6 Mb) TX bytes:24508991765
(23373.5 Mb)
Interrupt:36 Memory:d6000000-d6012800
eth1 Link encap:Ethernet HWaddr 00:22:19:5A:F5:0A
inet addr:10.11.14.2 Bcast:10.11.14.255 Mask:255.255.255.0
UP BROADCAST RUNNING MULTICAST MTU:9000 Metric:1
RX packets:555998991 errors:0 dropped:0 overruns:0 frame:0
TX packets:387734075 errors:0 dropped:0 overruns:0 carrier:0
collisions:0 txqueuelen:1000
RX bytes:3937604786430 (3755192.5 Mb) TX bytes:507324304462
(483822.1 Mb)
Interrupt:48 Memory:d8000000-d8012800
eth1:1 Link encap:Ethernet HWaddr 00:22:19:5A:F5:0A
inet addr:10.11.15.2 Bcast:10.11.15.255 Mask:255.255.255.0
UP BROADCAST RUNNING MULTICAST MTU:9000 Metric:1
Interrupt:48 Memory:d8000000-d8012800
eth4 Link encap:Ethernet HWaddr 00:E0:ED:11:26:DA
UP BROADCAST RUNNING PROMISC MULTICAST MTU:1560 Metric:1
RX packets:1866034809 errors:0 dropped:0 overruns:0 frame:0
TX packets:2001875307 errors:0 dropped:0 overruns:0 carrier:0
collisions:0 txqueuelen:4096
RX bytes:113391278729 (108138.3 Mb) TX bytes:2898423185157
(2764151.7 Mb)
eth5 Link encap:Ethernet HWaddr 00:E0:ED:11:26:DB
UP BROADCAST RUNNING PROMISC MULTICAST MTU:1560 Metric:1
RX packets:694905889 errors:0 dropped:0 overruns:0 frame:0
TX packets:672403099 errors:0 dropped:0 overruns:0 carrier:0

MediaSwift Admin & Install Guide 5-119
collisions:0 txqueuelen:4096
RX bytes:1042499493182 (994204.9 Mb) TX bytes:40986287247
(39087.5 Mb)
eth6 Link encap:Ethernet HWaddr 00:E0:ED:11:26:DC
UP BROADCAST RUNNING PROMISC MULTICAST MTU:1560 Metric:1
RX packets:2568099932 errors:0 dropped:0 overruns:0 frame:0
TX packets:2609611137 errors:0 dropped:0 overruns:0 carrier:0
collisions:0 txqueuelen:4096
RX bytes:814871356182 (777121.8 Mb) TX bytes:3409567373526
(3251616.8 Mb)
eth7 Link encap:Ethernet HWaddr 00:E0:ED:11:26:DD
UP BROADCAST RUNNING PROMISC MULTICAST MTU:1560 Metric:1
RX packets:1185786358 errors:0 dropped:0 overruns:0 frame:0
TX packets:1330076234 errors:0 dropped:0 overruns:0 carrier:0
collisions:0 txqueuelen:4096
RX bytes:1410786180062 (1345430.5 Mb) TX bytes:741322933058
(706980.6 Mb)
lo Link encap:Local Loopback
inet addr:127.0.0.1 Mask:255.0.0.0
UP LOOPBACK RUNNING MTU:16436 Metric:1
RX packets:171909519 errors:0 dropped:0 overruns:0 frame:0
TX packets:171909519 errors:0 dropped:0 overruns:0 carrier:0
collisions:0 txqueuelen:0
RX bytes:27214439276 (25953.7 Mb) TX bytes:27214439276
(25953.7 Mb)
oper server 2#
Display I/O statistics.
oper server 2# iostat_server -k 1
Linux 2.6.27.7-llpf-9-default (ce-2) 08/18/2009 _x86_64_
Time: 02:59:55 PM
avg-cpu: %user %nice %system %iowait %steal %idle
14.39 0.00 25.56 6.20 0.00 61.08
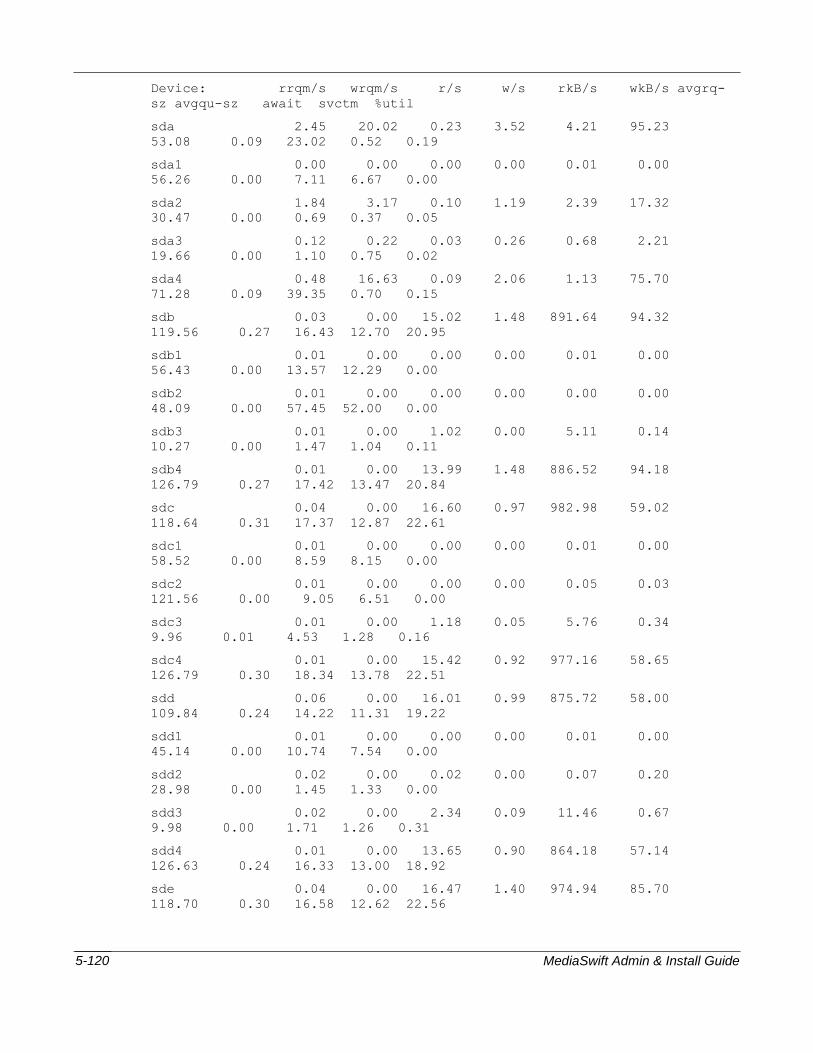
MediaSwift Admin & Install Guide 5-120
Device: rrqm/s wrqm/s r/s w/s rkB/s wkB/s avgrq-
sz avgqu-sz await svctm %util
sda 2.45 20.02 0.23 3.52 4.21 95.23
53.08 0.09 23.02 0.52 0.19
sda1 0.00 0.00 0.00 0.00 0.01 0.00
56.26 0.00 7.11 6.67 0.00
sda2 1.84 3.17 0.10 1.19 2.39 17.32
30.47 0.00 0.69 0.37 0.05
sda3 0.12 0.22 0.03 0.26 0.68 2.21
19.66 0.00 1.10 0.75 0.02
sda4 0.48 16.63 0.09 2.06 1.13 75.70
71.28 0.09 39.35 0.70 0.15
sdb 0.03 0.00 15.02 1.48 891.64 94.32
119.56 0.27 16.43 12.70 20.95
sdb1 0.01 0.00 0.00 0.00 0.01 0.00
56.43 0.00 13.57 12.29 0.00
sdb2 0.01 0.00 0.00 0.00 0.00 0.00
48.09 0.00 57.45 52.00 0.00
sdb3 0.01 0.00 1.02 0.00 5.11 0.14
10.27 0.00 1.47 1.04 0.11
sdb4 0.01 0.00 13.99 1.48 886.52 94.18
126.79 0.27 17.42 13.47 20.84
sdc 0.04 0.00 16.60 0.97 982.98 59.02
118.64 0.31 17.37 12.87 22.61
sdc1 0.01 0.00 0.00 0.00 0.01 0.00
58.52 0.00 8.59 8.15 0.00
sdc2 0.01 0.00 0.00 0.00 0.05 0.03
121.56 0.00 9.05 6.51 0.00
sdc3 0.01 0.00 1.18 0.05 5.76 0.34
9.96 0.01 4.53 1.28 0.16
sdc4 0.01 0.00 15.42 0.92 977.16 58.65
126.79 0.30 18.34 13.78 22.51
sdd 0.06 0.00 16.01 0.99 875.72 58.00
109.84 0.24 14.22 11.31 19.22
sdd1 0.01 0.00 0.00 0.00 0.01 0.00
45.14 0.00 10.74 7.54 0.00
sdd2 0.02 0.00 0.02 0.00 0.07 0.20
28.98 0.00 1.45 1.33 0.00
sdd3 0.02 0.00 2.34 0.09 11.46 0.67
9.98 0.00 1.71 1.26 0.31
sdd4 0.01 0.00 13.65 0.90 864.18 57.14
126.63 0.24 16.33 13.00 18.92
sde 0.04 0.00 16.47 1.40 974.94 85.70
118.70 0.30 16.58 12.62 22.56

MediaSwift Admin & Install Guide 5-121
sde1 0.01 0.00 0.00 0.00 0.01 0.00
50.97 0.00 5.55 4.00 0.00
sde2 0.01 0.00 0.00 0.00 0.02 0.03
51.77 0.00 9.52 6.45 0.00
sde3 0.01 0.00 1.17 0.06 5.73 0.39
9.93 0.00 1.76 1.29 0.16
sde4 0.01 0.00 15.30 1.34 969.17 85.29
126.77 0.29 17.68 13.47 22.41
sdf 0.04 0.00 14.93 0.96 876.99 58.54
117.77 0.25 15.43 12.39 19.69
sdf1 0.01 0.00 0.00 0.00 0.01 0.00
60.77 0.00 8.31 8.15 0.00
sdf2 0.01 0.00 0.00 0.00 0.07 0.03
152.75 0.00 8.75 6.00 0.00
sdf3 0.01 0.00 1.16 0.05 5.66 0.34
9.93 0.00 1.63 1.25 0.15
sdf4 0.01 0.00 13.76 0.91 871.25 58.17
126.64 0.24 16.57 13.32 19.54
sdg 0.06 0.00 16.77 1.24 923.40 70.65
110.41 0.26 14.29 11.27 20.29
sdg1 0.01 0.00 0.00 0.00 0.01 0.00
54.48 0.00 10.07 9.38 0.00
sdg2 0.02 0.00 0.01 0.00 0.07 0.06
26.01 0.00 2.00 1.62 0.00
sdg3 0.02 0.00 2.36 0.14 11.50 0.86
9.90 0.01 2.95 1.65 0.41
sdg4 0.01 0.00 14.40 1.09 911.82 69.73
126.67 0.25 16.13 12.86 19.93
sdh 0.04 0.00 14.06 1.18 854.71 65.25
120.69 0.23 15.38 12.42 18.93
sdh1 0.01 0.00 0.00 0.00 0.01 0.00
54.48 0.00 4.14 3.72 0.00
sdh2 0.01 0.00 0.00 0.00 0.02 0.03
75.74 0.00 5.26 4.13 0.00
sdh3 0.01 0.00 0.60 0.17 2.98 0.60
9.27 0.00 2.37 1.96 0.15
sdh4 0.01 0.00 13.46 1.01 851.70 64.62
126.65 0.23 16.07 12.99 18.80
sdi 0.03 0.00 13.75 0.86 870.39 54.79
126.62 0.26 17.56 13.41 19.60
sdi1 0.01 0.00 0.00 0.00 0.01 0.00
50.97 0.00 6.97 5.68 0.00
sdi2 0.01 0.00 0.00 0.00 0.00 0.00
52.90 0.00 24.00 23.20 0.00

MediaSwift Admin & Install Guide 5-122
sdi3 0.01 0.00 0.00 0.00 0.00 0.00
53.10 0.00 18.40 17.20 0.00
sdi4 0.01 0.00 13.75 0.86 870.36 54.79
126.63 0.26 17.56 13.41 19.60
sdj 0.03 0.00 13.69 0.85 866.71 54.07
126.62 0.24 16.69 13.16 19.14
sdj1 0.01 0.00 0.00 0.00 0.01 0.00
52.67 0.00 8.40 6.53 0.00
sdj2 0.01 0.00 0.00 0.00 0.00 0.00
52.90 0.00 34.80 34.40 0.00
sdj3 0.01 0.00 0.00 0.00 0.00 0.00
53.10 0.00 36.80 35.20 0.00
sdj4 0.01 0.00 13.69 0.85 866.69 54.07
126.63 0.24 16.69 13.16 19.13
sdk 0.03 0.00 14.48 1.12 916.56 70.97
126.62 0.27 17.23 14.31 22.33
sdk1 0.01 0.00 0.00 0.00 0.01 0.00
60.77 0.00 4.46 4.31 0.00
sdk2 0.01 0.00 0.00 0.00 0.00 0.00
52.90 0.00 21.20 15.20 0.00
sdk3 0.01 0.00 0.00 0.00 0.00 0.00
53.10 0.00 20.80 19.20 0.00
sdk4 0.01 0.00 14.48 1.12 916.54 70.97
126.62 0.27 17.23 14.31 22.33
sdl 0.03 0.00 18.76 3.23 1190.60 205.48
126.96 0.50 22.95 14.67 32.27
sdl1 0.01 0.00 0.00 0.00 0.01 0.00
58.52 0.00 5.19 4.59 0.00
sdl2 0.01 0.00 0.00 0.00 0.00 0.00
52.90 0.00 22.00 20.40 0.00
sdl3 0.01 0.00 0.00 0.00 0.00 0.00
53.10 0.00 22.00 20.80 0.00
sdl4 0.01 0.00 18.76 3.23 1190.58 205.48
126.96 0.50 22.95 14.67 32.27
sdm 0.03 0.00 13.37 0.89 846.41 56.85
126.64 0.23 15.91 12.95 18.47
sdm1 0.01 0.00 0.00 0.00 0.01 0.00
58.52 0.00 25.04 21.93 0.00
sdm2 0.01 0.00 0.00 0.00 0.00 0.00
52.90 0.00 66.40 65.20 0.00
sdm3 0.01 0.00 0.00 0.00 0.00 0.00
53.10 0.00 98.40 90.00 0.00
sdm4 0.01 0.00 13.37 0.89 846.39 56.85
126.64 0.23 15.91 12.95 18.47

MediaSwift Admin & Install Guide 5-123
sdn 0.04 0.06 13.82 5.52 816.46 83.01
93.02 0.23 12.05 9.60 18.56
sdn1 0.01 0.00 0.00 0.00 0.01 0.00
56.43 0.00 4.86 4.43 0.00
sdn2 0.01 0.00 0.00 0.00 0.07 0.03
146.53 0.00 7.88 5.40 0.00
sdn3 0.01 0.06 0.99 4.62 4.55 25.20
10.62 0.02 3.69 2.44 1.37
sdn4 0.01 0.00 12.83 0.91 811.82 57.79
126.64 0.21 15.46 12.81 17.60
sdo 0.04 0.00 14.81 1.62 900.45 93.43
120.97 0.25 15.12 12.11 19.89
sdo1 0.01 0.00 0.00 0.00 0.01 0.00
60.77 0.00 9.08 9.08 0.00
sdo2 0.01 0.00 0.03 0.00 0.07 0.03
7.14 0.00 1.01 0.92 0.00
sdo3 0.01 0.00 0.61 0.16 2.99 0.49
9.07 0.00 2.36 1.92 0.15
sdo4 0.01 0.00 14.18 1.46 897.38 92.92
126.65 0.25 15.77 12.64 19.76
sdp 0.04 0.10 18.60 8.94 1103.09 142.39
90.46 0.32 11.47 8.28 22.80
sdp1 0.01 0.00 0.00 0.00 0.01 0.00
58.52 0.00 4.59 4.30 0.00
sdp2 0.01 0.00 0.00 0.00 0.05 0.03
128.58 0.00 7.07 4.84 0.00
sdp3 0.01 0.10 1.26 7.34 5.60 40.58
10.74 0.06 7.21 3.65 3.14
sdp4 0.00 0.00 17.34 1.60 1097.43 101.79
126.68 0.25 13.40 10.89 20.63
sdq 0.04 0.04 20.54 3.33 1247.12 125.39
114.99 0.65 27.10 13.98 33.37
sdq1 0.01 0.00 0.00 0.00 0.01 0.00
58.52 0.00 6.52 5.78 0.00
sdq2 0.01 0.00 0.00 0.00 0.05 0.03
109.84 0.00 6.81 5.03 0.00
sdq3 0.01 0.04 0.91 1.50 4.41 8.75
10.93 0.01 5.65 2.49 0.60
sdq4 0.00 0.00 19.63 1.83 1242.64 116.61
126.68 0.63 29.51 15.40 33.04
sdr 0.04 0.03 21.53 2.41 1309.62 111.93
118.76 0.40 16.56 11.74 28.11
sdr1 0.01 0.00 0.00 0.00 0.01 0.00
54.48 0.00 4.41 4.00 0.00

MediaSwift Admin & Install Guide 5-124
sdr2 0.01 0.00 0.00 0.00 0.07 0.03
159.26 0.00 9.83 6.96 0.00
sdr3 0.01 0.03 0.91 0.77 4.38 7.67
14.36 0.01 6.24 2.35 0.39
sdr4 0.00 0.00 20.62 1.64 1305.15 104.23
126.64 0.39 17.34 12.51 27.85
sds 0.04 0.12 22.19 14.00 1322.95 190.59
83.65 0.51 14.00 9.03 32.67
sds1 0.01 0.00 0.00 0.00 0.01 0.00
50.97 0.00 4.39 3.74 0.00
sds2 0.01 0.00 0.00 0.00 0.05 0.03
122.91 0.00 9.20 6.44 0.00
sds3 0.01 0.11 1.39 11.79 6.25 49.04
8.40 0.09 7.08 4.15 5.47
sds4 0.00 0.01 20.80 2.21 1316.63 141.52
126.72 0.41 17.95 12.93 29.76
sdt 0.04 0.03 25.09 4.13 1488.37 178.12
114.06 0.62 21.07 12.78 37.36
sdt1 0.01 0.00 0.00 0.00 0.01 0.00
52.67 0.00 7.47 6.27 0.00
sdt2 0.01 0.00 0.00 0.00 0.05 0.03
69.87 0.00 4.72 3.79 0.00
sdt3 0.01 0.03 1.74 1.47 8.25 8.50
10.44 0.01 4.40 2.04 0.65
sdt4 0.00 0.00 23.35 2.66 1480.07 169.59
126.84 0.60 23.13 14.20 36.93
sdu 0.04 0.11 24.82 8.25 1398.56 126.90
92.27 0.49 14.84 9.95 32.89
sdu1 0.01 0.00 0.00 0.00 0.01 0.00
47.88 0.00 3.76 2.91 0.00
sdu2 0.01 0.00 0.01 0.00 0.03 0.03
17.62 0.00 2.49 2.06 0.00
sdu3 0.01 0.11 2.20 6.83 10.18 36.61
10.37 0.07 7.52 4.30 3.88
sdu4 0.00 0.00 22.61 1.42 1388.34 90.27
123.05 0.42 17.60 12.75 30.65
sdv 0.02 0.00 18.86 2.07 1193.84 131.70
126.68 0.72 34.38 17.11 35.80
sdv1 0.01 0.00 0.00 0.00 0.01 0.00
52.67 0.00 18.40 11.07 0.00
sdv2 0.01 0.00 0.00 0.00 0.00 0.00
52.90 0.00 47.20 46.80 0.00
sdv3 0.01 0.00 0.00 0.00 0.00 0.00
53.10 0.00 38.00 36.80 0.00

MediaSwift Admin & Install Guide 5-125
sdv4 0.00 0.00 18.86 2.07 1193.81 131.70
126.68 0.72 34.38 17.11 35.80
sdw 0.02 0.00 20.55 1.42 1300.54 90.42
126.61 0.37 16.92 12.31 27.04
sdw1 0.01 0.00 0.00 0.00 0.01 0.00
46.47 0.00 9.41 7.41 0.00
sdw2 0.01 0.00 0.00 0.00 0.00 0.00
52.90 0.00 36.00 35.60 0.00
sdw3 0.01 0.00 0.00 0.00 0.00 0.00
53.10 0.00 35.60 35.20 0.00
sdw4 0.00 0.00 20.55 1.42 1300.52 90.42
126.62 0.37 16.92 12.31 27.04
sdx 0.04 0.00 21.37 1.62 1259.30 98.82
118.15 0.36 15.74 11.57 26.59
sdx1 0.01 0.00 0.00 0.00 0.01 0.00
52.67 0.00 5.60 4.67 0.00
sdx2 0.01 0.00 0.00 0.00 0.02 0.03
49.76 0.00 5.55 4.58 0.00
sdx3 0.01 0.00 1.59 0.08 7.67 0.44
9.73 0.00 1.96 1.62 0.27
sdx4 0.00 0.00 19.77 1.54 1251.60 98.35
126.64 0.36 16.82 12.35 26.33
sdy 0.02 0.00 20.77 1.30 1314.35 82.99
126.63 0.37 16.83 12.27 27.09
sdy1 0.01 0.00 0.00 0.00 0.01 0.00
47.88 0.00 9.45 9.33 0.00
sdy2 0.01 0.00 0.00 0.00 0.00 0.00
52.90 0.00 41.20 33.60 0.00
sdy3 0.01 0.00 0.00 0.00 0.00 0.00
53.10 0.00 35.20 34.80 0.00
sdy4 0.00 0.00 20.77 1.30 1314.32 82.99
126.63 0.37 16.83 12.27 27.09
sdz 0.02 0.00 19.92 1.78 1260.69 113.91
126.67 0.40 18.49 12.82 27.81
sdz1 0.01 0.00 0.00 0.00 0.01 0.00
46.47 0.00 6.12 4.12 0.00
sdz2 0.01 0.00 0.00 0.00 0.00 0.00
52.90 0.00 30.80 30.80 0.00
sdz3 0.01 0.00 0.00 0.00 0.00 0.00
53.10 0.00 36.80 36.40 0.00
sdz4 0.00 0.00 19.92 1.78 1260.67 113.91
126.68 0.40 18.49 12.82 27.81
sdaa 0.02 0.00 20.28 1.50 1283.92 95.57
126.64 0.37 17.13 12.52 27.27

MediaSwift Admin & Install Guide 5-126
sdaa1 0.01 0.00 0.00 0.00 0.01 0.00
58.52 0.00 7.41 6.96 0.00
sdaa2 0.01 0.00 0.00 0.00 0.00 0.00
52.90 0.00 78.40 78.00 0.00
sdaa3 0.01 0.00 0.00 0.00 0.00 0.00
53.10 0.00 51.60 51.20 0.00
sdaa4 0.00 0.00 20.28 1.50 1283.89 95.57
126.65 0.37 17.13 12.52 27.27
sdab 0.02 0.00 19.69 1.30 1246.56 82.79
126.64 0.37 17.66 12.72 26.71
sdab1 0.01 0.00 0.00 0.00 0.01 0.00
58.52 0.00 7.70 7.26 0.00
sdab2 0.01 0.00 0.00 0.00 0.00 0.00
52.90 0.00 32.40 32.00 0.00
sdab3 0.01 0.00 0.00 0.00 0.00 0.00
53.10 0.00 42.80 36.80 0.00
sdab4 0.00 0.00 19.69 1.30 1246.54 82.79
126.64 0.37 17.66 12.72 26.70
sdac 0.02 0.00 20.25 1.32 1281.65 83.74
126.62 0.36 16.80 12.22 26.35
sdac1 0.01 0.00 0.00 0.00 0.01 0.00
58.52 0.00 10.37 9.93 0.00
sdac2 0.01 0.00 0.00 0.00 0.00 0.00
52.90 0.00 41.20 37.60 0.00
sdac3 0.01 0.00 0.00 0.00 0.00 0.00
53.10 0.00 31.20 30.00 0.00
sdac4 0.00 0.00 20.25 1.32 1281.63 83.74
126.63 0.36 16.80 12.22 26.35
sdad 0.04 0.00 20.84 1.35 1273.20 79.55
121.92 0.37 16.52 11.97 26.56
sdad1 0.01 0.00 0.00 0.00 0.01 0.00
58.52 0.00 4.59 4.15 0.00
sdad2 0.01 0.00 0.00 0.00 0.07 0.03
146.74 0.00 8.88 6.40 0.00
sdad3 0.01 0.00 0.79 0.10 3.85 0.39
9.51 0.00 2.32 1.96 0.17
sdad4 0.00 0.00 20.05 1.24 1269.26 79.13
126.62 0.36 17.11 12.40 26.40
sdae 0.04 0.10 19.69 8.91 1167.77 124.61
90.37 0.41 14.25 9.68 27.68
sdae1 0.01 0.00 0.00 0.00 0.01 0.00
58.52 0.00 18.52 17.93 0.00
sdae2 0.01 0.00 0.00 0.00 0.05 0.03
121.73 0.00 12.22 8.97 0.00

MediaSwift Admin & Install Guide 5-127
sdae3 0.01 0.10 1.34 7.55 6.15 38.12
9.96 0.07 7.62 4.57 4.06
sdae4 0.00 0.00 18.35 1.36 1161.56 86.47
126.64 0.34 17.24 12.81 25.25
sdaf 0.04 0.02 21.84 2.62 1327.32 117.23
118.08 0.41 16.88 12.11 29.64
sdaf1 0.01 0.00 0.00 0.00 0.01 0.00
58.52 0.00 12.30 11.85 0.00
sdaf2 0.01 0.00 0.00 0.00 0.07 0.03
159.34 0.00 12.87 8.87 0.00
sdaf3 0.01 0.02 0.94 0.92 4.41 8.95
14.32 0.01 4.82 2.13 0.40
sdaf4 0.00 0.00 20.90 1.70 1322.83 108.25
126.64 0.40 17.88 12.98 29.34
sdag 0.04 0.02 23.30 4.03 1422.61 171.19
116.62 0.54 19.81 12.93 35.34
sdag1 0.01 0.00 0.00 0.00 0.01 0.00
58.52 0.00 9.04 7.11 0.00
sdag2 0.01 0.00 0.00 0.00 0.07 0.03
68.11 0.00 3.89 3.44 0.00
sdag3 0.01 0.02 0.92 1.50 4.41 10.07
11.99 0.01 4.43 2.32 0.56
sdag4 0.00 0.00 22.38 2.53 1418.11 161.08
126.78 0.53 21.31 14.04 34.97
sdah 0.04 0.44 25.26 81.92 1503.05 829.54
43.53 12.25 114.33 5.77 61.84
sdah1 0.01 0.00 0.00 0.00 0.01 0.00
47.88 0.00 6.06 4.00 0.00
sdah2 0.02 0.26 0.11 43.12 14.32 241.35
11.83 10.23 236.58 4.33 18.70
sdah3 0.01 0.13 1.81 31.23 8.37 102.09
6.69 0.85 25.58 7.01 23.15
sdah4 0.00 0.05 23.34 7.57 1480.34 486.09
127.22 1.18 38.21 17.66 54.60
sdai 0.04 0.08 22.55 16.27 1308.42 230.94
79.31 0.50 12.90 8.74 33.94
sdai1 0.01 0.00 0.00 0.00 0.01 0.00
58.52 0.00 4.00 3.41 0.00
sdai2 0.01 0.00 0.02 0.00 0.06 0.03
7.61 0.00 1.27 1.10 0.00
sdai3 0.01 0.08 2.00 13.48 9.26 53.18
8.06 0.10 6.15 4.28 6.62
sdai4 0.00 0.00 20.52 2.79 1299.08 177.73
126.71 0.41 17.40 12.85 29.94

MediaSwift Admin & Install Guide 5-128
sdaj 0.04 0.07 22.53 17.32 1308.63 250.51
78.26 0.53 13.25 8.74 34.83
sdaj1 0.01 0.00 0.00 0.00 0.01 0.00
60.77 0.00 7.69 7.54 0.00
sdaj2 0.01 0.00 0.00 0.00 0.02 0.03
21.06 0.00 2.91 2.26 0.00
sdaj3 0.01 0.07 2.00 14.23 9.36 53.80
7.78 0.10 6.38 4.31 6.99
sdaj4 0.00 0.00 20.52 3.08 1299.24 196.69
126.72 0.42 17.97 13.04 30.79
sdak 0.04 0.08 22.66 14.36 1315.61 216.75
82.79 0.48 13.06 8.89 32.90
sdak1 0.01 0.00 0.00 0.00 0.01 0.00
58.52 0.00 6.81 5.93 0.00
sdak2 0.01 0.00 0.00 0.00 0.02 0.03
63.23 0.00 7.44 5.75 0.00
sdak3 0.01 0.07 2.02 11.74 9.47 49.41
8.56 0.09 6.43 4.31 5.93
sdak4 0.00 0.00 20.63 2.63 1306.09 167.31
126.69 0.39 16.98 12.59 29.29
sdal 0.04 0.09 22.89 17.56 1329.49 238.50
77.53 0.54 13.37 8.67 35.07
sdal1 0.01 0.00 0.00 0.00 0.01 0.00
47.88 0.00 4.48 3.52 0.00
sdal2 0.01 0.00 0.01 0.00 0.04 0.03
19.03 0.00 2.76 2.41 0.00
sdal3 0.01 0.08 2.03 14.74 9.59 58.57
8.13 0.11 6.73 4.35 7.29
sdal4 0.00 0.00 20.85 2.82 1319.85 179.90
126.70 0.43 18.08 13.06 30.92
sdam 0.04 0.06 21.61 14.79 1251.47 225.54
81.15 0.45 12.43 8.63 31.42
sdam1 0.01 0.00 0.00 0.00 0.01 0.00
52.67 0.00 4.67 3.87 0.00
sdam2 0.01 0.00 0.01 0.00 0.03 0.03
16.21 0.00 2.53 2.13 0.00
sdam3 0.01 0.06 1.97 12.06 9.30 51.63
8.68 0.09 6.27 4.30 6.04
sdam4 0.00 0.00 19.62 2.73 1242.13 173.87
126.69 0.36 16.30 12.34 27.59
sdan 0.04 0.04 20.22 4.24 1222.58 182.26
114.85 0.38 15.66 11.44 27.98
sdan1 0.01 0.00 0.00 0.00 0.01 0.00
47.88 0.00 4.00 2.91 0.00
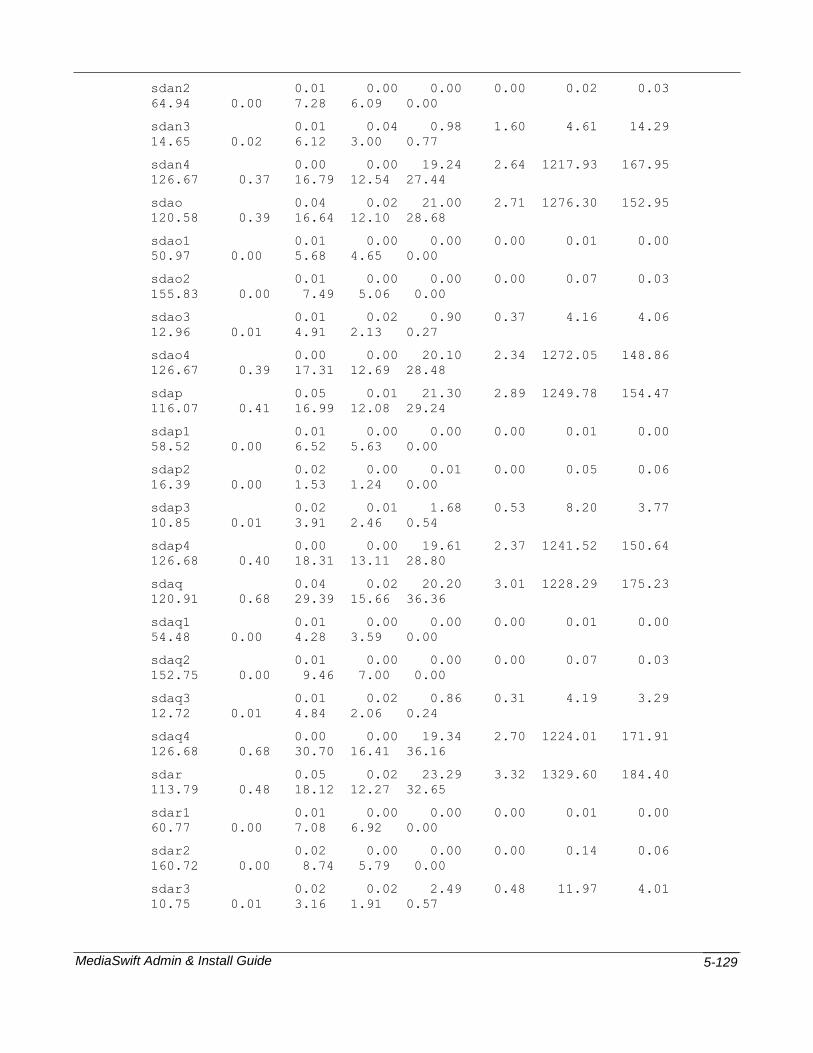
MediaSwift Admin & Install Guide 5-129
sdan2 0.01 0.00 0.00 0.00 0.02 0.03
64.94 0.00 7.28 6.09 0.00
sdan3 0.01 0.04 0.98 1.60 4.61 14.29
14.65 0.02 6.12 3.00 0.77
sdan4 0.00 0.00 19.24 2.64 1217.93 167.95
126.67 0.37 16.79 12.54 27.44
sdao 0.04 0.02 21.00 2.71 1276.30 152.95
120.58 0.39 16.64 12.10 28.68
sdao1 0.01 0.00 0.00 0.00 0.01 0.00
50.97 0.00 5.68 4.65 0.00
sdao2 0.01 0.00 0.00 0.00 0.07 0.03
155.83 0.00 7.49 5.06 0.00
sdao3 0.01 0.02 0.90 0.37 4.16 4.06
12.96 0.01 4.91 2.13 0.27
sdao4 0.00 0.00 20.10 2.34 1272.05 148.86
126.67 0.39 17.31 12.69 28.48
sdap 0.05 0.01 21.30 2.89 1249.78 154.47
116.07 0.41 16.99 12.08 29.24
sdap1 0.01 0.00 0.00 0.00 0.01 0.00
58.52 0.00 6.52 5.63 0.00
sdap2 0.02 0.00 0.01 0.00 0.05 0.06
16.39 0.00 1.53 1.24 0.00
sdap3 0.02 0.01 1.68 0.53 8.20 3.77
10.85 0.01 3.91 2.46 0.54
sdap4 0.00 0.00 19.61 2.37 1241.52 150.64
126.68 0.40 18.31 13.11 28.80
sdaq 0.04 0.02 20.20 3.01 1228.29 175.23
120.91 0.68 29.39 15.66 36.36
sdaq1 0.01 0.00 0.00 0.00 0.01 0.00
54.48 0.00 4.28 3.59 0.00
sdaq2 0.01 0.00 0.00 0.00 0.07 0.03
152.75 0.00 9.46 7.00 0.00
sdaq3 0.01 0.02 0.86 0.31 4.19 3.29
12.72 0.01 4.84 2.06 0.24
sdaq4 0.00 0.00 19.34 2.70 1224.01 171.91
126.68 0.68 30.70 16.41 36.16
sdar 0.05 0.02 23.29 3.32 1329.60 184.40
113.79 0.48 18.12 12.27 32.65
sdar1 0.01 0.00 0.00 0.00 0.01 0.00
60.77 0.00 7.08 6.92 0.00
sdar2 0.02 0.00 0.00 0.00 0.14 0.06
160.72 0.00 8.74 5.79 0.00
sdar3 0.02 0.02 2.49 0.48 11.97 4.01
10.75 0.01 3.16 1.91 0.57

MediaSwift Admin & Install Guide 5-130
sdar4 0.00 0.00 20.80 2.83 1317.48 180.33
126.76 0.47 20.01 13.60 32.15
sdas 0.04 0.02 21.81 3.61 1332.61 216.25
121.87 0.52 20.55 13.30 33.80
sdas1 0.01 0.00 0.00 0.00 0.01 0.00
46.47 0.00 4.12 3.29 0.00
sdas2 0.01 0.00 0.00 0.00 0.07 0.03
151.16 0.00 9.61 6.64 0.00
sdas3 0.01 0.01 0.83 0.27 4.06 3.36
13.46 0.01 5.06 1.97 0.22
sdas4 0.00 0.00 20.97 3.34 1328.46 212.86
126.79 0.52 21.26 13.83 33.63
oper server 2#
Lock service on server.
oper server 2# lock
Are you sure (y/n)? y
Locking server...
Locked
oper server 2# exit
console# show status
Cluster state: degraded
Blade Slot Status Operational state Device state Administrative
state
ce-1 N/A N/A stopped N/A
ce-2 powered on disabled started locked
ce-3 powered on enabled started unlocked
ce-4 powered on enabled starting unlocked
console#
Reboot the server.
oper server 2# powercycle
Are you sure (y/n)? y
OK
oper server 2# exit
console# show status
Cluster state: degraded

MediaSwift Admin & Install Guide 5-131
Blade Slot Status Operational state Device state Administrative
state
ce-1 N/A N/A stopped N/A
ce-2 N/A N/A stopped N/A
ce-3 powered on enabled started unlocked
ce-4 powered on enabled started unlocked
Display process status for pang, spread, apache, and ntp.
oper server 2# process_server
oper server 2# process_server
root 4701 1 0 Aug17 ? 00:00:00 /sbin/syslogd -a
/var/lib/ntp/dev/log
spread 7194 1 9 Aug17 ? 01:54:55 /usr/bin/spread -n ce-2 -
c /etc/spread.conf
root 7195 1 2 Aug17 ? 00:34:11
/opt/pang/cache/avalon/sbin/snmpd -f -A -LF e
/opt/pang/cache/avalon/var/log/snmpd.log -LS c u 10.11.12.3
root 7769 1 99 Aug17 ? 3-21:03:05 /opt/pang/bin/pang -d -
f /opt/pang/conf/pang.conf
admin 10336 10335 44 15:02 ? 00:00:00 bash -c /usr/bin/sudo
/opt/pang/bin/check_processes.sh 2> /dev/null
root 10366 10336 0 15:02 ? 00:00:00 sh
/opt/pang/bin/check_processes.sh
oper server 2#
Restart MediaSwift software on the server.
oper server 2# restart
Are you sure (y/n)? y
Restarting server 2
oper server 2# exit
console# show status
Cluster state: enabled
Server Slot Status Operational state Device state Administrative
state ce-1 powered on enabled started
unlocked
ce-2 powered on enabled starting unlocked
ce-3 powered on enabled started unlocked
ce-4 powered on enabled started unlocked
ce-5 powered on enabled started unlocked
ce-6 powered on enabled started unlocked
ce-7 powered on enabled started unlocked

MediaSwift Admin & Install Guide 5-132
ce-8 powered on enabled started unlocked
ce-9 powered on enabled started unlocked
ce-10 powered on enabled started unlocked
ce-11 powered on enabled started unlocked
ce-12 powered on enabled started unlocked
console#
Start MediaSwift software on the server.
oper server 2# start
Starting server 2
oper server 2# exit
console# show status
Cluster state: enabled
Blade Slot Status Operational state Device state Administrative
state ce-1 powered on enabled started
unlocked
ce-2 powered on N/A N/A unlocked
ce-3 powered on enabled started unlocked
ce-4 powered on enabled started unlocked
ce-5 powered on enabled started unlocked
ce-6 powered on enabled started unlocked
ce-7 powered on enabled started unlocked
ce-8 powered on enabled started unlocked
ce-9 powered on enabled started unlocked
ce-10 powered on enabled started unlocked
ce-11 powered on enabled started unlocked
ce-12 powered on enabled started unlocked
console#
Stop MediaSwift software on the server, and leave it in Stopped mode (restart using start command).
oper server 2# stop
Are you sure (y/n)? y
Stopping server 2
oper server 2# exit
console# show status
Cluster state: enabled

MediaSwift Admin & Install Guide 5-133
Blade Slot Status Operational state Device state Administrative
state ce-1 powered on enabled started
unlocked
ce-2 powered on N/A N/A unlocked
ce-3 powered on enabled started unlocked
ce-4 powered on enabled started unlocked
ce-5 powered on enabled started unlocked
ce-6 powered on enabled started unlocked
ce-7 powered on enabled started unlocked
ce-8 powered on enabled started unlocked
ce-9 powered on enabled started unlocked
ce-10 powered on enabled started unlocked
ce-11 powered on enabled started unlocked
ce-12 powered on enabled started unlocked
console#
Unlock the server state from Out of Service mode and return it to In-Serviec mode. Note that unlock goes
through a stop and start cycle for MediaSwift.
console# oper server 2
oper server 2# unlock
Unocking server...
Unlocked
oper server 2# exit
console# show status
Cluster state: enabled
Blade Slot Status Operational state Device state Administrative
state
ce-1 powered on enabled started unlocked
ce-2 powered on N/A N/A unlocked
ce-3 powered on enabled started unlocked
ce-4 powered on enabled started unlocked
ce-5 powered on enabled started unlocked
ce-6 powered on enabled started unlocked
ce-7 powered on enabled started unlocked
ce-8 powered on enabled started unlocked
ce-9 powered on enabled started unlocked
ce-10 powered on enabled started unlocked
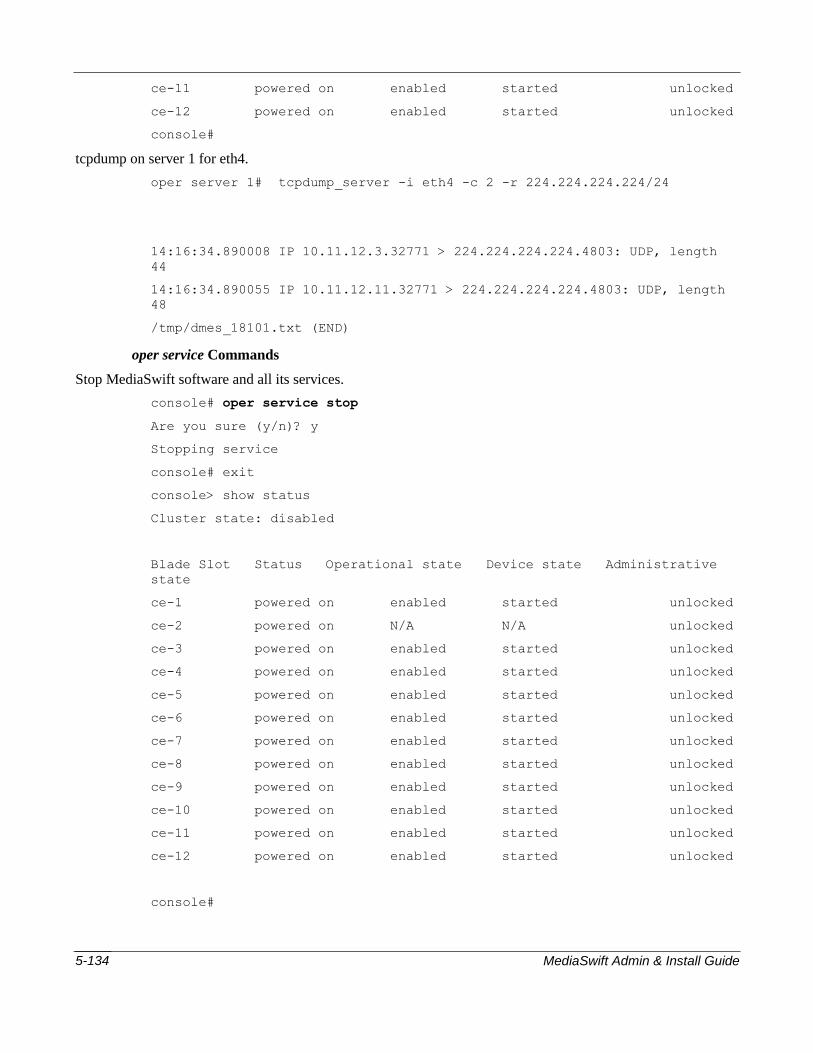
MediaSwift Admin & Install Guide 5-134
ce-11 powered on enabled started unlocked
ce-12 powered on enabled started unlocked
console#
tcpdump on server 1 for eth4.
oper server 1# tcpdump_server -i eth4 -c 2 -r 224.224.224.224/24
14:16:34.890008 IP 10.11.12.3.32771 > 224.224.224.224.4803: UDP, length
44
14:16:34.890055 IP 10.11.12.11.32771 > 224.224.224.224.4803: UDP, length
48
/tmp/dmes_18101.txt (END)
oper service Commands
Stop MediaSwift software and all its services.
console# oper service stop
Are you sure (y/n)? y
Stopping service
console# exit
console> show status
Cluster state: disabled
Blade Slot Status Operational state Device state Administrative
state
ce-1 powered on enabled started unlocked
ce-2 powered on N/A N/A unlocked
ce-3 powered on enabled started unlocked
ce-4 powered on enabled started unlocked
ce-5 powered on enabled started unlocked
ce-6 powered on enabled started unlocked
ce-7 powered on enabled started unlocked
ce-8 powered on enabled started unlocked
ce-9 powered on enabled started unlocked
ce-10 powered on enabled started unlocked
ce-11 powered on enabled started unlocked
ce-12 powered on enabled started unlocked
console#
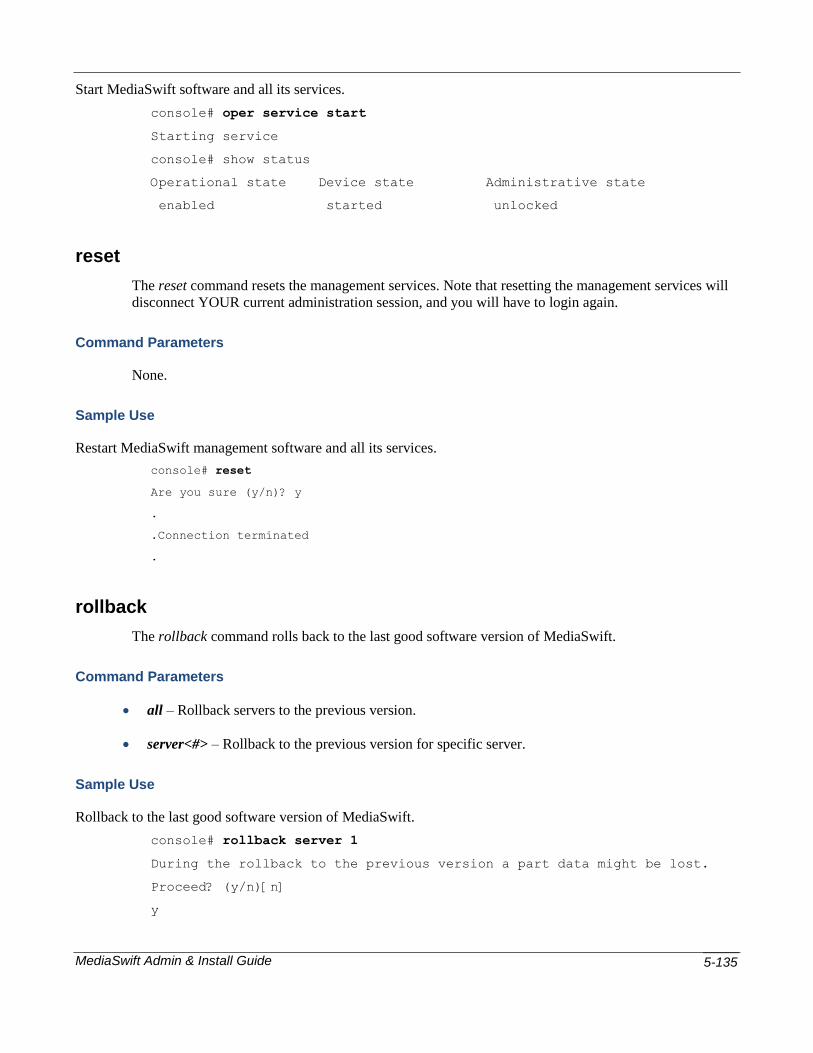
MediaSwift Admin & Install Guide 5-135
Start MediaSwift software and all its services.
console# oper service start
Starting service
console# show status
Operational state Device state Administrative state
enabled started unlocked
reset
The reset command resets the management services. Note that resetting the management services will
disconnect YOUR current administration session, and you will have to login again.
Command Parameters
None.
Sample Use
Restart MediaSwift management software and all its services.
console# reset
Are you sure (y/n)? y
.
.Connection terminated
.
rollback
The rollback command rolls back to the last good software version of MediaSwift.
Command Parameters
all – Rollback servers to the previous version.
server<#> – Rollback to the previous version for specific server.
Sample Use
Rollback to the last good software version of MediaSwift.
console# rollback server 1
During the rollback to the previous version a part data might be lost.
Proceed? (y/n)[n]
y

MediaSwift Admin & Install Guide 5-136
Stopping ce-1
Starting ce-1
Proceeding cache to metadata sync. Some data in the cache might be lost.
Are you sure (y/n)? y
Starting cache synchronization...
Done
console#
show
The show command displays runtime information related to the operational environment of
MediaSwift.
The Enable mode show command includes the parameters available in the Regular mode show
command (refer to show, page 5-80) and the following additional parameters.
Command Parameters
The following parameters are only available in Enable mode:
config – Display running configuration.
license – Display system license information.
Sample Use
Display the system running configuration.
console# show config
<?xml version="1.0" encoding="UTF-8" standalone="no" ?>
<cluster xmlns:xsi='http://www.w3.org/2001/XMLSchema-instance'
xsi:noNamespaceSchemaLocation='cluster_conf.xsd'>
<mgmt-config>
<ipaddr>192.168.5.117</ipaddr>
<netmask>255.255.255.0</netmask>
<default-gw>192.168.5.1</default-gw>
<nameserver>10.1.1.235</nameserver>
<site_name>BIG Grid </site_name>
</mgmt-config>
<web-config>
<controller>

MediaSwift Admin & Install Guide 5-137
<ip>10.11.18.202</ip>
</controller>
<controller>
<ip>10.11.18.203</ip>
</controller>
<controller>
<ip>10.11.18.204</ip>
</controller>
<controller>
<ip>10.11.18.205</ip>
</controller>
<controller>
<ip>10.11.18.210</ip>
</controller>
<controller>
<ip>10.11.18.210</ip>
</controller>
</web-config>
<common>
<ntp>
<server-ip>127.127.1.0</server-ip>
<timezone>Etc/GMT</timezone>
</ntp>
<snmp>
<trap-ip>10.11.12.1</trap-ip>
<snmp-read-community>gdcbhv</snmp-read-community>
<snmp-write-community>nkppui</snmp-write-community>
<snmp-trap-community>ffff</snmp-trap-community>
</snmp>
<service>
<protocols>
<enable-bittorent>1</enable-bittorent>
<enable-edk>1</enable-edk>
<enable-gnutella>1</enable-gnutella>
<enable-http>1</enable-http>
<enable-ares>1</enable-ares>

MediaSwift Admin & Install Guide 5-138
</protocols>
<net>
<fwd-mode>PROMISC</fwd-mode>
</net>
</service>
</common>
<blades>4</blades>
<blade id='1'>
<cache-engine>
<network></network>
</cache-engine>
</blade>
<blade id='2'>
<cache-engine>
<network></network>
</cache-engine>
</blade>
<blade id='3'>
<cache-engine>
<network></network>
<service></service>
</cache-engine>
</blade>
<blade id='4'>
<cache-engine>
<network></network>
<service></service>
</cache-engine>
</blade>
</cluster>
console#
Display system license information.
console# show license
Licensed chassis serial number: H6L1K3J
Licensed chassis serial number: 7GB9C4J
Licensed chassis serial number: 3GB9C4J

MediaSwift Admin & Install Guide 5-139
Licensed chassis serial number: 9GB9C4J
Licensed chassis serial number: 4GB9C4J
EDK enabled: 1
Bittorent enabled: 1
Kazaa enabled: 1
Gnutella enabled: 1
Ares enabled: 1
Http enabled: 1
Pando enabled: 1
Thunder enabled: 0
Smartfilter enabled: 0
Storage volumes: 45
Controllers: 0
Evaluaton ends on: 3-10-2009
Max bandwidth: 2000 Mbps
console#
upgrade
The upgrade command upgrades the software version of MediaSwift.
Command Parameters
all <TFTP server> <file> |management <TFTP server> <file> |server <server
#> <TFTP server> <file>
Where:
all – Downloads and installs software image file.
management – Downloads and installs software image file for management server.
server – Downloads and installs software image file for specific server.
<TFTP server> – The hostname or IP address of a TFTP server accessible from the MediaSwift
server on which you are running the upgrade command.
<file> – The name of the file containing the software version package received from Allot. Note that
if the TFTP server is running on one of the Allot servers, the upgrade command attempts to retrieve
the file from the /TFTPboot/ directory.
< server #> –The specific MediaSwift server on which you are running the upgrade command.

MediaSwift Admin & Install Guide 5-140
NOTE If you do not have root access, the file can also be uploaded to the /TFTPboot/ folder using MediaSwift Config Files Management option. For more information, see Managing the Configuration Files in the MediaSwift Operation Guide. After uploading the file, you can upgrade using the upgrade command.
Sample Use
Upgrade to a new software version available on a TFTP server.
console# upgrade 10.1.1.50 PeerApp_B_3.0.113_20090910_01_64bit.tar.gz
Checking for network connectivity...
Contacting ce-1 machine ...
Ok
Install management software might disconnect current session and require
reconnect.
Continue installation of management software? [Y/n]y
Starting system installation
Starting software installation...
Doing pre-installation sanity tests
Done
Installing SNMP agent
Backing up old logs
Shutting down syslog services done
Starting syslog services done
Stopping any running daemons ..
Removing old agent directory /opt/pang/mgmt/avalon
Installing SNMP agent in /etc/inittab
Installing SNMP trap daemon in /etc/inittab
Installing monitoring daemon in /etc/inittab
Installing Analyzer
Backing up analyzer configuration ...
Done
Upgrade existing web installation...
install mrtg...
install libapr0...
install php...

MediaSwift Admin & Install Guide 5-141
Web installation finished successfully :)
Starting upgrade...
Starting software installation...
Doing pre-installation sanity tests
Done
Installing SNMP agent
Backing up old logs
Stopping any running daemons ..
Removing old agent directory /opt/pang/cache/avalon
Installing SNMP agent in /etc/inittab
Installing standalone cache engine...
Waiting while cache engine is shutting down...
Upgrading cache engine ...
Installing Spread environment
Stopping spread daemon...
Installing Spread files
Restarting Spread daemon
Done
Done
Succeeded
console#
vlan
The vlan command enables you to add or remove a vlan to and from an interface.
Command Parameters
[add <interface name> <vlan id> <ip> [mask]]| [remove <interface name>
<vlan id>]
where:

MediaSwift Admin & Install Guide 5-142
add – adds a new vlan to an interface
remove – removes a vlan from an interface
Sample Use
Add vlan 10 to eth0 with IP address 10.11.12.15 and netmask 255.255.255
console# vlan add eth0 10 10.11.12.15 255.255.255
Set name-type for VLAN subsystem. Should be visible in
/proc/net/vlan/config
Added VLAN with VID == 10 to IF -:eth0:-
interface eth0.10 is up
Remove vlan 10 from eth0
console# vlan remove eth0 10
Removed VLAN -:eth0.10:-
eth0.10 removed
console#

MediaSwift Admin & Install Guide 6-1
Chapter 6: Monitoring MediaSwift
Standalone Configuration Statistical information regarding bandwidth utilization, caching statistics, and server status for
MediaSwift in Standalone configuration is available via both SNMP and the CLI.
To view system uptime
1. At the CLI prompt, enter show uptime.
2. The overall uptime of caching service and uptime is displayed.
To view system time and date
At the CLI prompt, enter show time.
To view status using the CLI
At the CLI prompt, enter show <type> [<options>], where <type> is the type of status or
statistics that you want to view, and [<options>] are the required options. Possible values for <type>
include:
bypass – Display the eth status.
config – Current active configuration in XML format (privileged command available in
Enabled mode).
eventlog – Display event log content.
license – Current active license (privileged command available in Enabled mode).
status – Includes service status, physical slot status, administration status
(enabled/disabled) and operational status.
systemid – Unique system identifier, used for support and licensing purposes.
time – Display system date and time.
uptime – Display cluster uptime.
version – Display the installed software version for management and cache engine.
volumes – Display mounted volumes.
For more information on available CLI monitoring commands, refer to CLI Reference, page 7-1.
To view status and statistics using SNMP, use any SNMP monitoring tool.

MediaSwift Admin & Install Guide 6-2
Grid Configuration Statistical information regarding bandwidth utilization, caching statistics, and server status for
MediaSwift in Grid configuration is available via both SNMP and the CLI.
To view system uptime
1. At the CLI prompt, enter show uptime.
2. The overall uptime of caching service and uptime of individual servers is
displayed.
To view system time and date
At the CLI prompt, enter show time.
To view status using the CLI
At the CLI prompt, enter show <type> [<options>], where <type> is the type of status or
statistics that you want to view, and [<options>] are the required options. The possible values for
<type> include:
bypass – Display the eth status.
config – Current active configuration in XML format (privileged command available in
Enabled mode).
connectivity – Display the iSCSI connectivity.
eventlog – Display the content of the event log.
Leader – Display the current cluster leader.
license – Current active license (privileged command available in Enabled mode).
mount – Display mounted volumes.
process – Display the process status for various MediaSwift software components
(pang, spread, apache, ntp).
status – Includes service status, physical slot status, per server, server administration
status (enabled/disabled) and operational status per server.
systemid – Unique system identifier, used for support and licensing purposes.
uptime – Display cluster uptime.
version – The installed software version for management server and per cache engine
server.
For more information on available CLI monitoring commands, refer to CLI Reference, page 7-1.

MediaSwift Admin & Install Guide 6-3
To view status and statistics using SNMP, use any SNMP monitoring tool.


MediaSwift Admin & Install Guide 7-1
Chapter 7: CLI Reference
The following is a tree structure of CLI commands in MediaSwift Standalone and Grid
configurations.
Regular Mode arp Display ARP table
cache Cache operations (Grid only)
hash Display the file’s metadata using a hash
ID.
list Display and exports the list of cache
content.
display Display full list of cache content.
export Export cache content to TFTP server.
direction Calculate the visible subnets on the
interface
dmesg Display the dmesg
dstat Display I/O statistics
enable Enter Enable mode
eventlog Event log commands
date Display eventlog of a specific date
export Export event log to TFTP server
show Display event log
tail Display online event log
exit Logs you out from the CLI
help Display CLI commands
ifconfig Display the interface(s)
iostat Display extended I/O statistics
jumbo Send jumbo echo messages
ping Send echo messages
show Show run-time information
bypass Display the eth status
connectivity Display the iSCSI connectivity (Grid Only)
eventlog Display event log
leader Display current cluster leader
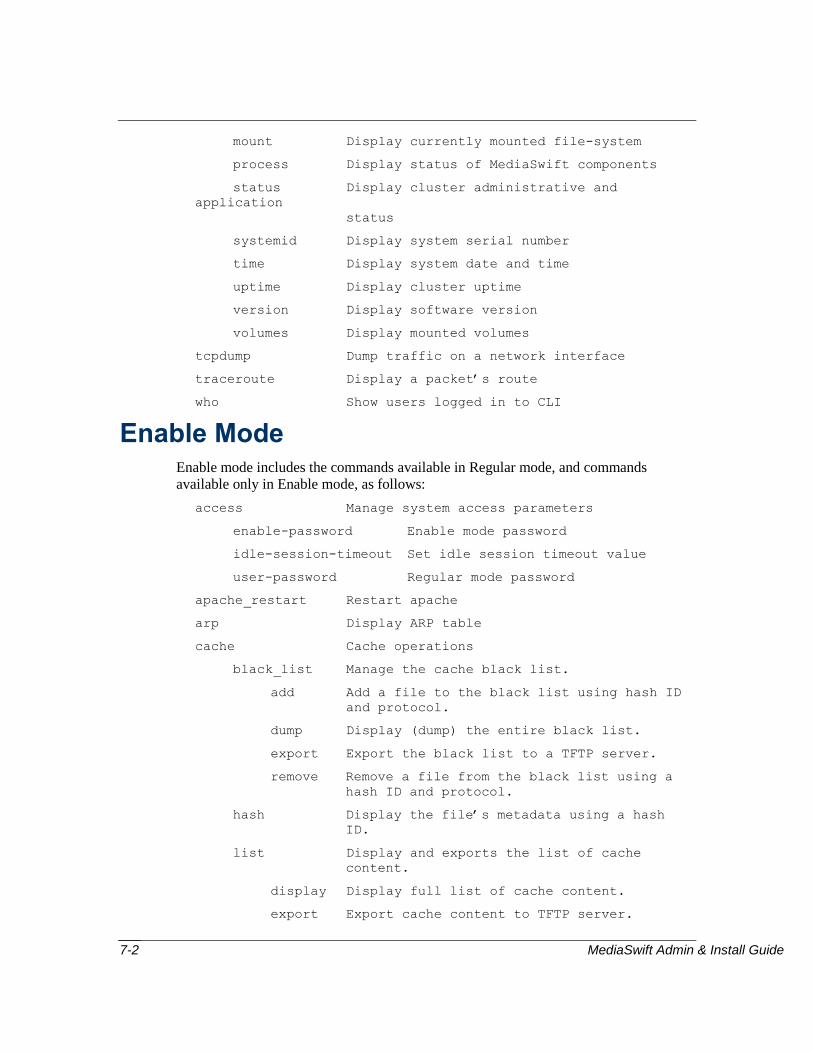
MediaSwift Admin & Install Guide 7-2
mount Display currently mounted file-system
process Display status of MediaSwift components
status Display cluster administrative and
application
status
systemid Display system serial number
time Display system date and time
uptime Display cluster uptime
version Display software version
volumes Display mounted volumes
tcpdump Dump traffic on a network interface
traceroute Display a packet’s route
who Show users logged in to CLI
Enable Mode Enable mode includes the commands available in Regular mode, and commands
available only in Enable mode, as follows:
access Manage system access parameters
enable-password Enable mode password
idle-session-timeout Set idle session timeout value
user-password Regular mode password
apache_restart Restart apache
arp Display ARP table
cache Cache operations
black_list Manage the cache black list.
add Add a file to the black list using hash ID
and protocol.
dump Display (dump) the entire black list.
export Export the black list to a TFTP server.
remove Remove a file from the black list using a
hash ID and protocol.
hash Display the file’s metadata using a hash
ID.
list Display and exports the list of cache
content.
display Display full list of cache content.
export Export cache content to TFTP server.

MediaSwift Admin & Install Guide 7-3
short Display the Least Recently Used cached HASH
IDs.
remove Remove a file from the cache using hash ID.
summary Display CMDB statistics summary.
sync Verify and synchronize cache metadata
volume Manage cache volumes
activate Activate a cache volume
deactivate Stop using a specific volume for
caching
remove Remove all hash IDs from a specific volume
config Enter Configuration mode
detection_rules Manage detection rules configuration (Grid
Only)
apply Apply detection rules
import_groups Import groups frm TFTP server
import_signaturesImport groups frm TFTP server
show Display current detection rules
direction Calculate the visible subnets on the
interface
dmesg Display the dmesg
downgrade Rollback to the last good version
dstat Display I/O statistics
eventlog Event log commands
date Display eventlog of a specific date
export Export event log to TFTP server
forward Starts event log forwarding
show Display event log
stop Stops event log forwarding
tail Display online event log
exit Logs you out from the CLI
help Display CLI commands
ifconfig Display the interface(s)
iostat Display extended I/O statistics
jumbo Send jumbo echo messages
license Manage system license
activate Activate system license

MediaSwift Admin & Install Guide 7-4
import Import license from TFTP server
show Display current license
oper System management operations
service Manage services
powercycle Restart MediaSwift software and all its
services
start Start MediaSwift software and services
stop Stop MediaSwift software and all its
services
ping Send echo messages
reset Reset management services
rollback Rollback MediaSwift software version (Grid
Only)
all Rollback all servers to previous version
server<#> Rollback specific server to previous
version
show Show run-time information
bypass Rollback to the last good version
config Display running configuration
eventlog Display event log
leader Display current cluster leader
license Display system license information
mount Display currently mounted file-system
process Display status of MediaSwift components
status Display cluster administrative and
application status
systemid Display system serial number
time Display system date and time
uptime Display cluster uptime
version Display software version
volumes Display mounted volumes
tcpdump Dump traffic on a network interface
traceroute Display a packet’s route
upgrade Upgrade MediaSwift software version
all Upgrade MediaSwift software on all servers
(Grid Only)

MediaSwift Admin & Install Guide 7-5
management Upgrade MediaSwift software for management
server (Grid Only)
server Upgrade MediaSwift software for specific
server (Grid Only)
vlan Display a list of users currently logged in
add Add a vlan to an interface
remove Remove a vlan from an interface
who Show users logged in to CLI
Configuration Mode apply Apply config changes
diff Show pending changes
discard Discard pending changes
display Display pending configuration
exit Exit current mode
export Export cluster configuration to TFTP server
help Commands description
import Import cluster configuration from TFTP
server
network Configure management network interface
default_gw Configure default gateway
ip Configure management network interface
ntp Configure management NTP parameters
server Configure management NTP server
timezone Configure management NTP timezone
restore Restore last good configuration
time Set system date and time
Server Mode (Grid Only) arp_server Display server’s ARP table
direction_server Calculate visible subnets on interface
dmesg_server Display dmesg
dstat_server Display I/O, CPU, and networking statistics
exit Enter Enabled mode
fdisk_server Display available caching block devices

MediaSwift Admin & Install Guide 7-6
help Display available commands
ifconfig_server Display interface(s)
iostat_server Display I/O statistics
jumbo_server Echo jumbo packets
lock Lock server in out-of-service mode
powercycle Graceful server shutdown
process_server Display process status for pang, spread, apache,
and ntp
restart Restart server MediaSwift application
start Start server MediaSwift application
stop Stop server MediaSwift application
systemid_server Show chassis ID
tcpdump_server Tcpdump on appropriate server
unlock Unlock server from out-of-state to in-service
mode