Embed Size (px)
Citation preview
Meeting Triumph and Disaster by Paul Comben
Published on Grognard.com with author’s permission Page 1 of 29
Meeting Triumph and Disaster
The Gaming Ups and Downs of Famous Battles by Paul Comben
10-Sep-2015
In a roundabout sort of way, this article was inspired by something Mark Herman said at the beginning of one of his YouTube films. In the course of introducing an engaging dissertation on Empire of the Sun, he referred to a particularly close struggle that had only been decided on the last play of the game. I readily took the inference to be that the parties involved had really enjoyed the experience, and of course, we have all been there at some part in our hobby lives – a game that goes down to the last throw, the last move, and then concludes with us on the right side or the wrong side of the design’s victory evaluation. How we feel about that will probably vary quite a lot, depending on whether the game truly entertained and challenged us up to that point, and whether we feel the result is appropriate to the historical context of whatever we were playing. Things can go wrong – we might feel we were more pitted against the system than our actual opponent, or that in some other way the result has been far too contrived. On the other hand, there is nothing wrong with winning (or losing) at the last gasp if the thresholds have been appropriately set, and if we are sensible enough to enjoy the experience of seeing our hopes and ambitions falter around a vista of sunk ships, dead leaders and routed whatevers. In the course of this article I will therefore be looking at how a range of different designs, grouped around this or that particular subject, have dealt with matters of who has won and who has lost, where the occasional “slip” has occurred, and what else might be included in any future design. But let us now start with a first visit to antiquity and the era of Alexander and Darius.
Meeting Triumph and Disaster by Paul Comben
Published on Grognard.com with author’s permission Page 2 of 29
Gaugamela – Win Big Or Else
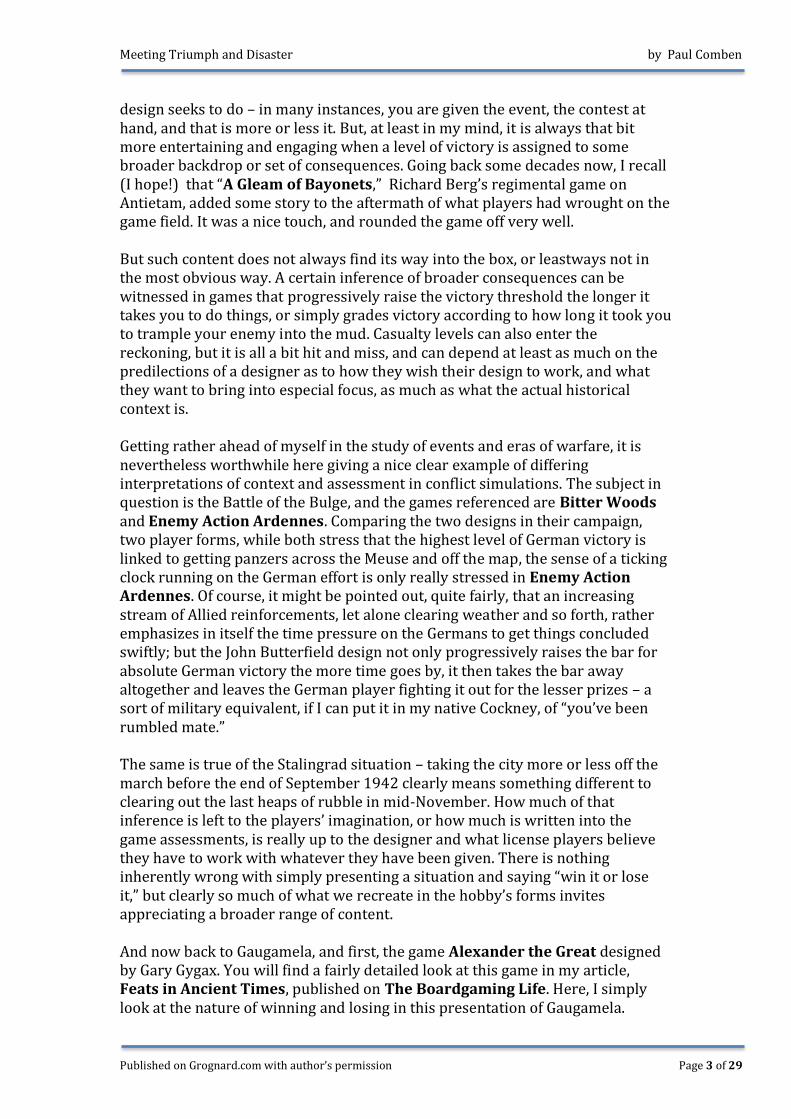
Richard Burton played Alexander the Great in the Robert Rossen written and directed film from 1956. Frankly, it was an odd, muted kind of a movie, which took forever and a day to get going, and then did not get going very much. Gaugamela occurred far too near the end of the film, whereas reflecting the energy and pulse Oliver Stone wanted to get into the final cut of his own Alexander, the Gaugamela scene there occurred at the very beginning. One thing the two films did have in common is that both battle scenes are preceded by Alexander stressing that the key to victory is in killing Darius – in fact, in the Oliver Stone film the young Macedonian, whilst not going quite so far as knocking the Persian king’s block off, does knock over his wooden token whilst striding round his campaign tent telling Parmenion what to do with whatever he has got left hanging in the air. When it comes to games, killing Darius (and then probably crying buckets over his dead body – odd bloke, Alexander) ought to be put into a certain historical context. By the time of Gaugamela, Darius had seen a considerable portion of his empire fall under Macedonian sway; and to make matters worse, attempts to best Alexander in battle had ended in the notable Persian defeats of Granicus and Issus. However, now deep into Persian lands, Alexander could no more suffer any heavy defeat than Darius could survive another one. What then ensued, of course, was that Darius’ nerve failed him yet again, so that while he survived the battle, his credibility as Persian ruler was shot to bits. In essence, his death warrant was as good as signed the moment his chariot sped away from his still fighting army. As for Alexander, it is probably fair to say that not only did he need to win the battle, but that he had to win it with no more than a modest amount of casualties. This might have helped form the “Kill Beardy” strategy – not only would it force Darius to stick or bust, it would also avoid a more protracted battle with the danger of higher casualties and those vulnerable flanks left unprovided for too long a period. But before we break open the rules of several Gaugamela games, we might briefly ponder the issue as to how “self-contained” any game on any event might desire to be. Putting battle events into a broader context is not something every
Meeting Triumph and Disaster by Paul Comben
Published on Grognard.com with author’s permission Page 3 of 29
design seeks to do – in many instances, you are given the event, the contest at hand, and that is more or less it. But, at least in my mind, it is always that bit more entertaining and engaging when a level of victory is assigned to some broader backdrop or set of consequences. Going back some decades now, I recall (I hope!) that “A Gleam of Bayonets,” Richard Berg’s regimental game on Antietam, added some story to the aftermath of what players had wrought on the game field. It was a nice touch, and rounded the game off very well. But such content does not always find its way into the box, or leastways not in the most obvious way. A certain inference of broader consequences can be witnessed in games that progressively raise the victory threshold the longer it takes you to do things, or simply grades victory according to how long it took you to trample your enemy into the mud. Casualty levels can also enter the reckoning, but it is all a bit hit and miss, and can depend at least as much on the predilections of a designer as to how they wish their design to work, and what they want to bring into especial focus, as much as what the actual historical context is. Getting rather ahead of myself in the study of events and eras of warfare, it is nevertheless worthwhile here giving a nice clear example of differing interpretations of context and assessment in conflict simulations. The subject in question is the Battle of the Bulge, and the games referenced are Bitter Woods and Enemy Action Ardennes. Comparing the two designs in their campaign, two player forms, while both stress that the highest level of German victory is linked to getting panzers across the Meuse and off the map, the sense of a ticking clock running on the German effort is only really stressed in Enemy Action Ardennes. Of course, it might be pointed out, quite fairly, that an increasing stream of Allied reinforcements, let alone clearing weather and so forth, rather emphasizes in itself the time pressure on the Germans to get things concluded swiftly; but the John Butterfield design not only progressively raises the bar for absolute German victory the more time goes by, it then takes the bar away altogether and leaves the German player fighting it out for the lesser prizes – a sort of military equivalent, if I can put it in my native Cockney, of “you’ve been rumbled mate.” The same is true of the Stalingrad situation – taking the city more or less off the march before the end of September 1942 clearly means something different to clearing out the last heaps of rubble in mid-November. How much of that inference is left to the players’ imagination, or how much is written into the game assessments, is really up to the designer and what license players believe they have to work with whatever they have been given. There is nothing inherently wrong with simply presenting a situation and saying “win it or lose it,” but clearly so much of what we recreate in the hobby’s forms invites appreciating a broader range of content. And now back to Gaugamela, and first, the game Alexander the Great designed by Gary Gygax. You will find a fairly detailed look at this game in my article, Feats in Ancient Times, published on The Boardgaming Life. Here, I simply look at the nature of winning and losing in this presentation of Gaugamela.
Meeting Triumph and Disaster by Paul Comben
Published on Grognard.com with author’s permission Page 4 of 29
Morale is the key, and the moment when morale collapses for either side being the instant of victory or defeat. Inflicting or suffering unit reduction or loss generally has a two-fold effect – the side suffering the casualty will lose X amount of morale points, the amount varying on the size or quality of the unit on the receiving end of the hurt, and the side inflicting the casualty gaining a more modest morale benefit. Killing Darius or Alexander certainly does provoke the single biggest morale losses/gains in the system, but the death of either is not automatically game over. Potentially, there were and are different ways of playing this, depending on how a designer wants to shape things – with leader losses on many a battlefield, I like the idea of determining over turns whether the bad news has actually spread across the field. In Alexander the Great, however, it is all a bit arbitrary – instantly lose 10 points or gain 7 points, depending on whether your army did the deed or had the one done in, and if that reduces your morale total to zero, that is it. Losses do not add any further context to victory or defeat considerations, and as I pointed out in my Feats in Ancient Times piece, this recreation of Gaugamela can end up with the two armies knocking great lumps out of each other in a way which is certainly entertaining, but not particularly realistic. In truth, this design is very much about the battle and nothing but the battle – what is going on in palace corridors and behind Macedonian tent flaps does not really have a place. Spreading its physical impressiveness over a fair amount of table space is the Gaugamela scenario from The Great Battles of Alexander. Compared to Alexander the Great, there is certainly some “tailoring” here to accommodate the broader realities, but not that much. Killing Darius will result in an automatic win as the Persian host and the Persian cause will be deemed to be in the process of dissipating away. Killing Alexander (which is very difficult to achieve given the ratings the gods have printed next to his head) will push the Macedonian/Greek army a long way towards defeat (it is roughly equivalent to losing the entire phalanx), but is not necessarily the end of hopes to win the actual battle. This is not so very different to the Guidon/Avalon Hill design, and to some extent, this surprised me. Certainly one can imagine situations where Alexander dies or receives a mortal wound at or near the moment of victory, but at whatever stage Alexander gets punctured or pummeled, you only have to look at what happened in the aftermath of his actual death to suspect that Darius, had he survived, would have found plenty of contentious Macedonians he could have set at each other’s throats, or sent or their way homeward with a few wagons of loot. Of course, one might say that it is all about fighting the battle, and just the battle. But all battles have their context, and all casualty levels have a meaning that will depend on that context. Actually, we have to be careful with the term casualty, as this series, GBoH, is built around forces losing cohesion and ability to function. This is not the same as picturing great piles of dead and wounded soldiers all over the place; nevertheless, it is hard to divorce whichever way hurt is administered from the ability to sustain and pursue a cause in the aftermath of a close struggle. A lot of Alexander’s army, about half of it in fact, has to be rendered ineffective before the day will be lost. The numbers are less for the Persians, reflecting the morale fragility of much of their host, but it is still
Meeting Triumph and Disaster by Paul Comben
Published on Grognard.com with author’s permission Page 5 of 29
substantial. It may be that even in the squeakiest of conclusions, far more of the victor’s lost contingents are simply shaken than actually cut up, and will be brought back to order in due course. But how then will they regard their king or their supposed demi-god? It may be up to the players to decide this themselves in convivial post-game chitchat – too tough, too close a win a Gaugamela and the companies around Alexander might have had far more inclination to take the loot and go home. And if Alexander tries to say otherwise, let us just say he is likely to be helped on his way…just like Darius was. And what of Darius? The game provides him with a fight or fly option, but the penalty for him clearing off is limited to no longer being around to command his minions. I must admit I find it difficult to imagine Darius ever deciding to place himself in harm’s way for the sake of one of the greatest cultures in the ancient world. He had two chances to show some mettle, and frankly, he blew it both times. Furthermore, Darius’ mode of command might be considered a tad suspect even at the best of times, for if his actions in the Oliver Stone film are to be given credence, he spent his “parked” period of the battle gesturing in a way that must have made his subordinates wonder if he was telling them which way to move or showing them how to wear and inflate a life jacket in case of emergencies. There are two other Gaugamela designs I want to bring into discussion here – the Richard Borg C&C Ancients depiction, and that of Professor Philip Sabin in his Lost Battles. What makes these Gaugamela renderings particularly interesting is that they each embody a design philosophy that reaches beyond at least some of the orthodoxies of the hobby, and in the case of many Richard Borg designs, beyond the usual board wargame audience. C&C Ancients has a pedigree very much linked to the likes of Battle Cry and Memoir ’44 – games that have hovered somewhere between game and wargame, with opinions varying as to where their settling point truly is. On the other hand, in many respects I would view the C&C Ancients system as the equal of most other ways of depicting ancient battles. Where it might be thought to falter somewhat is in the determination of winners and losers, which is a bit blunt and arbitrary (lost units of whatever type count the same), and in what the play of cards does or does not do for the realistic co-ordination of armies. I will have more to say on this in part two of Feats in Ancient Times. On the other hand, there are few sights in board wargaming quite as stirring and irresistible as seeing an epic depiction of Gaugamela or any other the other “biggies.” The Philip Sabin Gaugamela is, of course, just one part of a very substantial collection of battles included in his Lost Battles design. If I understand correctly, the driving force behind this project was to produce a model capable of recreating the battles of antiquity without getting too bogged down in the minutiae of command, terrain and combat. This was not broad brushing by any means, but more a way of depicting the level at which command actually worked, the effectiveness of particular force types, and how to present an actual battlefield without getting too arbitrary as to where to put the rocks and the streams. Given this approach, by which the one model is meant to accommodate the function of many different armies, we should not be surprised that the model
Meeting Triumph and Disaster by Paul Comben
Published on Grognard.com with author’s permission Page 6 of 29
also has just the one form of victory/defeat evaluation, based largely upon computations involving an initial army value, plus numbers of opposing units that are shattered, spent, routed etc. at the time the battle is concluded. What does add something extra to this is a handicap system designed to compensate the army deemed to have been at a significant disadvantage as the forces deploy. This is rather different to the bidding system you will encounter in Great Battles of Alexander, in that the provisions in Lost Battles are integral to the play of the design and are specifically meant to level the field in an exercise setting out to determine by precisely how much one army outclasses and/or outnumbers another. This does not skew actual fighting abilities of units and the qualities of leaders, since the purpose is merely to apply some final modifiers to the victory calculation. Perhaps some people will raise an eyebrow at this, but all that is intended is to offer a seriously disadvantaged side a chance of victory by quality of play…or luck...or both. We can perhaps sometimes lose track of the game aspect of wargaming, and here we have a design that offers something like compensation for the player destined to command the suspiciously shaky or the total no-hopers. I certainly consider it relevant that Professor Sabin has used a range of designs to further the studies of his students in London, and there is, I think, a certain invitation to the players here to approach the model as students and to think around what they experiencing and how to interpret the results.
Meeting Triumph and Disaster by Paul Comben
Published on Grognard.com with author’s permission Page 7 of 29
Alesia – What’s In And What’s Out
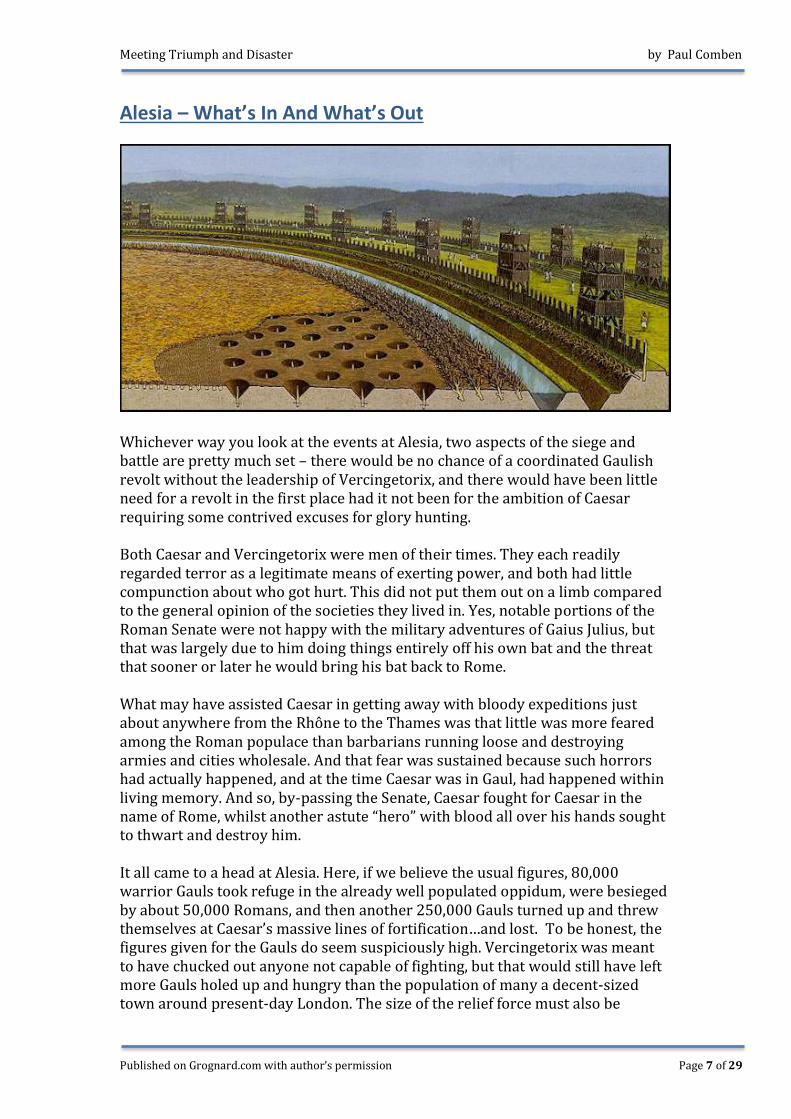
Whichever way you look at the events at Alesia, two aspects of the siege and battle are pretty much set – there would be no chance of a coordinated Gaulish revolt without the leadership of Vercingetorix, and there would have been little need for a revolt in the first place had it not been for the ambition of Caesar requiring some contrived excuses for glory hunting. Both Caesar and Vercingetorix were men of their times. They each readily regarded terror as a legitimate means of exerting power, and both had little compunction about who got hurt. This did not put them out on a limb compared to the general opinion of the societies they lived in. Yes, notable portions of the Roman Senate were not happy with the military adventures of Gaius Julius, but that was largely due to him doing things entirely off his own bat and the threat that sooner or later he would bring his bat back to Rome. What may have assisted Caesar in getting away with bloody expeditions just about anywhere from the Rhône to the Thames was that little was more feared among the Roman populace than barbarians running loose and destroying armies and cities wholesale. And that fear was sustained because such horrors had actually happened, and at the time Caesar was in Gaul, had happened within living memory. And so, by-passing the Senate, Caesar fought for Caesar in the name of Rome, whilst another astute “hero” with blood all over his hands sought to thwart and destroy him. It all came to a head at Alesia. Here, if we believe the usual figures, 80,000 warrior Gauls took refuge in the already well populated oppidum, were besieged by about 50,000 Romans, and then another 250,000 Gauls turned up and threw themselves at Caesar’s massive lines of fortification…and lost. To be honest, the figures given for the Gauls do seem suspiciously high. Vercingetorix was meant to have chucked out anyone not capable of fighting, but that would still have left more Gauls holed up and hungry than the population of many a decent-sized town around present-day London. The size of the relief force must also be
Meeting Triumph and Disaster by Paul Comben
Published on Grognard.com with author’s permission Page 8 of 29
brought into question, as if we concur that the mighty Persian empire, or at least the remaining half of it, was not able to field more than 75,000 to 100,000 men at Gaugamela, it seems highly suspect that anything like 250,000 Gauls could have trekked to the perimeter of Caesar’s ramparts. Thus, the numbers for those belligerent painted nudists might well be on the dodgy side of horrendously inflated, but up to a point, that does not matter. In the two games under consideration here, Caesar Alesia (Avalon Hill) and Alesia (GMT) the Gauls have not got anything like six times as many units as the Romans have, and the important thing is that there is sufficient of everything to ensure that the challenge facing both sides feels valid and is up to snuff. So how do you win? As the Gauls in Caesar Alesia there is just one path to victory – get your main man out of Alesia and off the map. For the Romans it is simply a matter of preventing this from happening by either moving next to his counter (deemed an automatic kill) or blocking off his exits – nasty. The one proviso attached to the Roman effort is that you must keep Caesar alive; if he dies, not only will his commentaries be cut short, the whole basis of his being in Gaul in the first place will cease to exist. In such circumstances the most the Roman player can achieve is a draw by keeping the head Gaul cooped up. For the most part, as a set of clear objectives, this works pretty well – the Gauls’ rebellion was likely to founder without their leader, and Caesar would be doing himself no favours at all by dying on a field he was not supposed to be on in the first place. But other aspects of the history, and to no small extent, the context of things right there on the field, is left markedly disregarded by this. Anyone who has played the game will know this situation: the Gauls attack, the Roman lines buckle, Vercingetorix emerges to the blast of war trumpets (optional extra), the Romans buckle a bit more, Vercingetorix advances as does the turn marker; and then, even as he stands but a handful of hexes from the map edge, he turns to those companies about him, transforms into a well-known cartoon character, says “Screw you guys, I’m going home!” and so heads back into his vacated fortress. That is it, I am afraid. You might have nothing between you and victory save a few clear hexes, but out of time is out of time, and if Caesar is still alive somewhere else on the board, guess who gets to write the victory speech. These are the sorts of problems that arise when things are just too inflexible or too narrow. Caesar’s army can be desperately reduced, and so much so that his only future hope would be to cause Pompey to do himself a mischief laughing at it, but if Vercingetorix is still on the board at game close, even if he is actually teetering on the very edge of it, you, as the Gauls, have lost. Clearly this would not be satisfactory to everyone, and frankly, it is hardly that difficult to sort out if your inclination is that way. If your rebel leader is within reasonable striking distance of the map edge at the end of the game – say anywhere beyond the inner line of works, and if he has, at the moment, a clear path off the board, roll the die, modify for the actual distance, and see if the revolt lives, dies, or wanders around hopelessly in circles. And what of Caesar?
Meeting Triumph and Disaster by Paul Comben
Published on Grognard.com with author’s permission Page 9 of 29
Even if he did survive the battle, if any significant part of his army did not, proving that the pen is indeed mightier than the sword may be the only salvation. Over eighteen hundred years later, Napoleon was never above concocting pages of eloquent codswallop to excuse his series of failings and misfires, starting with Eylau. In time the French came to understand the full meaning of the saying “to lie like a bulletin,” but the emperor never could break the habit of telling the French public of massive victories and minimal casualties, even when he was in the midst of headlong retreat. The GMT Alesia, part of the GBoH series, does address the above issues, and by way of making a point, does so with a telling economy of words. There is no arbitrary limit on the assault periods, so no blowing the whistle (or trumpet) early and leaving Vercingetorix suspended with one leg over the last rampart on his way out. The current assault goes on until either he has got both legs over and slipped down the other side, or the Gauls call it a day by a withdrawal evaluation. Vercingetorix himself does not have to get off the map, just beyond the outer line of the circumvallation in the loose company of a few Alesia garrison units. Alternatively, the Gauls win by hurting Caesar’s army sufficiently to put a very large block in the way of his even larger ambition…or at least that is the interpretation you might take at the first… However… Whereas the older design made it impossible to win as the Romans if Gaius Julius was done in several acts short of getting his own Shakespeare opus, here, beyond the big problem of trying to command with no overall commander, you do not relinquish your right to claim victory if the Gauls fail to persevere to a positive result. Likewise, Vercingetorix receiving his deathblow does not end all hopes of a Gaulish victory. With this sort of framework, it is tempting to see the victory conditions of the competing armies as a bit out of synch. It largely depends on what interpretation one puts on those lost Roman cohorts. You might simply see this means of Gaulish victory as the Roman force losing viability on the field, and nothing but the field action actually meaning anything. But this is a battle with just as much story and consequence around it as anything Alexander got up to, and as such I do not think it unreasonable to bring that broader story to bear on what is happening here. It may be a point historians would dispute either way, but just as the Germans had no prospect of holding together without Arminius, it is very difficult to envisage a viable Gaulish threat without the one figure able to lead one large army and command another to come to its aid.
Meeting Triumph and Disaster by Paul Comben
Published on Grognard.com with author’s permission Page 10 of 29
AGINCOURT – THE BROKEN BATTLE
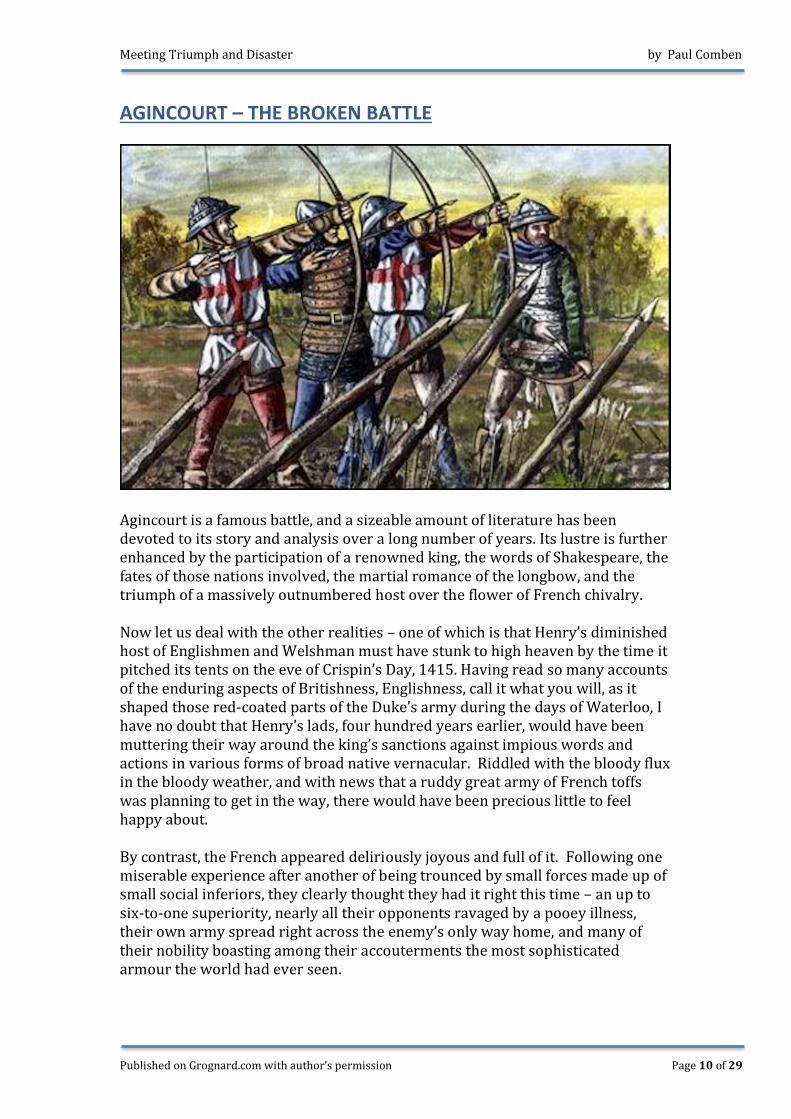
Agincourt is a famous battle, and a sizeable amount of literature has been devoted to its story and analysis over a long number of years. Its lustre is further enhanced by the participation of a renowned king, the words of Shakespeare, the fates of those nations involved, the martial romance of the longbow, and the triumph of a massively outnumbered host over the flower of French chivalry. Now let us deal with the other realities – one of which is that Henry’s diminished host of Englishmen and Welshman must have stunk to high heaven by the time it pitched its tents on the eve of Crispin’s Day, 1415. Having read so many accounts of the enduring aspects of Britishness, Englishness, call it what you will, as it shaped those red-coated parts of the Duke’s army during the days of Waterloo, I have no doubt that Henry’s lads, four hundred years earlier, would have been muttering their way around the king’s sanctions against impious words and actions in various forms of broad native vernacular. Riddled with the bloody flux in the bloody weather, and with news that a ruddy great army of French toffs was planning to get in the way, there would have been precious little to feel happy about. By contrast, the French appeared deliriously joyous and full of it. Following one miserable experience after another of being trounced by small forces made up of small social inferiors, they clearly thought they had it right this time – an up to six-to-one superiority, nearly all their opponents ravaged by a pooey illness, their own army spread right across the enemy’s only way home, and many of their nobility boasting among their accouterments the most sophisticated armour the world had ever seen.
Meeting Triumph and Disaster by Paul Comben
Published on Grognard.com with author’s permission Page 11 of 29
What happened next was really a foregone conclusion – the French lost…horribly and entirely, and amongst other things, the English got John Dunstable’s hit tune out of the deal, namely, The Agincourt Song. And that is the great bothersome paradox about Agincourt, especially when it comes to presenting it in a game. There is much in the subject that begs to be turned into a game experience, even a cultural game experience, given all it is imbued with; the trouble is, a great deal of the experience will be in realizing there is not much of an actual game to be had. If you search for Agincourt games on BGG, the list is very incredibly small, although it does not reveal stuff such as Yeoman’s Agincourt scenario. Easily the best of the games that are presented, certainly in terms of dedication to detail, is Jim Dunnigan’s 1978 study of the battle. But even there, the game really only serves to portray the lopsided nature of things – that the French had even less chance of winning in the historical situation than Lewis Armistead had of seeing a clear road all the way to Washington. So why include this particular battle in the article? In the main, I wanted to offer a different perspective to the occasional debate in the hobby about broken games – in that here we have, employing the same parlance, a broken battle. From what I have read on forums, including quite recently, it seems games are most commonly considered broken (at least sometimes by dint of premature judgments) if one side is considered to have a means of play that is immune to any form of counter play. Such situations are often remedied by a few relatively minor tweaks here and there, just to prevent one side or the other running riot over the map. And I must admit that my own experience of discovering games to be broken in any manifest sense has been very limited – I am often still ploughing through the rules to find out what I should be doing rather than exploring what I could be up to. But what do you do with any form of engagement that is so totally one-sided because historically it was the equivalent of Manchester City versus some Sunday League’s third pub eleven? The obvious answer might be not to do anything at all, and to leave the subject well alone. But do we really want that? Should we never consider not only Agincourt, but also the likes of Culloden or Glen Shiel, the third day of Gettysburg or the battle of Nashville simply because they were historical blow-outs? In my opinion there are always ways of dealing with this. The solution in the SPI Agincourt was to provide a pair of different “historical” possibilities, in order to improve French chances. Beyond that, perhaps the designer hoped people would simply enjoy the unfolding of events, and judging by comments over the years he was not entirely wrong. For me, what-if’s are a perfectly acceptable way of presenting otherwise grossly unbalanced situations, as is the use of handicaps. I see nothing wrong in having a two tier victory evaluation if needs be – the game’s “historical” result and the handicap result. And given where we are today in the hobby’s evolution, let me return briefly to a favorite argument of mine, which is to give those leaders on the field more to do and be involved with. A great deal of what went wrong for the French at Agincourt was at least partially avoidable, and we know that because there actually was at least the kernel of a plan to deal with the English host…only it was never followed or developed. The
Meeting Triumph and Disaster by Paul Comben
Published on Grognard.com with author’s permission Page 12 of 29
likes of Marshal Boucicaut, the most experienced of the French commanders, were in favour of holding back and waiting for the French muster to attain its maximum strength. The major extra advantage of so doing is that there would not have been a fight at Agincourt at all, which was a lousy field from any sensible French perspective – narrow, with cavalry inhibiting, flank-warding woods to either side, the Qualité des Français really needed to be fighting elsewhere. Only they did not. Historically, Boucicaut and other French nobles who had a semblance of military sense were overruled and their arguments effectively buried under a heap of chivalric insistence and family escutcheons. In plain terms, Boucicaut got out-argued. But who knows, on another 25th October 1415 he might have done better. So, instead of simply saying “it’s this deployment or that one” straight from the printed scenario setups, why not give the player a bit of fun trying to organize something like a cogent council of war? Give the French leaders some points to spend, and the English player a few points to spend trying to muck things up. This is matter close to my wargaming heart, and I live in earnest hope of seeing it work its charms in some design somewhere.
Meeting Triumph and Disaster by Paul Comben
Published on Grognard.com with author’s permission Page 13 of 29
Waterloo – Meeting It Meanfully
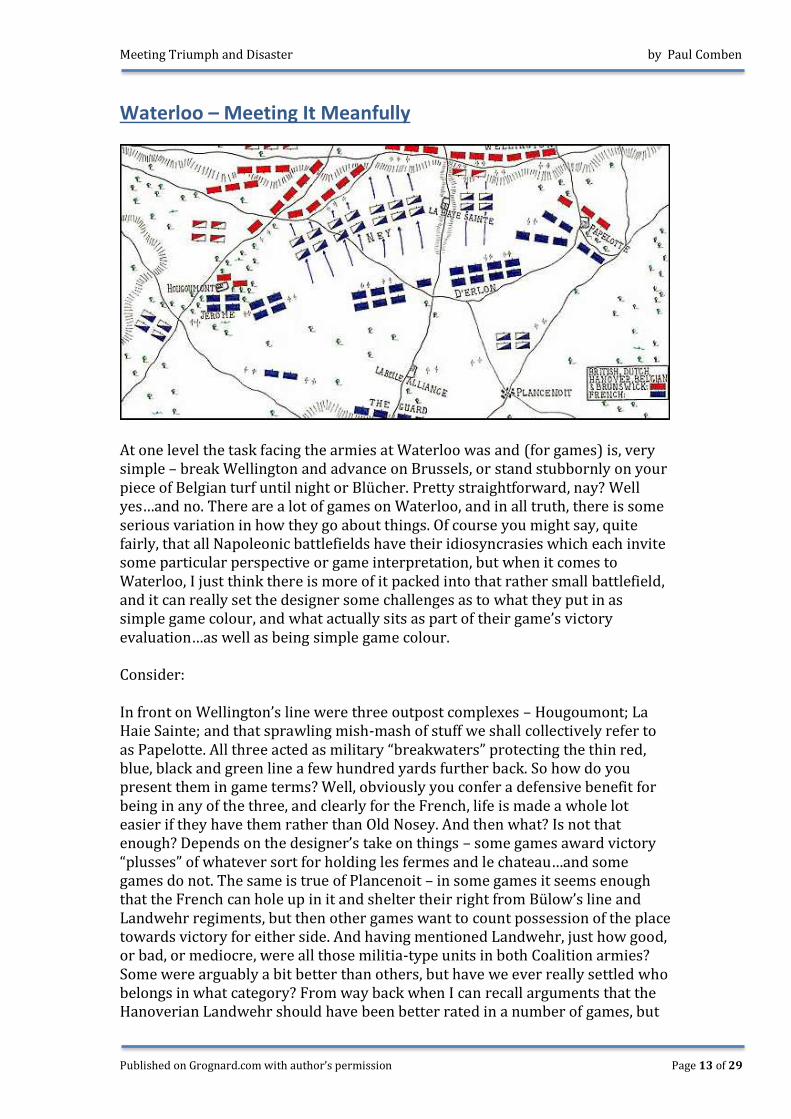
At one level the task facing the armies at Waterloo was and (for games) is, very simple – break Wellington and advance on Brussels, or stand stubbornly on your piece of Belgian turf until night or Blücher. Pretty straightforward, nay? Well yes…and no. There are a lot of games on Waterloo, and in all truth, there is some serious variation in how they go about things. Of course you might say, quite fairly, that all Napoleonic battlefields have their idiosyncrasies which each invite some particular perspective or game interpretation, but when it comes to Waterloo, I just think there is more of it packed into that rather small battlefield, and it can really set the designer some challenges as to what they put in as simple game colour, and what actually sits as part of their game’s victory evaluation…as well as being simple game colour. Consider: In front on Wellington’s line were three outpost complexes – Hougoumont; La Haie Sainte; and that sprawling mish-mash of stuff we shall collectively refer to as Papelotte. All three acted as military “breakwaters” protecting the thin red, blue, black and green line a few hundred yards further back. So how do you present them in game terms? Well, obviously you confer a defensive benefit for being in any of the three, and clearly for the French, life is made a whole lot easier if they have them rather than Old Nosey. And then what? Is not that enough? Depends on the designer’s take on things – some games award victory “plusses” of whatever sort for holding les fermes and le chateau…and some games do not. The same is true of Plancenoit – in some games it seems enough that the French can hole up in it and shelter their right from Bülow’s line and Landwehr regiments, but then other games want to count possession of the place towards victory for either side. And having mentioned Landwehr, just how good, or bad, or mediocre, were all those militia-type units in both Coalition armies? Some were arguably a bit better than others, but have we ever really settled who belongs in what category? From way back when I can recall arguments that the Hanoverian Landwehr should have been better rated in a number of games, but
Meeting Triumph and Disaster by Paul Comben
Published on Grognard.com with author’s permission Page 14 of 29
then I can also read recent accounts of entire battalions of the stuff marching off the field because they had been conveniently told to withdraw but not where to stop. Likewise, if I recall correctly, the Brunswickers suffered a noticeable drop in morale/effectiveness between Wellington’s Victory and its offspring, Ney Versus Wellington, driven by reconsideration of what they had managed to do or not do historically. The sticking power of such troops, and of the different nationalities, is a major point, because dissipated units, whether thumped about or plain fled, will affect how fortunes move upon the field, and thus how the day is going in terms of the final count-up of scores. And, dare I say, games do vary on this as well. As they do with the battlefield map – in not a few designs, “Waterloo World” stumbles a few hundred yards, if that, west of the Nivelles Road and then plunges into the void. In others you can, as the French, pile regiments into a sweep around Wellington’s right, brushing past or storming into Braine l’Alleud on your way to executing the alternative breakfast plan. And is that it? Nope. Given the sheer importance to Wellington of that initial position along the ridge bearing the Ohain road and for a good long time now the biggest egg advert in Europe (British joke, for those of us who remember way back), at least one game awards victory positives for being on it. And even then that is not quite it, as you have those “What-if’s” you can amuse yourself with from game to game – Grouchy turns up/Grouchy does not turn up, but neither do the Prussians/the Duke recalls the 17,000 men he sent to Hal/it did not rain the night before/it did rain the night before, but Napoleon starts the battle earlier anyway - twit/Napoleon feels better/Napoleon feels worse…and so on and so forth. And now the games… The very first Waterloo game I bought and felt I really had something I could unreservedly enjoy was Yaquinto’s Thin Red Line. Much of what I have mentioned above by way of victory determinants did find its way into this design – from points for capturing/holding Hougoumont , La Haie Sainte or Plancenoit, points for routs and unit elimination, points for being at the Waterloo end of the road to Brussels, for arriving on the map at all (Prussians), and for incapacitating someone important. Killing Napoleon by means other than a drawn-out process of disappointment concluded the game immediately in the Coalition’s favour. On the whole, these evaluations have much to commend them. They also tend to infer that the French, as we will see in other Waterloo games, do not have to do what they actually intended that morning in order to win – i.e. be off the map and marching through the streets of Brussels. Rather, there are certainly situations where the French can do enough to make the marching through Brussels bit the next exciting episode…if only we were not out of time and map. Incidentally, there is next to no room west of Hougoumont so that strategy is not desperately inviting. As for the militias/Landwehr, they are all, both Prussian and Hanoverian, on the wobbly side of resolute and determined. The Brunswick corps, by contrast, looks a bit too good to match at least some accounts of their wavering character, so to some extent, this is swings and roundabouts.
Meeting Triumph and Disaster by Paul Comben
Published on Grognard.com with author’s permission Page 15 of 29
There are a couple of other flaws – the initial Grand battery deployment is certainly not where modern research puts it, and modern research rather suggests that the presentation of massed artillery in Napoleonic wargames has yet to fully synch with the battlefield experience. The Thin Red Line has also been accused of being too bloody in its heaping up of losses on its roster sheets. I am cautious about this, as again, modern accounts really do suggest that the later stages of Waterloo saw the armies far more thinned-out than earlier histories might declare. Frankly, we are dealing with something other than the killed, the wounded and the obviously routed. Have a guess what just might be missing. In 1994 GMT released The Battles of Waterloo. The take on the Waterloo battle in this four battle package opens up the field to include everything between Hougoumont and Braine l’Alleud, as well as a large amount of “Prussian approach” territory. As for gameplay, heading into those western territories as the French player does not actually place you closer to any tangible victory goodness, but it does give you the chance of fighting out a major element of your game battle without having to bang your head against the packed units of Wellington’s historic reverse slope position. And as for that line, at the highest level of French victory (Massive) les fermes and le chateau are entirely left out of the reckoning, as all the assessment is based on shattered Coalition forces and having possession of the northernmost stretches of the Brussels road. In other words, if you have done this, the former outposts of Wellington’s line are going to be as relevant to winning and losing as the Maginot Line in June 1940. However, trying out a strategy of manoeuvre here does come with one distinct disadvantage to sit alongside the simple matter of how much time it is going to take to start striking telling blows. Hougoumont and La Haie Sainte may be irrelevant for any reckoning looking at a massive French victory, but they are absolutely integral to achieving a decisive one (the next victory level in descending order). So, if you start sending troops over to the west, you are marching directly away from one of the locations you need to win at this level (La Haie Sainte) and will probably find the Duke even more protective about Hougoumont than his was in real life. I have not played enough games of this design to be certain of this, but I tend to feel that the compensation for striking for the flank comes not only in avoiding the best defensive terrain on the map, but in also getting Wellington’s army to do more moving about than it is comfortable with. For the greater part of Waterloo the Anglo-Allied army did not shift very much at all – it stood and got shot at, or some bits briefly charged forward, but it was hardly moving around like Muhammad Ali in his prime. Then again, given the way Napoleon and Ney fought their side of the battle, it hardly needed to do anything else. But this is the thing about victory conditions in games – players are going to do what the game says they need to do to win, which might sound like plain commonsense, but it can leave some perfectly viable alternative or actual historical methods distressingly neglected.
Meeting Triumph and Disaster by Paul Comben
Published on Grognard.com with author’s permission Page 16 of 29
Casualty status works with victory assessments by defining formations as either shaken or shattered. This is not the place to go into the minutiae of these specifics, but suffice to say that the nondescript morale of many Anglo-Allied and Prussian units can make them accidents waiting to happen. Other factors worth a mention include the rather obvious but valid forfeiture of the game by the French if Napoleon instead of Saint Maurice gets bifurcated by a bouncing cannon ball, and the fact that this interpretation of the battle can end in a draw. What “draw” might mean in the context of the campaign is probably open to all kinds of interpretations - Napoleon’s army can make an orderly withdrawal/the Prussians mucked it up/The Duke and Blücher are looking to reorganize north of Soignes etc. etc. Just as an aside beyond pure victory procedures, this design does not entertain any possible early start to the battle (it really is too wet) but does offer a “Grouchy arrives” option – even though he was even wetter than the weather was. This design is hardly alone in providing a Grouchy what-if; the trouble is, from my purely subjective point of view, they never really come across as realistic possibilities. There was just too much bearing down on the situation beyond hearing the sound of the guns on the 18th of June and then deciding whether to acknowledge what his corps commanders were saying about it: i.e. His forces had been desperately late starting after the Prussians on the 17th. His forces had then gone a long way down the wrong road. It had rained like it was going out of fashion. Vandamme, III Corps commander, had the sulks. Neither Vandamme or Gérard (IV Corps commander) had much time for Grouchy. Grouchy, following Napoleon’s shuffling of forces on the 17th, was short of bona fide light cavalry to help find what was where. Soult’s messages to Grouchy were hardly a model of precision and clarity. Soult did not send enough messengers with the messages. Grouchy was not particularly experienced with independent command, and tactless when it came to independently minded corps commanders. Of course, you can say that none of that changes where Grouchy was on the map when the Waterloo guns started to sound, and he was, despite everything, still close enough to effect something of consequence. But the whole point of highlighting the above issues is to stress that by the time he could and should have shifted, there was an accumulated pile of emotive and practical reasons why he was never going to do so. Well, that is my take on it anyway. Offering a complete change of method and overall feel is Martin Wallace’s Waterloo from around 2008. The system here, using order disks as a form of currency, and keeping most mechanisms pretty simple, certainly produces an original take on the battle, but is nevertheless surpassed by the designer’s

Meeting Triumph and Disaster by Paul Comben
Published on Grognard.com with author’s permission Page 17 of 29
Gettysburg title from just a little later – much the same system, but better honed and accented. Unsurprisingly for a game that keeps things pretty simple, the victory evaluation does not really cater for the casualty susceptibilities of different national contingents on the field. Victory is by tally of eliminated units, or by the French taking hold of Mont Saint Jean. Whenever a qualifying condition occurs, that is when the game ends. However, like the very recent W1815, any dead Prussians do not count towards victory levels for the French. The Coalition player can also win by capturing the Rossomme space, but les fermes and le chateau just do their stronghold bit without directly contributing to victory. One distinctly odd thing about the design, broad brushed or not, is that eliminated cavalry do not count towards the casualty totals. There must be a reason for this, which I can only assume is linked to the balance and function of the designer’s system, as it makes no real sense as an historical evaluation. One thing the game does have in common with the GMT offering above is that you can get a draw if everyone fails to do anything decisively dramatic. Waterloo 200 from Vento Nuovo has a strong territorial objective element to victory process, perhaps in part driven by the feint, shift, and bluff nature of its fog of war, wooden block mechanisms. All the territorial aspects, are, however, perfectly legitimate, although the map is far more “east” than “west.” The objectives here are linked to a considerable degree to winning the competition on the map rather than directly reflecting upon the repercussions for the broader campaign. That is better represented by victory caused brought about via ten unit losses to one or other side, but these aspects of the game are again better seen as part of a desire to create competition (and a very good one) rather than a devastatingly accurate telling of Waterloo in all its aspects. Pratzen’s Le Retour de L’Empreur is another four game 1815 package like The Battles of Waterloo. Sweeping left of Wellington’s line can result in points for capturing Braine L’Alleud, whilst nibbling and knocking at the Duke’s left also yields points for taking Papelotte. Other plusses and minuses are what we have already come to expect: casualties producing markedly damaged formations, and the usual crash and burn if Mameluke Ali has got the slippers and the brandy out but there is no emperor to partake. In the body (sorry) of the series rules, this is deemed the worst defeat of all – the end of glory and the greatest epic of the age. Well, they would say that, would not they? As for this side of the Channel, “Upstart Corsican Ogre’s dead, damn his eyes sir!” Now pass the port . Finally, there is Fallen Eagles from Hexasim. This game also offers something west of the Nivelles Road as a victory objective – the hamlet of Merbe Braine. There is certainly a serious amount of territorial content in the evaluations, ranging from Plancenoit to the aforementioned Merbe Braine. To also state what should now be the patently obvious, if Napoleon dies on the field, that is game entirely over. Serious benefits are given for wounding or killing the two Coalition commanders, but fundamentally it is killing and wrecking units that will
Meeting Triumph and Disaster by Paul Comben
Published on Grognard.com with author’s permission Page 18 of 29
consolidate triumph on the day. And as far as I am aware, this design is the only one that offers a draw, but then effectively describes it as a failure for the French – which is just about what it would be. We can certainly enjoy the contest of battle in games of more limited perspective, but nevertheless, the history is that a drawn Waterloo was about as much good Napoleon as going into extra time and penalties would be for the England football team – you just know it is all going to end in tears.
Meeting Triumph and Disaster by Paul Comben
Published on Grognard.com with author’s permission Page 19 of 29
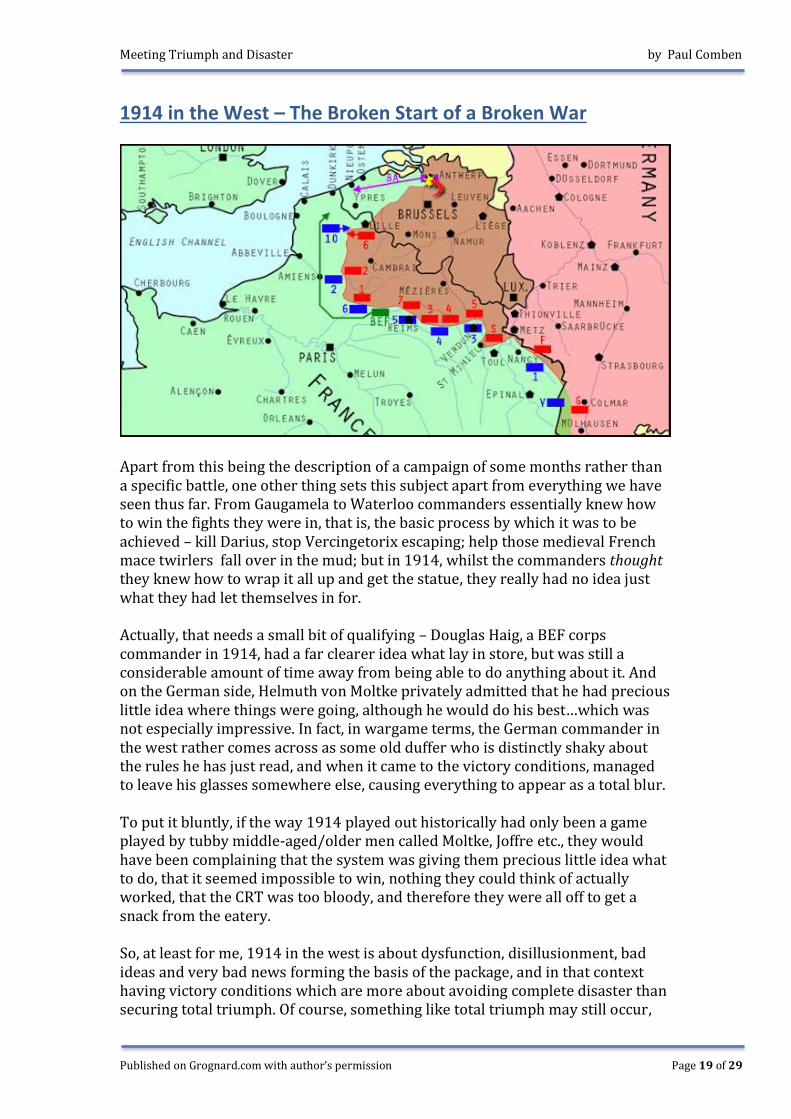
1914 in the West – The Broken Start of a Broken War
Apart from this being the description of a campaign of some months rather than a specific battle, one other thing sets this subject apart from everything we have seen thus far. From Gaugamela to Waterloo commanders essentially knew how to win the fights they were in, that is, the basic process by which it was to be achieved – kill Darius, stop Vercingetorix escaping; help those medieval French mace twirlers fall over in the mud; but in 1914, whilst the commanders thought they knew how to wrap it all up and get the statue, they really had no idea just what they had let themselves in for. Actually, that needs a small bit of qualifying – Douglas Haig, a BEF corps commander in 1914, had a far clearer idea what lay in store, but was still a considerable amount of time away from being able to do anything about it. And on the German side, Helmuth von Moltke privately admitted that he had precious little idea where things were going, although he would do his best…which was not especially impressive. In fact, in wargame terms, the German commander in the west rather comes across as some old duffer who is distinctly shaky about the rules he has just read, and when it came to the victory conditions, managed to leave his glasses somewhere else, causing everything to appear as a total blur. To put it bluntly, if the way 1914 played out historically had only been a game played by tubby middle-aged/older men called Moltke, Joffre etc., they would have been complaining that the system was giving them precious little idea what to do, that it seemed impossible to win, nothing they could think of actually worked, that the CRT was too bloody, and therefore they were all off to get a snack from the eatery. So, at least for me, 1914 in the west is about dysfunction, disillusionment, bad ideas and very bad news forming the basis of the package, and in that context having victory conditions which are more about avoiding complete disaster than securing total triumph. Of course, something like total triumph may still occur,

Meeting Triumph and Disaster by Paul Comben
Published on Grognard.com with author’s permission Page 20 of 29
but in all likelihood, winning in a game on this theme is a bit like being nearer the front of a long traffic jam than the back – you still have a long wait, but you might just get moving again a bit quicker than those grumbling behind. John Gorkowski”s Guns of August is the simplest game in this section, employing a short set of rules with a significant amount of colour baked in. Victory for either side has nothing directly to do with casualties, save that disabling your foe in some degree will enable you to maintain forward progress. But the victory conditions hardly resound with any real sense of attainability in some cases, or with a sense of finality in others. French forces getting to Saarbrücken (French automatic victory) has about as much chance of occurring in most games as the Dyle Plan had of proving a blistering success in 1940, but whilst there is a better chance of the Germans getting to Paris (German automatic victory), that is no guarantee that the war is about to end. It is simply a better place to be, perhaps, in the ensuing traffic jam. Assuming both sides avoid losing either their capital (France) or the place symbolizing that Plan 17 has actually worked (the white gloves and red trousers are over the Moselle), victory goes to the side possessing a “past the finishing line” number of named locations in France. The German total minus the Allied total has to come to at least nine for a German win. A look at the map shows this to be a pretty big ask, as if you more of less work out where the front historically was come the end of autumn, the Germans lost pretty big. To get the total to nine means lopping off and holding far more of northern France than was actually given up. Even if the Schlieffen Wheel (as adjusted and played around with by “Pimp My Plan” Helmuth) works better than it did, it still might not be enough. As far as I can see, Channel ports and frontier fortresses are going to have to fall for the totals to reach where they need to be. For the French, however, unless you are really determined to reach Saarbrücken or the dice favour you to the point of suspecting supernatural intervention, winning will inevitably be more about defending France than plunging into the French bits the Germans nabbed nearly fifty years earlier. Obviously, this is more than a portrayal of any German military edge; it is simply where the designer has put the most attainable goals for victory. I do not think this is out of kilter with the reality. This stage of the war, in its harsh nature, was not what the generals thought it was – a dash for Paris or getting over the Rhine – it was what it was subsequently understood to be, namely, a jockeying for position and initial advantages. After that, everyone was in uncharted but very bloody regions. Next we come to two Ted Raicer designs, Grand Illusion and 1914 Glory’s End. There is a certain intricacy, or perhaps one might say “intricate chaos” about the methods of victory evaluation in Grand Illusion, but I feel that at its absolute fundamentals, it is saying the same thing as the John Gorkowski design – that the French and their allies, such as they are in 1914, are more likely to win by stopping the Germans winning than winning outright themselves. There is certainly an onus on the French to be aggressive with a Plan 17 range of attacks owing to sanctions to be imposed if they abort too much too early, and incentives
Meeting Triumph and Disaster by Paul Comben
Published on Grognard.com with author’s permission Page 21 of 29
of another kind too in that Plan 17 bonuses are more achievable than in the world of Guns of August. But ultimately, whatever the French gain will go alongside their territorial retentions as offsets to the accumulated German VP total. The French can win outright by capturing Trier as this model’s totem of German failure, but overall, it is more by not losing too much of what they have possess at game start than by grabbing handfuls of extras that the French will endure into a further four years of misery. The random factor in all this is that the German player has no firm idea as to the value of what he has occupied thus far until particular game turns or the capture of Paris. Only then do the victory locations get assigned a value by means of random chit pull, which may mean you are close to victory, or further away than you might desire if the chits and the French efforts with Plan 17 say so. There are numerous ways you can interpret what this chit system is meant to depict. My favoured option is that it again reflects the uncertainty of commands that dare not think too much of what it was they had committed to. Lets us not forget that no one, prior to August 1914, had commanded armies on this sort of scale, and it was all so different out there in the field as opposed to moving blocks on a table. Funny peculiar orders, no orders, miscommunication, apprehension, despair, these are the things that I feel sit with those VP chits. In many instances, winning and losing must have felt remarkably the same. An interesting aspect of this game and 1914 Glory’s End having the same designer working on an evolution of the same concepts, is where, in what is the earlier game (1914 Glory’s End) you see the first appearance of ideas that will carry through to the later work. 1914 Glory’s End first appeared about ten years before Grand Illusion, and being games of broadly the same scale, it is not too surprising that a number of aspects carried over, although ultimately the later game is very much a design in its own right. However, both games share an ethos of preventing players from making artificial, contrived, or premature grabs for certain locations that run contrary to the premise of the historical plans and outlooks. Glory’s End “shelters” some handy objectives, such as the Channel ports, by only activating them for victory evaluations after Paris has been put in danger – by dint of a German unit entering the marked perimeter around the city. In practical terms, this means than the Germans cannot just peel off units to attack the coastal towns whilst still in that portion of the game when they should be hammering towards Paris. They are not actually prevented from shifting troops further west, but the points are not there until Paris can hear the thunder of guns, and if the Germans are getting ahead of themselves and breaking their plan up even more than they did historically, Paris might up not hearing very much of anything at all. A further matter of interest in these designs, and very much linked to their plan/off-plan aspects, is that victory, certainly for the Germans, does not only consist of making “Schlieffen” work better, but at least in some eventualities, doing well with some decidedly non-Schlieffen approaches. In a design like Worthington’s Guns of August, the German player needs to take anything and everything he can…wherever he/she can get it. But in a game like Grand
Meeting Triumph and Disaster by Paul Comben
Published on Grognard.com with author’s permission Page 22 of 29
Illusion, while there are a range of provisions for the fortress of Antwerp, for Plan 17 and for the territorial “borders” of the Schlieffen wheel, the game also offers a big victory incentive to the German player for taking Verdun and/or Nancy/Toul. This, one might argue, is not simply doing better than the historic achievement or the historic plan, it is doing something very different to the plan. However, this is not the design wanting it both ways, but simply searching for that medium between ensuring that preferred realities are not twisted out of shape by gameplay, but at the same time ensuring that the player is not merely running through a script. Historically, there did come a time in the campaign when the German commanders in Lorraine thought they could now do more than simply clobber French attacks, and taking Verdun and other French fortresses became goals they lobbied for in terms of getting extra resources and manpower. As with so much else in design, it is all a question of interpretation and performing a balancing act. Undoubtedly player’s experiences of what victory and defeat in these two games tends to look like are going to vary, but I think it fair to say that anything like a war-ending level of triumph is not ever within easy grasp. And nor should it be. What is possibly of more interest with any game that looks to harness play to realities, and that without turning the harness into a straightjacket, is how they achieve that very goal. If you look across the range of games I have presented here, there are all sorts of potential ways they can be spoilt by the wrong rule, no rule, or some other amendment that creates a poor effect. Sometimes it can be a matter of the designer being apprehensive of how players are going to treat a design, and then reacting too much. These two Ted Raicer designs try to keep things between the lines with a few historically relevant prods, but that is not always possible with other designs, and then things can begin to look either clumsy or overly contrived. Games, potentially, can be “mucked-up” all sorts of ways, but many of those ways seem to have a link to straying beyond reasonable parameters, and indulging rather than inhibiting the players’ omniscience across the campaign map. As good an example of this as any are Waterloo games…again. In real life, on the morning of June 18th, Napoleon poured scorn over his petit déjeuner (I prefer brown sauce on my sausages) following concerns voiced by his II Corps commander, Reille. According to “Huggy Honoré,” word on the Genappe street was that the Prussians were intending to join Wellington via marching from Wavre to Mont Saint Jean. Napoleon, however, retorted that the Prussians were far too shaken after Ligny to effect any sort of meaningful juncture with the Anglo-Allied army for several more days. To what extent Napoleon really believed this is open to doubt, given that his first communications to Grouchy that morning (via Marshal Soult doing his best impression of Sergeant Wilson) rather suggested that he suspected something was up. On the other hand, whatever he thought that was, he still seemed to think that Grouchy could keep it in hand, as nothing but a few cavalry patrols initially moved out from the main body of his army at Waterloo. What am I leading to in this aside is the quandary facing many a designer, because the game “Napoleon” will know exactly how many Prussians are coming, and where; and
Meeting Triumph and Disaster by Paul Comben
Published on Grognard.com with author’s permission Page 23 of 29
in stark contrast to the real Napoleon, may well start planning a serious forward defence of his/her right flank unless the rules specifically restrain them. This is tricky stuff, and it is probably fair to say that the same approach is not going to work across a range of subjects, because plans and objectives and commanders and armies are going to vary so much from battle to battle, and from campaign to campaign. In Ted Raicer’s games the controls are very much linked to objectives, which is hardly going to be useable in terms of preventing French units at Waterloo hovering around the east edge of the map ready to pounce on the first Prussians to show themselves. The Battles of Waterloo employed a modest amount of restraint, but at least in some instances, it would be nice if you could rely on players not to play after a manner that wrecks the game experience – basically, do not do this or that if it is going to spoil things. Of course, you may always come across someone who wants to do anything the game lets him or her do, but that is not an attitude I appreciate. After all, no game rule book will ever tell me not to throw the game out the window into the pouring rain; so expecting players to conduct moves within the spirit of the situation before them is hardly asking much – which is not the same as expecting bad practice and bad attitudes never to occur.
Meeting Triumph and Disaster by Paul Comben
Published on Grognard.com with author’s permission Page 24 of 29
The Battle of Britain – One Side Of The Coin
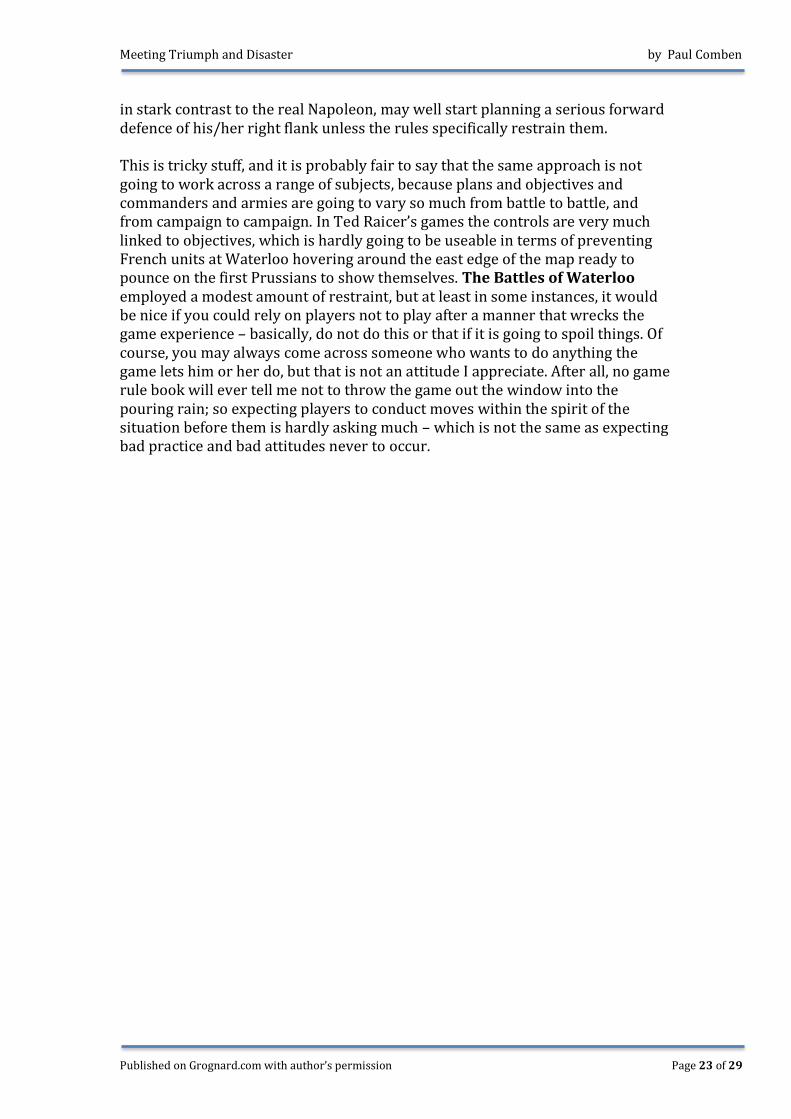
I daresay some readers will be wondering where Gettysburg has gone in this article? Well, up to a point, it is here, represented by another battle launched for vague reasons and without any clear idea as to how to progress anything that actually then occurred. When the film, The Battle of Britain, hit British cinemas, I was still a young lad full of hope and boyish mischief. All my friends at school wanted to see the film, and in a rather typically boyish sort of way, those who saw it first (I seem to have seen it last), were full of lurid accounts of that splat splat moment involving a Heinkel crew member and certain pair of goggles. I may have been just a bit past the age when I am my friends would run around the playground with our arms stretched out like wings and ready to go “Brrrrrrr!” or “Dakadakadaka!” when we had someone in our sights, but looking back, I am aware that the playground of the new school building we were due to move to (there is another new school building there these days, that looks like a giant stack of licorice allsorts), was built on a bombsite. And if I went out doing errands for mum, or if mum took me to Dorothy’s wool shop (it happened), we walked past a V1 impact site, a group of prefab homes built on a patch of land where at least eight houses were demolished in the Blitz, then past the butcher’s and the grocer’s, another bomb site, and then you were at Dorothy’s. But for me, until I saw that film, it was all a bit remote and ancient history. And then, that night in the cinema, I saw streets just like my street full of fire and explosions, saw places I had at least heard of being bombed, or the skies above them full of dogfighting planes; and in a really eerie moment, I saw a little lad who was the absolute double of me at the same age, watching a German plane crash into a London railway station. What has all this to do with Battle of Britain games? Well nothing, save to stress how so many designs, including the highly rated and appreciated, often leave out some rather important aspects of the times they portray. Again, readers may assert that games about two air forces trying to compel the other to give up are hardly going to have space or the necessity to portray people’s feelings, but ultimately I do believe that The Battle of Britain was very largely about the
Meeting Triumph and Disaster by Paul Comben
Published on Grognard.com with author’s permission Page 25 of 29
feelings and the emotions that filled my close forbears less than twenty years before I was kicking about. In a real sense, it could hardly be about much else – even if the Luftwaffe had won the battle, and even if Hitler had overcome his trepidation about a maritime operation, the Royal Navy, which had been on an aggressive defensive posture for some time, would still have stood in the way, and it would have been very difficult to see past their intervention to a German push on London. So, ultimately, flying Bf109’s and He111’s over the Comben/Feber (different generations of my family in the same house) garden shed was only of worth if it diminished the British will to resist…and frankly, it did not. By contrast the British establishment, who knew about as much regarding ordinary Britons as they did about having to make their own dinner, had no great faith in the public’s ability to persevere, and hence the trepidation in certain exclusive quarters. Game designs of the events that summer do not often touch upon such considerations. If I broaden out this study just for a moment, the games I have encountered regarding Britain’s fight through the summer and early autumn of 1940 have tended to be either Fighter Command against the Luftwaffe or a take on the “Sea Lion” operation. In two-player air games the Luftwaffe player is likely to want to prioritize radar and airfield targets, but that is not always in synch with what the game gives him/her to do. And in solo designs, the target pattern can vary considerably. The only game I properly know of (Their Finest Hour is too far back in my play experience) that is something more of a mix, and with other extras included, is Britain Stands Alone – a game I am lucky enough to have acquired recently, but do not think belongs with the games I will be running through. The first of those is Richard Borg’s Battle of Britain. I chose this not only because I own it, but because it has a certain retro look, coming as it does with little plastic planes and with a box that, in the best possible way, looks like the sort of games box I got things like Monopoly and Cluedo (Clue) in back in the 1960s…you know, when I was possibly running around with my arms out going “Brrrrrrrrrr dakadaka…splat splat,” and when the events of 1940 were not much further away in time than the First Gulf War is now. How I would have coped with this game back when I was still short of ten I am not too sure, but I certainly would want to have given it go. As far as winning is concerned, as was the case historically, the onus is very much on the Germans to make things happen. However, even in the advanced game, which has, on the face of it, an impressive scope, with all of England there to be engaged with, the victory determination process is incredibly simple – the Germans need to knock out nine targets in eight turns, or that is it. The RAF will also triumph if the Germans are sufficiently bereft of forces at the commencement of any turn. The targets the Luftwaffe can go for are all on mission cards, and fall into three basic categories – airfields, radar, and cities. That all sounds fair enough, but there are far more city cards than either airfields or radar sites, and as the selection of mission type begins with a blind draw of cards, your ability to go after what you think is particularly necessary does look compromised. True, from your drawn cards, you then pick, as the German, which card for each

Meeting Triumph and Disaster by Paul Comben
Published on Grognard.com with author’s permission Page 26 of 29
Luftflotte is the active one, but of course, you still might not get the card you really were hoping for. The only thing I can relate this to in the pattern of historical events is Göring fussing and fretting and fidgeting out of his train window over what to do, and basically upsetting the formulation of any more coherent strategy – which is perhaps not too far from the reality. At the risk of banging my drum too much, there is a line of argument that everything supposedly connected to Sea Lion, including the air battle, was meant to work far more by threat and the show of force rather than being an operation truly designed to put German units in London. That is why I made a cautious comparison to Gettysburg campaign, where Lee’s mindset was more to move north and then see what happened as opposed to working to a definite plan with clear objectives. Returning now to the design in question, in more detailed games, bombing particular cities will most likely have specific effects – affecting production of this or that, causing the degrading of convoy supply, or ruining my great grandfather’s ability to make Christmas toys out of old biscuit tins in the aforementioned shed. Here, in Richard’s design, there is a generic production ability that is affected by bombed-out targets. Likewise, destroyed airfields simply cannot base RAF units, and any radar station loss punches a hole in the overall radar net. Something that is missing from this is any notion of a prestige target, such as London, or damage to London facilities hurting the British cause more than damage to some place else. Another thing missing is the weather, but it is important to point out that the game is played over what might be presented as nine “large” turns covering a period of time from July to October 1940, and as such, fitting in the required turns of bombing action is probably not too hard to manage. Given that the game does run some perfectly valid challenges in terms of actual raid planning and response, and that it is a nice looking bit of kit, how any player will feel about it might just come down how you feel about the mission selection process. If you prefer to have complete, or near complete control of your target selection, or even if the targets are at least partially random, that they do fit a particular strategy phase, the process here might not appeal to you. But if you are happy with the game throwing you a challenge you must think hard about how to fulfill through allocation of resources, it is a quality design deserving of a bit of respect – and I would have loved to have had this in my Christmas pile when I was a boy….even if my dad did not understand it and was too full of pud to play it. London’s Burning dates from just a few years after the Richard Borg design, and is something rather different in a number of respects. It was certainly not the only solitaire Battle of Britain game at the time of its release (RAF came well before), but it was a take on events that brought the battle to an intimate level. Mini raids (potentially several a day) are attacked by a pair of RAF fighters controlled by the player, with the results scaled up to reflect the balance of the fighting overall, is the general pattern of the design. Again, like the Richard Borg title, actual Luftwaffe raid targets are not designated by any strategy, but rather the Luftwaffe planes simply bomb the first undamaged target their randomized
Meeting Triumph and Disaster by Paul Comben
Published on Grognard.com with author’s permission Page 27 of 29
path puts them over. Winning or losing is a simple evaluation process – the two forces’ kills, and the number of targets damaged at game end. London being bombed is a bad thing for the player, for not only does it accrue more points against you, it is also a clear indicator that many other locations in southeast England have already been hit and are still awaiting repair. As a game experience this can be very entertaining and atmospheric, but taking a step back, it can be perceived as simply playing out a series of random challenges in the air, embellished by pilots being lost, or surviving a close scrape, or reaching ace status. Perhaps part of the problem is that very lack of certainty as to what the consequences of defeat would actually be. This is where you need a game narrative to offer some sense of what you are doing and what it ultimately is leading to – even if it is a bit highly coloured. Unless a design puts it otherwise, a Battle of Britain game can, I think, come across as a fight between air forces that is either won or lost, and that is it. There is hurt and tragedy of course, and historically there were serious crises for Fighter Command, but the advent of The Blitz and the increasing submarine war in the Atlantic were also admissions by the Germans that sending divisions across the Channel was an option that was never going to work. In such a context, that summer of long ago also saw Hitler making trips to Paris to see the sights, interspersed with lengthy “last appeals” to Britain to wake up and smell the ersatz coffee; and this all prior to an attempt to get a settlement by an element of force and an element of threat. Propaganda films and newsreel commentaries from the era, and these from all sides, could be seriously over the top, but there is something to be gleaned from one British piece of newsreel coverage, which showed a fight above Dover in the time before The Battle of Britain proper got underway. Despite the fact that immense things were meant to be at stake, and our blokes were risking death and frightful injury up there in the sky, the on-the-spot commentator described the engagement like a fun sports day, to be watched and relished for the event itself rather than any impending consequences. Undoubtedly, being an island helped shape British attitudes that summer – twenty-one miles of Channel was enough to put the Third Reich into the haze, and whatever it did, fundamentally it was never quite where you were at home. RAF (Lion) is the last game I will be studying. A great game by a great designer, it clearly identifies German efforts in the air battle with preparations for a landing on British shores, and this with the certainty that if the right criteria are met within the Sea Lion “window,” the Germans will send their barges to Hythe, Brighton, Eastbourne…and Walmington-on-Sea. I am certainly not going to argue with that as a premise for the game, as no one could absolutely argue that the Germans would not have attempted landings after a successful Luftwaffe campaign. However, as the designer himself says, the Sea Lion aspect is “a concession to drama.” The Germans may just have dared to launch the sea operation…but my money would not have been on it. The game’s designer appears to feel the same.

Meeting Triumph and Disaster by Paul Comben
Published on Grognard.com with author’s permission Page 28 of 29
Undoubtedly what helps in building the game reality is the fact that there is a range of cogent mechanisms here that assist the story to attain believability – German target priorities change via solitaire frameworks that make sense, and the permutations of success and failure for either side have logical consequences…providing, perhaps, you forget about the Royal Navy and a few other things beside. One other important part of the game drama looks back at you from the Lion victory point schedule. The scope for the British to gain points is pretty limited, and refers to the only things the British could hope for – German losses and the passing of time. By contrast the Germans get shifts in their favour for a whole range of events, from fighter losses, scales of bomb damage, failing RAF response to bomber raids, and the beginning of the Sea Lion preparation window. In all honesty the table looks a bit nasty for the solo player, and certainly helps promote a feeling of “the narrow margin.” Having said that, I think I am right in saying that some players have had the experience of the game ending surprisingly quickly, or have claimed (in both its editions) that the system could be tripped up. In all honesty I never managed either of those things; but then again, I was never really looking. Revisions to the design in recent times may well have addressed such issues anyway. If we go forward another four years, I think it is entirely relevant to events surrounding a possible invasion of Britain in 1940 that we look at what preceded the Normandy landings. Despite the fact that Hitler and his command had far more material reasons to expect an invasion in 1944, there were still moments when the prospect of such an operation was considered to be a gigantic bluff. And despite having lost any sense of air parity, let alone superiority, ages ago, Hitler still thought he could defeat the invasion, and believed that no more than a few jet bombers could keep the landing forces heads down long enough for the invasion reaction forces to drive forward – only he did not have any jet bombers. And of course, compared to the Royal Navy in 1940, the German navy capable of a Channel intervention in 1944 was minute, so that is another marked difference between the two invasion scenarios. To an extent, I am tempted to say that presenting any Battle of Britain game in pure isolation, no matter how good it is within its own particular remit, is still somewhat akin to fighting Quatre Bras all by itself to define and describe the entirety of Waterloo. As such, these games and others, whilst being in many cases very good depictions of air operations at a certain time in the war, and when there was a certain level of technology available, are not really The Battle of Britain as it properly and entirely was. There is room still for such a design, bringing all the fighting/political/social elements together, and frankly I would love to see it come into being.
Meeting Triumph and Disaster by Paul Comben
Published on Grognard.com with author’s permission Page 29 of 29
A Brief Conclusion – Sort Of! The path to creating victory conditions players can appreciate and work with probably lies somewhere between two extremes. At one extreme is the reality of real people being extremely silly, and at the other, there are the silly/comedic things games can sometimes toss our way. Examples of people being really silly include King Byrhtnoth politely letting the Vikings get off their swampy little causeway at the Battle of Maldon, and every permutation of “Misson Accomplished” which any amateur strategist has come up with in three thousand years’ worth of military folly. As for an example of games being silly, and this is meant in a very gentle way, I think of Rod Steiger as Napoleon berating his generals as “la Garde” falters in the movie Waterloo: “I’ve been in this position before at the Battle of Marengo! I lost the battle at five o’clock, but I won it back again at seven!” Not in Avalon Hill’s Waterloo you won’t, mate. Close down round there is at five. Paul Comben.