Embed Size (px)
Citation preview
©Copyright James E. “Coach” Robertson. Revised: 2/7/2014. 1
Merely Putting Does NOT Improve Your Putting Game By James E. “Coach” Robertson From his book “Encyclopedia of Successful GOLF Coaching” and “The Golf Team Swing and Performance Manual.”
Lesson #1: Golfers are NOT able improve their putting by merely putting more. The repetition of attempting putt after putt on a practice green can do more harm than good and only serve to make bad putting habits permanent. Practice makes permanent. Only deliberate practice leads to mastery.
“Within their existing practice routines, we observe more golfers perfecting poor putting than continually improving their scoring performance.”
Source: Coach
There is a more efficient way to learn to master putting, and to maintain your putting stroke, than by simply putting. This article explains that process. Overview Several factors surrounding putting make it impractical to improve your putting performance by merely making putts. a. The golf ball remains on the clubface for such a short period of time, and is not compressed as with the full swing, that the path of the golf ball across the green does not always provide adequate feedback about the putting stroke to learn everything you need to know. b. The undulation and surface of the greens influence the path of the golf ball enough that again, you do not receive accurate feedback about your putting stroke to learn everything you need to know. c. Variations in the putter’s face angle, center of percussion, angle of attack, path, and force are typically so minor that they cannot be detected without special equipment or drills. d. It is very difficult, if not impossible, to determine how the laws of physics (path; face angle; angle of attack; center of percussion; force) interact and influence each other during the putting stroke itself. e. Checking and assessing the timing and tempo of the putting stroke is impractical at best without specific electronic equipment. Solution This article outlines specific drills for assessing and developing each major factor in the putting stroke: face angle, center of percussion, angle of attack, path, and force. Work through each drill and end your practice session creating and executing several putts with your 6-Step Peak Performance Routine™, which is truly putting. END every putting session by working through your 6-Step Performance Routine™ and learning from the experience.
If you are not completely familiar
with the laws governing the
transfer of energy from the face of
your putter to the golf ball, you
may want to review those laws in
the following sections before
proceeding.
©Copyright James E. “Coach” Robertson. Revised: 2/7/2014. 2
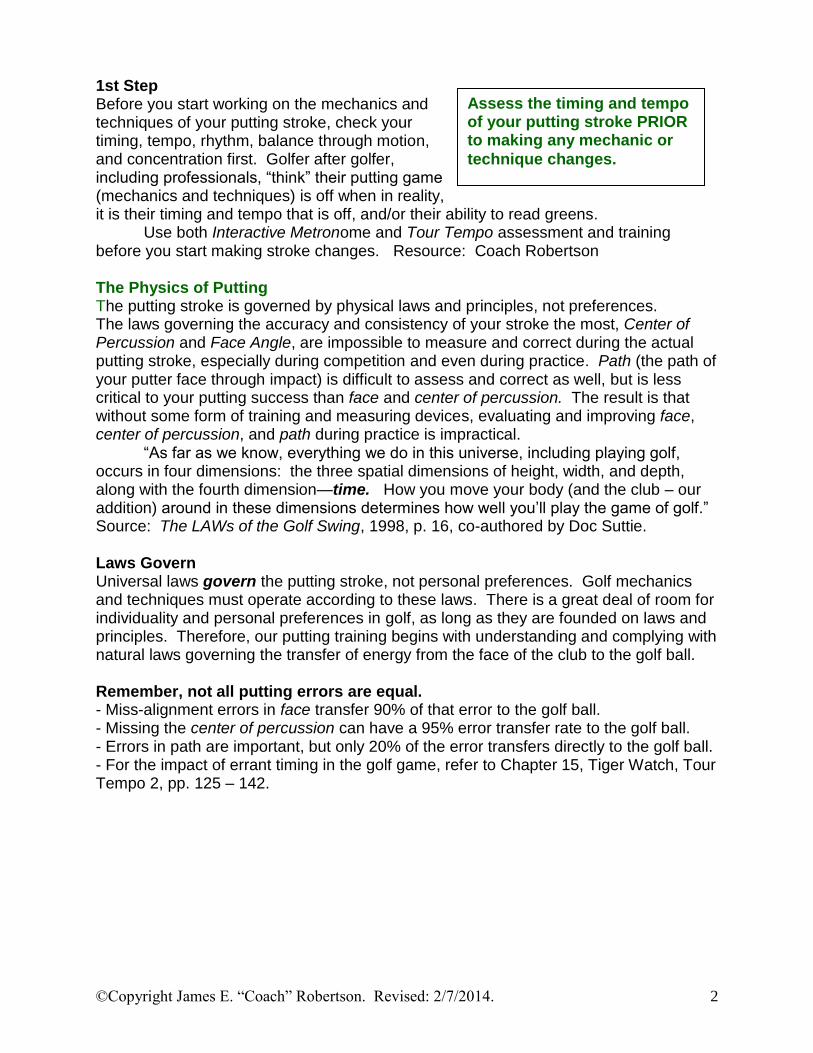
1st Step Before you start working on the mechanics and techniques of your putting stroke, check your timing, tempo, rhythm, balance through motion, and concentration first. Golfer after golfer, including professionals, ―think‖ their putting game (mechanics and techniques) is off when in reality, it is their timing and tempo that is off, and/or their ability to read greens. Use both Interactive Metronome and Tour Tempo assessment and training before you start making stroke changes. Resource: Coach Robertson The Physics of Putting The putting stroke is governed by physical laws and principles, not preferences. The laws governing the accuracy and consistency of your stroke the most, Center of Percussion and Face Angle, are impossible to measure and correct during the actual putting stroke, especially during competition and even during practice. Path (the path of your putter face through impact) is difficult to assess and correct as well, but is less critical to your putting success than face and center of percussion. The result is that without some form of training and measuring devices, evaluating and improving face, center of percussion, and path during practice is impractical. ―As far as we know, everything we do in this universe, including playing golf, occurs in four dimensions: the three spatial dimensions of height, width, and depth, along with the fourth dimension—time. How you move your body (and the club – our addition) around in these dimensions determines how well you’ll play the game of golf.‖ Source: The LAWs of the Golf Swing, 1998, p. 16, co-authored by Doc Suttie. Laws Govern Universal laws govern the putting stroke, not personal preferences. Golf mechanics and techniques must operate according to these laws. There is a great deal of room for individuality and personal preferences in golf, as long as they are founded on laws and principles. Therefore, our putting training begins with understanding and complying with natural laws governing the transfer of energy from the face of the club to the golf ball. Remember, not all putting errors are equal. - Miss-alignment errors in face transfer 90% of that error to the golf ball. - Missing the center of percussion can have a 95% error transfer rate to the golf ball. - Errors in path are important, but only 20% of the error transfers directly to the golf ball. - For the impact of errant timing in the golf game, refer to Chapter 15, Tiger Watch, Tour Tempo 2, pp. 125 – 142.
Assess the timing and tempo of your putting stroke PRIOR to making any mechanic or
technique changes.

©Copyright James E. “Coach” Robertson. Revised: 2/7/2014. 3
LAWS and Principles – a Review. We review the following laws with you first. Through impact, the primary determinants of a golf ball’s initial direction and speed are the putter face’s:
Center of Percussion (sweet spot) p. 3
Face Angle p. 4 Deliberate Practice p. 4
Path p. 6
Loft p. 7
Lie Angle (a principle versus a law) p. 9
Angle of Attach p. 10
Club Head Speed p. 11
Ball Position (a principle versus a law) p. 13
Timing, Tempo, and Rhythm p. 14
Putting Assessment Worksheet p. 16
Center of Percussion The Center of Percussion of the putter face is the ideal and most balanced spot on the face to strike the ball with. Striking the golf ball at the Center of Percussion (COP) transfers the greatest amount of available energy from the club face to the ball and starts the ball on a line perpendicular to the club face. Remember that we want all putts to begin as straight putts. In the drawing above, illustration 1 is where the center of percussion strikes the back-center of the ball, transfers full force potential, and starts the ball straight down the target line. In illustration 2, the putter face strikes the back of the ball out toward the toe of the putter face, transferring less energy to the ball. In this example, the putter face has a tendency to rotate open in reference to the target line and propels the ball off line to the right. In illustration 3, the putter face strikes the back of the ball toward the heel of the putter, transferring less energy to the ball, and the putter face has a tendency to rotate closed in reference to the target line and send the ball off line to the left. Striking the golf ball on the center of percussion is a top priority because close to 95% of any error is transferred to the ball. Striking the golf ball exactly on the center impacts both the amount of energy transferred to the ball and the ball’s direction, making it a double opportunity for performance.
Target Line
1. 3.2.
Pu
tter F
ac
e
Pu
tter F
ac
e
Pu
tter F
ac
e

©Copyright James E. “Coach” Robertson. Revised: 2/7/2014. 4
Deliberate practice: isolate, assess and improve, and integrate. The following instructions are added to our definition of deliberate practice. In our practice sessions, we start by isolating one law, such as Center of Percussion. Then we use one of our assessments and drills to improve on how a specific putting technique works within the law, which is the assess and improve part of the sequence. We finish each session by making a putting stroke with our 6-Step Performance Routine (just as if competing) which is integration. In the integration step, we allow the change, or technique we are working on, to operate on auto pilot. With this final step, you are learning to evaluate how well the practice is going from feedback with the full stroke. Center of Percussion assessment and training aids we use. Remember to Drill-for-Skill.
―Strike-N-Swipe‖ labels.
Dave Pelz’s ―Teacher – Standard‖.
Golf Around the World’s ―100% Pure Stroke‖.
Golf Around the World’s ―High Tech Putting Track‖ can be used as a training aid here as well.
Other (list other preferences here): Mastery Technique Putting Drill #1 In working toward mastery, perform the following drill 15 – 20 minutes daily for 20 – 30 contiguous days. In our program, this is Station #1. We have four 30ft. X 4 ft. indoor putting surfaces from BirdieBall.
Use one of the aforementioned training aids and work strictly on striking the ball in the center of percussion of the face. In our program, one device we use the Dave Pelz ―Teacher Prongs‖.
After working with the training aid and drill for several minutes, make a putting stroke with the full 6-Step Routine.
Notes on Center of Percussion—also include any questions you have for your teaching professional or golf coach: _________________________________________________________________ _________________________________________________________________
deliberate practice. Work that includes: 1. Practicing a well-defined task that is challenging to the golfer; 2. providing relevant and immediate feedback; 3. being conducted with full attention (in-the-moment) and intent; 4. the opportunity for repetition, learning from feedback, and error correction…which includes Step 6 of our Performance Routine, and 5. is conducted with enthusiasm. The primary components of deliberate practice include the total number of hours invested in practicing correctly, with the correct process, the presence of effort, determination, and concentration (attention and intent). Up to 10 years of deliberate practice can be required for an individual to achieve mastery in a specific area or sport.

©Copyright James E. “Coach” Robertson. Revised: 2/7/2014. 5
Face Angle – the next LAW The angle of the putter’s face at impact in relation to the target line is critical in determining both the initial direction and speed of the ball. Because we want all putts starting out as straight putts, the ideal face angle at impact is square to the target line, as illustrated by 1. Square. Square means that the putter face forms a 90 degree angle with the target line. Square (and 90 degrees) is the same as perpendicular. An important objective for your putting stroke is squaring the putter face with the target line through impact. Illustration 2. is open; the face of the putter is open (at more than a 90 degree angle with the target line) at impact, the golf ball is propelled to the right of the target line, and with some energy loss. That is the law. When the face angle of the putter is closed (at less than 90 degrees) at impact, such as in Illustration 3, the golf ball is propelled to the left of the target line with some energy loss. Squaring the fact through impact is a top priority because close to 90% of any error is transferred to the ball. Striking the ball with a square face impacts both the amount of energy transferred to the ball and the ball’s direction, making it another double opportunity for performance. Assessment and training aids
Golf Around the World’s ―Pin Balls‖ (2 golf balls attached in the middle)
GAW’s ―Gimmie Ball.‖
GAW’s “High Tech Putting Track”
Refer to Golf Around the World (GAW) for other training aids
Dave Pelz’s ―Putting Stick.‖
Laser. We use the Putting T-bar Laser.
Mastery Technique Putting Drill #2 *Have a professional check the face angle of your putter and ensure that it is properly aligned with the shaft and grip of the club. Check your club’s loft as well. In working toward mastery, perform the following drill 10 – 15 minutes a day for 20 – 30 contiguous days. In our program, this is Station #2.
Use one of the aforementioned training aids and work strictly on striking the ball with a square putter face through impact. In our program we use the GAW ―Pin Balls‖ and their ―Gimmie Ball.‖
Start with the Pin Balls. If you continue miss-hitting it, switch back and forth with the Gimmie Balls.
Additional Drill. Set a target up 6 – 10 feet from your putter. Work into your stance until you think your putter face is perfectly perpendicular to the target line to the target. Set the laser listed above down in front of your putter face, square
Target Line
1. Square 3. Closed2. Open
Pu
tte
r F
ac
e
Pu
tter F
ace
Pu
tter F
ace

©Copyright James E. “Coach” Robertson. Revised: 2/7/2014. 6
it up, press the laser button, and see how close the laser comes to the center of the target. Work with your position until you line up square ten times out of ten.
After working with the training aid and drill for several minutes make a putting stroke with your full routine.
Notes on Face Angle—also include any questions you have for your teaching professional or golf coach: _________________________________________________________________ _________________________________________________________________
Path The illustration to the right shows the path of a putter’s face as it passes through the ball at impact. Path is another major determinant of how the ball will travel in relation to the target line. Having the putter face on path through impact is priority, however, a mistake in path only transmits 20% of any error to the ball. This 20% is in contrast to over 90% transfer with face and angle. Striking the golf with the face on path impacts both the amount of energy transferred to the ball and the ball’s direction.
In the first illustration above, when the path of the putter face is parallel with, or traveling along, the target line through impact, the golf ball is propelled straight down the target line, which is our preference. An important consideration in the putting stroke is having the putter face travel straight along the target line a few inches prior to, through, and a few inches past, impact. [The stroke you use influences path. Please refer to our discussion of a pendulum versus a gate stroke in the Angle of Attach section of this article. Our preferred stroke to produce a more consistent path is a pendulum stroke.] In illustration 2, when the path of the putter face travels from outside the target line, through the ball, and to the inside on the follow through, the golf ball is propelled to the left of the target line. There is typically, however, no loss of energy transfer. In illustration 3, when the path of the putter face is traveling from inside the target line, through the ball, and to the outside on the follow through, the golf ball is propelled to the right of the target line. There is typically no loss of energy transfer. Assessment and Training Aid
Golf Around the World’s ―Putting Arc‖
GAW ―High Tech Putting Track‖
You can use two alignment clubs on the green, set up parallel to each other.
Video Feedback
Place an 18 inch piece of string on two tees, with the tees in the green, and work toward putting down the line of the string…all putts start out as straight putts.
The ―Eye Line‖ from Golf Around the World is effective in this drill as well.
Target Line
1. 3.2.
Pu
tte
r F
ac
e
Pu
tter F
ace
Pu
tter F
ace

©Copyright James E. “Coach” Robertson. Revised: 2/7/2014. 7
Mastery Technique Putting Drill #3 In working toward mastery, perform the following drill five minutes a day for 20 – 30 contiguous days. In our program, this is Station #3.
Use one of the aforementioned training aids and work strictly on striking the ball on path through impact. In our program we use the ―High Tech Putting Track.‖
After working with the training aid and drill for several minutes make a putting stroke with your full routine.
Notes on Path—also include any questions you have for your teaching professional or golf coach: _________________________________________________________________ _________________________________________________________________
Loft Review: one objective of a mechanically sound stroke is returning the putter’s shaft to its original setup position. Our preferred original position is perpendicular to the green, or forming a 90 degree angle - such as in the first Illustration to the right. The perpendicular position of the shaft in Illustration 1 is influential in the putting stroke because the typical putter is manufactured with only 4 — 5 degrees loft, which is not very much. Therefore, even minor position differences in relation to the putter’s face angle, or loft, with the putting surface can make large differences. The objective is to position the putter shaft perpendicular with the green in your setup and return it to that exact position at the moment of impact. In the second illustration the putter shaft, and thus the putter face and loft, is more lofted (more than a 90 degree angle with the shaft). With more loft, there is actually less energy being transferred from the putter face to the golf ball. With additional loft comes additional back spin, which is exactly opposite of what we want in the putting stroke. In putting, we want the ball over spinning as quickly as possible, which helps the ball remain on line. Loft is typically added to the putter’s face when the golfer’s hands are behind or late in the stroke. In illustration number 3 the putter shaft, and thus the putter face are de-lofted (less than 90 degrees). In this position, the golf ball not only receives less energy from the putter face, but is more apt to be pinched between the putter face and the green, and thus jump off line. Loft is typically reduced in the putter’s face when the golfer’s hands are ahead or early in the stroke.
Pu
tter S
ha
rt
Putting Surface
90 Degrees
Putte
r Shart
Putte
r Shart
LESS than
90 Degrees
MORE than
90 Degrees
1 2 3

©Copyright James E. “Coach” Robertson. Revised: 2/7/2014. 8
Many golfers associate the concept of loft with woods and irons but not with putters. The typical putter has 4 — 5 degrees of loft. If the putter face had 0 degrees loft, what would happen upon impact with the golf ball? Think about your driver for just a second. With 0 degrees loft, the clubface could not depart any backspin to the ball, which is what keeps the ball airborne. The same LAWS of energy transfer apply to your putter. Without loft, or with negative loft, the putter face could pinch the golf ball between the ground and the face, the ball would pop up or sideways slightly, and roll off path.
Years ago, when greens were cut longer than they are today, putters had even more loft in order to getting the ball up on top of the grass and rolling faster. Even today, some players use putters with more loft on greens that are cut long and with courser types of grass, and use putters with less loft for greens cut shorter and with finer grass hybrids.
Assessment and Training Aid *Use a golf club protractor to check the loft of your putter.
Video Feedback
Coaching Feedback
Other (list other preferences here):
Mastery You need to focus on proper club shaft alignment in all of your putting drills. Have your coach, or a playing partner, check out alignment on a consistent basis. Notes on Loft—also include any questions you have for your teaching professional or golf coach: _________________________________________________________________ _________________________________________________________________ Reminder on Hand Position Notice the perpendicular position of the putter shaft to the green. Maintain a position with the hands and arms that allows you to keep the putter shaft in a perpendicular position at address and through impact. Ensure that you maintain a consistent hand, arm, and shoulder position at address and through impact. Also remember to use cutters, tightest jeans, sock in the gut, shoulders in the slot, and poised hands.
Do you know what
degree of loft of your
putter is?
Putting
Surface
Putter
Hands
©Copyright James E. “Coach” Robertson. Revised: 2/7/2014. 9
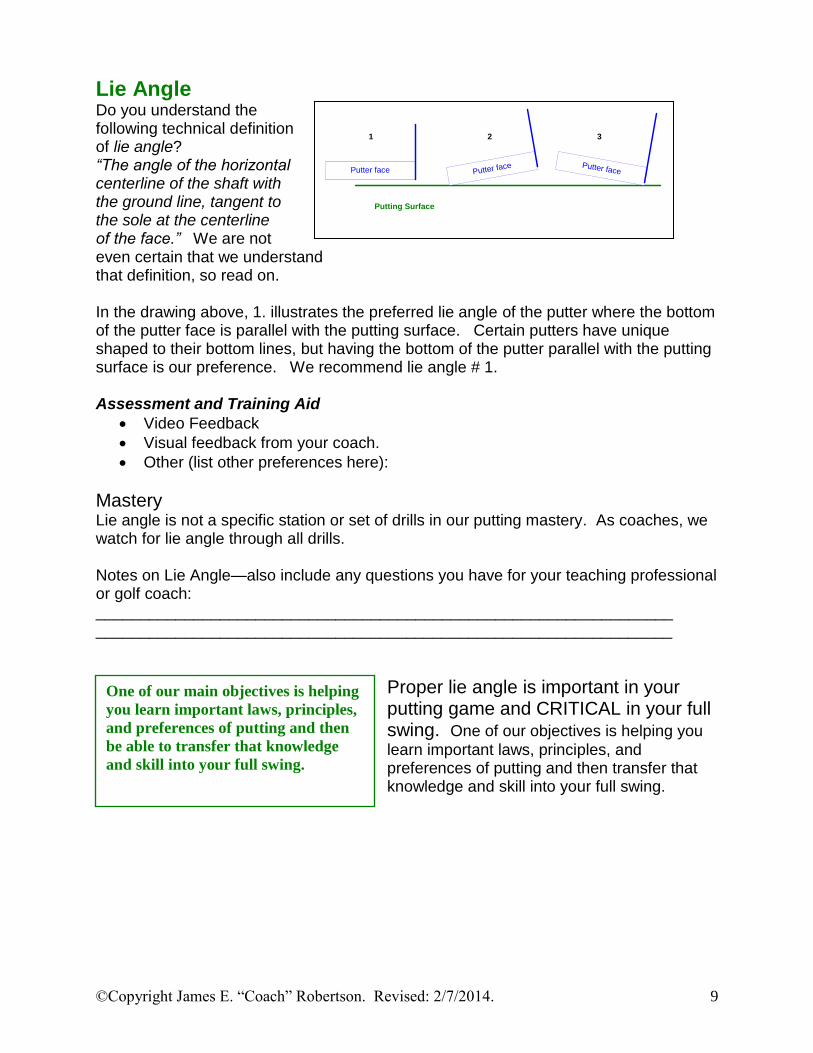
Lie Angle Do you understand the following technical definition of lie angle? “The angle of the horizontal centerline of the shaft with the ground line, tangent to the sole at the centerline of the face.” We are not even certain that we understand that definition, so read on. In the drawing above, 1. illustrates the preferred lie angle of the putter where the bottom of the putter face is parallel with the putting surface. Certain putters have unique shaped to their bottom lines, but having the bottom of the putter parallel with the putting surface is our preference. We recommend lie angle # 1. Assessment and Training Aid
Video Feedback
Visual feedback from your coach.
Other (list other preferences here):
Mastery Lie angle is not a specific station or set of drills in our putting mastery. As coaches, we watch for lie angle through all drills. Notes on Lie Angle—also include any questions you have for your teaching professional or golf coach: _________________________________________________________________ _________________________________________________________________
Proper lie angle is important in your putting game and CRITICAL in your full swing. One of our objectives is helping you
learn important laws, principles, and preferences of putting and then transfer that knowledge and skill into your full swing.
Putting Surface
Putter facePutter facePutter face
1 2 3
One of our main objectives is helping
you learn important laws, principles,
and preferences of putting and then
be able to transfer that knowledge
and skill into your full swing.

©Copyright James E. “Coach” Robertson. Revised: 2/7/2014. 10
Angle of Attack Angle of attack is the vertical movement of the putter face through the forward stroke in relation to the golf ball and putting surface. Pendulum Stroke A Pendulum Stroke (top example) has more elevation in its vertical arc than with other putting strokes, and thus its angle of attack is greater. It is important to work on a consistent angle of attack with both stroke strokes. Performance data tells us that it is important to strike the ball with a slight ascending (moving up) path at impact in order to ensure proper roll. The pendulum stroke accomplishes this objective more effectively than the gate stroke does. Gate Stroke Relative to other strokes, there is less angle of attack with a gate stroke (the bottom example) because there is very little elevation of the putter off the putting surface through the stroke. The arc of the gate stroke is typically very flat, thus having little, if any, angle of attack. In general, there is less elevation in all putting strokes because they are a one-lever mechanic. One-lever means there are no angles, or wrist cock, created in the stroke. Assessment and Training Aid
Golf Around the World’s ―Putting Arc‖
GAW ―High Tech Putting Track‖
Two alignment clubs on the green, set up parallel to each other
Video Feedback
Training aid for a pendulum stroke: we use the ―Putting T-Bar‖ which you can locate at www.wrightputtingdynamics.com.
Mastery Technique Putting Drill #4 In working toward mastery, perform the following drill 15 – 20 minutes a day for 20 – 30 contiguous days. In our program, this is Station #3.
Use one of the aforementioned training aids and work strictly on striking the ball with a consistent path, as well as with a square club face, through impact. We prefer, and teach, the pendulum stroke, but that is our preference and not a law.
After working with the training aid and drill for several minutes make a putting stroke with your full routine.
Putting
Surface
Angle of
Pendulum
Stroke
Golf Ball
Putting
Surface
Angle of Gate
Stroke
Golf Ball
©Copyright James E. “Coach” Robertson. Revised: 2/7/2014. 11
Notes on gate or pendulum strokes—also include any questions you have for your teaching professional or golf coach: _________________________________________________________________ _________________________________________________________________
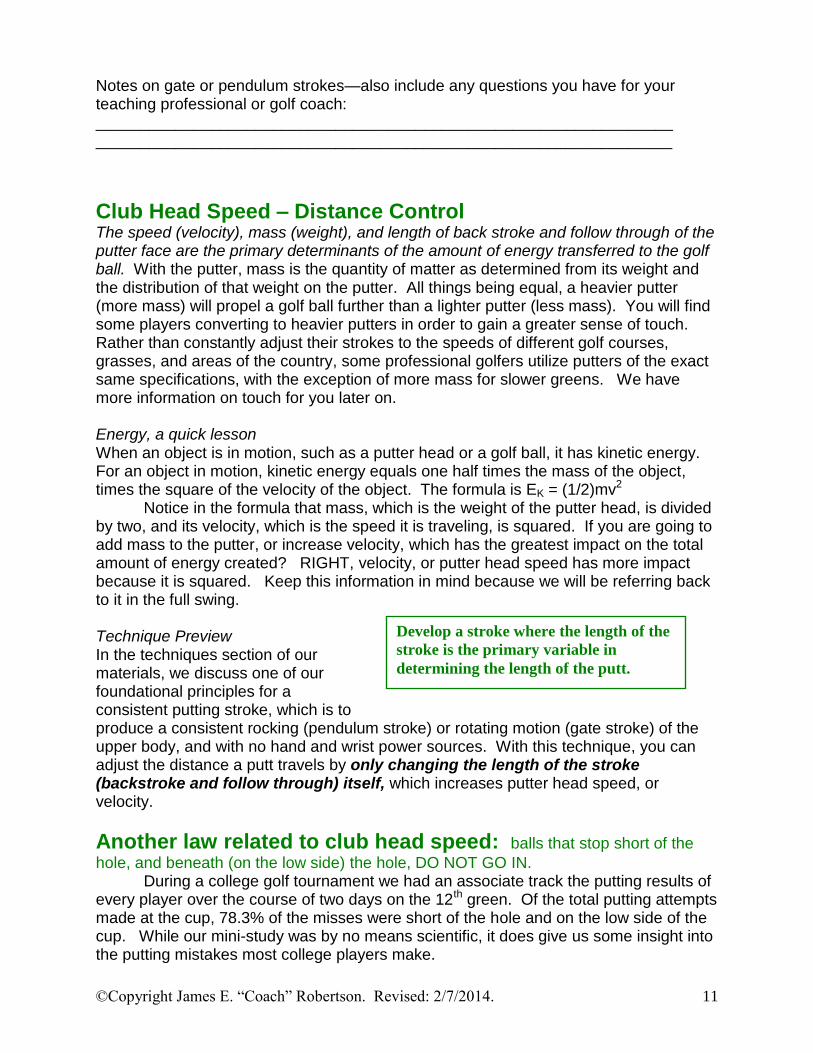
Club Head Speed – Distance Control The speed (velocity), mass (weight), and length of back stroke and follow through of the putter face are the primary determinants of the amount of energy transferred to the golf ball. With the putter, mass is the quantity of matter as determined from its weight and the distribution of that weight on the putter. All things being equal, a heavier putter (more mass) will propel a golf ball further than a lighter putter (less mass). You will find some players converting to heavier putters in order to gain a greater sense of touch. Rather than constantly adjust their strokes to the speeds of different golf courses, grasses, and areas of the country, some professional golfers utilize putters of the exact same specifications, with the exception of more mass for slower greens. We have more information on touch for you later on. Energy, a quick lesson When an object is in motion, such as a putter head or a golf ball, it has kinetic energy. For an object in motion, kinetic energy equals one half times the mass of the object, times the square of the velocity of the object. The formula is EK = (1/2)mv2 Notice in the formula that mass, which is the weight of the putter head, is divided by two, and its velocity, which is the speed it is traveling, is squared. If you are going to add mass to the putter, or increase velocity, which has the greatest impact on the total amount of energy created? RIGHT, velocity, or putter head speed has more impact because it is squared. Keep this information in mind because we will be referring back to it in the full swing. Technique Preview In the techniques section of our materials, we discuss one of our foundational principles for a consistent putting stroke, which is to produce a consistent rocking (pendulum stroke) or rotating motion (gate stroke) of the upper body, and with no hand and wrist power sources. With this technique, you can adjust the distance a putt travels by only changing the length of the stroke (backstroke and follow through) itself, which increases putter head speed, or velocity.
Another law related to club head speed: balls that stop short of the
hole, and beneath (on the low side) the hole, DO NOT GO IN. During a college golf tournament we had an associate track the putting results of every player over the course of two days on the 12th green. Of the total putting attempts made at the cup, 78.3% of the misses were short of the hole and on the low side of the cup. While our mini-study was by no means scientific, it does give us some insight into the putting mistakes most college players make.
Develop a stroke where the length of the
stroke is the primary variable in
determining the length of the putt.
©Copyright James E. “Coach” Robertson. Revised: 2/7/2014. 12
How do you think this LAW impacts putting? Collect some data on your next golf round and evaluate what your thoughts are? Mastery Technique Putting Drill #5 In working toward mastery, perform the following drill 15 – 20 minutes a day for 20 – 30 contiguous days. In our program, this is Station #5.
5-ball drill. Place 5 balls from a target at distances of 6 ft., 12 ft., 18 ft., 24 ft., and 30 ft. Focusing only on distance control, make a stroke from each distance with the objective of the ball stopping approximately 15 - 17 inches past the hole. Repeat the drill from distances of 10, 20, 30, 40, and 50 feet.. *Refer to the ―Optimal Rolling Speed‖ information in our swing and performance manual.
After working with aforementioned drill for several minutes, make a putting stroke with your full routine.
Mastery Technique Putting Drill #6 Principles: - Feel is not real; - distance can be controlling the length of the backstroke and follow through; - the backstroke and follow through of a pendulum putting stroke are typically the same; - the follow through of a gate stroke is typically slightly longer than the backstroke. In working on controlling the distance of your back stroke and follow through: - mark the center of an Alignment Stick with a small piece of tape; - place a small piece of tape on the right and left sides 7 inches from center. Align your toes to these two marks. With your feet square, the center of your heels will be 14 inches apart. - Place the next pieces of tape at three inch intervals from each other as follows. 23‖ 20‖ 17‖ 14‖ Center 14‖ 17‖ 20‖ 23‖
- Make at least three putting strokes from each of the four lengths. You may want to start with the longest stroke and move in.
Notes on distance control—also include any questions you have for your teaching professional or golf coach: _________________________________________________________________ _________________________________________________________________

©Copyright James E. “Coach” Robertson. Revised: 2/7/2014. 13
Ball Position Our preference: To start with, move into a position where the left eye is directly over the ball and the putter is a perpendicular position to the green. You will learn, however, that unless you are bent over adequately at the hip joints, positioning the left eye over the ball can place you in an incorrect position. Setting up too close to, or too far from, the golf ball can cause the shoulder plane to miss-align with the target line. CHECK THIS OUT IN YOUR SET UP. Assessment and Training Aid
Golf Around the World’s ―Eye Line‖, a putting alignment mirror.
Mastery Technique Putting Drill #7 In working toward mastery of ball position, perform the following drill 10 - 15 minutes a day for 20 – 30 contiguous days. In our program, this is Station #6.
Use the aforementioned training aid and work on positioning the ball precisely below the left eye. The alignment mirror will also help you square the clubface through impact.
After working with the training aid and drill for several minutes, make a putting stroke with your full routine.
Notes on the positioning of your head over the ball—also include any questions you have for your teaching professional or golf coach: _________________________________________________________________ _________________________________________________________________

©Copyright James E. “Coach” Robertson. Revised: 2/7/2014. 14
Timing, Tempo, and Rhythm Add the metronome to your 6-Step Routine™ Practice. Also be certain to complete the IM and Tour Tempo assessment and training prior to making any mechanical or technique adjustments to your putting stroke. EXECUTING THE BLUEPRINT LAW: A golfer at rest tends to stay at rest; a golfer in motion tends to remain in motion. Principle: Once you begin moving toward the golf ball, and into your setup, remain in motion the entire time (slight though it might be) and through the entire stroke. Experiment with keeping your original pressure with the hands and keeping the putter head up and off the green. Grounding the putter head can stop all motion, thus breaking the LAW, and can change the sensitivity of your grip pressure as well. Weighing: Do you weigh the putter head through the entire stroke? Dynamic: Do you remain in motion, slight though it may be, through the entire putting stroke?
Flow Training/Practice – a counting technique - Precise timing, tempo, and rhythm are critical to putting success and to all golf swings. The following drill helps develop and restore all of those elements. - Remember that within the alignment process for putting, proper alignment of the eyes and shoulders is more critical than any other body parts. - Remember to include cutters, tightest jeans, sock in the gut, drop the shoulders into the slot, and poised hands within your 6-Step Routine™. - Work through this drill. Use the counting technique in competitive and practice warm ups (most of our professionals use a metronome as well), but do not incorporate the technique into your competitive putting until you are comfortable with it. - Most of our professionals begin the counting process in connection with Step 5, ―Trigger the Blueprint‖, of their 6-Step Routine™. Says one pro, “the final time I visualize the ball coming back from the target, the second the ball crosses the small target dot 8 inches in front of the ball, which also reconfirms the position of the target dot for me, I begin counting and walking toward the golf ball.”
Count “one thousand and 1” with each step you take toward the ball and maintain that pace with each step. Using a metronome will help. Using the metronome in the Tour Tempo training will help as well.
As you approach the ball and are counting “one thousand and 1”, simultaneously align the face of your putter behind the ball and perpendicular with the target line, as you also set your left eye in position relative to the ball. You execute all of these moves simultaneously on the count of “one thousand and 1‖. It will take some practice.
On the next count, place both feet together, perpendicular with the target line, and with the ball in the middle of them.
On the next count, move the left foot into its proper position.
On the next count, move the right foot into its proper position.
On the following count execute a forward press to trigger the back stroke.
Execute On the following count execute the stroke.
Discontinue counting and hold your finish until the ball stops rolling. Learn from the feedback.
©Copyright James E. “Coach” Robertson. Revised: 2/7/2014. 15
Mastery Technique Putting Drill #8 In working toward mastery of timing and tempo, perform the following drill 10 - 15 minutes a day for 20 – 30 contiguous days. In our program, this is the station where you work through your 6-Step Routine™.
Our Recommendation Our recommendation is that you start developing appropriate stroke techniques which relate to each of the five laws we have discussed. Start with a fairly level putting surface and invest adequate time each day. Sources The putting statistics in this article were taken from Dave Pelze’s book, Putt Like the Pros, Harper Perennial Publishers, 1989.
Lesson #2 END every putting session by working through your 6-Step Performance Routine™ and learning from the experience. [Refer to our article on the 6-Step Peak Performance Routine™.]
Coach Robertson is a PGA Tour Instructor, Director of The St. Andrews Golf
Academy, Staff Writer for The World Golf Teachers Federation, and Head College
Golf Coach at Southern Arkansas University. Author of “Gateway to the Game of
GOLF”, “The Golfer’s Profile System”, “The Golf Team Swing and Performance
Manual”, and “The Encyclopedia of Successful Golf Coaching.” Coach always
enjoys your feedback and can be contacted at [email protected] or through
Skype at james.e.robertson (USA).

©Copyright James E. “Coach” Robertson. Revised: 2/7/2014. 16
PUTTING ASSESSMENT Putting Assessment and Recommendation Worksheet
Date________________ Student________________
Areas Assessed: ** Comments: Ratings and Additional Comments:
Center of
Percussion
95%
Face Angle 90%
Path 20%
Angle of Attack
Distance control
Impact point
Hand/shoulder
position
Shoulder line
Forearms
position
Putter shaft
alignment
Putter face
alignment
Ball position&
bottom of swing
Ball position &
eye line
Head movement
Body movement
Wrist position
Forming and
maintaining the
Triangle
Rhythmic swing
Hand position on
club
Grip pressure
Swing tempo
Putting routine
The Hourglass
Distance back
and through
Pendulum or
gate?
** Error transfer rate.