Embed Size (px)
Citation preview
DyeHard Teaching Materials
Table of Contents
Methods[Lab1] Method: What Does a Method Look Like?
Parameters[Lab2] Spawning Debris with parameters
Conditionals[Lab3] If/Else Lab[Lab4] Variables: Declaration and Assignment[Lab5] Nested if/else statement (continue from lab4)
Lab5 ChallengesPersonalization
[Lab6] PersonalizationLab6 Challenges
Loops[Lab7] For loop[Lab8] Nested For-loop[Lab9] For-loop/Nested For-loop With Condition
Methods
[Lab1] Method: What Does a Method Look Like?Activity, 1 hour Concepts:
The format and parts of a method in java.Learning Objectives:
Students will be able to: Write a method in java.How to Assess (optional): Look at student output to verify their methods compile and are working as desired.Materials:
● Projector showing teacher’s demonstration ● Computer with Java editor for each student● DyeHard Procedural API installed on each computer
Process:
1. Make sure you (the teacher) are able to compile and run the project before showing it to the students.
2. Demonstrate opening the editor and opening the lab project, and navigating to the “MyGame” class
3. Tell the students you are going to write a method. First, talk about what a method is.a. A named section of a program that performs a specific task.
4. Tell them the first step in writing a method is to identify the task you want to perform.a. You want the game to be coolb. Write the phrase “Make cool game” in the editor and try to run the game
i. There will be an error. Ask the students why this caused an errorii. Answer: It needs to be written in a language the computer understands!
5. Discuss with students about the keywords, ‘public’ and ‘private’a. The first word a computer needs when reading a method is “public” or “private”
i. public means that code in other places of the program can see and use this method.
ii. private means that the method can only be seen and used from inside the class that owns it.
iii. Tell students that everything they will write during the camp needs to be public
6. Erase “Make cool game”, and write “public”7. Now, the computer needs to know what sort of information the method gives back
a. If you enter some equation on a calculator, should the calculator compute the answer and just sit there, or should it also show the answer?
b. For the purposes of the lab, we don’t need any information from the method, so the return type should be ‘void’ which indicates nothingness
8. Write “void” after the word “public”9. It is time to name the method.
a. The name of a method should describe what it does. It is important for method’s names to make sense.
b. Explain that method names cannot have spaces.c. In order to keep method names readable, Java programmers use camel casing
for method names.i. The first word is uncapitalized, but the other words start with capital
letters.1. Write “camelCaseName” on the board to demonstrate.
d. NOTE: in order to function properly, the API will require that you name the method “buildGame()” or else the program won’t function as expected
10. Then explain that we need to tell the computer where the instructions will start and end. We do this with curly brackets! If you forget the brackets, the computer will get confused and not know where to look. Often people forget the end bracket so the computer doesn’t know when to stop reading. So, put both brackets on the screen now with some spaces in between to write the instructions.
11. Write “// Code goes here” within the brackets. Then introduce student to the double forward slashes ( // ) which represent the text that the computer should ignore -- we call this an “inline comment”. It won’t cause any errors, but it also won’t do anything.

a. Comments are used to describe code to human readers.12. To build the world for the game, you need game objects. I am going to give the computer
a couple of commands. They are the commands the computer already knows. They area. apiStartHero()b. apiSpawnSingleDebris()
13. Write “apiStartHero();” and run the game. The hero will appear in the game.a. The hero won’t move anywhere. Explain that moving the hero will be covered in a
later lesson.14. Write “apiSpawnSingleDebris();” and run the game. A debris will appear in the
game.15. Challenge students to create several debris in the game.
a. If someone tries to create multiple heros, it won’t work.i. Explain that startHero is not the same action as spawnSingleDebris. The
hero is being set up, while the debris is being created.b. Student’s may want to know how to control some aspect of the game (the way
objects move, where debris spawn, etc.). Explain that this will be covered in later lessons.
16. When the students have finished, start a discussion.a. What are the parts of a method?b. Can you set up a game with the apiStartHero() and
apiSpawnSingleDebris() methods? Why or why not? What else is needed?
Parameters
[Lab2] Spawning Debris with parametersConcepts:
Using parameters to provide variable information to methodsLearning Objectives:
● Students will be able to use a method that requires parameters● Positions in the game world (get familiar with coordinate system)
How to Assess (optional):Observe students using methods with parameters in the lab.Ask students probing questions, such as:
1. What is a parameter?2. What parameters are you using? What do they do?
Materials:● Projector showing teacher’s demonstration ● Computer with Java editor for each student● DyeHard Procedural API installed on each computer
Process:1. Discuss the work from the previous lab. Start a discussion about the code from previous
lab:a. Review: What does the code do?b. What DOESN’T it do that you want it to do?
2. Give a working definition of parameters
a. A parameter is considered as a variable in a method definition. An actual value that passed into a function as a parameter is called an argument.
b. Some methods will let you give them information (in the form of Integers, Strings, booleans, and other data types) and it will use that information to complete its task.
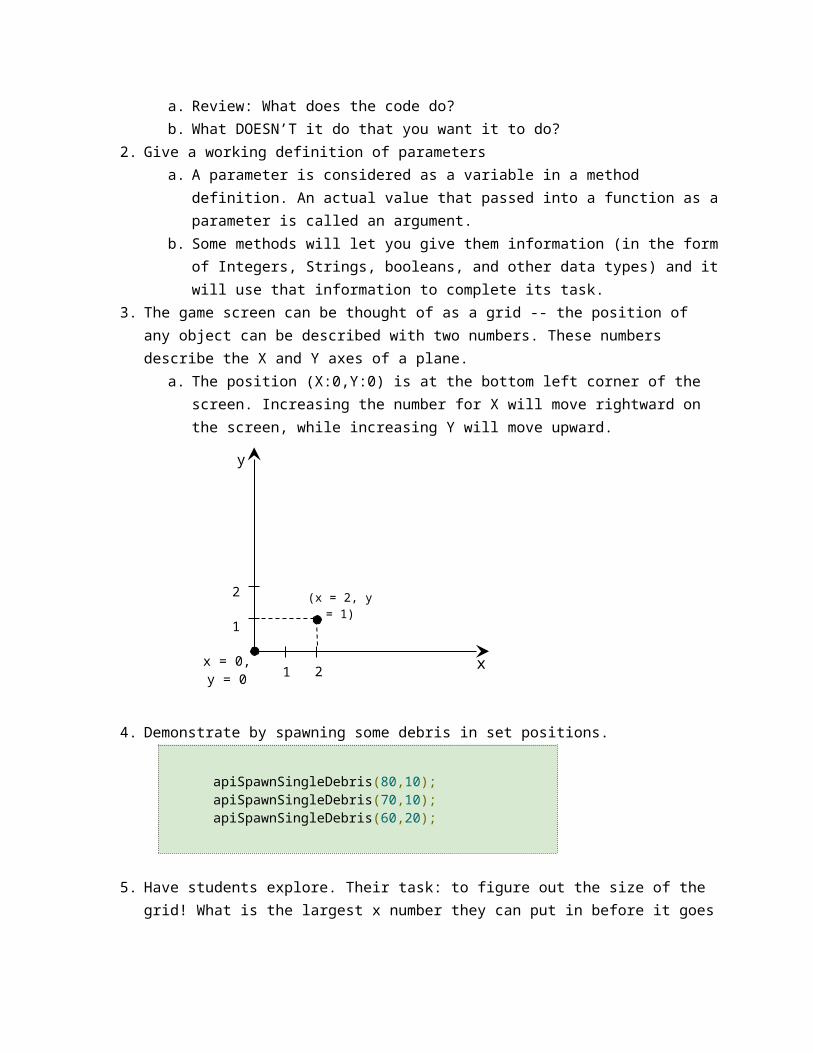
3. The game screen can be thought of as a grid -- the position of any object can be described with two numbers. These numbers describe the X and Y axes of a plane.
a. The position (X:0,Y:0) is at the bottom left corner of the screen. Increasing the number for X will move rightward on the screen, while increasing Y will move upward.
4. Demonstrate by spawning some debris in set positions.
apiSpawnSingleDebris(80,10);apiSpawnSingleDebris(70,10);apiSpawnSingleDebris(60,20);
5. Have students explore. Their task: to figure out the size of the grid! What is the largest x number they can put in before it goes off the screen (should be around 100)? What is the largest y number (should be around 60)?
6. Group discussiona. Have students share the numbers they got for the max values.
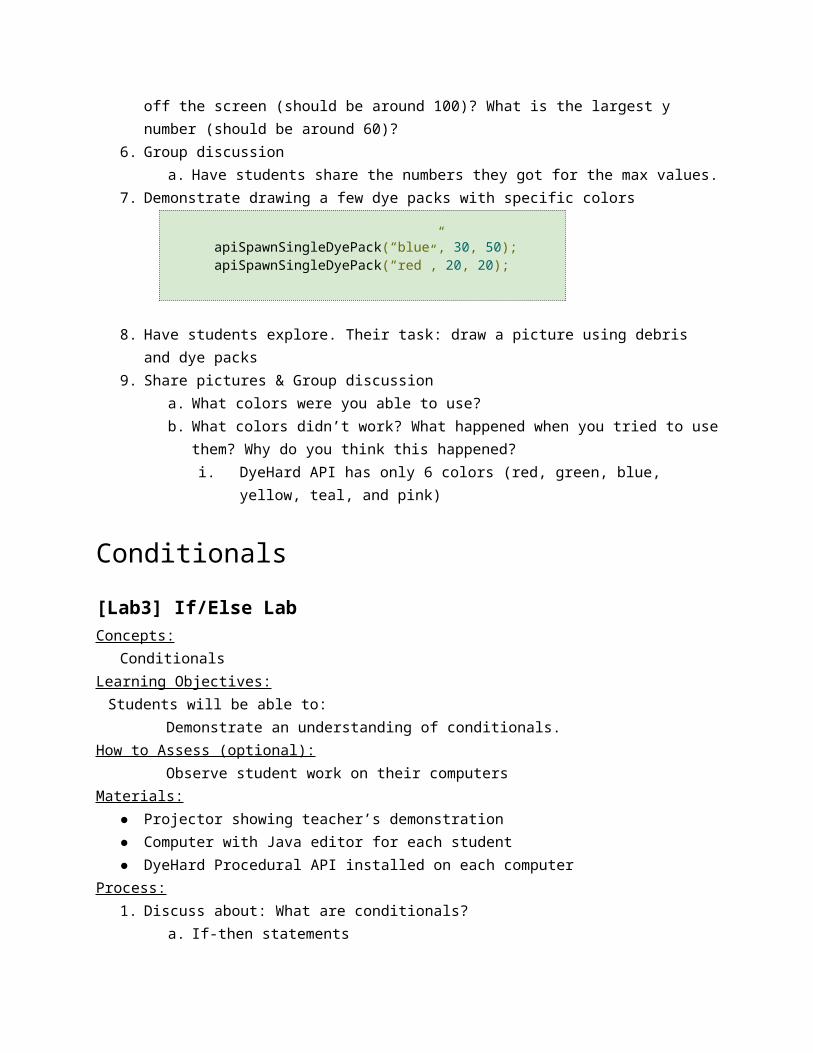
7. Demonstrate drawing a few dye packs with specific colors
apiSpawnSingleDyePack(“blue”, 30, 50);apiSpawnSingleDyePack(“red”, 20, 20);
8. Have students explore. Their task: draw a picture using debris and dye packs9. Share pictures & Group discussion
(x = 2, y = 1)
21
2
1
x
y
x = 0, y = 0
a. What colors were you able to use?b. What colors didn’t work? What happened when you tried to use them? Why do
you think this happened?i. DyeHard API has only 6 colors (red, green, blue, yellow, teal, and pink)
Conditionals
[Lab3] If/Else LabConcepts:
ConditionalsLearning Objectives:
Students will be able to: Demonstrate an understanding of conditionals.How to Assess (optional): Observe student work on their computersMaterials:
● Projector showing teacher’s demonstration ● Computer with Java editor for each student● DyeHard Procedural API installed on each computer
Process:1. Discuss about: What are conditionals?
a. If-then statementsb. Could also be if-then-else statementsc. Why might these be useful?
2. Inform them that they will be implementing if / else statements in their code today3. Now begin demonstration of how a conditional statement is written
a. Start in updateGame()b. Write “if(apiIsKeyboardButtonPressed(KeysEnum.UP))”
i. If statements always start with lowercase “ if ”, and followed by a pair of parentheses then a pair of curly bracket.
ii. The parentheses show what condition you are looking at with the if statement -- the IF part of an if statement
iii. apiIsKeyboardButtonPressed(KeysEnum.UP) is like asking “is UP arrow button on the keyboard is pressed?”. This means that the program is checking to see if the UP key on the keyboard is being pressed.
c. Place an open curly bracket under the if statement followed by a closing curly bracket
i. Between the curly brackets is where programmers put the THEN part of the if/then statement
d. Structure:
if( … ){ // the THEN part goes here}
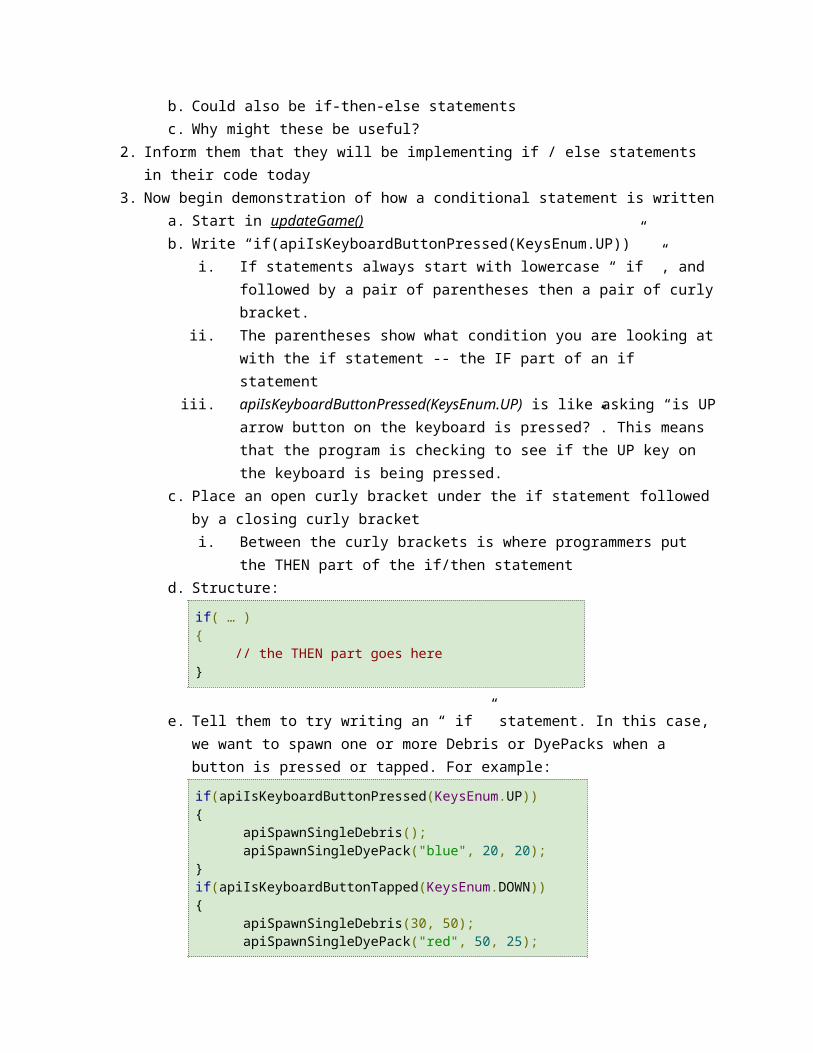
e. Tell them to try writing an “ if ” statement. In this case, we want to spawn one or more Debris or DyePacks when a button is pressed or tapped. For example:
if(apiIsKeyboardButtonPressed(KeysEnum.UP)){
apiSpawnSingleDebris();apiSpawnSingleDyePack("blue", 20, 20);
}if(apiIsKeyboardButtonTapped(KeysEnum.DOWN)){
apiSpawnSingleDebris(30, 50);apiSpawnSingleDyePack("red", 50, 25);
}
f. Then check if everyone completed the task and move on.
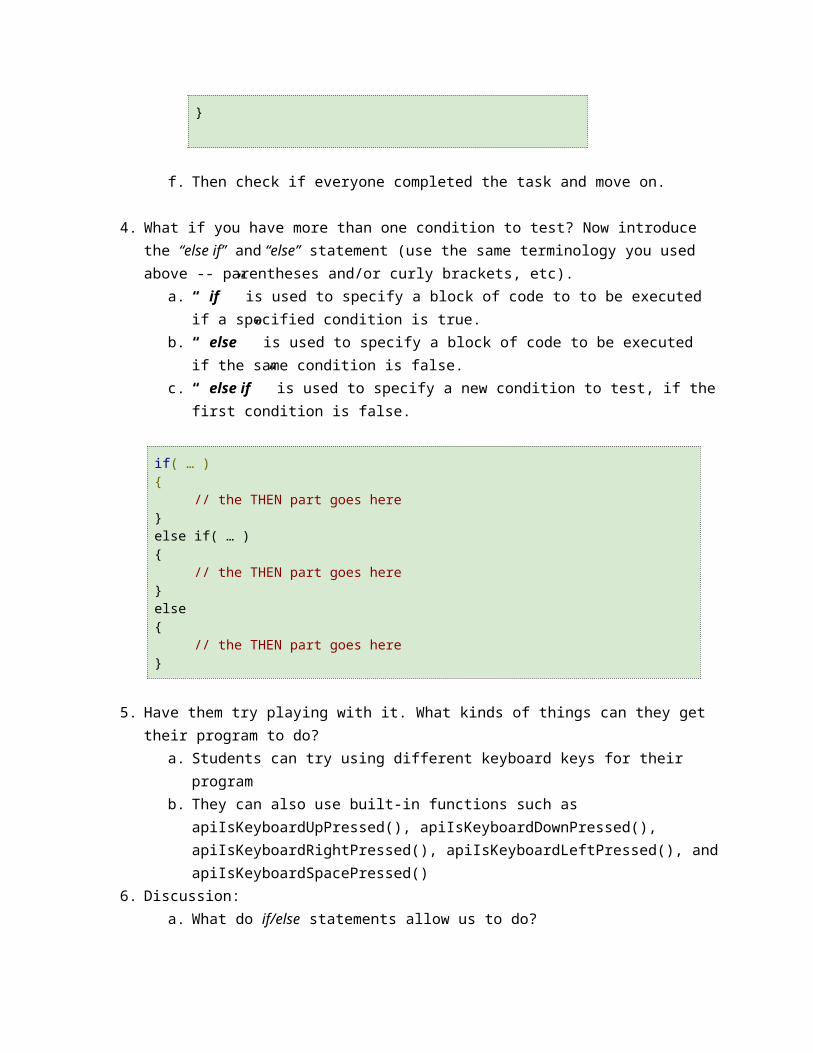
4. What if you have more than one condition to test? Now introduce the “else if” and “else” statement (use the same terminology you used above -- parentheses and/or curly brackets, etc).
a. “ if ” is used to specify a block of code to to be executed if a specified condition is true.
b. “ else ” is used to specify a block of code to be executed if the same condition is false.
c. “ else if ” is used to specify a new condition to test, if the first condition is false.
if( … ){ // the THEN part goes here}else if( … ){ // the THEN part goes here}else{ // the THEN part goes here}
5. Have them try playing with it. What kinds of things can they get their program to do?a. Students can try using different keyboard keys for their program
b. They can also use built-in functions such as apiIsKeyboardUpPressed(), apiIsKeyboardDownPressed(), apiIsKeyboardRightPressed(), apiIsKeyboardLeftPressed(), and apiIsKeyboardSpacePressed()
6. Discussion:a. What do if/else statements allow us to do?b. Is there anything that if/else statements can’t do -- do we need more than if/else
statements to make a game?
[Lab4] Variables: Declaration and AssignmentConcepts:
Variable declarations and assignmentsLearning Objectives:
Students will be able to:● Demonstrate an understanding of variable declarations● Move object along vertical and horizontal lines(x- or y-axis)
How to Assess (optional): Observe student work on their computersMaterials:
● Projector showing teacher’s demonstration ● Computer with Java editor for each student● DyeHard Procedural API installed on each computer● Graph paper and pencils for students (optional)
Process:1. Review about what the students have learned so far.
a. Method and parametersb. If/else statement
2. Discuss about variable declaration: a. What is a variable?
i. A variable is like a small container which store a data value.ii. In general, there are two types of variable, Local and Global. Today, we
are going to focus on global variable.b. How do we declare a variable?
i. State the type of the variable -- is it a number? Or could it be a letter? How about a word?
1. For true/false values, we use boolean2. For numbers, we want either int or float3. For letters and other symbols, we want char4. For words and phrases, we want String
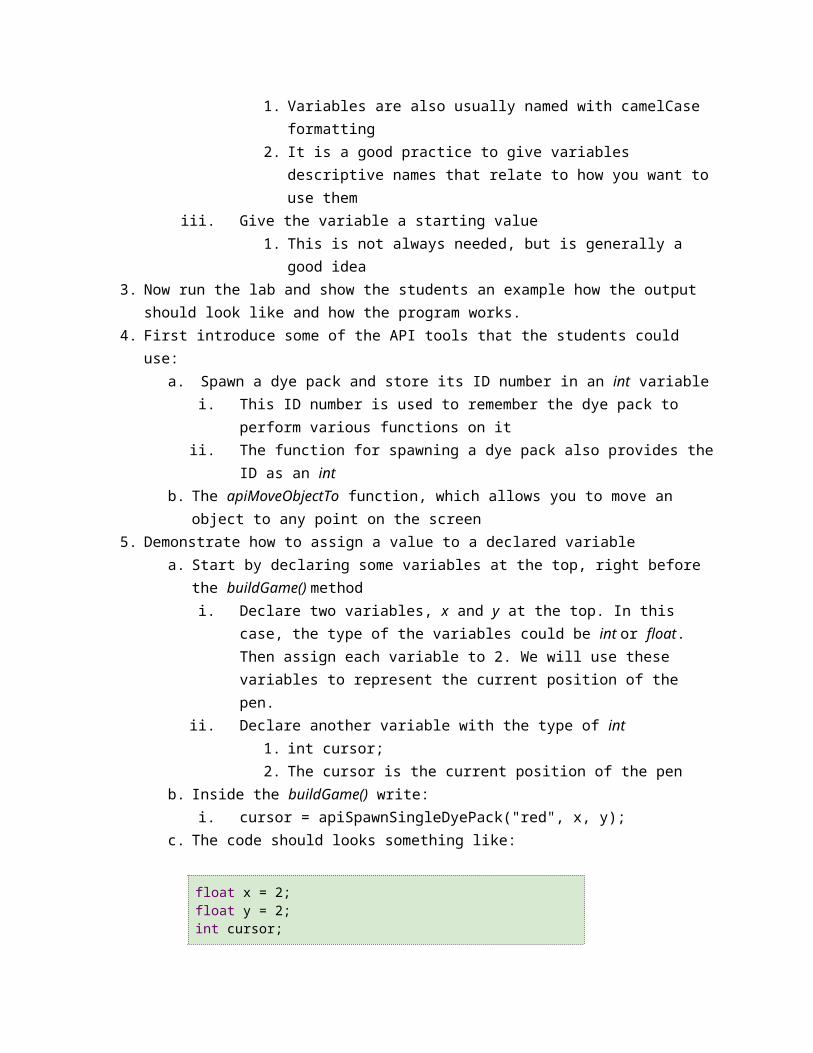
ii. After deciding on the type, you need to give the variable a name.1. Variables are also usually named with camelCase formatting2. It is a good practice to give variables descriptive names that relate
to how you want to use themiii. Give the variable a starting value
1. This is not always needed, but is generally a good idea
3. Now run the lab and show the students an example how the output should look like and how the program works.
4. First introduce some of the API tools that the students could use:a. Spawn a dye pack and store its ID number in an int variable
i. This ID number is used to remember the dye pack to perform various functions on it
ii. The function for spawning a dye pack also provides the ID as an intb. The apiMoveObjectTo function, which allows you to move an object to any point
on the screen5. Demonstrate how to assign a value to a declared variable
a. Start by declaring some variables at the top, right before the buildGame() methodi. Declare two variables, x and y at the top. In this case, the type of the
variables could be int or float. Then assign each variable to 2. We will use these variables to represent the current position of the pen.
ii. Declare another variable with the type of int1. int cursor;2. The cursor is the current position of the pen
b. Inside the buildGame() write:i. cursor = apiSpawnSingleDyePack("red", x, y);
c. The code should looks something like:
float x = 2;float y = 2;int cursor;…public void buildGame(){ cursor = apiSpawnSingleDyePack("red", x, y);}…
6. Similar to the previous lab, set up some if/else statements for controls with the addition of variable declarations
a. Write conditional statements of Up, down, left, and right inside the updateGame() method (since we need to check for the user inputs every time frame)
b. Inside these conditional statements, draw something as we move and demonstrate how to modify some numeric variables
i. Use the API spawning functions as ink to draw. In this case, 1. apiSpawnSingleDyePack(“blue”, x, y) (or with any
DyeHard color) ii. Incrementing and decrementing numeric variables. Addition and
subtraction symbols, as well as the assignment symbol1. x = x + 3; // adding to x represents positive horizontal
movement -- right2. x = x - 3; // reducing x represents leftward movement
3. y = y + 3; // adding to y indicates upward movement4. y = y - 3; // reducing y indicates downward movement
iii. Recall:
c. The code should look something like:
...
if(apiIsKeyboardButtonTapped(KeysEnum.UP)){// Place a dyepack as 'ink'apiSpawnSingleDyePack("blue", x, y);
// move the variable for the pen's position upwardy = y + 3;
}else if(...)){
...}// and so on
7. Now, we want to move the dye pack so add the this line after the end of the if/else blocka. apiMoveObjectTo(cursor, x, y);
i. This function looks at the dye pack indicated by the ID stored inside the “cursor” variable, and then moves it to horizontal position x, and vertical position y.
8. We are now able to move the cursor and create a trail of dye packs
[Lab5] Nested if/else statement (continue from lab4)Time: ~2 hoursConcepts:
Nested conditional logicLearning Objectives:
y+
y-
x+x-
x
y
x = 0, y = 0
Students will be able to: Demonstrate an understanding of nested if statementsHow to Assess (optional): Observe student work on their computersMaterials:
● Projector showing teacher’s demonstration ● Computer with Java editor for each student● DyeHard Procedural API installed on each computer● Graph paper and pencils for students (optional)● The final program from lab 4 as a starting point
Process:
1. Discussion: ask the studentsa. From the previous labs, everyone should know what is if/else statement. What if
we want to use “if/else” inside of an if/else statement? Is it possible to do that?b. Tell them, we called it nested if/else statement!
2. Inform the students that we will continue working from what we have done in the previous lab (lab4). So tell students to open their projects from the previous lab4 and save the project as lab5.
3. Also inform them that today, we are going to make a Drawing Pad!4. In this lab we need to introduce some new tools
a. The students will be making a new function, called paintDyePacki. Method declaration and implementation
b. The boolean negation symbol ‘ ! ’i. !true is equal to falseii. someBooleanVariable = !someBooleanVariable; // this
statement reverses the boolean value stored in someBooleanVariablec. Nested conditional statements
i. The nested if/else statement is created by placing if statements inside other if statements
ii. This technique allows for more advanced logic and more complex branching paths in the code
5. From the previous lab, we are able to draw as we move the cursor. What if want to move the cursor without drawing, so we can take the brush off the paper and draw two separate lines, instead of one continuous line
6. Now declare a boolean variable at the top, called drawMode and then initialize it to falsea. boolean drawMode = false;b. Inside the updateGame function, create an if statement which will switch the
drawMode variable between true and false as the user taps the space bar
if(apiIsKeyboardButtonTapped(KeysEnum.SPACE)){drawingMode = !drawingMode;
}

...
7. We are going to declare a new public method called paintDyePack which will not return anything (void)
a. Within the method, we begin by checking if the program is in drawing modeb. Then copy the if/else code block from the updateGame of lab4 and paste it inside
this if statement
. . .if(drawingMode){
if(apiIsKeyboardButtonTapped(KeysEnum.UP)){// Place a dyepack as 'ink'apiSpawnSingleDyePack("blue", x, y);
// move the variable for the pen's position upward
y = y + 3;}else if(...)){
...}// and so on
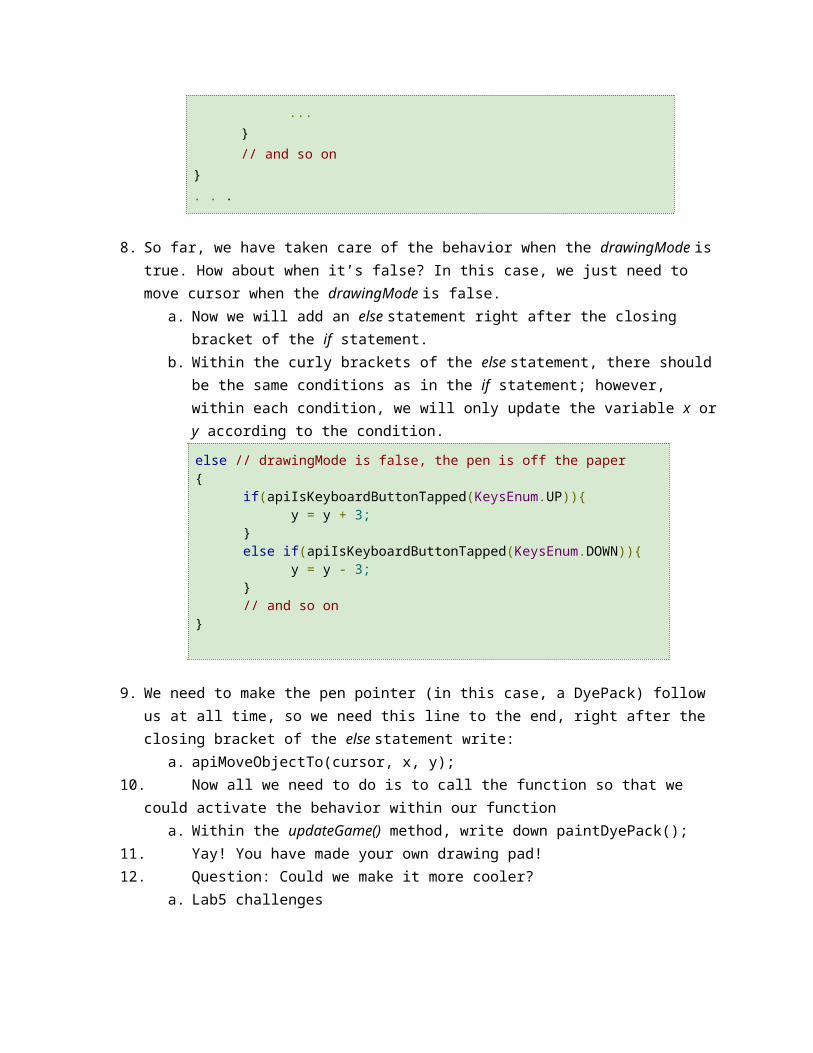
}. . .
8. So far, we have taken care of the behavior when the drawingMode is true. How about when it’s false? In this case, we just need to move cursor when the drawingMode is false.
a. Now we will add an else statement right after the closing bracket of the if statement.
b. Within the curly brackets of the else statement, there should be the same conditions as in the if statement; however, within each condition, we will only update the variable x or y according to the condition.
else // drawingMode is false, the pen is off the paper{
if(apiIsKeyboardButtonTapped(KeysEnum.UP)){y = y + 3;
}else if(apiIsKeyboardButtonTapped(KeysEnum.DOWN)){
y = y - 3;}// and so on
}
9. We need to make the pen pointer (in this case, a DyePack) follow us at all time, so we need this line to the end, right after the closing bracket of the else statement write:

a. apiMoveObjectTo(cursor, x, y);10. Now all we need to do is to call the function so that we could activate the behavior within
our functiona. Within the updateGame() method, write down paintDyePack();
11. Yay! You have made your own drawing pad! 12. Question: Could we make it more cooler?
a. Lab5 challenges
Lab5 Challenges1. Did you realized that the cursor seems to be behind when you move your cursor to a
place that is already drawn on? How could we fix this?a. Hint: apiAlwaysOnTop(int)
2. Have students write a new method which have similar behavior but different logic as the one they have implemented. Then add to the program so that user could switch between the two methods.
a. This time, call the method paintDebris and spawn Debris instead of DyePackb. Control idea:
i. Paint Debris instead of DyePack while the user hold the SHIFT key
Personalization
[Lab6] PersonalizationConcepts:
Replacing resource files
Learning Objectives:Students will be able to:
● Demonstrate an understanding of replacing files in the resource folder● Also demonstrate understanding of concepts covered throughout the week
How to Assess (optional): Observe student work on their computers
Materials:● Projector showing teacher’s demonstration ● Computer with Java editor for each student● DyeHard Procedural API installed on each computer● Lab5 program
Process:1. Begin by reviewing the programming concepts that we have covered so far
a. Methods (with and without parameter)
b. Variablesc. Conditionals and nested if/else
2. Inform the students that we are going to use our own graphics to replace the default game graphics.
3. Students could use their program from lab5 as a starting point. So let’s start by having the students open their Lab5 project and save the project as Lab6.
4. Have students find some png graphic files and put them on their computersa. They can use free clip arts from online, perhaps from: http://www.school-clip-
art.com/ or another age appropriate site b. Students can also produce their own graphics by using MS Paint or other image
editing software5. Demonstrate how to crop and resize images
a. The graphics should be no larger than 300 x 300b. The game engine will resize graphics to fit the size of the original objects
automatically6. If the students don’t have the graphics with the recommended sizes, they could use an
online editor, http://www197.lunapic.com/editor/ 7. Demonstrate where and how to create the resources folder
a. Navigate to the project folder and find the resources folder. If no “resources” folder exists already, create a new folder called, “resources”
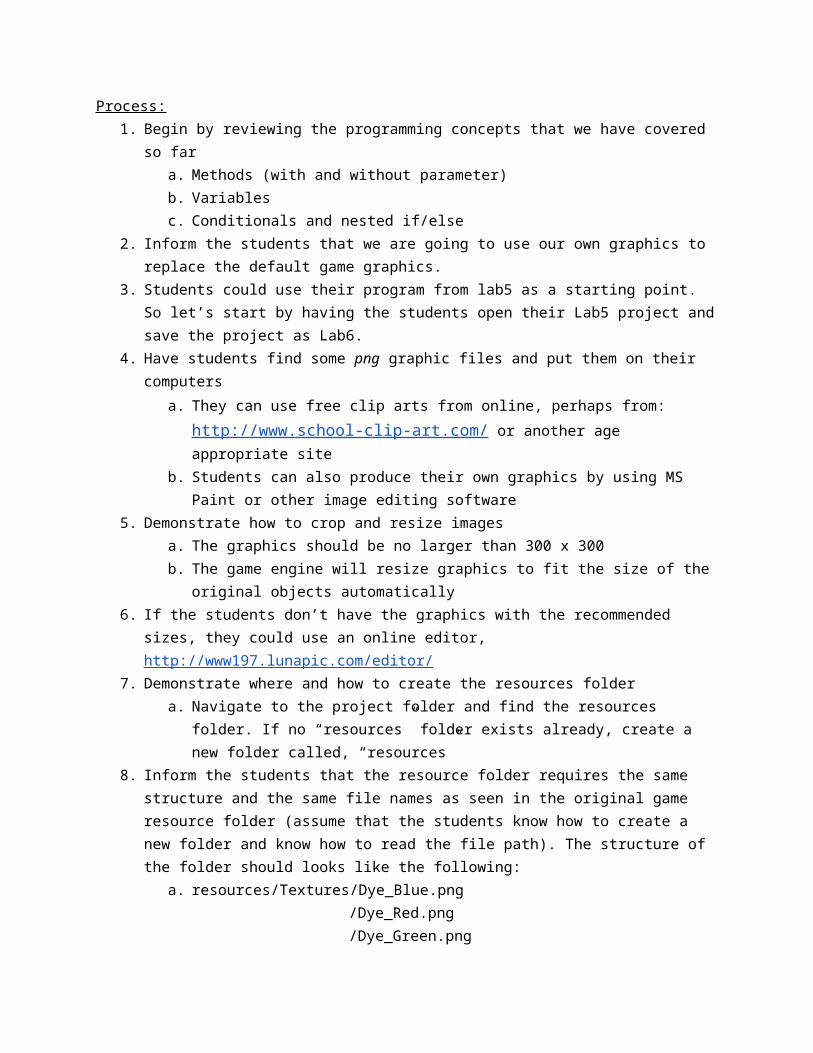
8. Inform the students that the resource folder requires the same structure and the same file names as seen in the original game resource folder (assume that the students know how to create a new folder and know how to read the file path). The structure of the folder should looks like the following:
a. resources/Textures/Dye_Blue.png /Dye_Red.png /Dye_Green.png /Dye_Yellow.png /Dye_Pink.png /Dye_Teal.png
b. resources/Textures/Debris/debris_01.png /debris_02.png
/debris_03.png9. It’s time to recompile and run the game
Lab6 Challenges1. Have the students make their own game using new graphics
a. Share some ideas. Some potential ideas include:i. Drawing a pictureii. Making a maze
Loops

[Lab7] For loopConcepts:
For loop logic
Learning Objectives:Students will be able to:
● Demonstrate an understanding of looping logic● Know how to use a for loop● Understand more on coordinate and grid system● Also demonstrate understanding of concepts covered throughout the week
How to Assess (optional): Observe student work on their computers
Materials:● Projector showing teacher’s demonstration ● Computer with Java editor for each student● DyeHard Procedural API installed on each computer● Graph paper and pencils for students (optional)
Process:1. Review discussion
a. How have we been creating objects so far?b. How many times did you have to write the spawn object functions?
2. Introduce for-loops to the studentsa. What are for-loops?
i. A feature of programming languages to facilitate repeating codeb. Why for-loops?
i. Requires less work for programmersii. Allows for unlimited repetition
c. What is the structure of a for-loop?i. A for-loop typically has a “for” keyword, a variable which initialize to a
start value, end value check, and incrementing number1. for ( variable_start_value; end_value_check;
incrementing_number){ . . . }
2. Make sure there is a semicolon between each statement inside the parentheses
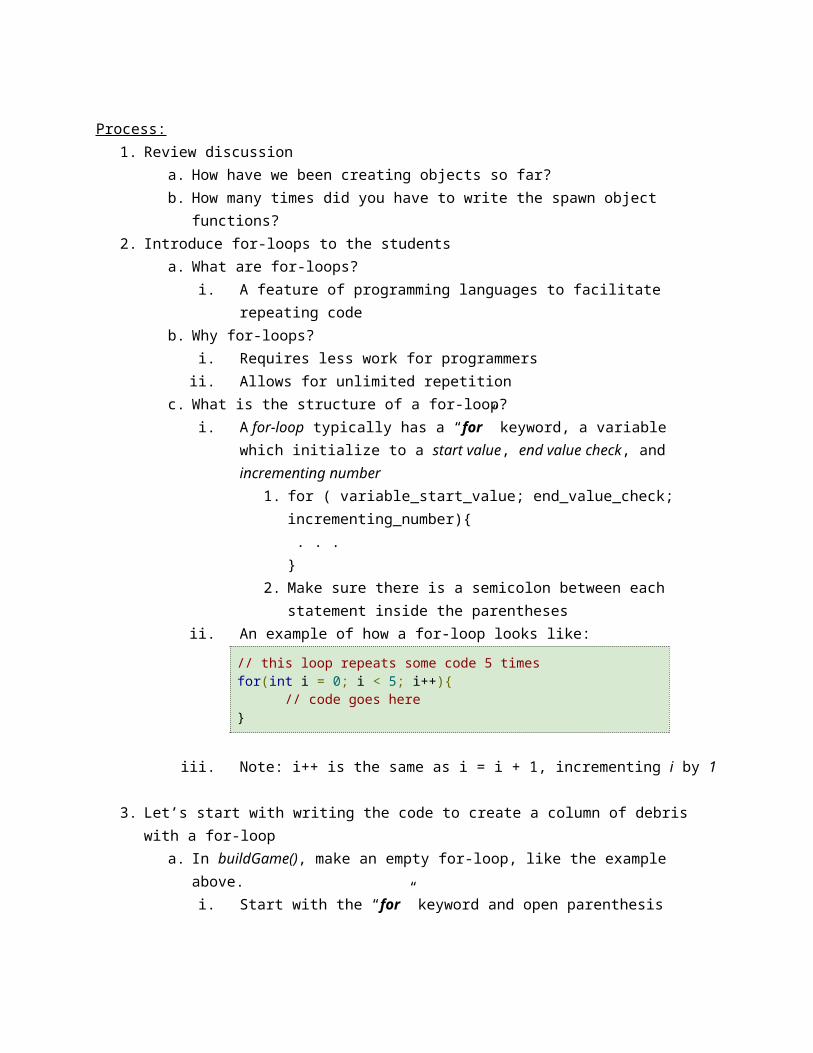
ii. An example of how a for-loop looks like:
// this loop repeats some code 5 timesfor(int i = 0; i < 5; i++){
// code goes here}
iii. Note: i++ is the same as i = i + 1, incrementing i by 1
3. Let’s start with writing the code to create a column of debris with a for-loopa. In buildGame(), make an empty for-loop, like the example above.
i. Start with the “for” keyword and open parenthesisii. Next, define the starting value by declaring a variable inside the
parentheses:1. int i = 0;
iii. Define the end value check1. i < 5;
iv. Finally, define what the loop should do when it reaches the end, this is normally used for changing the loop value
1. i = i + 1){
}b. We now have an empty loop, lets make it spawn some debris
i. Within the curly brackets of the loop, starting by declaring a variable that uses the loop value. Note: since this variable is within the for-loop scope, we called this a Local variable. This variable can only be accessed in the loop.
1. int y = i * 5;ii. Now, write a method call using the new variable
1. apiSpawnSingleDebris(50, y);c. Run the program and demonstrate that the loop has indeed created a column of
debris.d. Close the game window and return to the loop, this is a good time to slowly
review the flow of a for-loopi. First, the loop creates the variable of type int, “i” with the initial value of 0ii. Then it looks to see if i is less than 5
1. i = 0 so, 0 < 5, this is true, so the loop executes the code within itiii. The int y gets created
1. 0 * 5 = 0, so y is 0 in the first iterationiv. The debris function gets calledv. The end of the loop has been reached, time to go back to the top of the
loopvi. The loop runs, the value update
1. i = i + 1, so i becomes 1vii. Return to step ii, note that i has increased by 1viii. Cover the second iteration
1. Note that y has changed from the first iteration, because i has changed
ix. Have the students walk you through the third iteration
x. Skip to the end of the fifth iteration, five debris have been spawned so far, and i is equal to 4
1. The value update runs, i = i +1, 4 +1 = 5 so i is now 52. The end value check runs, i is equal to 5, this means i < 5 is false,
so the loop ends entirely4. Now, let the students create a row of debris (students could place the row wherever they
want) a. Creating a row is the same idea as column except, instead of changing the y
position, we change the x position every iteration5. Then, give students a task to make a simple maze using some more for-loops (using the
row and column concepts). Provide them time to experiment.a. The best formula to define a line with a for loop looks like this
i. int y = 20 + i * 5;1. y is the coordinate value you want to define2. 20 is the starting value of the coordinate3. i is the loop value4. 5 is the step size
ii. This example creates a line starting from height 20, taking upward steps of size 5
b. The students can use the following function in updateGame() to move the hero around the maze
i. apiObjectFollowTheMouse(heroID);ii. Remember how to store an ID in a variable in buildGame()
1. heroID = apiStartHero();6. Discuss:
a. If you were to write this code without using the for-loops, how many lines of code do you think you would need to write?
b. What else could you do with for-loops?c. How would you create a diagonal line with a for loop?
[Lab8] Nested For-loopConcepts:
Nested for-loop logic
Learning Objectives:Students will be able to:
● Demonstrate an understanding of nested looping logic.● More practice on coordinate system and grid system (row and column in programming)● Also demonstrate understanding of concepts covered throughout the week
How to Assess (optional): Observe student work on their computers
Materials:● Projector showing teacher’s demonstration ● Computer with Java editor for each student● DyeHard Procedural API installed on each computer● Graph paper and pencils for students (optional)
Process:1. Discussion:
a. What does a for-loop do? What is the structure of the for-loop?b. What is the best way to draw a line with a for-loop? Declare a local variable...
i. int y = 20 + i * 5;1. y is the coordinate value you want to define2. 20 is the starting value of the coordinate3. i is the loop value4. 5 is the step size
c. Could we draw a square block of objects using only a block of for-loop?2. By this time, students should have a good understanding of coordinate system. Inform
students that today, we are going to learn a for-loop inside a for-loop, also known as Nested loops.
a. Then show students the output of the lab8 and tell them that we are going to draw an American flag using nested for-loops. (Note: students could draw anything they want as long as they are using nested for-loops)
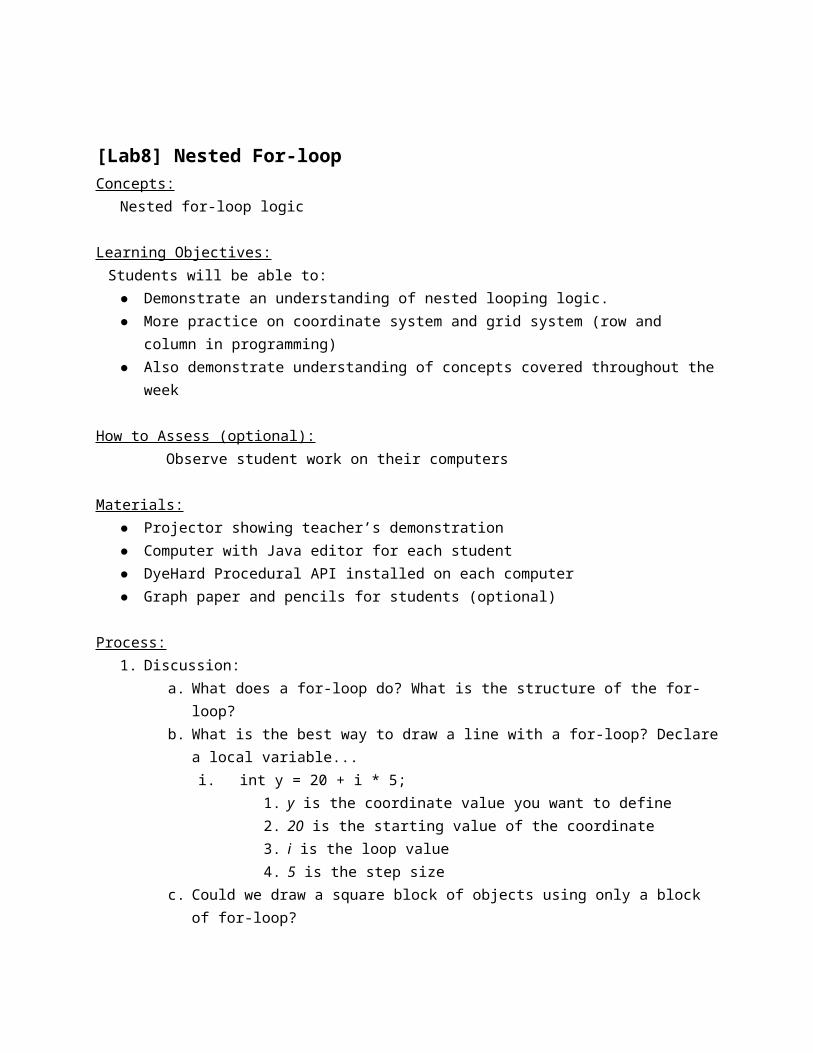
3. We are going to begin with drawing a 7 x 7 square block of blue DyePack. Start by creating a for-loop, and within the curly bracket of the for-loop, write another for-loop (an empty loop, for now)
a. To make it easier to understand, we are going to name the variables of the loops as row and column. We will name the outer for-loop variable to “row” and the inner for-loop variable to “col”. The start value for these outer and inner loops will be 0.
b. Within the curly brackets of the inner loop, declare two variablesi. int x = 20 + col * 3;ii. int y = 35 + col * 3;iii. The 20 and 35 are the x and y positions of the first DyePack. These
position will be incrementing by 3 every round of the loopc. Now we got the point of where we want to start placing the DyePack. So right
below the two variables, we are going to create a DyePacki. apiSpawnSingleDyePack(“blue”, x, y);ii. This line will also be ran every round of the loop
d. The code should looks like:
for(int row = 0; row < 7; row++){for(int col = 0; col < 7; col++){
int x = 20 + col * 3;int y = 35 + row * 3;
apiSpawnSingleDyePack("blue", x, y);}
}
e. Now we have a block of blue DyePack, which represents the blue background of
the stars on the American flag:
4. The next step is to draw the stars. Since we don’t have an actual star shape and the white color, we will use Teal color DyePack instead. One possible way to draw the stars is to use 2 sets of nested for-loops. One nested loops is to draw a 3 x 3 matrix, and another set is to draw a 2 x 2 matrix.
a. The method to draw the stars is similar to how we draw the blue background of the stars, accept with different number of items to draw, starting points, and step size. The DyePack to spawn is teal.
b. The first nested for-loop is for drawing a 3 x 3 matrix, so the numbers of rows and columns (number of items to draw) are 3. The starting point for x-coordinate is 23 and for y-coordinate is 38. Both x and y have the step of 6 units.
c. The second nested for-loop is for drawing a 2 x 2 matrix, so the numbers of rows and columns are 2. The starting point for x-coordinate is 26 and for y-coordinate
is 41. Both x and y also have the step of 6 units.
5. The next step for today class is to draw the upper part of the red and white (in this case, teal) stripes. To draw those stripes, we also need to have 2 sets of nested for-loop. One set is for the red stripes, and another set is for teal stripes.
a. For the red stripes, we need to have 4 rows and about 15 columns. The start point for x-coordinate is 41 with the step size of 3. And the start point for y-coordinate is 35 with the step size of 6. The code should look like:
for(int row = 0; row < 4; row++){for(int col = 0; col < 15; col++){
int x = 41 + col * 3;int y = 38 + row * 6;
apiSpawnSingleDyePack("teal", x, y);}
}
b. The nested loop for teal stripes is also similar to the nested loop used to draw the red stripes, accept this time we will have 3 rows and 15 columns, and the start point for y-coordinate is 38 with the step size of 6.
c. The result should look something like:
6. Now students should have a good understanding of how nested for-loops work. Now let them finished the last part of the flag which is the lower part of the red and teal stripes, with the following information:
a. There are also 2 sets of nested for-loops.b. There are 3 rows, 22 columns, and start point for x-coordinate is 20 for both setsc. The start point for y-coordinate for the first set is 17, and 20 for the second one.
7. Now each student have a complete drawing of the American flag on their computer screen. See if they could draw something else with all programming concepts that they have learned so far.
[Lab9] For-loop/Nested For-loop With ConditionConcepts:
Condition within loop
Learning Objectives:Students will be able to:
● Demonstrate an understanding of nested looping with condition.● Also demonstrate understanding of concepts covered throughout the week
How to Assess (optional): Observe student work on their computers
Materials:● Projector showing teacher’s demonstration ● Computer with Java editor for each student● DyeHard Procedural API installed on each computer● A generated Java doc file which contains a list of all the procedural functions and
description
Process:

1. In this lab, students will learn about loops with condition, by demonstrating how to handle collisions in the DyeHard game. The students should have a good understanding of nested loops and conditions; therefore, this concept should be straightforward.
2. Before starting to code, let’s introduce to students some functions from DyeHard procedural API, that can be used in the loop
Functions Description
apiObjectCount() Get the number of the total objects in play
apiGetID(int index) Get the ID number of a registered object
apiGetType(int ID) Get the main type of the object
apiGetSubtype(int ID) Get the subtype of the object
apiColliding(int ID1, int ID2)
Check if the ID1 object is colliding with ID2 object
3. Inform them that there’s a complete list of all the procedural functions (generated Java doc) they could use as a reference.
4. Let’s start by having each students look at the list of functions and start building their own game world. For example, having a hero, spawning some enemies, DyePacks, PowerUps, ability to fire the paint and so on.
5. Have you or the students realized that the all collisions happened in the game are being handled by default. Ask students,
a. What if we want to something different happens (other than the default behavior) when an object is colliding with another object?
b. What if we want to just destroy enemy when it touches the fired paint?c. What if we want an enemy to shift further away from the Hero when the hero fired
at it?d. In this case, we will use loop with condition to take care of any collisions.
6. One of the possible way to set the custom behavior for the colliding objects is by using nested for-loops, and within the nested loops, we will need to:
a. First, check if the two objects are colliding to each other by using apiColliding(int ID1, int ID2)
b. Then, check which object is colliding with which, by using apiGetType(int ID) or apiGetSubtype(int ID).
c. The type or subtype of objects could be checked based on the String name of the object in this list: http://tinyurl.com/Dyehard-ObjectTypeList
7. Let’s write the code! Assume students already have their game world built. Within the updateGame() function of the game, continue from the last line of that function:
a. let’s create a for-loop using the function apiObjectCount() as the condition of the loop. Then create 3 variables which will store some data such as ID number, type, and subtype of the first object:
for(int i = 0; i < apiObjectCount(); i++){int firstID = apiGetID(i);
String firstType = apiGetType(firstID);String firstSubtype = apiGetSubtype(firstID);
. . .
}
b. Within the loop, on the next blank line, similar to the outer loops, we will create another for loops and 3 variables (secondID, secondType, secondSubtype) which will store some data for the second object.
c. Now we have a nested for-loop which go through every two objects in the play. 8. Now we need to check if any two specific objects are colliding to each other and then
apply a custom behavior to those objects when collision happened. This could be done by adding conditions within the nested loop:
a. On the next blank line, within the inner loop, write a condition that would check if object1 is colliding with object2:
i. if (apiColliding(firstID, secondID)){ . . . } This line check if the firstID object is colliding with secondID object; however, it does not tell the type or subtype of those two objects.
ii. So the next step is to check what are the two types or subtypes of the objects that are colliding. For example, if you want to apply a custom behavior when the Bullet hit the Enemy, how would you do that?
b. Within the if condition, write a sub condition to check if the object type Bullet is collided with the object type Enemy:
i. if (firstType == "Bullet" && secondType == "Enemy"){ . . . }
ii. Now students could apply custom behaviors when the bullets hit the enemies by adding any behavior they would like within the (inner) if statement.
iii. For example, when the bullet hit the enemy, the bullet and the enemy could be:
1. destroyed ( apiDestroy(int ID) ),2. shifted ( apiMoveObject(int ID, double deltaX,
double deltaY) ) [delta = the difference or change in a certain quantity],3. moved ( apiMoveObjectTo(int ID, double x, double
y) ),4. Etc.
9. What if we want to destroy only the specific type (subtype) of enemy? Then we will need to add another layer of if/else statement, within the inner if statement we have so far.
. . .
if (secondSubtype == "Charger"){
// custom behavior... } else{
if (firstSubtype == "Blue"){
// custom behavior...}// custom behavior...
}
. . .
10. Provide time for students to work on this. Students could refer to generated Java Doc for more possible behaviors.


![The Cross Cascade Pipeline: A more efficient, more ... · OLYMPIC’S OPENING STATEMENT - 1 [/OPL.DOC] 4/21/99 The Cross Cascade Pipeline: A more efficient, more reliable and environmentally](https://img.pdfslide.net/doc/110x75/5b6215e37f8b9a54488d0d08/the-cross-cascade-pipeline-a-more-efficient-more-olympics-opening-statement.jpg)