Embed Size (px)
Citation preview

Microsoft Visual Basic 2012
CHAPTER THREE
Program Design and Coding

3
Chapter 3: Program Design and Coding 2
Objectives
►Change the color properties of an object►Add images to a PictureBox object►Locate and save an image from the World Wide
Web►Import an image into the Program Resources
folder►Size an image

3
Chapter 3: Program Design and Coding 3
Objectives
►Set the Visible property in the Properties window►Set the Enabled property in the Properties
window►Run a Visual Basic 2012 program►Enter Visual Basic 2012 code►Understand Visual Basic 2012 code statement
formats

3
Chapter 3: Program Design and Coding 4
Objectives
►Use IntelliSense to enter Visual Basic 2012 code statements
►Use code to set the Visible property of an object►Use code to set the Enabled property of an object►Enter comments in Visual Basic 2012 code

3
Chapter 3: Program Design and Coding 5
Objectives
►Correct errors in Visual Basic 2012 code►Write code to use the Close() procedure►Print code►Prepare an event planning document

3
Chapter 3: Program Design and Coding 6
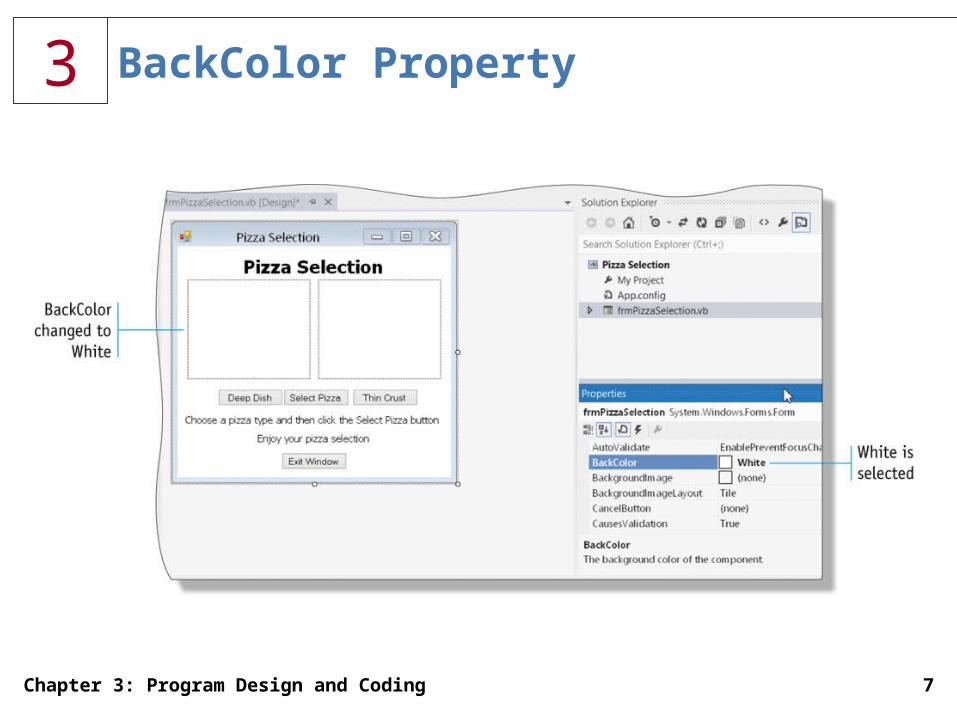
BackColor and ForeColor Properties
►Tap or click the Windows Form object to select it►If necessary, scroll in the Properties window until
the BackColor property is displayed, and then tap or click the right column of the BackColor property
►Tap or click the BackColor arrow. Then, tap or click the Web tab to display the Web tabbed page
►Scroll to display the color you wish to apply►Tap or click the color you wish to apply on the
color list
3
Chapter 3: Program Design and Coding 7
BackColor Property

3
Chapter 3: Program Design and Coding 8
Locating and Saving an Image from the World Wide Web
►Open your Web browser and navigate to the webpage containing the image you want to save.
►Press and hold or right-click the image, tap or click Save Picture As, and then navigate to the location on your computer where you store downloaded files
►Click the Save button to save the image

3
Chapter 3: Program Design and Coding 9
Locating and Saving an Image from the World Wide Web
3
Chapter 3: Program Design and Coding 10
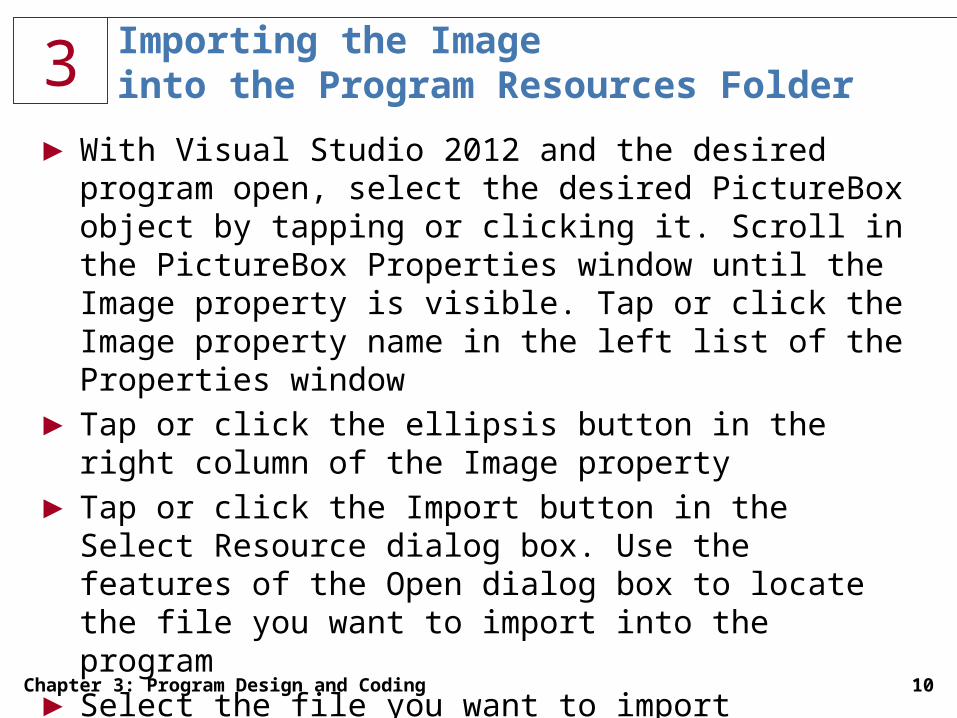
Importing the Image into the Program Resources Folder
►With Visual Studio 2012 and the desired program open, select the desired PictureBox object by tapping or clicking it. Scroll in the PictureBox Properties window until the Image property is visible. Tap or click the Image property name in the left list of the Properties window
►Tap or click the ellipsis button in the right column of the Image property
►Tap or click the Import button in the Select Resource dialog box. Use the features of the Open dialog box to locate the file you want to import into the program
►Select the file you want to import

3
Chapter 3: Program Design and Coding 11
Importing the Image into the Program Resources Folder
►Tap or click the Open button in the Open dialog box
►Tap or click the OK button in the Select Resource dialog box

3
Chapter 3: Program Design and Coding 12
Sizing an Image
►Select the PictureBox object to resize, and then scroll in the Properties window until you see the SizeMode property. Tap or click the SizeMode property name in the left column, and then tap or click the SizeMode arrow in the right column of the SizeMode property
►Tap or click StretchImage in the SizeMode list

3
Chapter 3: Program Design and Coding 13
Sizing an Image

3
Chapter 3: Program Design and Coding 14
Visible Property
►Select the desired PictureBox object. Scroll in the Properties window until the Visible property is displayed. Tap or click the Visible property name in the left column, and then tap or click the Visible arrow in the right column of the Visible property
►Tap or click False on the Visible property list

3
Chapter 3: Program Design and Coding 15
Visible Property

3
Chapter 3: Program Design and Coding 16
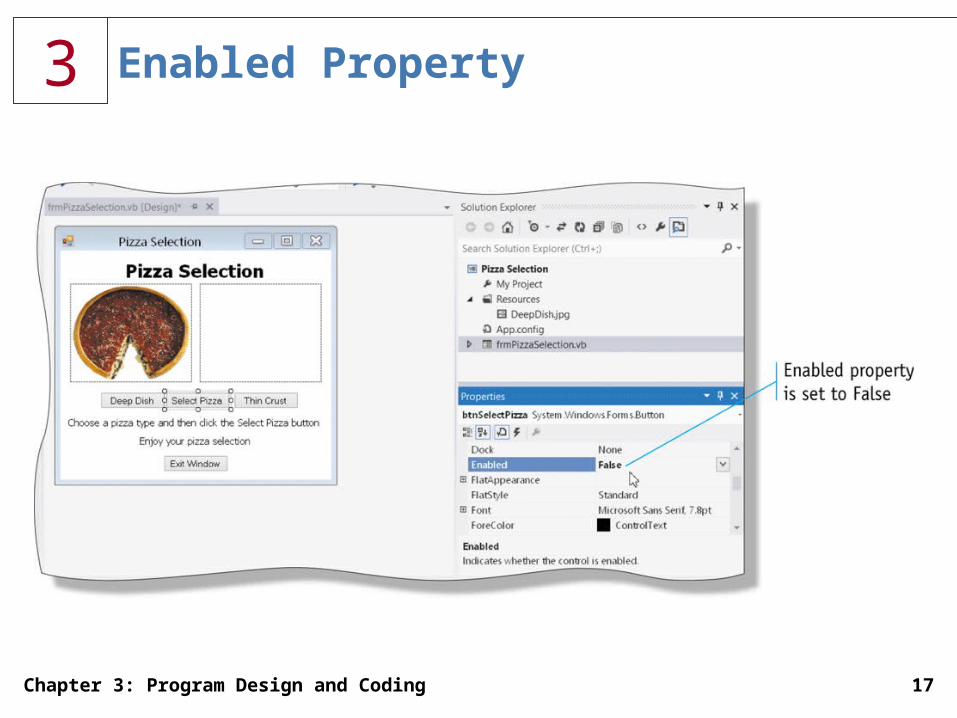
Enabled Property
►Select the desired object. Scroll in the Properties window until the Enabled property is displayed. Tap or click the Enabled property name in the left column, and then tap or click the Enabled arrow in the right column of the Enabled property
►Tap or click False on the Enabled property list
3
Chapter 3: Program Design and Coding 17
Enabled Property

3
Chapter 3: Program Design and Coding 18
Running a Program
►Point to the Start Debugging button on the Standard toolbar
►Tap or click the Start Debugging button on the Standard toolbar

3
Chapter 3: Program Design and Coding 19
Entering Visual Basic Code for Event Handling
►With Visual Studio 2012 and the desired program open and the [Design] tabbed window visible, point to the desired button object in the Windows Form object
►Double-click the button object

3
Chapter 3: Program Design and Coding 20
Entering Visual Basic Code for Event Handling

3
Chapter 3: Program Design and Coding 21
Visual Basic 2012 Coding Statements
►The Visual Basic syntax specifies how each statement must be written
►When the user taps or clicks a button while the program is running, an action associated with the coding statement will occur

3
Chapter 3: Program Design and Coding 22
General Format of a Visual Basic Statement

3
Chapter 3: Program Design and Coding 23
IntelliSense
►IntelliSense displays all allowable entries you can make in a Visual Basic statement each time a dot (period), equal sign, or other special character required for the statement is typed

3
Chapter 3: Program Design and Coding 24
Entering a Visual Basic Statement
►With the code window open and the insertion point positioned where you want to insert the code, type pic followed by a period
►To identify the correct entry, type its next letter until the entry is selected
►When IntelliSense highlights the correct object name, press the key corresponding to the entry that is to follow the object name. In this case, press the PERIOD key
►As with the object name in the second step, the next step is to enter one or more characters until IntelliSense highlights the desired property in the list. Type the letter v for the Visible property
3
Chapter 3: Program Design and Coding 25
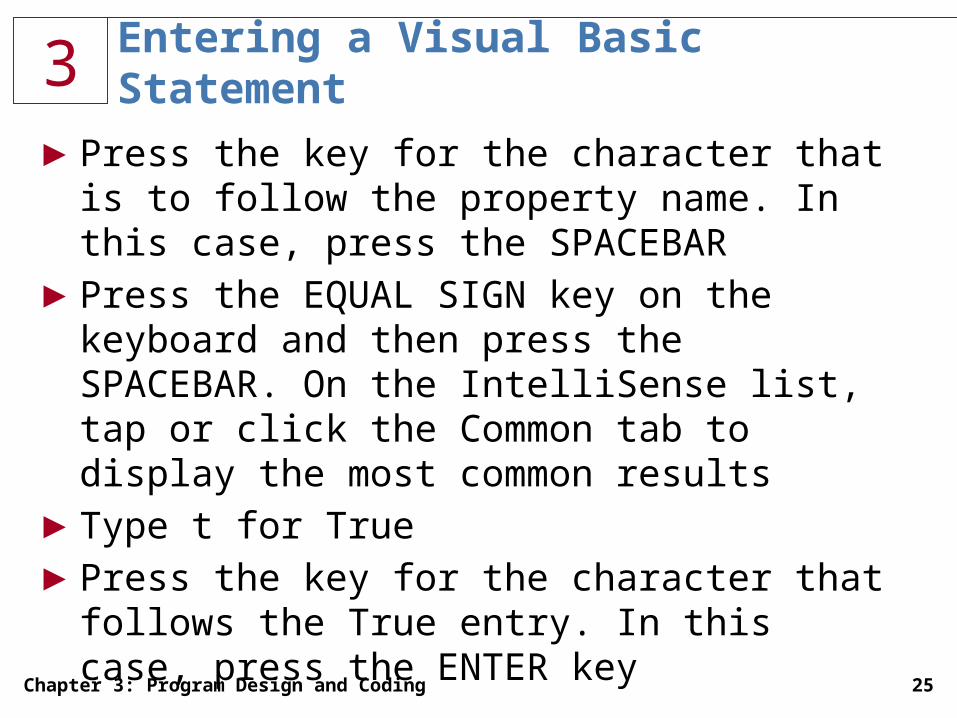
Entering a Visual Basic Statement
►Press the key for the character that is to follow the property name. In this case, press the SPACEBAR
►Press the EQUAL SIGN key on the keyboard and then press the SPACEBAR. On the IntelliSense list, tap or click the Common tab to display the most common results
►Type t for True►Press the key for the character that follows the
True entry. In this case, press the ENTER key

3
Chapter 3: Program Design and Coding 26
Entering a Visual Basic Statement

3
Chapter 3: Program Design and Coding 27
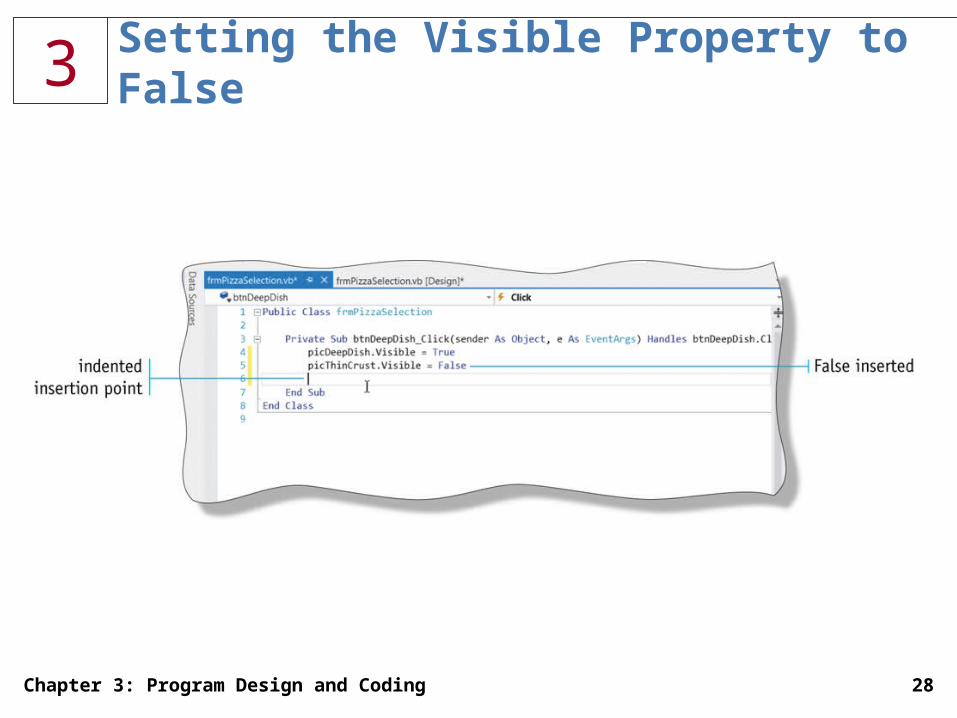
Setting the Visible Property to False
►With the insertion point in the desired location, type pic
►Type the next letter for the button name►Press the key for the character that is to follow
the object name. In this case, press the PERIOD key
►Press the SPACEBAR, press the EQUAL SIGN key, and then press the SPACEBAR
►Type f and then press the ENTER key
3
Chapter 3: Program Design and Coding 28
Setting the Visible Property to False

3
Chapter 3: Program Design and Coding 29
Enabled Property
►Type btn to display the IntelliSense list►Type additional characters in the button name
until IntelliSense highlights the desired entry in the list
►Type a period, type e, press the SPACEBAR, press the EQUAL SIGN key, press the SPACEBAR again, and then type t to select True in the IntelliSense list
►Press the ENTER key to enter the completed statement and place the insertion point on the next line

3
Chapter 3: Program Design and Coding 30
Enabled Property

3
Chapter 3: Program Design and Coding 31
Comments in Program Statements
►To insert a blank line following the event code generated by Visual Studio that begins with the word, Private, tap or click anywhere in that line and then press the END
►Press the ENTER key►Type the first line of the comments, beginning
with an apostrophe, and then press the ENTER key

3
Chapter 3: Program Design and Coding 32
Comments in Program Statements

3
Chapter 3: Program Design and Coding 33
Same Line Comments

3
Chapter 3: Program Design and Coding 34
Introductory Comments
►Tap or click to the left of the word, Public, on line 1 in the program to place the insertion point on that line
►Press the ENTER key and then press the UP ARROW key
►Type an apostrophe, a space, the text Program Name: and then press the TAB key one time
►Type the program name and then press the ENTER key

3
Chapter 3: Program Design and Coding 35
Introductory Comments

3
Chapter 3: Program Design and Coding 36
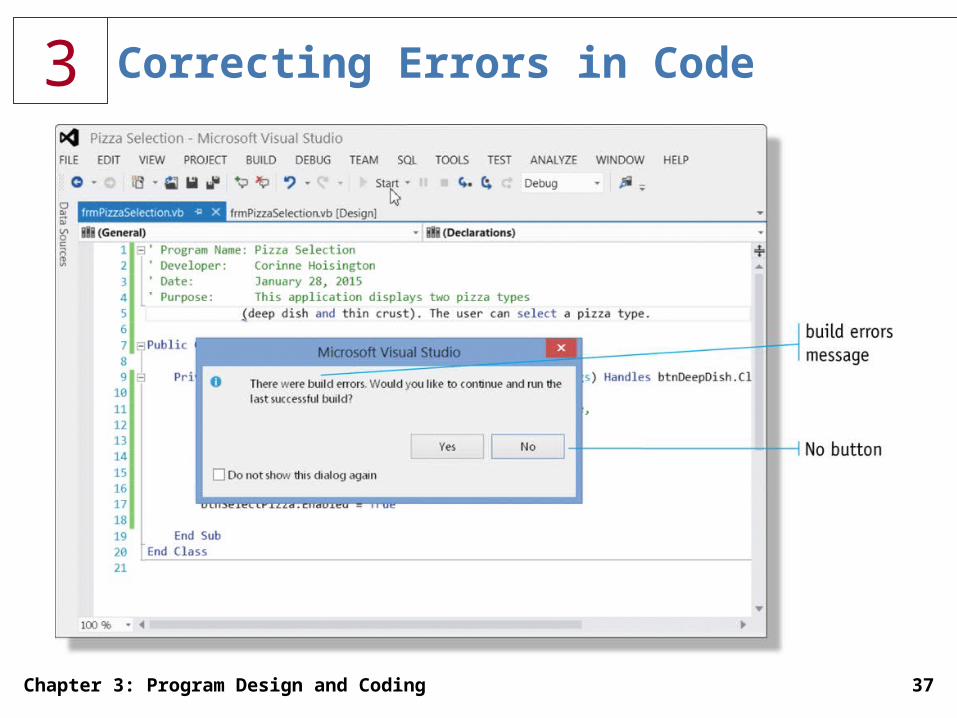
Correcting Errors in Code
►Using IntelliSense to help you enter code reduces the likelihood of coding errors considerably• One possible error would be to forget an
apostrophe in a comment statement►A build errors message means the Visual Basic
compiler detected a coding error in the program
3
Chapter 3: Program Design and Coding 37
Correcting Errors in Code

3
Chapter 3: Program Design and Coding 38
Correcting Errors in Code
►Tap or click the No button in the Microsoft Visual Studio dialog box that informs you of a build error
►Double-click anywhere on the error line►Tap or click in the leftmost column on the line
containing the error to place the insertion point at that location
►Type an apostrophe►Click anywhere in the code editing window

3
Chapter 3: Program Design and Coding 39
Correcting Errors in Code

3
Chapter 3: Program Design and Coding 40
Additional Tap or Click Events
►On the [Design] tabbed page, double-click the Exit Window Button object
3
Chapter 3: Program Design and Coding 41
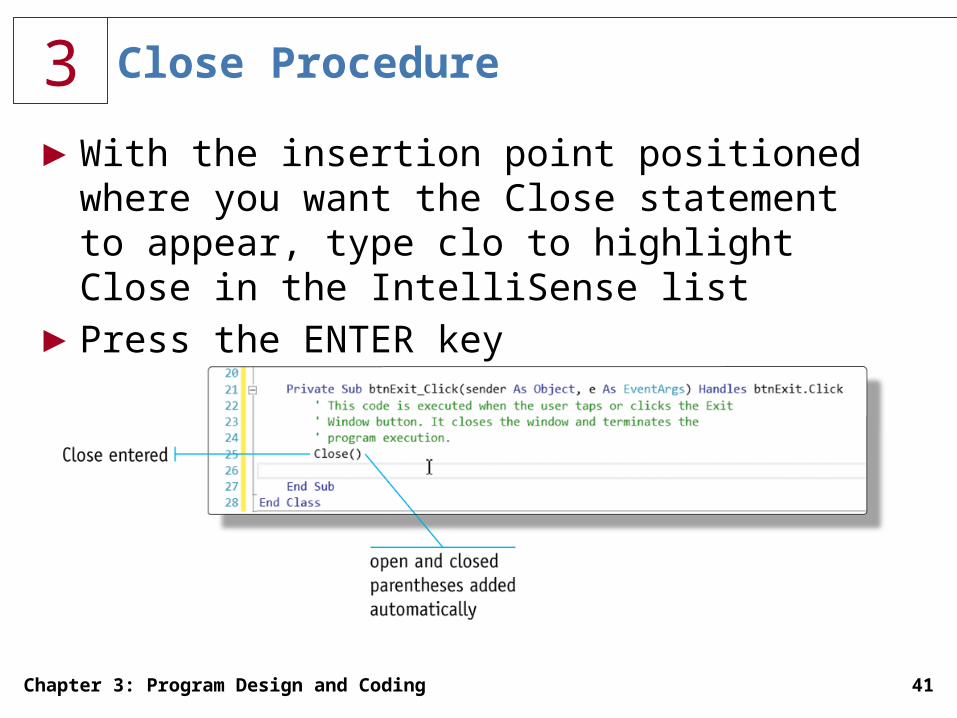
Close Procedure
►With the insertion point positioned where you want the Close statement to appear, type clo to highlight Close in the IntelliSense list
►Press the ENTER key

3
Chapter 3: Program Design and Coding 42
Printing Code
►Tap or click FILE on the menu bar to display the File menu
►Tap or click Print on the FILE menu to display the Print dialog box
►Ensure that a check mark appears in the Include line numbers check box if you want line numbers on your printout. Most developers prefer line numbers on printouts
►Make any other needed selections in the Print dialog box
►Tap or click the OK button in the Print dialog box to print the code

3
Chapter 3: Program Design and Coding 43
Event Planning Document

3
Chapter 3: Program Design and Coding 44
Phase 4 – Code the Program
►After the events and tasks within the events have been identified, the developer is ready to code the program• Entering Visual Basic statements to accomplish
the tasks specified on the event planning document
►Developer enters the code and implements the logic

3
Chapter 3: Program Design and Coding 45
Summary
►Change the color properties of an object►Add images to a PictureBox object►Locate and save an image from the World Wide
Web►Import an image into the Program Resources
folder►Size an image

3
Chapter 3: Program Design and Coding 46
Summary
►Set the Visible property in the Properties window►Set the Enabled property in the Properties
window►Run a Visual Basic 2012 program►Enter Visual Basic 2012 code►Understand Visual Basic 2012 code statement
formats

3
Chapter 3: Program Design and Coding 47
Summary
►Use IntelliSense to enter Visual Basic 2012 code statements
►Use code to set the Visible property of an object►Use code to set the Enabled property of an object►Enter comments in Visual Basic 2012 code

3
Chapter 3: Program Design and Coding 48
Summary
►Correct errors in Visual Basic 2012 code►Write code to use the Close() procedure►Print code►Prepare an event planning document

Microsoft Visual Basic 2012
CHAPTER THREE COMPLETE
Program Design and Coding