Embed Size (px)
Citation preview
Mini-Lessons: The First 30 Days of Writer’s Workshop in Grades 3–6
30 Days of Instruction
143©2012 Benchmark Education Company, LLC
Grades 3 – 6 • Mini-Lessons
144 ©2012 Benchmark Education Company, LLC
Teacher’s Note The first week of lessons will be for the entire workshop time. There will be no independent write for this week. This week will focus on building oral language and developing the joy of writing.
DAY 1 – Preparing for Writer’s Workshop Whole-Group Instruction and Building Oral Language
Purpose
• Encourage smooth transitions when coming and going to whole-group instruction.• Show students where and how to sit during whole-group instruction.• Begin oral language development by reading literature and modeling making
connections and storytelling. (Teacher will need some objects reflecting a memory to use during the lesson—such as photos, mementos, etc.)
Teaching Points
• During Writer’s Workshop, collaboration and camaraderie are best built when students can come together in a central meeting place. Show students the area where whole-group writing instruction will occur, and model how you expect students to sit when they come to that area. Teachers often assign students a place on the floor or on the carpet so there won’t be competition to sit in a certain place.
• Explain and model your signal (i.e. bell, clap, click, calling table groups, etc.) for transitioning students to whole-group instruction for Writer’s Workshop.
• Model the procedure for moving to the whole-group area. Then give students the opportunity to practice the procedure and how to sit quietly and attentively.
• Say: When we move to the meeting area, this will be a time to learn more about writing.
• Say: We will begin Writer’s Workshop the same way every day.
• Say: Today I have a book that I want to share with you. The title is Something from Nothing by Phoebe Gilman (or any other book that deals with recording thoughts on paper).
• Read this picture book to the students, stopping at times to think aloud and to model making text-to-self or text-to-text connections.
• Say: This book made me think about the many stories, or personal narratives, in my head, even though I have nothing in my hand. For example, I think about the time (teacher will tell a personal narrative of his or her childhood). Here is a photo of me . . . Here is a memento from the trip . . .
• Acknowledge any hands that may go up and reinforce the fact that they have made connections.
• Say: Does this make you think of anything that happened when you were younger? Would some of you like to share a personal narrative about something you remember?
Grades 3 – 6 • Mini-Lessons
• Allow students to tell stories. If any of their stories remind the teacher of a different memory, model the idea of being able to use what others say as a reminder of another personal narrative. Continue until the end of the workshop time.
• Say: I really enjoyed hearing some of your memories, and I hope that you have enjoyed hearing mine. Remember, we all have memories and stories to tell.
• Review and model your signal for leaving whole-group instruction.
• Use the signal and invite students to go back to their seats.
145©2012 Benchmark Education Company, LLC
Grades 3 – 6 • Mini-Lessons

DAY 2 – Preparing for Writer’s Workshop Establishing Routines, Building Oral Language
Purpose
• Build listening skills.• Introduce and Practice “Turn and Talk.”• Continue with oral language development.
Teaching Points
• Review and practice coming to the whole-group meeting area.
• Say: There will be times when you all will want to share your thoughts. Today we are going to learn a way to do that called “Turn and Talk.” When I invite you to turn and talk, you will sit knee to knee and look at your partner to take turns sharing an idea.
• Teachers may want to assign students a partner they are sitting beside and can work with so the same partner is available each time.
• Choose a student to be your partner and model what it looks like to turn and talk.
• Invite the students to practice turning and talking. Invite them to talk about why it’s important to listen to you partner. Make sure they understand they should be knee to knee and looking at and listening to their partner.
• After asking students to again focus on the teacher, discuss why it’s important to have good listening habits including appropriate noise levels.
• Say: Although you are great readers, there is much that we can learn from picture books. Today I have another book to share with you. The title is Wolf! by Becky Bloom (or any other book that models storytelling).
• The teacher models making connections with this book and telling another memory.
• Say: Many of you have shared memories with the group. Since I know that all of you have memories to tell, let’s practice our new strategy. Turn and talk to your partner about one of your memories.
• The teacher will want to listen to the students tell their stories to each other. Pay special attention to good personal narratives that some of the reluctant students have told.
• Say: While listening to the partners, I heard (name) tell a very personal narrative. (Name), will you share your personal narrative with the class?
• Dismiss class practicing signals and behavior when returning to seats or moving on to write independently.
146 ©2012 Benchmark Education Company, LLC
Grades 3 – 6 • Mini-Lessons
DAY 3 – Preparing for Writer’s Workshop Establishing Routines, Building Oral Language
Purpose
• Build listening skills• Practice “Turn and Talk.”• Continue with oral language development.
Teaching Points
• Review and practice coming to the whole-group meeting area.
• Say: There will be many times during Writer’s Workshop when you listen to a speaker. You may be asked to listen to your teacher when they are talking. You may be asked to listen to a classmate and you may want your classmate to listen to you. When you listen to a speaker, what are some of the important things to remember?
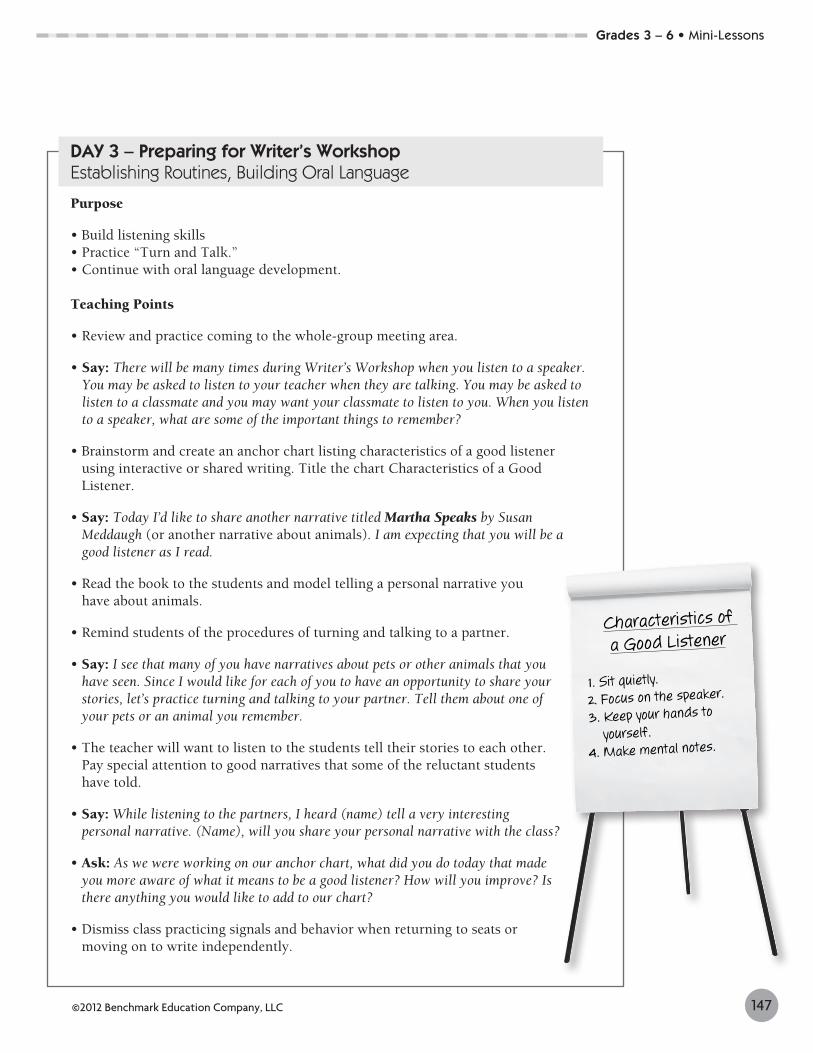
• Brainstorm and create an anchor chart listing characteristics of a good listener using interactive or shared writing. Title the chart Characteristics of a Good Listener.
• Say: Today I’d like to share another narrative titled Martha Speaks by Susan Meddaugh (or another narrative about animals). I am expecting that you will be a good listener as I read.
• Read the book to the students and model telling a personal narrative you have about animals.
• Remind students of the procedures of turning and talking to a partner.
• Say: I see that many of you have narratives about pets or other animals that you have seen. Since I would like for each of you to have an opportunity to share your stories, let’s practice turning and talking to your partner. Tell them about one of your pets or an animal you remember.
• The teacher will want to listen to the students tell their stories to each other. Pay special attention to good narratives that some of the reluctant students have told.
• Say: While listening to the partners, I heard (name) tell a very interesting personal narrative. (Name), will you share your personal narrative with the class?
• Ask: As we were working on our anchor chart, what did you do today that made you more aware of what it means to be a good listener? How will you improve? Is there anything you would like to add to our chart?
• Dismiss class practicing signals and behavior when returning to seats or moving on to write independently.
147©2012 Benchmark Education Company, LLC
Characteristics of a Good Listener
1. Sit quietly. 2. Focus on the speaker.
3. Keep your hands to
yourself.4. Make mental notes.
Grades 3 – 6 • Mini-Lessons
DAY 4 – Preparing for Writer’s Workshop Creating a Topic List of Writing Ideas and Oral Language Development
Purpose
• Practice listening skills.• Create a list of possible writing topics.• Continue with oral language development.
Teaching Points
• Review and practice coming to the whole-group meeting area.
• Say: Today I’d like to share another piece of narrative writing. This story is titled Wilfrid Gordon McDonald Partridge by Mem Fox (or All the Places to Love by Patricia MacLachlan). Please refer to our anchor chart to remind yourself about what it means to be a good listener.
• Read the narrative to the students and model telling a personal narrative you have about any connection you can make to this book.
• Remind students of the procedures of turning and talking to a partner.
• Say: Many of you have many stories you would like to share. Since I would like for each of you to have an opportunity to share your narratives, let’s practice turning and talking to your partner.
• The teacher will want to listen to the students tell their stories to one another. Pay special attention to good personal narratives that some of the reluctant students have told.
• Say: While I was listening to (name’s) personal narrative, it reminded me of another personal narrative that I have.
• Tell the personal narrative to the students and then say: I have told so many stories and I want to make a list of them. I will just write down a few words to help me remember the topic of my stories. For example, I just told you a personal narrative about (my grandmother’s quilt). I will just write down “grandmother’s quilt” on my list.
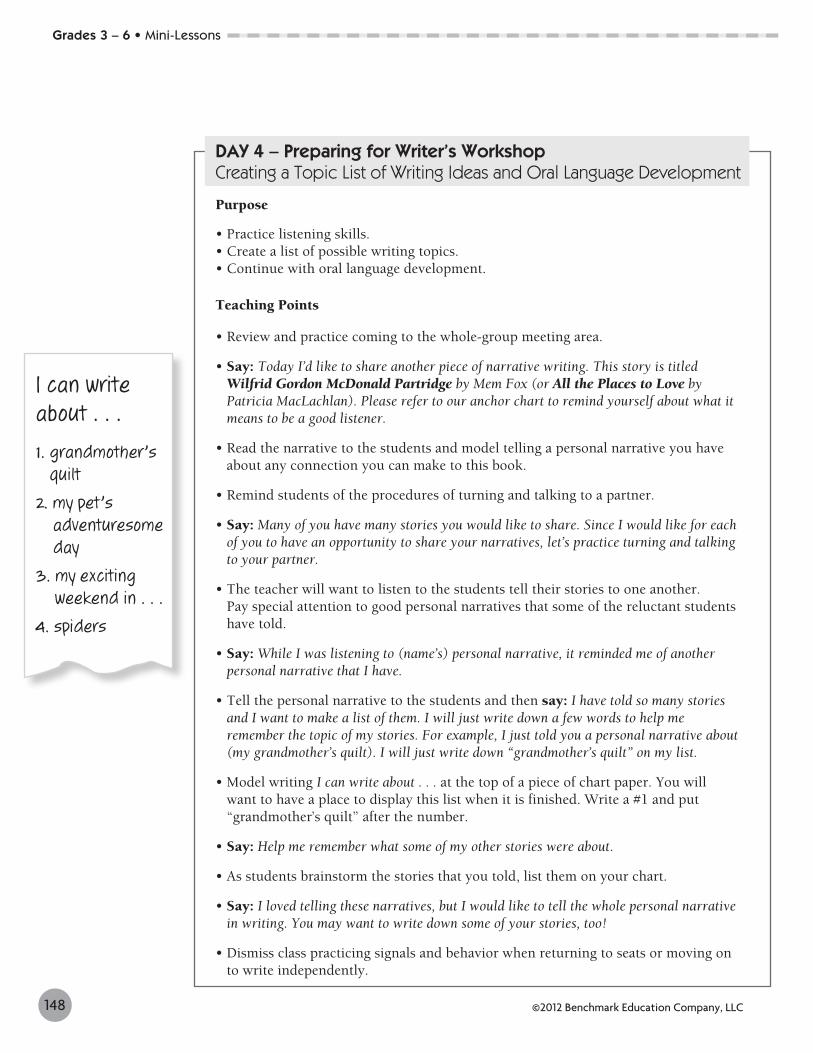
• Model writing I can write about . . . at the top of a piece of chart paper. You will want to have a place to display this list when it is finished. Write a #1 and put “grandmother’s quilt” after the number.
• Say: Help me remember what some of my other stories were about.
• As students brainstorm the stories that you told, list them on your chart.
• Say: I loved telling these narratives, but I would like to tell the whole personal narrative in writing. You may want to write down some of your stories, too!
• Dismiss class practicing signals and behavior when returning to seats or moving on to write independently.
148 ©2012 Benchmark Education Company, LLC
I can write about . . .1. grandmother’s
quilt2. my pet’s
adventuresome day
3. my exciting weekend in . . .
4. spiders
Grades 3 – 6 • Mini-Lessons
DAY 5 – Preparing for Writer’s Workshop Creating a Topic List of Writing Ideas and Building Oral Language
Purpose
• Practice listening skills.• Create a list of possible writing topics.• Continue with oral language development.
Teaching Points
• Review and practice coming to the whole-group meeting area.
• Say: Today I’d like to share another narrative. This narrative is titled Arthur Writes a Story by Marc Brown (or another narrative that centers around writing). Please refer to our anchor chart to remind yourself about what it means to be a good listener.
• Read the story to the students and model telling a personal narrative you have about any connection you can make to the book.
• Say: Many of you have many stories you would like to share. Since I would like for each of you to have an opportunity to share your stories, let’s practice turning and talking to your partner.
• The teacher will want to listen to the students tell their stories to one another and allow one or two students to share their stories with the whole group.
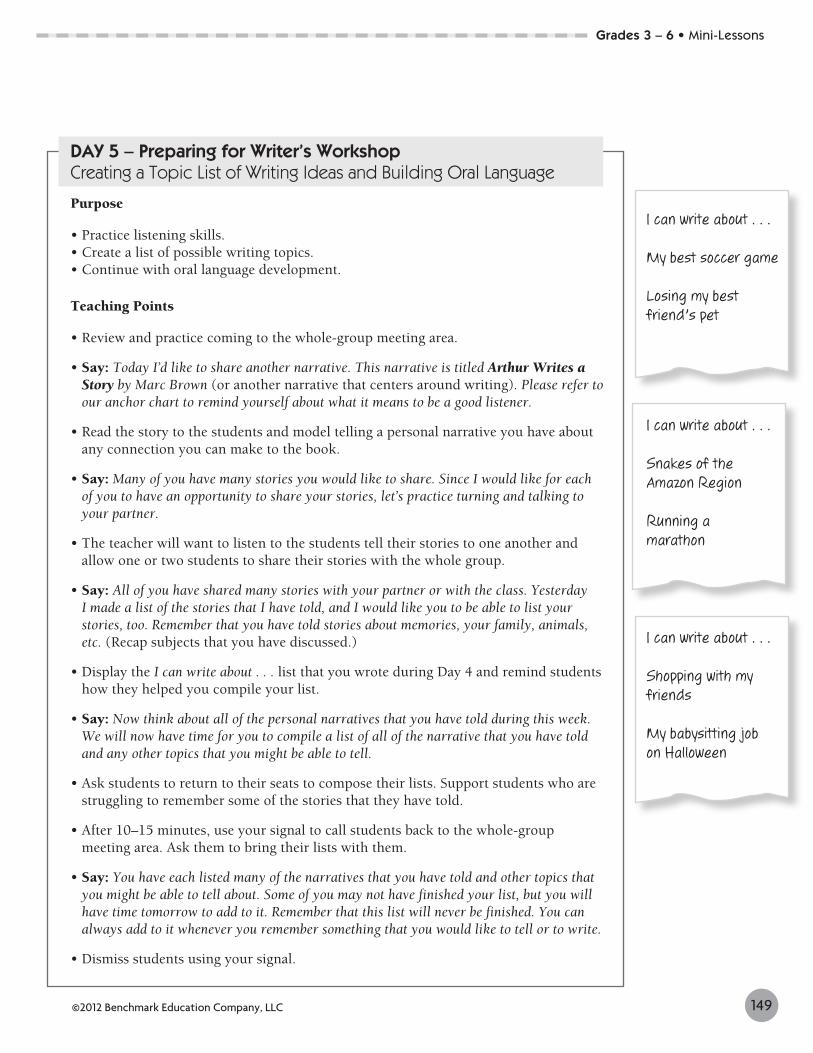
• Say: All of you have shared many stories with your partner or with the class. Yesterday I made a list of the stories that I have told, and I would like you to be able to list your stories, too. Remember that you have told stories about memories, your family, animals, etc. (Recap subjects that you have discussed.)
• Display the I can write about . . . list that you wrote during Day 4 and remind students how they helped you compile your list.
• Say: Now think about all of the personal narratives that you have told during this week. We will now have time for you to compile a list of all of the narrative that you have told and any other topics that you might be able to tell.
• Ask students to return to their seats to compose their lists. Support students who are struggling to remember some of the stories that they have told.
• After 10–15 minutes, use your signal to call students back to the whole-group meeting area. Ask them to bring their lists with them.
• Say: You have each listed many of the narratives that you have told and other topics that you might be able to tell about. Some of you may not have finished your list, but you will have time tomorrow to add to it. Remember that this list will never be finished. You can always add to it whenever you remember something that you would like to tell or to write.
• Dismiss students using your signal.
149©2012 Benchmark Education Company, LLC
I can write about . . .
My best soccer game
Losing my best friend’s pet
I can write about . . .
Snakes of the Amazon Region
Running a marathon
Grades 3 – 6 • Mini-Lessons
I can write about . . .
Shopping with my friends
My babysitting job on Halloween
Grades 3 – 6 • Mini-Lessons
DAY 6 – Writer’s Workshop Procedures: Using and Storing Writing Folders
Purpose
• Guide students in the proper use and care of their writing folders.• Help students understand where their folders are stored and how to
return them to the storage place.
Teaching Points
• Use your signal to call students to the whole-group meeting area.
• Hold up a folder that you have predetermined each student will use as their writing folder. (Usually these folders are uniform in appearance. They are the same color and type for easy identification as a writing folder.)
• Say: You will each have a folder that looks like this. This is your writing folder. Please write your name on your folder (if it is not already labeled). You will use your folder to store all of your writing and other resources writers use. Your topic list will go inside this folder. When we come back for our mini-lesson, please bring your folder with you. We will store our folders (in a predetermined place) and return them when Writer’s Workshop is over.
• Emphasize to students that their folders should never go home and should not be kept in their desks. The folders will be needed for Writer’s Workshop on a daily basis, and the folders must always be available.
• Model a folder you have assembled with your own writing. Show that your name is on the front of your folder and that you have included pieces of your writing that are “in progress” or “completed.” You may want to show that you have stapled your topic sheet on the inside cover.
• Say: Your writing folder is your tool to help you organize your writing and keep your writing from getting misplaced. It will be one of your most important resources when you write. You should keep it with you during Writer’s Workshop.
• Say: We keep our writing folders in the same place each day. It is very important to get and return our folders carefully. We need to take good care of them because we will use them every day. (Model the storage place and how the folders should look before and after the students have returned their folders to the proper place.)
• Distribute writing folders to students.
• If necessary, model for the students how to follow the procedure (calling rows, tables, students, etc.) when you are ready to end Writer’s Workshop. Practice until the students are able to retrieve and store folders correctly and quietly.
150 ©2012 Benchmark Education Company, LLC
Teacher’s NoteFor today’s lesson only, the writing time is included in this lesson so that students will be prepared for Day 7.

Grades 3 – 6 • Mini-Lessons
151©2012 Benchmark Education Company, LLC
• Writing Time: Distribute the topic list that they compiled on Day 5. Ask students to return to their seats. Invite them to place their name on the front of the folder and then add to their topic lists. Suggest that students who are ready might want to begin writing, and they may do so at this time. As students are working, circulate and help students staple their topic lists to their folders.
I can write about . . .
Baseball vs. Soccer
My best friend moving
When I was “Mom for a week”
DAY 7 – Writer’s Workshop Choosing the Writing Topic
Purpose
• Guide students in the process of choosing a topic for writing from their list.
Teaching Points
• Use your signal to call students to the whole-group meeting area.
• The teacher should have his or her own topic list that was compiled with the students available to use for this mini-lesson.
• The students need to have their writing folder with them.
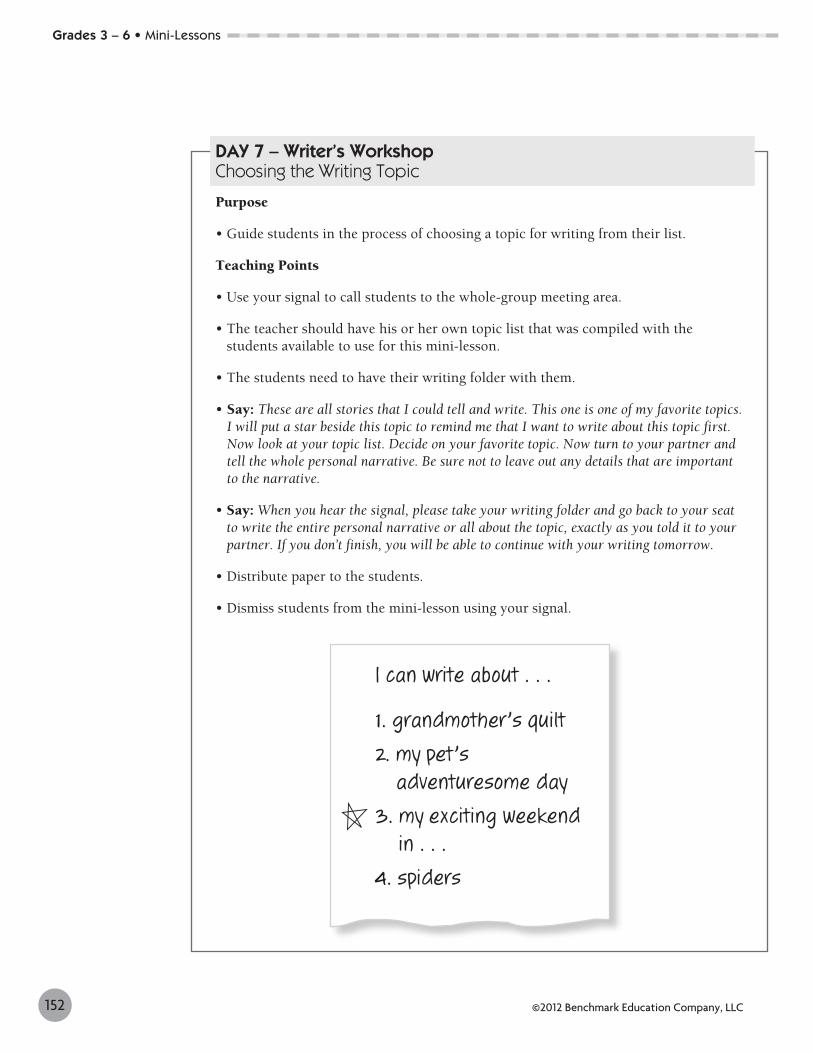
• Say: These are all stories that I could tell and write. This one is one of my favorite topics. I will put a star beside this topic to remind me that I want to write about this topic first. Now look at your topic list. Decide on your favorite topic. Now turn to your partner and tell the whole personal narrative. Be sure not to leave out any details that are important to the narrative.
• Say: When you hear the signal, please take your writing folder and go back to your seat to write the entire personal narrative or all about the topic, exactly as you told it to your partner. If you don’t finish, you will be able to continue with your writing tomorrow.
• Distribute paper to the students.
• Dismiss students from the mini-lesson using your signal.
152 ©2012 Benchmark Education Company, LLC
I can write about . . .
1. grandmother’s quilt2. my pet’s
adventuresome day3. my exciting weekend
in . . .4. spiders
Grades 3 – 6 • Mini-Lessons
DAY 8 – Concept of Writer’s Workshop
Purpose
• Introduce concept of Writer’s Workshop to students.• Clarify the purpose of Writer’s Workshop.
Teaching Points
• Use your signal to call students to the whole-group meeting area.
• Say: Today we will be talking about Writer’s Workshop and what it is.
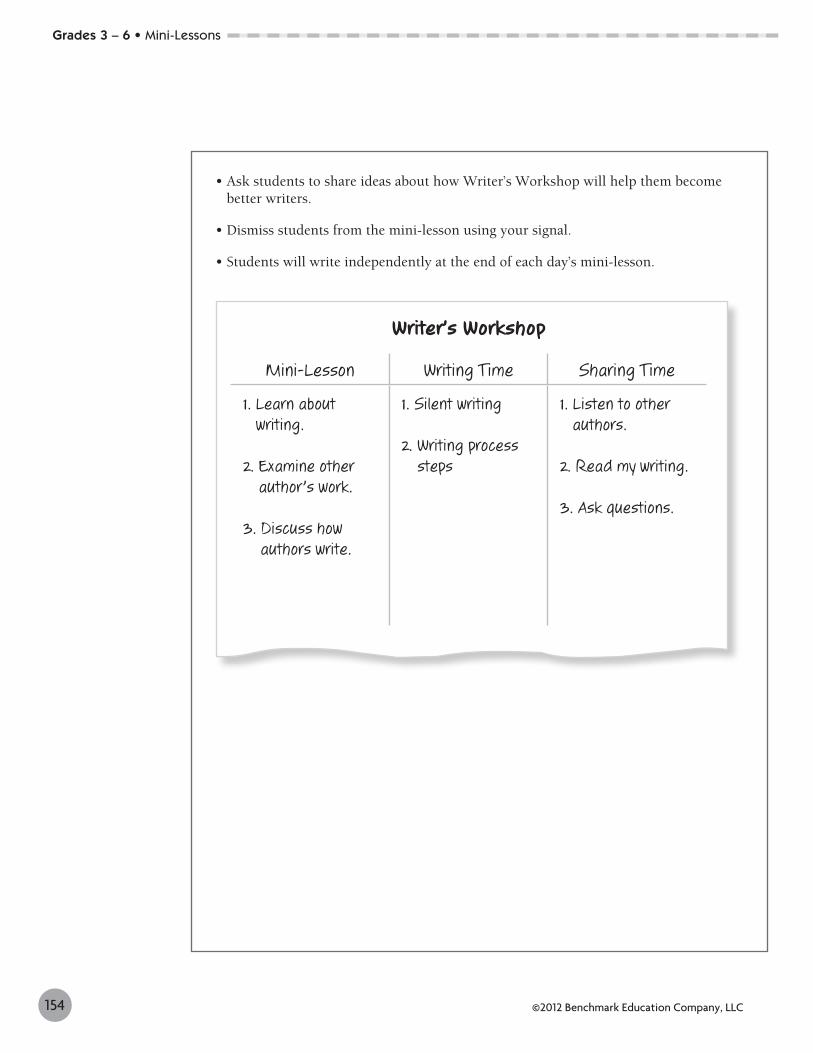
• Draw a blank three-column chart. As you explain and discuss the components (mini-lesson, independent writing time, and sharing time) of Writer’s Workshop, you will complete the chart.
• Begin by explaining the mini-lesson. Write “Mini-Lesson” at the top of the first column.
• Say: We have been learning about how we come together as a whole group to learn more about writing. This is one part of Writer’s Workshop.
• Write a few ideas in the Mini-Lesson column.
• Write “Writing Time” at the top of the second column. Explain that students will be doing different things during writing time. Explain that most of their writing time will be spent writing and using the writing process. Explain that the students will be learning about the writing process during their mini-lessons.
• Say: After our mini-lesson, we will use what we learn about writing to write different pieces of writing that interests us. We will use the writing process when we write, so each of us may be at different places in the writing process.
• Write a few ideas in the Writing Time column.
• Write “Sharing Time” at the top of the third column. Explain the students will have an opportunity to share what they have written with other students in the class. Explain that they will also hear what others have written.
• Say: There will be times to share with the group or a partner about things you have written. You may get help from your friends about a writing problem, read an especially interesting part of your writing to a classmate, or listen to another student’s writing as they read to you.
• Write a few ideas in the Sharing Time column.
153©2012 Benchmark Education Company, LLC
Grades 3 – 6 • Mini-Lessons
154 ©2012 Benchmark Education Company, LLC
• Ask students to share ideas about how Writer’s Workshop will help them become better writers.
• Dismiss students from the mini-lesson using your signal.
• Students will write independently at the end of each day’s mini-lesson.
Writer’s Workshop
Mini-Lesson Writing Time Sharing Time
1. Learn about writing.
2. Examine other author’s work.
3. Discuss how authors write.
1. Silent writing
2. Writing process steps
1. Listen to other authors.
2. Read my writing.
3. Ask questions.
Grades 3 – 6 • Mini-Lessons

155©2012 Benchmark Education Company, LLC
Tools Students Use When Writing1. notebook paper2. unlined paper3. pencils/pens4. stapler
DAY 9 – Writer’s Workshop Procedures Using and Storing Writing Tools
Purpose
• Introduce students to storage places for writing tools.• Guide students in the proper use and storage of materials.
Teaching Points
• Use your signal to call students to the whole-group meeting area.
• Tell your students that today you are going to tell them about a place in your room where they will find many things they will need as writers. Invite your class to come with you to the writing table or to the location in the classroom where materials will be stored. Tell your students that these are resources that they may need when writing, editing, revising, and publishing. (Have several different tools there to share with the students. Suggestions: loose leaf notebook paper, unlined paper, construction paper, stapler, tape, hole punch, rulers, scissors, pens for editing, sharpened pencils, markers, dictionaries, thesauri, etc.) Take the time to talk about each item, emphasizing that these are tools to use during Writer’s Workshop only. Explain to students that it will be their responsibility to use the materials wisely and for the correct purpose.
• Say: As we learn about the writing process during our mini-lessons, you will see how we use these tools.
• Invite the students to return to the whole-group meeting area and find their seat. Debrief the location of the writing tools and their use. Create an anchor chart titled “Tools Students Use When Writing.” Invite the students to help list the tools and note how each tool is used. Ask if they can think of other items that they might need during the workshop. Post the anchor chart over the writing table or in the writing area.
• Dismiss students from the mini-lesson using your signal.
• Students will write independently at the end of each day’s mini-lesson.
Grades 3 – 6 • Mini-Lessons
DAY 10 – Writer’s Workshop Procedures Creating an Effective Atmosphere for Writers
Purpose
• Guide students in developing rules for Writer’s Workshop.• Help students understand what Writer’s Workshop looks like and sounds like.
Teaching Points
• Call students to the whole-group meeting area using your practiced signal.
• Using the anchor charts, review with students what makes a good listener and what Writer’s Workshop is.
• Say: We know that during Writer’s Workshop we learn about writing. There are ways that we can work together to make our classroom a place that will allow us to write well. Today we are going to brainstorm what we can do to make our classroom a place where we can write and collaborate.
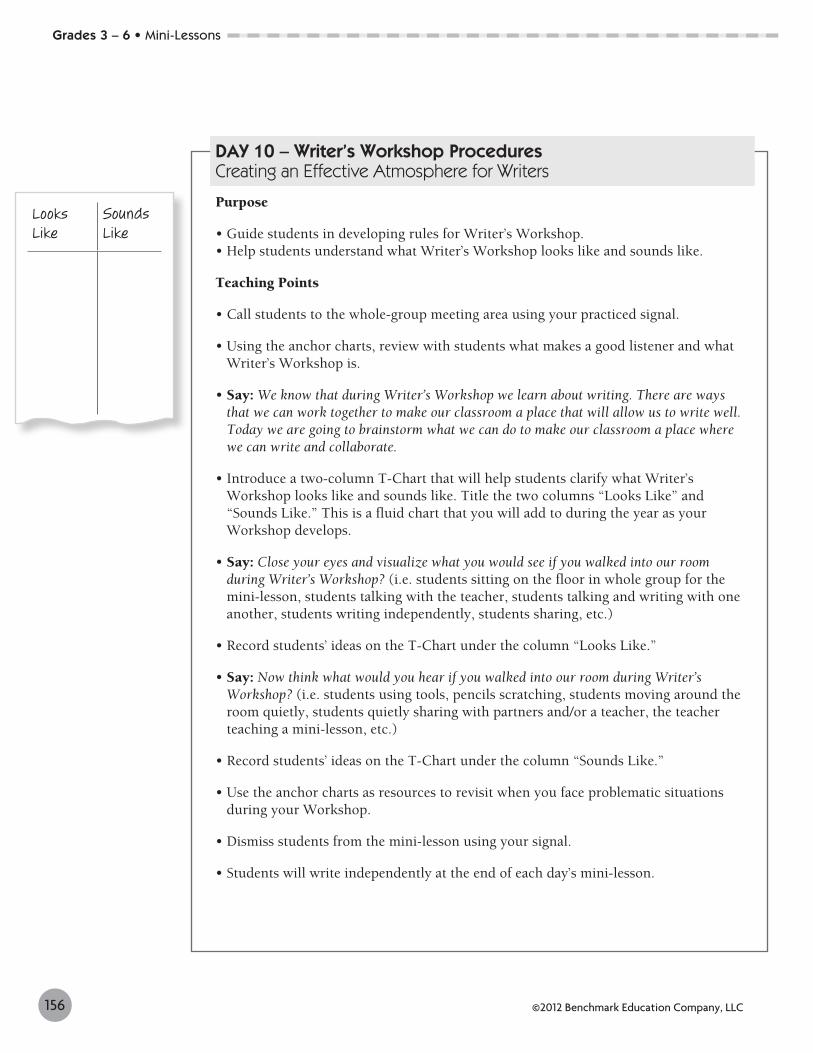
• Introduce a two-column T-Chart that will help students clarify what Writer’s Workshop looks like and sounds like. Title the two columns “Looks Like” and “Sounds Like.” This is a fluid chart that you will add to during the year as your Workshop develops.
• Say: Close your eyes and visualize what you would see if you walked into our room during Writer’s Workshop? (i.e. students sitting on the floor in whole group for the mini-lesson, students talking with the teacher, students talking and writing with one another, students writing independently, students sharing, etc.)
• Record students’ ideas on the T-Chart under the column “Looks Like.”
• Say: Now think what would you hear if you walked into our room during Writer’s Workshop? (i.e. students using tools, pencils scratching, students moving around the room quietly, students quietly sharing with partners and/or a teacher, the teacher teaching a mini-lesson, etc.)
• Record students’ ideas on the T-Chart under the column “Sounds Like.”
• Use the anchor charts as resources to revisit when you face problematic situations during your Workshop.
• Dismiss students from the mini-lesson using your signal.
• Students will write independently at the end of each day’s mini-lesson.
156 ©2012 Benchmark Education Company, LLC
Grades 3 – 6 • Mini-Lessons
Looks Like
Sounds Like
DAY 11 – Writer’s Workshop Procedures Appropriate Behavior
Purpose
• Discuss behavior that is appropriate and conducive to writing.
Teaching Points
• Use your signal to call students to the whole-group meeting area.
• Say: When I am writing, I need to be able to think about my good ideas and put those ideas in writing. I can’t write well if someone is bothering me. What helps you to do your best thinking and writing? What helps Writer’s Workshop run smoothly?
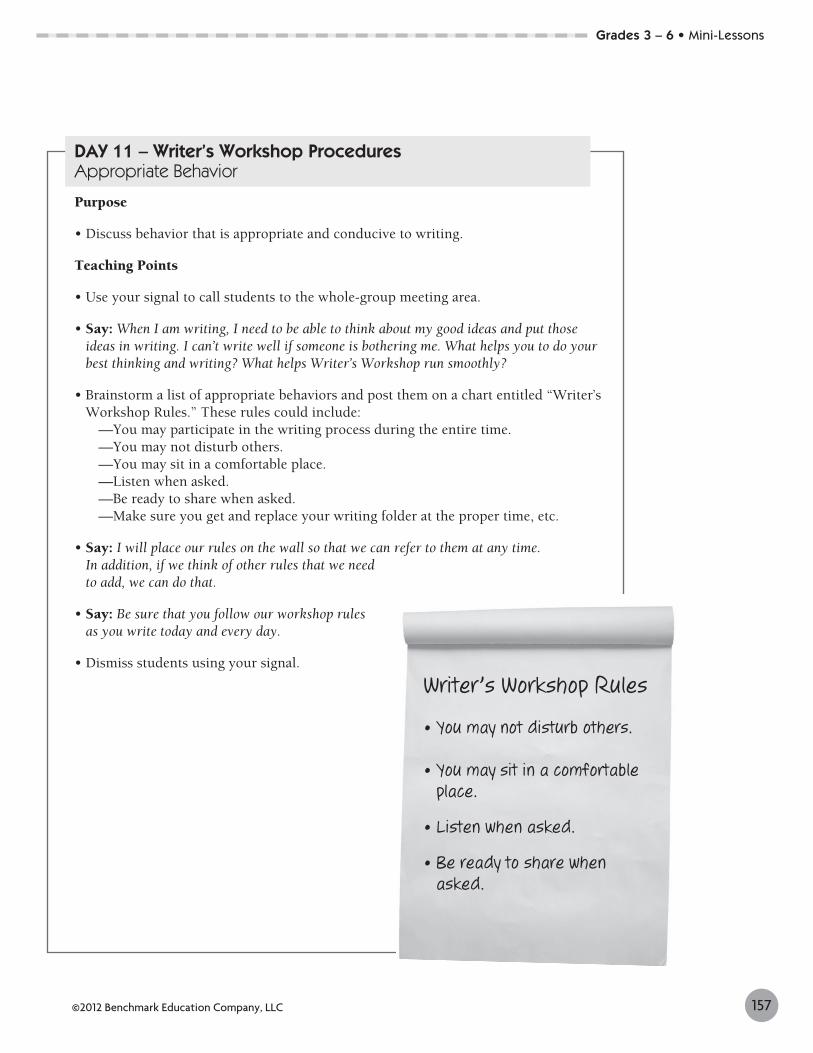
• Brainstorm a list of appropriate behaviors and post them on a chart entitled “Writer’s Workshop Rules.” These rules could include: —You may participate in the writing process during the entire time. —You may not disturb others. —You may sit in a comfortable place. —Listen when asked. —Be ready to share when asked. —Make sure you get and replace your writing folder at the proper time, etc.
• Say: I will place our rules on the wall so that we can refer to them at any time. In addition, if we think of other rules that we need to add, we can do that.
• Say: Be sure that you follow our workshop rules as you write today and every day.
• Dismiss students using your signal.
157©2012 Benchmark Education Company, LLC
Writer’s Workshop Rules
• You may not disturb others. • You may sit in a comfortable
place.
• Listen when asked.
• Be ready to share when asked.
Grades 3 – 6 • Mini-Lessons
DAY 12 – Writer’s Workshop Procedures: Where to Sit
Purpose
• Guide students in sitting in the location that is most conducive to writing.• Help students understand where and when they might move to a new location
to write.
Teaching Points
• Use your signal to call students to the whole-group meeting area.
• Model sitting at your desk to write something.
• Say: Is this the only place in the classroom that you have seen me write? What other places have you noticed me writing?
• Brainstorm a list of places that students have seen you engaged in writing.
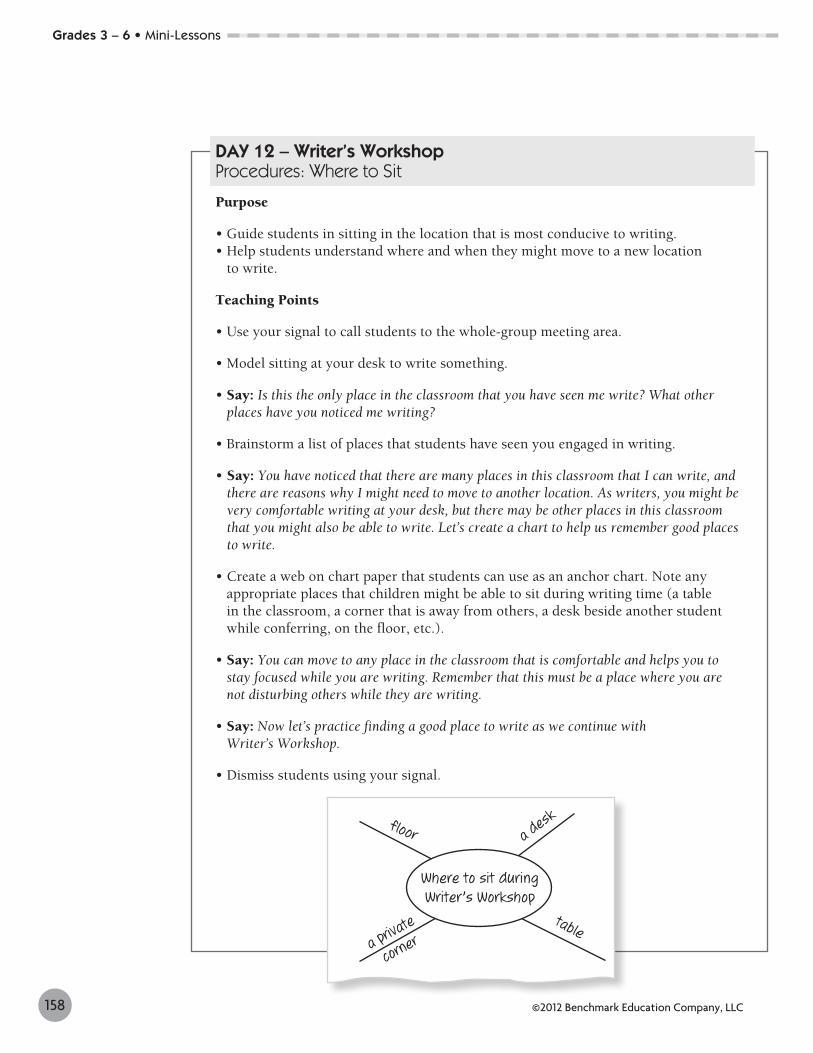
• Say: You have noticed that there are many places in this classroom that I can write, and there are reasons why I might need to move to another location. As writers, you might be very comfortable writing at your desk, but there may be other places in this classroom that you might also be able to write. Let’s create a chart to help us remember good places to write.
• Create a web on chart paper that students can use as an anchor chart. Note any appropriate places that children might be able to sit during writing time (a table in the classroom, a corner that is away from others, a desk beside another student while conferring, on the floor, etc.).
• Say: You can move to any place in the classroom that is comfortable and helps you to stay focused while you are writing. Remember that this must be a place where you are not disturbing others while they are writing.
• Say: Now let’s practice finding a good place to write as we continue with Writer’s Workshop.
• Dismiss students using your signal.
158 ©2012 Benchmark Education Company, LLC
Where to sit during Writer’s Workshop
floor a desk
tablea priv
ate
corner
Grades 3 – 6 • Mini-Lessons
DAY 13 – Introduce the Writing Process
Purpose
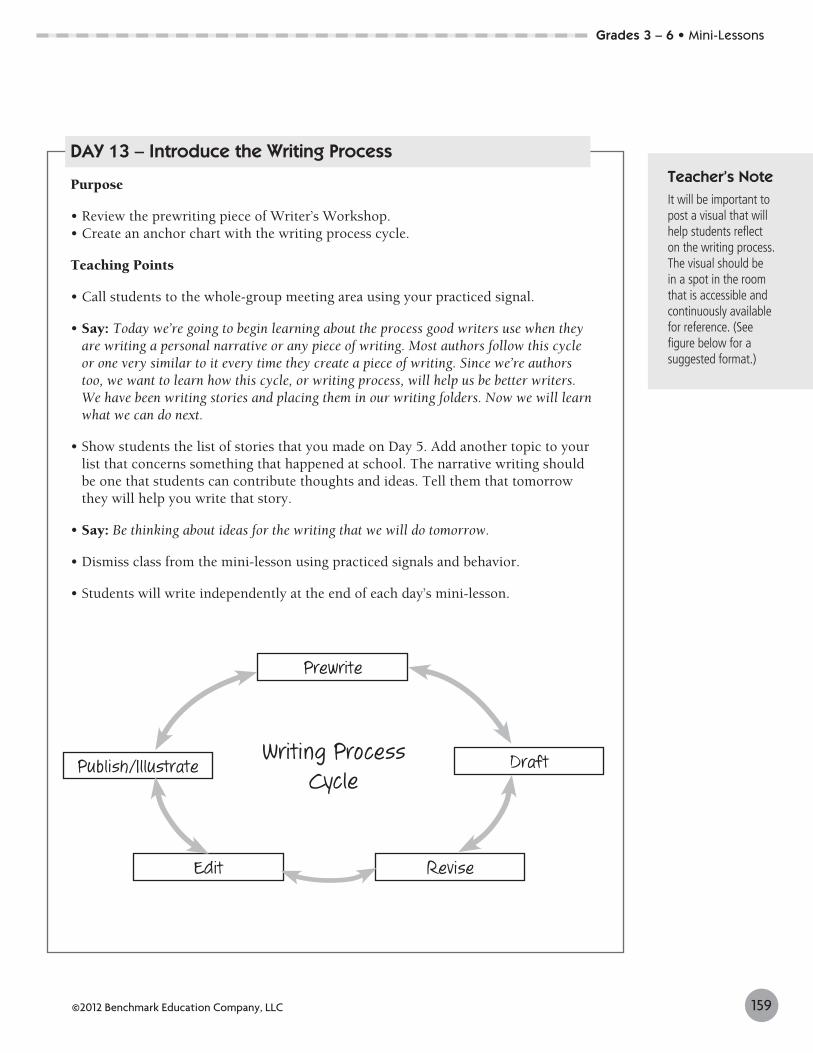
• Review the prewriting piece of Writer’s Workshop.• Create an anchor chart with the writing process cycle.
Teaching Points
• Call students to the whole-group meeting area using your practiced signal.
• Say: Today we’re going to begin learning about the process good writers use when they are writing a personal narrative or any piece of writing. Most authors follow this cycle or one very similar to it every time they create a piece of writing. Since we’re authors too, we want to learn how this cycle, or writing process, will help us be better writers. We have been writing stories and placing them in our writing folders. Now we will learn what we can do next.
• Show students the list of stories that you made on Day 5. Add another topic to your list that concerns something that happened at school. The narrative writing should be one that students can contribute thoughts and ideas. Tell them that tomorrow they will help you write that story.
• Say: Be thinking about ideas for the writing that we will do tomorrow.
• Dismiss class from the mini-lesson using practiced signals and behavior.
• Students will write independently at the end of each day’s mini-lesson.
159©2012 Benchmark Education Company, LLC
Teacher’s NoteIt will be important to post a visual that will help students reflect on the writing process. The visual should be in a spot in the room that is accessible and continuously available for reference. (See figure below for a suggested format.)
Prewrite
Draft
Revise
Publish/Illustrate
Edit
Grades 3 – 6 • Mini-Lessons
Writing Process Cycle
DAY 14 – Continue Prewriting Using a Web
Purpose
• Explain to students the importance of prewriting.• Create a narrative writing web.
Teaching Points
• Call students to the whole-group meeting area using your practiced signal.
• Revisit the brainstorming process and remind students about the new idea that they will all help to write.
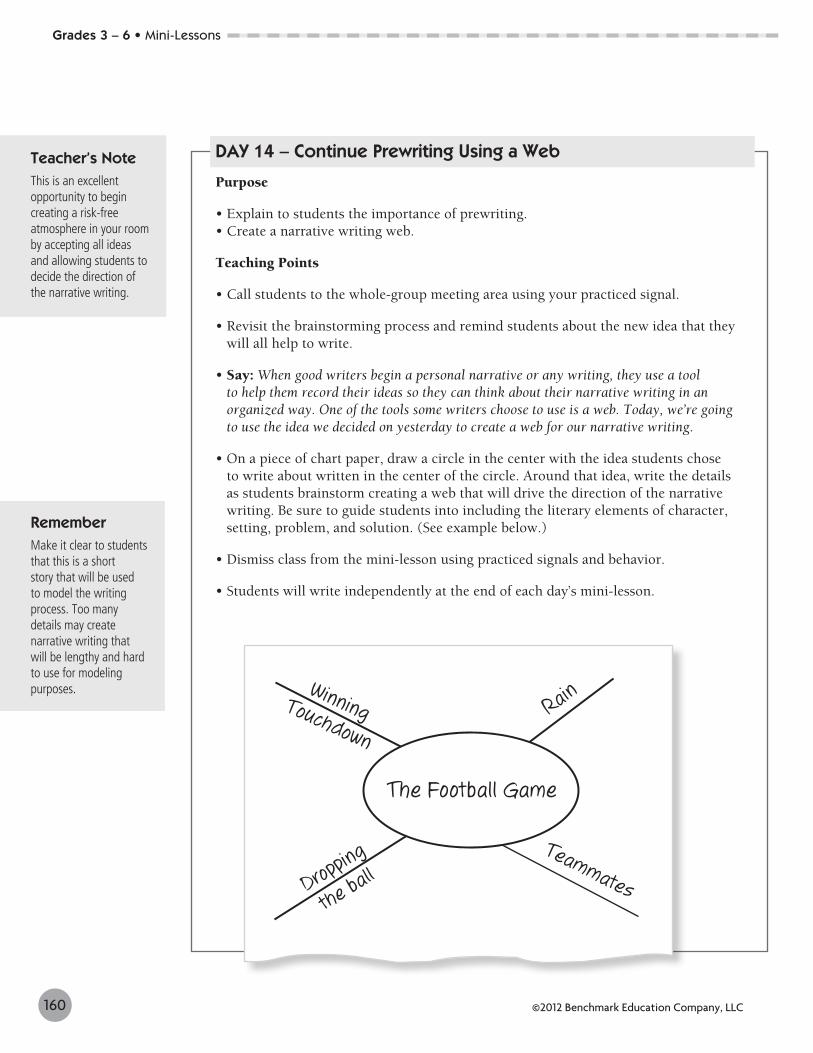
• Say: When good writers begin a personal narrative or any writing, they use a tool to help them record their ideas so they can think about their narrative writing in an organized way. One of the tools some writers choose to use is a web. Today, we’re going to use the idea we decided on yesterday to create a web for our narrative writing.
• On a piece of chart paper, draw a circle in the center with the idea students chose to write about written in the center of the circle. Around that idea, write the details as students brainstorm creating a web that will drive the direction of the narrative writing. Be sure to guide students into including the literary elements of character, setting, problem, and solution. (See example below.)
• Dismiss class from the mini-lesson using practiced signals and behavior.
• Students will write independently at the end of each day’s mini-lesson.
160 ©2012 Benchmark Education Company, LLC
Teacher’s Note This is an excellent opportunity to begin creating a risk-free atmosphere in your room by accepting all ideas and allowing students to decide the direction of the narrative writing.
RememberMake it clear to students that this is a short story that will be used to model the writing process. Too many details may create narrative writing that will be lengthy and hard to use for modeling purposes. Winning Touchdown
Rain
Dropping
the ball
The Football Game
Teammates
Grades 3 – 6 • Mini-Lessons

DAY 15 – Continue Prewriting
Purpose
• Create an anchor chart showing different kinds of prewriting.
Teaching Points
• Call students to the whole-group meeting area using your practiced signal.
• Say: We have been using a web to do our prewriting for our narrative piece. As you practice writing, you may choose other ways to prewrite. Today we are going to create an anchor chart with different ideas about prewriting. The chart may help you choose a way to prewrite that will help you organize ideas for a piece of writing.
• Using a piece of chart paper, title the anchor chart “Prewriting.” Invite your students to give ideas of different ways to prewrite. (make lists, draw pictures, brainstorm, use graphic organizers, etc.)
• Say: After you have finished your prewriting, remember to store that paper in your writing folders so you have it when you begin writing your narrative writing.
• Dismiss class from the mini-lesson using practiced signals and behavior.
• Students will write independently at the end of each day’s mini-lesson.
161©2012 Benchmark Education Company, LLC
Grades 3 – 6 • Mini-Lessons
Prewriting
• Make lists.
• Draw pictures.
• Brainstorm.
• Use graphic organizers.
162 ©2012 Benchmark Education Company, LLC
Grades 3 – 6 • Mini-Lessons
DAY 16 – Continue Prewriting
Purpose
• Review the prewriting step of the writing.• Know that every piece of narrative writing has a beginning, middle, and end.• Create an anchor chart showing the characteristics of a beginning, middle,
and end of a piece of narrative writing.
Teaching Points
• Make sure you have the writing process anchor chart posted in a place where you can easily refer to the writing process cycle. Call attention to the writing process cycle and review the process of prewriting. Talk with your class about the next step in the process—rough draft.
• Say: When a writer is ready to begin writing the rough draft, it is important to look over the prewriting and think about where to start writing. If a writer is composing a story, or a piece of narrative writing, it’s important to remember that every narrative has a beginning. In the beginning, an author may reveal the character and setting.
• Use the class prewriting from Day 13 and identify the character and setting.
• Say: All narratives have a middle. In the middle, a writer tells about important details and events in the narrative writing. This may be a problem, a complication, a predicament, or an obstacle in the narrative writing.
• Use the class prewriting to identify the points that may be in the middle of the narrative writing.
• Say: Every piece of narrative writing has an ending. In the end, a writer could tell how a problem is solved.
• Use the class prewriting to identify the points that could be in the ending of the narrative writing.
• Say: When we begin our narrative writing, it will be important to use our prewriting to help us make sure we don’t leave out any part of narrative writing.
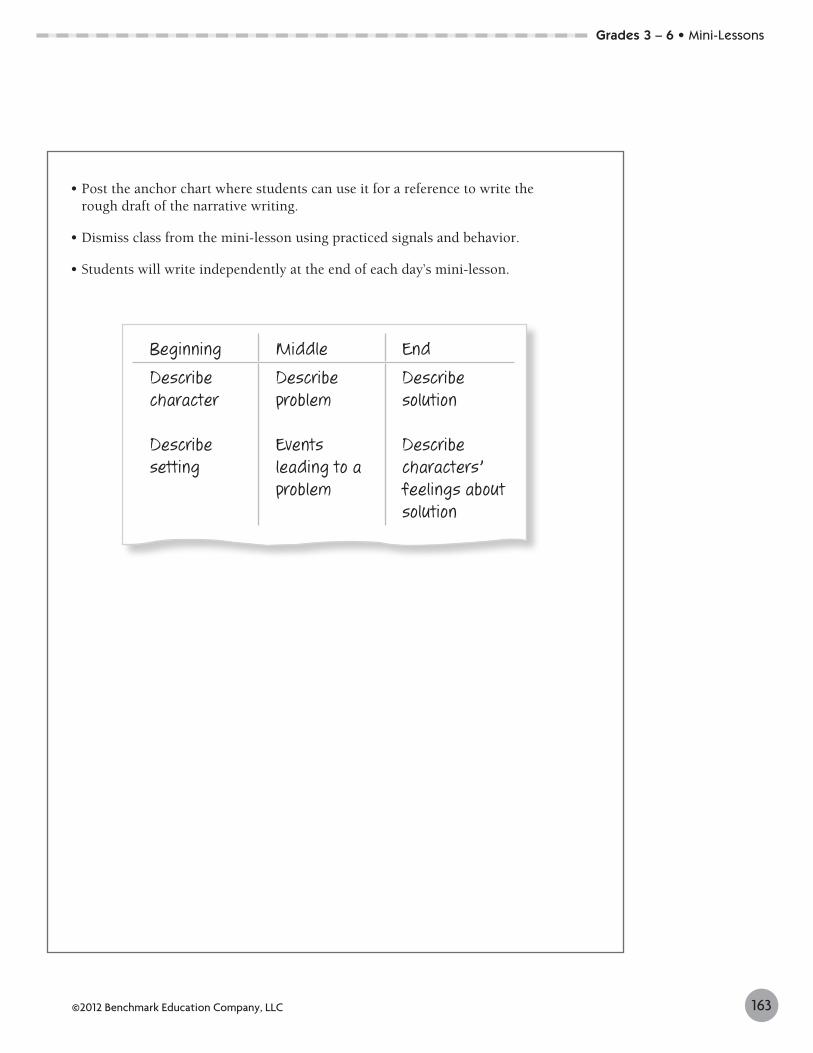
• Using chart paper, create a three-column T-Chart. Title the first column “Beginning,” the second column “Middle,” and the third column “End.” Invite the class to contribute ideas of what a writer could put in the beginning of a piece of narrative writing (details describing a character[s], details describing the setting, etc.), in the middle (details describing a problem, events leading up to a problem, how a character reacts to the problem, etc.), and at the end of a narrative (details describing how a problem is solved, how a character feels about the solutions, how the solution affects the character, etc.).
163©2012 Benchmark Education Company, LLC
Beginning Middle EndDescribe character
Describe setting
Describe problem
Events leading to a problem
Describe solution
Describe characters’ feelings about solution
Grades 3 – 6 • Mini-Lessons
• Post the anchor chart where students can use it for a reference to write the rough draft of the narrative writing.
• Dismiss class from the mini-lesson using practiced signals and behavior.
• Students will write independently at the end of each day’s mini-lesson.
Grades 3 – 6 • Mini-Lessons
Day 17 – Begin Rough Draft Step of Writing Process Cycle
Purpose
• Review the Beginning, Middle, and End Anchor Chart.• Understand that the rough draft is written on every other line. • Begin writing the rough draft of your class narrative.
Teaching Points
• Call students to the whole-group meeting area using your practiced signal.
• It is important to have the writing process posted in a place where you can easily refer to the writing process cycle. Call attention to the writing process cycle and review the process of prewriting. Talk with the class about the next step in the process—rough draft.
• Say: When a writer is ready to start writing a rough draft, the first thing that an author does is look at the prewriting to see where he or she wants to start. The last time we met, we identified the points that we could put at the beginning of our rough draft.
• Say: When an author is writing the rough draft, it is important that his or her attention is on putting thoughts on paper. You will probably make some spelling errors, grammar errors, or have story elements you will eventually want to change. The most important thing about a rough draft is that you spend your time writing and putting your ideas on paper.
• Say: It is also important to remember that we will write on every other line. Writers do this because there will come a time when they will need that extra line to fix up the writing.
• Using a piece of chart paper, begin the process of writing the rough draft of your class narrative. (Be sure that you skip lines on the paper.) Invite the class to contribute ideas for the narrative writing using the prewriting web and chart as a guide.
• Begin writing the rough draft, inviting students to contribute sentences and ideas for the beginning of the class narrative. Continue with this process until your mini-lesson time is up. Tell the students that you will continue with the narrative writing tomorrow. You will use your mini-lesson time for the next couple of days until the rough draft for your narrative writing is complete.
• Dismiss class from the mini-lesson using practiced signals and behavior.
• Students will write independently at the end of each day’s mini-lesson.
164 ©2012 Benchmark Education Company, LLC
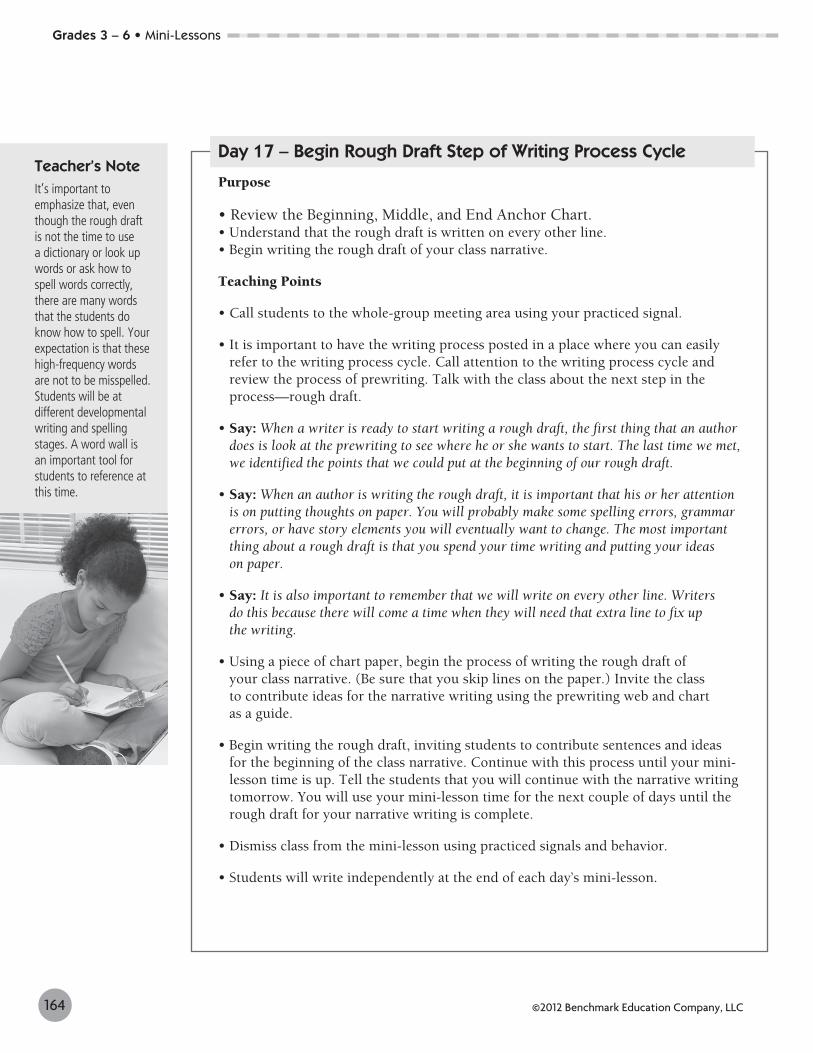
Teacher’s Note It’s important to emphasize that, even though the rough draft is not the time to use a dictionary or look up words or ask how to spell words correctly, there are many words that the students do know how to spell. Your expectation is that these high-frequency words are not to be misspelled. Students will be at different developmental writing and spelling stages. A word wall is an important tool for students to reference at this time.
Grades 3 – 6 • Mini-Lessons
DAYS 18–19 – Continue Writing Process Cycle Rough Draft
Purpose
• Continue using the writing process cycle (rough draft) to create a class narrative emphasizing a beginning, middle, and end to the piece of narrative writing.
Teaching Points
• Call students to the whole-group meeting area using your practiced signal.
• Say: Today we will continue writing the rough draft of our piece of narrative writing. Who knows what part of our narrative writing we are ready to draft? How do you know? (By looking at our prewriting and looking at the points we want to write about.)
• Reread the rough draft of what has been written so far. Continue writing the rough draft until your mini-lesson time is over.
• You will use your mini-lesson time for a couple of days to complete the rough draft.
• Dismiss class from the mini-lesson using practiced signals and behavior.
• Students will write independently at the end of each day’s mini-lesson.
165©2012 Benchmark Education Company, LLC
Teacher’s NoteYou will want to encourage your students to reread often. They need to make sure that their writing makes sense and that their message conveys what they intended.
DAY 20 – Completing the Rough Draft
Purpose
• Create an anchor chart entitled “Rough Draft.”
Teaching Points
• Call students to the whole-group meeting area using your practiced signal.
• Say: We have been writing the rough draft of our narrative writing. Let’s create an anchor chart about the important points of a rough draft.
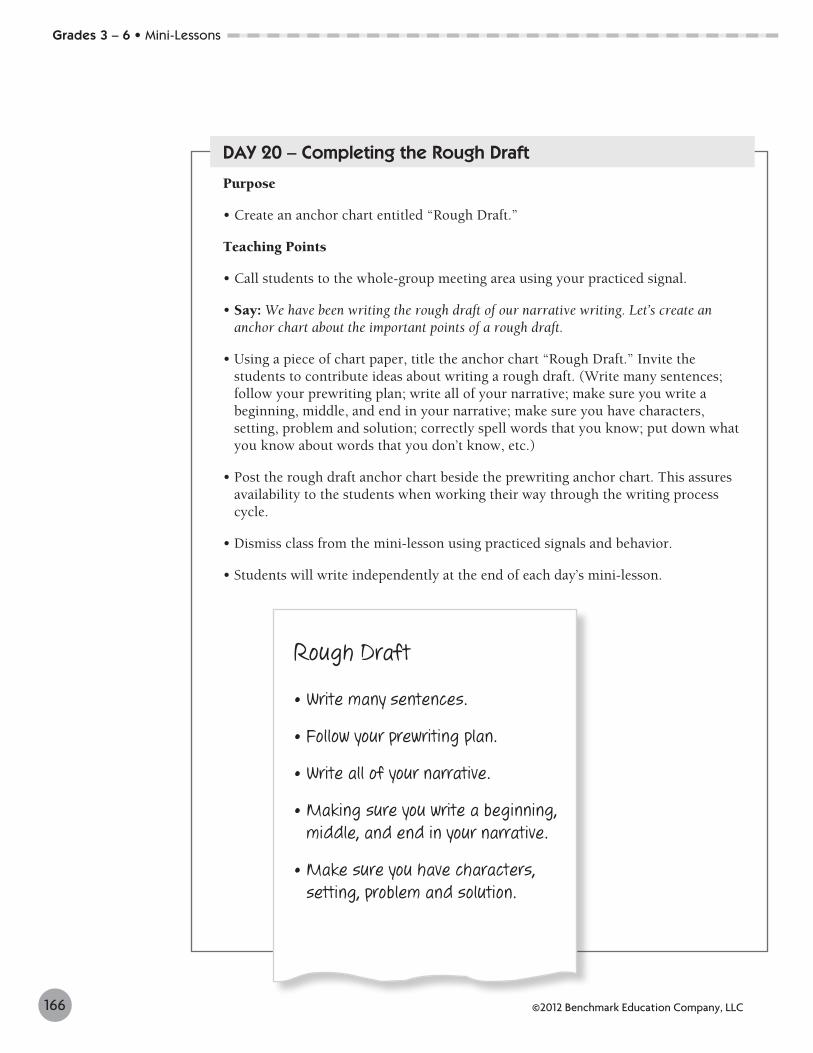
• Using a piece of chart paper, title the anchor chart “Rough Draft.” Invite the students to contribute ideas about writing a rough draft. (Write many sentences; follow your prewriting plan; write all of your narrative; make sure you write a beginning, middle, and end in your narrative; make sure you have characters, setting, problem and solution; correctly spell words that you know; put down what you know about words that you don’t know, etc.)
• Post the rough draft anchor chart beside the prewriting anchor chart. This assures availability to the students when working their way through the writing process cycle.
• Dismiss class from the mini-lesson using practiced signals and behavior.
• Students will write independently at the end of each day’s mini-lesson.
166 ©2012 Benchmark Education Company, LLC
Rough Draft
• Write many sentences.
• Follow your prewriting plan.
• Write all of your narrative.
• Making sure you write a beginning, middle, and end in your narrative.
• Make sure you have characters, setting, problem and solution.
Grades 3 – 6 • Mini-Lessons
DAY 21 – Introduce Revising Using a Caret
Purpose
• Introduce students to the revising step of the writing process cycle. • Use completed class narrative to model revising concept.• Model the use of a caret as a revision tool used to insert one or two words.
Teaching Points
• Call students to the whole-group meeting area using your practiced signal.
• Say: Do you remember what a good reader does after they finish reading? That’s right. They go back and think about their reading. A good writer does about the same thing. After an author has written the rough draft, a good writer goes back over their writing and thinks about how their writing sounds. There are many things to think about. An author may think about the character, setting, problem, and solution. They may think about using describing words, adding sentences to make their writing clearer, or adding whole chunks to a narrative to make it more exciting or easier for their audience to read. Today we’re going to look at one way to revise your writing.
• Reread the piece of narrative writing that the class wrote together. While you read, think aloud to model the process of adding adjectives to provide description.
• Say: I’m reading this sentence. It says that . . . (For example: “It says that the bear was chasing the rabbit into the forest. I ask myself what kind of bear it was. Was it a bear cub? Was it an enormous bear? How did it move? Was it hungry?”) I think that we could add words to this sentence to make it more interesting. We could also help the reader visualize the . . . What words do you think we could add to this sentence?
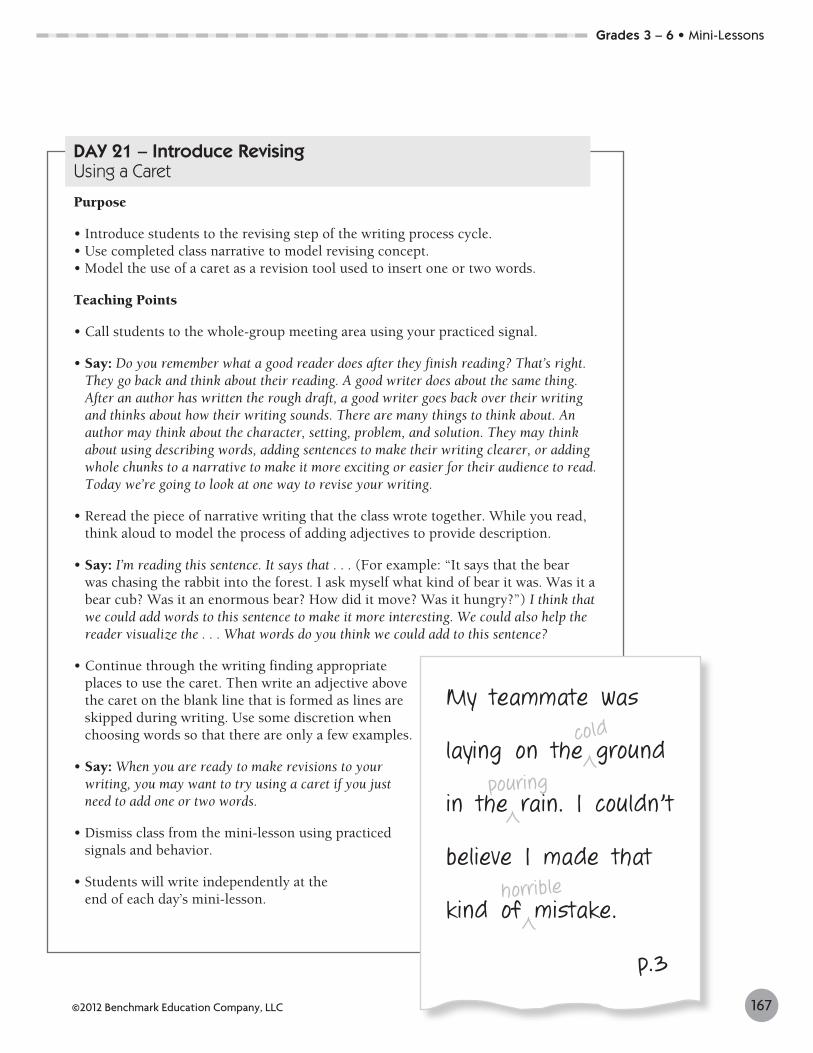
• Continue through the writing finding appropriate places to use the caret. Then write an adjective above the caret on the blank line that is formed as lines are skipped during writing. Use some discretion when choosing words so that there are only a few examples.
• Say: When you are ready to make revisions to your writing, you may want to try using a caret if you just need to add one or two words.
• Dismiss class from the mini-lesson using practiced signals and behavior.
• Students will write independently at the end of each day’s mini-lesson.
167©2012 Benchmark Education Company, LLC
My teammate was
laying on the ground
in the rain. I couldn’t
believe I made that
kind of mistake.
p.3
cold
horrible
pouring
Grades 3 – 6 • Mini-Lessons

DAY 22 – Continue Revising Using Spider Legs
Purpose
• Model the use of a spider leg as a revision tool used when adding one or two sentences to a rough draft.
Teaching Points
• Call students to the whole-group meeting area using your practiced signal.
• Say: The step of the writing process that we’ve been learning about is revising. This step is difficult for some writers because it’s hard to change what they have written. Remember that, when we make revisions, we are making our writing more interesting, more accurate, and more complete. There are times when we revise that we may need to add more than a word to our writing. We many want to add a sentence. We’re going to use a tool called a spider leg.
• Read through the class narrative writing to find a place where another sentence could be added for clarity or detail.
• Model cutting a strip of writing paper and taping it on the draft where you want to add the sentence.
• Say: Now you’re ready to write your sentence(s) on this strip of paper. When you read the writing, read this sentence with the rest of your writing.
• Continue modeling using the spider leg revision tool by inviting the class to find one or two different places where a sentence could be added to the rough draft that was written in class on Days 17–19.
• Say: When you are ready to make revisions to your writing, you may want to try using this tool. The strips are already cut. You can find them back on the writing table (or any place that would be convenient for students).
• Dismiss class from the mini-lesson using practiced signals and behavior.
• Students will write independently at the end of each day’s mini-lesson.
168 ©2012 Benchmark Education Company, LLC
that I wanted to run and hide.
Then I looked at the coach.
I tackled the wrong
guy! I was so
embarrassed.
I looked at the faces
in the crowd. * p.4
stunned
Grades 3 – 6 • Mini-Lessons
DAY 23 – Continue Revising Using an Asterisk
Purpose
• Model the use of an asterisk as a revision tool to add a paragraph to a rough draft.
Teaching Points
• Call students to the whole-group meeting area using your practiced signal.
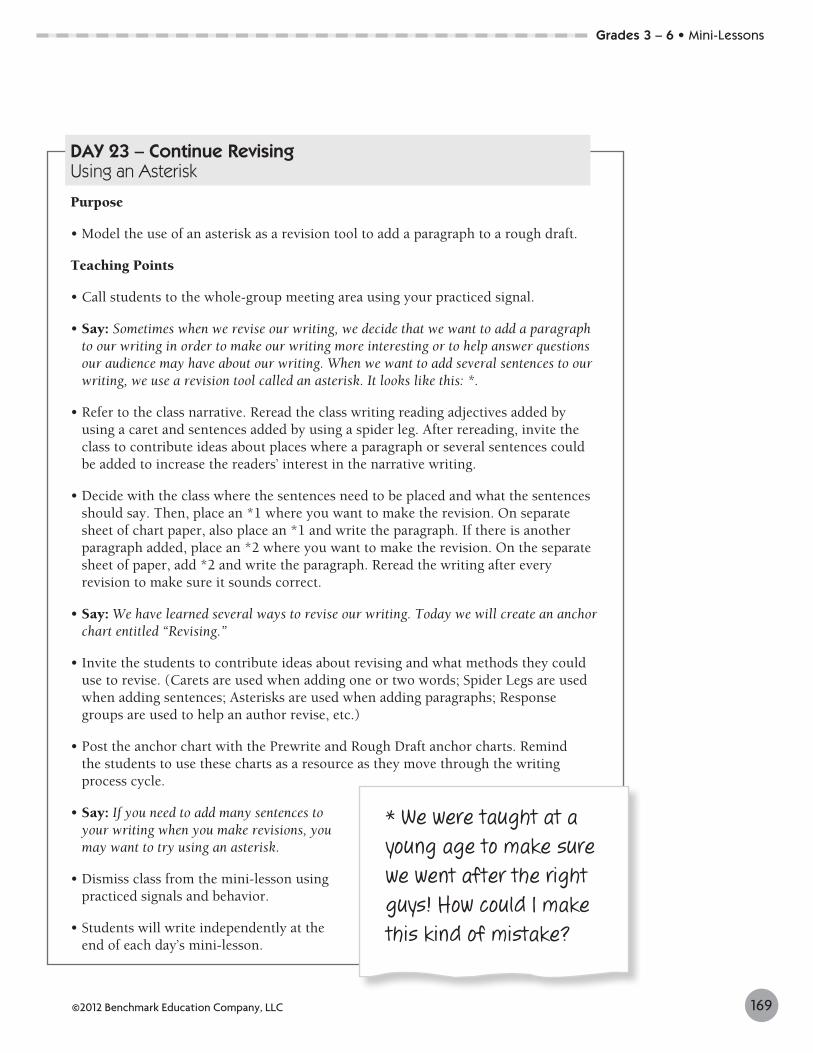
• Say: Sometimes when we revise our writing, we decide that we want to add a paragraph to our writing in order to make our writing more interesting or to help answer questions our audience may have about our writing. When we want to add several sentences to our writing, we use a revision tool called an asterisk. It looks like this: *.
• Refer to the class narrative. Reread the class writing reading adjectives added by using a caret and sentences added by using a spider leg. After rereading, invite the class to contribute ideas about places where a paragraph or several sentences could be added to increase the readers’ interest in the narrative writing.
• Decide with the class where the sentences need to be placed and what the sentences should say. Then, place an *1 where you want to make the revision. On separate sheet of chart paper, also place an *1 and write the paragraph. If there is another paragraph added, place an *2 where you want to make the revision. On the separate sheet of paper, add *2 and write the paragraph. Reread the writing after every revision to make sure it sounds correct.
• Say: We have learned several ways to revise our writing. Today we will create an anchor chart entitled “Revising.”
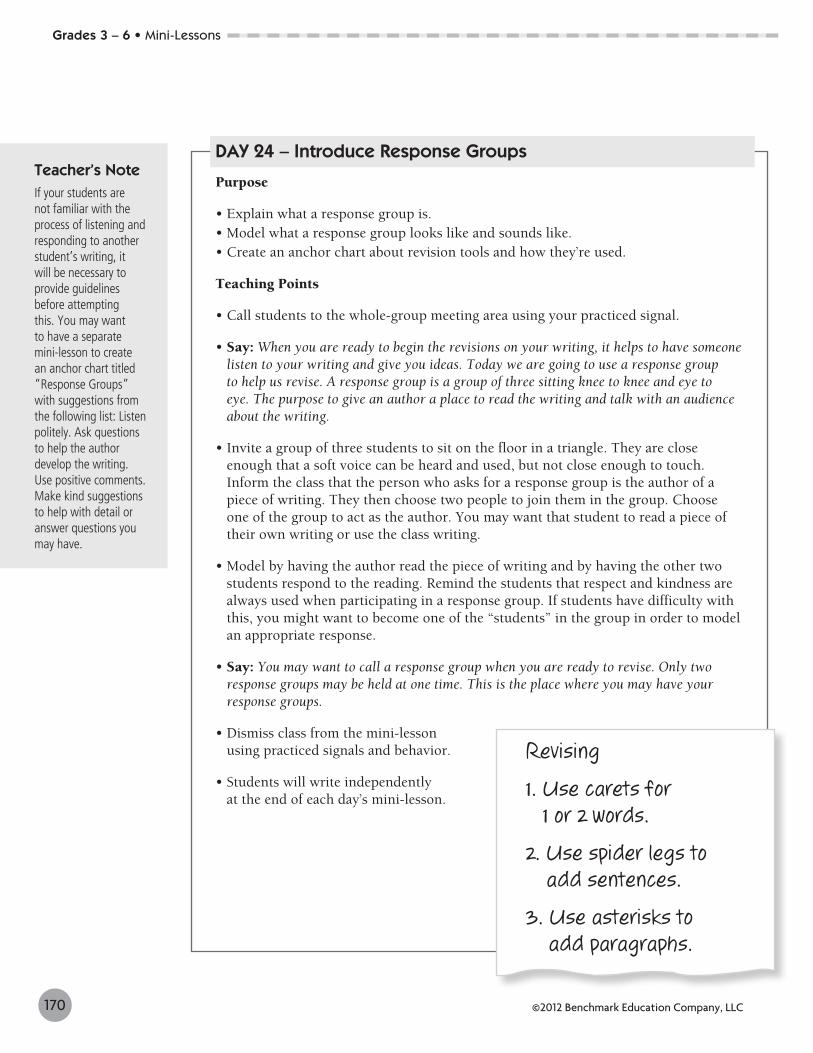
• Invite the students to contribute ideas about revising and what methods they could use to revise. (Carets are used when adding one or two words; Spider Legs are used when adding sentences; Asterisks are used when adding paragraphs; Response groups are used to help an author revise, etc.)
• Post the anchor chart with the Prewrite and Rough Draft anchor charts. Remind the students to use these charts as a resource as they move through the writing process cycle.
• Say: If you need to add many sentences to your writing when you make revisions, you may want to try using an asterisk.
• Dismiss class from the mini-lesson using practiced signals and behavior.
• Students will write independently at the end of each day’s mini-lesson.
169©2012 Benchmark Education Company, LLC
* We were taught at a young age to make sure we went after the right guys! How could I make this kind of mistake?
Grades 3 – 6 • Mini-Lessons
DAY 24 – Introduce Response Groups
Purpose
• Explain what a response group is.• Model what a response group looks like and sounds like.• Create an anchor chart about revision tools and how they’re used.
Teaching Points
• Call students to the whole-group meeting area using your practiced signal.
• Say: When you are ready to begin the revisions on your writing, it helps to have someone listen to your writing and give you ideas. Today we are going to use a response group to help us revise. A response group is a group of three sitting knee to knee and eye to eye. The purpose to give an author a place to read the writing and talk with an audience about the writing.
• Invite a group of three students to sit on the floor in a triangle. They are close enough that a soft voice can be heard and used, but not close enough to touch. Inform the class that the person who asks for a response group is the author of a piece of writing. They then choose two people to join them in the group. Choose one of the group to act as the author. You may want that student to read a piece of their own writing or use the class writing.
• Model by having the author read the piece of writing and by having the other two students respond to the reading. Remind the students that respect and kindness are always used when participating in a response group. If students have difficulty with this, you might want to become one of the “students” in the group in order to model an appropriate response.
• Say: You may want to call a response group when you are ready to revise. Only two response groups may be held at one time. This is the place where you may have your response groups.
• Dismiss class from the mini-lesson using practiced signals and behavior.
• Students will write independently at the end of each day’s mini-lesson.
170 ©2012 Benchmark Education Company, LLC
Teacher’s NoteIf your students are not familiar with the process of listening and responding to another student’s writing, it will be necessary to provide guidelines before attempting this. You may want to have a separate mini-lesson to create an anchor chart titled “Response Groups” with suggestions from the following list: Listen politely. Ask questions to help the author develop the writing. Use positive comments. Make kind suggestions to help with detail or answer questions you may have.
Revising
1. Use carets for 1 or 2 words.
2. Use spider legs to add sentences.
3. Use asterisks to add paragraphs.
Grades 3 – 6 • Mini-Lessons
Teacher tip here? pull out some copy?
DAY 25 - Introduce Editing
Purpose
• Introduce students to editing.
Teaching Points
• Call students to the whole-group meeting area using your practiced signal.
• Point out the editing step in the writing process by referencing the writing process cycle.
• Say: After authors have revised their writing, then they look at the next step in the writing process. This is the editing step. It is important that writing has no spelling, capitalization, or punctuation errors. The first step is for the author to look for mistakes by rereading. Then an author often asks someone to help them continue the process. You will do the same thing when you ask someone to be your editor. Your editor will help you read through your writing to look for errors. During the year, we will learn many new things about grammar, capitalization, punctuation, and spelling. You will be expected to use what we learn as you edit your own writing and the writing of others.
• Edit your class writing or a story that has at least one spelling error, one capitalization error, and one punctuation error. Invite students to correct errors they see as you read the story.
• Say: You may be ready to edit your writing. Remember to reread your writing to find and correct as many errors as possible before asking a classmate to be your editor.
• Dismiss class from the mini-lesson using practiced signals and behavior.
• Students will write independently at the end of each day’s mini-lesson.
171©2012 Benchmark Education Company, LLC
Teacher’s NoteCommon editing marks are included on page 180. You will be the best judge as to the levels of mastery your students will have when identifying spelling, punctuation, and capitalization errors. You may want to create a chart for your students to use as a resource with the editing marks noted.
Grades 3 – 6 • Mini-Lessons
DAY 26 – Editing, continued
Purpose
• Explain that conferring with the teacher is part of the editing step of the writing process.
• Make an anchor chart about what to do as they wait to confer with the teacher.
Teaching Points
• Call students to the whole-group meeting area using your practiced signal.
• Point out the editing step in the writing process by referencing the writing process cycle.
• Say: After authors have edited their writing with a partner, they are almost ready to publish their writing.
• Display the story that was written together on Days 17–19 and reread it with students. Refer to the Writing Process Cycle chart.
• Say: Now that we are almost ready to publish our writing, we need to confer with the teacher, who will be your editor-in-chief, the person in charge of publications. This is part of the editing process. I will be your editor-in-chief. When you get the editor-in-chief’s approval, you may begin the publishing process.
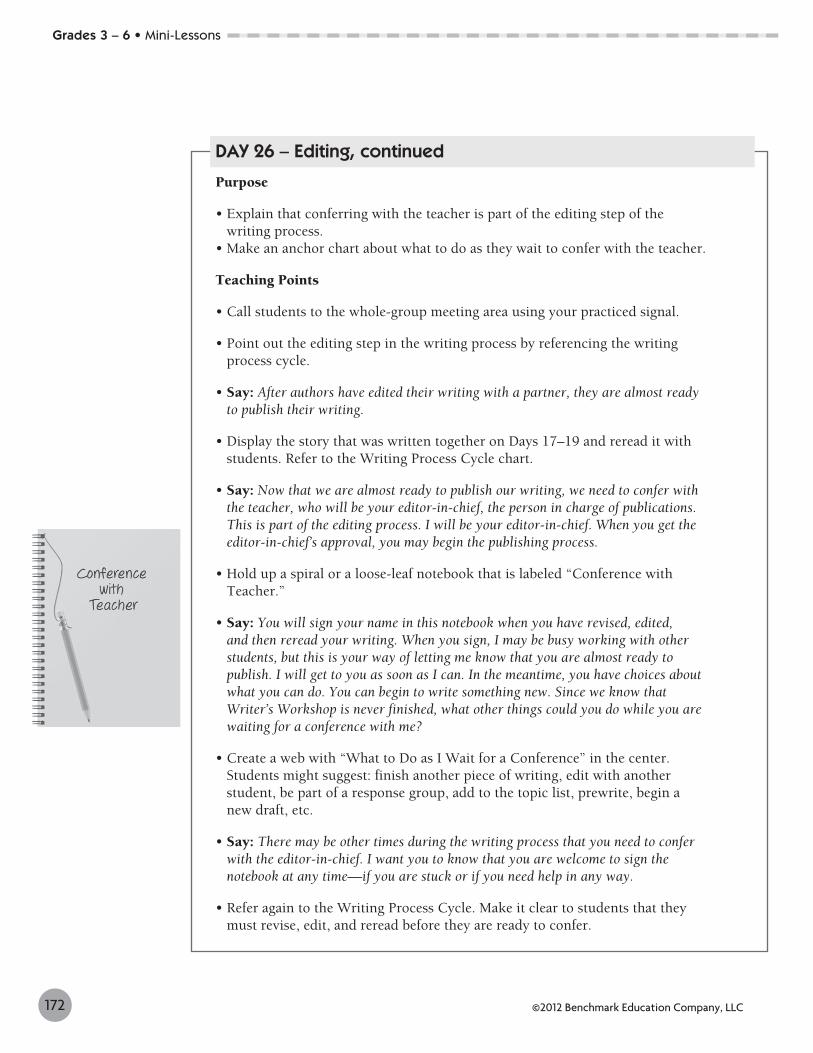
• Hold up a spiral or a loose-leaf notebook that is labeled “Conference with Teacher.”
• Say: You will sign your name in this notebook when you have revised, edited, and then reread your writing. When you sign, I may be busy working with other students, but this is your way of letting me know that you are almost ready to publish. I will get to you as soon as I can. In the meantime, you have choices about what you can do. You can begin to write something new. Since we know that Writer’s Workshop is never finished, what other things could you do while you are waiting for a conference with me?
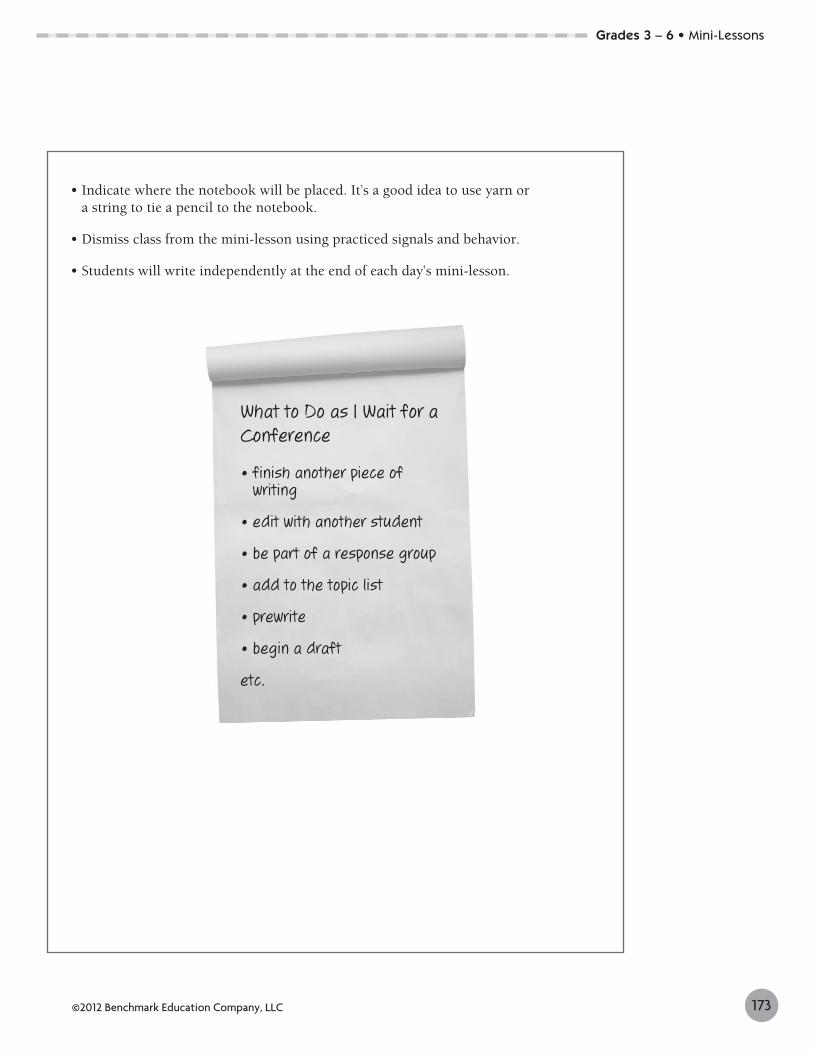
• Create a web with “What to Do as I Wait for a Conference” in the center. Students might suggest: finish another piece of writing, edit with another student, be part of a response group, add to the topic list, prewrite, begin a new draft, etc.
• Say: There may be other times during the writing process that you need to confer with the editor-in-chief. I want you to know that you are welcome to sign the notebook at any time—if you are stuck or if you need help in any way.
• Refer again to the Writing Process Cycle. Make it clear to students that they must revise, edit, and reread before they are ready to confer.
172 ©2012 Benchmark Education Company, LLC
Grades 3 – 6 • Mini-Lessons
• Indicate where the notebook will be placed. It’s a good idea to use yarn or a string to tie a pencil to the notebook.
• Dismiss class from the mini-lesson using practiced signals and behavior.
• Students will write independently at the end of each day’s mini-lesson.
173©2012 Benchmark Education Company, LLC
What to Do as I Wait for a Conference
• finish another piece of writing
• edit with another student
• be part of a response group
• add to the topic list
• prewrite
• begin a draft
etc.
Grades 3 – 6 • Mini-Lessons
DAY 27 – Conferring with the Teacher
Purpose
• Discuss the procedures of teacher/student conferences and their importance.
Teaching Points
• Call students to the whole-group meeting area using your practiced signal.
• Point out the editing step with students and review with them what they need to do during this step of the writing process.
• Say: After authors have edited their writing with their other writers, then they need to talk to the editor-in-chief. We will review your writing once again to ensure that it is ready for publication. We will read your piece together, and then we might focus on one, or possibly two, items that would improve your writing. You might choose to make any changes to your writing during the conference, or you might decide to go back to your writing place to do your final work. You need to have the approval of the editor-in-chief before you begin to publish.
• Say: Let’s review the writing process. If we have revised and edited our writing, we are almost ready to publish. What should we do now? Yes, we sign the conference notebook so that we can meet with the editor-in-chief. When the teacher is ready to confer, we bring our writing folder and our pencil to the conference table. We are prepared to read our writing with the editor-in-chief.
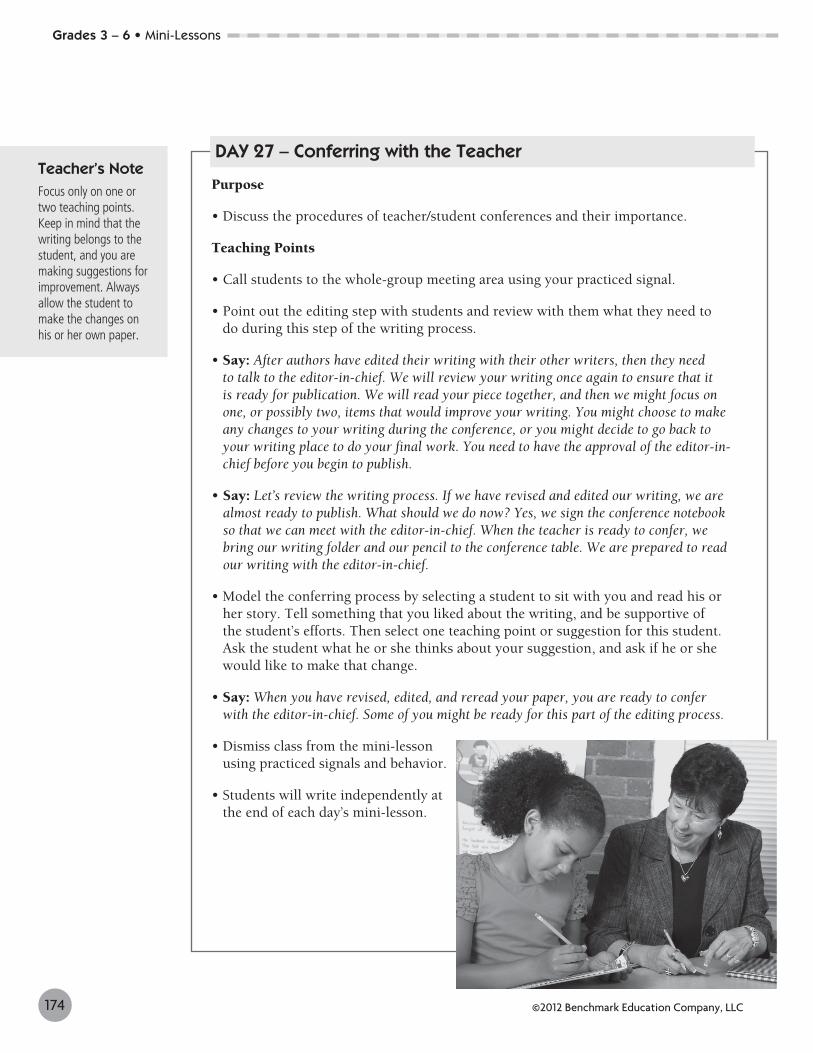
• Model the conferring process by selecting a student to sit with you and read his or her story. Tell something that you liked about the writing, and be supportive of the student’s efforts. Then select one teaching point or suggestion for this student. Ask the student what he or she thinks about your suggestion, and ask if he or she would like to make that change.
• Say: When you have revised, edited, and reread your paper, you are ready to confer with the editor-in-chief. Some of you might be ready for this part of the editing process.
• Dismiss class from the mini-lesson using practiced signals and behavior.
• Students will write independently at the end of each day’s mini-lesson.
174 ©2012 Benchmark Education Company, LLC
Teacher’s Note Focus only on one or two teaching points. Keep in mind that the writing belongs to the student, and you are making suggestions for improvement. Always allow the student to make the changes on his or her own paper.
Grades 3 – 6 • Mini-Lessons
DAY 28 – Publishing
Purpose
• Explain the publishing step of the writing process.
Teaching Points
• Call students to the whole-group meeting area using your practiced signal.
• Point out the publishing step in the writing process by referencing the writing process cycle.
• Say: After authors have edited their writing, then they look at the next step in the writing process. This is the publishing step. As authors, we will decide on illustrations, charts, graphs, or diagrams that need to be added to the writing. In the publishing stage, we reread our writing to make sure the message says what we want it to say. We add any illustrations that are needed.
• Display the story that was written together on Days 17–19 and reread it with students. Refer to the Writing Process Cycle chart.
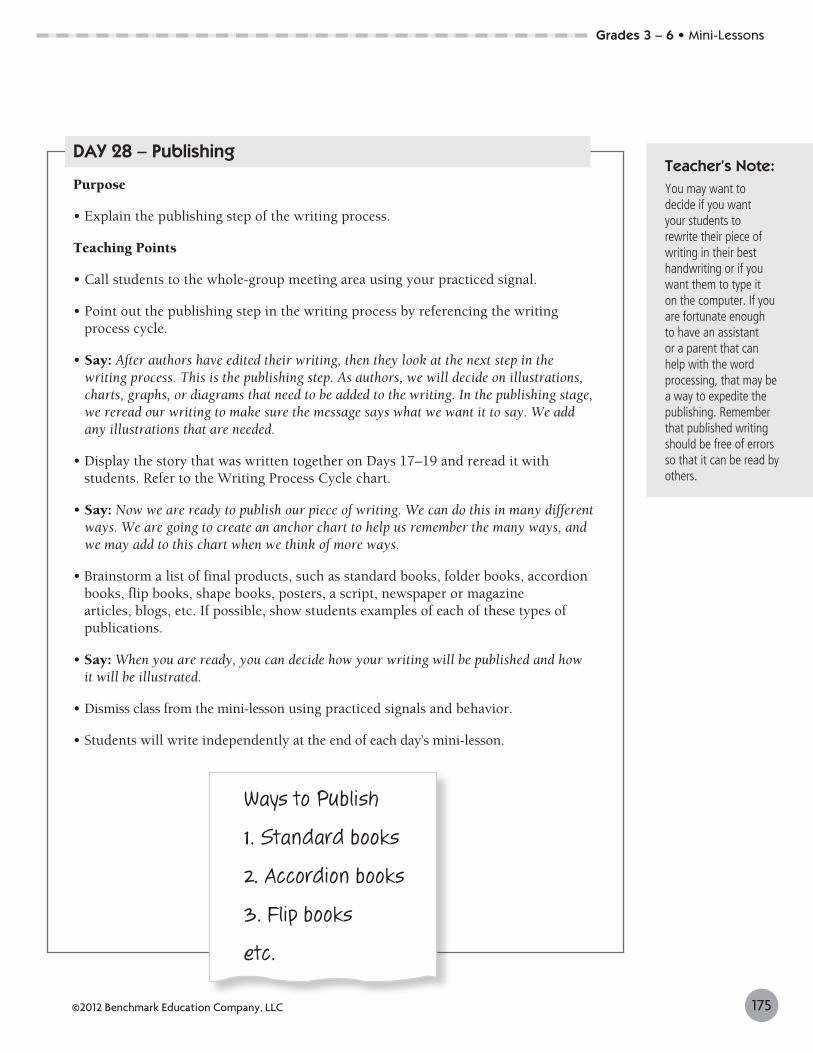
• Say: Now we are ready to publish our piece of writing. We can do this in many different ways. We are going to create an anchor chart to help us remember the many ways, and we may add to this chart when we think of more ways.
• Brainstorm a list of final products, such as standard books, folder books, accordion books, flip books, shape books, posters, a script, newspaper or magazine articles, blogs, etc. If possible, show students examples of each of these types of publications.
• Say: When you are ready, you can decide how your writing will be published and how it will be illustrated.
• Dismiss class from the mini-lesson using practiced signals and behavior.
• Students will write independently at the end of each day’s mini-lesson.
175©2012 Benchmark Education Company, LLC
Teacher’s Note:You may want to decide if you want your students to rewrite their piece of writing in their best handwriting or if you want them to type it on the computer. If you are fortunate enough to have an assistant or a parent that can help with the word processing, that may be a way to expedite the publishing. Remember that published writing should be free of errors so that it can be read by others.
Ways to Publish
1. Standard books
2. Accordion books
3. Flip books
etc.
Grades 3 – 6 • Mini-Lessons
DAY 29 – Publishing, continued
Purpose
• Explain the publishing step of the writing process.• Discuss text features that could be added to the writing during publication.
Teaching Points
• Call students to the whole-group meeting area using your practiced signal.
• Point out the publishing step in the writing process by referencing the writing process cycle.
• Say: In the publishing stage, we reread our writing to make sure the message says what we want it to say. Then we add any illustrations, charts, or diagrams that are needed. We think about the cover and other features, such as a title page.
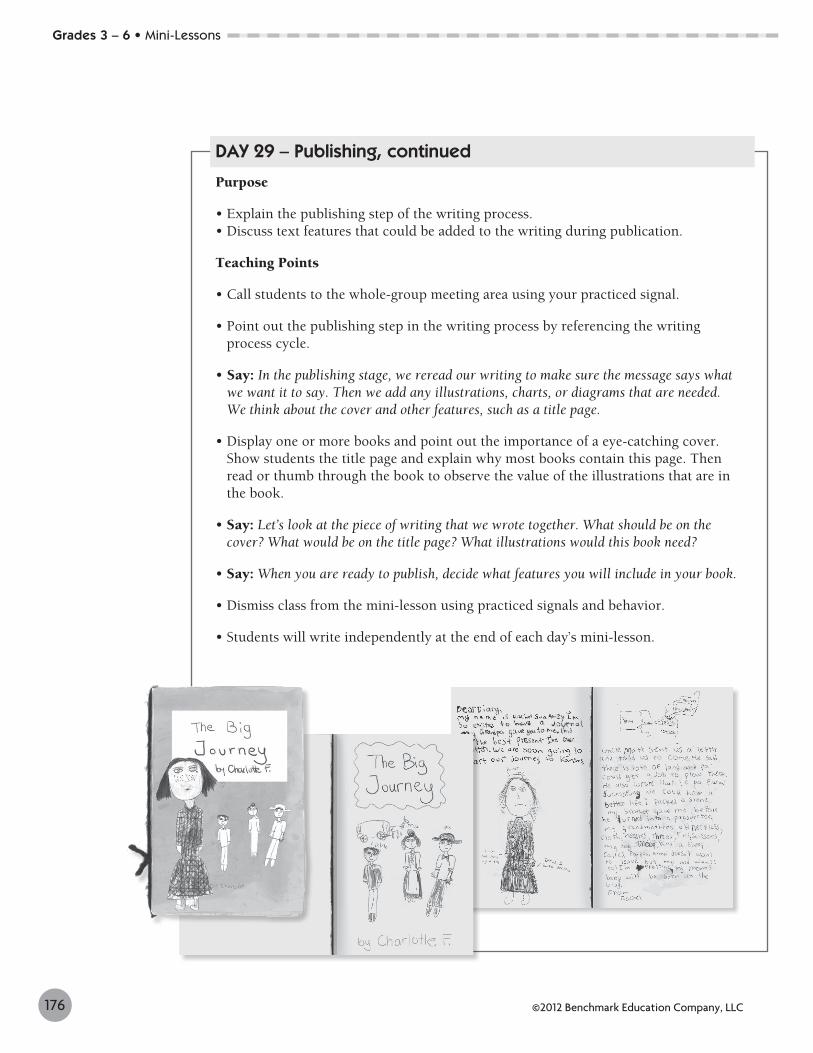
• Display one or more books and point out the importance of a eye-catching cover. Show students the title page and explain why most books contain this page. Then read or thumb through the book to observe the value of the illustrations that are in the book.
• Say: Let’s look at the piece of writing that we wrote together. What should be on the cover? What would be on the title page? What illustrations would this book need?
• Say: When you are ready to publish, decide what features you will include in your book.
• Dismiss class from the mini-lesson using practiced signals and behavior.
• Students will write independently at the end of each day’s mini-lesson.
176 ©2012 Benchmark Education Company, LLC
Grades 3 – 6 • Mini-Lessons
DAY 30 – Sharing
Purpose
• Explain the sharing step of the writing process.• Learn appropriate responses.• Understand the importance of the author’s chair.
Teaching Points
• Call students to the whole-group meeting area using your practiced signal.
• Point out the sharing step in the writing process by referencing the writing process cycle.
• Say: After authors have their writing published, they often like to share their writing with others. This is the sharing step. Authors are proud of what they have written.
• Display the narrative that you have written.
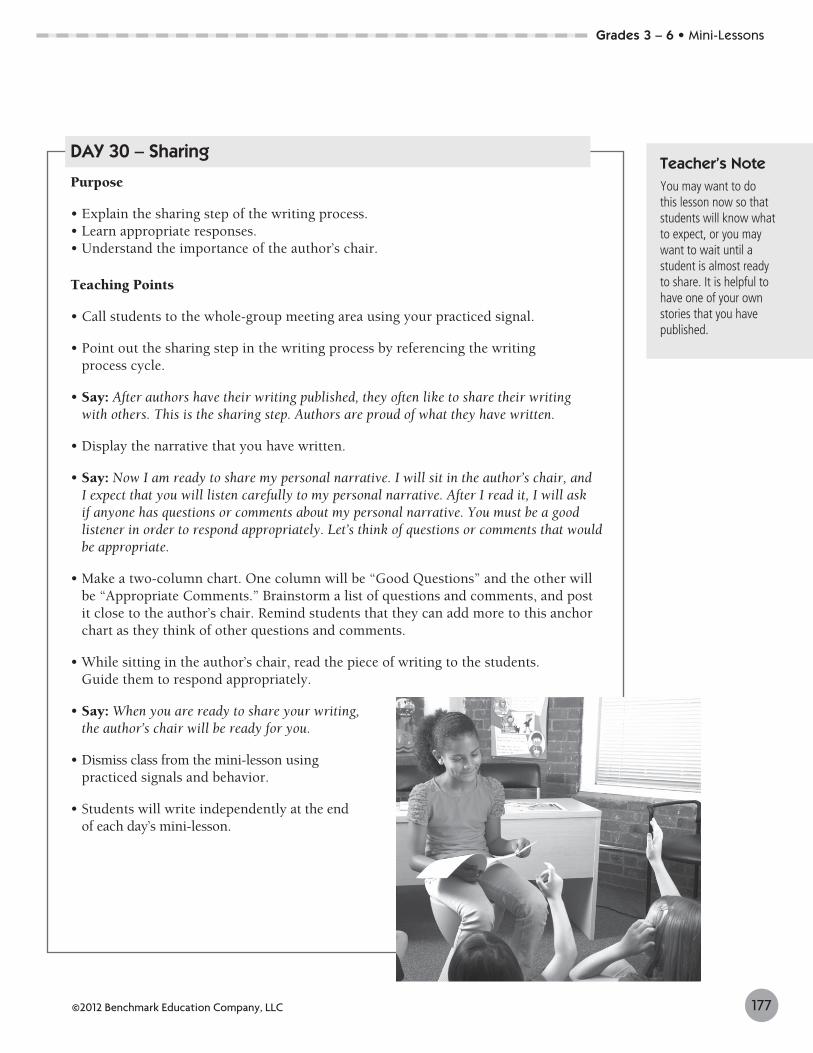
• Say: Now I am ready to share my personal narrative. I will sit in the author’s chair, and I expect that you will listen carefully to my personal narrative. After I read it, I will ask if anyone has questions or comments about my personal narrative. You must be a good listener in order to respond appropriately. Let’s think of questions or comments that would be appropriate.
• Make a two-column chart. One column will be “Good Questions” and the other will be “Appropriate Comments.” Brainstorm a list of questions and comments, and post it close to the author’s chair. Remind students that they can add more to this anchor chart as they think of other questions and comments.
• While sitting in the author’s chair, read the piece of writing to the students. Guide them to respond appropriately.
• Say: When you are ready to share your writing, the author’s chair will be ready for you.
• Dismiss class from the mini-lesson using practiced signals and behavior.
• Students will write independently at the end of each day’s mini-lesson.
177©2012 Benchmark Education Company, LLC
Teacher’s Note You may want to do this lesson now so that students will know what to expect, or you may want to wait until a student is almost ready to share. It is helpful to have one of your own stories that you have published.
Grades 3 – 6 • Mini-Lessons