Embed Size (px)
Citation preview

SpecificationsLength........................................................................................45.25.in.(1131.3mm)Beam............................................................................................ 23.75.in.(593.8mm)Engine.............................................................. Zenoah®.G26M.and.Tuned.ExhaustSpeed..............................................................................................................+35.MPHRadio.System......................................................................... .JR®.XR3i.FM.75MHzPropeller................................................................................................... Prather.270
1/8-Scale.Miss.Elam.Unlimited.Hydroplane.Owner's.Manual
Miss
��
Congratulations.on.the.purchase.of.your..Pro.Boat™.Miss.Elam..This.is.a.1/8-scale.replica.of.the.world.famous.full-scale.hydro..You.are.just.minutes.from.one.of.the.most.thrilling.experiences.the.radio.control.hobby.has.to.offer.
The.Pro.Boat.Miss.Elam.is.a.professionally.built,.ready-to-run.fiberglass.model.
Powered.by.the.potent.Zenoah®.G26M.engine,.you.will.be.able.to.race.across.the.water.at.speeds.in.excess.of.35.mph!
It.is.very.important.that.you.operate.this.boat.responsibly..With.proper.care.and.maintenance,.you.will.be.able.to.enjoy.your.Miss.Elam.for.many.years.to.come.
Carefully.unpack.your.Miss.Elam.and.examine.the.boat.and.its.contents..The.box.should.contain.the.Miss.Elam.RTR.with.radio.installed,.a.boat.stand,.and.the.JR®.XR3i.radio.transmitter..If.you.are.missing.any.of.these.items.or.notice.any.damage,.immediately.contact.the.place.of.purchase.
Table of Contents
Limited.Warranty.&.Limits.of.Liability..................................................................................................................... 3Additional.Required.Items.......................................................................................................................................... 5Suggested.Field.Equipment.and.Supplies................................................................................................................. 5Contents......................................................................................................................................................................... 5Section.1:.Building.the.Boat.Stand............................................................................................................................ 6Section.2:.Attaching.the.Turn.Fin............................................................................................................................... 6Section.3:.Removing.the.Canopy.............................................................................................................................. 7Section.4:.Installing.the.Radio.System.Batteries.................................................................................................... 7Section.5:.Installing.the.Rudder................................................................................................................................. 9Section.6:.Propeller.Balancing.................................................................................................................................... 9Section.7:.Fueling.the.Tank........................................................................................................................................10Section.8:.Fuel/Oil.Mixture.......................................................................................................................................10Section.9:.Range.Check.the.XR3i.Radio.System................................................................................................10Section.10:.Starting.the.Engine................................................................................................................................11Section.11:.Initial.Launch.of.the.Miss.Elam...........................................................................................................12Section.12:.Stopping.the.Engine..............................................................................................................................12Section.13:.Cooling.System......................................................................................................................................13Section.14:.Clutch.......................................................................................................................................................14Section.15:.Troubleshooting.Guide.........................................................................................................................15Section.16:.Hull.Care.................................................................................................................................................15Section.17:.Maintenance............................................................................................................................................15Section.18:.Replacement.Parts................................................................................................................................17Appendix.......................................................................................................................................................................18Notes.............................................................................................................................................................................19
Introduction
�
Pursuant.to.this.Limited.Warranty,.Horizon.Hobby,.Inc..will,.at.its.option,.(i).repair.or.(ii).replace,.any.product.determined.by.Horizon.Hobby,.Inc..to.be.defective..In the event of a defect, these are your exclusive remedies.
This.warranty.does.not.cover.cosmetic.damage.or.damage.due.to.acts.of.God,.accident,.misuse,.abuse,.negligence,.commercial.use,.or.modification.of,.or.to.any.part.of.the.Product..This.warranty.does.not.cover.damage.due.to.improper.installation,.operation,.maintenance,.or.attempted.repair.by.anyone.other.than.an.authorized.Horizon.Hobby,.Inc..service.center..This.warranty.is.limited.to.the.original.purchaser.and.is.not.transferable..In.no.case.shall.Horizon.Hobby’s.liability.exceed.the.original.cost.of.the.purchased.product.and.will.not.cover.consequential,.incidental.or.collateral.damage..Horizon.Hobby,.Inc..reserves.the.right.to.inspect.any.and.all.equipment.involved.in.a.warranty.claim..Repair.or.replacement.decisions.are.at.the.sole.discretion.of.Horizon.Hobby,.Inc..Further,.Horizon.Hobby.reserves.the.right.to.change.or.modify.this.warranty.without.notice.
REPAIR.OR.REPLACEMENT.AS.PROVIDED.UNDER.THIS.WARRANTY.IS.THE.EXCLUSIVE.REMEDY.OF.THE.CONSUMER..HORIZON.HOBBY,.INC..SHALL.NOT.BE.LIABLE.FOR.ANY.INCIDENTAL.OR.CONSEQUENTIAL.DAMAGES.
As Horizon Hobby, Inc. has no control over use, setup, final assembly, modification or misuse, no liability shall be assumed nor accepted for any resulting damage or injury. By the act of use, setup or assembly, the user accepts all resulting liability.
If you as the purchaser or user are not prepared to accept the liability associated with the use of this product, you are advised to return this product immediately in new and unused condition to the place of purchase.
Safety PrecautionsThis.is.a.sophisticated.hobby.product.and.not.a.toy..It.must.be.operated.with.caution.and.common.sense.and.requires.some.basic.mechanical.ability..Failure.to.operate.this.product.in.a.safe.and.responsible.manner.could.result.in.injury.or.damage.to.the.product.or.other.property..This product is not intended for use by children without direct adult supervision.
The product manual contains instructions for safety, operation and maintenance. It is essential to read and follow all the instructions and warnings in the manual, prior to assembly, setup or use, in order to operate correctly and avoid damage or injury.
Questions, Assistance, and RepairsYour.local.hobby.store.and/or.place.of.purchase.cannot.provide.warranty.support.or.repair..Once.assembly,.setup.or.use.of.the.product.has.been.started,.you.must.contact.Horizon.Hobby,.Inc..directly..This.will.enable.Horizon.to.better.answer.your.questions.and.service.you.in.the.event.that.you.may.need.any.assistance.
Questions or AssistanceFor.questions.or.assistance,[email protected],..or.call.877.504.0233.toll.free.to.speak.to.a..service.technician.
Inspection or RepairsIf.your.product.needs.to.be.inspected.or.repaired,.please.call.for.a.Return.Merchandise.Authorization.(RMA)..Pack.the.product.securely.using.a.shipping.carton..Please.note.that.original.boxes.may.be.included,.but.are.not.designed.to.withstand.the.rigors.of.shipping.without.additional.protection..Ship.via.a.carrier.that.provides.tracking.and.insurance.for.
Limited Warranty & Limits of Liability
��
lost.or.damaged.parcels,.as.Horizon.Hobby,.Inc..is.not.responsible.for.merchandise.until.it.arrives.and.is.accepted.at.our.facility..Include.your.complete.name,.address,.phone.number.where.you.can.be.reached.during.business.days,.RMA.number,.and.a.brief.summary.of.the.problem..Be.sure.your.name,.address,.and.RMA.number.are.clearly.written.on.the.shipping.carton.
Warranty Inspection and RepairsTo.receive.warranty.service,.you.must.include.your.original.sales.receipt.verifying.the.proof-of-purchase.date..Providing.warranty.conditions.have.been.met,.your.product.will.be.repaired.or.replaced.free.of.charge..Repair.or.replacement.decisions.are.at.the.sole.discretion.of.Horizon.Hobby.
Non-Warranty RepairsShould.your.repair.not.be.covered.by.warranty.and.the.expense.exceeds.50%.of.the.retail.purchase.cost,.you.will.be.provided.with.an.estimate.advising.you.of.your.options..You.will.be.billed.for.any.return.freight.for.non-warranty.repairs..Please.advise.us.of.your.preferred.method.of.payment..Horizon.Hobby.accepts.money.orders.and.cashiers.checks,.as.well.as.Visa,.MasterCard,.American.Express,.and.Discover.cards..If.you.choose.to.pay.by.credit.card,.please.include.your.credit.card.number.and.expiration.date..Any.repair.left.unpaid.or.unclaimed.after.90.days.will.be.considered.abandoned.and.will.be.disposed.of.accordingly.
Electronics and engines requiring inspection or repair should be shipped to the following address (freight prepaid):
Horizon Service Center 4105 Fieldstone Road
Champaign, Illinois 61822
All other products requiring inspection or repair should be shipped to the following address (freight prepaid):
Horizon Product Support 4105 Fieldstone Road
Champaign, Illinois 61822
Limited Warranty PeriodHorizon.Hobby,.Inc..guarantees.Pro.Boat™.products.to.be.free.from.defects.in.both.material.and.workmanship.at.the.date.of.purchase.
General GuidelinesIt.is.important.that.you.read.and.follow.this.instruction.manual,.along.with.the.JR®.XR3i.radio.system.manual.and.the.Zenoah®.G26.engine.manual,.before.you.run.this.exciting.boat..Failure.to.read.and.understand.the.manual.could.result.is.personal.injury,.property.damage.or.permanent.damage.to.your.boat!.It.is.also.important.to.run.your.boat.responsibly..With.proper.care.and.maintenance,.you.will.be.able.to.proudly.enjoy.your.Miss.Elam.for.many.years.to.come.
This.boat.has.been.designed.to.race.in.an.oval.path,.just.like.its.full.scale.counterpart..At.high.speeds.do.not.attempt.turns.to.the.left,.as.the.boat.may.become.unstable..If.you.have.to.turn.left,.do.so.in.a.large.diameter.turn.and.at.slow.speeds.
When.operating.the.boat,.stay.clear.of.people,.full-scale.boats,.stationary.objects.and.wildlife..It.is.preferable.to.operate.the.Miss.Elam.in.low.wake,.low.wind.conditions.and.in.areas.free.of.people,.wildlife.and.objects.
Before.you.operate.your.model,.make.sure.that.your.frequency.is.clear..If.someone.is.operating.on.the.same.frequency,.both.models.could.go.out.of.control,.possibly.causing.damage.to.the.models.or.to.others..Check.all.of.the.hardware,.manifold,.pipe.and.propeller.for.security.before.and.after.each.run.
If.at.any.time.while.operating.your.model.you.sense.any.abnormal.function,.end.your.operation.immediately..Do.not.operate.your.boat.again.until.you.are.certain.the.problem.has.been.corrected..Always stay clear of the propeller.
Limited Warranty & Limits of Liability (cont)
�
Although.the.Miss.Elam.comes.fully.assembled.and.ready.for.action,.you.will.need.a.few.additional.items.in.order.to.run.your.boat..You.will.need.the.following:
Zenoah®.2-Cycle.Oil.(ZEN20001)CA.or.epoxy.glueFlex.Shaft.lubrication.(see.local.hobby.store)Fuel.container
Fuel.Pump.(HAN155)12.“AA”.alkaline.batteries.(8.for.the.transmitter.and.4.for.the.receiver)Gasoline.(+87.Octane),.ethanol-free
In.addition.to.the.items.needed.to.run.the.Miss.Elam,.we.recommend.that.you.carry.the.following..in.your.field.box:
Engine.Tuning.Screwdriver.(DYN2775)Clean.towelsExtra.Propellers.(PRAB270)2mm.hex.wrench2.5mm.hex.wrench
4mm.hex.wrench#1.PhillipsSmall.crescent.wrenchWaxScrew-locking.compound
Additional Required Items
Suggested Field Equipment and Supplies
Contents
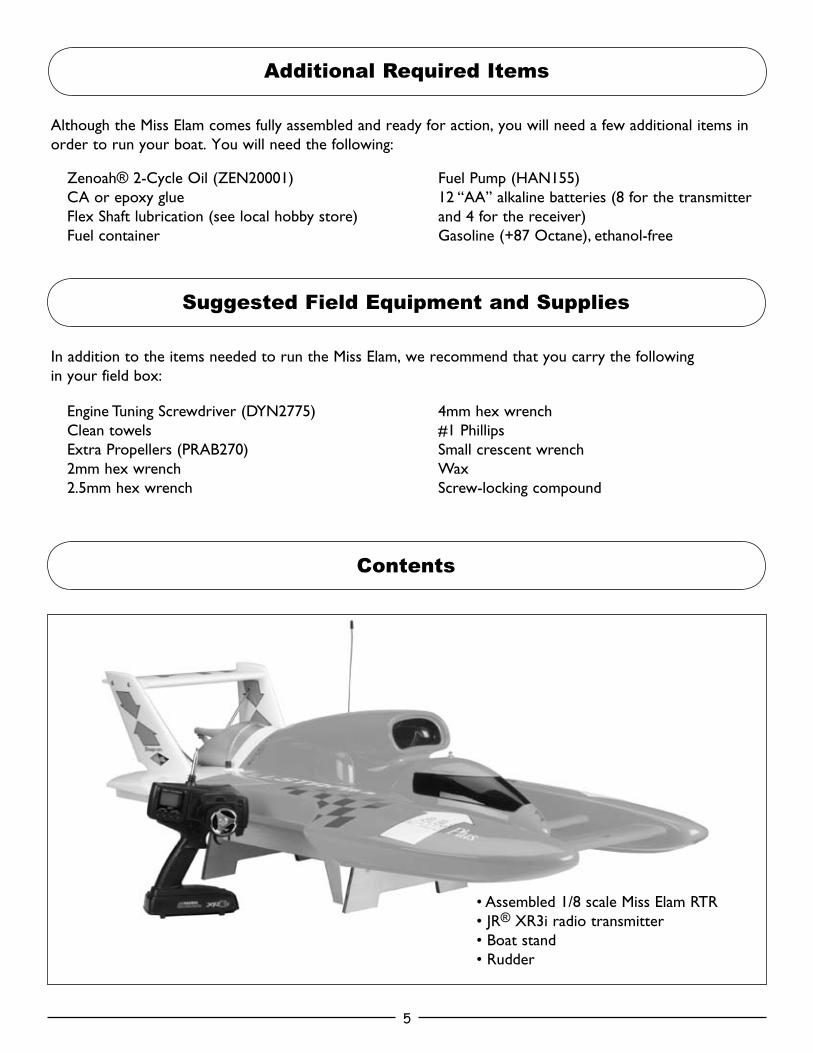
•.Assembled.1/8.scale.Miss.Elam.RTR•.JR®.XR3i.radio.transmitter•.Boat.stand•.Rudder

�
Parts RequiredPlywood.boat.stand.pieces.(4)Tools.and.Adhesives.NeededCA.or.epoxy
.1..Attach.the.side.boat.pieces.by.interlocking.them.into.the.end.pieces.as.shown.
.2..Secure.the.interlocking.boat.stand.with.medium.thick.CA.or.epoxy..Make.certain.you.allow.the.CA.or.epoxy.to.fully.cure.before.placing.the.boat.on.the.stand.
Parts RequiredTurn.Fin3mm.hex.screws.(2)Tools.and.Adhesives.Needed3mm.hex.driverBlue.Threadlock
.1..Locate.the.included.turn.fin..This.will.be.attached.to.the.right.sponson..Any.attempt.to.turn.the.boat.left.may.cause.the.boat.to.flip,.especially.if.this.is.done.in.a.tight.diameter.and.at.high.speeds.
.2..Place.the.Miss.Elam.on.the.completed.boat.stand.once.the.glue.has.fully.cured.
.3..Locate.the.turn.fin.and.the.included.3mm..hex.screws.(2).to.secure.the.turn.fin.
.4..Carefully.place.a.few.drops.of.blue.Threadlock.on.the.threads.of.all.four.hex.screws..This.will.help.to.keep.the.screws.secured.to.the.blind.nuts.within.the.sponson.
.5..Carefully.attach.the.turn.fin.onto.the.right.sponson.as.shown.and.tighten.the.hex.screws.with.a.3mm.hex.driver.
Section 1: Building the Boat Stand
Section 2: Attaching the Turn Fin

�
Unscrew.the.2.knurled.hatch-mounting.screws.from.the.rear.of.the.hatch..Lift.the.hatch.from.the.boat.
Tools and Accessories Required12."AA".batteries2.5mm.hex.wrench
Receiver Batteries.1..Remove.the.2.5mm.hex.head.screws.that.
secure.the.clear.Lexan.radio.box.cover.
.2..Remove.the.receiver.battery.holder.and.install.4.“AA”.alkaline.batteries.in.the.battery.holder..Note.proper.polarity.
.3..Wrap.the.battery.holder.in.the.foam.provided..Secure.the.foam.using.a.rubber..band..Reinstall.the.battery.holder.into.the..radio.compartment.
Section 3: Removing the Canopy
Section 4: Installing the Radio System Batteries
�
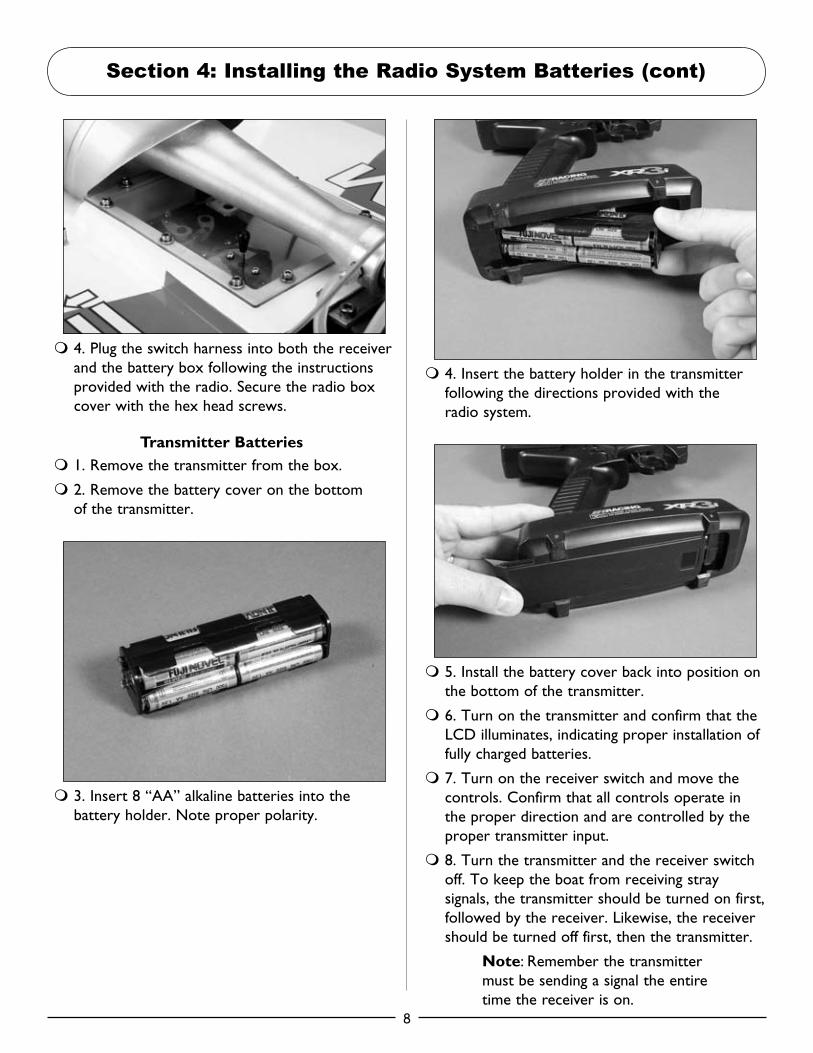
.4..Plug.the.switch.harness.into.both.the.receiver.and.the.battery.box.following.the.instructions.provided.with.the.radio..Secure.the.radio.box.cover.with.the.hex.head.screws.
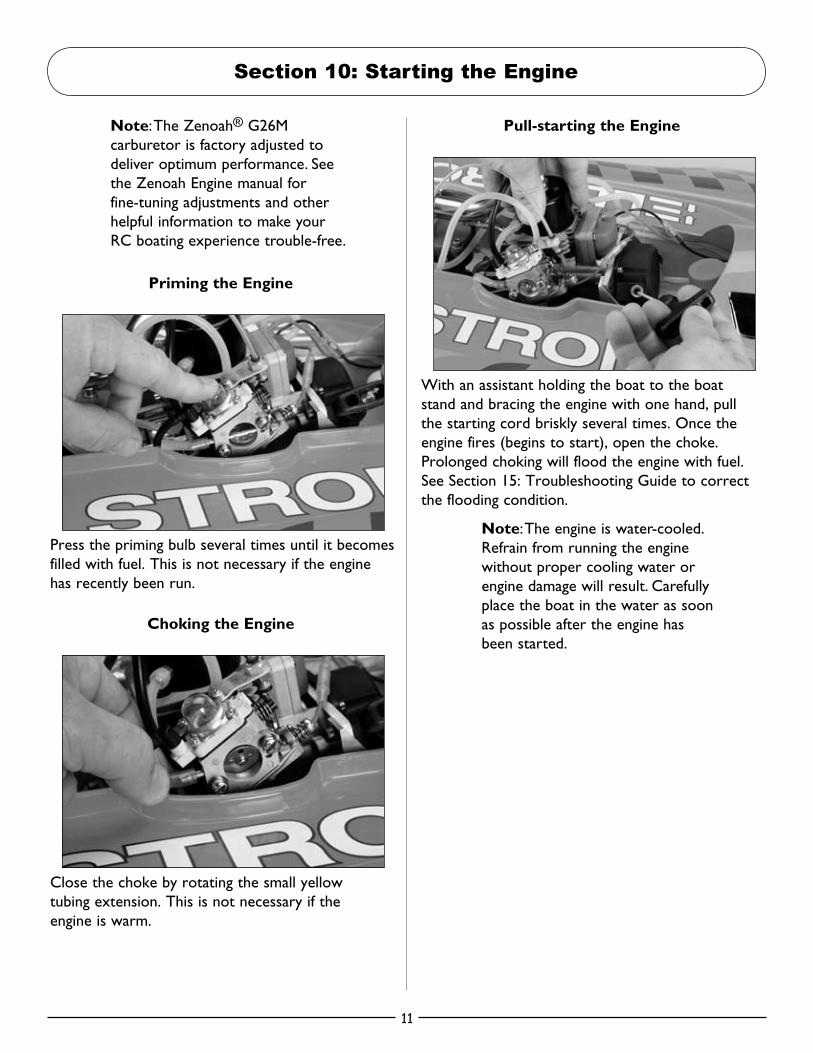
Transmitter Batteries.1..Remove.the.transmitter.from.the.box.
.2..Remove.the.battery.cover.on.the.bottom..of.the.transmitter.
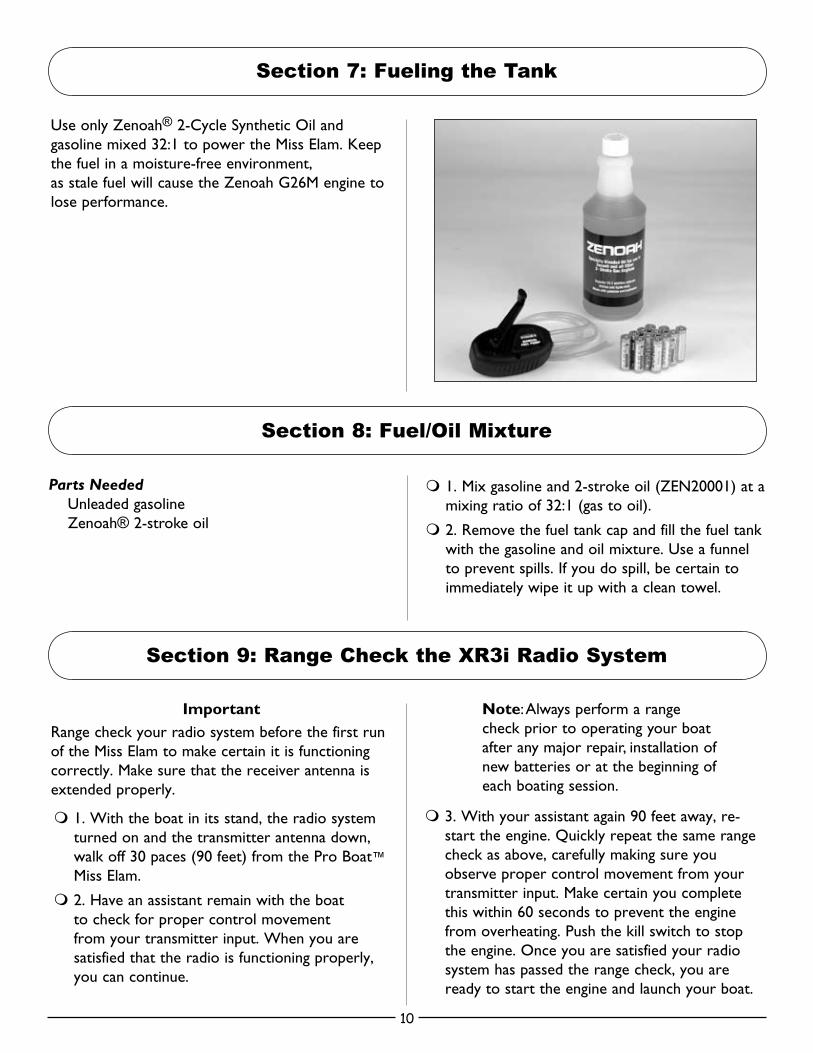
.3..Insert.8.“AA”.alkaline.batteries.into.the.battery.holder..Note.proper.polarity.
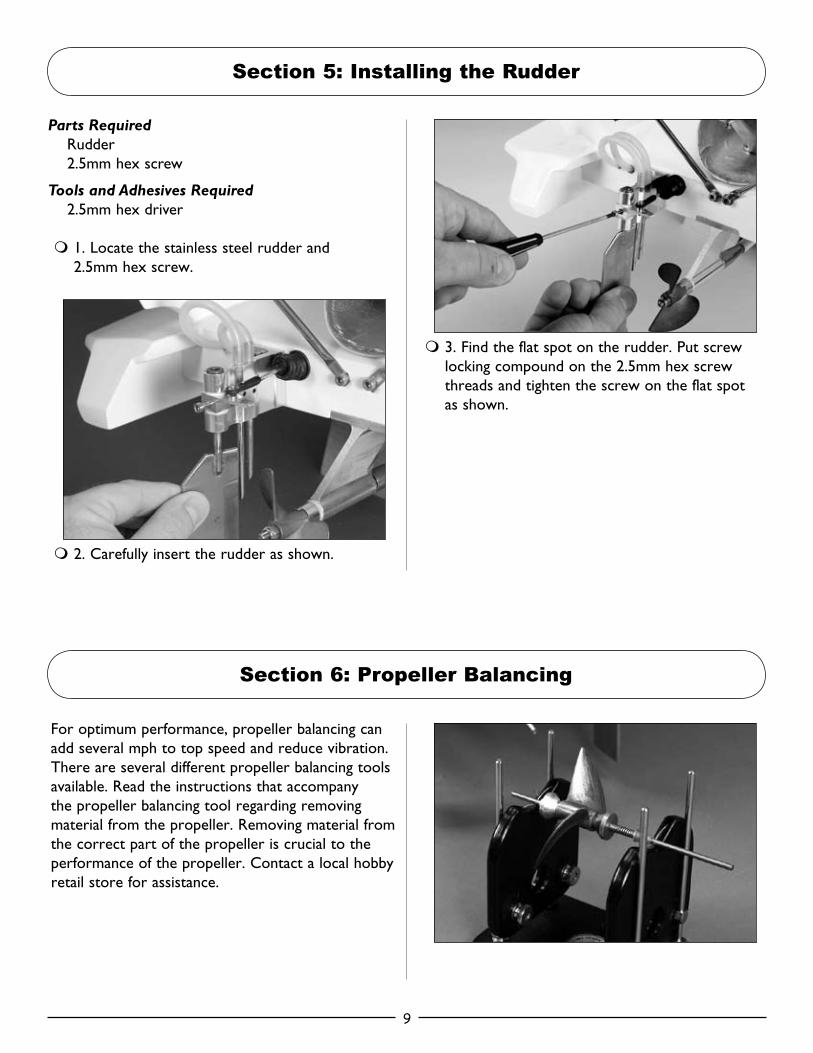
.4..Insert.the.battery.holder.in.the.transmitter.following.the.directions.provided.with.the..radio.system.
.5..Install.the.battery.cover.back.into.position.on.the.bottom.of.the.transmitter.
.6..Turn.on.the.transmitter.and.confirm.that.the.LCD.illuminates,.indicating.proper.installation.of.fully.charged.batteries.
.7..Turn.on.the.receiver.switch.and.move.the.controls..Confirm.that.all.controls.operate.in.the.proper.direction.and.are.controlled.by.the.proper.transmitter.input.
.8..Turn.the.transmitter.and.the.receiver.switch.off..To.keep.the.boat.from.receiving.stray.signals,.the.transmitter.should.be.turned.on.first,.followed.by.the.receiver..Likewise,.the.receiver.should.be.turned.off.first,.then.the.transmitter.
Note:.Remember.the.transmitter.must.be.sending.a.signal.the.entire.time.the.receiver.is.on.
Section 4: Installing the Radio System Batteries (cont)
�
Parts RequiredRudder2.5mm.hex.screw
Tools and Adhesives Required2.5mm.hex.driver
.1..Locate.the.stainless.steel.rudder.and..2.5mm.hex.screw.
.2..Carefully.insert.the.rudder.as.shown.
.3..Find.the.flat.spot.on.the.rudder..Put.screw.locking.compound.on.the.2.5mm.hex.screw.threads.and.tighten.the.screw.on.the.flat.spot..as.shown.
For.optimum.performance,.propeller.balancing.can.add.several.mph.to.top.speed.and.reduce.vibration..There.are.several.different.propeller.balancing.tools.available..Read.the.instructions.that.accompany.the.propeller.balancing.tool.regarding.removing.material.from.the.propeller..Removing.material.from.the.correct.part.of.the.propeller.is.crucial.to.the.performance.of.the.propeller..Contact.a.local.hobby.retail.store.for.assistance.
Section 5: Installing the Rudder
Section 6: Propeller Balancing
10
Use.only.Zenoah®.2-Cycle.Synthetic.Oil.and.gasoline.mixed.32:1.to.power.the.Miss.Elam..Keep.the.fuel.in.a.moisture-free.environment,..as.stale.fuel.will.cause.the.Zenoah.G26M.engine.to.lose.performance.
Parts NeededUnleaded.gasolineZenoah®.2-stroke.oil
.1..Mix.gasoline.and.2-stroke.oil.(ZEN20001).at.a.mixing.ratio.of.32:1.(gas.to.oil).
.2..Remove.the.fuel.tank.cap.and.fill.the.fuel.tank.with.the.gasoline.and.oil.mixture..Use.a.funnel.to.prevent.spills..If.you.do.spill,.be.certain.to.immediately.wipe.it.up.with.a.clean.towel.
ImportantRange.check.your.radio.system.before.the.first.run.of.the.Miss.Elam.to.make.certain.it.is.functioning.correctly..Make.sure.that.the.receiver.antenna.is.extended.properly.
.1..With.the.boat.in.its.stand,.the.radio.system.turned.on.and.the.transmitter.antenna.down,.walk.off.30.paces.(90.feet).from.the.Pro.Boat™.Miss.Elam.
.2..Have.an.assistant.remain.with.the.boat..to.check.for.proper.control.movement..from.your.transmitter.input..When.you.are.satisfied.that.the.radio.is.functioning.properly,.you.can.continue.
Note:.Always.perform.a.range.check.prior.to.operating.your.boat.after.any.major.repair,.installation.of.new.batteries.or.at.the.beginning.of.each.boating.session.
.3..With.your.assistant.again.90.feet.away,.re-start.the.engine..Quickly.repeat.the.same.range.check.as.above,.carefully.making.sure.you.observe.proper.control.movement.from.your.transmitter.input..Make.certain.you.complete.this.within.60.seconds.to.prevent.the.engine.from.overheating..Push.the.kill.switch.to.stop.the.engine..Once.you.are.satisfied.your.radio.system.has.passed.the.range.check,.you.are.ready.to.start.the.engine.and.launch.your.boat.
Section 7: Fueling the Tank
Section 9: Range Check the XR3i Radio System
Section 8: Fuel/Oil Mixture
11
Note:.The.Zenoah®.G26M.carburetor.is.factory.adjusted.to.deliver.optimum.performance..See.the.Zenoah.Engine.manual.for.fine-tuning.adjustments.and.other.helpful.information.to.make.your.RC.boating.experience.trouble-free.
Priming the Engine
Press.the.priming.bulb.several.times.until.it.becomes.filled.with.fuel..This.is.not.necessary.if.the.engine.has.recently.been.run.
Choking the Engine
Close.the.choke.by.rotating.the.small.yellow..tubing.extension..This.is.not.necessary.if.the..engine.is.warm.
Pull-starting the Engine
With.an.assistant.holding.the.boat.to.the.boat..stand.and.bracing.the.engine.with.one.hand,.pull..the.starting.cord.briskly.several.times..Once.the.engine.fires.(begins.to.start),.open.the.choke..Prolonged.choking.will.flood.the.engine.with.fuel..See.Section.15:.Troubleshooting.Guide.to.correct.the.flooding.condition.
Note:.The.engine.is.water-cooled..Refrain.from.running.the.engine.without.proper.cooling.water.or.engine.damage.will.result..Carefully.place.the.boat.in.the.water.as.soon.as.possible.after.the.engine.has.been.started.
Section 10: Starting the Engine

1�
With.the.transmitter.antenna.up,.maneuver.the.Miss.Elam.in.an.oval,.turning.only.to.the.right.at.slow.to.medium.speeds..Make.certain.that.the.boat.and.radio.system.are.functioning.correctly.
As.you.are.running.the.Miss.Elam.in.an.oval,.watch.for.water.being.discharged.from.the.water.outlets.on.the.left.side.of.the.hull..Water.flowing.from.the.water.outlet.indicates.the.engine.is.being.properly.cooled..If.you.do.not.notice.any.water.coming.from.the.water.outlet,.bring.the.boat.in.and.make.sure.that.the.water.cooling.line.or.the.water.pickup.located.near.the.rudder.are.not.clogged.
If.at.anytime.you.notice.the.boat.and/or.radio.system.are.not.functioning.correctly,.end.the.operation.of.the.boat.immediately.and.do.not.run.the.boat.again.until.you.are.confident.the.problems.have.been.corrected.
Idle.the.boat.near.shore.and.press.the.kill.switch.located.on.top.of.the.cockpit.as.shown.
Section 11: Initial Launch of the Miss Elam
Section 12: Stopping the Engine

1�
Water Pump
The.water.pump.is.operated.from.crankcase.pressure..Be.sure.that.water.is.exiting.the.2.water.jackets.mounted.on.the.left.side.of.the.boat.when.the.engine.is.running.and.the.boat.is.in.the.water..If.water.does.not.stream.out.of.either.the.exhaust.or.cylinder.head.cooling.ports,.immediately.stop.engine.operation.and.remove.obstructions.in.the.lines.or.replace.broken.cooling.lines.
Hint:.To.test.each.cooling.line.for.obstructions.or.a.leak.in.the.cooling.system,.place.a.piece.of.tubing.over.the.water.inlet.tubes.in.front.of.the.rudder.and.blow.into.the.tube..When.testing.for.obstructions.in.the.cooling.system,.be.sure.to.isolate.each.system.by.pinching.the.appropriate.water.lines.
Water-Cooled Cylinder Head and Exhaust Manifold Cooling Jacket
The.exhaust.system.is.cooled.independently.from.the.cylinder.head..See.line.drawings.for.proper.cooling.line.routing..Do.not.alter.the.cooling.line.routing.method.
Section 13: Cooling System
Zenoah® G26M Engine
CarburetorInsulator Plate
Water-Cooled Cylinder Head
Tuned Pipe
Tuned Pipe Fitting
Water Pump Rudder Pick-Up Tube
Rudder Pick-Up Tube
Water Outlet
Water Outlet

1�
The.centrifugal.clutch.automatically.engages.when.the.engine.rpm.is.increased..Be.sure.that.the.idle.speed.adjustment.is.set.low.enough.so.that.the.propeller.does.not.rotate.at.idle.
Periodically.disassemble.the.clutch.and.clean.debris.from.the.clutch.shoes.and.the.inner.clutch.bell.with.DYN5505.Dynamite®.Nitro.Force.
Section 14: Clutch
1�
The.Pro.Boat™.Miss.Elam.should.provide.many.hours.of.exciting.high-speed.racing.fun.with.just.minor.maintenance..Preventative.maintenance.is.very.important..Taking.the.time.to.make.sure.all..of.the.screws.and.bolts.are.properly.secured.before.each.run.and.after.each.operation.and.regularly.lubricating.the.flex.cable.will.prevent..many.problems.
Replacement.parts.are.available.from.Pro.Boat..See.the.back.of.this.manual.for.specific.descriptions.and.item.numbers.
Items Required2mm.hex.wrenchWaterproof.greaseThreadlocking.compound
It.is.vitally.important.to.properly.lubricate.the.flex.drive.shaft.and.the.propeller.shaft.with.heavy.cable.grease.every.5–10.hours.of.operation..You.will.also.find.that.it.will.eventually.become.necessary.to.replace.the.Teflon.liner.sleeve.of.the.drive.shaft..At.some.point,.it.may.also.become.necessary.to.replace.the.drive.shaft.(flex.cable).as.well.
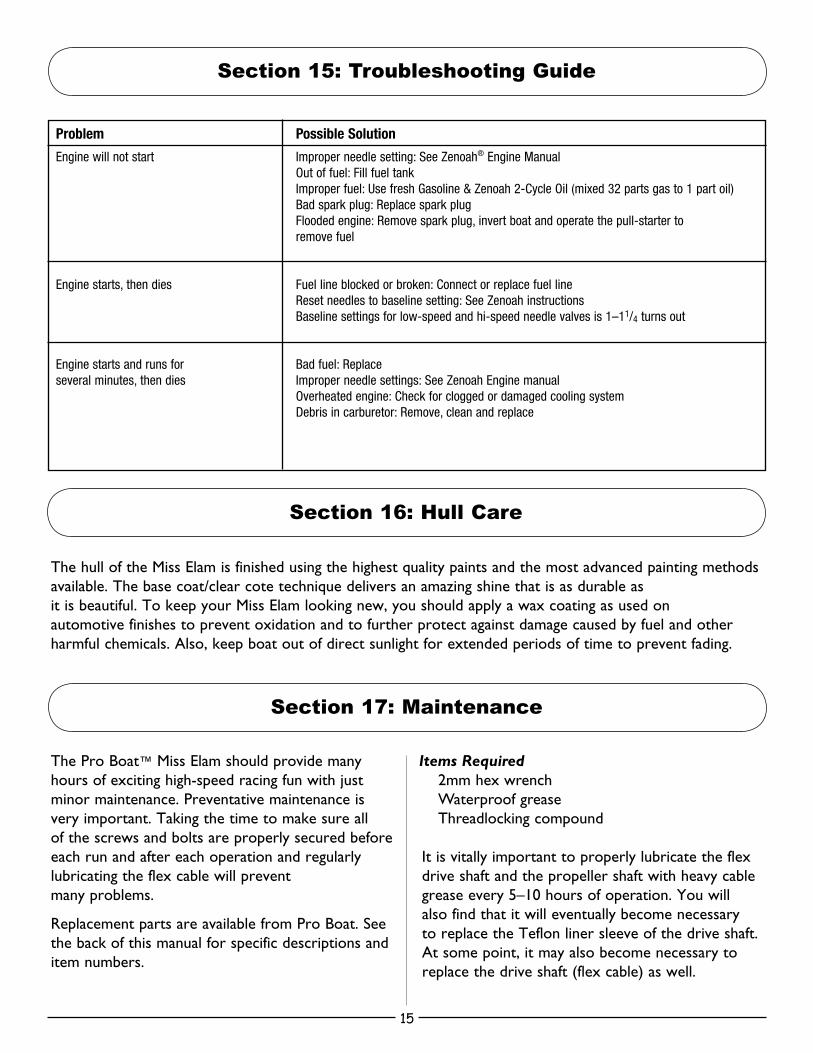
Problem Possible Solution
Enginewillnotstart Improperneedlesetting:SeeZenoah®EngineManual Outoffuel:Fillfueltank Improperfuel:UsefreshGasoline&Zenoah2-CycleOil(mixed32partsgasto1partoil) Badsparkplug:Replacesparkplug Floodedengine:Removesparkplug,invertboatandoperatethepull-starterto removefuel
Enginestarts,thendies Fuellineblockedorbroken:Connectorreplacefuelline Resetneedlestobaselinesetting:SeeZenoahinstructions Baselinesettingsforlow-speedandhi-speedneedlevalvesis1–11/4turnsout
Enginestartsandrunsfor Badfuel:Replaceseveralminutes,thendies Improperneedlesettings:SeeZenoahEnginemanual Overheatedengine:Checkforcloggedordamagedcoolingsystem Debrisincarburetor:Remove,cleanandreplace
The.hull.of.the.Miss.Elam.is.finished.using.the.highest.quality.paints.and.the.most.advanced.painting.methods.available..The.base.coat/clear.cote.technique.delivers.an.amazing.shine.that.is.as.durable.as..it.is.beautiful..To.keep.your.Miss.Elam.looking.new,.you.should.apply.a.wax.coating.as.used.on..automotive.finishes.to.prevent.oxidation.and.to.further.protect.against.damage.caused.by.fuel.and.other.harmful.chemicals..Also,.keep.boat.out.of.direct.sunlight.for.extended.periods.of.time.to.prevent.fading.
Section 15: Troubleshooting Guide
Section 16: Hull Care
Section 17: Maintenance
1�
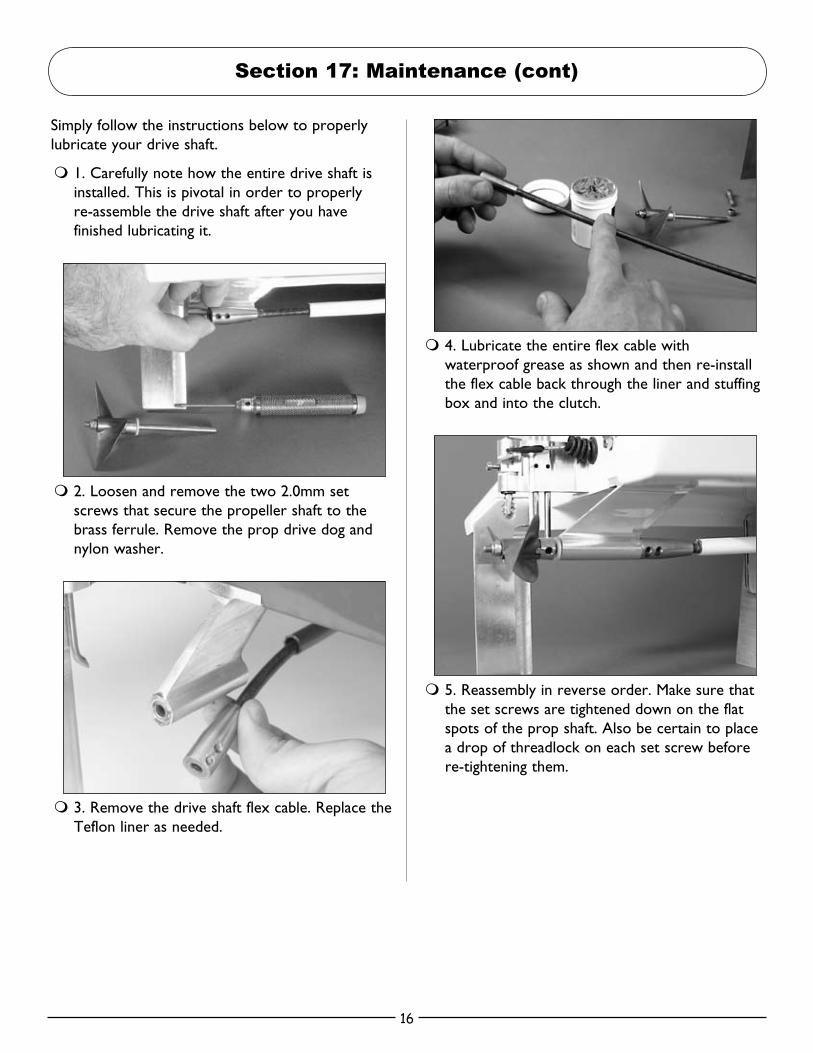
Simply.follow.the.instructions.below.to.properly.lubricate.your.drive.shaft.
.1..Carefully.note.how.the.entire.drive.shaft.is.installed..This.is.pivotal.in.order.to.properly..re-assemble.the.drive.shaft.after.you.have.finished.lubricating.it.
.2..Loosen.and.remove.the.two.2.0mm.set.screws.that.secure.the.propeller.shaft.to.the.brass.ferrule..Remove.the.prop.drive.dog.and.nylon.washer.
.3..Remove.the.drive.shaft.flex.cable..Replace.the.Teflon.liner.as.needed.
.4..Lubricate.the.entire.flex.cable.with.waterproof.grease.as.shown.and.then.re-install.the.flex.cable.back.through.the.liner.and.stuffing.box.and.into.the.clutch.
.5..Reassembly.in.reverse.order..Make.sure.that.the.set.screws.are.tightened.down.on.the.flat.spots.of.the.prop.shaft..Also.be.certain.to.place.a.drop.of.threadlock.on.each.set.screw.before.re-tightening.them.
Section 17: Maintenance (cont)

1�
Your.local.hobby.store.should.carry.a.good.supply.of.Miss.Elam.replacement.parts..You.can.also.purchase.these.parts.from.Horizon.Hobby.at.www.horizonhobby.com.or.call.toll-free.1-800-338-4639.
PRB2951.................................................................................................HullPRB2952.................................................................................................CockpitPRB2261................................................................................................. Exhaust.CoverPRB2953.................................................................................................WIngPRB2255.................................................................................................Wing.StrutsPRB2955................................................................................................. Boat.StandPRB2297.................................................................................................Cooling.TubingPRB2555................................................................................................. Servo.Tray.setPRB2264................................................................................................. Fuel.TankPRB2273.................................................................................................Kill.SwitchPRB2268.................................................................................................Throttle.Cable.with.EZ.ConnectorPRB2556.................................................................................................Manifold.with.ScrewsPRB2557.................................................................................................Cooling.TubingPRB2558................................................................................................. Fuel.Tank.StrapPRB2559.................................................................................................Rudder.Pushrod.SetPRB2560................................................................................................. Servo.Pushrod.SetPRB2561.................................................................................................Cover.for.Radio.BoxPRB2562................................................................................................. Flex.ShaftPRB2266.................................................................................................Teflon.LinerPRB2281................................................................................................. Prop.Drive.DogPRB2283................................................................................................. Prop.StrutPRB2282................................................................................................. Prop.ShaftPRB2252.................................................................................................RudderPRB2254.................................................................................................Turn.Fin.with.HardwarePRB2259................................................................................................. Pipe.MountPRB2563.................................................................................................Tuned.PipePRB2278.................................................................................................Cockpit.Nuts.(2)PRB2288.................................................................................................Nylon.Washers.(4)PRB2564................................................................................................. Brass.Tube.for.Water.InletPRB2251.................................................................................................Rudder.Bracket/ArmPRB2651.................................................................................................Water.PumpPRB2954.................................................................................................DecalsPRB2566................................................................................................. Instruction.ManualPRB2683.................................................................................................ClutchPRB2686.................................................................................................Clutch.ShoesPRB2687.................................................................................................Clutch.Spring.(2)PRB2688.................................................................................................Clutch.BearingPRAB270................................................................................................ Propellor:.2.74x4.2.Bronze
Section 18: Replacement Parts

1�
Appendix
PRB2651 CarburetorPRAB270
PRB2283PRB2252
PRB2275
PRB2254
PRB2952
PRB2264Pull.Start
Primer.Button
Spark.Plug
PRB2556
PRB2563 Carburetor
PRB2273
PRB2563
PRB2278

1�
Notes

����
©.2006.Horizon.Hobby,.Inc..4105.Fieldstone.Road.
Champaign,.Illinois.61822.(877).504-0233.
www.horizonhobby.com
Printed.in.China
www.proboatmodels.com