Embed Size (px)
Citation preview
MKIII 2.0 Golf/Jetta Rear Disk Brake DIY
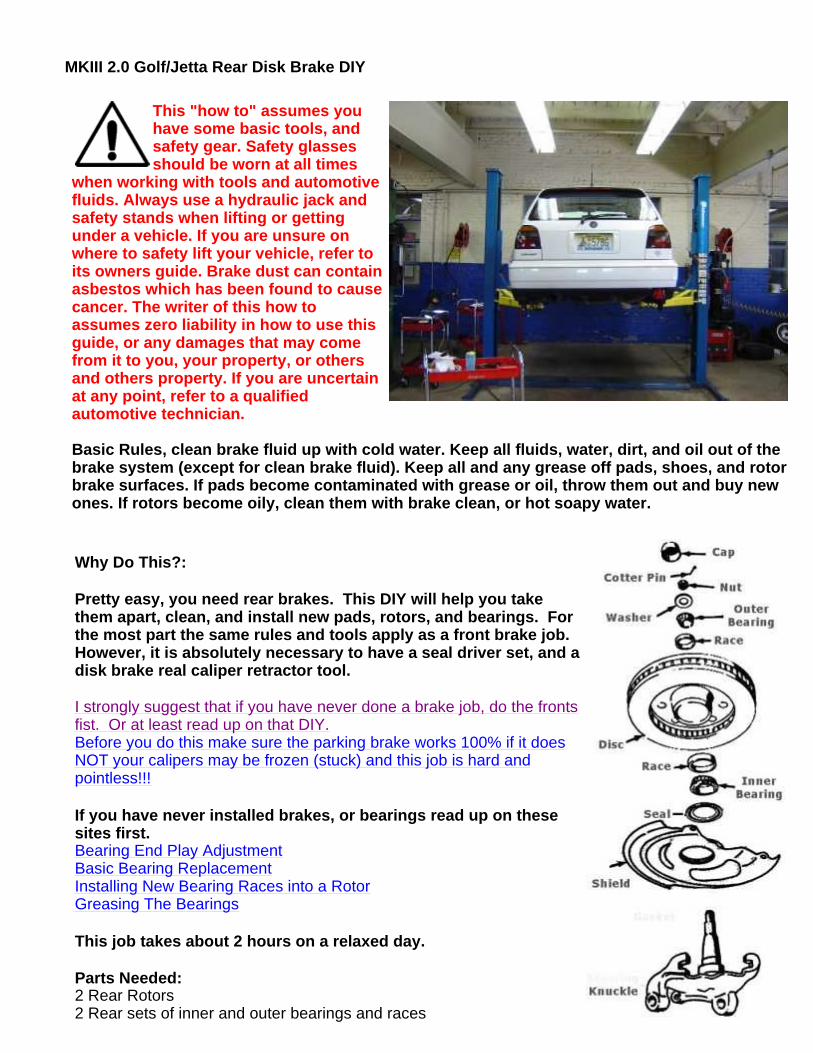
This "how to" assumes you have some basic tools, and safety gear. Safety glasses should be worn at all times
when working with tools and automotive fluids. Always use a hydraulic jack and safety stands when lifting or getting under a vehicle. If you are unsure on where to safety lift your vehicle, refer to its owners guide. Brake dust can contain asbestos which has been found to cause cancer. The writer of this how to assumes zero liability in how to use this guide, or any damages that may come from it to you, your property, or others and others property. If you are uncertain at any point, refer to a qualified automotive technician. Basic Rules, clean brake fluid up with cold water. Keep all fluids, water, dirt, and oil out of the brake system (except for clean brake fluid). Keep a ll and any grease off pads, shoes, and rotor brake surfaces. If pads become contaminated with gr ease or oil, throw them out and buy new ones. If rotors become oily, clean them with brake clean, or hot soapy water.
Why Do This?:
Pretty easy, you need rear brakes. This DIY will h elp you take them apart, clean, and install new pads, rotors, an d bearings. For the most part the same rules and tools apply as a f ront brake job. However, it is absolutely necessary to have a seal driver set, and a disk brake real caliper retractor tool.
I strongly suggest that if you have never done a brake job, do the fronts fist. Or at least read up on that DIY. Before you do this make sure the parking brake works 100% if it does NOT your calipers may be frozen (stuck) and this job is hard and pointless!!!
If you have never installed brakes, or bearings rea d up on these sites first. Bearing End Play Adjustment Basic Bearing Replacement Installing New Bearing Races into a Rotor Greasing The Bearings
This job takes about 2 hours on a relaxed day.
Parts Needed: 2 Rear Rotors 2 Rear sets of inner and outer bearings and races
2 Grease Seals, 2 cotter pins, and 2 dust caps A set of quality rear brake pads
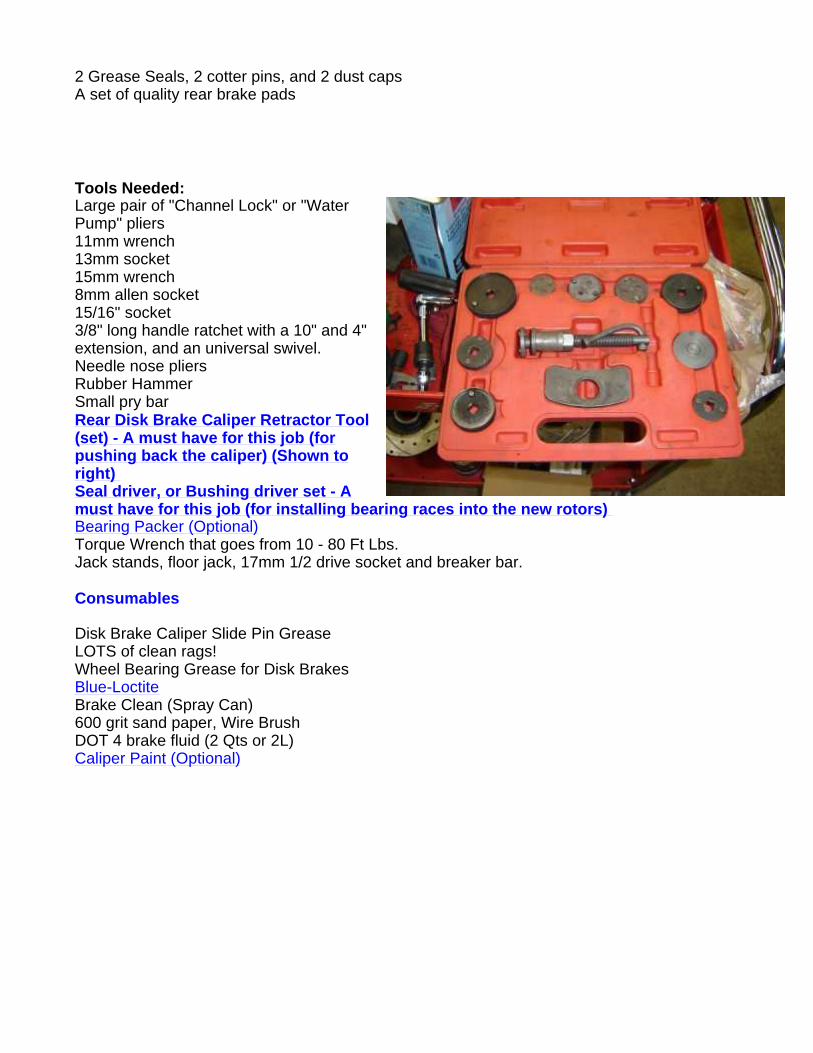
Tools Needed: Large pair of "Channel Lock" or "Water Pump" pliers 11mm wrench 13mm socket 15mm wrench 8mm allen socket 15/16" socket 3/8" long handle ratchet with a 10" and 4" extension, and an universal swivel. Needle nose pliers Rubber Hammer Small pry bar Rear Disk Brake Caliper Retractor Tool (set) - A must have for this job (for pushing back the caliper) (Shown to right) Seal driver, or Bushing driver set - A must have for this job (for installing bearing race s into the new rotors) Bearing Packer (Optional) Torque Wrench that goes from 10 - 80 Ft Lbs. Jack stands, floor jack, 17mm 1/2 drive socket and breaker bar. Consumables Disk Brake Caliper Slide Pin Grease LOTS of clean rags! Wheel Bearing Grease for Disk Brakes Blue-Loctite Brake Clean (Spray Can) 600 grit sand paper, Wire Brush DOT 4 brake fluid (2 Qts or 2L) Caliper Paint (Optional)
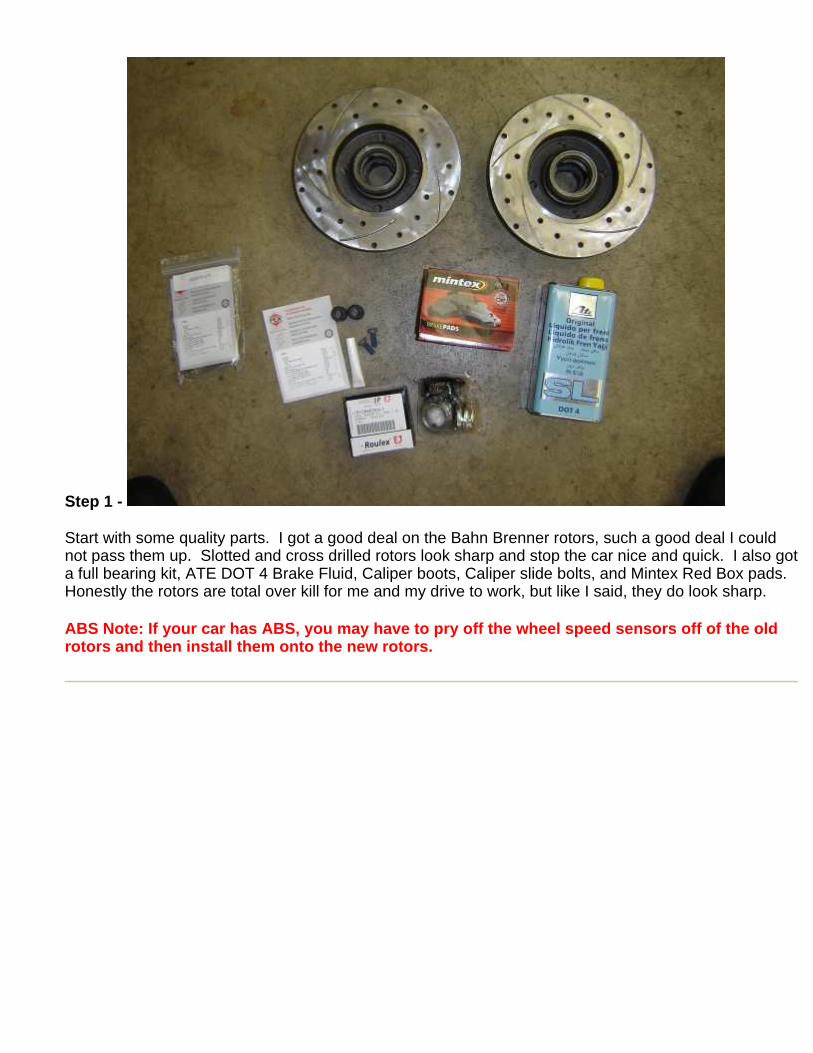
Step 1 -
Start with some quality parts. I got a good deal on the Bahn Brenner rotors, such a good deal I could not pass them up. Slotted and cross drilled rotors look sharp and stop the car nice and quick. I also got a full bearing kit, ATE DOT 4 Brake Fluid, Caliper boots, Caliper slide bolts, and Mintex Red Box pads. Honestly the rotors are total over kill for me and my drive to work, but like I said, they do look sharp.
ABS Note: If your car has ABS, you may have to pry off the wheel speed sensors off of the old rotors and then install them onto the new rotors.
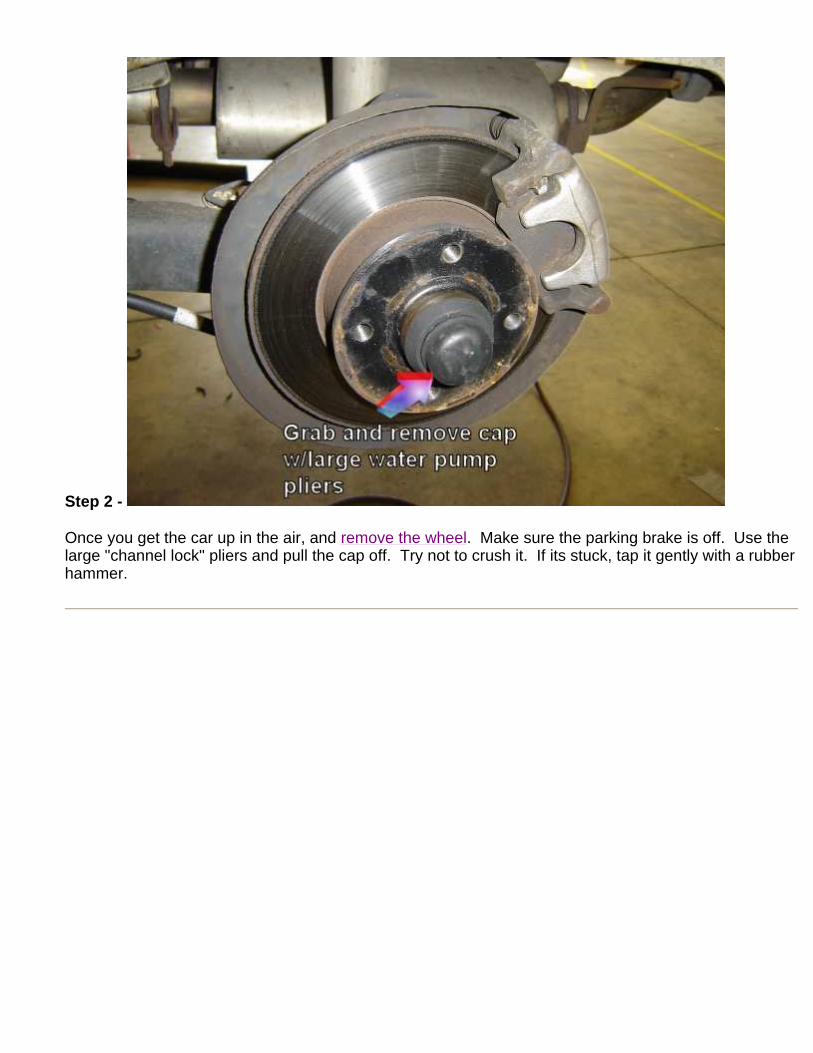
Step 2 -
Once you get the car up in the air, and remove the wheel. Make sure the parking brake is off. Use the large "channel lock" pliers and pull the cap off. Try not to crush it. If its stuck, tap it gently with a rubber hammer.
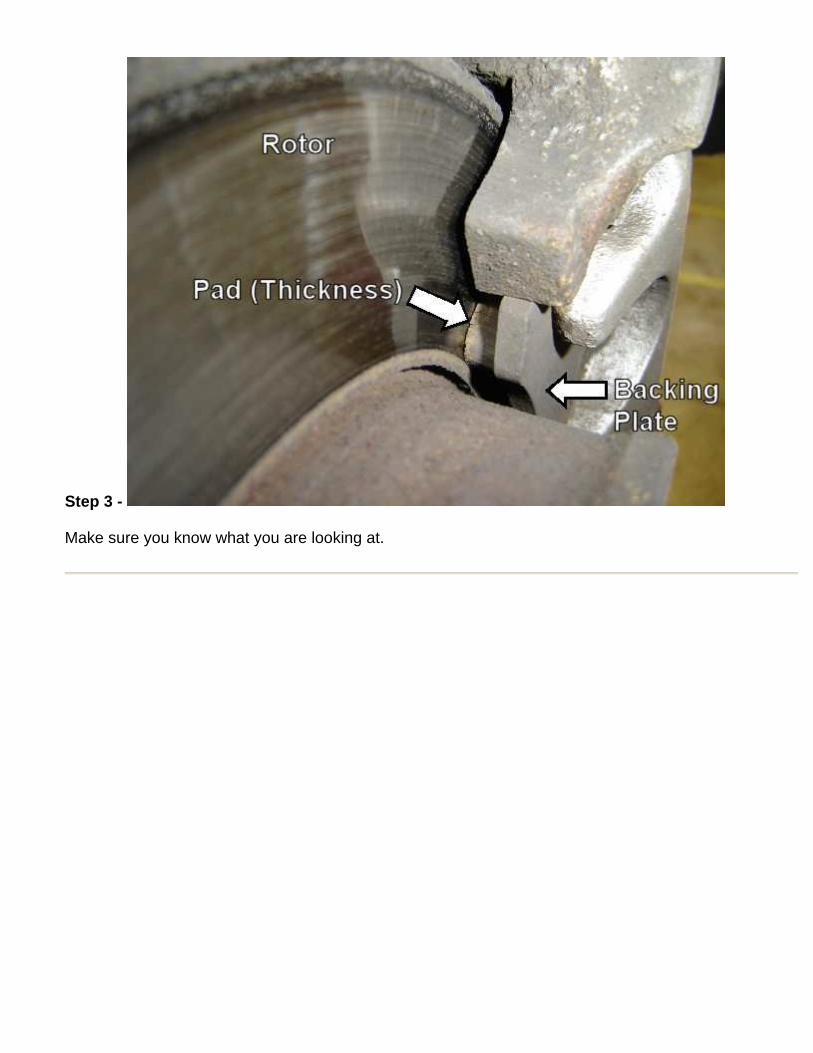
Step 3 -
Make sure you know what you are looking at.
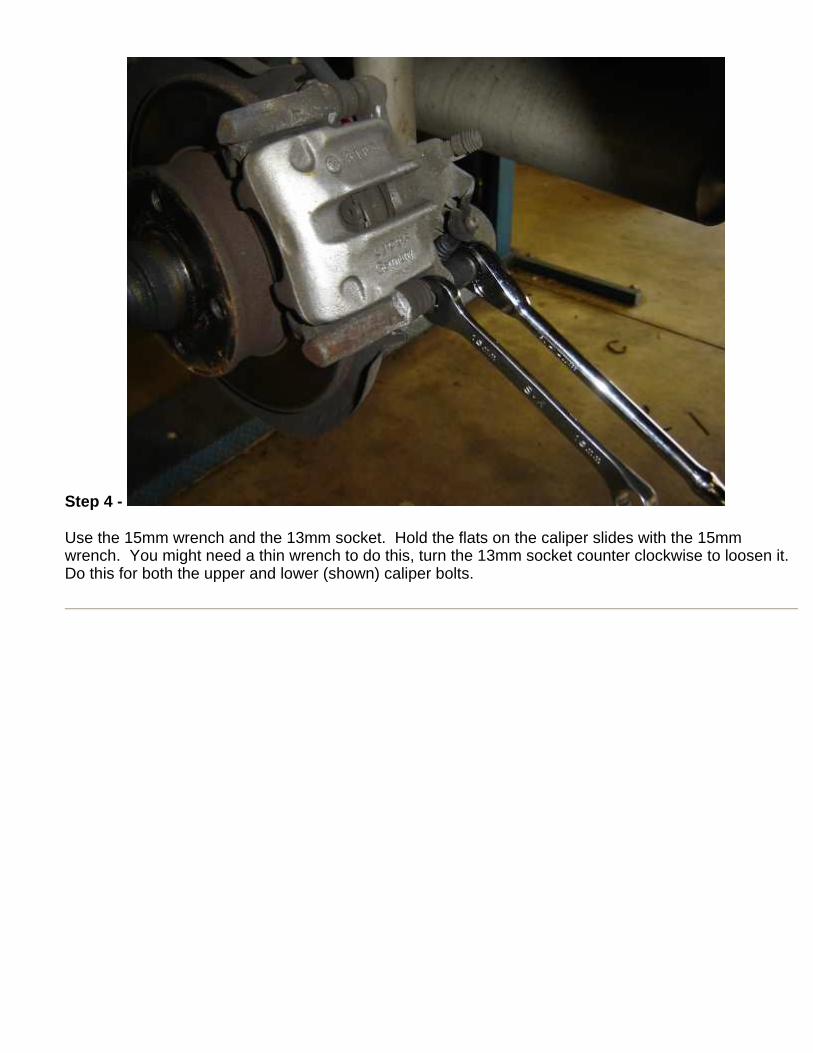
Step 4 -
Use the 15mm wrench and the 13mm socket. Hold the flats on the caliper slides with the 15mm wrench. You might need a thin wrench to do this, turn the 13mm socket counter clockwise to loosen it. Do this for both the upper and lower (shown) caliper bolts.
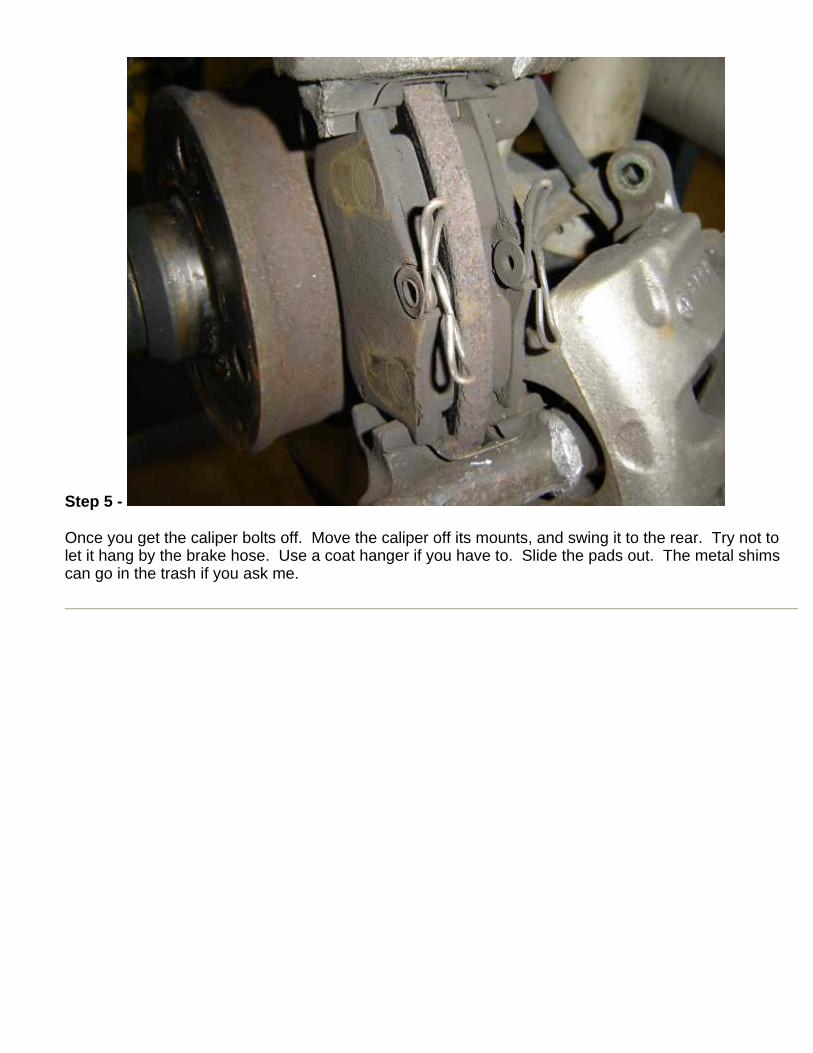
Step 5 -
Once you get the caliper bolts off. Move the caliper off its mounts, and swing it to the rear. Try not to let it hang by the brake hose. Use a coat hanger if you have to. Slide the pads out. The metal shims can go in the trash if you ask me.
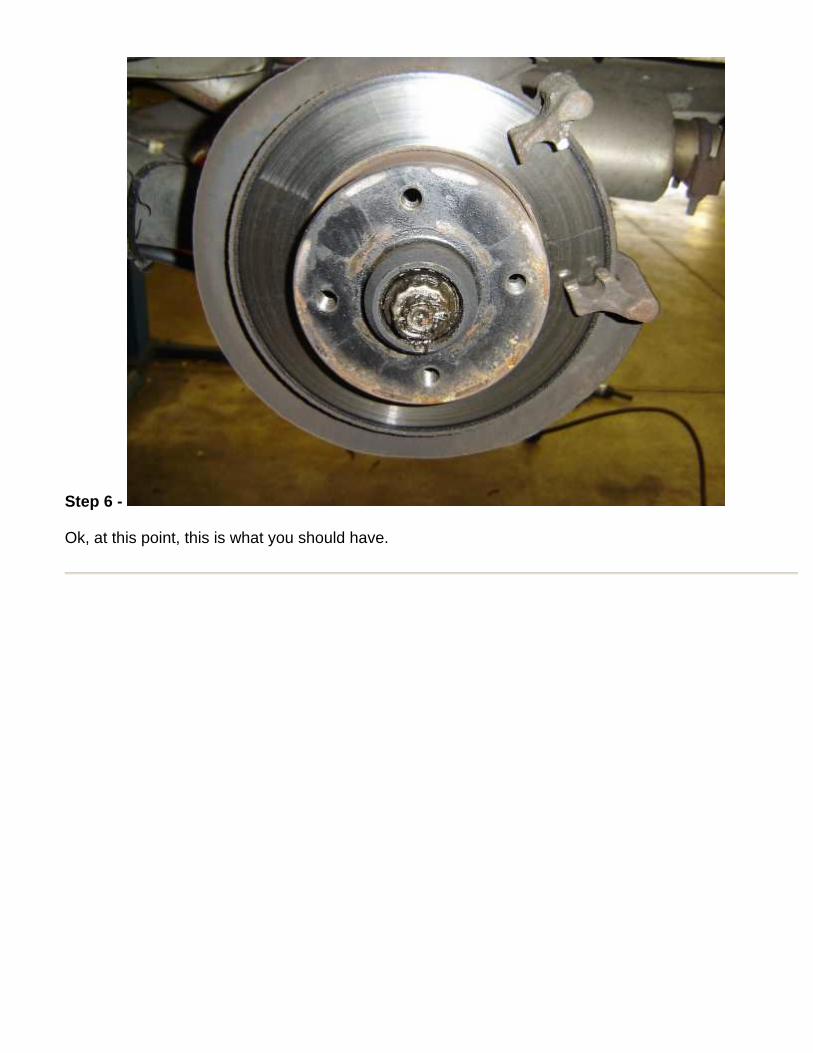
Step 6 -
Ok, at this point, this is what you should have.
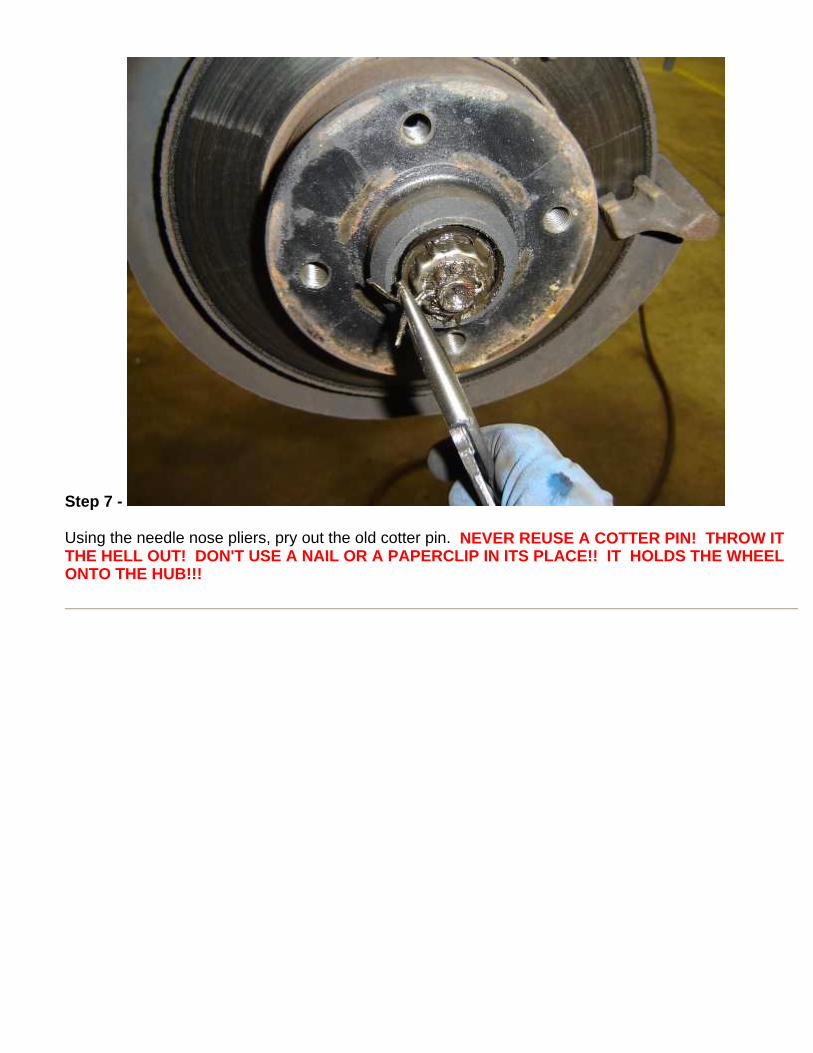
Step 7 -
Using the needle nose pliers, pry out the old cotter pin. NEVER REUSE A COTTER PIN! THROW IT THE HELL OUT! DON'T USE A NAIL OR A PAPERCLIP IN I TS PLACE!! IT HOLDS THE WHEEL ONTO THE HUB!!!
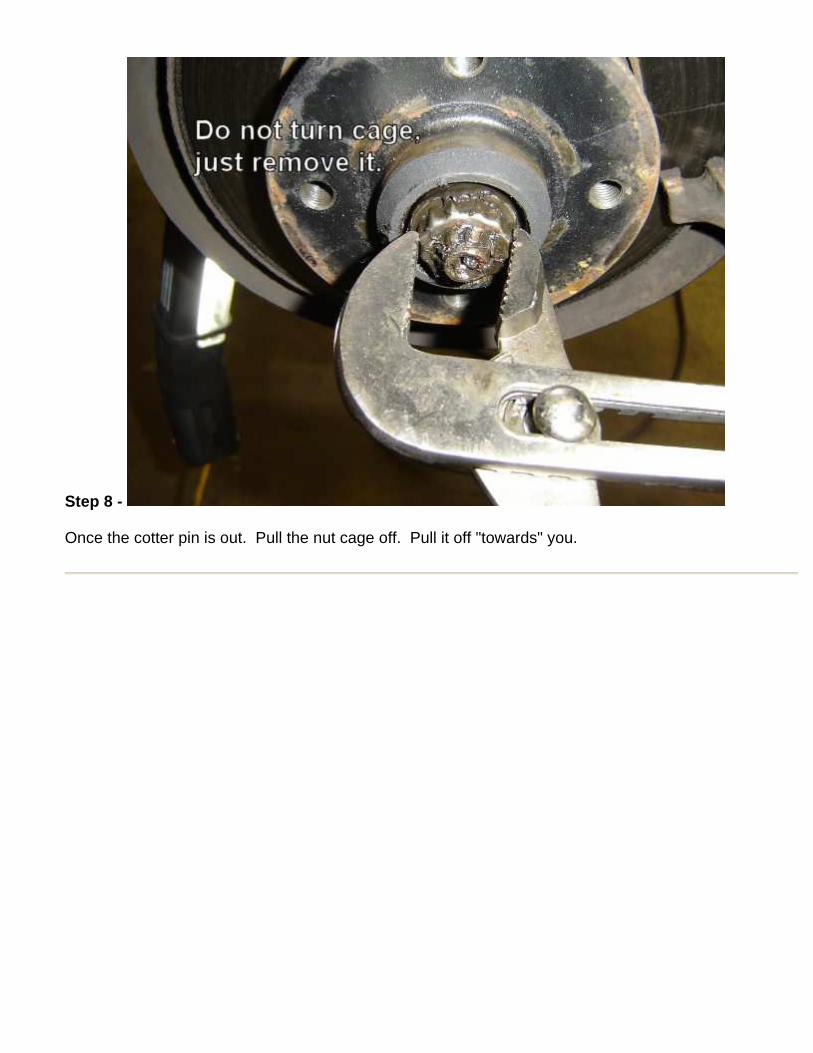
Step 8 -
Once the cotter pin is out. Pull the nut cage off. Pull it off "towards" you.
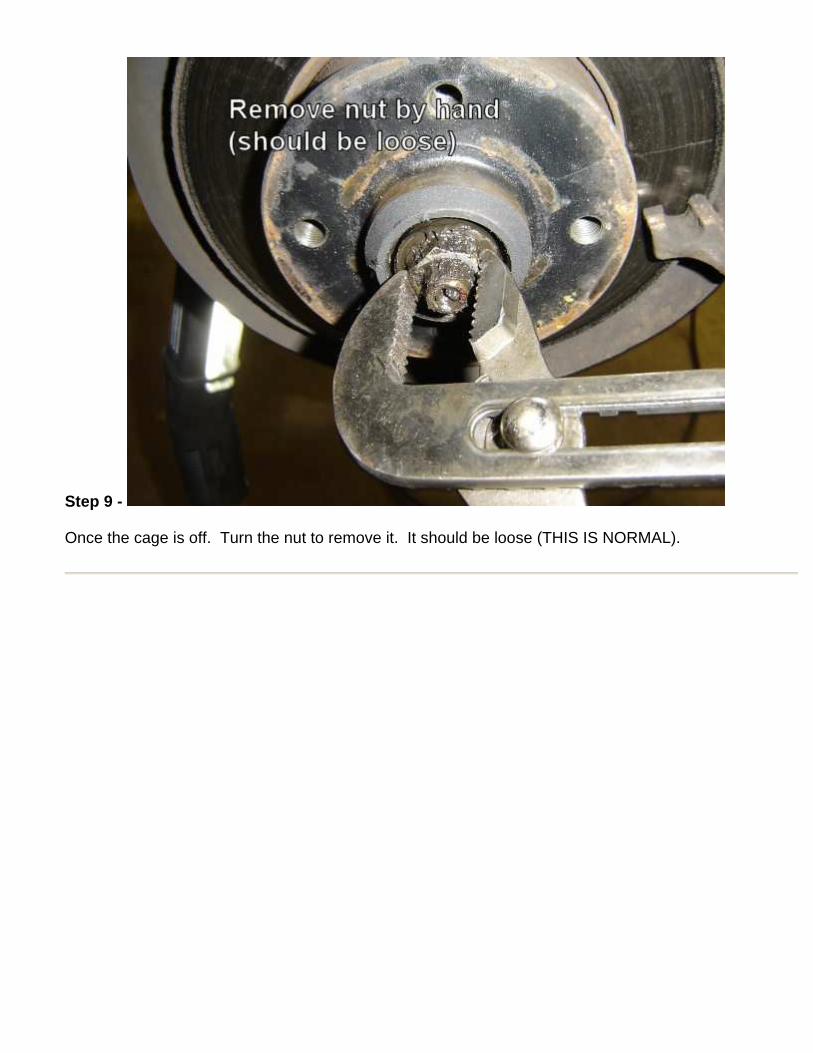
Step 9 -
Once the cage is off. Turn the nut to remove it. It should be loose (THIS IS NORMAL).
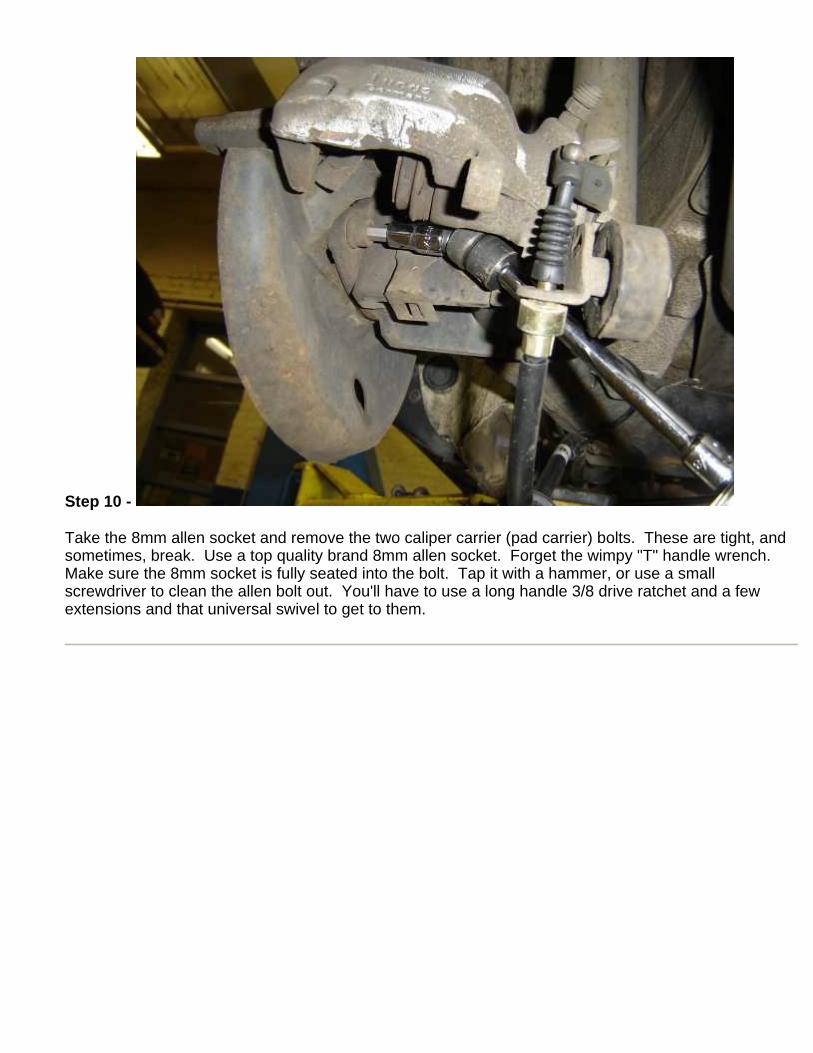
Step 10 -
Take the 8mm allen socket and remove the two caliper carrier (pad carrier) bolts. These are tight, and sometimes, break. Use a top quality brand 8mm allen socket. Forget the wimpy "T" handle wrench. Make sure the 8mm socket is fully seated into the bolt. Tap it with a hammer, or use a small screwdriver to clean the allen bolt out. You'll have to use a long handle 3/8 drive ratchet and a few extensions and that universal swivel to get to them.
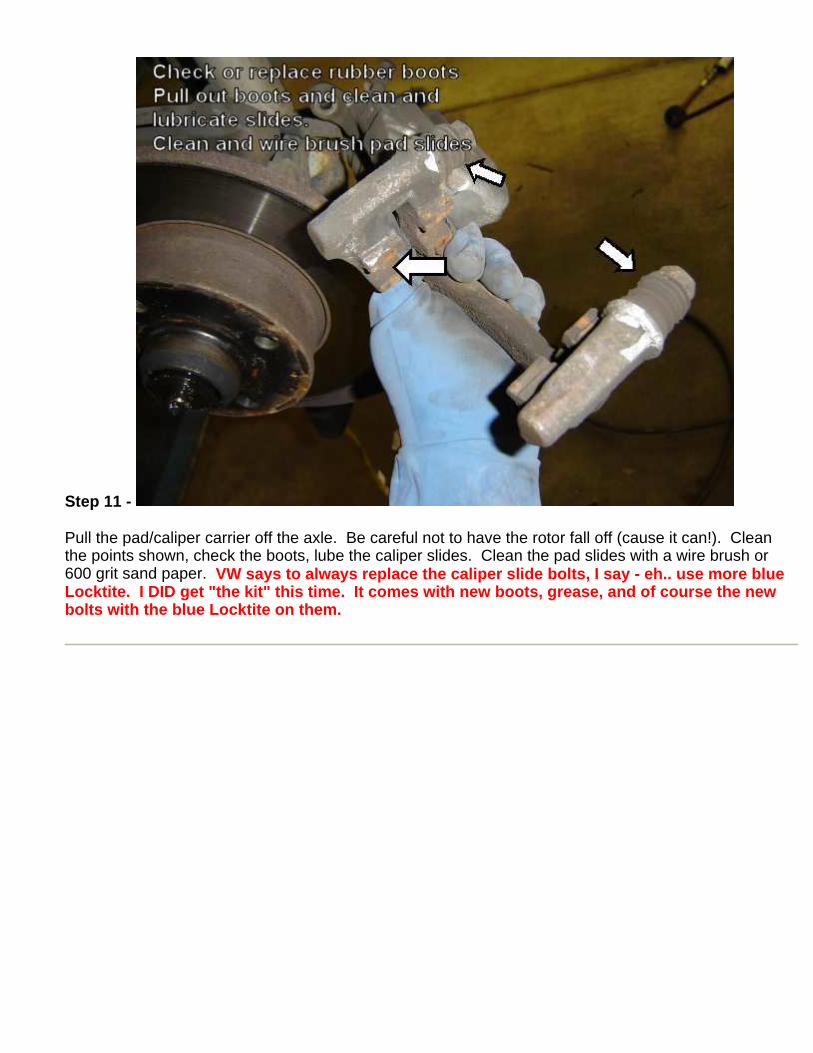
Step 11 -
Pull the pad/caliper carrier off the axle. Be careful not to have the rotor fall off (cause it can!). Clean the points shown, check the boots, lube the caliper slides. Clean the pad slides with a wire brush or 600 grit sand paper. VW says to always replace the caliper slide bolts, I say - eh.. use more blue Locktite. I DID get "the kit" this time. It comes with new boots, grease, and of course the new bolts with the blue Locktite on them.
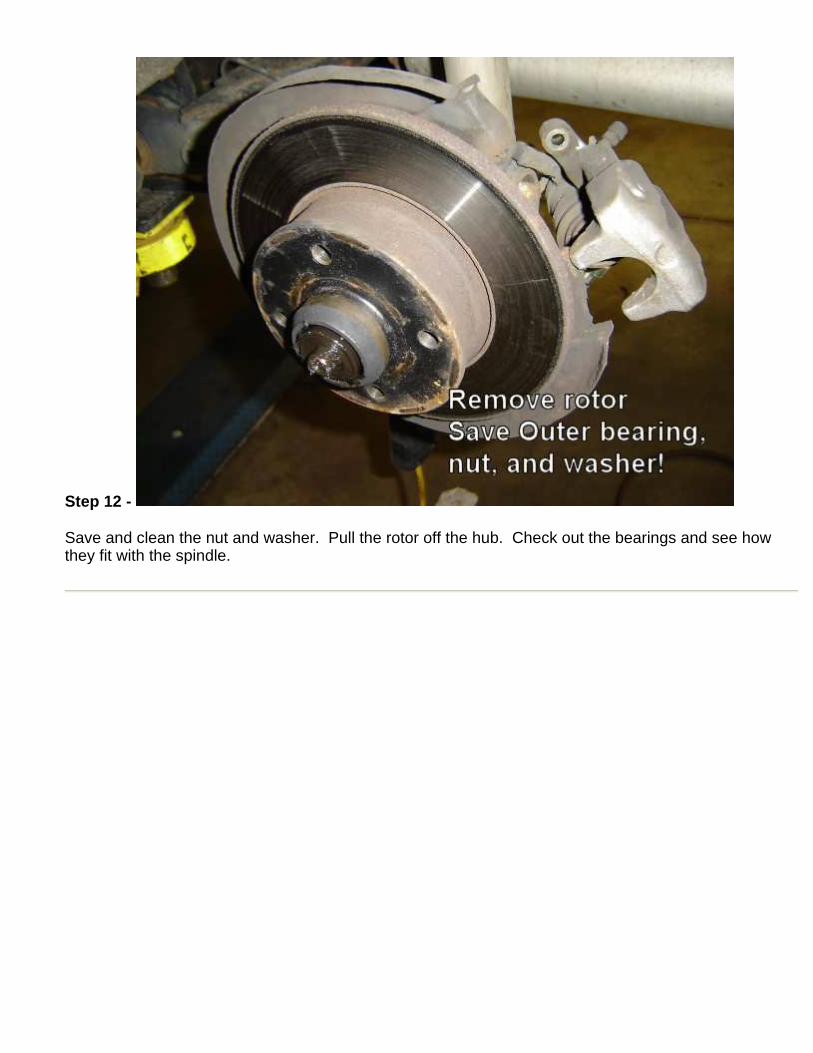
Step 12 -
Save and clean the nut and washer. Pull the rotor off the hub. Check out the bearings and see how they fit with the spindle.
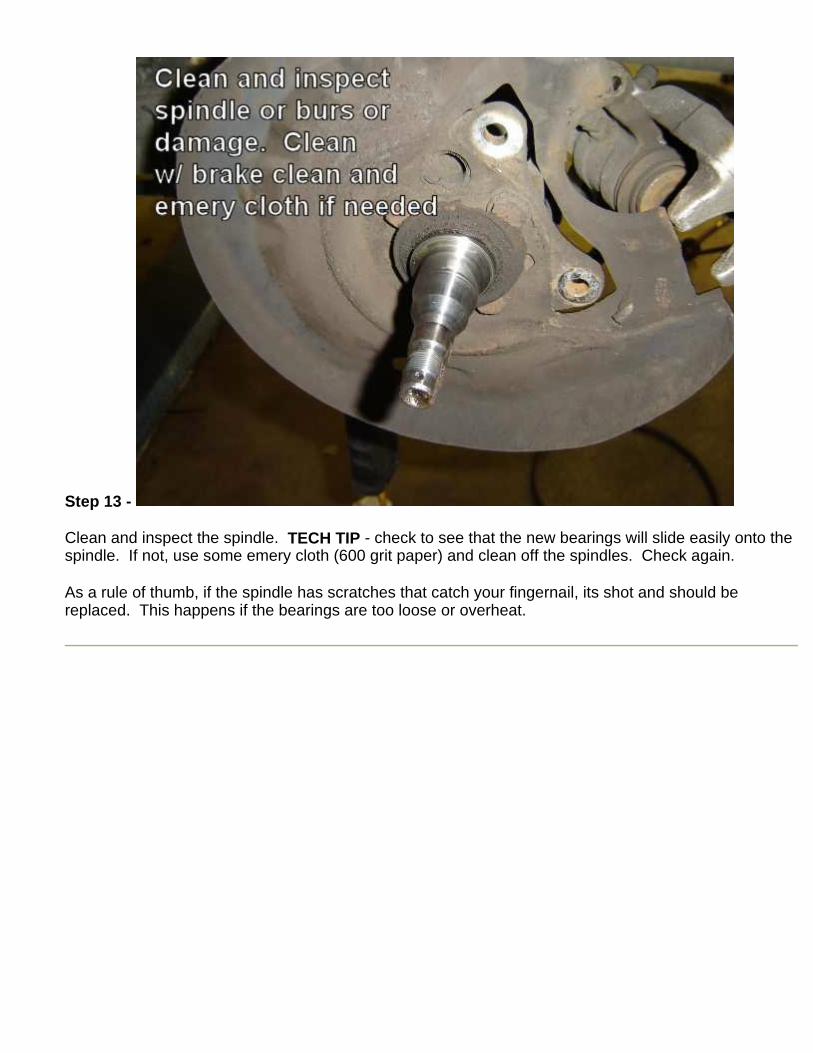
Step 13 -
Clean and inspect the spindle. TECH TIP - check to see that the new bearings will slide easily onto the spindle. If not, use some emery cloth (600 grit paper) and clean off the spindles. Check again.
As a rule of thumb, if the spindle has scratches that catch your fingernail, its shot and should be replaced. This happens if the bearings are too loose or overheat.
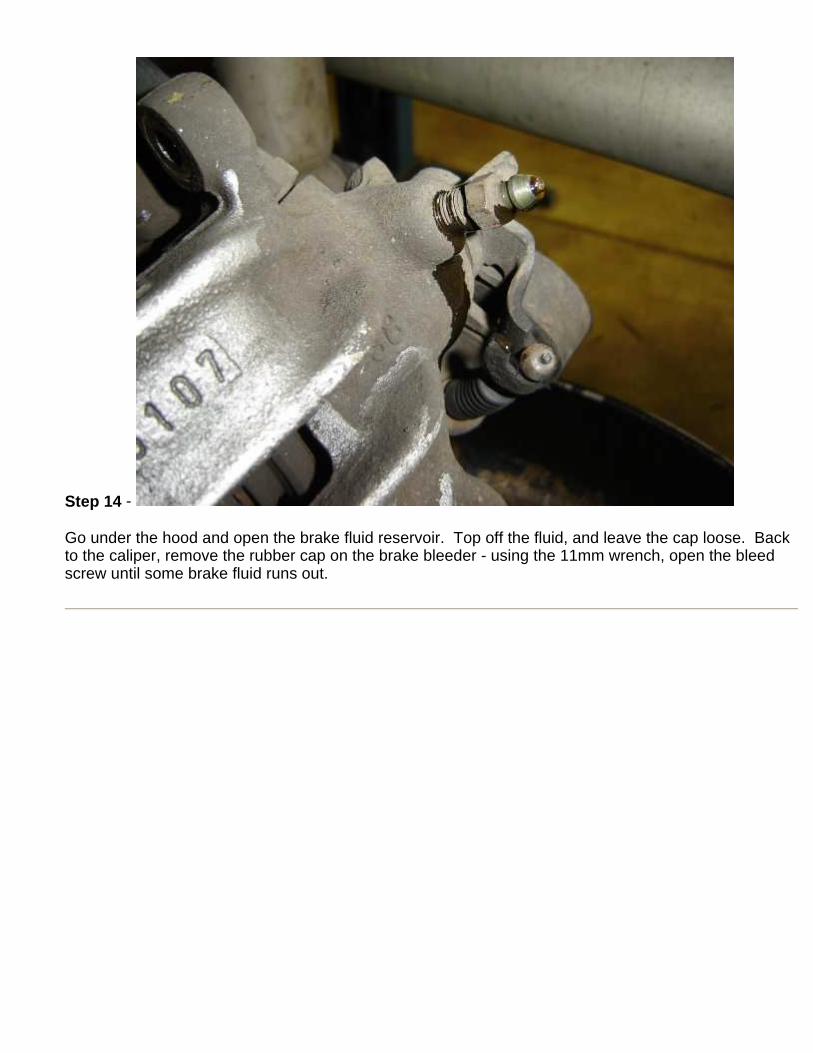
Step 14 -
Go under the hood and open the brake fluid reservoir. Top off the fluid, and leave the cap loose. Back to the caliper, remove the rubber cap on the brake bleeder - using the 11mm wrench, open the bleed screw until some brake fluid runs out.
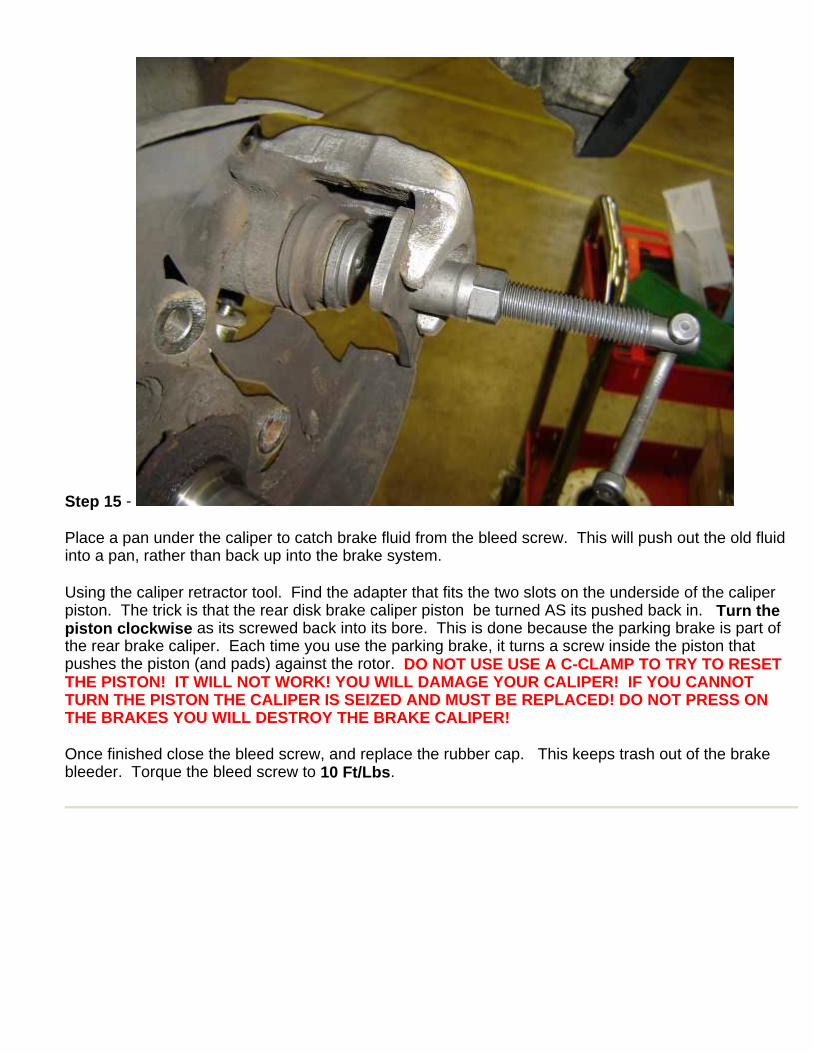
Step 15 -
Place a pan under the caliper to catch brake fluid from the bleed screw. This will push out the old fluid into a pan, rather than back up into the brake system.
Using the caliper retractor tool. Find the adapter that fits the two slots on the underside of the caliper piston. The trick is that the rear disk brake caliper piston be turned AS its pushed back in. Turn the piston clockwise as its screwed back into its bore. This is done because the parking brake is part of the rear brake caliper. Each time you use the parking brake, it turns a screw inside the piston that pushes the piston (and pads) against the rotor. DO NOT USE USE A C-CLAMP TO TRY TO RESET THE PISTON! IT WILL NOT WORK! YOU WILL DAMAGE YOUR CALIPER! IF YOU CANNOT TURN THE PISTON THE CALIPER IS SEIZED AND MUST BE R EPLACED! DO NOT PRESS ON THE BRAKES YOU WILL DESTROY THE BRAKE CALIPER!
Once finished close the bleed screw, and replace the rubber cap. This keeps trash out of the brake bleeder. Torque the bleed screw to 10 Ft/Lbs .
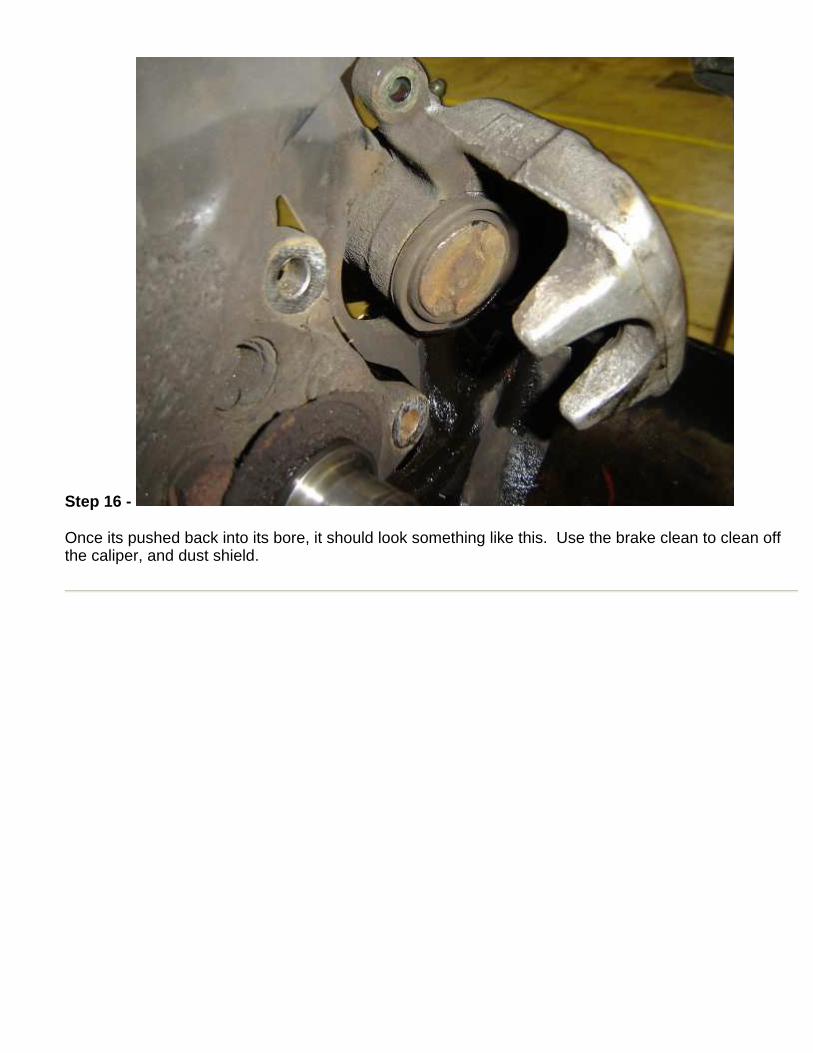
Step 16 -
Once its pushed back into its bore, it should look something like this. Use the brake clean to clean off the caliper, and dust shield.
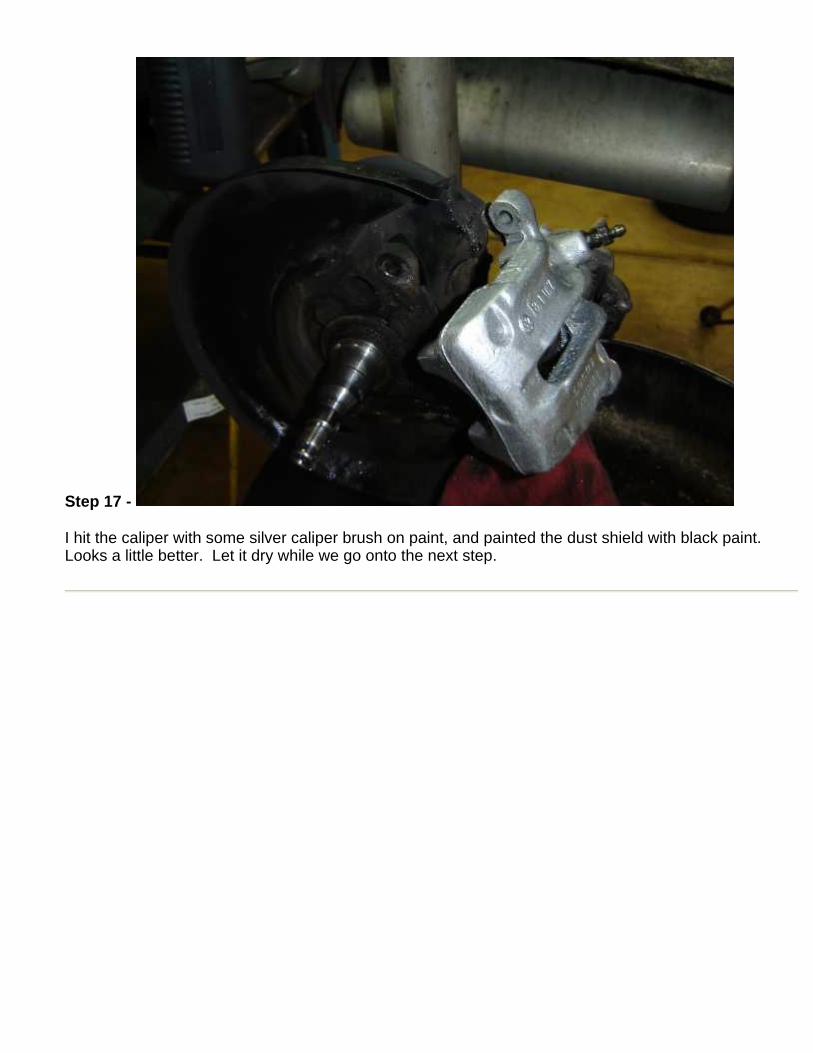
Step 17 -
I hit the caliper with some silver caliper brush on paint, and painted the dust shield with black paint. Looks a little better. Let it dry while we go onto the next step.

Step 18 -
Get your seal/bushing driver set and see what one fits with the new bearing races.
Check this out about how the bearings work;
There is an inner (axle side) and outer bearing (dust cap side). Bearings come with races, the races are what get pressed or driven into the rotor. When the bearing spins, its rides against the race. Races are "wear matched" to the bearings. Meaning, you should never mix or change used bearings with each other and each others races. The graphic below is a generic diagram of the VW design. This is known as an "adjustable integral hub wheel bearing". The washer and nut hold the bearings and the rotor (and races) in place on the spindle. The nut adjusts the thrust pressure of the bearings and races. Too tight, and bearings are smashed into the races. Too loose and they are floating around, beating themselves to death as the wheels hit bumps and pot holes. The cage nut and cotter pin locks the nut in place with a hole in the spindle. If the cotter pin were to break, the cage, nut, bearings, and rotor could spin off the spindle.. with your wheel... and brakes... its a bad thing.
A few notes about wheel bearings; NEVER HIT BEARINGS OR RACES DIRECTLY WITH A HAMMER! KEEP BEARINGS, GREASE, AND HARDWARE CLEAN FROM DIRT AND SAND! YOU MUST USE A GREASE FOR "DISK BRAKES" - NEVER USE GENERIC "GREASE" FOR THIS JOB! NEVER OVER TORQUE OR MISADJUST A WHEEL BEARING!

Step 19 -
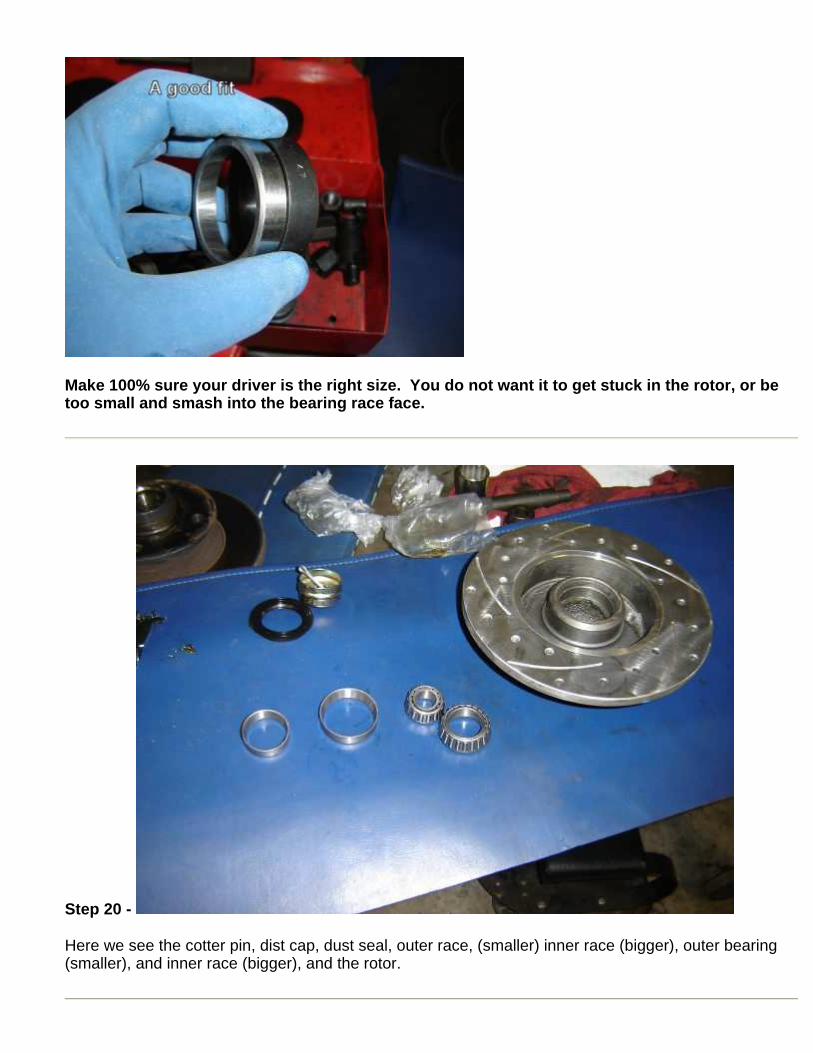
Make 100% sure your driver is the right size. You do not want it to get stuck in the rotor, or be too small and smash into the bearing race face.
Step 20 -
Here we see the cotter pin, dist cap, dust seal, outer race, (smaller) inner race (bigger), outer bearing (smaller), and inner race (bigger), and the rotor.
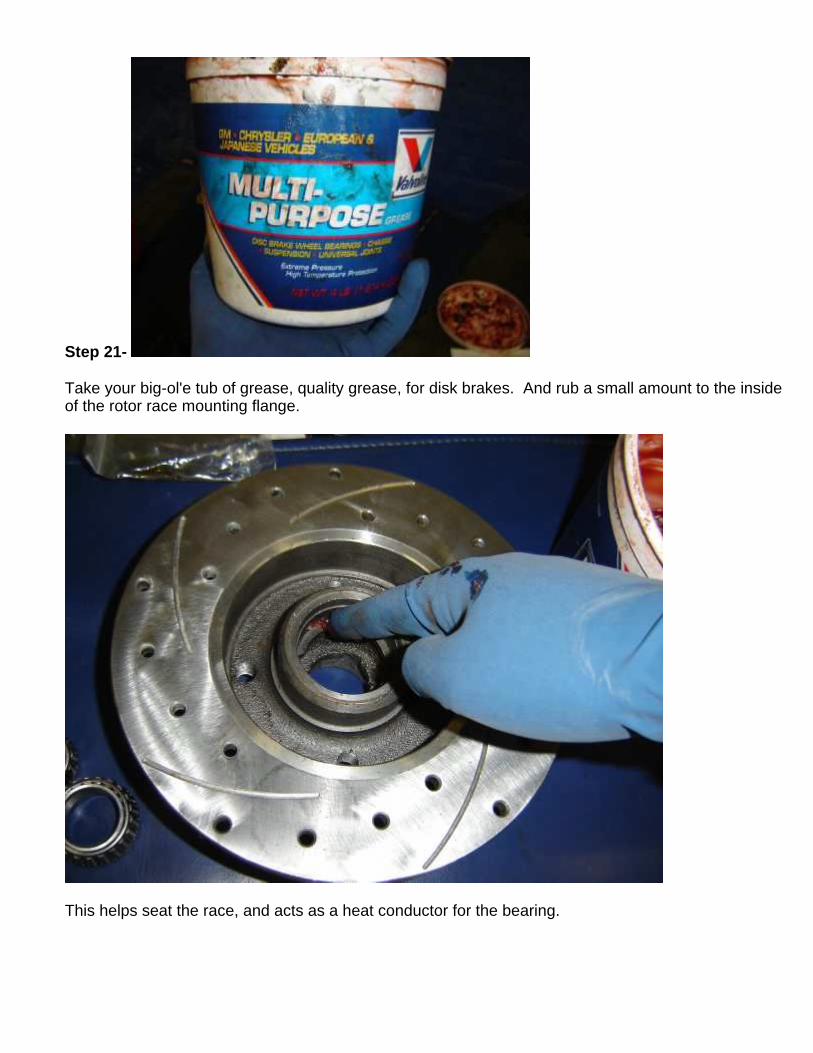
Step 21-
Take your big-ol'e tub of grease, quality grease, for disk brakes. And rub a small amount to the inside of the rotor race mounting flange.
This helps seat the race, and acts as a heat conductor for the bearing.
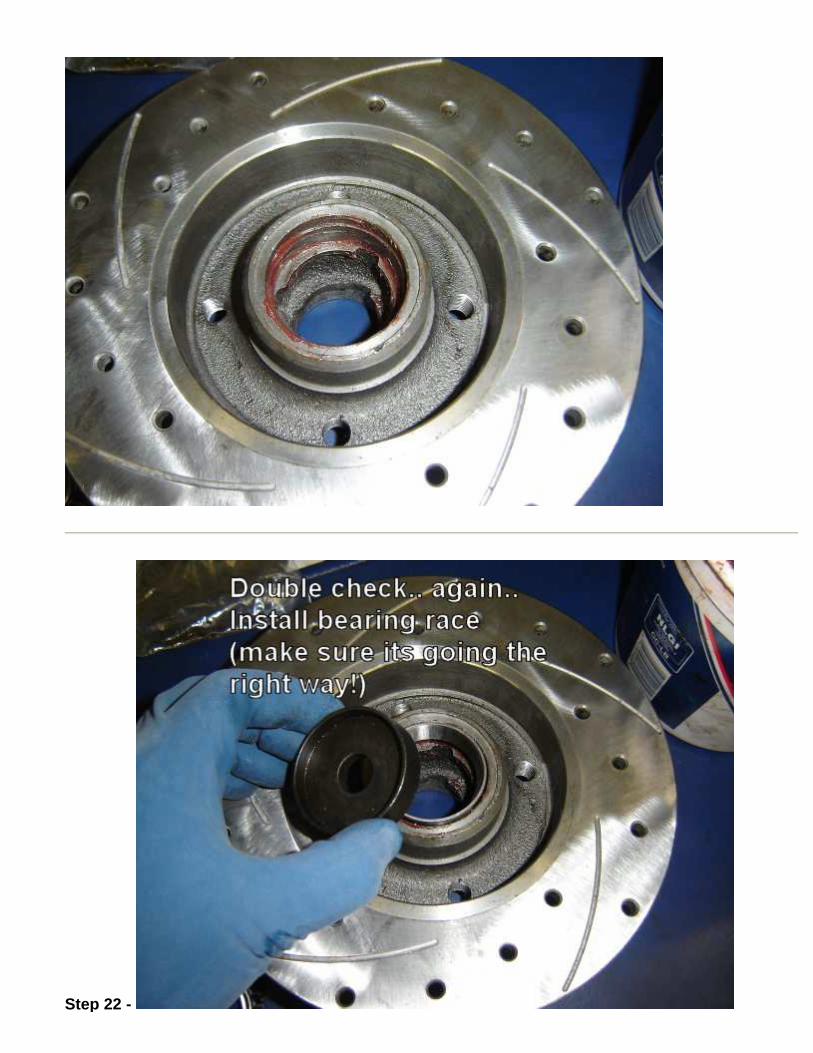
Step 22 -
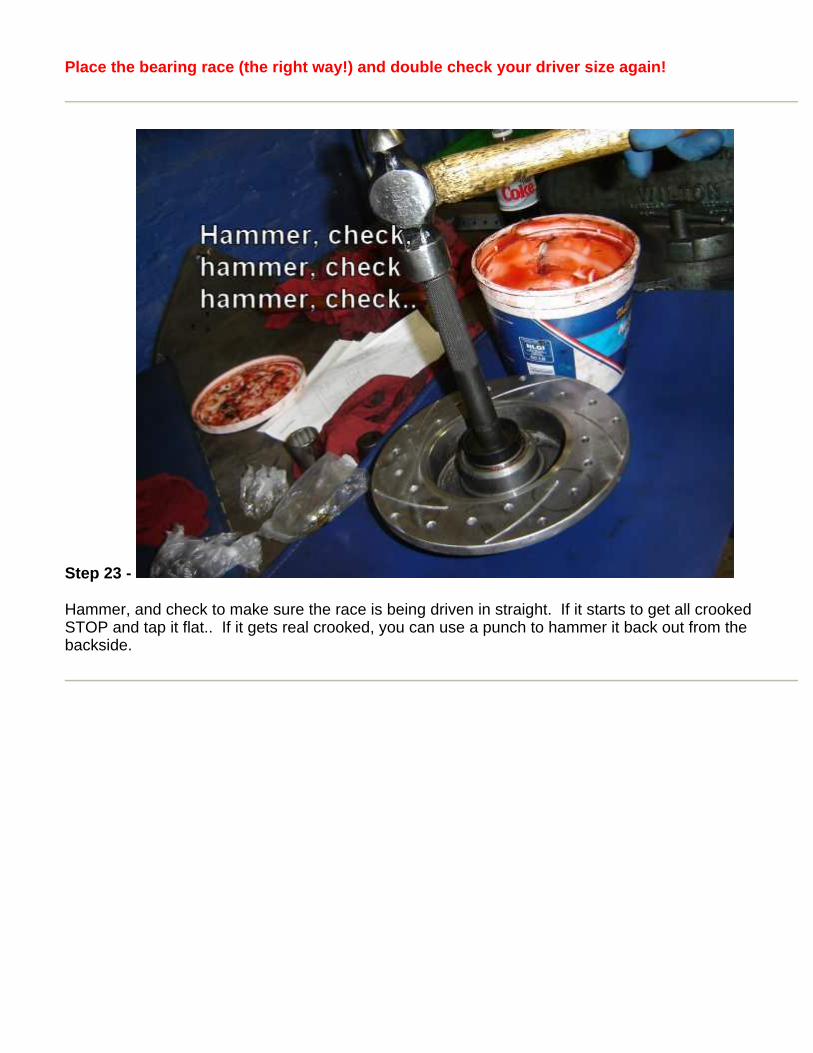
Place the bearing race (the right way!) and double check your driver size again!
Step 23 -
Hammer, and check to make sure the race is being driven in straight. If it starts to get all crooked STOP and tap it flat.. If it gets real crooked, you can use a punch to hammer it back out from the backside.
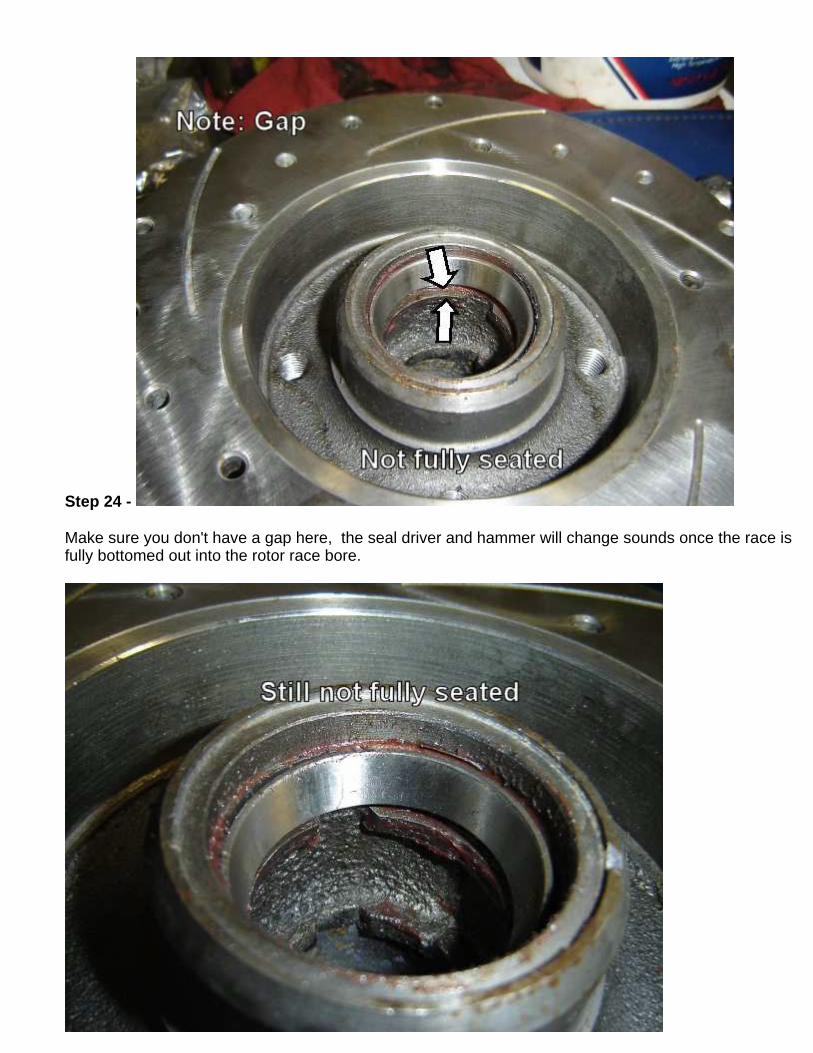
Step 24 -
Make sure you don't have a gap here, the seal driver and hammer will change sounds once the race is fully bottomed out into the rotor race bore.
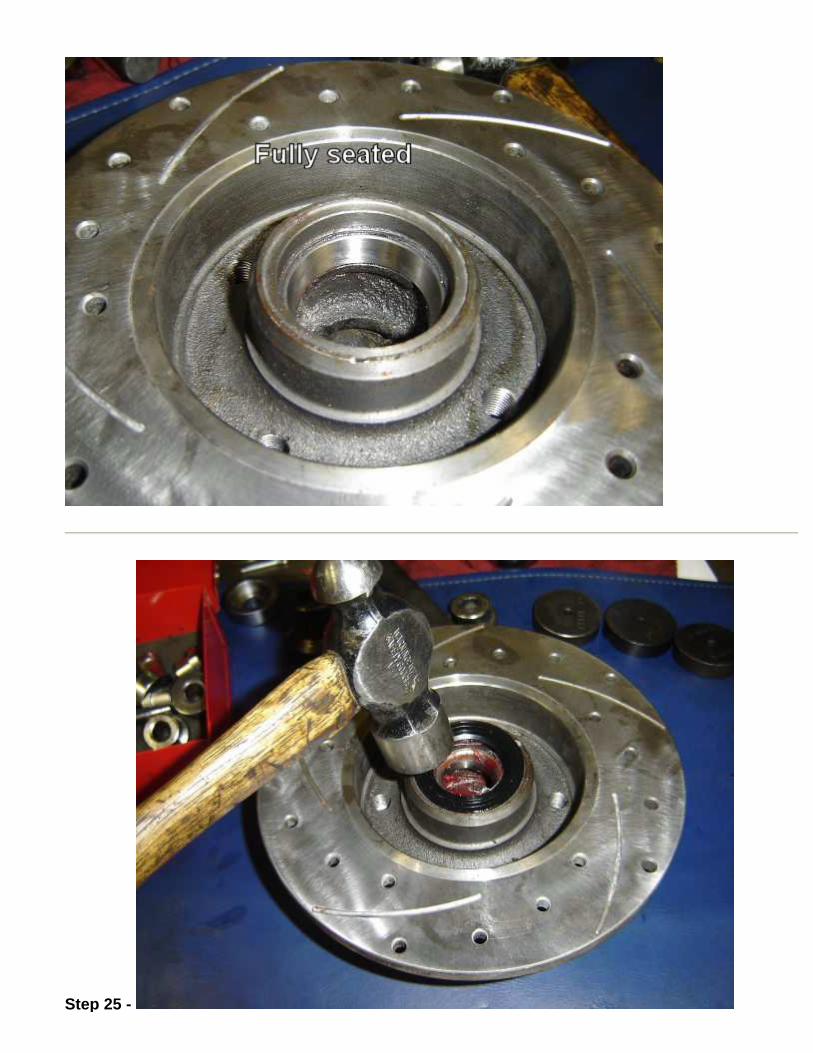
Step 25 -
Lube the bearing (how to here - pdf) , and then install it (again check to make sure its going in the right way!!). Tap the grease seal into place.
Do the same for the outer bearing race and bearing. There is no grease seal on this side.
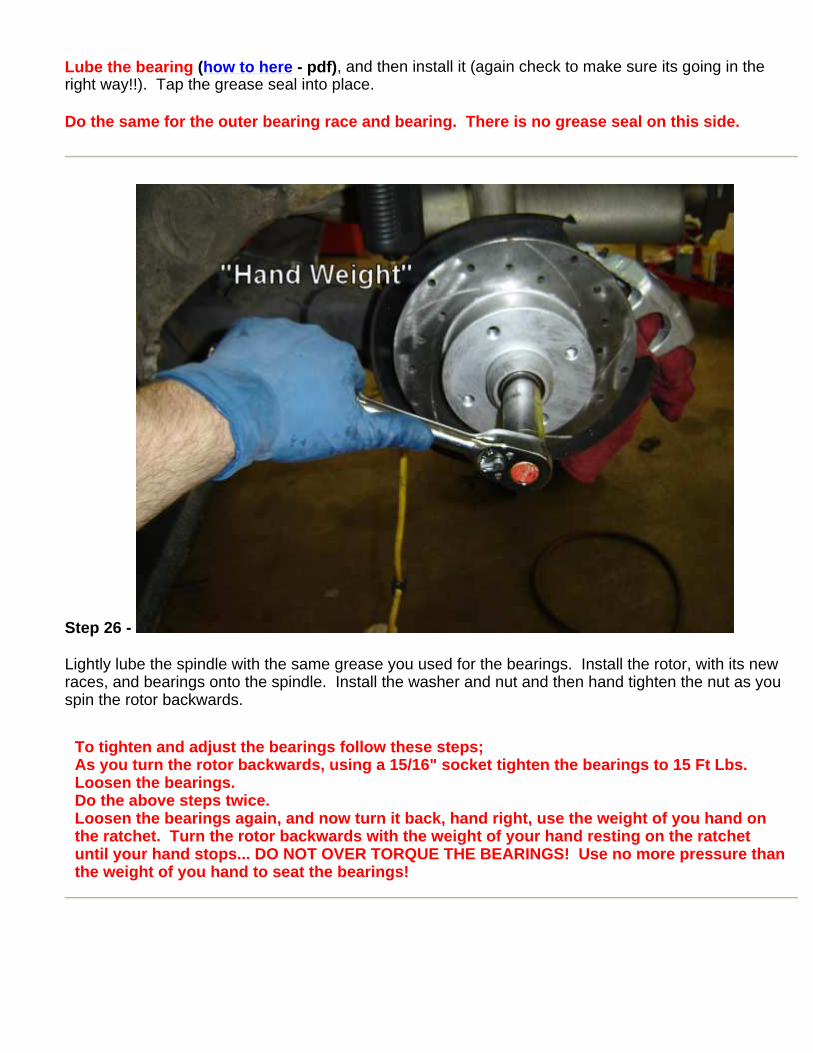
Step 26 -
Lightly lube the spindle with the same grease you used for the bearings. Install the rotor, with its new races, and bearings onto the spindle. Install the washer and nut and then hand tighten the nut as you spin the rotor backwards.
To tighten and adjust the bearings follow these ste ps; As you turn the rotor backwards, using a 15/16" soc ket tighten the bearings to 15 Ft Lbs. Loosen the bearings. Do the above steps twice. Loosen the bearings again, and now turn it back, ha nd right, use the weight of you hand on the ratchet. Turn the rotor backwards with the wei ght of your hand resting on the ratchet until your hand stops... DO NOT OVER TORQUE THE BEA RINGS! Use no more pressure than the weight of you hand to seat the bearings!
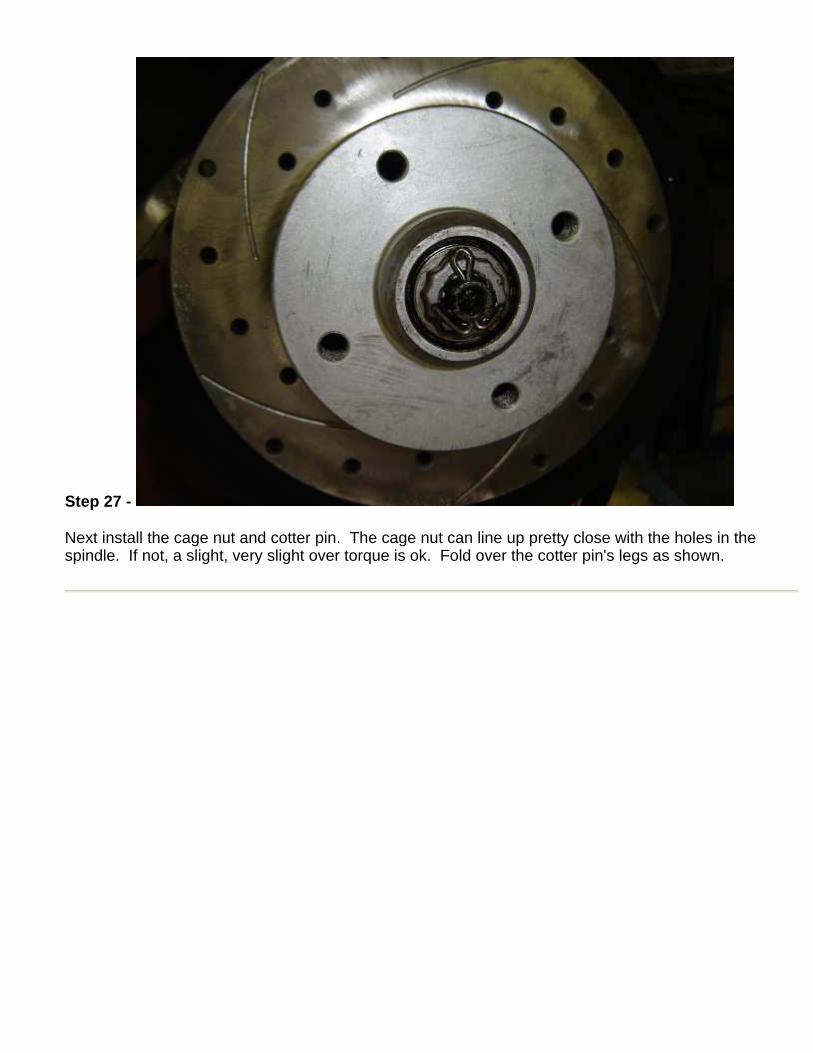
Step 27 -
Next install the cage nut and cotter pin. The cage nut can line up pretty close with the holes in the spindle. If not, a slight, very slight over torque is ok. Fold over the cotter pin's legs as shown.
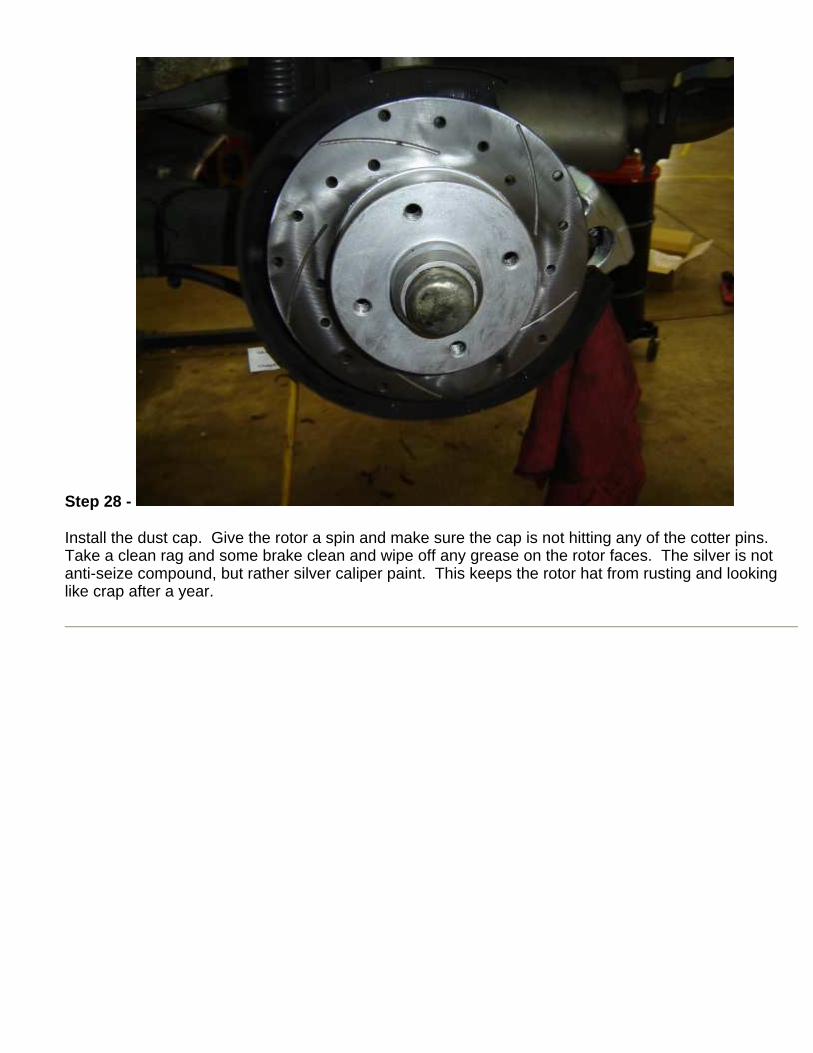
Step 28 -
Install the dust cap. Give the rotor a spin and make sure the cap is not hitting any of the cotter pins. Take a clean rag and some brake clean and wipe off any grease on the rotor faces. The silver is not anti-seize compound, but rather silver caliper paint. This keeps the rotor hat from rusting and looking like crap after a year.
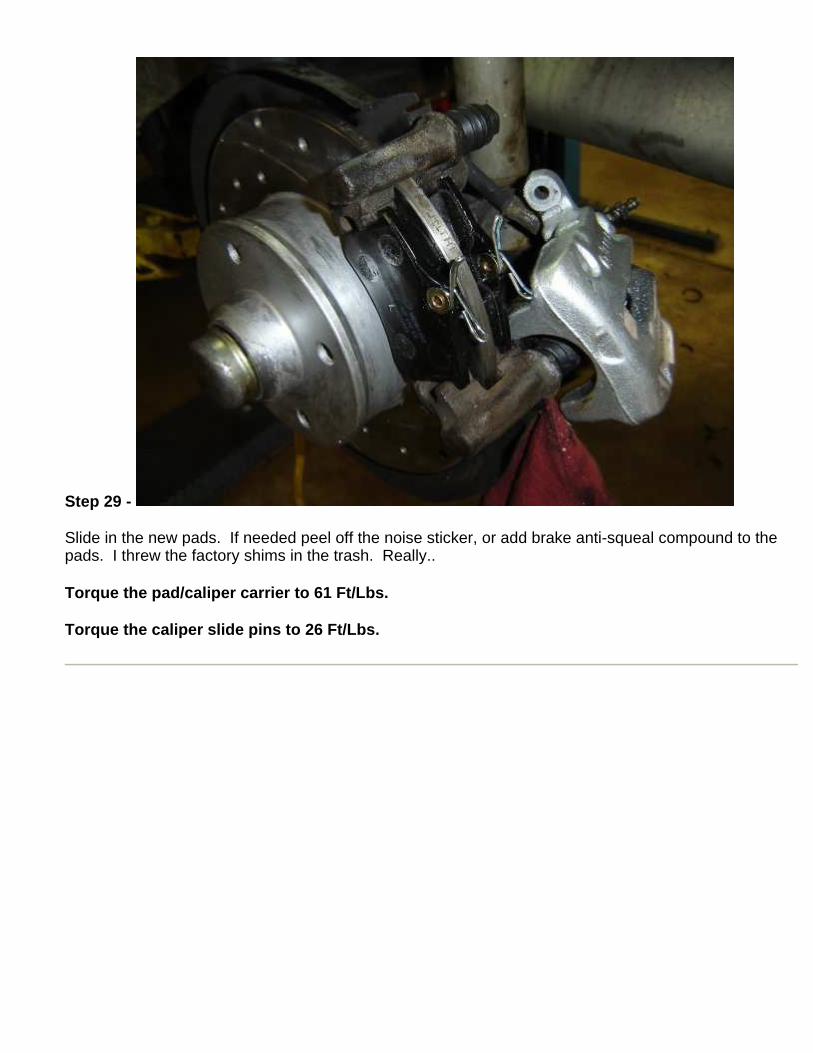
Step 29 -
Slide in the new pads. If needed peel off the noise sticker, or add brake anti-squeal compound to the pads. I threw the factory shims in the trash. Really..
Torque the pad/caliper carrier to 61 Ft/Lbs.
Torque the caliper slide pins to 26 Ft/Lbs.
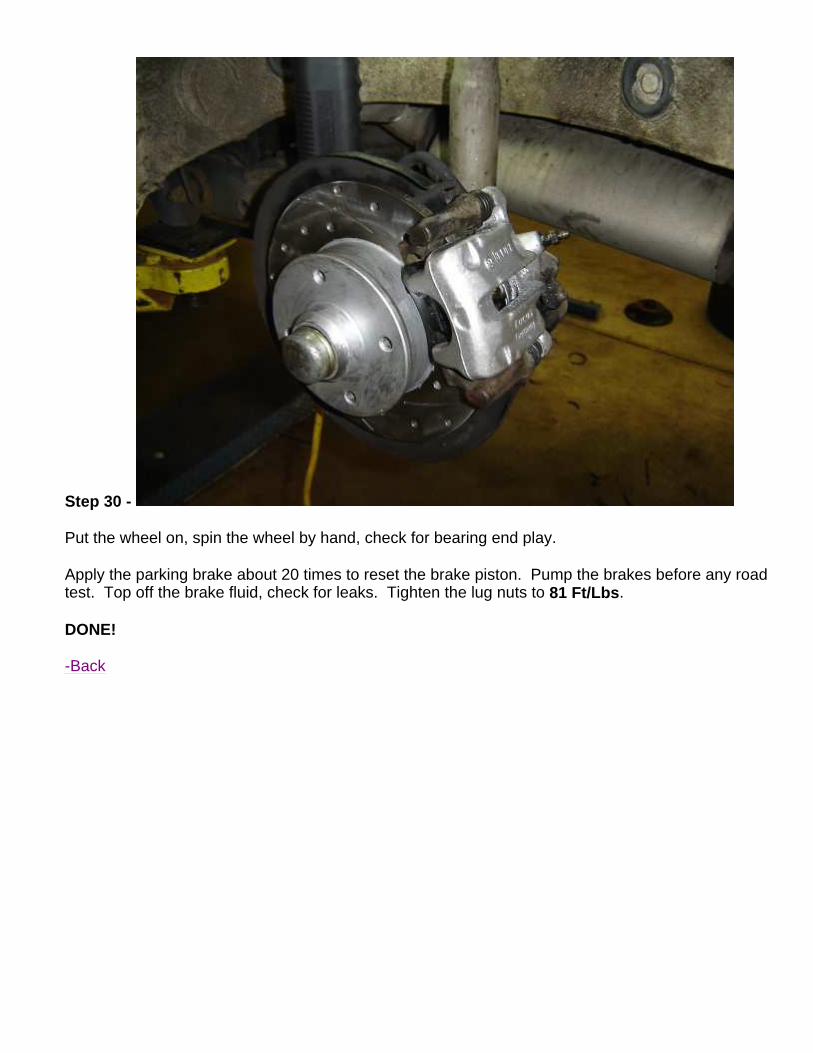
Step 30 -
Put the wheel on, spin the wheel by hand, check for bearing end play.
Apply the parking brake about 20 times to reset the brake piston. Pump the brakes before any road test. Top off the brake fluid, check for leaks. Tighten the lug nuts to 81 Ft/Lbs .
DONE!
-Back