Embed Size (px)
Citation preview
MMBase Installation HOWTO
Adrian Offerman
minor corrections
Copyright © 2003 − 2006 Adrian Offerman
June 25, 2006
Revision HistoryRevision 0.3.5 2006−06−25 Revised by: AOTomcat init scriptRevision 0.3.4 2005−09−18 Revised by: AOminor correctionsRevision 0.3.2 2005−01−25 Revised by: AOMMBase 1.7.3, Java 1.5.0−01Revision 0.3.1 2004−12−26 Revised by: AOEmail moduleRevision 0.3.0 2004−12−25 Revised by: AOMMBase 1.7.2, Tomcat 5.5.4, Java 1.5.0, MySQL Connector/J 3.0.16−ga, Jikes 1.22Revision 0.2.6 2004−07−27 Revised by: AOminor additionsRevision 0.2.5 2004−02−28 Revised by: AOCreative Commons copyright license adjustedRevision 0.2.4 2004−01−22 Revised by: AOCreative Commons copyright license; minor additions and correctionsRevision 0.2.3 2003−12−26 Revised by: AOminor additions and correctionsRevision 0.2.2 2003−12−20 Revised by: AOcopyright adjustedRevision 0.2.1 2003−12−18 Revised by: AOminor correctionsRevision 0.2.0 2003−12−15 Revised by: AOJK 2 Connector setup added

Revision 0.1.0 2003−12−10 Revised by: AOinitial draft
This document describes the installation of the MMBase content management system on a Red Hat Linuxdistribution, using the Tomcat application server, and integrating it with MySQL and Apache.
Table of Contents1. Introduction.....................................................................................................................................................1
2. Installation.......................................................................................................................................................2
3. Installing Java.................................................................................................................................................3
4. Installing Tomcat............................................................................................................................................6
5. Replacing Tomcat's default JSP compiler Jasper with IBM's Jikes compiler........................................11
6. Installing ImageMagick................................................................................................................................12
7. Installing MMBase........................................................................................................................................13
8. Connecting MMBase to MySQL using MySQL Connector/J..................................................................16
9. Installing MMBase additional applications................................................................................................189.1. Installing the CloudContext Security module.................................................................................189.2. Installing the Media module...........................................................................................................199.3. Installing the Email module............................................................................................................19
10. Configuring initial MMBase settings........................................................................................................21
11. Running MMBase.......................................................................................................................................23
12. Connecting Apache and Tomcat using mod_jk2.....................................................................................25
13. Installing an Apache reverse proxy as a front−end to your MMBase server........................................30
14. Installing more MMBase servers on a single Tomcat server..................................................................31
15. Acknowledgements.....................................................................................................................................33
16. Contributers................................................................................................................................................34
17. Revision history...........................................................................................................................................35
18. Disclaimer....................................................................................................................................................36
19. Copyright.....................................................................................................................................................37
MMBase Installation HOWTO
i
1. Introduction>From the MMBase website (www.mmbase.org):
"MMBase is a Web Content Management System with strong multimedia features. MMBasehas a large installed base in The Netherlands, and is used by major Dutch broadcasters,publishers, educational institutes, national and local governments. MMBase is written in Java,it is Open Source Software (MPL) and all standards used are as 'open' as possible. The systemcan be used with all major operating systems, application servers and databases."
Unfortunately, the installation of MMBase is not well documented. Furthermore, when searching the internetlooking for installation clues and trying out tips, it turns out that the details of the installation have changedfrequently.
This document describes the installation of the MMBase content management system on a Red Hat Linuxdistribution, using the Tomcat application server, and the integration with MySQL and Apache.
It is based on our own experience and compiled to the benefit of the community.
These are the ingredients we used to cook up this recipe ourselves:
Red Hat 8.0 distribution running a 2.4.20 kernel, with Alan Cox 2 and EA/ACL extensions.• Java 2 Software Developers Kit (SDK) and Java 2 Run−time Engine (J2RE) from Sun's Java 2Platform Standard Edition 5.0 (J2SE) (version 1.5.0−01),
•
Apache Jakarta Tomcat 5.5.4,• ImageMagick 6.1.3−7,• MMBase 1.7.3 with various modules,• MySQL Connector/J 3.0.16−ga,• Jikes 1.22.•
And before:
Red Hat 8.0 distribution running a 2.4.20 kernel, with Alan Cox 2 and EA/ACL extensions.• Java 2 Software Developers Kit (SDK) and Java 2 Run−time Engine (J2RE) from the BlackdownJava 2 JDK version v1.4.1−01,
•
Apache Jakarta Tomcat 4.1.27,• ImageMagick 5.4.7−5,• MMBase 1.6.5 for JDK 1.4,• MySQL Connector/J 3.0.8,• Jikes 1.18.•
1. Introduction 1
2. InstallationAlthough we installed MMBase on a kernel with the Alan Cox and EA/ACL extensions, these features are noprerequisites.
We assume that you have already installed and configured Apache and MySQL on your server.
2. Installation 2

3. Installing JavaDownload the latest versions of the Java 2 Development Kit (JDK) or Run−time Engine (JRE), and theaccompanying documentation from:
http://java.sun.com
Installation instructions and release notes for the JDK and JRE are available at the download page.
Make the binary distribution of the JDK executable and extract in a new directory:
chmod +x jdk−xxx.bin cd /usr/local/ .../jdk−xxx.bin
Install the JDK documentation by unzipping it in the JDK directory:
cd /usr/local/jdk−xxx/ unzip .../jdk−xxx−doc.zip
Change the ownership of the JDK directory and make it available as /usr/local/j2sdk/:
chown −R root:root /usr/local/jdk−xxx/ ln −s /usr/local/jdk−xxx /usr/local/j2sdk
If you need only the JRE, the installation would be like this:
chmod +x jre−xxx.bin cd /usr/local/ .../jre−xxx.bin chown −R root:root /usr/local/jre−xxx/ ln −s /usr/local/jre−xxx /usr/local/j2re
Using JDK version 1.5.0 caused our Tomcat server to crash every now and then:
# # An unexpected error has been detected by HotSpot Virtual Machine: # # SIGSEGV (0xb) at pc=0x4042db3f, pid=11991, tid=16386 # # Java VM: Java HotSpot(TM) Server VM (1.5.0−b64 mixed mode) # Problematic frame: # V [libjvm.so+0x3abb3f] #
Upgrading to version 1.5.0−01 seemed to solve these problems.
For the (previously used) BlackDown Java for Linux distribution:
3. Installing Java 3

Find yourself a mirror for the BlackDown Java Development Kit at:
http://www.blackdown.org/java−linux/mirrors.html
There you can download the latest versions of the J2 Software Development Kit (SDK) and Run−timeEngine (RE).
Make sure you pick out the right version for the gcc library installed on your system. You can find outthe version currently installed by typing:
rpm −q libgcc
Installation instructions for the Java Development Kit are available as INSTALL−j2sdk andINSTALL−j2re.
Make the binary distribution of the SDK executable and extract in a new directory:
chmod +x j2sdk−xxx.bin cd /usr/local/ .../j2sdk−xxx.bin
Change the ownership of the J2SDK directory and make it available as /usr/local/j2sdk/:
chown −R root:root /usr/local/j2sdk−xxx/ ln −s /usr/local/j2sdk−xxx /usr/local/j2sdk
Do the same for the RE:
chmod +x j2re−xxx.bin cd /usr/local/ .../j2re−xxx.bin chown −R root:root /usr/local/j2re−xxx/ ln −s /usr/local/j2re−xxx /usr/local/j2re
Since we didn't install the JDK and JRE in our path, we have to add the bin/ directories to our $PATHenvironment variable. To make sure the Java distributions and classes can be found, we set the $JAVA_HOMEand $CLASSPATH variables as well.
For the Bourne shells, create a file /etc/profile.d/java.sh:
if ! echo ${PATH} | grep −q /usr/local/j2sdk/bin ; then export PATH=/usr/local/j2sdk/bin:${PATH} fi if ! echo ${PATH} | grep −q /usr/local/j2re/bin ; then export PATH=/usr/local/j2re/bin:${PATH} fi export JAVA_HOME=/usr/local/j2sdk export CLASSPATH=.:/usr/local/j2sdk/lib/tools.jar:/usr/local/j2re/lib/rt.jar
Set its ownership and access rights:
MMBase Installation HOWTO
3. Installing Java 4

chown root:root /etc/profile.d/java.sh chmod 755 /etc/profile.d/java.sh
Do the same for C shells, by creating the file /etc/profile.d/java.csh:
if ( "${path}" !~ */usr/local/j2sdk/bin* ) then set path = ( /usr/local/j2sdk/bin $path ) endif if ( "${path}" !~ */usr/local/j2re/bin* ) then set path = ( /usr/local/j2re/bin $path ) endif setenv JAVA_HOME /usr/local/j2sdk setenv CLASSPATH .:/usr/local/j2sdk/lib/tools.jar:/usr/local/j2re/lib/rt.jar
and setting its ownership and access rights:
chown root:root /etc/profile.d/java.csh chmod 755 /etc/profile.d/java.csh
Now the JDK should be available to everyone on your system.
You can test the Java engine by typing:
java −version
or create a file Test.java:
public class Test { public static void main(String[] args) { System.out.println("Hello world"); } }
and test the compiler:
javac Test.java java Test
MMBase Installation HOWTO
3. Installing Java 5
4. Installing TomcatDownload a binary distribution of Tomcat from the Apache Jakarta website:
http://jakarta.apache.org/tomcat/
If you don't want to run the Tomcat daemon as root, create a new user/group tomcat (first make sure that theUID and GID you use are still available by checking the files /etc/passwd and /etc/group):
groupadd −g 220 tomcat useradd −u 220 −g tomcat −c "Tomcat" −r −d /usr/local/tomcat −s "/sbin/nologin" tomcat
You really should not use the root account to run the Tomcat daemon; (using Tomcat version 4.1.27) wefound out that this allows the MMBase admin user to write backup dumps of his sites anywhere on thesystem.
<TODO: better solution available?>
Extract the Tomcat distribution in a new directory:
cd /usr/local/ tar −zxvf .../jakarta−tomcat−xxx.tar.gz
Version 4.1.27 came with a hot−fix:
cd /usr/local/jakarta−tomcat−xxx/ tar −zxvf .../xxx−hotfix−xxx.tar.gz
Change the ownership of the Tomcat directory and make it available as /usr/local/tomcat/:
chown −R tomcat:tomcat /usr/local/jakarta−tomcat−xxx ln −s /usr/local/jakarta−tomcat−xxx /usr/local/tomcat
Open up the firewall for web access to the Tomcat server by adding to the file/etc/sysconfig/iptables:
−A RH−Lokkit−0−50−INPUT −p tcp −m tcp −−dport 8080 −−syn −j ACCEPT
You need to reboot your system to make this rule effective or restart the iptables firewall:
service iptables restart
Since (for some odd reason) some network managers allow outgoing web connections only to TCP port80, there might be people around that cannot access your Tomcat (and MMBase) server through port8080. Further below we will explain how to install a JK 2 mapping or a reverse proxy in Apache, so
4. Installing Tomcat 6
Tomcat and MMBase can be accessed through the Apache web server at port 80. Apart from the portissue, this has the advantage that you can use Apache to manage you SSL connections and use yourexisting Apache logs and statistics facilities for Tomcat and MMBase as well.
If you decide to use Apache as a front−end to your Tomcat and MMBase server, there's no need to openup port 8080 in your firewall.
To run Tomcat, set the $CATALINA_HOME environment variable:
CATALINA_HOME=/usr/local/tomcat
and fire it up:
/usr/local/tomcat/bin/startup.sh
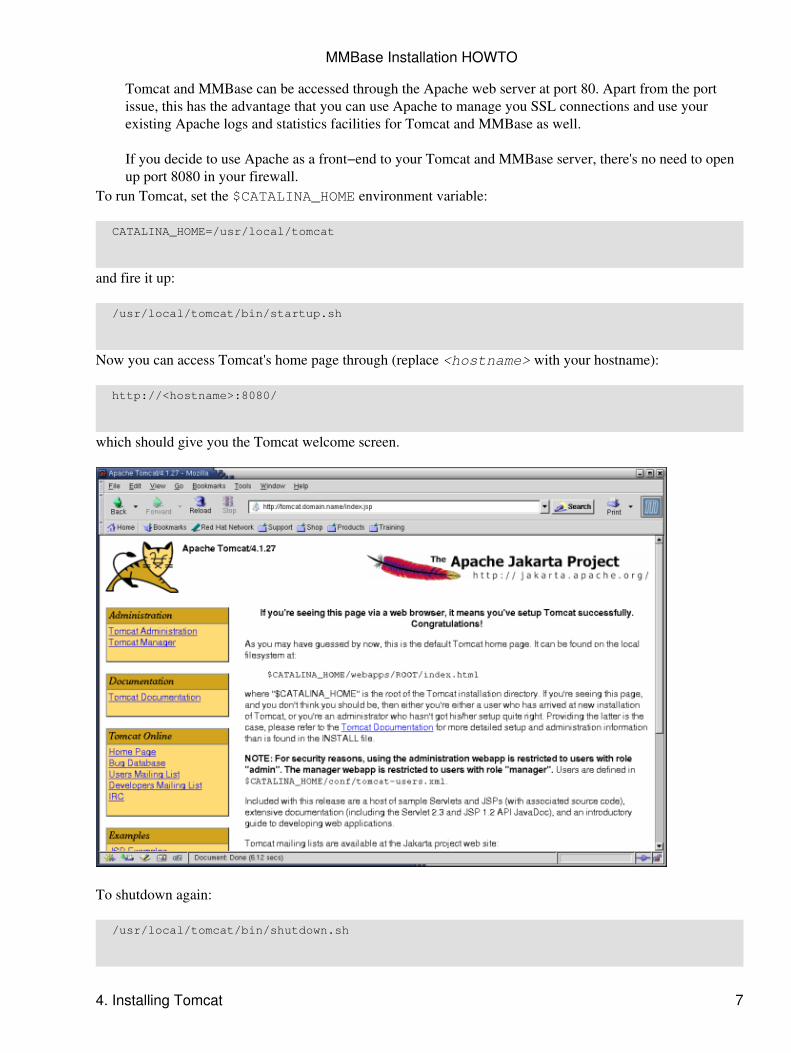
Now you can access Tomcat's home page through (replace <hostname> with your hostname):
http://<hostname>:8080/
which should give you the Tomcat welcome screen.
To shutdown again:
/usr/local/tomcat/bin/shutdown.sh
MMBase Installation HOWTO
4. Installing Tomcat 7
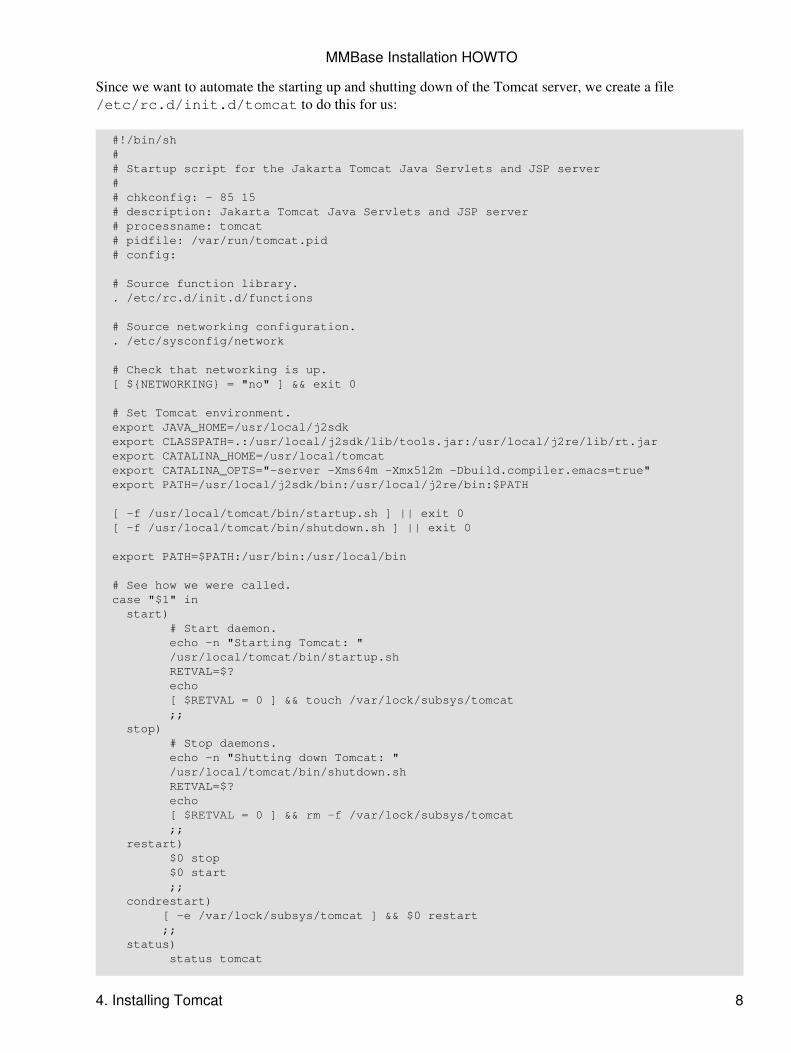
Since we want to automate the starting up and shutting down of the Tomcat server, we create a file/etc/rc.d/init.d/tomcat to do this for us:
#!/bin/sh # # Startup script for the Jakarta Tomcat Java Servlets and JSP server # # chkconfig: − 85 15 # description: Jakarta Tomcat Java Servlets and JSP server # processname: tomcat # pidfile: /var/run/tomcat.pid # config:
# Source function library. . /etc/rc.d/init.d/functions
# Source networking configuration. . /etc/sysconfig/network
# Check that networking is up. [ ${NETWORKING} = "no" ] && exit 0
# Set Tomcat environment. export JAVA_HOME=/usr/local/j2sdk export CLASSPATH=.:/usr/local/j2sdk/lib/tools.jar:/usr/local/j2re/lib/rt.jar export CATALINA_HOME=/usr/local/tomcat export CATALINA_OPTS="−server −Xms64m −Xmx512m −Dbuild.compiler.emacs=true" export PATH=/usr/local/j2sdk/bin:/usr/local/j2re/bin:$PATH
[ −f /usr/local/tomcat/bin/startup.sh ] || exit 0 [ −f /usr/local/tomcat/bin/shutdown.sh ] || exit 0
export PATH=$PATH:/usr/bin:/usr/local/bin
# See how we were called. case "$1" in start) # Start daemon. echo −n "Starting Tomcat: " /usr/local/tomcat/bin/startup.sh RETVAL=$? echo [ $RETVAL = 0 ] && touch /var/lock/subsys/tomcat ;; stop) # Stop daemons. echo −n "Shutting down Tomcat: " /usr/local/tomcat/bin/shutdown.sh RETVAL=$? echo [ $RETVAL = 0 ] && rm −f /var/lock/subsys/tomcat ;; restart) $0 stop $0 start ;; condrestart) [ −e /var/lock/subsys/tomcat ] && $0 restart ;; status) status tomcat
MMBase Installation HOWTO
4. Installing Tomcat 8
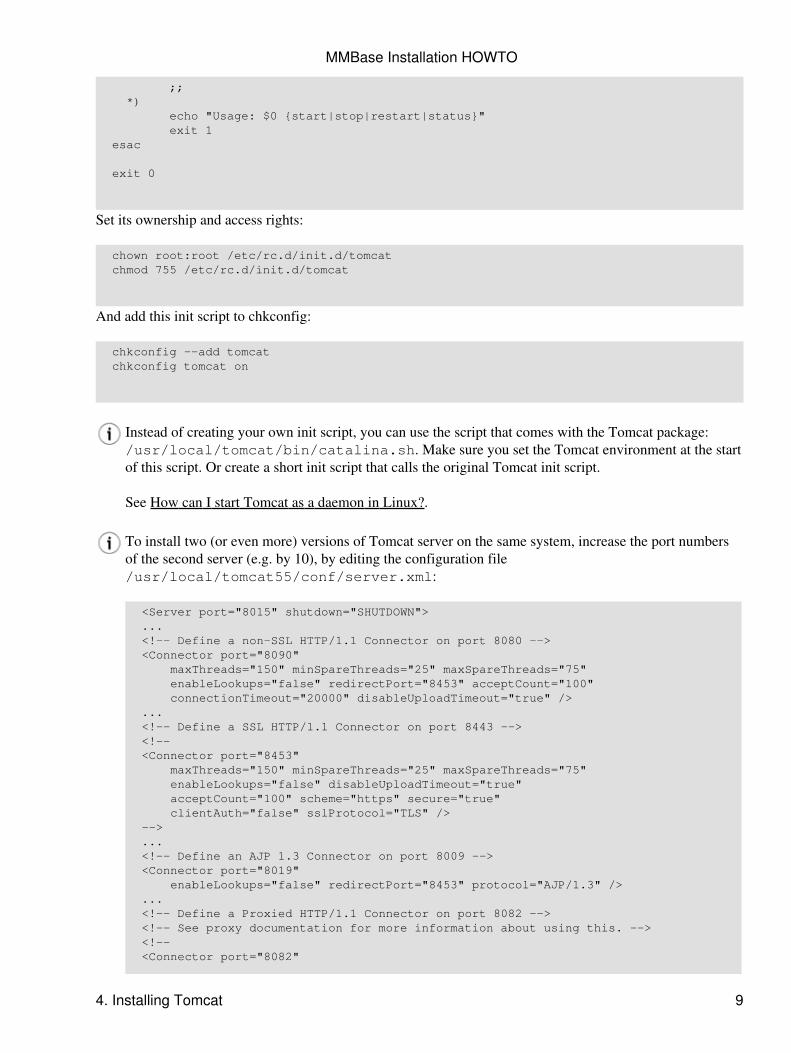
;; *) echo "Usage: $0 {start|stop|restart|status}" exit 1 esac
exit 0
Set its ownership and access rights:
chown root:root /etc/rc.d/init.d/tomcat chmod 755 /etc/rc.d/init.d/tomcat
And add this init script to chkconfig:
chkconfig −−add tomcat chkconfig tomcat on
Instead of creating your own init script, you can use the script that comes with the Tomcat package:/usr/local/tomcat/bin/catalina.sh. Make sure you set the Tomcat environment at the startof this script. Or create a short init script that calls the original Tomcat init script.
See How can I start Tomcat as a daemon in Linux?.
To install two (or even more) versions of Tomcat server on the same system, increase the port numbersof the second server (e.g. by 10), by editing the configuration file/usr/local/tomcat55/conf/server.xml:
<Server port="8015" shutdown="SHUTDOWN"> ... <!−− Define a non−SSL HTTP/1.1 Connector on port 8080 −−> <Connector port="8090" maxThreads="150" minSpareThreads="25" maxSpareThreads="75" enableLookups="false" redirectPort="8453" acceptCount="100" connectionTimeout="20000" disableUploadTimeout="true" /> ... <!−− Define a SSL HTTP/1.1 Connector on port 8443 −−> <!−− <Connector port="8453" maxThreads="150" minSpareThreads="25" maxSpareThreads="75" enableLookups="false" disableUploadTimeout="true" acceptCount="100" scheme="https" secure="true" clientAuth="false" sslProtocol="TLS" /> −−> ... <!−− Define an AJP 1.3 Connector on port 8009 −−> <Connector port="8019" enableLookups="false" redirectPort="8453" protocol="AJP/1.3" /> ... <!−− Define a Proxied HTTP/1.1 Connector on port 8082 −−> <!−− See proxy documentation for more information about using this. −−> <!−− <Connector port="8082"
MMBase Installation HOWTO
4. Installing Tomcat 9

maxThreads="150" minSpareThreads="25" maxSpareThreads="75" enableLookups="false" acceptCount="100" connectionTimeout="20000" proxyPort="80" disableUploadTimeout="true" /> −−>
Complete this second Tomcat server installation as above for the first server, using adjusted directoryand file names.
MMBase Installation HOWTO
4. Installing Tomcat 10
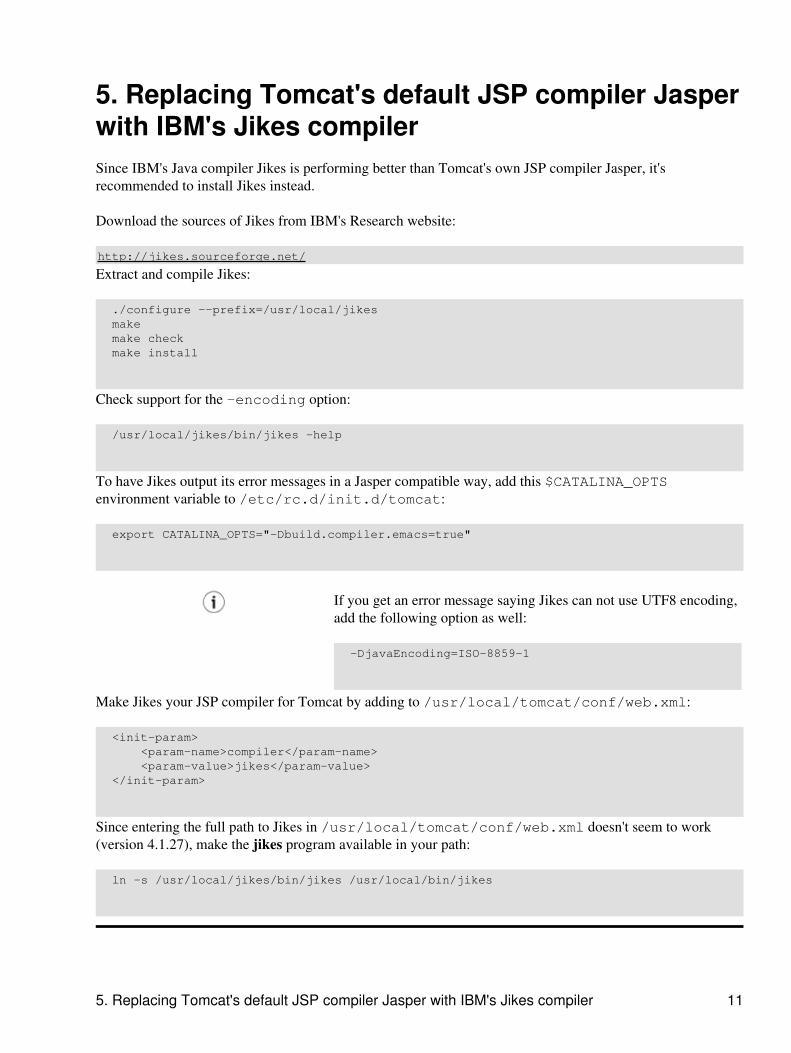
5. Replacing Tomcat's default JSP compiler Jasperwith IBM's Jikes compilerSince IBM's Java compiler Jikes is performing better than Tomcat's own JSP compiler Jasper, it'srecommended to install Jikes instead.
Download the sources of Jikes from IBM's Research website:
http://jikes.sourceforge.net/
Extract and compile Jikes:
./configure −−prefix=/usr/local/jikes make make check make install
Check support for the −encoding option:
/usr/local/jikes/bin/jikes −help
To have Jikes output its error messages in a Jasper compatible way, add this $CATALINA_OPTSenvironment variable to /etc/rc.d/init.d/tomcat:
export CATALINA_OPTS="−Dbuild.compiler.emacs=true"
If you get an error message saying Jikes can not use UTF8 encoding,add the following option as well:
−DjavaEncoding=ISO−8859−1
Make Jikes your JSP compiler for Tomcat by adding to /usr/local/tomcat/conf/web.xml:
<init−param> <param−name>compiler</param−name> <param−value>jikes</param−value> </init−param>
Since entering the full path to Jikes in /usr/local/tomcat/conf/web.xml doesn't seem to work(version 4.1.27), make the jikes program available in your path:
ln −s /usr/local/jikes/bin/jikes /usr/local/bin/jikes
5. Replacing Tomcat's default JSP compiler Jasper with IBM's Jikes compiler 11
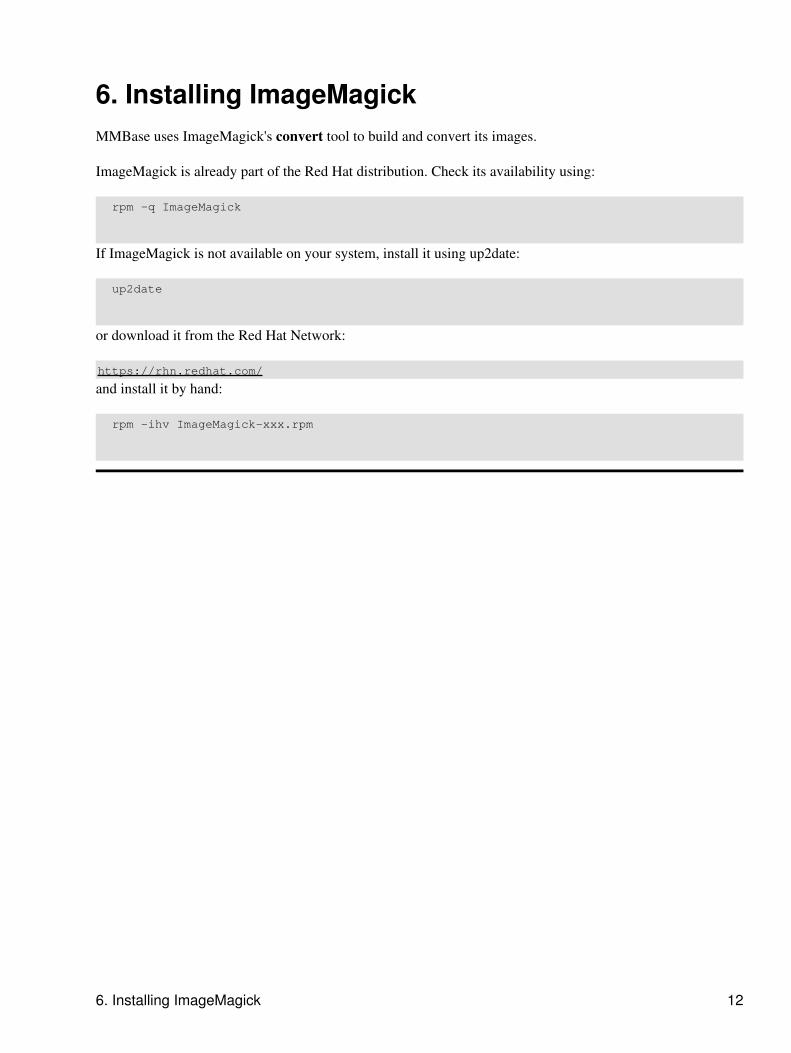
6. Installing ImageMagickMMBase uses ImageMagick's convert tool to build and convert its images.
ImageMagick is already part of the Red Hat distribution. Check its availability using:
rpm −q ImageMagick
If ImageMagick is not available on your system, install it using up2date:
up2date
or download it from the Red Hat Network:
https://rhn.redhat.com/
and install it by hand:
rpm −ihv ImageMagick−xxx.rpm
6. Installing ImageMagick 12

7. Installing MMBaseDownload the binary distribution of MMBase, and the additional applications you need (i.e. CloudContextSecurity, Media, Email) (see the next section), from:
http://www.mmbase.org/ −−> Download −−> Releases
MMBase version 1.7.2 contained a nasty bug, resulting in problems with the editwizards. The 1.7.3release includes a bugfix for this problem.
Make sure you pick out the right version for the Java 2 JDK installed on your system. You can find out theversion currently installed by typing:
java −version
Extract the binary distribution of MMBase, copy it into the Tomcat directory, and change the ownership of theMMBase directory:
unzip mmbase−xxx.zip cd /usr/local/tomcat/webapps/ mkdir mmbase−webapp/ cp −R .../mmbase−x.x.x/mmbase−webapp/* ./mmbase−webapp/ chown −R tomcat:tomcat ./mmbase−webapp/
Installing MMBase version 1.7 on Tomcat version 5 resulted in version incompatibilities:
FATAL org.mmbase.servlet.MMBaseStartThread − Could not find the MMBase module!Class javax/servlet/http/HttpServletResponse violates loader constraints
We had to disable the RMMCI library to get this installation up and running:
mv /usr/local/tomcat/webapps/web−app/WEB−INF/lib/mmbase−rmmci.jar \ /usr/local/tomcat/webapps/web−app/WEB−INF/lib/mmbase−rmmci.jar.org
For MMBase version 1.7 running on Tomcat version 5, enable the Xerces libraries:
mv /usr/local/tomcat/webapps/mmbase−webapp/WEB−INF/lib/xalan.renametojar \ /usr/local/tomcat/webapps/mmbase−webapp/WEB−INF/lib/xalan.jar mv /usr/local/tomcat/webapps/mmbase−webapp/WEB−INF/lib/xerces.renametojar \ /usr/local/tomcat/webapps/mmbase−webapp/WEB−INF/lib/xerces.jar mv /usr/local/tomcat/webapps/mmbase−webapp/WEB−INF/lib/xml−apis.renametojar \ /usr/local/tomcat/webapps/mmbase−webapp/WEB−INF/lib/xml−apis.jar
Or you will have fatal errors like: FATAL org.mmbase.servlet.MMBaseStartThread − Could not find the MMBase module!org/apache/xpath/XPathAPI
7. Installing MMBase 13

For MMBase version 1.6 running on Tomcat version 4, replace the Tomcat Xerces libraries by those comingwith MMBase:
mv −i /usr/local/tomcat/common/endorsed/xercesImpl.jar ~/ mv −i /usr/local/tomcat/common/endorsed/xmlParserAPIs.jar ~/ cp /usr/local/tomcat/webapps/mmbase−webapp/WEB−INF/lib/xalan.jar \ /usr/local/tomcat/common/endorsed/ chown tomcat:tomcat /usr/local/tomcat/common/endorsed/xalan.jar chmod 644 /usr/local/tomcat/common/endorsed/xalan.jar cp /usr/local/tomcat/webapps/mmbase−webapp/WEB−INF/lib/xerces.jar \ /usr/local/tomcat/common/endorsed/ chown tomcat:tomcat /usr/local/tomcat/common/endorsed/xerces.jar chmod 644 /usr/local/tomcat/common/endorsed/xerces.jar cp /usr/local/tomcat/webapps/mmbase−webapp/WEB−INF/lib/xml−apis.jar \ /usr/local/tomcat/common/endorsed/ chown tomcat:tomcat /usr/local/tomcat/common/endorsed/xml−apis.jar chmod 644 /usr/local/tomcat/common/endorsed/xml−apis.jar
If you will not be using an Apache JK 2 mapping or reverse proxy (see further below) as a front−end to yourMMBase server, you can add to the file /usr/local/tomcat/conf/server.xml:
<Context path="/mmbase" docBase="/usr/local/tomcat/webapps/mmbase−webapp" debug="0"> <!−− if you want symlinks to work: −−> <Resources className="org.apache.naming.resources.FileDirContext" allowLinking="true" /> </Context>
This will allow you to access your MMBase server using (replace <hostname> with your hostname):
http://<hostname>:8080/mmbase
instead of:
http://<hostname>:8080/mmbase−webapp
Check if the ImageMagick convert tool is in your path:
which convert
If not, add it to/usr/local/tomcat/webapps/mmbase−webapp/WEB−INF/config/applications/Resources/builders/images.xml.For example:
<property name="ImageConvert.ConverterCommand">/usr/bin/X11/convert</property>
Make sure that the directory/usr/local/tomcat/webapps/mmbase−webapp/WEB−INF/config/builders/applicationsis writable by the servlet engine user (for auto−installing builders):
MMBase Installation HOWTO
7. Installing MMBase 14

chown tomcat:tomcat /usr/local/tomcat/webapps/mmbase−webapp/WEB−INF/config/builders/applications chmod 775 /usr/local/tomcat/webapps/mmbase−webapp/WEB−INF/config/builders/applications
MMBase Installation HOWTO
7. Installing MMBase 15

8. Connecting MMBase to MySQL using MySQLConnector/JWe can connect MMBase to our MySQL database server using MySQL Connector/J. This JDBC driver forMySQL can be downloaded from:
http://www.mysql.com/downloads/api−jdbc.html
Copy the JDBC driver to the MMBase lib/ directory:
cp mysql−connector−java−xxx−bin.jar /usr/local/tomcat/webapps/mmbase−webapp/WEB−INF/lib/ chown tomcat:tomcat /usr/local/tomcat/webapps/mmbase−webapp/WEB−INF/lib/mysql−connector−java−xxx−bin.jar chmod 664 /usr/local/tomcat/webapps/mmbase−webapp/WEB−INF/lib/mysql−connector−java−xxx−bin.jar
Make this your JDBC driver for MMBase by editing/usr/local/tomcat/webapps/mmbase−webapp/WEB−INF/config/modules/jdbc.xml.Substitute the database name (mmbase), user (mmuser) and password (mmpass) with the database settingsyou'd like MMBase to use.
<property name="url">jdbc:mysql://$HOST:$PORT/$DBM</property> <property name="user">mmuser</property> <property name="password">mmpass</property> <property name="supportclass">org.mmbase.module.database.DatabaseSupportShim</property> <property name="database">mmbase</property> <property name="connections">20</property> <property name="host">localhost</property> <property name="driver">com.mysql.jdbc.Driver</property> <property name="port">3306</property> <property name="querys">256</property> <property name="probetime">30</property>
Set the ownership and access rights of this configuration file. Since it contains your database name, user nameand password, make sure other users can not read this file.
chown tomcat:tomcat /usr/local/tomcat/webapps/mmbase−webapp/WEB−INF/config/modules/jdbc.xml chmod 640 /usr/local/tomcat/webapps/mmbase−webapp/WEB−INF/config/modules/jdbc.xml
Now create the MySQL database you've just defined for MMBase:
mysql −u root −p
CREATE DATABASE <mmbase>; USE <mmbase>; GRANT SELECT,INSERT,UPDATE,DELETE,CREATE,DROP ON <mmbase>.* TO <mmuser>@'%' IDENTIFIED BY '<password>'; GRANT SELECT,INSERT,UPDATE,DELETE,CREATE,DROP ON <mmbase>.* TO <mmuser>@localhost IDENTIFIED BY '<password>'; GRANT SELECT,INSERT,UPDATE,DELETE,CREATE,DROP ON <mmbase>.* TO <mmuser>@localhost.<domainname> IDENTIFIED BY '<password>'; # RH bug fix
8. Connecting MMBase to MySQL using MySQL Connector/J 16
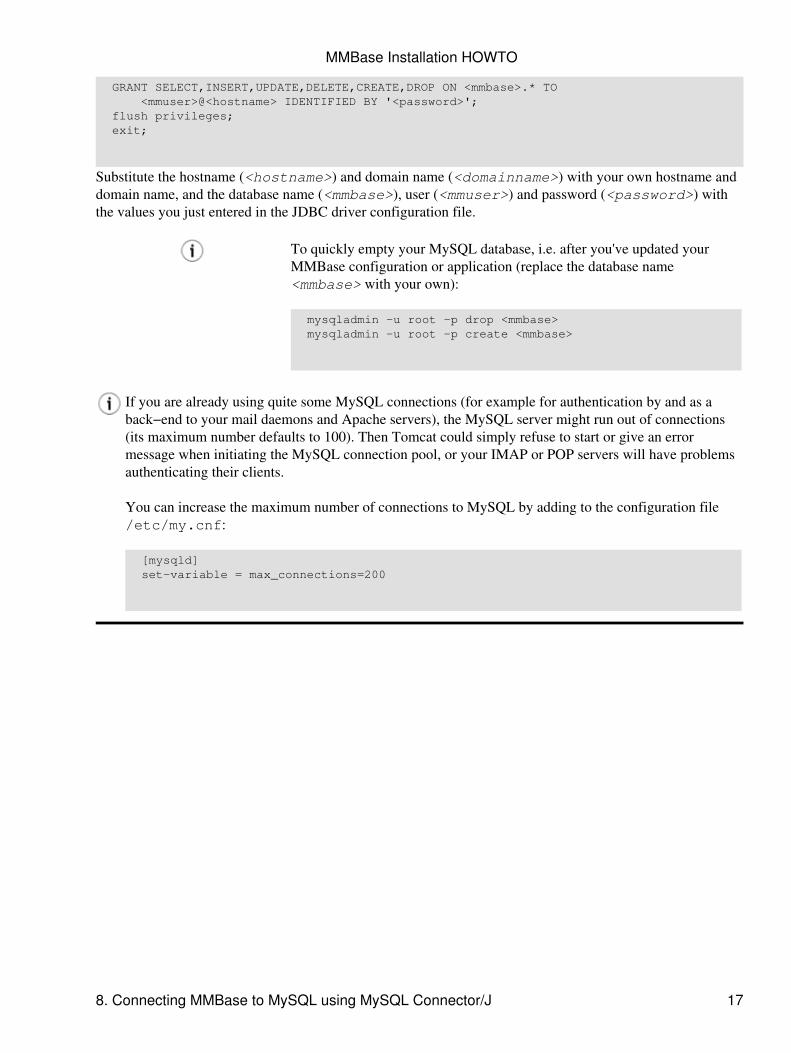
GRANT SELECT,INSERT,UPDATE,DELETE,CREATE,DROP ON <mmbase>.* TO <mmuser>@<hostname> IDENTIFIED BY '<password>'; flush privileges; exit;
Substitute the hostname (<hostname>) and domain name (<domainname>) with your own hostname anddomain name, and the database name (<mmbase>), user (<mmuser>) and password (<password>) withthe values you just entered in the JDBC driver configuration file.
To quickly empty your MySQL database, i.e. after you've updated yourMMBase configuration or application (replace the database name<mmbase> with your own):
mysqladmin −u root −p drop <mmbase> mysqladmin −u root −p create <mmbase>
If you are already using quite some MySQL connections (for example for authentication by and as aback−end to your mail daemons and Apache servers), the MySQL server might run out of connections(its maximum number defaults to 100). Then Tomcat could simply refuse to start or give an errormessage when initiating the MySQL connection pool, or your IMAP or POP servers will have problemsauthenticating their clients.
You can increase the maximum number of connections to MySQL by adding to the configuration file/etc/my.cnf:
[mysqld] set−variable = max_connections=200
MMBase Installation HOWTO
8. Connecting MMBase to MySQL using MySQL Connector/J 17
9. Installing MMBase additional applicationsWith the release of version 1.7 MMBase was reworked into a more modular structure. The developers decidedto take several modules (i.e. CloudContext Security, Media, Email) from the MMBase tree, and make theseavailable as separate entities. However, at this moment MMBase doesn't have a module interface at all. So, touse these additional applications, the library and other files need to be placed into the installation tree and theconfiguration needs to be added into the existing configuration files by hand.
9.1. Installing the CloudContext Security module
>From the MMBase website (www.mmbase.org):
"Cloud security uses the object mmbaseuser to store information used for authorisation andauthentication of users. The two main advantages of this security implementation are that theuser administration can be carried out by using a webbrowser (instead of editing a file on thefilesystem) and that the users of your MMBase installation are available as objects in thecloud. For instance, it is possible to create groups of users, which are allowed to carry outcertain tasks."
"A context exists of a set of rights which describe what you can do within this context with anobject of MMBase. For example you define read access to a the context which is used byanonymous visitors of your site and you can define a context with edit rights for registeredusers of your site. "
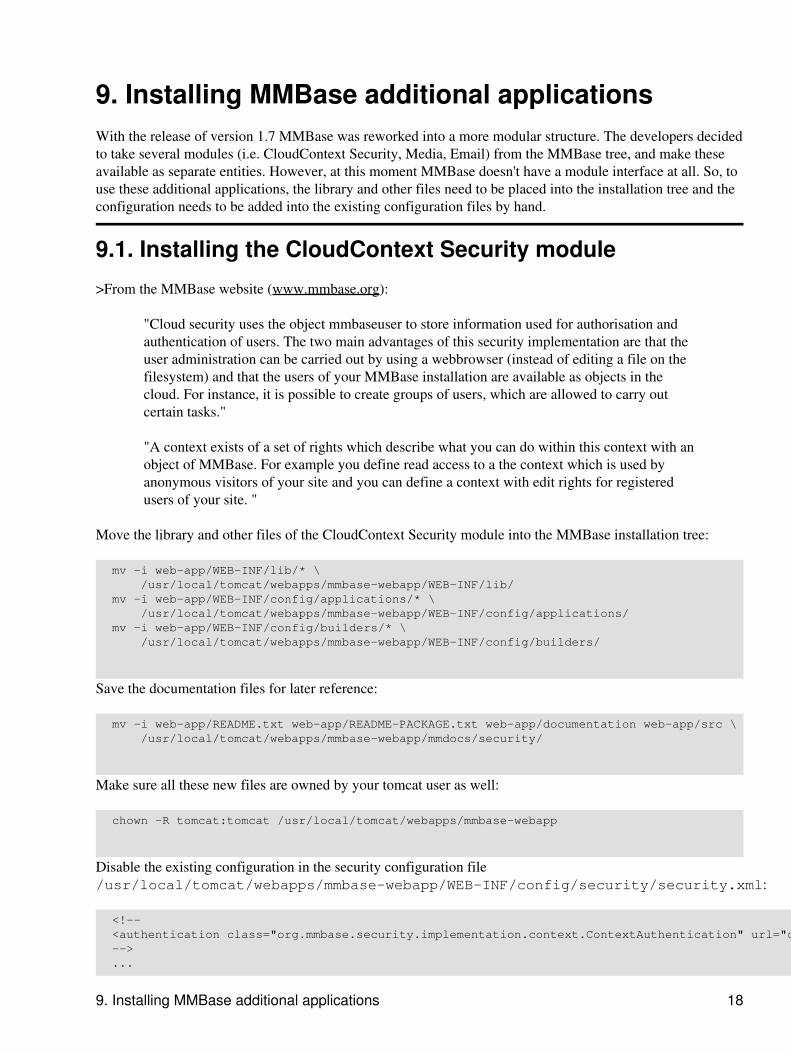
Move the library and other files of the CloudContext Security module into the MMBase installation tree:
mv −i web−app/WEB−INF/lib/* \ /usr/local/tomcat/webapps/mmbase−webapp/WEB−INF/lib/ mv −i web−app/WEB−INF/config/applications/* \ /usr/local/tomcat/webapps/mmbase−webapp/WEB−INF/config/applications/ mv −i web−app/WEB−INF/config/builders/* \ /usr/local/tomcat/webapps/mmbase−webapp/WEB−INF/config/builders/
Save the documentation files for later reference:
mv −i web−app/README.txt web−app/README−PACKAGE.txt web−app/documentation web−app/src \ /usr/local/tomcat/webapps/mmbase−webapp/mmdocs/security/
Make sure all these new files are owned by your tomcat user as well:
chown −R tomcat:tomcat /usr/local/tomcat/webapps/mmbase−webapp
Disable the existing configuration in the security configuration file/usr/local/tomcat/webapps/mmbase−webapp/WEB−INF/config/security/security.xml:
<!−− <authentication class="org.mmbase.security.implementation.context.ContextAuthentication" url="context/config.xml" /> −−> ...
9. Installing MMBase additional applications 18
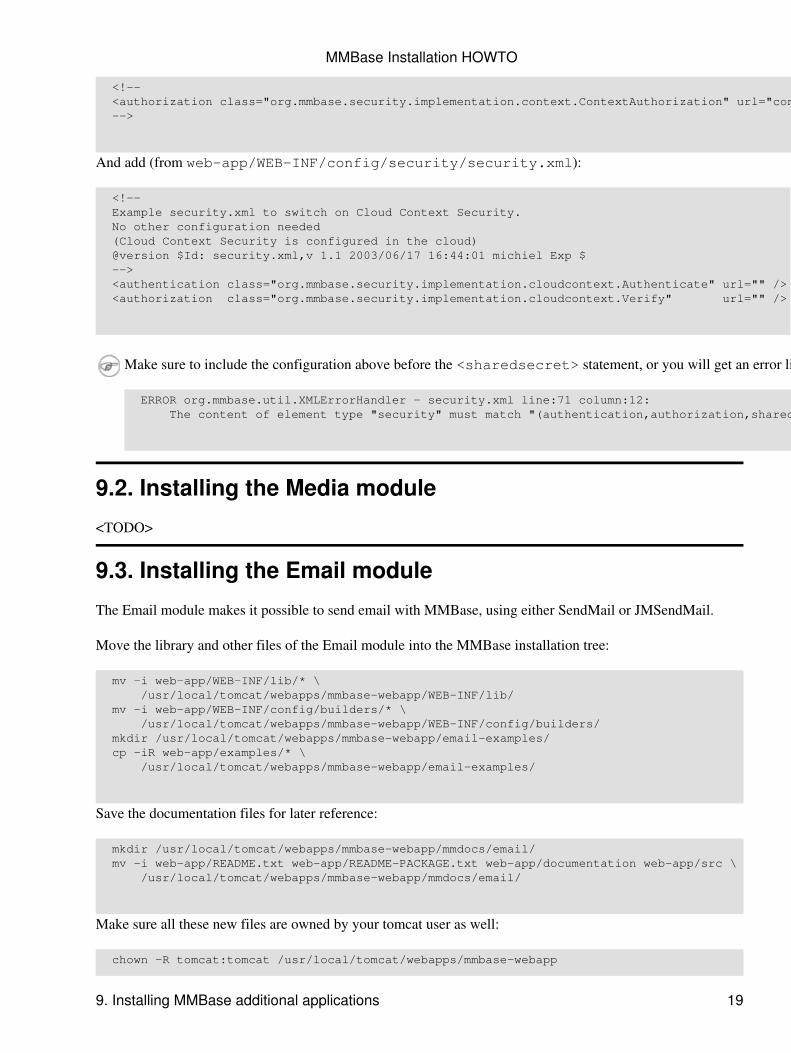
<!−− <authorization class="org.mmbase.security.implementation.context.ContextAuthorization" url="context/config.xml" /> −−>
And add (from web−app/WEB−INF/config/security/security.xml):
<!−− Example security.xml to switch on Cloud Context Security. No other configuration needed (Cloud Context Security is configured in the cloud) @version $Id: security.xml,v 1.1 2003/06/17 16:44:01 michiel Exp $ −−> <authentication class="org.mmbase.security.implementation.cloudcontext.Authenticate" url="" /> <authorization class="org.mmbase.security.implementation.cloudcontext.Verify" url="" />
Make sure to include the configuration above before the <sharedsecret> statement, or you will get an error like this:
ERROR org.mmbase.util.XMLErrorHandler − security.xml line:71 column:12: The content of element type "security" must match "(authentication,authorization,sharedsecret)".
9.2. Installing the Media module
<TODO>
9.3. Installing the Email module
The Email module makes it possible to send email with MMBase, using either SendMail or JMSendMail.
Move the library and other files of the Email module into the MMBase installation tree:
mv −i web−app/WEB−INF/lib/* \ /usr/local/tomcat/webapps/mmbase−webapp/WEB−INF/lib/ mv −i web−app/WEB−INF/config/builders/* \ /usr/local/tomcat/webapps/mmbase−webapp/WEB−INF/config/builders/ mkdir /usr/local/tomcat/webapps/mmbase−webapp/email−examples/ cp −iR web−app/examples/* \ /usr/local/tomcat/webapps/mmbase−webapp/email−examples/
Save the documentation files for later reference:
mkdir /usr/local/tomcat/webapps/mmbase−webapp/mmdocs/email/ mv −i web−app/README.txt web−app/README−PACKAGE.txt web−app/documentation web−app/src \ /usr/local/tomcat/webapps/mmbase−webapp/mmdocs/email/
Make sure all these new files are owned by your tomcat user as well:
chown −R tomcat:tomcat /usr/local/tomcat/webapps/mmbase−webapp
MMBase Installation HOWTO
9. Installing MMBase additional applications 19

Edit the email configuration file/usr/local/tomcat/webapps/mmbase−webapp/WEB−INF/config/modules/sendmail.xml(from web−app/WEB−INF/config/modules/sendmail.xml):
... <status>active</status> ... <classfile>org.mmbase.applications.email.SendMail</classfile> ...
Add to Tomcat's root Context (in /usr/local/tomcat/conf/context.xml for Tomcat version 5, in/usr/local/tomcat/conf/server.xml for Tomcat version 4) (replace <smtp.domain.tld> with the adres of yourSMTP server):
Resource name="mail/Session" auth="Container" type="javax.mail.Session"/> <ResourceParams name="mail/Session"> <parameter> <name>mail.smtp.host</name> <value>smtp.domain.tld</value> </parameter> </ResourceParams> <ResourceLink name="linkToGlobalResource" global="simpleValue" type="java.lang.Integer"/>
Failing to do this, results in a fatal error:
FATAL org.mmbase.module.JMSendMail − JMSendMail failure: Name mail is not bound in this Context
Installing the Email module in MMBase version 1.7 running on Tomcat version 5resulted in a fatal error:
FATAL org.mmbase.servlet.MMBaseStartThread − Could not find the MMBase module!javax/mail/Session
MMBase Installation HOWTO
9. Installing MMBase additional applications 20

10. Configuring initial MMBase settingsHere are some initial configuration settings for MMBase.
Change the default password admin2k for the administrator admin by editing/usr/local/tomcat/webapps/mmbase−webapp/WEB−INF/config/security/context/config.xml:
<user name="admin" context="admin"> <identify type="name/password" rank="administrator">admin2k</identify> </user>
Also, outcomment or remove the user foo/bar.
Since this file contains your administrators password, make sure other users can not read it:
chmod 640 /usr/local/tomcat/webapps/mmbase−webapp/WEB−INF/config/security/context/config.xml
To use the MMBase builder mmbaseuser (using the mmbaseuser table in your MySQL database) for userauthentication, set the authentication class in the configuration file/usr/local/tomcat/webapps/mmbase−webapp/WEB−INF/config/security/security.xmlto:
<authentication class="org.mmbase.security.implementation.cloud.Authenticate" url="" />
and set the authorization class to:
<authorization class="org.mmbase.security.implementation.cloud.Verify" url="" />
In the same file change the shared secret used to communicate with remote builders (on other MMBaseservers):
<sharedsecret>yoursharedsecret</sharedsecret>
You can set the language for MMBase by editing/usr/local/tomcat/webapps/mmbase−webapp/WEB−INF/config/modules/mmbaseroot.xml:
<property name="language">en</property>
You can set the SMTP gateway by editing/usr/local/tomcat/webapps/mmbase−webapp/WEB−INF/config/modules/sendmail.xml:
<property name="mailhost">localhost</property>
10. Configuring initial MMBase settings 21
MMBase Installation HOWTO
10. Configuring initial MMBase settings 22
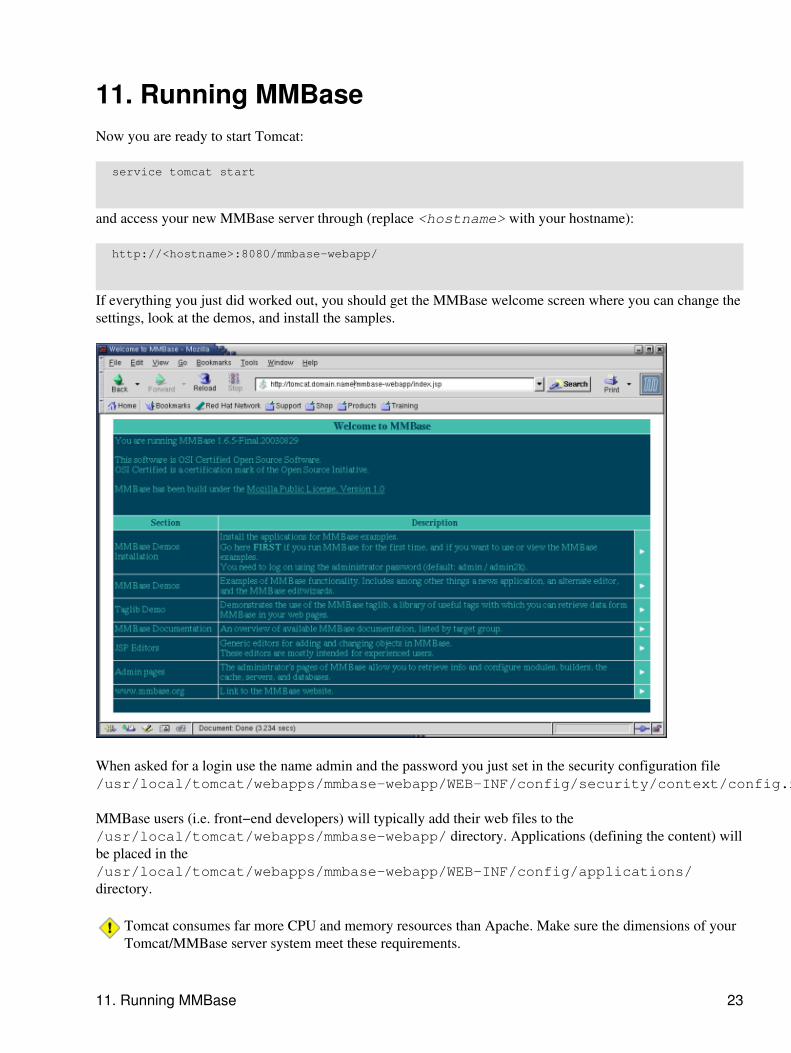
11. Running MMBaseNow you are ready to start Tomcat:
service tomcat start
and access your new MMBase server through (replace <hostname> with your hostname):
http://<hostname>:8080/mmbase−webapp/
If everything you just did worked out, you should get the MMBase welcome screen where you can change thesettings, look at the demos, and install the samples.
When asked for a login use the name admin and the password you just set in the security configuration file/usr/local/tomcat/webapps/mmbase−webapp/WEB−INF/config/security/context/config.xml.
MMBase users (i.e. front−end developers) will typically add their web files to the/usr/local/tomcat/webapps/mmbase−webapp/ directory. Applications (defining the content) willbe placed in the/usr/local/tomcat/webapps/mmbase−webapp/WEB−INF/config/applications/directory.
Tomcat consumes far more CPU and memory resources than Apache. Make sure the dimensions of yourTomcat/MMBase server system meet these requirements.
11. Running MMBase 23
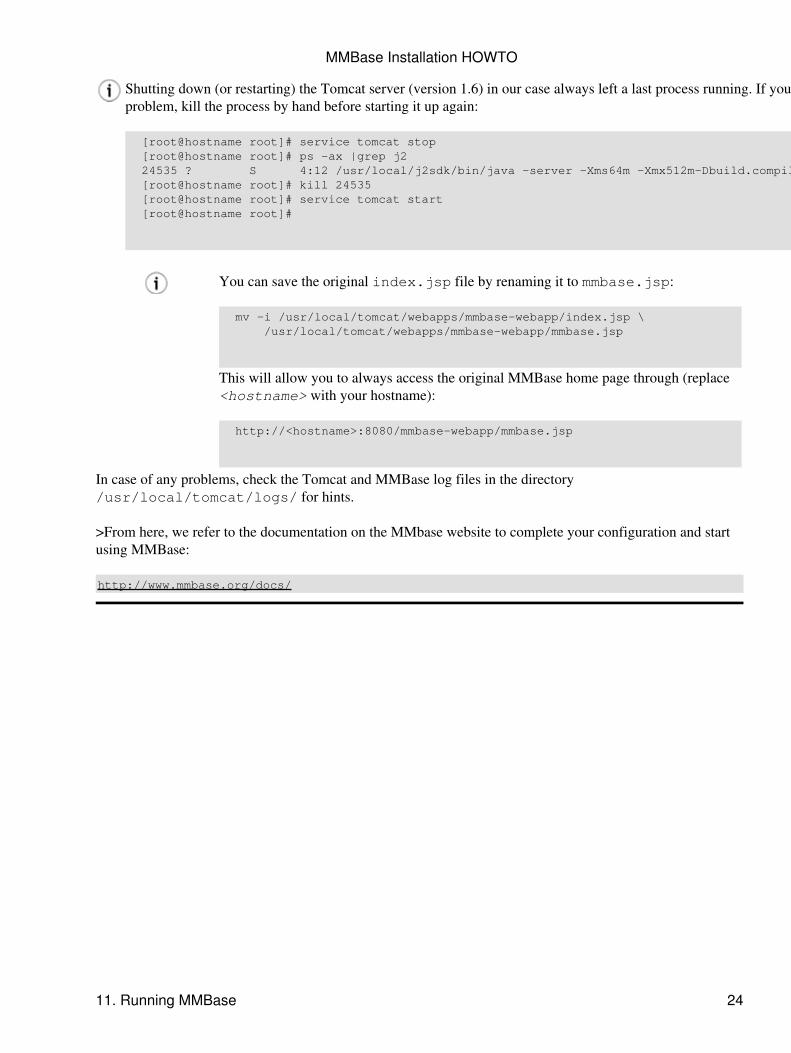
Shutting down (or restarting) the Tomcat server (version 1.6) in our case always left a last process running. If you experience this sameproblem, kill the process by hand before starting it up again:
[root@hostname root]# service tomcat stop [root@hostname root]# ps −ax |grep j2 24535 ? S 4:12 /usr/local/j2sdk/bin/java −server −Xms64m −Xmx512m−Dbuild.compiler.emacs=true ... [root@hostname root]# kill 24535 [root@hostname root]# service tomcat start [root@hostname root]#
You can save the original index.jsp file by renaming it to mmbase.jsp:
mv −i /usr/local/tomcat/webapps/mmbase−webapp/index.jsp \ /usr/local/tomcat/webapps/mmbase−webapp/mmbase.jsp
This will allow you to always access the original MMBase home page through (replace<hostname> with your hostname):
http://<hostname>:8080/mmbase−webapp/mmbase.jsp
In case of any problems, check the Tomcat and MMBase log files in the directory/usr/local/tomcat/logs/ for hints.
>From here, we refer to the documentation on the MMbase website to complete your configuration and startusing MMBase:
http://www.mmbase.org/docs/
MMBase Installation HOWTO
11. Running MMBase 24

12. Connecting Apache and Tomcat using mod_jk2Since (for some odd reason) some network managers allow outgoing web connections only to TCP port 80,there might be people around that cannot access your Tomcat (and MMBase) server through port 8080. Youcan install a JK 2 mapping or a reverse proxy in Apache, so Tomcat and MMBase can be accessed through theApache web server at port 80. Apart from the port issue, this has the advantage that you can use Apache tomanage you SSL connections and use your existing Apache logs and statistics facilities for Tomcat andMMBase as well.
Here we describe the installation and configuration of the JK 2 Connector connecting Apache and Tomcat. Inthis way, Tomcat paths can be mapped into Apache.
>From the JK 2 Connector website (http://jakarta.apache.org/tomcat/tomcat−4.1−doc/config/jk2.html):
" The JK 2 Connector element represents a Connector component that communicates witha web connector via the AJP protocol. This is used for cases where you wish to invisiblyintegrate Tomcat 4 into an existing (or new) Apache installation, and you want Apache tohandle the static content contained in the web application, and/or utilize Apache's SSLprocessing. In many application environments, this will result in better overall performancethan running your applications under Tomcat stand−alone using the HTTP/1.1 Connector.However, the only way to know for sure whether it will provide better performance for yourapplication is to try it both ways. "
If you will only be needing a simple configuration−− typically a single Tomcat server sitting on the samesystem as your Apache server−− Apache reverse proxies might be an easier solution for you. Although theseare simpler in terms of the interconnection features, reverse proxies provide more flexibility in fiddling withyour paths and other options. The configuration of Apache reverse proxies is described in the next section.
However, if you plan to build or grow to a farm of several Tomcat servers behind an Apache front−end orbuild a high−performance system, deploying the JK 2 Connector is the way to go.
Download the sources of the JK 2 Connector from the Apache Jakarta website:
http://jakarta.apache.org/site/sourceindex.cgi
Extract and compile the JK 2 Connector:
tar −zxvf jakarta−tomcat−connectors−jk2−src−xxx.tar.gz cd jakarta−tomcat−connectors−jk2−src/jk/native2/ ./configure \ −−with−apxs2=/usr/local/apache/bin/apxs make
Make sure your $JAVA_HOME environment variable is set and the Java binaries are in your $PATH or addthis option to your ./configure command:
−−with−java−home=/usr/local/j2sdk
Copy the module files mod_jk2.so and jkjni.so to the modules/ directory of Apache:
12. Connecting Apache and Tomcat using mod_jk2 25

cp −i ../build/jk2/apache2/*.so /usr/local/apache/modules/ chmod 755 /usr/local/apache/modules/mod_jk2.so chown root:root /usr/local/apache/modules/mod_jk2.so chmod 755 /usr/local/apache/modules/jkjni.so chown root:root /usr/local/apache/modules/jkjni.so libtool −−finish /usr/local/apache/modules
Copy the sample configuration file workers2.properties to the configuration directory of Apache:
cp −i ../../jk/conf/workers2.properties /usr/local/apache/conf/ chown root:root /usr/local/apache/conf/workers2.properties chmod 644 /usr/local/apache/conf/workers2.properties
and adjust it to your own needs.
Here is a simple configuration that should get you up and running:
[logger] # outcomment this in production use level=DEBUG
[config:] file=${serverRoot}/conf/workers2.properties debug=0 debugEnv=0
[uriMap:] info=Maps the requests. Options: debug debug=1
[shm:] info=Scoreboard. Required for reconfiguration and status with multiprocess servers file=${serverRoot}/logs/jk2.shm size=1000000 debug=0 disabled=0
[workerEnv:] info=Global server options timing=1 debug=0
[status:] info=Status worker, displays runtime informations
[uri:<hostname>/jkstatus/*] info=Display status information and checks the config file for changes. group=status:
[channel.socket:localhost:8009] info=Ajp13 forwarding over socket
# Define the worker [ajp13:localhost:8009] channel=channel.socket:localhost:8009
[uri:<hostname>/mmbase−webapp/*]
MMBase Installation HOWTO
12. Connecting Apache and Tomcat using mod_jk2 26

info=MMBase
Most of this configuration is pretty standard. The last uri declaration (replace <hostname> with yourhostname) is what this is all about; it maps all client requests starting with /mmbase−webapp/ fromApache to your Tomcat server.
When we made a virtual host mapping, somehow the general mappings no longer worked for this virtualhost (other virtual hosts on the same IP address had no problem at all). We had to explicitly add thegeneral mappings for this virtual host to make these work again. A bug? Or a consequence of the wayApache implements name based virtual hosts?
So now, the same application you accessed through Tomcat as (replace <hostname> with your hostname):
http://<hostname>:8080/mmbase−webapp/
will be available through Apache as:
http://<hostname>/mmbase−webapp/
Only name based virtual hosts are supported this way. Make sure you add thevirtual host name (pointing to this very same (web) server) to the /etc/hostsfile (replace <hostname> with your hostname):
192.168.3.17 <hostname>
or things will not work (running DNS is not sufficient here!).If your Apache installation is serving only a single website, you can leave out the hostname:
[uri:/mmbase−webapp/*] info=MMBase
which will serve the mapped /mmbase−webapp/ directory on every address and site of your Apacheinstallation.
Using JK Connector version 2, all configuration settings will be in the workers2.properties file.Even though Tomcat comes with its own JK 2 configuration file/usr/local/tomcat/conf/jk2.properties, there's no need to edit this as long as you stickwith the standard port 8009.
If you do have to edit this file (for example when changing the port), make sure that you do it when yourTomcat server is not running; the file is auto−edited by Tomcat itself.
After adding the mod_jk2 module to your Apache configuration (in the file/etc/httpd/conf/httpd.conf or in a new file jk2.conf in the Apache configuration directory/etc/httpd/conf.d):
# Load mod_jk2 module LoadModule jk2_module modules/mod_jk2.so
MMBase Installation HOWTO
12. Connecting Apache and Tomcat using mod_jk2 27

chown root:root /etc/httpd/conf.d/jk2.conf chmod 644 /etc/httpd/conf.d/jk2.conf
you can now restart Apache and give your new entrance a try: (replace <hostname> with your hostname):
http://<hostname>/mmbase−webapp/
To check the status of the JK 2 Connector (replace <hostname> with your hostname):
http://<hostname>/jkstatus/
You can reread the configuration in /usr/local/apache/conf/workers2.properties by(re)loading the JK Status page. This allows you to add new mappings without restarting Apache orhaving it reload its configuration. However, existing mappings can not be removed this way and requireApache to reconfigure.
Although it's also possible to place the JK 2 configurations (in a slightly different form) in your Apacheconfiguration file, this is a good reason to stick with the workers2.properties setup.
To protect access to the JK Status page, add an authentication declaration to theApache configuration. For example:
<Location /jkstatus/> AuthType Basic AuthName "JK 2 Connector Status" AuthUserFile /etc/httpd/conf/users AuthGroupFile /etc/httpd/conf/groups Require group admin </Location>
This will prompt for a login from a user from the admin group.In case of any problems, check the JK 2 Connector log messages that will be written to your Apacheerror_log.
In case the JK 2 Connector has difficulties connecting toTomcat, check whether Tomcat is indeed available on port8009:
netstat −tln
Access requests mapping to Tomcat will be logged in the access_log's and error_log's of Apache.
For more information on the workers2.properties configuration, check the documentation at:
MMBase Installation HOWTO
12. Connecting Apache and Tomcat using mod_jk2 28
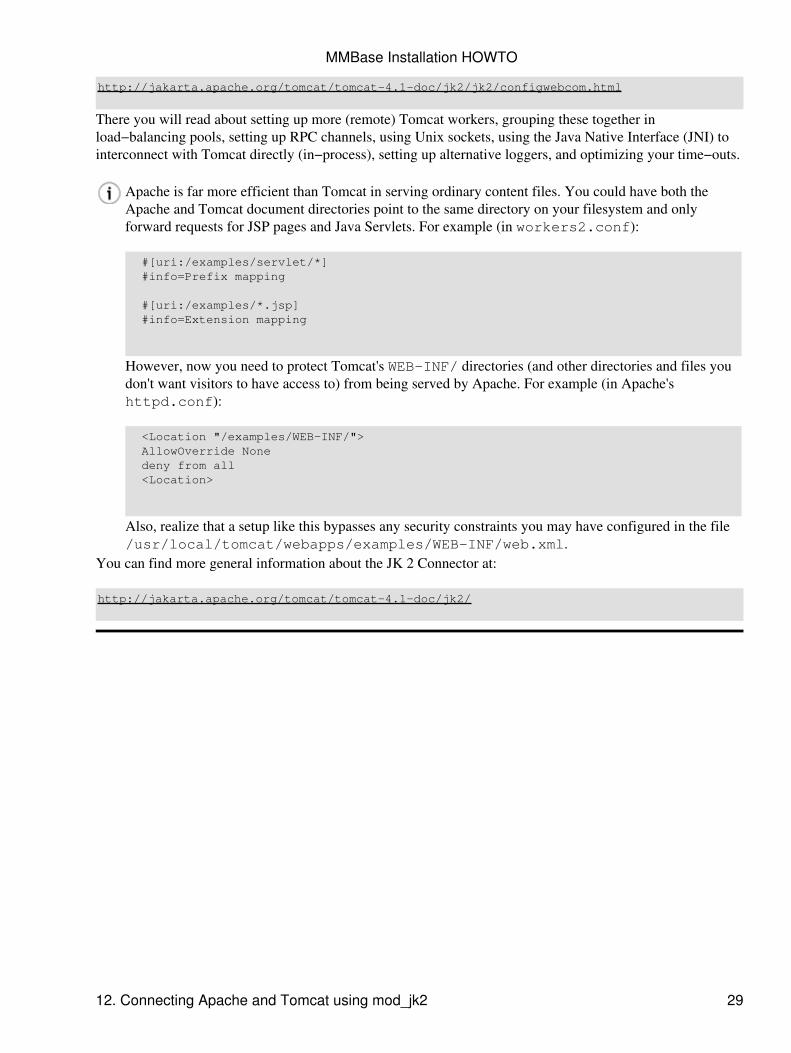
http://jakarta.apache.org/tomcat/tomcat−4.1−doc/jk2/jk2/configwebcom.html
There you will read about setting up more (remote) Tomcat workers, grouping these together inload−balancing pools, setting up RPC channels, using Unix sockets, using the Java Native Interface (JNI) tointerconnect with Tomcat directly (in−process), setting up alternative loggers, and optimizing your time−outs.
Apache is far more efficient than Tomcat in serving ordinary content files. You could have both theApache and Tomcat document directories point to the same directory on your filesystem and onlyforward requests for JSP pages and Java Servlets. For example (in workers2.conf):
#[uri:/examples/servlet/*] #info=Prefix mapping
#[uri:/examples/*.jsp] #info=Extension mapping
However, now you need to protect Tomcat's WEB−INF/ directories (and other directories and files youdon't want visitors to have access to) from being served by Apache. For example (in Apache'shttpd.conf):
<Location "/examples/WEB−INF/"> AllowOverride None deny from all <Location>
Also, realize that a setup like this bypasses any security constraints you may have configured in the file/usr/local/tomcat/webapps/examples/WEB−INF/web.xml.
You can find more general information about the JK 2 Connector at:
http://jakarta.apache.org/tomcat/tomcat−4.1−doc/jk2/
MMBase Installation HOWTO
12. Connecting Apache and Tomcat using mod_jk2 29
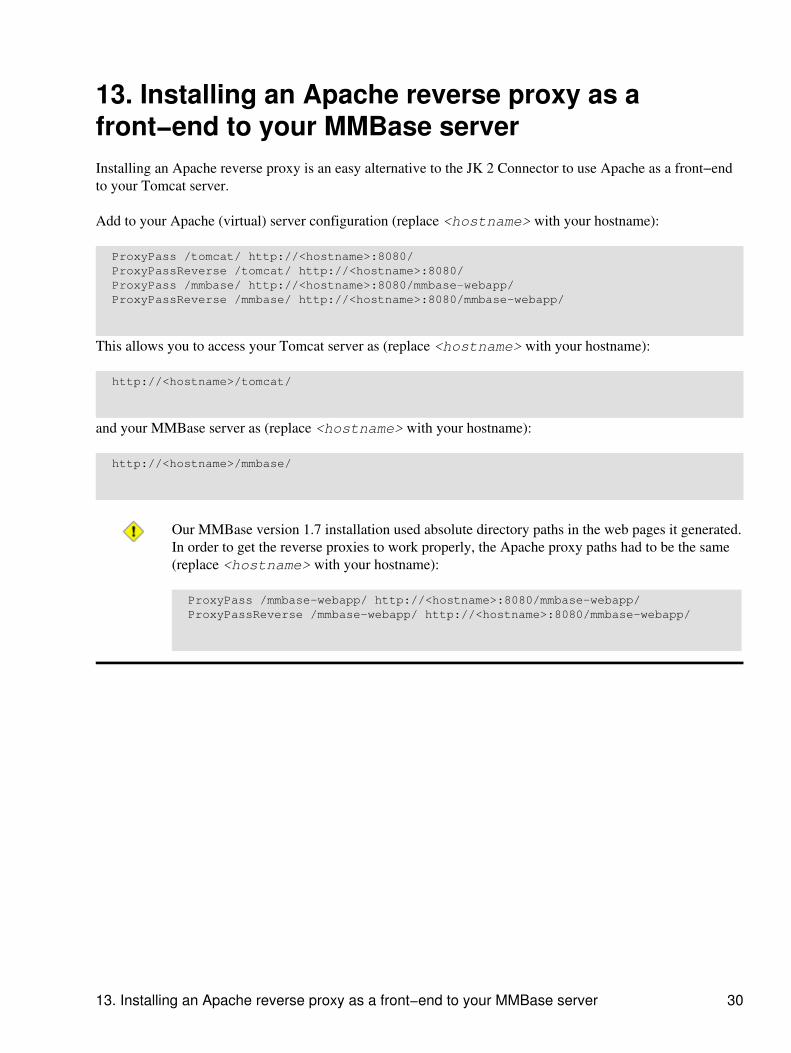
13. Installing an Apache reverse proxy as afront−end to your MMBase serverInstalling an Apache reverse proxy is an easy alternative to the JK 2 Connector to use Apache as a front−endto your Tomcat server.
Add to your Apache (virtual) server configuration (replace <hostname> with your hostname):
ProxyPass /tomcat/ http://<hostname>:8080/ ProxyPassReverse /tomcat/ http://<hostname>:8080/ ProxyPass /mmbase/ http://<hostname>:8080/mmbase−webapp/ ProxyPassReverse /mmbase/ http://<hostname>:8080/mmbase−webapp/
This allows you to access your Tomcat server as (replace <hostname> with your hostname):
http://<hostname>/tomcat/
and your MMBase server as (replace <hostname> with your hostname):
http://<hostname>/mmbase/
Our MMBase version 1.7 installation used absolute directory paths in the web pages it generated.In order to get the reverse proxies to work properly, the Apache proxy paths had to be the same(replace <hostname> with your hostname):
ProxyPass /mmbase−webapp/ http://<hostname>:8080/mmbase−webapp/ ProxyPassReverse /mmbase−webapp/ http://<hostname>:8080/mmbase−webapp/
13. Installing an Apache reverse proxy as a front−end to your MMBase server 30
14. Installing more MMBase servers on a singleTomcat serverIf you want to support more instances of MMBase, for example if you would like to make MMBase availableto more or all of your users, you can create several MMBase installations and have these all run on the sameTomcat server.
Install MMBase in the home directory of the user <user> performing all steps before:
create a directory mmbase/ in the users home directory,• copy all MMBase files into the directory /home/<user>/mmbase/,• build the directory structure and configuration files in the very same way we did before,• for MMBase version 1.7 running on Tomcat version 5, enable the Xerces libraries,• for MMBase version 1.6 running on Tomcat version 4, remove the Xerces libraries in MMBase (afteryou have copied these from MMBase to Tomcat the first time),
•
install the MySQL JDBC driver and create a new MySQL database for this user.•
Make sure both the user and the Tomcat server have access to the MMBase installation:
chown −R <user>:tomcat /home/<user>/mmbase/
Make sure that the directory/home/<user>/mmbase/WEB−INF/config/builders/applications is writable and accessibleby the servlet engine user (for auto−installing builders):
chmod 770 /home/<user>/mmbase/WEB−INF/config/builders/applications chmod 750 /home/<user>/mmbase/WEB−INF/config/builders/ chmod 750 /home/<user>/mmbase/WEB−INF/config/ chmod 750 /home/<user>/mmbase/WEB−INF/ chmod 750 /home/<user>/mmbase/
Now the home directory of this user has to be accessible to the Tomcat server as well. You can change thegroup owner of the users home directory to the tomcat user group:
chown −g tomcat /home/<user>/
Or, if you don't want this, use the Access Control Lists (ACL's) to accomplish the same:
setfacl −m u:tomcat:r−x /home/<user>/
Finally, link the new MMBase installation to the Tomcat server:
ln −s /home/<user>/mmbase /usr/local/tomcat/webapps/mmbase−<user>
and restart Tomcat:
14. Installing more MMBase servers on a single Tomcat server 31
service tomcat restart
which will make this users MMBase installation available through:
http://<hostname>:8080/mmbase−<user>/
Again, you can set up a JK 2 mapping or a reverse proxy in Apache like we did before.
In order to run several instances of MMBase on a single Tomcatserver, make sure you increase the available memory resources, i.e.by adding to the $CATALINA_OPTS environment variable in/etc/rc.d/init.d/tomcat:
−Xms64m −Xmx512m
MMBase Installation HOWTO
14. Installing more MMBase servers on a single Tomcat server 32

15. AcknowledgementsThis document is a follow−up on the "MMBase Mini−HOWTO: Installation on Debian Woody", by CasperJoost Eyckelhof, University of Twente, The Netherlands.
15. Acknowledgements 33
16. ContributersFelipe Caballero Gil,• André van Elst, Finalist, The Netherlands.•
16. Contributers 34

17. Revision historyVersion 0.3.5, June 25, 2006: Tomcat init script,• Version 0.3.4, September 19, 2005: minor corrections,• version 0.3.2, January 25, 2005: MMBase 1.7.3, Java 1.5.0−01,• version 0.3.1, December 26, 2004: Email module,• version 0.3.0, December 25, 2004: MMBase 1.7.2, Tomcat 5.5.4, Java 1.5.0, MySQL Connector/J3.0.16−ga, Jikes 1.22,
•
version 0.2.6, July 27, 2004: minor additions,• version 0.2.5, February 28, 2004: Creative Commons copyright license adjusted,• version 0.2.4, January 22, 2004: Creative Commons copyright license; minor additions andcorrections,
•
version 0.2.3, December 26, 2003: minor additions and corrections,• version 0.2.2, December 20, 2003: copyright adjusted,• version 0.2.1, December 18, 2003: minor corrections,• version 0.2, December 15, 2003: JK 2 Connector setup added,• version 0.1, December 10, 2003: initial draft.•
17. Revision history 35
18. DisclaimerThis document is provided "as is", without any expressed or implied warranties. Use the ideas, concepts,scripts, examples, helping hands and other information at your own risk.
The specific products and their respective manufacturers are not to be taken as endorsements of, norcommercials for, the manufacturer.
18. Disclaimer 36

19. CopyrightCompiled, Copyright © 2003 − 2006, by Adrian Offerman.
This document is licensed under the Creative Commons Attribution−ShareAlike copyrightlicense.
This allows you to copy, distribute, display, and print this work, and make derivative works, and makecommercial use of the work, under the conditions that you give the original author credit, and if you alter,transform, or build upon this work, you may distribute the resulting work only under a license identical to thisone. For any reuse or distribution, you must make clear to others the license terms of this work. Any of theseconditions can be waived if you get permission from the author. Your fair use and other rights are in no wayaffected by the above.
19. Copyright 37