Embed Size (px)
Citation preview
C2V1A Router User Guide 1
User Guide Mode l Number RAC2V1A 802 . 1 1ac Wave 2 Rou te r
RAC2V1A Router User Guide 2
Table of Contents 1. Overview ............................................................... 5
1.1. Introduction .................................................................................................. 5
2. Product Overview ............................................... 6
2.1. About The Router ....................................................................................... 6 2.2. What's in the Box? ..................................................................................... 6 2.3. Items You Need ........................................................................................... 6 2.4. About This Manual ...................................................................................... 7
3. System Requirements ........................................ 8
3.1. Recommended Hardware ........................................................................ 8 3.2. Windows ........................................................................................................ 8 3.3. Mac OS ........................................................................................................... 8 3.4. Linux/Unix ..................................................................................................... 8 3.5. Mobile Devices ............................................................................................. 8
4. Installing the Router ........................................... 9
4.1. Front Panel .................................................................................................... 9 4.2. Rear Panel ................................................................................................... 10 4.3. Selecting an Installation Location ........................................................ 11
4.3.1. Desktop Mounting Instructions .................................................... 12 4.3.2. Factors Affecting Wireless Range............................................... 12
4.4. Ethernet or Wireless? .............................................................................. 13 4.5. Connecting the Router ........................................................................... 14 4.6. Configuring the Wireless Connection................................................ 14 4.7. Getting Support ........................................................................................ 14
5. Basic Configuration .......................................... 15
5.1. Accessing the Configuration Interface ............................................. 15 5.2. Configuring the Wireless Network ..................................................... 16
5.2.1. Enabling or Disabling the Wireless Network. .......................... 16 5.2.2. Changing the Administrator Password ..................................... 16 5.2.3. Changing the Default Wi-Fi Network Name (SSID) and
Password ...............................................................................................17 5.2.4. Configuring Wi-Fi Protected Setup (WPS) .............................. 18 5.2.5. Setting Up the Internet/WAN Connection ............................... 18
RAC2V1A Router User Guide 3
6. Advanced Configuration Options ................ 20
6.1. Configuring DHCP ................................................................................... 20 6.1.1. Configuring DHCP for IPv4 ........................................................... 20 6.1.2. Configuring DHCP for IPv6 ............................................................ 21 6.1.3. Adding and Deleting Reserved DHCP Clients ......................... 21
6.2. Selecting the NAT Mode ........................................................................22 6.3. Setting the Wireless Mode ....................................................................22 6.4. General Firewall Configuration Settings .......................................... 23 6.5. Port Forwarding ....................................................................................... 24 6.6. Configuring DMZ for Gaming or Conferencing Applications ... 25 6.7. Viewing Network System Information ............................................. 26 6.8. Restarting the Router ............................................................................. 26 6.9. Viewing the System Logs ..................................................................... 26 6.10. Setting Up DDNS ..................................................................................... 26
6.10.1. Requirements ......................................................................................27
7. Router Configuration Screen Descriptions 28
7.1. Basic Setup ................................................................................................ 29 7.1.1. Basic Wireless Settings .................................................................. 29 7.1.2. WPS Settings ...................................................................................... 31
7.2. WAN Setup ................................................................................................ 32 7.2.1. Dynamic Configuration Settings (IPv4) ................................... 32 7.2.2. Static IP Connection Type (IPv4) ............................................... 34 7.2.3. DNS Settings ...................................................................................... 35 7.2.4. Dynamic Configuration Settings (IPv6) ................................... 36 7.2.5. Static IP Connection Type (IPv6) ............................................... 37
7.3. LAN Setup .................................................................................................. 39 7.3.1. LAN Settings (IPv4) ........................................................................ 39 7.3.2. LAN Settings (IPv6)......................................................................... 42 7.3.3. Client List ............................................................................................ 44
7.4. Wireless ....................................................................................................... 46 7.4.1. Basic Setup ......................................................................................... 46 7.4.2. Advanced Settings........................................................................... 50 7.4.3. Associated Stats ............................................................................... 53 7.4.4. Airtime Fairness ................................................................................ 54 7.4.5. QoS Classification ............................................................................ 56 7.4.6. Log ......................................................................................................... 58
7.5. Firewall ........................................................................................................ 59 7.5.1. Firewall Settings ............................................................................... 59
RAC2V1A Router User Guide 4
7.5.2. Port Forwarding ................................................................................ 60 7.5.3. Port Triggers ....................................................................................... 61 7.5.4. DMZ ....................................................................................................... 62 7.5.5. WAN Ping Blocking ......................................................................... 64 7.5.6. Application Layer Gateway Settings ......................................... 64 7.5.7. MAC Filter ........................................................................................... 65 7.5.8. Parental Controls .............................................................................. 66 7.5.9. IPv6 Client Filter ............................................................................... 73
7.6. USB ............................................................................................................... 74 7.6.1. USB Status .......................................................................................... 74 7.6.2. File Sharing ......................................................................................... 75 7.6.3. Media Sharing ..................................................................................... 77 7.6.4. USB Access Control ........................................................................ 78
7.7. Utilities ......................................................................................................... 79 7.7.1. System Information ......................................................................... 79 7.7.2. Restart Router .................................................................................... 81 7.7.3. Factory Defaults ............................................................................... 82 7.7.4. System Settings ................................................................................ 83 7.7.5. System Logs ....................................................................................... 84 7.7.6. DDNS .................................................................................................... 85 7.7.7. Blocked Device ................................................................................. 86 7.7.8. QoS ........................................................................................................ 87
8. Troubleshooting ............................................... 89
8.1. The router is plugged in, but the light is off ................................... 89 8.2. I'm not getting on the Internet (all connections) ......................... 89 8.3. I'm not getting on the Internet (Ethernet) ...................................... 89 8.4. I'm not getting on the Internet (Wireless) ...................................... 89 8.5. My wireless Internet connection stops working sometimes .... 90 8.6. I can get on the Internet, but everything is slow .......................... 90
9. Safety Requirements ........................................ 91
9.1.1. Federal Communication Commission Interference
Statement ............................................................................................. 91
RAC2V1A Router User Guide 5
Overview Introduction Get ready to experience the Internet’s express lane! Whether you’re
checking out streaming media, downloading new software, or checking
your email, the RAC2V1A router brings it all to you faster and more
reliably.
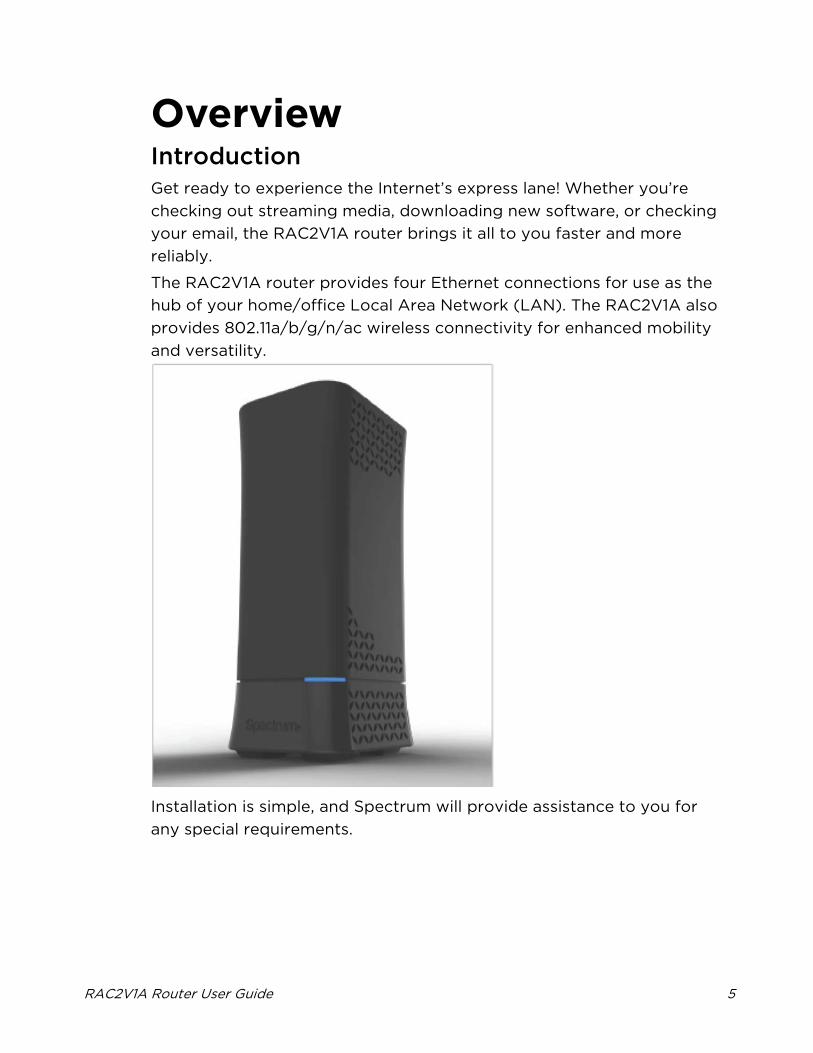
The RAC2V1A router provides four Ethernet connections for use as the
hub of your home/office Local Area Network (LAN). The RAC2V1A also
provides 802.11a/b/g/n/ac wireless connectivity for enhanced mobility
and versatility.
Installation is simple, and Spectrum will provide assistance to you for
any special requirements.
RAC2V1A Router User Guide 6
Product Overview About The Router The RAC2V1A router is a dual-band 802.11ac router that allows users to
connect to the Internet through a separate modem.
The RAC2V1A router has the following features:
• Remote management capability: allows Spectrum to make changes
to the router's configuration
• Convenience: supports Ethernet and 802.11a/b/g/n/ac wireless
connections; both wired and wireless connections can be used
simultaneously
• Four Gigabit Ethernet ports for connections to non-wireless devices
• A USB 3.0 host port
What's in the Box? Make sure you have the following items before proceeding. Call
Spectrum for assistance if anything is missing.
• Router
• Power Supply
• Spectrum Quick Start Guide
• Two Stickers with Wi-Fi Network Name and Password
• Ethernet Cable
• Safety Insert/License Agreement
Items You Need Make sure you have the following items on hand before continuing:
• Router package: see What's in the Box? (page 7) for a list of items in
the package.
• Ethernet Cable: In addition to the Ethernet cable provided, you may
need an additional Ethernet cable if you want to connect to wired
clients. This is a standard CAT5e Ethernet cable with RJ45 type
connectors on both ends. You can buy Ethernet cables from any
electronics retailer and many discount stores.
• Spectrum Quick Start Guide: This guide contains information about
your service and how to set it up. Read this information carefully and
contact Spectrum if you have any questions.
Product Overview
RAC2V1A Router User Guide 7
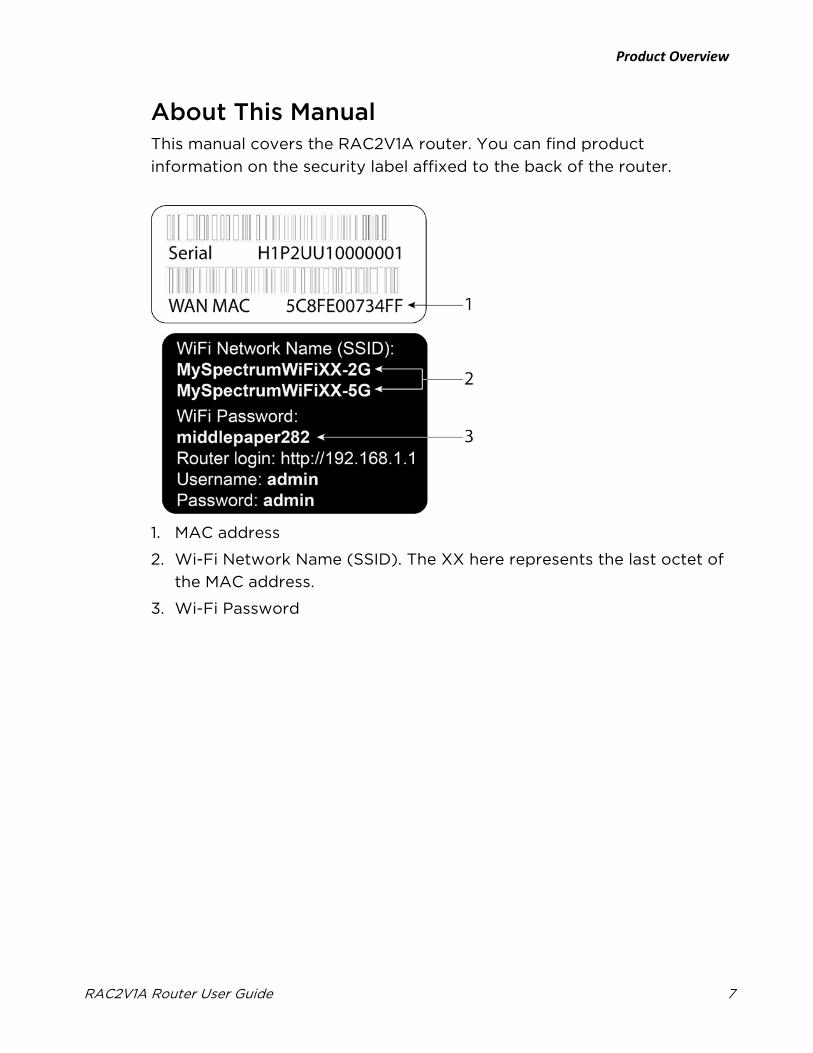
About This Manual This manual covers the RAC2V1A router. You can find product
information on the security label affixed to the back of the router.
1. MAC address
2. Wi-Fi Network Name (SSID). The XX here represents the last octet of
the MAC address.
3. Wi-Fi Password
RAC2V1A Router User Guide 8
System Requirements The router operates with most computers and wireless devices. The
following describes requirements for each operating system; see the
documentation for your system for details on enabling and configuring
networking.
To use the router, you need high-speed Internet service from Spectrum.
Recommended Hardware The following hardware configuration is recommended. Computers not
meeting this configuration can still work with the router, but may not be
able to make maximum use of available throughput.
• CPU: P4, 3 GHz or faster.
• RAM: 1 GB or greater.
• Ethernet: Gig-E (1000Base-T).
• Wi-Fi: 802.11a, b, g, n, or ac compliant Wi-Fi equipment.
Windows Windows 7, Windows 8, or Windows 10. A supported Ethernet or
wireless LAN connection must be available.
Mac OS System 7.5 to Mac OS 9.2 (Open Transport recommended), or OS X. A
supported Ethernet or wireless LAN connection must be available.
Linux/Unix Hardware drivers, TCP/IP and DHCP must be enabled in the kernel. A
supported Ethernet or wireless LAN connection must be available.
Mobile Devices Android OS or iOS.
RAC2V1A Router User Guide 9
Installing the Router Before you start, make sure that:
• You have all the Items You Need (page 6).
• The modem and power outlets are available nearby.
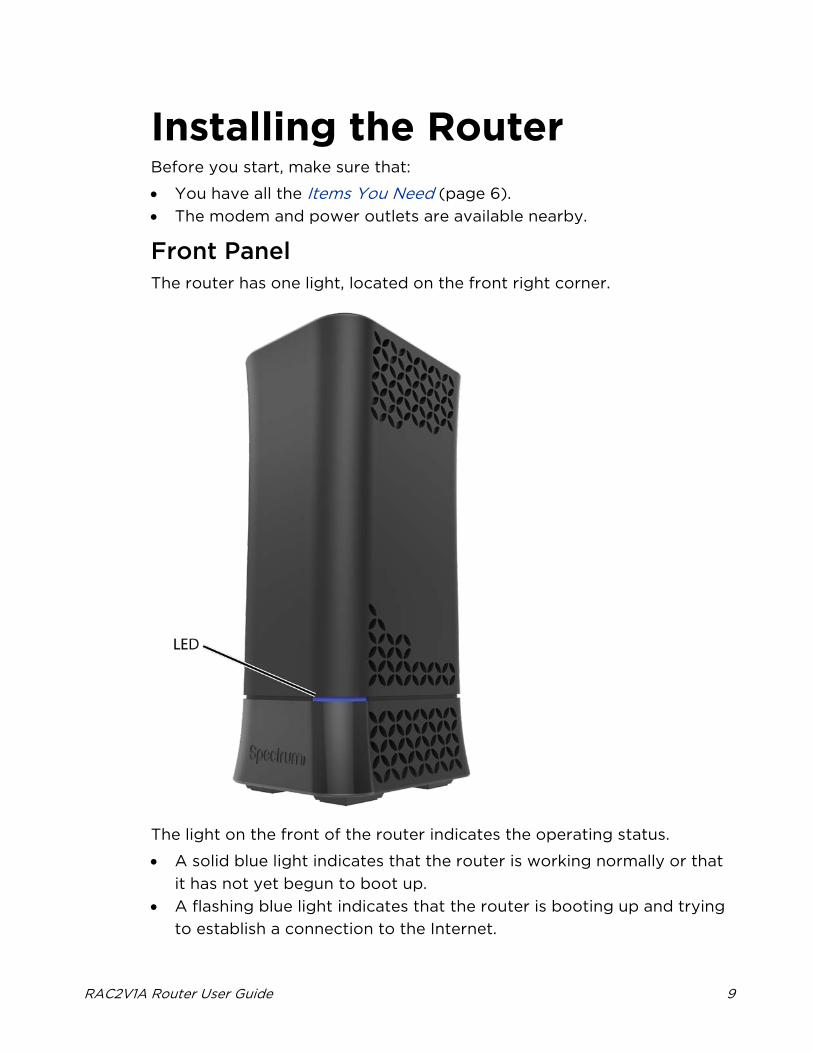
Front Panel The router has one light, located on the front right corner.
The light on the front of the router indicates the operating status.
• A solid blue light indicates that the router is working normally or that
it has not yet begun to boot up.
• A flashing blue light indicates that the router is booting up and trying
to establish a connection to the Internet.
Installing the Router
RAC2V1A Router User Guide 10
• A pulsing light that alternates blue and red indicates that the router is
updating firmware.
• A flashing red light indicates that the router is not able to establish an
Internet connection.
• A solid red light indicates that the device was not able to achieve a
normal operating state.
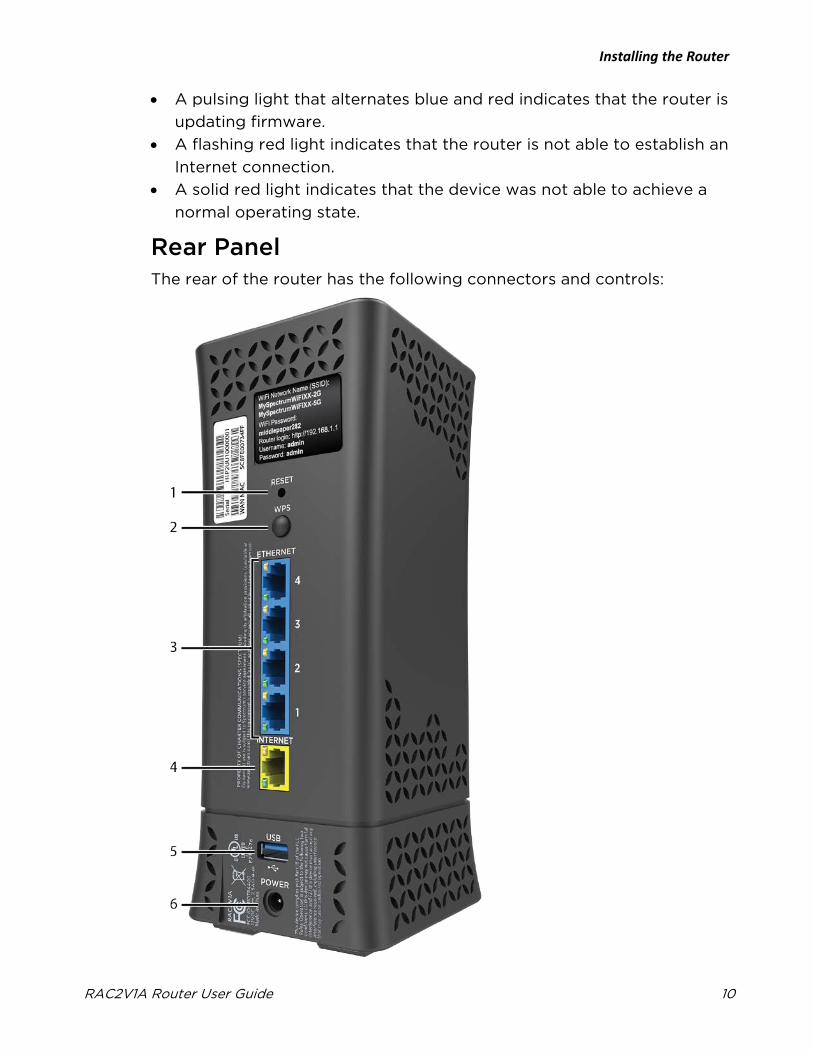
Rear Panel The rear of the router has the following connectors and controls:
Installing the Router
RAC2V1A Router User Guide 11
1. Reset button: resets the router as if you power cycled the unit. Use a
pointed non-metallic object to press this button and hold it for more
than one second but less than five seconds.
Note: If you hold the Reset button for more than five seconds, the
router will be reset to the factory default settings and will restart. Do
not perform a factory reset unless you expressly guided to do so by
Spectrum customer service.
2. WPS Button: begins associating the router with a wireless device.
3. Ethernet (1 - 4): connectors for use with a computer LAN port or
another Ethernet-connected device.
4. Internet: connector to the Spectrum modem.
5. USB: USB host connector for use with external USB devices.
6. Power: connector for the power cord.
Note: The LEDs beside each Ethernet (1 – 4) port and the Internet port
appear green if the port is connected at 1Gbps or amber if the port is
connected at 10Mbps/100Mbps. The LEDs flash while data is being
transferred, or they appear solid when data is not currently being
transferred.
Selecting an Installation Location There are a number of factors to consider when choosing a location to
install the router:
• Is an AC outlet available nearby? For best results, the outlet should
not be switched and should be close enough to the router that
extension cords are not required.
• Is the modem nearby? Can you easily run cables between the router’s
location and the modem?
• If you are connecting devices to the Ethernet ports, can you easily
run cables between the router’s location and those devices?
• If you want to install the router on a desktop, is there enough space
on either side to keep the vents clear? Blocking the vents may cause
overheating.
Installing the Router
RAC2V1A Router User Guide 12
• How close are the wireless devices? In general, the router should be
located centrally within the premises, as close as possible to the
location where users will want to access the wireless connection. The
router wireless connection range is typically 100–200 feet (30m–
65m) for 2.4 GHz signals and less for 5 GHz signals. A number of
factors can affect connection range, as described below.
Desktop Mounting Instructions
Position the router so that:
• Air flows freely around it
• The back faces the nearest wall
• It will not fall to the floor if bumped or moved
• The sides of the unit are not blocked.
Factors Affecting Wireless Range
A number of factors can affect the usable range for wireless
connections.
Increases
range
• Locating the unit centrally
• Creating as much "line-of-sight" as possible with
client devices
Decreases
range
• Metal or concrete walls between the router and other
client devices
• Large metal appliances, aquariums, or metal cabinets
between the router and other client devices
• Interference and RF noise (2.4 GHz wireless phones,
microwave ovens, wireless speaker/receiver systems,
or other wireless networks)
• Placing the router in a cabinet or other enclosed
space
• Placing the router next to a desktop computer
Notes:
• It may be acceptable to decrease the range of the wireless network,
as long as the decreased range is sufficient for your needs. By
limiting the network’s range, you reduce interference with other
networks and make it harder for unwanted users to find and connect
to the network.
Installing the Router
RAC2V1A Router User Guide 13
• Setting the transmit power level to High increases the range. Setting
it to Medium or Low decreases the range. Medium or Low may be
more appropriate for high-density residential locations.
Ethernet or Wireless? There are two ways to connect the computer (or other equipment) to
the router. The following will help you decide which is best for you:
Ethernet
Ethernet is a standard method of connecting two or more computers
into a Local Area Network (LAN). You can use the Ethernet connection
if the client device has built-in Ethernet hardware. The router provides
support for up to four such connected devices.
Note: To connect more than four client devices to the router through
the Ethernet ports, you need an Ethernet switch (available at computer
retailers).
The router includes one 3-foot (.9m) Ethernet cable. The enclosed
Ethernet cable is yellow to match the Internet port on the back of the
router, because this cable is primarily intended to connect the router to
the Spectrum modem. You can purchase more cables if necessary at a
computer retailer. If you are connecting the router directly to a
computer, or to an Ethernet switch with a cross-over switch, ask for
Category 5e (CAT5e) straight-through cable. CAT5e cable is required
for gigabit Ethernet (Gig-E), not regular CAT5 cable.
Wireless
Wireless access lets you connect additional (wireless-capable) devices
to the router. The 802.11 wireless LAN standard allows one or more
computers to access the router using a wireless (radio) signal. These
connections are in addition to the connections supported via Ethernet.
Installing the Router
RAC2V1A Router User Guide 14
Both
If you have two or more clients, you can use Ethernet for up to four
devices and wireless for the others.
Connecting the Router 1. Unplug the power to turn off the modem.
2. Connect one end of the Ethernet cable (included) to the modem, and
the other end to the Internet port on the router.
3. Reconnect the plug on the modem to turn the modem back on. Wait
approximately 2 minutes to allow the modem to fully power up.
4. Connect the power adapter (included) to the power connector on
the back of the router, and then connect the power adapter to an
available AC outlet. Wait until the light on the front panel of the
router turns blue and begins to pulse.
5. To manage the setup of the router, you can use a second Ethernet
cable (not provided) to connect a computer to an available LAN port
on the router, or you can connect wirelessly by using the preset
wireless security settings printed on the security label located on the
back of the router.
6. Open a browser on the computer to access the management
interface of the router. If the webpage does not display correctly, try
another browser. See Accessing the Configuration Interface (page 15)
for more information.
Configuring the Wireless Connection The router ships with a secure Wi-Fi network name (SSID) that is unique
for every device. By default, the router is set to the most current
wireless security setting, WPA2, to provide maximum protection for
Wi-Fi devices connected to the router. Wi-Fi network information is
located on the label on the back of the router. You can sign in to the
router and configure additional wireless settings.
See Configuring the Wireless Network (page 16) for complete
instructions on configuring the wireless connection.
Getting Support Please contact Spectrum if you need assistance.
RAC2V1A Router User Guide 15
Basic Configuration The router ships with a basic factory default configuration that should
allow you to immediately access the Internet after installing the
hardware according to the instructions in this guide.
If you need to modify the router's default basic settings, or if you want
to configure advanced settings, refer to the appropriate instructions in
this document.
Wireless LAN Default Security Setting: The router ships with wireless
LAN security set by default. See the security label on the product for the
factory security settings: Wi-Fi network name (SSID) and Wi-Fi
password.
If you need to modify the router’s default wireless security settings, or if
you want to configure any other settings, refer to the appropriate
instructions in this document.
Note: You may set up the computer and other client devices to work
with the security settings on the router. Most client devices support the
WPA2 default security standard in the router. Refer to the
documentation for the client device for instructions on setting security.
If the computer or client device supports Wi-Fi Alliance WPS (Wireless
Protected Setup), activate WPS on the computer or client device and
the router simultaneously to easily set up the Wi-Fi security.
Accessing the Configuration Interface Perform the following steps to access the configuration interface.
1. If security has been properly set up on the computer to access the
wireless LAN on the router, use the connection utility for the
operating system to connect to the wireless LAN using its Wi-Fi
network name (SSID), as shown on the security label.
Note: If you cannot access the wireless LAN, you must first establish
a wired Ethernet connection between the computer and the router.
2. In the web browser, open the page http://192.168.1.1/ to access the
router setup. The sign-in screen for the router displays.
Basic Configuration
RAC2V1A Router User Guide 16
3. Enter the user name and password, and click Apply to sign in. These
default sign-in credentials appear on the label on the back of the
router. The Basic Wireless Settings screen displays.
Note: The default user name and the default password are both
“admin”. Both are in lower case letters.
4. Set basic setup configuration parameters as required for the system.
Note: Most configuration parameters that you may want to set can be
accessed on the Basic Wireless Settings screen or on the LAN Setup or
Wireless tabs.
Configuring the Wireless Network Perform the following steps to make the basic configuration settings for
the wireless network.
Enabling or Disabling the Wireless Network.
By default, the router is shipped with a default Wi-Fi network name and
Wi-Fi password for both 2.4 GHz and 5 GHz, as well as WPA2 security.
You can find this network name and password on the label on the back
of your router.
Perform the following steps to disable or re-enable the wireless network.
1. Access and sign in to the configuration interface.
2. Click the Basic Setup tab.
3. Click the Enable SSID checkbox in either the Wireless 2.4 GHz
section or the Wireless 5 GHz section to enable wireless networking
for that frequency.
4. Click Apply.
Changing the Administrator Password
You should change the administrator password to something other than
the default password so that unauthorized users cannot access your
configuration interface.
Note: When you first set up your router, the default user name and the
default password are both “admin”. Both are in lower case letters.
Perform the following steps to change the administrator password.
1. Access and sign in to the configuration interface. See Accessing the
Configuration Interface (page 15) for more information.
2. Click the Utilities tab.
Basic Configuration
RAC2V1A Router User Guide 17
3. Click System Settings in the side menu.
4. Enter the current administrator password in the Current Password
field.
5. Enter the new administrator password in both the New Password
and Confirm New Password fields.
Note: Administrator passwords are case-sensitive and must be
between 8-12 characters long. You can use any alphanumeric
characters (digits 0-9 and letters A-Z, either upper- or lower-case)
and printable special characters (such as $, !, ?, &, #, @ and others).
6. Click Apply.
7. Record your new administrator password here: __________________
Changing the Default Wi-Fi Network Name (SSID) and Password
Perform the following steps to change the 2.4 GHz and/or 5 GHz Wi-Fi
network name and password.
1. Access and sign in to the configuration interface.
2. Click the Basic Setup tab.
3. On the Basic Wireless Settings screen, enter a unique user-friendly
name to identify the Wi-Fi network in the Wi-Fi Network Name
(SSID) field under either Wireless 2.4 GHz or Wireless 5 GHz.
Note: This name is also referred to as the Service Set Identifier
(SSID). The name can be up to 32 characters long. Do not duplicate
any other Wi-Fi network names (SSIDs that may be operating in the
area.
4. Enter a new password in the Password (Network Key) field. Valid
characters are the numbers 0 to 9, the letters a through z and A
through Z and printable characters (such as $, !, ?, &, #, @ and
others).
5. Click Apply at the bottom of the screen.
6. Record the new network names and passwords here:
2.4 GHz Wi-Fi Network name (SSID): __________________________
2.4 GHz Password: ______________________________
5 GHz Wi-Fi Network name (SSID): ___________________________
5 GHz Password: _______________________________
Basic Configuration
RAC2V1A Router User Guide 18
Configuring Wi-Fi Protected Setup (WPS)
WPS is a standard method for easily configuring a secure connection
between the router and computers or other wireless devices (known as
enrollees) that support WPS. When WPS is enabled you can attach
other wireless devices by pressing the WPS buttons on the device (if
equipped) and on the router, or by entering the enrollee’s PIN and then
clicking the Start WPS Association icon.
Perform the following steps to enable the wireless network.
1. Access and sign in to the configuration interface.
2. Click the Basic Setup tab.
3. Click WPS Settings in the side menu.
4. In the appropriate section (2.4 GHz or 5 GHz), click the Wi-Fi
Protected Setup (WPS) Enable checkbox and click Apply to enable
WPS on the system.
5.
a. If the client device has a WPS button, press the WPS buttons on
the client device and on the router simultaneously to start the
WPS association.
Note: If you prefer, you can click Start PBC on the WPS Settings
screen instead of pressing the WPS button on the back of the
router.)
b. If the client device has a PIN number, enter the enrollee’s PIN in
the Enrollee PIN Code field, and then click Enroll. Enter the
router’s PIN code in the Device PIN Code field if requested during
connection.
6. If the connection is successful, then the device will connect to the
router. If it does not connect for some reason, then you should start
the association process over.
Setting Up the Internet/WAN Connection
A Dynamic or DHCP (Dynamic Host Configuration Protocol) connection
is the most commonly used WAN connection type.
Note: Do not change this setting unless Spectrum tells you to use
another connection type.
Perform the following steps to change the connection type.
Basic Configuration
RAC2V1A Router User Guide 19
1. Access and sign in to the configuration interface.
2. Click the WAN Setup tab.
3. Click Dynamic (IPv4), Static (IPv4), Dynamic (IPv6), or Static
(IPv6) in the side menu to display the appropriate screen for
configuring that type of WAN connection.
4. Set the required configuration parameters for the connection type
you selected as provided by Spectrum.
Note: Refer to WAN Setup in Router Configuration Screen
Descriptions (page 28) for specific instructions on setting the various
connection type configuration parameters.
5. Click Apply at the bottom of the screen.
RAC2V1A Router User Guide 20
Advanced Configuration Options This section explains how to use the most common advanced
configuration options for the router in the following areas:
• LAN Setup
• Wireless Setup
• Firewall
• Utilities
Note: Refer to Router Configuration Screen Descriptions (page 28) for
additional advanced configuration options.
Configuring DHCP DHCP (Dynamic Host Protocol Configuration) is enabled by default on
the router, which allows the router to act as a DHCP server and
automatically assign an IP address to each device on the network.
DHCP is a set of rules used by devices such as a computer, router, or
network adapter to allow the device to request and obtain an IP address
from a server, which maintains a list of addresses available for use. The
DHCP server ensures that all IP addresses are unique, e.g., no IP address
is assigned to a second device while the first device's assignment is valid
(its lease has not expired).
Without DHCP, the IP addresses must be entered manually at each
computer or device and a new IP address must be entered each time it
moves to a new location on the network.
Configuring DHCP for IPv4
Perform the following steps to configure DHCP for IPv4.
1. Access and sign in to the configuration interface.
2. Click the LAN Setup tab.
3. Click LAN Settings (IPv4) in the side menu to display the LAN
Settings screen.
4. Click the Enable DHCP Server checkbox under DHCP Server
Settings.
Advanced Configuration Options
RAC2V1A Router User Guide 21
5. Enter the Start IP Address and End IP Address for the range of IP
addresses that the DHCP Server running on the route will be allowed
to assign to a network device.
6. In the Lease Time field, select the time before the assigned IP
address will expire. (After the lease time is up, the user is
automatically assigned a new dynamic IP address.)
Note: Refer to LAN Setup (page 39) for specific instructions on
setting the various DHCP configuration parameters.
7. Click Apply at the bottom of the screen.
Configuring DHCP for IPv6
Perform the following steps to configure DHCP for IPv6.
1. Access and sign in to the configuration interface.
2. Click the LAN Setup tab.
3. Click LAN Settings (IPv6) in the side menu to display the LAN
Settings screen.
4. Click the Enable checkbox under LAN Settings (IPv6).
5. Enter the Start IP Address and End IP Address for the range of IP
addresses that the DHCP Server running on the route will be allowed
to assign to a network device.
6. In the Lease Time field, select the time before the assigned IP
address will expire. (After the lease time is up, the user is
automatically assigned a new dynamic IP address.)
Note: Refer to LAN Setup (page 39) for specific instructions on
setting the various DHCP configuration parameters.
7. Click Apply at the bottom of the screen.
Adding and Deleting Reserved DHCP Clients
The Client List screen shows the IP address, host name and MAC
address of each computer that is connected to the network. If a
computer does not have a specified host name, then the host name field
will be blank.
Perform the following steps to configure the DHCP Clients.
1. Access and sign in to the configuration interface.
2. Click the LAN Setup tab.

Advanced Configuration Options
RAC2V1A Router User Guide 22
3. Click Client List in the side menu to display the Client List screen.
4. Click Add to add a reserved IP client. Select an existing DHCP client
and then click Delete to delete the reserved IP for the client. Click
Refresh to update the Attached Client List.
Selecting the NAT Mode NAT (Network Address Translation) allows the router to manipulate IP
addresses so that just one single IP address can represent an entire
group of computers on the network and let them all communicate with
the Internet. This conserves IP addresses and is necessary in IPv4 since
there are a limited number of available IP addresses for use. (This
limitation does not affect the IPv6 address space.)
Perform the following steps to select the NAT Mode.
1. Access and sign in to the configuration interface.
2. Click the LAN Setup tab.
3. Click LAN Settings (IPv4) in the side menu to display the LAN
Settings screen.
4. Select the NAT Mode from the NAT Mode field drop-down list. The
optional modes are:
o Bridged: Data will pass through the router directly without any
routing and without NAT.
o RoutedWithNAT: Data will be routed by the device and all the
outgoing packets will be NATed.
o RoutedWithoutNAT: Data will be routed by the device but all the
outgoing packets will not be NATed.
5. Click Apply at the bottom of the screen.
Note: A dialog box prompts you to restart the router. Click OK to
restart.
Setting the Wireless Mode You can set the wireless mode to optimize performance based on the
type of network adapters being used by the client devices (for example,
820.11g, 802.11n or 802.11ac). Select the proper mode to support all of
the wireless devices that will connect to the router.
Perform the following steps to set the wireless mode.
1. Access and sign in to the configuration interface.
2. Click the Wireless tab.
Advanced Configuration Options
RAC2V1A Router User Guide 23
3. Click Basic Setup in the side menu to display the Basic Settings
screen.
4. Under Wireless 2.4 GHz or Wireless 5 GHz, select the proper mode
from the Wireless Mode drop-down list. The following options are
available: 2.4 GHz Options:
o 802.11g
o 802.11g+n 5 GHz Options:
o 802.11n
o 802.11n&802.11ac
o 802.11ac
Note: Mixed modes will be able operate in more than one mode,
depending on the capabilities of the connected device.
5. Click Apply at the bottom of the screen.
Note: If you have both 802.11a and 802.11b running on your network,
then clients that are capable of faster wireless modes will be slowed
down.
General Firewall Configuration Settings The router is equipped with a firewall that will protect your network
from a wide array of common Denial of Service (DoS) attacks, including
Ping of Death (PoD) attacks.
The firewall is enabled by default, but you can choose to disable it.
Turning off the firewall protection will not leave the network completely
vulnerable to hacker attacks, but it is recommended that you enable the
firewall whenever possible.
Perform the following steps if you have disabled the firewall and want to
enable it again.
1. Access and sign in to the configuration interface.
2. Click the Firewall tab.
3. Click Firewall Settings in the side menu to display the Firewall
Settings screen.
4. Check the Enable Firewall checkbox to enable the firewall on the
network.
5. Click Apply at the bottom of the screen.
Advanced Configuration Options
RAC2V1A Router User Guide 24
6. Click WAN Ping Blocking in the side menu to display the WAN Ping
Blocking screen.
7. Check the Block ICMP Ping Enable checkbox to protect against PoD
attacks.
8. Click Apply at the bottom of the screen.
Port Forwarding The port forwarding function forwards inbound traffic from the Internet
to a specified single device on your network. Examples include allowing
access to a web server on your network, peer-to-peer file sharing,
applications that allow remote access to a specified computer, some
gaming and videoconferencing applications and others.
If you have a server in the network that you want to make available to
the Internet, you can set up port forwarding. The firewall passes
requests from the Internet to the designated computer on the network.
This function works by allowing you to route external (Internet) calls for
services such as a web server (port 80), FTP server (Port 21), or other
applications through the router to the internal network.
Perform the following steps to set up port forwarding.
1. Access and sign in to the configuration interface.
2. Click the Firewall tab.
3. Click Port Forwarding in the side menu to display the Port
Forwarding screen.
4. Select the type of server that you want to add from the Service List
drop-down box.
5. Click Add
6. If necessary, adjust the following parameters.
Enable Enable forwarding for this port.
Description Enter a name for the port you want to forward.
Inbound Port Enter the inbound port range for the port you want
to forward. It should be the same range as the local
port.
Type Sets the format for the port. Options are TCP, UDP,
or BOTH.
Advanced Configuration Options
RAC2V1A Router User Guide 25
Private IP
Address
Enter the IP address of the machine on the LAN
where you want the connections to go.
Private Port Enter the private port range for the port you want
to forward. It should be the same range as the
inbound port.
7. Click Apply to save your settings.
Note: To stop forwarding a port, uncheck Enable for the forwarding rule,
and then click Apply. To completely remove a port forwarding rule,
choose the entry, choose the entry ID in the drop-down list and click
Clear, then click OK and Apply.
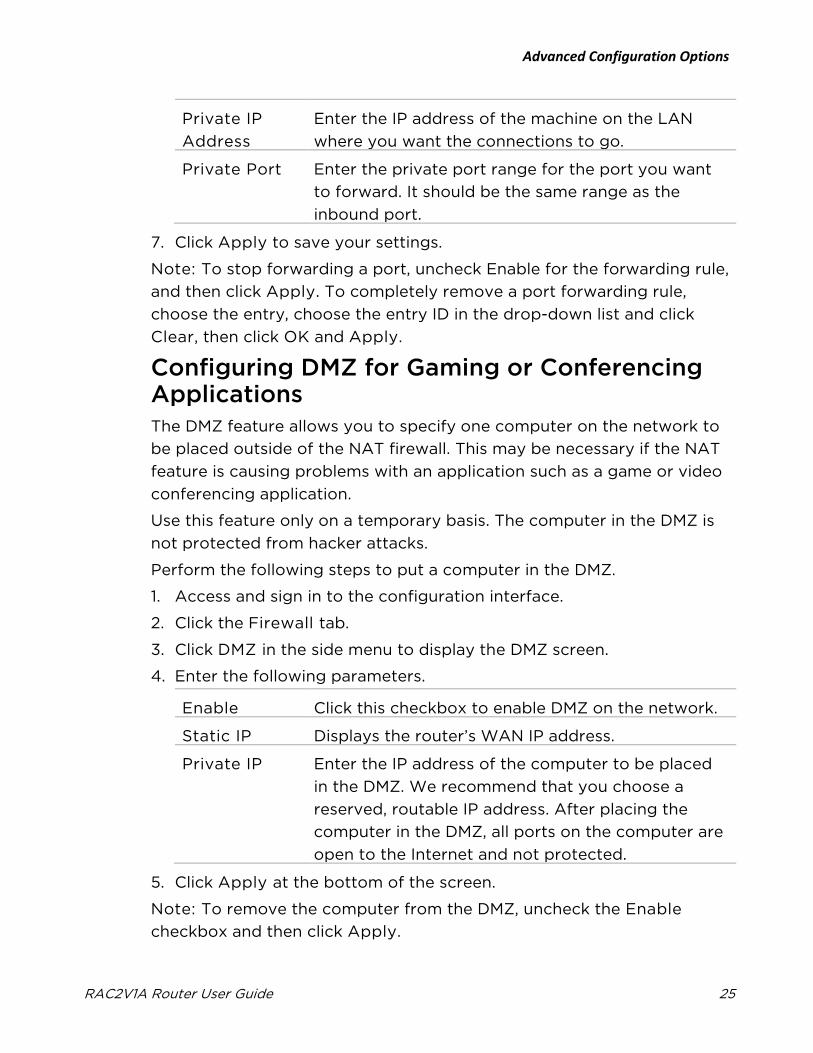
Configuring DMZ for Gaming or Conferencing Applications The DMZ feature allows you to specify one computer on the network to
be placed outside of the NAT firewall. This may be necessary if the NAT
feature is causing problems with an application such as a game or video
conferencing application.
Use this feature only on a temporary basis. The computer in the DMZ is
not protected from hacker attacks.
Perform the following steps to put a computer in the DMZ.
1. Access and sign in to the configuration interface.
2. Click the Firewall tab.
3. Click DMZ in the side menu to display the DMZ screen.
4. Enter the following parameters.
Enable Click this checkbox to enable DMZ on the network.
Static IP Displays the router’s WAN IP address.
Private IP Enter the IP address of the computer to be placed
in the DMZ. We recommend that you choose a
reserved, routable IP address. After placing the
computer in the DMZ, all ports on the computer are
open to the Internet and not protected.
5. Click Apply at the bottom of the screen.
Note: To remove the computer from the DMZ, uncheck the Enable
checkbox and then click Apply.
Advanced Configuration Options
RAC2V1A Router User Guide 26
Viewing Network System Information You can view status and system information for the network on the
System Information screen.
Perform the following steps to view system status information.
1. Access and sign in to the configuration interface.
2. Click the Utilities tab.
3. Click System Information in the side menu to display the System
Information screen.
Note: Refer to System Information (page 79) for an explanation of the
various status information parameters.
Restarting the Router It may be necessary to restart (reset) the router if it stops working
properly. This is the equivalent of unplugging power from the router and
plugging power back in. Restarting the router will not delete any of the
configuration settings.
Perform the following steps to restart the router.
1. Access and sign in to the configuration interface.
2. Click the Utilities tab.
3. Click Restart Router in the side menu to display the Restart Router
screen.
4. Click the Restart Router button to restart the router.
Viewing the System Logs The System Logs screen displays the system logs.
Perform the following steps to configure the system logs.
1. Access and sign in to the configuration interface.
2. Click the Utilities tab.
3. Click System Log in the side menu to display the System Logs.
When viewing the logs, click Refresh to update the list.
Setting Up DDNS DDNS (Dynamic DNS) allows you to provide Internet users with a fixed
domain name (instead of an IP address which may periodically change).
This allows various locations on the Internet to access the gateway and

Advanced Configuration Options
RAC2V1A Router User Guide 27
the applications that are set up in the gateway's port forwarding table
without knowing your current IP address.
Requirements
In order to use DDNS you must first create an account with a DDNS
provider. The DDNS provider maps your chosen domain name to your IP
address.
Once the account is established, perform the following steps to enable
DDNS.
1. Access and sign in to the configuration interface.
2. Click the Utilities tab.
3. Click DDNS in the side menu to display the DDNS configuration
screen.
4. Click the DDNS Enable checkbox.
Note: Refer to DDNS (page 85) for specific instructions on setting
the various DDNS configuration parameters.
5. After setting the necessary configuration parameters, click Apply at
the bottom of the screen.
RAC2V1A Router User Guide 28
Router Configuration Screen Descriptions This section provides an overview of the graphical user interface (GUI)
router setup screens.
Each of the following tabs in the GUI and their individual sub-menus and
configuration parameters are explained in detail:
• Basic Setup
• WAN Setup
• LAN Setup
• Wireless
• Firewall
• USB
• Utilities
Router Configuration Screen Descriptions
RAC2V1A Router User Guide 29
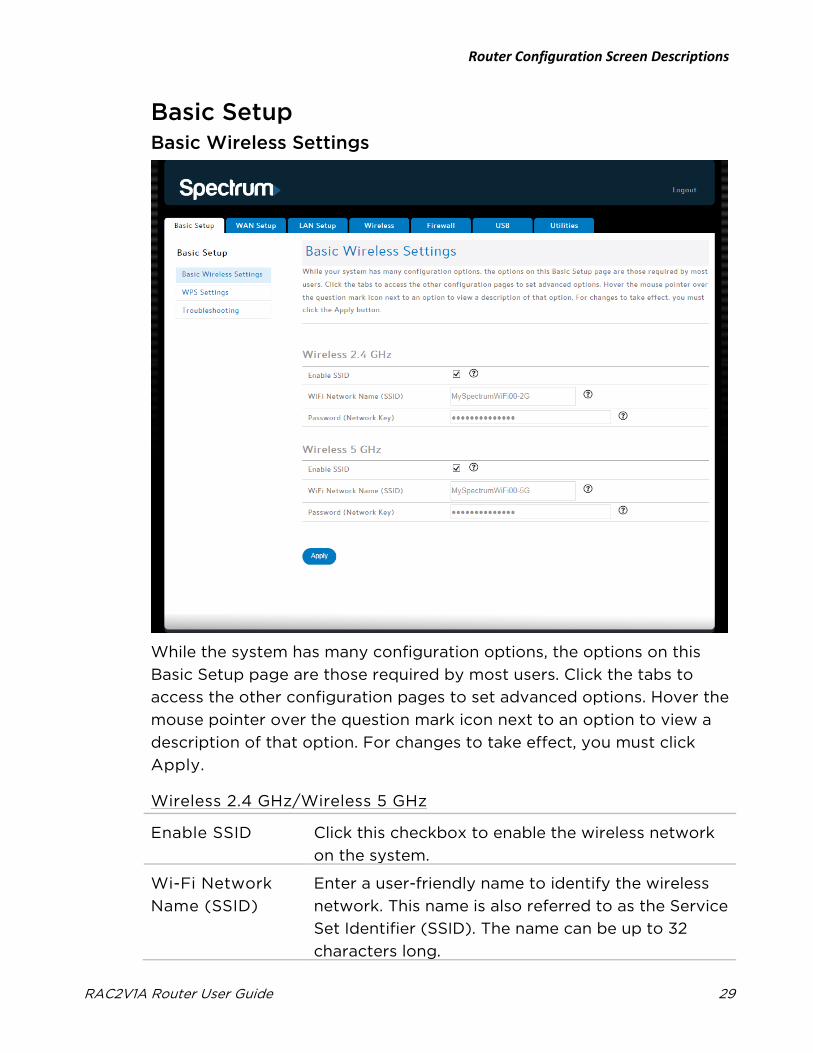
Basic Setup Basic Wireless Settings
While the system has many configuration options, the options on this
Basic Setup page are those required by most users. Click the tabs to
access the other configuration pages to set advanced options. Hover the
mouse pointer over the question mark icon next to an option to view a
description of that option. For changes to take effect, you must click
Apply.
Wireless 2.4 GHz/Wireless 5 GHz
Enable SSID Click this checkbox to enable the wireless network
on the system.
Wi-Fi Network
Name (SSID)
Enter a user-friendly name to identify the wireless
network. This name is also referred to as the Service
Set Identifier (SSID). The name can be up to 32
characters long.
Router Configuration Screen Descriptions
RAC2V1A Router User Guide 30
Wi-Fi Password Sets the Wi-Fi password. Use a Wi-Fi password that
will not be easy to guess. Wi-Fi passwords are case-
sensitive. Valid characters are the numbers 0 to 9,
the letters a through z and A through Z and
printable special characters (such as $, !, ?, &, #, @
and others). You must click Apply to save the new
Wi-Fi password.
Router Configuration Screen Descriptions
RAC2V1A Router User Guide 31
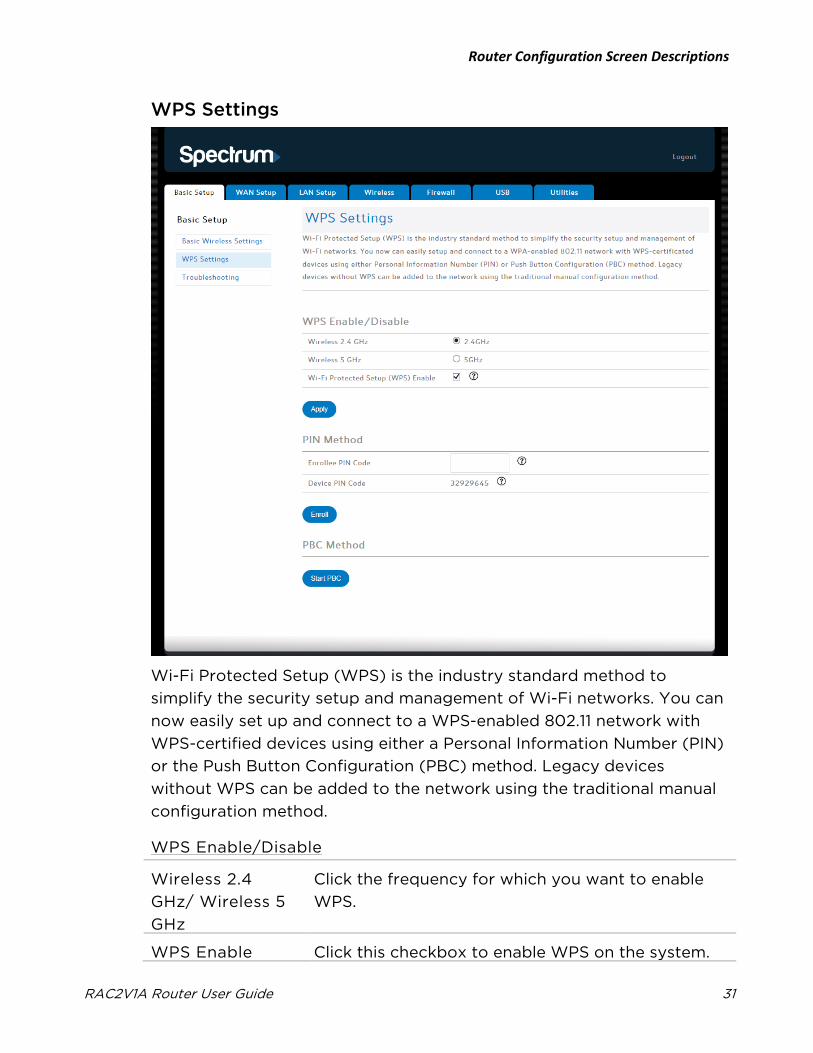
WPS Settings
Wi-Fi Protected Setup (WPS) is the industry standard method to
simplify the security setup and management of Wi-Fi networks. You can
now easily set up and connect to a WPS-enabled 802.11 network with
WPS-certified devices using either a Personal Information Number (PIN)
or the Push Button Configuration (PBC) method. Legacy devices
without WPS can be added to the network using the traditional manual
configuration method.
WPS Enable/Disable
Wireless 2.4
GHz/ Wireless 5
GHz
Click the frequency for which you want to enable
WPS.
WPS Enable Click this checkbox to enable WPS on the system.
Router Configuration Screen Descriptions
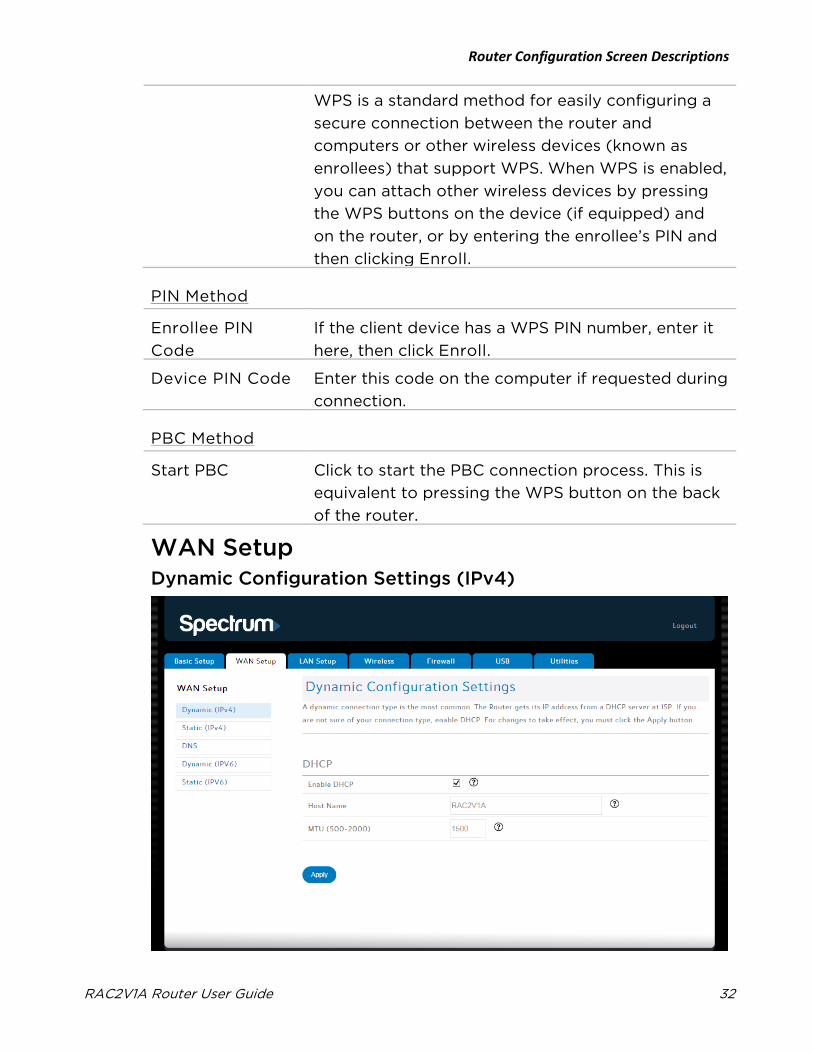
RAC2V1A Router User Guide 32
WPS is a standard method for easily configuring a
secure connection between the router and
computers or other wireless devices (known as
enrollees) that support WPS. When WPS is enabled,
you can attach other wireless devices by pressing
the WPS buttons on the device (if equipped) and
on the router, or by entering the enrollee’s PIN and
then clicking Enroll.
PIN Method
Enrollee PIN
Code
If the client device has a WPS PIN number, enter it
here, then click Enroll.
Device PIN Code Enter this code on the computer if requested during
connection.
PBC Method
Start PBC Click to start the PBC connection process. This is
equivalent to pressing the WPS button on the back
of the router.
WAN Setup Dynamic Configuration Settings (IPv4)
Router Configuration Screen Descriptions
RAC2V1A Router User Guide 33
A dynamic connection type is the most common type of connection.
The router gets its IP address from a Spectrum DHCP server. If you are
not sure of the connection type, use a dynamic connection. For changes
to take effect, you must click Apply.
Unless Spectrum directs you to do choose a Static address, you should
choose a dynamic address.
Note: You can use static (manual) IP addresses in addition to the DHCP
server, but any static addresses must be outside the range of the DHCP
pool to avoid duplicate IP addresses. Also, the static WAN IP address
must be routable by northern-bound routers.
DHCP
Enable DHCP Click this checkbox to enable a DHCP connection
for the system.
Host Name Use this field to enter a host name for the router.
MTU Maximum Transmission Unit. This is a measure of
Internet packet size, in bytes, that can be forwarded
to the network. You should not change this field
unless specifically directed to do so by Charter.
Router Configuration Screen Descriptions
RAC2V1A Router User Guide 34
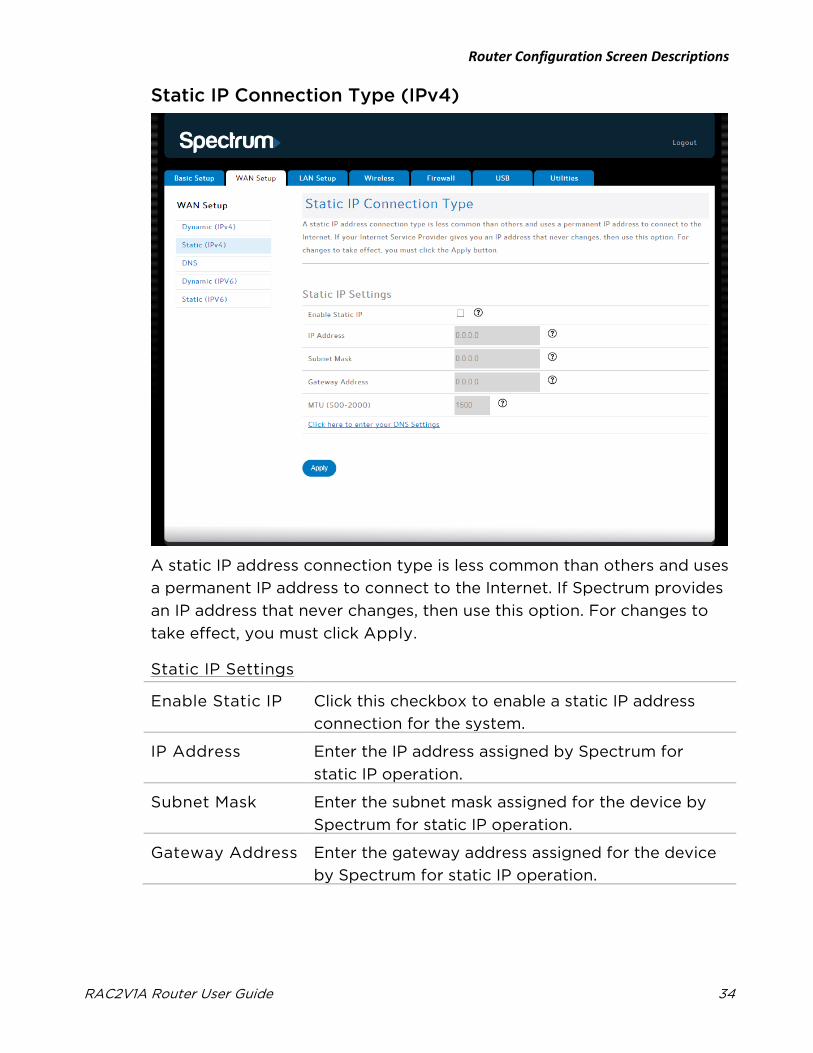
Static IP Connection Type (IPv4)
A static IP address connection type is less common than others and uses
a permanent IP address to connect to the Internet. If Spectrum provides
an IP address that never changes, then use this option. For changes to
take effect, you must click Apply.
Static IP Settings
Enable Static IP Click this checkbox to enable a static IP address
connection for the system.
IP Address Enter the IP address assigned by Spectrum for
static IP operation.
Subnet Mask Enter the subnet mask assigned for the device by
Spectrum for static IP operation.
Gateway Address Enter the gateway address assigned for the device
by Spectrum for static IP operation.
Router Configuration Screen Descriptions
RAC2V1A Router User Guide 35
MTU Maximum Transmission Unit. This is a measure of
Internet packet size, in bytes, that can be forwarded
to the network. You should not change this field
unless specifically directed to do so by Charter.
Click here to
enter your DNS
Settings
If Spectrum gave you specific DNS settings, click
here to go to the DNS Settings screen to enter
those settings.
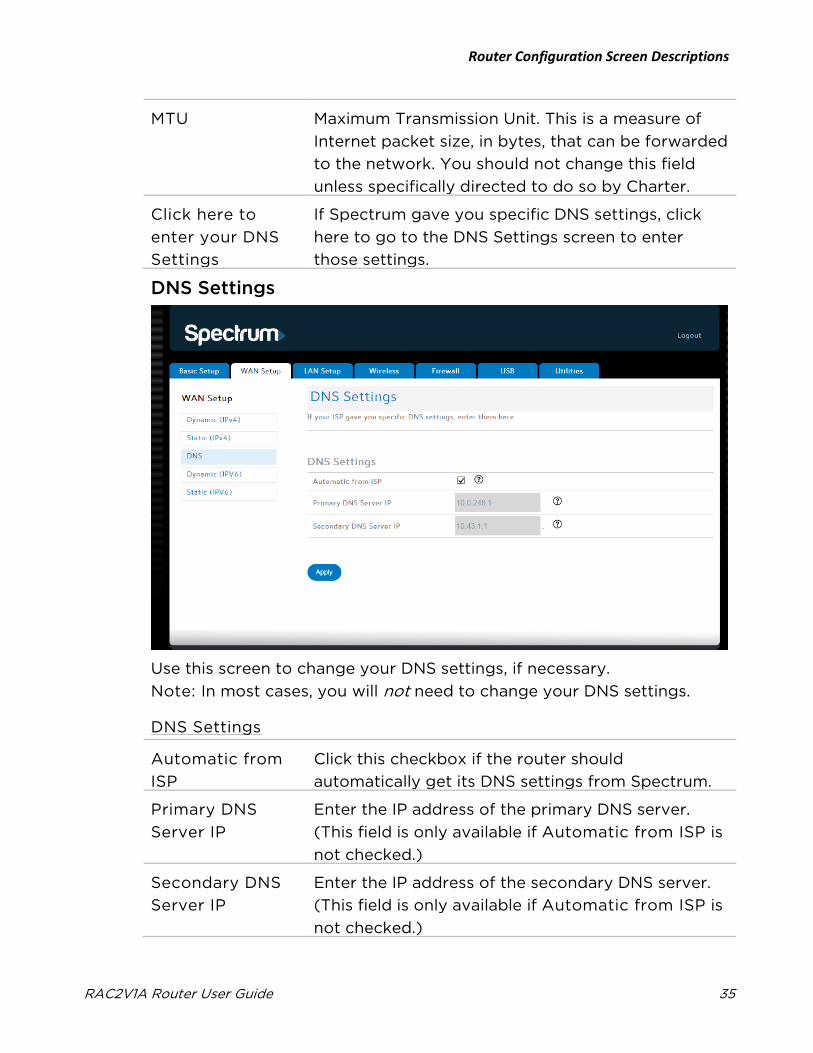
DNS Settings
Use this screen to change your DNS settings, if necessary.
Note: In most cases, you will not need to change your DNS settings.
DNS Settings
Automatic from
ISP
Click this checkbox if the router should
automatically get its DNS settings from Spectrum.
Primary DNS
Server IP
Enter the IP address of the primary DNS server.
(This field is only available if Automatic from ISP is
not checked.)
Secondary DNS
Server IP
Enter the IP address of the secondary DNS server.
(This field is only available if Automatic from ISP is
not checked.)
Router Configuration Screen Descriptions
RAC2V1A Router User Guide 36
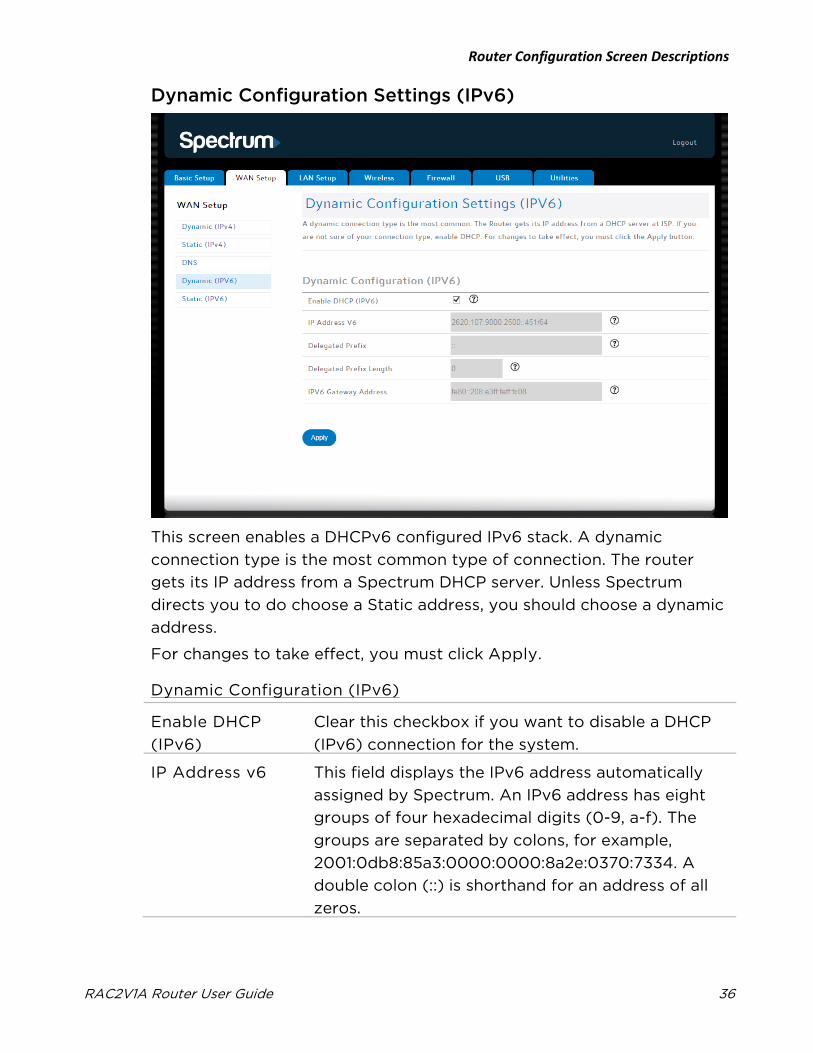
Dynamic Configuration Settings (IPv6)
This screen enables a DHCPv6 configured IPv6 stack. A dynamic
connection type is the most common type of connection. The router
gets its IP address from a Spectrum DHCP server. Unless Spectrum
directs you to do choose a Static address, you should choose a dynamic
address.
For changes to take effect, you must click Apply.
Dynamic Configuration (IPv6)
Enable DHCP
(IPv6)
Clear this checkbox if you want to disable a DHCP
(IPv6) connection for the system.
IP Address v6 This field displays the IPv6 address automatically
assigned by Spectrum. An IPv6 address has eight
groups of four hexadecimal digits (0-9, a-f). The
groups are separated by colons, for example,
2001:0db8:85a3:0000:0000:8a2e:0370:7334. A
double colon (::) is shorthand for an address of all
zeros.
Router Configuration Screen Descriptions
RAC2V1A Router User Guide 37
The prefix length appears at the end of the IPv6
address, following a slash.
Delegated Prefix This field displays the assigned IPv6 prefix to be
used by addresses allocated in the local network.
Delegated Prefix
Length
This field displays the assigned IPv6 prefix length.
IPv6 Gateway
Address
This field displays the gateway address.
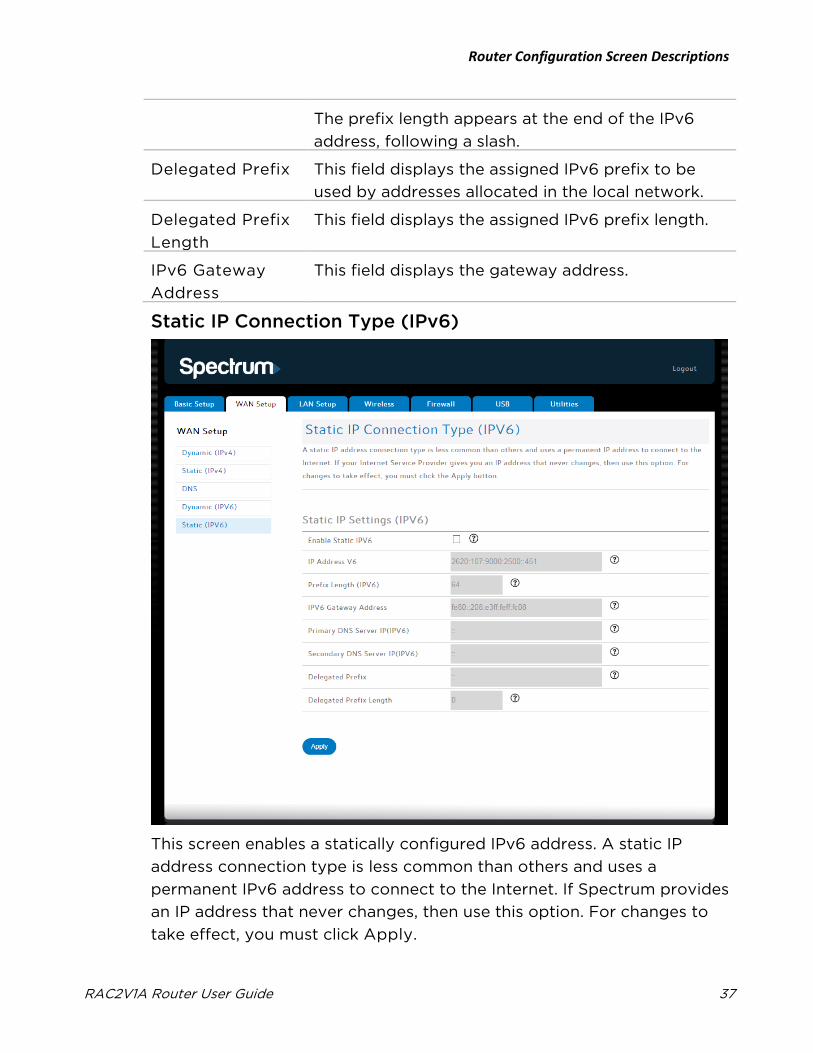
Static IP Connection Type (IPv6)
This screen enables a statically configured IPv6 address. A static IP
address connection type is less common than others and uses a
permanent IPv6 address to connect to the Internet. If Spectrum provides
an IP address that never changes, then use this option. For changes to
take effect, you must click Apply.
Router Configuration Screen Descriptions
RAC2V1A Router User Guide 38
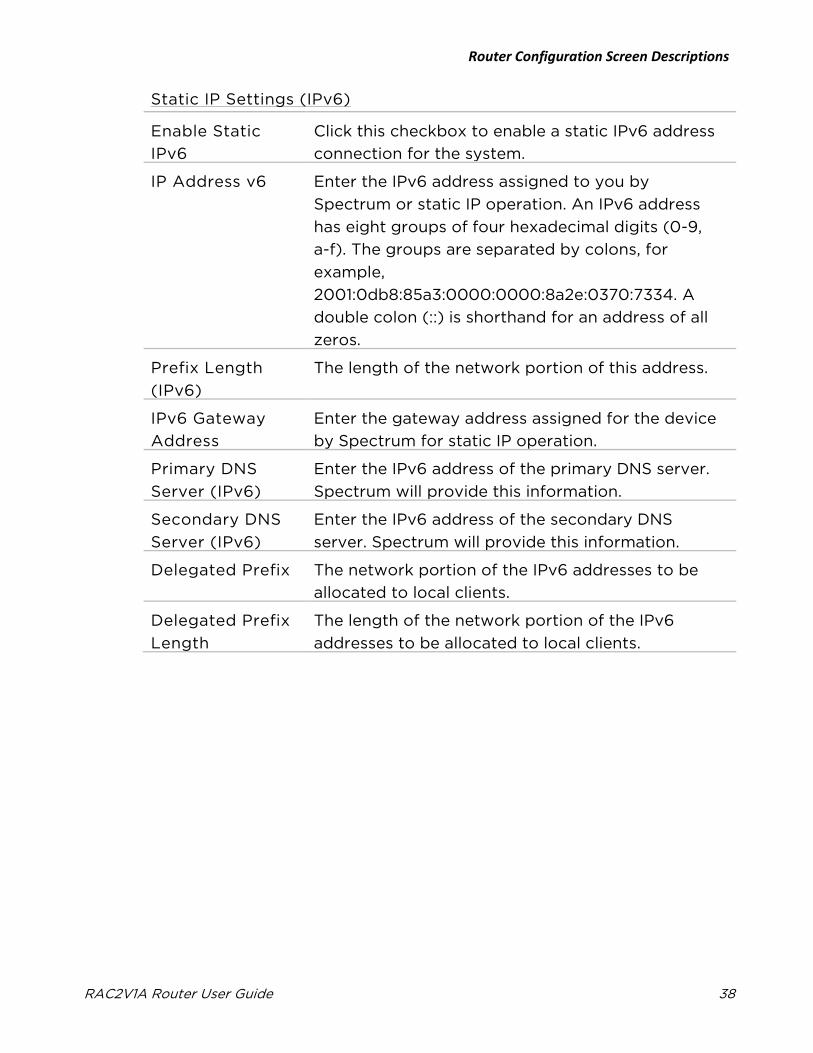
Static IP Settings (IPv6)
Enable Static
IPv6
Click this checkbox to enable a static IPv6 address
connection for the system.
IP Address v6 Enter the IPv6 address assigned to you by
Spectrum or static IP operation. An IPv6 address
has eight groups of four hexadecimal digits (0-9,
a-f). The groups are separated by colons, for
example,
2001:0db8:85a3:0000:0000:8a2e:0370:7334. A
double colon (::) is shorthand for an address of all
zeros.
Prefix Length
(IPv6)
The length of the network portion of this address.
IPv6 Gateway
Address
Enter the gateway address assigned for the device
by Spectrum for static IP operation.
Primary DNS
Server (IPv6)
Enter the IPv6 address of the primary DNS server.
Spectrum will provide this information.
Secondary DNS
Server (IPv6)
Enter the IPv6 address of the secondary DNS
server. Spectrum will provide this information.
Delegated Prefix The network portion of the IPv6 addresses to be
allocated to local clients.
Delegated Prefix
Length
The length of the network portion of the IPv6
addresses to be allocated to local clients.
Router Configuration Screen Descriptions
RAC2V1A Router User Guide 39
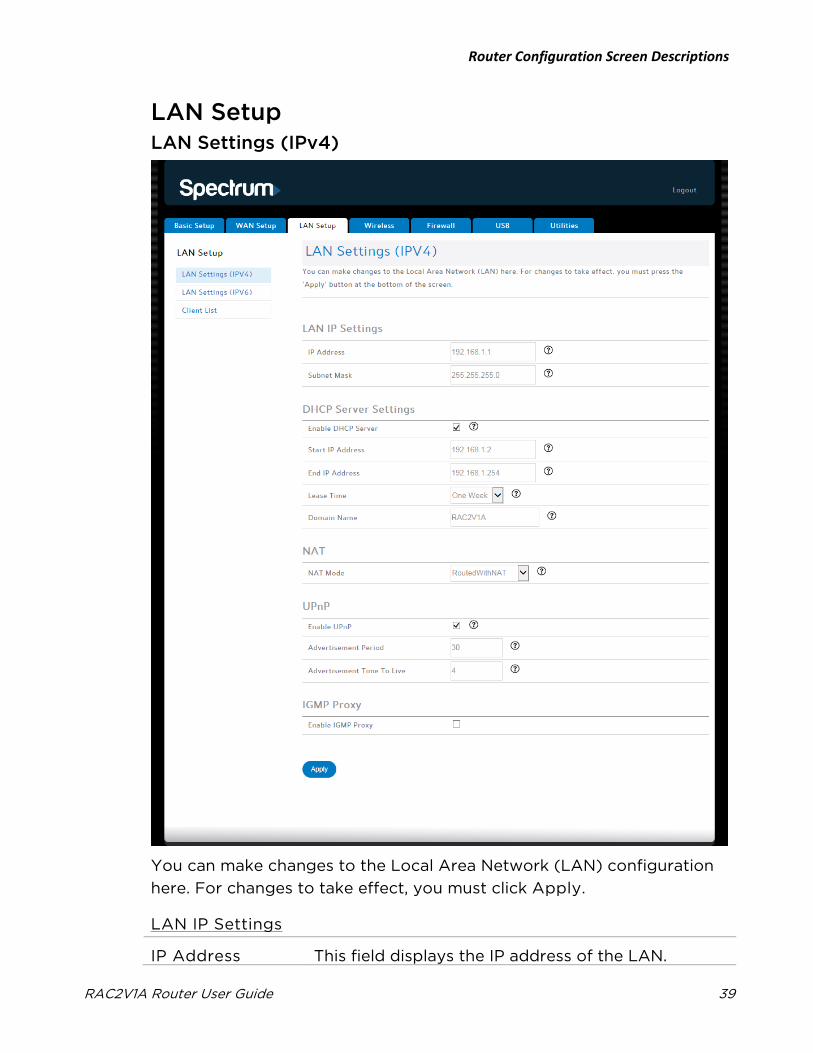
LAN Setup LAN Settings (IPv4)
You can make changes to the Local Area Network (LAN) configuration
here. For changes to take effect, you must click Apply.
LAN IP Settings
IP Address This field displays the IP address of the LAN.
Router Configuration Screen Descriptions
RAC2V1A Router User Guide 40
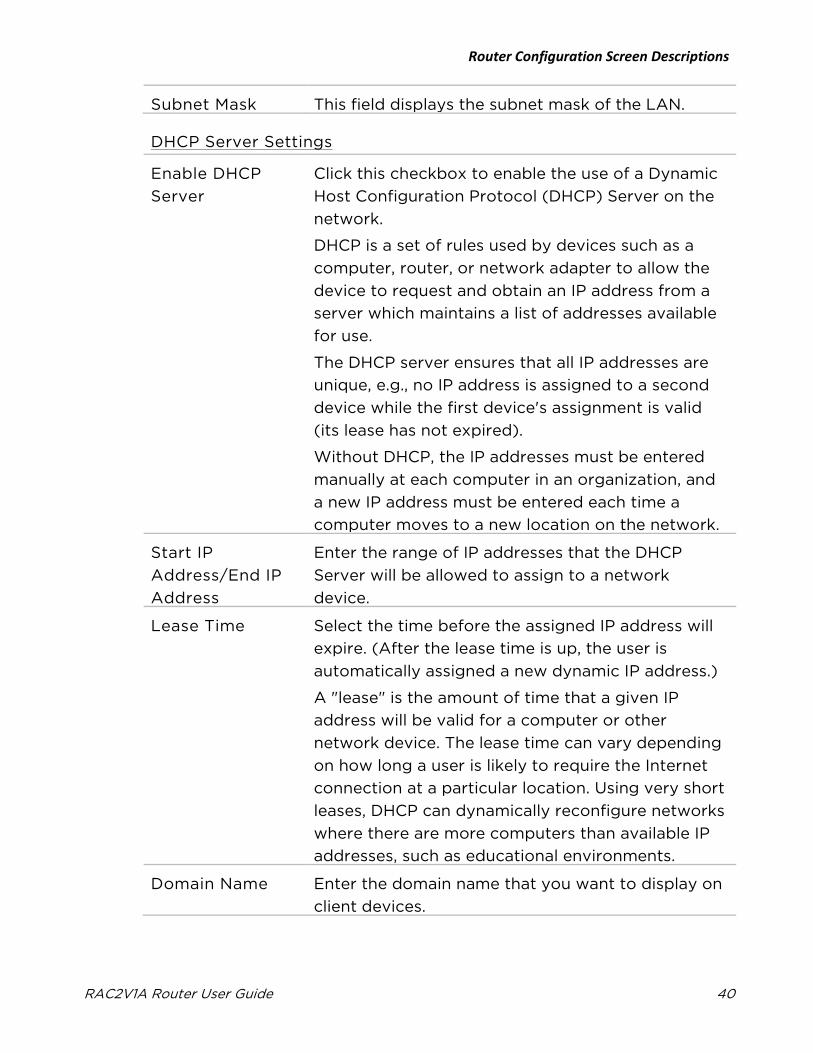
Subnet Mask This field displays the subnet mask of the LAN.
DHCP Server Settings
Enable DHCP
Server
Click this checkbox to enable the use of a Dynamic
Host Configuration Protocol (DHCP) Server on the
network.
DHCP is a set of rules used by devices such as a
computer, router, or network adapter to allow the
device to request and obtain an IP address from a
server which maintains a list of addresses available
for use.
The DHCP server ensures that all IP addresses are
unique, e.g., no IP address is assigned to a second
device while the first device's assignment is valid
(its lease has not expired).
Without DHCP, the IP addresses must be entered
manually at each computer in an organization, and
a new IP address must be entered each time a
computer moves to a new location on the network.
Start IP
Address/End IP
Address
Enter the range of IP addresses that the DHCP
Server will be allowed to assign to a network
device.
Lease Time Select the time before the assigned IP address will
expire. (After the lease time is up, the user is
automatically assigned a new dynamic IP address.)
A "lease" is the amount of time that a given IP
address will be valid for a computer or other
network device. The lease time can vary depending
on how long a user is likely to require the Internet
connection at a particular location. Using very short
leases, DHCP can dynamically reconfigure networks
where there are more computers than available IP
addresses, such as educational environments.
Domain Name Enter the domain name that you want to display on
client devices.
Router Configuration Screen Descriptions
RAC2V1A Router User Guide 41
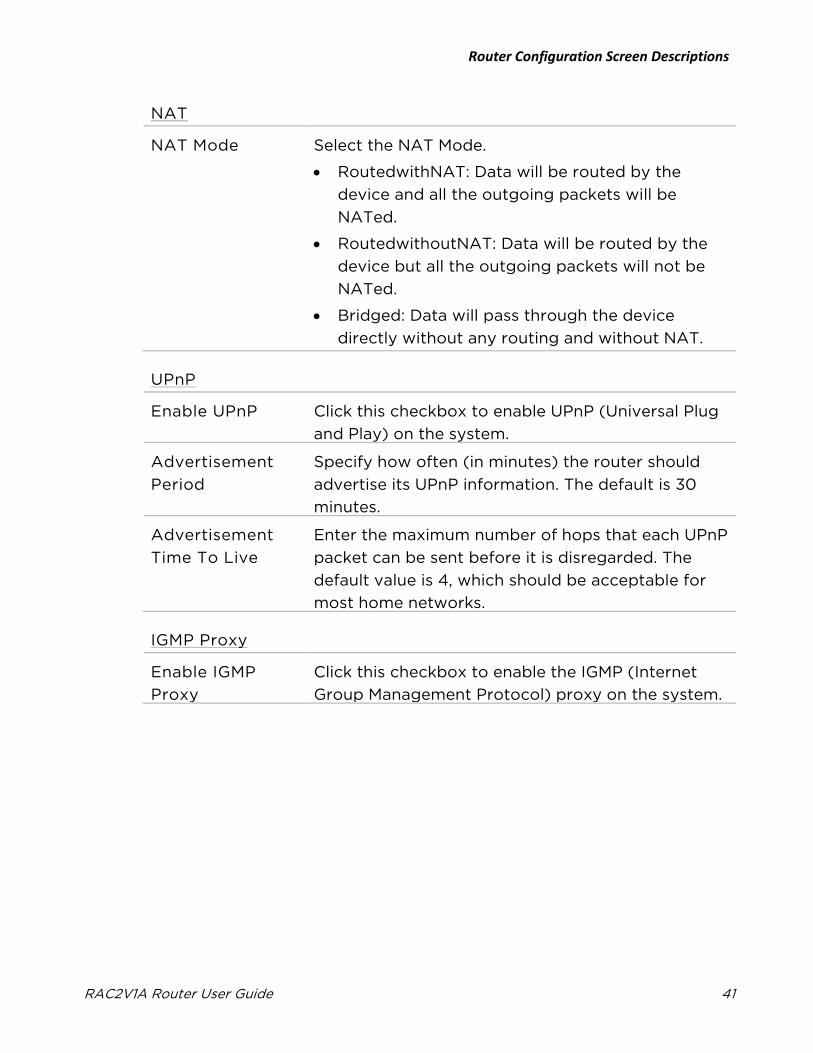
NAT
NAT Mode Select the NAT Mode.
• RoutedwithNAT: Data will be routed by the
device and all the outgoing packets will be
NATed.
• RoutedwithoutNAT: Data will be routed by the
device but all the outgoing packets will not be
NATed.
• Bridged: Data will pass through the device
directly without any routing and without NAT.
UPnP
Enable UPnP Click this checkbox to enable UPnP (Universal Plug
and Play) on the system.
Advertisement
Period
Specify how often (in minutes) the router should
advertise its UPnP information. The default is 30
minutes.
Advertisement
Time To Live
Enter the maximum number of hops that each UPnP
packet can be sent before it is disregarded. The
default value is 4, which should be acceptable for
most home networks.
IGMP Proxy
Enable IGMP
Proxy
Click this checkbox to enable the IGMP (Internet
Group Management Protocol) proxy on the system.
Router Configuration Screen Descriptions
RAC2V1A Router User Guide 42
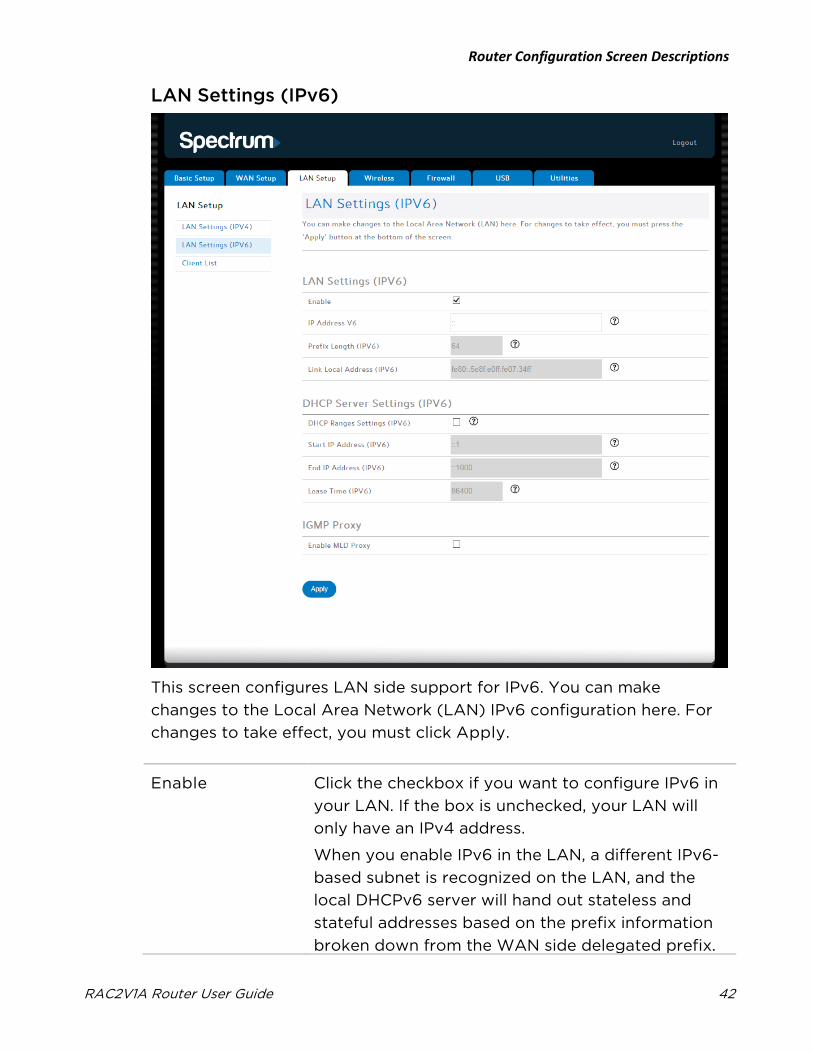
LAN Settings (IPv6)
This screen configures LAN side support for IPv6. You can make
changes to the Local Area Network (LAN) IPv6 configuration here. For
changes to take effect, you must click Apply.
Enable Click the checkbox if you want to configure IPv6 in
your LAN. If the box is unchecked, your LAN will
only have an IPv4 address.
When you enable IPv6 in the LAN, a different IPv6-
based subnet is recognized on the LAN, and the
local DHCPv6 server will hand out stateless and
stateful addresses based on the prefix information
broken down from the WAN side delegated prefix.

Router Configuration Screen Descriptions
RAC2V1A Router User Guide 43
LAN Settings (IPv6)
IP Address (IPv6) This field displays the IPv6 address of the LAN. An
IPv6 address has eight groups of four hexadecimal
digits (0-9, a-f). The groups are separated by
colons, for example,
2001:0db8:85a3:0000:0000:8a2e:0370:7334. A
double colon (::) is shorthand for an address of all
zeros.
Prefix Length v6 Length of the network portion of the IPv6 address.
Link Local
Address (IPv6)
IPv6 address that can be used only on this LAN
interface.
DHCP Server Settings (IPv6)
DHCP Ranges
Settings (IPv6)
Click the checkbox if you want to enable the LAN
DHCPv6 pool range.
Start IP Address
(IPv6)/End IP
Address (IPv6)
Enter the range of IPv6 addresses that the DHCP
Server will be allowed to assign to a network
device.
Lease Time
(IPv6)
Select the time before the assigned IP address will
expire. (After the lease time is up, the user is
automatically assigned a new dynamic IP address.)
A "lease" is the amount of time that a given IP
address will be valid for a computer or other
network device. The lease time can vary depending
on how long a user is likely to require the Internet
connection at a particular location. Using very short
leases, DHCP can dynamically reconfigure networks
where there are more computers than available IP
addresses, such as educational environments.
Enable DHCP
Relay (IPv6)
Click the checkbox to enable DHCP Relay
functionality on the system.
Router Configuration Screen Descriptions
RAC2V1A Router User Guide 44
IGMP Proxy
Enable MLD
Proxy
Multicast Listener Discover (MLD) lets your router
discover multicast listeners on an attached link.
Click the checkbox to enable MLD proxy
functionality on the system.
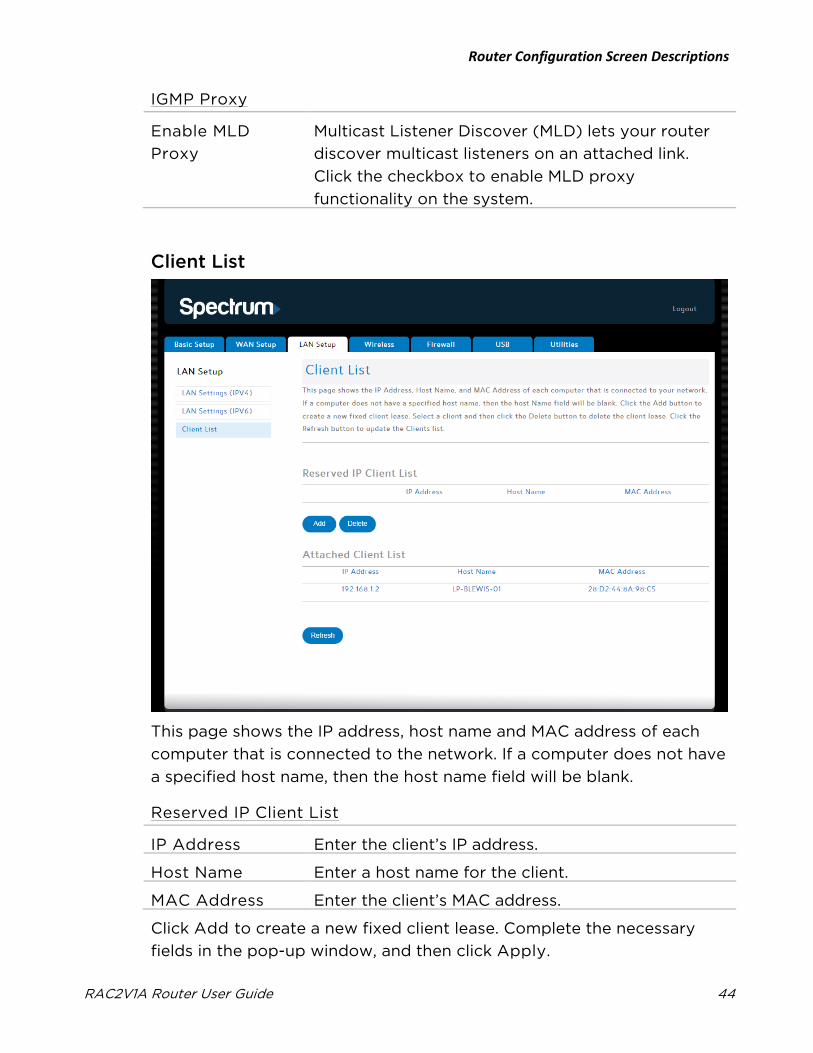
Client List
This page shows the IP address, host name and MAC address of each
computer that is connected to the network. If a computer does not have
a specified host name, then the host name field will be blank.
Reserved IP Client List
IP Address Enter the client’s IP address.
Host Name Enter a host name for the client.
MAC Address Enter the client’s MAC address.
Click Add to create a new fixed client lease. Complete the necessary
fields in the pop-up window, and then click Apply.
Router Configuration Screen Descriptions
RAC2V1A Router User Guide 45
Select a client and then click Delete to delete the reserved client from
the list.
Attached Client List
IP Address The IP address of a connected client.
Host Name The host name of a connected client.
MAC Address The MAC address of a connected client.
Click Refresh to update the client list.
Router Configuration Screen Descriptions
RAC2V1A Router User Guide 46
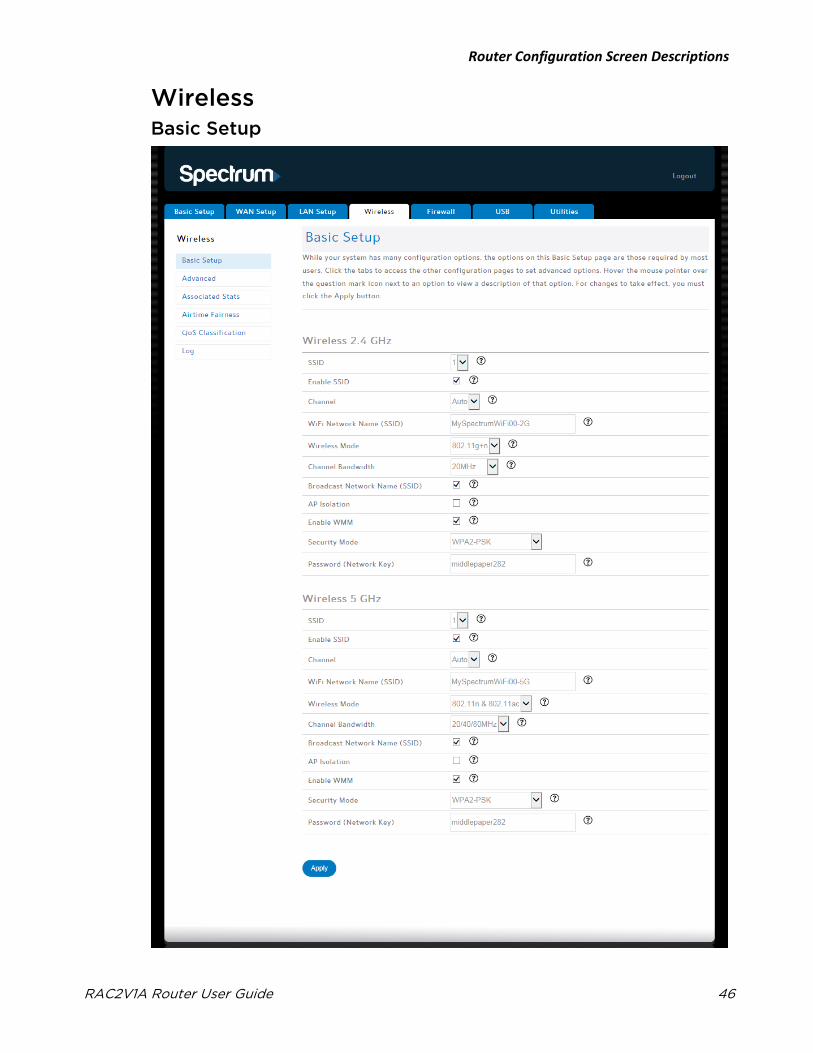
Wireless Basic Setup
Router Configuration Screen Descriptions
RAC2V1A Router User Guide 47
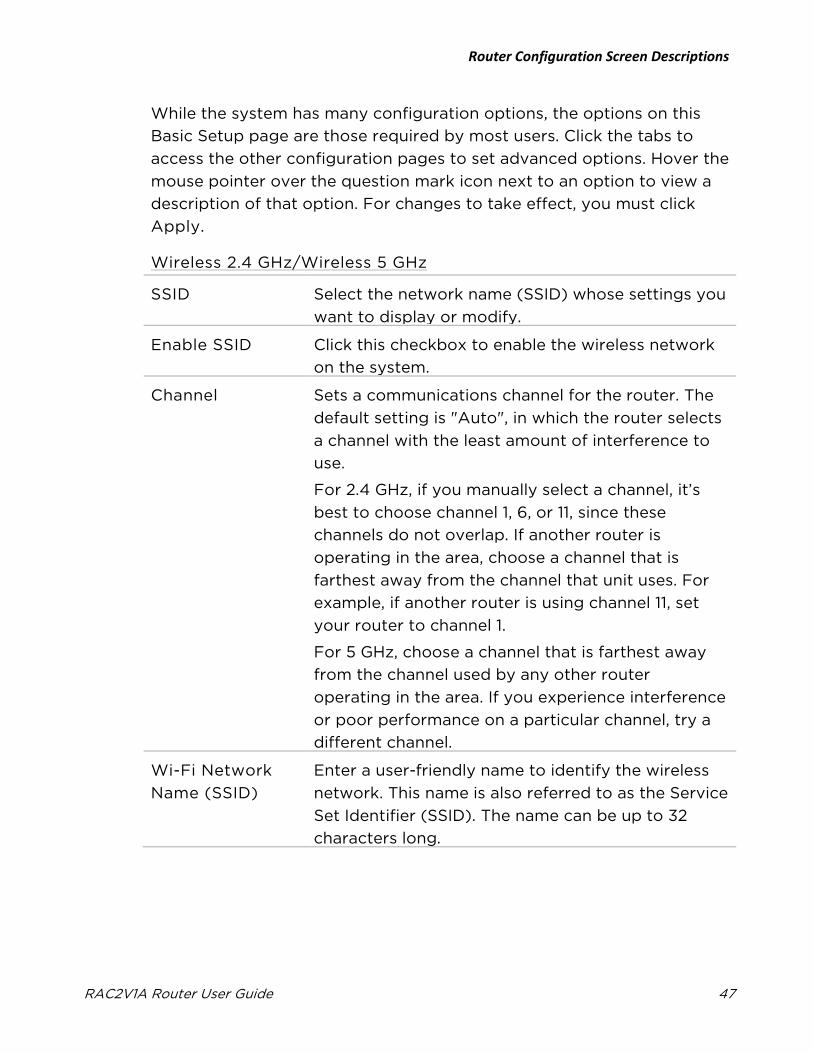
While the system has many configuration options, the options on this
Basic Setup page are those required by most users. Click the tabs to
access the other configuration pages to set advanced options. Hover the
mouse pointer over the question mark icon next to an option to view a
description of that option. For changes to take effect, you must click
Apply.
Wireless 2.4 GHz/Wireless 5 GHz
SSID Select the network name (SSID) whose settings you
want to display or modify.
Enable SSID Click this checkbox to enable the wireless network
on the system.
Channel Sets a communications channel for the router. The
default setting is "Auto", in which the router selects
a channel with the least amount of interference to
use.
For 2.4 GHz, if you manually select a channel, it’s
best to choose channel 1, 6, or 11, since these
channels do not overlap. If another router is
operating in the area, choose a channel that is
farthest away from the channel that unit uses. For
example, if another router is using channel 11, set
your router to channel 1.
For 5 GHz, choose a channel that is farthest away
from the channel used by any other router
operating in the area. If you experience interference
or poor performance on a particular channel, try a
different channel.
Wi-Fi Network
Name (SSID)
Enter a user-friendly name to identify the wireless
network. This name is also referred to as the Service
Set Identifier (SSID). The name can be up to 32
characters long.
Router Configuration Screen Descriptions
RAC2V1A Router User Guide 48
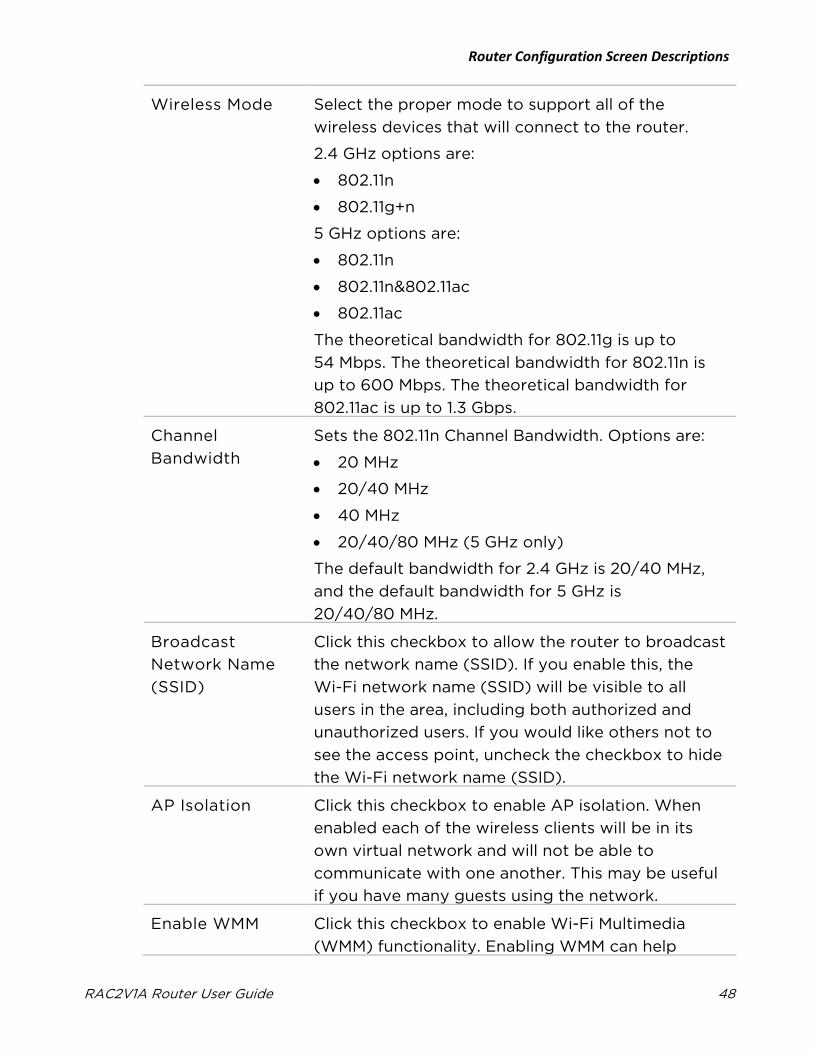
Wireless Mode Select the proper mode to support all of the
wireless devices that will connect to the router.
2.4 GHz options are:
• 802.11n
• 802.11g+n
5 GHz options are:
• 802.11n
• 802.11n&802.11ac
• 802.11ac
The theoretical bandwidth for 802.11g is up to
54 Mbps. The theoretical bandwidth for 802.11n is
up to 600 Mbps. The theoretical bandwidth for
802.11ac is up to 1.3 Gbps.
Channel
Bandwidth
Sets the 802.11n Channel Bandwidth. Options are:
• 20 MHz
• 20/40 MHz
• 40 MHz
• 20/40/80 MHz (5 GHz only)
The default bandwidth for 2.4 GHz is 20/40 MHz,
and the default bandwidth for 5 GHz is
20/40/80 MHz.
Broadcast
Network Name
(SSID)
Click this checkbox to allow the router to broadcast
the network name (SSID). If you enable this, the
Wi-Fi network name (SSID) will be visible to all
users in the area, including both authorized and
unauthorized users. If you would like others not to
see the access point, uncheck the checkbox to hide
the Wi-Fi network name (SSID).
AP Isolation Click this checkbox to enable AP isolation. When
enabled each of the wireless clients will be in its
own virtual network and will not be able to
communicate with one another. This may be useful
if you have many guests using the network.
Enable WMM Click this checkbox to enable Wi-Fi Multimedia
(WMM) functionality. Enabling WMM can help
Router Configuration Screen Descriptions
RAC2V1A Router User Guide 49
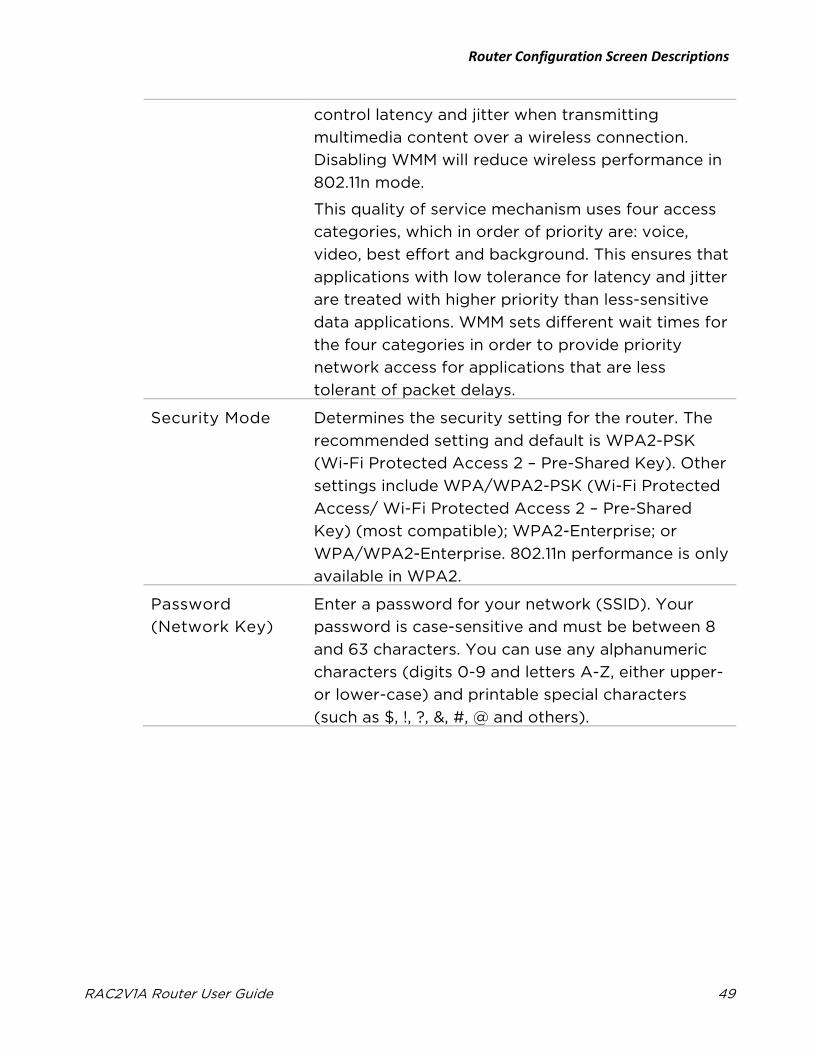
control latency and jitter when transmitting
multimedia content over a wireless connection.
Disabling WMM will reduce wireless performance in
802.11n mode.
This quality of service mechanism uses four access
categories, which in order of priority are: voice,
video, best effort and background. This ensures that
applications with low tolerance for latency and jitter
are treated with higher priority than less-sensitive
data applications. WMM sets different wait times for
the four categories in order to provide priority
network access for applications that are less
tolerant of packet delays.
Security Mode Determines the security setting for the router. The
recommended setting and default is WPA2-PSK
(Wi-Fi Protected Access 2 – Pre-Shared Key). Other
settings include WPA/WPA2-PSK (Wi-Fi Protected
Access/ Wi-Fi Protected Access 2 – Pre-Shared
Key) (most compatible); WPA2-Enterprise; or
WPA/WPA2-Enterprise. 802.11n performance is only
available in WPA2.
Password
(Network Key)
Enter a password for your network (SSID). Your
password is case-sensitive and must be between 8
and 63 characters. You can use any alphanumeric
characters (digits 0-9 and letters A-Z, either upper-
or lower-case) and printable special characters
(such as $, !, ?, &, #, @ and others).
Router Configuration Screen Descriptions
RAC2V1A Router User Guide 50
Advanced Settings
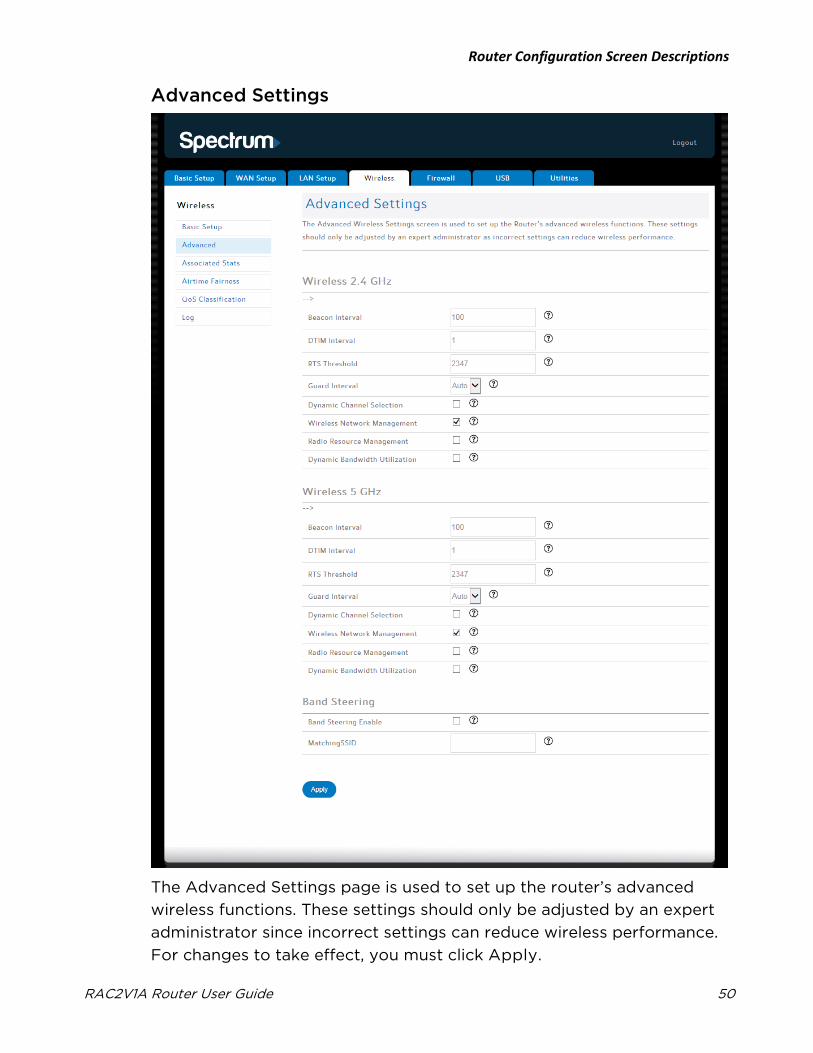
The Advanced Settings page is used to set up the router’s advanced
wireless functions. These settings should only be adjusted by an expert
administrator since incorrect settings can reduce wireless performance.
For changes to take effect, you must click Apply.
Router Configuration Screen Descriptions
RAC2V1A Router User Guide 51
Wireless 2.4 GHz/Wireless 5 GHz
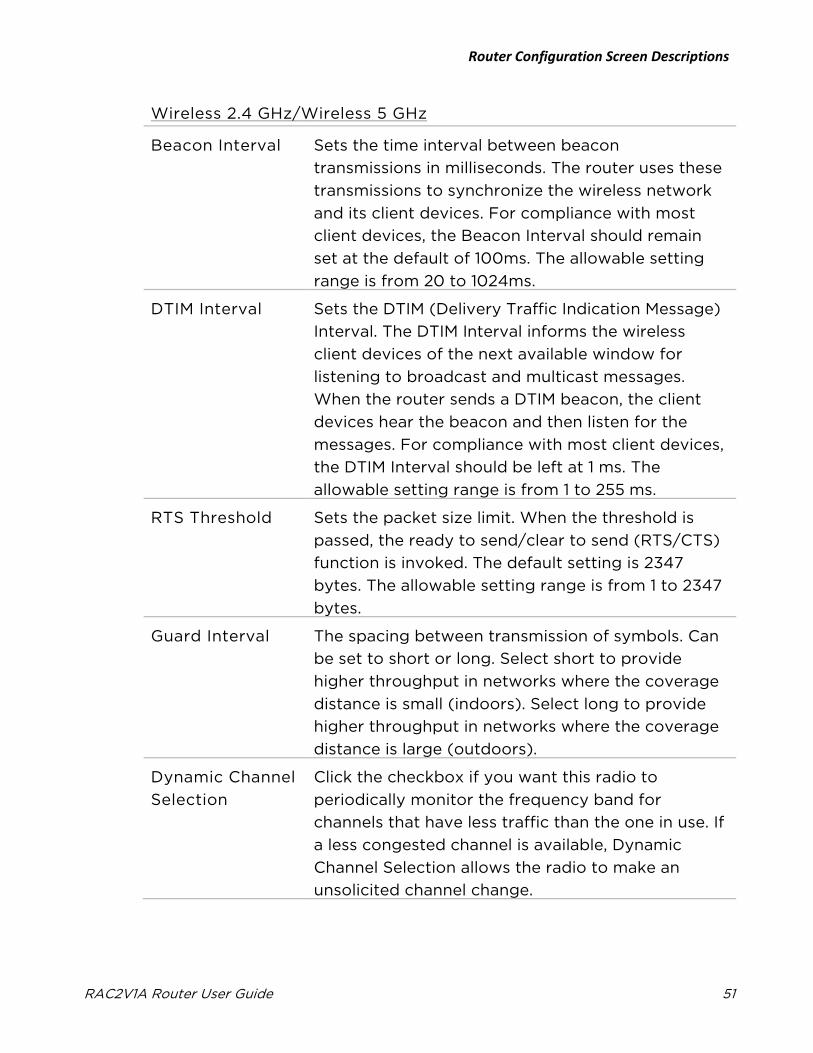
Beacon Interval Sets the time interval between beacon
transmissions in milliseconds. The router uses these
transmissions to synchronize the wireless network
and its client devices. For compliance with most
client devices, the Beacon Interval should remain
set at the default of 100ms. The allowable setting
range is from 20 to 1024ms.
DTIM Interval Sets the DTIM (Delivery Traffic Indication Message)
Interval. The DTIM Interval informs the wireless
client devices of the next available window for
listening to broadcast and multicast messages.
When the router sends a DTIM beacon, the client
devices hear the beacon and then listen for the
messages. For compliance with most client devices,
the DTIM Interval should be left at 1 ms. The
allowable setting range is from 1 to 255 ms.
RTS Threshold Sets the packet size limit. When the threshold is
passed, the ready to send/clear to send (RTS/CTS)
function is invoked. The default setting is 2347
bytes. The allowable setting range is from 1 to 2347
bytes.
Guard Interval The spacing between transmission of symbols. Can
be set to short or long. Select short to provide
higher throughput in networks where the coverage
distance is small (indoors). Select long to provide
higher throughput in networks where the coverage
distance is large (outdoors).
Dynamic Channel
Selection
Click the checkbox if you want this radio to
periodically monitor the frequency band for
channels that have less traffic than the one in use. If
a less congested channel is available, Dynamic
Channel Selection allows the radio to make an
unsolicited channel change.
Router Configuration Screen Descriptions
RAC2V1A Router User Guide 52
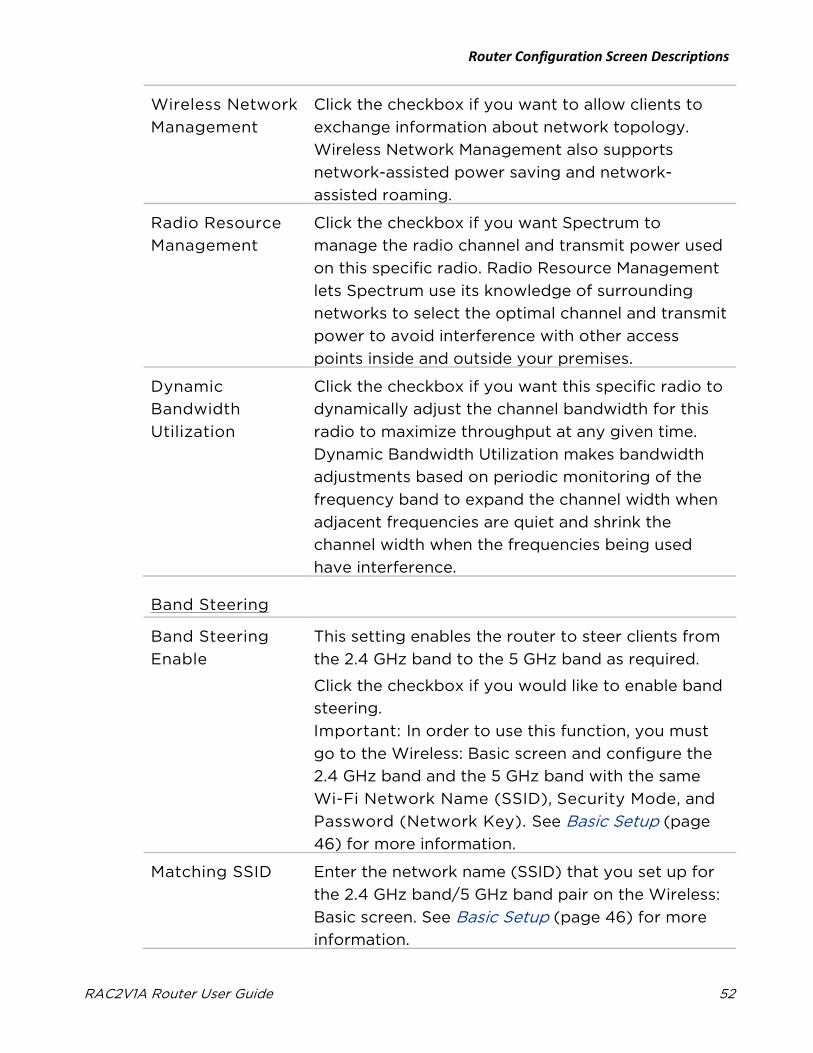
Wireless Network
Management
Click the checkbox if you want to allow clients to
exchange information about network topology.
Wireless Network Management also supports
network-assisted power saving and network-
assisted roaming.
Radio Resource
Management
Click the checkbox if you want Spectrum to
manage the radio channel and transmit power used
on this specific radio. Radio Resource Management
lets Spectrum use its knowledge of surrounding
networks to select the optimal channel and transmit
power to avoid interference with other access
points inside and outside your premises.
Dynamic
Bandwidth
Utilization
Click the checkbox if you want this specific radio to
dynamically adjust the channel bandwidth for this
radio to maximize throughput at any given time.
Dynamic Bandwidth Utilization makes bandwidth
adjustments based on periodic monitoring of the
frequency band to expand the channel width when
adjacent frequencies are quiet and shrink the
channel width when the frequencies being used
have interference.
Band Steering
Band Steering
Enable
This setting enables the router to steer clients from
the 2.4 GHz band to the 5 GHz band as required.
Click the checkbox if you would like to enable band
steering.
Important: In order to use this function, you must
go to the Wireless: Basic screen and configure the
2.4 GHz band and the 5 GHz band with the same
Wi-Fi Network Name (SSID), Security Mode, and
Password (Network Key). See Basic Setup (page
46) for more information.
Matching SSID Enter the network name (SSID) that you set up for
the 2.4 GHz band/5 GHz band pair on the Wireless:
Basic screen. See Basic Setup (page 46) for more
information.
Router Configuration Screen Descriptions
RAC2V1A Router User Guide 53
Associated Stats
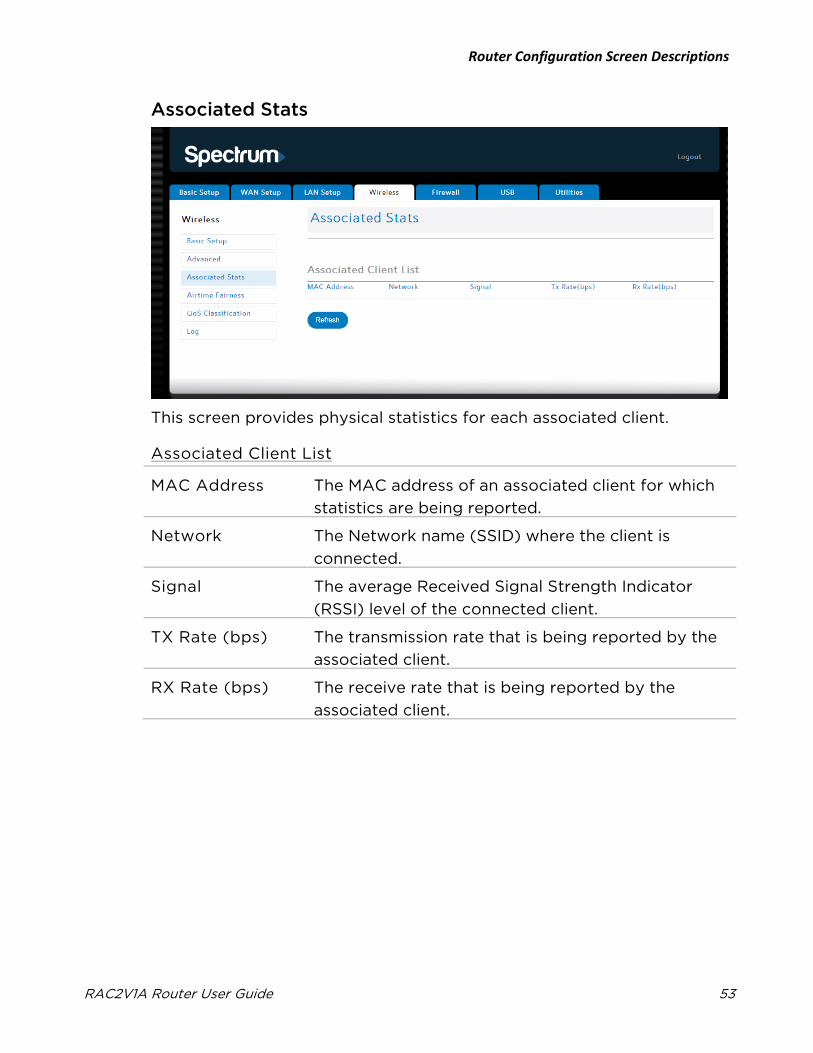
This screen provides physical statistics for each associated client.
Associated Client List
MAC Address The MAC address of an associated client for which
statistics are being reported.
Network The Network name (SSID) where the client is
connected.
Signal The average Received Signal Strength Indicator
(RSSI) level of the connected client.
TX Rate (bps) The transmission rate that is being reported by the
associated client.
RX Rate (bps) The receive rate that is being reported by the
associated client.
Router Configuration Screen Descriptions
RAC2V1A Router User Guide 54
Airtime Fairness
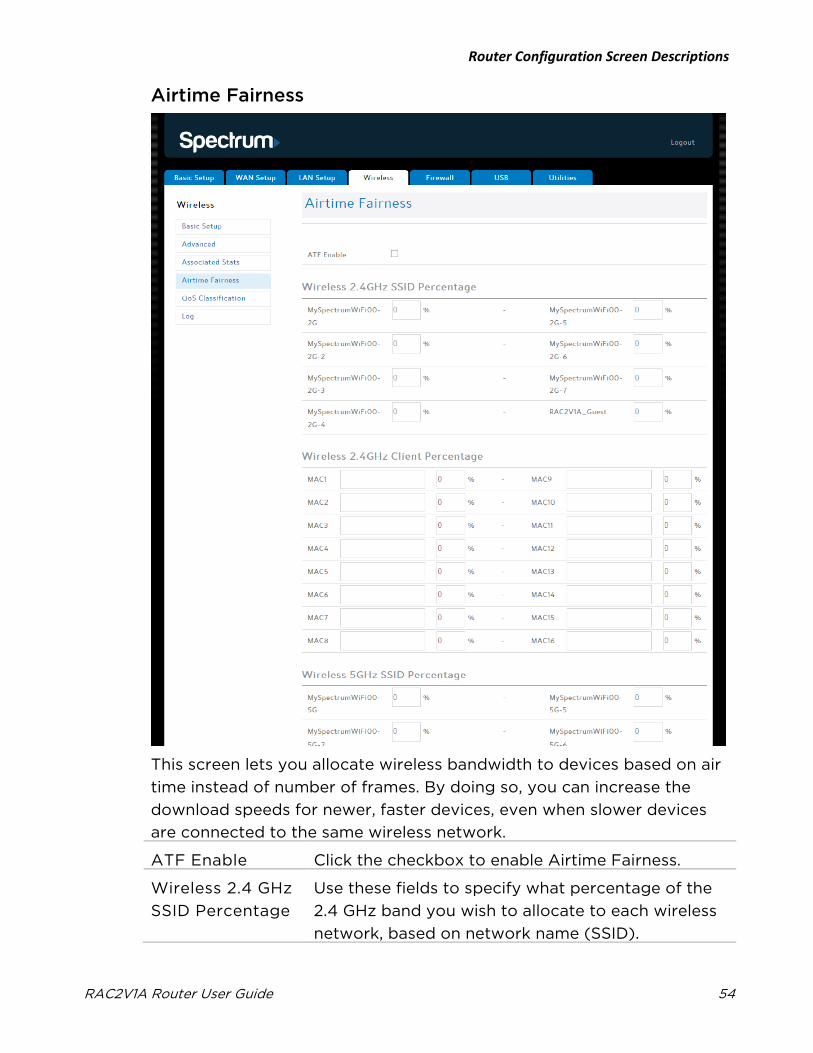
This screen lets you allocate wireless bandwidth to devices based on air
time instead of number of frames. By doing so, you can increase the
download speeds for newer, faster devices, even when slower devices
are connected to the same wireless network.
ATF Enable Click the checkbox to enable Airtime Fairness.
Wireless 2.4 GHz
SSID Percentage
Use these fields to specify what percentage of the
2.4 GHz band you wish to allocate to each wireless
network, based on network name (SSID).
Router Configuration Screen Descriptions
RAC2V1A Router User Guide 55
Wireless 2.4 GHz
Client
Percentage
Use these fields to specify what percentage of the
2.4 GHz band you wish to allocate to each device,
based on MAC address. You can enter up to 16 MAC
addresses.
Wireless 5 GHz
SSID Percentage
Use these fields to specify what percentage of the
5 GHz band you wish to allocate to each wireless
network, based on network name (SSID).
Wireless 5 GHz
Client
Percentage
Use these fields to specify what percentage of the
5 GHz band you wish to allocate to each device,
based on MAC address. You can enter up to 16 MAC
addresses.

Router Configuration Screen Descriptions
RAC2V1A Router User Guide 56
QoS Classification
Router Configuration Screen Descriptions
RAC2V1A Router User Guide 57
This screen shows the mapping of network name (SSID) priorities and
Differentiated Services Code Point (DSCP) remarking. DSCP specifies
the priority for queueing IP packets before they are forwarded.
For example, you could set the Home as a Hotspot (HaaH) SSID as a
lower priority than the primary SSID to make sure that the owner of the
service always gets priority treatment.
If you select SSID Priority as the classification method, all of the L3
DSCP/ToS values for the transmission packets (LAN/WAN to WLAN)
will be remarked to the same 802.11e QoS control field value.
If you select DSCP Remarking as the classification method, the L3
DSCP/ToS value of the transmission packets (LAN/WAN to WLAN) will
be remarked to 802.11e QoS control field values following the DSCP
remarking table below.
Wireless 2.4 GHz/Wireless 5 GHz
SSID Choose the network name (SSID) settings that you
want to display or modify.
Enable
Classification
Click the checkbox if you want to enable this
classification on your system.
Classification
Method
Choose a classification method for your router.
Options are SSID Priority or DSCP Remarking.
SSID Priority If you choose SSID Priority as the classification
method, choose the priority to assign to each
packet. Options are:
• 0 maps to Layer 2 CoS value 2 and 802.11e WMM
Access Category BK. This is the lowest priority.
• 1 maps to Layer 2 CoS value 0 and 802.11e WMM
Access Category BE.
• 2 maps to Layer 2 CoS value 4 and 802.11e WMM
Access Category VI.
• 3 maps to Layer 2 CoS value 6 and 802.11e WMM
Access Category VO. This is the highest priority.
Router Configuration Screen Descriptions
RAC2V1A Router User Guide 58
DSCP Remarking Table
This section defines the mapping relationship between L3 DSCP value,
L2 ToS value, and 802.11e QoS control field value. We recommend that
you do not change the default values displayed on the screen.
DSCP The DSCP value for this entry.
Binary The binary value for this DSCP entry.
Decimal The decimal value for this DSCP entry.
Wireless Tos The wireless type of service. Larger values indicate
a higher priority.
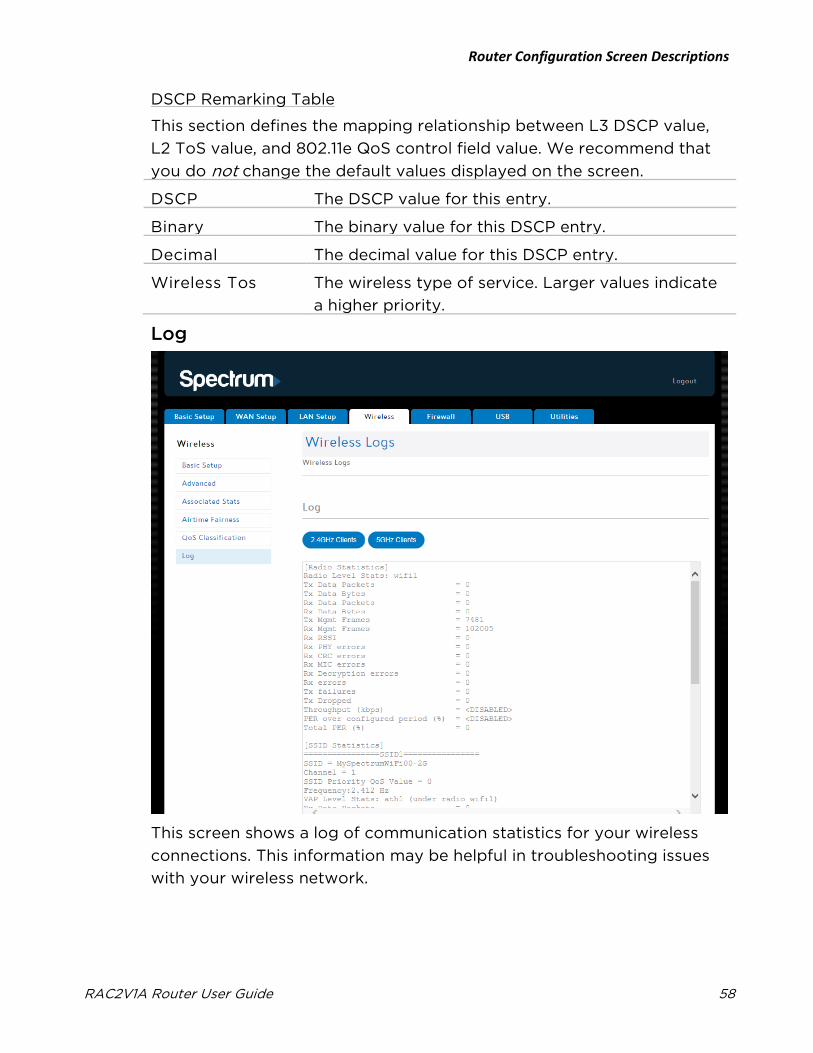
Log
This screen shows a log of communication statistics for your wireless
connections. This information may be helpful in troubleshooting issues
with your wireless network.
Router Configuration Screen Descriptions
RAC2V1A Router User Guide 59
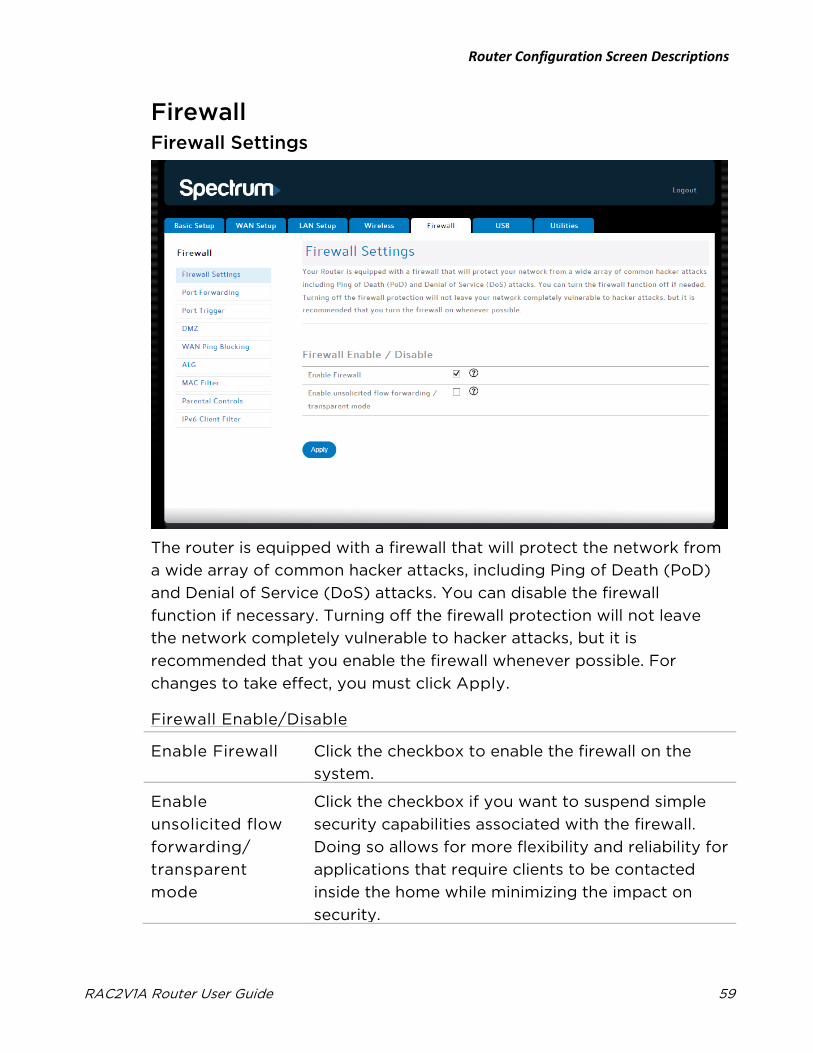
Firewall Firewall Settings
The router is equipped with a firewall that will protect the network from
a wide array of common hacker attacks, including Ping of Death (PoD)
and Denial of Service (DoS) attacks. You can disable the firewall
function if necessary. Turning off the firewall protection will not leave
the network completely vulnerable to hacker attacks, but it is
recommended that you enable the firewall whenever possible. For
changes to take effect, you must click Apply.
Firewall Enable/Disable
Enable Firewall Click the checkbox to enable the firewall on the
system.
Enable
unsolicited flow
forwarding/
transparent
mode
Click the checkbox if you want to suspend simple
security capabilities associated with the firewall.
Doing so allows for more flexibility and reliability for
applications that require clients to be contacted
inside the home while minimizing the impact on
security.
Router Configuration Screen Descriptions
RAC2V1A Router User Guide 60
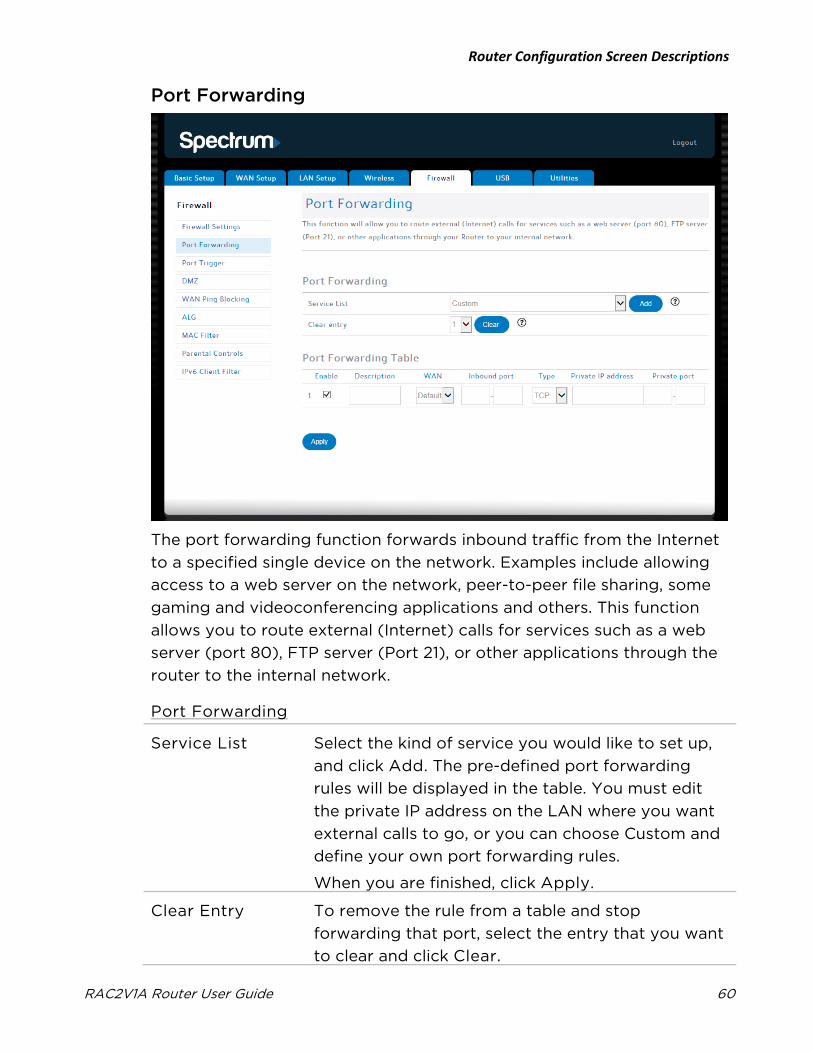
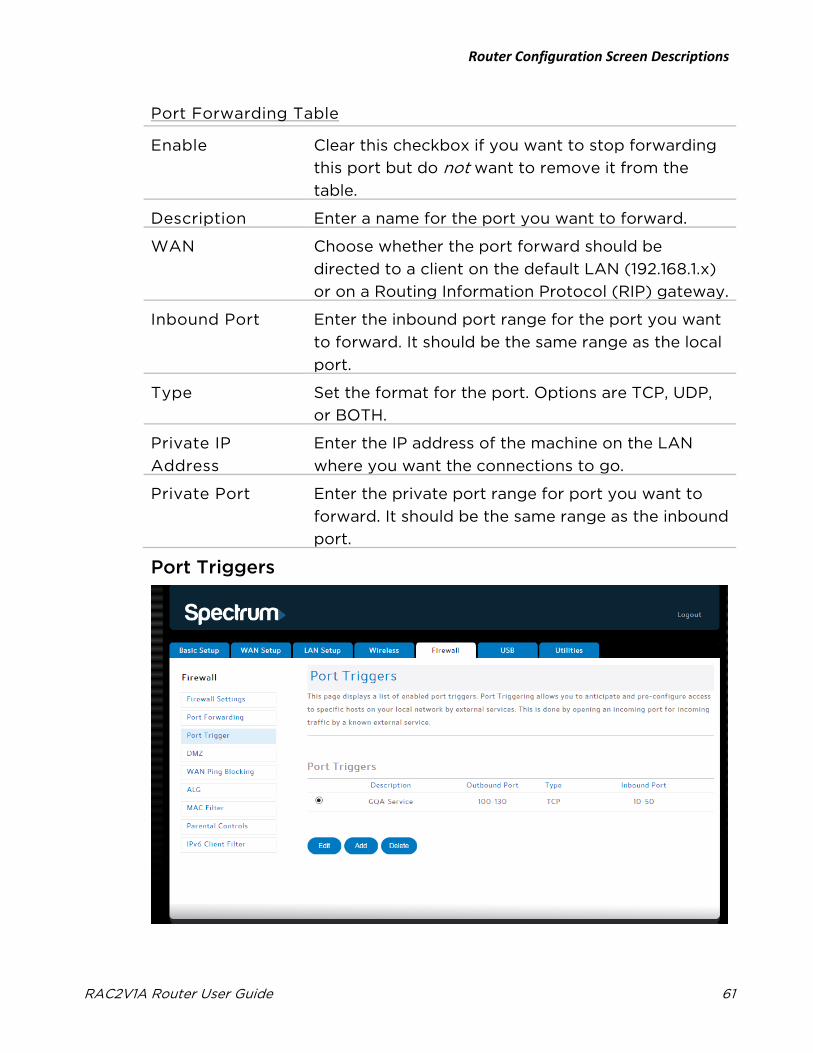
Port Forwarding
The port forwarding function forwards inbound traffic from the Internet
to a specified single device on the network. Examples include allowing
access to a web server on the network, peer-to-peer file sharing, some
gaming and videoconferencing applications and others. This function
allows you to route external (Internet) calls for services such as a web
server (port 80), FTP server (Port 21), or other applications through the
router to the internal network.
Port Forwarding
Service List Select the kind of service you would like to set up,
and click Add. The pre-defined port forwarding
rules will be displayed in the table. You must edit
the private IP address on the LAN where you want
external calls to go, or you can choose Custom and
define your own port forwarding rules.
When you are finished, click Apply.
Clear Entry To remove the rule from a table and stop
forwarding that port, select the entry that you want
to clear and click Clear.
Router Configuration Screen Descriptions
RAC2V1A Router User Guide 61
Port Forwarding Table
Enable Clear this checkbox if you want to stop forwarding
this port but do not want to remove it from the
table.
Description Enter a name for the port you want to forward.
WAN Choose whether the port forward should be
directed to a client on the default LAN (192.168.1.x)
or on a Routing Information Protocol (RIP) gateway.
Inbound Port Enter the inbound port range for the port you want
to forward. It should be the same range as the local
port.
Type Set the format for the port. Options are TCP, UDP,
or BOTH.
Private IP
Address
Enter the IP address of the machine on the LAN
where you want the connections to go.
Private Port Enter the private port range for port you want to
forward. It should be the same range as the inbound
port.
Port Triggers
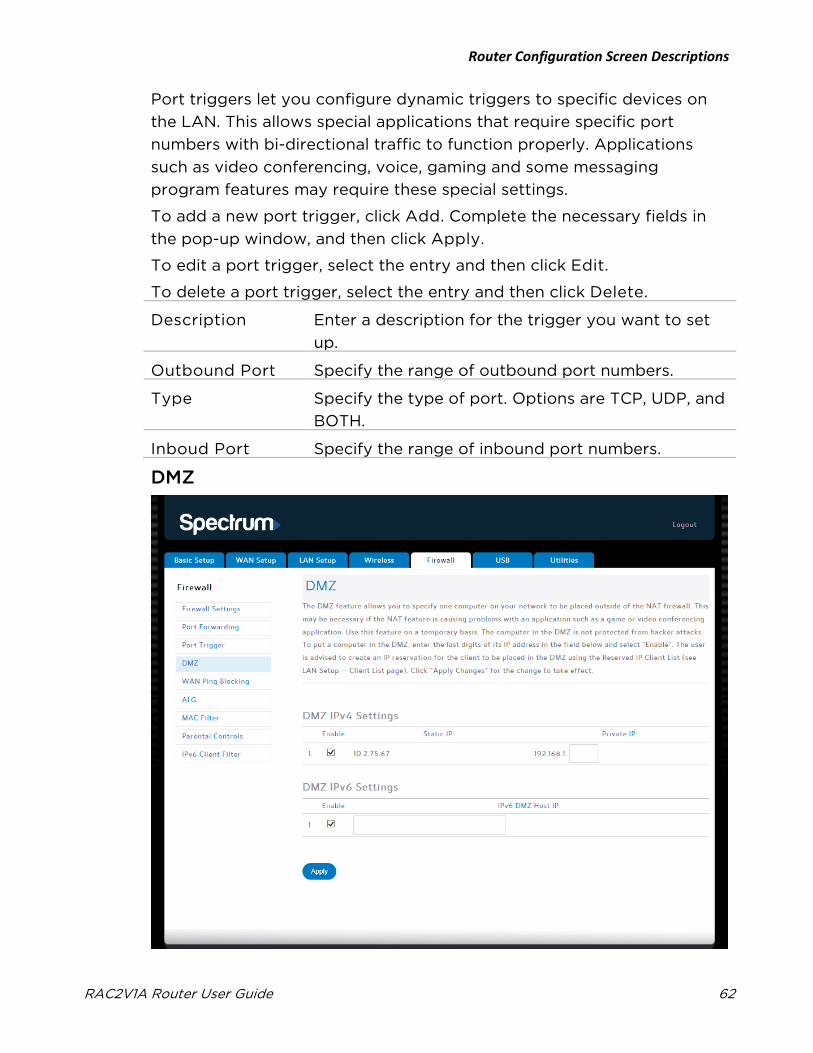
Router Configuration Screen Descriptions
RAC2V1A Router User Guide 62
Port triggers let you configure dynamic triggers to specific devices on
the LAN. This allows special applications that require specific port
numbers with bi-directional traffic to function properly. Applications
such as video conferencing, voice, gaming and some messaging
program features may require these special settings.
To add a new port trigger, click Add. Complete the necessary fields in
the pop-up window, and then click Apply.
To edit a port trigger, select the entry and then click Edit.
To delete a port trigger, select the entry and then click Delete.
Description Enter a description for the trigger you want to set
up.
Outbound Port Specify the range of outbound port numbers.
Type Specify the type of port. Options are TCP, UDP, and
BOTH.
Inboud Port Specify the range of inbound port numbers.
DMZ
Router Configuration Screen Descriptions
RAC2V1A Router User Guide 63
The DMZ feature allows you to specify one computer on the network to
be placed outside of the NAT firewall. This may be necessary if the NAT
feature is causing problems with an application such as a game or video
conferencing application.
Use this feature only on a temporary basis. The computer in the DMZ is
not protected from hacker attacks.
To put a computer in the DMZ, click the Enable checkbox, enter its IP
address, and click Apply.
DMZ IPv4 Settings
Enable Clear this checkbox if you want to remove the
computer from the DMZ and disable the DMZ on
the network.
Static IP Displays router’s WAN IP address. This is the
address that external devices will use to contact the
computer in the DMZ.
Private IP Enter the IPv4 address of the computer to be
placed in the DMZ. Be sure that the address is not in
the range of addresses delivered by the DHCP
server if enabled. Once you place the computer in
the DMZ, all ports on the computer are open to the
Internet and not protected.
DMZ IPv6 Settings
Enable Clear this checkbox if you want to remove the
computer from the DMZ and disable the DMZ on
the network.
IPv6 DMZ Host IP Enter the IPv6 address of the computer to be
placed in the DMZ. Be sure that the address is not in
the range of addresses delivered by the DHCP
server if enabled. Once you place the computer in
the DMZ, all ports on the computer are open to the
Internet and not protected.
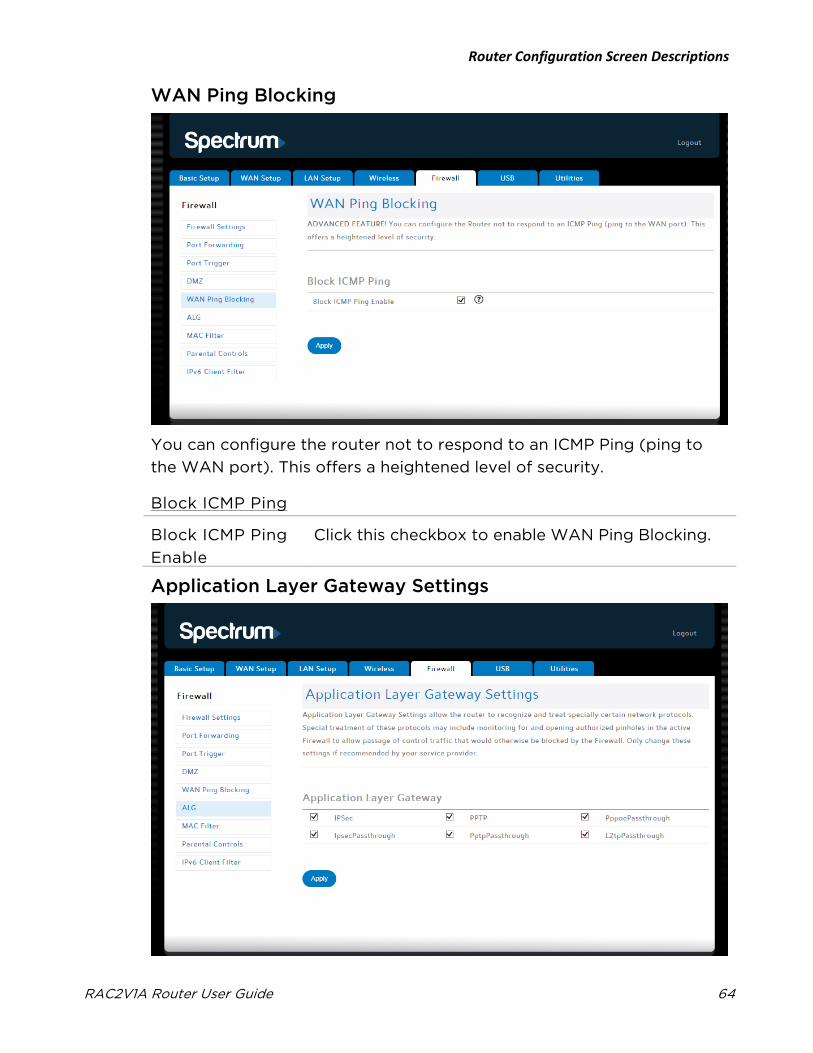
Router Configuration Screen Descriptions
RAC2V1A Router User Guide 64
WAN Ping Blocking
You can configure the router not to respond to an ICMP Ping (ping to
the WAN port). This offers a heightened level of security.
Block ICMP Ping
Block ICMP Ping
Enable
Click this checkbox to enable WAN Ping Blocking.
Application Layer Gateway Settings
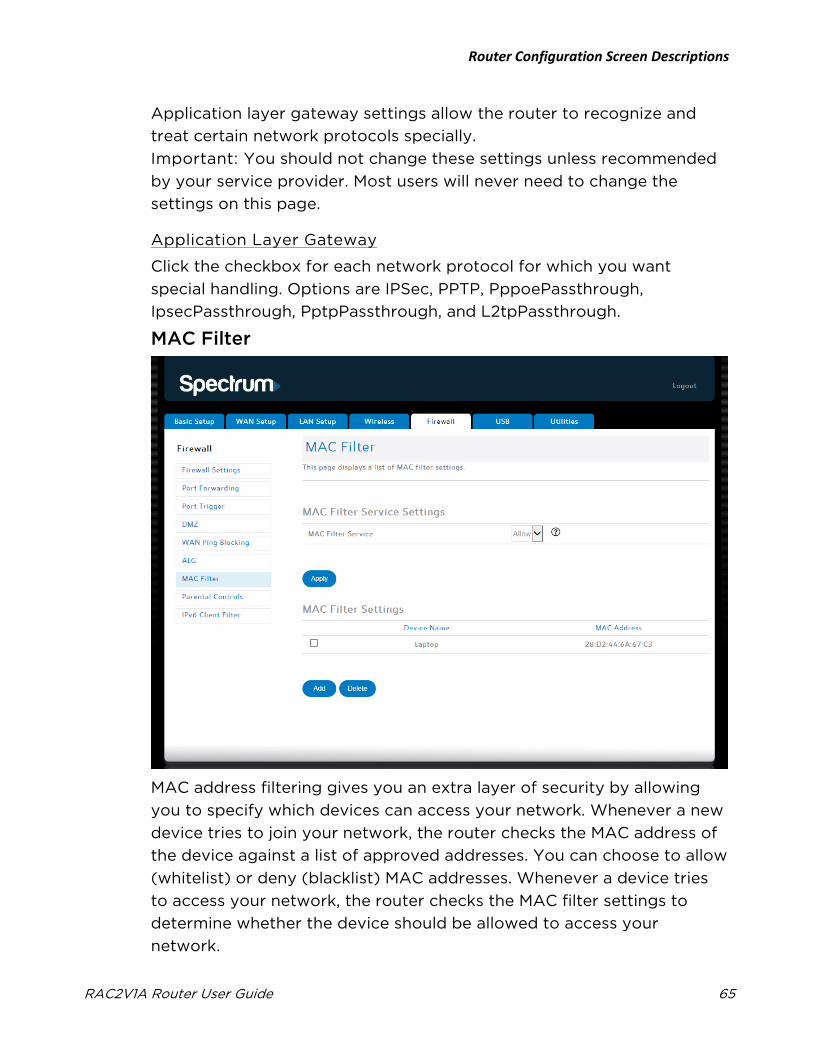
Router Configuration Screen Descriptions
RAC2V1A Router User Guide 65
Application layer gateway settings allow the router to recognize and
treat certain network protocols specially.
Important: You should not change these settings unless recommended
by your service provider. Most users will never need to change the
settings on this page.
Application Layer Gateway
Click the checkbox for each network protocol for which you want
special handling. Options are IPSec, PPTP, PppoePassthrough,
IpsecPassthrough, PptpPassthrough, and L2tpPassthrough.
MAC Filter
MAC address filtering gives you an extra layer of security by allowing
you to specify which devices can access your network. Whenever a new
device tries to join your network, the router checks the MAC address of
the device against a list of approved addresses. You can choose to allow
(whitelist) or deny (blacklist) MAC addresses. Whenever a device tries
to access your network, the router checks the MAC filter settings to
determine whether the device should be allowed to access your
network.
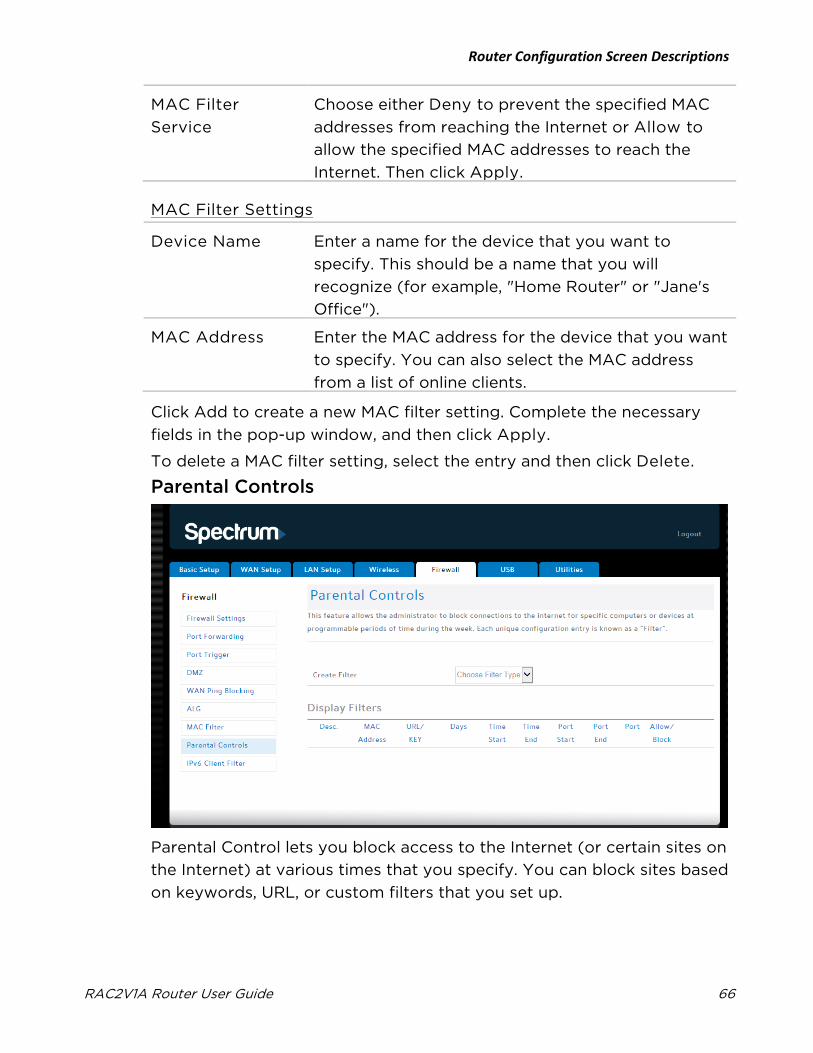
Router Configuration Screen Descriptions
RAC2V1A Router User Guide 66
MAC Filter
Service
Choose either Deny to prevent the specified MAC
addresses from reaching the Internet or Allow to
allow the specified MAC addresses to reach the
Internet. Then click Apply.
MAC Filter Settings
Device Name Enter a name for the device that you want to
specify. This should be a name that you will
recognize (for example, "Home Router" or "Jane's
Office").
MAC Address Enter the MAC address for the device that you want
to specify. You can also select the MAC address
from a list of online clients.
Click Add to create a new MAC filter setting. Complete the necessary
fields in the pop-up window, and then click Apply.
To delete a MAC filter setting, select the entry and then click Delete.
Parental Controls
Parental Control lets you block access to the Internet (or certain sites on
the Internet) at various times that you specify. You can block sites based
on keywords, URL, or custom filters that you set up.
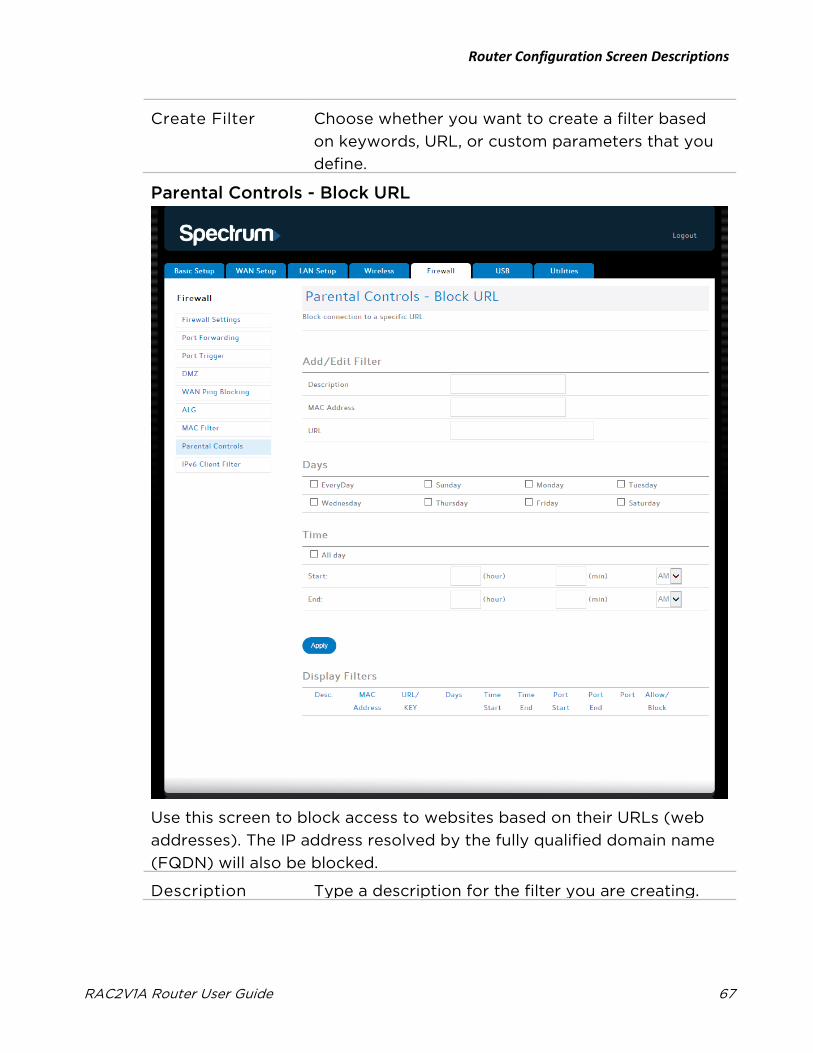
Router Configuration Screen Descriptions
RAC2V1A Router User Guide 67
Create Filter Choose whether you want to create a filter based
on keywords, URL, or custom parameters that you
define.
Parental Controls - Block URL
Use this screen to block access to websites based on their URLs (web
addresses). The IP address resolved by the fully qualified domain name
(FQDN) will also be blocked.
Description Type a description for the filter you are creating.
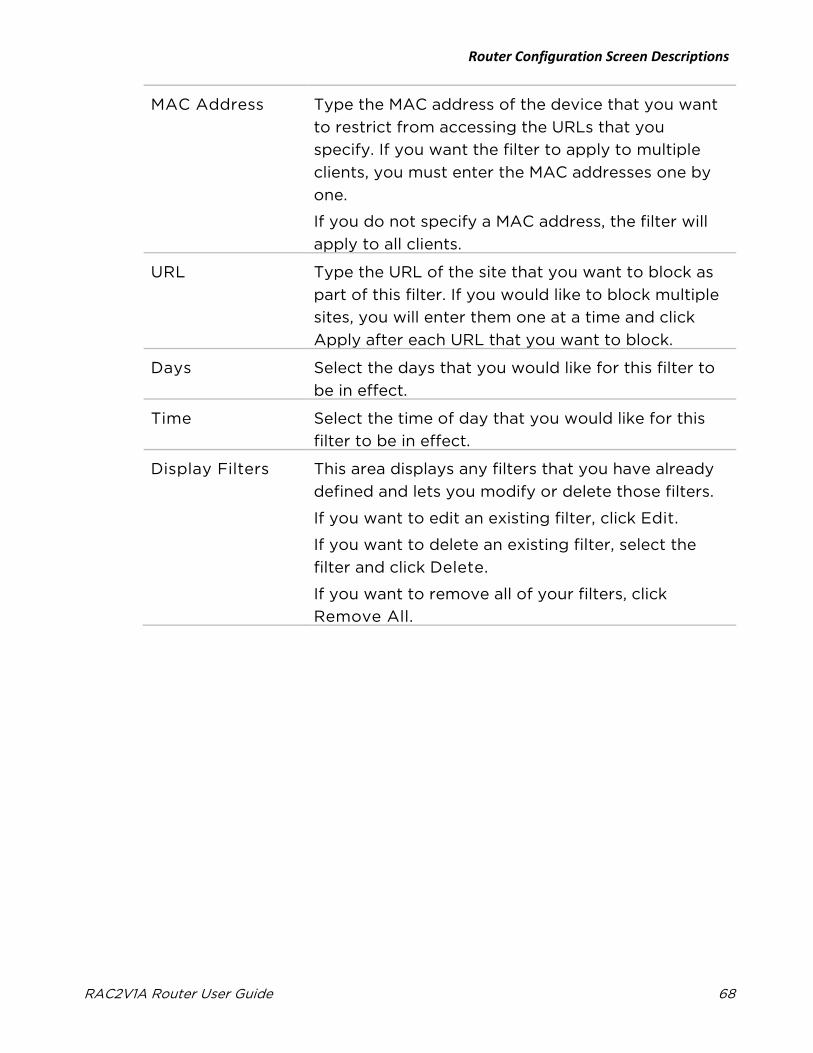
Router Configuration Screen Descriptions
RAC2V1A Router User Guide 68
MAC Address Type the MAC address of the device that you want
to restrict from accessing the URLs that you
specify. If you want the filter to apply to multiple
clients, you must enter the MAC addresses one by
one.
If you do not specify a MAC address, the filter will
apply to all clients.
URL Type the URL of the site that you want to block as
part of this filter. If you would like to block multiple
sites, you will enter them one at a time and click
Apply after each URL that you want to block.
Days Select the days that you would like for this filter to
be in effect.
Time Select the time of day that you would like for this
filter to be in effect.
Display Filters This area displays any filters that you have already
defined and lets you modify or delete those filters.
If you want to edit an existing filter, click Edit.
If you want to delete an existing filter, select the
filter and click Delete.
If you want to remove all of your filters, click
Remove All.
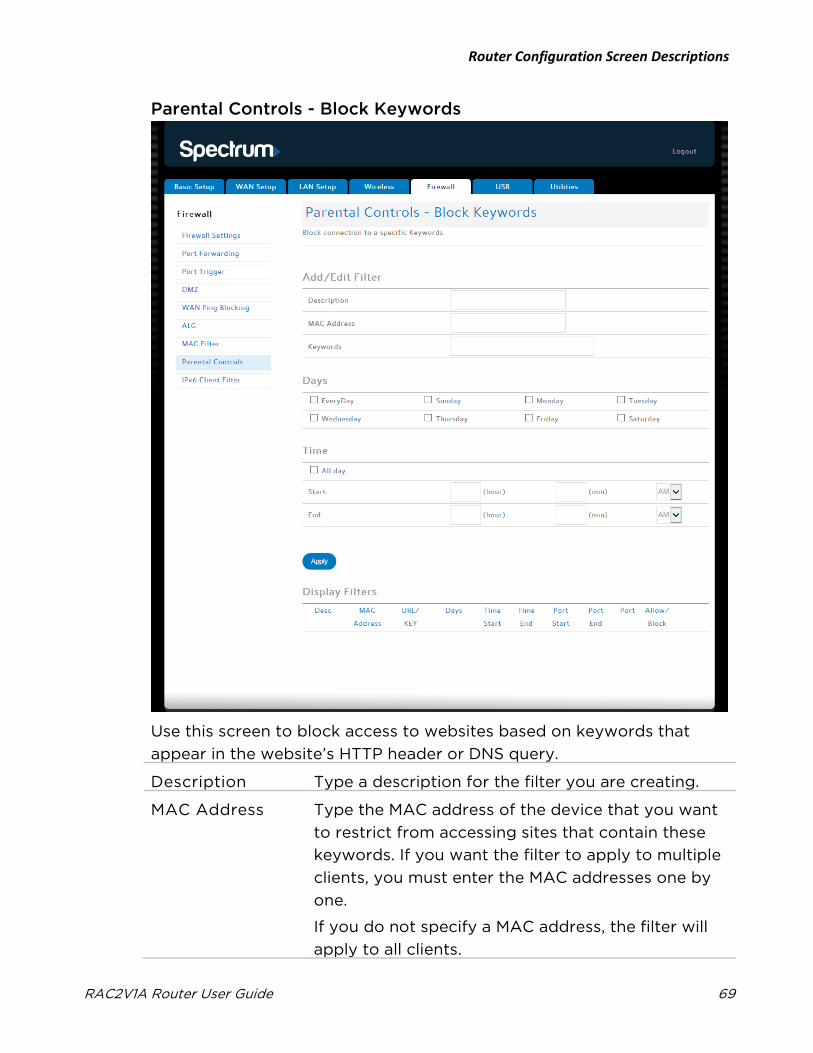
Router Configuration Screen Descriptions
RAC2V1A Router User Guide 69
Parental Controls - Block Keywords
Use this screen to block access to websites based on keywords that
appear in the website’s HTTP header or DNS query.
Description Type a description for the filter you are creating.
MAC Address Type the MAC address of the device that you want
to restrict from accessing sites that contain these
keywords. If you want the filter to apply to multiple
clients, you must enter the MAC addresses one by
one.
If you do not specify a MAC address, the filter will
apply to all clients.
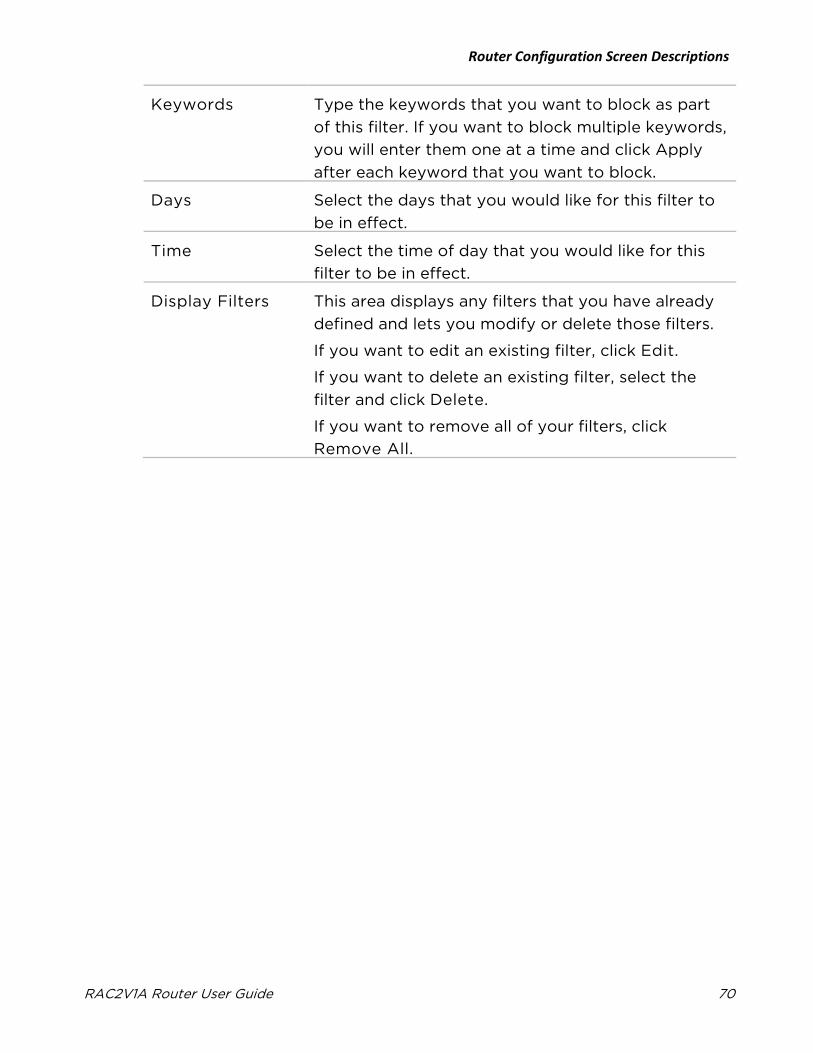
Router Configuration Screen Descriptions
RAC2V1A Router User Guide 70
Keywords Type the keywords that you want to block as part
of this filter. If you want to block multiple keywords,
you will enter them one at a time and click Apply
after each keyword that you want to block.
Days Select the days that you would like for this filter to
be in effect.
Time Select the time of day that you would like for this
filter to be in effect.
Display Filters This area displays any filters that you have already
defined and lets you modify or delete those filters.
If you want to edit an existing filter, click Edit.
If you want to delete an existing filter, select the
filter and click Delete.
If you want to remove all of your filters, click
Remove All.
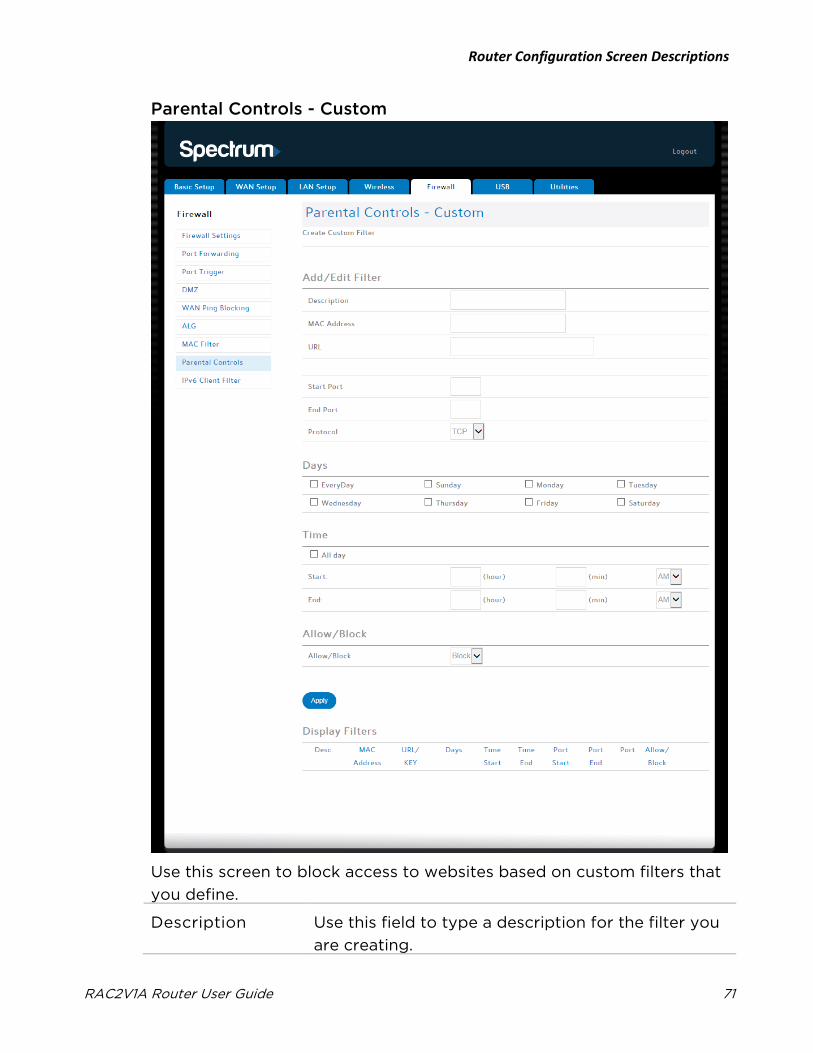
Router Configuration Screen Descriptions
RAC2V1A Router User Guide 71
Parental Controls - Custom
Use this screen to block access to websites based on custom filters that
you define.
Description Use this field to type a description for the filter you
are creating.
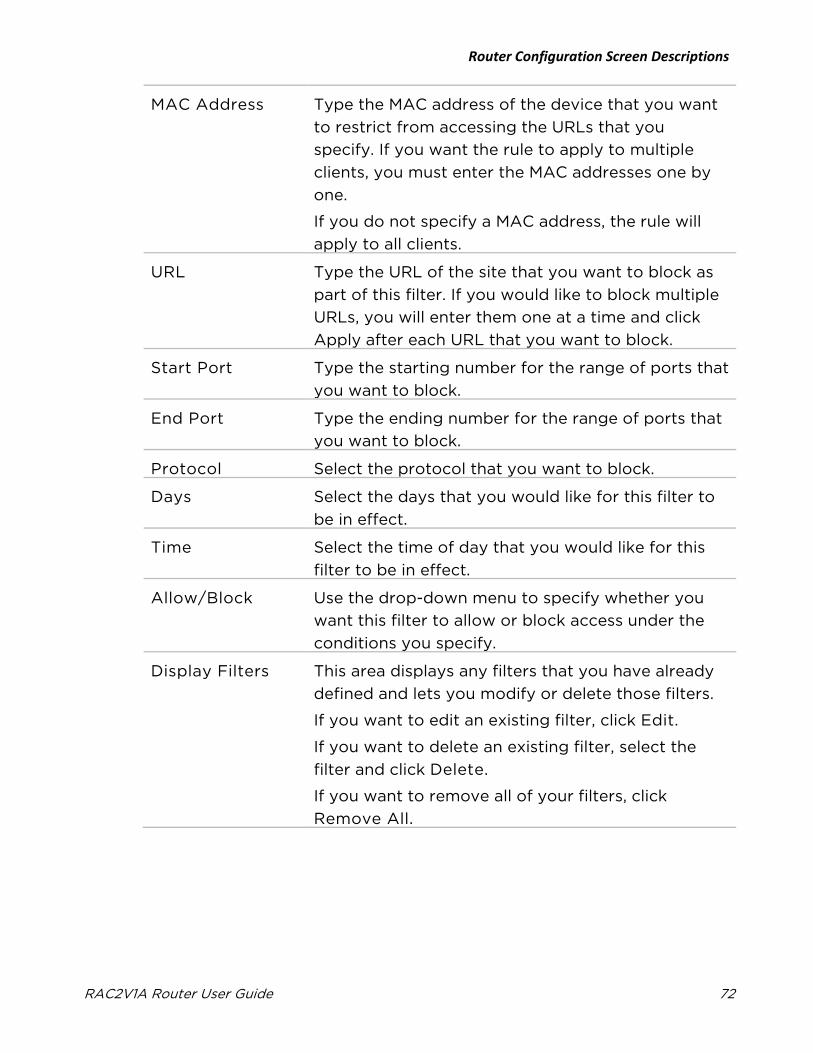
Router Configuration Screen Descriptions
RAC2V1A Router User Guide 72
MAC Address Type the MAC address of the device that you want
to restrict from accessing the URLs that you
specify. If you want the rule to apply to multiple
clients, you must enter the MAC addresses one by
one.
If you do not specify a MAC address, the rule will
apply to all clients.
URL Type the URL of the site that you want to block as
part of this filter. If you would like to block multiple
URLs, you will enter them one at a time and click
Apply after each URL that you want to block.
Start Port Type the starting number for the range of ports that
you want to block.
End Port Type the ending number for the range of ports that
you want to block.
Protocol Select the protocol that you want to block.
Days Select the days that you would like for this filter to
be in effect.
Time Select the time of day that you would like for this
filter to be in effect.
Allow/Block Use the drop-down menu to specify whether you
want this filter to allow or block access under the
conditions you specify.
Display Filters This area displays any filters that you have already
defined and lets you modify or delete those filters.
If you want to edit an existing filter, click Edit.
If you want to delete an existing filter, select the
filter and click Delete.
If you want to remove all of your filters, click
Remove All.
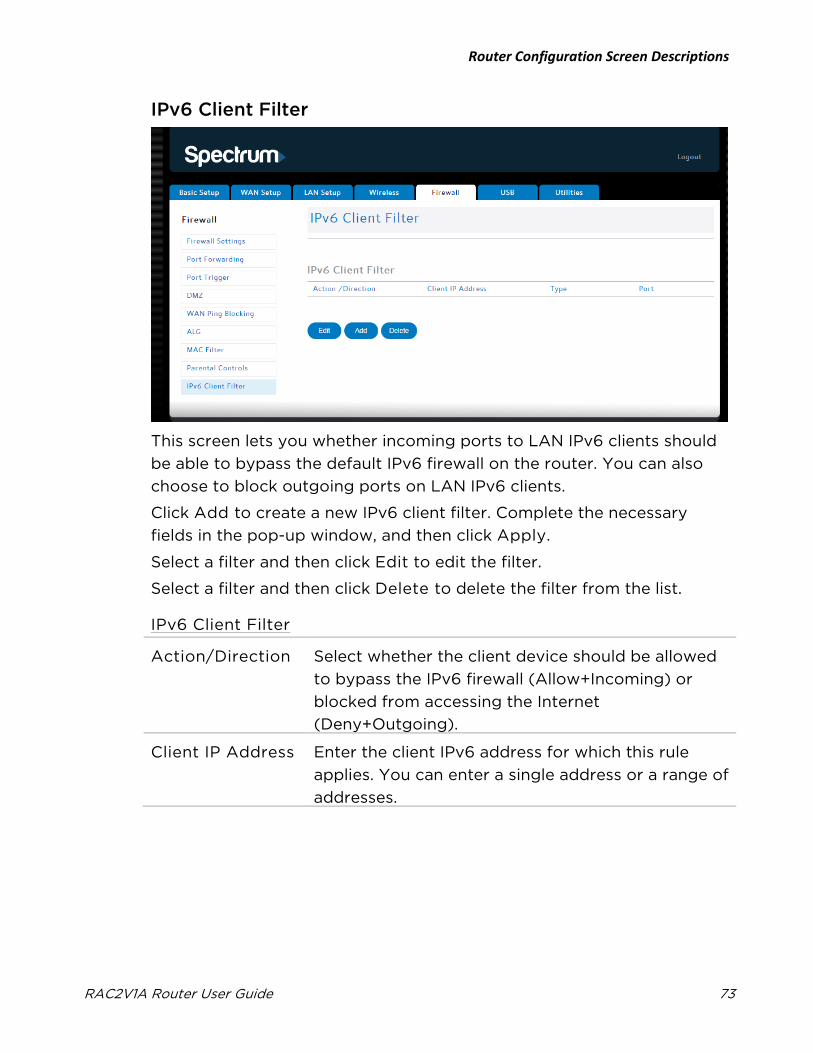
Router Configuration Screen Descriptions
RAC2V1A Router User Guide 73
IPv6 Client Filter
This screen lets you whether incoming ports to LAN IPv6 clients should
be able to bypass the default IPv6 firewall on the router. You can also
choose to block outgoing ports on LAN IPv6 clients.
Click Add to create a new IPv6 client filter. Complete the necessary
fields in the pop-up window, and then click Apply.
Select a filter and then click Edit to edit the filter.
Select a filter and then click Delete to delete the filter from the list.
IPv6 Client Filter
Action/Direction Select whether the client device should be allowed
to bypass the IPv6 firewall (Allow+Incoming) or
blocked from accessing the Internet
(Deny+Outgoing).
Client IP Address Enter the client IPv6 address for which this rule
applies. You can enter a single address or a range of
addresses.
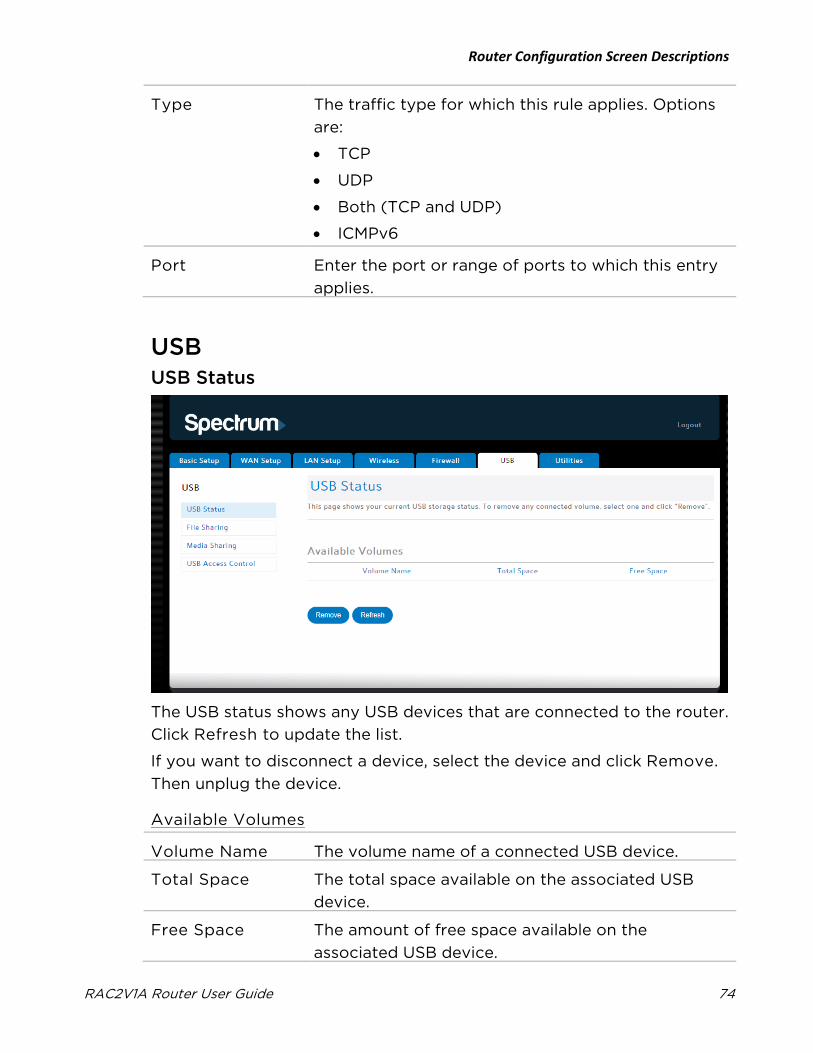
Router Configuration Screen Descriptions
RAC2V1A Router User Guide 74
Type The traffic type for which this rule applies. Options
are:
• TCP
• UDP
• Both (TCP and UDP)
• ICMPv6
Port Enter the port or range of ports to which this entry
applies.
USB USB Status
The USB status shows any USB devices that are connected to the router.
Click Refresh to update the list.
If you want to disconnect a device, select the device and click Remove.
Then unplug the device.
Available Volumes
Volume Name The volume name of a connected USB device.
Total Space The total space available on the associated USB
device.
Free Space The amount of free space available on the
associated USB device.

Router Configuration Screen Descriptions
RAC2V1A Router User Guide 75
File Sharing
File sharing lets you configure folders on the USB device so that you can
share files with other devices. An FTP server makes the folder available
for remote users over the Internet. Shared folders are available to users
on your local network.
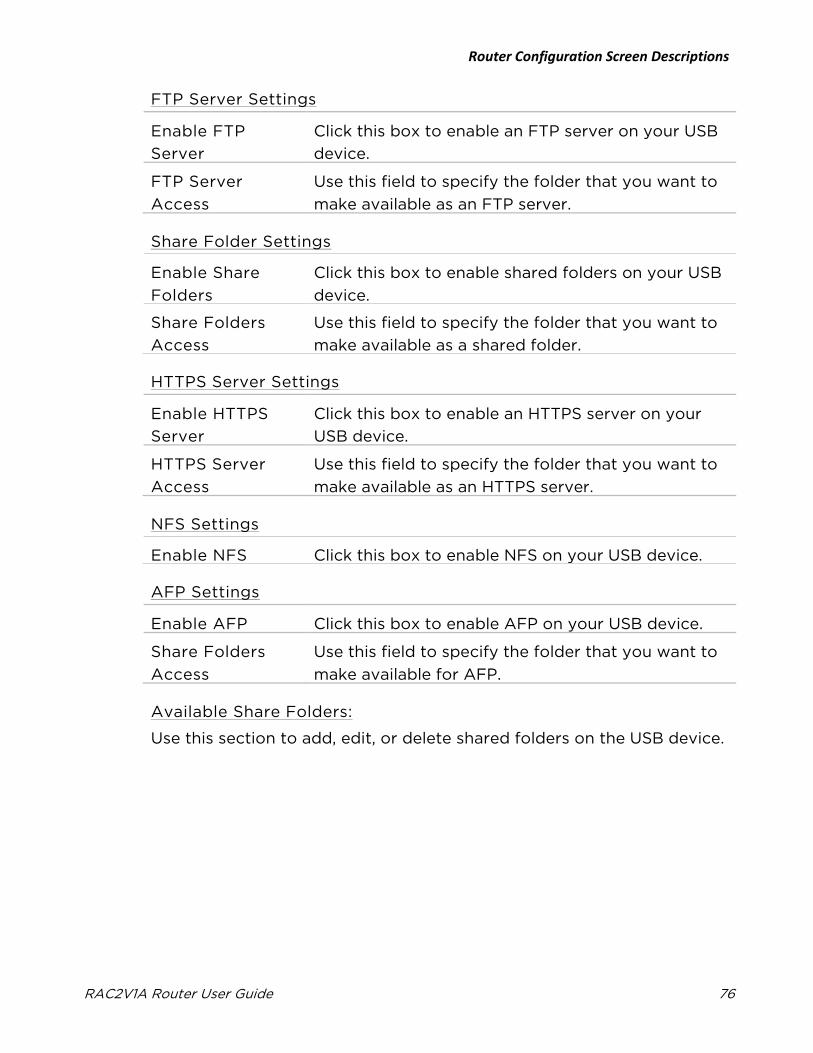
Router Configuration Screen Descriptions
RAC2V1A Router User Guide 76
FTP Server Settings
Enable FTP
Server
Click this box to enable an FTP server on your USB
device.
FTP Server
Access
Use this field to specify the folder that you want to
make available as an FTP server.
Share Folder Settings
Enable Share
Folders
Click this box to enable shared folders on your USB
device.
Share Folders
Access
Use this field to specify the folder that you want to
make available as a shared folder.
HTTPS Server Settings
Enable HTTPS
Server
Click this box to enable an HTTPS server on your
USB device.
HTTPS Server
Access
Use this field to specify the folder that you want to
make available as an HTTPS server.
NFS Settings
Enable NFS Click this box to enable NFS on your USB device.
AFP Settings
Enable AFP Click this box to enable AFP on your USB device.
Share Folders
Access
Use this field to specify the folder that you want to
make available for AFP.
Available Share Folders:
Use this section to add, edit, or delete shared folders on the USB device.
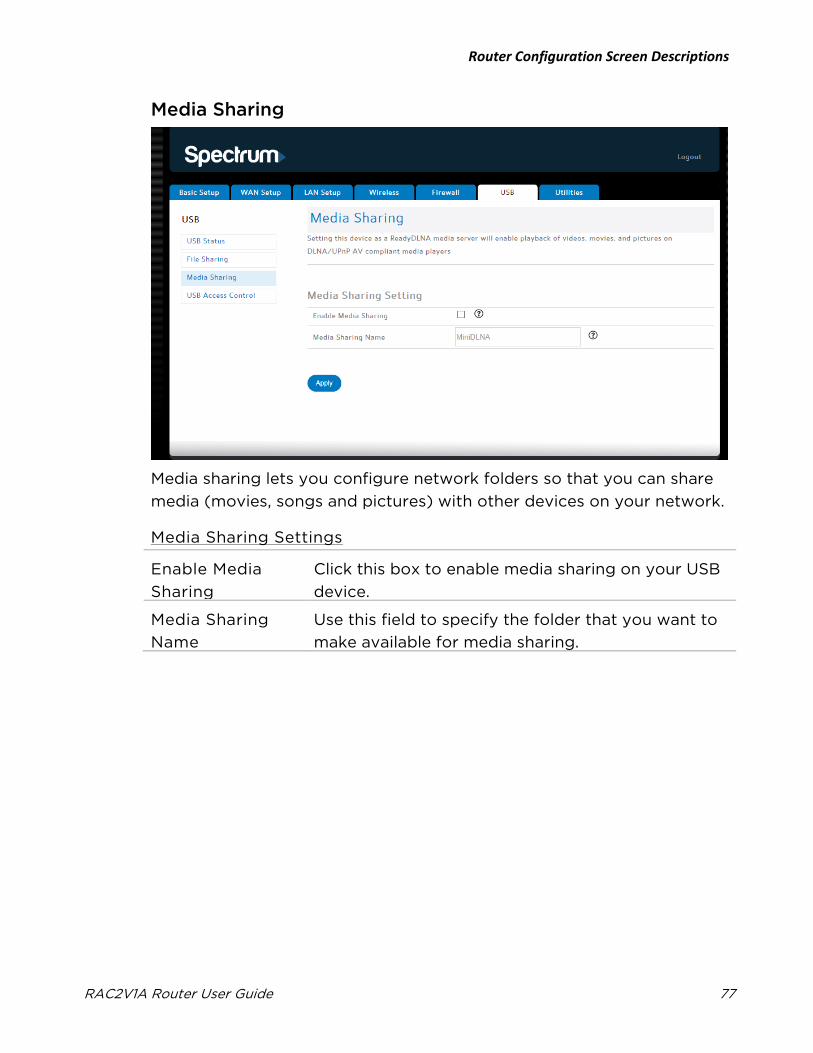
Router Configuration Screen Descriptions
RAC2V1A Router User Guide 77
Media Sharing
Media sharing lets you configure network folders so that you can share
media (movies, songs and pictures) with other devices on your network.
Media Sharing Settings
Enable Media
Sharing
Click this box to enable media sharing on your USB
device.
Media Sharing
Name
Use this field to specify the folder that you want to
make available for media sharing.
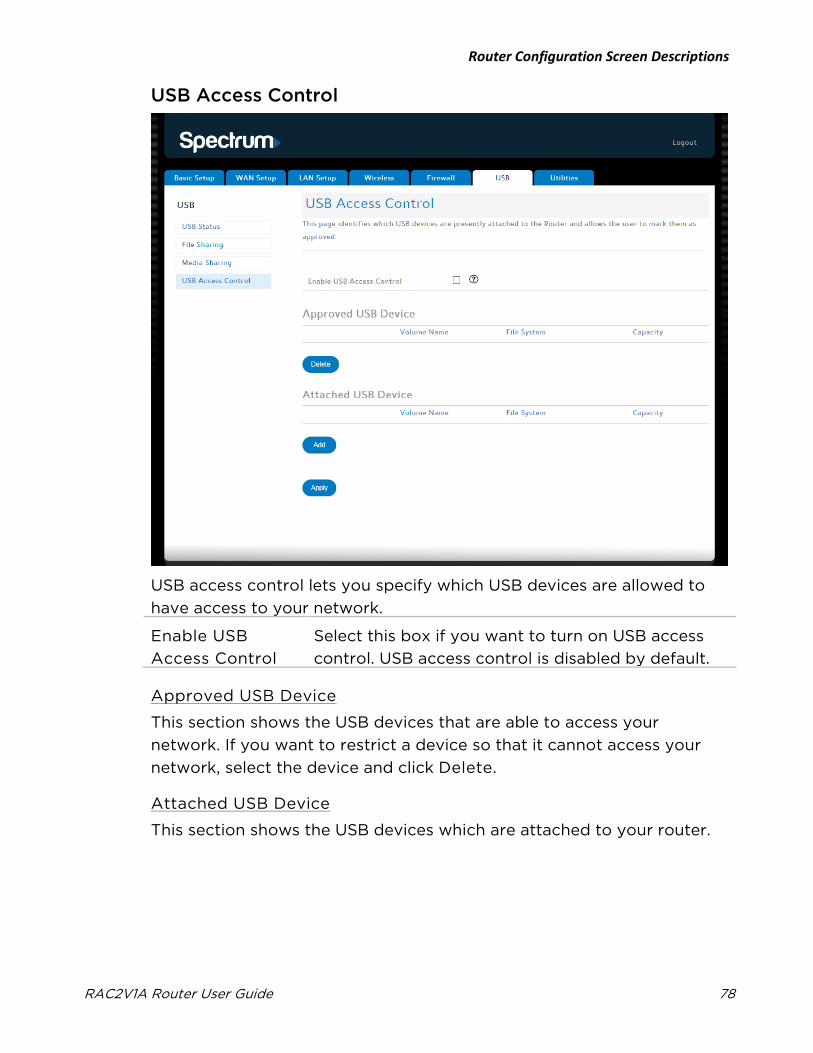
Router Configuration Screen Descriptions
RAC2V1A Router User Guide 78
USB Access Control
USB access control lets you specify which USB devices are allowed to
have access to your network.
Enable USB
Access Control
Select this box if you want to turn on USB access
control. USB access control is disabled by default.
Approved USB Device
This section shows the USB devices that are able to access your
network. If you want to restrict a device so that it cannot access your
network, select the device and click Delete.
Attached USB Device
This section shows the USB devices which are attached to your router.
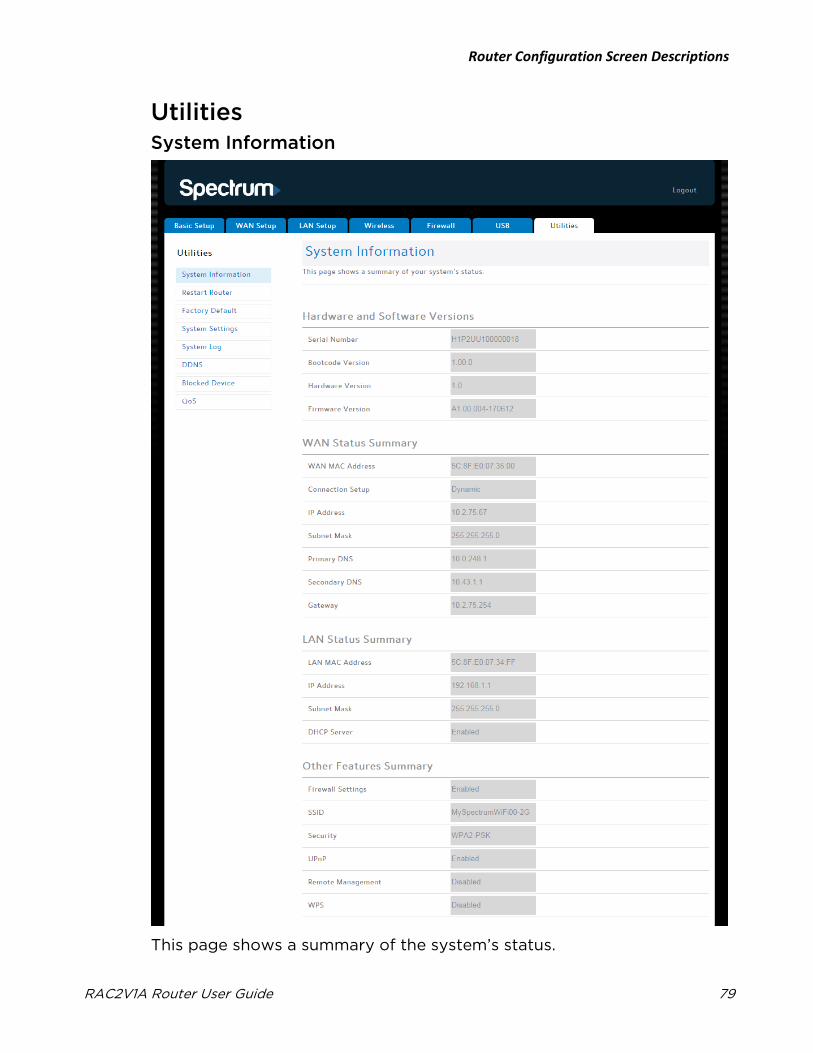
Router Configuration Screen Descriptions
RAC2V1A Router User Guide 79
Utilities System Information
This page shows a summary of the system’s status.
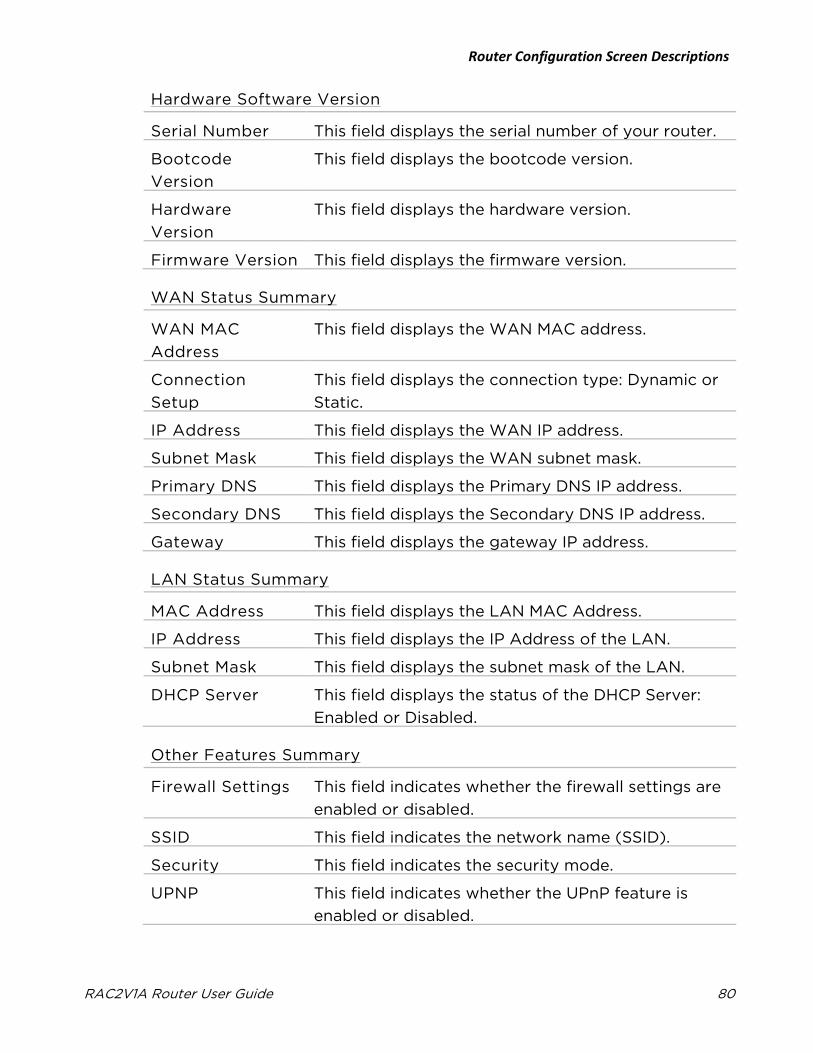
Router Configuration Screen Descriptions
RAC2V1A Router User Guide 80
Hardware Software Version
Serial Number This field displays the serial number of your router.
Bootcode
Version
This field displays the bootcode version.
Hardware
Version
This field displays the hardware version.
Firmware Version This field displays the firmware version.
WAN Status Summary
WAN MAC
Address
This field displays the WAN MAC address.
Connection
Setup
This field displays the connection type: Dynamic or
Static.
IP Address This field displays the WAN IP address.
Subnet Mask This field displays the WAN subnet mask.
Primary DNS This field displays the Primary DNS IP address.
Secondary DNS This field displays the Secondary DNS IP address.
Gateway This field displays the gateway IP address.
LAN Status Summary
MAC Address This field displays the LAN MAC Address.
IP Address This field displays the IP Address of the LAN.
Subnet Mask This field displays the subnet mask of the LAN.
DHCP Server This field displays the status of the DHCP Server:
Enabled or Disabled.
Other Features Summary
Firewall Settings This field indicates whether the firewall settings are
enabled or disabled.
SSID This field indicates the network name (SSID).
Security This field indicates the security mode.
UPNP This field indicates whether the UPnP feature is
enabled or disabled.
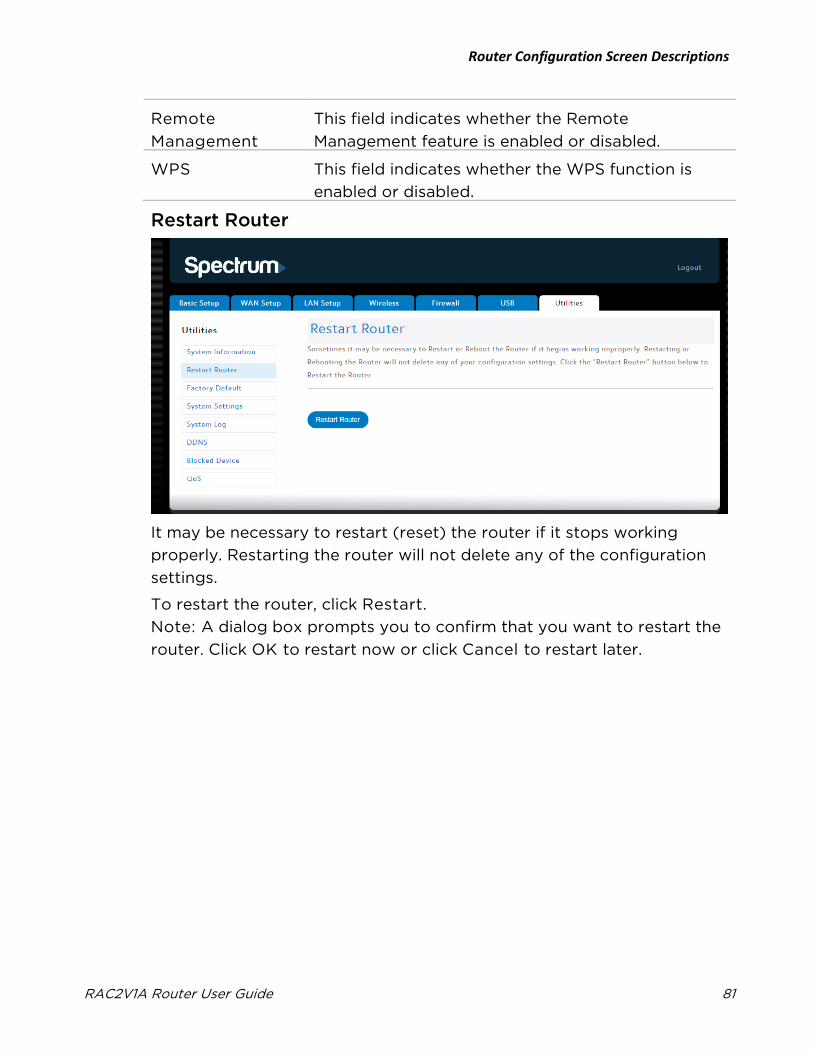
Router Configuration Screen Descriptions
RAC2V1A Router User Guide 81
Remote
Management
This field indicates whether the Remote
Management feature is enabled or disabled.
WPS This field indicates whether the WPS function is
enabled or disabled.
Restart Router
It may be necessary to restart (reset) the router if it stops working
properly. Restarting the router will not delete any of the configuration
settings.
To restart the router, click Restart.
Note: A dialog box prompts you to confirm that you want to restart the
router. Click OK to restart now or click Cancel to restart later.
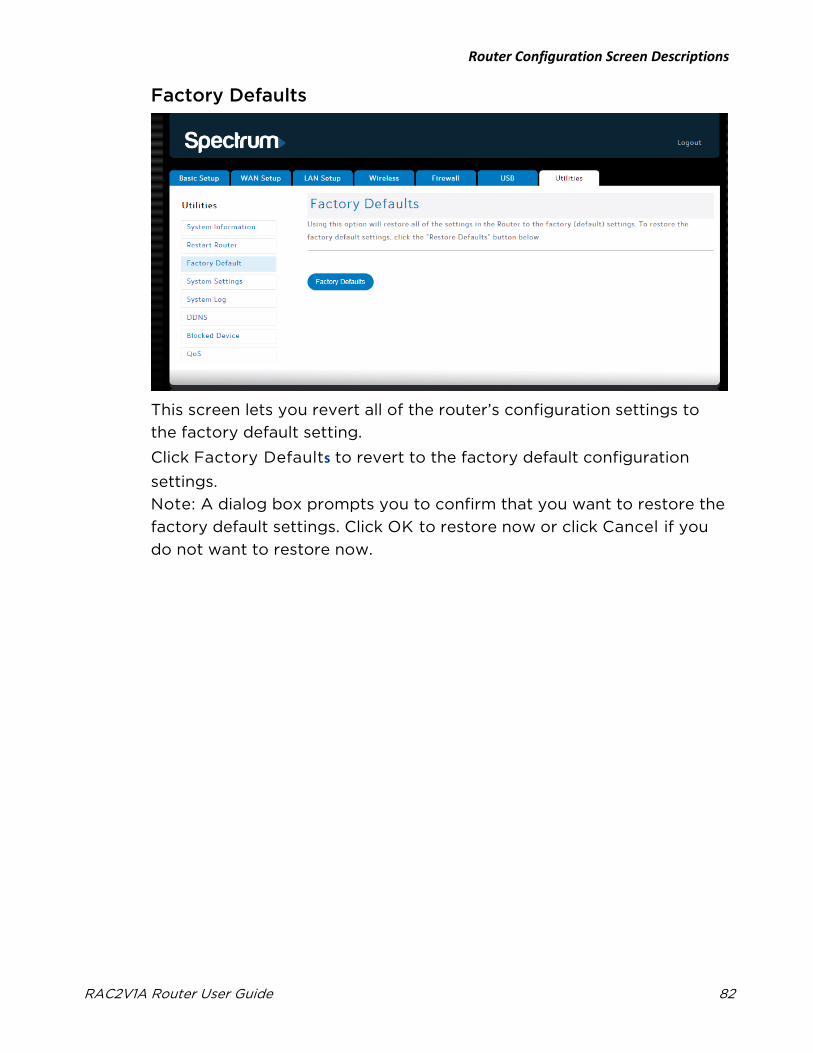
Router Configuration Screen Descriptions
RAC2V1A Router User Guide 82
Factory Defaults
This screen lets you revert all of the router’s configuration settings to
the factory default setting.
Click Factory Defaults to revert to the factory default configuration
settings.
Note: A dialog box prompts you to confirm that you want to restore the
factory default settings. Click OK to restore now or click Cancel if you
do not want to restore now.
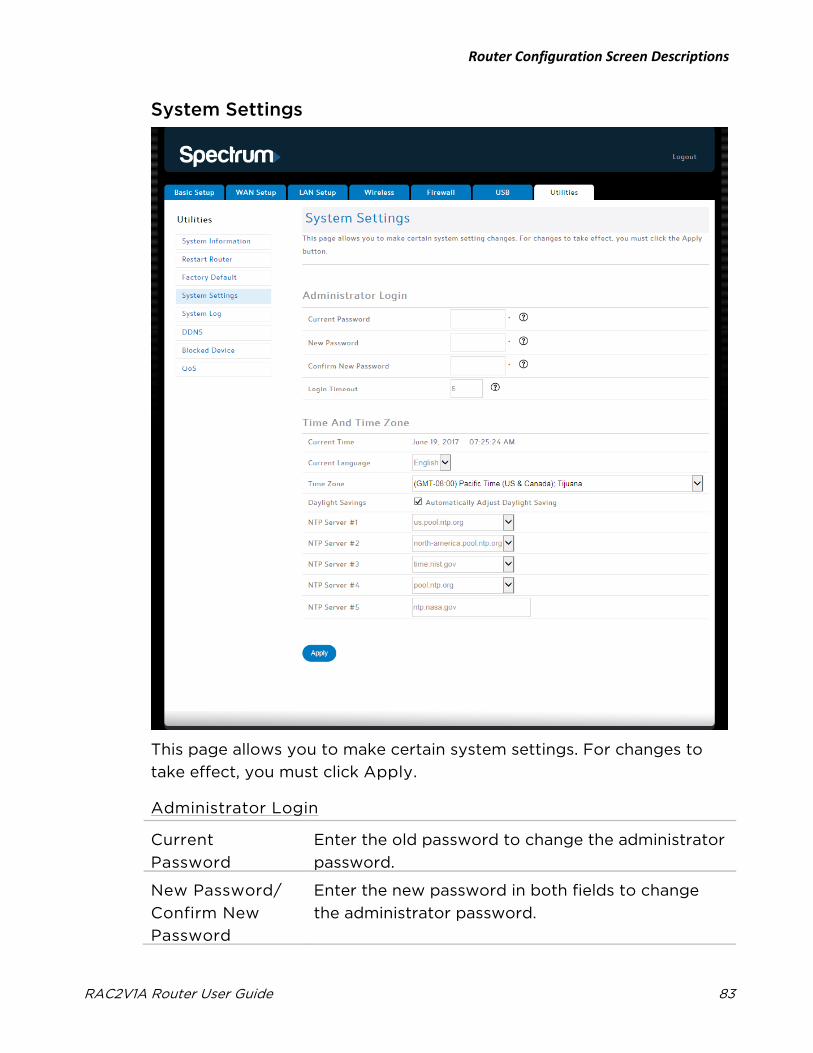
Router Configuration Screen Descriptions
RAC2V1A Router User Guide 83
System Settings
This page allows you to make certain system settings. For changes to
take effect, you must click Apply.
Administrator Login
Current
Password
Enter the old password to change the administrator
password.
New Password/
Confirm New
Password
Enter the new password in both fields to change
the administrator password.

Router Configuration Screen Descriptions
RAC2V1A Router User Guide 84
Login Timeout Enter the number of minutes that these web pages
can remain idle before the user is logged out.
Time And Time Zone
Current Time Displays the current time.
Current
Language
Select the language you want to see displayed in
the GUI.
Time Zone Select the time zone.
Daylight Savings Click this checkbox to automatically update the
system clock for Daylight Saving Time.
NTP Server 1-5 The host name or IP addresses of the NTP servers
that you want to use. 1-4 allow you to select a
server from a drop-down list. 5 allows you to type
in a server name.
System Logs
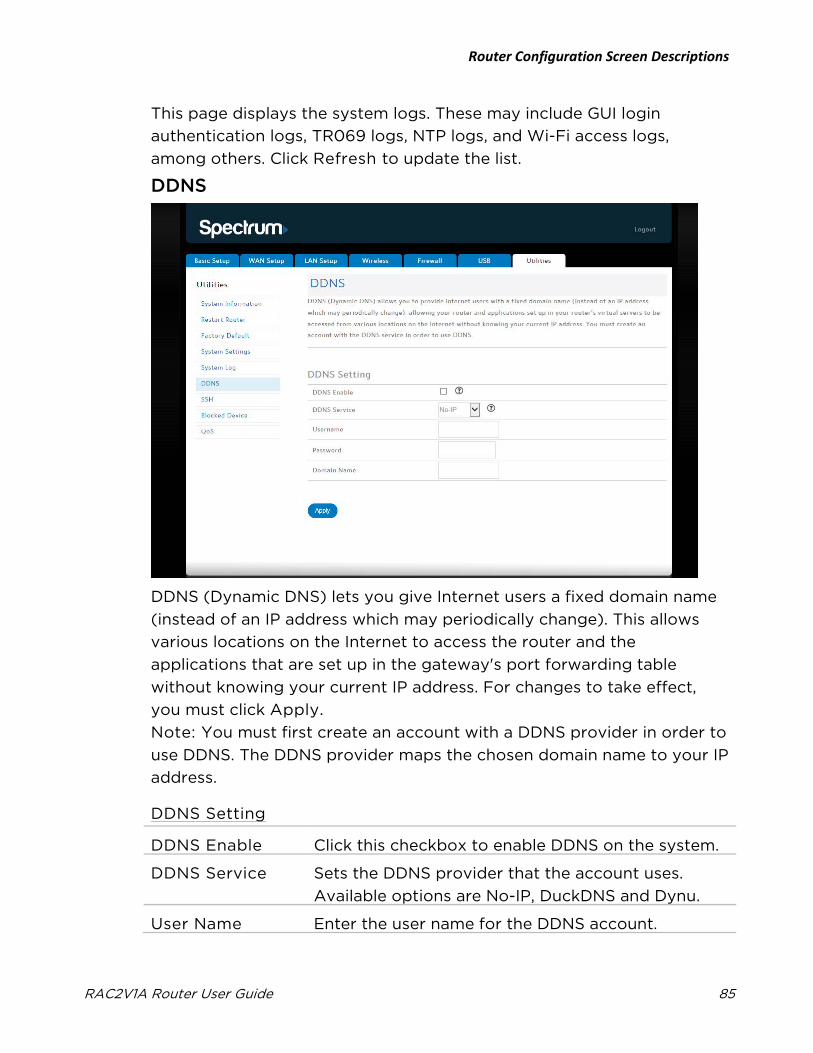
Router Configuration Screen Descriptions
RAC2V1A Router User Guide 85
This page displays the system logs. These may include GUI login
authentication logs, TR069 logs, NTP logs, and Wi-Fi access logs,
among others. Click Refresh to update the list.
DDNS
DDNS (Dynamic DNS) lets you give Internet users a fixed domain name
(instead of an IP address which may periodically change). This allows
various locations on the Internet to access the router and the
applications that are set up in the gateway's port forwarding table
without knowing your current IP address. For changes to take effect,
you must click Apply.
Note: You must first create an account with a DDNS provider in order to
use DDNS. The DDNS provider maps the chosen domain name to your IP
address.
DDNS Setting
DDNS Enable Click this checkbox to enable DDNS on the system.
DDNS Service Sets the DDNS provider that the account uses.
Available options are No-IP, DuckDNS and Dynu.
User Name Enter the user name for the DDNS account.
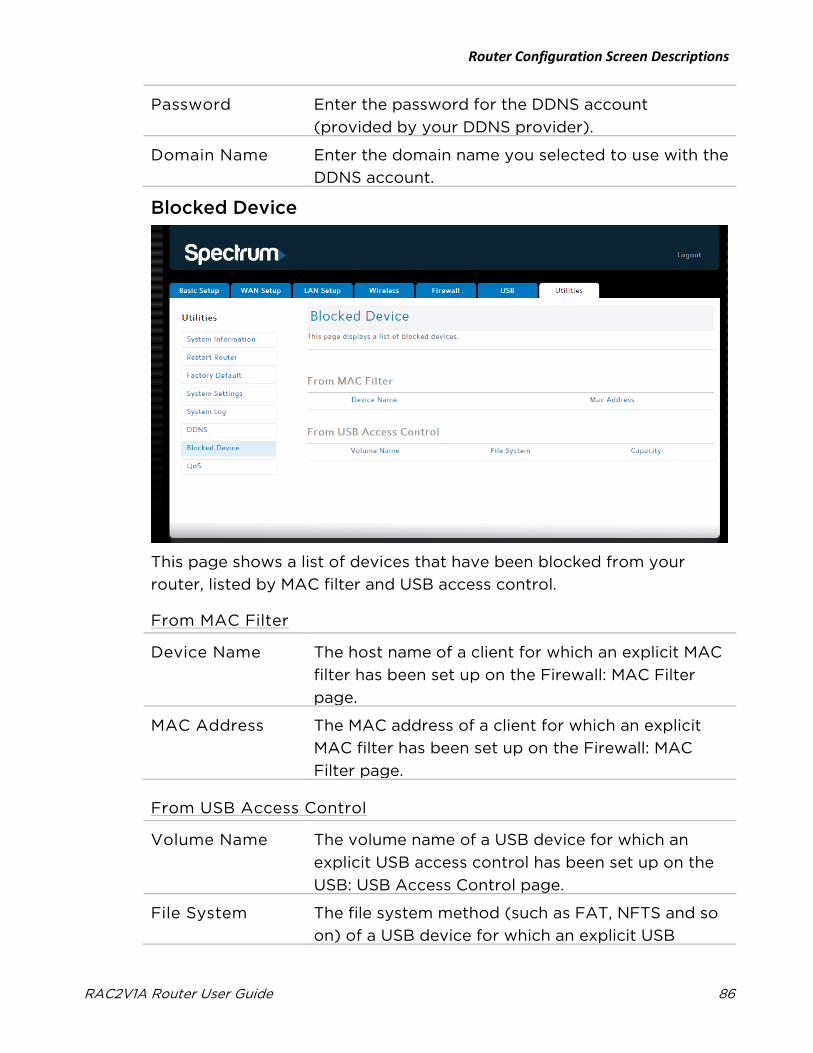
Router Configuration Screen Descriptions
RAC2V1A Router User Guide 86
Password Enter the password for the DDNS account
(provided by your DDNS provider).
Domain Name Enter the domain name you selected to use with the
DDNS account.
Blocked Device
This page shows a list of devices that have been blocked from your
router, listed by MAC filter and USB access control.
From MAC Filter
Device Name The host name of a client for which an explicit MAC
filter has been set up on the Firewall: MAC Filter
page.
MAC Address The MAC address of a client for which an explicit
MAC filter has been set up on the Firewall: MAC
Filter page.
From USB Access Control
Volume Name The volume name of a USB device for which an
explicit USB access control has been set up on the
USB: USB Access Control page.
File System The file system method (such as FAT, NFTS and so
on) of a USB device for which an explicit USB
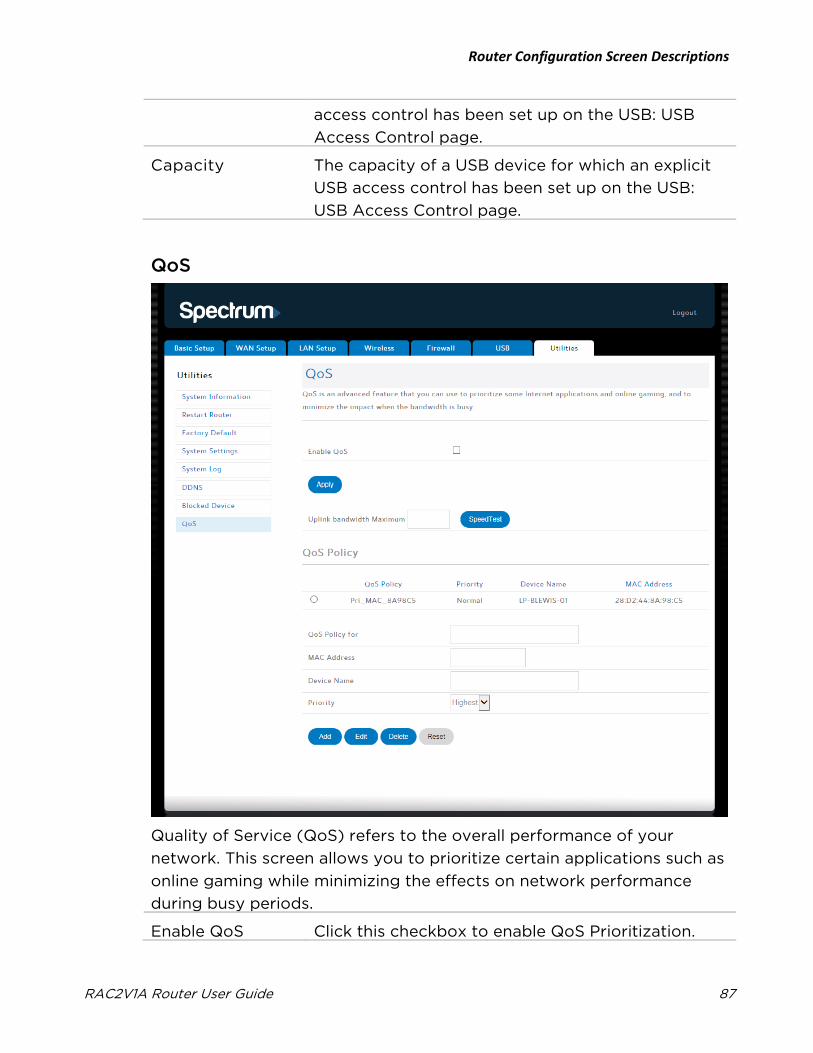
Router Configuration Screen Descriptions
RAC2V1A Router User Guide 87
access control has been set up on the USB: USB
Access Control page.
Capacity The capacity of a USB device for which an explicit
USB access control has been set up on the USB:
USB Access Control page.
QoS
Quality of Service (QoS) refers to the overall performance of your
network. This screen allows you to prioritize certain applications such as
online gaming while minimizing the effects on network performance
during busy periods.
Enable QoS Click this checkbox to enable QoS Prioritization.
Router Configuration Screen Descriptions
RAC2V1A Router User Guide 88
Uplink bandwidth
Maximum
Enter the highest speed that you want to allow for
uploads in this policy.
SpeedTest Click this button to run a speed test and verify your
connection speed.
QoS Policy for Enter a name for this QoS policy.
MAC Address Enter the MAC address of the client device that will
be affected by this policy
Device Name Enter a name for the client device that will be
affected by this policy.
Priority Choose the priority for this policy. In the event of
conflicting policies, this priority will be used to
determine which policy takes precedent.
RAC2V1A Router User Guide 89
Troubleshooting The router is plugged in, but the light is off Check all power connections. Is the power cord plugged in firmly at
both ends?
If you plugged the power cord into a power strip, make sure the strip is
switched on.
Try to plug the power cord into a different outlet. If the outlet is
controlled by a wall switch, make sure the switch is on.
Finally, check the fuse or circuit breaker panel.
I'm not getting on the Internet (all connections) It may take several minutes to establish a connection the first time you
power up the router, especially when many people are online. Always
leave the router plugged into AC power and connected to the modem.
Check the light on the front. It should be blue.
Check the cable connections. Connectors should be tight. Cables should
not be pinched, kinked, or bent sharply—any of these can cause a break
or short in the cable. (You may have to replace the cable).
Proceed to the Ethernet or wireless solutions if necessary.
I'm not getting on the Internet (Ethernet) If you are using a switch, is the switch turned on?
Are you using the right type of Ethernet cable? Use an RJ45 Cat5e cable
for direct connection to a computer; use a cross-over cable for
connection to a switch.
Unplug the power from the router and wait a few seconds, then plug the
power back in.
A misconfiguration could lock out all access to the router. If you think
this has happened, see Factory Defaults (page 82).
I'm not getting on the Internet (Wireless) Check the light on the front. It should be blue.
Does the connection utility discover your wireless LAN? If you turned off
“Broadcast Wi-Fi Network Name (SSID)” you need to manually enter the
name of the wireless LAN in the connection utility.
Troubleshooting
RAC2V1A Router User Guide 90
Change the security setting to another setting.
A misconfiguration could lock out all access to the router. If you think
this has happened, see Factory Defaults (page 82).
Make sure that your wireless device is compatible with the wireless
mode that you selected. See Setting the Wireless Mode (page 22).
My wireless Internet connection stops working sometimes This may be caused by distance or interference. Try moving the device
closer to the router.
Two common sources of interference are 2.4 GHz “remote” telephones
and microwave ovens. If you cannot remove the interfering product, try
using a different channel.
I can get on the Internet, but everything is slow If the Web site you are visiting is very popular, that site may be having
trouble servicing all the requests. If other sites download quickly, wait
for a few minutes and try again. Web site traffic during peak hours may
also affect the connection speed.
Other communications on the LAN, or interference with wireless
connections, may slow down the connection.
RAC2V1A Router User Guide 91
Safety Requirements The RAC2V1A router complies with the applicable requirements for
performance, construction, labeling and information when used as
outlined below:
• Do not use product near water (i.e. wet basement, bathtub, sink or
near a swimming pool, etc.), to avoid risk of electrocution.
• The product shall be cleaned using only a damp, lint-free, cloth. No
solvents or cleaning agents shall be used.
• Do not use spray cleaners or aerosols on the router.
• Avoid using and/or connecting the equipment during an electrical
storm, to avoid risk of electrocution.
• Do not locate the equipment within 6 feet (1.9 m) of a flame or
ignition source (i.e. heat registers, space heaters, fireplaces, etc.).
• Use the power adapter included with the equipment.
• Equipment should be installed near the power outlet and should be
easily accessible.
• In areas of high surge events or poor grounding situations and areas
prone to lightning strikes, additional surge protection may be
required (i.e. PF11VNT3 from American Power Conversion) on the AC
and Ethernet lines.
• When the router is connected to a local computer through Ethernet
cables, the computer must be properly grounded to the
building/residence AC ground network. All plug-in cards within the
computer must be properly installed and grounded to the computer
frame per the manufacturer’s specifications.
• Ensure proper ventilation. Position the router so that air flows freely
around it and the ventilation holes on the unit are not blocked.
• Do not mount the router on surfaces that are sensitive to heat and/or
which may be damaged by the heat generated by the modem or its
accessories.
Federal Communication Commission Interference Statement
This equipment has been tested and found to comply with the limits for
a Class B digital device, pursuant to Part 15 of the FCC Rules. These
limits are designed to provide reasonable protection against harmful
interference in a residential installation. This equipment generates, uses
and can radiate radio frequency energy and, if not installed and used in
Safety Requirements
RAC2V1A Router User Guide 92
accordance with the instructions, may cause harmful interference to
radio communications. However, there is no guarantee that interference
will not occur in a particular installation. If this equipment does cause
harmful interference to radio or television reception, which can be
determined by turning the equipment off and on, the user is encouraged
to try to correct the interference by one of the following measures:
• Reorient or relocate the receiving antenna.
• Increase the separation between the equipment and receiver.
• Connect the equipment into an outlet on a circuit different from that
to which the receiver is connected.
• Consult the dealer or an experienced radio/TV technician for help.
FCC Caution: Any changes or modifications not expressly approved by
the party responsible for compliance could void the user's authority to
operate this equipment.
This device complies with Part 15 of the FCC Rules. Operation is subject
to the following two conditions: (1) This device may not cause harmful
interference, and (2) this device must accept any interference received,
including interference that may cause undesired operation.
IMPORTANT NOTE:
Radiation Exposure Statement:
This equipment complies with FCC radiation exposure limits set forth for
an uncontrolled environment. This equipment should be installed and
operated with minimum distance 25cm between the radiator & your
body.
This transmitter must not be co-located or operating in conjunction with
any other antenna or transmitter.
Country Code selection feature to be disabled for products marketed to
the US/CANADA
Operation of this device is restricted to indoor use only
© 2017 ARRIS Enterprises LLC. All Rights Reserved.
No part of this publication may be reproduced in any form or by any means or
used to make any derivative work (such as translation, transformation, or
adaptation) without written permission from ARRIS Enterprises LLC. (“ARRIS”).
ARRIS reserves the right to revise this publication and to make changes in content
from time to time without obligation on the part of ARRIS to provide notification of
such revision or change.
ARRIS and the ARRIS logo are all trademarks of ARRIS Enterprises LLC. Other
trademarks and trade names may be used in this document to refer to either the
entities claiming the marks or the names of their products. ARRIS disclaims
proprietary interest in the marks and names of others.
ARRIS provides this guide without warranty of any kind, implied or expressed,
including, but not limited to, the implied warranties of merchantability and fitness
for a particular purpose. ARRIS may make improvements or changes in the
product(s) described in this manual at any time.
The capabilities, system requirements and/or compatibility with third-party
products described herein are subject to change without notice.