Embed Size (px)
Citation preview
iv
Foreword Knowledge is like a garden: if it is not cultivated, it cannot be harvested. African proverb More than 33 million people worldwide are now living with HIV infection and since 1981 an estimated 25 million men, women and children have died as a consequence of the disease. Over the last several decades families have been ripped apart, communities have been ravaged and national economies have been jeopardized – the losses have been devastating. However, the tide is slowly turning and changes have begun to take hold. HIV care and antiretroviral treatment are becoming available to more people each day, efforts to prevent new infections in adults and children are having an impact and People Living with HIV (PLHIV) are speaking up, combating widespread stigma and discrimination and taking an active role in shaping programs and in their own health care. In fact, one of the most remarkable achievements amid this ocean of devastation is the recognition of the vital importance of the active involvement of PLHIV in the health care system, engaging those most affected by the disease in self care and the care of others. In Central Harlem, New York City, where we began our work more than twenty-five years ago, we witnessed the transformative power of actively engaging PLHIV within teams of multidisciplinary health care providers. We learned of their ability to communicate their experiences and to listen and understand the experiences of their peers. We learned that PLHIV are best poised to articulate their own health needs and that empowered with knowledge and authority they can play a substantial role supporting the health needs of others. And we learned that each time an individual with HIV infection makes the difficult decision to openly and publically acknowledge their status, their courage is reflected throughout their community by reducing stigma and discrimination and enhancing the quality of the services for themselves and others. In our work in Africa supporting HIV prevention, care and treatment, our understanding and appreciation of the vital importance of PLHIV working within the health care system has continued to grow. In settings where human resources are severely constrained, Peer Educators have taken on more formal roles as counselors and health educators working with families to provide accurate information on HIV and enhance adherence to care and treatment and, through task shifting, freeing up the time of nurses and physicians. In addition to their valuable work with their peers, PLHIV have also provided meaningful feedback to health care programs, offering insights into the best ways to engage difficult to reach populations and to optimize the delivery of health care services. Most importantly, they have highlighted and demonstrated the critical importance of addressing the psychosocial as well as the biomedical needs of PLHIV to ensure optimal health outcomes for children, adults, families and communities. We have had the privilege of working with countless individuals committed to the greater involvement of people living with HIV/AIDS and with many talented and inspiring PLHIV who openly and bravely acknowledged their HIV-status and devoted themselves to working with their peers. The Comprehensive Peer Educator Training Curriculum and Implementation Manual bring together the collective experience of hundreds of people who collaborated on the development of Peer Educator programs. We’ve drawn upon other curricula and program materials, adapted as needed, then pre-tested and implemented in collaboration with other partners and the Ministries of Health in our work in PMTCT and HIV prevention, care and treatment programs in Ethiopia,

Comprehensive Peer Educator Training Curriculum: Trainer Manual v
Rwanda and Swaziland. We have enhanced these materials based on field experiences as well as invaluable feedback from facilitators, participants and health care providers. The Curriculum and Manual are presented as generic tools which can be easily adapted by Ministries of Health, health care facilities, PLHIV associations and other organizations seeking to initiate or expand health facility based Peer Educator programs. We are hopeful that the availability of these tools reflecting our collective learning and experiences will further support the active involvement of PLHIV in HIV prevention, care and treatment programs and contribute to the good health of families infected with and affected by HIV throughout the world. We would like to express our appreciation of the individuals who contributed a significant amount of their time and effort to the development of the Curriculum and Manual. Special thanks go to Tayla Colton, independent consultant, for her technical support and expertise, Leah Westra, Project Officer, for coordination and editing of the materials and Peter Twyman and Cristiane Costa for conceiving of this project, gently and persuasively moving it forward and ensuring an excellent product. We admire their talent and vision and are inspired by their commitment to the greater involvement of people living with HIV as active providers and recipients of HIV prevention, care and treatment services. Elaine Abrams and Wafaa El-Sadr International Center for AIDS Care and Treatment Programs Columbia University

vi
Acknowledgments The Comprehensive Peer Educator Training Curriculum and Implementation Manual are the result of many people’s hard work and dedication to the greater involvement of people living with HIV (GIPA) and family-focused HIV care and treatment. The materials draw on ICAP’s experiences working with peer educators, Ministries of Health, NGOs and PLHIV Associations across sub-Saharan Africa. The authors thank Wafaa El-Sadr, ICAP Director, for supporting the development of these materials and for her tireless commitment to family-focused HIV care. We are grateful to David Hoos, ICAP Senior Implementation Director, and Robin Flam, ICAP Clinical Unit Director, for their review and inputs into the curriculum and implementation manual. We also thank Shekinah Elmore, ICAP Psychosocial Program Officer, and Linda Andrews, independent consultant, for their contributions. We acknowledge ICAP’s first activities developing peer educator programs through the MTCT-Plus Initiative, particularly in Mozambique, Uganda and Zambia. These projects provided ICAP with insights both into the necessity of peer involvement in HIV services, as well as practical lessons on how best to incorporate peer educators into multidisciplinary care teams. We give special thanks to the staff of ICAP-Ethiopia, ICAP-Swaziland and ICAP-Rwanda for their early, groundbreaking work with Ministries of Health and other partners to establish and institutionalize facility-based peer educator programs within PMTCT and HIV services. Particular thanks go to: Zenebe Melaku, Negash Tulu and Zelalem Tesfaye (ICAP-Ethiopia); Xoliswa Keke, Joris Vandelanotte and Nompilo Matsebula (ICAP-Swaziland); and Ruben Sahabo, Eugenie Ingabire, Didine Munezero and Odette Mukansoro (ICAP-Rwanda), as well as Ministry of Health officials, PLHIV Associations and collaborating NGOs and health facilities in each of these countries. We also acknowledge the wonderful work of other ICAP country offices implementing peer educator programs including those in Kenya, Mozambique, Nigeria, South Africa and Tanzania. We thank Daina Bungs, Karen Forgash and Mary Jo Hoyt of the François-Xavier Bagnoud Center, School of Nursing, University of Medicine and Dentistry of New Jersey for laying out the Manuals, designing the covers and assisting us with illustrations; Benjamin Weil and Karen Cure for copyediting the Manuals; and Poul Olson for his help designing and finalizing the materials for publication. These generous people and organizations allowed us to borrow their illustrations: the Academy for Educational Development; Family Care International; the Female Health Company; Karen Forgash, FXB Center, School of Nursing, University of Medicine and Dentistry of New Jersey; the Hesperian Foundation; Pathfinder International; UNICEF; and Petra Röhr-Rouendaal. We give our special thanks to the numerous peer educators, peer educator coordinators and multidisciplinary HIV care team members in the many countries where ICAP works. We admire your commitment to serving others with quality HIV care and to upholding the rights of all people living with HIV and their families. You are a source of hope and inspiration to many around the globe and in your countries, health facilities and communities.
We acknowledge the following donors for their financial support of the MTCT-Plus Initiative: the Bill and Melinda Gates Foundation, the William and Flora Hewlett Foundation, the Robert Wood Johnson Foundation, the Henry J. Kaiser Family Foundation, the John D. and Catherine

Comprehensive Peer Educator Training Curriculum: Trainer Manual vii
T. MacArthur Foundation, the David and Lucille Packard Foundation, the Rockefeller Foundation and the Starr Foundation. We also acknowledge the Pfizer Foundation for supporting ICAP’s peer education activities, as well as the U.S. Centers for Disease Control and Prevention (CDC) and the United States Agency for International Development (USAID) under the President’s Emergency Plan for AIDS Relief (PEPFAR) for supporting ICAP’s country programs across sub-Saharan Africa.

viii
Table of Contents
Foreword ....................................................................................................................................................................... iv
Acknowledgments ..................................................................................................................................................... vi
Table of Contents ..................................................................................................................................................... viii
Acronyms ..................................................................................................................................................................... xii
Notes to the Trainer ................................................................................................................................................ xiii
Module 1: Course Overview and Introduction to the Training................................................................. 1-1
Session 1.1: Welcome, Introductions, Agenda and Ground Rules ........................................................... 1-3
Session 1.2: Review of Training Objectives ................................................................................................. 1-4
Session 1.3: Learning Needs Assessment ..................................................................................................... 1-6
Appendix 1A: Sample Training Registration Form ..................................................................................... 1-7
Appendix 1B: Sample Training Agenda ........................................................................................................ 1-8
Appendix 1C: Learning Needs Assessment ............................................................................................... 1-10
Appendix 1D: Answers to Learning Needs Assessment Questions ...................................................... 1-11
Module 2: Roles and Responsibilities of Peer Educators as Part of the Multidisciplinary HIV
Care Team ................................................................................................................................................................. 2-1
Session 2.1: Introduction: Overview of the Peer Educator Program ...................................................... 2-3
Session 2.2: Understanding Peer Education ................................................................................................. 2-5
Session 2.3: Roles and Responsibilities of Peer Educators in Family-focused HIV Programs ........... 2-7
Session 2.4: Peer Educators as Part of the Multidisciplinary Care Team ................................................ 2-9
Session 2.5: Module Summary ...................................................................................................................... 2-11
Module 3: HIV and Reproductive Health Basics ......................................................................................... 3-1
Session 3.1: Introduction: Myths and Rumors about HIV, AIDS and PLHIV ..................................... 3-3
Session 3.2: The Difference between HIV and AIDS ................................................................................ 3-5
Session 3.3: From HIV to AIDS – What Does HIV Do in the Body? ................................................... 3-7
Session 3.4: Sexual and Reproductive Body Parts and Their Functions ................................................ 3-10
Session 3.5: HIV Transmission and Prevention ........................................................................................ 3-15
Session 3.6: Introduction to Comprehensive, Family-focused Care ...................................................... 3-20
Session 3.7: Module Summary ...................................................................................................................... 3-23
Module 4: Communication and Counseling Skills ....................................................................................... 4-1
Session 4.1: Introduction: Our Own Attitudes and Values ...................................................................... 4-3
Session 4.2: What Is Counseling? .................................................................................................................. 4-4
Session 4.3: Key Counseling Skills for Peer Educators ............................................................................. 4-7
Session 4.4: Communicating to Groups .................................................................................................... 4-16
Session 4.5: Classroom Counseling Practicum ........................................................................................ 4-18
Session 4.6: Module Summary ...................................................................................................................... 4-20
Appendix 4A: Counseling and Communication Checklist ...................................................................... 4-22
Module 5: Comprehensive HIV Care ............................................................................................................... 5-1
Session 5.1: Introduction: Review of Family-focused Care ....................................................................... 5-3
Session 5.2: HIV Counseling and Testing: The Entry Point to Care ....................................................... 5-5
Session 5.3: HIV Care and Treatment: What is the Difference? ............................................................. 5-7
Session 5.4: Prevention and Treatment of Opportunistic Infections and Other Complications ....... 5-9
Session 5.5: Tuberculosis Education, Screening and Referral ................................................................ 5-12
Session 5.6: Helping with Referrals to Ensure Comprehensive Care ................................................... 5-15
Session 5.7: Module Summary ...................................................................................................................... 5-17

Comprehensive Peer Educator Training Curriculum: Trainer Manual ix
Module 6: Antiretroviral Therapy (ART) ........................................................................................................ 6-1
Session 6.1: Introduction: Myths and Facts about ART ............................................................................ 6-3
Session 6.2: Who Needs ART? ...................................................................................................................... 6-5
Session 6.3: Goals and Benefits of ART ....................................................................................................... 6-8
Session 6.4: Common ART Regimens ........................................................................................................ 6-10
Session 6.5: Common Side Effects of ARVs ............................................................................................. 6-14
Session 6.6: Module Summary ...................................................................................................................... 6-19
Module 7: HIV Prevention, Care and Treatment for Pregnant Women and Their Children .......... 7-1
Session 7.1: Introduction: Prevention of Mother-to-Child Transmission (PMTCT) Overview ......... 7-3
Session 7.2: Strategies to Prevent Mother-to-Child HIV Transmission .................................................. 7-6
Session 7.3: Supporting Pregnant Women and Mothers with Ongoing ART Services ...................... 7-13
Session 7.4: Identifying and Caring for Babies Exposed to HIV ........................................................... 7-15
Session 7.5: Introduction to Pediatric HIV Care and Treatment ........................................................... 7-19
Session 7.6: Classroom Practicum on PMTCT .......................................................................................... 7-22
Session 7.7: Module Summary ...................................................................................................................... 7-24
Module 8: Adherence and Psychosocial Support .......................................................................................... 8-1
Session 8.1: Introduction: The Importance of Adherence ........................................................................ 8-3
Session 8.2: Adherence Basics ........................................................................................................................ 8-4
Session 8.3: Psychosocial Support Basics ..................................................................................................... 8-7
Session 8.4: Common Barriers to Adherence and Psychosocial Well-being .......................................... 8-9
Session 8.5: Helping People Adhere to Care ............................................................................................ 8-12
Session 8.6: Helping People Prepare for and Adhere to Treatment: Part 1 – Group Education ..... 8-16
Session 8.7: Helping People Prepare for and Adhere to Treatment: Part 2 – Individual Counseling,
Assessment and Planning .............................................................................................................................. 8-22
Session 8.8: Providing Ongoing Adherence and Psychosocial Support ................................................ 8-25
Session 8.9: Classroom Practicum on Adherence and Psychosocial Support Counseling ................. 8-29
Session 8.10: Module Summary ................................................................................................................... 8-32
Appendix 8A: Generic Adherence Readiness Assessment Form ........................................................... 8-34
Appendix 8B: Generic Psychosocial Assessment Form .......................................................................... 8-36
Appendix 8C: Generic Adherence Follow-up Assessment Form .......................................................... 8-37
Module 9: Identifying and Tracing People Who Do Not Return to the Clinic ................................... 9-1
Session 9.1: Introduction: Why Do Clients Miss Clinic Visits? ............................................................... 9-3
Session 9.2: Identifying People Who Do Not Return to the Clinic ......................................................... 9-5
Session 9.3: Strategies to Follow Up with People Who Do Not Return to the Clinic ......................... 9-8
Session 9.4: Classroom Practicum on Client Follow-up .......................................................................... 9-12
Session 9.5: Module Summary ...................................................................................................................... 9-14
Appendix 9A: Sample Page from a Clinic Appointment Book .............................................................. 9-16
Appendix 9B: Sample Patient Appointment Card .................................................................................... 9-17
Appendix 9C: Sample Phone Follow-up Logbook ................................................................................... 9-18
Module 10: Positive Living ................................................................................................................................. 10-1
Session 10.1: Introduction: The Recipe for Positive Living .................................................................... 10-3
Session 10.2: Healthy Mind ......................................................................................................................... 10-5
Session 10.3: Healthy Body .......................................................................................................................... 10-8
Session 10.4: Safer Sex ................................................................................................................................. 10-10
Session 10.5: Preventing and Treating Sexually Transmitted Infections (STIs) ................................ 10-16
Session 10.6: Helping Clients Be Active Participants in Their Own Care .......................................... 10-18
Session 10.7: Classroom Practicum on Positive Living .......................................................................... 10-20
Session 10.8: Module Summary ................................................................................................................ 10-22

x
Module 11: Stigma, Discrimination and Disclosure ................................................................................... 11-1
Session 11.1: Introduction: Our Own Experiences with Stigma ............................................................ 11-3
Session 11.2: How Do Stigma and Discrimination Affect HIV Services? ........................................... 11-5
Session 11.3: Strategies to Deal with Stigma .............................................................................................. 11-7
Session 11.4: Introduction to Disclosure.................................................................................................... 11-9
Session 11.5: Disclosure Counseling ......................................................................................................... 11-11
Session 11.6: Classroom Practicum on Stigma and Disclosure Counseling ....................................... 11-15
Session 11.7: Module Summary ................................................................................................................. 11-18
Module 12: Community Outreach, Education and Linkages ................................................................. 12-1
Session 12.1: Introduction: What Services Do Clients Need in Their Communities? ....................... 12-3
Session 12.2: Linking Clients to Community Support Services ............................................................. 12-4
Session 12.3: Community Resource Mapping ........................................................................................... 12-7
Session 12.4: Being a Community Educator and Advocate .................................................................. 12-10
Session 12.5: Module Summary ................................................................................................................. 12-12
Appendix 12A: Sample Community Resource Inventory ..................................................................... 12-14
Module 13: Record-keeping and Reporting .................................................................................................. 13-1
Session 13.1: Introduction: Why do We Need Records? ........................................................................ 13-3
Session 13.2: Peer Educator Recording and Reporting Forms ............................................................... 13-5
Session 13.3: Module Summary ................................................................................................................... 13-8
Appendix 13A: Sample Daily Register for Individual Counseling Sessions ......................................... 13-9
Appendix 13B: Sample Daily Register for Group Education Sessions ............................................... 13-10
Appendix 13C: Sample Monthly Reporting Form .................................................................................. 13-11
Module 14: Supervised Practicum .................................................................................................................... 14-1
Session 14.1: Practicum Preparation ........................................................................................................... 14-4
Session 14.2: Supervised Practicum ............................................................................................................. 14-6
Session 14.3: Practicum Debriefing ............................................................................................................. 14-7
Appendix 14A: Peer Educator Supervised Practicum Checklist ............................................................ 14-8
Module 15: Next Steps, Course Evaluation and Graduation ................................................................... 15-1
Session 15.1: Reflection on Learning Objectives ...................................................................................... 15-3
Session 15.2: Next Steps for Peer Educators ............................................................................................. 15-5
Session 15.3: Final Learning Assessment/Post-Test ................................................................................ 15-7
Session 15.4: Training Evaluation ................................................................................................................ 15-8
Session 15.5: Graduation and Closing......................................................................................................... 15-9
Appendix 15A: Final Learning Assessment ............................................................................................. 15-10
Appendix 15B: Answers to Final Learning Assessment Questions ..................................................... 15-11
Advanced Module 16: Sexuality, Childbearing and Family Planning Basics ..................................... 16-1
Session 16.1: Introduction: Let’s Talk about Sex ...................................................................................... 16-3
Session 16.2: Different Sexual Behaviors: Okay for Me? ....................................................................... 16-4
Session 16.3: Parts of the Body Involved in Sex and Reproduction ...................................................... 16-7
Session 16.4: Conception and Childbearing Choices ............................................................................. 16-12
Session 16.5: Types of Family Planning Methods ................................................................................... 16-16
Session 16.6: Dual Protection and Condom Use .................................................................................... 16-28
Session 16.7: Classroom Practicum on Conception, Childbearing and Family
Planning Counseling .................................................................................................................................... 16-29
Session 16.8: Module Summary ................................................................................................................. 16-31
Advanced Module 17: Nutrition Education and Counseling ................................................................. 17-1
Session 17.1: Introduction: The Relationship between Nutrition and HIV ......................................... 17-3
Session 17.2: The Basic Food Groups ........................................................................................................ 17-5
Session 17.3: Providing Basic Nutrition Education and Counseling for Adults and Children .......... 17-8

Comprehensive Peer Educator Training Curriculum: Trainer Manual xi
Session 17.4: Common Nutrition and Eating Problems among PLHIV ........................................... 17-14
Session 17.5: What to Do if There Is Not Enough Food .................................................................... 17-18
Session 17.6: Classroom Practicum on Nutrition Education and Counseling ................................... 17-20
Session 17.7: Module Summary ................................................................................................................ 17-22
Advanced Module 18: Pediatric HIV Care and Treatment ...................................................................... 18-1
Session 18.1: Introduction: The Importance of Pediatric Care and Treatment ................................... 18-3
Session 18.2: Identifying HIV-exposed and HIV-infected Infants and Children ................................ 18-5
Session 18.3: Caring for HIV-exposed and HIV-infected Babies .......................................................... 18-8
Session 18.4: Pediatric ART ....................................................................................................................... 18-12
Session 18.5: Pediatric Disclosure.............................................................................................................. 18-14
Session 18.6: Pediatric Adherence ............................................................................................................. 18-19
Session 18.7: Classroom Practicum on Pediatric HIV ........................................................................... 18-24
Session 18.8: Module Summary ................................................................................................................. 18-26
Advanced Module 19: PLHIV Support Groups ........................................................................................... 19-1
Session 19.1: Introduction: Why Do We Need Support Groups? ........................................................ 19-3
Session 19.2: Planning Support Group Meetings ...................................................................................... 19-6
Session 19.3: Facilitating Support Group Meetings ................................................................................ 19-12
Session 19.4: Practicum on Support Groups ........................................................................................... 19-16
Session 19.5: Module Summary ................................................................................................................ 19-18
Illustration Credits ................................................................................................................................................ 20-1

xii
Acronyms
3TC Lamivudine ABC Abacavir AIDS Acquired Immune Deficiency Syndrome ANC Antenatal care ART Antiretroviral therapy/treatment ARV Antiretroviral AZT Zidovudine CD4 Cluster of differentiation 4 cell CTX Cotrimoxazole d4T Stavudine DBS Dried blood spot ddI Didanosine DNA PCR Deoxyribonucleic acid - polymerase chain reaction DOTS Directly observed therapy short-course ECP Emergency contraceptive pills EFV Efavirenz HAART Highly active antiretroviral therapy HBC Home-based care HIV Human Immunodeficiency Virus HTC HIV testing and counseling ICAP International Center for AIDS Care and Treatment Programs IUD Intra-uterine device LAM Lactational amenorrhea method LPV/r Kaletra MCH Maternal and child health MTCT Mother-to-child transmission (of HIV) NGO Non-governmental organization NVP Nevirapine OI Opportunistic infection ORS Oral rehydration solution PCP Pneumococcal pneumonia PE Peer Educator PEP Post-exposure prophylaxis PID Pelvic inflammatory disease PLHIV Person (or people) living with HIV PMTCT Prevention of mother-to-child transmission (of HIV) TB Tuberculosis TDF Tenofovir SDM Standard Days Method SMS Short message service (text message) STI Sexually transmitted infection VCT Voluntary counseling and testing WHO World Health Organization ZDV Zidovudine
Comprehensive Peer Educator Training Curriculum: Trainer Manual xiii
Notes to the Trainer Introduction Despite significant challenges, the global expansion of prevention of mother-to-child transmission of HIV (PMTCT) and HIV care and treatment programs in the past 5 years, particularly in sub-Saharan Africa, has been dramatic. By the end of 2007, WHO reported that about 3 million people living with HIV (PLHIV) were receiving antiretroviral treatment (ART), representing 31% of those in need, compared to just 2% in 2003. However, with this expansion of services comes the need to develop innovative and responsive programs to support PLHIV to adhere to clinical care and to medication regimens in the long-term. The International Center for AIDS Care and Treatment Programs (ICAP) at Columbia University’s Mailman School of Public Health (MSPH) is an important partner in the global effort to expand access to quality PMTCT and HIV care and treatment services. ICAP supports the design, development and implementation of a diverse range of initiatives providing HIV prevention, care and treatment services in resource-limited settings. To better support clients and their families, as well as implement more meaningful involvement of PLHIV and task shifting, ICAP implements Peer Educator programs in a number of sub-Saharan Africa countries. In order to share Peer Educator materials and experiences more widely, ICAP developed these generic training materials (Trainer and Participant Manual) that can be adapted to a range of country- and program-specific settings. Please also see the third document in this set, Planning, Managing and Monitoring Peer Educator Programs: An Implementation Manual, for more information and guidance on Peer Educator programs. Peer Education in HIV Prevention, Care and Treatment Programs Despite global success enrolling clients in PMTCT and care and treatment, continued stigma, fear of disclosure, fears of testing and treatment for children and lack of psychosocial and material support remain common problems, leaving many people without access to the services they need. Once these barriers to receiving HIV care are overcome, one of the biggest challenges is the need for clients to achieve near-perfect adherence to care and treatment for their entire lives. Adherence and psychosocial support, as a part of comprehensive care and treatment programs, can help people live long, healthy lives, improve the health and well-being of affected families, help decrease stigma and discrimination and prevent new infections, ultimately slowing the epidemic. Proper education and counseling of clients and their family members, particularly before and after the initiation of ART, is vital for adherence success. Experience shows that clients’ adherence to care and treatment depends on preparation with the multidisciplinary care team; counseling and planning for “real life” adherence and disclosure strategies; an uninterrupted drug supply; regular follow-up at the facility, community and household levels; ongoing clinical monitoring; and provision of or linkages to material and support services, including food. Systems to track clients who have missed appointments, discontinued treatment and are lost to follow-up (LTFU) must be developed and routinely implemented as part of any adherence strategy. Strong linkages between community- and facility-based HIV programs help ensure a continuum of prevention, care and support for clients and their families.

xiv
The Added Value of Peer Educators The engagement of PLHIV as Peer Educators and the continuous and active involvement of PLHIV associations and community support groups can complement the work of health care providers and play an important role in ensuring access to effective and sustained care and treatment. Peer Educators also can play an important role in prevention, including both primary and secondary prevention activities, as well as encouraging and implementing a family-focused approach that recognizes HIV as a family disease. Peer education provides a viable solution to some of the program needs and challenges mentioned above. Some of the advantages of Peer Educator programs include:
People trust others in a similar situation: Clients have the opportunity to discuss their personal circumstances in a safe environment with someone who relates to their situation.
Improved adherence: Peer Educators can support clients’ adherence to care and treatment because they may have a deeper understanding of what the client is going through.
Community participation: Peer Educators can play a role in community mobilization, decreasing stigma and increasing support for PLHIV.
Empowerment of individuals: Peer Educators can increase people’s confidence that they can make good decisions and take action. Peer Education programs can help both Peer Educators and their clients change behaviors in order to take care of their own health and that of their families.
Job opportunities: Training and work experience may improve Peer Educators’ job opportunities in the formal economic sector.
Improved service quality: Peer Educators can help to improve the overall quality and effectiveness of health care programs by giving feedback to the clinic about the needs of patients and communities.
Task shifting and saved time: Peer Educators can help free up the time of doctors, nurses and social workers by providing basic education and counseling at the clinic.
Increased access: Peer Educators can gain access to groups that are otherwise difficult to reach and encourage them to seek prevention, care and treatment services. Similarly, Peer Educators can follow up with clients who have missed appointments, since they are often from the same communities.
How to Use this Curriculum This comprehensive training course was designed to train Peer Educators to become active members of multidisciplinary HIV care teams – at the hospital, clinic, health center and community level. The purpose of this training course is to empower and ensure greater involvement of PLHIV as active providers and recipients of HIV services. The breadth and depth of knowledge required to be a Peer Educator is immense. This training course is designed to provide basic training for PLHIV becoming Peer Educators. In order for training to be effective, it is recommended that training groups not exceed 20 participants. The basic training course contains 15 Modules, which can be conducted over 8 classroom days and 5 practicum days. Alternatively, if training is conducted at a health facility (recommended), the practicum sessions can be interspersed within the classroom training days. Adaptations to the training schedule should be made as needed, based on availability of trainers and participants, the training location, availability of time for practicum sessions and other factors. As Peer Educators gain skills, confidence and experience, and as the program matures and changes, refresher and advanced training should be provided at regular intervals. Four advanced training Modules are
Comprehensive Peer Educator Training Curriculum: Trainer Manual xv
included in the curriculum. These Modules may be integrated into the basic training course, or used during subsequent refresher or advanced trainings with Peer Educators. The training curriculum is designed to acknowledge and build upon the wealth of knowledge and personal experience Peer Educators already have, as PLHIV and clients in HIV care and treatment programs themselves. The training course is highly participatory and based on principles of adult learning. By using the suggested participatory training methodologies, participants will be able to share their thoughts and experiences openly and learn from one another as much as they learn from trainers. The key information covered in the training is intended to be practical and interesting to participants. The experiences, baseline knowledge and literacy levels of participants will vary, so trainers should make adaptations as needed. Curriculum Design There are 2 parts to the curriculum – a Trainer Manual and a Participant Manual. Each Module of the Trainer Manual begins with the following information, followed by step-by-step trainer instructions and key content information for each Session:
Duration: The approximate time it will take to facilitate the training Module. Learning Objectives: The expected knowledge and skills participants will gain by the end of the Module.
Key Content Areas: A list of the Sessions within the Module.
Methodologies: An overview of the training methods used in the Module. Materials Needed: A list of materials the trainer should collect and prepare before the training sessions, such as flip chart, markers, tape or Bostik, etc. Work for the Trainer to Do in Advance: Key preparatory activities for the trainers to do before facilitating the Module.
Key Points: A summary of key points, at the end of each Module.
Step-by-Step Trainer Instructions: The training is designed to be participant-focused instead of trainer-driven. Adults learn and retain more information when they participate fully, actively and equally in the learning process. The trainer’s main task is to facilitate the learning process and encourage active interaction and learning between participants, recognizing the enormous amount of knowledge Peer Educators have as clients in HIV programs. The trainer’s role is to draw out these experiences and encourage skills-building, exchange of information and confidence-building among participants. The training methods used should serve as a model for how Peer Educators should communicate with clients in their work. Lectures and trainer-led activities should be minimized as much as possible, with emphasis instead on participatory activities, with the trainer supplementing information when needed. The participatory training methodologies used in the curriculum include:
Interactive trainer presentation
Large group discussion
Large group work

xvi
Small group discussion
Small group work
Brainstorming
Guest speakers
Case studies
Role-play
Demonstration and return demonstration
Reflection
Observation
Games
Snowballing
Facility-based practicum
Each Session begins with a shaded box, listing the training methodologies used in that Session, followed by suggested step-by-step guidance for trainers. Module 14 includes detailed information about preparing for and implementing the facility-based practical sessions. Key Information: The key content information for each Session follows the step-by-step trainer instructions. Trainers should adapt the key information as needed for their particular setting and on the baseline knowledge of participants (for example, sometimes it will be useful to cover all of the key information, but in other cases when participants already know a good deal about the topic, trainers may just want to review some parts of the key information). There are also notes where trainers should adapt the key information to their country context, for example when discussing specific ART regimens. Some of the Modules also contain Appendices that will be useful for trainers and participants. The Participant Manual contains a simplified version of the Key Information in the Trainer Manual. Trainers should encourage participants to refer to their Manual during the training and to take their own notes as needed. The Participant Manual also serves as a useful reference for Peer Educators after the training. How to be an Effective Training Facilitator Trainers should always keep the following “dos and don’ts” in mind. DOs
Do maintain good eye contact.
Do prepare in advance.
Do involve participants.
Do use visual aids.
Do speak clearly.
Do speak loud enough.
Do encourage questions.
Do recap at the end of each Session.
Do bridge one topic to the next.
Do encourage participation.
Do write clearly and boldly.
Do summarize.
Do use logical sequencing of topics.

Comprehensive Peer Educator Training Curriculum: Trainer Manual xvii
Do use good time management.
Do K.I.S. (Keep It Simple).
Do give feedback.
Do position visuals so everyone can see them.
Do avoid distracting mannerisms and distractions in the room.
Do be aware of the participants’ body language.
Do keep the group focused on the task.
Do provide clear instructions.
Do check to see if your instructions are understood.
Do evaluate as you go.
Do be patient.
DON’Ts
Don’t talk to the flip chart.
Don’t block the visual aids.
Don’t stand in one spot—move around the room.
Don’t ignore the participants’ comments and feedback (verbal and non-verbal).
Don’t read from the curriculum.
Don’t shout at the participants.
Don’t assume everyone has the same level of baseline knowledge.
Don’t assume everyone can read and write at the same level. A Note on Confidentiality The success of Peer Educator training depends on active participation and engagement of each participant. Participants should be encouraged and feel “safe” to share their own personal experiences, including the challenges they have faced at the hospital, in their community and at home. Trainers should remind participants that what is said in the training sessions is confidential (and they should respect this rule themselves) and that no one will be judged or stigmatized for their comments or questions. Evaluation Training evaluation methods include:
A learning needs assessment (pre-test) in Module 1 and a post-test in Module 15
Observation and assessment during the practicum session, using a skills checklist
Participant feedback on a daily basis (see below), as well as a participant training evaluation at the end of the course
How Did it Go?: Informal evaluations should be conducted at the end of each training day through “How did it go” exercises to ensure that participants understand course content and that trainers can make adjustments to content or methodology if needed. To encourage honest evaluation, trainers can ask participants to note what they liked and did not like about the day on pieces of paper (one piece with a happy face to record things they liked about the day and another piece with a sad face to note things that did not go well), or on pieces of flip chart. Alternatively, one of the participants can volunteer to lead the “How did it go” exercise, which can be conducted with the trainers out of the room. The participant would then report back to the trainers on how participants viewed the day. This feedback should be reviewed by trainers and modifications made as needed for subsequent training days. Note: The Dos and Don’ts of training were taken from: Colton, T., Dillow, A., Hainsworth, G., Israel, E. & Kane, M. Community Home-based Care for People and Communities Affected by HIV/AIDS: A Comprehensive Training Course for Community Health Workers. Watertown, MA: Pathfinder International, 2006.


Comprehensive Peer Educator Training Curriculum: Trainer Manual 1-1
MODULE 1:
Course Overview and Introduction to
the Training
DURATION: 80 minutes (1 hour, 20 minutes)
LEARNING OBJECTIVES:
By the end of this Module, participants will be able to:
Know more about the trainers and other training participants
Understand the training agenda, objectives and “ground rules”
Assess their own baseline knowledge about content and skills to
be covered during the training
CONTENT:
Session 1.1: Welcome, Introductions, Agenda and Ground Rules
Session 1.2: Review of Training Objectives
Session 1.3: Learning Needs Assessment
METHODOLOGIES:
Guest speaker
Interactive trainer presentation
Small group work
Large group discussion
Needs assessment
MATERIALS NEEDED:
Flip chart
Markers
Tape or Bostik
Name tags
Pens and notebooks (for each participant)
Copies of the Participant Manual (for each participant)
Large “TRUE” and “FALSE” signs (can be made on flip chart)

1-2 Module 1
Copies of Appendix 1A and Appendix 1C (note that Appendix 1B is
included in the Participant Manual)
WORK FOR THE TRAINER TO DO IN ADVANCE:
Read through the entire Module and make sure you are familiar
with the training methodologies and content.
Invite guest speakers to open the training and give introductory
remarks.
Finalize the training agenda using Appendix 1B: Sample Training
Agenda as a guide. This includes deciding which Modules will be
included in the basic training and which will be included in future,
advanced trainings.
Finalize all training logistics and ensure that the training room is
set up, all materials for the training are available, meals are
arranged for participants, etc.
Make 1-2 copies (depending on the number of participants) of
Appendix 1A: Sample Training Registration Form.
Write the training objectives on flip chart or prepare an
overhead.
If possible, learn more about participants’ literacy skills and
previous training experiences. Based on this, decide whether a
group or an individual pre-test would be more appropriate.
If a group pre-test is to be conducted, make “TRUE” and
“FALSE” signs on flip chart.
If an individual pre-test is to be conducted, make copies of
Appendix 1C: Learning Needs Assessment so that each participant
has a copy.

Comprehensive Peer Educator Training Curriculum: Trainer Manual 1-3
SESSION 1.1: Welcome, Introductions, Agenda and
Ground Rules (45 minutes)
TRAINER INSTRUCTIONS
Methodologies: Guest Speaker, Interactive Trainer Presentation, Small Group Work, Large Group Discussion
Step 1: Introduce yourself and the other trainers and welcome participants to the
training. Introduce keynote speaker(s) to give brief introductory remarks and
welcome.
Step 2: Pass around a registration sheet (see Appendix 1A for a sample) and ask
participants to record their name, organization, age, sex, contact information and
any other HIV-related training that they have received.
Note: Remember to ask participants to sign in for each day of the training;
another daily sign-in sheet may be required for this.
Step 3: Introduce the Participant Manual and make sure each person has a copy. Explain
that the Manual contains the key points for each Module and that it can be used
as a reference after the training. Encourage participants to take their own notes
during the training. A notebook and pen are provided to each participant for this
purpose.
Step 4: Lead an introductory activity so people can introduce themselves and get to
know more about one another and the trainers. Adjust the activity depending on
the size of the group.
Here is one example of an introductory activity:
Ask participants to get in pairs with someone they do not know. Give the pairs
five minutes to get to know each other (name, family members, what is
important to them, how long they have been in the care and treatment program,
etc.). After 5 minutes, bring the large group back together and ask each person
to introduce their partner to the larger group. The trainers should also
participate and introduce one another.
Step 5: Go over the training agenda that participants have in the beginning of their
Participant Manuals (see Appendix 1B). Do not forget to mention logistics, such as
lunch, start and end times, payment of per diems and transport arrangements.
Ask if there are questions about the agenda before moving on.
Step 6: Lead participants to set “ground rules” for the training. Record these rules on
flip chart and encourage participation from the whole group.
Examples include: turn off mobile phones, confidentiality, no judgmental attitudes,
no question is a bad question, everyone should be respected when they have the
floor, everyone should actively participate, come back from breaks and lunch on
time, etc. Keep these “ground rules” posted throughout the training.

1-4 Module 1
SESSION 1.2: Review of Training Objectives
(15 minutes)
TRAINER INSTRUCTIONS
Methodologies: Large Group Discussion, Interactive Trainer
Presentation
Step 1: Ask participants to answer the following questions:
Why do you want to be a Peer Educator?
What skills and information do you hope to learn at this training?
Step 2: Review each of the training objectives below, referring to the pre-prepared flip chart on which the training objectives are written.
Step 3: Allow participants time to ask questions about the training objectives and remind
them that Peer Educators will receive on-the-job support as well as refresher
trainings in addition to this basic training.
KEY INFORMATION
Training objectives By the end of this basic training course (Modules 1-15), participants will be able to:
1. Work as an integral part of facility multidisciplinary care teams, specifically at PMTCT and HIV care and treatment clinics
2. Provide one-on-one counseling and group education to clients and their families so they better understand, use and adhere to HIV prevention, care and treatment services
3. Assist clients and their families to access different services within the health facility
4. Help prioritize pregnant women for HIV care and treatment services
5. Follow up HIV-exposed babies and provide basic information to clients on caring for their HIV-exposed and HIV-infected babies and children
6. Implement family-focused care by encouraging clients to disclose to family members and bring them to the clinic for counseling, testing, care and treatment
7. Serve as role models for positive living and adherence to care and treatment
8. Help clients, family members and community members live positively with HIV and prevent new HIV infections
9. Identify and trace clients who have missed appointments or have discontinued treatment in order to bring them back into care
10. Assist clients and their families to access community-based services, such as support groups, associations of people living with HIV (PLHIV) and food support

Comprehensive Peer Educator Training Curriculum: Trainer Manual 1-5
11. Conduct community mobilization and sensitization around HIV and prevention, care and treatment services
12. Keep records of daily, weekly and monthly activities
There are also 4 advanced training Modules (Advanced Modules 16-19) included in this curriculum. Some or all of these Modules may be added to the basic training course, or they may be used for advanced Peer Educator training later on. After completing the 4 advanced training Modules, participants will be able to:
1. Provide basic counseling on conception, childbearing and family planning and make appropriate referrals
2. Understand the relationship between nutrition and HIV and provide practical nutrition advice to clients and their families
3. Provide more in-depth information to clients on caring for their HIV-exposed and HIV-infected babies and children
4. Organize and lead PLHIV support group meetings

1-6 Module 1
SESSION 1.3: Learning Needs Assessment
(20 minutes)
TRAINER INSTRUCTIONS
Methodologies: Needs Assessment
Step 1: Note: The facilitators first need to determine whether or not participants will
be comfortable completing an individual, written learning needs assessment (pre-
test). If a written learning needs assessment will cause added stress to participants, or if trainers feel that some or all of participants’ literacy levels
would make this a challenge, then opt for the group learning needs assessment.
Tell participants that in order to guide the training and make it useful to them,
trainers need to have an idea of what people already know and what gaps exist.
Step 2: For a group learning needs assessment: Post a large “TRUE” sign on one
side of the room and also a large “FALSE” side on the other side of the room.
Select some of the statements from Appendix 1C: Learning Needs Assessment, read
each out loud and ask participants to move to either the TRUE or the FALSE
side of the room – participants can also stand in the middle if they are not sure. Ask a few participants to explain their responses and allow participants to change
their positions. Do not worry about explaining the right answers as all of the
topics will be covered in detail during the training.
For an individual, written learning needs assessment: Pass out copies of
Appendix 1C: Learning Needs Assessment to each participant. Give participants
about 15 minutes to complete the questions. Ask participants to hand their
completed papers to a trainer when they are complete. The trainers should
score each assessment after the training day is completed, using Appendix 1D:
Answers to Learning Needs Assessment Questions as a guide.
Step 3: After the needs assessment, debrief by asking participants how they felt about
the questions. Were the questions easy or difficult?
Again, remind participants that we are all here to learn and that at the end of the
training they will be able to answer all of these questions and many more with
confidence.
KEY INFORMATION
See Appendix 1C: Learning Needs Assessment.

Comprehensive Peer Educator Training Curriculum: Trainer Manual 1-7
APPENDIX 1A: Sample Training Registration Form
Pre
vio
us
Tra
inin
g
Ph
on
e #
(or
co
nta
ct
#)
Ad
dre
ss
Ag
e
Sex
Org
an
izati
on
Nam
e

1-8 Module 1
APPENDIX 1B: Sample Training Agenda
This suggested Peer Educator basic training agenda should be used as a guide. The exact agenda will depend on the days and times of the training and the availability of trainers, preceptors and participants; the training and practicum venue; as well as participant knowledge and skills. The first 8 days are mainly classroom-based and the last 5 days are supervised practicum days at health facilities and in their surrounding communities (optional). If the training is conducted on-site at a health facility (recommended), trainers may opt to include 1-2 hour practical sessions each day as well as full-day practical sessions at the end of the classroom training. Trainers may also wish to integrate one or more of the advanced Modules into the basic training agenda.
Week 1:
Time Day 1 Day 2 Day 3 Day 4 Day 5 8:30-10:00 Official Opening
Module 1: Course Overview and Introduction
Module 4: Communication and Counseling Skills
Module 6: ART
Module 7: HIV Prevention, Care and Treatment for Pregnant Women and their Children
Module 8, continued
10:00-10:15 TEA BREAK TEA BREAK
TEA BREAK TEA BREAK TEA BREAK
10:15-12:00 Module 2: Roles and Responsibilities of Peer Educator
Module 4, continued Module 6, continued Module 7, continued
Module 8, continued
12:00-1:00 LUNCH LUNCH
LUNCH LUNCH LUNCH
1:00-3:00 Module 3: HIV and Reproductive Health Basics
Module 5: Comprehensive HIV Care
Module 6, continued Module 7, continued Module 8, continued
3:00-3:15 TEA BREAK TEA BREAK TEA BREAK TEA BREAK TEA BREAK
3:15-4:30 Module 3, continued Module 5, continued Review or catch-up time Module 8: Adherence and Psychosocial Support
Module 8, continued
4:30-4:45 DAILY RECAP, EVALUATION AND CLOSING
DAILY RECAP, EVALUATION AND CLOSING
DAILY RECAP, EVALUATION AND CLOSING
DAILY RECAP, EVALUATION AND CLOSING
DAILY RECAP, EVALUATION AND CLOSING

Comprehensive Peer Educator Training Curriculum: Trainer Manual 1-9
Week 2: Time Day 6 Day 7 Day 8 Day 9 Day 10 8:30-10:00 Module 9: Identifying and
Tracing People Who Do Not Return to the Clinic
Module 10, continued Module 12: Community Outreach, Education and Linkages
SUPERVISED PRACTICUM – DAY 1
SUPERVISED PRACTICUM – DAY 2
10:00-10:15 TEA BREAK TEA BREAK TEA BREAK
10:15-12:00 Module 9, continued Module 11: Stigma, Discrimination and Disclosure
Module 12, continued
12:00-1:00 LUNCH LUNCH
LUNCH
1:00-3:00 Module 10: Positive Living Module 11, continued Module 13: Record-Keeping and Reporting
3:00-3:15 TEA BREAK TEA BREAK TEA BREAK
3:15-4:30 Module 10, continued Module 11, continued Review or catch-up time
Module 14: Supervised Practicum (preparation)
4:30-4:45 DAILY RECAP, EVALUATION AND CLOSING
DAILY RECAP, EVALUATION AND CLOSING
DAILY RECAP, EVALUATION AND CLOSING
Week 3: Time Day 11 Day 12 Day 13 Day 14
8:30-10:00
SUPERVISED PRACTICUM - DAY 3
SUPERVISED PRACTICUM - DAY 4
SUPERVISED PRACTICUM - DAY 5
Practicum Debriefing Module 15: Action Planning, Evaluation and Graduation
10:00-10:15
10:15-12:00
12:00-1:00
1:00-3:00
3:00-3:15
3:15-4:30
4:30-4:45

1-10 Module 1
APPENDIX 1C: Learning Needs Assessment
Name: ____________________ Date:_________________ Score:______/30 correct
# Questions (tick True, False or Don’t Know for each question) True False Don’t Know
1 Peer Educators are volunteers, so they are not members of the multidisciplinary HIV care team.
2 CD4 cells help protect us from infections.
3 Dual protection means wearing 2 condoms at a time.
4 If a man is circumcised, he does not have to use condoms.
5 HIV is most commonly spread through unsafe sex.
6 Supportive counseling includes telling people what you think is best.
7 Shared confidentiality means you should tell a person’s family, but not community members, that the person has HIV.
8 Peer Educators should ask clients about family members at each visit.
9 Only people on antiretroviral therapy (ART) need HIV care services.
10 People living with HIV (PLHIV) are less likely to get tuberculosis (TB) than people without HIV.
11 Cotrimoxazole (CTX, or Bactrim) helps prevent opportunistic infections (OIs).
12 Only very sick people need ART.
13 A person on ART can still pass HIV to another person.
14 Normally, a person’s CD4 count goes down when they start ART.
15 Many side effects of antiretroviral medicines (ARVs) will go away in 2-4 weeks.
16 If a woman with HIV has a baby, it is certain the baby will be HIV infected.
17 It is safe for pregnant women to take ARVs.
18 The motto for prevention of mother-to-child transmission (PMTCT) of HIV is “saving 2 lives.”
19 There is no way to know for sure if a 6-month-old baby is HIV infected.
20 Peer Educators can help clients create an ART adherence plan.
21 Most people miss their ARV doses because they are lazy.
22 Missing one ARV dose per week is okay.
23 There is not much we can do if people do not come back to the clinic.
24 Positive living means telling people you are living with HIV.
25 Good nutrition is part of positive living.
26 People living with HIV can help prevent new HIV infections.
27 It is important for Peer Educators to disclose their HIV-status.
28 Disclosure is an ongoing process.
29 Children do not need to know about their HIV-status.
30 Peer Educators are also community educators and advocates.
Comprehensive Peer Educator Training Curriculum: Trainer Manual I -11
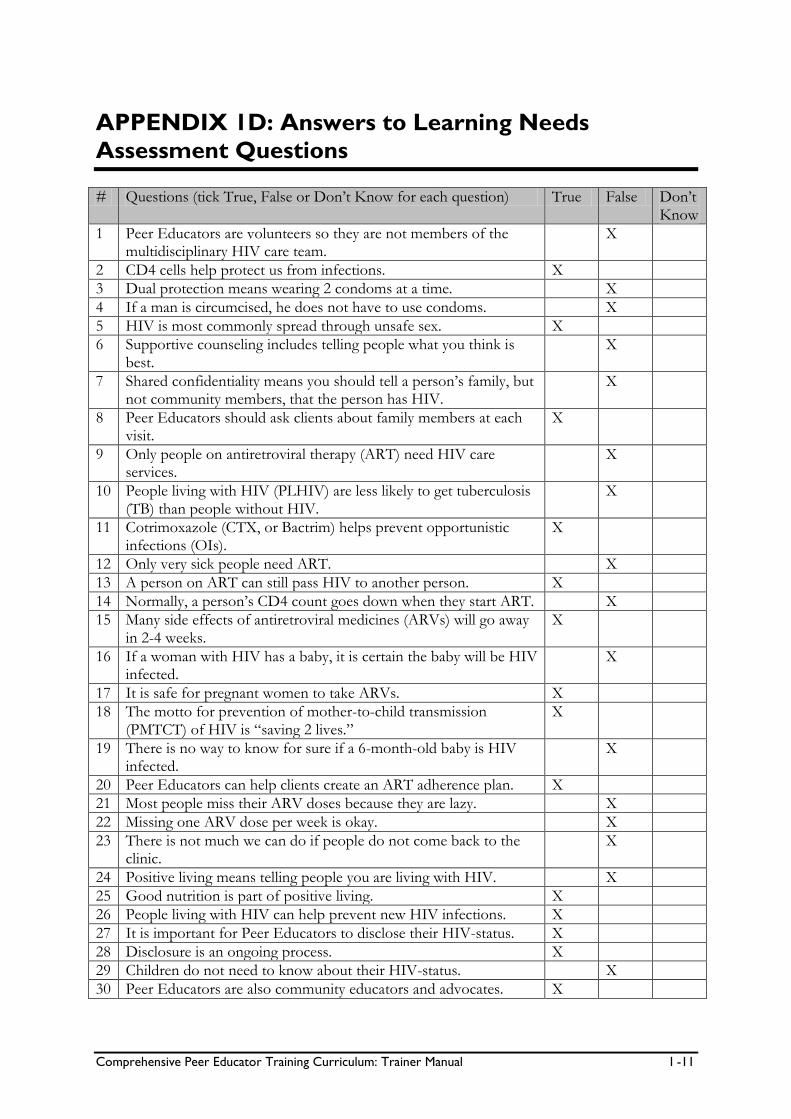
APPENDIX 1D: Answers to Learning Needs
Assessment Questions
# Questions (tick True, False or Don’t Know for each question) True False Don’t Know
1 Peer Educators are volunteers so they are not members of the multidisciplinary HIV care team.
X
2 CD4 cells help protect us from infections. X
3 Dual protection means wearing 2 condoms at a time. X
4 If a man is circumcised, he does not have to use condoms. X
5 HIV is most commonly spread through unsafe sex. X
6 Supportive counseling includes telling people what you think is best.
X
7 Shared confidentiality means you should tell a person’s family, but not community members, that the person has HIV.
X
8 Peer Educators should ask clients about family members at each visit.
X
9 Only people on antiretroviral therapy (ART) need HIV care services.
X
10 People living with HIV (PLHIV) are less likely to get tuberculosis (TB) than people without HIV.
X
11 Cotrimoxazole (CTX, or Bactrim) helps prevent opportunistic infections (OIs).
X
12 Only very sick people need ART. X
13 A person on ART can still pass HIV to another person. X
14 Normally, a person’s CD4 count goes down when they start ART. X
15 Many side effects of antiretroviral medicines (ARVs) will go away in 2-4 weeks.
X
16 If a woman with HIV has a baby, it is certain the baby will be HIV infected.
X
17 It is safe for pregnant women to take ARVs. X
18 The motto for prevention of mother-to-child transmission (PMTCT) of HIV is “saving 2 lives.”
X
19 There is no way to know for sure if a 6-month-old baby is HIV infected.
X
20 Peer Educators can help clients create an ART adherence plan. X
21 Most people miss their ARV doses because they are lazy. X
22 Missing one ARV dose per week is okay. X
23 There is not much we can do if people do not come back to the clinic.
X
24 Positive living means telling people you are living with HIV. X
25 Good nutrition is part of positive living. X
26 People living with HIV can help prevent new HIV infections. X
27 It is important for Peer Educators to disclose their HIV-status. X
28 Disclosure is an ongoing process. X
29 Children do not need to know about their HIV-status. X
30 Peer Educators are also community educators and advocates. X


Comprehensive Peer Educator Training Curriculum: Trainer Manual 2-1
MODULE 2:
Roles and Responsibilities of Peer
Educators as Part of the
Multidisciplinary HIV Care Team
DURATION: 105 minutes (1 hour, 45 minutes)
LEARNING OBJECTIVES:
By the end of this Module, participants will be able to:
Understand the goals and objectives of the Peer Education
program, and the roles of key partners in the program
Have a common understanding of the many roles Peer Educators
can play in improving access and adherence to HIV prevention,
care and treatment services
Understand the day-to-day activities and expectations of Peer
Educators
Explain who is part of a multidisciplinary HIV care team and how
the team works together
CONTENT:
Session 2.1: Introduction: Overview of the Peer Education Program
Session 2.2: Understanding Peer Education
Session 2.3: Roles and Responsibilities of Peer Educators
Session 2.4: Peer Educators as Part of the Multidisciplinary Care
Team
Session 2.5: Module Summary
METHODOLOGIES:
Guest speaker
Interactive trainer presentation
Small group discussion
Large group discussion
Brainstorming

2-2 Module 2
MATERIALS NEEDED:
Flip chart
Markers
Tape or Bostik
Peer Education program description and diagram of key players, if
available
Peer Educator job description
WORK FOR THE TRAINER TO DO IN ADVANCE:
Read through the entire Module and make sure you are familiar
with the training methodologies and content.
Invite program partners to this portion of the training to explain
more about the program.
Complete background information on the program and create a
diagram of the program partners and how they work together.
Work with program partners to develop a job description for
Peer Educators.

Comprehensive Peer Educator Training Curriculum: Trainer Manual 2-3
SESSION 2.1: Introduction: Overview of the Peer
Educator Program (15 minutes)
TRAINER INSTRUCTIONS
Methodologies: Guest Speaker or Interactive Trainer Presentation
Step 1: Review the Module learning objectives.
Step 2: Note: If the training facilitators are not part of the organization that is managing
or implementing the Peer Education program, it is recommended that someone
from this organization (for example a local NGO, the national PLHIV
Association, or the Ministry of Health) is invited to the training to give an
overview of the program.
Present an overview of the Peer Education program to participants. Use the
major discussion points below to guide the presentation. Be sure to include the
overall scope and goals of the program, as well as the roles of all participants and
partners.
Step 3: Draw a diagram of the key players in the Peer Educator program and their
relationship to one another (for example the donor, the Ministry of Health,
PLHIV associations, health facilities, health care workers, Peer Educators, etc.).
Step 4: Give participants a chance to ask questions about the Peer Educator program.
KEY INFORMATION
Note: The training facilitators and Peer Education program partners should fill in this key information according to the local program design and implementation plan. Background:
The Peer Education program was started in ______ (month, year).
The program was started by __________________ (organization/s).
Funding for the program is provided by ___________________________ (organization or donor).
The Peer Education program goal is to: _____________________________________________________________________ (fill in) The major objectives of the Peer Education program are to: _____________________________________________________________________ (fill in)

2-4 Module 2
Partners in the Peer Education program include: ___________________________________________________________________________ (Fill in and give a brief summary of each partner’s role in the program. Examples of partners may include: the Ministry of Health, provincial or district health teams, hospitals, health centers, clinics, health care workers, Peer Educator supervisors, PLHIV associations, community-based and faith-based organizations, community health workers, donors, etc.)

Comprehensive Peer Educator Training Curriculum: Trainer Manual 2-5
SESSION 2.2: Understanding Peer Education
(30 minutes)
TRAINER INSTRUCTIONS
Methodologies: Small Group Discussion, Large Group Discussion,
Interactive Trainer Presentation
Step 1: Ask participants to get into small groups of 3. Give the groups about 15 minutes
to discuss the following questions (you may want to write these on flip chart):
Think back to the time you were first diagnosed with HIV. How did you feel?
Did you know anyone living with HIV at that time? Were you able to ask that
person questions about living with HIV? What questions did you have when you were first diagnosed with HIV? When you
first started taking ARVs?
How could a Peer Educator have helped you during these times, or even now?
Step 2: Bring the large group back together and ask each small group to summarize its
discussion.
Step 3: Tell participants that we are all motivated to be Peer Educators for different
reasons, but usually we are motivated because of our own experiences – both
good and bad things that have happened to us – as PLHIV and clients in HIV
programs.
Use the content below to present general information on Peer Education
programs and their benefits to Peer Educators, clients and the health facility.
KEY INFORMATION
Key terms:
A peer is a person who belongs to the same social group as another person or group. The social group may be based on age, sex, sexual orientation, occupation, social group or status, health status or other factors.
Education refers to the development of a person’s knowledge, attitudes, beliefs or behavior, as a result of the learning process.
Peer education is the transfer of knowledge and skills to members of a social group by others within the same group.
HIV Peer Educators are people who are themselves enrolled in HIV prevention, care and/or treatment services; have a good understanding of HIV, care, treatment, PMTCT and adherence; and have the skills to help other clients with their care and treatment. Usually, Peer Educators are volunteers.

2-6 Module 2
Advantages of peer education programs:
People trust others in a similar situation: Clients have the opportunity to discuss their personal circumstances in a safe environment with someone who relates to their situation.
Improved adherence: Peer Educators can support clients’ adherence to care and treatment because they may have a deeper understanding of what the client is going through.
Community participation: Peer Educators can play a role in community mobilization, decreasing stigma, and increasing support for PLHIV.
Empowerment of individuals: Peer Educators can increase people’s confidence that they can make good decisions and take action. Peer Education programs can help both Peer Educators and their clients change behaviors in order to take care of their own health and that of their families.
Job opportunities: Training and work experience may improve Peer Educators’ job opportunities in the formal economic sector.
Improved service quality: Peer Educators can help to improve the overall quality and effectiveness of health care programs by giving feedback to the clinic about the needs of patients and communities.
Task shifting and saved time: Peer Educators can help free up the time of doctors, nurses and social workers by providing basic education and counseling at the clinic.
Increased access: Peer Educators can gain access to groups that are otherwise difficult to reach and encourage them to seek prevention, care and treatment services. Similarly, Peer Educators can follow up with clients who have missed appointments, since they are often from the same communities.

Comprehensive Peer Educator Training Curriculum: Trainer Manual 2-7
SESSION 2.3: Roles and Responsibilities of Peer
Educators in Family-focused HIV Programs (30
minutes)
TRAINER INSTRUCTIONS
Methodologies: Brainstorming, Interactive Trainer Presentation
Step 1: Start by asking participants to brainstorm what a Peer Educator does as part of
the multidisciplinary HIV care team. Record responses on flip chart.
Step 2: Pass out copies of the Peer Educator job description to each participant. Review
the job description and ask if there are any questions.
Step 3: Review how Peer Educators will be supported and supervised by program
partners, for example, health care workers, NGOs or district health teams. You
may also want to discuss any Peer Educator incentives (stipend, transport
allowance, uniform, etc.) during this step.
Step 4: Remind participants that an important part of being a Peer Educator is openly
disclosing your HIV-status to clients and community members. Ask participants
to break into pairs and discuss the following 3 questions for about 10 minutes
(you may want to write these on flip chart):
How did it feel to disclose to someone the first time?
Have you disclosed to someone you do not know well? If yes, what were your experiences? If no, what do you think your experiences might be?
How can Peer Educators help support each other to disclose at the clinic and in the
community?
Bring the large group back together and discuss why it is important for Peer
Educators to openly disclose their HIV-status in the clinic and in the community.
Step 5: Allow time for participants to ask questions about the roles and responsibilities
of being a Peer Educator.
KEY INFORMATION
Note: The training facilitators and Peer Educator program partners should fill in this key information according to the local program design and implementation plan.

2-8 Module 2
Example of a Peer Educator job description (adapt to the local context): Peer Educators are expected to:
Spend at least 2-3 days per week working at the health facility and 1-2 days per week working in the community
Participate as an active member of the multidisciplinary care team at ART and maternal and child health (MCH) clinics, including attending multidisciplinary team meetings
Openly disclose their HIV-status to clients and community members
Conduct group education sessions, in coordination with other members of the multidisciplinary care team, including: 1. Pre-ART sessions 2. PMTCT sessions 3. Others, as decided by the program
Conduct one-on-one counseling sessions with clients, caregivers and treatment supporters on the following topics: 1. HIV basics 2. Understanding care and treatment 3. Adherence to care and treatment 4. PMTCT and the importance of treatment for mothers and follow-up care for babies 5. Disclosure 6. Positive living and positive prevention 7. Ongoing psychosocial support 8. Others, as decided by the program
Work as part of the multidisciplinary care team to prioritize pregnant women for care and treatment services and follow up mothers and babies after delivery
Help clients with referrals within the health facility, including walking them to the referral point, explaining why the referral was made and what services will be given at the referral point and making sure the client is seen in a timely manner at the referral point
Act as a link between clients and the multidisciplinary care team, including presenting common concerns of clients/adherence challenges faced by clients in multidisciplinary team meetings
Implement family-focused care by asking all clients about family members and encouraging them to come for HIV testing and counseling, care and treatment
Work as part of the multidisciplinary care team to identify and follow up with clients who do not return to the clinic for appointments, CD4 or other tests and results and medication refills (this includes making follow-up phone calls and home visits according to the facility protocol)
Link clients and caregivers with community-based care and support services
Conduct community outreach and education activities to improve community knowledge about and acceptance of PMTCT and HIV care and treatment services for adults, pregnant women and children
Lead support group meetings and, where none exist, form new support groups
Keep basic records and compile monthly reports

Comprehensive Peer Educator Training Curriculum: Trainer Manual 2-9
SESSION 2.4: Peer Educators as Part of the
Multidisciplinary Care Team (20 minutes)
TRAINER INSTRUCTIONS
Methodologies: Brainstorming, Large Group Discussion
Step 1: Ask participants to list all the people they have come in contact with at the
facility when accessing PMTCT and HIV care and treatment services. List these
on flip chart, and fill in using the content below if needed.
Step 2: Ask participants to discuss why each of the people listed on flip chart is
important to providing quality HIV services to clients and family members. Remind them to draw on their own experiences.
Step 3: Ask participants what they think would happen if one member of the
multidisciplinary care team left. How would this impact a client’s care?
Step 4: Remind participants that they are going to be an important part of the
multidisciplinary care team and that they will complement, not duplicate, the other
members’ roles.
KEY INFORMATION
The multidisciplinary care team: No one person, no matter how skilled, can provide all the care and support that a client needs. We all have different training, skills and personal strengths. Also, no one person has time to do everything. This is why it is important for HIV prevention, care and treatment programs to have a multidisciplinary team that looks after every client.
Depending on the specific site, members of the HIV care team can include:
Doctors: Check on clients’ health status and make a care and treatment plan, assess if a client needs to be on ART and, if so, which medicines they should take
Nurses: Provide PMTCT counseling to women, provide adherence counseling to all clients, perform intake and history-taking activities when the client comes to the clinic, take blood samples, provide support on positive living, weigh infants and give immunizations
Pharmacists: Provide clients with medicines and information on how to take them and ask about adherence
Multidisciplinary means a mix of different professionals and volunteers – doctors, nurses, counselors, peer educators, administrative staff and others – working as members of a team.

2-10 Module 2
Lab technicians: Take blood or other samples from clients, perform lab tests - like CD4, liver function, etc., record test results and report them back to the doctor and nurses
Phlebotomists: Take people’s blood for testing at the lab
Counselors or social workers: Provide counseling before and after an HIV test, on PMTCT, on living positively with HIV and on disclosing HIV-status to family members, help when a client feels depressed or hopeless or is thinking about suicide and provide referrals to other supportive services in the community
Peer Educators and lay counselors: Provide “real life” advice and psychosocial support to clients, help clients with adherence and disclosure, talk about HIV and care and treatment in understandable terms, link clients with needed facility and community resources, serve as the link between clients and clinical staff, follow up with clients by phone or at home if they miss an appointment
Data clerks/information officers: Make sure good records are kept on all clients so the team can give them the best possible care
Other clinic staff such as receptionists, cleaners and security guards: Welcome clients to the clinic and are often the people who give the “first impression” to clients when they visit the clinic
Site coordinators or advisors: Coordinate inputs at the hospital and make sure people are working together
Community-based workers and organizations: Provide psychosocial support, material support, home-based care and nutritional support in the clients’ homes and communities and mobilize the community to stop stigma and discrimination
Faith-based organizations and spiritual leaders: Provide support and counseling to clients and their families, including at times material and nutritional support
Family members and friends: Accept the person’s status and provide support for her or him to live positively and access and adhere to care and treatment, practice safer sex and infection prevention in the home and serve as home-based care providers
The clients themselves: Are educated and informed consumers of services and active participants in their own care
Multidisciplinary care teams need to work together, communicate with one another and respect each individual’s contribution to improving the health and well-being of the client. If one “link in the chain” is missing, clients will not get the quality care they need in the hospital, community or home. It is important that multidisciplinary care teams plan specific ways to work together, such as by meeting regularly to talk about the program and particular clients’ care.

Comprehensive Peer Educator Training Curriculum: Trainer Manual 2-11
SESSION 2.5: Module Summary (10 minutes)
TRAINER INSTRUCTIONS
Methodologies: Large Group Discussion, Interactive Trainer
Presentation
Step 1: Ask participants what they think are the key points of this Module. What
information will they take away from the Module?
Step 2: Summarize the key points of the Module using participant feedback and the
content below.
Step 3: Ask if there are any questions or clarifications.
Step 4: Review the learning objectives with participants and make sure all are confident
with their skills and knowledge in these areas.
Step 5: If there are areas participants do not fully understand or in which they need
more help, go back and review the session before moving to the next Module.
KEY INFORMATION
THE KEY POINTS OF THIS MODULE INCLUDE:
Peer Educators are important providers and recipients of HIV prevention, care and treatment services.
Peer Educators have many day-to-day roles and responsibilities to support clients and their families to access and adhere to prevention, care and treatment services.
Peer Educators make up an important part of the multidisciplinary care team and complement the work of other team members.


Comprehensive Peer Educator Training Curriculum: Trainer Manual 3-1
MODULE 3:
HIV and Reproductive Health Basics
DURATION: 210 minutes (3 hours, 30 minutes)
LEARNING OBJECTIVES:
By the end of this Module, participants will be able to:
Discuss common myths and rumors about HIV and AIDS
Discuss the difference between HIV and AIDS
Discuss how HIV affects the immune system
Identify sexual and reproductive body parts in men and women
Describe the basic function of sexual and reproductive body
parts in men and women
Describe the ways HIV is transmitted
Talk about ways HIV infection can be prevented
Understand the major pieces of comprehensive HIV care and
support and why each is important to PLHIV and their families
Understand and incorporate the idea of “family-focused care”
into their work as Peer Educators
CONTENT:
Session 3.1: Introduction
Session 3.2: The Difference between HIV and AIDS
Session 3.3: From HIV to AIDS – What Does HIV Do in the Body?
Session 3.4: Sexual and Reproductive Body Parts and Their
Functions
Session 3.5: HIV Transmission and Prevention
Session 3.6: Introduction to Comprehensive, Family-Focused Care
Session 3.7: Module Summary
METHODOLOGIES:
Interactive trainer presentation
Small group work
Large group discussion

3-2 Module 3
Brainstorming
MATERIALS NEEDED:
Flip chart
Markers
Tape or Bostik
Small sheets of paper or index cards
Male and female reproductive models, if available
WORK FOR THE TRAINER TO DO IN ADVANCE:
Read through the entire Module and make sure you are familiar
with the training methodologies and content.
For Session 3.1, write common myths and rumors about HIV and
PLHIV on small sheets of paper or index cards.
For Session 3.2, write the definitions of HIV and AIDS on flip
chart.
For Session 3.4, make overheads of the male and female
reproductive diagrams or recreate these images on flip chart. If
possible, the trainer should obtain male and female reproductive
models for this session as well.

Comprehensive Peer Educator Training Curriculum: Trainer Manual 3-3
SESSION 3.1: Introduction (20 minutes)
TRAINER INSTRUCTIONS
Methodologies: Interactive Trainer Presentation, Small Group Work,
Large Group Discussion
Step 1: Review the Module learning objectives.
Step 2: Give each participant 1 or 2 of the pre-prepared myths and rumors cards (be
sure to include any local myths and rumors in addition to those listed below).
Step 3: Ask participants to spend 5-10 minutes talking with the person next to them
about (you may want to write these on flip chart):
The impact that the myth or rumor has on PLHIV, families and the community
Where you think the myth or rumor came from
What you can say to someone who believes this myth or rumor is true
Step 4: Bring the large group back together and ask each person to briefly say one of the
myths and rumors they discussed, and what they might say to someone who
believes it is true.
Step 5: Tell participants that an important part of being a Peer Educator is knowing all
the facts about HIV and AIDS and being able to communicate the facts to people
in the clinic and in the community.
Remind participants that while everyone is entitled to his or her own opinions,
knowing the facts will help decrease stigma and discrimination of PLHIV and
encourage people to seek prevention, care and treatment services.
KEY INFORMATION
Common myths and rumors about HIV, AIDS and PLHIV (adapt to your local setting and include any common myths and rumors in your community):
Having sex with a virgin can cure AIDS.
Only promiscuous people get infected with HIV.
Anyone with TB or pneumonia has HIV.
An HIV-positive woman must have been sleeping around.
People over age 40 do not get HIV.
PLHIV should never have sex again.
PLHIV should be responsible and tell everyone about their HIV-status as soon as they know they are positive.
Traditional healers and holy water can cure people with HIV.
A faithful couple that is HIV-positive does not need to use condoms.
Being diagnosed with HIV is a death sentence.
You can tell if a person has HIV or AIDS by looking at her or him.
ART is only available in rich countries or is for people who have a lot of money.

3-4 Module 3
ART makes you look better on the outside, but it makes you sick on the inside and may ultimately kill you.
Feeling better after starting ART means an HIV-positive person has been cured.
Being HIV-positive means a woman should never have children.
All children born to women with HIV will get infected with HIV.
ART is too strong for pregnant women to take, as it will hurt the baby.

Comprehensive Peer Educator Training Curriculum: Trainer Manual 3-5
SESSION 3.2: The Difference between HIV and AIDS
(15 minutes)
TRAINER INSTRUCTIONS
Methodologies: Large Group Discussion, Interactive Trainer
Presentation
Step 1: Tell participants that it is important for Peer Educators to know and be able to
explain the difference between HIV and AIDS to clients and community
members.
Step 2: Ask participants to give some common or slang words for HIV and AIDS in the community and record these on flip chart.
Step 3: Ask participants if the difference between HIV and AIDS was explained to them
during VCT, PMTCT or in the ART clinic. If yes, ask some participants to share
with the group how it was explained to them. Ask the group to comment and fill
in gaps using the content below and the pre-prepared flip charts with the
definitions of HIV and AIDS.
Step 4: Ask participants to define what it means when someone is “HIV-infected.” What
does it mean when someone has “AIDS?” Fill in using the content below.
KEY INFORMATION
HIV stands for Human Immunodeficiency Virus: H Human (refers to us) I Immunodeficiency (lack of protection from getting sick) V Virus (a type of germ in the body that cannot be cured) AIDS stands for Acquired Immune Deficiency Syndrome: A Acquire (to get something) I Immune (the way the body fights disease) D Deficiency (not enough of something – in this case a lack of protection from getting
sick) S Syndrome (a group of symptoms or illnesses)
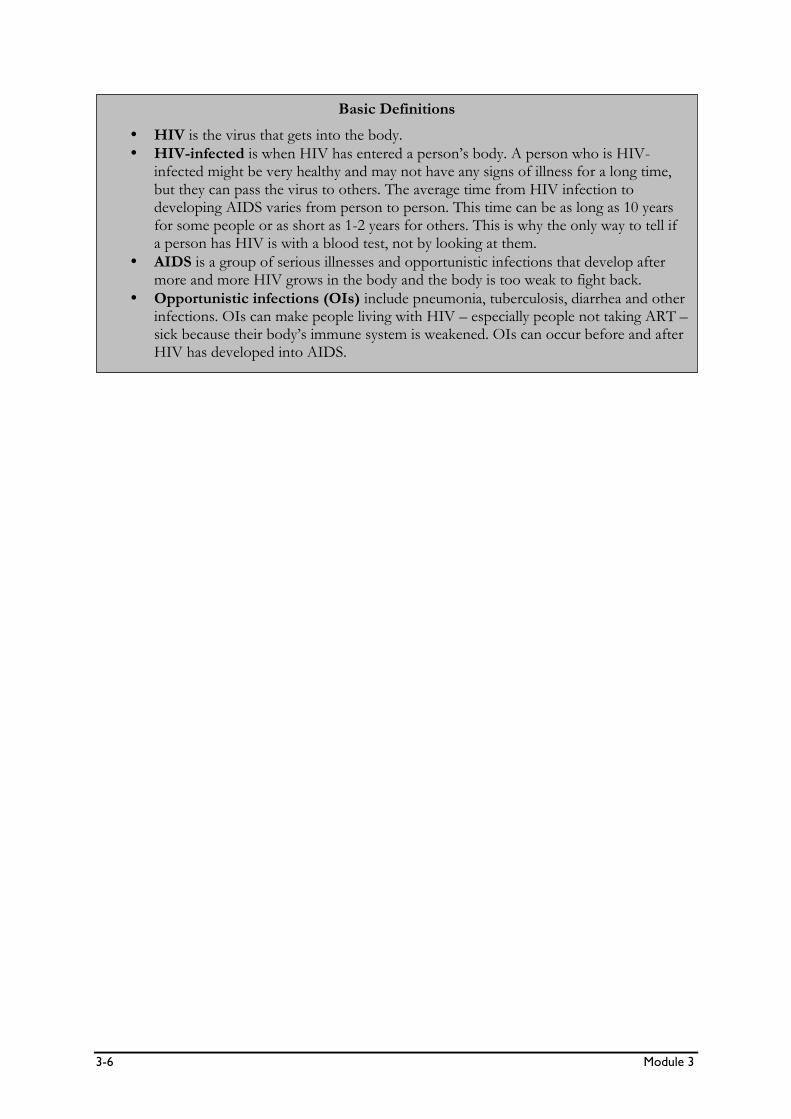
3-6 Module 3
Basic Definitions
HIV is the virus that gets into the body.
HIV-infected is when HIV has entered a person’s body. A person who is HIV-infected might be very healthy and may not have any signs of illness for a long time, but they can pass the virus to others. The average time from HIV infection to developing AIDS varies from person to person. This time can be as long as 10 years for some people or as short as 1-2 years for others. This is why the only way to tell if a person has HIV is with a blood test, not by looking at them.
AIDS is a group of serious illnesses and opportunistic infections that develop after more and more HIV grows in the body and the body is too weak to fight back.
Opportunistic infections (OIs) include pneumonia, tuberculosis, diarrhea and other infections. OIs can make people living with HIV – especially people not taking ART – sick because their body’s immune system is weakened. OIs can occur before and after HIV has developed into AIDS.

Comprehensive Peer Educator Training Curriculum: Trainer Manual 3-7
SESSION 3.3: From HIV to AIDS – What does HIV
Do in the Body? (40 minutes)
TRAINER INSTRUCTIONS
Methodologies: Large Group Discussion, Interactive Trainer
Presentation, Small Group Work
Step 1: Ask participants how people know if they have HIV. Ask them to reflect on their
own experiences if they want to share. Use content below to review the
importance of HIV testing (especially for pregnant women) and ongoing clinical
and lab tests for PLHIV to monitor health.
Step 2: Ask participants to break into 3 small groups. Ask each group to prepare a short skit or a series of drawings about the way HIV enters the body and ends up
making people sick. They should be sure to include the following:
HIV enters the body
HIV-positive, lots of CD4 cells, no symptoms
HIV-positive, less CD4 cells, with some symptoms and infections
AIDS develops, low CD4 cells, many infections attacking the body.
Step 3: Ask some of the small groups to present their skit or drawings, pretending that
the audience is made up of new clients at the HIV clinic who just learned they
were HIV-positive. Ask the group to comment and ask questions that they think
clients would want to know, using examples of questions they had when they got
their own HIV test results.
Step 4: Fill in using the content and illustrations below.
KEY INFORMATION
How do people know if they have HIV or AIDS?
HIV infection can be diagnosed with a simple blood test. The service is usually called HTC, or HIV testing and counseling. Sometimes it is called VCT, or voluntary counseling and testing. Pregnant women are usually given an HIV test as a routine part of antenatal care. Remember, you cannot tell if people have HIV by looking at them!
AIDS is diagnosed by clinical and lab tests done at the hospital or clinic (usually using blood samples). Where these tests are not available, a doctor can diagnose AIDS after examining a person’s health and taking a history.

3-8 Module 3
CD4 cells are our “guardian angels” that protect our bodies from infections that can make us sick. The higher a person’s CD4 count, the better.
What does HIV do to the immune system?
The immune system is the body’s natural defense against diseases.
The human body is made up of many tiny cells. Cells are the basic building blocks in our body – they give us energy and keep us healthy and alive.
In a healthy person, the immune system fights off diseases that enter the body to keep the person healthy. A type of cell called the CD4 cell helps the body fight infections. Some people talk about the CD4 cells as “soldiers” that defend the body. We could also look at them as the “guardian angels” that protect us from disease.
HIV enters the blood stream and starts to attack CD4 cells.
HIV reproduces itself in the CD4 cells. These are the same cells that the body uses to fight infection.
For a while, the CD4 “guardian angel” cells keep the virus weak in the body.
After some time, HIV becomes stronger than the CD4 cells and keeps making more of the virus and attacking more of the CD4 cells. HIV keeps reproducing and there is more and more of it in the body.
This makes people more likely to get infections and it is harder for the body to fight these infections because it does not have as many CD4 cells, or “guardian angel cells.”
Eventually, the HIV attacks so many of the CD4 cells that there are not enough to fight back. The body is attacked by infections and germs that the person cannot fight off.
These infections (called opportunistic infections, or OIs) are what eventually make people develop AIDS and, without treatment, die.
Making sense of CD4 test results:
PLHIV should get a blood test to see the levels of CD4 cells when they first know they are HIV-positive and then regularly after that time (usually every 6 months). It is important for Peer Educators to help clients, including pregnant women, come back for and understand the CD4 test results.
Healthy people with good immune systems have CD4 counts of 500-1500 (measured in the unit cells/mm3). People do not need to start taking ART when the CD4 count is this high but they should take cotrimoxazole (CTX) when they are advised to do so by health care workers.
When a person’s CD4 count goes below about 500, they may start getting OIs that the body has trouble fighting. OIs, such as TB, can occur at any low CD4 count, while infections such as pneumonia generally happen only when people have a CD4 count less than 200.
When a person’s CD4 count goes below a certain number, they will sometimes become quite sick and now need ART to stay healthy (in many countries the cutoff is 200 for adults and 350 for pregnant women, but it depends on the country so check your national guidelines).
It is important to get CD4 tests on a regular basis because usually the CD4 cell count will fall first and then the person will get sick a bit later. If the person knows the CD4 cell count is dropping, he or she can take steps to avoid getting sick, like taking ART.

Comprehensive Peer Educator Training Curriculum: Trainer Manual 3-9
Stages of HIV and AIDS:
1. HIV enters: Virus enters the body. 2. HIV-positive, high CD4 count, no major symptoms: People carry HIV and can
spread it to others but feel healthy and have a lot of CD4 cells. People will not know they are HIV-positive unless they get tested. This stage can last up to 10 years in adults but lasts a much shorter time in children, who usually become sick quickly.
3. HIV-positive, fewer CD4 cells, some symptoms: People are healthy most of the time but may start losing weight and getting sick more often as they have less and less CD4 cells. Also takes longer to feel healthy after being sick.
4. AIDS, very few CD4 cells, lots of symptoms and infections: People have many OIs and a hard time getting rid of them, CD4 count drops below 200 and amount of HIV increases in the body.
Viral Load Testing
In some places, where it is available, viral load and CD4 tests can be used together to decide when to start ART and to see how a person is responding to treatment.
Viral load is a measure of the amount of HIV that is in the blood (measured in copies per mL).
When a person is first infected with HIV, the viral load is very high.
As HIV grows in the body and the CD4 count goes down, there is more HIV in the blood and so the viral load increases.
When ART is successful, a person’s viral load will decrease quickly and often stays either very low or undetectable as long as the person takes her or his medications regularly.
An “undetectable viral load” does not mean that there is no HIV in the blood or in the body. It means that the amount of HIV is too low to be detected by the test.
The lower a person’s viral load, the better. The higher a person’s viral load, the more sick she or he will become and the higher the chance of passing HIV to other people, including to a female sexual partner, who may then pass HIV to an infant during pregnancy, labor and delivery or breastfeeding.
HIV Infection in Babies and Children
The way HIV affects the immune system in babies and children is similar to adults. But babies and children with HIV usually progress from HIV to AIDS very quickly if they are not on ART. However, there are different CD4 count cut-offs for babies and children than there are for adults. For children under 5 years old, CD4% (the % of CD4 cells present out of all of the immune system cells) is used instead of CD4 cell count.
There is more on HIV in infants and children in Module 7 and Advanced Module 18.

3-10 Module 3
SESSION 3.4: Sexual and Reproductive Body Parts
and Their Functions (40 minutes)
TRAINER INSTRUCTIONS
Methodologies: Brainstorming, Small Group Work, Large Group
Discussion, Interactive Trainer Presentation
Step 1: Ask participants to share words or phrases having to do with sex. This may
include body parts and sexual activities. Encourage participants to use local
languages and slang. Ask participants how they felt saying these words out loud.
Ask them why they think it so difficult to talk with people about sex and explain
how important it is for Peer Educators to talk about sex and sexuality openly and comfortably in their communities.
Step 2: Break participants into 2 or more small groups – one made up of male
participants and the other female participants (if there are many participants,
make a few small groups). Give each group flip chart paper and markers and ask
them to draw a “body map” of either the male or the female sexual and
reproductive body parts. Ask participants to be as detailed as possible in their
body maps and to be prepared to discuss the purpose of each body part. Give
the small groups about 15-20 minutes.
Step 3: After 15 minutes, ask the small groups to present their body maps to the large
group and encourage comments and discussion. Use the illustrations below to fill
in any missing information and have participants follow along in their Participant
Manual. If possible, also use male and female reproductive models to show the
various body parts.
Step 4: Debrief by asking participants how they felt talking about sexual and reproductive
body parts. Ask the group if there are any questions before moving on.
KEY INFORMATION
Sex is a normal part of life, but sometimes it can be uncomfortable to talk about sex, sexuality and reproduction. It is very important for Peer Educators to be comfortable talking about sex and reproduction openly with their clients and in the community. Peer Educators may have different religious and cultural beliefs than some of their clients, but it is important never to judge other people because of their sexual behavior – even if we do not agree with the behavior. Because HIV is most often spread through unsafe sex, it is also important for Peer Educators to understand the parts of the body involved in sex and reproduction before sharing this information. In order to encourage people to protect themselves and their families, we must make sure they have the facts!

Comprehensive Peer Educator Training Curriculum: Trainer Manual 3-11
Female sexual and reproductive body parts External female body parts (parts you can see):
Urethra: where urine (pee) comes out of the body
Vagina: where the penis or fingers enter during sex and also where a baby comes out. The vagina is the opening to the cervix and the uterus, which is where babies grow.
Anus: where stool (poop) comes out of the body and where the penis or fingers enter the body during anal sex
Labia minora and labia majora: sometimes called the “lips” around the vagina and urethra
Clitoris: where women can have strong pleasure and orgasm Some women may have experienced genital cutting, where the clitoris and labia may have been removed in part or completely. Some women may also have had parts of their vaginas sewn up. It is important not to judge women who have or have not undergone these procedures.
Remember: People define sex differently, but it is important the Peer Educators NEVER judge people because of their sexual views or behaviors!
There are many different ways people have sex, such as vaginal sex, anal sex, oral sex, masturbation, using fingers or objects in the vagina or anus, and many others.
Also, some people have sex with men, some people with women and some people with both men and women. In all parts of the world, there are men who have sex with other men and some women who have sex with other women.

3-12 Module 3
Internal female body parts (parts you cannot see):
Uterus or womb: where a baby grows and where monthly bleeding comes from
Ovaries: where a woman’s eggs are stored
Fallopian tubes: attached to the uterus. The eggs travel through the fallopian tubes to get from the ovaries to the uterus.
Cervix: “mouth” of the uterus. Sperm enters the uterus through the cervix and the baby comes out of the uterus through the cervix.
Vagina: where the penis or fingers enter during sex and also where a baby comes out. The vagina is the opening to the cervix and the uterus, which is where babies grow.

Comprehensive Peer Educator Training Curriculum: Trainer Manual 3-13
Male sexual and reproductive body parts External male body parts (parts you can see):
Penis: the main body part for sex and pleasure. The penis delivers the sperm that can make a woman pregnant during sex. The tip of the penis may have foreskin or, if the man has been circumcised, there will be no foreskin.
Scrotum: sack that holds the testicles (balls)
Anus: where stool (poop) comes out of the body and where the penis or fingers enter the body during anal sex. Note that the anus is not shown in the diagram below, but is located in the same place as in a female.

3-14 Module 3
Internal male body parts (parts you cannot see):
Testicles or balls: where sperm are made and stored. Sperm live in a fluid called semen (cum), which is what comes out when a man ejaculates. Semen can contain STIs and HIV.
Vas deferens: attached to the testicles. Sperm travel through these tubes to get to the urethra.
Urethra: the opening on the end of the penis where urine (pee) and semen (cum) containing sperm come out. Note that urine and semen do NOT come out at the same time.

Comprehensive Peer Educator Training Curriculum: Trainer Manual 3-15
SESSION 3.5: HIV Transmission and Prevention
(55 minutes)
TRAINER INSTRUCTIONS
Methodologies: Brainstorming, Small Group Work, Large Group
Discussion, Interactive Trainer Presentation
Step 1: Ask participants to brainstorm which body fluids contain HIV and which body
fluids do not contain HIV. Record these on 2 separate pieces of flip chart and fill
in using the content below.
Clarify that while some body fluids do not contain HIV (like urine and mucous), if there is blood in these fluids as well, they may contain HIV.
Step 2: Prepare 2 sheets of flip chart. One should say, “ACTIONS THAT DO NOT
TRANSMIT HIV” and the other should say, “ACTIONS THAT MAY TRANSMIT
HIV.” Post them on opposite sides of the training room (and post blank flip
charts next to each if more room is needed). Give participants markers and ask
them to write all the actions they know do and do not transmit HIV on the
appropriate flip charts. You may need to give some examples to get participants
started. Give participants about 5-10 minutes to write their answers on the flip
charts.
Once participants have returned to their seats, review each flip chart, filling in as
needed from the content below on the ways HIV is and is not transmitted.
Remind participants that different actions carry different levels of risk.
Step 3: Tell participants that the next steps, after knowing how HIV is passed from
person to person, are to know all the ways to prevent HIV and help people
practice safe behaviors.
Note: Depending on the baseline knowledge level of participants, the trainer
may need to lead an interactive presentation on HIV prevention before this
activity using the content below.
Break the large group into 4 smaller groups. Ask each group to select a speaker.
Assign each group one of the modes of HIV transmission (sexual, mother-to-
child, blood-to-blood, and sharp object use). Give the groups flip charts and
markers. Ask each group to come up with 3-5 key messages to tell clients and
other community members about preventing this kind of HIV transmission. Ask
groups to write the messages on flip chart. The trainers should work with each
of the small groups.
Step 4: After 15 minutes, the chosen speaker for each group should present the key
messages to the larger group as if they were leading a meeting of PLHIV and their
families at the hospital. Remind them that they need to speak clearly and slowly
and explain each message in common terms. It is best if they can use “real life”
examples and experiences. Give each group about 5 minutes to present, then ask if there are questions and fill in with the content below.

3-16 Module 3
Step 5: Debrief by asking the speakers how they felt presenting in front of the large
group. Did they feel comfortable that they knew the right information and could
answer questions?
Step 6: Close the session by reminding participants of the important role Peer Educators
play in preventing new HIV infections. Also, remind participants that there will be
more on PMTCT in Module 7 and more on positive living and positive prevention
in Module 10.
KEY INFORMATION
Fluids that do and do not transmit HIV HIV is most easily transmitted in these body fluids:
Semen (cum)
Vaginal fluids
Blood
Birthing fluids
Breast milk
HIV is not usually transmitted in these body fluids - unless there is also blood:
Urine (pee)
Feces (poop)
Saliva (spit)
Sweat
Mucous (snot)
Pus
Ways HIV is transmitted Sexual transmission:
Unprotected sexual intercourse with a PLHIV – this includes male-female sex, male-male sex, and female-female sex
Direct contact with body fluid of infected person (blood, semen, vaginal secretions)
Note that sexual transmission accounts for 87% of HIV transmission worldwide
HIV transmission is more likely if:
One or both people have advanced HIV infection or AIDS
One or both people have just recently been infected with HIV (because at this time there is a lot of HIV in the blood). People should be encouraged not to have sex if they have any signs or symptoms of HIV or if they think they have been infected with HIV recently. They should go for HIV testing and counseling and enroll in care and treatment if HIV-positive.
Mother-to-child transmission (MTCT):
During pregnancy
During labor and delivery (most MTCT happens at this stage)
During breastfeeding
Note that MTCT is more likely if the mother has advanced HIV infection or AIDS, or if she is not taking ARVs. MTCT is also more likely if the mother is infected with HIV close to or during pregnancy and breastfeeding.

Comprehensive Peer Educator Training Curriculum: Trainer Manual 3-17
Blood-to-blood transmission:
Transfusion with infected blood
Direct contact with infected blood/body fluids Use of unsafe sharp objects:
Injecting drugs and sharing needles with an infected person
Piercing, tattooing or cutting with unclean knives or other objects Ways HIV is NOT transmitted:
Sharing food or a drinking cup
Hugging
Kissing
Shaking hands
Coughing or sneezing
Being near a PLHIV
Sharing a latrine/toilet
Using condoms
Mosquitoes or insect bites – even if they carry human blood, HIV cannot live outside of humans

3-18 Module 3
HIV prevention Peer Educators have an important role to play in teaching people how to prevent HIV. Their efforts will benefit themselves, their families and their communities. The ABCs of preventing sexual transmission of HIV: A: Abstinence – this approach works best for young people B: Be faithful to your partner (whether or not your partner is living with HIV or is HIV-
negative) C#1: Consistent and correct condom use (male or female) – every time – for “dual protection”
against pregnancy and HIV C#2: Circumcision – male circumcision can reduce the risk of sexual HIV transmission from
women living with HIV to HIV-negative men (see the box below) D: Delay sexual debut E: Early and complete treatment of STIs F: Free and open communication between partners about sex G: Get to know your HIV-status
Uncircumcised Penis Circumcised Penis
Male Circumcision
Male circumcision can reduce the risk of female-to-male sexual transmission of HIV, but should not be used as the only risk reduction method. Circumcision involves removal of the foreskin on the penis, as shown in the drawing below. Circumcisions can be performed on babies or on adults but should only be done by trained doctors at a health facility.
Circumcision has NOT been shown to reduce the risk of male-to-female sexual transmission of HIV.
Studies are ongoing to see if circumcision affects male-male sexual transmission of HIV.
Circumcision is not recommended for men living with HIV.
It is important to use condoms and get tested for HIV even if the man is circumcised.

Comprehensive Peer Educator Training Curriculum: Trainer Manual 3-19
Prevention of mother-to-child transmission:
Prevention of unwanted pregnancies in the first place (good family planning and communication about family planning between couples)
HIV testing before deciding to become pregnant
Good, early antenatal care
HIV testing as part of antenatal care
Counseling for mothers and fathers on PMTCT
Safer sex during and after pregnancy
Family support and reducing stigma against pregnant women with HIV
ARVs for the mother during pregnancy and for the baby when it is born
Prioritizing pregnant women for ART if they are eligible – during pregnancy and ongoing
Safe, normal delivery at a facility
Safe infant feeding – exclusive breastfeeding (no other fluids, foods or herbs at all, including water) OR exclusive formula feeding (only when it is safe!) for as long as possible – 6 months is best. Then when the baby is 6 months old, giving others foods along with breast milk OR formula.
Prevention and treatment of breast infections
Regular follow-up of mother and baby Prevention of blood-to-blood transmission:
Screening all blood and blood products for HIV (and hepatitis)
Following infection prevention procedures at clinics
Using protective equipment (like apron, gloves and eye shields)
Throwing out needles and other sharp instruments directly into sharps containers (a can or bottle will work too)
Cleaning and disinfecting all surfaces with a solution of bleach and water Prevention of unsafe sharp object use:
Do not share blades or knives in traditional ceremonies involving blood or cuts on the skin.
Do not inject drugs or share needles. If you have to, be sure to clean them every time with bleach mixed with water.
Do not share piercing or tattooing tools. If you have to, be sure to clean them with bleach solution every time.

3-20 Module 3
SESSION 3.6: Introduction to Comprehensive,
Family-focused Care (30 minutes)
TRAINER INSTRUCTIONS
Methodologies: Brainstorming, Large Group Discussion, Interactive
Trainer Presentation
Step 1: Ask participants to think about what kinds of services and support they have
needed from the clinic, in their communities and at home to live positively with
HIV. What about their families? Note responses on flip chart and encourage
participants to think beyond individual and medical needs. Use the content
below, as needed, to fill in any gaps.
Step 2: Go through the list of services in step 1. For each service, ask participants and
discuss:
Is this a clinic- or community-based service?
What could be the Peer Educator’s role in this service?
Note: The Peer Educator’s role in each clinic- and community-based service will
depend on the scope of work outlined in each specific program, so adjust
accordingly.
Step 3: Based on participants’ answers, lead a discussion on the importance of
comprehensive care for PLHIV and their families, explaining why it is important
for Peer Educators to think about the whole family and not just the individual.
Use the content below to guide the discussion. Read and discuss each of the
family-focused care case studies below.
Step 4: Close the session by reminding participants to ALWAYS think and ask about
clients’ family members!
KEY INFORMATION
The goals of comprehensive HIV care are to:
Improve the quality of life of PLHIV
Improve the lives of families and communities affected by HIV
Prevent further spread of HIV Important points to remember about comprehensive care:
It involves many types of information, resources and services to address a range of needs – not just medical needs.
PLHIV have different needs at different points in time, depending on the stage of illness and their specific circumstances. Remember, HIV is a chronic illness that lasts for a person’s whole life.

Comprehensive Peer Educator Training Curriculum: Trainer Manual 3-21
A “continuum of care” responds to the range of care and support needs in different places – such as at the hospital, clinic, community and home – over the course of a person’s life.
It relies on a coordinated response from people with a variety of skills – such as doctors, nurses, counselors, pharmacists, family members, community health workers, peer educators, other PLHIV, spiritual leaders and volunteers.
Program components for comprehensive care: Peer Educators need to know about all of the aspects of comprehensive care so that they can best help PLHIV and their families understand and get the services they need. This training covers information and skills related to many pieces of comprehensive care. Comprehensive HIV care includes:
Pre- and post-test HIV counseling, HIV testing and follow-up
Early infant diagnosis for babies
Prevention, diagnosis and treatment of opportunistic infections and other illnesses, such as TB
ARVs and ART
PMTCT, antenatal and reproductive health services
Support for exclusive breastfeeding
Regular immunizations for babies
Ongoing monitoring of health status (through lab tests and physical exams)
Ongoing follow-up of babies who have been exposed to HIV
Hospitalization for those who are very sick
Counseling on adherence and positive living
Couples counseling and disclosure counseling
Referral and follow-up
Home-based care (HBC)
Malaria prevention and treatment
Nutritional support
Access to clean water
Psychological support
Social and spiritual support
Material or economic support (money, clothes, food, etc.)
Legal support
End of life care, including pain management
Care and support for family members, including children Family-focused care:
Family-focused care means that all members of the multidisciplinary care team, including Peer Educators, think about the needs of all family members, and not just those of the client.
It also means thinking about the linkages between the individual client, that client’s family and the community as a whole.
Peer Educators should make it a normal practice to ask clients about their family members and partners and encourage them to bring these people to the clinic for services, if needed.
Remember: People’s day-to-day lives include their families, partners, friends and other community members, so it is important to ask about them at every visit!

3-22 Module 3
Family-focused care case studies:
A Peer Educator may know that a client’s mother-in-law moved into the house and the doctor may know that the client is getting sick more often. Only when the Peer Educator and the doctor share this information with each other would they be able to see that the client may be hiding her HIV-status from her mother-in-law and may no longer take medications openly. She may need help to disclose her status.
A pregnant woman is seen for antenatal care and she tests HIV-positive. She is given PMTCT counseling and told to come back to collect her CD4 results. The counselor asks her if she has a partner at home or other children. The woman says that she has a young baby who seems healthy and a partner who has had a high fever and a lot of coughing. The Peer Educator helps the woman decide how to disclose her status to her partner and try to bring him – as well as her baby – into the clinic for testing. Only by asking about the whole family can we identify other people in need of services and help the family as a unit.
A nurse may know that a child is not growing fast enough, while a doctor might have just found out that the mom has TB. The home-based care provider might have noticed that the mom is not able to work in the garden anymore because she is too sick and the family does not have enough food now. Only by talking together and thinking about the whole family’s well-being can they develop a support plan for the mother and the child.
Note: Some of the preceding information in this Module was adapted from the following sources: Colton, T., Dillow, A., Hainsworth, G., Israel, E., & Kane, M. (2006). Community Home-based Care for People and Communities Affected by HIV/AIDS: A Comprehensive Training Course for Community Health Workers. Watertown, MA: Pathfinder International.

Comprehensive Peer Educator Training Curriculum: Trainer Manual 3-23
SESSION 3.7: Module Summary (10 minutes)
TRAINER INSTRUCTIONS
Methodologies: Large Group Discussion, Interactive Trainer
Presentation
Step 1: Ask participants what they think are the key points of this Module. What
information will they take away from the Module?
Step 2: Summarize the key points of the Module using participant feedback and the
content below.
Step 3: Ask if there are any questions or clarifications.
Step 4: Review the learning objectives with participants and make sure all are confident
with their skills and knowledge in these areas.
Step 5: If there are areas participants do not fully understand or in which they need
more help, go back and review the session before moving to the next Module.
KEY INFORMATION
THE KEY POINTS OF THIS MODULE INCLUDE:
Peer Educators should know the facts about HIV and AIDS and help dispel myths and rumors among clients and in the community.
People can be healthy and HIV-infected for many years before getting sick and developing AIDS. But they can still spread HIV to other people so it is important for people to know their HIV-status by getting tested.
HIV attacks a person’s immune system and makes it hard for the body to stay healthy and fight off diseases and infections.
HIV attacks the CD4 cells in the body. The CD4 cells are like guardian angels that protect the body from illnesses. Eventually, HIV attacks so many of the CD4 cells that the body cannot fight infections anymore and the person develops AIDS.
Babies and children with HIV develop AIDS much faster than adults.
Health care workers can tell if someone needs to start ART by looking at the number of CD4 cells they have (through a blood test). The test can also be used to see if the treatment is working.
The higher a person’s CD4 count, the better. The lower a person’s viral load, the better.
Peer Educators need to talk openly about sexuality with people and help them practice safer sex.

3-24 Module 3
(KEY POINTS, CONTINUED)
It is very important that Peer Educators know all the ways HIV can and cannot be passed from person to person and that they help people prevent new infections.
HIV lives in semen, vaginal and birthing fluids, blood and breast milk.
HIV can be passed through unsafe sex with a person living with HIV, from a mother living with HIV to her child, from blood-to-blood contact, and from sharing needles, knives and other sharp objects.
Peer Educators should know all the pieces of comprehensive care and help clients and their families understand and access these services over time.
HIV is a family and community disease. It is important for Peer Educators to always ask about a person’s family members and try to get them into the clinic for needed services.

Comprehensive Peer Educator Training Curriculum: Trainer Manual 4-1
MODULE 4:
Communication and Counseling Skills
DURATION: 210 minutes (3 hours, 30 minutes)
LEARNING OBJECTIVES:
By the end of this Module, participants will be able to:
Reflect on their own attitudes, values and beliefs and discuss how
these may affect communication with others
Describe the importance of effective communication and
counseling skills in PMTCT and HIV care and treatment settings
Discuss the basic principles of counseling and challenges to
implementing these principles
Discuss what is meant by shared confidentiality and why it is
important
Demonstrate the 7 key counseling and communication skills
Know how to communicate effectively in front of a group
CONTENT:
Session 4.1: Introduction: Our Own Values and Attitudes Session 4.2: What Is Counseling?
Session 4.3: Key Counseling Skills for Peer Educators
Session 4.4: Communicating to Groups
Session 4.5: Classroom Counseling Practicum
Session 4.6: Module Summary
METHODOLOGIES:
Large group discussion
Interactive trainer presentation
Role-play
Small group work

4-2 Module 4
MATERIALS NEEDED:
Flip chart
Markers
Tape or Bostik
Case study cards for Session 4.5
WORK FOR THE TRAINER TO DO IN ADVANCE:
Read through the entire Module and make sure you are familiar
with the training methodologies and content.
Practice the role-plays in Session 4.3 with co-trainers, or with
participants who volunteer to help with this session.
Prepare case study cards for Session 4.5.

Comprehensive Peer Educator Training Curriculum: Trainer Manual 4-3
SESSION 4.1: Introduction: Our Own Attitudes and
Values (15 minutes)
TRAINER INSTRUCTIONS
Methodologies: Large Group Discussion, Interactive Trainer
Presentation
Step 1: Review the Module learning objectives.
Step 2: Ask participants to describe a situation in which they could see a health care
provider, counselor or Peer Educator’s negative attitudes and values. For
example, a nurse may have made you feel like you were to blame for having HIV or a counselor made a pregnant woman with HIV feel like she was a bad mother.
Step 3: Ask participants what some of their own values, attitudes and prejudices are
about HIV and PLHIV. Use the content below to explain these terms.
Step 4: Remind participants that even though everyone is entitled to his or her own
opinions, it is important to be respectful and non-judgmental when working as a
Peer Educator and communicating with clients and other community members.
KEY INFORMATION
Key terms:
Attitudes and values are feelings, beliefs and emotions about a fact, thing, behavior or person. For example, some people believe that having multiple sexual partners is okay as long as you practice safer sex, while other people believe that this is wrong.
Prejudices are negative opinions or judgments made about a person or group of people before knowing the facts. For example, assuming that a person with HIV must be promiscuous or that truck drivers sleep around are both prejudices.
Being self-aware means knowing yourself, how other people view you and how you affect other people.
Peer Educators should always:
Think about the issues related to their own attitudes, values and prejudices and how they affect their ability to help provide effective counseling and support services to clients and community members
Be sensitive to the culture, values and attitudes of their clients, even if they are different from their own
Learn some of the main culture, values and attitudes of the people with whom they are working at the facility and in the community
Examine their own values and beliefs in order to avoid prejudice and bias. Make all people feel comfortable and that it is “safe” to talk with them openly and honestly
Remember: Prejudice, stigma and negative attitudes drive the HIV epidemic,
so Peer Educators should avoid them!

4-4 Module 4
SESSION 4.2: What Is Counseling? (30 minutes)
TRAINER INSTRUCTIONS
Methodologies: Large Group Discussion, Interactive Trainer
Presentation
Step 1: Ask participants to describe a time when they received good counseling from
someone (a doctor, nurse, friend, family member, Peer Educator, spiritual leader,
etc.) Ask participants what made the counseling good. Why was the counseling
helpful?
Step 2: Ask participants to now describe a time when they received bad counseling from someone. Ask participants what made the counseling bad.
Step 3: Facilitate a discussion on the purpose of counseling, and what counseling is and is
not, using the content below. Be sure to talk about times when Peer Educators
should refer clients to a trained counselor or other member of the
multidisciplinary team.
Step 4: Ask participants why it is important to keep counseling sessions confidential and
what is meant by the phrase “shared confidentiality.” Ask participants to discuss
the importance of privacy (both visual and auditory) during counseling. Use the
content below to fill in, as needed.
Step 5: Remind participants that this Module and others are meant to prepare them to
be great communicators and counselors.
KEY INFORMATION
What is counseling?
Counseling is a two-way communication process that helps people look at their personal issues, make decisions and plan how to take action.
The aim of counseling is not to solve every problem but to improve the client’s coping skills.
Counseling helps people talk about, explore and understand their thoughts and feelings.
Counseling helps people work out what they want to do and how they will do it. Counseling includes:
Establishing supportive relationships
Having conversations with a purpose (not just chatting)
Listening attentively
Helping people tell their stories without fear of stigma or judgment
Giving correct and appropriate information
Helping people to make informed decisions
Exploring options and alternatives
Helping people to recognize and build on their strengths

Comprehensive Peer Educator Training Curriculum: Trainer Manual 4-5
Helping people to develop a positive attitude toward life
Respecting everyone’s needs, values, culture, religion and lifestyle Counseling does not include:
Solving someone’s problems
Telling someone what to do
Making decisions for another person
Blaming the person
Interrogating or questioning the person
Judging the person
Preaching or lecturing to a person
Making promises that cannot be kept
Imposing one’s own beliefs on another person
Remember: Some clients may need professional counseling services that are beyond what Peer Educators are trained to do. Peer Educators should always talk with other members of the multidisciplinary team if they have a difficult case or are unsure what to do. Peer Educators should refer clients to a trained counselor right away if:
They are very depressed
They are very anxious
They are thinking about suicide
Things are not getting better after counseling sessions
The Peer Educator is unsure what to do

4-6 Module 4
Shared confidentiality: In order for clients to trust Peer Educators with their feelings and problems, it is important for them to know that this information will be kept confidential. This means that Peer Educators and other members of the multidisciplinary care team will not tell other people what the client says, that the client is HIV-positive or any other information about the client. Confidentiality is especially important in HIV programs because of the stigma surrounding HIV and discrimination against PLHIV in the home, at work, at school and in the community. Because multidisciplinary teams take care of clients, sometimes they need to discuss a client’s needs and health status with one another to provide the best care possible.
Peer Educators will come from the same community as the recipients of their services. This might make some people who know them uneasy, especially in the beginning. Peer Educators need to assure clients that they will not discuss their concerns, health or problems with people in the community. Privacy: PRIVACY is a very important part of quality counseling. Even though space is a challenge in most HIV prevention, care and treatment programs, it is important that the multidisciplinary team works together to create private areas where counseling can take place. It is important that other people cannot see or hear a private counseling session and that there are no interruptions while counseling is taking place.
Shared Confidentiality
Shared confidentiality means that information about a client is disclosed to another person involved in the client’s care – a member of the multidisciplinary team, a community health worker, a treatment supporter, etc. – with the client’s consent.
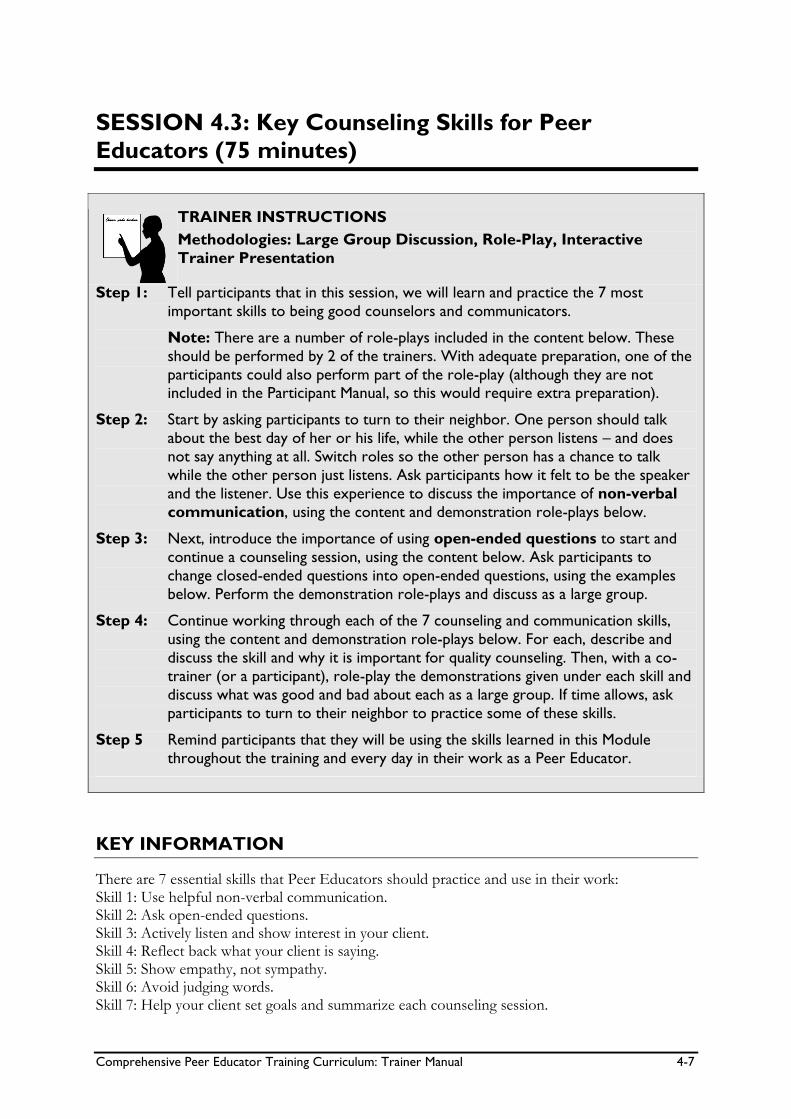
Comprehensive Peer Educator Training Curriculum: Trainer Manual 4-7
SESSION 4.3: Key Counseling Skills for Peer
Educators (75 minutes)
TRAINER INSTRUCTIONS
Methodologies: Large Group Discussion, Role-Play, Interactive
Trainer Presentation
Step 1: Tell participants that in this session, we will learn and practice the 7 most
important skills to being good counselors and communicators.
Note: There are a number of role-plays included in the content below. These
should be performed by 2 of the trainers. With adequate preparation, one of the
participants could also perform part of the role-play (although they are not included in the Participant Manual, so this would require extra preparation).
Step 2: Start by asking participants to turn to their neighbor. One person should talk
about the best day of her or his life, while the other person listens – and does
not say anything at all. Switch roles so the other person has a chance to talk
while the other person just listens. Ask participants how it felt to be the speaker
and the listener. Use this experience to discuss the importance of non-verbal
communication, using the content and demonstration role-plays below.
Step 3: Next, introduce the importance of using open-ended questions to start and
continue a counseling session, using the content below. Ask participants to
change closed-ended questions into open-ended questions, using the examples
below. Perform the demonstration role-plays and discuss as a large group.
Step 4: Continue working through each of the 7 counseling and communication skills,
using the content and demonstration role-plays below. For each, describe and
discuss the skill and why it is important for quality counseling. Then, with a co-
trainer (or a participant), role-play the demonstrations given under each skill and
discuss what was good and bad about each as a large group. If time allows, ask
participants to turn to their neighbor to practice some of these skills.
Step 5 Remind participants that they will be using the skills learned in this Module
throughout the training and every day in their work as a Peer Educator.
KEY INFORMATION
There are 7 essential skills that Peer Educators should practice and use in their work: Skill 1: Use helpful non-verbal communication. Skill 2: Ask open-ended questions. Skill 3: Actively listen and show interest in your client. Skill 4: Reflect back what your client is saying. Skill 5: Show empathy, not sympathy. Skill 6: Avoid judging words. Skill 7: Help your client set goals and summarize each counseling session.

4-8 Module 4
Skill 1: Use helpful non-verbal communication
Make eye contact.
Face the person.
Be relaxed and open with your posture.
Sit next to the person you are counseling. Do not sit behind a desk!
Dress neatly and respectfully.
Use good body language – nod your head and lean forward.
Smile.
Do not look at your watch, the clock or anything other than the person you are talking with.
Try not to write during a counseling session, unless you are recording key information for the client to take home or for your records. Turn your mobile phone off and never take calls during a counseling session.
Role-play: Non-verbal communication
What not to do Non-verbal communication
What to do Helpful non-verbal communication
Client walks in Client walks in Peer Educator: Hello. My name is _________ (name). (Peer Educator is filling in the register from behind a desk)
Peer Educator: Hello. My name is _________ (name). (Peer Educator keeps filling in the register)
Client: I have some questions about my risk of HIV.
Client: I have some questions about my risk of HIV.
Peer Educator: Please sit down (speaking in a hurried fashion). What were your questions? (Peer Educator still looking at the register)
Peer Educator: (Looks at client, stops writing in the register, and moves chair so that it is not behind the desk) Please sit down. What were your questions? (Leans forward, not crossing legs)
Client: Well, I think my husband might be infected.
Client: Well, I think my husband might be infected.
Peer Educator: (No response and still filling in the register)
Peer Educator: (Looks warmly, yet with concern, at client. Optional: demonstrate appropriate touch)
Client: (Clears throat to get Peer Educator’s attention)
----
Peer Educator: Oh sorry (she finally stops writing and looks at watch). Yes, go ahead, you said that you are concerned that your sister might be infected? (Peer Educator’s hands are folded, legs crossed and facing away from client, looking across the room with expression suggesting disinterest)
Peer Educator: You look concerned, why do you think he might be infected? (PE looks at client, leaning forward and not crossing legs)
Client: Well no, actually it was my hus…, actually it’s okay. Don’t worry, sorry to have bothered you.
Client: (Proceeds to tell her story)

Comprehensive Peer Educator Training Curriculum: Trainer Manual 4-9
Skill 2: Ask open-ended questions Closed-ended questions: Closed-ended questions can be answered with a one-word or short answer. Examples of closed-ended questions are, “How old are you?” “What is your CD4 count?” and “Do you have children?” Closed-ended questions are good for gathering basic information at the start of a counseling or group education session. They should not be used too much because they can make it seem that the Peer Educator is being too direct. They are not helpful in getting at how the client is really feeling. Open-ended questions: Open-ended questions cannot be answered in one word. People answer open-ended questions with more of an explanation. Examples of open-ended questions are, “Can you tell me more about your relationship with your partner?” or “How does that make you feel?” Open-ended questions are the best kind to ask during counseling and group education sessions. They help clients explain their feelings and concerns and also help Peer Educators get the information they need to help clients make decisions. Examples of closed- and open-ended questions
Closed-ended question Open-ended question Do you have safer sex? How do you negotiate safer sex with your
partner? Do you have more than one sex partner? There are a lot of ways to reduce risk for HIV
– like not having sex, being faithful to each other and using condoms. Which would work best for you based on your situation?
Do you use condoms? What challenges do you have using condoms with your partner?
Do you drink alcohol when you are upset? What are some of the ways you relieve stress or anger?
Did your partner get tested? How would you feel about asking your partner to get tested so you can both be as healthy as possible?
Do you want to have children in the future? How do you feel about having a bigger family? What concerns to do you have?
Do you have someone you can talk with about taking your medicines the right way?
Tell me more about the people you have disclosed to and how they could help you remember to take your medicines.
Do you know how to prevent transmission of HIV to your baby?
I want to make sure that I have explained everything well to you – can you tell me what you understand about ways you can protect your baby from HIV?
Do you exclusively breastfeed your baby? Can you tell me more about how you feed your baby?

4-10 Module 4
Role-play: Open-ended questions What not to do
Closed-ended questions What to do
Open-ended questions Client walks in Client walks in Peer Educator: Hi, how are you? I’m ________ (name). I am a Peer Educator. Today, as part of your ANC visit, I will be discussing with you HIV, HIV testing and ways you can protect your health, the health of your baby and your family.
Peer Educator: Hi, how are you? I’m ________ (name). I am a Peer Educator. Today, as part of your ANC visit, I will be discussing with you HIV, HIV testing and ways you can protect your health, the health of your baby and your family.
Client: OK Client: OK Peer Educator: Do you know how HIV is transmitted?
Peer Educator: Tell me, how do you think HIV is transmitted?
Client: Yes, I think so. Client: Well, I’m not sure, but I think you can get it from sex.
Peer Educator: OK, great. And do you know how HIV is passed from mother to baby?
Peer Educator: Yes, that’s right. How else is do you think it is transmitted?
Client: Um, yes, I guess so. Client: By kissing and blood transfusions. Peer Educator: You are correct in stating that
HIV is transmitted by blood transfusions if the blood is not screened. However, blood is screened, so the chance of HIV transmission through transfusions is very, very low. But, HIV isn’t actually transmitted by kissing. The reason is…….
Client: Hmm. That’s very interesting. Peer Educator: What have you heard about
mother-to-child-transmission of HIV? Client: Well, I’ve heard that HIV is transmitted
from mom to baby. So I guess if I’m HIV-positive, that means that my baby will be positive too, right?
Peer Educator: Not necessarily. A mother with HIV can pass HIV to her baby during pregnancy, labor and delivery, and breastfeeding. But not all women who have HIV will pass it to their babies. It is important that you and your baby get care and treatment here at this clinic to stay healthy and lower the chances that your baby will get HIV.

Comprehensive Peer Educator Training Curriculum: Trainer Manual 4-11
Skill 3: Actively listen and show interest in your client Active listening skills:
Listen in a way that shows respect, interest and empathy.
Show the person you are listening by saying “okay” or “mmm hmm.”
Use a calm tone of voice – not directive.
Listen to the content of what the person is saying – are there themes?
Listen to how they are saying it – do they seem worried, angry, etc.?
Allow the person to express her or his emotions. For example, if she is crying, allow her time for this.
Never judge a person or impose your own values.
Keep distractions to a minimum and try to find a private place to talk.
Do not do other tasks while talking to a person.
Do not interrupt the person.
Ask questions or gently probe if you need more information.
Use open-ended questions that can’t be answered with “yes” or “no.” For example, “Can you tell me a bit more about that?”
Role-play: Active listening
What to do Gestures and responses that show interest
Peer Educator: How do you think your partner will react if you invite him to come to the clinic for an HIV test? Client: Actually, I’m really very worried about it. I was hoping you wouldn’t ask, to tell you the truth. Peer Educator: Mmm hmm (nods sympathetically). Client: I think my husband will accuse me of being HIV-infected if I’ve been tested, even if I don’t even have my result yet. Peer Educator: He’ll accuse you of being infected? Client: Well, mostly because he’ll be angry that I went ahead and agreed to be tested without telling him first. Peer Educator: Mmm hmm. Client: Last time I was sick and went to the clinic without asking him, he got angry with me for spending the money to see the doctor and get some tests done. I think he’s going to react the same way. Peer Educator: So, really, it seems like it’s not that he minds you getting an HIV test, it’s that he minds that you did so without consulting with him first. So, would you prefer not to get the HIV test today and instead wait until the next visit?

4-12 Module 4
Skill 4: Reflect back what your client is saying Reflecting skills: The Peer Educator repeats back to the person the main themes and feelings that the person communicated to him/her. Reflecting also:
Provides feedback to the person and enables the person to confirm that she or he has been listened to, understood and accepted
Helps promote discussion
Shows understanding of the person’s story
Helps Peer Educators check the clarity of their understanding
Provides a good alternative to always responding with questions
Can reflect the content of what is being said as well as the feelings the person has about the situation
For example, after the person talks for awhile about his/her feelings and situation, the Peer Educator can say, “So I sense that you feel __________ because __________.” Or, “I’m hearing that when ___________ happened, you didn’t know what to do.”
Role-play: Reflecting skills
What to do Reflecting back
Peer Educator: What do you think about telling your partner about your HIV-status? Maybe he could be your treatment supporter? Client: Well, I honestly don’t think I could ever bring up the subject to him. I really think he’d have a fit and say that I have been sleeping around. Peer Educator: It sounds like disclosing to your husband is something that you would actually be hesitant, maybe even afraid, to do right now. Client: Yes, that’s right…….

Comprehensive Peer Educator Training Curriculum: Trainer Manual 4-13
Skill 5: Show empathy, not sympathy Empathy or empathizing is a skill used in response to an emotional statement.
Empathy shows an understanding of how the client feels and encourages the client to discuss the issue further.
Empathy is different than sympathy. When you sympathize, you feel sorry for a person and look at her or him from your own point of view.
For example, if the client says, “My baby wants to feed very often and it makes me feel so tired,” the Peer Educator could respond by saying, “You are feeling very tired all the time then?” If the Peer Educator responds by saying, “I know how you feel. My baby also wanted to feed often and I was exhausted!” this is sympathizing because attention is on the Peer Educator and her experiences rather than on the client.
Role-play: Showing empathy vs. sympathy
What not to do Sympathizing
What to do Empathizing
Peer Educator: What do you think about asking your partner to use condoms?
Peer Educator: What do you think about asking your partner to use condoms?
Client: I’d really be afraid that he might hit me, or even worse.
Client: I’d really be afraid that he might hit me, or even worse.
Peer Educator: Yes, I know what you mean, that happened to my sister. She actually did ask her husband to use condoms and you know what? He hit her then he made her leave the house. He didn’t let her come back for two full days.
Peer Educator: It sounds like you’re afraid of your husband’s response.
Client: So did your sister go back? Client: You’re right, I am. It’s not just about asking him to use condoms. I’m also fearful that he’ll be upset if dinner is late, if the house isn’t tidy, if the children aren’t behaving properly, or for a lot of other reasons.

4-14 Module 4
Skill 6: Avoid judging words
Judging words are words such as “right,” “wrong,” “well,” “badly” and “properly.” Using the words “these people” or “those people” to describe people living with HIV is also judgmental.
If a Peer Educator uses these words when asking questions, the client may feel that she or he is wrong, or that there is something wrong with her or his actions or feelings.
However, sometimes Peer Educators need to use the “good” judging words to build a client's confidence.
Role Play: Avoiding judging words
What not to do Using judging words
What to do Avoid words that sound judging
Peer Educator: What do you think about asking your partner to use condoms?
Peer Educator: What do you think about asking your partner to use condoms?
Client: Honestly I don’t feel comfortable with it.
Client: Honestly I don’t feel comfortable with it.
Peer Educator: (Surprised) Really? That’s the wrong way to feel! Have you had a good conversation about condoms?
Peer Educator: Mmm hmm.
Client: No, not really. Client: It came up once many years ago before we got married. He said that condoms were uncomfortable and will give him kidney problems.
Peer Educator: He’s stupid isn’t he? I hope you are a good girl and have a good conversation about condoms and how condoms prevent HIV, STIs and pregnancy.
Peer Educator: I’ve heard other women say that as well. Have you ever had a talk with him about using condoms to protect the baby’s and your health? Also, condoms definitely won’t cause any kidney problems – that is a myth.
Client: Yes, I will. Client: That’s a good idea, maybe I’ll try that.

Comprehensive Peer Educator Training Curriculum: Trainer Manual 4-15
Skill 7: Help your client set goals and summarize each counseling session Goal-setting skills: Towards the end of a counseling session, the Peer Educator works with the person to come up with “next steps” to solve their issues in the short and long term. Next steps and goals:
Should be developed jointly by the Peer Educator and the person receiving counseling
Can empower people to achieve what they want by agreeing to realistic short- and long-term goals and actions
Provide direction and must be results-oriented
Must be clear enough to help people measure their own progress (people feel good when they achieve something they have set out to do)
To start, the Peer Educator could say, “Okay, now let’s think about the things you will do this week based on what we talked about.”
Summarizing skills: The Peer Educator summarizes what has been communicated during a counseling session and clarifies the major ideas and next steps. Summarizing:
Can be useful in an ongoing counseling session or in making sure you are clear on important issues raised during a counseling session
Is best when both the Peer Educator and client participate and agree with the summary
Provides an opportunity for the Peer Educator to encourage clients to examine their feelings about the session
The Peer Educator could say, “I think we’ve talked about a lot of important things today. (List main points.) We agreed that the best next steps are to ___________________. Does that sound right? Let’s plan a time to talk again soon.”

4-16 Module 4
SESSION 4.4: Communicating to Groups (20
minutes)
TRAINER INSTRUCTIONS
Methodologies: Large Group Discussion, Interactive Trainer
Presentation
Step 1: Ask if any of the participants have ever spoken to a group of people before. Ask
them to share their experiences. What was helpful when speaking? What could
have made it better? What did you take away from your speaking experience?
Step 2: Ask if any of the participants have ever participated in a group education session. Ask them to share their experiences. What was helpful about the session? What
could have made it better?
Step 3: Remind participants that, as Peer Educators, they will be speaking with
individuals, couples, family members and large groups. They will work with the
multidisciplinary team to conduct group education sessions with clients.
Step 4: Review the major differences between one-on-one counseling and group
education below, and go over the key points. Remind participants that they will
be able to practice speaking in front of a group later in the training. Module 8
includes information on leading group education sessions at the clinic and
Advanced Module 19 includes information about leading support group meetings.
KEY INFORMATION
Peer Educators will be asked to conduct one-on-one counseling as well as lead group education sessions in their work at clinics and in the community. While many of the good practices used in counseling can also be used in group education sessions, there are a few differences Peer Educators should be aware of. In general, these are the major differences between counseling and group education:
One-on-one counseling Group education Confidential (or shared confidentiality) Not usually confidential within the group Usually one-on-one or with couples With small or large groups of people who
may not know each other Based on needs of individual client(s) Usually has a pre-set curriculum/content
areas Focused on specific actions and feelings of the client(s)
More general and less personalized

Comprehensive Peer Educator Training Curriculum: Trainer Manual 4-17
Important points to remember when speaking in front of a group:
Be sure to plan the group session ahead of time and practice what you are going to say.
Do not stand behind a desk or other furniture.
Encourage participants to sit in a semi-circle to make it more comfortable to talk and less like a classroom. The person leading the session should be part of the semi-circle. Make sure you can make eye contact with everyone and that no one is staring at your back.
Speak loudly enough so everyone can hear you clearly, but so that you are not shouting.
Start by explaining the goals and content areas of your topic and ask if there are any questions.
Lead an introductory activity (have people introduce themselves, or say something about their family) so participants feel more comfortable with one another.
Interact with participants and engage them by moving around the room, asking questions, and asking people to share personal stories/concerns, etc.
Acknowledge that the people attending will know something about the topic being discussed. Encourage them to share what they know and use it as an opportunity to identify and correct any misconceptions.
Make eye contact with all members of the group.
Check in regularly to make sure participants are engaged and understand the messages.
Pay attention to people who seem shy or quiet and emphasize that everyone’s personal experiences, questions and concerns are important.
Use visual aids and avoid lecturing.
Encourage participants to speak with you in private afterward if they have concerns they do not want to share with the group.
Ask group participants to summarize what they have learned and actions they will take at the end.
Always leave time for questions and re-explain anything that was not understood completely.

4-18 Module 4
SESSION 4.5: Classroom Counseling Practicum
(60 minutes)
TRAINER INSTRUCTIONS
Methodologies: Small Group Work, Role-Play, Case Studies
Step 1: Break participants into 5 small groups. Pass out one of the pre-prepared case
study cards to each group (the case studies are also included in the Participant
Manual). Ask each group to read their case and then to select one person who
will play the role of the Peer Educator, another the role of the client, and the
others will play the role of observer. Refer participants to Appendix 4A, which is a checklist of the key counseling and communication skills practiced in this Module.
Step 2: Ask the groups to start their role-play. The client should spend 5-10 minutes
talking to the Peer Educator about her or his concerns. The Peer Educator will
practice as many of the listening and learning skills as possible in the time given.
Step 3: After 5-10 minutes, stop the exercise and ask the observers to provide feedback
on each of the skills and techniques observed, using the checklist in Appendix 4A
as a guide.
Step 4: As time allows, repeat this exercise until everyone has had an opportunity to
practice the role of Peer Educator.
Step 5: Bring the large group back together to debrief the activity. If time allows, ask
some of the small groups to perform their role-play for the large group. Close
the session by reminding participants that good communication and counseling
skills are very important skills when working as a Peer Educator. We should all
work hard to improve our own counseling skills and help other Peer Educators
improve their skills as well.
KEY INFORMATION
Case Study 1: M___ is a client you see regularly at the ART clinic. He tells you that he has a male partner that he sees on the weekends. He is very worried that his family and co-workers will find out. Case Study 2: S___ meets with you after testing positive for HIV. He is very angry and tells you the test must be wrong because he has only had sex with 2 people in his whole life and they were very healthy. Case Study 3: N___ is pregnant with her first baby and has found out she has HIV. She says she is so frightened that her husband might find out when he sees these medicines from the hospital.

Comprehensive Peer Educator Training Curriculum: Trainer Manual 4-19
Case Study 4: L___ is enrolled in the care and treatment program and started taking ART about 4 months ago. She starts crying because she was not able to get enough money to pay for the bus to the hospital last month, so she has stopped taking her ARVs. Case Study 5: B___ is living with HIV. She had her second child about 7 weeks ago. She comes to the clinic today and is very frightened that the baby is going to get sick and die. Note: Some of the preceding information in this Module was adapted from the following sources: WHO & CDC. (2008). Prevention of Mother-to-Child Transmission of HIV Generic Training Package: Trainer Manual.

4-20 Module 4
SESSION 4.6: Module Summary (10 minutes)
TRAINER INSTRUCTIONS
Methodologies: Large Group Discussion, Interactive Trainer
Presentation
Step 1: Ask participants what they think are the key points of this Module. What
information will they take away from the Module?
Step 2: Summarize the key points of the Module using participant feedback and the
content below.
Step 3: Ask if there are any questions or clarifications.
Step 4: Review the learning objectives with participants and make sure all are confident
with their skills and knowledge in these areas.
Step 5: If there are areas participants do not fully understand or in which they need
more help, go back and review the session before moving to the next Module.
KEY INFORMATION
THE KEY POINTS OF THIS MODULE INCLUDE:
Our own attitudes, values and prejudices should not be a part of communication and counseling with clients and other community members.
Counseling is a way of working with people to understand how they feel and help them decide what they think is best to do in their situation.
Peer Educators are not responsible for solving all of the client’s problems.
Peer Educators’ role is to support and assist the client’s decision-making process.
There can be many challenges to providing quality counseling in PMTCT and ART clinics, including lack of time and lack of private counseling space.
It is important for clients to know that what they say will be kept private. Peer Educators should practice shared confidentiality.
Peer Educators should work with the multidisciplinary care team to ensure that there is private counseling space available and that counseling sessions are not interrupted for any reason.
These are the 7 key listening and learning skills Peer Educators should always use: Use helpful non-verbal communication. - Ask open-ended questions. - Actively listen and show interest in your client. - Reflect back what your client is saying.

Comprehensive Peer Educator Training Curriculum: Trainer Manual 4-21
(KEY POINTS, CONTINUED) - Show empathy, not sympathy. - Avoid judging words. - Help your client set goals and summarize each counseling session.
Peer Educators will also be expected to speak with groups and practice good group communication skills.

4-22 Module 4
APPENDIX 4A:
Counseling and Communication Checklist
Counseling and Communication Skills Checklist
Skill Specific Strategies, Statements, Behaviors (√)
Skill 1: Use helpful non-verbal communication
Make eye contact.
Face the person (sit next to her or him) and be relaxed and open with posture.
Use good body language (nod, lean forward, etc.).
Smile.
Do not look at your watch, the clock or anything other than the client.
Do not write during the session.
Other (specify)
Skill 2: Ask open-ended questions
Use open-ended questions to get more information.
Ask questions that show interest, care and concern.
Other (specify)
Skill 3: Actively listen and show interest in your client
Nod and smile. Use encouraging responses (such as “yes,” “okay” and “mmm hmm”).
Use a calm tone of voice that is not directive.
Allow the client to express emotions.
Do not interrupt.
Other (specify)
Skill 4: Reflect back what your client is saying
Reflect emotional responses back to the client.
Other (specify)
Skill 5: Show empathy, not sympathy
Demonstrate empathy: show an understanding of how the client feels.
Avoid sympathy.
Other (specify)
Skill 6: Avoid judging words
Avoid judging words such as “good,” “bad,” “correct,” “proper,” “right,” “wrong,” etc.
Use words that build confidence and give support (e.g., recognize and praise what a client is doing right).
Other (specify)
Skill 7: Help your client set goals and summarize each counseling session
Work with the client to come up with realistic “next steps.”
Summarize the main points of the counseling session.
Other (specify)
Note: This checklist was adapted from: WHO & CDC. Prevention of Mother-to-Child Transmission of HIV Generic Training Package: Trainer Manual. 2008.
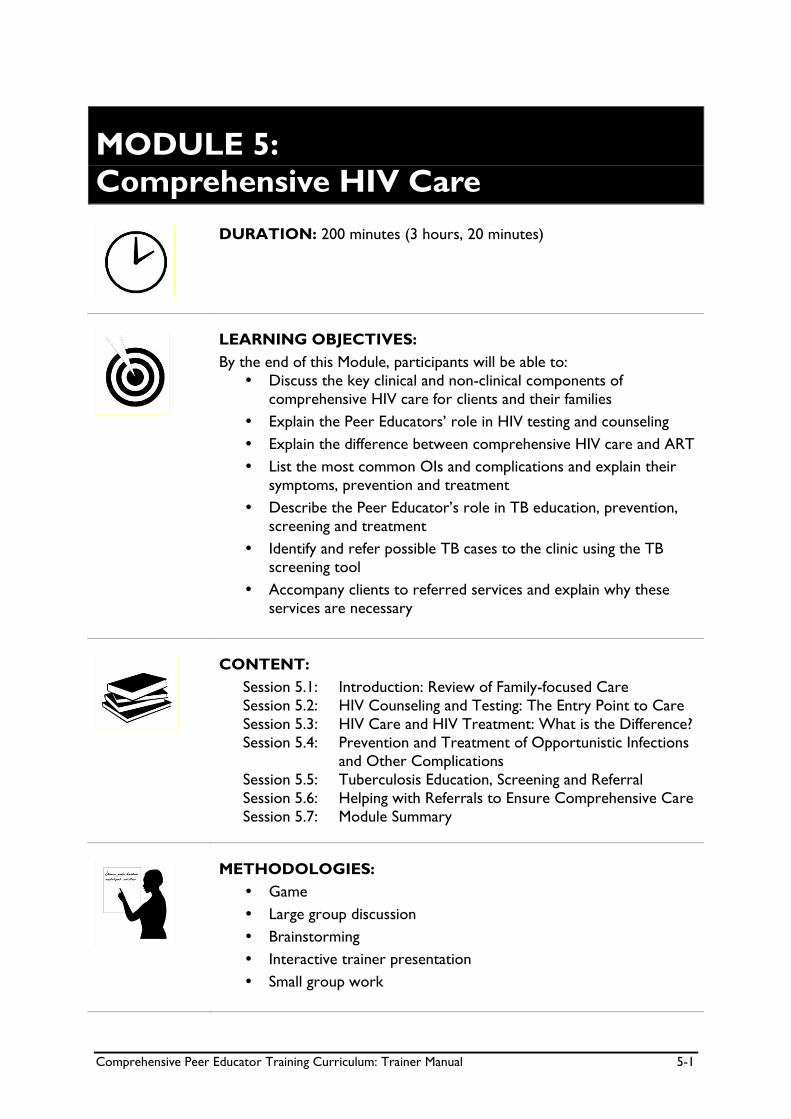
Comprehensive Peer Educator Training Curriculum: Trainer Manual 5-1
MODULE 5:
Comprehensive HIV Care
DURATION: 200 minutes (3 hours, 20 minutes)
LEARNING OBJECTIVES:
By the end of this Module, participants will be able to:
Discuss the key clinical and non-clinical components of
comprehensive HIV care for clients and their families
Explain the Peer Educators’ role in HIV testing and counseling
Explain the difference between comprehensive HIV care and ART
List the most common OIs and complications and explain their
symptoms, prevention and treatment
Describe the Peer Educator’s role in TB education, prevention,
screening and treatment
Identify and refer possible TB cases to the clinic using the TB
screening tool
Accompany clients to referred services and explain why these
services are necessary
CONTENT:
Session 5.1: Introduction: Review of Family-focused Care
Session 5.2: HIV Counseling and Testing: The Entry Point to Care
Session 5.3: HIV Care and HIV Treatment: What is the Difference?
Session 5.4: Prevention and Treatment of Opportunistic Infections
and Other Complications
Session 5.5: Tuberculosis Education, Screening and Referral
Session 5.6: Helping with Referrals to Ensure Comprehensive Care
Session 5.7: Module Summary
METHODOLOGIES:
Game
Large group discussion
Brainstorming
Interactive trainer presentation
Small group work

5-2 Module 5
Role-play
MATERIALS NEEDED:
Ball
Flip chart
Markers
Tape or Bostik
WORK FOR THE TRAINER TO DO IN ADVANCE:
Read through the entire Module and make sure you are familiar
with the training methodologies and content.
Prepare OI cards for Session 5.4.
Collect all referral forms used within hospitals and health centers
where Peer Educators will be working.

Comprehensive Peer Educator Training Curriculum: Trainer Manual 5-3
SESSION 5.1: Introduction: Review of Family-focused
Care (10 minutes)
TRAINER INSTRUCTIONS
Methodologies: Game
Step 1: Review the Module learning objectives.
Step 2: Ask all participants to stand up and form a circle. Remind participants about the
discussion of comprehensive, family-focused care from Module 3. Start by holding
the ball and stating one component of comprehensive, family-focused care out
loud. Throw the ball to one of the participants, who should state another
component of comprehensive, family-focused care. Continue on until participants
have listed most of the components of comprehensive care.
Step 3: Remind participants that Peer Educators need to think about the whole family
and not just the individual. They also need to help clients get all the care and
support they need, including but not limited to ART.
KEY INFORMATION
Review from Module 3 The goals of comprehensive HIV care are to:
Improve the quality of life of PLHIV
Improve the lives of families and communities affected by HIV
Prevent further spread of HIV Comprehensive care includes:
Pre- and post-test HIV counseling, HIV testing and follow-up
Early infant diagnosis for babies
Prevention, diagnosis and treatment of OIs and other illnesses, such as tuberculosis
Palliative care, including pain management
ARVs and ART
PMTCT, antenatal and reproductive health services
Support for safer infant feeding (usually exclusive breastfeeding, but could also be exclusive formula feeding)
Regular immunizations for babies
Ongoing monitoring of health status (through lab tests and physical exams)
Ongoing follow-up of babies that have been exposed to HIV
Hospitalization for those who are very sick
Counseling on positive living and prevention
Couples counseling and disclosure counseling
Referral and follow-up

5-4 Module 5
Home-based care (HBC)
Malaria prevention and treatment
Nutrition education
Access to clean water
Psychological support
Social and spiritual support
Linkages to material or economic support (money, clothes, food, etc.)
Legal support
End-of-life care, including pain management
Care and support for family members, including children

Comprehensive Peer Educator Training Curriculum: Trainer Manual 5-5
SESSION 5.2: HIV Counseling and Testing: The Entry
Point to Care (45 minutes)
TRAINER INSTRUCTIONS
Methodologies: Large Group Discussion, Brainstorming, Interactive
Trainer Presentation, Small Group Work
Step 1: Ask if any participants want to share a personal story about HIV testing and
counseling. What was her or his experience with pre- and post-test counseling?
Step 2: Ask participants to brainstorm some of the reasons why people in their
community do not get tested for HIV. Record on flip chart.
Step 3: Lead a discussion on the important role Peer Educators play in post-test counseling and support, as well as in mobilizing community members and clients’
family members to get tested, using the content below.
Step 4: Ask participants to break up into 4 small groups. Explain that each small group
will have 15 minutes to come up with a plan to mobilize certain groups of people
to come to get HIV testing and counseling. Assign each group 1 of the following:
Male partners of women in the PMTCT program
Family members of clients on ART
Adolescents in the community
Community leaders
Step 5 Ask some of the small groups to present their HIV testing and counseling plans
to the large group for discussion.
KEY INFORMATION
HIV testing is an entry point to care and treatment: This is the first step to getting care and treatment services. We need to know for sure that people have HIV before we link them with care and treatment. The HIV testing and counseling process includes 3 major steps:
Pre-test counseling session
HIV testing
Post-test counseling session

5-6 Module 5
Peer Educators are NOT trained as HIV test counselors and should play a supportive role to the nurse or counselor assigned to this task at their site. Peer Educators can play an especially important role in bringing community members and family members of clients in for testing and counseling. They also can help adults and children understand their results and plan for next steps during and after post-test counseling, especially by encouraging people to enroll in care and treatment if they are positive.
Peer Educators can help people plan next steps after their post-test counseling by:
Listening and providing support, using good communication skills
Explaining CD4 testing, why it is done and when and where to pick up results
Explaining the importance of enrolling in a care and treatment program, and helping people do this
Helping clients find sources of support
Supporting clients to disclose their HIV test result to someone they trust
Encouraging clients to join a PLHIV association or support group
Asking about partners and children and encouraging them to come for testing and counseling
For pregnant women, discussing PMTCT and the idea that if the woman enrolls in care and treatment she is “saving two lives.” Also, discussing antenatal care and safe delivery planning, as well as promoting safer infant feeding for all babies (this will be covered more in Module 7).
Agreeing on a date for the next visit, recording this in a notebook and making sure it is recorded in the client’s appointment card. Make sure to talk with clients about how important it is for them to come back to the clinic.
Peer Educators can mobilize clients’ family members to get HIV testing and counseling:
Another good strategy is for Peer Educators to counsel clients on how important it is to test other members of the family, including partners and children.
Peer Educators can focus on the whole family of each client in order to improve the family’s overall health and well-being and get them the services and support they need.
If the client gives consent and this is part of the Peer Educator’s role, home visits are a good place to talk about family testing, as well as during support group meetings or individual counseling sessions at the health facility.
Peer Educators can mobilize all community members to get HIV testing and counseling:
Peer Educators can help educate and mobilize community members about the importance of knowing their HIV-status.
Peer Educators can speak about HIV testing and counseling at community gatherings, religious events, in workplaces and with community leaders and community organizations (such as youth groups and women’s groups).
Note: There is more on HIV testing and counseling for infants and children in Module 7 and Advanced Module 18.
Remember: HIV testing and counseling is the ENTRY POINT to care and treatment.

Comprehensive Peer Educator Training Curriculum: Trainer Manual 5-7
SESSION 5.3: HIV Care and HIV Treatment: What is
the Difference? (25 minutes)
TRAINER INSTRUCTIONS
Methodologies: Large Group Discussion, Interactive Trainer
Presentation
Step 1: Ask participants what kinds of care they receive at the hospital, a primary health
clinic, health center or in the community, other than ART, and record responses
on flip chart. Why are these services just as important as ART?
Step 2: Explain the difference between care and treatment using the content below, emphasizing that all PLHIV should be given care services (OI prevention and
treatment, psychological and nutritional support, positive living support, etc.), but
not all people in care need to be on ART. Copy the diagram below onto flip
chart to help with this explanation. Also discuss where care services, other than
ART, are offered.
Step 3: Lead a group discussion, using the following questions as a guide:
What are some of the barriers people face getting HIV care services?
What are some of the consequences of not coming for regular care?
What motivates people who are feeling healthy and are not on ART to come back
to the clinic for regular care services?
How can Peer Educators help people understand how important it is to come back
to the clinic often for care, even if they are healthy and not on ART?
KEY INFORMATION
There is a lot people with HIV can do to stay healthy even if they are not on ART. All PLHIV should come to the hospital for regular check-ups, tests, counseling and medicines to help prevent OIs and to stay healthy. Also, when people come back to the clinic regularly for CD4 testing and check-ups, they can start ART right away when they are eligible. In some places, people think that ART is only for very sick and dying people, but this is not true. Starting ART as soon as possible once eligible reduces the chances that the person will become very sick and die. One way of saying this is that all PLHIV need care, and a certain number of PLHIV also need treatment with ART. Once a person tests positive for HIV, they should be enrolled in the care program at the hospital or clinic and linked to needed community resources. Over time, the person will probably also need to be enrolled in treatment, which should begin as soon as possible once a person is eligible.

5-8 Module 5
Who is eligible for care? Everyone who is living with HIV should
be enrolled in care, even if they are not eligible for ART.
People should return to the clinic at least once every six months for a check-up, counseling and a CD4 test to see if they are eligible for treatment.
Babies who have been exposed to HIV should also all be enrolled in care from birth.
Babies and pregnant mothers should come back to the clinic even more often.
Components of clinical care (other than ART):
General health check-ups by the doctor and nurse
Prevention and treatment of OIs, especially pneumonia, malaria and TB
Infant diagnosis and care for babies exposed to HIV
CD4 cell testing to see how much HIV is affecting the immune system and if ART is needed
Other lab tests, such as one to test how well the liver is functioning (called “LFTs”), especially for people on ART
Sexual and reproductive health services, including family planning and STI diagnosis and treatment
Emotional counseling and support
Positive living counseling and support
Prevention, such as PMTCT and prevention of new infections
Disclosure counseling and support
Discussion and referral for testing and care of other family members (like children, partners, etc.)
Nutrition counseling and support (direct support or through referrals)
Education on hygiene, sanitation and clean water
Linkages to support groups and community resources Where is care provided? HIV care services can be provided at hospitals, clinics and health centers. HIV care should be integrated within ART clinics and is also available in other clinics where PLHIV seek services (for example ANC, outpatient and under-5 clinics). Peer Educators should work with the multidisciplinary care team to advocate for all PLHIV to be provided with quality care services and to encourage good referral linkages between the ART and PMTCT clinics and other places where HIV care is delivered.
People on ART
All people living with HIV and enrolled in care

Comprehensive Peer Educator Training Curriculum: Trainer Manual 5-9
SESSION 5.4: Prevention and Treatment of
Opportunistic Infections and Other Complications
(30 minutes)
TRAINER INSTRUCTIONS
Methodologies: Large Group Discussion, Interactive Trainer
Presentation, Game
Step 1: Ask if any of the participants can define the term “opportunistic infection.” Ask
participants to give examples of OIs and record them on flip chart. Fill in the list
as needed from the content below.
Step 2: Ask participants what they know about OIs and how they can be prevented
and/or treated. If participants feel comfortable, ask them to share their own
stories about OIs. What are participants doing to prevent these infections?
Step 3: Review common OIs and their symptoms using the content below.
Step 4: Ask for 7 volunteers from the group. Have each come to the front of the room.
Organize a game where each volunteer is assigned an OI from the list below by
giving each person one of the pre-prepared OI cards.
Ask them to act out how the OI impacts the body or to speak as if they were
that OI (for example, “I’m the infection that makes people cough a lot and have a
fever. It is easy to pass me from one person to the next especially when in a closed
room”). Ask the other participants to guess which OI the person represents (in
this case, TB) and then lead a discussion about ways it can be prevented and
treated.
Step 5: Review the key strategies used to prevent and treat OIs using the content below
and encourage participants to share their own experiences.
KEY INFORMATION
Opportunistic infections:
Opportunistic infections, or OIs, are the infections that make PLHIV sick because the body’s immune system is weakened and cannot fight back. PLHIV, especially people not on ART, can get many OIs.
One of the best ways to live positively with HIV, whether someone is on ART or not, is to prevent OIs from happening in the first place or treating them right away. Usually, a doctor or nurse will give PLHIV medicines to prevent some infections – like PCP and TB. They will also give some medicines to babies born to mothers with HIV to help prevent them from getting sick. Eating well, drinking clean water and practicing good hygiene also help prevent infections.
Peer Educators should also be aware of other common infections in PLHIV as well as signs and symptoms that PLHIV may experience.

5-10 Module 5
Some common OIs, other complications and symptoms in PLHIV:
Tuberculosis (TB) – a common OI that usually affects the lungs Signs and Symptoms: Cough, fever, weight loss Prevention: Cover mouth when coughing or sneezing and do so into a
tissue, keep windows open and try to keep children away from people with active TB. In some countries, doctors will give medicines to adults to prevent active TB or to young children who have been exposed to someone with active TB.
Treatment: Usually 6-9 months of daily medication (see the next session for more information)
Pneumonia (or PCP) – a serious lung infection (note that bacterial pneumonia is very common among PLHIV and more common than PCP)
Signs and Symptoms: Coughing, weakness, shortness of breath Prevention: Take cotrimoxazole (CTX) and wash hands with soap before
eating and after using the toilet. Treatment: A doctor will prescribe antibiotics.
Sores or Pain in and around the Mouth – may be caused by thrush, herpes, malnutrition, Kaposi’s sarcoma (a form of cancer) or dental problems
Signs and Symptoms: Pain in or around the mouth, white patches (thrush), blisters, sores, cracks, dark spots, infected gums, loose teeth
Prevention: Brush teeth, tongue and inside of mouth at least 2 times per day, rinse the mouth with warm salt water
Treatment: ART will usually prevent thrush. Rinse the mouth with salt water, lemon juice or gentian violet solution (dark blue crystals). Doctors may prescribe antifungal medicines or antibiotics.
Skin Problems – may be due to thrush, warts, bacterial infections, shingles, allergies, pressure sores, Kaposi’s sarcoma (a form of cancer) or many other causes
Signs and Symptoms: Rash, itchy skin, sores, very dry skin, boils or abscesses, pain (in the case of Kaposi’s sarcoma, purple spots on the skin and swelling of the face, genitals and limbs)
Prevention: Keep the skin clean and dry, wash with soap and water, try not to scratch, cool the skin with clean water, massage pressure areas and, for bedridden patients, change positions often.
Treatment: Use calamine lotion to soothe itching, use gentian violet solution to help clean the skin, use hydrogen peroxide to clean wounds and sores, use safe local remedies. Doctors may prescribe antibiotics or other medication. Clients who develop a rash while taking nevirapine should go to the clinic right away!

Comprehensive Peer Educator Training Curriculum: Trainer Manual 5-11
Malaria – spread by mosquitoes Signs and Symptoms: High, spiking fever, weakness Prevention: Sleep and rest under an insecticide treated bed net, drain
standing water in and around the home, use insecticide room sprays before sleeping (if available)
Treatment: A doctor will prescribe anti-malarial medicine.
Sexually Transmitted Infections (STIs) and yeast infections (thrush, candidiasis) – People living with HIV are more likely to get STIs and people with STIs are more likely to contract HIV during unsafe sex.
Signs and Symptoms: Sores or rash in the genital or anal areas, unusual discharge from the penis or vagina, pain during urination (sometimes there are no symptoms, especially in women)
Prevention: Practice safer sex, use condoms, avoid sex if you or your partner have an STI
Treatment: The doctor may prescribe antibiotics, depending on the type of STI. Do not have sex while treating an STI, take all medications and have all partners treated as well.
Major weight loss (wasting) – Wasting is an AIDS-defining illness Signs and Symptoms: Major weight loss, weakness – usually due to diarrhea, loss of
appetite and reduced food intake Prevention: Prevent diarrhea by washing hands with soap (especially
before eating and after using the toilet), use only safe, clean, boiled water for drinking and cooking, avoid eating undercooked meat, fish and eggs, only use pasteurized milk products. Also increase food intake. Cotrimoxazole (CTX) can help prevent diarrhea in children.
Treatment: Oral rehydration solution, drink a lot of clear fluids, eat soft foods that are not spicy or greasy, increase food intake. Doctors may prescribe antibiotics.

5-12 Module 5
SESSION 5.5: Tuberculosis Education, Screening and
Referral (55 minutes)
TRAINER INSTRUCTIONS
Methodologies: Large Group Discussion, Interactive Trainer
Presentation, Small Group Work, Role-Play
Step 1: Ask participants if anyone would like to share a story about a time they, or one
of their family members, had TB.
Step 2: Present background information on TB and the close relationship between HIV
and TB using the content below.
Step 3: Hang 3 sheets of flip chart. One should be entitled “EDUCATE FAMILIES AND COMMUNITIES ABOUT TB,” another, “IDENTIFY PEOPLE WITH TB” and the
third, “HELP WITH TB TREATMENT.”
Step 4: One by one, go through each of the 3 flip charts. Ask participants what Peer
Educators can do for each activity and record under the title. Fill in using the
content below. For “IDENTIFY PEOPLE WITH TB,” write the 5 key TB
screening questions and ask for a volunteer to read each one out loud. Remind
participants that Peer Educators have a role to play in finding people who may
have TB in the community and bringing them to the clinic.
Step 5: Ask for 2 volunteers and demonstrate a home visit with a family member in
which the trainer acts as the Peer Educator. Ask the screening questions of the
family members and do not forget to ask about children in the home. Provide the
family with a referral to the health center and the reasons the referral.
Step 6: Next, ask participants to break up into groups of 3 and role-play home visits in
which they use the TB screening questions, advise families when TB testing and
care is needed and how to prevent new TB infections at home.
Step 7: Close the session by discussing some of the ways to prevent the spread of TB at
health facilities, using the content below as needed.
KEY INFORMATION
More about TB:
TB is the most common OI among PLHIV. About 50% of PLHIV will develop TB. Because TB and HIV are so closely linked, services also need to be linked.
TB usually infects the lungs, but it can also infect other areas. Usually people with TB have a bad cough that does not go away, fever and weight loss.
TB is spread through the air, especially from coughing, sneezing and being in close quarters with a person with TB. It is made worse when there is poor air circulation – like if there are no open windows. It is VERY easy to spread TB from person-to-person, and PLHIV are especially likely to get it if they are in contact with a person with TB. Small children are at high risk for infection when they live with adults who have TB.
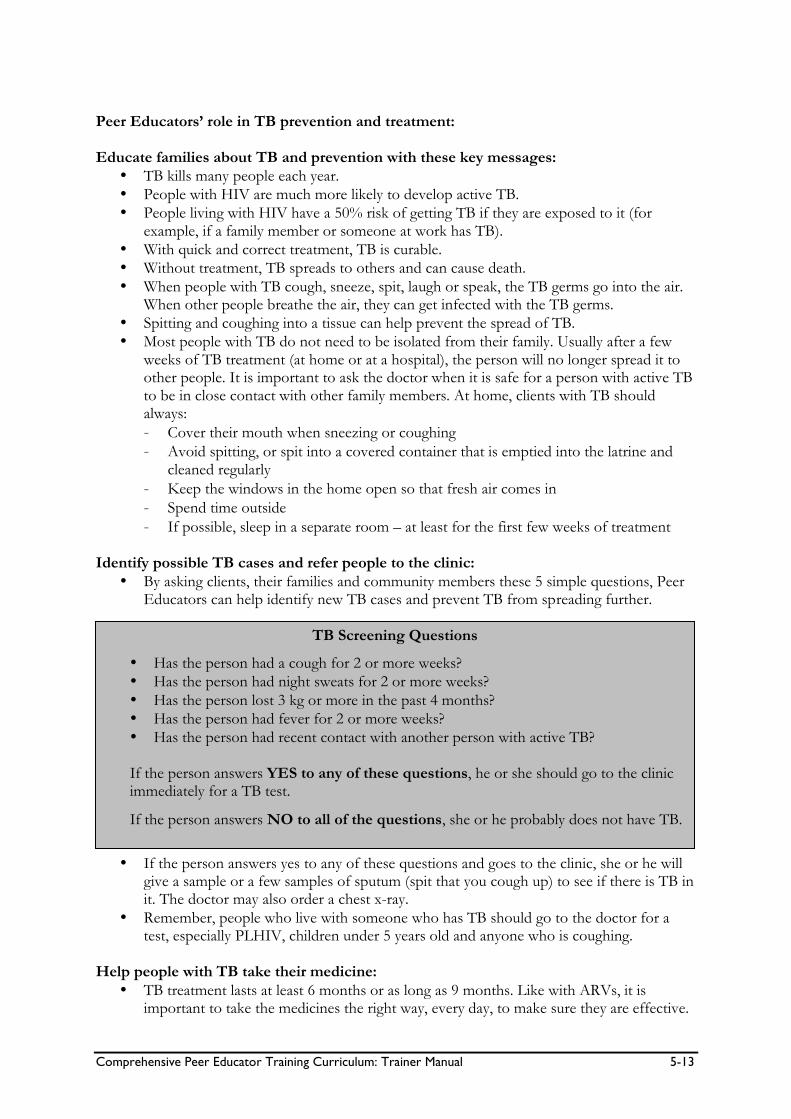
Comprehensive Peer Educator Training Curriculum: Trainer Manual 5-13
Peer Educators’ role in TB prevention and treatment: Educate families about TB and prevention with these key messages:
TB kills many people each year.
People with HIV are much more likely to develop active TB.
People living with HIV have a 50% risk of getting TB if they are exposed to it (for example, if a family member or someone at work has TB).
With quick and correct treatment, TB is curable.
Without treatment, TB spreads to others and can cause death.
When people with TB cough, sneeze, spit, laugh or speak, the TB germs go into the air. When other people breathe the air, they can get infected with the TB germs.
Spitting and coughing into a tissue can help prevent the spread of TB.
Most people with TB do not need to be isolated from their family. Usually after a few weeks of TB treatment (at home or at a hospital), the person will no longer spread it to other people. It is important to ask the doctor when it is safe for a person with active TB to be in close contact with other family members. At home, clients with TB should always:
- Cover their mouth when sneezing or coughing
- Avoid spitting, or spit into a covered container that is emptied into the latrine and cleaned regularly
- Keep the windows in the home open so that fresh air comes in
- Spend time outside
- If possible, sleep in a separate room – at least for the first few weeks of treatment Identify possible TB cases and refer people to the clinic:
By asking clients, their families and community members these 5 simple questions, Peer Educators can help identify new TB cases and prevent TB from spreading further.
If the person answers yes to any of these questions and goes to the clinic, she or he will
give a sample or a few samples of sputum (spit that you cough up) to see if there is TB in it. The doctor may also order a chest x-ray.
Remember, people who live with someone who has TB should go to the doctor for a test, especially PLHIV, children under 5 years old and anyone who is coughing.
Help people with TB take their medicine:
TB treatment lasts at least 6 months or as long as 9 months. Like with ARVs, it is important to take the medicines the right way, every day, to make sure they are effective.
TB Screening Questions
Has the person had a cough for 2 or more weeks?
Has the person had night sweats for 2 or more weeks?
Has the person lost 3 kg or more in the past 4 months?
Has the person had fever for 2 or more weeks?
Has the person had recent contact with another person with active TB? If the person answers YES to any of these questions, he or she should go to the clinic immediately for a TB test.
If the person answers NO to all of the questions, she or he probably does not have TB.

5-14 Module 5
The names of some of the most common drugs to treat TB are isoniazid, rifampicin, pyrazinamide and ethambutol.
The most common strategy for TB treatment is Directly Observed Treatment Short-Course (DOTS). This is also called supervised treatment. This is when a trained community health worker observes the client taking medicine every day, provides support and keeps records about which medications were taken on which day.
Explain that it is important to have a TB treatment supporter who can help remind the person to take the drugs every day.
Even though people will feel better soon after starting TB treatment, they still have to take the medicines every day. If people stop the medicine before 6 or 9 months, they can get sick again, possibly with a worse form of TB. This is called multi-drug resistant TB, which is very dangerous and very hard to treat. They will also pass TB to other people if the medicines are not taken the right way.
Help people understand common side effects of TB medication and how to manage them. For example, clients may be alarmed that rifampicin turns their urine orange, but this is completely normal.
If a person develops TB while taking ARVs, the doctor may or may not change the ART regimen and add TB drugs. If a person is not on ART yet, usually TB treatment is started before ART. Then, if eligible, the person can start taking ART after she or he has taken the TB medicines for a period of time – usually 2 weeks or 2 months, depending on how low the person’s CD4 cell count is.
Adherence to both ART and TB medicines is important to get well and prevent sickness and death.
Help prevent the spread of TB in health facilities:
Keep the windows open so there is always fresh air.
Alert doctors and nurses about clients who are coughing so that they can be seen right away.
Encourage coughing clients to cover their mouths and provide tissues, if possible.
Ask people with TB to wait in a very well-ventilated area, if possible. But do not stigmatize or label people with TB (such as by making people with TB stand outside of the clinic).
If possible, use protective masks when in contact with clients who have active TB.

Comprehensive Peer Educator Training Curriculum: Trainer Manual 5-15
SESSION 5.6: Helping with Referrals to Ensure
Comprehensive Care (25 minutes)
TRAINER INSTRUCTIONS
Methodologies: Large Group Discussion, Interactive Trainer
Presentation
Step 1: Lead a discussion on referrals using the content below. Using examples, explain
the difference between internal and external referrals.
Step 2: Ask participants to think about a time they were referred to another service
within the same health facility or a time when they were referred to another health facility.
Ask 2-3 participants to volunteer to share a time when they were referred and
they went to the other service successfully. What helped them seek the referral
services?
Then, ask 2-3 participants to volunteer to share a time when they did not go to
the place where they were referred. Why didn’t they go and what could have
helped them go to the referral service?
Step 3: Ask participants what they think Peer Educators can do to make referrals easier
for clients. Review the key steps for successful referrals below, discussing each
one individually.
Step 4: Review commonly used referral forms from hospitals and health centers. Make
sure participants understand what information is included on the form.
KEY INFORMATION
Referring:
No one person or organization can provide a person and her or his family with all the comprehensive care and support services they need. That is why it is important to have a strong referral system in place.
Making a referral means that you formally send a person and/or family members to another place in the hospital, another health facility or another organization for services. There are two basic kinds of referrals:
- Internal: Referrals from one part of the health facility to another part of the health facility (for example, from the VCT to the ART clinic or from the PMTCT unit to the ART clinic)
- External: Referrals from the facility to a community organization or from a community organization to the health facility (for example, a Peer Educator refers a person to a PLHIV support group or a home-based care worker refers a client to the hospital to get a CD4 test)
5-16 Module 5
The “referral network” should include organizations and people in a defined geographical area that provide services and support needed by PLHIV, their caregivers and their families. Peer Educators play an important role in both types of referrals.
Helping people get from place to place in the health facility: Many times people will need different services at the hospital or health facility on the same visit. This can be very overwhelming for people who are not familiar with where things are or how to get from place to place – especially if they are not feeling well or have to wait a long time at each place. A key role of the Peer Educator is to help people get from one place to another in a health facility as easily as possible. Key steps to successful referrals:
Talk with members of the multidisciplinary team about the referral system so everyone is clear on how referrals are made and followed-up.
Make sure you know where each service is at the hospital or clinic and the fastest way to get there. It is helpful to walk around the facility alone first and then you will be able to better help clients.
Make sure you know which days and which hours during the day different services are offered.
Make sure you know where people are being referred and why. What services do they need when they get there? For example, if someone is being referred to the lab, what tests does she or he need?
It is best if there is a referral form on which the doctor or nurse writes exactly why someone is being referred. Peer Educators should be familiar with any forms used at the health facility.
Tell health care workers when you think a client needs to be referred. Peer Educators may have knowledge about clients’ health and social support needs that other members of the multidisciplinary team are not aware of.
Peer Educators should help people understand why they are being referred and why it is important to get these services. People often do not understand why they have been referred and sometimes just leave. This is common with referrals from PMTCT services to ART services.
If possible, walk with the person to the other part of the hospital or health center and make sure that she or he has a comfortable place to wait.
Peer Educators should wait with the person at the referral point. This is a good time to provide counseling and support and to ask about the needs of other family members.
Peer Educators should tell staff that the client is waiting and talk with the doctor or nurse to try and get the person seen as soon as possible to minimize waiting, especially for pregnant women. One of the biggest reasons why people do not get care is because they do not want to wait a long time. Some facilities give pregnant women “red carpet treatment,” meaning they do not have to wait to be seen.
If people need other services or need to get more referrals, stay with them until they leave the health facility. Continue to explain why each service is important and walk them from place to place.
If needed, help the person plan follow-up actions and visits to the health facility and provide needed referrals to community-based organizations.
Comprehensive Peer Educator Training Curriculum: Trainer Manual 5-17
SESSION 5.7: Module Summary (10 minutes)
TRAINER INSTRUCTIONS
Methodologies: Large Group Discussion, Interactive Trainer
Presentation
Step 1: Ask participants what they think are the key points of this Module. What
information will they take away from the Module?
Step 2: Summarize the key points of the Module using participant feedback and the
content below.
Step 3: Ask if there are any questions or clarifications.
Step 4: Review the learning objectives with participants and make sure all are confident
with their skills and knowledge in these areas.
Step 5: If there are areas participants do not fully understand or in which they need
more help, go back and review the session before moving to the next Module.
THE KEY POINTS OF THIS MODULE INCLUDE:
HIV testing and counseling is the entry point to care and treatment.
Peer Educators can help with pre- and post-test counseling by providing emotional support, linkages to support groups and linkages to PMTCT, care and treatment services.
Peer Educators can also help motivate community members and clients’ family members to get tested.
Peer Educators should counsel all PLHIV to enroll in care services at the clinic or hospital, even if they feel healthy and are not on ART.
Important components of care that can help all PLHIV include: check-ups by health care workers, preventing and treating OIs (especially by taking CTX), regular CD4 tests, early infant testing for babies, counseling on positive living, nutrition, disclosure and linkages to support groups.
One of the most important parts of HIV clinical care is to get a CD4 test done at least every 6 months, whether the person is on ART or not.
Coming back often for care also means people can be identified and started on treatment as soon as they are eligible instead of waiting until they are very sick.
OIs attack the body when the immune system is weak.
One of the best things PLHIV can do to stay healthy is to prevent OIs and other complications by living positively, taking certain medicines to prevent getting sick and by going to see the nurse or doctor right away when something is wrong.
Tuberculosis (TB) is the most common OI among PLHIV.

5-18 Module 5
(KEY POINTS, CONTINUED)
Peer Educators can help educate families and community members to prevent TB. They can also help find TB cases in the community by asking 5 key questions, referring people to the health center if they answer yes to any and helping clients adhere to TB treatment.
Peer Educators play a key role in referring clients for services, helping them understand why they are being referred and taking them to the referral point when possible.

Comprehensive Peer Educator Training Curriculum: Trainer Manual 6-1
MODULE 6:
Antiretroviral Therapy (ART)
DURATION: 225 minutes (3 hours, 45 minutes)
LEARNING OBJECTIVES:
By the end of this Module, participants will be able to:
Dispel myths about antiretroviral medicines (ARVs) and
antiretroviral therapy (ART)
Define what is meant by “ARV” and “ART”
Explain who needs ART and how we know when someone should
start ART
Understand key issues to be discussed and addressed before a
person starts ART
Discuss the goals and benefits of ART
Help explain to clients that ART is “treatment for life”
Know common first-line ARVs and ART regimens and explain to
clients how to take them
Help clients recognize, manage and know when to go to the
doctor for ART-related side effects
CONTENT:
Session 6.1: Introduction: Myths and Facts about ART
Session 6.2: Who Needs ART?
Session 6.3: Goals and Benefits of ART
Session 6.4: Common ART Regimens
Session 6.5: Common Side Effects of ARVs
Session 6.6: Module Summary

6-2 Module 6
METHODOLOGIES:
Game
Large group discussion
Interactive trainer presentation
Case studies
Brainstorming
Small group work
Role-play
MATERIALS NEEDED:
Flip chart
Markers
Tape or Bostik
True and false cards for each participant for use in Session 6.1
Commonly prescribed adult and pediatric ARVs, including all
packaging (boxes, bottles, etc.)
Colored paper
Colored markers
Scissors
National ART Guidelines (adult and pediatric)
WORK FOR THE TRAINER TO DO IN ADVANCE:
Read through the entire Module and make sure you are familiar
with the training methodologies and content.
Invite an ART pharmacist to co-facilitate the Module and brief the
pharmacist on the training methods and content.
Adapt the content on ARVs and ART (e.g., eligibility, common
regimens, etc.) to be consistent with national guidelines.
Make “True” and “False” cards for each participant for Session 6.1.
To do so, you can cut pieces of regular-sized paper in half and
write TRUE on one and FALSE on the other.
Collect all commonly used ARVs, including their original bottle
and boxes. If possible, collect both adult and pediatric formulations, including syrups.

Comprehensive Peer Educator Training Curriculum: Trainer Manual 6-3
SESSION 6.1: Introduction: Myths and Facts about
ART (20 minutes)
TRAINER INSTRUCTIONS
Methodologies: Game, Large Group Discussion
Step 1: Review the Module learning objectives.
Step 2: Give each participant a card that says “TRUE” and a card that says “FALSE” on
it.
Step 3: Go through the myths and facts statements below one by one, mixing up the
myths and facts, and ask participants to hold up their “TRUE” card if they think
the statement is true or the “FALSE” card if the statement is a myth. Remind
participants that a myth is a popular belief that people share. Include any local
myths about ART in your setting.
Step 4: Ask selected participants why they think a statement is true or false and
encourage discussion and debate in the large group. Also ask participants how
they think these myths and rumors started.
Step 5: Summarize the discussion by reminding participants that there are a lot of
myths about ARVs and ART that can be harmful and prevent people from
starting treatment or taking their medicines the right way. All Peer Educators
should know the facts about HIV treatment and be able to explain them to
clients and community members. It is also okay for Peer Educators to tell
clients they are not sure of the answer to a question about ART and to check
in with a member of the multidisciplinary team.

6-4 Module 6
KEY INFORMATION
Some common myths and facts about HIV treatment:
Myth Fact
ART is a last resort and is only good for people that are sick and dying.
Even people who look and feel healthy may need ART. The medicines work best if they are taken as soon as they are needed. People should not wait until they are very sick to start ART.
ART can cure AIDS. ART is a lifelong, daily treatment. ART is not a cure for AIDS. There is NO CURE for AIDS.
It is hard to be on ART because you have to come to the clinic so often.
Most people taking ART only need to come back to the clinic once each month and sometimes even less often.
You have to take ARVs on a full stomach, so people who do not have enough food cannot take them.
It is true that some ARVs should be taken with food, but most of them can be taken with a small amount of food.
Only rich people can afford to take ART. In most countries, people can get ART for free now.
Pregnant women cannot take ARVs because they will hurt the baby.
Pregnant women can safely take ARVs. ARVs help keep the mom healthy and can prevent HIV infection in the baby.
People can share ARVs with family members. Each person in the family needs to get her or his own ARVs from the clinic. If you share them, it means you are not taking the correct dose for yourself.
Once you are feeling better, you can stop taking ART.
ART is for life! Even if you start to feel better after you start ART, stopping will eventually make you sick again. Stopping ART will also make it very difficult to have the medicines work if you start taking them again. When this happens, you might need to take different kinds of ARVs that are not always available.
If you take ART, you can have sex without condoms because the HIV will not spread anymore.
People can still pass HIV to others while on ART, even if they feel healthy. It is important to always use condoms when you have sex.
Traditional medicines are just as good as ART. While some traditional medicines can help people feel better, research has shown that ART is the best way to treat HIV.
If the ARVs make you feel sick, you should stop taking them.
Some ARVs can cause mild to serious side effects in some people, so it is important to know the signs and seek regular care by a doctor or nurse. Most side effects can be managed or will go away over time.
There are no ARVs for babies and children. There are special kinds of ARVs for babies and children, and the dose is based on their weight. Children should not be given adult ARVs unless instructed by a doctor.
***Add other myths in your community.

Comprehensive Peer Educator Training Curriculum: Trainer Manual 6-5
SESSION 6.2: Who Needs ART? (45 minutes)
TRAINER INSTRUCTIONS
Methodologies: Interactive Trainer Presentation, Large Group
Discussion, Case Studies
Step 1: Write “ARVs” on one flip chart paper and “ART” on another. Ask participants
to brainstorm about the definition of each phrase. Fill in as needed, using the
content below and reminding participants that it is important to know the
difference between ARVs and ART.
Step 2: Ask participants who are taking ART to talk about when they started treatment.
Guide the discussion with these questions:
How did you know you were ready to start ART?
How did you get ready to start taking ARVs? What did/did not make you feel
ready?
Step 3: Ask participants to brainstorm how to know if someone is ready to start ART.
Guide the discussion with these questions:
What are the clinical signs that a person is ready to start ART?
How do we know if a person is ready to start ART?
What are some of the issues we can help people address to ensure that they are
ready and able to take medicines every day for their whole life?
Record ideas on flip chart and use the content below to supplement the
discussion.
Step 4: Read through each of the 3 case studies below, and discuss each in the large
group. Focus on what Peer Educators would say to these clients about the
criteria for starting ART.
Step 5: Close the session by asking 2-3 participants to recap the difference between
ARVs and ART and to give a summary of who needs ART and how to help
people get ready to take ARVs.
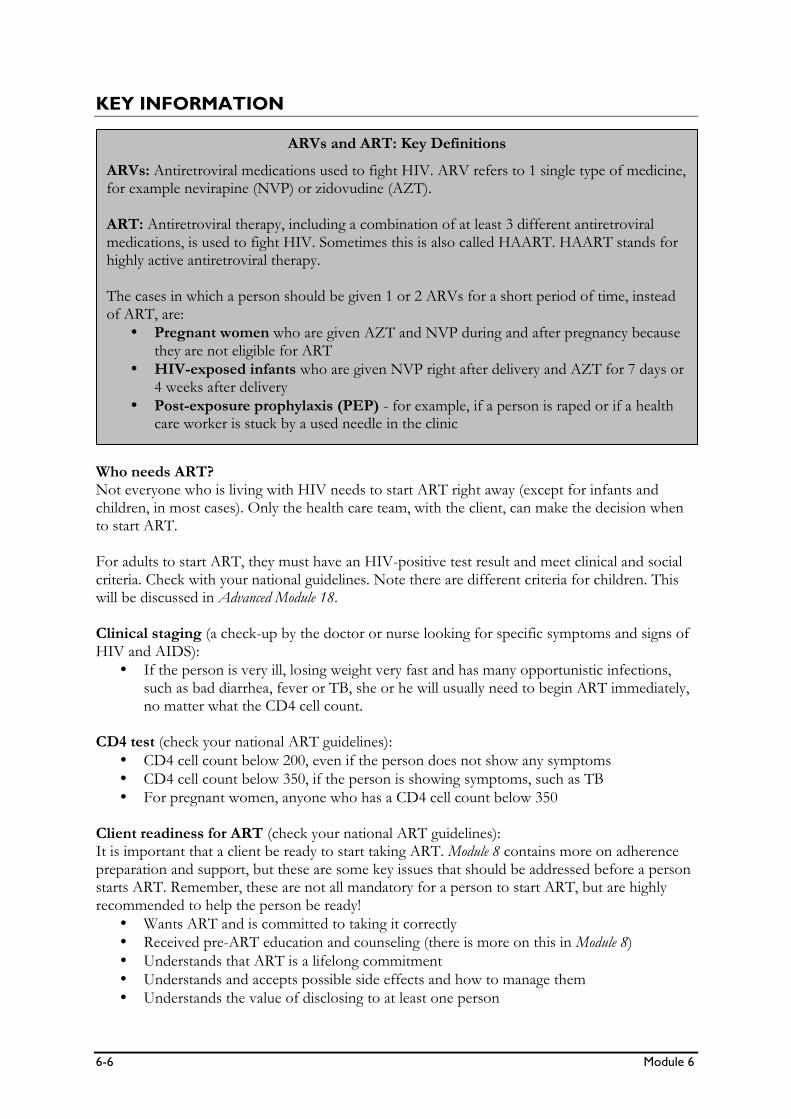
6-6 Module 6
KEY INFORMATION
Who needs ART? Not everyone who is living with HIV needs to start ART right away (except for infants and children, in most cases). Only the health care team, with the client, can make the decision when to start ART. For adults to start ART, they must have an HIV-positive test result and meet clinical and social criteria. Check with your national guidelines. Note there are different criteria for children. This will be discussed in Advanced Module 18. Clinical staging (a check-up by the doctor or nurse looking for specific symptoms and signs of HIV and AIDS):
If the person is very ill, losing weight very fast and has many opportunistic infections, such as bad diarrhea, fever or TB, she or he will usually need to begin ART immediately, no matter what the CD4 cell count.
CD4 test (check your national ART guidelines):
CD4 cell count below 200, even if the person does not show any symptoms
CD4 cell count below 350, if the person is showing symptoms, such as TB
For pregnant women, anyone who has a CD4 cell count below 350 Client readiness for ART (check your national ART guidelines): It is important that a client be ready to start taking ART. Module 8 contains more on adherence preparation and support, but these are some key issues that should be addressed before a person starts ART. Remember, these are not all mandatory for a person to start ART, but are highly recommended to help the person be ready!
Wants ART and is committed to taking it correctly
Received pre-ART education and counseling (there is more on this in Module 8)
Understands that ART is a lifelong commitment
Understands and accepts possible side effects and how to manage them
Understands the value of disclosing to at least one person
ARVs and ART: Key Definitions
ARVs: Antiretroviral medications used to fight HIV. ARV refers to 1 single type of medicine, for example nevirapine (NVP) or zidovudine (AZT). ART: Antiretroviral therapy, including a combination of at least 3 different antiretroviral medications, is used to fight HIV. Sometimes this is also called HAART. HAART stands for highly active antiretroviral therapy. The cases in which a person should be given 1 or 2 ARVs for a short period of time, instead of ART, are:
Pregnant women who are given AZT and NVP during and after pregnancy because they are not eligible for ART
HIV-exposed infants who are given NVP right after delivery and AZT for 7 days or 4 weeks after delivery
Post-exposure prophylaxis (PEP) - for example, if a person is raped or if a health care worker is stuck by a used needle in the clinic

Comprehensive Peer Educator Training Curriculum: Trainer Manual 6-7
Has a treatment supporter or “buddy”
Has an adherence plan
Has had any previous non-adherence issues to care or medicines addressed as part of the adherence plan
Has support to address any psychosocial barriers to adherence
Will accept a phone call or home visit from a Peer Educator, community health worker or health care provider if she or he misses an appointment at the clinic
Group Case Studies Case Study 1: T___ comes out of the clinic upset. He tells you he is angry because he traveled for two hours to get to the clinic, but the doctor would not give him ART today and said he needed to come back next week. What are some of the reasons why the doctor may not have given T___ ART today? Case Study 2: You are walking to the market and G___ stops you because she knows you are a Peer Educator. She tells you she tested positive for HIV and is going to the clinic to get ART because it will help her live longer. What questions would you ask G___? What things would you tell her about when people should start ART? Case Study 3: A client named W___ comes out of the doctor’s office very confused. He does not feel well and his CD4 cell count is 150. The doctor would not give him ART because the Peer Educator and counselor mentioned they had some concerns. W___ has not told anyone about his HIV-status and he has often missed his CTX doses. The Peer Educator asked W___ to come back to speak with her again in 3 days. W___ is eligible for ART because his CD4 cell count is 150, but what are some of the non-medical issues that the Peer Educator needs to address with W___ before he can start ART?

6-8 Module 6
SESSION 6.3: Goals and Benefits of ART
(30 minutes)
TRAINER INSTRUCTIONS
Methodologies: Large Group Discussion, Interactive Trainer
Presentation, Small Group Work, Role-Play
Step 1: Ask if any of the participants can recall how HIV affects the body (discussed in
Module 3). For example, ask what HIV does to the CD4 cells. Review how HIV
affects the body if needed.
Step 2: Lead a discussion on how ART works in the body and why it is necessary to take
a combination of ARVs to fight HIV, using the content below. Keep the explanations as simple as possible to make sure all participants understand.
Step 3: Ask participants to turn to the person sitting next to them. One person should
play the role of the Peer Educator and the other a client. Ask the Peer Educator
to explain how ART works to the client, using very simple terms. Have pairs
switch roles after about 5 minutes. Pairs should give each other feedback on
their explanations.
Step 4: Ask participants to reflect on their own or family members’ experiences with
ART and to list some of the goals and benefits of ART. Write on flip chart and fill
in as needed from the content below. Then, discuss what ART does NOT do,
highlighting that it does not cure HIV.
Step 5: Remind participants that HIV can still be passed from person to person even if
one or both people are on ART.
KEY INFORMATION
How does ART work? As we learned, HIV attacks the body’s immune system and CD4 “soldier” cells. HIV enters CD4 cells and reproduces itself to make more virus. When on ART, we take a combination of 3 or more ARVs, from at least 2 different classes of drugs, because each medicine does something different in the body. Different ARV medicines:
Prevent HIV from entering the CD4 cells
Prevent HIV from growing inside the cells
Prevent HIV from leaving the cell to infect other cells
Why so many medicines?
People need to take many ARVs (usually 3 but sometimes more), not just 1 or 2, because HIV attacks the cells in many different ways and the different medicines work in different ways.

Comprehensive Peer Educator Training Curriculum: Trainer Manual 6-9
When a person takes ART the right way, every day, for life, it helps CD4 cells fight against HIV and the virus does not attack as many cells. This means the person has more healthy CD4 cells that can help the body protect itself from infection. Goals and benefits of ART:
Keep the person healthy by increasing the number of healthy CD4 cells
Prevent HIV from reproducing in the person’s CD4 cells
Prevent HIV from leaving one cell and infecting other cells
Prevent transmission of HIV from a mother to her baby
Keep the immune system strong so the body can prevent and fight infections
Make the person feel healthier and able to work, take care of self and family, and be an active member in the community
ART does NOT…
ART does not cure HIV. Once people have HIV, they will have it for their entire lives, even if they feel healthy or their CD4 cell count is very high.
ART does not prevent the spread of HIV to another person. ART helps keep HIV under control in a person’s body, but she or he can still pass it to other people.
This is why it is important to always practice safer sex!

6-10 Module 6
SESSION 6.4: Common ART Regimens (75 minutes)
TRAINER INSTRUCTIONS
Methodologies: Brainstorming, Large Group Discussion, Interactive
Trainer Presentation, Small Group Work
Step 1: Note: In preparation for this session, make sure you know which ARVs are
available in the country and the first-line ART regimens. Adapt the content below
based on your national guidelines.
Step 2: Ask participants to brainstorm all of the ARV medication names they have ever
heard of. List these on flip chart. Ask participants what they think is important
for anyone taking ART to know about their medications (e.g., name, dose, timing, take with/without food, possible side effects, etc.).
Post 5 (or more) flip chart papers around the room. Label each with the name of
a first-line ARV: AZT, 3TC, NVP, EFV, d4T (or other first-line ARVs according to
your national ART guidelines).
For each of the ARVs listed on flip chart, discuss the following, co-facilitating with
a pharmacist if possible:
Write the common name(s) of the medicine.
Pass around the box and bottle/container holding the medicine, as well as the
actual tablets and syrups so that Peer Educators know what each looks like.
Write the common dose of the medication in adults.
Write how often the medicine is taken (e.g., once per day, twice per day,
etc.) and any food restrictions (most ARVs in the first-line regimen can be
taken with or without food).
Write some of the possible side effects of the medicine, drawing on
participants’ own experiences with the medicine when possible.
Step 3: Next, explain the definitions of first-line and second-line ART regimens, using the
content below.
Step 4: Now that Peer Educators are familiar with the common ARVs, review the first-
line ART regimens for adults used in the country. There are examples given in
the content below, but you should check with your national ART guidelines
regularly, as the regimens often change. Note that pediatric ART regimens are
covered in Advanced Module 18.
Step 5: Ask participants to break into groups of 4. Give each group different colored
paper, markers and scissors. Each group should spend the next 30 minutes
making a job aide for themselves on the different ARVs, key information about
the medicine and the common first-line ART regimens.
Step 6: Have each group present their job aide back to the large group. The trainers can
photocopy the different job aides and distribute to all participants during the
next training day.

Comprehensive Peer Educator Training Curriculum: Trainer Manual 6-11
Step 7: Debrief by reminding participants that an important job of the Peer Educator is
to help people understand which medicines they are taking, how many to take
and how often to take them. Peer Educators should work closely with the facility
pharmacist to stay up to date on the names of medicines being used.
Peer Educators should always ask a member of the multidisciplinary team if they
have any questions about the medications they themselves or their clients are
taking.
KEY INFORMATION
Important points to remember about ART regimens:
Peer Educators do not need to memorize every ARV medicine or ART regimen that exists, but they should be familiar with the names and instructions for the most common regimens.
Knowing more about the drugs can also help in communicating with the clinical staff, who may use drug names or abbreviations that are not familiar to clients.
Peer Educators should talk with clients about the medicines they are taking, why they are taking the medicine, how often, and how they take each one.
Changing brands, shapes, sizes and packaging
Sometimes clients may have to switch brands of the same medicines, depending on what is available in the country.
This can be difficult for clients as the shape, size, packaging and dosing of their medications may change, even though they are still on the same regimen.
Peer Educators should work with the pharmacist to be up to date on drug changes, help people prepare for this change and make sure that adherence is kept up.

6-12 Module 6
Common first-line ART regimens for adults (adapt to your national ART guidelines):
Regimen Name and dose Timing Possible side effects
AZT+3TC+NVP
AZT/ZDV zidovudine 300 mg
Twice daily or every 12 hours
Nausea, headache, vomiting, fatigue, anemia, muscle pain, weakness
3TC lamivudine 150 mg
Twice daily or every 12 hours
Stomach pain, nausea, numbness or tingling in hands and feet, vomiting
NVP nevirapine 200 mg
Once daily for 14 days, then twice daily or every 12 hours
Nausea, headache, vomiting, fever, rash. Rashes can be deadly – see a doctor right away.
AZT+3TC+EFV
AZT/ZDV zidovudine 300 mg
Twice daily or every 12 hours
Nausea, headache, vomiting, fatigue, anemia, muscle pain, weakness
3TC lamivudine 150 mg
Twice daily or every 12 hours
Stomach pain, nausea, numbness or tingling in hands and feet, vomiting
EFV efavirenz 600 mg (400 mg if <40 kg)
Once daily, at night. Do not take with a high fat meal. Should not be taken when pregnant.
Rash, nausea, dizziness, diarrhea, headache, sleeplessness, bad dreams
d4T+3TC+NVP
d4T stavudine 30 mg if <60 kg 40 mg if >60 kg
Twice daily or every 12 hours
Changes in body shape, weight loss, fatigue, stomach pain, numbness in hands and feet. Numbness in hands and feet – see a doctor right away.
3TC lamivudine 150 mg
Twice daily or every 12 hours
Stomach pain, nausea, numbness or tingling in hands and feet, vomiting
NVP nevirapine 200 mg
Once daily for 14 days, then twice daily or every 12 hours
Nausea, headache, vomiting, fever, rash. Rashes can be deadly – see a doctor right away.
d4T+3TC+EFV
d4T stavudine 30 mg if <60 kg 40 mg if >60 kg
Twice daily or every 12 hours
Changes in body shape, weight loss, fatigue, stomach pain, numbness in hands and feet. Numbness in hands and feet – see a doctor right away.
3TC lamivudine 150 mg
Twice daily or every 12 hours
Stomach pain, nausea, numbness or tingling in hands and feet, vomiting
EFV efavirenz 600 mg (400 mg if <40 kg)
Once daily, at night. Do not take with a high fat meal. Should not be taken when pregnant.
Rash, nausea, dizziness, diarrhea, headache, sleeplessness, bad dreams

Comprehensive Peer Educator Training Curriculum: Trainer Manual 6-13
Second-line ART regimens If the first-line regimen does not work well, the doctor may switch a client to a second-line regimen. This regimen will probably include at least 2 new ARVs. Check your national ART guidelines to see what second-line ART regimens are available in the country. Some common second-line ART regimens may include the following ARV medicines:
ABC (abacavir)
ddI (didanosine)
TDF (tenofovir)
LPV/r (Kaletra)
Others A Note on Pediatric ART: There is more about ART for infants and children in Advanced Module 18. Many of the same ARV medicines used for adults are also used in children, but there are some major differences:
Pediatric ARVs are sometimes in syrups and need to be given with syringes.
If syrups are not available, tablets may need to be crushed or dissolved in liquid.
The dose of pediatric ARVs depends on the child’s weight. The dose will change as the child grows.
Giving ART to children requires a lot of dedication and hard work by caregivers!

6-14 Module 6
SESSION 6.5: Common Side Effects of ARVs
(45 minutes)
TRAINER INSTRUCTIONS
Methodologies: Large Group Discussion, Brainstorming, Interactive
Trainer Presentation
Step 1: Introduce the session by asking participants what is meant by the term “side
effect.” Record on flip chart and fill in using the content below if needed.
Ask participants who take ART what kinds of side effects they (or their children
on ART) have experienced. Use the following questions to guide the discussion:
What was the side effect?
How long did the side effect last?
What did you do to manage the side effect?
Step 2: Explain that ARVs are strong medications and that many adults and children will
experience some kind of side effects. Most of the time side effects are not severe
and will go away with time and as the body gets used to the medicines. However,
some side effects are dangerous and the person should go see a doctor right
away. Also, some side effects can last a long time.
Step 3: Prepare flip chart papers with the major categories of side effects listed in the
content below. Each flip chart should have one side effect written along the top
(e.g. “HEADACHE,” “DIARRHEA,” “RASH,” etc.). Post the flip charts in different
places around the room.
Step 4: Give out markers to each participant. Ask participants to walk around the room,
stopping at the flip charts with the names of side effects/symptoms they or
someone they know has experienced. Ask them to write down what helped
make the side effect go away on the flip chart papers. For example, if the flip
chart title is “HEADACHE,” a participant may write “cool compresses”
underneath.
Step 5: Once the participants have circulated around the room, review each flip chart
and use the content below to help participants learn about side effects, how to
help clients with side effects and when a client should visit the health facility right
away. Also discuss some of the long-term side effects of ARVs, such as changes in
body shape.
Step 6: Post a new flip chart paper labeled “DANGER SIGNS.” Ask participants to list
which side effects/signs they think are the most dangerous and require going to
the doctor or nurse right away. Write these on the flip chart. Use the content in
the box below to fill in as needed.
Step 7: Close the session by reminding participants that Peer Educators play an
important role in helping clients prepare for, prevent and manage side effects. It
is very important that people with dangerous side effects come to the clinic right
away and never stop taking their ARVs without consulting their doctor or nurse.
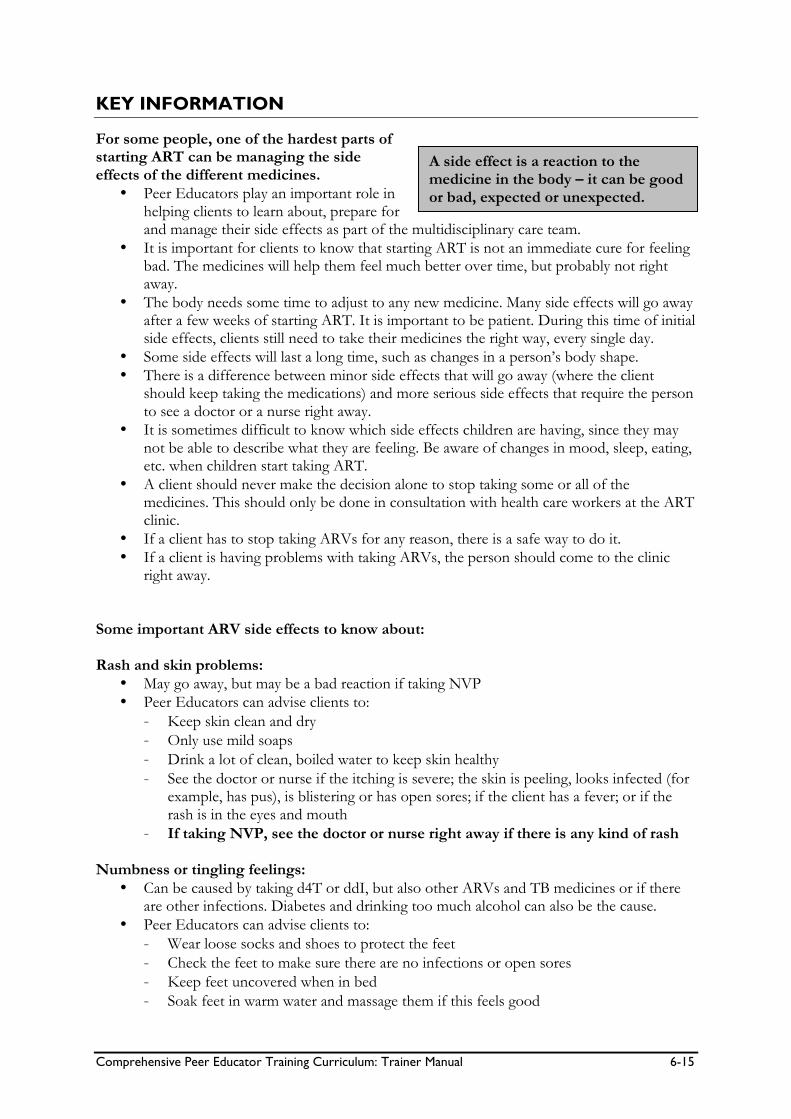
Comprehensive Peer Educator Training Curriculum: Trainer Manual 6-15
KEY INFORMATION
For some people, one of the hardest parts of starting ART can be managing the side effects of the different medicines.
Peer Educators play an important role in helping clients to learn about, prepare for and manage their side effects as part of the multidisciplinary care team.
It is important for clients to know that starting ART is not an immediate cure for feeling bad. The medicines will help them feel much better over time, but probably not right away.
The body needs some time to adjust to any new medicine. Many side effects will go away after a few weeks of starting ART. It is important to be patient. During this time of initial side effects, clients still need to take their medicines the right way, every single day.
Some side effects will last a long time, such as changes in a person’s body shape.
There is a difference between minor side effects that will go away (where the client should keep taking the medications) and more serious side effects that require the person to see a doctor or a nurse right away.
It is sometimes difficult to know which side effects children are having, since they may not be able to describe what they are feeling. Be aware of changes in mood, sleep, eating, etc. when children start taking ART.
A client should never make the decision alone to stop taking some or all of the medicines. This should only be done in consultation with health care workers at the ART clinic.
If a client has to stop taking ARVs for any reason, there is a safe way to do it.
If a client is having problems with taking ARVs, the person should come to the clinic right away.
Some important ARV side effects to know about: Rash and skin problems:
May go away, but may be a bad reaction if taking NVP
Peer Educators can advise clients to:
- Keep skin clean and dry
- Only use mild soaps
- Drink a lot of clean, boiled water to keep skin healthy
- See the doctor or nurse if the itching is severe; the skin is peeling, looks infected (for example, has pus), is blistering or has open sores; if the client has a fever; or if the rash is in the eyes and mouth
- If taking NVP, see the doctor or nurse right away if there is any kind of rash Numbness or tingling feelings:
Can be caused by taking d4T or ddI, but also other ARVs and TB medicines or if there are other infections. Diabetes and drinking too much alcohol can also be the cause.
Peer Educators can advise clients to:
- Wear loose socks and shoes to protect the feet
- Check the feet to make sure there are no infections or open sores
- Keep feet uncovered when in bed
- Soak feet in warm water and massage them if this feels good
A side effect is a reaction to the medicine in the body – it can be good or bad, expected or unexpected.

6-16 Module 6
- Keep feet up
- Do not walk too much at one time and take breaks
- Eat healthy foods and take multivitamins every day
- See the doctor or nurse when numbness/tingling starts. There are some medications that may be able to help the symptoms.
Nausea and vomiting:
Usually go away in 2-4 weeks
Peer Educators can advise clients to:
- Take medicines with food
- Eat small meals more often
- Eat crackers or dry bread
- Chew on ginger or drink ginger tea
- Stay away from fried or greasy and fatty foods
- Stay away from very spicy foods
- Drink a lot of clean, boiled water, weak tea and lemon water
- Do not drink too much coffee or strong tea
- Stop using traditional medicines that may be making things worse
- See the doctor or nurse if there is fever, vomiting more than 3 times each day, inability to drink, stomach pains, dehydration or confusion
Headaches:
Usually go away in 2-4 weeks
Peer Educators can advise clients to:
- Rest in a quiet, dark room
- Put a cold cloth over the face and eyes
- Stay away from strong tea and coffee
- Take paracetomol or aspirin
- See the doctor or nurse if it does not go away with paracetamol or if there is fever, vomiting, blurry vision or convulsions
Diarrhea:
Usually goes away in 2-4 weeks
Peer Educators can advise clients to:
- Not stop eating or drinking
- Eat small meals during the day
- Eat soft foods like rice and bananas
- Stay away from spicy, greasy or fatty foods
- Drink sips of clean, boiled water, weak tea, oral rehydration salts or lemon water
- See the doctor or nurse if there is blood or mucous in the diarrhea, if there is fever, if diarrhea occurs more than 4-5 times in a day, if diarrhea occurs for more than 5 days in a row or if the person loses more than 2 kg
Cannot sleep or has nightmares:
Usually goes away in 2-4 weeks (most common with clients taking EFV)
Peer Educators can advise clients to:
- Take ARVs at bedtime
- Avoid heavy meals before going to sleep

Comprehensive Peer Educator Training Curriculum: Trainer Manual 6-17
- Avoid drugs or alcohol
- Avoid foods or drinks with sugar or caffeine before going to sleep
- Talk about feelings and worries with Peer Educators, friends or family members
- See the doctor or nurse if they are really depressed or suicidal Tiredness:
This is very common and can be caused by many things.
Peer Educators can advise clients to:
- Avoid alcohol and drugs
- Do light physical activity, like taking a walk
- Eat lots of fruits and vegetables and make sure to get enough iron
- Take multivitamins
- Try to get enough sleep at night and rest during the day if needed
- See the doctor or nurse if they have a drug or alcohol problem or feel really depressed
Long-term side effects: Many of the side effects people have when starting ART will go away over time. However, there are some long-term side effects that Peer Educators should be aware of. These may include:
Changes in body shape – this is a long-term side effect that can be caused by ART, especially regimens with d4T. Some PLHIV may develop more fat on their stomach, breasts or other areas and lose fat in their face, arms and legs.
A build up of lactic acid in the body, which can cause weakness, nausea and other symptoms
Increased fat and sugar levels in the blood
Changes to different organs in the body (rare) Peer Educators can advise clients to:
Eat well and exercise
Discuss any changes in their bodies with the doctor or nurse (there may be medications that can be given to limit these changes)
Attend all of their clinic visits and get lab tests on schedule
Continue taking the ARVs
Remember: Clients should not stop taking their medications if they have side effects! The decision to stop or change ARVs should be made by the client and a health care worker together.

6-18 Module 6
Note: Some of the preceding information in this Module was adapted from the following sources: AIDSinfo Drug Database. Available at: http://www.aidsinfo.nih.gov/DrugsNew/Default.aspx?MenuItem=Drugs. Horizons/Population Council, International Centre for Reproductive Health, and Coast Province General Hospital, Mombasa, Kenya. (2004). Adherence to antiretroviral therapy in adults: A guide for trainers. Nairobi, Kenya: Population Council.
Serious Side Effects that Require Immediate Care at a Health Facility
Advise the client to come to the clinic right away if he or she has:
Red rash that is getting worse
Rash in the eyes or mouth
Severe headache with stiff neck
Numbness/tingling/burning in the hands and feet
High fever that will not come down
Vomiting for more than 3 days
Diarrhea 5 times or more in a day, diarrhea for more than 5 days or if there is blood in the diarrhea
Problems breathing
Abdominal pain
Dehydration or cannot drink
Blurry vision
Depression or thoughts of suicide
A lot of confusion Seizures or convulsions

Comprehensive Peer Educator Training Curriculum: Trainer Manual 6-19
SESSION 6.6: Module Summary (10 minutes)
TRAINER INSTRUCTIONS
Methodologies: Large Group Discussion, Interactive Trainer
Presentation
Step 1: Ask participants what they think are the key points of this Module. What
information will they take away from the Module?
Step 2: Summarize the key points of the Module using participant feedback and the
content below.
Step 3: Ask if there are any questions or clarifications.
Step 4: Review the learning objectives with participants and make sure all are confident
with their skills and knowledge in these areas.
Step 5: If there are areas participants do not fully understand or in which they need
more help, go back and review the session before moving to the next Module.
KEY INFORMATION
THE KEY POINTS OF THIS MODULE INCLUDE:
There are a lot of myths about ARVs and ART. Peer Educators need to know the facts and share correct information with others.
ARVs are antiretroviral medications used to fight HIV.
ART means antiretroviral treatment, including a combination of at least 3 different anti-retroviral medications (ARVs), used to fight HIV.
ART is a lifelong commitment, meaning people have to take the medicines every day, at the same time of day for their entire lives, even if they feel good.
ART is not a cure for AIDS, and HIV can still be spread when taking ART.
Traditional medicines may be able to help with some symptoms, but they are NOT a replacement for ART.
Not everyone who is living with HIV needs to start ART right away (except for children, who usually need to start ART sooner than adults).
There are a number of criteria a person must meet to start ART. These include both medical criteria (stage of disease and CD4 cell count) and non-medical criteria (like their ability to understand and adhere to treatment). Clients should be part of the decision to start ART with the health care team.
Since HIV affects the body in different ways, different kinds of ARVs need to be taken to fight HIV. At least 3 types of ARVs (from 2 classes of drugs) should be taken at a time to fight HIV. The only exception is for pregnant women who are not eligible for ART and for HIV-exposed babies, who usually take 2 kinds of ARVs.

6-20 Module 6
(KEY POINTS, CONTINUED)
If the first-line treatment does not work, the doctor may switch the client to a second-line regimen.
The ARVs for babies and children are similar to the ones for adults. The difference is that some come in syrups while others are in capsules and tablets that can be broken or crushed. The doses are also different and change based on the child’s weight.
Some people on ART have side effects that make them feel very bad. Many side effects go away within a few weeks of starting ART or a new drug. It is important to be patient because it takes time to get used to all new medicines. Some side effects, like changes in body shape, are long-term and probably will not go away.
Other side effects, including rash, severe headaches, severe diarrhea and numbness are severe. If a client has these side effects, it is important that she or he go to the clinic right away.
Clients should never stop taking their ART without consulting a clinician.

Comprehensive Peer Educator Training Curriculum: Trainer Manual 7-1
MODULE 7:
HIV Prevention, Care and Treatment for
Pregnant Women and Their Children
DURATION: 300 minutes (5 hours)
LEARNING OBJECTIVES:
By the end of this Module, participants will be able to:
Define MTCT, PMTCT and MTCT-Plus
Explain key PMTCT concepts and interventions before and during
pregnancy, during the time of labor and delivery, and after the
baby is born – and the Peer Educators’ role in each
Explain the importance of ART for pregnant women
List different ways HIV-exposed and infected babies and children
can be found and brought into care and treatment
Help counsel families and caregivers on needed follow-up of
babies exposed to HIV during pregnancy and breastfeeding
Understand when and how HIV can be diagnosed in infants and
children
Understand the major differences between adult and pediatric
HIV care and treatment
CONTENT:
Session 7.1: Introduction: Prevention of Mother-to-Child
Transmission (PMTCT) Overview
Session 7.2: Strategies to Prevent Mother-to-Child HIV
Transmission
Session 7.3: Supporting Pregnant Women and Mothers with
Ongoing ART Services
Session 7.4: Identifying and Caring for Babies Exposed to HIV
Session 7.5: Introduction to Pediatric HIV Care and Treatment
Session 7.6: Classroom Practicum on PMTCT
Session 7.7: Module Summary

7-2 Module 7
METHODOLOGIES:
Large group discussion
Interactive trainer presentation
Small group work
Role-play
Case studies
Game
MATERIALS NEEDED:
Flip chart
Markers
Tape or Bostik
National PMTCT guidelines
National pediatric ART guidelines
Samples of ARVs used for PMTCT (for moms and babies)
Samples of CTX tablets and syrup
Dried blood spot (DBS) sample collection cards, if available
Any forms or registers used for early infant diagnosis at the health
facility
Sample pediatric ARVs and tools to give ARVs (syringes, etc.)
Case study cards for Session 7.6
Ball
WORK FOR THE TRAINER TO DO IN ADVANCE:
Read through the entire Module and make sure you are familiar
with the training methodologies and content.
Adapt the content to reflect the national PMTCT and pediatric
care and treatment guidelines in your country.
Collect ARVs used for PMTCT, CTX, as well as first-line pediatric
ARVs and supplies to give ARVs.
Collect any forms and registers used for infant diagnosis.
Prepare case study cards for Session 7.6.

Comprehensive Peer Educator Training Curriculum: Trainer Manual 7-3
SESSION 7.1: Introduction: Prevention of Mother-to-
Child Transmission (PMTCT) Overview (20 minutes)
TRAINER INSTRUCTIONS
Methodologies: Large Group Discussion, Interactive Trainer
Presentation
Step 1: Review the Module learning objectives.
Step 2: First ask participants to define “PMTCT.”
Step 3: Ask if any of the participants have received PMTCT services or know someone
who has. Ask participants to discuss:
What types of PMTCT services they or someone they know has received?
What was good about these services?
What could have been done better?
Step 4: Give a brief presentation about MTCT, the goals of PMTCT programs and key
MTCT-Plus concepts using the content below. Be sure to fill in the content using
MTCT statistics from your own country.
Ask participants what they think are the challenges to preventing MTCT in their
country (given the fact that so many babies are still becoming HIV-infected).
Step 5: Ask participants what role they think Peer Educators can play in helping more
women understand and access PMTCT services for themselves and their babies.
KEY INFORMATION
Mother-to-child transmission (MTCT): This is the transmission of HIV from a woman living with HIV to her baby during pregnancy, labor and delivery or after birth during breastfeeding. PMTCT stands for Prevention of Mother-to-Child Transmission (of HIV). MTCT around the world:
There are 2 million children under 15 years old living with HIV infection.
In 2007, there were 370,000 new HIV infections among babies and children. Most of these new infections were a result of MTCT.
Without quality maternal and child health, PMTCT and HIV care and treatment services, about 32% of babies born to mothers living with HIV will become HIV-infected during pregnancy, labor and delivery, and breastfeeding.
Without care and treatment, about 30% of HIV-infected babies will die before they are 1 year old, and 50% before they are 2 years old.

7-4 Module 7
MTCT in your country:
Each year in our country, an estimated ____________ women have babies. Of these, about ___________ are women living with HIV.
Each year in our country, an estimated ____________ infants get HIV from their mothers – during pregnancy, labor and delivery or during breastfeeding.
PMTCT program objectives:
PMTCT programs started off with the goal of reducing transmission of HIV from mothers to their babies.
For a long time, PMTCT programs focused on HIV testing for pregnant women and giving the mother and the baby single-doses of nevirapine (NVP – one pill for the mother and one syringe of medicine for the baby) to lower the risk that the baby would get HIV. These programs, however, did not focus on treatment of the mother’s HIV or the baby’s health after delivery.
Based on experience over time and the increasing availability of HIV care and treatment, we know that supporting the comprehensive health needs of the woman and child is the best way to ensure the entire family’s health.
Benefits of MTCT-Plus programs:
Fewer babies with HIV
Healthier moms, babies and families
Improved care, treatment and support for all mothers and children
Stronger families and communities
Reduced number of orphans and vulnerable children
What is MTCT-Plus?
MTCT-Plus programs aim to reduce the transmission of HIV from mothers living with HIV to their babies.
MTCT-Plus programs also emphasize taking care of the mother’s health, including enrollment in care and treatment programs, careful follow-up of HIV-exposed babies and ongoing support, care and treatment for the whole family (including those with HIV infection).
This is why we call it MTCT-Plus – because the focus is on preventing HIV in the baby PLUS taking care of the mother, the baby and the whole family over time.

Comprehensive Peer Educator Training Curriculum: Trainer Manual 7-5
MTCT-Plus – key concepts:
Key Concept 1 – Keep Moms Healthy The healthier the mom (the less HIV she has in her blood and the higher her CD4 cell
count), the less likely it is that the baby will become HIV-infected. The sicker the mother (a lot of virus in the blood and low CD4 cell count), the more likely it is that the baby will become HIV-infected.
A healthy mom is able to take care of herself and love and take care of her baby and all of her family. Without healthy moms, we will not have healthy families or communities!
Key Concept 2 – Reduce Risk at Every Stage The risks of passing HIV from a mother living with HIV to her baby are different at different times during and after the pregnancy.
During pregnancy, labor and delivery, about 20 out of 100 babies will get HIV if there are no ARVs and other services offered.
During breastfeeding, about 12 out of every 100 babies will get HIV with no services offered (this depends a lot on how and how long the mom breastfeeds).
It is important to reduce the risk of transmission at each of these stages.
Key Concept 3 – All Moms Need ARVs
One of the best ways to lower the amount of HIV in the mother’s body, increase her CD4 cell count and make her healthy and less likely to pass HIV to the baby is for her to get the care and treatment she needs to be as healthy as possible, including ART. All pregnant women with HIV need to take ARVs.
If a mom has a CD4 cell count below 350, the baby is at high risk of getting HIV. According to the WHO, women with a CD4 cell count of 350 or lower should start ART and stay on ART for their entire lives (check with your own national guidelines).
If a mom has a CD4 cell count above 350, the baby has a lower risk of getting HIV than if the mom’s CD4 cell count is low. According to the WHO, women with a CD4 cell count above 350 should take a shorter course of ARVs (AZT during the last part of pregnancy and single dose NVP at delivery) during the pregnancy (check with your own national guidelines). These women should stop taking the ARVs shortly after they deliver the baby.
Key Concept 4 – All Babies of HIV-Infected Moms Need Medicine
Babies need to take ARVs at the time of birth and for the first few weeks of life to help prevent them from becoming HIV-infected.
They need to take CTX starting at 6 weeks to prevent other infections that may make them very sick or lead to a rapid death. Babies should take CTX until it is certain that they are not HIV-infected.
If the baby gets tested and is HIV-infected, it is likely that the baby will also need lifelong ART (check with your own national guidelines).
Remember: If the mom and the baby get the care and treatment they need, including ARVs, the chance of MTCT can be lowered from 1 baby out of every 3 babies to 1 baby out of every 50 babies.

7-6 Module 7
SESSION 7.2: Strategies to Prevent Mother-to-Child
HIV Transmission (75 minutes)
TRAINER INSTRUCTIONS
Methodologies: Interactive Trainer Presentation, Small Group Work,
Large Group Discussion, Role-Play
Step 1: Prepare 6 pages of flip chart, each with one of the following headings:
“BEFORE PREGNANCY”
“DURING PREGNANCY”
“DURING LABOR AND DELIVERY”
“AFTER THE BABY IS BORN – MOM’S HEALTH”
“AFTER THE BABY IS BORN – BABY’S HEALTH”
“AFTER THE BABY IS BORN – INFANT FEEDING”
Step 2: Break participants into 6 groups and give each one of the flip chart papers. Give
each group about 15 minutes to brainstorm what can be done to prevent MTCT
and to keep the mom healthy at their assigned stage. Have groups record their
ideas on the flip chart.
Step 3: After 15 minutes, ask each small group to present back their PMTCT strategies
to the large group. Encourage group discussion and fill in as needed from the
content below on PMTCT strategies at each stage.
Step 4: Pass around AZT, NVP and 3TC tablets and syrups (or other ARVs used in the
national PMTCT program) to the whole group and explain how they are taken
during and after pregnancy by the mom and the baby (according to your national
guidelines).
Step 5: Ask participants what they think we mean by the phrase “saving 2 lives.” Record
answers on flip chart. Explain to participants that this is the motto of PMTCT
and a message they should share with moms, partners and the whole community
to show how important PMTCT services are. Have participants turn to the
person sitting next to them and role-play how they would explain the motto
“saving 2 lives” to a mom that just found out she was HIV-positive during an
ANC visit.

Comprehensive Peer Educator Training Curriculum: Trainer Manual 7-7
Remember: All women have the right to have or not have babies, no matter what their HIV status.
KEY INFORMATION
PMTCT strategies PMTCT strategies before pregnancy:
Prevent HIV transmission in the first place – through programs that promote:
Risk reduction
Condoms
Being faithful
Delaying the age at which young people have sex for the first time
Making sure all people understand HIV prevention and have access to services, including condoms and HIV testing and counseling
Community support to access HIV prevention services
Prevent unwanted pregnancies through good family planning and reproductive health programs (see also Module 3 and Advanced Module 16). Promote “dual protection.” Dual protection means preventing unwanted pregnancy, STIs and HIV at the same time. Here are some ways to have dual protection:
Using male or female condoms every time you have sex
Using male or female condoms PLUS another family planning method
Promote HIV testing and counseling, especially before having sex with someone, getting married and getting pregnant.
Emphasize the importance of knowing your HIV-status before becoming pregnant so that you can make informed decisions about having a healthy baby.
Make sure people know about STIs and get treatment for themselves and their partner(s) right away.

7-8 Module 7
PMTCT strategies during pregnancy:
Promote antenatal care for all women (at least 3 visits, but more is better).
Promote HIV testing and counseling for all pregnant women and their partners (unless they say that they do not want to be tested for HIV).
Make sure all pregnant women receive ARVs (adapt to your national guidelines)
The WHO recommendation for women eligible for ART (CD4 cell count less than 350):
- The mom gets AZT + 3TC + NVP each day while she’s pregnant, during labor and continues on treatment after the baby is born.
- The baby gets AZT 2 times every day for 7 days or 4 weeks (depending on how long the mom took ART during pregnancy).
The WHO recommendation for women not eligible for ART (CD4 cell count more than 350):
- The mom gets AZT 2 times per day from 28 weeks (7 months) of pregnancy and a single dose of NVP during labor.
- The baby gets NVP syrup and AZT syrup 2 times every day for either 7 days or 4 weeks (depending on how long the mom took her ARVs during pregnancy).
- CD4 test taken within 3-6 months after delivery
**Note that along with the CD4 cell count, the doctor or nurse may also use WHO staging to decide which pregnant women need to start ART.
Make sure all women receive CTX prophylaxis (adapt to your national guidelines). In many places, women with CD4 cell counts less than 350 should be given CTX prophylaxis to take everyday. In other places, all pregnant women living with HIV will be given CTX, no matter what her CD4 cell count.
Make sure women plan for a safe delivery at a health facility.
Promote safer sex and condom use during pregnancy.
Make sure women receive nutrition advice and supplements (iron, multivitamins) and infant feeding education, support and counseling.
Promote prevention of malaria, TB and tetanus.
Promote treatment of STIs.
Create linkages to mothers support groups and other social support in the community.
Plan for postpartum follow-up of the mother and the baby.
Remember to promote the PMTCT motto of “saving 2 lives” (the mom’s and the baby’s) by enrolling in MTCT-Plus services, taking ARVs and coming back to the clinic often.
Remember that most moms who need ART for their own health and to prevent HIV in their baby do not look or feel sick!

Comprehensive Peer Educator Training Curriculum: Trainer Manual 7-9
PMTCT strategies near to and during labor and delivery:
Help moms plan to deliver the baby in a health facility with a trained provider. Talk to partners and other family members about how important it is for the mom and baby to have a safe delivery.
Encourage moms with unknown HIV-status to get tested right away.
If the mother took ARVs during the pregnancy, the WHO recommends that:
The mother should continue taking ARVs during labor and delivery.
The baby should get a single dose of NVP within 72 hours of birth and AZT 2 times every day for 7 days.
Encourage moms who did not start taking ARVs during pregnancy to take them during labor and delivery, according to national guidelines. The WHO recommends that:
The mom gets AZT and single dose of NVP as soon as labor starts.
The baby gets single dose of NVP within 72 hours of birth and AZT 2 times every day for 4 weeks.
Promote good infection prevention practices for all births by keeping the delivery area clean, washing hands, cleaning instruments between deliveries, etc.
Review infant feeding education and counseling received during ANC and help the mom to implement her feeding choice before she leaves the hospital.
PMTCT strategies after the baby is born:
All babies born to women with HIV are exposed to HIV because they shared blood and fluids with the mother. This does not mean that they will all become HIV-infected.
Many babies will escape HIV infection, especially if the mother and baby get care and ARVs.
It is important to explain follow-up care to mothers and families very well and make sure that they continue to come to the clinic after the baby is delivered.
There is a lot that can be done to keep the baby healthy when it has been exposed to HIV and there are tests that can be done to tell if the baby is HIV-infected.
Follow-up for the mom and family:
Link new moms with community health workers who can visit them regularly in their homes in the days/weeks after birth. In some cases, Peer Educators may also conduct home visits.
Make sure that moms are enrolled in care and treatment programs, have adherence support and are on/continue taking ART if they are eligible.
Counsel the mom and family on follow-up of the baby (including CTX prophylaxis when the baby is 6 weeks old), importance of routine child care visits and immunizations, HIV testing options for the baby and the timing and meaning of these tests.
Help create demand for needed HIV services by encouraging the mom to tell health care workers that she has HIV and that the baby has been exposed.
Provide ongoing emotional support and counseling to help the mom deal with any issues or concerns she may be having. The mom may also need help with disclosure to her partner or family members.
Discuss family planning desires and options (does she want to have another baby? If yes, how soon?) and refer her for family planning services.
Link the new mom to support groups, nutrition services, income-generating activities or other sources of needed support.

7-10 Module 7
Follow-up for the baby:
The baby should get single-dose NVP within 72 hours of birth and AZT 2 times every day for 1- 4 weeks, depending on if the mom took ART during pregnancy and your national guidelines.
Make sure the baby goes for check-ups and gets immunizations on schedule.
Make sure the mother tells all health care workers that the baby has been exposed to HIV.
Help moms recognize oral thrush (white spots in the mouth or throat) and other health problems in the baby and bring the baby to the clinic right away for treatment.
Make sure the baby is getting good nutrition and growing well.
Explain to the mother that the baby needs to start taking CTX starting at age 6 weeks. CTX helps prevent infections and keeps the baby healthy.
Recommend and provide counseling (and follow-up) about testing her baby for HIV. Depending on national guidelines and what tests are available, the baby may need 2 tests:
In some places, once the baby is 6 weeks old, a small amount of blood can be taken from the baby’s heel to test and see if the baby is HIV-infected. The test can find out which children are HIV-infected as early as possible so they can get the care and treatment they need.
The baby will have to have another test 6 weeks after the baby stops breastfeeding or when the baby is about a year and a half old to make sure the baby did not become infected during breastfeeding.
Remember that the HIV test used on adults can be used in children. But it can only be used to tell for sure if a child over 18 months old is HIV-infected. Before 18 months, it usually just shows whether the baby was exposed to HIV.
PMTCT strategies during infant feeding
There is HIV in breast milk. It is important to note that most of the HIV transmission during breastfeeding happens
when mothers mix-feed their babies and/or when the mothers are very sick with AIDS, have a low CD4 cell count and do not take ART.
Key Definitions
Mixed feeding means giving babies breast milk together with other liquids, like water, herbal mixtures, juice or other foods like cow’s milk, formula milk or soft porridge. Exclusive breastfeeding means only giving the baby breast milk (and any medicines prescribed by a doctor).

Comprehensive Peer Educator Training Curriculum: Trainer Manual 7-11
There is much lower transmission from breast milk if:
The mother is healthy
The mother is on ART during breastfeeding
The baby ONLY gets breast milk for as long as possible up to 6 months (exclusive breastfeeding), and there is no mixed feeding
Breast infections are prevented and treated right away
Thrush (white spots, yeast) in the baby’s mouth is treated right away Peer Educators should support women to make good decisions around infant feeding and help them implement their infant feeding plan (or change the plan if it is not working). Although Peer Educators are not sufficiently trained to be infant feeding counselors, they can refer mothers to other members of the multidisciplinary care team for counseling and provide basic information to women and their families in the community and at the health care facility.
Breastfeeding vs. Formula Feeding
Exclusive formula feeding (no breast milk) is the only way to guarantee that a baby will not get HIV from its mother after delivery.
HOWEVER, in most places in sub-Saharan Africa, replacement feeding causes many babies to become sick and die from diseases, malnutrition, infections and other problems. This happens because formula feeding is expensive and depends on having clean water and the time and money to prepare the formula frequently each day to meet the infant’s need.
If for any reason the mother will not be able to practice safe formula feeding, it is safer for her to breastfeed the baby.
Also, there is stigma against women who do not breastfeed, and it is often very difficult for the mom to prepare replacement feeds.
Peer Educators can help mothers decide which feeding choice is best for them and safest for the baby, and continue to support mothers while they feed their babies.
Remember: for the majority of women you will work with, exclusive breastfeeding for as long as possible – up to 6 months – is going to be safest for the baby.

7-12 Module 7
Key messages about infant feeding:
Breast milk is “the norm” in most places. Breastfeeding is healthy, free and helps prevent diseases in the baby like diarrhea and respiratory problems that could be deadly. Breast milk is the only food babies need until they are 6 months old.
Women should take ART if they are eligible, as this will decrease the amount of HIV in their blood and breast milk. All women, whether on ART or not, should be encouraged to exclusively breastfeed and come back to the clinic regularly.
In most developing country contexts, exclusive breastfeeding for as long as possible up to 6 months (no water, juices or other liquids and no foods like cow’s milk, formula milk or soft porridge – except medicines prescribed by a doctor) is usually the best and healthiest choice for all babies. Mothers may also opt to exclusively formula feed their baby if it is safe to do so.
Women should not wean (stop breastfeeding) before 6 months. Early weaning will cause more harm than good to the baby.
Before 6 months, it can be harmful for the baby to have more than breast milk OR formula.
At 6 months, the baby’s immune system is stronger and the baby needs to have other foods, in addition to breast milk or formula, to get the nutritions it needs. Adding foods, in addition to breast milk or formula, does not increase the risk of MTCT after the baby is 6 months old. Mothers should be referred to a nurse or infant feeding counselor to talk about safely preparing other foods for the baby at 6 months.
Women should not be advised to quickly wean the baby off of the breast at 6 months.
The baby can have breast milk and other foods until it is 12-18 months old and/or the mother stops breastfeeding completely. Moms should not stop breastfeeding if there are not enough healthy foods for the baby to eat.
If the baby is tested and found to be HIV-infected, the mother should keep breastfeeding.
Women should watch out for breast infections (cracking, sore nipples, strange discharge from nipples, pain, etc.) and come to the clinic right away if this happens.
Peer Educators should help link women with nutritional support during the weaning period.

Comprehensive Peer Educator Training Curriculum: Trainer Manual 7-13
SESSION 7.3: Supporting Pregnant Women and
Mothers with Ongoing ART Services (30 minutes)
TRAINER INSTRUCTIONS
Methodologies: Large Group Discussion, Interactive Trainer
Presentation
Step 1: Remind participants that one of the best ways to prevent MTCT is for the
mother to stay healthy, take ART and adhere to her own ongoing care and
treatment.
Step 2: Ask participants to think about some of the challenges to linking moms with ongoing ART services. Record these on flip chart and fill in using the content
below or other examples specific to your clinical and community contents.
Step 3: Next, ask participants to discuss some of the ways Peer Educators can make sure
women and their babies are offered care and treatment and routine child health
care services when they are all in different locations and provided by different
health care workers. List specific solutions on flip chart and fill in as needed using
some of the ideas below and other examples specific to your context.
Step 4: Close the session by reminding participants that making sure moms and babies
are linked to ongoing care and treatment services is a key part of their work as
Peer Educators.
KEY INFORMATION
We have talked about the need for pregnant women to enroll in ongoing HIV care and treatment. Some of the challenges of linking PMTCT and ART services include:
Services are located in different parts of the hospital and it is difficult for women to go to multiple service delivery points on different days.
Many times, women get antenatal services from a clinic or a health center close to their home, whereas ART services may only be available at a hospital or higher level facility.
Different providers provide various services, with no one person coordinating the mother’s or the baby’s care.
Records may not give information on where else in the hospital a client has been seen or the results of visits to other hospital services.
There are no formal referral systems in place from one service to another in many hospitals, and even if a referral is made, there is often no way to follow up to see if the mom and baby went for other services.
Moms and families are not always given the counseling they need to understand how important it is to enroll in and adhere to care and treatment.

7-14 Module 7
Women may not get the support they need at home to come back to the clinic often for appointments. Women who have not disclosed to family members may find it very hard to come back to the clinic for services since they will not have support at home.
Many women come for antenatal care, but it is often late in the pregnancy.
There are myths and fears about taking ARVs during pregnancy in many communities.
In some places, many women deliver their baby at home and may not have regular contact with a health care facility.
Some possible solutions to link PMTCT and ART services include:
Facilities can strengthen the care portion of services so that women who are not eligible for ART are still seen regularly for care, get medicines like CTX to prevent infections, receive CD4 testing and get regular counseling.
Facilities can develop intra-facility referral forms and follow-up systems between PMTCT, ART and other services (like TB, family planning, etc.).
Referral forms and linkages between clinics, health centers and hospitals can be developed and strengthened.
Peer Educators can provide quality information and counseling to women in their homes and at the clinic on the benefits of ongoing care and treatment for themselves and other family members.
Peer Educators can literally walk with clients from one part of the hospital or health center to another and help them understand why they are being referred and what to expect.
Peer Educators can also work with other multidisciplinary team members to prioritize pregnant women for care and treatment. For example, they can ensure that they are not made to wait long hours at the clinic, that there are family care and treatment days where the mom and baby can be seen at the same time by one doctor or that there are designated days in the ART clinic for pregnant and postpartum women. They can also collaborate with community health workers to identify and visit pregnant women in the community.
Peer Educators can greet their pregnant or newly-delivered clients at the ART clinic to make them feel comfortable and welcome.
Peer Educators can keep their own records about which women they should follow up with. For example, they can keep a list of all pregnant women eligible for ART and make sure that each comes to scheduled appointments and receives home visits.
Peer Educators can educate the community, including community leaders, about the importance of antenatal care for all moms and of care and treatment services for moms and babies living with HIV.
Peer Educators can start mothers support groups so women have the support and information they need to keep themselves and their babies healthy.
Remember: Multidisciplinary team meetings that include Peer Educators are a good place to talk about how to improve linkages and follow-up for pregnant women and their families.

Comprehensive Peer Educator Training Curriculum: Trainer Manual 7-15
SESSION 7.4: Identifying and Caring for Babies
Exposed to HIV (60 minutes)
TRAINER INSTRUCTIONS
Methodologies: Large Group Discussion, Interactive Trainer
Presentation, Small Group Work
Step 1: Ask participants to think of places where we can find babies who may need HIV
care and treatment and record on flip chart. Remind participants that while
PMTCT services are a good place to start, there are many other places where
Peer Educators can look for HIV-exposed or HIV-infected babies and bring them
to the clinic for testing, care and treatment.
Step 2: Break participants into 3 groups. Give each group flip chart paper and markers.
Give the small groups about 15 minutes to discuss the following:
Group 1: Discuss the care of HIV-exposed babies immediately after delivery
and for the first few weeks of life.
Group 2: Discuss the care of HIV-exposed babies from 6 weeks to 12
months of age.
Group 3: Discuss what kind of ongoing care HIV-exposed and HIV-infected
babies need.
Step 3: After 15 minutes, ask each small group to quickly present the key points of their
discussion. When Group 2 presents, pass around CTX syrup so participants can
be familiar with the way it looks.
Allow time for the large group to add or ask questions and fill in as needed from
the content below. Explain to participants why it is always important for Peer
Educators to think about and focus on the whole family, using the content below.
Step 4: Ask if any participants know about HIV testing for babies. After allowing time for
participants to give their ideas, present key points about HIV testing in babies
under 18 months of age, and in children over 18 months of age, using the content
below. If DBS testing is available at the health facilities where participants will be
working, be sure to show DBS sample cards and any forms/registers the facility is
using for early infant diagnosis.
Step 5: Close the session by reminding participants of the key role of Peer Educators in
finding exposed babies and making sure they are tested, that the results are
picked up and understood by the mom or caretaker and that HIV-infected babies
are enrolled in care and treatment.

7-16 Module 7
KEY INFORMATION
All babies born to women with HIV are exposed to HIV because they shared blood and fluids with the mom. HIV transmission to the baby does not happen in all pregnancies. Therefore, many babies will escape HIV infection, especially if the mother and baby get care and treatment.
Finding babies and bringing them into care: PMTCT programs are one of the best ways to find babies exposed to HIV who should be tested and enrolled in care and treatment. But there are other places where Peer Educators can help the multidisciplinary team find babies exposed to HIV or infected with HIV since not all will get PMTCT services or come back for follow-up. These places include:
Under-5 clinics
Pediatric inpatient wards
Adult ART clinics
Health centers and hospital outpatient departments where babies are taken when they are sick
Homes with adults living with HIV
With community health workers and community-based organizations, especially those working with orphans
With traditional healers and traditional birth attendants who may be a first point of contact for sick babies
It is important to remember that while most babies living with HIV are infected through MTCT, others may have been victims of sexual abuse. Peer Educators should always turn to a professional counselor in these situations. Caring for babies exposed to HIV: The most important thing for babies exposed to HIV and HIV-infected babies is that they come back to the clinic often to see the doctor and that they take CTX every day.
Babies with HIV may get sick very quickly and they need to be seen at the clinic more often than adults with HIV or children who do not have HIV.
Peer Educators should counsel moms and other caretakers about bringing babies back to the clinic every month for a check-up and whenever they are sick.
Right away after the baby is delivered to a mom with HIV:
The baby should get single-dose NVP within 72 hours of birth and AZT 2 times every day for 1-4 weeks, depending on whether the mother took ART during pregnancy and your national guidelines.
These medicines can be given in the maternity ward. In some places, where women often deliver their babies at home, NVP is given to the mother to take home during her pregnancy so that the mother can give the dose to the baby right away after delivery. Babies delivered at home should be seen at the clinic as soon as possible for a check-up and for ARVs.
Remember: It is important to explain follow-up care to moms and families very well and to make sure that they continue to get the medical attention they need and are not lost after the baby is delivered. There is a lot that can be done to keep the baby healthy when it has been exposed to HIV and there are tests that can be done to tell if the baby itself is HIV-infected.

Comprehensive Peer Educator Training Curriculum: Trainer Manual 7-17
5 key points about caring for babies exposed to or infected with HIV:
Come back to the clinic often. If the baby is sick, don’t wait – come in right away.
Go for early HIV testing.
Give CTX to the baby every day.
Weigh and measure the baby at every visit. Focus on the whole family.
At 6 weeks of age:
All exposed babies should start taking CTX. This is the same drug that adults take to prevent pneumonia. It is available as a syrup or tablet for babies. This is one of the best ways to keep babies healthy and prevent illness. Babies exposed to HIV or with confirmed HIV infection should take CTX every day.
The dose of CTX will depend on the baby’s weight. We all know that babies grow very fast – even every day – so the baby needs to come back to the clinic very often to be weighed so we know how much medicine to give.
Where available, babies should be tested for HIV with DNA PCR as soon as possible after 6 weeks of age (as explained in the box below).
Ongoing:
If the baby is HIV-infected, a CD4 test needs to be done. The CD4 cell count number is measured the same as for adults but, if available, CD4% is a better measure in children under 5 years of age. A health care worker will interpret the results, but Peer Educators should know that what is considered a high or a low CD4 count in adults is not the same for children. For example, a CD4 cell count of 500 is good for an adult but very low for a baby.
Babies should keep taking CTX until it is definite that they are not HIV-infected and they are no longer breastfeeding.
Make sure the baby goes for check-ups and gets immunizations on schedule.
Health care providers should look for and treat infections.
Make sure the baby is getting good nutrition and growing well. The doctors or nurses will weigh, measure and examine the baby at every visit to see if it is growing and developing normally. The baby’s height, weight and head measurement should be recorded on a growth chart at each visit. This is one of the best ways to see if a baby is healthy.
Focus on the family:
Having a sick baby and knowing that the baby may have HIV can be very hard for parents and caretakers.
It is important for Peer Educators to spend time talking with the family about how they are feeling and making sure they understand what is happening with the baby (tests, medicines, side effects, etc.) in easy-to-understand terms.
HIV is a family disease and parents of sick babies will often themselves be sick and in need of care and treatment and support to adhere, disclose to others or seek community services.
Parents and caretakers should be active in the baby’s care and monitoring, as they often know best when “something is not right” with the baby (the baby is crying all the time, the baby is not eating, the baby is not sitting up or playing, etc.). Whenever the baby is not doing well, parents and caretakers should be encouraged to trust their instincts and bring the baby to the clinic right away.
Peer Educators should also ask about all caretakers of the baby, as they often change. All caretakers should know what is going on with the baby’s health and care.

7-18 Module 7
HIV testing in Babies and Children
Some moms are scared to have their children tested because of lack of information about what services will be available if the test is positive. Peer Educators need to explain to moms and caregivers that there is help available for the child and that the sooner they know the child’s HIV-status, the more quickly the child, if infected, can take medicines to stay healthy. As always, it is important to follow national guidelines for HIV testing in babies and children. HIV testing in babies under 18 months of age:
The only way to know for sure if a child under 18 months of age is HIV-infected is through DNA PCR testing with dried blood spots, or DBS. If this test is not available, the doctor can also examine the baby, check the CD4 cell count, and look for signs of HIV and AIDS.
Rapid HIV tests used in adults can be used to test babies, but they will only tell us if the baby is exposed to HIV, not if the baby is definitely HIV-infected.
Once the baby is 6 weeks old, a small amount of blood can be taken from the baby’s heel and a test can be done to see if the baby is HIV-infected (this is for the DNA PCR test). Once the nurse has counseled the mother and the baby’s blood is taken, the sample will be sent out to a laboratory to be tested.
During counseling, Peer Educators should help the mom think about her support system – who will help her if the baby is HIV-infected? Who will help her come to clinic appointments? These people can be her treatment supporters if and when the baby starts taking medicines.
Peer Educators should make sure mothers understand that the results will take time and schedule an appointment for the mother and baby to return to the clinic to pick up the results. Peer Educators should follow up if the mom or caregiver does not come back to pick up the results of the child’s HIV test.
If the result of the test is positive, the baby is HIV-infected and most babies should start ART right away (the WHO recommends that all HIV-infected babies start ART – refer to your national guidelines). Help the mom and the baby go to the ART clinic to get the baby enrolled as soon as possible. If the mom is breastfeeding, she should continue to do so, as this will help the baby.
If the result of the test is negative and the mom is still breastfeeding, she should keep breastfeeding, make sure the baby is brought to the clinic for regular visits and then retest the baby 2-3 months after she has stopped breastfeeding completely. The baby is still at risk of becoming HIV-infected as long as she is breastfeeding.
HIV testing in children over 18 months of age:
Once children are 18 months old, they can be tested for HIV with the standard rapid test used on adults.
If the child is still breastfeeding, he or she should be retested after the mother has completely stopped breastfeeding.
Be sure to follow your national guidelines on HIV testing in babies and children!

Comprehensive Peer Educator Training Curriculum: Trainer Manual 7-19
SESSION 7.5: Introduction to Pediatric HIV Care and
Treatment (40 minutes)
TRAINER INSTRUCTIONS
Methodologies: Large Group Discussion, Interactive Trainer
Presentation
Step 1: Introduce the session by reminding participants that Peer Educators can help
caregivers and parents get their children tested for HIV, and if the child is
infected, link the family with pediatric care and treatment services.
Step 2: First ask participants to discuss how HIV is different in children and adults. Be sure to make the point that HIV progresses much more quickly in children and
that children with HIV need ART more quickly than most adults with HIV.
Step 3: Ask participants if they think ARVs for children are the same as ARVs for adults,
and if not, to list some of the differences. Ask participants caring for children
with HIV when their child started ART, what ARVs they give, how much, how
often and some of the challenges in giving medicines to children every day.
Encourage participants to ask questions of others who have firsthand experience
with pediatric ART.
Step 4: Review the common ART regimens for babies and children (according to your
national guidelines), stressing that the doses will change depending on the child’s
weight. Ask the group to brainstorm about some of the key issues when starting
a baby or a child on ART. Fill in using the content below as needed.
Step 5: Close the session by discussing what Peer Educators can do to help children
living with HIV and their caregivers access and adhere to care and treatment.
Remind participants that they will learn more about pediatric HIV care and
treatment in Advanced Module 18 (and advise them whether this Advanced Module
will be taught during basic training or as an update training).
KEY INFORMATION
Pediatric HIV
Children are not little adults. Adults can live many years with HIV before they get sick. But children, particularly babies, are not as strong and can get sick very quickly once infected with HIV.
50% of babies with HIV will die before their second birthday without care and ART.
Caring for sick children and having a child die can be very hard emotional experiences for families.
Children are our future and we need to keep them healthy to build strong communities and a strong nation.

7-20 Module 7
Babies and children with HIV who are in care and take ART can live long, healthy lives and grow up to be healthy adults.
Pediatric ART
As with adults, ART can help keep babies and children with HIV healthy, strong and able to live a whole lifetime when they adhere to their care and medication regimens.
But the use of ART in babies and children is not always easy and is often more complicated than ART in adults.
Pediatric ART regimens are not always available and can be more difficult to take than those for adults. Children depend on caregivers to give their ART and take them to the clinic – and doses and regimens change often with children (depending on their age and weight).
Common first-line ART regimens for infants and children (refer to your national pediatric HIV guidelines – these are just some examples):
AZT + 3TC + NVP or EFV d4T + 3TC + NVP or EFV
ABC + 3TC (or AZT/3TC) + LPV/r **Note that EFV should not be given to children under 3 years of age. Key issues for pediatric ART:
Most babies and young children with HIV will need ART since they get sick quickly and are at great risk for illness and death. Remember, all HIV-infected babies and children also need CTX.
The WHO recommends that all infants who are HIV-infected start ART, but it is important to follow your national guidelines. Only a doctor can decide if a pediatric patient is eligible for ART.
Once the doctor decides the child should start ART, the caregivers need to be well-prepared for the challenges ahead. Peer Educators can help caregivers understand pediatric HIV and make an ART adherence plan with the multidisciplinary care team.
Success with pediatric ART depends on a partnership among the caregiver(s), the child, the multidisciplinary care team at the clinic, and the community.
All members of the family and all caretakers must be prepared to give the child ART at the same time, the right way, every day. The child must cooperate and be involved in the treatment as well.
There are many barriers to adherence with pediatric ART. Children may not want to take the medicines, they may be away at school for many hours of the day or caregivers may be at work or not always with the child when the medicines need to be given.
Pediatric ARVs are not always available in syrup form, so pills may need to be crushed or dissolved in water or juice, adding extra time to the caregivers’ day. Some of the pediatric ARV syrups taste very bad.
The dose of different ARVs will change often in children because it depends on their weight. It can be hard for caregivers to remember the right dose to give since it changes as the child grows.
Peer Educators can help families understand and access pediatric ART and the care and treatment services they need to have healthy families and communities.
ARV names AZT = zidovudine 3TC = lamivudine NVP = nevirapine EFV = efavirenz d4T = stavudine ABC = abacavir LPV/r = Kaletra

Comprehensive Peer Educator Training Curriculum: Trainer Manual 7-21
Caregivers may also be living with HIV themselves. If parents or caregivers have not disclosed their HIV-status, it makes it hard to tell people about the child’s HIV-status. The family or other caregivers will not know what kinds of care and treatment the child needs if they do not know the child’s HIV-status.
As children get older, they should know about their own HIV-status. What we tell children about HIV depends on their age and maturity. But it is always important for children to know what is going on with their own health. Peer Educators can help caregivers prepare to disclose to their children and support them in this process.
Note: There is more information about pediatric HIV care and treatment, including adherence and disclosure, in Advanced Module 18.
The most important thing to remember about pediatric ART is that clients and caregivers need to come back to the clinic often to see the doctor. They also need support at home and in the community, including through Peer Educators. Like with adults, it is very important for children to take ARVs at the right time, the right way, and at the same time every day.

7-22 Module 7
SESSION 7.6: Classroom Practicum on PMTCT
(60 minutes)
TRAINER INSTRUCTIONS
Methodologies: Large Group Discussion, Small Group Work, Case
Studies, Role-Play
Step 1: Ask if there are questions or areas where participants need clarification on
knowledge and skills related to PMTCT.
Step 2: Divide the group into smaller groups of 4. Hand out one of the pre-prepared
case study cards to each group. Each group should spend about 40 minutes doing
rotating role-plays where one person acts as the mother, another as the Peer Educator, the third as the child or family member (when applicable to the case
study) and the fourth as an observer who gives constructive feedback. Make sure
the groups switch roles after about 10 minutes.
Step 3: The trainers should rotate around the room and provide feedback to the small
groups during the activity.
Step 4: Ask some of the groups to perform their role-play in front of the large group
and discuss.
Step 5: Debrief by reminding participants that they play an important role in promoting
PMTCT services, preparing and supporting people on PMTCT and providing
ongoing follow-up to moms and babies. Answer any remaining questions.
KEY INFORMATION
Case Study 1: A 22-year old woman named W___ comes to the ART clinic for a regular appointment. She is doing well on her ART regimen and confides in you that she really wants to have a baby. She has discussed it with her husband, who is also living with HIV, but he told her that it is not responsible for them to have a baby because it will definitely be born with HIV. What would you tell her about PMTCT services, family planning, etc.? Case Study 2: You are talking with a pregnant woman named L___ who just received her CD4 test results. Her CD4 cell count is 150. You sense that she does not understand why the CD4 test was done or what the number means. She has not disclosed to her partner yet and is very afraid that her baby will have HIV. What things would you talk to her about? Case Study 3: C___ comes to the health center for her first antenatal care visit. She tests positive for HIV. She is very upset because she is certain that she has been cursed and her baby will have HIV for sure. You want to discuss ARVs with her to protect herself and the baby, but she says that ARVs will kill the baby – they are too strong to take while pregnant. What would you tell her about ARVs during pregnancy?

Comprehensive Peer Educator Training Curriculum: Trainer Manual 7-23
Case Study 4: F___ is 2 months old. His mother is HIV-positive and has brought him to the clinic. The mother says that she is breastfeeding the baby but complains that he does not feed well, cries a lot and that she is thinking of adding other foods so that the baby can get full and stop crying. When you talk to the mother, she says her partner has bought her formula, which she will give in addition to breastfeeding and her mother suggested that she should add some porridge so that the baby can be full and stop crying. You also notice that the baby has sores in his mouth. When you ask, you learn that the baby has not been tested for HIV. What would you talk with F___’s mother about? Case Study 5: S___ brings her infant niece to the clinic for immunizations. In talking with S___, you learn that the baby is HIV-infected and is taking CTX and ART. The baby’s mom (S___’s sister) is very busy at her market shop and does not bring the baby back to the clinic often, causing her to run out of medicines. S___ wants a 3-month supply of medicines so that she and the baby do not have to come back to the clinic so much. What would you say to S___ about how important it is to bring the baby back to the clinic often? Case Study 6: At a mothers support group meeting, a woman named O___ asks a question. She has an 8-week old baby and she wants to know if her baby has HIV like she does. She is worried that her husband and mother-in-law will be very angry with her if the baby is HIV-infected. She feels very lonely and afraid. Some of the other women in the group say they are going through the same thing. What would you discuss during the support group – for example, testing babies for HIV, caring for babies that are exposed to HIV, ongoing care for mothers, safe breastfeeding, etc.? Note: Some of the preceding information in this Module was adapted from the following sources: Joint United Nations Programme on HIV/AIDS. (2008). 2008 Report on the Global AIDS Epidemic. Geneva, Switzerland: UNAIDS. De Cock, K., et al. (2000). Prevention of mother-to-child HIV transmission in resource-poor countries: translating research into policy and practice. Journal of the American Medical Association: 283(9)1175–1182. Dabis, F. & Ekpini, E. (2002). HIV-1/AIDS and maternal and child health in Africa. Lancet: 359(9323)2097–2104. WHO. (2007). Antiretroviral Therapy of HIV Infection in Infants and Children: Towards Universal Access, Recommendations for a public health approach. Geneva, Switzerland: UNAIDS.

7-24 Module 7
SESSION 7.7: Module Summary (15 minutes)
TRAINER INSTRUCTIONS
Methodologies: Game, Interactive Trainer Presentation
Step 1: Ask participants to stand in a circle. Throw the ball to one participant and ask
them to say one of the key points about PMTCT discussed during this Module.
After that person says a key point, he or she should throw the ball to another
participant who will say another key point. Continue until most of the key
messages are reviewed.
Step 2: After participants return to their seats, fill in any additional key points from the
list below as needed.
Step 3: Ask if there are any questions or clarifications.
Step 4: Review the learning objectives with participants and make sure all participants
are confident with their skills and knowledge in these areas.
Step 5: If there are areas participants do not fully understand or in which they need
more help, go back and review the session before moving to the next Module.
KEY INFORMATION
THE KEY POINTS OF THIS MODULE INCLUDE:
MTCT-Plus programs try to reduce the risk of HIV to the baby, but also try to give the mother, the baby and the whole family ongoing care, support and treatment.
The PMTCT motto is “SAVING 2 LIVES” (the mom’s and the baby’s).
Peer Educators should help women receiving PMTCT services enroll in the care and treatment program, receive follow-up services for themselves, their babies and other family members, join support groups and find nutritional and other support services in the community.
Not all babies born to women living with HIV will have HIV. About 1 out of 3 will become HIV-infected if there are no PMTCT interventions (including ARVs for the mother and baby).
There are many things that can be done to prevent MTCT before pregnancy, during pregnancy, during the time of labor and delivery and after the baby is born. Peer Educators should be familiar with interventions at each stage and talk to people in the community about the importance of PMTCT services.

Comprehensive Peer Educator Training Curriculum: Trainer Manual 7-25
(KEY POINTS, CONTINUED)
Pregnant women should be prioritized for HIV care and treatment with ART if they are eligible (according to national guidelines). Most ARVs will not hurt the baby and this is one of the best ways to prevent MTCT.
Pregnant women should also take cotrimoxazole (CTX) if they are eligible (according to national guidelines).
There is HIV in breast milk. Exclusive formula feeding is the only way to prevent HIV transmission from the mother to her baby after it is born, but there are also many risks of formula feeding for the baby, including sickness and death.
For most women, exclusive breastfeeding for as long as possible up to 6 months is best for the baby. After 6 months, the baby needs other foods in addition to breast milk or formula. Giving other foods, along with breast milk or formula, does not increase the risk of MTCT after the baby is 6 months old.
Mothers should only stop breastfeeding when there is a good, safe supply of replacement foods for the baby (many women breastfeed until the baby is 12-18 months old).
Women and their babies should keep coming back to the clinic for care and treatment, child health and other services.
All HIV-exposed babies should get follow-up care and take CTX until their HIV-status is known for sure.
HIV makes babies and children sick quickly, so we need to identify them early and get them enrolled in care and treatment as soon as possible.
The only way to tell for sure if a baby under 18 months of age is HIV-infected is through “DNA PCR” testing with dried blood spots (DBS), which can be done when the baby is at least 6 weeks old.
Adult HIV tests can be used to tell if a baby under 18 months has been exposed to HIV or if a child over 18 months old is HIV-infected.
Without ART, most children with HIV will die before their second birthday.
With ART, children with HIV can become healthy, productive adults.
The 5 key points to remember with following HIV-exposed and infected children are:
- Come back to the clinic often.
- Go for early HIV testing.
- Give CTX to the baby every day (to prevent infections).
- Weigh and measure the baby at each visit.
- Focus on the whole family.

7-26 Module 7

Comprehensive Peer Educator Training Curriculum: Trainer Manual 8-1
MODULE 8:
Adherence and Psychosocial Support
DURATION: 430 minutes (7 hours, 10 minutes)
Note: Due to its length, this Module will need to be split across 2
training days.
LEARNING OBJECTIVES:
By the end of this Module, participants will be able to:
Define adherence and psychosocial support
Understand the importance of adherence and psychosocial
support in HIV prevention, care and treatment programs
Describe common factors affecting adherence and psychosocial
well-being among clients
Work within the multidisciplinary team to provide preparatory
and ongoing adherence and psychosocial education, counseling
and support to clients and families, including group education
sessions and individual counseling sessions
Conduct a client-centered adherence and psychosocial support
assessment
Provide clients and families with follow-up adherence and
psychosocial support counseling, support and referrals
CONTENT:
Session 8.1: Introduction: The Importance of Adherence
Session 8.2: Adherence Basics
Session 8.3: Psychosocial Support Basics
Session 8.4: Common Barriers to Adherence and Psychosocial
Well-Being
Session 8.5: Helping People Adhere to Care
Session 8.6: Helping People Prepare for and Adhere to Treatment:
Part 1 – Group Education
Session 8.7: Helping People Prepare for and Adhere to Treatment:
Part 2 – Individual Counseling, Assessment and
Planning
Session 8.8: Providing Ongoing Adherence and Psychosocial
Support
Session 8.9: Classroom Practicum on Adherence and Psychosocial
Support Counseling

8-2 Module 8
Session 8.10: Module Summary
METHODOLOGIES:
Large group discussion
Interactive trainer presentation
Brainstorming
Small group work
Role-play
Case studies
MATERIALS NEEDED:
Flip chart
Markers
Tape or Bostik
National ART guidelines (specifically any sections related to
adherence preparation and support)
Commonly used adherence reminder tools (e.g., pill boxes,
medicine calendars, etc.)
Case study cards for Session 8.9
WORK FOR THE TRAINER TO DO IN ADVANCE:
Read through the entire Module and make sure you are familiar
with the training methodologies and content.
Adapt the content to reflect the national ART (and adherence, if
available) guidelines in your country (e.g., the number of group
and one-on-one sessions required before a person starts ART).
Collect any tools used to help clients with adherence (e.g., pill
boxes, medicine diaries and calendars, etc.).
Prepare case study cards for Session 8.9.

Comprehensive Peer Educator Training Curriculum: Trainer Manual 8-3
SESSION 8.1: Introduction: The Importance of
Adherence (15 minutes)
TRAINER INSTRUCTIONS
Methodologies: Large Group Discussion, Interactive Trainer
Presentation
Step 1: Review the Module learning objectives.
Step 2: Ask participants what is meant by the term “adherence.” Record on flip chart.
Step 3: Ask a participant or two to volunteer to speak about why adherence is
important to living positively with HIV. Ask another two participants to share more about what adherence means to them, in their own lives.
Step 4: Supplement the discussion using the content below. Close the session by
reminding participants that as Peer Educators, they bring a special knowledge and
credibility to adherence counseling and support because they are also PLHIV and
face many of the same adherence issues as the clients they will be working with.
KEY INFORMATION
Definition of adherence: The standard clinical definition of adherence has been taking more than 95% of medications the right way, at the right time. Over time, this definition has been broadened to include more factors related to continuous care, such as following a care plan, attending scheduled clinic appointments, picking up medicines on time and getting regular CD4 tests. Adherence:
Includes active participation of the client in her or his care plan
Includes adherence to both medications and care
Depends on a shared decision-making process between the client and health care providers
Determines the success of HIV care and treatment programs
Is not static – it changes over time
Adherence describes how faithfully a person sticks to and participants in her or his HIV prevention, care and treatment plan.

8-4 Module 8
SESSION 8.2: Adherence Basics (30 minutes)
TRAINER INSTRUCTIONS
Methodologies: Large Group Discussion, Interactive Trainer
Presentation, Small Group Work
Step 1: Write “ADHERENCE TO CARE” on one piece of flip chart paper and
“ADHERENCE TO TREATMENT” on another. Ask participants to list what we
mean by each of these phrases. Record participants’ answers on flip chart and fill
in as needed using the information below.
Step 2: Write “NON-ADHERENCE” on a flip chart paper and ask participants to discuss
what this phrase means. Record participants’ responses on the flip chart and fill in using the content below. Discuss the implications of non-adherence (such as
becoming sick, drug resistance and treatment failure) and explain that Peer
Educators have a key role in communicating the negative effects of non-
adherence to clients.
Step 3: Ask participants to turn to the person seated next to them and spend a few
minutes discussing these questions:
Why is adherence important?
What happens when a person does not adhere?
After a few minutes, reconvene the large group and ask participants to share
some of their ideas. Record these on flip chart and fill in using the content below.
Step 4: Conclude the session by reminding participants that, because adherence is very
important, yet also very difficult and changes over time, all of our clients need:
A lot of adherence support
Education and preparation for the challenges of adherence
Regular adherence assessment and follow-up
Client-centered problem-solving to help with adherence barriers
KEY INFORMATION
Adherence to care includes:
Entering into and continuing on a care and treatment plan
Taking medicines to prevent and treat opportunistic infections
Participating in ongoing education and counseling
Attending appointments and tests, such as regular CD4 tests, as scheduled
Picking up medications when scheduled and before running out
Recognizing when there is a problem or a change in health and coming to the clinic for care and support
Adopting a healthy lifestyle and trying to avoid risky behaviors

Comprehensive Peer Educator Training Curriculum: Trainer Manual 8-5
Adherence to treatment includes:
Taking ARVs correctly, as prescribed, for the person’s whole life, even if the person feels healthy (“every pill, every day”)
Taking other medicines, such as CTX, as prescribed
Not taking any treatment “breaks”
Giving medications to HIV-exposed and HIV-infected babies and children as prescribed Non-adherence includes:
Missing one or many appointments at the hospital or health center, lab or pharmacy
Not following the care plan
Missing a dose or doses of medicine
Sharing medications with other people
Stopping medicine for a day or many days, or taking a treatment break or holiday
Taking medicines at the wrong times
Taking medicines without following instructions about food or diet
Not reducing risk-taking behavior (for example, not practicing safer sex or not delivering a baby with a trained health care provider)
Why is near-perfect adherence important?
To ensure that ART and other medications do their job
To increase the CD4 cell count and decrease the amount of HIV in the body
To avoid the body becoming resistant to certain medicines
To make sure people get all the benefits that OI medicines and ARVs have to offer, such as feeling better, not getting OIs, etc.
To prevent mother-to-child transmission of HIV
To monitor people’s health and also help them find community support resources
To keep people looking and feeling good so they can get back to normal life
To prevent sickness and death
To keep families, communities and our nation healthy and productive What happens when a person does not adhere?
The levels of drugs in the body drop and HIV keeps multiplying.
A mother is more likely to pass HIV to her child during pregnancy, delivery or breastfeeding.
The CD4 cell count will drop and the person will start getting more OIs.
Children in particular will become ill very quickly.
Remember: No one is perfect. It is important not to judge clients if they are non-adherent. Instead, we should try to uncover the root causes of non-adherence and help clients find ways to resume good adherence as soon as possible.

8-6 Module 8
The person can develop resistance to one or all of the drugs, meaning that the drugs will not work anymore even if they are taken correctly again. We can say that HIV is a very “intelligent” virus – it only takes a couple of missed doses for it to learn how to be stronger than the ARVs, to multiply and take over the body again.
The ARV combination the person was originally taking will not work anymore and the person may have to start taking a new regimen or second-line ARVs (but there might not be many kinds of these ARVs available). So poor adherence can decrease future treatment options.
Remember: Development of drug resistance must be avoided at all costs. There are not many other drug options if people develop resistance to the drugs they are started on!

Comprehensive Peer Educator Training Curriculum: Trainer Manual 8-7
SESSION 8.3: Psychosocial Support Basics
(25 minutes)
TRAINER INSTRUCTIONS
Methodologies: Interactive Trainer Presentation, Brainstorming,
Large Group Discussion
Step 1: Write “PSYCHOSOCIAL SUPPORT NEEDS” on a piece of flip chart paper. Tell
participants that psychosocial support includes (directly or by referral):
Emotional support
Social support
Spiritual support
Step 2: Ask participants to brainstorm some of the most common emotional and social
support needs they have seen among pregnant women, adults and children
enrolled in PMTCT and care and treatment services, also drawing on their own
experiences as PLHIV. Fill in, as needed, using the content below. Make the point
that psychosocial well-being and support are also related to adherence.
Step 3: Close by reminding participants that we will discuss how Peer Educators can
provide and improve adherence and psychosocial support services for clients in
this Module.
KEY INFORMATION
Psychosocial support addresses the ongoing emotional, social and spiritual concerns and needs of people living with HIV, their partners, their family and caretakers of children living with HIV. Providing psychosocial support is important for PLHIV because:
HIV affects all dimensions of a person’s life: physical, psychological, social and spiritual.
A woman who has just learned her HIV-status during prenatal HIV testing may need support in understanding and adjusting to this information, as well as planning what is next.
It can help clients and caregivers cope more effectively with HIV and enhance their quality of life.
It can help clients and caretakers gain confidence in themselves and their skills (dealing with long-term illness, dealing with stigma or discrimination, dealing with taking medications every day, caring for an HIV-exposed or HIV-infected child, etc.).
Psychosocial well-being is related to better adherence to HIV care and treatment.
It can sometimes prevent more serious mental health issues from developing, such as anxiety or depression.
Mental health and well-being are closely linked to physical health and well-being.
It can provide or link people with needed socio-economic, housing and legal services.

8-8 Module 8
It can help people mentally and practically prepare for difficult circumstances, like bad health, having an HIV-infected baby or death.
When people can come together to solve problems and support one another, movements for change, acceptance and advocacy are born.
Common psychosocial support needs of clients living with HIV:
Support in understanding and coming to terms with their HIV-status and the effect it has on their own and their family’s lives
Discussion of views about taking medication, especially during pregnancy – including the fact that many pregnant women are not “sick,” which impacts their views on taking and adhering to medication and coming to the clinic for ongoing care
Empathy and acceptance from caregivers and family members
Peer support from other pregnant women and mothers
Strategies to disclose their HIV-status to their partners and other family members
Strategies to encourage their partners and other family members to test and, if appropriate, enroll into care and treatment programs
Access to social welfare services
Access to community-based organizations that support income-generating activities
Spiritual support and referrals to spiritual counseling
Knowledge about their legal issues and rights
Support for mental health, including anxiety and depression
Substance abuse management
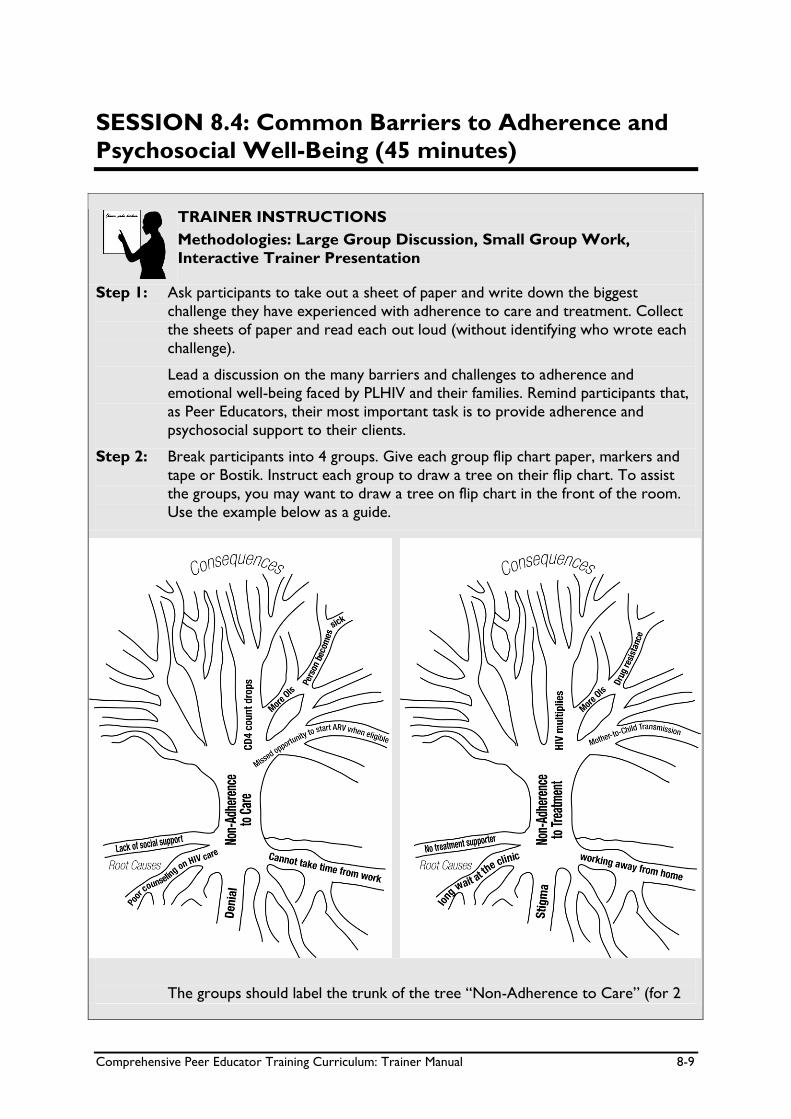
Comprehensive Peer Educator Training Curriculum: Trainer Manual 8-9
SESSION 8.4: Common Barriers to Adherence and
Psychosocial Well-Being (45 minutes)
TRAINER INSTRUCTIONS
Methodologies: Large Group Discussion, Small Group Work,
Interactive Trainer Presentation
Step 1: Ask participants to take out a sheet of paper and write down the biggest
challenge they have experienced with adherence to care and treatment. Collect
the sheets of paper and read each out loud (without identifying who wrote each
challenge).
Lead a discussion on the many barriers and challenges to adherence and emotional well-being faced by PLHIV and their families. Remind participants that,
as Peer Educators, their most important task is to provide adherence and
psychosocial support to their clients.
Step 2: Break participants into 4 groups. Give each group flip chart paper, markers and
tape or Bostik. Instruct each group to draw a tree on their flip chart. To assist
the groups, you may want to draw a tree on flip chart in the front of the room.
Use the example below as a guide.
The groups should label the trunk of the tree “Non-Adherence to Care” (for 2

8-10 Module 8
groups) and “Non-Adherence to Treatment” (for the other 2 groups). The roots
of the tree represent the root causes of non-adherence. The branches of the
tree represent the consequences of non-adherence.
Give the groups about 20 minutes to draw their adherence trees and encourage
participants to think about all of the root causes that affect adherence, including
things related to us as people, to our communities and culture, to health services
and to the medicines we take. Trainers should circulate and assist each small
group.
Step 3: After about 20 minutes, ask each group to present their adherence tree to the
larger group and facilitate discussion, filling in more “root causes” of non-
adherence, as needed, from the Table below.
Step 4: Debrief this activity by discussing these points:
We often blame clients for not adhering to care and treatment, but not
having access to quality health services is often one of the biggest barriers to
adherence.
While Peer Educators are not always able to address all of the root causes and barriers, there are many things that we can address and improve to
support clients’ adherence and psychosocial well-being in our work.
Adherence and psychosocial support is not only the work of Peer Educators
– the whole multidisciplinary team must work together to provide these
services to clients and their families.
KEY INFORMATION
Some of the common factors affecting adherence and psychosocial well-being Things about individual people than can affect adherence and psychosocial well-being:
How well they think they can adhere
Acceptance of HIV-status
Ability to disclose
Having a treatment supporter
Understanding the benefits of care and treatment and PMTCT services
Quality of life while on treatment
How sick or well people feel
Travel and migration
Health status
Mental illness, like depression
Drug or alcohol abuse
Concern for the family’s well-being Things about our communities and our culture that can affect adherence and psychosocial well-being:
Poverty
Lack of food
Stigma

Comprehensive Peer Educator Training Curriculum: Trainer Manual 8-11
Social support at home and in the community
Lack of child care to attend clinic
Ability to take time off work to attend clinic
Family structure and decision-making
Gender inequality
Violence
Forced migration
Distrust of the clinic/hospital
Use of traditional medicine
Political instability or war
Physical environment (for example, mountains, seasonal flooding, etc.) Things about health services that can affect adherence and psychosocial well-being:
The cost of health services or medicines
Drug stock-outs
Distance to the clinic/transportation costs
Convenience of clinic hours
Patient record and tracking systems
Number and type of health care workers
Provider attitudes
Provider language
Youth-friendliness of services
Waiting times
Space for private counseling
Linkages between different services
Referral systems
Linkages to social and material support in the community
Linkages to home-based care services
Support groups
PLHIV involvement Things about ARV medicines that can affect adherence and psychosocial well-being:
Side effects
Number of pills in regimen
Dose timing
Availability of reminder cues – pill boxes, calendars, alarms, etc.
Taste
Changing pediatric doses
Changes in drug supplier – labeling, pill size, color, formulation

8-12 Module 8
SESSION 8.5: Helping People Adhere to Care
(35 minutes)
TRAINER INSTRUCTIONS
Methodologies: Interactive Trainer Presentation, Large Group
Discussion
Step 1: Remind participants of the definition of adherence to care from Session 8.2.
Step 2: Lead a discussion on the standard appointment and follow-up schedule for clients
in your country (according to national guidelines), specifically:
An adult enrolled in care, but not on ART
An adult starting ART
An adult on ART
A pregnant woman living with HIV
A postpartum woman living with HIV
An HIV-exposed child
An HIV-infected child on ART
Step 3: Ask participants what some of the specific adherence challenges are for a person
enrolled in care but not yet on ART. Lead a discussion on the importance of
coming back to the clinic, even if a person is not on ART.
Step 4: Ask participants to think about a time they or someone they know missed an
appointment at the clinic. Ask participants to list the common reasons people
miss appointments or otherwise do not adhere to care. Record these on flip
chart.
For each common reason listed, ask participants to brainstorm ways clients can
be supported to overcome these barriers. Record on flip chart and fill in, as
needed, from the content below.
Step 5: Close by stressing how important it is for ALL members of the multidisciplinary
team to support clients’ adherence to care.
KEY INFORMATION
Reminder from Session 8.2 Adherence to care includes:
Entering into and continuing on a care and treatment plan
Taking medicines to prevent and treat opportunistic infections
Participating in ongoing education and counseling
Attending appointments and tests, such as regular CD4 tests, as scheduled
Picking up medications when scheduled and before running out

Comprehensive Peer Educator Training Curriculum: Trainer Manual 8-13
Recognizing when there is a problem or a change in health and coming to the clinic for care and support
Adopting a healthy lifestyle and avoiding risk behaviors
Making a commitment to preventing new HIV infections
Standard appointment follow-up schedule for adults, pregnant women and children (adapt to your national guidelines)
Adults enrolled in care, but not on ART
At least every 6 months, or more often if needed
For clients with advanced HIV, every month Adults starting ART
Second week after starting ART
Fourth week after starting ART
Every month for the first year on ART
Every 3-6 months for a check-up Adults on ART
Every month for the first year on ART
Every 3 months for medicine refills after the first year on ART
Every 6 months for a check-up Pregnant women living with HIV
Every month Postpartum women living with HIV
6 days postpartum
6 weeks postpartum and during newborn’s immunization visits
Then every 3 months HIV-exposed children
Every month if under 1 year of age
Every 3 months if over 1 year of age
Visits should be timed with immunizations when possible HIV-infected children not on ART
Monthly during the first year
Then every 3 months HIV-infected children on ART
2 weeks after starting ART
Every month for the first year on ART
Then every 3 months for a check-up after the first year on ART
Every 6 months for lab tests

8-14 Module 8
Strategies to improve adherence to care Client-friendly services:
Welcoming and comfortable environment (for example, the waiting time is not too long, there is a place to wait in the shade, the hours are convenient and Peer Educators and staff are welcoming)
Pregnant women are given priority treatment when they come for care where they are allowed to go before other clients (“red carpet treatment”)
Clinic is easy to access and services are “co-located,” meaning that a person can get many health needs taken care of in one visit or that his/her child can also be seen during the visit
Child care facilities at clinic (Peer Educators can also help with this)
Convenient/flexible hours Good communication:
Use good communication and active listening skills.
Ask open-ended questions about adherence to help the client share. For example, “Some people find it hard to come to the clinic every month because they have so much to do at home. How has this been for you?”
Restate answers to ensure understanding (reflective listening).
Show concern and respect.
Never judge someone who you are counseling. Confidentiality:
Make sure all clients understand that what is said at the clinic is confidential.
Assure that HIV-status will not be disclosed without consent.
Remind clients that they might see other community members at the clinic and help them prepare for this.
Remind clients that care and treatment information may be shared among the multidisciplinary care team, but not beyond it (shared confidentiality).
Adherence for Pre-ART Clients
Adherence is very important for all clients enrolled in HIV care – not just clients taking ART.
In many places, clients not on ART are lost to follow-up and only return to the clinic after becoming ill.
Peer Educators can counsel clients not taking ART on the importance of adherence to their care plan, including returning for clinic appointments, getting routine laboratory tests, and taking CTX, TB treatment and other medications as prescribed.
It is very important that clients not on ART get regular lab tests (like CD4) and check-ups so that when they become eligible for ART, they can start right away before becoming very ill.
Remember, clients have a right to privacy and confidentiality. Their HIV status should never be disclosed without prior consent.

Comprehensive Peer Educator Training Curriculum: Trainer Manual 8-15
Education and peer support:
The Peer Educator program can help clients understand their illness and the need to return to the clinic even if they are not on ART.
Peer Educators can talk with clients about potential adherence challenges and jointly come up with solutions. They can help clients create an individual adherence plan.
Support groups and one-on-one counseling sessions are good for adherence support.
PLHIV associations can also help their members with adherence. Psychosocial assessment and support:
Peer Educators can conduct a one-on-one psychosocial assessment when clients first enroll in care. This will help identify possible challenges to adherence to care and help Peer Educators know what emotional and social support is needed (see Session 8.7 for more information on conducting a psychosocial assessment). Another psychosocial assessment should be conducted when clients are preparing to take ART.
Strong outreach and follow-up, including an appointment and tracking system:
It is important that each clinic have a system to identify and follow-up clients who have missed appointments.
Peer Educators should speak with the multidisciplinary team to learn more about the follow-up systems in place at the clinics to which they are assigned. In some cases, Peer Educators will do follow-up phone calls and home visits, and in others, these tasks will be assigned to other people, such as patient trackers, home-based care workers or community health workers.
Here are some general suggestions on outreach and follow-up:
Use an appointment system to know which clients are supposed to come to the clinic each day and for which services.
Give clients reminder cards so they know when to come back to the clinic.
Develop tracing systems when clients miss appointments – plan ahead with the staff at the clinic. (Note: there is more on tracking and tracing clients in Module 9.)
Keep contact information updated and organized for each client.
Respect clients’ wishes about how they prefer to be contacted.
If the person gives consent, make a follow-up phone call or conduct home visits for those who have missed appointments (according to the specific follow-up plan at the facility).
Conduct community education on the importance of adherence to care and treatment.
Link clients with PLHIV associations and NGOs in the community that can help support adherence.
Remember: All members of the multidisciplinary team are responsible for supporting clients’ adherence to care!

8-16 Module 8
SESSION 8.6: Helping People Prepare for and
Adhere to Treatment: Part 1 – Group Education
(90 minutes)
TRAINER INSTRUCTIONS
Methodologies: Interactive Trainer Presentation, Large Group
Discussion, Brainstorming, Small Group Work
Step 1: Ask what participants who are on treatment did to get ready to take ART.
Explain that, in this session and the next, we will discuss 3 important activities to
prepare clients to start ART:
Making sure we have the client’s complete contact information up-to-date
Conducting group education sessions
Conducting one-on-one counseling sessions, including an adherence and
psychosocial support assessment
Step 2: Review any national guidelines related to ART preparation, including the number
of group and individual sessions required before a client can start taking ART. If
no national guidelines exist, discuss how many group and individual sessions
participants think clients should attend before starting ART (e.g., 3 group
sessions and at least 1 individual session, etc.). Discuss when exceptions should
be made, such as for pregnant women.
Step 3: Contact information: Ask participants to get into pairs. Have one person
share the basic information that would be needed to contact them in the
community where they live. After a few minutes, have participants switch roles.
Ask some of the pairs to share this information with the large group.
Debrief by discussing how important it is that we have complete and detailed
information about how to reach clients in the community. Information such as
their telephone number, address and description, treatment supporter
information, etc. should be verified and updated AT EVERY CLINIC VISIT. Use
the content below to guide the discussion, as needed.
Step 4: Group education sessions: Ask participants to raise their hand if they
participated in group education sessions before starting ART (or other group
education sessions, for example in PMTCT services). Ask participants to discuss
the following questions:
What information did you learn in the group sessions?
How was this information helpful to prepare you to take ART?
What other information would have been helpful to discuss in group sessions?
Were you able to ask questions and have those questions answered in the group
sessions you attended?
What, as a Peer Educator, would you do the same during the group sessions that
you will lead with clients? What would you do differently?

Comprehensive Peer Educator Training Curriculum: Trainer Manual 8-17
Step 5: Ask participants if they can recall the key points about speaking in front of
groups from Module 4. Fill in as needed from the content below.
Present the “Important Points about Group Education Sessions” from the
content below. Be sure to highlight why it is important to break the sessions into
different groups (e.g., Session 1, Session 2, Session 3) and to cover different
topics in each session.
Step 6: Refer participants to the “Key Topics to Discuss in Group Education Sessions
with Clients Starting ART” box in their participant manuals. Go through the
suggested topics for each session together, reminding participants again why it is
important for the group sessions to have structure.
Step 7: Break the large group into 3 smaller groups. Ask each group to prepare as if they
will be leading a group education session with clients about to start ART. Assign
the groups Session 1, Session 2 or Session 3. Give the groups about 20 minutes
to prepare an outline of their talk and to practice what they will say and prepare
any materials they will show the group. The groups should select 1-2 people to
present back to the large group.
Step 8: Ask each group to present a short version of the group education talk they have
prepared. Give each group about 10 minutes to present, and remind participants
that they will have more chances to practice leading group sessions during the
practicum in the clinic. After each group presents, have the large group give
feedback about what was done well and what can be improved.
KEY INFORMATION
Peer Educators play an important role in helping clients and their families prepare to start taking ART. This is done through group education and individual counseling sessions. Adherence preparation and initiation Make sure clients’ information is recorded and regularly updated in the file, including:
Name
ART or ANC number
Sex
Age
Physical address and description (if needed)
Phone contact number (and whether it is their own or someone else’s)
Treatment buddy contact information
Consent for phone call, SMS and/or home visit noted This information should be checked and updated at EVERY CLINIC VISIT!
Remember: All members of the multidisciplinary team are responsible for adherence preparation and education, not just Peer Educators!

8-18 Module 8
Conduct group education sessions: In many countries, the national policy is that clients starting ART should participate in 2 or 3 group education sessions (check your national guidelines). For pregnant women initiating ART, this number can be reduced to 1-2, as we do not want to delay initiation. Note that for pregnant women initiating HAART, these topics should be tailored around PMTCT and should be condensed into 1-2 group sessions instead of 3. See Module 7 for more information on PMTCT counseling and support. Important points about group education sessions:
Split up pre-ART initiation sessions into 2 or 3 distinct groups. Do not mix all clients into the same session because they will have different knowledge levels and questions depending on which sessions they have already been to.
Divide clients based on which session they are coming for, and have separate times for group education sessions 1, 2 and 3.
Invite treatment buddies to the group education sessions.
Make sure the different group education sessions have structure – a list of key topics for each group education session is suggested in the Table below.
Try to hold group education sessions in a meeting room or large clinic room – it is better not to do the sessions in the waiting room.
Make sure to note which people come to a session and note this in the clients’ files.
If possible, give clients take-away educational materials to remind them of what was covered in the sessions.
Use the tips for conducting group sessions from Module 4 (listed below).
What is a treatment buddy? A treatment buddy or treatment supporter is someone who is chosen by a client about to start ART to provide ongoing support for adherence to care and treatment. A treatment buddy is usually a client’s friend, family member or another PLHIV who is also enrolled in care and is a trusted person to whom a client can disclose her or his status. Generally, a treatment buddy receives some basic education on HIV, adherence and positive living, and can then provide psychosocial and adherence support to a client through the course of her or his care. Having a treatment buddy provides a client with another key aspect of comprehensive care.

Comprehensive Peer Educator Training Curriculum: Trainer Manual 8-19
Reminder from Module 4: Important points when speaking in front of a group
Be sure to plan the group session ahead of time and practice what you are going to say.
Do not stand behind a desk or other furniture.
Encourage participants to sit in a circle to make it more comfortable to talk and less like a classroom.
Speak loudly enough so everyone can hear you clearly, but so that you are not shouting.
Start by explaining the goals and content areas of your topic and ask if there are any questions.
Lead an introductory activity to “break the ice.” For example, all participants could state their name and one question they have about HIV care and treatment. Or they could say one thing about a family member they care about.
Interact with participants and engage them by moving around the room and asking questions.
Acknowledge that the people attending will know something about the topic being discussed. Encourage them to share what they know and use it as an opportunity to identify and correct any misconceptions.
Make eye contact with all members of the group.
Check in regularly to make sure participants are engaged and understanding the messages.
Pay attention to people who seem shy or quiet.
Use visual aids and avoid lecturing.
Encourage participants to speak with you in private afterward if they have private concerns.
Ask group participants to summarize what they have learned and actions they will take at the end.
Always leave time for questions and re-explain anything that was not understood completely.

8-20 Module 8
Key Topics to Discuss in Group Education Sessions with Clients Starting ART Pre-ART Session 1: HIV CARE AND TREATMENT BASICS
Understanding the diagnosis
How HIV is transmitted and prevented
How HIV affects the immune system
Meaning of CD4 count
Who needs ART (women, discuss that all mothers and babies will need ARVs, and some will need lifelong ART)
Importance of ongoing care and regular clinic visits
Positive living
Safer sex, dual protection, and prevention and treatment of STIs
OI prophylaxis (especially CTX)
TB prevention and treatment
Importance of disclosure
Family testing and enrollment
Identify sources of social support (family, counselor, support groups, community groups)
Summarize, answer questions and remind participants when the next session will be held
Offer to provide follow-up on any of these topics in individual counseling
Key Topics to Discuss in Group Education Sessions with Clients Starting ART Pre-ART Session 2: ADHERENCE TO HIV CARE AND TREATMENT
Beliefs and attitudes about ART
ART = lifetime commitment
Importance of adherence to care plan and to treatment
What can happen if you do not adhere to care and treatment
Importance of social support and disclosure to adherence, including concept of a treatment buddy
Previous adherence experiences (CTX, TB, etc.)
Common adherence barriers/challenges
Adherence strategies/tips
Importance of support groups
Linkages to home-based care
Special adherence issues for pregnant women and children
Summarize, answer questions and remind participants when the next session will be held
Offer to provide follow-up on any of these topics in individual counseling

Comprehensive Peer Educator Training Curriculum: Trainer Manual 8-21
Key Topics to Discuss in Group Education Sessions with Clients Starting ART Pre-ART Session 3: STARTING ART
Understanding the treatment plan (explanation of each ARV, dosing schedule, missed/late doses)
Preventing and managing side effects
Problem solving around adherence barriers, including the use of tools such as medicine diaries, pill boxes, watches, cell phones, etc.
How to make care and treatment plan part of every day life
What to do if there is a problem or question
Plan for 2-week and subsequent follow-up visits
Reminders on positive living and safer sex
Linkages and referral to support groups and community support services
Summarize, answer questions and remind participants when the next session will be held
Offer to provide follow-up on any of these topics in individual counseling

8-22 Module 8
SESSION 8.7: Helping People Prepare for and
Adhere to Treatment: Part 2 – Individual Counseling,
Assessment and Planning (60 minutes)
TRAINER INSTRUCTIONS
Methodologies: Large Group Discussion, Interactive Trainer
Presentation, Small Group Work, Role-Play
Step 1: Ask participants to share their thoughts on why it is important to have one-on-
one counseling sessions with clients before they start ART. Fill in as needed with
the content below, highlighting that each client should have AT LEAST one individual counseling session with a Peer Educator (and/or other members of the
multidisciplinary team) before starting ART. It is best if the individual session is
conducted AFTER the client has completed the group education sessions.
Step 2: Ask participants what we mean by “adherence readiness and psychosocial support
assessments.” Fill in using the content below, highlighting that these assessments
will help Peer Educators learn more about what their client knows and where
they may need more adherence and psychosocial support – when they enroll in
care, before starting ART and during future clinic visits. This is a good time to
make an adherence plan with your client. Remind participants that a psychosocial
assessment should be conducted with all clients when they enroll in care and
again when they are preparing to start ART.
Step 3: Review the key topics to discuss during the adherence and psychosocial support
assessments using the content below. The trainer should role-play how to
conduct an adherence and psychosocial support assessment. The adherence and
psychosocial assessments may be conducted at the same time or individually.
Step 4: Review any forms used to record clients’ participation in pre-ART adherence
counseling and if the Peer Educator will need to fill in any information on these
forms.
A sample adherence readiness assessment form is included in Appendix 8A and a
sample psychosocial assessment form in Appendix 8B. These should be adapted as
needed to the specific Peer Education program.
Step 5: Ask participants to break into pairs. One person should play the role of the Peer
Educator and the other the role of the client. Give the pairs about 15 minutes to
practice conducting an adherence readiness and psychosocial support assessment
and helping the client develop an adherence plan using the attached forms as a
guide. Then have participants switch roles and start the role-play over again. The
trainers should circulate around the room to observe and mentor participants. If
time allows, ask some of the small groups to present to the larger group.
Step 6: Summarize the importance of conducting both group education and individual
counseling sessions with clients to support their adherence and psychosocial well-being. Answer any questions participants may have.

Comprehensive Peer Educator Training Curriculum: Trainer Manual 8-23
KEY INFORMATION
Conduct one-on-one psychosocial and adherence readiness assessments, help make an adherence plan and provide individual counseling
Group education sessions are useful in giving many people key information at one time.
However, clients initiating care and treatment should also be given time to speak to a Peer Educator or counselor alone, and in privacy.
At least one individual counseling session (more is better) should be provided to all clients before they begin taking ART.
This is a good time to see what the client has absorbed from the group education sessions, and in which areas they need extra support.
The individual counseling session should include an adherence readiness and psychosocial support assessment (these may be conducted at the same time or at different times).

8-24 Module 8
Key Topics to Address and Provide Additional Counseling on During the Adherence Readiness and Psychosocial Support Assessments
Adherence Readiness Assessment:
Participation in group education sessions (how many, dates)
Understanding of CD4 cell count
Expectations about taking ART
Understanding of how ARVs can prevent MTCT and make people healthier
Confidence in ability to take medications every day, for entire life
Confidence in ability to give infant medicines the right way
Other caregivers of the children and their knowledge of how to give medications
Past experiences with adherence (for example, to CTX)
Specific ARV regimen (names of drugs, color/shape, how and when to take)
Common side effects
How to manage side effects
Importance of adherence and consequences of non-adherence
Remembering to come to the clinic for regular appointments – how?
Remembering to take pills on time, every day – how?
Use of tools, such as medicine diary, pill box, calendar, watch, etc.
Use of other medications, including traditional medicine
Difficulties in coming to the clinic
Plan for time spent away from home (during the day or for long periods of time)
Plans for medication storage
What to do if doses are missed
What to do if people ask about ART
What to do if there are any problems
Concerns about taking ART
Questions about care and treatment plan for self, baby or other family members Psychosocial Assessment:
Current living and relationship situation
Disclosure to family members and partner
Partner and other family member testing
Partner or family members on ART
Number and ages of children
Children tested, children on ART, children who are sick
Disclosure to children
Disclosure of children’s status to other people
Sources of support at home and in the community
Actual or potential risk of stigma, discrimination, and/or violence at home and in the community
Treatment supporter (record name and contact information)
Member of support group or community organization or church Challenges with poverty, such as transport to the clinic, food security, etc.

Comprehensive Peer Educator Training Curriculum: Trainer Manual 8-25
SESSION 8.8: Providing Ongoing Adherence and
Psychosocial Support (60 minutes)
TRAINER INSTRUCTIONS
Methodologies: Large Group Discussion, Interactive Trainer
Presentation, Small Group Work, Role-Play
Step 1: Ask participants to discuss why it is important to ask about adherence at EVERY
clinic visit, reminding participants that adherence needs and barriers will change
over time.
Step 2: Present the key points about ongoing adherence and psychosocial support from
the content below. Review the questions Peer Educators should ask each client at each clinic visit, as well as examples of how Peer Educators can use open-
ended questions to ask about missed doses and adherence challenges using the
content below.
Step 3: Discuss what Peer Educators should do when a client reports good adherence to
the care and treatment plan, and what they can do to help clients that may have
adherence challenges. Lead a discussion on advising clients about missed doses
using national guidelines or the content below.
Step 4: Review any tools or methods used to assess adherence at follow-up visits and
the Peer Educator’s role in each (e.g., pill counting, reviewing medication diaries,
etc.).
An ongoing ART adherence assessment form is included in Appendix 8C. This
should be adapted as needed to the specific Peer Education Program.
Step 5: With a co-trainer, demonstrate how to ask clients about adherence at follow-up
visits, what to do if the client is adhering well and what to do if the client is facing
adherence challenges.
Step 6: Break participants into groups of 3. Assign one person the role of the Peer
Educator, another the role of the client and another as an observer. Ask the
groups to practice asking about adherence during follow-up visits. After about 10
minutes, have participants switch roles. After another 10 minutes, have them
switch roles again so that everyone has a chance to play each role. Trainers
should circulate around the room to observe and mentor participants. If time
allows, ask some of the small groups to present back their role-plays to the large
group and discuss.
Step 7: Close the session by reminding participants that adherence and psychosocial
support needs change over time, so it is important to talk with clients openly at
EVERY visit. Also, adherence and psychosocial support is EVERYONE’S job!

8-26 Module 8
KEY INFORMATION
Provide ongoing adherence monitoring and individualized support Assessing adherence is very challenging and there is no perfect way to do so. Only through ongoing, individualized counseling and looking at the person’s response to ART over time can we really learn about adherence. It is very important to assess adherence at each visit, but we must also take the next steps after assessment to offer clients ongoing, individualized adherence support.
The purpose of ongoing adherence monitoring and support is to encourage the client (or caregivers) to express challenges and to be open about any problems they may be facing so that Peer Educators can provide them with ongoing support.
For children on ART, talk with the parents and caretakers about adherence at every clinic visit and with children directly if they are old enough to understand.
It is important for clients to come back to the clinic for follow-up 2 weeks after they start taking ART, and then every month after that.
Make adherence a normal part of every clinic visit. Remember, adherence and psychosocial support needs change over time.
Do not judge a person. Make clients feel comfortable and not fearful that they will be punished or judged if they openly discuss adherence challenges.
Share that everyone has problems taking medicines the right way all the time.
Build a trusting relationship and encourage people to be completely honest with you about adherence. Remember: our job as health care workers is to work WITH our clients, not against them!
Talk about clients’ adherence at multidisciplinary team meetings.
Use tools to help assess and improve adherence, such as:
- Pill counting
- Reviewing medicine diaries or calendars with clients
- Others

Comprehensive Peer Educator Training Curriculum: Trainer Manual 8-27
If, after talking with clients and discussing adherence, you feel that they are adhering well:
Praise them for good adherence.
Remind them to come back if there are any problems.
Talk about how important it is to be open with providers and Peer Educators and to solve challenges together.
If you feel that clients experienced some problems or challenges with adherence because they have talked to you about these challenges or if the clinical team thinks there may be adherence problems:
Give one-on-one counseling or refer to a counselor for difficult cases.
Try to identify the specific challenges.
Discuss specifics of how challenges affect adherence.
Help solve challenges and reduce barriers.
Discuss the importance of adherence.
Give referrals to support groups or other organizations.
Plan for next steps, including the clinic return date.
Praise them for sharing their challenges.
Record the session on the patient record.
Follow up at the next visit.
Examples of questions about missed doses (adapt as needed):
Many people taking these medications find it difficult from time to time. What has your experience been?
How many doses have you missed in the past day? Week? Month?
Do you ever share your medicines with family members, like your husband/wife or children?
At each visit, ask (adapt as needed for caregivers and children):
Can you tell me more about how you took your medications this month?
How many pills did you miss or take late in the last 7 days?
How did the medicines make you feel?
Can you tell me more about any problems you had with your medicines this month?
What challenges did you have taking your medications this month?
What support do you have to take your medications?
Examples of questions about adherence challenges (adapt as needed):
When is it most difficult to remember your medications?
It is not easy to take medicine every day. What makes it hard for you to take your pills?
What things help you to take your pills?
It’s always hard to give children medicine. What problems have you had giving your child ARVs?
What things make it hard to remember to take your medicines now that you’re feeling better?

8-28 Module 8
Giving advice about missed doses
For medicines taken twice per day:
Take the missed dose if your next dose is scheduled for more than 6 hours away.
Do not take the missed dose if the next dose is scheduled for less than 6 hours away. For example, let’s say that you usually take your medications at 7am and again at 7pm. If you miss your first dose at 7am, TAKE the missed dose if you remember before 1pm. DO NOT TAKE the missed dose if you remember after 1pm. Instead, just wait to take your next dose at 7pm. For medicines taken once per day:
Take the missed dose if you remember within 12 hours of the schedule dose time.
Do not take the missed dose if the next dose is scheduled for less than 12 hours away.
For example, let’s say that you usually take your medication at 7am, once every day. If you miss this dose, TAKE the missed dose if you remember before 7pm. DO NOT TAKE the missed dose if you remember after 7pm. Instead, just wait to take your next dose in the morning. Never take a double dose (two doses at a time)!

Comprehensive Peer Educator Training Curriculum: Trainer Manual 8-29
SESSION 8.9: Classroom Practicum on Adherence
and Psychosocial Support Counseling (60 minutes)
TRAINER INSTRUCTIONS
Methodologies: Large Group Discussion, Case Studies, Small Group
Work, Role-Play
Step 1: Provide a quick review of the content covered in the Module so far and ask if
there are questions or areas where participants do not yet feel comfortable and
need more help. Remind participants that one of the most important tasks of
Peer Educators is providing adherence and psychosocial support and counseling
to clients.
Step 2: Lead the group through the 4 group case studies described below. Read the case
study out loud (or ask for a volunteer to do so) and then, as a large group,
discuss what you would do to provide adherence and psychosocial support to
this client. Record responses on flip chart.
Step 3: If time allows, have participants break into small groups and practice more
adherence and psychosocial support case studies. Break participants into groups
of 3. Hand out the case study cards to each group. Do rotating role-plays where
one person acts as the client, another as the Peer Educator and others observe
and give constructive feedback. The trainers should rotate around the room and
provide feedback to the small groups during the activity.
Step 4: If there is time, ask some of the groups to perform their role-play in front of the
larger group and lead a discussion summarizing the skills learned in the Module
on supporting clients to adhere to care and treatment plans.
KEY INFORMATION
Case studies to discuss as a large group Group Case Study 1: N___ is married and has 4 children. She is 3 months pregnant and just found out during an ANC visit that she is HIV-positive. Her CD4 cell count is 175, so she is eligible for ART. What steps would you take to prepare N___ to start ART? Group Case Study 2: T___ is a 24-year-old man who just tested positive for HIV after he was referred for testing from the TB clinic. His CD4 cell count is 85 and the doctor asks you to start preparing him to start ART. T___ works as a truck driver. He is married and has 3 children. What steps would you take to prepare him to start ART?

8-30 Module 8
Group Case Study 3: A 27-year-old woman named C___ comes to you because she is in a lot of pain, is losing weight and has a high fever. She said she started taking ART about a year ago and felt really good within about 3 months. C___ admits that once she was feeling better she did not always take her ART every day because it was just a reminder that she had HIV. She wants to know why her ART is not working like it used to and why she is getting sicker and sicker even though she is taking the ART at the right time every day again. Group Case Study 4: A man named P___ comes to the clinic for a regular check-up and to get his ARV refill. You spend some time with him before he sees the doctor. How would you ask P___ about his adherence? What advice would you give him when you learn he usually misses his morning dose because he has no food to eat – he only has enough for one meal per day, which he eats at night?

Comprehensive Peer Educator Training Curriculum: Trainer Manual 8-31
Case studies to discuss in small groups Case Study 1: M___ is a 34-year-old married woman with two children aged 3 and 7. Her children live with their grandmother in another province. M___ is working as a domestic worker and has been on HAART for two months but has not disclosed to her employer or her family. She returns to the clinic to pick up her refill. The pharmacist notices she has many pills left over and she says she is having trouble remembering to take her medicines every day. How would you provide adherence and psychosocial support to M___? Case Study 2: N___ is 15 years old, pregnant and tested positive for HIV during her first ANC visit. During adherence counseling, she disclosed to the health worker that if the treatment is for life it will be difficult for her to take because she will not disclose to anybody. She expressed her fears of her parents throwing her out of the house and not supporting her but she wants to protect her unborn baby. What kind of psychosocial support would you provide to N___? Case Study 3: A man named V___ has been on ART for 4 years. Usually his adherence is almost perfect and he is feeling fine when he comes for refills, but this time he says things are not going well. You talk to him about what is going on. He says he got fired from his job at an office and now is working as a bus driver. He is working different hours and far from home. Some days he starts work at 6 in the morning and sometimes at noon. Since starting this new job, V___ forgot to take his pills with him to work two different times and has had to wait until he gets back home to take them. He does not want anyone at his new job to know he is HIV-positive. Case Study 4: A 26-year-old woman named B___ tested positive for HIV 6 months ago. She is caring for a sick husband and has 5 children. She is so busy that she has missed a couple of appointments at the ART clinic. Her husband is the only one who knows she is HIV-positive, and he himself has not been tested. She comes to the clinic because she thinks she might be pregnant and you meet her in the waiting area. How would you counsel B___? Case Study 5: A woman named D___ comes to you because she has diarrhea and a rash all over her body and wants to stop taking ART. She tells you that she’s missed 3 doses in the last month but thinks that taking the doses most of the time is good enough. She is worried about being a burden on her family so she doesn’t talk to them about the medicines, but they do know she’s HIV-positive. How would you counsel D___? Case Study 6: You meet with a mother named T___ and her 4-year-old child at the clinic. When you ask how the mother is doing, she cries and says she feels so badly because her son is spitting up his medicine and refuses to cooperate. She stopped giving him the medicines because she didn’t want him to cry and it made her feel like a bad mother. How would you counsel T___?

8-32 Module 8
SESSION 8.10: Module Summary (10 minutes)
TRAINER INSTRUCTIONS
Methodologies: Large Group Discussion, Interactive Trainer
Presentation
Step 1: Ask participants what they think are the key points of this Module. What
information will they take away from the Module?
Step 2: Summarize the key points of the Module using participant feedback and the
content below.
Step 3: Ask if there are any questions or clarifications.
Step 4: Review the learning objectives with participants and make sure all are confident
with their skills and knowledge in these areas.
Step 5: If there are areas participants do not fully understand or in which they need
more help, go back and review the session before moving to the next Module.
KEY INFORMATION
THE KEY POINTS OF THIS MODULE INCLUDE:
Adherence means how faithfully people stick to the care and treatment plan.
Adherence support is most successful when it is provided by a number of people on the multidisciplinary care team in partnership with clients and their family.
Adherence to care is important to make sure people stay healthy, understand how to live positively, know when to start ART and get psychosocial support.
Adherence to treatment is important to lower the amount of HIV in people’s body and to make sure they get all the benefits that OI medicines and ARVs have to offer (feeling better, not getting OIs, etc).
Non-adherence to treatment can lead to drug resistance, preventing the ART from working and making people very sick.
There are many barriers and challenges to good adherence and psychosocial well-being, including things related to people’s lives, to the medicines, and to the health care system and HIV program.
ART preparation includes group education sessions, one-on-one counseling sessions, and adherence and psychosocial support assessments and planning.
Adherence barriers and challenges will change over time. It is important to ask about adherence at all follow-up visits.
It is important that health care workers build a trusting relationship with clients so that they feel comfortable being completely honest about their adherence and psychosocial
Comprehensive Peer Educator Training Curriculum: Trainer Manual 8-33
(KEY POINTS, CONTINUED) support needs.
The use of tools, such as pill counting or an adherence calendar or diary, can help support adherence activities.
It is important to remember to use good communication and counseling skills whenever conducting adherence and psychosocial support groups or one-on-one sessions.

8-34 Module 8
APPENDIX 8A: Generic Adherence Readiness Assessment Form
Clinic Name: __________________________________________ Date: ________________________________________________ Client Name: __________________________________________ Client #/ART #: _______________________________________ 1. Have you attended group education sessions at the clinic?
Yes. How many? _____ No 2. Can you explain why you think you need to take ARVs? 3. What do you expect from taking ARVs? 4. Do you feel confident that you can take (or give children) medicines every day for the rest of your life?
Yes No counsel on lifelong adherence 5. For caregivers, who else takes care of the child other than you? Have these caregivers been trained on giving medications?
Yes No counsel on training all caregivers
6. Have you had any challenges taking other medications (TB treatment, CTX, etc.) every day at the same time?
Yes No 7. Can you tell me the names of the ARVs you will be taking and what time you will take each medicine? List: 8. Can you tell me some of the side effects of your medicines? 9. What will you do if you have side effects? counsel on side effect management 10. Do you know what can happen if you do not take all of your ARVs every day, at the same time, for life? counsel on lifelong adherence 11. Do you have a treatment supporter?
Yes No Name and contact number: _________________________
Has he/she been to the clinic with you? Yes No

Comprehensive Peer Educator Training Curriculum: Trainer Manual 8-35
12. Do you have any difficulties coming to this clinic for appointments?
Yes No counsel on adherence to care 13. How will you remember to come for your clinic appointments? 14. How will you remember to take your pills on time everyday? 15. Are you taking any other medicines other than the ones prescribed for you by the doctor? (Include traditional & herbal medicines)
Yes No counsel to be cautious of other medicines 16. How and where will you store your medication? 17. What will you do if you are about to run out of pills? 18. What will you do if you miss a dose of your medication? 19. Do you have any questions about your care and treatment plan?
Assessment of patient readiness to start ART:
Patient ready to start ART
Patient requires more preparation & counseling Other issues and notes: _____________________________________________________ _____________________________________________________ _____________________________________________________ _____________________________________________________ _____________________________________________________ _____________________________________________________ _____________________________________________________ _____________________________________________________ _____________________________________________________ _____________________________________________________ _____________________________________________________ _____________________________________________________ _____________________________________________________ _____________________________________________________ _____________________________________________________ _____________________________________________________ _____________________________________________________ _____________________________________________________ _____________________________________________________ _____________________________________________________ Name of person completing assessment: ___________________

8-36 Module 8
APPENDIX 8B: Generic Psychosocial Assessment Form
Clinic Name: _________________________________________________ Date: ________________________________________________________ Client Name: _________________________________________________ Client #/ART #: ______________________________________________ 1. Who lives with you at home? List:
2. Have you disclosed your HIV-status to your family?
Yes No counsel on disclosure 3. Have you disclosed your HIV-status to your partner(s)?
Yes No counsel on disclosure 4. Has your partner(s) been tested for HIV?
Yes No counsel on partner(s) testing 5. Is your partner taking ART (if living with HIV)? If yes, clinic name
Yes No 6. Do you have any children?
Yes No counsel on HIV testing for all children
Age: _____ ______________________ Tested for HIV? Yes No
Age: _____ ______________________ Tested for HIV? Yes No
Age: _____ ______________________ Tested for HIV? Yes No
Age: _____ ______________________ Tested for HIV? Yes No 7. Are any of your children taking ART (if HIV-infected)?
Yes No counsel on pediatric treatment 8. Have you told the children their HIV-status (if HIV-infected)?
Yes No counsel on disclosure to children 9. Who else have you told about the children’s HIV-status (if HIV-infected)? counsel on involvement of all caregivers
10. Do you have a treatment supporter?
Yes No counsel on treatment support Name and contact number: ___________________________________
Has he/she been to the clinic with you? Yes No 11. Who do you go to for support at home or in the community? List:
_________________________________________________________ _________________________________________________________
12. Do you belong to a community organization, support group or religious
group?
Yes No counsel on support groups Name of organization or group: ________________________________
13. Do you ever fear discrimination or violence at home or in the community?
Yes No counsel and refer for support 14. Who is your community health care worker?
Name: ___________________________________________________ Would it be okay if someone visited you at home if you miss an appointment at the clinic?
Yes No 15. Do you face financial challenges, like not having enough food to eat or not
being able to pay for transport to the clinic?
Yes No refer to community support List specific challenges:
Other issues and notes: _________________________________________________________ _________________________________________________________ _________________________________________________________ _________________________________________________________
Name of person completing assessment: ______________________

Comprehensive Peer Educator Training Curriculum: Trainer Manual 8-37
APPENDIX 8C: Generic Adherence Follow-up Assessment Form
Clinic Name: __________________________________________ Date: ________________________________________________ Client Name: __________________________________________ Client #/ART #: _______________________________________ A. Individual Counseling Session 1. Can you tell me more about how you took your medications this month? 2. How many pills did you miss or take late in the last 7 days? 3. How did the medicines make you feel? 4. Can you tell me more about any changes or problems you had with your medicines this month? 5. What challenges did you have taking your medications this month? 6. What support do you have to take your medications?
B. Results of Pill Count (if applicable) C. Review of Medicine Diary or Calendar (if applicable) D. Review of Chart (including CD4 cell count and viral load, if available; this should be completed by a pharmacist or clinician) Specific adherence challenges identified: _____________________________________________________ _____________________________________________________ _____________________________________________________ Next steps for the client: _____________________________________________________ _____________________________________________________ _____________________________________________________ Next appointment date: _________________________________ Other issues and notes: _____________________________________________________ _____________________________________________________ _____________________________________________________ _____________________________________________________ Name of person completing assessment: ___________________

8-38 Module 8

Comprehensive Peer Educator Training Curriculum: Trainer Manual 9-1
MODULE 9:
Identifying and Tracing People Who Do
Not Return to the Clinic
DURATION: 180 minutes (3 hours)
LEARNING OBJECTIVES:
By the end of this Module, participants will be able to:
Help prevent missed appointments through good communication
and counseling with clients, as well as using appointment
reminders
Describe local policies and procedures to identify and trace
clients who have missed appointments
Obtain and record consent for different types of follow-up
Describe the ways to identify clients who have missed
appointments and the recommended frequency of doing so
Conduct a follow-up phone call with a client who has missed an
appointment
Conduct a follow-up home visit with a client who has missed an
appointment
Record key information from a follow-up call or visit
Provide supportive counseling for clients who are returning to
the clinic after missing 1 or more appointments
CONTENT:
Session 9.1: Introduction: Why Do Clients Miss Clinic Visits?
Session 9.2: Identifying People Who Do Not Return to the Clinic
Session 9.3: Strategies to Follow Up with People Who Do Not
Return to the Clinic
Session 9.4: Classroom Practicum on Client Follow-up
Session 9.5: Module Summary

9-2 Module 9
METHODOLOGIES:
Brainstorming
Large group discussion
Interactive trainer presentation
Small group work
Guest speaker (optional)
Role-play
Case studies
MATERIALS NEEDED:
Flip chart
Markers
Tape or Bostik
Appointment books, registers or log books used in HIV clinics
Case study cards for Session 9.4
WORK FOR THE TRAINER TO DO IN ADVANCE:
Read through the entire Module and make sure you are familiar with the training methodologies and content.
Adapt the content to your specific Peer Education program, so
the Module reflects your program’s specific policies and
procedures on client follow-up and tracing.
Collect any appointment books, follow-up forms, etc., that are
used at clinics where Peer Educators will be working and make
photocopies for each participant.
If trainers are not also service providers, it may be useful to invite
service providers and/or data officers from the clinic to explain
the appointment, tracking and tracing systems in use.
Prepare case study cards for Session 9.4.

Comprehensive Peer Educator Training Curriculum: Trainer Manual 9-3
SESSION 9.1: Introduction: Why Do Clients Miss
Clinic Visits? (15 minutes)
TRAINER INSTRUCTIONS
Methodologies: Brainstorming, Large Group Discussion
Step 1: Review the Module learning objectives.
Step 2: Ask participants to quickly brainstorm some common reasons why they, or
other clients, may miss clinic visits. Ask them to draw from their own
experiences as well as information learned about adherence in Module 8. Write
responses on flip chart, filling in as needed from the content below.
Step 3: Remind participants that the entire multidisciplinary team is responsible for
preventing missed appointments and developing systems to identify and trace
clients who have missed appointments. These systems will depend on the specific
health facility. It is important for Peer Educators to learn what tracing and follow-
up systems are in place at the facilities to which they are assigned.
KEY INFORMATION
Common reasons for missing clinic visits:
Clinic hours are not convenient
Work schedule is not flexible
Long distances to travel
Lack of funds for transportation to clinic
Long wait time at the clinic
Unfriendly environment at clinic
Embarrassed or ashamed about adherence challenges
Need to take care of a child or a family member
Too sick to leave the house and reach the clinic
Forgot when the next appointment is
Feel well and do not want to go to the clinic
Do not understand importance of returning to the clinic at the right times
Do not understand when or why the next visit was scheduled
Moved to another home that is not near the clinic
Prefer to use traditional medicines
Went away for a long visit, seasonal work or holiday
Worried that a family member, neighbor or other clients will see them going to the clinic or at the clinic
Client died
Others

9-4 Module 9
Peer Educators can help prevent clients from missing clinic visits by supporting them to understand how important it is to adhere to the care plan, even if they are not on ART. Good communication and individual counseling highlighting the importance of coming back to the clinic often will help clients adhere to care. Even with good counseling and communication, some clients will miss clinic appointments. An important role of Peer Educators is to work as part of the multidisciplinary team to put systems in place to figure out who has missed an appointment at the clinic and to follow up with clients in order to bring them back to the clinic.

Comprehensive Peer Educator Training Curriculum: Trainer Manual 9-5
SESSION 9.2: Identifying People Who Do Not Return
to the Clinic (35 minutes)
TRAINER INSTRUCTIONS
Methodologies: Brainstorming, Interactive Trainer Presentation,
Large Group Discussion, Small Group Work, Guest Speaker
(optional)
Step 1: Note: The content of this session requires adaptation to the local program,
specifically on the type of appointment system used in PMTCT and ART clinics. If
trainers are not also service providers, it may be useful to invite service
providers and/or data officers from the clinic to this session to explain the appointment system in use.
Ask participants to think about their own experiences at the clinic and to discuss
who would know if they missed an appointment and how. Use the following
questions to guide the discussion:
What kind of contact information does the clinic have for you?
How would someone at the clinic know if you missed an appointment?
Would the clinic contact you if you missed an appointment? If yes, how? If no, how
would you like to be contacted?
Step 2: Review the different appointment books, client registers, pharmacy, and
laboratory log books that Peer Educators will see at the clinic. Discuss each and
provide copies of sample pages to participants if possible.
Step 3: Discuss Peer Educators’ role in filling in and using these appointment books and
registers, according to your specific Peer Education program.
KEY INFORMATION
As discussed in Module 8, make sure clients’ information is recorded and regularly updated in the file (at each visit), including:
Name
ART or ANC number or health record number
Sex
Age
Physical address and description (if needed)
Phone contact number (and whether it is their own or someone else’s)
Treatment buddy contact information
Consent for phone call, SMS and/or home visit noted In some places, clients may not give correct phone and address information on purpose because they do not want to be contacted. The best way to prevent this is to encourage open and honest communication between clients and health care workers and to explain how important it is to

9-6 Module 9
have the correct contact information on file. If clients give their own personal mobile phone number, you may want to call that number while the client is still at the clinic to make sure it is correct. As stated above, the contact information should be reviewed and updated at each clinic visit. Getting consent to follow up with clients: It is very important to get each client’s consent for follow-up by phone or by a home visit. Peer Educators should talk with other members of the multidisciplinary team to figure out how a client’s consent is noted on the ART or ANC card. Peer Educators should always check the client’s file before following up by phone call or home visit. Here are some ways to do this: On the ART or ANC card, near the place where the client’s contact information is written, you can use the following notations (adapt to your clinic setting): OR OR It is important to respect every client’s right to refuse follow-up SMS, phone calls and home visits. Clients may have important reasons to refuse follow-up, especially if they have not disclosed their HIV-status to family members and/or if they fear stigma, discrimination and violence from people at home or in the community. If clients do not give consent for follow-up, explore their reasons during an individual counseling session and follow up at the next clinic visit. Identifying clients who have missed an appointment: There are many tools that can be used to see who has missed an appointment, including:
ANC and ART clinic appointment books
Laboratory registers
Pharmacy registers
Others
SMS
PC
HV
SMS
PC
HV
SMS
PC
HV
In this example, the client has consented to receive an SMS, a phone call (PC) and a home visit (HV) if he or she misses an appointment at the clinic.
In this example, the client has consented to receive an SMS and a phone call, but not a home visit.
In this example, the client has refused an SMS, a phone call and a home visit.
Comprehensive Peer Educator Training Curriculum: Trainer Manual 9-7
Appointment books: Each health facility providing HIV services should have an appointment system in place, including an up-to-date appointment book. Peer Educators should speak with other members of the multidisciplinary team to learn more about the appointment system and what their role is in this system. At minimum, the appointment book should have a separate page for each day, which includes the following information (adapt to your local setting):
The client’s name
The client’s ART or ANC number
The client’s phone number (for easy reference, this should also be included in each client’s clinic file)
The reason for the next clinic visit (for example follow-up, refill, counseling, lab test, lab results, other)
A space to note whether or not the client came to the clinic on the day of the appointment
A space to note what action was taken if the client missed the appointment
A space to note the outcome of the follow-up action (did the client come back to the clinic?)
Space for comments See Appendix 9A for a sample of what one page in an appointment book could look like (adapt to your own setting). Appointment reminder cards: When each client is done with the clinic visit, he or she should be given an appointment to come back to the clinic. It is important to write down this date and time for the client (for example, on an appointment card or on the person’s health card that they keep) and to explain clearly why they need to come back to the clinic on that day. Clients should also be given instructions on what to do if they cannot come for their scheduled appointment (for example, calling the clinic to let them know). See Appendix 9B for a sample appointment card that the client would keep (adapt to your own setting). Weekly listing of clients who miss appointments: At least once each week, the team should work together to make a list of all of the people who were at least one week late for their appointment at the clinic, lab or pharmacy and this information:
Client’s name, phone number and address (from the client’s file)
What type of appointment clients missed
What type of follow-up they have consented to (also from the client’s file)
Treatment supporter’s phone number and address (if available) Once there is a list of people who have missed appointments, it will be easy to know who needs follow-up. In very busy clinics, the multidisciplinary team may want to prioritize which clients are followed up first (for example, mothers who did not pick up their baby’s HIV test results, clients on ART who did not come back for a refill or pregnant women who did not pick up their CD4 test results).

9-8 Module 9
SESSION 9.3: Strategies to Follow Up with People
Who Do Not Return to the Clinic (60 minutes)
TRAINER INSTRUCTIONS
Methodologies: Brainstorming, Interactive Trainer Presentation,
Large Group Discussion, Role-Play
Step 1: Note: The content of this session needs to be adapted to the specific program
and policies related to following up with patients who miss appointments. Also
make sure to collect any forms used in client follow-up.
Ask participants to brainstorm some of the ways we can follow up with clients
who miss appointments at the clinic. Ask what they think some of the challenges might be to each method of follow-up. Record on flip chart.
Step 2: Explain the local policies and procedures for following up with clients who miss
clinic appointments – by SMS (text message), phone, home visit or other means.
Explain the procedures step-by-step to participants and highlight the specific role
of the Peer Educator in client follow-up. Review how Peer Educators should log
their follow-up attempts (see Appendix 9C for an example of a phone follow-up
logbook). Fill in as needed with the content below.
Step 3: Ask each person to turn to the person seated to their left. One person will play
the role of the Peer Educator and the other the role of a client. Read the
following scenarios out loud to participants and ask them to role-play.
A PMTCT client named M___ misses an appointment to pick up her CD4 test results.
The nurse says that M___ needs to come back right away because she needs to start
taking ART. She asks that you follow up. You check M___’s file and see that she has
given consent to be called as well as her mobile phone number. You call M___. M___
says she cannot come to the clinic because her husband might find out she has HIV.
Ask some of the groups to role-play their phone call for the large group and
discuss.
Next, ask participants to switch roles and role-play this scenario:
The pharmacist tells you that an ART client named R___ is 10 days late for a refill and
asks you to follow up. You look at R__’s file and note that he does not have a phone,
but his treatment supporter does. R___ has given consent for the clinic to contact his
treatment supporter. You call T___, the treatment supporter. T___ says he has not
seen R___ in a few days – maybe he is sick or maybe he is working out of town.
Ask some of the pairs to role-play their phone call for the large group and
discuss.
Step 4: Note: Only do this Step if Peer Educators will be conducting home visits with
clients who miss appointments.
Ask participants to stay in their pairs. Read the above scenario again, but this

Comprehensive Peer Educator Training Curriculum: Trainer Manual 9-9
time add:
The client could not be reached by phone, so the nurse requests that you do a home
visit with M___. When you get to the house, M___ tells you she does not have money
for transport to the clinic.
Have the clients switch roles and read the above case study again, but this time
add a home visit.
When you visit R___ at home, he says he has decided to use herbal treatments instead
of ART for a little while.
Ask some of the pairs to role-play their home visits for the large group and
discuss.
Step 5: Close the session by reminding participants that Peer Educators play a key role
in following up with clients who miss appointments at the clinic. Remember,
helping clients understand the importance of adherence and making an
adherence plan with each client will help lower the number of missed
appointments.
Peer Educators should also update other members of the multidisciplinary team on the results of follow-up and any issues or challenges faced on a regular basis.
KEY INFORMATION
Each clinic should have its own standard operating procedure for following up with clients who miss appointments. When Peer Educators return to their sites, they should speak with the multidisciplinary team to see what specific procedures the clinic uses. If there is no standard procedure used to follow up with clients who miss appointments, Peer Educators may wish to bring this up with their supervisor and in the multidisciplinary team meeting.
Some general guidance on what to do when clients miss appointments (adapt to your own health facility’s standard procedures):
Check the client’s file to see if they have contact information listed and if they have given consent to be called or visited at home.
If the client has not contacted the clinic to reschedule or come to the clinic within one week of the appointment, there are a number of options for follow-up, depending on the procedures at the health facility and the client’s preferences.
Phone call or SMS to the client or the client’s treatment supporter: If consent has been given for an SMS or phone call, a member of the multidisciplinary team may send an SMS or call the client who has missed an appointment. If the client does not have a phone, and he or she has given consent, the person can also call the treatment supporter. Each clinic should have standard procedures for sending SMS or calling clients who miss appointments, including what to say, how to log the SMS or call, and what to do if you do not
Remember, every health facility should have a system to identify clients who have missed appointments and follow them up to bring them back into care!

9-10 Module 9
reach the person. Each clinic should also have a logbook (see Appendix 9C for a sample) where SMS and phone calls are recorded. Always follow the policies and procedures at your clinic. Here are some general tips on following up with clients by phone:
If sending an SMS, use the agreed-upon messages. Usually, it is best to keep the messages general in case someone other than the client receives them. Never give lab results or specific information about the client’s care in an SMS. Some examples are:
- You missed your appointment at (name) clinic. Please call us right away (phone number).
- You missed your appointment at the lab. Please call us right away (phone number).
- You missed your appointment at the (name) clinic. Please come as soon as possible and call (phone number).
- We need to see you and your child right away at the clinic. Please call us (phone number).
- The doctor needs to see you and your child at the (name) clinic. Please come as soon as possible.
- Your lab results are ready. Please come as soon as possible.
If the client still does not call back or return to the clinic after sending an SMS, you can follow up with a phone call.
If making a phone call, make sure the phone call is conducted in a quiet room.
Make sure you have all of the client’s information and file in front of you before you call.
Always try to speak with the client her- or himself.
Use scripts to know what to say when you talk with a client.
- Tell clients your name.
- Tell clients your reason for calling (that they have missed their appointment).
- Discuss reasons why the client should come back to the clinic.
- If the client refuses, provide adherence counseling and try to determine why the client will not come back. You could also ask if the client would be willing to accept a home visit so you could talk more in person.
- If the client accepts, make an appointment at a time and day that is convenient for the client (as soon as possible).
- Thank the client for taking the time to speak with you.
Phone calls should focus on giving basic adherence counseling and getting the client to return to the clinic. Never give test results over the phone!
Keep information confidential! If you talk to someone other than the client, do not say you are from the ART clinic. Instead, say that you are calling from the clinic and need to speak with the client, or that the doctor requests that the client return to the clinic.
Record every call and SMS in a call logbook (this is different from the appointment book, see Appendix 9C for an example), even if you were not able to speak with the client. The call logbook should include space to write down:
- The person making the call
- The client’s name and ART or ANC number
- The duration (length) of the call
- The outcome of the call
- The next action to be taken
- Any other comments Home visit by a community health worker or other Peer Educator linked to the health facility: It is a good idea for health facilities to be linked with community health workers, local NGOs and PLHIV associations to help with client follow-up. If clients have given consent for a home visit, Peer Educators or other members of the multidisciplinary team can meet regularly with community outreach workers to discuss which clients have missed appointments, the type of appointment missed and a plan for follow-up home visits.

Comprehensive Peer Educator Training Curriculum: Trainer Manual 9-11
Community health workers and Peer Educators can work closely together to make sure clients are given proper adherence counseling in the hope that they return to care as soon as possible. Home visit by Peer Educators: Some programs may ask Peer Educators to conduct home visits (alone or with other members of the multidisciplinary team) with clients who have missed appointments. Remember, a home visit should only be conducted if a client has given consent. Clients who have not consented to home visits should not receive them. Peer Educators should learn more about the home-visit policies and procedures at their clinic, but here are some general tips:
Peer Educators should consult with the multidisciplinary team before doing any home visiting.
During the home visit, first introduce yourself and say that you are from the clinic.
Always try and talk to the client in person and in a private spot. Ask if it is a good time to talk, or if you should come back another time that is more convenient.
Always keep information confidential when you are speaking with other members of the family or community.
Once you talk with clients, discuss why they missed the appointment, what makes it hard to come to appointments and how they can come back to the clinic as soon as possible. Help clients make a concrete plan for coming back (such as they will ask a family member to babysit next Tuesday and will get there by taxi).
Provide adherence counseling and remind clients how important it is that they return to the clinic for specific services.
Ask clients if you can check in every now and again to see how things are going.
Always be supportive and never judge clients for missing an appointment.
Write down the outcomes of all home visits, even if you were not able to find clients.
Discuss the outcomes of home visits with the multidisciplinary team. Contact the clinic right away if you find that a client is very ill and try to arrange for her or him to be transferred to the clinic or a hospital.
If clients still cannot be located during a home visit, do not give up. They might be traveling and eventually come back to the clinic. Keep following up through calls and home visits even if the first try is not a success.
Communicating with the multidisciplinary team: The multidisciplinary team should be updated on the results of follow-up through SMS, phone calls and home visits and also be informed of any issues faced. The monthly multidisciplinary meeting is a good time to discuss the outcomes, issues and challenges of patient follow-up.
When clients do return to the clinic for their appointment, it is very important to discuss how important it is to keep appointments and adherence to care and treatment. Some clients may require individual adherence counseling and problem solving.

9-12 Module 9
SESSION 9.4: Classroom Practicum on Client
Follow-up (60 minutes)
TRAINER INSTRUCTIONS
Methodologies: Small Group Work, Case Studies, Large Group
Discussion
Step 1: Break participants into small groups of 4. Give each group one of the pre-
prepared case study cards.
Step 2: Give each small group about 20 minutes to discuss their case study. Trainers
should help the small groups as needed.
Step 3: Bring the large group back together and ask each group to read their case study out loud and give the key points of their discussion. Discuss each case study as a
large group. Be sure to refer to the program’s specific policies about following up
with clients during the discussion.
KEY INFORMATION
Case Study 1: The social worker asks you to call B__ because she missed her ART refill appointment 7 days ago. What would you say to B__ on the phone? B__ tells you that she missed her appointment because she cannot leave her new job to come to the clinic. What would you say to B__? Case Study 2: You are asked to call C__, a woman who missed her appointment to pick up her child’s HIV test results (which are positive). You check the file and C__ has given consent to call her. You call and a man answers the phone. What would you say? The man says that he is C__’s husband and you can tell him what is going on. What would you say? Case Study 3: You have been trying to reach M__ by phone because he missed his appointment at the clinic. You know the number is working because one time a woman answered but said that M__ was not there. What would you do? The nurse asks you to get in touch with the PLHIV association to do a home visit. You check M__’s file and notice that he gave consent for a phone call but not for a home visit. What would you do?

Comprehensive Peer Educator Training Curriculum: Trainer Manual 9-13
Case Study 4: You go to the home of P__, a woman in care who has missed her 6-month check-up at the clinic. P__ says she is feeling fine now and is using holy water and herbs, which have made her well. She sees no need to come to the clinic since she feels well. What do you say to P__? Case Study 5: You ask the community health worker to visit A__, a PMTCT client who has missed an appointment at the clinic. What would you ask the community health worker to say during the home visit? The community health worker reports back to you that A__ does not feel well enough to come to the clinic and that she is very busy taking care of her children and husband. What would you do next? Case Study 6: You are out in the community with a list of 5 clients to visit at home. You cannot locate the first client’s home based on the information you have. What would you do? You go to the home of another client, named T__, who missed his ART refill date almost 2 weeks ago. A woman answers the door when you knock. What would you say? You learn that T__ is working in another province for the next 2 months. What would you say?

9-14 Module 9
SESSION 9.5: Module Summary (10 minutes)
TRAINER INSTRUCTIONS
Methodologies: Large Group Discussion, Interactive Trainer
Presentation
Step 1: Ask participants what they think are the key points of this Module. What
information will they take away from the Module?
Step 2: Summarize the key points of the Module using participant feedback and the
content below.
Step 3: Ask if there are any questions or clarifications.
Step 4: Review the learning objectives with participants and make sure all are confident
with their skills and knowledge in these areas.
Step 5: If there are areas participants do not fully understand or in which they need
more help, go back and review the session before moving to the next Module.
KEY INFORMATION
THE KEY POINTS OF THIS MODULE INCLUDE:
The priority should be on helping clients understand the need to come to the clinic for all of their appointments. Good communication and counseling – starting when a client enrolls in care – can prevent missed visits.
All health facilities should have policies and procedures in place to identify and follow up with clients who miss appointments.
It is important to get a client’s consent to send an SMS, call or do a home visit if she or he misses an appointment. This should be recorded on the client’s file.
Having an appointment system is the only way to know which clients did not come back to the clinic on time. Appointment books, laboratory registers and pharmacy registers can all be used to see who has missed an appointment.
Each week, Peer Educators can work with the multidisciplinary team to identify which clients did not return to the clinic on time. This list of clients is the first step in client tracing.
There are many ways to follow up with clients who miss appointments. Peer Educators should follow the policies and procedures at their clinic. Follow-up can be by SMS, phone call or home visit by a Peer Educator or a community health worker.
Always keep client information confidential during follow-up SMS, phone calls or home visits. Never disclose that the person is living with HIV or is receiving HIV care to anyone but the client or the treatment supporter.

Comprehensive Peer Educator Training Curriculum: Trainer Manual 9-15
(KEY POINTS, CONTINUED)
It is important to record the outcomes of ALL follow-up SMS, phone calls and home visits.
Part of follow-up is to provide individual adherence counseling to identify barriers and come up with solutions. Peer Educators should provide adherence counseling during follow-up and also when the client returns to the clinic.
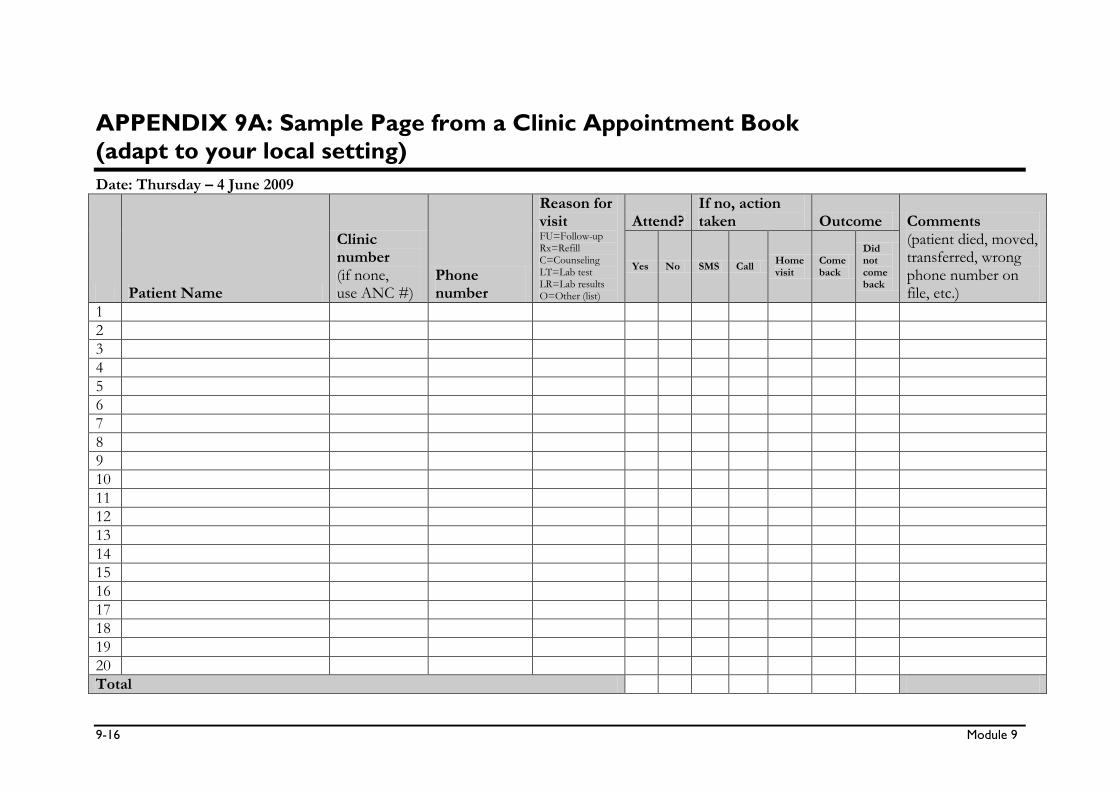
9-16 Module 9
APPENDIX 9A: Sample Page from a Clinic Appointment Book
(adapt to your local setting)
Date: Thursday – 4 June 2009
Patient Name
Clinic number (if none, use ANC #)
Phone number
Reason for visit FU=Follow-up Rx=Refill C=Counseling LT=Lab test LR=Lab results O=Other (list)
Attend? If no, action taken Outcome Comments
(patient died, moved, transferred, wrong phone number on file, etc.)
Yes No SMS Call Home visit
Come back
Did not come back
1
2
3
4
5
6
7
8
9
10
11
12
13
14
15
16
17
18
19
20
Total

Comprehensive Peer Educator Training Curriculum: Trainer Manual 9-17
APPENDIX 9B: Sample Patient Appointment Card
(adapt to your local setting)
Appointment Card Name: _________________________________________ Health Facility: _________________________________
Date Reason
1.
2.
3.
4.
5.
6.
7.
8.
9.
10.
PLEASE COME TO ALL OF YOUR APPOINTMENTS! If you cannot attend, call: _________________________

9-18 Module 9
APPENDIX 9C: Sample Phone Follow-up Logbook
(adapt to your local setting)
Date Patient name ART or ANC number
Initials of caller Phone number Outcome Next step
Call duration
Sent SMS
Phone not working
No answer
Spoke with patient
Spoke with someone else ______
Other _____________________
None – patient will return on ___
Try again on ________________
Call treatment buddy
Home visit
Other _____________________
Sent SMS
Phone not working
No answer
Spoke with patient
Spoke with someone else ______
Other _____________________
None – patient will return on ___
Try again on ________________
Call treatment buddy
Home visit
Other _____________________
Sent SMS
Phone not working
No answer
Spoke with patient
Spoke with someone else ______
Other _____________________
None – patient will return on ___
Try again on ________________
Call treatment buddy
Home visit
Other _____________________
Sent SMS
Phone not working
No answer
Spoke with patient
Spoke with someone else ______
Other _____________________
None – patient will return on ___
Try again on ________________
Call treatment buddy
Home visit
Other _____________________
Sent SMS
Phone not working
No answer
Spoke with patient
Spoke with someone else ______
Other _____________________
None – patient will return on ___
Try again on ________________
Call treatment buddy
Home visit
Other _____________________
Sent SMS
Phone not working
No answer
Spoke with patient
Spoke with someone else ______
Other _____________________
None – patient will return on ___
Try again on ________________
Call treatment buddy
Home visit
Other _____________________

Comprehensive Peer Educator Training Curriculum: Trainer Manual 10-1
MODULE 10:
Positive Living
DURATION: 270 minutes (4 hours, 30 minutes)
LEARNING OBJECTIVES:
By the end of this Module, participants will be able to:
Understand the “recipe” for positive living for individuals and
families
Support clients to have a healthy mind
Recognize common signs of anxiety and depression and provide
basic counseling and referrals
Support clients to have a healthy body
Help clients and their partners practice safer sex and prevent
new HIV infections
Help clients prevent and seek care for sexually transmitted
infections
Work with clients to actively participate in their own care and
advocate for themselves (and their children) as a part of positive
living
CONTENT:
Session 10.1: Introduction: The Recipe for Positive Living
Session 10.2: Healthy Mind
Session 10.3: Healthy Body
Session 10.4: Safer Sex
Session 10.5: Preventing and Treating Sexually Transmitted
Infections (STIs)
Session 10.6: Helping Clients Be Active Participants in Their Own
Care
Session 10.7: Classroom Practicum on Positive Living
Session 10.8: Module Summary

10-2 Module 10
METHODOLOGIES:
Brainstorming
Large group discussion
Interactive trainer presentation
Small group work
Snowballing
Return demonstration
Case studies
MATERIALS NEEDED:
Flip chart
Markers
Male and female condoms
Penis and vagina models
Tape or Bostik
Small pieces of paper
Case study cards for Session 10.7
WORK FOR THE TRAINER TO DO IN ADVANCE:
Read through the entire Module and make sure you are familiar
with the training methodologies and content.
Collect male and female condoms, penis and vaginal models and
other supplies listed above.
Prepare the case study cards for Session 10.7.

Comprehensive Peer Educator Training Curriculum: Trainer Manual 10-3
SESSION 10.1: Introduction: The Recipe for Positive
Living (20 minutes)
TRAINER INSTRUCTIONS
Methodologies: Brainstorming, Large Group Discussion, Interactive
Trainer Presentation
Step 1: Review the Module learning objectives.
Step 2: Tape many pieces of flip chart paper along one wall of the training room so that
there is one continuous sheet of paper. Tell participants that this is an open
“graffiti wall.”
Ask participants to think how they or people they know live positively with HIV. Give each participant a marker and ask everyone to get up and write what it
means to live positively with HIV on the graffiti wall. Encourage participants to be
creative – use words, drawings, songs, etc. to express what it means to live
positively with HIV.
After about 10 minutes, review what has been written on the graffiti wall as a
large group. Remind participants that Peer Educators can be role models to help
clients live positively with HIV.
Step 3: Write the “recipe for positive living” on flip chart.
KNOWLEDGE + DETERMINATION TO LIVE
with actions for a
HEALTHY MIND + HEALTHY BODY + HEALTHY SOUL
= A LONG, HEALTHY LIFE
Step 4: Ask participants to discuss what the different “ingredients” in the “recipe” mean
and fill in using the content below, if needed.
KEY INFORMATION
Positive living means having a positive outlook to living and life. It also means living responsibly with HIV and preventing new infections.
People living with HIV can live full and healthy lives if they take care of themselves, access care and treatment, and feel supported to make healthy choices.
Families can also live positively with HIV by supporting and taking care of each other.
Positive living includes:
- Keeping the mind healthy
- Keeping the body healthy
- Keeping the soul healthy
- Preventing new HIV infections
- Keeping the whole family healthy

10-4 Module 10
Peer Educators play a key role in helping other PLHIV live positively and following the “recipe for positive living”:
KNOWLEDGE + DETERMINATION TO LIVE
with actions for a
HEALTHY MIND + HEALTHY BODY + HEALTHY SOUL
= A LONG, HEALTHY LIFE
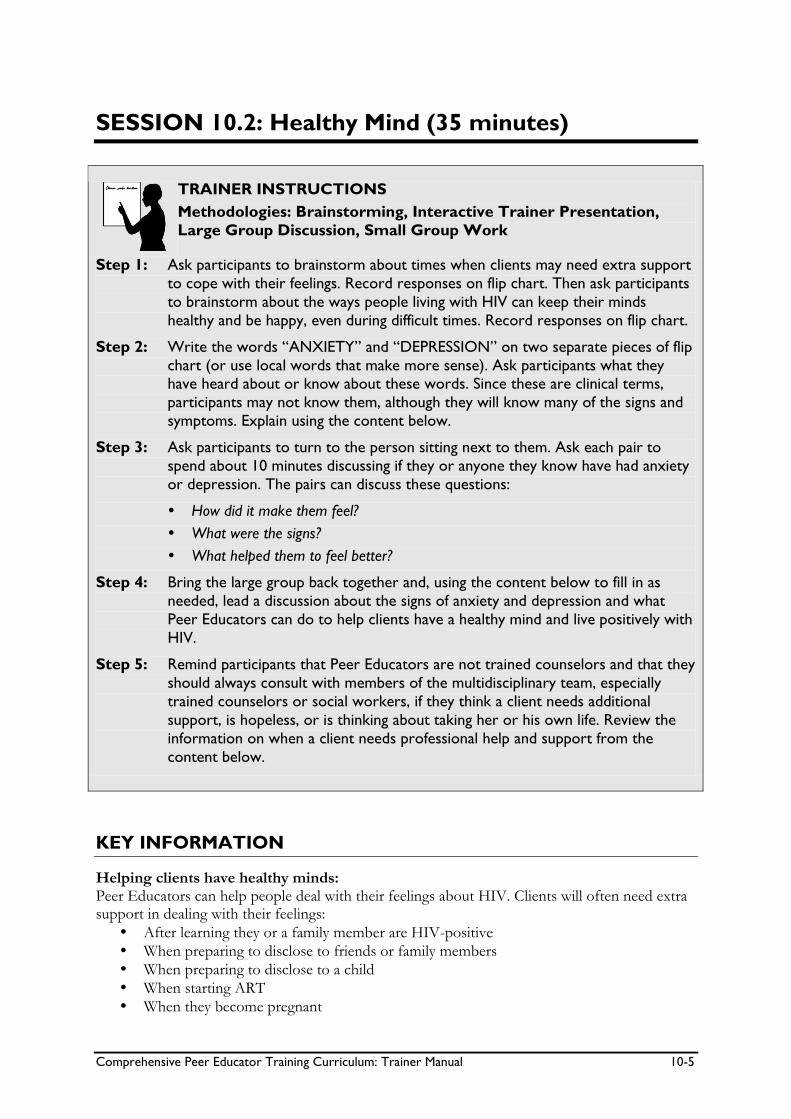
Comprehensive Peer Educator Training Curriculum: Trainer Manual 10-5
SESSION 10.2: Healthy Mind (35 minutes)
TRAINER INSTRUCTIONS
Methodologies: Brainstorming, Interactive Trainer Presentation,
Large Group Discussion, Small Group Work
Step 1: Ask participants to brainstorm about times when clients may need extra support
to cope with their feelings. Record responses on flip chart. Then ask participants
to brainstorm about the ways people living with HIV can keep their minds
healthy and be happy, even during difficult times. Record responses on flip chart.
Step 2: Write the words “ANXIETY” and “DEPRESSION” on two separate pieces of flip
chart (or use local words that make more sense). Ask participants what they have heard about or know about these words. Since these are clinical terms,
participants may not know them, although they will know many of the signs and
symptoms. Explain using the content below.
Step 3: Ask participants to turn to the person sitting next to them. Ask each pair to
spend about 10 minutes discussing if they or anyone they know have had anxiety
or depression. The pairs can discuss these questions:
How did it make them feel?
What were the signs?
What helped them to feel better?
Step 4: Bring the large group back together and, using the content below to fill in as
needed, lead a discussion about the signs of anxiety and depression and what
Peer Educators can do to help clients have a healthy mind and live positively with
HIV.
Step 5: Remind participants that Peer Educators are not trained counselors and that they
should always consult with members of the multidisciplinary team, especially
trained counselors or social workers, if they think a client needs additional
support, is hopeless, or is thinking about taking her or his own life. Review the
information on when a client needs professional help and support from the
content below.
KEY INFORMATION
Helping clients have healthy minds: Peer Educators can help people deal with their feelings about HIV. Clients will often need extra support in dealing with their feelings:
After learning they or a family member are HIV-positive
When preparing to disclose to friends or family members
When preparing to disclose to a child
When starting ART
When they become pregnant

10-6 Module 10
When they are about to lose a loved one or are grieving the loss of a loved one
When they face stigma, discrimination or violence
And many other times These are all important times for Peer Educators to provide emotional support, but ongoing support is also needed to help people live positively with HIV in the long term. Helping clients with anxiety and depression: Anxiety and depression are common reactions to living with HIV, especially when people are not feeling well and do not get the support they need from family, friends, health care providers and their community. Our mental health and our physical health are closely related – this is why helping people deal with anxiety and depression can help with positive living.
Signs of anxiety:
Cannot eat
Cannot breathe
Shaking and sweating
Heart pounding fast
Tingling in the hands or feet
Cannot sleep
Cannot concentrate on anything
Feel “jumpy” or “stressed”
Feel worried about many things Signs of depression:
Feel like you just do not know what to do (helpless or hopeless)
Really tired with no energy
Cannot find good in anything
Do not enjoy the things you used to
Sleep too much or not enough
Get angry for no reason
Cannot eat or eat too much
Do not feel like being social with friends or family
Do not feel like having sex
Talk about running away
Think about suicide (killing yourself) What to do when you think a client has anxiety or depression: Peer Educators can watch for signs of anxiety and depression in their clients. Peer Educators are not trained counselors, but they may be able to provide some basic advice to clients on how to deal with feelings of anxiety or depression. Peer Educators should always consult with other members of the multidisciplinary team if they think a client might be anxious or depressed.
Key Definitions: Anxiety and Depression
Anxiety is when you feel nervous, have a lot of fear or do not want to do things that you normally enjoy. Sometimes people also use the word “stress” to describe their feelings of anxiety. Depression is when you feel very sad and hopeless.

Comprehensive Peer Educator Training Curriculum: Trainer Manual 10-7
Peer Educators can also:
Provide continuous supportive counseling to clients so they feel “heard.” Use good communication skills, such as reflection.
Encourage the person to join a PLHIV association and a support group to meet other people living positively with HIV.
Link the person with community support services, like groups that provide spiritual support, counseling, home care or nutritional support.
Remind clients that they should not use alcohol or drugs because this will only make things worse.
Make a plan with clients to stay hopeful and feel good again.
Encourage clients to continue any religious or spiritual practices that make them feel peaceful.
Talk with family members (if the client says it is okay to do so) – they may be discouraged and need support, too. Remind them to provide ongoing support and love to the person.
Remind clients that their feelings are normal and they will feel better.
Talk with a professional counselor or social worker about the client’s symptoms and next steps. Give your client a referral to meet with a counselor or social worker.
Symptoms of anxiety and depression can also be due to a medical illness, so it is important for clients to have a check-up with the doctor or nurse.
When the Peer Educator needs to make a referral: Peer Educators should be aware of danger signs that anxiety and depression may be very serious or out of control and consult with the clinic doctors, nurses, social worker, community-based counselors and spiritual advisors immediately. Remember the principles of shared confidentiality when doing this.
Peer Educators should seek help from other members of the multidisciplinary team right away when:
Clients might hurt themselves or another person.
The depression is so bad that clients are thinking about killing themselves.
The family cannot cope with the person anymore and wants to throw her or him out.
Clients cannot eat or sleep (may be due to side effects of ARVs like efavirenz, but may also be anxiety or depression).
There is any kind of emotional crisis.
Peer Educators can help people find hope and joy, accept their situation and want to live for the future!

10-8 Module 10
SESSION 10.3: Healthy Body (40 minutes)
TRAINER INSTRUCTIONS
Methodologies: Snowballing, Large Group Discussion
Step 1: Introduce the session by telling participants that we will do an activity about
keeping our bodies healthy. Break participants into groups of 4.
Note: Trainers should adapt the group sizes depending on how many
participants are in the training.
Give each group 2 pieces of flip chart paper and a marker. Ask each group to
write “HEALTHY” on one flip chart and “UNHEALTHY” on the other. Ask the groups to list as many behaviors they can think of that PLHIV should do to keep
their bodies healthy on the “HEALTHY” flip chart and things that PLHIV should
avoid on the “UNHEALTHY” flip chart. Give the groups 10 minutes.
Step 2: After 10 minutes, have each group of 4 join another group of 4. Ask the groups
to review and combine their lists onto 2 new pieces of flip chart paper (with the
same titles). Participants should not write down each answer more than once.
Step 3: Then have the groups of 8 join another group of 8 and combine lists as before.
Keep going until there is one large group and a final list of healthy and unhealthy
behaviors. Ask for a participant to read through each list to the group. Fill in as
needed from the content below.
Step 4: Ask Peer Educators what challenges they have faced in keeping their bodies
healthy and practicing healthy behaviors. Discuss how Peer Educators can help
clients keep their bodies healthy.
KEY INFORMATION
Healthy behaviors: There are many things PLHIV can do to keep their bodies healthy and live positively with HIV, including:
Use condoms and practice safer sex every time.
Get STIs treated right away and tell your partner to get them treated too.
Get a TB test and treat TB right away.
Use a family planning method if you want to limit or space children.
Go to the hospital or clinic for check-ups, lab tests and to pick up medicines. Never miss an appointment.
Take medicines the right way (at the right time, the right number, etc.).
Tell the nurse and doctor if there are any changes, even small ones, in your health.
Stay busy and active.
Get enough rest.
Get sunlight and breathe fresh air every day.

Comprehensive Peer Educator Training Curriculum: Trainer Manual 10-9
Sleep and rest under a treated mosquito net if you live in a place with malaria.
Join a PLHIV association and a support group and talk about things openly.
Exercise or stretch every day to stay healthy. If bedridden, have a family member help with stretches to keep blood flowing and prevent bedsores.
Stay clean – wash regularly and wash hands often, especially after going to the toilet and before making food.
Eat enough good food and take multivitamins (there is more about nutrition in Advanced Module 17).
Boil drinking water to make sure it is clean.
Cook food well to get rid of germs.
Wash raw fruits and vegetables well with clean water.
Keep the house and compound clean, including getting rid of any still water and garbage.
Use a germ-killing bleach solution (like Jik, Barakina or Gentian Violet) diluted with water to keep household surfaces clean.
Unhealthy behaviors: Peer Educators should talk about avoiding practices or behaviors that are not healthy. These include:
Drinking too much alcohol
Using drugs
Smoking
Sharing medicines or stopping them without talking to the doctor
Having unsafe sex
Avoiding social contact and staying alone too much
Missing appointments at the clinic
Taking traditional medicines that you have not discussed with the doctor
Eating too many sugary or fatty foods
Not eating enough good foods

10-10 Module 10
SESSION 10.4: Safer Sex (60 minutes)
TRAINER INSTRUCTIONS
Methodologies: Large Group Discussion, Interactive Trainer
Presentation, Small Group Work, Return Demonstration
Step 1: Start the session by saying the following statements out loud and asking
participants to discuss:
People living with HIV have the right to a healthy sexual life.
People living with HIV have a responsibility to protect their sexual partners.
Everyone has a right to a healthy sexual life and it is our responsibility to protect our
sexual partner(s) by practicing safer sex.
Step 2: Ask participants what is meant by the term “safer sex” and why it is an important
part of living positively with HIV. Discuss what we can do to practice safer sex.
Record answers on flip chart and fill in, as needed, from the content below.
Explain that Peer Educators need to help clients and their families feel
comfortable talking about safer sex.
Step 3: Tape male and female condoms on the wall and hand out small sheets of paper
to participants. Ask them to write common myths about condoms on the papers
and to tape them on the wall next to the condoms. Some examples could include
that condoms cause HIV or that condoms are only for sex workers.
Discuss why people have these myths and what Peer Educators can do to make
sure people have the correct information about condoms.
Step 4: Demonstrate male and female condom use to participants using the penis and
vagina models. Explain each step simply and carefully. Use the content and
illustrations below as a guide.
Step 5: Ask participants to break into groups of 3 and practice demonstrating male and
female condom use, making sure to explain each step along the way, as if they
were teaching a client. The trainers should circulate around the room to provide
assistance.
Step 6: Have participants stay in their groups of 3 after the condom demonstration
activity. Ask each group to come up with one reason that people say they do not
want to use condoms. Ask the group to say their reason out loud and discuss
what a Peer Educator could advise a client who feels that way (or whose partner
feels that way).
Step 7: Lead an interactive presentation on the role Peer Educators can play in helping
clients to negotiate condom use with their partner(s) using the content below.

Comprehensive Peer Educator Training Curriculum: Trainer Manual 10-11
KEY INFORMATION
Why is safer sex important to living positively with HIV?
So HIV is not spread to a person’s partner(s)
So PLHIV do not expose themselves or their partner(s) to STIs
So PLHIV or their partner(s) do not have an unintended pregnancy
So PLHIV do not expose themselves or their partner(s) to new, more harmful strains of HIV
Ways to practice safer sex:
Use a condom for all kinds of sex (vaginal, anal, oral).
Reduce the number of partners and use condoms all the time.
We know that HIV is often transmitted between regular partners. If both partners have not been tested, then it is safest to use condoms – in both regular and casual partnerships.
Stay in a relationship where both partners have been tested for HIV and are faithful to one another.
Masturbate (alone or together).
Replace risky practices (such as sex without condoms) with safer practices, like touching, massage, kissing and hugging.
Do not put products or herbs in the vagina before sex.
Do not have sex if you or your partner have an STI or any kind of sore in the genital area.
Take all medicines (such as for STI treatment or ART) as prescribed by the doctor or nurse.
If possible, avoid sex while you or your partner has her period (is menstruating). If you do have sex during menstruation, try to use condoms.
Do not have sex at all.
Never force another person to have sex.
What is safer sex?
Safer sex is any kind of sex that reduces the chances of passing STIs or HIV from one person to another.
Safer sex includes preventing contact with your partner’s body fluids.
- These fluids include semen, fluid from the vagina and blood.
- To be safe, these fluids should not enter the vagina, the anus or the opening of the penis.
- They should not enter open sores, cuts or broken skin anywhere on the penis, in the mouth, on the vagina, in the anus or anywhere else on the body.

10-12 Module 10
Safer sex using condoms: Not having sex at all is one way to be completely safe. But this is not practical or enjoyable for most people. Using condoms is one reliable way to practice safer sex – see the list above for other ways.
There are a lot of myths about condoms, such as that they are only for sex workers or that married people do not use condoms. Peer Educators should promote condoms for all people in the community to protect themselves and their partners from HIV and other STIs.
Some people feel that condoms make sex less enjoyable. We should respect everyone’s personal experiences with condoms but also remember that even if it does change the way sex feels, it is still worth it to protect ourselves and our partner(s).
Some people think that if both partners are living with HIV then they do not need to use condoms. It is important for Peer Educators to explain that even if both partners are living with HIV, using condoms is still a good idea. That way, people can know all the facts and make up their mind about using condoms with their partner.
Remember:
Peer Educators should explain why it is important to use condoms to prevent unwanted pregnancy, STIs and the spread of HIV.
Peer Educators should give out male and female condoms to clients and their partners.
Never judge someone who does not use condoms. By giving people the facts about safer sex, everyone can decide what is the best and most realistic strategy for her or his own life.

Comprehensive Peer Educator Training Curriculum: Trainer Manual 10-13
How to use a Male Condom
These are the basic steps you should know for using, and demonstrating how to use, a male condom. If penis models are not available, you can use a bottle, banana or corn. Only condoms made out of latex protect against HIV.
Steps to use a male condom: 1. Look at the condom package and check the date to make sure it is still good and that the
package does not have any damage. 2. Open the packet on one side and take the condom out. Do not use your teeth to open the
package. 3. Pinch the tip of the condom to keep a little space at the tip. This will hold the semen and
prevent the condom from breaking. 4. Hold the condom so that the tip is facing up and it can be rolled down the penis. 5. Put it on the tip of an erect (hard) penis (only use condoms on an erect penis) and unroll
it down to the bottom of the penis. 6. After ejaculation (coming), hold the rim of the condom while the man removes his penis
without spilling the semen. The penis must be removed while it is still hard to make sure the condom does not fall off.
7. Remove the condom and tie it in a knot to avoid spilling. Throw it away in a latrine or bury it.
8. Use a new condom every time! Also, it is important to:
Use only lubricants made out of water (not oils).
Store condoms in a cool, dry place, out of the sun. Do not keep them in a wallet.
Do not use condoms that seem to be sticky, a strange color or damaged in any way. Throw them away.

10-14 Module 10
How to Use a Female Condom
Some women really like the female condom because it gives them more control over their own bodies and over sex. Some men like it too because they don’t have to use a male condom. The female condom is becoming more affordable and available to women in many countries. These are the main steps for using a female condom. If no vaginal model is available to demonstrate its use to people, you can use a box with a round hole cut in it or your hand.
Steps to use a female condom: 1. Open the packet. Do not use your teeth. 2. Find the inner ring at the bottom, closed end of the condom. The inner ring is not
attached to the condom. 3. Squeeze the inner ring between the thumb and middle finger. 4. Guide the inner ring all the way into the vagina with your fingers. The outer ring stays
outside the vagina and covers the lips of the vagina. 5. When you have sex, guide the penis through the outer ring. It has to be INSIDE the ring. 6. After the man ejaculates (comes), before the woman stands up, squeeze and twist the
outer ring to keep the semen inside the pouch and pull the pouch out. 7. Put the used condom in a latrine or bury it. Do not put it in a flush toilet.

Comprehensive Peer Educator Training Curriculum: Trainer Manual 10-15
Peer Educators can help clients negotiate condom use with their partner(s): It is very difficult for most people to talk about condoms openly with their partners. It may be especially hard for young people and unmarried people to talk about condoms because in many places they will be judged for having sex. Part of the Peer Educator’s job is to teach clients how to use condoms to protect themselves and their partners, and how to talk to their partners about condoms:
Promote condom use every time with all partners, and especially with any non-regular partners or partners who do not know their HIV-status. Pregnant women and their partners should also use condoms every time to protect the woman and the baby. We should all take responsibility for protecting ourselves and our partner(s).
Link with community organizations and community leaders to make sure everyone in the community knows about condoms and how to get them (including distribution by Peer Educators). This helps make condoms less taboo and more normal.
Recruit respected men in the community to talk about the benefits of condoms with other men.
Help people make condoms fun and pleasurable. For example, suggest that a woman help a man put on a condom or remind people that a man with a condom on may take a longer time to ejaculate (cum), so it can mean more pleasure for his partner.
Help people practice what they are going to say about condoms to their partners.
- Suggest that the person focus on safety issues instead of trust issues. For example, “It is good for us to use condoms to make sure we are both safe. It is not because I do not trust you.”
- Use other people practicing safer sex as examples. For example, “I know that so and so in the community decided they should use condoms, even though they are faithful to one another.”
- Suggest that the person bring their partner to talk with you as well.
- Tell people, “You use your whole body to have sex – not just the penis, vagina, anus or mouth. Only a small part of the body is covered by a condom so it should not take away from the experience.”
Some ways you can encourage your partner to use condoms:
If your partner says… You could say…
It will not feel as good. It may feel different. But it will still feel good. Here let me show you.
I do not have any diseases! I do not think I have any either, but one or both of us could and not know it. Let’s be safe.
You are already using family planning. I would like to use a condom anyway. One of us might have an infection from before that we might not know about.
Just this once without a condom…please. It only takes one time without a condom to get HIV or an STI. Also, I am not ready to be pregnant.
Condoms are for loose women. Why do you want to use one?
Condoms are for everyone who wants to protect themselves.
If you love me, we do not need condoms.
I do love you and I want us to be safe so we can be happy together.
NO CONDOM, NO SEX!!!

10-16 Module 10
SESSION 10.5: Preventing and Treating Sexually
Transmitted Infections (STIs) (40 minutes)
TRAINER INSTRUCTIONS
Methodologies: Large Group Discussion, Interactive Trainer
Presentation
Step 1: Ask participants if they can give the definition of an STI and how STIs and HIV
are connected. Fill in, as needed, from the content below, making sure to explain
that having an STI increases the chances that a person will become infected with
HIV.
Step 2: Review the common signs of STIs with participants as well as the common names
of STIs, referring to the content below. Use any local or slang terms for STIs that
exist.
Step 3: Ask participants what advice or information they can give to clients on
preventing STIs. Record responses on flip chart and fill in using the content
below. Remind participants that preventing STIs should be a part of positive living
counseling for people living with HIV, their partners and family members.
Step 4: Ask participants what advice or information they can give to clients who think
they have an STI. Record responses on flip chart and fill in using the content
below. Stress the importance of getting partners treated at the same time.
Step 5: Close the session by asking participants what they think Peer Educators can do
to help clients prevent STIs and get treatment for STIs. Record key points on flip
chart.
KEY INFORMATION
Sexually transmitted infections, or STIs, are infections passed from one person to another during sex. Any type of sex – vaginal, anal or oral – can cause an STI. STIs can also be passed from a pregnant woman to her baby before it is born or during the delivery. It is very important for clients and their partners to understand the importance of fast diagnosis and treatment of genital problems and STIs. When a person has an STI, especially one with sores, it is much easier to spread HIV. Unless STIs are treated, they can cause:
HIV to spread more easily
Infertility (not able to have children)
Premature or unhealthy babies
Very bad pain in the abdomen
Cancer of the cervix (the entrance to a woman’s uterus)
Death from a bad infection

Comprehensive Peer Educator Training Curriculum: Trainer Manual 10-17
Both men and women can get STIs, but a woman gets infected from a man more easily than a man gets infected from a woman. Many times, people, especially women, will have an STI and not know it. Sometimes in women there are no symptoms – so it’s always best to practice safer sex with condoms and go to the doctor if there are any symptoms. The most common signs of STIs include:
Unusual discharge from the vagina (some discharge is normal. Normal discharge is usually white and thin. But if there is more than usual or if it smells bad, is green, yellow or has white clumps, or looks different than usual, there may be an STI or another type of infection.)
A strange discharge from the urethra, the place where pee comes out (in a man, this is at the end of the penis and in a woman it is just above the vaginal opening)
Pain or bleeding when peeing or during sex
A rash, bump or sore on or around the penis, vagina or anus
Red and itchy genital area or anus (itching may also be caused by scabies or lice)
Warts or bumps in the genital area or around the anus
Swollen glands around the genital and thigh areas
For men, swollen or painful testicles (balls)
For women, pain in the lower belly
High fever How to prevent STIs:
Always practice safer sex.
Use condoms every time you have sex.
Keep the genital and anal areas clean.
Do not douche or use herbs or powders in the vagina.
If you or your partner(s) have an STI, do not have sex until it is cured. This will prevent the STI from spreading to your partner(s).
What to tell clients if they may have an STI:
Go to the clinic right away. Treat the STI early – usually with antibiotic pills or creams – and do not wait until you are very ill.
Help your partner to get checked by a doctor or nurse and get treated.
Make sure to take ALL of the medication, even if you feel better.
It is best to not have sex until your and your partner’s STI signs have gone away AND you both have finished all of the medicines.
Keep the genital and anal areas clean.
Try to wear underclothes made of cotton, and wash and dry them in the sun every day.
To relieve pain or discomfort, you can sit in a pan of clean, warm water for 15 minutes, 2 times each day.
Go back to the clinic if you do not get better by the end of your medicines.
Practice safer sex with condoms when you do have sex again.
Names of Common STIs:
Trichomonas
Gonorrhea (“clap,” VD)
Chlamydia
Genital warts
Syphilis
Chancroid
Genital herpes
HIV
Hepatitis B
Pelvic Inflammatory Disease (PID)

10-18 Module 10
SESSION 10.6: Helping Clients Be Active
Participants in Their Own Care (20 minutes)
TRAINER INSTRUCTIONS
Methodologies: Large Group Discussion, Brainstorming, Interactive
Trainer Presentation
Step 1: Ask participants to discuss why it is important to be an advocate for yourself and
an active participant in your own care. How much have they been involved in
their own care and treatment decisions? Use these questions to guide the
discussion:
What rights do clients living with HIV have at the clinic?
What have been your experiences as a participant in your own care at the clinic?
What are the challenges you have faced?
What makes you feel supported as a partner in your own care and treatment?
What can Peer Educators do to advocate for themselves and help other clients
advocate for themselves at the clinic?
Step 2: Ask the group to brainstorm ways that Peer Educators can help clients get
involved and stay involved in their own and their family members’ care and
treatment. Use the content below to add to the conversation as needed.
KEY INFORMATION
Why be involved in your own care? We all know a lot about our own bodies and our own health. The more we know, the more we can find the services we need, understand the care plan and follow up at home and at the clinic. Sometimes, and especially in very busy clinics, we really need to help clients advocate for themselves, ask questions and be involved in their own care. Clients need to be educated, motivated and supported in order to take care of themselves and their families and communicate what services are needed. This gives them a better sense of control, makes them feel better about their situation, and helps them be more successful in caring for themselves and their family. How can Peer Educators help clients be more involved in their own and their children’s care and treatment? Encourage clients to:
Be involved: Be a part of every decision that is made about your health.
Think ahead: When you talk to your health care workers about your health BEFORE problems happen, you will get the best possible care.

Comprehensive Peer Educator Training Curriculum: Trainer Manual 10-19
Ask questions: If you do not understand something that the doctor, nurse, counselor or pharmacist tells you, always ask questions. If you do not understand the answer, ask your question again.
Learn more about your health and treatment: Collect as much information as you can about your diagnosis, care and treatment. Ask your health care worker about the tests and treatment you need and how to get the treatment. Also know the risks and side effects of the treatment and what will happen if you do not take certain medicines.
Join a PLHIV association and a support group: This will help you talk to others facing similar situations and how to deal with specific challenges (like adherence or side effects).
Understand which medicines you and your children are taking: Make a list of all the prescription medicine, traditional medicine, and anything else you or your children are taking or doing for your treatment. Make sure you write down if you are allergic to any drugs. Before you take any medicines, make sure you ask a health care worker about:
- How to use the medicine
- How you might feel when you are on the medicine (side effects)
- What other medicines you should NOT take when using the medicine
- How long you will need to take the medicine
Get the results of every test: Ask for the results of the tests you or your children get. Ask what the results mean.
Ask for more information about referrals: Ask the doctor, nurse, social worker or Peer Educator:
- Why am I being referred? Is it necessary?
- How quickly do I need to go to the clinic/hospital? Will I have to wait a long time?
- Will they be familiar with my case so I don’t have to explain everything?
- Is there a referral form to take?
- What will happen to me if I do NOT go?
- Will I have to pay for treatment? How much will it cost?
Understand the treatment plan: Before you leave the clinic, ask your health care worker to explain the treatment plan you will use at home. Know what you need to bring back to your health care worker. Also make sure you understand your follow-up care plan and what medicines you must continue to take. Peer Educators are always available to help!
Follow up with a community health worker or Peer Educator: This can help you remember things you may have forgotten and help implement the care and treatment plan.

10-20 Module 10
SESSION 10.7: Classroom Practicum on Positive
Living (45 minutes)
TRAINER INSTRUCTIONS
Methodologies: Small Group Work, Case Studies, Large Group
Discussion
Step 1: Provide a quick review of the content covered in the Module so far and ask if
there are questions or areas where participants do not yet feel comfortable and
need more help.
Step 2: Divide participants into 5 small groups. Give each group 2 of the pre-prepared
case study cards. Ask the groups to spend 15 minutes discussing each case study and outlining on flip chart how they would manage the situation and help their
client live positively with HIV. The trainers should rotate around the room and
provide feedback to the small groups during the activity.
Step 3: As time allows, ask some of the small groups to present their case study and a
summary of the next steps they would take as Peer Educators to the large group.
KEY INFORMATION
Case Study 1: A 40-year-old married man living with HIV knows he should use condoms to prevent HIV from spreading, but is embarrassed to talk about them with his wife and fears she will think he is cheating on her. He told his wife that he is HIV-positive but has not discussed condoms with her, and does not know how to use condoms. He asks you for advice. Case Study 2: A pregnant woman tells you she is having trouble breathing sometimes and feels like her heart might jump out of her body because she is so scared her baby will die. She cannot sleep and is having trouble eating. How would you help her? Case Study 3: You stop by a client’s house on your way home because he has missed an appointment at the clinic. He is there completely alone, in dirty clothes, lying on a dirty blanket on the floor. He says he is so angry about having AIDS that he does not care if he lives or dies anymore and is not going to come to the clinic ever again. He tells you to leave his home right away. What would you say and do? Case Study 4: A young mother of 3 children just started coming to the ART clinic. She is worried about her children and wants to stay as healthy as she can to take good care of them. What would you tell her about living positively with HIV?

Comprehensive Peer Educator Training Curriculum: Trainer Manual 10-21
Case Study 5: A 25-year-old man on ART tells you he feels good and wants to have sex with his wife. She is also on ART and feeling really good. He wants to know if he needs to use condoms because they are both HIV-positive, on ART and doing well. He also says he cannot afford condoms and does not like how they feel. What would you say? Case Study 6: You learn that a client of yours can often be found at the local bar drinking and smoking into the morning hours. You worry that he may be hurting himself and missing doses because he is drunk when he gets home. What would you say to him about positive living and adherence? Case Study 7: A pregnant woman comes to you and says her husband refuses to wear a condom. He thinks they are only for sex workers and does not see the point because she is already pregnant. She is worried that she and the baby will get HIV from him because he is living with HIV, even though she is still negative. How would you help this woman? Case Study 8: A young man comes to the clinic and tells you that he recently had sex with another man at university. He wants to keep it a secret, but wants to be safe. He asks you how he can be safe and protect himself. What would you tell him about safer sex? Case Study 9: A client comes to you and says she does not care about her treatment anymore. It is so confusing and she is always just referred from one place to the next. She does not have time to wait anymore and feels angry that she does not know why she had to come to the clinic today in the first place, just to wait around for the nurse. How would you help her be an advocate for her own care and treatment? Case Study 10: A woman at the ART clinic tells you she has a strange, itchy bump on her vagina. She is worried because her husband has been staying out late at night and she thinks he may have a girlfriend. How would you advise her? Note: Some of the preceding information in this Module was adapted from the following sources: Burns, A., Lovich, R., Maxwell, J., & Shapiro, K. (1997). Where women have no doctor: A health guide for women. Berkeley, CA: The Hesperian Foundation. Colton, T., Dillow, A., Hainsworth, G., Israel, E., & Kane, M. (2006). Community home-based care for people and communities affected by HIV/AIDS: A comprehensive training course for community health workers. Watertown, MA: Pathfinder International. Orr, N. (2004). Positive health. Cape Town, South Africa: Double Story Books. WHO (draft). (2005). Participant manual for the WHO basic ART clinical training course, based on chronic HIV care with ARV therapy module. Addis Ababa, Ethiopia: WHO.

10-22 Module 10
SESSION 10.8: Module Summary (10 minutes)
TRAINER INSTRUCTIONS
Methodologies: Large Group Discussion, Interactive Trainer
Presentation
Step 1: Ask participants what they think are the key points of this Module. What
information will they take away from the Module?
Step 2: Summarize the key points of the Module using participant feedback and the
content below.
Step 3: Ask if there are any questions or clarifications.
Step 4: Review the learning objectives with participants and make sure all are confident
with their skills and knowledge in these areas.
Step 5: If there are areas participants do not fully understand or in which they need
more help, go back and review the session before moving to the next Module.
KEY INFORMATION
THE KEY POINTS OF THIS MODULE INCLUDE:
People with HIV can live full and healthy lives if they take care of themselves, access treatment and support and feel supported to make healthy choices.
Peer Educators play a key role in helping other PLHIV and their families live positively and follow the “recipe for positive living”:
KNOWLEDGE + DETERMINATION TO LIVE
with actions for a
HEALTHY MIND + HEALTHY BODY + HEALTHY SOUL
= A LONG, HEALTHY LIFE
Peer Educators can help clients keep their minds healthy by offering support and referring them to support groups, spiritual counselors and other groups.
Peer Educators should know the common signs of anxiety and depression. They should tell the clinical team if they think a client is anxious, depressed or wants to end her or his life.
Peer Educators can help people keep their bodies healthy by practicing safer sex, eating well, staying clean and keeping active (among other things).

Comprehensive Peer Educator Training Curriculum: Trainer Manual 10-23
(KEY POINTS, CONTINUED)
Peer Educators should help people stay away from unhealthy things like alcohol, smoking, unsafe sex, eating sugary and fatty foods, and being isolated from other people.
PLHIV and their partners should be counseled on safer sex to avoid spreading HIV and STIs, to avoid re-infection with a different strain of HIV and to avoid unwanted pregnancy.
Safer sex means avoiding the passing of semen, vaginal fluids and blood from one person to another.
One of the best ways to have safer sex is to use male or female condoms the right way, every time.
Peer Educators can give clients condoms and help clients negotiate condom use with their partners. Peer Educators should be safer sex role models.
Having an STI makes it much easier to get or spread HIV.
Peer Educators can help clients prevent STIs by educating them on how to have safer sex, referring clients with signs of STIs and advising clients on what to do while treating an STI.
Peer Educators can help other clients advocate for themselves and their children, be involved and understand their treatment, ask questions and understand referrals and other aspects of their care.

10-24 Module 10

Comprehensive Peer Educator Training Curriculum: Trainer Manual 11-1
MODULE 11:
Stigma, Discrimination and Disclosure
DURATION: 265 minutes (4 hours, 25 minutes)
LEARNING OBJECTIVES:
By the end of this Module, participants will be able to:
Define stigma and discrimination and discuss different types of
stigma
Describe how stigma and discrimination negatively affect people’s
access and adherence to HIV prevention, care and treatment
services
Implement strategies to deal with stigma and discrimination at the
individual level, at the health facility and in the community
Support clients to understand the advantages and disadvantages
of disclosure in their lives
Provide supportive counseling to clients to decide about and
prepare for disclosure
Discuss why it is important for children to know their HIV status
and help families prepare to disclose to children
Provide follow-up counseling to clients and family members after
disclosure
CONTENT:
Session 11.1: Introduction: Our Own Experiences with Stigma
Session 11.2: How Does Stigma Affect HIV Services?
Session 11.3: Strategies to Deal with Stigma
Session 11.4: Introduction to Disclosure
Session 11.5: Disclosure Counseling
Session 11.6: Classroom Practicum on Stigma and Disclosure
Counseling
Session 11.7: Module Summary

11-2 Module 11
METHODOLOGIES:
Reflection
Small group work
Large group discussion
Interactive trainer presentation
Card storming
Brainstorming
Start-stop drama
Role-play
Case studies
MATERIALS NEEDED:
Flip chart
Markers
Tape or Bostik
Blank index cards or small pieces of paper
Case study cards for Session 11.6
WORK FOR THE TRAINER TO DO IN ADVANCE:
Read through the entire Module and make sure you are familiar
with the training methodologies and content.
Prepare the case study cards for Session 11.6.

Comprehensive Peer Educator Training Curriculum: Trainer Manual 11-3
SESSION 11.1: Introduction: Our Own Experiences
with Stigma (30 minutes)
TRAINER INSTRUCTIONS
Methodologies: Reflection, Small Group Work, Large Group
Discussion, Interactive Trainer Presentation
Step 1: Review the Module learning objectives.
Step 2: Note: Since the words “stigma” and “discrimination” do not always translate
well to other languages, it is important that trainers and Peer Educators be able
to explain the terms in everyday words and phrases.
Ask participants to think quietly to themselves about a time they faced stigma and discrimination. This may or may not have to do with HIV. To explain a bit
more, ask participants:
Think about a time in your life when you felt isolated or rejected because you were
thought to be different than others.
Think about what happened. How did this make you feel?
Step 3: Ask participants to share their experiences with stigma and discrimination, as
they feel comfortable, with the person to their right. After about 5 minutes, ask
if anyone would like to share a story with the large group. People should only
share if they feel comfortable.
Step 4: Next, ask participants to again think quietly again to themselves, but now about a
time when they may have stigmatized or discriminated against someone else
because they thought that person was different. Again, this may or not be related
to HIV.
Then ask participants to think about a time when they have stigmatized
themselves. Ask a couple of participants to share their stories if they feel
comfortable.
Step 5: Ask participants to write down thoughts, feelings or words that they associate
with stigma and discrimination in their notebooks. Ask 2 or 3 participants to
read this list out loud to the larger group, if they feel comfortable doing so.
Step 6: Lead a short discussion on the definition and types of stigma and discrimination
using the content below.
Step 7: Finally, ask participants to think about the reasons HIV and people living with
HIV are stigmatized. Why is HIV stigmatized more than cancer, diabetes or other
long-term diseases?

11-4 Module 11
KEY INFORMATION
Defining stigma and discrimination We have all felt rejected or isolated at some point in our lives and we have all probably rejected or isolated another person because we think of them as different.
We know that stigma and discrimination are some of the biggest challenges to living with HIV or being affected by HIV all over the world. Stigma and discrimination make it hard for people to access HIV prevention, care and treatment services. Stigma and discrimination can also prevent people living with HIV from accessing community-based services, such as food support. Peer Educators need to help clients understand and deal with stigma and discrimination. They can work with the multidisciplinary team and the community to fight stigma and make sure people have access to the services they need without discrimination. There are different kinds of stigma:
Stigma towards others: Rejecting or isolating other people because they are different or perceived to be different.
Self-stigma: People take cruel and hurtful views placed upon them by other people as their own views of themselves. Often, self-stigma can lead to isolating oneself from the family and the community.
Secondary stigma: People, such as community health workers, doctors and nurses at the HIV clinic, children of parents with HIV, caregivers and family members, are stigmatized by their association with PLHIV.
There are different forms of discrimination:
Not being able to get a job
Being fired from a job
Being isolated from the family or community
Not having access to quality health care or other services
Facing violence at home or in the community
Being kicked out of school
Not being able to attend school
Being rejected from a church, mosque or temple
Key Definitions
Stigma: Having a negative attitude toward people that we think are not “normal” or “right.” For example, stigma can mean not valuing PLHIV or people associated with PLHIV. To stigmatize someone: Labeling someone and seeing them as inferior (less than, below) because of something about them. A lot of times people stigmatize other people because they do not have the right information and knowledge. People also stigmatize others because they are afraid. Discrimination: Treating someone unfairly or worse than others because they are different (for example, because someone thinks a person has HIV). Discrimination is the action that often follows stigma.

Comprehensive Peer Educator Training Curriculum: Trainer Manual 11-5
SESSION 11.2: How Do Stigma and Discrimination
Affect HIV Services? (45 minutes)
TRAINER INSTRUCTIONS
Methodologies: Small Group Work, Large Group Discussion,
Interactive Trainer Presentation
Step 1: Ask participants to break into groups of 4 or 5 people each. Give each group flip
chart paper and markers and explain the “root causes of stigma” activity. In the
front of the room, draw a large tree on a piece of flip chart, like the example
below. Label the trunk of the tree “STIGMA,” the roots of the tree “CAUSES
OF STIGMA” and the branches on the tree “RESULTS OF STIGMA.”
Step 2: Assign each group to fill in the stigma tree either for adults or for children. Give
groups about 15 minutes to create their own stigma tree and ask the groups to
spend a few minutes presenting their discussion and tree back to the large group.
Step 3: Lead a discussion about the impact of stigma and discrimination on HIV
prevention, care and treatment services drawing on the stigma trees and from
the content below. Discuss how the impacts might be different for adults and
children.

11-6 Module 11
KEY INFORMATION
Stigma and discrimination prevent good access to HIV prevention, care and treatment services for many people. Stigma and discrimination can prevent people living with HIV and their families from living a healthy and productive life. Stigma and discrimination can:
Keep people from getting an HIV test
Make it hard for people to tell their partner(s) their test result
Make it hard for people to suggest safer sex practices with their partner(s)
Cause a great deal of anxiety, stress or depression
Make it hard for parents to disclose to their children
Keep PLHIV from accessing care, treatment, counseling and community support services because they want to hide their status
Discourage pregnant women from taking ARVs or accessing other PMTCT services
Prevent people from caring for PLHIV in their family, in the community and in health care settings
How can stigma and discrimination affect HIV prevention, care and treatment?
They can prevent people from knowing their HIV-status, enrolling in care or getting a CD4 test. Fewer people are then able to access ART.
They can cause feelings of hopelessness and depression that can make it hard for people to start or adhere to ART.
They can cause fear that if a person takes ART, more people will know she or he is living with HIV.
They can prevent or delay disclosure, forcing people to keep their status and their ART a secret. This will impact their adherence and the amount of support they receive.
They can make it hard for people to negotiate condom use and safer sex practices.
Children with HIV cannot get the care and treatment they need if there is stigma attached to their illness or if the family has not disclosed to caregivers and teachers.
They can cause people to be isolated from friends and family, which means they will not get support to take ART and adhere to care and treatment.
Women — especially pregnant women — and young people are often the most stigmatized and discriminated against. This makes it even harder for these groups to access and adhere to care and treatment.
Stigma and discrimination among health care providers can result in low quality services at health facilities, making people less likely to access the care they need.
Stigma and discrimination can extend to caregivers of PLHIV as well, making it less likely that people will want to care for PLHIV or seek services themselves.
Peer Educators have an important role to play in reducing stigma and discrimination among individuals, at the health care facility and in the community. Being a positive role model is one of the best ways to fight stigma and discrimination! Making sure everyone knows about and has access to quality, affordable PMTCT, care and treatment services also helps fight negative attitudes and actions.

Comprehensive Peer Educator Training Curriculum: Trainer Manual 11-7
SESSION 11.3: Strategies to Deal with Stigma
(40 minutes)
TRAINER INSTRUCTIONS
Methodologies: Card Storming, Large Group Discussion, Interactive
Trainer Presentation
Step 1: Break participants into groups of 4 or 5 and give each group 10-15 index cards
or small sheets of paper to “card storm.” Ask participants to talk in their small
group and think of all the ways Peer Educators can help fight stigma in the health
facility, in the community and in their own families. Ask the groups to write one
strategy on each small sheet of paper.
Step 2: After about 15 minutes, collect the cards and bring the large group back
together. Post the cards on the wall, arranging them in logical categories.
Step 3: Ask the group which strategies they think are most helpful in dealing with stigma
and which will be the most challenging to implement.
Step 4: Fill in the conversation as needed using the content below and highlighting key
strategies to deal with stigma at different levels:
As individuals
At the health care facility
In the community
When working with other organizations
Step 5: Close the session by reminding participants that by speaking openly about their
HIV-status, Peer Educators will be helping to reduce stigma and discrimination in
the health facility and in their communities.
KEY INFORMATION
Some common individual strategies for dealing with stigma:
Stand up for yourself and talk back.
Educate people.
Be strong and prove yourself.
Talk to people you feel comfortable with.
Ignore people who stigmatize you.
Join a support group.
Try to explain the facts.
Avoid people who you know will stigmatize you.

11-8 Module 11
Some strategies for dealing with different forms of stigma: At the health facility:
Make sure people living with HIV, such as Peer Educators, are part of the care team. This includes attending regular staff meetings, trainings and other events.
Talk openly about your own attitudes, feelings, fears and behaviors with other Peer Educators and health care workers. Support each other to address fears and avoid burnout.
Share your experiences as a client with health care workers.
Encourage health care workers and other Peer Educators to be open about their status and for everyone to support one another.
Report any discrimination you see towards people living with HIV or their families at the clinic to a manager.
Listen to clients about their feelings and concerns about stigma and discrimination, and report these back to other health care workers.
Work with the multidisciplinary team to identify where stigma and discrimination exist in the clinic and work together to make changes.
In the community:
Get community and NGO leaders involved in the fight against HIV.
Work with community and religious leaders to acknowledge and accept that PLHIV are equal members of the community.
Promote PLHIV as role models and active community participants.
Organize community meetings and activities related to HIV.
Conduct community sensitization and education on HIV, led by PLHIV.
Get the community to support orphans and other children affected by or infected with HIV.
Improve linkages between health care facilities and the community.
Conduct community education on caring for someone with HIV and being a treatment buddy.
With faith-based and religious groups:
Use churches, mosques and other religious institutions to discuss stigma.
Get people to recognize their own stigmatizing behavior and correct it.
Help religious leaders to lead efforts in stigma reduction and tolerance.
Work with religious leaders to provide counseling that is non-stigmatizing and non-judgmental, such as pre-marital counseling.
Support religious leaders living with HIV to be open about their status.

Comprehensive Peer Educator Training Curriculum: Trainer Manual 11-9
SESSION 11.4: Introduction to Disclosure
(35 minutes)
TRAINER INSTRUCTIONS
Methodologies: Brainstorming, Interactive Trainer Presentation,
Large Group Discussion
Step 1: Ask participants what is meant by the term “disclosure.” How does this translate
into the local language? Record responses on a flip chart.
Step 2: Ask participants what they think is meant by the phrase, “Disclosure is an
ongoing process.” Discuss that disclosure is not a one-time event.
Step 3: Ask participants what have been the advantages and disadvantage of disclosure in their own lives and in the lives of PLHIV they know. Record responses on a flip
chart and fill in, as needed, using the content on advantages and disadvantages of
disclosure below.
Highlight the impact of stigma on peoples’ ability to disclose their HIV-status. As
more and more people openly disclose their status, including Peer Educators, we
will make HIV “normal” and reach the “tipping point.” Then stigma and
discrimination will start to decrease.
Step 4: Prepare a flip chart with the “circles of disclosure” diagram below. Discuss how
Peer Educators can help clients think about the circles of disclosure in their lives.
KEY INFORMATION
What is disclosure?
Disclosure is when a person tells one or more people about their HIV-status.
Disclosure is an ongoing process, meaning that a person may first want to disclose to only one person and then over time disclose to others. It is not a one-time event and PLHIV need ongoing support on disclosure.
Advantages of disclosure may include:
Avoiding the burden of secrecy and hiding
Avoiding anxiety about accidental or unwanted disclosure
Access to emotional and practical support
Ability to talk about symptoms and concerns
Easier access to health care
Enhanced adherence to care and medication
Ability to discuss safer sex and family planning choices with one’s partner(s)
Part of being a Peer Educator is openly disclosing your status to clients and people in the community. Peer Educators should be disclosure role models. Peer Educators should support one another with disclosure!

11-10 Module 11
Ability to refer partner and children for HIV counseling and testing, and to care and treatment, if needed
For pregnant women, ability to get support for safer infant feeding from family members and friends, and to find linkages to food support programs when the mom wants to wean the baby
Freedom to ask a friend or relative to be a treatment buddy
Access to patient support groups and community organizations
Serving as a role model for other people on disclosure Disadvantages of disclosure may include:
Blame by partner or family for “bringing HIV into the household”
Distancing, fear, rejection or abandonment by partner, family or friends
Loss of economic/subsistence support from a working partner
Discrimination in the community
Discrimination at work, including possible loss of job
Assumptions made about sexuality, promiscuity or lifestyle choices
Rejection of children at school or in the community
Reluctance on the part of partner to have more children
Physical violence
More self-stigma Deciding about disclosure:
A good way to understand disclosure and help people decide who they will disclose to is by creating “disclosure circles” with your client.
The center of the circle is the person her- or himself.
The next circle out is a person or people the person is very close to, such as a mother, sibling or partner.
The next circle includes larger groups of people that the person is not as close to, such as people at work or others in the community.
There can be many layers to the circles of disclosure.
Each layer of disclosure represents a process in itself – preparing for disclosure, the disclosure process and ongoing conversations after disclosure. Remember that the conversation does not end after disclosure. There will probably be ongoing discussions between the client and the person she or he has disclosed to over time.
The goal is NOT that all people will eventually disclose to all of the people in the circles. Instead, the circles provide a way to discuss the disclosure process and risks and benefits of disclosing to different people.
Here is an example of a disclosure circle:
Mother
ME
Community

Comprehensive Peer Educator Training Curriculum: Trainer Manual 11-11
SESSION 11.5: Disclosure Counseling (45 minutes)
TRAINER INSTRUCTIONS
Methodologies: Small Group Discussion, Large Group Discussion,
Interactive Trainer Presentation
Step 1: Ask participants to turn to the person to their left. Have participants spend the
next few minutes talking in pairs about how they felt about disclosing their HIV-
status. Ask the pairs to discuss these questions (you may want to write them on
flip chart):
What were your fears about disclosing?
How did you prepare to disclose?
How did you start the discussion when you disclosed your status?
What was the person’s reaction to your disclosure?
What happened in the days and weeks after you disclosed?
After about 10 minutes, ask if there are any volunteers to share their
experiences with disclosure with the large group.
Step 2: Ask participants what they think are the key points about disclosure counseling,
reminding them that:
Peer Educators will be able to help people plan for disclosure and to provide
follow-up support after disclosure.
Disclosure to each person is an ongoing process, not a one-time event.
Record answers on flip chart and supplement the discussion, as needed, using the
content below.
Step 3: Ask participants to reflect on their own experiences and brainstorm about the
different ways a person could start a disclosure conversation with a person they
trust. Some examples are given in the content below. Remind participants that,
as Peer Educators, they will help clients prepare for disclosure – including how
to start the conversation.
Step 4: Discuss why it is important for children to know their HIV-status and how Peer
Educators can help parents and caregivers prepare for disclosure to children, and
give follow-up support to the family after disclosure. Use the content below to
guide the discussion. Note: Additional information on disclosure to children can
be found in Advanced Module 18.

11-12 Module 11
KEY INFORMATION
Disclosure counseling:
Should not include pressure for someone to disclose
Is a confidential conversation that assists clients to work through the issues related to telling others about their HIV-status
Is important to reduce stigma, enhance adherence to care and treatment, and reduce the spread of HIV
Is intended to promote informed decisions about whether or not to disclose HIV-status and, if so, to whom
Assists and supports people who have decided to disclose their status
Enhances coping strategies following disclosure
Is an ongoing process that requires preparation, practice and follow-up support General approach to disclosure counseling:
Use good communication and counseling skills (e.g., good body language, ask open-ended questions, summarize and reflect, etc.).
Discuss the advantages and disadvantages of disclosure specific to the person’s life.
Help the person to identify barriers and fears about disclosure.
Explore possible options to overcome barriers.
Encourage the client to take the time needed to think things through.
Talk about sexual partners who need protection from HIV infection.
Identify sources of support.
Support clients to make their own decisions about disclosure. Peer Educators can help prepare clients who choose to disclose by:
Helping to decide whom to disclose to, when and where (using the disclosure circles discussed before)
For parents or caretakers, deciding what type of information is most understandable for a child, given the child’s age and development
Planning for a good place and time to have the conversation (for example, when the children are asleep and when no one else can hear)
Helping people weigh the advantages and disadvantages to disclosure to different people in their lives
Assisting the client to anticipate likely responses
Practicing disclosure through role-plays with clients, including how they will start the conversation. For example,
- “I wanted to talk to you about something because I know you can help and support me.”
- “I went to the clinic today for a check-up and they talked to me about how it is important for everyone to get an HIV test because you can’t tell if someone has it by looking at them.”
- “I want to talk with you about something very important right now. I am talking to you about it because I love you and I trust you.”
- “I need to talk to you about something difficult right now. It is important for our family that I be able tell you even the hard things. We need to support each other.”
Providing practical suggestions, ongoing support and reassurance
Planning the next steps and scheduling a time for follow-up counseling

Comprehensive Peer Educator Training Curriculum: Trainer Manual 11-13
What are the reasons to disclose a child’s HIV-status?
Children have a right to know about their own health care.
Children who have not been disclosed to may develop their own views about their illness, feel isolated, learn their HIV status by mistake or have poor adherence.
Orphaned or other vulnerable children may wonder why they have lost a parent or been rejected by the family. They need to know the truth. This will also help children seek the services they need, especially those who do not have regular caregivers.
Children often want and ask to know what is wrong. Children are observant, smart and curious. They often know much more than we adults think.
When children learn about their status directly from their caregivers, it can provide comfort and reassurance. Too often, children overhear health care workers and caregivers talking about their health as if they are not in the room.
Children who know their HIV-status can take an active role in their care and treatment plan and, when old enough, take steps to live positively and prevent new infections.
Considerations when disclosing to children (Note: There is more on disclosing to children in Advanced Module 18):
Children have a right to know about their own health. We must work with caregivers to encourage disclosure.
When we disclose to children, we must consider the needs, feelings and beliefs of children, parents and caregivers, as well as the specific family situation.
We need to involve all of the child’s caregivers and make sure everyone has the same messages and knows how and when the child will be disclosed to. There are challenges when a child has many caregivers or when the caregivers change. Peer Educators help by asking about all of the child’s caregivers and making sure they are given support during disclosure.
Keep in mind that disclosure to children depends on their stage of development:
- Young children may only need to know that they are sick and have to go to the doctor and take medicines to feel better.
- Older children should know that they have HIV, understand the disease and the medications, and actively participate in their own care and treatment.
Plan for follow-up support to the family, including children, after disclosure. Disclosure to children is not a one-time event and will require many conversations over time.

11-14 Module 11
Some tips on talking with children about HIV:
The best place to tell a child about his or her HIV-status is usually at home.
The best person to tell a child about his or her HIV-status is usually a trusted parent, caregiver or family member.
Many of the listening and learning skills apply to children as well as adults.
When talking with children, adults should be at the same level (such as sitting on the floor together).
Make sure there is privacy.
Listen to the child, and show that you are listening.
See what concerns the child has before giving information.
Allow children time to talk without being interrupted.
Use play and drawing to help learn how the child is feeling.
Always give children correct information – never lie.
A child does not always need to know how they got HIV.
Help children understand their choices and empower them to make decisions.
Remind children that they can come to you any time to talk or ask questions. Disclosure is not a one-time event, but instead an on-going conversation.

Comprehensive Peer Educator Training Curriculum: Trainer Manual 11-15
SESSION 11.6: Classroom Practicum on Stigma and
Disclosure Counseling (60 minutes)
TRAINER INSTRUCTIONS
Methodologies: Start-Stop Drama, Large Group Discussion, Small
Group Work, Role-Play, Case Studies
Step 1: The first part of the classroom practicum will be a start-stop drama. Ask for 3
volunteers. Assign each a role to play (pregnant woman, her mother, and her
sister or brother), based on the scenario below. Refer the actors to their
Participant Manual, give them a few minutes to prepare for their role and then
ask the group to get started with the drama.
The trainer should stop (“freeze”) the actors from time to time and the group
should discuss what is going on. Then the drama should resume. Continue the
start-stop drama for about 20 minutes.
Step 2: Ask participants to divide into groups of 3 and do rotating role-plays using the
case studies below. Give each group a pre-prepared case study card. One person
should act as a client, another as the Peer Educator providing disclosure support
and the third as an observer. The trainers should circulate around the room
during the small group work.
Step 3: After about 20 minutes, bring the large group back together. If time allows, ask
for one of the small groups to perform their role-play. Discuss what went well
and what could have been done differently as a group.
Step 4: Ask if there are questions or discussion points before moving on.
KEY INFORMATION
Scenario for Start-Stop drama: Actors: A pregnant woman, her mother and her sister (or brother)
A pregnant woman named C___ wants to disclose her status to her mother and sister.
C___ sits them down one evening after they have cleaned up the house and the other children are asleep. Her boyfriend is out at a bar with his friends.
C___ is scared that her baby will be HIV-infected. She wants her mother and sister to help her stay healthy during the pregnancy. She isn’t sure if she should tell her partner about her status and wants support and advice from her mother and sister.
C___ tells her mother and her sister that she found out at the clinic that she is HIV-positive.
The mother will not accept her daughter’s status. She says that the doctors are wrong and she should just take herbal medicines and she will feel better. She is completely in denial.
The sister knows a bit more about HIV than the mother, but is worried about C___ taking ART during pregnancy because she thinks it will kill the baby. She is also worried because she is a teacher at the community school and she is afraid she might lose her job if everyone knows there is HIV in the family.

11-16 Module 11
Case Study 1: A woman named F___ is a counselor at the local HIV testing center. About one year back, she decided to get tested and found out she is living with HIV. Since then, F___ has not enrolled in the care and treatment program because she does not want anyone to know she is positive. F___ is feeling well, but has started losing weight lately and thinks some of her fellow counselors might be talking about how she has HIV. She feels so badly about herself and thinks she should have known better than to have unsafe sex. She comes to you for advice. How would you counsel her? Case Study 2: A married man named P___ with 2 children (aged 7 and 3) tested positive for HIV last week after having pneumonia and being referred for HIV testing. He wants to know if he has AIDS and he has not told anyone about his status because he is worried about their reactions. He started using condoms, but his wife is acting suspicious. He wants to talk about disclosure with you. What would you talk to him about? Lead P___ through a disclosure role-play. Case Study 3: A pregnant woman named V___ comes to talk with you. She is physically quite well, but just tested positive for HIV during an antenatal check-up. She is scared to tell anyone and does not want to go to the ART clinic because someone might see her there and tell her family. Her husband can be violent when he gets upset, and she thinks he gave her HIV because he is the only person she has had sex with without condoms. She turns to you for help. How would you counsel V___? Case Study 4: A 19-year-old man named H___ tested positive for HIV about 2 years ago, but takes good care of himself and feels fine. He got tested because his girlfriend at that time found out she was HIV-positive. He has since changed girlfriends and has not told his new girlfriend about his HIV-status. He comes to the clinic for his regular appointment, but wants to talk with you about how to tell his girlfriend that he is living with HIV. He does not know how to use condoms and is afraid that if he starts using them with his girlfriend she will know he has HIV. How would you counsel H___? Case Study 5: A mother named J___ has been caring for her HIV-infected child for the last 6 years. The child is now ready to start school, but she is afraid to tell the teacher that her son has HIV. She is afraid he will be stigmatized in the school and that he will learn about his HIV-status from schoolmates or the teacher. Counsel J___ about disclosing to her son.

Comprehensive Peer Educator Training Curriculum: Trainer Manual 11-17
Note: Some of the preceding information in this Module was adapted from the following sources:
The CHANGE Project & ICRW. (2003). Understanding and challenging HIV stigma: Toolkit for action. Washington, DC: The CHANGE Project, Academy for Educational Development. Colton, T., Dillow, A., Hainsworth, G., Israel, E., & Kane, M. (2006). Community home-based care for people and communities affected by HIV/AIDS: A comprehensive training course for community health workers. Watertown, MA: Pathfinder International. The International HIV/AIDS Alliance. (2006). Trainer’s manual: Community engagement for antiretroviral treatment. Participatory tools and activities for civil society organizations working with people with HIV. International HIV/AIDS Alliance. Joint United Nations Programme on HIV/AIDS. (2003). Fact sheet: Stigma and discrimination. Geneva, Switzerland: UNAIDS. Joint United Nations Programme on HIV/AIDS. (2007). Reducing HIV stigma and discrimination: A critical part of national AIDS programmes. A resource for national stakeholders in the HIV response. Geneva, Switzerland: UNAIDS.

11-18 Module 11
SESSION 11.7: Module Summary (10 minutes)
TRAINER INSTRUCTIONS
Methodologies: Large Group Discussion, Interactive Trainer
Presentation
Step 1: Ask participants what they think are the key points of this Module. What
information will they take away from the Module?
Step 2: Summarize the key points of the Module using participant feedback and the
content below.
Step 3: Ask if there are any questions or clarifications.
Step 4: Review the learning objectives with participants and make sure all are confident
with their skills and knowledge in these areas.
Step 5: If there are areas participants do not fully understand or in which they need
more help, go back and review the session before moving to the next Module.
KEY INFORMATION
THE KEY POINTS OF THIS MODULE INCLUDE:
Stigma is a bad or negative attitude towards a person or group of people who are different from what we think is “right.” Stigma is often followed by discrimination – when a person is treated unfairly because they are thought to be “different” (for example, because they are living with HIV).
Stigma comes in many forms – it can be from one person to another, a person stigmatizing her- or himself, or stigma by association. Programs can also stigmatize and discriminate against people, as well as communities and religious groups.
Stigma and discrimination make it hard for people to accept, access and adhere to prevention, care and treatment services.
Peer Educators have an important role to play as positive role models, reducing stigma and discrimination among individuals, at the health care facility and in the community.
Peer Educators can work with the multidisciplinary care team to reduce stigma and discrimination at the health care facility.
When Peer Educators are very open about their own HIV-status, it helps to reduce stigma and discrimination.
Disclosure can help a person access prevention, care, treatment and support; improve adherence; help reduce stigma and discrimination by bringing HIV out into the open; and slow the spread of HIV by helping people protect themselves and their partners.
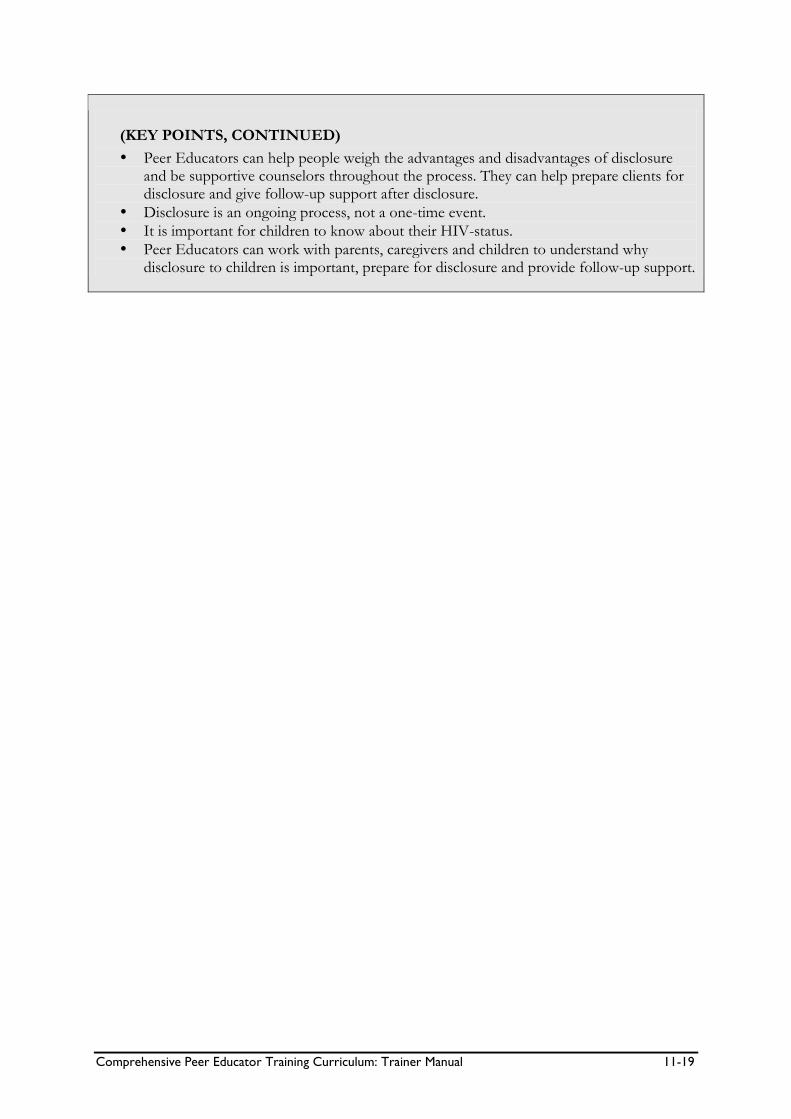
Comprehensive Peer Educator Training Curriculum: Trainer Manual 11-19
(KEY POINTS, CONTINUED)
Peer Educators can help people weigh the advantages and disadvantages of disclosure and be supportive counselors throughout the process. They can help prepare clients for disclosure and give follow-up support after disclosure.
Disclosure is an ongoing process, not a one-time event.
It is important for children to know about their HIV-status.
Peer Educators can work with parents, caregivers and children to understand why disclosure to children is important, prepare for disclosure and provide follow-up support.


Comprehensive Peer Educator Training Curriculum: Trainer Manual 12-1
MODULE 12:
Community Outreach, Education and
Linkages
DURATION: 190 minutes (3 hours, 10 minutes)
LEARNING OBJECTIVES:
By the end of this Module, participants will be able to:
Describe community- and home-based support services that
PLHIV and their families may need and the importance of each
Describe the Peer Educator’s role in linking clients with
community-based support services
List common challenges to strong facility-community linkages
List key strategies to improve facility-community linkages and the
Peer Educator’s role in strengthening these linkages
Create a community resources map and an inventory of
community services
Discuss how Peer Educators can serve as community HIV
educators and advocates
CONTENT:
Session 12.1: Introduction: What Services Do Clients Need in Their
Communities?
Session 12.2: Linking Clients to Community Support Services
Session 12.3: Community Resource Mapping
Session 12.4: Being a Community Educator and Advocate
Session 12.5: Module Summary
METHODOLOGIES:
Interactive trainer presentation
Brainstorming
Small group work
Large group discussion
Role-play

12-2 Module 12
MATERIALS NEEDED:
Flip chart
Markers
Tape or Bostik
Any existing community resource directories, maps or brochures
about available services for PLHIV and their families
WORK FOR THE TRAINER TO DO IN ADVANCE:
Read through the entire Module and make sure you are familiar
with the training methodologies and content.
Trainers may want to invite guest speakers from the community,
such as support-group leaders, home-based care workers, food
support organizations and legal service organizations. Be sure to
prepare the guest speakers in advance by briefing them on the
Peer Education program and the training.
Collect copies of any existing community HIV support resource
directories or materials that are available. In many places, the
district HIV teams or local NGOs will have created these
directories. Try to get enough copies for each participant.

Comprehensive Peer Educator Training Curriculum: Trainer Manual 12-3
SESSION 12.1: Introduction: What Services Do
Clients Need in Their Communities? (10 minutes)
TRAINER INSTRUCTIONS
Methodologies: Interactive Trainer Presentation, Brainstorming
Step 1: Note: If time allows, trainers may want to invite guest speakers to this session,
such as support group leaders, home-based care workers, income-generation or
community banking leaders, food support organizations or legal service
organizations. Be sure to prepare the guest speakers in advance and ask each to
spend about 5 minutes discussing their program. Invited guests can join the small
groups for these sessions.
Review the Module learning objectives.
Step 2: Remind participants that a key component of being a Peer Educator is
encouraging strong linkages between health facilities and the community. In
order to provide a continuum of care and support to clients and their families,
we must actively help them get the services they need — at the health facility, in
the community and at home.
Step 3: Ask participants to brainstorm common support needs of PLHIV that could be
provided in the community or in the home. Record responses on flip chart.
Some examples are provided below.
Ask participants to identify the top 6 most important community support needs
for PLHIV from the list. Circle these on the flip chart.
KEY INFORMATION
Common support needs of PLHIV and their families in the community and at home:
Home-based care
Home-based adherence support
Income-generating activities
Savings and loan programs
Support groups
Nutritional support
Legal advice and support
Spiritual guidance and support
Disclosure support
Transportation to get to the clinic
Education and counseling for family members
End-of-life care, including pain management
Others
Remember, no one person or organization can provide all of the services and support PLHIV need. We must work together to provide a continuum of ongoing care and support in the health facility, in the community and at home!

12-4 Module 12
SESSION 12.2: Linking Clients to Community
Support Services (50 minutes)
TRAINER INSTRUCTIONS
Methodologies: Small Group Work, Large Group Discussion,
Interactive Trainer Presentation
Step 1: Break participants into 6 small groups. Assign each small group one of the 6
support needs that the group prioritized in Session 12.1 (or use the 6
community-support services listed below). Give each small group flip chart paper
and markers.
Give the small groups about 20 minutes to discuss the following questions (you may want to write these on flip chart):
Why is this type of support important to PLHIV and their families?
What are your own experiences with this type of support?
Which organizations provide this support in your community?
How can Peer Educators help link clients with this support? Be specific!
Step 2: Ask each group to give a 5-minute presentation back to the large group.
Encourage participants to share their own experiences giving or receiving the
various services. Fill in, as needed, from the content below.
Step 3: Close the session by reminding participants that Peer Educators should think
about all of the comprehensive support needs clients and their family may have
and be able to link them to available community- and home-based services.
KEY INFORMATION
Some examples of community-based support and services for PLHIV and their families Home-based care: Home-based care (HBC) programs usually involve trained health workers visiting PLHIV in their homes to provide care and support services to clients and families. HBC is needed because:
Facility-based health services cannot cope with an increasing demand and increased numbers of patients.
Many people prefer to receive ongoing care in their homes, have too many responsibilities at home to visit the facility (children, getting water, cooking, farming) or live long distances from health facilities.
It ensures a continuum of care to patients both in the home and within health facilities.
It can empower PLHIV to take care of each other and themselves when they are trained as HBC providers.
It provides support and training to caregivers and family members, not just clients.

Comprehensive Peer Educator Training Curriculum: Trainer Manual 12-5
It can promote HIV prevention and can reduce stigma and discrimination in the whole community by bringing HIV out into the open.
Types of HBC programs:
Some HBC programs are extensions of facility-based services. In these types of programs, it is usual trained nurses or nurses’ aides who do home visits on certain days of the week, often focusing visits on the sickest patients or those who cannot come to the facility.
Other HBC programs are based in the community and run by community-based organizations. These programs often train volunteer community health workers to provide HBC services in homes and mobilization activities in the community.
The best HBC services help patients learn self-care and train family members/caretakers how to provide basic care.
Support groups: Support groups are very important for PLHIV and their families. Support groups offer a chance for PLHIV to come together to discuss concerns, share information and provide emotional support to one another. Meetings offer a chance for people to come together in a safe and accepting environment. There are many kinds of support groups for different people and situations, including:
General support groups for PLHIV
Adherence support groups
Mothers support groups
Women’s support groups
Caregivers of children living with HIV support groups
Youth support groups
Post-test clubs and groups
Many others Some support groups may be held at health facilities and others may be held in the community — for example, at schools, community centers, PLHIV association offices or in someone’s home. Advanced Module 19 contains more information on setting up and running support groups. Self-help and income-generating groups: Poverty is one of the most common challenges faced by PLHIV and their families. Many communities have organizations and groups to provide self-help and income generation to clients and families in need. These may include:
Income-generating activities (animal husbandry, gardening and agriculture, handicrafts, etc.)
Skills-training organizations
Savings and loan groups, including micro-credit
Village banking groups PLHIV associations: PLHIV associations can offer many other services and support to PLHIV, including:
Ongoing support through individual or group counseling
Support groups for PLHIV and their families
Financial or nutritional support to PLHIV and their families
Support for children to enroll in or stay in school (formal or non-formal education)

12-6 Module 12
Income-generating activities or micro-credit schemes for PLHIV and their families
Advocacy for PLHIV to receive the services they have a right to. This can be at community, regional, national and international levels
Community sensitization and advocacy to reduce stigma and discrimination
Sensitization/training for health care providers on providing quality care to PLHIV, drawing on members’ own perspectives and experiences
Help with legal support when people are discriminated against because of their HIV status (in the home, at work or in the community)
Linkages to a network of national and local PLHIV associations
Support for transportation to clinic appointments Food distribution and nutritional support: Peer Educators should help clients understand the importance of good nutrition to live positively with HIV. Peer Educators can help link clients who do not have enough food to eat to food-support organizations. There is more about nutrition in Advanced Module 17. Some types of community-based nutritional support include:
Food distribution
Community food donation programs
Community activities to help families affected by AIDS to care for their crops, gardens and animals
Community and school gardens
Community animal rearing
Agricultural extension and education programs Legal support: People living with HIV and their families often have their rights violated and may need legal support services. Some organizations provide these services for free or at reduced cost to PLHIV, often through PLHIV associations. Peer Educators should be aware of what kinds of legal services patients and their families need and who provides these services in the community. Types of legal support could include:
Inheritance rights for widows
Support for women or children who experience violence in the home or community
Inheritance rights and access to schooling and community services for children affected by HIV (including orphans)
Fighting discrimination in the workplace, at health facilities or in the community
Access to HIV testing and other HIV services, especially for children with no legal guardian
Access to school, especially for orphaned children
Access to social support and welfare services, regardless of HIV-status

Comprehensive Peer Educator Training Curriculum: Trainer Manual 12-7
SESSION 12.3: Community Resource Mapping
(60 minutes)
TRAINER INSTRUCTIONS
Methodologies: Large Group Discussion, Interactive Trainer
Presentation, Small Group Work
Step 1: Start the session by asking participants to think about why facility and community
services are not better linked. Ask them to first think quietly to themselves, and
then have a large group discussion. Encourage participants to think about and
discuss some of the “root causes” of this divide.
Step 2: Ask participants to brainstorm and discuss the ways in which we can improve linkages between the health facility and the communities we serve, given the
challenges discussed before. Record responses on flip chart. Fill in, as needed,
from the information below.
Step 3: Tell participants that one of the important ways Peer Educators can help
improve facility-community linkages is by creating community resource maps and
by creating and using an inventory of community support services. If available,
hand out any existing community resource directories that you were able to
collect before the training.
Step 4: Break participants into small groups. Participants who will be working at the
same health facility should work together. Give each group flip chart and
markers.
Explain that each small group should create a map on flip chart. They should
draw and label any health facilities as well as any community support services
available in the surrounding areas for PLHIV and their families (including the
support services discussed in the last session). After creating the map, each
group should discuss (you may want to write these on flip chart):
What community services are good/strong in your working area?
What gaps are there in community-based services in your working area?
How are these community services linked to the health facility now?
How could Peer Educators help improve these linkages?
After about 30 minutes, ask some of the groups to present their map to the
large group.
Step 5: Refer participants to Appendix 12A in their Manual. This is a form that all Peer
Educators should fill in together and update often. Once it is filled in, the form
will be an “inventory” of all of the community-based resources available to
PLHIV and their families. Ideally, different members of the multidisciplinary team
would be involved in learning about community resources, developing an
inventory and referring clients.
Walk participants through the form and, if time allows, give some time to start

12-8 Module 12
filling in the inventory based on the mapping activity. If there is not time,
encourage participants to fill in the inventory with other Peer Educators and
members of the multidisciplinary team within 1 month.
Note that this type of inventory could also be used to list the different services,
dates and times of clinics within a large health facility.
KEY INFORMATION
Some common challenges to facility-community linkages:
Health care workers may not be aware of community-based services.
Community organizations and community leaders may not be aware of services at the health facility.
Health care workers may not come from the communities they are serving at the clinic.
Community leaders and community organizations may not trust facility-based services or may prefer traditional medicine or healing.
Community members may not have been educated about the need for HIV-related services at the health facility.
People may get treated poorly when they go to the health facility.
It may cost a lot of money to get from the community to the health facility.
Community organizations may have not told health facility staff what services they could offer to clients.
Community health workers may not be trained on PMTCT or HIV care and treatment.
Many others Strategies to improve facility-community linkages:
Always ask about clients’ community and family situations and any support needs during visits.
Meet with community leaders to talk with them about HIV care and treatment services and why they are important. Also, clarify common myths about HIV and ART in the community.
Advocate that each health facility should have an updated list of community resources.
Work with the multidisciplinary team to learn what community organizations and services are available in the areas where clients live and meet with these organizations to set up a formal “two-way” referral system. This means that the health facility can refer people to community organizations and the community organizations can refer people to the health facility.
Work with the multidisciplinary team to plan an afternoon for community organizations, community health workers and community leaders to come to your health facility for a tour, to meet the health care workers and to learn more about the services that are provided there.
Participate in community meetings and gatherings to discuss HIV care and treatment.
Existing community health workers can be trained to identify community members and refer them for testing, PMTCT, care and treatment. They can also be trained to provide basic adherence and psychosocial support to community members and to follow up with clients who have missed appointments.

Comprehensive Peer Educator Training Curriculum: Trainer Manual 12-9
Involve community outreach workers with home-based follow-up of clients who have missed appointments at the hospital.
Involve community members openly living with HIV to strengthen facility-community linkages.
Start a support group at the health facility if this would be convenient and acceptable to potential members. Invite health care workers to the support group meetings to provide guidance and information.
Community resource maps and inventories: As a first step, Peer Educators can work together with community organizations and community health workers to map resources available in the community for people and families affected by HIV. In some places, resource lists may already exist, so check in with your local PLHIV associations, district HIV teams, regional health bureaus or other coordinating organizations. Peer Educators should carry an updated inventory of community support services at all times for easy reference and referral.

12-10 Module 12
SESSION 12.4: Being a Community Educator and
Advocate (60 minutes)
TRAINER INSTRUCTIONS
Methodologies: Large Group Discussion, Interactive Trainer
Presentation, Small Group Work, Role-Play
Step 1: Note: The content of this session should be adapted based on the anticipated
role of Peer Educators in the community. In some programs, it is likely that Peer
Educators will be based mainly in facilities, with limited activities in the
community. In others, Peer Educators will be expected to share their time
between facility- and community-based activities. Within the same program, these roles and responsibilities may change over time, so trainers should adjust
this session accordingly.
Lead a discussion on the role Peer Educators will play in community education
and advocacy within your specific program.
Step 2: Ask participants if they can recall some of the key points for speaking in front of
a group from Module 4. Add to the conversation, as needed, from the list of key
points below.
Step 3: Break participants into 5 small groups. Assign each group one of the following
scenarios to role-play:
You have been asked to speak about HIV care and treatment at a community
meeting.
You have been asked to speak to a youth group about HIV prevention, care and
treatment.
You have been asked by your church (or mosque, temple, etc.) to talk about the
support PLHIV need in the community.
You have been asked to speak at a PLHIV association meeting about positive living
and HIV care and treatment.
You are approaching a local NGO focusing on nutritional support about creating a
referral system for PLHIV enrolled in care and treatment at the local health center
where you work.
Step 4: Give the small groups about 20 minutes to prepare an outline of what they
would talk about for each scenario.
Step 5: Ask each group to spend about 7-10 minutes performing their role-play. Allow
the large group to give comments and constructive feedback on content and the
way Peer Educators presented the information.
Step 6: Remind participants that as trained, respected Peer Educators, they may be
asked to speak to community groups and at community gatherings. This is a good
opportunity to educate the community about HIV, advocate for the needs of
PLHIV and their families and help reduce stigma and discrimination of PLHIV.

Comprehensive Peer Educator Training Curriculum: Trainer Manual 12-11
KEY INFORMATION
How can Peer Educators mobilize the community around HIV?
Use your position as a Peer Educator to speak at community gatherings, community group meetings, religious services, women’s and youth group meetings and other community events.
Talk with families in your community about HIV, how to prevent HIV and what prevention, care and treatment services are available in the community.
Talk to young people about how to protect themselves from HIV, STIs and unwanted pregnancy. Help young people living with HIV to get the care and treatment they need.
Involve other community members in the fight against HIV. Talk with teachers, business leaders and political leaders about what they can do to help PLHIV and their families and prevent new HIV infections.
Get involved in community events, such as World AIDS Day activities and HIV testing campaigns.
Reminder from Module 4 Important points to remember when speaking in front of a group:
Be sure to plan the group session ahead of time and practice what you are going to say.
Do not stand behind a desk or other furniture.
Encourage participants to sit in a semi-circle to make it more comfortable to talk and less like a classroom. The person leading the session should be part of the semi-circle. Make sure you can make eye contact with everyone and that no one is staring at your back.
Speak loudly enough so everyone can hear you clearly, but so that you are not shouting.
Start by explaining the goals and content areas of your topic and ask if there are any questions.
Lead an introductory activity (have people introduce themselves or say something about their family) so participants feel more comfortable with one another.
Interact with participants and engage them by moving around the room, asking questions and asking people to share personal stories/concerns, etc.
Acknowledge that the people attending will know something about the topic being discussed. Encourage them to share what they know and use it as an opportunity to identify and correct any misconceptions.
Make eye contact with all members of the group.
Check in regularly to make sure participants are engaged and understanding the messages.
Pay attention to people who seem shy or quiet and emphasize that everyone’s personal experiences, questions and concerns are important.
Use visual aids and avoid lecturing.
Encourage participants to speak with you in private afterward if they have concerns they do not want to share with the group.
Ask group participants to summarize what they have learned and actions they will take at the end.
Always leave time for questions and re-explain anything that was not understood completely.

12-12 Module 12
SESSION 12.5: Module Summary (10 minutes)
TRAINER INSTRUCTIONS
Methodologies: Large Group Discussion, Interactive Trainer
Presentation
Step 1: Ask participants what they think are the key points of this Module. What
information will they take away from the Module?
Step 2: Summarize the key points of the Module using participant feedback and the
content below.
Step 3: Ask if there are any questions or clarifications.
Step 4: Review the learning objectives with participants and make sure all are confident
with their skills and knowledge in these areas.
Step 5: If there are areas participants do not fully understand or in which they need
more help, go back and review the session before moving to the next Module.
KEY INFORMATION
THE KEY POINTS OF THIS MODULE INCLUDE:
Some common needs of PLHIV and their families at the community and home levels include home-based care, adherence support, poverty reduction and income-generating activities, support groups, nutritional support and many other services.
There are many community-based services in most places, but often groups and organizations do not know about each other or do not make formal plans to work together. Without this collaboration, clients will not be able to access the full continuum of care and support. A key component of Peer Education is advocating for strong linkages between health facilities and these community services.
There are many ways to strengthen facility-community linkages, such as meeting with community leaders; orienting existing community organizations and health workers on PMTCT, ART and adherence; and having a strong two-way referral system between the health facility and community organizations.
Peer Educators should stay up-to-date on which services are available for PLHIV and their families in the community, have an inventory of these services and make referrals.
Peer Educators may be asked to speak to community groups or at community gatherings. Use your position of respect to educate and mobilize the community and advocate for the needs of PLHIV and their families. Speaking in the community can also help reduce stigma and discrimination.

Comprehensive Peer Educator Training Curriculum: Trainer Manual 12-13
Be sure to plan ahead when speaking in the community and use good group communication skills.

12-14 Module 12
APPENDIX 12A: SAMPLE COMMUNITY RESOURCES INVENTORY
Name of District or Community: ________________________________________________________________________________________
Name of Organization Services Provided and Schedule (days/hours) Catchment Area
Contact Person, Telephone and Address
1.
2.
3.
4.
5.
6.

Comprehensive Peer Educator Training Curriculum: Trainer Manual 12-15


Comprehensive Peer Educator Training Curriculum: Trainer Manual 13-1
MODULE 13:
Record-keeping and Reporting
DURATION: 95 minutes (1 hour, 35 minutes)
LEARNING OBJECTIVES:
By the end of this Module, participants will be able to:
Explain the importance of record-keeping
Understand how information collected and reported by Peer
Educators can be used to make program improvements
Fill in daily registers on individual counseling and group education
activities
Complete the monthly activity report
CONTENT:
Session 13.1: Introduction: Why Do We Need Records?
Session 13.2: Peer Educator Recording and Reporting Forms
Session 13.3: Module Summary
METHODOLOGIES:
Large group discussion
Interactive trainer presentation
Small group work
MATERIALS NEEDED:
Flip chart
Markers
Tape or Bostik
Copies of all Peer Educator recording and reporting forms and
registers

13-2 Module 13
WORK FOR THE TRAINER TO DO IN ADVANCE:
Read through the entire Module and make sure you are familiar
with the training methodologies and content.
Adapt the content of the Module to your specific Peer Education
Program, including the recording and reporting systems used.
If trainers are not also service providers, it may be useful to invite
service providers and/or data officers from the clinic to explain
the recording and reporting systems and forms in use.
Collect any recording and reporting forms and registers that Peer
Educators will be using. Make copies for each participant.

Comprehensive Peer Educator Training Curriculum: Trainer Manual 13-3
SESSION 13.1: Introduction: Why Do We Need
Records? (15 minutes)
TRAINER INSTRUCTIONS
Methodologies: Large Group Discussion, Interactive Trainer
Presentation
Step 1: Review the Module learning objectives.
Step 2: Ask participants if they can list all of the people they talked to in the last 3
weeks. Since most will not be able to recall this information, make the point that
if we do not write things down, we often do not remember them.
Step 3: Ask participants what kind of records they keep in their daily lives (e.g., medicine
diary, calendar, child’s health and immunization records, etc.). Ask participants
why they keep these records.
Step 4: Discuss why it is important for Peer Educators to keep records and complete
monthly reports. Give some examples of how Peer Educators and their
supervisors may use data for program decision-making and improvement. Fill in,
as needed, using the content below.
KEY INFORMATION
Records are important because they can help us:
Remember things we have done or need to do
Plan what we need to do
See what we have done
See what we can do better
Report to other people (such as our supervisor) what we have done
See what the gaps are in our services and fill them It is important for Peer Educators to understand the records that are kept in HIV care and treatment programs and to fill registers each day and reports each month because they will:
Show what you have done during the month (e.g., how many people you have counseled, how many group education sessions you have led, how many pregnant women you have taken to the ART clinic, etc.)
Show your supervisor what you have done
Help you plan for the next month
Help you follow up with clients from month to month
Show how effective Peer Educators can be in helping PLHIV

13-4 Module 13
The following are some illustrative examples of using data to improve the program:
The monthly summary reports indicate that pregnant women only make up 5% of all of the clients Peer Educators counsel. Peer Educators and supervisors could think of ways to reach more pregnant women with services and support.
The group education register shows that no men are coming to the group sessions. Peer Educators and supervisors could think of ways to reach more men with information.
The monthly summary report shows that most clients are receiving pre-ART education sessions, but only half are receiving individual counseling at the 2-week follow-up visit. Peer Educators and supervisors could talk about why this might be happening and think of ways to make sure all clients get an individual counseling session at their 2-week follow-up visit.

Comprehensive Peer Educator Training Curriculum: Trainer Manual 13-5
SESSION 13.2: Peer Educator Recording and
Reporting Forms (70 minutes)
TRAINER INSTRUCTIONS
Methodologies: Interactive Trainer Presentation, Large Group
Discussion, Small Group Work
Step 1: Note: Adapt the content in this session to your specific Peer Education
program. Use the actual forms that Peer Educators will be using in their day-to-
day work.
Pass out copies of the forms Peer Educators will be using in their work. Orient
participants on the different information they are expected to collect using the content below and the forms as guides.
At minimum, Peer Educators should complete:
Daily registers for individual counseling sessions
Daily registers for group education sessions
Monthly summary report
Step 2: Walk participants through each of the forms, one by one, explaining each column
and the information to be filled in. Be sure to make this activity participatory (for
example, stopping to ask participants why we would need to know each specific
item of information). Also review the points in the “Record-keeping Basics” box
below.
Discuss how the reports will be collected, reviewed and used to make program
improvements by Peer Educators, supervisors and the multidisciplinary team (for
example, through monthly meetings).
Step 3: Break participants up into small groups of 4. Give locally realistic scenarios for
participants to practice filling out each form. The trainers should assist the small
groups as needed.
Step 4: Bring the large group back together. Ask participants what they think will be
most challenging about keeping good records. Then ask participants to think of
ways to support each other in filling out daily and monthly forms and reports.
Record on flip chart and reiterate the importance of good record-keeping.
KEY INFORMATION
There are at least 3 important forms for Peer Educators to fill out:
Daily register for individual counseling sessions
Daily register for group education sessions
Monthly summary report

13-6 Module 13
In addition, and depending on the Program, Peer Educators also may need to fill in forms related to:
Client follow-up (phone calls, home visits, etc.)
Adherence and psychosocial support assessments
Attendance records
Others Daily register for individual counseling sessions (see Appendix 13A for a sample and adapt to your own setting): Peer Educators can record all one-on-one counseling sessions on this form. The form includes the following information:
The date of the individual counseling session
The name of the client counseled
The age of the client
The sex of the client
The client’s ART, ANC or under-5 number
The type of individual counseling provided to the client (for example, pre-ART, 2-week follow-up, monthly review, general counseling, home visit, adherence counseling, post-test support, PMTCT, caring for HIV-infected child or other)
Whether the client is an adult, a pregnant woman or a child
Any referrals made (for example, a pregnant woman was taken to the ART clinic, a child was taken to the ART clinic, the client was referred to a support group, etc.)
Daily register for group education sessions (see Appendix 13B for a sample and adapt to your own setting): Peer Educators can record all group education sessions – in the clinic or in the community – on this form. The form includes the following information:
The date of the group session
The type of group session (for example, pre-ART session 1, pre-ART session 2, pre-ART for children and caregivers, PMTCT, support group, community education and others)
The number of adults (male, female) and children (male, female) attending the session Monthly activity report (see Appendix 13C for a sample and adapt to your own setting): Each Peer Educator fills in this report once per month and gives it to their Supervisor. This report is a summary of the information contained in the 2 daily registers. The monthly activity report shows the main activities the Peer Educator has done in the month. Monthly reports should be reviewed by supervisors and shared and discussed with the multidisciplinary team. Everyone should review the monthly reports to see what is going well and what improvements could be made based on the data. Remember, there is no point in collecting data if we do not use it to improve our program!

Comprehensive Peer Educator Training Curriculum: Trainer Manual 13-7
The monthly activity report includes the following information:
The Peer Educator’s name, clinic name, month and year
Total number of individual counseling sessions held during the month
- By type of counseling session
- By type of client (adult, pregnant woman, child/caregivers)
Total number of referrals made during the month
- By type of referral
- By type of client
Total number of home visits made during the month (if this is part of the Peer Educator’s role)
- By type of visit
- By type of client
Total number of group education sessions held during the month
- By type of group session
- Total number of participants The monthly summary reports should be discussed by Peer Educators and supervisors (for example, through monthly meetings). A summary of Peer Educator activities should also be presented to the entire multidisciplinary team and discussed on a regular basis.
Record-keeping Basics
Write neatly.
Write in blue or black ink.
Cross-out mistakes neatly.
Write corrections clearly.
Keep forms and registers in a clean, dry place.
If you have to hand in a report, always make a photocopy for your records.
Ask another Peer Educator, a supervisor or member of the multidisciplinary team for help.

13-8 Module 13
SESSION 13.3: Module Summary (10 minutes)
TRAINER INSTRUCTIONS
Methodologies: Large Group Discussion, Interactive Trainer
Presentation
Step 1: Ask participants what they think are the key points of this Module. What
information will they take away from the Module?
Step 2: Summarize the key points of the Module using participant feedback and the
content below.
Step 3: Ask if there are any questions or clarifications.
Step 4: Review the learning objectives with participants and make sure all are confident
with their skills and knowledge in these areas.
Step 5: If there are areas participants do not fully understand or in which they need
more help, go back and review the session before moving to the next Module.
KEY INFORMATION
THE KEY POINTS OF THIS MODULE INCLUDE:
Keeping good records can help Peer Educators show the work they have done, plan for what do next and follow up with clients.
It is important for Peer Educators to keep good records of their work and to submit monthly reports on time to their supervisor. These reports should be discussed and shared among Peer Educators, supervisors and the multidisciplinary team.
There are at least 3 important forms for Peer Educators to fill out on a regular basis:
- Daily register for individual counseling sessions
- Daily register for group education sessions
- Monthly summary report
Peer Educators should help each other to fill out the forms and ask each other, their supervisor or other members of the multidisciplinary team if they have questions.

Comprehensive Peer Educator Training Curriculum: Trainer Manual 13-9
APPENDIX 13A: Sample Daily Register for Individual Counseling Sessions
(adapt to your local setting)
Type of Individual Counseling Session
(tick “A” for adult client and “C” for child client)
Referrals and
Linkages
Date Client's Name Age Sex
ART # or ANC # or Under 5 clinic #
Pre
-AR
T a
dhere
nce
counselin
g
2 w
eek r
evie
w p
ost A
RT
in
itia
tio
n
Mo
nth
ly A
RT
revie
w o
r
refill
Post
HIV
test counselin
g
and s
upport
Mis
sed a
ppoin
tme
nt/lo
st to
follo
w-u
p c
ounselin
g
PM
TC
T
Counselin
g f
or
care
giv
ers
of
HIV
-exposed o
r H
IV-in
fecte
d
infa
nts
and c
hild
ren
Psychosocia
l support
Oth
er
Pre
gnant
wom
an w
alk
ed to
AR
T c
linic
Child
walk
ed to A
RT
clin
ic
Invited/r
efe
rred for
support
gro
up m
eetin
g
A C A C A C A C A C A C A C A C A C A C A C
TOTALS:

13-10 Module 13
APPENDIX 13B: Sample Daily Register for Group Education Sessions
(adapt to your local setting)
Pre-ART session #1 Pre-ART Session #2 Pre-ART Session #3 PMTCT Session Support Group Meeting Other Group Session
Date of Group Session A
du
lts
Pre
gn
an
t
wo
men
Ch
ild
ren
an
d
Care
giv
ers
Ad
ult
s
Pre
gn
an
t
wo
men
Ch
ild
ren
an
d
Care
giv
ers
Ad
ult
s
Pre
gn
an
t
wo
men
Ch
ild
ren
an
d
Care
giv
ers
Ad
ult
s
Pre
gn
an
t
wo
men
Ch
ild
ren
an
d
Care
giv
ers
Ad
ult
s
Pre
gn
an
t w
om
en
Ch
ild
ren
an
d
Care
giv
ers
Ad
ult
s
Pre
gn
an
t
wo
men
Ch
ild
ren
an
d
Care
giv
ers
write number of people write number of people write number of people write number of people write number of people write number of people
TOTALS:

Comprehensive Peer Educator Training Curriculum: Trainer Manual 13-11
APPENDIX 13C: Sample Monthly Reporting Form
(adapt to your local setting)
Name of Peer Educator:
Name of Health Facility:
Reporting Month:
Individual sessions
Pre-ART adherence counseling
Adult
Totals for the month Child
2 week review post-ART initiation
Adult
Child
Monthly ART review of refill
Adult
Child
Post HIV test counseling and support
Adult
Child
Missed appointments/lost to follow-up counseling
Adult
Child
PMTCT
Adult
Child
Counseling for caregivers of HIV-exposed or HIV-infected infants and children
Adult
Child
Psychosocial support
Adult
Child
Other
Adult
Child
Referrals Pregnant women walked to ART clinic
Totals for the month Children walked to ART clinic
People invited/referred to support group meeting
Adult
Child
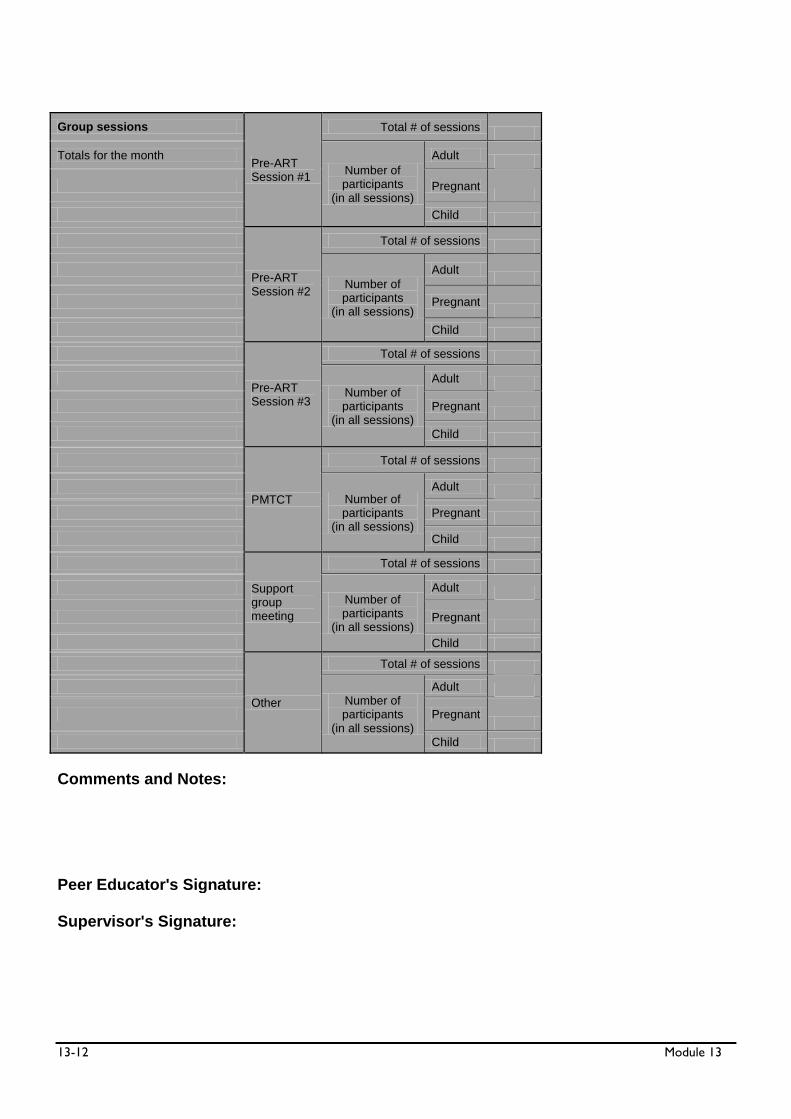
13-12 Module 13
Group sessions
Pre-ART Session #1
Total # of sessions
Totals for the month
Number of participants
(in all sessions)
Adult
Pregnant
Child
Pre-ART Session #2
Total # of sessions
Number of participants
(in all sessions)
Adult
Pregnant
Child
Pre-ART Session #3
Total # of sessions
Number of participants
(in all sessions)
Adult
Pregnant
Child
PMTCT
Total # of sessions
Number of participants
(in all sessions)
Adult
Pregnant
Child
Support group meeting
Total # of sessions
Number of participants
(in all sessions)
Adult
Pregnant
Child
Other
Total # of sessions
Number of participants
(in all sessions)
Adult
Pregnant
Child
Comments and Notes:
Peer Educator's Signature:
Supervisor's Signature:

Comprehensive Peer Educator Training Curriculum: Trainer Manual 14-1
MODULE 14:
Supervised Practicum
DURATION: 3–5 days
LEARNING OBJECTIVES:
By the end of this Module, participants will be able to:
Practice skills learned during the training in a health facility
offering HIV prevention, care and treatment services
Demonstrate competency in the major skills taught during the
training
Identify skill areas where further on-the-job practice and
mentoring are required
CONTENT:
Session 14.1: Practicum Preparation
Session 14.2: Supervised Practicum
Session 14.3: Practicum Debriefing
METHODOLOGIES:
Interactive trainer presentation
Large group discussion
Supervised practicum
Trainer/preceptor discussion
Small group work
MATERIALS NEEDED:
Appendix 14A: Peer Educator Supervised Practicum Checklist (one
practicum checklist should be prepared for each participant)
Peer Educator reporting and recording forms (enough for each
participant)

14-2 Module 14
WORK FOR THE TRAINER TO DO IN ADVANCE:
Read through the entire Module and make sure you are familiar
with the training methodologies and content.
If the training is conducted at a health facility, explore ways to
have short practical sessions throughout the training, followed by
all-day practicum sessions when the classroom portions of the
training are complete.
If the training is not conducted at a health facility, select sites for
the practicum – ideally busy hospitals and health centers offering
PMTCT and HIV care and treatment services where Peer
Educators will actually be working.
- Meet with facility leadership and staff to discuss the Peer Educator program, the training and the supervised practicum.
Ideally, members of the multidisciplinary teams from
practicum sites will have been involved in the training.
- If possible, orient some of the facility staff to be preceptors during the practicum and orient them on the key skills taught
in training, the roles of Peer Educators at the site and the
practicum checklist.
- Get a sense of daily activities at the facility and how
participants may be able to observe and practice applying the
skills they have learned.
- Plan when Peer Educators should come to the clinic (dates and times) with the clinical team. Ideally, the practicum should
occur at times when there is heavy patient flow at the clinic
to allow for maximum interaction between Peer Educators
and clients.
Depending on the role Peer Educators will play, you may also
want to organize a community-based practicum, where
participants practice conducting home follow-up visits or speaking
with community groups. If there is a community-based
component to the practicum, this will require careful planning and
preparation. Be sure to explain the Peer Educator Program and
training well to community members who are involved in the
practicum. Get verbal consent from clients for home visits well in
advance.
Assign participants to preceptors. Depending on the number of
participants and preceptors, it is best to split up the group so that preceptors have no more than 4-5 participants each during the
practicum.
Orient preceptors on methods of coaching, mentoring and giving
feedback if they are new to this type of training. Ideally,
preceptors would be pre-selected and able to participate in
some/all of the classroom training.
Work with preceptors and facility staff to decide how the
practicum will be structured. Review the practicum checklist as a
Comprehensive Peer Educator Training Curriculum: Trainer Manual 14-3
group and decide how participants will practice the key skills. For
example, if participants are to practice giving a group education
session on adherence, this must be arranged in advance and
clients must be present, a space for the talk identified, etc. Or, if
participants are to practice conducting home follow-up visits, then
this should be arranged with clients well in advance.
Arrange for transport to and from the practicum site(s) and lunch
for participants and preceptors.
Photocopy Appendix 14A: Peer Educator Supervised Practicum
Checklist. Preceptors should have one checklist for each
participant in their group (and a few extra copies just in case).
Preceptors will fill in the checklist for each participant throughout
the course of the supervised practicum.
Photocopy Peer Educator recording and reporting forms that the
Peer Educator Program will use. Make sure there is at least one
copy for each participant (and give extra copies to preceptors just in case).
If possible, it is best to bring all participants back together at a site
for the practicum debrief and final session (Module 15) after the
practicum.

14-4 Module 14
SESSION 14.1: Practicum Preparation (60 minutes)
TRAINER INSTRUCTIONS
Methodologies: Interactive Trainer Presentation, Large Group
Discussion
Step 1: Review the Module learning objectives.
Step 2: Introduce the practicum to participants and tell them that this is the time they
will get to take all of the information and skills they have learned and practice
them at hospitals and health centers, with real clients, working as members of
the multidisciplinary team.
Step 3: Introduce new preceptors who may be joining the group.
Step 4: Review the practicum logistics and assignment of participants to preceptors.
Allow time for questions.
Step 5: Hand out a copy of Appendix 14A: Peer Educator Supervised Practicum Checklist and
copies of the Peer Educator recording and reporting forms to each participant.
Go over the major activities that will be conducted during the practicum
(supervised individual counseling sessions, supervised group education sessions,
home visits, etc.) and the key skills Peer Educators will be asked to demonstrate,
using the checklist as a guide. Try to make this participatory by asking different
people to read the skills out loud to the large group.
Ask participants if there are skills or areas on the practicum checklist that they
do not feel comfortable with or of which they need review. Take the time
needed to review content areas and skills, repeating case studies or reviewing
curriculum content as appropriate and as time allows. Alternatively, you may also
schedule an optional review session before the practicum begins.
Step 6: Lead a discussion on practicum conduct, touching on the following points:
We are guests at the health facility and must respect the wishes of the health
care workers and managers there.
Keep all discussions and observations during the practicum confidential. Only
share with other participants, trainers or preceptors.
Never wander off without the preceptor. Always inform the preceptor if you
need to take a break or leave the facility for any reason during the practicum.
Always introduce yourself to health care workers and clients. Tell them that
you are a Peer Educator in training and explain a bit about the program if the
person is interested.
Always ask clients for their verbal consent to talk with you or participate in a
group session. Remember: Any client can refuse to participate or stop
participating at any time during the practicum.
Always ask the preceptor if you have a question or a concern. Remember:

Comprehensive Peer Educator Training Curriculum: Trainer Manual 14-5
This is a chance to learn!
Step 7: Discuss plans for the practicum follow-up, which will also be the last official day
of the training. All trainers, preceptors and participants should attend.
Step 8: Close by reminding participants that the practicum is a great chance to apply all
that they have learned in the training and to make improvements where needed
so they can be the best Peer Educators possible.
KEY INFORMATION
See Appendix 14A: Peer Educator Supervised Practicum Checklist.

14-6 Module 14
SESSION 14.2: Supervised Practicum (3–5 days)
TRAINER INSTRUCTIONS
Methodologies: Supervised Practicum, Trainer/Preceptor Discussion
DURING THE PRACTICUM:
Step 1: Attend practicum sessions and provide supportive supervision to preceptors and
Peer Educators on areas that need improvement. Work with the
multidisciplinary team and the preceptors to make sure the practicum goes
smoothly.
Step 2: Help preceptors and Peer Educators introduce the program to clients and be sure to get consent from each client that the Peer Educators work with.
Step 3: Ensure that preceptors and Peer Educators are attending and carrying out the
practicum sessions as planned and that they are completing the practicum
checklist for each Peer Educator. Remember to praise Peer Educators for skills
well done!
AFTER THE PRACTICUM:
Step 4: Convene all of the preceptors, trainers and the Peer Education program
Coordinator after the practicum.
Step 5: Review each participant’s practicum checklist and discuss as a group whether or
not each person is ready to graduate from the course and become a Peer
Educator. Trainers and preceptors should have a plan for Peer Educators who
will not graduate (for example, they could be asked to repeat the training).
Step 6: Identify and discuss common areas of weakness in the practicum and arrange for
refresher training and on-site mentoring in these areas. It is unlikely that each
participant will have mastered each skill over the short training and practicum
period, so plans for future training and on-site supportive supervision are
important.
Step 7: Thank preceptors for their hard work and dedication to the program.
KEY INFORMATION
See Appendix 14A: Peer Educator Supervised Practicum Checklist.

Comprehensive Peer Educator Training Curriculum: Trainer Manual 14-7
SESSION 14.3: Practicum Debriefing (50 minutes)
TRAINER INSTRUCTIONS
Methodologies: Small Group Work, Large Group Discussion,
Interactive Trainer/Preceptor Presentation
Step 1: If possible, reconvene all of the participants, preceptors and trainers at the set
date, time and location.
Note: If participants do their practicum at scattered sites far away from one
another, a group debriefing may not be possible. If this is the case, plan for
facility-based or regional debriefing sessions with participants after the practicum.
Step 2: Break participants into small groups of 5. Ask each group to spend about 10 minutes debriefing on the practicum session. Ask the small groups to discuss the
following questions (you may want to write these on flip chart):
What was your overall experience during the practicum?
What skills were the most difficult?
What skills were the easiest?
Which areas would you like more support on to make you the best Peer Educator
possible?
Step 3: Bring the large group back together and ask each of the small groups to briefly
present their thoughts about the practicum session. Following the small group
presentations, ask some of the preceptors to give their thoughts on the
practicum. Encourage open discussion.
Step 4: Ask the preceptors to lead a brief discussion on specific skills/areas that they
think will require more work (based on overall results of the practicum). Make
sure that no one person is singled out or feels ashamed of their performance
during the practicum. Remind participants that they will be provided with
ongoing support, mentoring and training to sharpen their skills and also learn
new skills.
Step 5: Congratulate preceptors and participants on a job well done!
KEY INFORMATION
There is no pre-prepared content for this session.

14-8 Module 14
APPENDIX 14A: Peer Educator Supervised Practicum Checklist
Instructions: Preceptors should complete one checklist for each Peer Educator during the practicum. As you observe a specific skill being demonstrated, tick your rating as GOOD, FAIR or POOR. If you want to make comments or recommendations, write in the right-hand column and be sure to share comments with the Peer Educator. Note that it is unlikely that all items on the checklist will be observed during the practicum. This extensive list of skills is intended to be a guide to preceptors and Peer Educators. At the end of the practicum, complete the final evaluation for each participant.
Name of Participant: _______________________________ Name of Preceptor(s): __________________________________________ Dates of Practicum: ________________________________ Name of Practicum Site: ________________________________________
Key Skill Area Preceptor’s Rating (Tick One) Comments Good
has mastered the skill
Fair needs more
practice
Poor needs more
training
General Communication and Counseling Skills with Individuals
Greets clients properly
Introduces self and role as a Peer Educator
Ensures privacy and maintains confidentiality
Uses good non-verbal communication:
Makes eye contact
Sits next to and faces the client
Smiles
Minimizes distractions and writing
Asks open-ended questions to get more information
Uses active listening skills:
Uses a calm, non-directive tone of voice
Allows the client to express emotions
Does not interrupt Shows a respectful, non-judgmental attitude
Reflects back what the client is saying Shows empathy (not sympathy) towards the client
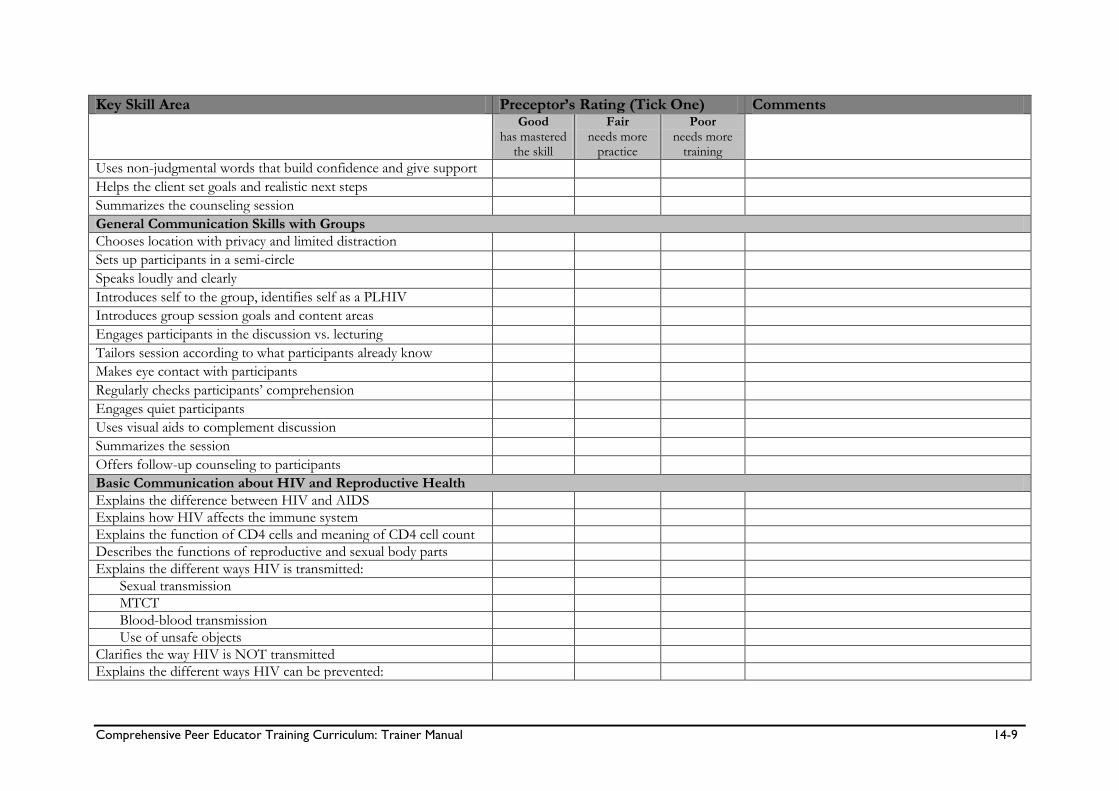
Comprehensive Peer Educator Training Curriculum: Trainer Manual 14-9
Key Skill Area Preceptor’s Rating (Tick One) Comments Good
has mastered the skill
Fair needs more
practice
Poor needs more
training
Uses non-judgmental words that build confidence and give support Helps the client set goals and realistic next steps Summarizes the counseling session General Communication Skills with Groups
Chooses location with privacy and limited distraction Sets up participants in a semi-circle Speaks loudly and clearly Introduces self to the group, identifies self as a PLHIV Introduces group session goals and content areas Engages participants in the discussion vs. lecturing Tailors session according to what participants already know Makes eye contact with participants Regularly checks participants’ comprehension Engages quiet participants Uses visual aids to complement discussion Summarizes the session Offers follow-up counseling to participants Basic Communication about HIV and Reproductive Health
Explains the difference between HIV and AIDS
Explains how HIV affects the immune system
Explains the function of CD4 cells and meaning of CD4 cell count
Describes the functions of reproductive and sexual body parts
Explains the different ways HIV is transmitted:
Sexual transmission
MTCT
Blood-blood transmission
Use of unsafe objects
Clarifies the way HIV is NOT transmitted
Explains the different ways HIV can be prevented:

14-10 Module 14
Key Skill Area Preceptor’s Rating (Tick One) Comments Good
has mastered the skill
Fair needs more
practice
Poor needs more
training
Prevention of sexual transmission – the ABCs
Male circumcision
PMTCT
Prevention of blood-blood transmission
Prevention of unsafe object use
Asks clients about family members (health, HIV testing, enrollment)
Comprehensive HIV Care
Describes components of comprehensive HIV care
Provides post-HIV test support
Mobilizes clients’ family members for HIV testing
Explains why HIV care is important, even if a person is not on ART
Explains the most common OIs and other complications, their signs and symptoms, prevention and treatment
Tuberculosis
Pneumonia/PCP
Mouth sores or pain
Skin problems
Malaria
STIs
Weight loss
Explains the benefits and dosing of CTX
Provides TB education
Uses the TB screening tool to identify possible TB cases and refer
Provides support to people with TB to take medications correctly
Helps clients seek referrals within the health facility
Effectively communicates with the multidisciplinary team
ART
Explains who needs ARVs and ART
Explains the goals and benefits of ART
Identifies first-line regimen, dosage, timing and possible side effects
Provides advice on preventing and managing ARV side effects:
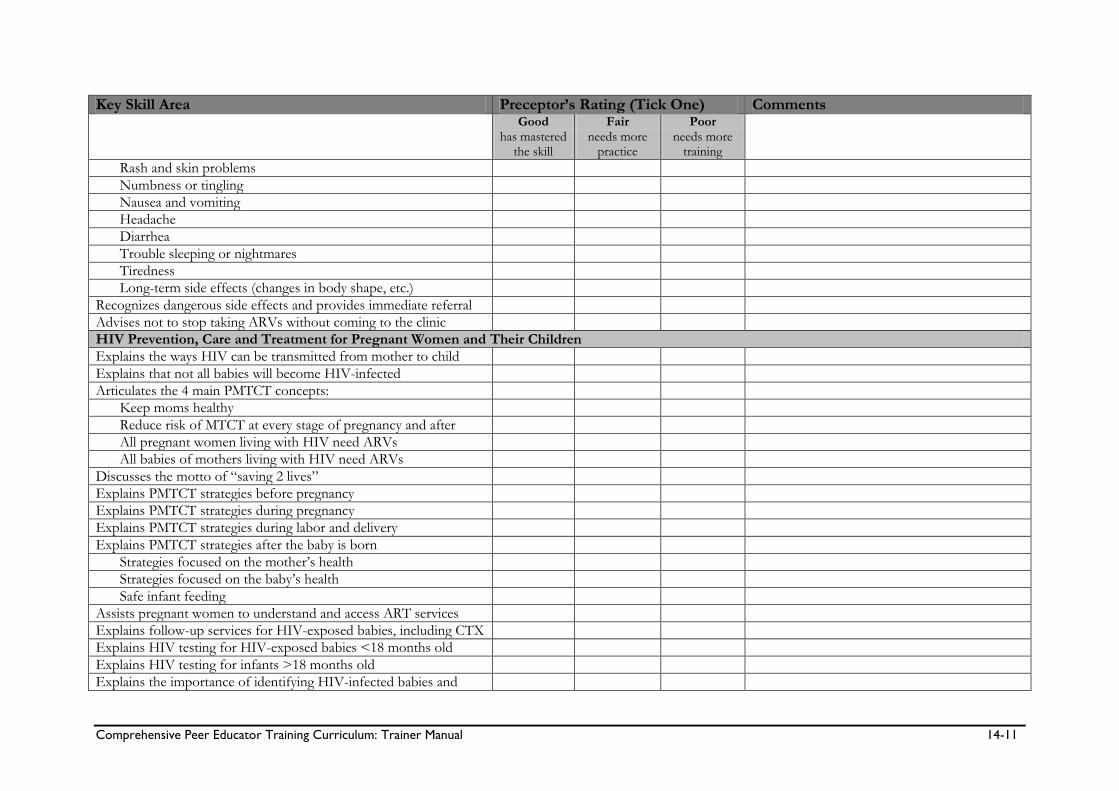
Comprehensive Peer Educator Training Curriculum: Trainer Manual 14-11
Key Skill Area Preceptor’s Rating (Tick One) Comments Good
has mastered the skill
Fair needs more
practice
Poor needs more
training
Rash and skin problems
Numbness or tingling
Nausea and vomiting
Headache
Diarrhea
Trouble sleeping or nightmares
Tiredness
Long-term side effects (changes in body shape, etc.)
Recognizes dangerous side effects and provides immediate referral
Advises not to stop taking ARVs without coming to the clinic
HIV Prevention, Care and Treatment for Pregnant Women and Their Children
Explains the ways HIV can be transmitted from mother to child
Explains that not all babies will become HIV-infected
Articulates the 4 main PMTCT concepts:
Keep moms healthy
Reduce risk of MTCT at every stage of pregnancy and after
All pregnant women living with HIV need ARVs
All babies of mothers living with HIV need ARVs
Discusses the motto of “saving 2 lives”
Explains PMTCT strategies before pregnancy
Explains PMTCT strategies during pregnancy
Explains PMTCT strategies during labor and delivery
Explains PMTCT strategies after the baby is born
Strategies focused on the mother’s health
Strategies focused on the baby’s health
Safe infant feeding
Assists pregnant women to understand and access ART services
Explains follow-up services for HIV-exposed babies, including CTX
Explains HIV testing for HIV-exposed babies <18 months old
Explains HIV testing for infants >18 months old
Explains the importance of identifying HIV-infected babies and

14-12 Module 14
Key Skill Area Preceptor’s Rating (Tick One) Comments Good
has mastered the skill
Fair needs more
practice
Poor needs more
training
starting them on care and treatment right away
Adherence and Psychosocial Support
Explains the importance of adhering to the specific care plan
Records/updates the client’s complete contact information correctly
Effectively conducts pre-ART group education session #1
Effectively conducts pre-ART group education session #2
Effectively conducts pre-ART group education session #3
Effectively conducts individual pre-ART adherence counseling
Conducts an ART readiness assessment
Provides individualized counseling to make an adherence plan
Conducts a psychosocial assessment
Provides individualized counseling and support to address psychosocial needs and concerns
Asks about adherence at follow-up visits or refill appointments
Counsels clients who are having adherence challenges
Provides referrals for community adherence and psychosoc. support
Identifying and Tracing People Who Do Not Return to the Clinic
Demonstrates understanding of the facility’s policies and procedures to identify and follow up with clients
Asks clients for consent to follow-up by phone or home visit Records clients’ follow-up preferences Uses the clinic’s appointment book correctly Uses the clinic’s appointment reminder cards correctly Helps create lists of clients who miss appointments Effectively contacts client who has missed an appointment by phone Effectively communicates with a community health worker to arrange a follow-up home visit
Conducts a home visit with a client who has missed an appointment and provides necessary counseling
Records the outcome of the follow-up attempt

Comprehensive Peer Educator Training Curriculum: Trainer Manual 14-13
Key Skill Area Preceptor’s Rating (Tick One) Comments Good
has mastered the skill
Fair needs more
practice
Poor needs more
training
Provides adherence counseling when clients return to the clinic Positive Living
Describes the importance of positive living Gives practical support to keep the mind healthy Provides support to clients with anxiety and/or depression Understands when to make mental health referrals Explains healthy and unhealthy behaviors for PLHIV Describes ways to practice safer sex and prevent HIV Demonstrates male and female condom use Describes useful strategies to negotiate condom use
Describes the common signs and symptoms of STIs
Advises on complete treatment of STIs for self and partner
Counsels on how clients can be involved in their own care
Stigma, Discrimination and Disclosure
Provides support to cope with and fight stigma and discrimination
Freely discloses own HIV-status to clients and health care workers
Provides disclosure counseling for adults
Provides disclosure counseling for caregivers and children
Community Outreach, Education and Linkages
Demonstrates knowledge of available community resources
Refers clients to needed resources in the community
Speaks about HIV prevention, care and treatment at a community meeting or event (optional)
Record-keeping and Reporting
Correctly fills in daily activity records for individual sessions
Correctly fills in daily activity records for group sessions
Correctly completes monthly summary report

14-14 Module 14
Final Evaluation by Preceptors:
Name of participant: ________________________________________________________ Tick one: ____ Demonstrated a majority of skills effectively and is ready to start work as a Peer Educator ____ Demonstrated some skills effectively, but still needs more practice before becoming a Peer Educator ____ Unable to demonstrate most skills and should participate in the training course again before becoming Peer Educator Additional comments: Preceptor(s) Signature: _______________________________ Date: ___________________________

Comprehensive Peer Educator Training Curriculum: Trainer Manual 15-1
MODULE 15:
Next Steps, Course Evaluation and
Graduation
DURATION: 120 minutes (2 hours)
LEARNING OBJECTIVES:
By the end of this Module, participants will be able to:
Review and reflect on the overall learning objectives of the Peer
Educator training
Discuss their vision and hopes for the Peer Education program
and their future as Peer Educators
Agree on next steps when they return to their respective health
facilities
Complete a final learning assessment
Complete a training evaluation
Graduate from the training
CONTENT:
Session 15.1: Reflection on Learning Objectives
Session 15.2: Next Steps for Peer Educators
Session 15.3: Final Learning Assessment/Post-Test
Session 15.4: Training Evaluation
Session 15.5: Graduation and Closing
METHODOLOGIES:
Large group discussion
Interactive trainer presentation
Learning assessment/Post-test
Participatory evaluation
Celebration!

15-2 Module 15
MATERIALS NEEDED:
Flip chart
Markers
Tape or Bostik
Copies of Appendix 15A: Final Needs Assessment (one for each
participant)
Training completion certificates
Camera (optional)
Peer Educator kits (optional, see below)
WORK FOR THE TRAINER TO DO IN ADVANCE:
Read through the entire Module and make sure you are familiar
with the training methodologies and content.
Photocopy Appendix 15A: Final Needs Assessment (one for each
participant).
Invite the Peer Educator Program Coordinator or Manager to this
final training day, if not already a participant in the daily training
activities. Ask her or him to present:
- Practical guidance on next steps for Peer Educators at the site
level, including when they should report to their site, how
they will be introduced to the multidisciplinary team, etc.
- The plan for supervising and mentoring Peer Educators in
their work
- The plan for continuing education of Peer Educators (at the site level, through refresher and advanced training, at monthly
and quarterly meetings, etc.)
Arrange the Peer Educator graduation ceremony in advance.
Consider:
- Location, date and time
- Inviting guest speakers and attendees
- Informing local press
- Preparing training completion certificates for each participant
- Preparing Peer Educator kits containing t-shirts or uniforms, notebooks, recording forms, job aids or other materials
provided by the program. These could be provided as part of
the graduation ceremony.

Comprehensive Peer Educator Training Curriculum: Trainer Manual 15-3
SESSION 15.1: Reflection on Learning Objectives
(20 minutes)
TRAINER INSTRUCTIONS
Methodologies: Large Group Discussion
Step 1: Review the Module learning objectives.
Step 2: Review the overall training objectives with participants, referring to the flip chart
page prepared on the first day of training (or by rewriting the learning objectives
on flip chart and referring participants to the Participant Manual).
Ask for a volunteer to read each of the learning objectives out loud. After each,
discuss as a group:
Did we meet this learning objective during the training?
How confident do you feel that you will be able to do this when you return to your
site?
What extra support would you like in this area?
Record answers on flip chart or in a notebook, especially areas requiring extra
support.
KEY INFORMATION
At the beginning of the training, we agreed on a number of learning objectives. By the end of this basic training course (Modules 1-15), participants will be able to: 1. Work as an integral part of facility multidisciplinary care teams, specifically at PMTCT and
HIV care and treatment clinics 2. Provide one-on-one counseling and group education to clients and their families so they
better understand, use and adhere to HIV prevention, care and treatment services 3. Assist clients and their families to access different services within the health facility, such as
ART, PMTCT, VCT, TB diagnosis and treatment, STI treatment, maternal and child health, and family planning
4. Help prioritize pregnant women for HIV care and treatment services 5. Follow up HIV-exposed babies and provide basic information to clients on caring for their
HIV-exposed and HIV-infected babies and children 6. Implement family-focused care by encouraging clients to disclose to family members and
bring them to the clinic for counseling, testing, care and treatment 7. Serve as role models for positive living and adherence to care and treatment 8. Help clients, family members and community members live positively with HIV and prevent
new HIV infections 9. Identify and trace clients who have missed appointments or have discontinued treatment in
order to bring them back into care

15-4 Module 15
10. Assist clients and their families to access community-based services, such as support groups, PLHIV associations, food support and income-generating activities
11. Conduct community mobilization and sensitization around HIV and prevention, care and treatment services
12. Keep records of daily, weekly and monthly activities

Comprehensive Peer Educator Training Curriculum: Trainer Manual 15-5
SESSION 15.2: Next Steps for Peer Educators
(30 minutes)
TRAINER INSTRUCTIONS
Methodologies: Interactive Trainer Presentation, Large Group
Discussion
Step 1: Ask the Peer Education Program Coordinator or Manager to spend a few
minutes discussing the next steps for Peer Educators to help them “prepare for
the workplace.” Tailor this discussion to the local Peer Education program.
The next steps and preparation discussion could include the following:
Logistics – when and where will Peer Educators report for work, stipend
disbursement, etc.
How Peer Educators will be introduced to the multidisciplinary team and
other facility staff members
When and where Peer Educators will sign their contracts and the details of
the contract
How supervision and mentoring will work day-to-day at the facility, including
lines of reporting and communication
The role of the Program Coordinator
The plan for continuous mentoring
The plan to update Peer Educators through refresher and advanced training
What to do if there is a problem
Other relevant issues
Step 2: Remind Peer Educators of the importance of staying up to date on key issues,
clinic services and the Peer Educator program. Peer Educators should take the
initiative to stay up-to-date and share information with one another. The
Program Coordinator, supervisors and members of the multidisciplinary team
will make sure Peer Educators are mentored and offered continuing education.
Step 3: Allow participants time to ask questions. Clarify any outstanding programmatic
or logistical issues.
Step 4: Go around the room and ask each participant to name two specific things they
will do better now as a result of the Peer Educator training.
Step 5: Next, go around the room and ask each participant to talk about their vision and
hope for the Peer Educator program and her- or himself as a Peer Educator.

15-6 Module 15
KEY INFORMATION
There is no pre-prepared content for this session.

Comprehensive Peer Educator Training Curriculum: Trainer Manual 15-7
SESSION 15.3: Final Learning Assessment/Post-Test
(35 minutes)
TRAINER INSTRUCTIONS
Methodologies: Learning Assessment/Post-test
Step 1: Note: The facilitators should reflect on their decision from Module 1 on
whether or not to conduct a group or an individual written post-test. As with
the pre-test, if a written post-test will cause added stress to participants, then
opt for the group post-test.
Tell participants that in order to evaluate how effective the training was in building the knowledge and skills of Peer Educators, we will now do a final
learning assessment. This is similar to the needs assessment conducted at the
start of the training. Remind participants that this is not a test, but rather a way
for participants to evaluate what they have learned and for trainers to note
where more mentoring is needed at the site level.
Step 2: For a group post-test: Post a large “TRUE” sign on one side of the room and
also a large “FALSE” sign on the other side of the room.
Select some of the statements from Appendix 15A: Final Learning Assessment and
ask participants to move to either the TRUE or the FALSE side of the room –
participants can also stand in the middle if they are not sure. Ask a few
participants to explain their responses, and allow participants to change their
positions. Discuss the correct answers as a large group.
For an individual, written post-test: Pass out copies of Appendix 15A: Final
Learning Assessment to each participant. Give participants about 15 minutes to
complete the questions. Ask participants to hand their completed post-tests to a
trainer when they are done. The trainers should score them after the training is
completed, using Appendix 15B: Answers to Final Learning Assessment as a guide.
Step 3: Debrief by asking participants to compare how they felt about their knowledge
and skills on the first day of training vs. how they feel now on the last day of
training. Ideally, the final needs assessment should be a time for participants to
feel confident in the skills and knowledge they have learned during the training.
Step 4: Review the correct answers for the post-test and encourage discussion.
Step 5: Remind participants how much they have learned in the past week and
congratulate them on a job well done!
KEY INFORMATION
See Appendix 15A: Final Learning Assessment.

15-8 Module 15
SESSION 15.4: Training Evaluation (15 minutes)
TRAINER INSTRUCTIONS
Methodologies: Large Group Discussion, Participatory Evaluation
Step 1: Tell participants that it is important to give honest feedback on the training so
that the trainers know what went well and what can be done better at future
trainings.
Post 2 pieces of flip chart paper on opposite sides of the room. Label the top of
one with a smiley face () and the top of the other with a sad face ().
Step 2: Ask the group to select 2 note-takers/facilitators and give each a marker. Ask participants to discuss the following questions after the trainers leave the room
(you may want to write them on flip chart):
What did you like best about the training?
What did you not like about the training?
What do you think could be done better in future trainings?
Ask the note-takers to record the input on the appropriate flip chart page.
Remind participants that this is an anonymous exercise and that the trainers will
soon leave the room. Ask the note-takers to roll up the flip chart pages and call
the trainers back into the room when the exercise is finished.
Note: This could also be done as an individual evaluation where each participant
fills out his or her own evaluation form.
Step 3: All trainers should leave the room.
The nominated note-takers should facilitate discussion of the above questions
and record participants’ answers on the appropriate flip chart pages. This should
take about 15 minutes. Once finished, the note-takers should roll up the flip
chart pages and call the trainers back into the room.
Step 4: Ask if anyone has any feedback to share with the whole group. Discuss and thank
participants for their honest feedback.
Step 5: After the training: The trainers should meet to debrief, review participant
feedback and discuss what they think went well and what could be improved
during the next training.
KEY INFORMATION
There is no pre-prepared content for this session.

Comprehensive Peer Educator Training Curriculum: Trainer Manual 15-9
SESSION 15.5: Graduation and Closing (20 minutes)
TRAINER INSTRUCTIONS
Methodologies: Celebration!
Step 1: Congratulate Peer Educators on a job well done. Ask invited guests to make
their remarks and then officially present participants with their training
completion certificates.
Step 2: This is also a good time to distribute Peer Educator kits containing t-shirts or
uniforms, notebooks, recording forms, job aids or other materials provided by
the program.
Step 3: Take a group photo, if possible, and make copies to distribute to each trainer
and participant after the training.
Step 4: Thank everyone for their hard work and officially close the training.
Step 5: Make sure to take care of any remaining logistical issues, including transport
stipends, etc. for trainers and participants.
KEY INFORMATION
There is no pre-prepared content for this session.

15-10 Module 15
APPENDIX 15A: Final Learning Assessment
Name: ____________________ Date:_________________ Score:______/30 correct
# Questions (tick True, False or Don’t Know for each question) True False
Don’t Know
1 Peer Educators are volunteers, so they are not members of the multidisciplinary HIV care team.
2 CD4 cells help protect us from infections.
3 Dual protection means wearing 2 condoms at a time.
4 If a man is circumcised, he does not have to use condoms.
5 HIV is most commonly spread through unsafe sex.
6 Supportive counseling includes telling people what you think is best.
7 Shared confidentiality means you should tell a person’s family, but not community members, that the person has HIV.
8 Peer Educators should ask clients about family members at each visit.
9 Only people on antiretroviral therapy (ART) need HIV care services.
10 People living with HIV (PLHIV) are less likely to get tuberculosis (TB) than people without HIV.
11 Cotrimoxazole (CTX or Bactrim) helps prevent opportunistic infections (OIs).
12 Only very sick people need ART.
13 A person on ART can still pass HIV to another person.
14 Normally, a person’s CD4 count goes down when they start ART.
15 Many side effects of antiretroviral medicines (ARVs) will go away in 2-4 weeks.
16 If a woman with HIV has a baby, it is certain the baby will be HIV-infected.
17 It is safe for pregnant women to take ARVs.
18 The motto for prevention of mother-to-child transmission (PMTCT) of HIV is “saving 2 lives.”
19 There is no way to know for sure if a 6-month-old baby is HIV-infected.
20 Peer Educators can help clients create an ART adherence plan.
21 Most people miss their ARV doses because they are lazy.
22 Missing one ARV dose per week is okay.
23 There is not much we can do if people do not come back to the clinic.
24 Positive living means telling people you are living with HIV.
25 Good nutrition is part of positive living.
26 People living with HIV can help prevent new HIV infections.
27 It is important for Peer Educators to disclose their HIV-status.
28 Disclosure is an ongoing process.
29 Children do not need to know about their HIV-status.
30 Peer Educators are also community educators and advocates.

Comprehensive Peer Educator Training Curriculum: Trainer Manual 15-11
APPENDIX 15B: Answers to Final Learning
Assessment Questions
# Questions (tick True, False or Don’t Know for each question)
True False Don’t Know
1 Peer Educators are volunteers so they are not members of the multidisciplinary HIV care team.
X
2 CD4 cells help protect us from infections. X
3 Dual protection means wearing 2 condoms at a time. X
4 If a man is circumcised, he does not have to use condoms. X
5 HIV is most commonly spread through unsafe sex. X
6 Supportive counseling includes telling people what you think is best.
X
7 Shared confidentiality means you should tell a person’s family, but not community members, that the person has HIV.
X
8 Peer Educators should ask clients about family members at each visit.
X
9 Only people on antiretroviral therapy (ART) need HIV care services.
X
10 People living with HIV (PLHIV) are less likely to get tuberculosis (TB) than people without HIV.
X
11 Cotrimoxazole (CTX or Bactrim) helps prevent opportunistic infections (OIs).
X
12 Only very sick people need ART. X
13 A person on ART can still pass HIV to another person. X
14 Normally, a person’s CD4 count goes down when they start ART. X
15 Many side effects of antiretroviral medicines (ARVs) will go away in 2-4 weeks.
X
16 If a woman with HIV has a baby, it is certain the baby will be HIV-infected.
X
17 It is safe for pregnant women to take ARVs. X
18 The motto for prevention of mother-to-child transmission (PMTCT) of HIV is “saving 2 lives.”
X
19 There is no way to know for sure if a 6-month-old baby is HIV-infected.
X
20 Peer Educators can help clients create an ART adherence plan. X
21 Most people miss their ARV doses because they are lazy. X
22 Missing one ARV dose per week is okay. X
23 There is not much we can do if people do not come back to the clinic.
X
24 Positive living means telling people you are living with HIV. X
25 Good nutrition is part of positive living. X
26 People living with HIV can help prevent new HIV infections. X
27 It is important for Peer Educators to disclose their HIV-status. X
28 Disclosure is an ongoing process. X
29 Children do not need to know about their HIV-status. X
30 Peer Educators are also community educators and advocates. X


Comprehensive Peer Educator Training Curriculum: Trainer Manual 16-1
ADVANCED MODULE 16:
Sexuality, Childbearing and Family
Planning Basics
DURATION: 390 minutes (6 hours, 30 minutes)
Note: Trainers can adjust the methodology and content to make the
Module shorter or longer as needed.
LEARNING OBJECTIVES:
By the end of this Module, participants will be able to: Reflect on their biases and values about particular sexual
behaviors
Understand the importance of being non-judgmental when counseling clients about sexual and reproductive health
Identify and describe the basic functions of sexual and reproductive body parts in men and women
Explain how conception happens
Work as part of the multidisciplinary team to support clients with their childbearing decisions
Work with members of the multidisciplinary team to provide information on family planning methods and make referrals for family-planning services
Counsel clients on dual protection from STIs, HIV and unwanted pregnancy
CONTENT:
Session 16.1: Introduction: Let’s Talk about Sex
Session 16.2: Different Sexual Behaviors: Okay for Me?
Session 16.3: Parts of the Body Involved in Sex and Reproduction
Session 16.4: Conception and Childbearing Choices
Session 16.5: Types of Family Planning Methods
Session 16.6: Dual Protection and Condom Use Session 16.7: Classroom Practicum on Conception, Childbearing
and Family Planning Counseling
Session 16.8: Module Summary

16-2 Module 16
METHODOLOGIES:
Brainstorming
Large group discussion
Large group work
Small group work
Interactive trainer presentation
Role-play
Case studies
MATERIALS NEEDED:
Flip chart
Markers (different colors if possible)
Tape or Bostik
Available family planning methods (male and female condoms, oral
contraceptive pills, emergency contraceptive pills, spermicide,
injectables, implants, IUD, diaphragm, cycle beads, etc.)
Male and female anatomical models, if available
Female and male condoms
Vagina and penis models
Sexual behavior cards for Session 16.2
Case study cards for Session 16.7
WORK FOR THE TRAINER TO DO IN ADVANCE:
Read through the entire Module and make sure you are familiar
with the training methodologies and content.
Collect all of the materials and supplies listed above.
Prepare sexual behavior cards for Session 16.2.
Prepare case study cards for Session 16.7.

Comprehensive Peer Educator Training Curriculum: Trainer Manual 16-3
SESSION 16.1: Introduction: Let's Talk about Sex
(20 minutes)
TRAINER INSTRUCTIONS
Methodologies: Brainstorming, Large Group Discussion
Step 1: Review the Module learning objectives.
Step 2: Post blank flip chart pages along one side of the training room, creating a “wall”
of paper. Give markers out to participants and ask them to write all the words
or phrases they can think of having to do with sex along the “graffiti wall.” These
can be body parts, sexual activities or others. Encourage the group to use local languages and slang.
Step 3: Ask participants to take turns reading out the words on the “graffiti wall.”
Step 4: Debrief the activity by asking participants to discuss these questions:
How did you feel saying these words out loud?
Why do you think so many people find it hard to talk about sex?
How can we feel more comfortable talking about sex?
Step 5: Using the content below, explain how important it is that Peer Educators be able
to accept and talk about sex and sexuality openly and comfortably in their
communities.
KEY INFORMATION
Sex is a normal part of life. It is very important for Peer Educators to be comfortable talking about sex and reproduction with their clients and in the community. HIV is mainly spread through unsafe sex. Unsafe sex is any kind of sex that puts ourselves or our sexual partners at risk of getting a sexually transmitted infection, including HIV, or unwanted pregnancy. In order to help people protect themselves and their families, we must make sure people have the facts. Sometimes, it can be uncomfortable to talk about sex, sexuality and reproduction. Peer Educators need to talk openly with people to help them practice safe sex, understand reproduction and make informed choices about having children.

16-4 Module 16
SESSION 16.2: Different Behaviors: Okay for Me?
(60 minutes)
TRAINER INSTRUCTIONS
Methodologies: Large Group Work, Large Group Discussion
Step 1: Note: Trainers should prepare pieces of A4 or letter-sized paper, each listing
one of the sexual behaviors from the list in the content below. Trainers can add
other behaviors or omit some behaviors on the list depending on the local
context. It is important to include some behaviors that are considered “outside
of the mainstream” or those that are taboo in your setting.
On each piece of paper, write the behavior in large letters. Underneath, in
smaller letters, write, “OK for me,” “Not OK for me, but OK for others” and
“Not OK.” Here is a sample of what each piece of paper should look like:
Also prepare 3 large pieces of paper, each with one of the following labels: “OK
FOR ME,” “NOT OK FOR ME, BUT OK FOR OTHERS” and “NOT OK.” Try
to use different colored paper or different colored markers if possible. Post
them next to each other, high on a wall of the training room. Leave enough
space for the sexual behavior cards to be posted beneath them.
Step 2: Introduce the exercise by telling participants that we will be exploring a range of
sexual behaviors people practice and our own attitudes and values about these
behaviors. Reassure participants that their statements will be kept confidential in
the exercise and encourage them to be honest.
Step 3: Give each participant some of the pre-prepared sexual behavior cards (divide
them evenly among participants). Ask participants to:
Read the sexual behavior on the card.
Decide how they feel about this behavior and circle one option on the card:
“OK for me” – means this is a behavior I would do
“OK for others, but not for me” – means this is a behavior that I would
personally not do, but I have no problem with other people doing it
“Not OK” – means that no one should do this behavior because it is wrong
Remind participants that they should not share their answers with others and
VAGINAL SEX
OK for me Not OK for me, Not OK
but OK for others

Comprehensive Peer Educator Training Curriculum: Trainer Manual 16-5
that their answers will be kept confidential. Also remind participants that this
exercise is NOT about HIV risk, but about our values around sexual behaviors.
Give participants about 10 minutes to circle their answer on each card and ask
them to place the cards face down in a pile in the center of the room.
Step 4: Mix up the cards and redistribute them to participants. Note that participants
may or may not have some of their own cards, but that all responses should
remain confidential.
Ask participants to, one by one, read the behavior on a card and then post it on
the wall under the “OK FOR ME,” “OK FOR OTHERS, BUT NOT FOR ME”
and “NOT OK” signs, according to what is circled on the card.
Step 5: Once all of the cards have been posted, ask participants to gather around the
wall and review the placement of the cards. Lead a group discussion using some
of the following questions as a guide:
Are you surprised by the placement of some of the cards? Which ones surprised
you?
How would you feel if someone placed a sexual behavior that you are okay with in the “Not OK” category?
How would you feel if someone placed a behavior that you are not okay with in one
of the “OK” categories?
Does the placement of the cards suggest that some sexual behaviors are “right”
and some are “wrong?” How do you feel about that?
Are there behaviors that are “Not OK” under any circumstances? (possible
responses could include rape, incest, etc.)
What does this activity tell us about how clients might feel when we ask them
about their sexual practices?
How do you think health care workers values and attitudes about different sexual
practices affect their/our work?
How can we feel more comfortable talking about sexuality and sexual behaviors
with clients?
How can we make clients feel more comfortable discussing sex and sexual
behaviors?
Step 6: Review the increased risks of certain sexual behaviors with participants. For
example, “dry sex” can increase the chances that a person gets HIV because it
often causes cuts and irritation in the woman’s vagina.
Step 7: Close the session by stating that we all carry value judgments when it comes to
sexual behaviors, but in order to be effective Peer Educators, we must not
impose our own values on clients as we explore their individual situations. It is
important to openly discuss sexuality and sexual practices with clients to make
sure they have the information, skills and supplies they need to protect
themselves and their partners.

16-6 Module 16
Remember:
In many places, “sex” is often thought to mean only penis-vagina sex between a man and a woman. But sexual behaviors include much more than penis-vagina sex.
We all have value judgments when it comes to sex and sexual behaviors, but Peer Educators should not put their values on clients. Clients should feel comfortable talking about their sexual behaviors with Peer Educators no matter what.
If Peer Educators do not talk about sex and sexual behaviors with clients, they may not get the information, skills and supplies they need to protect themselves and their partners and reduce risks of HIV, STIs, sexual violence, discrimination and unwanted pregnancy.
KEY INFORMATION
Different types of sexual behaviors (adapt to the local context, as needed):
Hugging
Kissing Giving oral sex Receiving oral sex
Group sex
Penis-vagina sex Anal sex Oral-anal sex
Two women having sex
Two men having sex Getting paid for sex Sex in a public place
Being faithful to one partner
Having many sex partners
Sex with a person who is much younger
Sex with a person who is much older
Masturbation Masturbating your partner with your hand
Watching pornographic movies
Sex with people you do not know well
Sex with your spouse Sex between a teacher and a student
Having “dry sex” Sex with a relative of your deceased spouse
Sex between relatives Sex with children Sex before marriage Sex with someone other than a spouse
Rape Paying for sex Sex with animals Having sex without pleasure
Swallowing cum (semen)
Telling someone a lie just to have sex
Sex with someone of a different race
Sex with someone of a different ethnic group
Forcing your partner to have sex
Sex with someone who is married
Sex with a disabled person
Sex after using alcohol
Sex after using drugs Watching other people have sex
Having sexual desires about other people
Being celibate (not having sex)
Having sex because it is your duty
Placing objects in the rectum/anus
Placing objects in the vagina
Using toys or vibrators for sexual pleasure

Comprehensive Peer Educator Training Curriculum: Trainer Manual 16-7
SESSION 16.3: Parts of the Body Involved in Sex and
Reproduction (60 minutes)
TRAINER INSTRUCTIONS
Methodologies: Brainstorming, Small Group Work, Large Group
Discussion
Step 1: Note: The content in this session was also covered in Module 3. If this Module is
included as part of the basic Peer Educator training, you can refer to the body
maps created during Module 3 as a review. If this Module is being taught as part
of an advanced training, it is best to go through the body mapping exercise again
as a review and refresher.
Ask participants to brainstorm all of the body parts involved in sex and
reproduction for men and for women. Record these on flip chart and encourage
participants to think about all of the parts of the body where people may
experience sexual pleasure (e.g., breasts, anus, clitoris, etc.).
Step 2: Break participants into 4 small groups. Give each group flip chart paper and
markers (it is best if each group gets many colors of markers). Ask 2 of the
groups to draw body maps of all of the female body parts involved in sex and
reproduction. Ask the other 2 groups to draw body maps of all of the male body
parts involved in sex and reproduction. Tell the groups that they should discuss
the name and location of each body part, as well as the function of the body part.
Give the small groups about 20 minutes to draw their body maps.
Step 3: Ask each small group to present their body map to the large group and discuss,
filling in as needed from the content below. Be sure participants understand the
function of each body part in sex and reproduction.
Step 4: Debrief the activity by discussing these questions:
Do you think most people in the community understand how their own and their
partner’s sexual and reproductive body parts work? Why or why not?
What can Peer Educators do to help people learn about and feel comfortable
talking about their bodies and their sexual health?
KEY INFORMATION
Review from Module 3 Because HIV is most often spread through unsafe sex, it is important for Peer Educators to understand the parts of the body involved in sex and reproduction before sharing this information. In order to encourage people to protect themselves and their families, we must make sure they have the facts!

16-8 Module 16
Female sexual and reproductive body parts External female body parts (parts you can see):
Urethra: where urine (pee) comes out of the body
Vagina: where the penis or fingers enter during sex and also where a baby comes out. The vagina is the opening to the cervix and the uterus, which is where babies grow.
Anus: where stool (poop) comes out of the body and where the penis or fingers enter the body during anal sex
Labia minora and labia majora: sometimes called the “lips” around the vagina and urethra
Clitoris: where women can have strong pleasure and orgasm Some women may have experienced genital cutting, where the clitoris and labia may have been removed in part or completely. Some women may also have had parts of their vaginas sewn up. It is important not to judge women who have or have not undergone these procedures.

Comprehensive Peer Educator Training Curriculum: Trainer Manual 16-9
Internal female body parts (parts you cannot see):
Uterus or womb: where a baby grows and where monthly bleeding comes from
Ovaries: where a woman’s eggs are stored
Fallopian tubes: attached to the uterus. The eggs travel through the fallopian tubes to get from the ovaries to the uterus.
Cervix: “mouth” of the uterus. Sperm enters the uterus through the cervix and the baby comes out of the uterus through the cervix.
Vagina: where the penis or fingers enter during sex and also where a baby comes out. The vagina is the opening to the cervix and the uterus, which is where babies grow.

16-10 Module 16
Male sexual and reproductive body parts External male body parts (parts you can see):
Penis: the main body part for sex and pleasure. The penis delivers the sperm that can make a woman pregnant during sex. The tip of the penis may have foreskin or, if the man has been circumcised, there will be no foreskin.
Scrotum: sack that holds the testicles (balls)
Anus: where stool (poop) comes out of the body and where the penis or fingers enter the body during anal sex. Note that the anus is not shown in the diagram below, but is located in the same place as in a female.

Comprehensive Peer Educator Training Curriculum: Trainer Manual 16-11
Internal male body parts (parts you cannot see):
Testicles or balls: where sperm are made and stored. Sperm live in a fluid called semen (cum), which is what comes out when a man ejaculates. Semen can contain STIs and HIV.
Vas deferens: attached to the testicles. Sperm travel through these tubes to get to the urethra.
Urethra: the opening on the end of the penis where urine (pee) and semen (cum) containing sperm come out. Note that urine and semen do NOT come out at the same time.

16-12 Module 16
SESSION 16.4: Conception and Childbearing Choices
(60 minutes)
TRAINER INSTRUCTIONS
Methodologies: Large Group Discussion, Interactive Trainer
Presentation
Step 1: Using the body maps from the last activity as a guide, as well as anatomical
models (if you have them), ask participants to explain what they think the
following terms mean, and fill in from the content below as needed:
Conception
Contraception
Family planning
Birth spacing
Step 2: Lead a discussion using the following questions as a guide:
Should people living with HIV have children?
What are some of the risks of having children when you are living with HIV?
Why might a person living with HIV want to have children despite these risks?
What concerns do you think discordant couples (where one person is living with HIV
and the other is HIV-negative) have about childbearing?
What challenges do women living with HIV face when deciding to get pregnant?
- In their families?
- In their communities?
- At the health clinic?
What challenges do you think men living with HIV face when deciding about having
children with their partner?
How can Peer Educators support people’s choices about having children?
Step 3: Discuss how Peer Educators can ask clients about their childbearing choices and
provide appropriate information for them to make healthy decisions for
themselves and their families. Use the content below. Finally, remind participants
that Peer Educators should always work closely with other members of the
multidisciplinary team and provide referrals to clients as needed.
KEY INFORMATION
Peer Educators can help people in the community understand how women get pregnant and give people information to make choices about if, and when, they want to become pregnant. Peer Educators can give information to clients and their partners (including when only one partner is

Comprehensive Peer Educator Training Curriculum: Trainer Manual 16-13
living with HIV or when both partners are living with HIV) about ways to prevent pregnancy, space pregnancies or the safest ways to have a baby.
Peer Educators should always work with other members of the multidisciplinary team, as they are not trained family planning counselors or educators. Good referral linkages between Peer Educators and other health care workers are very important. Conception:
A girl is born with all the eggs she needs in her lifetime. The eggs are stored in the ovaries. After the girl reaches puberty (around age 14-15), the ovary will release one egg each month until she stops having her period (the time each month that women bleed) at around age 45-50. About 2 weeks before monthly bleeding, the ovary releases one egg, which travels down the fallopian tubes to the uterus. This process is called ovulation.
If the girl or woman has sex with a man during the time of ovulation, the sperm from the man will enter into the cervix, travel through the uterus, and into the tube where it can join the egg. When a sperm from a man joins the egg of a woman, this is called fertilization. A woman will not always get pregnant if she has sex with a man (without a condom) while she is ovulating because every woman’s cycle is a little bit different.
The joined egg and sperm travel back down the tube into the uterus. It buries itself into the woman’s uterus lining and a baby will start to grow.
After about 2 weeks, a placenta starts to grow. This is a sack that holds the baby inside the woman’s uterus and helps it gets nutrients. Blood and food from the woman travel through the placenta and help the baby grow for 9 months until it is ready to be born.
If the woman does NOT have sex with a man (or uses a condom) during ovulation, the egg will pass out of the woman’s body during monthly bleeding. There is no monthly bleeding during pregnancy because the woman’s body needs that blood to nourish the baby.
Childbearing choices: All people, including people living with HIV, have the right to decide if they want to have children or not and, if they do, how many children they want to have. It is very important that Peer Educators not be judgmental of a person’s decisions about having children. Peer Educators can work with doctors, nurses, counselors and other members of the multidisciplinary team to help clients understand their childbearing choices and make healthy, informed decisions. Peer Educators can work with other members of the multidisciplinary team to ask their clients about their childbearing preferences: For women, discuss:
Is she pregnant now?
When was her last period (monthly bleeding)?
If she is not pregnant, does she want to have children now? In the future? When?
Other key terms
Contraception: The use of a method or more than one method to prevent pregnancy when a man and a woman have sex.
Family planning: Having the number of children you want, when you want them. Often this includes using a contraceptive method to prevent or space births.
Birth spacing: When people plan their births far enough apart so the woman and the baby are not at risk of the health problems that can occur when babies are born too close together. At least 3 years between children is recommended.
16-14 Module 16
Is her partner living with HIV or HIV-negative?
Is she using a contraceptive method? For men, discuss:
Does he have a female partner?
Is she pregnant now?
Do they want to become pregnant now? In the future? When?
Is his partner living with HIV or HIV-negative?
Are they using a contraceptive method? For clients who want to prevent or space pregnancy, Peer Educators can provide information and referrals:
Provide basic family planning information and referrals.
Talk about the importance of dual protection to protect against both pregnancy and HIV/STIs (there is more on this in the next session).
Give condoms and show the person how to use them. For women living with HIV who want to have a baby, Peer Educators can talk with them about the safest times to get pregnant for their own and their baby’s health:
When their CD4 cell count is high
When they do not have any major illnesses (including TB)
When they are on ART (if eligible)
For women living with HIV who are currently pregnant, Peer Educators can work with other members of the multidisciplinary team to:
Make sure they enroll in a PMTCT program.
Counsel them on different PMTCT services (see Module 7).
Encourage them to take ART if they are eligible, or ARVs during the pregnancy if not.
Talk to them about their pregnancy desires after the baby is born and provide basic family planning information and referrals for family planning services.
For men living with HIV who wish to have a child with their partner, Peer Educators can work with other members of the multidisciplinary team to:
Encourage them to take and adhere to ART, if eligible.
Encourage them to practice safer sex with condoms during the times of the month when their partner is NOT ovulating (see below) – men should also always use condoms during sex with other partners.
Counsel them to prevent and treat any STIs and to bring their partner(s) for treatment as well.
Peer Educators can also encourage women to use condoms and another contraceptive until they are healthier. They can also stress the importance of long-term adherence to care and treatment so that they can stay healthy for their own well-being and that of their child/children. Remember that Peer Educators should always work with other members of the multidisciplinary team when providing information about safe pregnancy and childbearing.

Comprehensive Peer Educator Training Curriculum: Trainer Manual 16-15
Peer Educators can also provide childbearing information to discordant couples where one person is living with HIV and the other person is HIV-negative:
Remember that all people have the right to decide if they want to have children, when they have children and how many children they have.
Encourage discordant couples who wish to become pregnant to practice safer sex when the woman is NOT ovulating (this is usually during the 7 days after she has her monthly bleeding and the time during her monthly bleeding). This will help prevent the spread of HIV to the HIV-negative partner (the man or the woman). Then, the couple can try and conceive when the woman is ovulating (this is usually around days 8-20 of her monthly cycle) – not using condoms during this time.
Counsel the couple about how important it is for the partner living with HIV to be enrolled in care and, if eligible, take ART. Good adherence to ART can lower the amount of HIV in the person’s body and help reduce the chance that the HIV-negative partner will be infected.
Counsel the couple on preventing and treating STIs.
Encourage the HIV-negative partner to get regular HIV tests, especially before, during and after pregnancy.

16-16 Module 16
SESSION 16.5: Types of Family Planning Methods
(70 minutes)
TRAINER INSTRUCTIONS
Methodologies: Interactive Trainer Presentation, Large Group
Discussion, Brainstorming
Step 1: Lead a discussion on the importance of family planning for people with HIV and
the whole community, stressing that all people, regardless of HIV-status, have the
right to choose whether or not to have children as well as the timing and
number of children they have.
Step 2: Ask participants why they think family planning is included as part of Peer Educator training and if (and why or why not) they think it is important for Peer
Educators to understand family planning services.
Review what the Peer Educator’s role in family planning services will be (adapt to
your specific program). Remind participants that Peer Educators are not trained
as family planning providers, but that after this training they will be able to
provide basic information about family planning methods, distribute condoms and
show clients how to use them (and in some cases distribute pills, depending on
the program), and make referrals to the family planning clinic as well as follow
up. When providing family planning information and referrals, Peer Educators
should always consult with other members of the multidisciplinary team.
Step 3: Present the family planning methods listed in the content below, focusing on
those that are available in your setting. Explain that all modern methods of family
planning are generally safe and work well for people living with HIV, but that
condoms are the only method that effectively prevents STIs/HIV. Pass around
samples of each method and discuss:
What the method is
How the method prevents pregnancy (and how well)
If/how the method prevents STIs/HIV
Possible side effects
Other important points to know
Common myths and misconceptions about the method (ask participants to
discuss myths in their communities)
Step 4: Review the general points on family planning counseling in the content below and
record them on flip chart. Remind participants that they should always consult
with members of the multidisciplinary team when providing family planning
information and referrals.
Step 5: Refer participants to Appendix 16A, which is a summary of all of the family
planning methods discussed in this session. Trainers may want to adapt this
based on methods that are locally available. Peer Educators can use this as a
reminder when talking with clients about family planning choices.
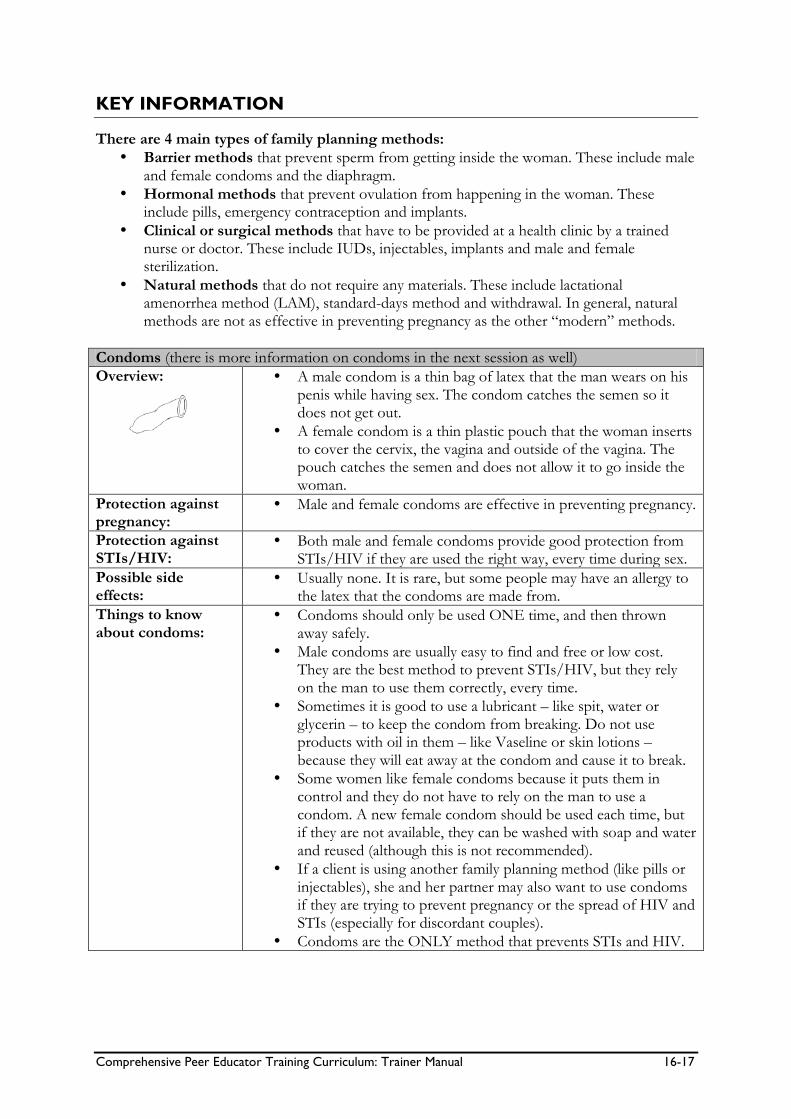
Comprehensive Peer Educator Training Curriculum: Trainer Manual 16-17
KEY INFORMATION
There are 4 main types of family planning methods:
Barrier methods that prevent sperm from getting inside the woman. These include male and female condoms and the diaphragm.
Hormonal methods that prevent ovulation from happening in the woman. These include pills, emergency contraception and implants.
Clinical or surgical methods that have to be provided at a health clinic by a trained nurse or doctor. These include IUDs, injectables, implants and male and female sterilization.
Natural methods that do not require any materials. These include lactational amenorrhea method (LAM), standard-days method and withdrawal. In general, natural methods are not as effective in preventing pregnancy as the other “modern” methods.
Condoms (there is more information on condoms in the next session as well)
Overview:
A male condom is a thin bag of latex that the man wears on his penis while having sex. The condom catches the semen so it does not get out.
A female condom is a thin plastic pouch that the woman inserts to cover the cervix, the vagina and outside of the vagina. The pouch catches the semen and does not allow it to go inside the woman.
Protection against pregnancy:
Male and female condoms are effective in preventing pregnancy.
Protection against STIs/HIV:
Both male and female condoms provide good protection from STIs/HIV if they are used the right way, every time during sex.
Possible side effects:
Usually none. It is rare, but some people may have an allergy to the latex that the condoms are made from.
Things to know about condoms:
Condoms should only be used ONE time, and then thrown away safely.
Male condoms are usually easy to find and free or low cost. They are the best method to prevent STIs/HIV, but they rely on the man to use them correctly, every time.
Sometimes it is good to use a lubricant – like spit, water or glycerin – to keep the condom from breaking. Do not use products with oil in them – like Vaseline or skin lotions – because they will eat away at the condom and cause it to break.
Some women like female condoms because it puts them in control and they do not have to rely on the man to use a condom. A new female condom should be used each time, but if they are not available, they can be washed with soap and water and reused (although this is not recommended).
If a client is using another family planning method (like pills or injectables), she and her partner may also want to use condoms if they are trying to prevent pregnancy or the spread of HIV and STIs (especially for discordant couples).
Condoms are the ONLY method that prevents STIs and HIV.

16-18 Module 16
Oral Contraceptive Pills
Overview:
Oral contraceptive pills, or “the pill,” contain hormones that stop a woman’s ovaries from releasing eggs. This means that fertilization will not happen when a man releases sperm inside the woman.
Protection against pregnancy:
The pill is VERY effective protection against pregnancy if it is taken the right way, and at the same time every day.
Protection against STIs/HIV:
The pill DOES NOT protect against STIs/HIV.
Possible side effects:
Usually women have no side effects. Some women may experience nausea, headaches, weight gain, breast swelling and tenderness or changes in monthly bleeding (usually lighter). Women who smoke a lot should NOT take the pill.
Things to know about the pill:
One pill must be taken by mouth at the same time every day.
When a woman is taking certain types of medicine for tuberculosis (Rifampicin), she should not rely on the pill to protect her from pregnancy. She should use another method.
It is usually safe to take ART and the pill, but it is important for a woman to talk with a doctor or nurse to make sure.
Some oral contraceptives cannot be used when a woman is breastfeeding. However, there are certain kinds of pills that are safe for women to take when breastfeeding.
If a woman misses pills, or stops taking the pill, she can become pregnant right away.
Emergency Contraceptive Pills (ECP)
Overview:
ECP is a combination of oral contraceptive pills that prevents pregnancy AFTER a woman has unprotected sex. This is a good method to use if a condom breaks, if a woman has been raped or if sex was unplanned.
ECP works by preventing ovulation. ECP is not an abortion.
ECP only works if it is taken within 5 days of unprotected sex. The earlier it is taken, the more effective it is in preventing pregnancy.
Protection against pregnancy:
ECP is effective in preventing pregnancy if it is taken within 5 days of unprotected sex. The earlier it is taken, the more effective it is in preventing pregnancy.
Protection against STIs/HIV:
ECP does NOT protect against STIs/HIV.
Possible side effects:
Usually none. Some women may experiences nausea, vomiting and changes in monthly bleeding.
Things to know about the ECP:
ECP should just be used in emergencies or when other methods fail.
Women should consult with a doctor or nurse to see what kinds and how many pills to take if ECP is needed.

Comprehensive Peer Educator Training Curriculum: Trainer Manual 16-19
Injectables
Overview:
A nurse or a doctor can give a woman a shot in her arm that contains hormones. One injection provides protection from pregnancy for 3 months (may be shorter or longer, depending on the type of injectable).
Protection against pregnancy:
Injectables prevent pregnancy very well.
Protection against STIs/HIV:
Injectables do NOT prevent STIs/HIV.
Possible side effects:
Usually none. Some women may gain weight, have sore or tender breasts, nausea or changes in monthly bleeding. If a woman uses injectables for a long time, she may stop having monthly bleeding altogether, but this is not dangerous.
Things to know about injectables:
The woman must see a health provider every 2-3 months to get an injection (usually in her upper arm).
The woman does not have to do anything before sex because the injectable works all the time.
No one can tell if a woman is using injectables. Some women like that they do not have to tell their partner(s) about using the method.
Injectables are safe to use when breastfeeding.
Implants
Overview:
A trained nurse or doctor puts 1-6 small, soft rods under the skin of a woman’s arm. The rods are filled with hormones that help prevent pregnancy.
Protection against pregnancy:
Implants are very good at preventing pregnancy for 3-7 years (depending on the type of implant used).
Protection against STIs/HIV:
Implants do NOT protect against STIs/HIV.
Possible side effects:
Usually none. Some women may gain weight, have sore or tender breasts, nausea or changes in monthly bleeding. After a year or so, some women may stop having monthly bleeding altogether, but this is not dangerous.
Things to know about implants:
A trained nurse or doctor has to put in the implants and remove them.
Most women do not experience pain when the implants are put in.
The woman does not have to do anything before sex since the implants work all the time.
Implants are safe to use during breastfeeding.
The implants can be left in for 3-7 years, depending on the type. If the woman wants to get pregnant, a trained provider has to remove the implants from her arm.

16-20 Module 16
Intra-uterine Device (IUD)
Overview:
An IUD is a small, flexible plastic device, usually with a copper wire around it.
It is put inside the woman’s uterus (through the vagina – no surgery is needed) by a trained health care worker.
It works by making it hard for the sperm to travel in the uterus and fertilize the egg.
Protection against pregnancy:
The IUD is VERY effective at preventing pregnancy.
Protection against STIs/HIV:
The IUD does NOT protect against STIs/HIV.
Possible side effects:
Usually none. Some women may get pain in the uterus and cramping, long and heavy monthly bleeding or spotting (light bleeding).
Things to know about IUDs:
An IUD can safely stay inside the uterus for 10 years once a doctor or nurse has inserted it.
The IUD is very safe and women will not feel it inside.
Men and women cannot feel the IUD during sex.
Men and women do not have to do anything before having sex – the IUD works all the time.
No one can tell if a woman has an IUD, other than the doctor or nurse.
It is important that women be checked for STIs before getting an IUD.
It is also important to use condoms or be in a mutually faithful relationship to prevent STIs when using an IUD.
IUDs are generally safe for people living with HIV. People with advanced HIV or AIDS or with STIs should NOT use IUDs.
Diaphragm
Overview:
A diaphragm is a small rubber cup that a woman inserts into her vagina before and during sex. The diaphragm covers the cervix so the sperm cannot pass into the womb.
Protection against pregnancy:
If used the right way and every time during sex, diaphragms are good at preventing pregnancy.
Protection against STIs/HIV:
Diaphragms only give some protection against STIs and HIV.
Possible side effects:
Some women have urinary tract infections when using the diaphragm. Women should be advised to pee soon after sex to help prevent this.
Things to know about the disphragm:
Diaphragms should be used with spermicide just in case of any sperm on the outside of the diaphragm.
Women who want to use a diaphragm must see a doctor or nurse, who will fit the diaphragm to the woman’s size.

Comprehensive Peer Educator Training Curriculum: Trainer Manual 16-21
Spermicides
Overview:
A spermicide is a chemical that kills sperm after it comes out of the penis. It can be in the form of a jelly, foam, cream or tablet.
Some condoms contain a spermicide to give extra protection. Others are meant to be inserted into the vagina.
Protection against pregnancy:
Spermicides alone are NOT very good at preventing pregnancy. They are more effective when used with condoms or a diaphragm.
Protection against STIs/HIV:
Spermicides do not protect against STIs/HIV.
Possible side effects:
If used often, spermicides can cause irritation in the vagina or on the penis. This can cause small cuts that actually increase the chance that HIV will be passed during sex.
Things to know about spermicides:
Spermicides are not the best choice for people living with HIV or discordant couples because they can irritate the skin and cause cuts and sores.
Spermicides must be put into the vagina no more than 1 hour before sex. They must be left inside the vagina for 6 hours after sex to make sure all the sperm are dead.
Sterilization
Overview:
Sterilization is an operation that is done in a health facility. It is a permanent method, meaning that once a man or a woman has had this surgery, he or she will not be able to have children.
Sterilization in women is called tubal ligation. A doctor will cut and tie the woman’s fallopian tubes, so the eggs can no longer travel down to the uterus or be fertilized by sperm. Women who have had tubal ligation still have regular monthly bleeding and still can have pleasurable sex.
Sterilization in men is called vasectomy. Only trained nurses and doctors can perform vasectomies. A vasectomy is a simple operation that takes about 10 minutes. During a vasectomy, the man’s Vas deferens (tubes that carry sperm) are cut so that the sperm do not leave the body any more. The operation does not change a man’s ability to have sex and to feel pleasure. He will still release semen (cum) during sex, but there will be no sperm in the semen that can make a woman pregnant.
Protection against pregnancy:
Male and female sterilization is very effective at preventing pregnancy.
Protection against STIs/HIV:
Male and female sterilization does NOT protect against STIs/HIV.
Things to know about sterilization:
After a man has a vasectomy, it can take up to 3 months for all of the sperm to be gone, so another family planning method should be used during this time.
Some women choose to have tubal ligations right away after delivering a baby since they are already in the hospital.
Sterilization is best for men and women that never want to have children or have had all the children they want in life.
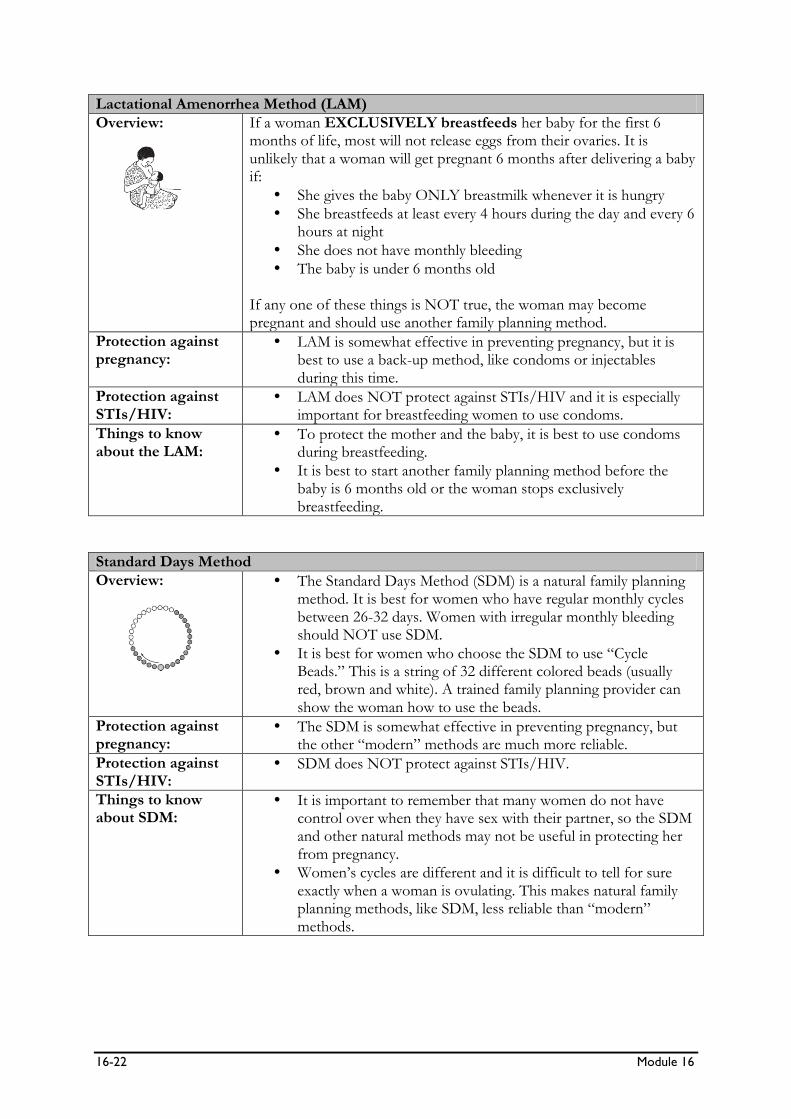
16-22 Module 16
Lactational Amenorrhea Method (LAM)
Overview:
If a woman EXCLUSIVELY breastfeeds her baby for the first 6 months of life, most will not release eggs from their ovaries. It is unlikely that a woman will get pregnant 6 months after delivering a baby if:
She gives the baby ONLY breastmilk whenever it is hungry
She breastfeeds at least every 4 hours during the day and every 6 hours at night
She does not have monthly bleeding
The baby is under 6 months old If any one of these things is NOT true, the woman may become pregnant and should use another family planning method.
Protection against pregnancy:
LAM is somewhat effective in preventing pregnancy, but it is best to use a back-up method, like condoms or injectables during this time.
Protection against STIs/HIV:
LAM does NOT protect against STIs/HIV and it is especially important for breastfeeding women to use condoms.
Things to know about the LAM:
To protect the mother and the baby, it is best to use condoms during breastfeeding.
It is best to start another family planning method before the baby is 6 months old or the woman stops exclusively breastfeeding.
Standard Days Method
Overview:
The Standard Days Method (SDM) is a natural family planning method. It is best for women who have regular monthly cycles between 26-32 days. Women with irregular monthly bleeding should NOT use SDM.
It is best for women who choose the SDM to use “Cycle Beads.” This is a string of 32 different colored beads (usually red, brown and white). A trained family planning provider can show the woman how to use the beads.
Protection against pregnancy:
The SDM is somewhat effective in preventing pregnancy, but the other “modern” methods are much more reliable.
Protection against STIs/HIV:
SDM does NOT protect against STIs/HIV.
Things to know about SDM:
It is important to remember that many women do not have control over when they have sex with their partner, so the SDM and other natural methods may not be useful in protecting her from pregnancy.
Women’s cycles are different and it is difficult to tell for sure exactly when a woman is ovulating. This makes natural family planning methods, like SDM, less reliable than “modern” methods.

Comprehensive Peer Educator Training Curriculum: Trainer Manual 16-23
Withdrawal
Overview: This method is when the man pulls his penis out before he ejaculates (comes).
This method does NOT work well and is not recommended for family planning.
Protection against pregnancy:
Withdrawal is not very effective in preventing pregnancy because some of the semen comes out and enters the vagina before the man ejaculates. Also, it is difficult for some men to pull the penis out before ejaculating.
Protection against STIs/HIV:
Withdrawal does not offer much protection from STIs/HIV because some small amount of semen leaks out of the penis during sex, before the man ejaculates.
Things to know about withdrawal:
Withdrawal should only be used as a last resort as it is not an effective method of preventing pregnancy or STIs/HIV. It also means that the woman has to rely on the man for protection.
General Points on Family Planning Counseling
Peer Educators are not trained family planning counselors. They should always work with doctors, nurses and other members of the multidisciplinary team when providing family planning education or counseling to clients and should make needed referrals for family planning services.
It is important for clients to know all the methods that are locally available to them so they can make an informed decision about if they want to use a method and which type of method is best. Peer Educators should know which family planning methods are available at different health facilities in their working areas.
Peer Educators should NOT tell clients which methods are best for them. A woman, man or couple should be informed completely about the different methods available and the benefits and drawbacks of each so they can choose without pressure or confusion.
As with all counseling, ensure there is privacy and confidentiality when talking with clients about family planning methods.
Encourage clients to discuss family planning methods with their partner so they can both take responsibility for protection from unwanted pregnancy and STIs/HIV.
Be aware that discordant couples (where one person is living with HIV and the other is HIV-negative) may face special challenges when making decisions about pregnancy and family planning.
Clients who choose hormonal methods should be provided with adherence counseling about the importance of taking oral contraceptives on time each day (including planning reminder cues), never missing pills and the importance of returning to the clinic.
Always remind clients to come back to see a health care worker if they have any questions, concerns or are having side effects.

16-24 Module 16
SESSION 16.6: Dual Protection and Condom Use
(45 minutes)
TRAINER INSTRUCTIONS
Methodologies: Large Group Discussion, Interactive Trainer
Presentation, Small Group Work, Role-Play
Step 1: Note: Male and female condoms and penis and vaginal models are needed for
this activity. Some participants may be uncomfortable touching and talking about
condoms, but it is important that all Peer Educators know about condoms and
can tell and show people how to use them.
Ask participants what they think the term “dual protection” means. Record on flip chart and fill in using the content below.
Step 2: Remind participants that condoms are effective in preventing HIV, STIs and
unwanted pregnancies.
Step 3: Using the penis model, ask if anyone in the class can demonstrate male condom
use. Ask the participant to describe the steps out loud. Make corrections as
needed according to the steps described in the box below.
Step 4: Ask the same for the female condom. Ask a participant to demonstrate and say
the steps out loud. Correct, as needed, according to the steps described below.
Step 5: Ask participants to break into groups of 3 and practice demonstrating male and
female condom use, making sure to explain each step along the way.
Step 6: Ask participants to stay in their groups and to role-play that one person is a
client living with HIV, another is her or his partner (and is HIV-negative), and the
third is the Peer Educator. The couple wants to prevent pregnancy and also the
spread of HIV. Have the person playing the Peer Educator talk with the couple
about dual protection. About every 5 minutes, switch roles until everyone has
had a chance to play the role of the Peer Educator. If time allows, ask some of
the groups to perform their role-play in front of the large group.
Step 7: Close the discussion by reminding participants that Peer Educators play a very
important role in helping clients understand and practice dual protection.
KEY INFORMATION
Dual protection: Dual protection means preventing STIs, HIV infection and unwanted pregnancy at the same time. Dual protection includes:
Using male or female condoms in combination with another contraceptive method
Using male or female condoms alone
Abstinence (not having sex at all)
Avoiding all forms of penetrative sex

Comprehensive Peer Educator Training Curriculum: Trainer Manual 16-25
Using condoms plus a hormonal or long-term contraceptive method is one of the best ways to prevent HIV, STIs and unwanted pregnancy in male-female sexual relationships. Condoms:
Not having sex at all is one way to be completely safe. But this is not practical or enjoyable for most people. Using condoms is one reliable way to practice safer sex and prevent STIs, HIV and unwanted pregnancy (see Module 10 for more discussion on safer sex).
There are a lot of myths about condoms, such as that they are only for sex workers or that married people do not use condoms. Peer Educators should promote condoms for people in the community to protect themselves and their partners from HIV and other STIs.
Some people feel that condoms make sex less enjoyable. We should respect everyone’s personal experiences with condoms, but remember that even if it does change the way sex feels, it is still worth it to protect ourselves and our partner(s).
Some people think that if both partners are living with HIV, then they do not need to use condoms. It is important for Peer Educators to explain that even if both partners are living with HIV, using condoms is still a good idea. This is because there may be some chance of passing different types of HIV from one partner to the other, which may lead to drug resistance. Condoms can also prevent the spread of other STIs between partners. Peer Educators can help explain the facts so people and couples can make up their mind about using condoms with their partners.
Part of the Peer Educator’s job is to spread the truth about condoms, distribute condoms and help people learn how to use them to protect themselves and their partners from HIV, STIs and unwanted pregnancy.

16-26 Module 16
How to use a Male Condom
These are the basic steps you should know for using, and demonstrating how to use, a male condom. If penis models are not available, you can use a bottle, banana or corn. Only condoms made out of latex protect against HIV.
Steps to use a male condom:
Look at the condom package and check the date to make sure it is still good and that the package does not have any damage.
Open the packet on one side and take the condom out. Do not use your teeth to open the package.
Pinch the tip of the condom to keep a little space at the tip. This will hold the semen and prevent the condom from breaking.
Hold the condom so that the tip is facing up and it can be rolled down the penis.
Put it on the tip of an erect (hard) penis (only use condoms on an erect penis) and unroll it down to the bottom of the penis.
After ejaculation (coming), hold the rim of the condom while the man removes his penis without spilling the semen. The penis must be removed while it is still hard to make sure the condom does not fall off.
Remove the condom and tie it in a knot to avoid spilling. Throw it away in a latrine or bury it.
Use a new condom every time! Also, it is important to:
Use only lubricants made out of water (not oils).
Store condoms in a cool, dry place, out of the sun. Do not keep them in a wallet.
Do not use condoms that seem to be sticky, a strange color or damaged in any way. Throw them away.

Comprehensive Peer Educator Training Curriculum: Trainer Manual 16-27
How to Use a Female Condom
Some women really like the female condom because it gives them more control over their own bodies and over sex. Some men like it, too, because they do not have to use a male condom. The female condom is becoming more affordable and available to women in many countries. These are the main steps for using a female condom. If no vaginal model is available to demonstrate its use to people, you can use a box with a round hole cut in it or your hand.
Steps to use a female condom:
Look at the condom package and check the expiration date to make sure it is still good and that the package does not have any damage.
Open the packet. Do not use your teeth.
Find the inner ring at the bottom, closed end of the condom. The inner ring is not attached to the condom.
Squeeze the inner ring between the thumb and middle finger.
Guide the inner ring all the way into the vagina with your fingers. The outer ring stays outside the vagina and covers the lips of the vagina.
When you have sex, guide the penis through the outer ring. It has to be INSIDE the ring.
After the man ejaculates (comes), before the woman stands up, squeeze and twist the outer ring to keep the semen inside the pouch and pull the pouch out.
Put the used condom in a latrine or bury it. Do not put it in a flush toilet.

16-28 Module 16
SESSION 16.7: Classroom Practicum on Conception,
Childbearing and Family Planning Counseling
(60 minutes)
TRAINER INSTRUCTIONS
Methodologies: Role-Play, Case Studies, Large Group Discussion
Step 1: Break participants into small groups of 3. Hand out a case study card to each
group. Ask the groups to assign one person to play the role of a Peer Educator,
one the role of the client and another the role of observer (or the client’s partner).
Note: If time is limited, the trainer can present the case studies and participants
can discuss as a large group.
Step 2: Ask the small groups to discuss and role-play their case study. After about 10
minutes, switch roles until everyone has had a chance to play the role of the
Peer Educator.
Step 3: Ask some of the small groups to role-play their case study in front of the large
group and discuss what was done well and what could have been done differently
when counseling the client(s) about conception, childbearing and family planning.
KEY INFORMATION
Case Study 1: A___ is a 25-year-old woman living with HIV. She is on ART and is feeling very well. She does not have a regular partner, but does have a couple of different boyfriends. She does not want children right now, but may want them in the future. How would you counsel her? Case Study 2: B___ and G___ are a married couple. They are both living with HIV and are on ART. They have 3 healthy children and do not want to have any more. How would you counsel B___ and G___? Case Study 3: T___ is a 35-year-old woman. She is HIV-negative, but her husband is living with HIV. Her husband usually uses condoms, but not all the time. She is afraid of getting HIV and becoming pregnant, but she is also afraid to talk to her husband about family planning because she knows he wants more children. How would you counsel her? Case Study 4: P___ and her boyfriend N___ visit you at the clinic. P___ just learned that her CD4 cell count is 150 and the doctor wants to start her on ART. N___ is HIV-negative. They want to have a baby soon and ask you if it is safe. How would you counsel this couple?

Comprehensive Peer Educator Training Curriculum: Trainer Manual 16-29
Note: Some of the preceding information in this Module was adapted from the following sources: Colton, T., Dillow, A., Hainsworth, G., Israel, E., & Kane, M. (2006). Community home-based care for people and communities affected by HIV/AIDS: A comprehensive training course for community health workers. Watertown, MA: Pathfinder International. EngenderHealth. (2002). Integration of HIV/STI prevention, sexuality, and dual protection in family planning counseling: A training manual. New York, NY: EngenderHealth.


Comprehensive Peer Educator Training Curriculum: Trainer Manual 16-31
SESSION 16.8: Module Summary (15 minutes)
TRAINER INSTRUCTIONS
Methodologies: Large Group Discussion, Interactive Trainer
Presentation
Step 1: Ask participants what they think are the key points of this Module. What
information will they take away from the Module?
Step 2: Summarize the key points of the Module using participant feedback and the
content below.
Step 3: Ask if there are any questions or clarifications.
Step 4: Review the learning objectives with participants and make sure all are confident
with their skills and knowledge in these areas.
Step 5: If there are areas participants do not fully understand or in which they need
more help, go back and review the session before moving to the next Module.
THE KEY POINTS OF THIS MODULE INCLUDE:
We all have value judgments when it comes to sex and sexual behaviors. But in order to be good Peer Educators, we must not put our values on our clients.
Peer Educators need to talk openly with people to help them practice safer sex, understand reproduction and make informed choices about having children.
It is important for Peer Educators to know all of the body parts involved in sex, sexuality and reproduction in women and men.
Peer Educators can help people in the community understand how women get pregnant and help people make choices about if/when they want to become pregnant and provide non-judgmental information on family planning and childbearing.
Peer Educators should always consult with doctors, nurses, counselors and other members of the multidisciplinary team when providing clients with information on conception, childbearing and family planning. Peer Educators can also provide clients with referrals for more counseling or services.
All people, including PLHIV and discordant couples, have the right to decide if they want to have children or not and if they do, how many children they want to have.
Peer Educators are not trained family planning providers, but they can give clients basic information on family planning methods and make referrals for these services.
It is important for clients to know all the family planning methods that are available to them so they can make an informed decision about using family planning and which type of method is best.
Dual protection means preventing STIs/HIV and unwanted pregnancy at the same time. The key to practicing dual protection is to use condoms, either alone or with another contraceptive method, such as pills, injectables or clinical methods.

16-32 Module 16

Comprehensive Peer Educator Training Curriculum: Trainer Manual 17-1
ADVANCED MODULE 17:
Nutrition Education and Counseling
DURATION: 360 minutes (6 hours)
Note: Trainers can adjust the methodology and content to make the
Module shorter or longer as needed.
LEARNING OBJECTIVES:
By the end of this Module, participants will be able to:
Discuss the relationship between nutrition and HIV and how
nutrition is part of comprehensive HIV care and treatment
Understand why PLHIV sometimes do not eat enough healthy
foods
Know the basic food groups and what locally available foods
belong to each group
Provide basic nutrition education and counseling to adults,
pregnant and breastfeeding women and caregivers of children
living with HIV
Provide practical information to address common nutrition and
eating problems in coordination with other members of the
multidisciplinary team and as part of the comprehensive HIV care
and treatment plan
Identify ways to help or refer clients and their families when there
is not enough food to eat
CONTENT:
Session 17.1: Introduction: The Relationship between Nutrition and
HIV
Session 17.2: The Basic Food Groups
Session 17.3: Providing Basic Nutrition Education and Counseling for
Adults and Children Session 17.4: Common Nutrition and Eating Problems among PLHIV
Session 17.5: What to Do if There Is Not Enough Food
Session 17.6: Classroom Practicum on Nutrition Education and
Counseling
Session 17.7: Module Summary

17-2 Module 17
METHODOLOGIES:
Large group discussion
Interactive trainer presentation
Small group work
Role-play
Brainstorming
Guest speaker (optional)
Case studies
MATERIALS NEEDED:
Flip chart
Markers
Tape or Bostik
Locally available foods from all of the basic food groups for Session
17.2 (optional)
Case study cards for Session 17.6
WORK FOR THE TRAINER TO DO IN ADVANCE:
Read through the entire Module and make sure you are familiar
with the training methodologies and content.
Decide on an activity for Session 17.2 to help participants better
understand the basic food groups. If possible, and if funds are
available, purchase many different, locally available foods so the
nutrition discussion is as practical as possible.
Adapt the list of foods in Session 17.2 to what is locally available
and affordable in your setting.
Invite a guest speaker(s) from the community to Session 17.5
(optional).
Prepare case study cards for Session 17.6.

Comprehensive Peer Educator Training Curriculum: Trainer Manual 17-3
SESSION 17.1: Introduction: The Relationship
between Nutrition and HIV (20 minutes)
TRAINER INSTRUCTIONS
Methodologies: Large Group Discussion, Interactive Trainer
Presentation
Step 1: Review the Module learning objectives.
Step 2: Lead a discussion to introduce the Module and get a sense of what people
already know. Use these questions to guide the group discussion and fill in, as
needed, from the content below:
Why is good nutrition so important?
Is good nutrition important for PLHIV? Why?
How does nutrition fit into overall care and treatment services for PLHIV?
How is good nutrition important for PLHIV who are healthy and not sick? What
about for PLHIV who are sick? What about for pregnant women living with HIV?
What are some of the common beliefs about nutrition and HIV and nutrition and
ARVs in the community? Do you think these are true or false?
Step 3: Ask participants to discuss some of the reasons that PLHIV and their families
may not be able to eat enough healthy foods. Use the content below to
supplement the discussion.
KEY INFORMATION
Good nutrition is an important part of comprehensive HIV care and treatment, including for pre-ART clients, clients on ART and HIV-exposed and HIV-infected infants and children. Good nutrition does not replace the need for medical care. Instead, having a good, balanced diet is part of a person’s overall HIV care and treatment plan. Good nutrition is important for PLHIV because it can:
Make muscles, skin and bones healthy
Provide energy
Protect against infections
Prevent weight loss
Help medicines get absorbed into the body
Help prevent or reduce side effects of some ARVs
Decrease the amount of time it takes to get better after an illness
Help women who are pregnant and breastfeeding to stay healthy
Help children living with HIV grow well

17-4 Module 17
Poor nutrition can lead to:
Weakened immune system
Increased number and seriousness of infections and illness
Slower healing process
Getting sicker more often and faster
Poorer response to treatment
Poor growth in children Good nutrition is important for all PLHIV, even if they are not ill, because it can help maintain weight and fight off infections and illnesses. Once a person becomes sick with AIDS, eating enough and the right foods is also important to help gain weight and become healthy again. The sooner a client starts to eat enough nutritious foods, the better. Once a person loses weight or becomes very ill, the harder it is to put weight back on. Many PLHIV may not be able to eat enough nutritious foods. This can be because of:
Poverty and loss of household income, or the person is too sick to tend the farm or garden
Eating problems, such as sores in the mouth, diarrhea and vomiting
Changes in the way food tastes (due to medicines or illnesses)
Feeling tired, alone or depressed, which could lead to loss of appetite
Discrimination and uneven food distribution within the household
HIV and infections can affect the way the body absorbs and uses the foods we eat. This can lead to weight loss and malnourishment.
Peer Educators can help clients understand why good nutrition is important to their own and their family’s health and how eating well is part of comprehensive HIV care and treatment. They can also help clients learn what kinds of locally available and affordable foods they can eat as part of a balanced diet.

Comprehensive Peer Educator Training Curriculum: Trainer Manual 17-5
SESSION 17.2: The Basic Food Groups (60 minutes)
TRAINER INSTRUCTIONS
Methodologies: Large Group Discussion, Interactive Trainer
Presentation, Small Group Work
Step 1: Note: There are a number of activities that could be conducted to help
participants learn about the basic food groups. A no-cost activity is given below.
However, if funds are available, trainers can organize an activity where they, or
participants, bring in locally available and affordable foods – being sure to bring
what is most commonly eaten in the community. Participants can categorize each
food item in one of the basic food groups and discuss the nutritive benefits of the foods. This would also be an opportunity for participants to discuss nutritious
and practical meal planning, something they may need to do with clients.
Begin the discussion by asking participants what is meant by the term “eating a
balanced diet.” Fill in, as needed, using the content below.
Step 2: Introduce participants to the basic food groups (“Go,” “Grow” and “Glow”
foods and “Fats and Sugars”) using the content below as a guide. Just give a few
illustrative examples of foods in each group and be sure to adapt examples to the
local context. Also talk about “Junk Foods” – that is, packaged foods and drinks
that have no nutritional value (e.g., soda, candy, potato chips).
Step 3: Hand out index cards or small pieces of paper to each participant. Ask all
participants to think about what they have had to eat and drink in the last 12
hours, and to write each food/ingredient on one of the small pieces of paper.
Note: There may be repetition if participants have eaten lunch together or
taken tea together at the training. If this is the case, ask participants to describe
what they ate for dinner last night or another time when they ate at home
instead of with other training participants.
Step 4: Have participants break into 4 small groups and ask each person to take their
food and drink cards to their small groups. Give each group 5 pieces of flip chart
paper, markers and tape or Bostik. Ask each group to label the flip charts with
one of the following: “Go,” “Grow,” “Glow,” “Fats and Sugars” and “Junk
Food,” and then to post them on the wall near where the group is working.
Give each small group 15 minutes to work together to place the small pieces of
paper on the flip chart papers, depending on if the food item is a “Go,” “Grow,”
“Glow,” “Fats and Sugars” or a “Junk Food” item. Once the groups are finished,
ask each to briefly present back their food and drink items to the large group.
Encourage discussion and correction if any of the items have been placed in an
incorrect category.
Step 5: Close the session by asking participants to discuss how Peer Educators can help
clients and their families understand the basic food groups and how to eat a
balanced diet, thinking about what is locally available and affordable. Remind Peer Educators that they should be role models for good nutrition.

17-6 Module 17
KEY INFORMATION
Eating a balanced diet means eating many different types of foods and eating enough foods every day. No one food or group of foods can give us all the nutrients that we need to stay healthy. We need to eat a variety of foods to help us get the energy we need to “go”, to “grow” and to keep our immune system strong, or to “glow.” It is always best to eat foods that are grown at home or produced locally instead of imported or processed foods, which do not have as many nutrients. The basic food groups:
“GO” foods give us energy and make us GO. These include rice, bread, pasta and other grains. These foods should make up the biggest part of the meal.
“GROW” foods provide protein and help build our bodies and keep muscles strong. These include meat, fish, eggs, beans, nuts and dairy. Note that PLHIV should try to eat legumes every day (such as beans, lentils, peas and nuts). These are usually cheaper than meat and provide a good source of protein.
“GLOW” foods provide vitamins and minerals to help the immune system stay strong and fight off infections. These include all kinds of fruits and vegetables.
Fats and sugars can help give energy, help us gain weight and can make foods taste better, but they should be eaten with other healthy foods and in moderation. “Good fats” include things like avocados, nuts and palm oil.
“Junk food”: Sometimes when we are very busy or do not have time to prepare food, we eat pre-prepared foods and “junk foods” that have no nutritional value and can even be harmful to our health. Peer Educators should help clients understand why they should avoid “junk foods” like soda, candy and potato chips – they cost a lot of money and do not give us any good nutrition. Fresh, natural foods are always the best, and they are usually cheaper than packaged and pre-prepared foods.
It is important for Peer Educators to help clients learn which locally available and affordable foods to eat in order to have a balanced diet and get the energy and nutrients needed to stay healthy and prevent infections.

Comprehensive Peer Educator Training Curriculum: Trainer Manual 17-7
Some examples of GO, GROW and GLOW foods: (Adapt to include locally available and affordable foods in your setting.)
GO foods (starches)
GROW foods (proteins and dairy)
GLOW foods (fruits and vegetables)
Rice
Bread
Chapati
Maize meal
Cassava
Pasta/noodles
Plantains
Yams
Millet
Sorghum
Potatoes
Matoke
Crackers
Beans
Lentils
Peas
Nuts
Sesame
Eggs
Fish
Beef
Lamb
Goat
Chicken
Pork
Milk
Yogurt
Cheese
Carrots
Cabbage
Tomatoes
Kale
Okra
Spinach, leafy greens
Cassava leaves
Pumpkin leaves
Eggplant
Mushrooms
Cauliflower
Capsicum/peppers
Avocadoes
Pineapple
Mango
Oranges
Lemons/limes
Pawpaw
Bananas
Jack fruit
Plums
Pears
Peaches
Apples
Watermelon
Passion fruit
Guavas

17-8 Module 17
SESSION 17.3: Providing Basic Nutrition Education
and Counseling for Adults and Children (75 minutes)
TRAINER INSTRUCTIONS
Methodologies: Large Group Discussion, Small Group Work, Role-
Play, Interactive Trainer Presentation
Step 1: Ask participants to think about nutrition education, counseling and support they
have received from health care workers. Use the following questions to guide
the discussion:
What type of nutrition counseling and support have you received?
What was good about the nutrition counseling and support you received? Was it practical? Why or why not?
What things could have made nutritional counseling and support more helpful for
you and your family?
What do you think are the key points about nutrition PLHIV need to know when
they first learn they are living with HIV? What about when they first start ART?
What about pregnant or breastfeeding women living with HIV?
Step 2: Divide participants into 6 small groups. Tell the groups that they should review
the information for this session in the Participant Manual and then prepare a
short role-play where one person plays the role of the Peer Educator and
another person plays one of the following roles:
An adult who has just been diagnosed with HIV, is healthy and not yet eligible for
ART
An adult with opportunistic infections (OIs) who has recently started ART
A pregnant woman living with HIV who is taking ARVs
A breastfeeding woman living with HIV who is on ART
A mother living with HIV and her newborn baby
A caregiver of a 2-year-old child living with HIV and on ART
Give the small groups about 15 minutes to prepare a short role-play in which the
Peer Educator gives nutritional education and counseling to the client.
After about 15 minutes, ask the small groups to perform their role-plays in front
of the large group and encourage discussion about what went well and what
other participants may have done differently. Fill in, as needed, from the
suggested nutrition education and counseling key points for adults, pregnant
women and children in the content below. Remind participants that nutrition
education should be part of comprehensive care and treatment for all PLHIV.
Step 3: Review the key information on safely preparing and storing foods. This should be
a part of all nutrition education and counseling with clients.
Step 4: Lead a discussion about how to identify and refer clients, especially children, who
may be malnourished using the content below. Stress the need for quick referral

Comprehensive Peer Educator Training Curriculum: Trainer Manual 17-9
to a health care worker and treatment of any client who shows signs of
malnutrition.
Step 5: Close the session by reminding participants that Peer Educators, along with
other members of the multidisciplinary team including nutritionists, can provide
clients with practical nutrition advice and education that is responsive to their
specific needs and realities. Nutrition must be considered part of comprehensive
HIV care and treatment.
KEY INFORMATION
Key points for nutrition education and counseling for ADULTS living with HIV Nutritional needs of adults living with HIV:
PLHIV who are well (asymptomatic) still need to eat more food than people without HIV to stay healthy. PLHIV should try to take in more food each day and eat snacks during the day to get more energy.
PLHIV with advanced HIV or AIDS need to eat more food than asymptomatic PLHIV to keep weight on and stay healthy. PLHIV with advanced HIV or AIDS should eat an extra full meal each day. This may be difficult for some clients due to health problems or poverty.
Remember that all adults living with HIV should start ART as soon as they are eligible. PLHIV should be encouraged to:
Eat a balanced diet with foods from all of the groups.
Eat up to another full meal each day, if possible. Try to eat small snacks during the day to get more energy.
Choose foods according to what is available and affordable.
Use local foods and eat fresh foods instead of processed or fried foods.
Make GO foods (starches) the biggest part of the diet.
Try and eat GROW foods (proteins) with every meal (including non-animal proteins, like legumes).
Eat many GLOW foods (fruits and vegetables) every day.
Use fats and oils in small amounts (unless the person needs to gain weight, in which case fats and oils can be used more).
Not eat too much sugar and avoid junk foods.
Try to eat small, frequent meals throughout the day.
Take a daily multivitamin (if this is available from the health facility).
Store and prepare food safely (see below).
Drink at least 8 glasses of clean, boiled water each day.
Try and get some exercise every day. Even a short walk and some stretching will help build muscles, increase appetite, improve digestion and relieve stress.

17-10 Module 17
Key points for nutrition education and counseling for PREGNANT and BREASTFEEDING women Nutritional needs of pregnant and breastfeeding women:
During pregnancy and breastfeeding, women need to eat more healthy foods so that they stay healthy and gain weight, and so that the baby develops. Good nutrition is also important for the woman to produce breastmilk.
ALL pregnant and breastfeeding women, regardless of HIV-status, should eat more healthy foods during these times.
Pregnant women should eat foods high in Vitamin A and also need foods high in iron to prevent anemia.
Pregnant women with advanced HIV or AIDS need to eat even more healthy foods than usual, including more GROW foods (proteins), if possible.
Remember, all pregnant women living with HIV need to take ARVs or ART. Pregnant and breastfeeding women should be encouraged to:
Eat a balanced diet including all of the food groups.
Eat more food than usual.
Eat more GROW foods (proteins) high in iron. This is to prevent anemia. Examples are green leafy vegetables, fish, red meat, chicken, liver, eggs, seeds, dried fruit, beans, millet and sorghum.
Eat more foods high in Vitamin A, such as green, red, yellow and orange vegetables, egg yolks, liver, sweet potatoes and yellow maize.
Take daily multivitamins, iron and folic acid as directed by a health care worker.
Get more rest, especially during the last 3 months of pregnancy.
Avoid harmful foods or traditional practices during pregnancy and breastfeeding (give local examples).
Try to prevent and treat diarrhea, nausea, vomiting, loss of appetite and mouth and throat problems right away, as these may prevent healthy weight gain.
Prepare and store foods safely.
Use iodized salt if possible – this will help prevent iodine deficiency and goiter.
Treat any worms or parasites right away.
Try to get some exercise every day. Even a short walk and some stretching will help build muscles, increase appetite, improve digestion and relieve stress.
It is also important to talk to pregnant women about how they will feed their baby once it is born. There is more on this below, as well as in Module 7.

Comprehensive Peer Educator Training Curriculum: Trainer Manual 17-11
Key points for nutrition education and counseling for caregivers of INFANTS AND CHILDREN (HIV-exposed or HIV-infected) Nutritional needs of HIV-exposed and HIV-infected infants and children:
Proper nutrition can help young children gain weight, grow and develop. Good nutrition can decrease illnesses like diarrhea and vomiting and keep children healthy longer.
Children with HIV need to eat more healthy foods than children without HIV to grow, develop and stay healthy.
If children have advanced HIV or AIDS, they should eat more at each meal if possible and try to eat an extra meal during the day.
Remember, all HIV-infected infants should start ART (according to national guidelines) and the doctor should check children for ART eligibility regularly.
Infants aged 0-6 months (see Module 7 for more information on infant feeding):
Mothers should be supported to make informed infant feeding decisions.
Mothers should exclusively breastfeed for as long as possible up to 6 months, if that is the infant feeding choice.
Mothers should initiate breastfeeding as soon as possible (if that is the feeding choice), and be shown good positioning and attachment. Mothers should be encouraged to feed whenever the baby wants and to express milk while away from the baby.
Mothers should use a cup and spoon to feed the baby, not a bottle.
Avoid mixed feeding.
Do not give traditional medicines and remedies, unless you are sure they are safe (check with a doctor or nurse).
Look for mouth and tongue sores or patches in the baby and get treatment right away. Infants aged 6-24 months (see Module 7 for more information on weaning and complementary feeding):
Wean the baby off of the breast if enough replacement food is available and can be safely prepared, or add complementary foods at 6 months.
After the baby is 6 months old, caregivers should be encouraged to feed the child foods rich in energy and other nutrients, like porridge enriched with milk, sugar, pounded groundnuts, bean powder or soya bean oil.
In some places, children who are weaning off of breastmilk may be able to get special food baskets or packages from local organizations. Peer Educators can make referrals if these services are available in their working areas.
Children should get the proper amount and variety of foods, especially after an illness.
Children should eat foods from the basic food groups at least three times a day.
If children have a lot of illnesses and are losing weight, try to help identify which foods they like and give these foods frequently. Offer food in small amounts many times during the day if possible.
For children with no diarrhea, vomiting or nausea, a small amount of margarine or oil can be added to food to increase energy intake.
Children can be given mashed fruits and vegetables like ripe bananas, avocados, pumpkin and boiled sweet potato as often as possible to increase food intake.
Children should be de-wormed every 4-6 months, starting when they are 1 year old.
All children need vitamin A supplements starting when they are 6 months old.
All children should take a daily multivitamin if available.
Encourage children to be active and play. This will help build muscles and also help with digestion.

17-12 Module 17
Diagnosis and treatment of malnutrition: Adults and children may become malnourished if they do not eat enough foods, do not eat healthy foods from all of the food groups or if they have illnesses that prevent the body from taking in or processing food. Malnourished children living with HIV have a high chance of becoming very ill and dying. To prevent malnourishment, Peer Educators can counsel mothers and caregivers on the importance of:
Regular growth monitoring for children – even when they are healthy
Good nutrition for children
Good hygiene at home Adults and children who are malnourished need immediate medical care. Depending on the situation, some people may need to be admitted to the hospital for treatment. Others with mild malnutrition can usually be managed at home. Peer Educators can help recognize signs of malnutrition in clients and their families and make referrals for immediate care by a doctor, nurse or nutritionist. Peer Educators can also provide support to caregivers of malnourished children by offering support and practical nutrition advice. Signs of malnutrition include:
Not gaining weight or not gaining enough weight (in children and pregnant women)
Developmental delays (in children)
Behavior changes (for example, the person could be irritable or not responsive)
Tiredness
Decrease in body fat, especially on the legs, arms, buttocks and face (especially in children, but also in adults)
A big, swollen belly (especially in children, but also in adults)
Swelling in other parts of the body
Dry or peeling skin
Changes in skin color
Changes in hair color
Nails become brittle and change shape
Vision problems
Changes in hair (for example, it could be thinner, easily pulled out, dull brown or red color)
Poor healing of wounds
Goiter (large, swollen area on the throat, mostly seen in adults) Peer Educators should always refer adults and children with signs of malnutrition to a health care worker right away!

Comprehensive Peer Educator Training Curriculum: Trainer Manual 17-13
Safely preparing foods: The way we store and prepare food is just as important to our health as the kinds of foods we eat. Most foods naturally have germs in them that can make people sick if the food is not prepared correctly. Foods also come in contact with germs when they are transported and handled. Peer Educators can educate clients on ways to store and prepare food at home as part of nutrition counseling.
Tips to safely prepare and store food
Always wash and dry hands before and after touching food.
Wash and dry all cooking and eating utensils well.
Wash and dry all raw vegetables and fruits with clean water before cooking or serving. If possible, peel the skin off before cooking or serving fruits and vegetables.
Wash and cook all meats and animal products until there is no blood or pink and red areas.
Do not prepare raw and cooked foods on the same surface because germs will be spread from the raw food to the cooked food.
Hard boil or cook eggs well – they should not be runny.
Try not to overcook vegetables because this takes away their nutrients. You can steam, fry or boil them for about 5 minutes. If you boil vegetables, the leftover water can be used for cooking, such as making a soup.
Always keep food covered and away from flies and insects.
Serve food right away after it is cooked – do not let it cool too much.
Do not eat leftover food unless it has been kept cold, such as in a refrigerator. If you do eat leftover food, be sure to reheat it to kill any germs that may have grown.
Always filter or boil water used for cooking and drinking.

17-14 Module 17
SESSION 17.4: Common Nutrition and Eating
Problems (60 minutes)
TRAINER INSTRUCTIONS
Methodologies: Brainstorming, Small Group Work, Large Group
Discussion, Interactive Trainer Presentation
Step 1: Ask participants to brainstorm some of the common nutrition and eating
problems they, or other people living with HIV, experience. Give some examples
from the content below to get the conversation started. Next, ask participants
what they have done to make these problems better.
Step 2: Break participants into 7 small groups. Assign each group one of the following problems: major weight loss, anemia, diarrhea, nausea and vomiting, mouth and
throat sores, loss of appetite and taste changes. Give each group flip chart paper
and markers. Give the groups about 15 minutes to discuss the following
questions:
The nurse asks you to give basic nutritional counseling to a client with this
symptom/problem, in addition to the care she or he receives from the doctor.
What advice would you give a person with this problem – what things should she or
he do?
What things should the person avoid?
Step 3: Ask each small group to spend a couple of minutes presenting their key points
back to the large group. Add to the discussion, as needed, using the content
below. Make sure that participants discuss nutritional advice as well as the
importance of ongoing care and treatment, including ART, to prevent and
minimize these problems. Remind participants to always work with other
members of the multidisciplinary team and to refer clients with these problems
to the doctor or nurse.
Step 4: Ask participants what foods and herbs they have used (or others in the
community use) to help prevent or treat common eating and nutritional
problems. Review the list of foods, herbs and spices that can help relieve some
symptoms in the box below, adding safe, local remedies as well. Stress that while
some foods can be used to treat illnesses, Peer Educators should always refer
clients to a health care worker and advise clients to adhere to the care and
treatment plan, including taking ART the right way, every day.
KEY INFORMATION
Common nutritional and eating problems and advice for clients: Peer Educators should work with doctors, nurses, nutritionists and other members of the multidisciplinary team to support clients with nutritional problems. Many nutrition problems and eating challenges are symptoms of serious illnesses. Peer Educators should always refer clients

Comprehensive Peer Educator Training Curriculum: Trainer Manual 17-15
with these problems to a doctor or nurse for care. Peer Educators should also support clients to adhere to their care and treatment plan, including ART, which can help reduce these symptoms. Keep in mind that the nutritional advice here should always be given along with medical care from doctors, nurses and other members of multidisciplinary team. Major weight loss (sometimes this is also called wasting):
Eat small meals often. Try to include “GROW” foods with each meal.
Eat snacks during the day if possible (such as peanuts, boiled eggs and avocados).
Eat more “GO” foods (like rice, ugali, chapati, bread and porridge).
Eat more beans, lentils, peas and nuts.
Try to eat more meat, fish and eggs.
Use more fats and oils in food, especially “good fats” like avocados and nuts.
Eat more dairy foods (like milk and yogurt).
Add dry milk powder to foods, like porridge and cereals.
Add sugar, honey, syrup or fruit jam to foods.
Try to eat more of your favorite foods.
Also, adhere to the care and treatment plan, including ART. As discussed in Module 6, people living with HIV may experiences changes in their body shape. This is a long-term side effect that can be caused by ART, especially regimens with d4T. Some PLHIV may develop more fat on their stomach, breasts or other areas and lose fat in their face, arms and legs. These side effects may be confused with weight gain or weight loss. Peer Educators should always refer clients with changes in body shape to the doctor or nurse. Anemia (due to lack of iron in the diet; can also be caused by malaria and hookworm infections):
Try to eat more meat, legumes, fish, eggs, green leafy vegetables, dried fruits and whole grains.
Do not drink coffee, tea, milk or cocoa while eating – these reduce how the body processes iron.
Eat fruits and vegetables with lots of Vitamin C (such as oranges, lemons and green leafy vegetables) to increase how the body processes iron.
Go to the health facility to treat malaria, hookworm or other parasites.
Take a multivitamin with iron and iron tablets.
Also, adhere to the care and treatment plan, including ART. Diarrhea:
Eat soups and drink safe water, rice water, thin porridge and weak tea to avoid dehydration.
Drink oral rehydration solution (ORS).
Eat small amounts of food many times a day.
Eat foods like millet, bananas, peas and lentils to help retain fluids.
Eat foods like rice, bread, millet, maize, porridge, boiled potatoes, sweet potatoes and crackers that are easy to digest.
Eat soft foods like bananas, squash, cooked and mashed green bananas, paw-paws, mashed sweet potatoes and mashed carrots.
Eat eggs, chicken or fish for protein.
Also, adhere to the care and treatment plan, including ART.

17-16 Module 17
Stay away from:
Strong citrus fruits, such as oranges and lemons
Dairy products, such as milk (try fermented products instead, like yogurt)
Caffeine (coffee and teas)
Alcohol
Fried foods
Very sugary foods
Extra oil, butter or lard
Gas-forming foods such as cabbage, onions and carbonated soft drinks Nausea and vomiting:
Drink fluids, especially clean water, to prevent dehydration.
Eat bland soups.
Eat fruit, such as bananas.
Eat lightly salty and dry foods, such as crackers or bread, to calm the stomach.
Drink herbal teas and lemon juice in hot water.
Eat small amounts of food many times a day.
Also, adhere to the care and treatment plan, including ART. Stay away from:
Spicy or fatty foods
Coffee and tea (caffeine)
Alcohol Mouth and throat sores or infection:
Eat soft mashed foods, such as scrambled eggs, cooked carrots, sweet potatoes, bananas, soup, paw-paws and porridge.
Eat cold foods or foods at room temperature.
Drink liquids, such as beef broth, lentil or pea soup.
Rinse the mouth with clean, warm salt water before and after eating.
Use cinnamon tea as a mouthwash.
Suck on clean ice, if available, to relieve pain.
For thrush, eat fermented foods, such as plain yogurt. Sucking on a lemon and eating garlic can also help.
Also, adhere to the care and treatment plan, including ART. Stay away from:
Spicy or salty foods that can irritate mouth sores
Strong citrus fruits and juices that can irritate mouth sores
Sugary foods and drinks
Rough foods like toast and raw vegetables
Alcohol
Loss of appetite:
Eat small frequent meals throughout the day.
Eat nutritious snacks between meals.
Take walks before meals if possible – fresh air helps to stimulate appetite.
Avoid smoking – it reduces appetite.
Add seasonings, especially herbs, to food to give more flavor.
Try rinsing out the mouth after meals.

Comprehensive Peer Educator Training Curriculum: Trainer Manual 17-17
Use lemon, raw tomatoes or tonic water to stimulate the taste buds.
Chew food well and move it around the mouth to stimulate taste buds.
Avoid strong-smelling foods.
Eat with others as much as possible.
Also, adhere to the care and treatment plan, including ART. Taste changes (can sometimes be caused by ARVs and other medications):
Change sweetness, saltiness or sourness of food by adding sugar, salt, jam or lemon to increase the taste.
Try different herbs and spices.
Eat more fish or chicken, as meat can often have a metallic taste.
Eat lentils, beans or split peas.
Brush teeth after eating to remove any aftertaste.
Also, adhere to the care and treatment plan, including ART.
Foods, herbs and spices that can help relieve common eating problems
Certain foods, herbs and spices can help relieve common eating problems. People can try these remedies or other safe herbal remedies used in their community, and decide for themselves whether or not they are helpful. Remember that food is not a substitute for medicine. Herbs and spices should not be used in place of healthy, balanced eating or in place of medications (including ART). Peer Educators should always refer clients with nutritional and eating problems to the doctor or nurse.
Basil: helps relieve nausea and helps digestion. It can be added to foods or chopped and mixed with water and gargled.
Raw carrots: very high in vitamin A and can help clear the digestive system of worms and parasites. They can be added to other foods or eaten directly.
Cayenne pepper: helps improve appetite, fights infections and can help heal ulcers. It can be sprinkled on foods or added to fruit juice or water.
Cloves: help improve appetite, digestion and relieve diarrhea, nausea and vomiting. They can be used in soups, fruit juice and tea.
Garlic: helps digestion and weakness, relieves diarrhea, throat and ear infections, and relieves oral and vaginal thrush. It can be eaten raw, used in tea or used when cooking other foods.
Ginger: helps with digestion and can relieve diarrhea and nausea. It also can help improve appetite and be used to treat coughs and sore throats. It can be added to food, chewed raw or made into tea.
Lemons and limes: help fight bacteria, help digestion and dry the mouth. They can be added to foods or drinks or sucked on directly.
Mint: helps digestion and can soothe mouth sores. Use in tea or chew the leaves to help with digestion.
Neem: helps bring down fever. It can be boiled to make tea or bark can be chewed directly.
Parsley: helps improve appetite. It can be added to raw or cooked foods.
Pumpkin seeds: help the digestive system clean itself of worms and parasites. Seeds can be dried in the sun and eaten.
Thyme: helps relieve coughing and helps with digestion and the growth of good bacteria in the stomach. It can be made with tea or used as a mouthwash.

17-18 Module 17
SESSION 17.5: What to Do if There Is Not Enough
Food (60 minutes)
TRAINER INSTRUCTIONS
Methodologies: Large Group Discussion, Small Group Work, Guest Speaker (optional), Interactive Trainer Presentation
Step 1: Note: You may want to invite nutritional support organizations to this session
of the training. There may be international associations such as World Food
Program, Heifer International, World Vision, Red Cross or CARE providing this
kind of support to the whole community or just focused on PLHIV, and/or there
may be local, community-based organizations providing these services. Brief any
invited guests on the session in advance, including their role in the session.
Start the session by asking participants to raise their hand if they themselves, or
other people they know, have experienced times when they did not have enough food to eat. Ask participants to discuss the reasons why people do not have
enough food and what happens when people do not have enough food.
Step 2: Ask participants to break into 4 small groups. Give each group flip chart paper
and markers. Give the small groups about 15 minutes to discuss the following
questions, noting key points on flip chart:
What can Peer Educators do to identify clients and families who do not have
enough food to eat?
What can Peer Educators do to help link clients and families with food support and
other nutritional services?
Step 3: Ask each group to briefly present back the key points of their discussion and
record solutions on flip chart. Add to the discussion, if needed, using the content
below.
Step 4: If there are guest speakers at the session, ask them to give a brief overview of
the services they offer to PLHIV and their families, which specific communities
they work in, and whether or not there is a referral system from the facility to
the nutrition program or from the nutrition outreach program to the facility.
Review any referral forms used by the nutritional support programs.
Allow participants to ask questions of the nutrition organizations and encourage
the group to think more about how they can work together to best provide a
continuum of care and support – including nutritional support – to clients and
family members.
Step 5: Remind Peer Educators that when they return to their facility they will work
with the multidisciplinary team to learn more about community nutrition
resources and services and what their role will be in linking clients to these
resources.

Comprehensive Peer Educator Training Curriculum: Trainer Manual 17-19
KEY INFORMATION
One of the most common challenges people living with HIV and their families face is lack of food. Many times, extra income that would usually go to buy food instead goes to health care for the person living with HIV. If some of the wage earners in the family are ill, there is less income for food. One of the best things Peer Educators can do to help families who do not have enough food is to make sure they get HIV care and treatment. With ART, people can get healthy and stay healthy enough to work or tend a farm or garden. Depending on the specific program, Peer Educators can also help link PLHIV and their families with community-based nutrition support. Some health facilities also offer food supplies to PLHIV, pregnant women and families directly. Some ways Peer Educators can help PLHIV and their families get enough good foods to eat (adapt to the specific Peer Education program):
Work with the multidisciplinary team to have formal linkages between the clinic and food support organizations, including distributing food to clients at the health facility level.
Link clients with nutrition support programs in the community.
Link clients with animal husbandry, agricultural and other income-generating activities in the community.
Provide practical counseling and education to clients and family members on good nutrition, locally available foods, as well as storing and preparing food.
Make sure clients take multivitamins.
Help families learn to make sack gardens or start community or school gardens.
Help organize market workers, restaurant and store owners to donate food to households affected by HIV.
Help organize community members to help take care of other people’s gardens when they are ill or need to go to the facility for an appointment.
Help organize food banks through community- and faith-based organizations.

17-20 Module 17
SESSION 17.6: Classroom Practicum on Nutrition
Education and Counseling (70 minutes)
TRAINER INSTRUCTIONS
Methodologies: Role-Play, Case Studies, Large Group Discussion
Step 1: Break participants into small groups of 3. Hand out a case study card to each
group. Ask the groups to assign one person to play the role of a Peer Educator,
one the role of the client and another the role of observer (or the client’s
partner).
Note: If time is limited, the trainer can present the case studies and participants can discuss as a large group.
Step 2: Ask the small groups to discuss and role-play their case study. After about 10
minutes, switch roles until everyone has had a chance to play the role of the
Peer Educator.
Step 3: Ask some of the small groups to role-play their case study in front of the large
group and discuss what was done well and what could have been done differently
when providing nutrition education and counseling to each client. Be sure that
the nutrition advice provided in the role-plays is very practical and specific and
that the importance of adhering to the HIV care and treatment plan was
discussed. Remind participants that they should always consult other members of
the multidisciplinary team when providing nutrition education and counseling.
KEY INFORMATION
Case Study 1: L___ is a 30-year-old woman living with HIV. She started ART about 1 year ago, but has recently stopped. The nurse refers L___ to you for more counseling. You learn that her husband died and that, without his income, she is very poor and does not have enough food to eat. She says she stopped taking ART because she knows it has to be taken with food, but she does not always have food to eat. How would you counsel her? What other information would you want to know? What practical nutritional advice would you provide to L___? Case Study 2: D___ is a male client living with HIV. Recently, he has been feeling ill and has lost a lot of weight. The nurse refers him to you for counseling. D___ says that he does not have meat to eat anymore since he lost his job at the factory. You also learn that he is taking CTX, but not ART. What other information would you want to know? How would you counsel D___? What practical nutrition advice would you provide, including on locally available and affordable foods that could help him gain weight?

Comprehensive Peer Educator Training Curriculum: Trainer Manual 17-21
Case Study 3: R___ is a 20-year-old woman living with HIV. You meet her in the clinic waiting area. She is unwell and says that she does not like to eat anymore. She tells you she has very painful sores in her mouth and that it hurts to eat. Also, she says food does not taste the same. How would you counsel R___? What practical nutrition advice would you provide? Case Study 4: B___ and her boyfriend N___ visit you at the clinic. They are both living with HIV. B___ is pregnant. The nurse said she is not gaining enough weight during the pregnancy and refers her to you for more counseling. How would you counsel B___ and N___? What information would you want to know? What practical nutrition advice would you provide? Case Study 5: F___ is the caregiver of a 2-year-old girl named V___. V___ is living with HIV and is on ART. F___ brings V___ to the clinic because she has very bad diarrhea. The doctor notes that V___ is losing weight. How would you counsel F___? What practical nutrition advice would you provide? Note: Some of the preceding information in this Module was adapted from the following sources: Colton, T., Dillow, A., Hainsworth, G., Israel, E., & Kane, M. (2006). Community home-based care for people and communities affected by HIV/AIDS: A comprehensive training course for community health workers. Watertown, MA: Pathfinder International. WHO/Food and Agriculture Organization (FAO). (2002). Living well with HIV/AIDS: A manual on nutritional care and support for people living with HIV/AIDS. Geneva, Switzerland: WHO/FAO.

17-22 Module 17
SESSION 17.7: Module Summary (15 minutes)
TRAINER INSTRUCTIONS
Methodologies: Large Group Discussion, Interactive Trainer
Presentation
Step 1: Ask participants what they think are the key points of this Module. What
information will they take away from the Module?
Step 2: Summarize the key points of the Module using participant feedback and the
content below.
Step 3: Ask if there are any questions or clarifications.
Step 4: Review the learning objectives with participants and make sure all are confident
with their skills and knowledge in these areas.
Step 5: If there are areas participants do not fully understand or in which they need
more help, go back and review the session before moving to the next Module.
KEY INFORMATION
THE KEY POINTS OF THIS MODULE INCLUDE:
Good nutrition is part of comprehensive HIV care and treatment, including ART.
Good nutrition is important for all PLHIV, even if they are not ill (asymptomatic), because it can help maintain weight and fight off infections and illnesses.
The sooner a client starts to eat enough nutritious foods, the better. Once a person loses weight or becomes very ill, the harder it is to put weight back on.
Eating a balanced diet means eating many different types of foods and eating enough foods every day. We need to eat a variety of foods to help us get the energy we need (to “go,” to “grow” and to keep our immune system strong, or “glow”).
It is always best to eat foods that are grown at home or produced locally instead of imported or processed foods, which do not have as many nutrients.
PLHIV with advanced HIV or AIDS should eat another full meal each day. This may be difficult for some clients due to health problems or poverty.
ALL pregnant and breastfeeding women, regardless of HIV-status, should eat more healthy foods during these times.
Pregnant women with advanced HIV or AIDS need to eat even more healthy foods than usual, including more GROW foods (proteins), if possible.
Proper nutrition can help young children gain weight, grow and develop. Good nutrition can also decrease illnesses like diarrhea and vomiting and keep children healthy and well longer.

Comprehensive Peer Educator Training Curriculum: Trainer Manual 17-23
(KEY POINTS, CONTINUED) Children with HIV need to eat more healthy foods than children without HIV to grow,
develop and stay healthy.
Adults and children may become malnourished if they do not eat enough foods, do not eat healthy foods from all of the food groups, or if they have illnesses that prevent the body from taking in or processing food. Adults and children who are malnourished need immediate medical care.
It is important to teach clients and their family members how to safely store and prepare foods at home.
Peer Educators, along with other members of the multidisciplinary team, can help clients come up with practical solutions to common nutritional and eating problems, like weight loss, diarrhea, mouth sores and loss of appetite.
One of the most common challenges people living with HIV and their families face is lack of food. You can help link PLHIV and their families with community-based and health facility-based nutrition support.


Comprehensive Peer Educator Training Curriculum: Trainer Manual 18-1
ADVANCED MODULE 18:
Pediatric HIV Care and Treatment
DURATION: 390 minutes (6 hours, 30 minutes)
Note: Trainers can adjust the methodology and content to make the
Module shorter or longer as needed.
LEARNING OBJECTIVES:
By the end of this Module, participants will be able to:
Discuss why it is important to give special attention to HIV-
exposed and HIV-infected babies and children in health facilities
and in the community
List different ways HIV-exposed and HIV-infected babies and
children can be found and brought into care and treatment
Understand when and how HIV can be diagnosed in infants and
children
Provide information to mothers and caregivers on the care HIV-
exposed and HIV-infected children need
Understand what ARVs are commonly available for children
Work with other members of the multidisciplinary team to help
prepare families for disclosure to children and offer follow-up
support
Work as part of the multidisciplinary team to prepare families for
ARV adherence and to provide ongoing support for adherence to
care and treatment in children
CONTENT:
Session 18.1: Introduction: The Importance of Pediatric HIV Care
and Treatment
Session 18.2: Identifying HIV-exposed and HIV-infected Infants and
Children
Session 18.3: Caring for HIV-exposed and HIV-infected Babies
Session 18.4: Pediatric ART
Session 18.5: Pediatric Disclosure
Session 18.6: Pediatric Adherence
Session 18.7: Classroom Practicum on Pediatric HIV
Session 18.8: Module Summary

18-2 Advanced Module 18
METHODOLOGIES:
Interactive trainer presentation
Large group discussion
Role-play
Demonstration
Small group work
Taste test
Case studies
MATERIALS NEEDED:
Flip chart
Markers
Tape or Bostik
DBS cards and bar code labels
Pediatric ARVs (including Kaletra suspension) and supplies to give
them (e.g., syringes)
Spoons for Kaletra taste test
Case study cards for Session 18.7
WORK FOR THE TRAINER TO DO IN ADVANCE:
Read through the entire Module and make sure you are familiar
with the training methodologies and content.
Invite members of the multidisciplinary team caring for children as
co-trainers of this Session if possible.
Prepare flip charts for Session 18.3.
Review the case studies in Session 18.6 and Session 18.7 and adapt
to the local context as needed.
Prepare the case study cards for Session 18.7.

Comprehensive Peer Educator Training Curriculum: Trainer Manual 18-3
SESSION 18.1: Introduction: The Importance of
Pediatric HIV Care and Treatment (45 minutes)
TRAINER INSTRUCTIONS
Methodologies: Interactive Trainer Presentation, Large Group
Discussion
Step 1: Review the Module learning objectives.
Step 2: Remind participants that Peer Educators have a key role to play in getting babies
and children enrolled in care and treatment and sticking with the care plan in the
long term. Ask if any participants are currently caring for HIV-exposed or HIV-infected children. Encourage them to share their first-hand experiences
throughout the Module.
Step 3: Ask participants to discuss why care and treatment are so important for babies
and children with HIV, highlighting that, without ART, most will die before their
second birthday. Fill in, as needed, using the content below.
Step 4: Ask participants to brainstorm the special needs of babies and children with HIV,
drawing from personal experiences when possible. Ask participants caring for
children with HIV what some of the challenges are and record on flip chart, filling
in using the content below as needed.
KEY INFORMATION
Important points about pediatric HIV:
Children are not little adults. Adults can live many years with HIV before they get sick. But children, particularly babies, are not as strong and are much more likely to get sick very quickly once infected with HIV.
50% of babies with HIV will die before their second birthday without care and ART.
Caring for sick children and having a child die can be very hard emotional experiences for families.
Children are our future and we need to keep them healthy to build strong communities and a strong nation.
Babies and children with HIV who are in care and take ART can live long, healthy lives and grow up to be healthy adults.

18-4 Advanced Module 18
Challenges to pediatric care and treatment For babies exposed to HIV:
Mothers in PMTCT programs either cannot bring their babies back to the clinic or do not understand the importance of doing so.
Often, when mothers bring babies back to the clinic, health care workers do not know that the baby has been exposed to HIV.
Early infant HIV testing is available in most countries, but not in all areas, and many mothers and caregivers do not have the facts about early testing.
For HIV-infected babies and children:
It can be hard to find babies in need of care and treatment, and waiting too long means the babies will probably die.
Many children living with HIV may be orphans without a consistent caregiver.
Health care workers may not be used to working with children or know about pediatric care and treatment.
Children have to rely on adults to give their medicines and bring them to the clinic for appointments, which may be a challenge, especially if the caregiver is sick.
Older children or adolescents may not want to be tested or take ARVs.
There are not many ART regimens available for children in Africa.
Doses of ARVs change all the time for children because they are based on the child’s weight. This can make it hard for the caregiver to give the right dose.
Many people are afraid that ARVs will hurt children.
It can be difficult to talk about HIV with children.
Many caregivers do not want to tell their children, other family members or people in the community that the child is HIV-infected.
Peer Educators have an important role to play in helping parents, caregivers and children overcome these challenges and get the care and treatment they need!

Comprehensive Peer Educator Training Curriculum: Trainer Manual 18-5
SESSION 18.2: Identifying HIV-exposed and HIV-
infected Infants and Children (35 minutes)
TRAINER INSTRUCTIONS
Methodologies: Large Group Discussion, Interactive Trainer
Presentation
Step 1: Note: The content in this session was also covered in Module 7. If this Module is
included as part of the basic Peer Educator training, you can shorten this session.
If this Module is being taught as part of an advanced or refresher training, it is
best to go through all of the suggested steps and the important information on identifying exposed and infected babies, as well as HIV testing for infants and
children.
Ask participants to think of places where we can find babies who may need HIV
care and treatment and record on flip chart. Remind participants that while
PMTCT services are a good place to start, there are many other places where
Peer Educators can look for HIV-exposed or HIV-infected babies and bring them
to the clinic for testing, care and treatment. In places where many people are
living with HIV, Peer Educators can help make sure all children have an HIV test,
even those who are feeling healthy.
Step 2: Ask participants to brainstorm some of the signs and symptoms of HIV in babies
and list these on flip chart. Remind participants that Peer Educators should
counsel parents and caregivers and refer babies with these symptoms for HIV
testing as soon as possible. Peer Educators should always consult with other
members of the multidisciplinary team if they think a child has signs of HIV.
Step 3: Ask if any participants know about HIV testing for babies. After allowing time for
participants to give their ideas, present key points about HIV testing in babies
under 18 months of age, and in children over 18 months of age, using the
content below.
If DBS is used at the health facilities where participants will be working, be sure
to show DBS sample cards and any forms/registers the facility is using for early
infant diagnosis.
Step 4: Remind participants of the key role Peer Educators play in finding HIV-exposed
babies and sick babies and making sure they are tested. It is also important to
make sure mothers and caregivers pick up HIV test results on time and that
children are enrolled in care and treatment if exposed or infected. Finally,
suggest that Peer Educators can be good role models by having all of their own
children tested for HIV.

18-6 Advanced Module 18
KEY INFORMATION
Review from Module 7 Finding babies and bringing them into care: PMTCT programs are one of the best ways to find babies exposed to HIV who should be tested and enrolled in care and treatment. But there are other places where Peer Educators can help the multidisciplinary team and community workers find babies exposed to HIV or infected with HIV (since not all will get PMTCT services or come back for follow-up). These include:
Under-5 clinics
Pediatric inpatient wards
Adult ART clinics
Health centers and hospital outpatient departments where babies are taken when they are sick
Homes with adults living with HIV
Community health workers and community-based organizations, especially those working with orphans
Traditional healers and traditional birth attendants who may be a first point of contact for sick babies
In places where many people are living with HIV, Peer Educators and other members of the multidisciplinary team should encourage HIV testing and counseling for ALL children. This way, more children can get the lifesaving care and treatment services they need. It is important to remember that while most babies living with HIV are infected through MTCT, others may have been victims of sexual abuse. In these situations, Peer Educators should always turn to a professional counselor. HIV testing in babies and children: Some mothers are scared to have their children tested because of lack of information about what services will be available if the test is positive. Peer Educators need to explain to mothers and caregivers that there is help available for children and that the sooner they know the children’s HIV-status, the more quickly the children can, if infected, take medicines to stay healthy. Many times, infant HIV testing is provided as part of PMTCT services at the maternal and child health clinic. It usually takes some weeks before the test results are returned and sometimes mothers do not come back to the clinic for the results. Peer Educators can help make sure mothers and caregivers receive their child’s HIV test results by providing good counseling,
Peer Educators should know the common signs and symptoms of HIV in babies and children:
Losing weight
Not gaining weight or growing according to plan
Lots of ear, throat and other infections
Diarrhea
Fever
Coughing
Skin problems
Thrush (white spots) in the mouth Swollen glands

Comprehensive Peer Educator Training Curriculum: Trainer Manual 18-7
making sure the contact information is written in the patient file and following up when people do not return for test results. Peer Educators can recommend HIV testing and counseling for ALL children, and can be good role models by having their own children tested for HIV as well. As always, it is important to follow national guidelines for HIV testing in babies and children.
HIV Testing in Babies and Children HIV testing in babies under 18 months of age:
The only way to know for sure if a child under 18 months of age is HIV infected is through DNA PCR testing. A sample of the baby’s blood is put on filter paper and dried. This is called dried blood spot, or DBS. Then the DBS sample is tested for HIV. If this test is not available, the doctor can also examine the baby, check the CD4 cell count, and look for signs of HIV and AIDS.
Rapid HIV tests used in adults can be used to test babies, but they will only tell us if the baby is exposed to HIV, not if the baby is definitely HIV-infected.
Once the baby is 6 weeks old, a small amount of blood can be taken from the baby’s heel to do a test to see if the baby is HIV-infected (this is for the DNA PCR test). Once the mother is counseled by the nurse and the baby’s blood is taken, the sample will be sent out to a laboratory to be tested.
During counseling, Peer Educators should help the mom think about her support system – who will help her if the baby is HIV-infected? Who will help come to clinic appointments? These people can be treatment supporters if and when the baby starts taking medicines.
Peer Educators should make sure mothers understand that the results will take time, and they should schedule an appointment for the mother and baby to return to the clinic to pick up results. Peer Educators should follow up if the mom or caregiver does not come back to pick up the results of the child’s HIV test.
If the result of the test is positive, the baby is HIV-infected and most babies should start ART right away (WHO recommends that all HIV-infected babies start ART – refer to your national guidelines). Help the mom and the baby go to the ART clinic to get the child enrolled as soon as possible. If the mom is breastfeeding, she should continue to do so, as this will help the baby.
If the result of the test is negative and the mom is still breastfeeding, she should keep breastfeeding, make sure the baby is brought to the clinic for regular visits, and then retest the baby 2-3 months after she has stopped breastfeeding completely. The baby is still at risk of becoming HIV-infected as long as it is breastfeeding. This is because there is HIV in breast milk. There is less HIV in the breast milk if the woman is on ART.
HIV testing in children over 18 months of age:
Once children are 18 months old, they can be tested for HIV with the standard rapid test used on adults.
If children are still breastfeeding, they should be retested after the mother has completely stopped breastfeeding.
Be sure to follow your national guidelines on HIV testing in babies and children.

18-8 Advanced Module 18
SESSION 18.3: Caring for HIV-exposed and HIV-
infected Babies (50 minutes)
TRAINER INSTRUCTIONS
Methodologies: Interactive Trainer Presentation, Large Group
Discussion, Role-Play
Step 1: Note: The content in this session was also covered in Module 7. If this Module is
included as part of the basic Peer Educator training, you can shorten or adjust
this session. If this Module is being taught as part of an advanced or refresher
training, it is best to go through all of the suggested steps and the important
information on caring for HIV-exposed infants.
Using the pre-prepared flip chart and the content below, review the key
components of caring for HIV-exposed babies right after they are born.
Ask participants to discuss these questions:
What do you think are some of the challenges mothers and caregivers face making
sure the baby gets these services right away after birth?
What are some of the things Peer Educators can do to help make sure HIV-
exposed babies get these services?
Next, ask for 2 volunteers to come to the front of the room and role-play how a
Peer Educator can counsel a pregnant woman living with HIV about caring for
her newborn. Make sure the Peer Educator covers all of the key messages listed
in the content below. Discuss the role-play as a large group.
Step 2: Using the pre-prepared flip chart and the content below, review the key
components of caring for HIV-exposed babies who are 6 weeks old. Ask
participants to discuss these questions:
What do you think are some of the challenges mothers and caregivers face making
sure babies get these services when they are 6 weeks old?
What are some of the things Peer Educators can do to help make sure HIV-
exposed babies get these services at 6 weeks?
Next, ask for 2 volunteers to come to the front of the room and role-play how a
Peer Educator can counsel a new mother living with HIV about the care her baby
will need when she or he is 6 weeks old. Make sure the Peer Educator covers all
of the key messages listed in the content below. Discuss the role-play as a large
group.
Step 3: Using the pre-prepared flip chart and the content below, review the key
components of ongoing care for HIV-exposed and HIV-infected babies
and children. Ask participants to discuss these questions:
What do you think are some of the challenges mothers and caregivers face making
sure children get the ongoing care they need?

Comprehensive Peer Educator Training Curriculum: Trainer Manual 18-9
What are some of the things Peer Educators can do to help make sure children get
the ongoing HIV services they need?
Next, ask for 2 volunteers to come to the front of the room and role-play how a
Peer Educator can counsel a new mother living with HIV about the care her baby
will need over time. Make sure the Peer Educator covers all of the key messages
listed in the content below. Discuss the role-play as a large group.
Summarize the 5 key points about caring for HIV-exposed children using the
content below.
Step 4: Ask participants what is meant by the phrase “focus on the whole family,” and why
this is important when helping care for HIV-exposed and HIV-infected children.
Fill in, as needed, using the content below.
KEY INFORMATION
Review from Module 7 All babies born to women with HIV are exposed to HIV because they shared blood and fluids with the mother. HIV transmission to the baby does not happen in all pregnancies. Therefore, many babies will escape HIV infection, especially if the mother and baby get care and treatment.
Caring for babies exposed to HIV: The most important thing for babies exposed to HIV and HIV-infected babies is that they come back to the clinic often to see the doctor and that they take CTX every day.
Babies with HIV may get sick very quickly and they need to be seen at the clinic more often than adults with HIV or children who do not have HIV.
Peer Educators should counsel mothers and other caregivers about bringing babies back to the clinic every month for a check-up and whenever they are sick.
Remember: It is important to explain follow-up care very well to mothers and families, make sure that they continue to get the medical attention they need and that they are not lost after the baby is delivered. There is a lot that can be done to keep babies healthy when they have been exposed to HIV and there are tests that can be done to tell if babies are HIV-infected.

18-10 Advanced Module 18
Right away after babies are delivered to mothers with HIV:
Babies should get single-dose NVP within 72 hours of birth and AZT 2 times every day for 1-4 weeks, depending on whether the mother took ART during pregnancy and your national guidelines.
These medicines can be given in the maternity ward. In some places, where women often deliver their babies at home, NVP is given to the mother to take home during her pregnancy so that she can give the dose to the baby right away after delivery. Babies delivered at home should be seen at the clinic as soon as possible for a check-up and for ARVs.
At 6 weeks of age:
All exposed babies should start taking CTX. This is the same drug that adults take to prevent pneumonia. It is available as a syrup or tablet for babies. This is one of the best ways to keep babies healthy and prevent illness. Babies exposed to HIV or with confirmed HIV infection should take CTX EVERY DAY.
The dose of CTX will depend on the baby’s weight. We all know that babies grow very fast – even every day – so the baby needs to come back to the clinic very often to be weighed so we know how much medicine to give.
Where available, babies should be tested for HIV with DNA PCR as soon as possible after 6 weeks of age (as explained in the box below).
Ongoing:
If the baby is HIV-infected, a CD4 test needs to be done. CD4 cell count number is measured like it is for adults but, if available, CD4% is a better measure in children under 5 years of age. A health care worker can interpret the results, but Peer Educators should know that what is considered a high or a low CD4 cell count in adults is not the same for children. For example, a CD4 cell count of 500 is good for an adult but very low for a baby.
Babies should keep taking CTX until it is definite that they are not HIV-infected and they are no longer breastfeeding.
Make sure babies go for check-ups and get immunizations on schedule.
Health care providers should look for and treat infections.
Make sure babies are getting good nutrition and growing well. Doctors or nurses will weigh, measure and examine babies at every visit to see if they are growing and developing normally. Babies’ height, weight and head measurement should be recorded on a growth chart at each visit. This is one of the best ways to see if babies are healthy.
5 key points about caring for babies exposed to HIV:
Come back to the clinic often. If babies are sick, do NOT wait – come in right away.
Go for early HIV testing.
Give CTX to the baby every day.
Weigh and measure the baby at every visit.
Focus on the whole family.

Comprehensive Peer Educator Training Curriculum: Trainer Manual 18-11
Focus on the family:
Having a sick baby and knowing that the baby may have HIV can be a very hard thing for parents and caregivers.
It is important for Peer Educators to spend time talking with families about how they are feeling and making sure they understand what is happening with babies (tests, medicines, side effects, etc.) in easy-to-understand terms.
HIV is a family disease and parents of sick babies will often themselves be sick and in need of care and treatment and support to adhere, disclose to others or seek community services.
Parents and caregivers should be active in the baby’s care and monitoring as they often know best when “something is not right” with the baby (the baby is crying all the time, the baby is not eating, the baby is not sitting up or playing, etc.). Whenever the baby is not doing well, parents and caregivers should be encouraged to trust their instincts and bring the baby to the clinic right away.
Peer Educators should also ask about all caregivers of the baby, as they often change. All caregivers should know what is going on with a baby’s health and care and treatment plan.

18-12 Advanced Module 18
SESSION 18.4: Pediatric ART (45 minutes)
TRAINER INSTRUCTIONS
Methodologies: Large Group Discussion, Demonstration, Interactive
Trainer Presentation
Step 1: Note: Before this session, the trainer should collect all pediatric ARVs available
and supplies for giving medicines (such as syringes for drawing up and measuring
syrups).
Ask participants if they think ARVs for children are the same as ARVs for adults
and, if not, to list some of the differences.
Step 2: Ask participants caring for children with HIV what ARVs they give, how much, how often and some of the challenges and solutions in giving medicines to
children every day. Encourage participants to ask questions of others who have
firsthand experience with pediatric ART.
Step 3: Review the common ART regimens for babies and children in your setting (refer
to national pediatric HIV guidelines), stressing that the doses always depend on
the child’s weight.
Step 4: Work with the guests from the multidisciplinary care team to demonstrate how
pediatric ARVs are given and give participants a chance to practice drawing up
specific amounts of syrups, crushing and dissolving pills, etc.
Step 5: Review the “key issues for pediatric ART” in the key information below. Record
key points on flip chart and encourage discussion.
KEY INFORMATION
Pediatric ART:
As with adults, ART can help keep babies and children with HIV healthy, strong and able to live a whole lifetime when they adhere to their care and medication regimens.
The use of ART in babies and children is not always easy and is often more complicated than ART in adults.
Pediatric ART regimens are not always available and can be more difficult to take than for adults. Children depend on caregivers to give their ART and to take them to the clinic. Doses and regimens change often with children, depending on their age and weight.
Peer Educators can help families understand and access pediatric ART and the care and treatment services they need to have healthy families and communities.

Comprehensive Peer Educator Training Curriculum: Trainer Manual 18-13
Common first-line ART regimens for infants and children (refer to your national pediatric HIV guidelines – these are just some examples): AZT + 3TC + NVP or EFV d4T + 3TC + NVP or EFV AZT + 3TC + LPV/r d4T + 3TC + LPV/r **Note: EFV should not be given to children under 3 years of age. Key issues for pediatric ART:
Most babies and young children with HIV will need ART since they get sick quickly and are at great risk for illness and death.
All HIV-infected babies and children also need CTX.
WHO recommends that all HIV-infected infants start ART. Not all national pediatric ART guidelines have been updated to include this recommendation. It is important to follow your national guidelines.
Only a doctor can decide if a pediatric patient is eligible for ART. The doctor will look at the child’s CD4 cell count or CD4% and clinical symptoms.
Once the doctor decides the child should start ART, the caregivers need to be prepared for the challenges ahead. Peer Educators can help caregivers understand pediatric HIV and make an ART adherence plan with the multidisciplinary care team.
Success with pediatric ART depends on a partnership among the caregiver(s), the child, the multidisciplinary care team at the clinic, and the community.
All members of the family and all caregivers must be prepared to give the child ART at the same time, the right way, every day. The child must cooperate and be involved in his/her treatment as well.
There are many barriers to adherence with pediatric ART.
- Children may not want to take the medicines, they may be away at school for many hours of the day, or caregivers may be at work or not always with children when the medicines need to be given.
- Pediatric ARVs are not always available in syrup form, so pills may need to be crushed or dissolved in water or juice, adding extra time to the caregivers’ day. Some of the pediatric ARV syrups taste very bad.
- The dose of different ARVs will change often in children because it depends on their weight. It can be hard for caregivers to remember the right dose to give since it changes as children grow.
- Caregivers may also be living with HIV themselves. If parents or caregivers have not disclosed their HIV-status, it makes it hard to tell people about children’s HIV-status. The family or other caregivers will not know what kinds of care and treatment children need if they do not know the children’s status.
As children get older, they should know about their own HIV-status. What we tell children about HIV depends on their age and maturity. But it is always important for children to know what is going on with their own health. Peer Educators can help caregivers prepare to disclose to their children and support them in this process.
ARV names AZT or ZDV = zidovudine 3TC = lamivudine NVP = nevirapine EFV = efavirenz d4T = stavudine LPV/r = Kaletra

18-14 Advanced Module 18
SESSION 18.5: Pediatric Disclosure (70 minutes)
TRAINER INSTRUCTIONS
Methodologies: Large Group Discussion, Interactive Trainer
Presentation, Small Group Work
Step 1: Lead a discussion on the importance of open, honest communication with
children and HIV disclosure to children. Use the following questions to guide the
discussion and fill in, as needed, from the key information below. Encourage
participants to draw on experiences with their own children or other children in
their family.
Do you think it is difficult to communicate with children? What makes it easy or difficult?
Do you believe that children should be told about their HIV-status? Why or why not?
At what age should children know their HIV-status?
What are some of the things we need to consider with disclosure to children?
What do you think is meant by the phrase, “disclosure is an ongoing process?”
Why are so many adults, including health care workers, reluctant to tell children
about their HIV-status?
Fill in using the content below and record key points on flip chart. Highlight the
importance of open, honest communication with children – even very young
children – about their health and well-being.
Step 2: Present the key steps and strategies that Peer Educators can use to help families
with disclosure to children (preparation, education, planning and ongoing follow-
up and support), using the content below. Record key points on flip chart.
Remind participants that Peer Educators can work with other members of the
multidisciplinary team to support parents and caregivers to disclose to children,
but that Peer Educators themselves should not disclose to children.
Step 3: Ask participants if they can recall the tips about talking with children (from
Module 4). Lead a discussion on these tips using the content in the box below as
needed.
Step 4: Discuss how disclosure to children depends on their age and developmental
stage. Break participants into 3 groups. Give each small group flip chart paper
and markers. Assign each group one of the following:
Pre-school-aged children
Primary school-aged children
Adolescents
Have participants decide which age ranges make up each group (there are
suggestions in the key information below). Ask each of the groups to spend 15
minutes brainstorming what a parent or caregiver might say to children of this
age group about their HIV-status and to record on flip chart.

Comprehensive Peer Educator Training Curriculum: Trainer Manual 18-15
After 15 minutes, bring the large group back together and ask the small groups
to present their ideas on what to say to children about HIV at different ages and
developmental stages. Fill in, as needed, using the content below. Remind
participants that how we disclose to children depends on their age,
developmental stage and family dynamics. Finally, remind participants that
disclosure is not a one-time event – it is an ongoing process.
Step 5: Close the session by reminding participants that it is children’s right to know
about their own health and that, as Peer Educators, we must support parents
and caregivers with disclosure (especially once children reach school age, if not
before).
KEY INFORMATION
Some key points on disclosure to children:
Children – even very young children – have feelings, concerns and questions.
It is important to talk with children openly and honestly. It is never good to lie to children or hide information that they want to know.
Parents and caregivers should start talking about health issues with children at an early age.
Disclosure is more than telling children their HIV-status.
Disclosure is an ongoing process – it is not a one-time event.
When to say “HIV” varies with the child and the family, but most children should know they have HIV by the time they are school-aged.
Let the child be the guide – children will naturally ask questions.
Individualize the approach according to the child’s age, developmental stage, maturity, coping skills and family situation.
What are the reasons to disclose a child’s HIV-status?
Children have a right to know about their own health care.
Children who have not been disclosed to may develop their own views about their illness, feel isolated, learn their HIV-status by mistake or have poor adherence.
Orphaned or other vulnerable children may wonder why they have lost a parent or been rejected by the family. They need to know the truth – this will also help children seek the services they need, especially those who do not have regular caregivers.
Children often want and ask to know what is wrong. Children are observant, smart and curious. They often know much more than we adults think.
When children learn about their HIV-status directly from their caregivers, it can provide comfort and reassurance. Too often, children overhear health care workers and caregivers talking about their health as if they were not in the room.
Children who know their HIV-status can take an active role in their care and treatment plan and, when old enough, take steps to live positively and prevent new infections.
When disclosing to children, we must consider:
Their needs, feelings and beliefs
The needs, feelings and beliefs of the parents and caregivers

18-16 Advanced Module 18
Their age and developmental stage
Their specific family situation
How the parents and caregivers communicate with children What are some of the reasons adults do not want to tell children about their HIV-status?
Sometimes they do not know where to start.
There may be fear that disclosing will cause mental harm to children or that they will think they are not normal.
Children may not understand the stigma attached to HIV.
Parents and caregivers may feel guilty that children are HIV-infected.
There may be fear of talking about taboo subjects with children.
Parents and caregivers may have a hard time coping with their own illness or that of loved ones. They may use denial to cope.
In many places, there is silence around death and illness and limited open communication within families.
Sometimes people believe that children are too young to understand complicated health issues.
How can Peer Educators help families with disclosure? Peer Educators can support parents and caregivers during the disclosure process, but should not themselves disclose to children. As always, Peer Educators should work with doctors, nurses, counselors and other members of the multidisciplinary team when supporting families with disclosure to children. Peer Educators can work with other members of the multidisciplinary team to help prepare families for disclosure. Remember: If parents or caregivers are not ready to disclose, we cannot force the process. Asking and discussing the questions below can help us determine what kind of support caregivers need.
What do they think is important to communicate to the child?
What do they think will be the hardest part of the disclosure process?
What do they think will be the hardest questions to answer?
Peer Educators can work with other members of the multidisciplinary team to help educate families about HIV and disclosure.
Acknowledge that disclosure is very difficult.
Affirm people’s commitment to disclosing to children.
Answer any questions about pediatric HIV the family may have (consult with other members of the multidisciplinary team to answer the family’s questions).
Help families predict questions and responses from children.
Help plan how children will receive support after disclosure. Peer Educators can work with other members of the multidisciplinary team to help families plan for disclosure.
When and where will disclosure start?
- Ideally, when children are in a comfortable place, such as at home (some families may be more comfortable if some of the disclosure process takes place at the health facility with the support of a counselor, social worker, nurse or doctor)
- Start by playing with the child or talking about the child’s day.
Who will lead the discussion and what is that person’s relationship to the child?

Comprehensive Peer Educator Training Curriculum: Trainer Manual 18-17
Some tips on talking with children about HIV
The best place to tell children about their HIV-status is usually at home. However, some families may prefer that some of the disclosure process happen at the health facility with the support of a counselor, social worker, nurse or doctor.
The best person to tell children about their HIV-status is usually a trusted parent, caregiver or family member. Some families may want to have a counselor or other health professional give support during some of the disclosure process.
Many of the listening and learning skills for adults apply to children as well.
When talking with children, adults should be at the same level (such as sitting on the floor together).
Make sure there is privacy.
Listen to children and show that you are listening.
See what concerns children have before giving information.
Allow children time to talk without being interrupted.
Use play and drawing to help learn how children are feeling.
Always give children correct information – never lie.
Children do not always need to know how they got HIV.
Help children understand their choices and empower them to make decisions.
Remind children that they can come to you any time to talk or ask questions. Disclosure is not a one-time event, but rather an ongoing conversation.
Will there be other people involved (for example if the child becomes angry and withdrawn or has questions that the parent or caregiver may have trouble answering)?
How will they start the conversation?
How will they provide support to the child after disclosure?
What anxieties does the family have and what can help reduce this anxiety?
What support does the family need? Peer Educators can work with other members of the multidisciplinary team to offer follow-up support to families and children.
Offer support to parents and caregivers and make sure they have space and time to talk about their feelings and the process.
Make sure children know whom to ask when they have questions.
Offer support to children to cope with their emotions and feelings after disclosure. Refer them to a children’s support group, if possible.
Make sure children are given a chance to express their feelings through talking, role-play or drawing.
Plan for a follow-up counseling session with children and parents or caregivers at the clinic, in consultation with a counselor, nurse or social worker.
Focus on steps children can take to live a long, healthy life (including taking ART).

18-18 Advanced Module 18
HIV Disclosure Strategies for Children of Different Ages and Developmental Stages
At all ages:
Create an environment where children will feel free to ask questions.
Plan how to respond to children’s possible responses (verbal and non-verbal).
Plan for the impact on family members, friends, school and community members.
Let children lead you (their questions, reactions) in terms of the amount and type of information given.
Use language appropriate to children’s developmental stage and emotional readiness.
Keep what is said simple, clear and, most of all, honest.
Children may need reassurance that they have not done anything wrong.
Offer ongoing post-disclosure counseling and support to children and caregivers.
Suggestions of what to say to children of different ages about HIV
Pre-school children (approximately 3-5 years old, but depends on the cultural context):
You have to see the nurse so she can check your blood.
The nurse takes your blood to make sure you stay well.
You need to take medicine because there’s a germ in your blood that can make you sick.
Primary school children (approximately 6-10 years old, but depends on the cultural context): It is important to start the disclosure process at this stage. Children should know their HIV-status if they do not already. Give more detailed information, with specific examples.
Going to the doctor will help you stay well.
You have a virus in your blood called HIV. It attacks the germ fighters in your body. This is why you get sick sometimes.
You and I both have HIV in our bodies.
You have to take medicine so the germ fighters can work and you will not get sick so much.
You and mommy take medicine to keep us strong.
HIV is nothing to be ashamed of, but it is something private. You do not have to tell other people if you do not want to.
Maybe we should keep this in the family for now?
Adolescents (approximately 10-19 years old, but depends on the cultural context): Realistic information about health status should be given and all questions should be answered. Be sure to ask about and discuss adolescents’ feelings and fears about HIV.
You have a virus called HIV. A virus is something that gets into your blood and can make you sick. Having HIV does not mean that you are sick all the time.
You can control the virus by taking your medication every day. But there is no way you can get rid of HIV completely.
Knowing that you have HIV gives you a special responsibility to take extra good care of yourself and not to pass the virus to other people.
Having HIV does not mean that you can’t live a long life, have relationships or get married.
If you have sex, it is important for you and your partner to use condoms.
You can have a baby in the future, but there are risks of passing HIV to your partner or to the baby. There are many things you could do to lower the chances that your baby gets HIV. We can talk more about this whenever you like.

Comprehensive Peer Educator Training Curriculum: Trainer Manual 18-19
SESSION 18.6: Pediatric Adherence (70 minutes)
TRAINER INSTRUCTIONS
Methodologies: Taste Test, Large Group Discussion, Interactive Trainer Presentation, Case Studies
Step 1: First, conduct a Kaletra taste test. Pass out spoons to each participant and put a
drop or 2 of Kaletra on each. Reassure participants that it is safe just to taste a
small amount of Kaletra. Discuss participants’ reactions to the taste using these
questions as a guide:
How did the Kaletra taste?
How might the taste of ARVs affect children’s adherence?
Step 2: Ask participants caring for children on ART what adherence challenges they face
and any solutions they have found to these challenges.
Step 3: Using the content below, present the 3 major strategies Peer Educators can use to support pediatric adherence (education, counseling and preparation, and
ongoing monitoring and support). Highlight the WHO, WHAT, WHEN and
HOW of adherence preparation.
Step 4: Ask participants what they think is meant by the term “adherence fatigue.”
Discuss the importance of assessing adherence at every visit because adherence
challenges will change over time and as children grow and develop.
Step 5: As time allows, present the 2 case studies at the end of the Key Information
section below. Adapt these case studies to the local context as needed. The
trainer should read each part of the case study out loud and encourage
participants to follow along in the Participant Manual. Discussion questions are
included in the case studies.
KEY INFORMATION
Adherence can be difficult for children and their caregivers. Pediatric ARVs may be hard to give (measuring syrups or breaking pills) and the doses change over time based on a child’s weight. Even though there are many challenges, more and more babies and children have access to the HIV care and treatment they need in order to live longer and be healthy.
Pediatric HIV care requires collaboration between children and all caregivers, the commitment of caregivers, and children’s cooperation. Adherence needs and barriers change as children go through different developmental stages – there is not a “one-size-fits-all” approach.

18-20 Advanced Module 18
Peer Educators can help caregivers and children on ART in many ways. Peer Educators can provide adherence education, counseling and ongoing support. Peer Educators can work with other members of the multidisciplinary team to provide adherence education:
Identify children’s primary caregivers, recognizing that this may change over time. When possible, work with more than one caregiver and make sure that each new caregiver is educated and counseled on pediatric HIV care and treatment.
Hold separate group education sessions for caregivers and children. They have different needs from adults who are about to start ART.
Work with parents and all caregivers to understand what is meant by adherence, including:
- Understanding the diagnosis and the care and treatment plan
- Coming to the clinic for appointments
- Never missing a dose and not taking any breaks
- Taking medicines the “right” way
Explain the importance of adherence to children’s health:
- With good adherence, children living with HIV can live long, healthy and productive lives.
- Acknowledge the difficulty in caring for children with HIV.
Talk about the need for open, honest communication with the health care team, including Peer Educators.
Peer Educators can work with other members of the multidisciplinary team to provide individual adherence counseling to caregivers:
Take time to prepare caregivers and children.
Encourage all of children’s main caregivers to come to the clinic for adherence education and preparation sessions.
Conduct an adherence and psychosocial support assessment (see Module 8) to learn more about the family’s situation and specific needs.
Work with caregivers to personalize the medication schedule for the family’s life.
Help caregivers anticipate and manage problems, such as when children refuse, vomit, spit out medicines, etc.
Help make the health facility child-friendly (for example, by reducing waiting times for child patients, setting up family days, offering a safe and inviting place for children to play, etc.).
Address the WHO, WHAT, WHEN and HOW of the medications:
WHO will give the medications? Ideally, many people should be trained to give children medicine (for example, it should not just the mother). But, this might be hard if the mother has not disclosed her own or the child’s HIV-status.
WHAT medications will be given? Help the family with medicine identification, storage, measuring and giving it to children.
WHEN will the medications be given? Establish specific times and consider daily routines of caregivers and children.
HOW will the medications be given? How are syrup doses measured? Do pills need to be broken or crushed? Does one of the medicines taste really bad? Should they be taken at the same time? What if children spit out the medicine?
- Include demonstration and practice for caregivers.
- Discuss a reward system to use with children.

Comprehensive Peer Educator Training Curriculum: Trainer Manual 18-21
Peer Educators can work with other members of the multidisciplinary team to provide ongoing adherence monitoring and support:
Encourage clients to be honest and open about adherence challenges.
Ask about adherence at every visit and work as part of the multidisciplinary care team to support adherence.
- Children may have different issues with adherence over time as they grow.
- For example, infants may easily swallow syrup but then, when they get older, they may refuse to swallow a pill because it tastes bad. Remember to always treat clients and their families with respect and never to judge.
Offer ongoing support to children and caregivers, especially around disclosure.
Offer information on, or refer to, children’s support groups and caregivers’ support groups.
Use adherence tools, such as labeled syringes, pill boxes and medication calendars (in the appointment book that patients keep).
What to do about adherence challenges:
Review the current regimen.
Get detailed information about the adherence problems using the ART readiness assessment tool from Module 8 as a guide.
Review the WHO, WHAT, WHEN and HOW of medications.
Observe how caregivers administer medicine to children if possible.
Work with children and caregivers to identify specific adherence challenges.
Try to solve problems related to these barriers.
Be aware of “adherence fatigue”: - As with adults, do not assume “once adherent, always adherent.” - This is especially true for children, as they will have different adherence
challenges at different developmental stages. - With time, children may get tired of taking medications. - With time, caregivers may get tired of giving medications.

18-22 Advanced Module 18
Pediatric adherence case studies to be discussed in a large group (as time allows) Note: The case studies have multiple parts. Trainers should read one part at a time and then ask participants to discuss the suggested questions for that part of the case study. Case Study 1: L___ is a 2-year-old male orphan with HIV who lives with his grandmother, M___. L___ has been enrolled in HIV care and treatment for the last year. L___ takes AZT + 3TC + NVP, as well as CTX. Clinically, L___ is doing well on treatment. M___ comes to the clinic and tells you that she has had trouble giving L___ his medication lately. She does not know what to do because he has always taken it easily in the past. Discussion questions:
What would you discuss with M___ at this visit? What specific questions would you ask?
M___ says that L___ runs from her when it is time to take the medication. She runs after him and tries to hold him down and force his mouth open to take the medicines. This is hard for her in her old age. About half the time, L___ gags, chokes and vomits the medicine. M___ is worried because she knows the medicines are important to keep the boy alive. Discussion questions:
What information would help you learn more about why L___ is acting this way? You learn that L___’s aunt, who used to live in the house, has just moved to the capital for work. M___ has had a hard time giving L___ medicine on her own since her daughter used to help with this. Discussion questions:
What next steps would you take? How would you address their adherence barriers? How would you plan to follow-up?

Comprehensive Peer Educator Training Curriculum: Trainer Manual 18-23
Case Study 2: P___ is an 8-year-old boy living with HIV and taking ART. He lives with his mother, C___. P___ started taking ART last year, is doing well and just started school. C___, who is also on ART, gives his medicine at the same time as his baby sister, who is 14 months old. C___ reports good adherence for both children. C___ comes to the clinic and says that her son is feeling very tired these days and it is hard to wake him up for school in the mornings. He has had some diarrhea on and off and has missed 2 days of school in the last month because he is sick. Discussion questions:
What questions would you ask P___? What questions would you ask C___?
You learn that P___ also lives with his 4-year-old sister, his maternal grandmother and his father. His dad works in another country, so is only home one weekend per month. You learn that C___ sells vegetables during the day to help support the family, but that she is able to give the children their morning and night doses. When you ask about disclosure, you learn that C___ has NOT told her mother about her own or the children’s HIV-status. She has also not told P___ about his HIV-status. She is afraid it will make matters worse between her husband and her mother. Discussion questions:
What information would you want to know? You decide to spend some time with P___, the boy. He says that he really likes school and wishes he did not have to miss school so much because he is sick. He wonders why he is sick all the time and his friends get to go to school every day. Discussion questions:
What would you discuss with P___? Two weeks later, the mother and son come to the clinic because P___ still has diarrhea. Since their last visit, you learned from another Peer Educator that C___ has been working a lot more hours at her vegetable stand. When you ask C___ about this, she starts to cry and tells you that she is working more to keep up with high food prices and to pay for her son’s school uniform and books. She admits that she returns from work late sometimes when the children are already in bed. When you ask who gives the children their evening doses, she says that they miss their doses sometimes because her mother does not know about the medications. Discussion questions:
What would you discuss with C___? What plans for follow-up would you make with C___ and her son?

18-24 Advanced Module 18
SESSION 18.7: Classroom Practicum on Pediatric
HIV (60 minutes)
TRAINER INSTRUCTIONS
Methodologies: Role-Play, Case Studies, Large Group Discussion
Step 1: Break participants into small groups of 4. Hand out a case study card to each
group. Ask the groups to assign one person to play the role of a Peer Educator,
one the role of the client, one the role of the child (if applicable) and one the
role of observer.
Note: If time is limited, the trainer can present the case studies and participants can discuss as a large group.
Step 2: Ask the small groups to discuss and role-play their case study. After about 10
minutes, switch roles until everyone has had a chance to play the role of the
Peer Educator.
Step 3: Ask some of the small groups to role-play their case study in front of the large
group and discuss what was done well and what could have been differently
when counseling the client(s) about pediatric HIV care and treatment.
KEY INFORMATION
Case Study 1: I___ is a 12-year-old female orphan with HIV who lives with her maternal aunt and uncle. Her aunt, M___, monitors her ARV medication and reports very good adherence. When asked to consider disclosure of HIV-status, M___ starts crying. She is not sure how to explain HIV to I___ in a way that she will understand. She is also concerned that I___ “will feel different from other kids.” At school, I___ has already learned about HIV. No one has told her anything about why her parents died, but she is worried that her parents had HIV and that she will die soon too. She has only been told that the medication she takes is to “keep her strong.” How would you counsel I___ and M___? Case Study 2: P___ brings N___, a 5-year-old boy who has been on ART for the past 8 months, to the clinic. The pharmacist is concerned that there is more medication left than there should be if the medication was given properly. When you speak to P___, she is not able to say about how much medication N___ takes or how he takes it. You figure out that P___ is not the same caregiver who brought the child to the ART clinic last time.

Comprehensive Peer Educator Training Curriculum: Trainer Manual 18-25
Case Study 3: A 28-year-old mother named R___ and her 5-month-old baby named C___ come to the clinic. The mother is living with HIV and is exclusively breastfeeding the baby. The baby is taking CTX and is getting immunizations on schedule. The mother is happy with the child’s growth and development. The mother’s 2 year-old daughter is also at the clinic. Neither of the children has been tested for HIV. Talk to the mother about testing, care and treatment for both children. Case Study 4: You meet a 15-year-old girl named B___ who tested positive for HIV last year, but did not go for any follow-up care. You counsel her and she agrees to get a CD4 test. The doctors say she needs to start ART. B___ lives with her mother and her younger brother – they both know she is HIV-positive but since she is healthy, the family believes she does not need ART. They do not want anyone in the community to know she is living with HIV. What would you talk with B___ and her family about? Case Study 5: L___ is a 6-year-old girl living with HIV and taking ART. She lives with her mother M___, maternal uncle and 5 older half-siblings and cousins. Each time L___ comes to the clinic she gets very upset when she gets blood drawn, and recently has been asking, “Why do I need to take medications?” and “Why am I always sick?” Today, L___ is very upset at the clinic. When you ask, you find out that M___ has not told L___ anything about her HIV-status or the reasons why she has to come to the clinic so much. How would you counsel L___? Note: Some of the preceding information in this Module was adapted from the following sources: The Adherence Networking Group. (2006). Kids count: Children’s ART adherence resource pack. South Africa: Adherence Networking Group. WHO. (2007). Antiretroviral Therapy of HIV Infection in Infants and Children: Towards Universal Access, Recommendations for a
public health approach. Geneva, Switzerland: UNAIDS.

18-26 Advanced Module 18
SESSION 18.8: Module Summary (15 minutes)
TRAINER INSTRUCTIONS
Methodologies: Large Group Discussion, Interactive Trainer
Presentation
Step 1: Ask participants what they think are the key points of this Module. What
information will they take away from the Module?
Step 2: Summarize the key points of the Module using participant feedback and the
content below. Trainers could also use a game to review the key points.
Step 3: Ask if there are any questions or clarifications.
Step 4: Review the learning objectives with participants and make sure all are confident
with their skills and knowledge in these areas.
Step 5: If there are areas participants do not fully understand or in which they need
more help, go back and review the session before moving to the next Module.
KEY INFORMATION
THE KEY POINTS OF THIS MODULE INCLUDE:
With care and treatment, children with HIV can become healthy, productive adults. All HIV-exposed babies should get follow-up care and take CTX until their HIV-status is known for sure.
Without treatment, most children with HIV will die before their second birthday.
HIV makes babies and children sick quickly, so we need to identify HIV-infected children early and get them enrolled in care and treatment as soon as possible.
The only way to tell for sure if a baby under 18 months of age is HIV-infected is through DNA PCR testing, which can be done when the baby is at least 6 weeks old.
The 5 key points to remember with following HIV-exposed and infected children are:
- Come back to the clinic often.
- Go for early HIV testing.
- Give CTX to the baby every day.
- Weigh and measure the baby at each visit.
- Focus on the whole family.
Pediatric ART depends on a partnership among parents and caregivers, children and the multidisciplinary care team.
Comprehensive Peer Educator Training Curriculum: Trainer Manual 18-27
(KEY POINTS, CONTINUED)
There are special ARVs for babies and children. They should not be given adult ARVs unless prescribed by the doctor.
The type and dose of ARVs for children depends on age and weight. This will change often over time, so clients need to come back to the clinic regularly.
Disclosure to children has many benefits even though many adults are hesitant to talk to children about HIV.
Disclosure to children requires attention to the child’s age, developmental stage, coping skills, as well as the beliefs of the parents or caregivers and the family situation.
Disclosure is an ongoing process that takes place over time and after careful preparation. Peer Educators can work with other members of the multidisciplinary team to help prepare, support and follow up with disclosure.
Peer Educators can work with other members of the multidisciplinary team to help caregivers prepare to give ART to babies and children and to adhere to the care and treatment plan in the long term.
Peer Educators can also provide emotional support to caregivers, as caring for sick children and/or giving children medicine every day is not easy.
It is important to provide ongoing adherence monitoring, follow-up and counseling services to children and caregivers. Adherence needs and barriers will change over time, especially as children age and go through different developmental stages.
The entire multidisciplinary team should be involved in supporting children and their families with adherence, disclosure and psychosocial support.

18-28 Advanced Module 18

Comprehensive Peer Educator Training Curriculum: Trainer Manual 19-1
ADVANCED MODULE 19:
PLHIV Support Groups
DURATION: 330 minutes (5 hours, 30 minutes)
Note: The duration will be longer if the optional activity in Session 19.4
is included. Trainers can adjust the methodology and content to make
this Advanced Module shorter or longer as needed.
LEARNING OBJECTIVES:
By the end of this Module, participants will be able to:
Discuss the overall goals and objectives of peer support groups
Understand different types of support groups that may be helpful
for PLHIV and their families
Plan a support group meeting, including making an agenda and
working with co-facilitators
Effectively facilitate a support group meeting
CONTENT:
Session 19.1: Introduction: Why Do We Need Support Groups?
Session 19.2: Planning Support Group Meetings
Session 19.3: Facilitating Support Group Meetings
Session 19.4: Classroom Practicum on Support Groups
Session 19.5: Module Summary
METHODOLOGIES:
Large group discussion
Brainstorming
Interactive trainer presentation
Small group work
Case studies
Observation (optional)
Role-play

19-2 Advanced Module 19
MATERIALS NEEDED:
Flip chart
Markers
Tape or Bostik
Case study cards for Sessions 19.2 and 19.4
WORK FOR THE TRAINER TO DO IN ADVANCE:
Read through the entire Module and make sure you are familiar
with the training methodologies and content.
Organize for participants to attend and observe a support group
meeting (optional).
Prepare case study cards for Sessions 19.2 and 19.4.

Comprehensive Peer Educator Training Curriculum: Trainer Manual 19-3
SESSION 19.1: Introduction: Why Do We Need
Support Groups? (30 minutes)
TRAINER INSTRUCTIONS
Methodologies: Large Group Discussion, Brainstorming, Interactive
Trainer Presentation
Step 1: Review the Module learning objectives.
Step 2: Lead a discussion to introduce the Module and get a sense of participants’
experiences with support groups. First, ask participants to raise their hand if they
have participated in a support group meeting. Then, ask participants to raise their
hand if they have facilitated a support group meeting. Use these questions to guide the group discussion and fill in, as needed, from the content below:
What type of support group did you attend or facilitate?
What were your experiences with the support group? What was good? What was
not good?
Is/was being a support group member helpful to you? Why or why not?
What do you think Peer Educators can do to start or improve support groups in the
health facility or in the community?
Step 3: Ask participants to brainstorm on the different types of people that would
benefit from support groups and the range of topics that could be discussed in
support group meetings. Record on flip chart and fill in, as needed, from the
content below. Remind participants that while support groups may have many
functions, the most important is that they provide psychosocial and emotional
support to members.
KEY INFORMATION
Peer support groups are groups of people who come together because they share a common situation. In peer support groups, members help each other to improve and better manage their situation, share challenges and discuss solutions. Members support each other to implement decisions made in order to meet their psychological, social, physical and medical needs.
Very often people living with HIV feel isolated and alone. Meeting other people living with HIV can reduce isolation and encourage PLHIV to live more fully and positively.
Support groups can help increase the uptake of health facility services, such as HIV testing, PMTCT and HIV care and treatment. Support groups can help members to better understand clinical services, give them support to seek and adhere to different services and bring family members for services.
Support groups also offer a way to link health facility services and community-based services for their members. For example, health care providers can speak about HIV services as part of community-based support group meetings. Or, leaders of community-
19-4 Advanced Module 19
based organizations can speak about the services they offer at health facility-based support group meetings.
Depending on the specific program, Peer Educators may play an important role in starting support groups in health facilities or in the community, facilitating support group meetings and/or helping others organize them and recruit members for them. More on support groups:
There are many kinds of support groups. Some support groups may be designed to be ongoing – with members coming and going
in and out of the group over time. Other support groups may have a specific number of topics to cover, after which
members are “graduated” out of the support group. Some support groups may be held at health facilities and others may be held in the
community (for example, at schools, community centers, PLHIV association offices or in someone’s home).
Here are some of the different types of support groups:
Adherence support groups: People who are all starting ART or who are at a similar stage in their treatment (either preparing to begin ART, starting ART or having been on ART for a while) may find it helpful to meet each other for mutual support. Groups can be women only, men only or mixed. It is best that they are led by someone enrolled in care and treatment, such as a Peer Educator.
Mothers support groups: Mothers living with HIV and those with HIV-exposed or HIV-infected children may want to have their own support group. Mothers support groups can provide needed psychosocial and emotional support to members and also help mothers understand and access key HIV and PMTCT services, such as ARVs for members and their children. These groups can also address concerns specific to mothers, such as safer infant feeding, care of HIV-exposed babies and the importance of adherence to PMTCT and ART services.
Parents and caregivers support groups: People caring for HIV-exposed or HIV-infected children need extra support. Groups may want to discuss nutrition, weaning support for breastfeeding mothers, challenges and solutions to adherence with the children, disclosure to children and pressures from friends and family.
Adolescent support groups: Adolescents living with HIV face special challenges and may want to form their own support groups. These groups may involve recreational activities (sports, crafts, drama, etc.), as well as time for discussion and mutual support. It is best if a young person can help lead this type of support group.
Play groups for children: Children living with HIV and their caregivers may benefit from groups where children of similar ages can play together, where there is play therapy and where caregivers have a chance to share and talk. These groups often involve child-friendly activities, such as drawing, art and music.
Couples support groups: Couples, including those where both people are living with HIV as well as discordant couples, may wish to form support groups. Couples can share common concerns and challenges and support one another to live positively with HIV.
Post-test clubs: These groups are for anyone who has been tested for HIV. Therefore, they do not require participants to identify their status when joining. They often focus on promoting HIV information and education in the community, but they also provide a

Comprehensive Peer Educator Training Curriculum: Trainer Manual 19-5
social environment for the members to meet each other and discuss any important issues, including how to stay negative, being in a discordant couple etc.
Groups for other specific populations: Other groups of people with common characteristics may wish to form their own support groups. This could include sex workers support groups, support groups for men who have sex with men or others. In some places, there are support groups just for single people to meet other singles living with HIV. In areas with a diverse population, groups of people that have the same ethnicity or speak the same language may wish to form their own support groups.
Remember: The goal of support groups is to offer psychosocial and emotional support to their members. While some support groups may decide to organize income generation, micro-lending or other activities, there should always be a focus on psychosocial support to one another.

19-6 Advanced Module 19
SESSION 19.2: Planning Support Group Meetings
(110 minutes)
TRAINER INSTRUCTIONS
Methodologies: Large Group Discussion, Brainstorming, Interactive
Trainer Presentation, Small Group Work, Case Studies
Step 1: Discuss the importance of learning more about the support groups that already
exist in the community and at health facilities before starting new support
groups. Ask participants what Peer Educators can do to learn more about
existing support groups and what specific questions they would ask about
existing support groups. Fill in, as needed, using the information below.
Step 2: Ask participants if they think it is better to hold support group meetings at health
facilities or in the community. Discuss the pros and cons of community- and
health-facility-based support groups and remind participants that they should talk
with clients about where they would prefer to attend a support group meeting.
Step 3: Ask participants to brainstorm the key steps to plan a support group. Record on
flip chart. Supplement the discussion by reviewing the key steps needed to plan a
support group (below).
Step 4: Break participants into 4 small groups. Give each small group flip chart, markers
and one of the pre-prepared case study cards, including the list of questions
beneath each case study. Ask the groups to find a quiet place to read through
their case study, discuss the questions and prepare an agenda for the meeting.
Give the groups about 40 minutes to work together. Trainers should sit in to
provide support to each of the small groups.
Step 5: Bring the large group back together. Ask each of the small groups to spend about
10 minutes presenting their scenario, a summary of their discussion and the
proposed agenda for their support group meeting. Encourage discussion and
inputs from the group. Tell participants that later in the training they will revisit
these support group meeting agendas in the same small groups.
Step 6: Close the session by reminding participants that they should talk with other
members of their multidisciplinary team and the Peer Educator program
managers to learn more about their expected role in starting and facilitating
support groups.
KEY INFORMATION
Learn what support groups already exist in the community and at health facilities: An important first step is for Peer Educators to see what support groups already exist in the community and in health facilities and where there are gaps to fill. Peer Educators can meet with existing support group organizers and get information including the following:
Who is the support group for? How many regular members are there?

Comprehensive Peer Educator Training Curriculum: Trainer Manual 19-7
How often does the group meet? Where does the group meet? Are there mainly men, women, children or parents or is there a mix of people? How does someone become a member? Who facilitates the support group? What does the group talk about? Are there other activities, like income generation? Are there fees to come to the support group? Are there linkages between the group and the hospital, health centers and VCT centers? What gaps are there? Needs to be filled?
Consult with key informants to understand more about what support groups are needed: Peer Educators can meet with local PLHIV associations, community-based organizations, members of the multidisciplinary team at the health facility and clients to get a better sense of what kinds of support groups are needed and where gaps exist.
Consult with the multidisciplinary care team on what types of support groups are needed based on their interactions with clients and challenges faced.
Ask clients what kinds of support groups they are interested in, when they could come to a meeting, where they would like the meeting to be held and what kinds of things they would like to talk about (e.g. adherence strategies, stigma, disclosure, etc.).
Decide who the support group is for:
Who will be invited to attend? What is the ideal number and type of participants? It is recommended that support
groups not have more than 25-30 people in the same meeting so that everyone can participate. Larger support groups can break off into smaller support groups if needed.
Define the goals and objectives of the support group:
What is the purpose of the support group? What will members gain from the support group? Is the support group meant to go on indefinitely, or will it cover a certain number of
topics and then come to an end?

19-8 Advanced Module 19
Example of support group goals and objectives: Health-facility-based family support groups (FSGs) in Uganda
Goal: To strengthen the provision of PMTCT services to HIV-positive antenatal/ postnatal mothers and their families by providing an opportunity to meet and support each other psychologically, socially and to link them with HIV prevention, care and treatment services. General objective: To bring together HIV-positive antenatal/postnatal mothers and their families to receive support to follow through with PMTCT interventions and to access and adhere to HIV prevention, care and treatment. Specific objectives: The specific objectives of the Family Support Groups are for members to help each other to:
Disclose to each other and to friends, relatives, partners and children in order to build a personal support system.
Accept and understand their HIV-status and learn how to live positively. Make informed decisions about safe motherhood, including:
- Antenatal care
- Swallowing of ARVs by mothers and their babies
- Birth planning and safe delivery
- Safe infant feeding
- Postnatal care
- Family planning Encourage partners and other family members to get tested for HIV. Learn how and when to access CTX prophylaxis and ART. Prepare for adherence to ARVs. Link and access HIV prevention, care, treatment and support services, including
community social services.
Make a plan to recruit support group members: How will you let people know about the support group? Will members of the multidisciplinary team at the health facility refer people to the
support group? Decide on the location of the support group meetings:
Consider the location of the support group – can it be held at the health facility? Is this convenient or should it be located in the community? Be sure the location offers some privacy and is convenient for members.
If support group meetings are held at a health facility, will members be able to get HIV services before/after the meeting? For example, if there is a mothers support group meeting at the health facility, will members be able to have their babies tested for HIV that day?
Select convenient days and times for the support group and decide how often the group will meet:
What time and how often will the groups be held? Do most participants work during the day or do they have household chores that they need to do at certain times of the day? Is 1 hour enough or is 2 hours better?
Can children come and, if not, will there be someone to watch them while their parent or caregiver attends the meeting?

Comprehensive Peer Educator Training Curriculum: Trainer Manual 19-9
Will the group meet once each month? More often? Less often? Decide who will lead the support group meetings and who will be invited to speak:
Who will run the support group and what will be the topics to discuss? Will nurses or other health facility staff have a role in the meeting? Peer Educators may lead the support group or they may support other facilitators.
What will be the role of the support group members? (It should be participatory.) If you are facilitating, what are you going to say at the beginning? It is good to practice
this beforehand and make some small notes, if needed, to remember the key points. Will there be a secretary to record decisions made at the meeting? If yes, she or he should
ideally be nominated by group members. Will there be guest speakers?
Plan the logistics of the meeting:
Is there privacy at the meeting space? Are there enough places for people to sit? Can the room be arranged so participants are in a semi-circle (instead of in rows)? Will you arrange for tea or snacks for the meeting? Who will get them? How will they be
paid for? Who will keep attendance and other records of the support group?
Make an agenda for the meeting:
Suggested agenda items for support group meetings
Registration/sign-in Refreshments (tea, coffee, snacks, etc.) Welcome/opening (song, prayer, dance, etc.) Introductions Overview of the agenda Reminder about confidentiality Health talk by invited guest or facilitator (the health talk can be
a time to share information with support group members on a specific topic and also dispel myths and rumors)
Testimonials by members related to the specific topic Questions and answers Open discussion and sharing Review of key messages Plan for the next meeting Closing (song, prayer, dance, etc.)

19-10 Advanced Module 19
Case studies for small group work Case Study 1: You and another Peer Educator are starting a support group at your health facility. You have learned that most of your clients do not belong to a support group, but that they would be interested in joining one. The group will meet once per month. Discussion questions and tasks for small groups:
1. What steps would you take to plan the support group? 2. What are the goals of the group? Who is the group for? 3. What do you want members to gain from participating in the group? 4. How will you recruit support group members and advertise the first support group
meeting? 5. How will you work with other members of the multidisciplinary team? 6. Develop an agenda for the first support group meeting, which will be held in the training
room of the health facility where you work. Case Study 2: The PMTCT nurse at your health facility notices that many of her clients are not coming back to the clinic on time for their appointments, especially after they deliver their babies. The nurse comes to you because she wants you to help organize a mothers support group at the clinic. She wants the member mothers to support one another during and after pregnancy and she also thinks it would be helpful to include a short, 15-minute health talk during each of the support group meetings. Discussion questions and tasks for small groups:
1. What are some of the things you would want to discuss with the nurse? What about with PMTCT clients?
2. What are the goals of the mothers support group? 3. What do you want the members to gain from the group? 4. How would you recruit support group members? 5. Develop an agenda for the first mothers support group meeting, which will be held in
the antenatal clinic waiting area. Include a short health talk on a specific topic. Case Study 3: A local PLHIV association has monthly support group meetings in their office. The president of the support group asks you to come to lead the next meeting, which will focus on adherence to HIV care and treatment. About 25 men and women are expected to attend the meeting. Discussion questions and tasks for small groups:
1. What information would you want to know from the support group president? 2. How would you plan for the meeting? 3. What do you hope members will gain from this meeting? 4. Develop an agenda for the meeting (the meetings last about 90 minutes).
Comprehensive Peer Educator Training Curriculum: Trainer Manual 19-11
Case Study 4: You and another Peer Educator try to learn more about support groups in the community so you can refer your clients. You learn that there was a strong support group in the community run by a local church. The support group had about 30 active members, but in the past year, the group has not met regularly and members often miss meetings. After talking with other members of the multidisciplinary team and some of your clients, you decide that you should try to work together and improve this community support group instead of starting a new one. Discussion questions and tasks for small groups:
1. What things would you want to find out about the support group and its members? 2. What are some of the reasons you think the support group is not as active as it used to
be? 3. What steps would you take to improve the support group? 4. How will you convince people to return to the support group? 5. Develop an agenda for a support group meeting.

19-12 Advanced Module 19
SESSION 19.3: Facilitating Support Group Meetings
(50 minutes)
TRAINER INSTRUCTIONS
Methodologies: Large Group Discussion, Interactive Trainer
Presentation, Brainstorming
Step 1: Ask participants who have facilitated a support group meeting to share some of
their recommendations on how to be a good support group facilitator. Open up
the discussion to all participants. Use the following questions to guide the
discussion and fill in, as needed, from the information below:
What is the role of a support group facilitator?
What makes a good support group facilitator?
What things should facilitators avoid?
How should facilitators manage quiet support group members? What about
controlling very talkative members?
Step 2: Read the following scenario out loud to participants and then discuss, using the
questions below as a guide. Fill in, as needed, with the information below.
A nurse at the ART clinic where you work asks you to facilitate this month’s PLHIV
support group meeting because she is going to be away at a training.
What questions would you ask the nurse?
How would you prepare for the support group meeting?
What would you do to be a good meeting facilitator?
What would you do after the meeting?
Step 3: Ask participants to think about their own experiences as support group
members and as PMTCT and ART clients. Ask participants if they think a short
health talk would be a good agenda item for some support groups and discuss.
Next, ask them to brainstorm possible health talk topics that could be useful to
support group members. A list of topics can be found below, but there are no
right or wrong answers. Remind participants to always seek feedback and inputs
from support group members to learn what they want to discuss at their
meetings.
Step 4: Remind participants that they may be asked to facilitate a support group meeting
or support other facilitators. They may also be asked to be a guest speaker at
meetings in the community. It is important to ALWAYS plan ahead, be prepared
and use good communication skills!

Comprehensive Peer Educator Training Curriculum: Trainer Manual 19-13
KEY INFORMATION
Make an agenda and stick to it! Careful planning is key to the success of support groups in the long-term. When members feel the meetings are organized and useful, they will come back. On the
other hand, if support group meetings are unorganized, there is no clear purpose for the meeting or members do not find the meetings useful, they will probably not come back.
Respect members’ and facilitators’ time. Make sure meetings start and end on time. Make sure to plan new learning opportunities for support group members:
Everyone is busy. Make sure each support group meeting offers something new and useful to members.
One way to do this is to include a health talk as a part of each support group meeting. The health talk can be focused on a different topic area at each of the meetings. This is also a good way to improve linkages between support group members and health facility services. Health talks should be kept short and simple (about 15-20 minutes is recommended) so that support group members have time to discuss their feelings, questions and concerns. You might conduct the health talk or ask a nurse or other “expert” to lead the health talk.
Get feedback from support group members on topics they would like to discuss during the meetings and incorporate these into the agenda.
Ideas for health education topics that can be incorporated into support group meetings
(Remember that not all support group meetings need to include health talks.) Having a safe pregnancy, labor and delivery Positive living Disclosure to adults Disclosure to children Dealing with stigma Care for HIV-exposed babies HIV testing for babies and children Safer infant feeding Adherence for adults Adherence for children Preventing opportunistic infections Nutrition Planning for our family’s future (memory books, will-making, etc.) Domestic violence Family planning and dual protection Good hygiene Preventing new HIV infections

19-14 Advanced Module 19
Set up the room so that everyone is comfortable and can participate: Encourage participants to sit in a semi-circle to make it more comfortable to talk and less
like a classroom. The person leading the meeting should be part of the semi-circle. Facilitators should not stand behind a desk or other furniture. If possible, provide tea or a light snack for members and facilitators. If health care
workers or other guests are invited, encourage them to eat and socialize with members. Remind participants about confidentiality:
Support group members will only feel open to discuss their experiences and feelings if they know there is confidentiality.
It is always a good idea to remind support group members at the start of each meeting that what is said during the meeting is not repeated in the community. Facilitators should always respect this as well!
Be a good facilitator:
Create a safe and welcoming environment for support group members. Support groups should not feel like health education sessions or lectures. Instead, members should feel that this is “their” meeting.
Be sure to plan the meeting agenda ahead of time and practice what you are going to say. Lead an introductory activity (have people introduce themselves or say something about
their family) so participants feel more comfortable with one another. Review the agenda with support group members and ask if there are questions. Always
ask for inputs for the next meeting agenda. Interact with participants and engage them by moving around the room, asking questions
and asking people to share personal stories/concerns, etc. Encourage participants to share their own experiences and concerns. Make eye contact with all members of the group. Pay attention to people who seem shy or quiet and emphasize that everyone’s personal
experiences, questions and concerns are important. Try to discourage people from dominating the discussion. If this is happening, you could
say, “You have shared so many helpful ideas and experiences with us – let’s hear from some other members now.”
Stick to the agenda and keep time! Offer on-going support and referrals to participants:
Encourage participants to speak with you or another facilitator in private afterwards if they have concerns they do not want to share with the group.
Know what support and services are available in the community and at nearby health facilities so you can provide referrals.
If the meeting takes place at a health facility, try to time it so members can seek services after the meeting.
Seek support and inputs from multidisciplinary team members and other experts on topics that you are unsure about, you are uncomfortable with or are beyond your area of expertise. Remember, it is always better to say you do not know the answer to a question and to ask someone who does rather than give wrong information.
There may be situations where support group members need assistance right away (for example, if they are mentally distressed, suicidal, violent or the victim of violence). In these cases, Peer Educators should practice shared confidentiality and alert members of the multidisciplinary team to these issues right away.

Comprehensive Peer Educator Training Curriculum: Trainer Manual 19-15
Keep records of the meeting: Always keep an attendance record. Remember that this should be kept confidential and
not widely shared. Ask someone to take simple notes at the meeting (or you can do this yourself after the
meeting has finished). Note what topics were discussed, key concerns of members and any next steps. Also note the date, time and location of the next meeting.

19-16 Advanced Module 19
SESSION 19.4: Practicum on Support Groups
(130 minutes)
TRAINER INSTRUCTIONS
Methodologies: Observation (optional), Small Group Work, Role-
Play, Large Group Discussion
Step 1: Note: If possible, take participants to observe a support group meeting, either in
the community or in a health facility, as part of the practicum. Be sure to
introduce participants to the support group leaders and members and explain
why they are observing. After returning to the classroom, debrief on what
participants observed at the meeting and what they would have done the same or differently. If it is not possible to observe an actual support group meeting
during the training, encourage participants to do so after the training has finished.
Divide participants into the same 4 small groups they were in for the support
group planning activity in Session 19.2.
Step 2: Give each group flip chart paper and markers, and make sure each has the same
pre-prepared case study card they used in Session 19.2. Tell participants that they
will now work in small groups to facilitate the support group meeting that they
planned earlier in the day. Encourage the groups to find a quiet place where they
can sit together away from distraction. Give the groups about 40 minutes to plan
how to facilitate the meeting and to practice. At least one trainer should work
with each small group if possible.
Step 3: After about 40 minutes, bring the large group back together. Give each small
group about 20 minutes to role-play how they would facilitate portions of their
specific support group meeting, with other participants acting as support group
members. Discuss what was done well and what the facilitator(s) could have
done better after each role-play. Have participants refer to the tips on facilitation
in Session 19.3 to guide their feedback.
Step 4: Debrief the practicum by asking participants to reflect on their experiences
leading the support group meetings. Remind participants that support groups are
intended to provide psychosocial and emotional support to members and, in
some cases, to help them understand and access key health care services. Ask
participants to discuss their specific role in starting and leading support groups
with the multidisciplinary team and Peer Educator Program managers.
KEY INFORMATION
See the case studies in Session 19.2.

Comprehensive Peer Educator Training Curriculum: Trainer Manual 19-17
Note: Some of the preceding information in this Module was adapted from the following sources: The Republic of Uganda Ministry of Health. (2006). National guidelines for implementation of family support groups in prevention of mother-to-child transmission of HIV. Kampala, Uganda: Republic of Uganda Ministry of Health.

19-18 Advanced Module 19
SESSION 19.5: Module Summary (10 minutes)
TRAINER INSTRUCTIONS
Methodologies: Large Group Discussion, Interactive Trainer
Presentation
Step 1: Ask participants what they think are the key points of this Module. What
information will they take away from the Module?
Step 2: Summarize the key points of the Module using participant feedback and the
content below.
Step 3: Ask if there are any questions or clarifications.
Step 4: Review the learning objectives with participants and make sure all participants
are confident with their skills and knowledge in these areas.
Step 5: If there are areas participants do not fully understand or in which they need
more help, go back and review the session before moving to the next Module.
KEY INFORMATION
THE KEY POINTS OF THIS MODULE INCLUDE:
Peer Educators play an important role in starting support groups in the health facility or in the community, facilitating support group meetings and helping others organize and recruit members for support groups.
While there are many different types of support groups, they all should aim to provide psychosocial and emotional support to their members.
In peer support groups, members help each other to improve and better manage their situation, share challenges and discuss solutions. Members support each other to implement decisions taken in order to meet their psychological, social, physical and medical needs.
Careful planning is one of the keys to successful support groups. This includes having clearly defined goals and objectives for the groups and an agenda for each meeting.
Including short health talks as part of support group meetings is one way to share information with members and encourage them to seek health services. This is also a way to get other multidisciplinary team members involved in the support group.
Support group meetings should always be participatory and everything that is said during the meeting should be kept confidential.
Good facilitation skills are important to successful support group meetings. It is important to provide support group members with information and referrals for
ongoing psychosocial support, clinical care and other services.

Comprehensive Peer Educator Training Curriculum: Trainer Manual 20-1
Illustration Credits Boonjindasap, Sutida for Pathfinder International: Page 16-22 (2nd illustration only). The Female Health Company. Picture book for FC condom demonstration. Available at http://www.femalehealth.com/resources.html: Pages 10-14, 16-27. Forgash, Karen A., François-Xavier Bagnoud Center: Pages 3-9, 3-18, 8-9, 11-5. The Hesperian Foundation: Pages 10-13, 16-17, 16-18, 16-19, 16-20, 16-21. Hoskin, F. & Williams, M. (1982). The universal childbirth picture book. Lexington, MA: Women’s International Network. As cited and adapted in: Colton, T., Dillow, A., Hainsworth, G., Israel, E., & Kane, M. (2006). Community home-based care for people and communities affected by HIV/AIDS: A comprehensive training course for community health workers. Watertown, MA: Pathfinder International. Available at: http://www.pathfind.org/site/PageServer?pagename=Pubs_CHBC: Pages 3-12, 3-13, 3-14, 16-9, 16-10, 16-11. Klein, S., Miller, S., & Thomson, F. (2004). A book for midwives. Berkeley, CA: The Hesperian Foundation. As cited and adapted in: Colton, T., Dillow, A., Hainsworth, G., Israel, E., & Kane, M. (2006).Community home-based care for people and communities affected by HIV/AIDS: A comprehensive training course for community health workers. Watertown, MA: Pathfinder International. Available at http://www.pathfind.org/site/PageServer?pagename=Pubs_CHBC: Pages 3-11, 16-8. Röhr-Rouendaal, Petra. (2007). Where there is no artist: Development drawings and how to use them. Available at: http://www.petraweb.net/715.htm: Page 3-9. United Nations Children’s Fund (UNICEF): Page 16-22 (1st illustration only).