Embed Size (px)
DESCRIPTION
Music is a language, a form of communication with great power.Music is an expression of the human spirit.
Citation preview

MUSIC IN THE PRESCHOOL
Music is a language, a form of communication with great power.
Music is an expression of the human spirit.
Language can be a barrier between men, but music is universal. It crosses the barriers of
understanding.
Music forms an integral part of man‟s life in his religion, and his entertainment. All cultures
have their own forms of music.
Man has created music, but we take our cue from nature. Most sounds begin in nature, i.e.
the sound of thunder.
A child absorbs music just like he absorbs language. His sensitive period for language
includes the sensitive period for music.
All children have musical ability, but they must be exposed to music to develop it.
A child is aware of rhythm before they are even born, i.e. their mother‟s heartbeat and
movements.
A baby responds to their mother‟s voice in song.
Children will absorb the attitudes of others towards music, and a love for music can be
developed at an early age.
A child‟s life at school can be filled with song. It is a natural expression of joy. He can listen
to music, move to it, sing to it, or join in with musical percussion. He can even compose or
read music.
Music is not treated as a separate subject, but is drawn in as a natural part of the day. For
example, a tape of African music can be played as part of the African continent folder.
Choose songs and instruments according to your themes.
In a natural way after the child has had an auditory experience with music we can
introduce the child to notation. He composes music first (xylophone), and then reads it
(following the pattern of first writing, then reading).
Music is a good introduction to the child‟s life at school. It has the power to calm the rowdy,
and arouse the timid.
The Montessori bells are the first musical materials introduced to the child.
Children always enjoy the repetition of old, familiar songs, and they are eager to learn new
ones.
Prepare the child for music by playing the silence game and any other games that refine
the auditory sense (sound cylinders, bells).
You can play background music during the work cycle.

DOING MUSIC WITH VARIOUS GROUPS
Music for the younger group (21/2-31/2 years of age).
At first each session should be approximately 10 minutes. You can work this up to 12-15
minutes in time.
The younger group has a short auditory memory.
Work with only one concept at a time. I.e. -clap to the rhythm
-move to the music (hop or skip,
remembering they have limited co-ordination)
-listen for different instruments.
Stop the music when you introduce a new concept.
This group can be quickly over-stimulated and you should therefore, also include non-
active exercises.
Music for the middle age group (approximately 4-5 years).
The child‟s co-ordination is better now and can therefore go from one movement to the
next without stopping the music.
By the end of the year the 4-year-old can skip.
These children can do partner work, and are also capable of rhythmic movements.
Music for the older group (approximately 5-6 years).
This age group needs mental and physical challenges and stimulation.
They can start reading music, learning notation, and simple composition at this age.
These children enjoy dramatising music.

THE BASIC ELEMENTS IN MUSIC
1) Pitch -high/low
2) Dynamics -intensity (soft, then loud, then soft again)
3) Duration -long/short (within the music itself)
4) Tempo -starts slow and then picks up
5) Timbre -tone quality (different sounds-coarse/smooth)
6) Texture -the relationship among the various notes
7) Harmony -the pattern of intervals and chords in a piece

THE MUSIC RING
Song:
1. You can listen to various types of music with the children, or sing.
2. Children like order so they enjoy singing the same songs over and over. It is a good idea
to have a song that the children sing everyday in their morning ring to greet one another.
3. A few examples of songs that you can do with children in your morning ring are:
“Good morning, good morning
it‟s a good, good, good, good morning
we say hello, and how do you do
to all our friends and our teachers too
good morning, good morning
it‟s a good, good, good, good morning”
“Good morning Mr. Sun
the day has just begun
I like to see your smiling face
good morning Mr. Sun”
“What day is it today
what day is it today
today is………..
and that‟s the day today”
“Good morning, how do you do, it‟s a lovely day today.
The sun is/isn‟t shining, the sky is/isn‟t blue
the school is ready and waiting for you
Good morning, how do you do, it‟s a lovely day today”
Movement and dramatisation:
1. Here you have a song and the children move to the music.
2. You can do action songs with the children such as the „hokey pokey‟.
3. You could also let the children feel the music. Tell them to make an action that will match
the music that you are going to play.
Body percussion:
1. You can also use your own body to make sounds. For example: you can pat your hands
on your legs to sound like a horse.
2. Let the children experiment and come up with their own ideas.
Rhythm:
1. You can introduce rhythm to the child by means of clapping out syllables. They can clap
out their names, or a whole sentence.
2. Eventually, once the children are aware of rhythm, you can do rhythmic clapping with the
children to a piece of music.
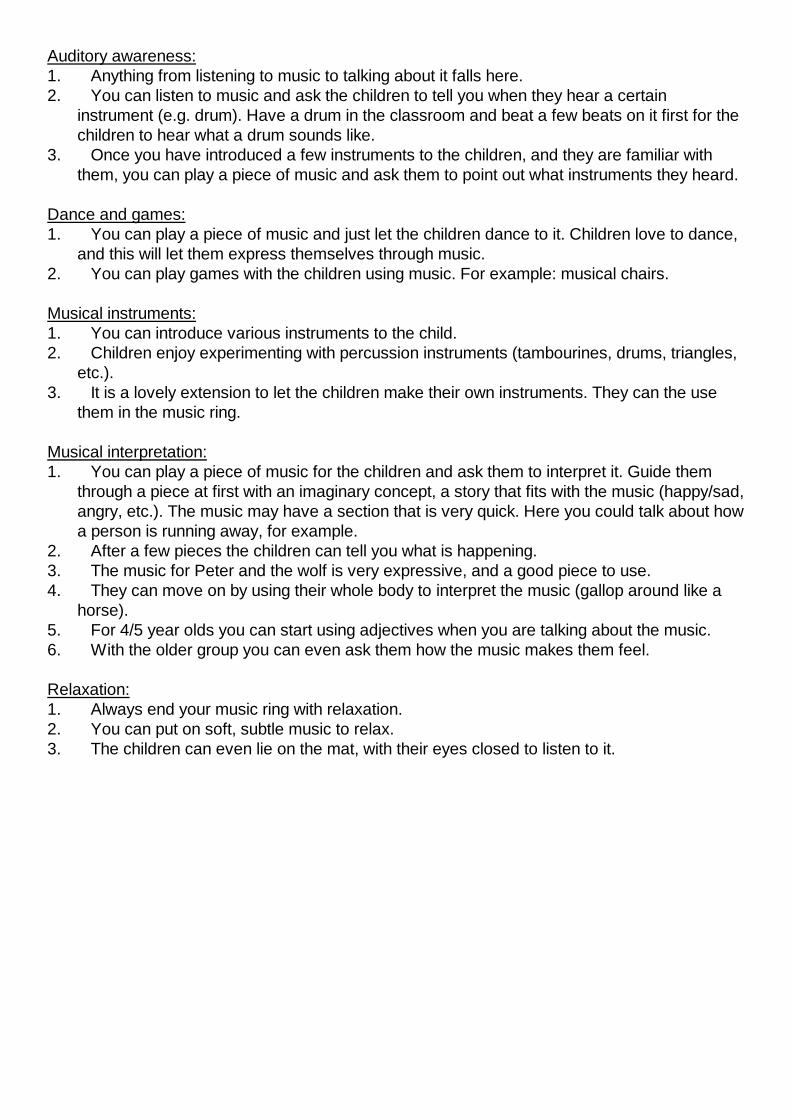
Auditory awareness:
1. Anything from listening to music to talking about it falls here.
2. You can listen to music and ask the children to tell you when they hear a certain
instrument (e.g. drum). Have a drum in the classroom and beat a few beats on it first for the
children to hear what a drum sounds like.
3. Once you have introduced a few instruments to the children, and they are familiar with
them, you can play a piece of music and ask them to point out what instruments they heard.
Dance and games:
1. You can play a piece of music and just let the children dance to it. Children love to dance,
and this will let them express themselves through music.
2. You can play games with the children using music. For example: musical chairs.
Musical instruments:
1. You can introduce various instruments to the child.
2. Children enjoy experimenting with percussion instruments (tambourines, drums, triangles,
etc.).
3. It is a lovely extension to let the children make their own instruments. They can the use
them in the music ring.
Musical interpretation:
1. You can play a piece of music for the children and ask them to interpret it. Guide them
through a piece at first with an imaginary concept, a story that fits with the music (happy/sad,
angry, etc.). The music may have a section that is very quick. Here you could talk about how
a person is running away, for example.
2. After a few pieces the children can tell you what is happening.
3. The music for Peter and the wolf is very expressive, and a good piece to use.
4. They can move on by using their whole body to interpret the music (gallop around like a
horse).
5. For 4/5 year olds you can start using adjectives when you are talking about the music.
6. With the older group you can even ask them how the music makes them feel.
Relaxation:
1. Always end your music ring with relaxation.
2. You can put on soft, subtle music to relax.
3. The children can even lie on the mat, with their eyes closed to listen to it.

POINTS TO FOLLOW TO HAVE A WELL ORGANISED, ENJOYABLE RING
The percussion instruments are to be of good quality, and in good condition.
You must have sufficient space for free movement.
Use suitable CD‟s or tapes. They should also be in place before you start so that the
children do not have to wait for you. They will loose interest.
The floor surface should be smooth.
The directress should enjoy the music, and be enthusiastic.
You must be spiritually prepared. You must also use your initiative, and follow the children‟s
interest.
Have many variations of music. Like everything else, we introduce the child to all the
different types of music, not only those that we enjoy.
Participate with the children where you can.
Be well prepared.
HAVE FUN!!!!!!!!!!!
POINTS TO CONSIDER WHEN USING MUSICAL INSTRUMENTS
Avoid using too many instruments at the same time.
Only work with approximately 8 children at a time, otherwise it gets out of hand, and is not
enjoyable.
Avoid monotony- alternate the instruments between the children.
Try combining instruments- melodic with non-melodic instruments.
Melodic instruments- chime bars, glockenspiel, xylophone
Non-melodic instruments- rhythm sticks, castanets, cymbals and finger cymbals, sleigh
bells, tambourines, triangles, drums, etc.
The instruments should create the mood of the music.
The instruments should have good sound.

THE ORCHESTRA
1. You have a laminated card of the layout of the orchestra (control chart). You would also
have a separate card, with the instrument groups and the conductor loose and separate.
You would discuss the layout of the orchestra with the child using the control chart. Then
show the child the other card and all the loose pieces and tell him that you are going to
match them so that the orchestra is the same as the control chart. When you have done
this give the child a turn to match the orchestra.
2. You could have loosely grouped instrument classified cards with one instrument from
each family of instruments in the orchestra. You would do a matching exercise with the
cards, then a naming exercise, then and an exercise for the reading child.
3. You could have specifically grouped instrument classified cards with every instrument
from one family of instruments in the orchestra. You would do a matching exercise with
the cards, then a naming exercise, then and an exercise for the reading child.
4. You could also have a set of nomenclature cards for any particular instrument in the
orchestra naming all of its parts.

THE MONTESSORI BELLS
Materials:
Set “A” – a series of 13 bells, each a semi-tone higher than the one below – from middle C to C
of the octave above
They are on black and white bases corresponding to the black and white piano notes (This is the
control set)
Set “B” – a set of bells identical to set “A”, but they are all on wooden bases
A wooden board with black and white spaces – each the size of the base of the bells and in the
order of the keys of a piano
A mallet (the object used to strike the bell) (also known as a striker)
A damper (the object used to stop the tone of the bell)
White discs with the note names on them (c, d, e, f, g, a, b)
The regular bell set up:
This is where the 5 black bells are behind the black spaces. The 5 brown bells, which match the
black bells, are kept on a shelf of the bell cabinet.
General comments on the materials
In addition to providing a sensorial means for children to increase the acuity (keenness of vision
or thought) of their auditory perceptions, the bells are a beautiful musical instrument in their own
right. In order to preserve and respect them, they need to be handled carefully at all times.
When working with the bells, one‟s hands should never touch the metal. The bells may be
cleaned with a barely damp cloth. Polish will harm the finish on the bells and so should be
avoided. Activities with magnets should not involve the bells.
Place the cabinet so that the bells cannot be seen or played from the wrong side. The visual
impression of the spacing of the bells should always be seen from the front. It is the pattern of
the major scale and should be visually absorbed just as the regular increase/decrease in the
gradation of the pink tower is visually absorbed.
The white bells are the controls and remain at the rear, which is marked with black and white
spaces. The white bells are placed behind the white spaces and not on them.
The bells are stored and, with only a few exceptions, used on the bell cabinet.
Correct terminology:
Bell
Mallet (the object used to strike the bell)
Damper (the object used to stop the tone of the bell)
Children are to play the bells standing up. The adult may have to kneel so that the child‟s
introduction to playing a bell will show the arm holding the mallet should be parallel to the floor.
NAME OF ACTIVITY: The Bells- introduction
AREA: Auditory sense/Music
AGE: 3+
MATERIALS USED: The regular bell set up
DIRECT AIM: 1.To teach the child how to carry and how to strike a bell
2.To teach the child how to use the damper
INDIRECT AIM: To help the child to focus on one sound
To show the best way to obtain a clear note
To show the child how to stop a tone
CONTROL OF ERROR: 1. If no sound is heard- the bell has not been struck properly
2. If the sound continues- the tone was not stopped by the
damper
PRESENTATION 1:
1. Invite the child to work with you and name the activity. Show the child where the bell
cabinet is kept in the classroom.
2. Tell the child that the bells make the same sounds as the keys on a piano.
3. Tell the child that these are the bells and that “there is a very special way of handling this
material. I will show you how to carry a bell and how to play it.”
4. Select a brown bell, preferably the third or fourth.
5. Show the child how to pick up and carry a bell – one hand on the stem and your other
hand supporting the base underneath.
6. Carry it to the table. Set it down carefully so that there is no noise when the bell meets the
table.
7. With the child go back to the bell cabinet.
8. Pick up a mallet. Tell the child, “This is a mallet”.
9. Show the child how to carry the mallet to the table with the head cradled in one hand while
the fingers of the other hand hold the opposite end of the mallet. Let him carry it to the
table.
10. Sit with the child at the table.
11. The mallet should now be held in a suspended position by your right thumb and first two
fingers. The mallet should be able to swing freely, like the tongue of a bell.
12. Point to the rim of the bell. Tell the child to “watch”. Strike the rim.
13. Keep listening until the sound can no longer be heard.
14. Then tell the child to “listen”. Strike and listen.
15. Then tell the child to “listen until you cannot hear it anymore”. Strike and listen.
16. Invite the child to strike the bell with the mallet.
17. If the child has a problem with the procedure tell him “it is my turn again”. Then in your
demonstration emphasise the part that gave the child difficulty.
18. (When the child is reasonably successful leave the child and observe from a distance.)
19. When finished the child will return the bell and mallet to the bell cabinet. Assist the child if
necessary.

20. Thank the child for working with you.
Note: The child may now take any of the brown bells for their exploration. Eventually the child
should have struck all the brown bells.
Children may only use the material if they handle it correctly.
PRESENTATION 2:
1. Invite the child to work with you and name the activity. Show the child where the bell
cabinet is kept in the classroom.
2. Remind the child that the bells make the same sounds as the keys on a piano.
3. Remind the child that these are the bells and that “there is a very special way of handling
this material.”
4. Select a brown bell, preferably the third or fourth.
5. Remind the child how to pick up and carry a bell – one hand on the stem and your other
hand supporting the base underneath. Let him carry it to the table.
6. With the child go back to the bell cabinet.
7. Point to the mallet. Remind the child, “this is a mallet”.
8. Pick up the damper. Tell the child, “This is a damper”.
9. Show the child how to carry the damper with one hand on each side. Let the child carry it.
10. Tell the child you will carry the mallet to the table (carry it with the head cradled in one
hand while the fingers of the other hand hold the opposite end of the mallet.)
11. Go back to the table. Sit down.
12. Tell the child “ This is a damper. We are going to use it to stop the sound of the bell.”
13. Strike the bell with the mallet.
14. Listen to the sound.
15. Stop the sound with the damper by pressing the felt of the damper against the rim of the
bell.
16. Invite the child to have a turn.
17. Help the child to pack the work away.
18. Thank the child for working with you.
EXTENSIONS:
1. Play a bell. Stop the tone with the damper. Sing the pitch on „ah‟ or „la‟. Let the children sing
too.
Note:
1. Never force a child to sing alone.
2. Never tell a child not to sing because they are singing off key. Sometimes they sing off key
because they are not conscious of it yet, or they do not have the control yet of the
appropriate throat muscles. Telling them not to sing can cause serious damage to self-
esteem and/or self-confidence.
3. Once a child is able to strike and carry a bell correctly they may play all 8 brown bells. This
may lead to: -extemporaneous playing (developing music spontaneously)
-Playing known melodies on the bells by ear
-Child‟s own melodic composition
“ The tone of the bell, which is soft and gentle, is an admirable accompaniment to the sound of
the child‟s voice. The children begin to sing a prolonged note on the vowel sound „o‟. It is a
simple exercise but the children enjoy it very much, and they hum or sing very softly. It is
sufficient for the teacher merely to begin and immediately three or four children will form a
group and do it with her. To sing softly is really an individual lesson, but it is usually such a
success that it ends by being a collective lesson. For instance, if one obtains absolute silence,
and then strikes the bells gently, accompanying them in a soft voice, the children are
fascinated; and in a large class, there will always be found children who are ready for the
exercise and who do it and display their ability. These children show the way to the others, who
begin by listening. If this exercise is carried out a little every day, one very soon has the whole
class in a condition to follow this singing exactly.” (Anna Maccheroni, unpublished lectures,
1921, London)
NAME OF ACTIVITY: The Bells- matching
AREA: Auditory sense/Music
AGE: 3+
MATERIALS USED: The regular bell set up
DIRECT AIM: To match the pitches of the bells
INDIRECT AIM: Patience
Concentration
Matching
To develop memory of pitches
To develop the ability to hold a sound in one‟s head (to hear
music in one‟s head)
CONTROL OF ERROR: The child‟s auditory sense- a mismatch between the bells
PRESENTATION:
1. Invite the child to work with you and name the activity. Take the child to the bell cabinet.
2. Pick up the mallet and check the bells by playing up the brown bells and down the white
bells. (All presentations from now begin in this way)
3. Place it down.
4. Take 3 contrasting brown bells, widely spaced (but not the lowest bell and the highest bell-
possibly the first, fourth, and sixth bells) and place them in reverse order in front of the
bells at the right end of the bell set up. The bases of all 3 bells should be touching.
5. Pick up the mallet and strike the lowest white bell (of the 3 you removed), and then strike
the first brown bell (the bell on the far left in the row of 3 bells).
6. It should not be a match. Shake your head to indicate that it is not a match, but do not talk.
7. Move that brown bell slightly to the left, leaving a small gap between it and the other 2
bells in the row.
8. Strike the white bell again, then the next brown bell.
9. It still should not be a match. Shake your head to indicate no again.
10. Move that brown bell slightly to the left.
11. Strike the white bell again, then the next brown bell.
12. It should be a match. Nod your head to indicate that it is a match.
13. Pick it up with both hands, as before, and place it in front of the white space.
14. Repeat this process for the other 2 pairs.
15. When all 3 pairs of bells have been matched and are sitting in front of their white spaces,
check each match by striking the white bell and then the brown bell matched to it. If they
match move the brown bell onto its white space.
16. Repeat this with all the pairs.
17. Then check the bells by playing up the brown bells and down the white bells.
18. Take out the 3 bells and invite the child to have a turn.

19. Thank the child for working with you.
Note:
1. The child can increase the number of bells used. If after a lot of practice with the bells the
child does not increase the number of bells used, you can suggest it.
2. Since the focus of this presentation should be on the sound of the bells, it is important that
the sound of the human voice does not intrude because it would divert the child‟s focus from
the sound of the bells.
3. It is important to set up the exercise so that a match is not found on the first try because that
would make it difficult for the child to see the point of the exercise.
EXTENSIONS AND GAMES
1. Place the brown bells at random on a table far from the bell cabinet with a mallet and a
damper. There is also a mallet and a damper on the bell cabinet. Bring a white bell forward
and strike it. Leave the mallet and damper on the bell cabinet, walk to the brown bells on the
table on find the match. Leave the mallet and damper on the table and carry the bell back
using both hands. Test to see if the correct bell was selected. If not carry it back to the table
and try again. When the correct match is found select a different white bell and continue as
before.
There are 4 variations to increase the difficulty of this exercise:
-play the white bell, then walk directly to the brown bells and match
-play the white bell, walk around the room and then go to the brown bells and match
-play the white bell, have a short conversation, then walk to the brown bells
-play the white bell, then quickly play all the other white bells, then walk to the brown bells
and match
2. In the second set of 4 games/variations the procedure is the same except the brown bells
are scattered around the room.
3. Another game is for 6-16 children. Half of them take a brown bell and the other half take the
corresponding white bell (this is the only time the bells are removed from their place on the
bell cabinet). The children make 2 lines facing each other (brown bells in 1 line, white bells in
the other). The directress plays the first white bell in the line and the first brown bell in the
other line. The children nod or shake their heads if it is a match or not. If it is not a match the
directress plays the first white bell again and then the second brown bell in the line. Continue
like this until a match is found. If it is a match the 2 children stand together facing the other
children. Continue in this way until all the matches are found. If you have an odd number of
children the extra child can strike the bells instead of the directress.

NAME OF ACTIVITY: The Bells- establishing up and down
AREA: Auditory sense/Music
AGE: 3+
MATERIALS USED: The regular bell set up
DIRECT AIM: To establish up and down with the child (ascending and
descending scales)
INDIRECT AIM: Patience
Concentration
To develop memory of the order of pitches
Further work with the bells, and developing the child‟s musical
knowledge
CONTROL OF ERROR: Directress
PRESENTATION:
1. Invite the child to work with you and name the activity. Take the child to the bell cabinet.
2. Pick up the mallet and check the bells by playing up the brown bells and down the white
bells.
3. After checking the bells simply play the ascending scale on the brown bells and say, “ This
is going up the scale, the sound gets higher”.
4. Play the descending scale on the white bells and then say, “This is going down the scale,
the sound gets lower”.
5. The child may be invited to play the ascending and descending scale.
6. Do a three period lesson to ensure the child has grasped the concept.
7. Thank the child for working with you.
Note:
There is nothing about the visual appearance of the bells that indicates which way to play in
order to progress up and down the scale. This very quick little demonstration may be shown to
any child who can successfully strike and carry a bell.
EXTENSIONS AND GAMES WITH THE ASCENDING AND DESCENDING SCALES
1. Movement games that deal with movement on the part of the children. The children may
show the direction the music moves with whole body movement in the following way: The
children hold onto the back of a chair and begin in a squatting position. As the music ascends
the children raise themselves. As the music descends the children lower themselves. For an
added challenge they can turn around so that they cannot see the person playing the bells. (It
is okay if they peek, eventually they will only need the auditory clue)
2. The children may also sing with the scale. They can either sing „ah‟ or „la‟, vowel or
consonant sounds, or the name of a child on each note of the scale. They can sing the first
note loudly and the remaining notes softly.
NAME OF ACTIVITY: The Bells- high and low exercises
AREA: Auditory sense/Music
AGE: 3+
MATERIALS USED: The regular bell set up
DIRECT AIM: To establish high and low bells
INDIRECT AIM: Patience
Concentration
Further work with the bells, and developing the child‟s musical
knowledge
CONTROL OF ERROR: Directress
PRESENTATION:
1. Invite the child to work with you and name the activity. Take the child to the bell cabinet.
2. Pick up the mallet and check the bells by playing up the brown bells (ascending scale) and
down the white bells (descending scale).
3. After checking the bells and ascertaining that there is knowledge of ascending and
descending scales, choose a low bell and a high bell. Usually the first and the seventh bell
(c and b) are used in the first presentation, as this is the widest possible contrast.
4. Move the 2 bells onto the bell table in front of their white spaces.
5. Strike the low bell, listen, stop the tone of the bell with the damper and then say (or sing in
the pitch) “This is a low bell”.
6. Invite the child to strike and listen to the low bell.
7. Introduce the high bell in the same manner.
8. Do a three period lesson with the child to ensure they grasped the concept.
9. Thank the child for working with you.
Note:
1. This vocabulary lesson may be given to any child or small group of children who understand
going up and down the scale.
EXTENSIONS AND GAMES WITH HIGH AND LOW BELLS
1. Later you can ask the child to close their eyes or turn around so they cannot see which bell is
being played and then they must guess if it is high or low.

2. You can introduce high, higher, highest- or low, lower, lowest to the child (three period
lesson)
3. You can play a movement game with the children where they pretend to pick fruit. Choose a
fruit that grows high on a tree (apples) for a high sound, and a fruit that grows low on the
ground (strawberries) for low sound. When the children hear a high sound they pretend to
pick the apples (stretching up high), and when they hear a low sound they pretend to pick
strawberries (bending down low).
4. The children may speak in high voices or low voices. They may listen to hear who has the
highest or the lowest voice in the group.
5. You can also listen to songs with the children and they must listen for a high or low note in
the song and they raise their hand when they hear one.
NAME OF ACTIVITY: The Bells- grading
AREA: Auditory sense/Music
AGE: 3½+
MATERIALS USED: The regular bell set up
DIRECT AIM: To grade the bells
INDIRECT AIM: Patience
Concentration
Refining their auditory sense
To develop memory of pitches
To develop the ability to hold a sound in one‟s head (to hear
music in one‟s head)
CONTROL OF ERROR: The child‟s auditory sense- will hear if incorrectly graded
PRESENTATION 1:
1. Invite the child to work with you and name the activity. Take the child to the bell cabinet.
2. Pick up the mallet and check the bells by playing up the brown bells and down the white
bells.
3. Mix the brown bells on the front of the bell cabinet.
4. Find the first 2 bells in the scale by matching (c and d).
5. When c and d are matched play the bells for c and d and then the first bell in the row on
the front of the bell cabinet. If it is the third bell in the scale place it in its appropriate white
space. If it is not the correct bell, move it slightly to the left (as in matching).
6. Play c and d again and then the second bell in the row on the front of the bell cabinet.
7. Continue in this manner until the third bell in the scale is found.
8. The remaining bells are then moved back to the right.
9. Play c, d, and e (first three bells) and the first bell in the row, and continue as before to
find the fourth bell in the scale, etc.
10. Invite the child to have a turn.
11. Thank the child for working with you.
Note:
You can make this exercise slightly more difficult by only matching the first bell (c) to begin with.

PRESENTATION 2: (grading by comparison)
1. Invite the child to work with you and name the activity. Take the child to the bell cabinet.
2. Pick up the mallet and check the bells by playing up the brown bells and down the white
bells.
3. Mix the brown bells on a table.
4. Put the first bell in front of the second bell.
5. Play them both.
6. Keep the lower one and move it in front of the third bell. Play them both and keep the
lower one.
7. Continue in this manner until the end of the row is reached.
8. The last bell selected should be the lowest one of them all.
9. Place it on the lowest white space on the bell cabinet.
10. Do not check it with the corresponding white bell.
11. Repeat the procedure to find the next lowest bell.
12. Continue in this manner until all the brown bells are on the bell cabinet.
13. Now play up the brown to see if they have been grade properly.
14. Invite the child to have a turn.
PRESENTATION 3:
1. Invite the child to work with you and name the activity. Take the child to the bell cabinet.
2. Pick up the mallet and check the bells by playing up the brown bells and down the white
bells.
3. Mix the brown bells on a table.
4. Listen for the lowest bell as you play them all.
5. Take the lowest bell and place it on the lowest white space on the bell cabinet.
6. Do not check it with the corresponding white bell.
7. Listen for the lowest bell as you play the remaining brown bells.
8. Take that bell and place it on the next white space on the bell cabinet.
9. Do not check it with the corresponding white bell.
10. Continue in this manner until all of the brown bells are on the bell cabinet.
11. Now play up the brown bells to see if they have been correctly graded.
12. Invite the child to have a turn.
13. Thank the child for working with you.
Note:
1. Children may think of other ways to grade from lower to higher.
“ You will observe that certain children will repeat this exercise an almost incredible number of
times. Perhaps you will hardly believe me when I say that children have performed this
exercise a hundred times; I myself would have found difficult to believe f I had not seen it. If the
child repeats the exercise so often, it is because, if you will allow me the expression, he is
hungry for it- almost insatiable. If the child is hungry for it, it is because he is in this sensitive
period in which he requires it, a period which ends by knowing all these notes. Then there is no
longer any need for him to begin the exercise by finding the lowest note; he will be able to
recognize at once the correct place for each note in the scale.” (Maria Montessori, unpublished
lectures, London, 1925)
2. We demonstrate lowest to highest because that is the way we think in music theory. When
children are secure with lower to higher, they may try higher to lower – only if THEY think of
it!!
EXTENSIONS AND GAMES WITH GRADING OF THE BELLS
1. Mix the brown bells on a table. Choose a white bell and pull it slightly forward. Play it. Ask the
child if he can fetch one that is just higher than that one.
2. Play the first 3 bells. Ask the child to sing the next bell.
3. Here there are 9 children. 8 children have a bell each and the 9th child plays each bell. The
children need to figure out how to get in order of the scale.
NAME OF ACTIVITY: The Bells- naming
AREA: Auditory sense/Music
AGE: 3½+
MATERIALS USED: The regular bell set up
(White discs with note names on them- for extensions and
games)
DIRECT AIM: To name the bells
INDIRECT AIM: Patience
Concentration
To develop memory of pitches
To increase musical vocabulary
CONTROL OF ERROR: Directress
PRESENTATION:
1. Invite the child to work with you and name the activity. Take the child to the bell cabinet.
2. Pick up the mallet and check the bells by playing up the brown bells and down the white
bells.
3. Select 2 bells such as c and g (the first and fifth bells).
4. Set them in front of their places.
5. Strike the first bell. Say (or sing), “ This is c”.
6. Let the child strike and listen to c.
7. Strike the second bell. Say (or sing), “This is g”.
8. Let the child strike and listen to g.
9. Do a three period lesson to ensure the child has grasped the concept.
10. Thank the child for working with you.

NOTE: Always remember with a three period lesson that if the child does not grasp the concept
in the second period you do not move on to the third period. If the child cannot recall the names
in the third period you do not consolidate.
Note:
1. On another day check to see if the child remembers c and g. If they do, add one or two more
bells and do a three period lesson with all three or four bells. If they did not remember c and
g repeat the lesson with just those two pitches.
2. Perfect pitch- a child with this kind of pitch remembers the names of the pitches.
Relative pitch- a child with this kind of pitch does not remember the names of the sounds of
the pitches. If it is obvious that the child is not remembering the sounds in relation to their
names, show them that the names of the bells use the first seven letters of the alphabet.
Place the white discs with the appropriate note names in front of the bells. At some point this
should also be done with children with perfect pitch.
If offered at the right age, more people would develop perfect pitch.
3. After a child has mastered one method of naming, other systems may be of interest
do, re, mi, fa, sol, la, ti, do
c- do d- re e- mi f- fa g- sol a- la b- ti c- do
EXTENSIONS AND GAMES FOR NAMING WITH THE BELLS
1. Children are assigned different pitches. They raise their hand when they hear their pitch.
2. If it is obvious that the child is not remembering the sounds in relation to their names, show
them that the names of the bells use the first seven letters of the alphabet. Place the white
discs with the appropriate note names in front of the bells.
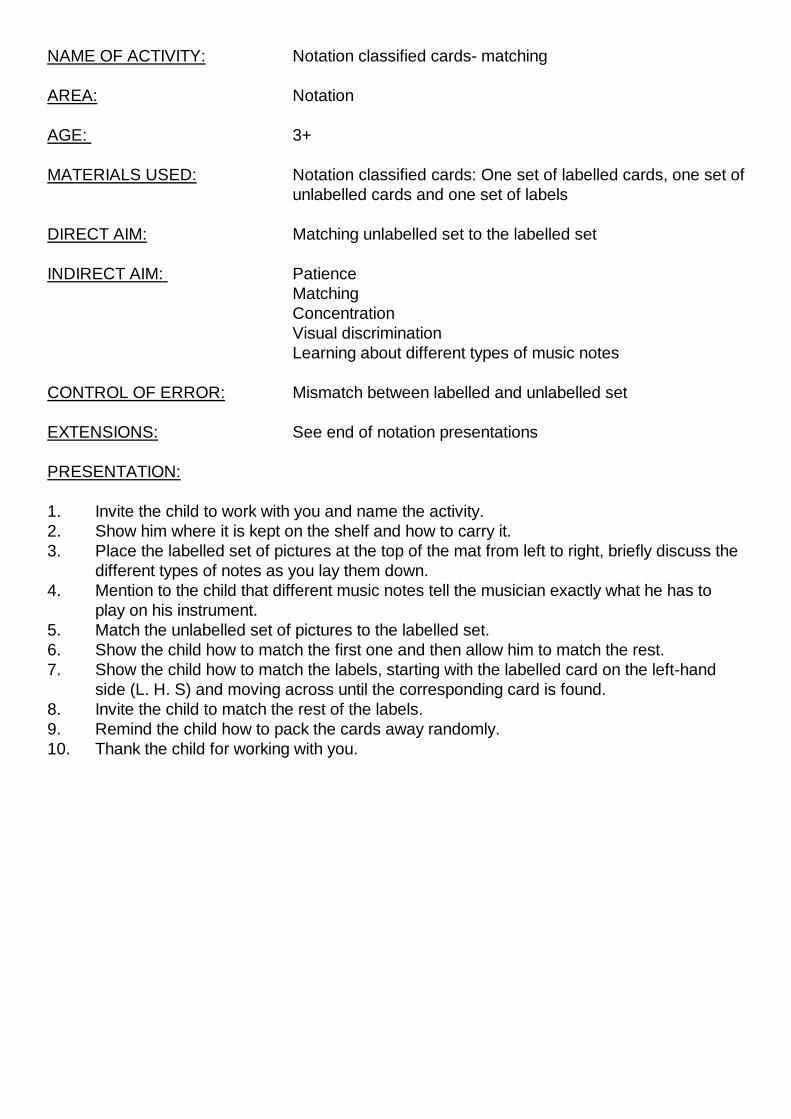
NAME OF ACTIVITY: Notation classified cards- matching
AREA: Notation
AGE: 3+
MATERIALS USED: Notation classified cards: One set of labelled cards, one set of
unlabelled cards and one set of labels
DIRECT AIM: Matching unlabelled set to the labelled set
INDIRECT AIM: Patience
Matching
Concentration
Visual discrimination
Learning about different types of music notes
CONTROL OF ERROR: Mismatch between labelled and unlabelled set
EXTENSIONS: See end of notation presentations
PRESENTATION:
1. Invite the child to work with you and name the activity.
2. Show him where it is kept on the shelf and how to carry it.
3. Place the labelled set of pictures at the top of the mat from left to right, briefly discuss the
different types of notes as you lay them down.
4. Mention to the child that different music notes tell the musician exactly what he has to
play on his instrument.
5. Match the unlabelled set of pictures to the labelled set.
6. Show the child how to match the first one and then allow him to match the rest.
7. Show the child how to match the labels, starting with the labelled card on the left-hand
side (L. H. S) and moving across until the corresponding card is found.
8. Invite the child to match the rest of the labels.
9. Remind the child how to pack the cards away randomly.
10. Thank the child for working with you.
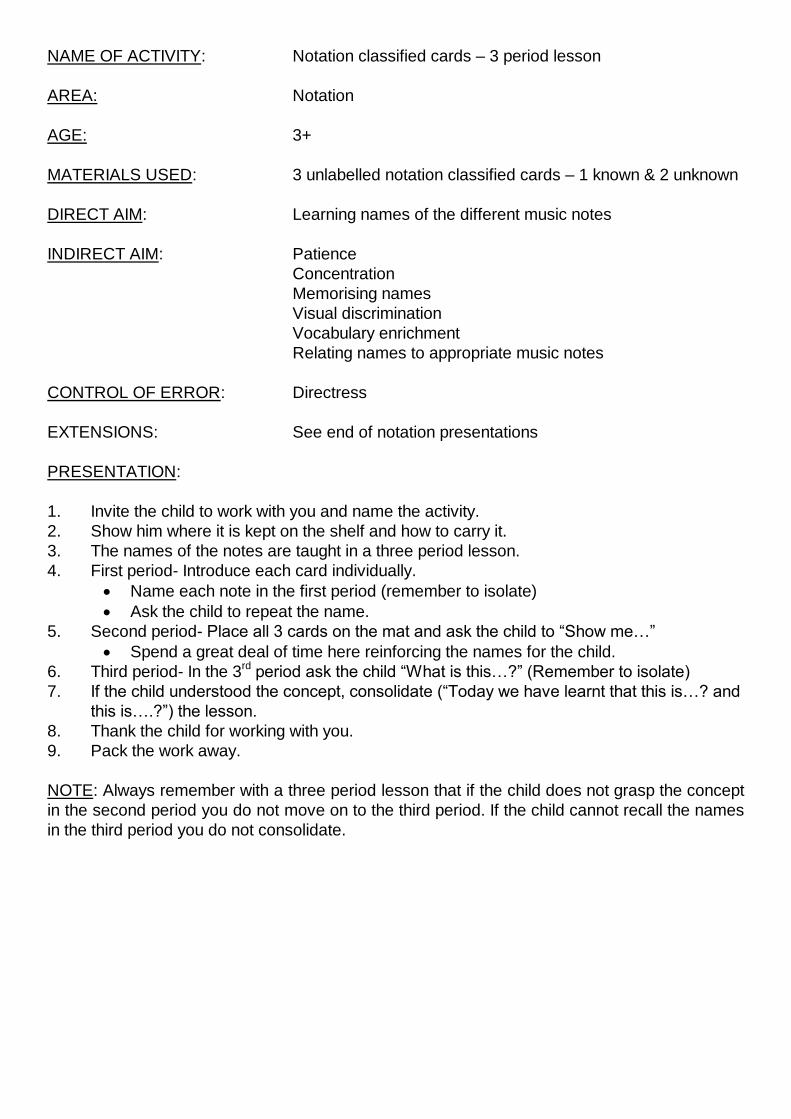
NAME OF ACTIVITY: Notation classified cards – 3 period lesson
AREA: Notation
AGE: 3+
MATERIALS USED: 3 unlabelled notation classified cards – 1 known & 2 unknown
DIRECT AIM: Learning names of the different music notes
INDIRECT AIM: Patience
Concentration
Memorising names
Visual discrimination
Vocabulary enrichment
Relating names to appropriate music notes
CONTROL OF ERROR: Directress
EXTENSIONS: See end of notation presentations
PRESENTATION:
1. Invite the child to work with you and name the activity.
2. Show him where it is kept on the shelf and how to carry it.
3. The names of the notes are taught in a three period lesson.
4. First period- Introduce each card individually.
Name each note in the first period (remember to isolate)
Ask the child to repeat the name.
5. Second period- Place all 3 cards on the mat and ask the child to “Show me…”
Spend a great deal of time here reinforcing the names for the child.
6. Third period- In the 3rd
period ask the child “What is this…?” (Remember to isolate)
7. If the child understood the concept, consolidate (“Today we have learnt that this is…? and
this is….?”) the lesson.
8. Thank the child for working with you.
9. Pack the work away.
NOTE: Always remember with a three period lesson that if the child does not grasp the concept
in the second period you do not move on to the third period. If the child cannot recall the names
in the third period you do not consolidate.

NAME OF ACTIVITY: Notation classified cards – for the reading child
AREA: Notation
AGE: 5½ - 6
MATERIALS USED: Notation classified cards – one set labelled cards, one set
unlabelled cards, and one set of labels
DIRECT AIM: Reading the labels and matching them to the correct pictures
INDIRECT AIM: Patience
Memory
Reading
Concentration
Visual discrimination
CONTROL OF ERROR: Labelled set of cards – if mismatched
EXTENSIONS: See end of notation presentations
PRESENTATION:
1. Invite the child to work with you and name the activity.
2. Show him where it is kept on the shelf and how to carry it.
3. Place the unlabelled pictures out on top of the mat from left to right.
4. Show the child how to read and match the first label.
5. Invite the child to read labels and match them to the corresponding pictures.
6. Once the child has matched all the labels to the pictures, use the labelled set as a control
of error by matching them to the corresponding cards.
7. Thank the child for working with you.
8. Remind the child to pack the cards back randomly.
9. Help the child to pack the work away.

EXTENSIONS FOR NOTATION CLASSIFIED CARDS
1. Once the child has learnt the different beats for the different music notes you can make your
own tune by placing different notes out randomly and clapping out the beats.
2. The children can make up their own tune and clap out the beats.
3. The children can make up a tune and ask another child to clap the beat.
Notation definitions:
semibreve -1 big note
-A value of 4 beats
-Clap and hold for 3 beats
minim -A value of 2 beats
-Clap and hold for 1 beat
crochet -1 clap
-1 beat
quaver -Half a beat
-2 quick claps
treble clef -Indicates music to be played with your right hand
bass clef -Indicates music to be played with your left hand
4. You can teach the older child the value of the notes in comparison to each other.
I.e.: 1 semibreve
= 2 minum
= 4 crochet
= 8 quaver