Embed Size (px)
Citation preview
More Modules
Inheritance, Exporting, documentation, testing
Inheritance
• Inheritance is the concept that a class can be a "subclass" of another class.
• subclasses ("children") inherit all the methods of their superclasses ("parents")
• In most languages, classes can have at most one parent.– single inheritance
• In Perl, classes are allowed to inherit from as many parents as you like– multiple inheritance
• Just because this is allowed, doesn't necessarily mean this is a good idea.

Inheriting• Inheritance is accomplished by specifying a class's
parent(s) within that class's package @ISA array:• package Student;use strict;use Person;our @ISA = ('Person');– "Student is a Person"– compile time: use base 'Person';
• Whenever a method is called on an object of Student, if that method is not found, Perl searches the Person package for the method.– If the method isn't found there, Perl searches Person's parent
class(es), etc– If multiple inheritance is used anywhere, Perl searches Depth-
first through the parent classes.
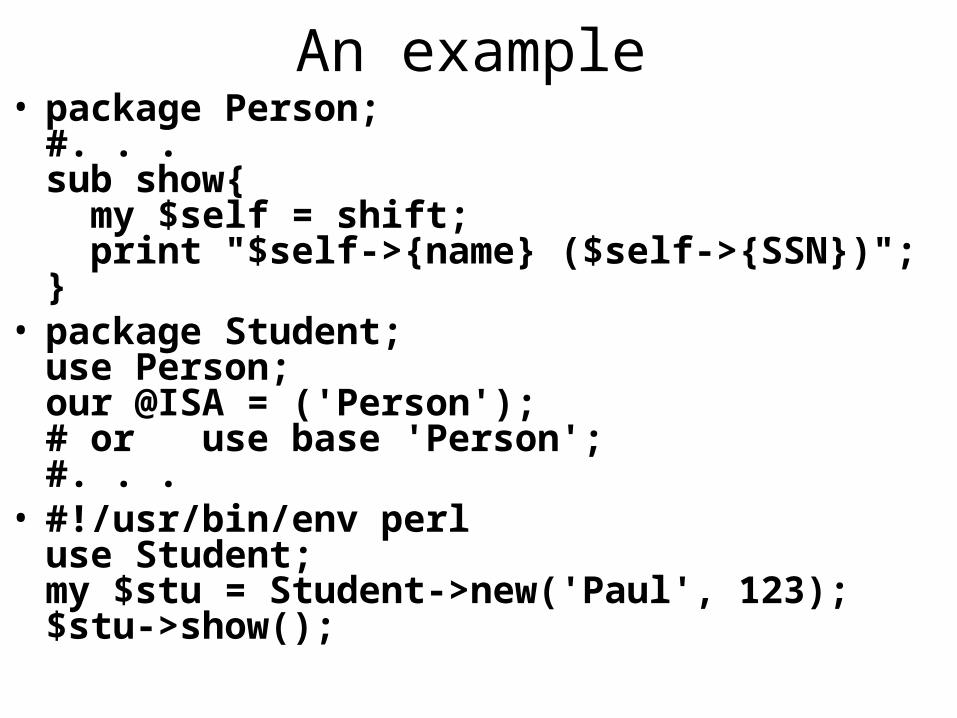
An example• package Person;#. . . sub show{ my $self = shift; print "$self->{name} ($self->{SSN})";}
• package Student;use Person;our @ISA = ('Person');# or use base 'Person';#. . .
• #!/usr/bin/env perluse Student;my $stu = Student->new('Paul', 123);$stu->show();
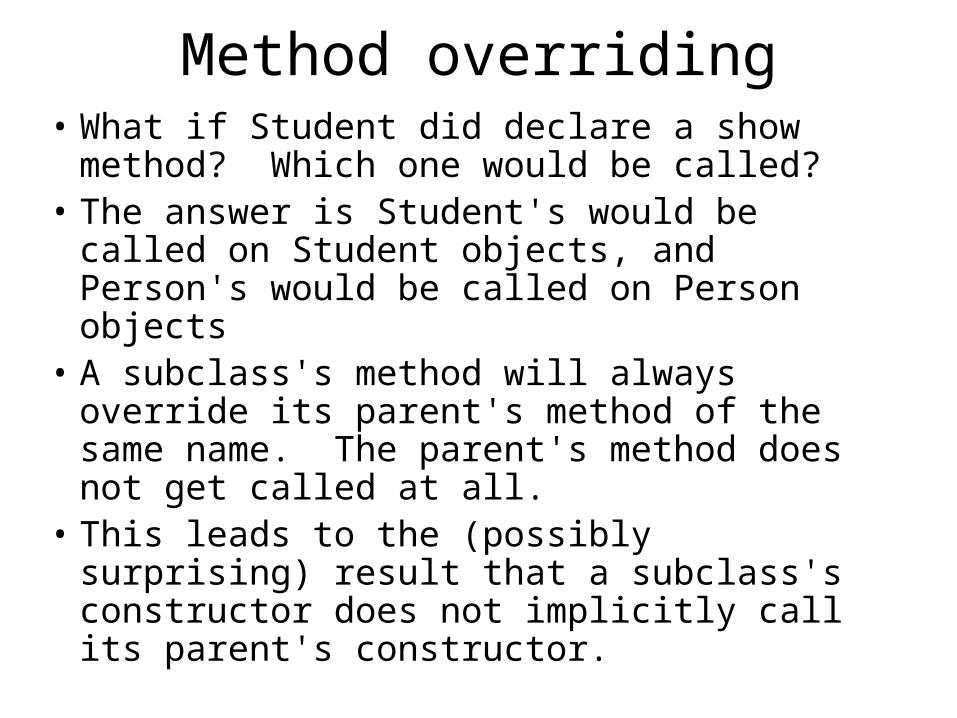
Method overriding• What if Student did declare a show method?
Which one would be called?• The answer is Student's would be called on
Student objects, and Person's would be called on Person objects
• A subclass's method will always override its parent's method of the same name. The parent's method does not get called at all.
• This leads to the (possibly surprising) result that a subclass's constructor does not implicitly call its parent's constructor.
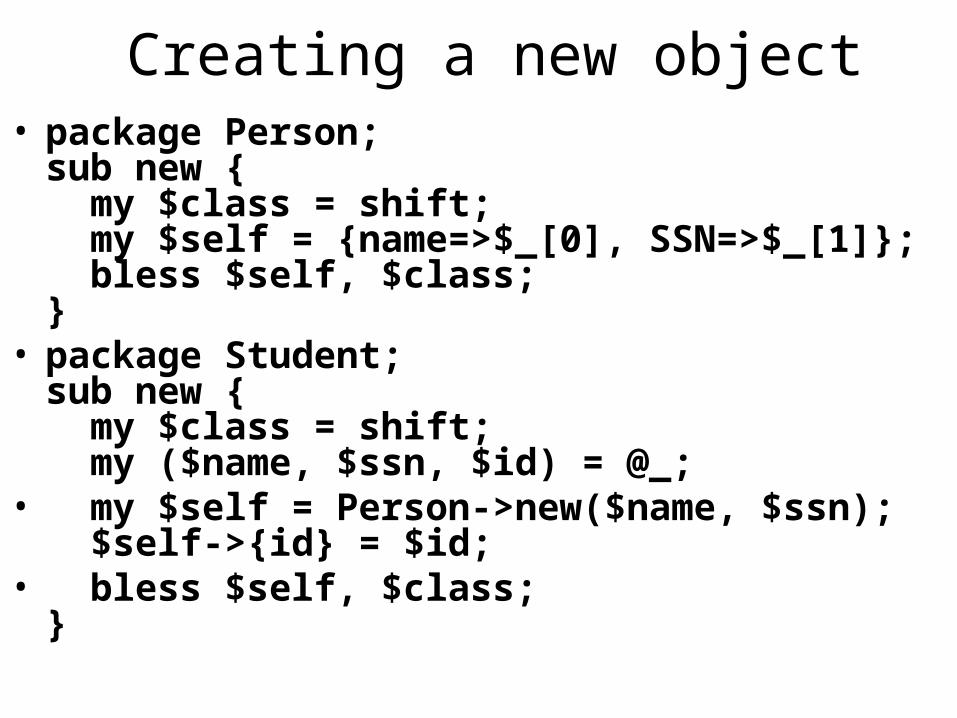
Creating a new object• package Person;sub new { my $class = shift; my $self = {name=>$_[0], SSN=>$_[1]}; bless $self, $class;}
• package Student;sub new { my $class = shift; my ($name, $ssn, $id) = @_;
• my $self = Person->new($name, $ssn); $self->{id} = $id;
• bless $self, $class;}
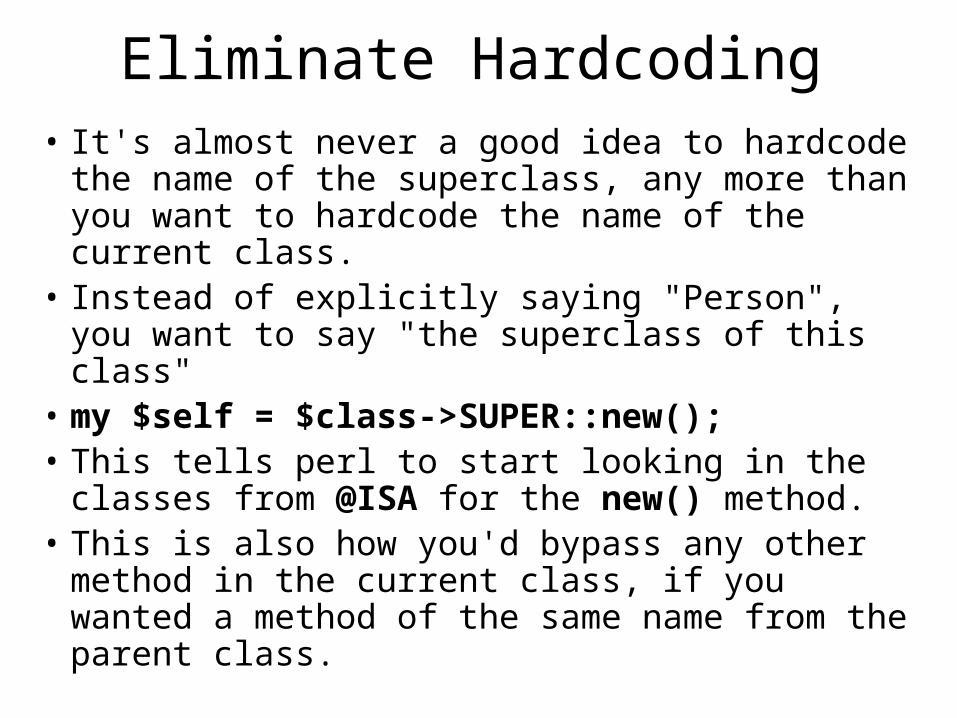
Eliminate Hardcoding• It's almost never a good idea to hardcode the
name of the superclass, any more than you want to hardcode the name of the current class.
• Instead of explicitly saying "Person", you want to say "the superclass of this class"
• my $self = $class->SUPER::new();• This tells perl to start looking in the classes
from @ISA for the new() method.• This is also how you'd bypass any other method
in the current class, if you wanted a method of the same name from the parent class.
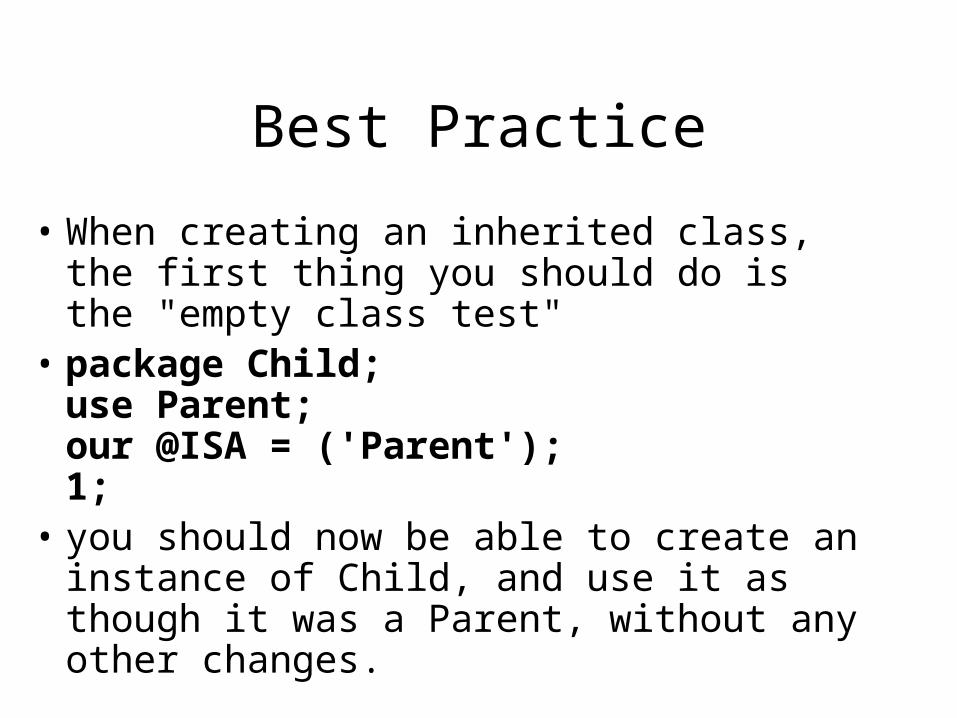
Best Practice
• When creating an inherited class, the first thing you should do is the "empty class test"
• package Child;use Parent;our @ISA = ('Parent');1;
• you should now be able to create an instance of Child, and use it as though it was a Parent, without any other changes.
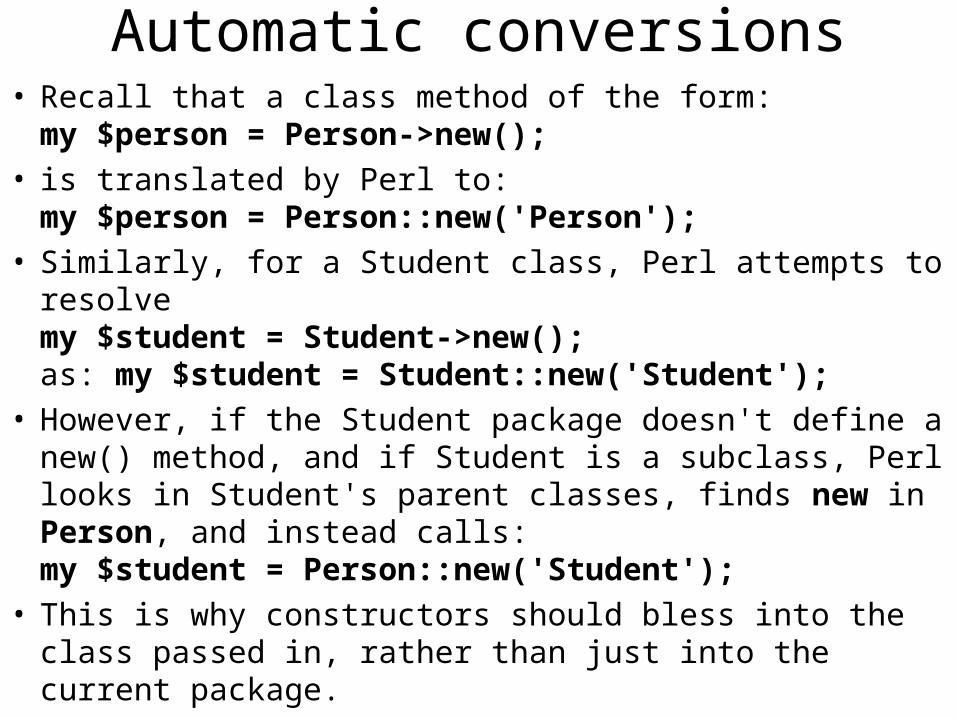
Automatic conversions• Recall that a class method of the form:my $person = Person->new();
• is translated by Perl to:my $person = Person::new('Person');
• Similarly, for a Student class, Perl attempts to resolvemy $student = Student->new();as: my $student = Student::new('Student');
• However, if the Student package doesn't define a new() method, and if Student is a subclass, Perl looks in Student's parent classes, finds new in Person, and instead calls:my $student = Person::new('Student');
• This is why constructors should bless into the class passed in, rather than just into the current package.
Exporting / Importing
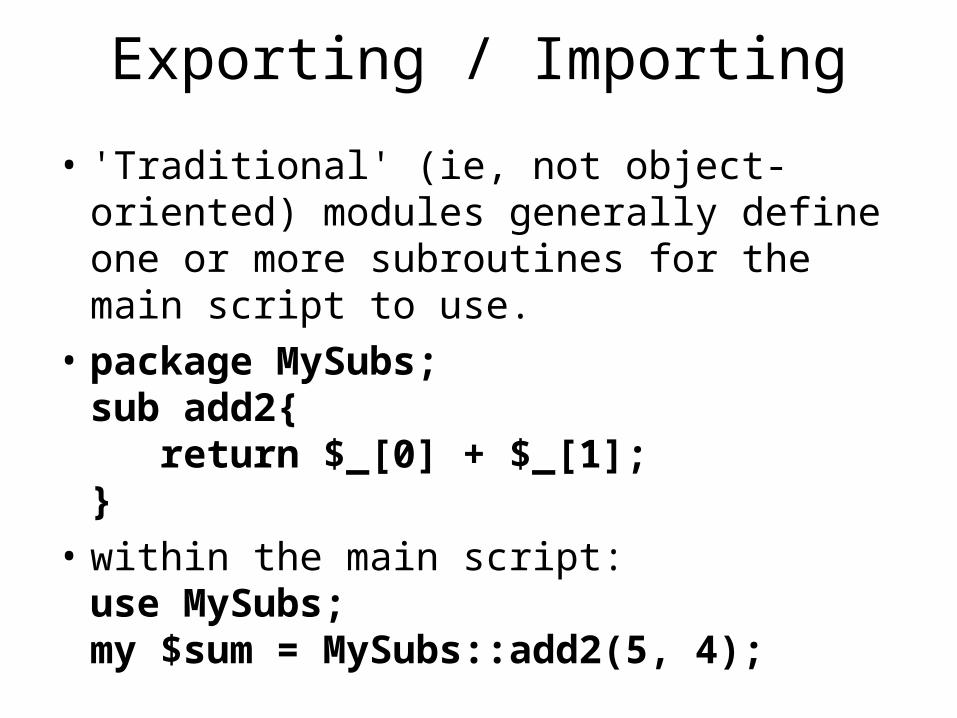
• 'Traditional' (ie, not object-oriented) modules generally define one or more subroutines for the main script to use.
• package MySubs;sub add2{ return $_[0] + $_[1];}
• within the main script:use MySubs;my $sum = MySubs::add2(5, 4);
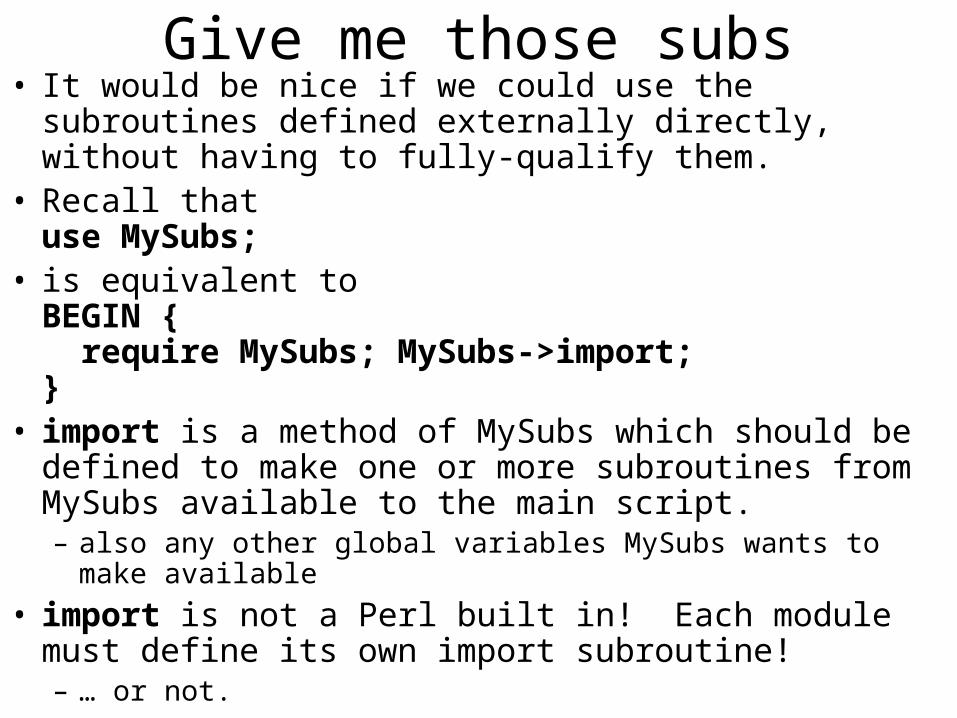
Give me those subs• It would be nice if we could use the subroutines defined
externally directly, without having to fully-qualify them.• Recall that use MySubs;
• is equivalent toBEGIN { require MySubs; MySubs->import;}
• import is a method of MySubs which should be defined to make one or more subroutines from MySubs available to the main script.– also any other global variables MySubs wants to make available
• import is not a Perl built in! Each module must define its own import subroutine!– … or not.
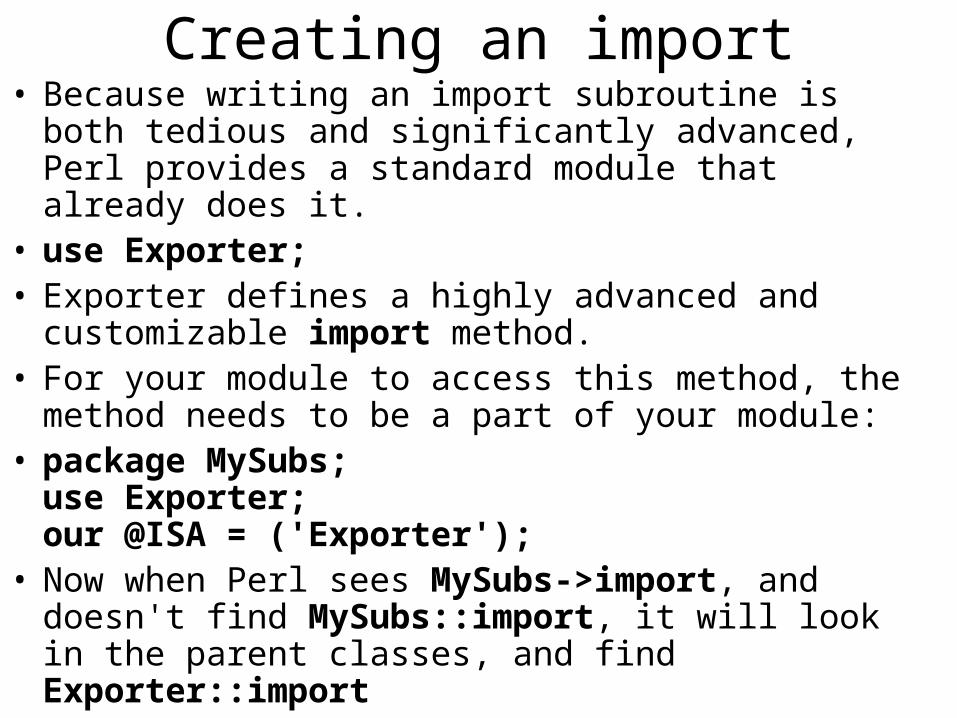
Creating an import• Because writing an import subroutine is both tedious and
significantly advanced, Perl provides a standard module that already does it.
• use Exporter;• Exporter defines a highly advanced and customizable import method.
• For your module to access this method, the method needs to be a part of your module:
• package MySubs;use Exporter;our @ISA = ('Exporter');
• Now when Perl sees MySubs->import, and doesn't find MySubs::import, it will look in the parent classes, and find Exporter::import

What and how to Export• Exporter::import looks for three package variables which define what to export
• @EXPORT defines items that are imported by default
• @EXPORT_OK defines items that can be imported upon request
• %EXPORT_TAGS defines groups of items that can be imported together
• Any module that inherits from Exporter should define these three package variables.
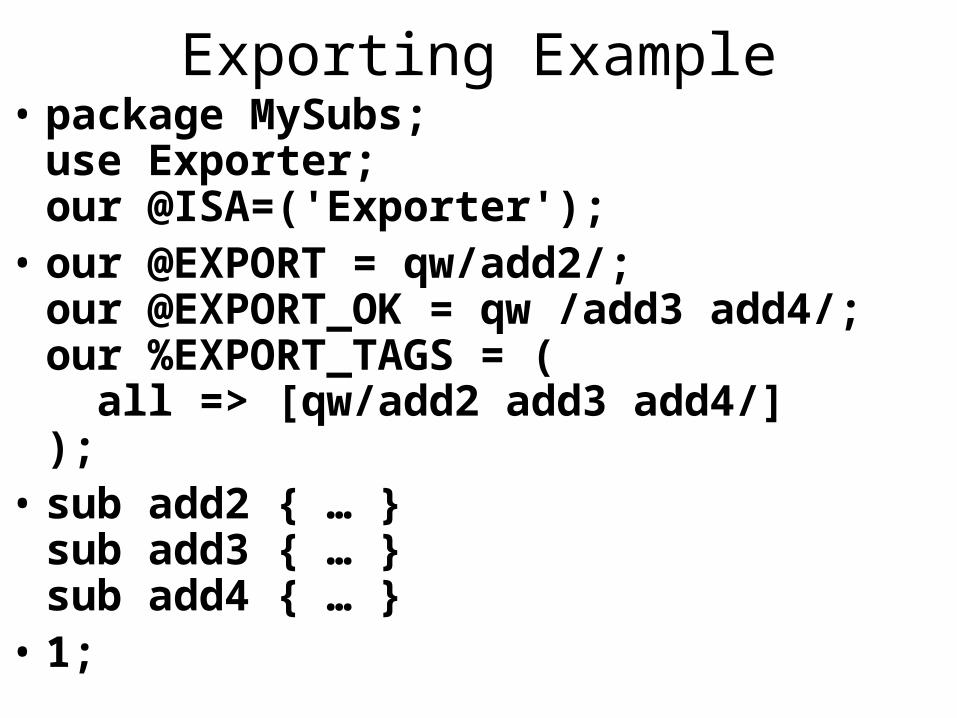
Exporting Example• package MySubs;use Exporter;our @ISA=('Exporter');
• our @EXPORT = qw/add2/;our @EXPORT_OK = qw /add3 add4/;our %EXPORT_TAGS = ( all => [qw/add2 add3 add4/]);
• sub add2 { … }sub add3 { … }sub add4 { … }
• 1;
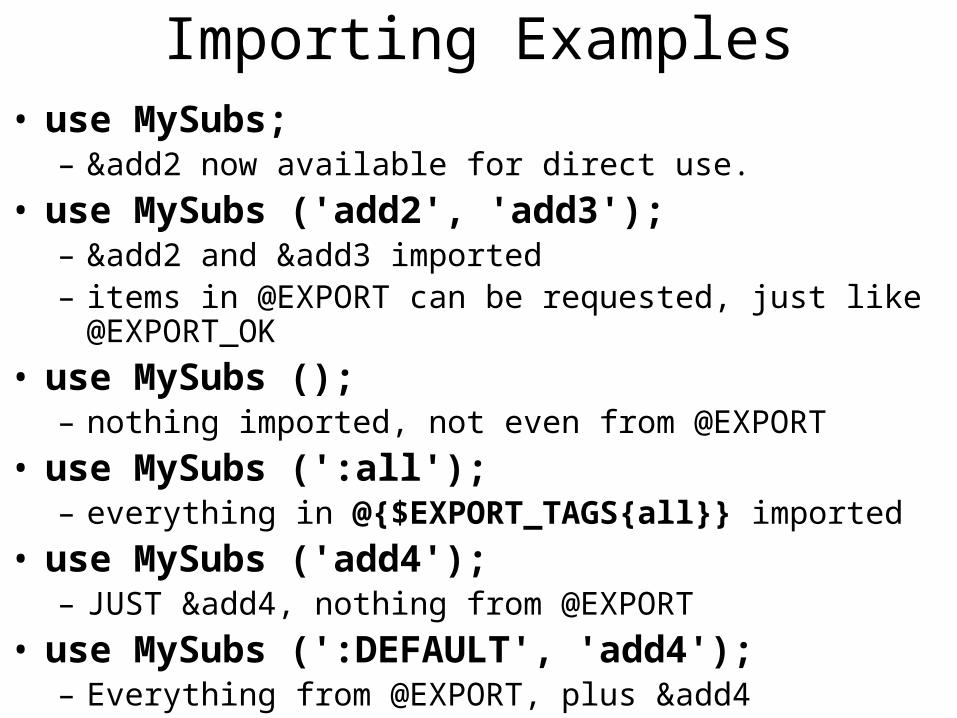
Importing Examples• use MySubs;
– &add2 now available for direct use.• use MySubs ('add2', 'add3');
– &add2 and &add3 imported– items in @EXPORT can be requested, just like @EXPORT_OK
• use MySubs ();– nothing imported, not even from @EXPORT
• use MySubs (':all');– everything in @{$EXPORT_TAGS{all}} imported
• use MySubs ('add4');– JUST &add4, nothing from @EXPORT
• use MySubs (':DEFAULT', 'add4');– Everything from @EXPORT, plus &add4
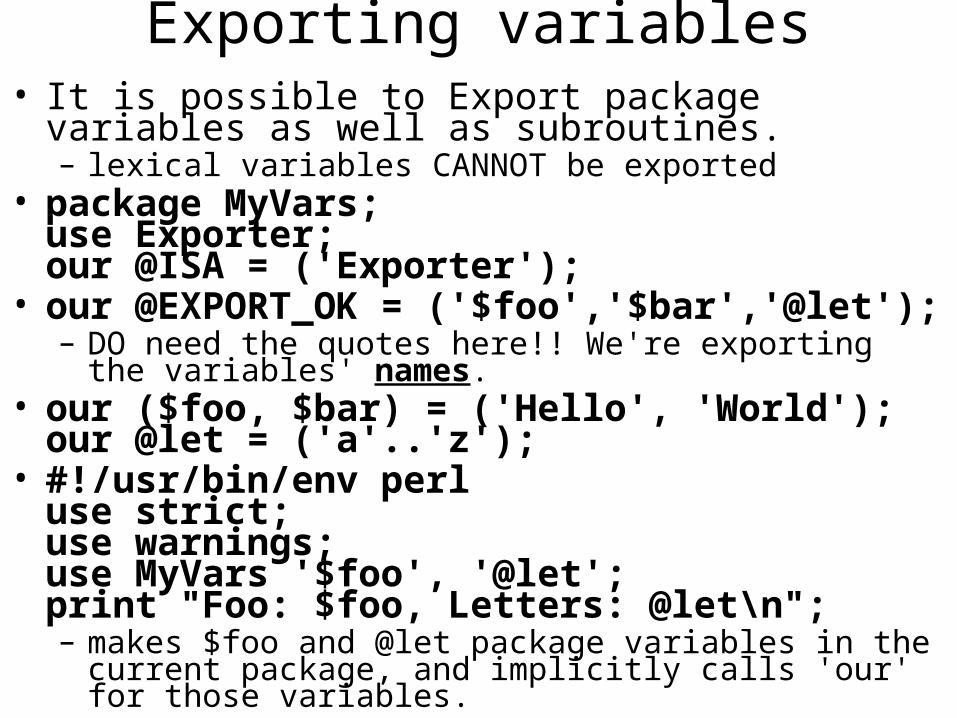
Exporting variables• It is possible to Export package variables as well as
subroutines.– lexical variables CANNOT be exported
• package MyVars;use Exporter;our @ISA = ('Exporter');
• our @EXPORT_OK = ('$foo','$bar','@let');– DO need the quotes here!! We're exporting the variables' names.
• our ($foo, $bar) = ('Hello', 'World');our @let = ('a'..'z');
• #!/usr/bin/env perluse strict;use warnings;use MyVars '$foo', '@let';print "Foo: $foo, Letters: @let\n";– makes $foo and @let package variables in the current package,
and implicitly calls 'our' for those variables.
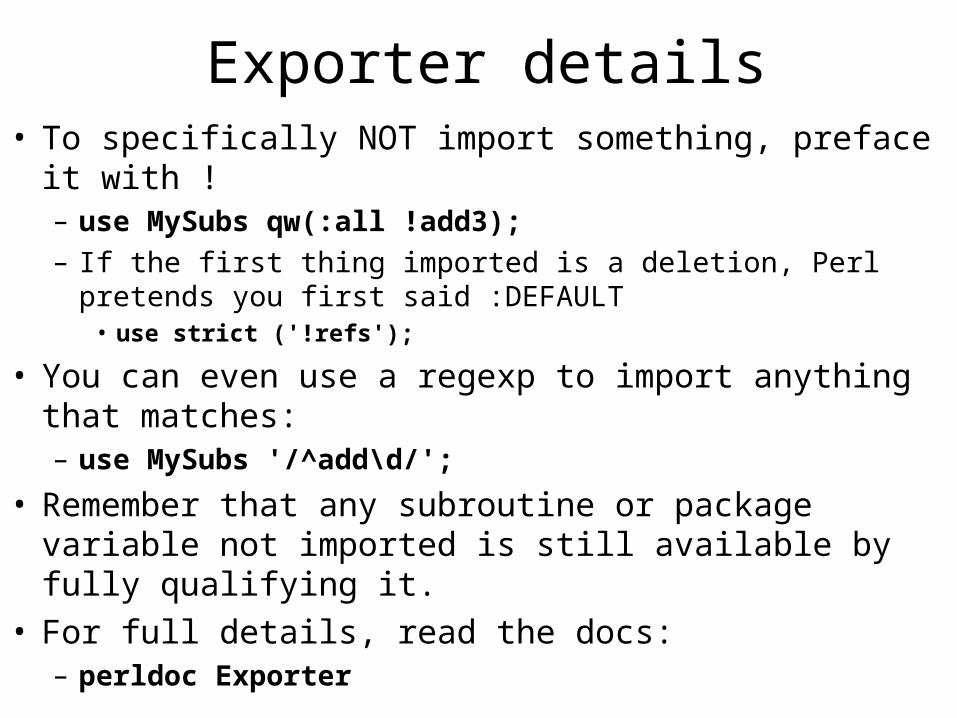
Exporter details• To specifically NOT import something, preface it with !
– use MySubs qw(:all !add3);– If the first thing imported is a deletion, Perl pretends you first
said :DEFAULT• use strict ('!refs');
• You can even use a regexp to import anything that matches:– use MySubs '/^add\d/';
• Remember that any subroutine or package variable not imported is still available by fully qualifying it.
• For full details, read the docs:– perldoc Exporter
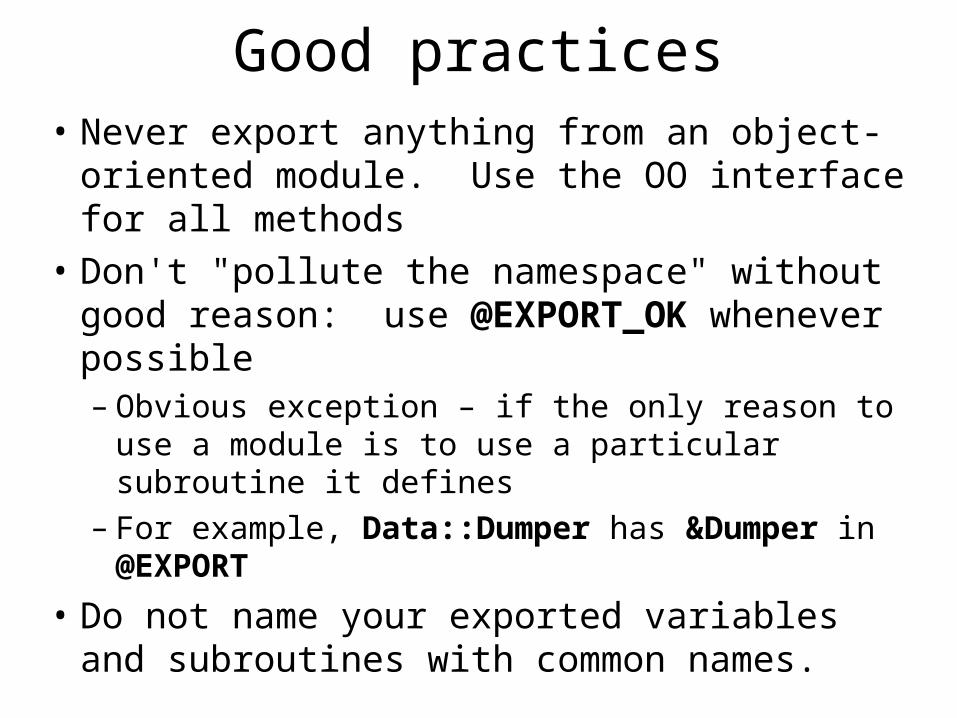
Good practices• Never export anything from an object-oriented
module. Use the OO interface for all methods
• Don't "pollute the namespace" without good reason: use @EXPORT_OK whenever possible– Obvious exception – if the only reason to use a
module is to use a particular subroutine it defines– For example, Data::Dumper has &Dumper in @EXPORT
• Do not name your exported variables and subroutines with common names.
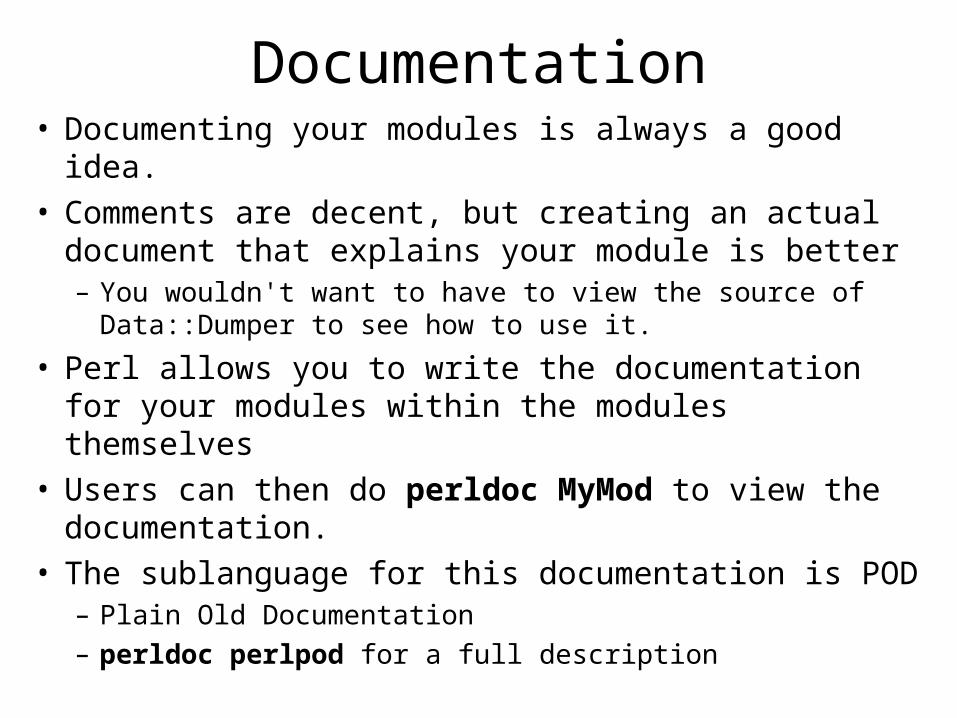
Documentation• Documenting your modules is always a good idea.• Comments are decent, but creating an actual document
that explains your module is better– You wouldn't want to have to view the source of Data::Dumper
to see how to use it.
• Perl allows you to write the documentation for your modules within the modules themselves
• Users can then do perldoc MyMod to view the documentation.
• The sublanguage for this documentation is POD– Plain Old Documentation– perldoc perlpod for a full description
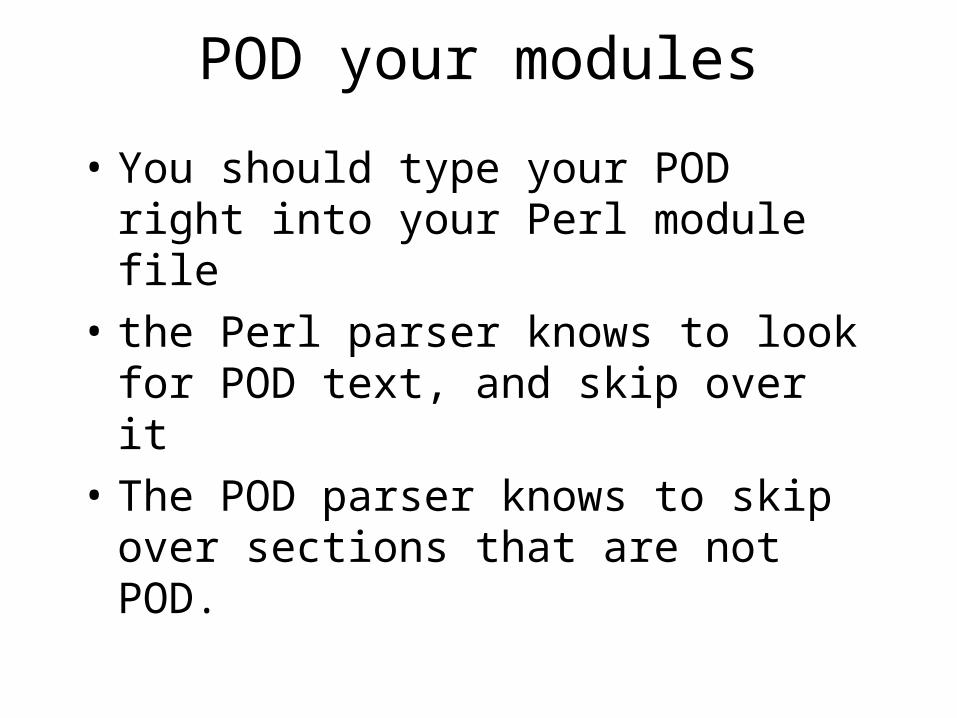
POD your modules
• You should type your POD right into your Perl module file
• the Perl parser knows to look for POD text, and skip over it
• The POD parser knows to skip over sections that are not POD.
POD• Three kinds of paragraphs, delimited by blank
lines both above and below
• 'Normal' paragraph – normal text, just type it as you would any other document
• Preformatted paragraph – start a paragraph with a tab or a space, and the paragraph will not be formatted in any way– use this for blocks of code in your documentation
• Command paragraph – start with a = character, to specially format the following text
POD commands• =head1, =head2, =head3, =head4
– The text in this paragraph is a heading– =head1 MySubs: Utility functions
• =over 5, =item *, =back– a list of items. '5' will be the number of characters to indent. '*' is
the bullet to use for this list item. Any paragraphs between the =item and =back are the text for this list item. =back means the end of the list
• =pod– POD begins here. POD actually begins with any command, so use
this only to start a 'normal' or preformatted POD paragraph.
• =cut– POD ends here. What follows until the next POD line is actual
Perl code

Formatting
• Within a normal paragraph, or a list heading, you can format the text
• I<italics text>
• B<bold text>
• C<code text> (fixed-width, unformatted)
• S<non-breaking spaces>
• (see perldoc perlpod for more)

POD Good Practices• All modules should define standard sections
(delimited with one of the =head commands)– Name: Name and brief summary of your module– Description: Description, common uses– Synopsis: Example of how your module is to be used– Subroutines/Methods: name, define, and demonstrate
each subroutine created– See Also: Pointers to any relevant data– Copyright: Who created it, when, how to contact you
• Any other sections you think would be useful• Look at the source of any standard module for
examples
Testing• When creating your modules, you should have a test
plan in mind.• You want to write tests that will insure your module
does what it's supposed to.• Often a good idea to build the tests first, before
defining the implementation of your module. Then as you write the module, run the tests to see if you are coding correctly.
• Perl provides several different Test suites to help you out with these
• Two examples: Test::Simple, Test::More
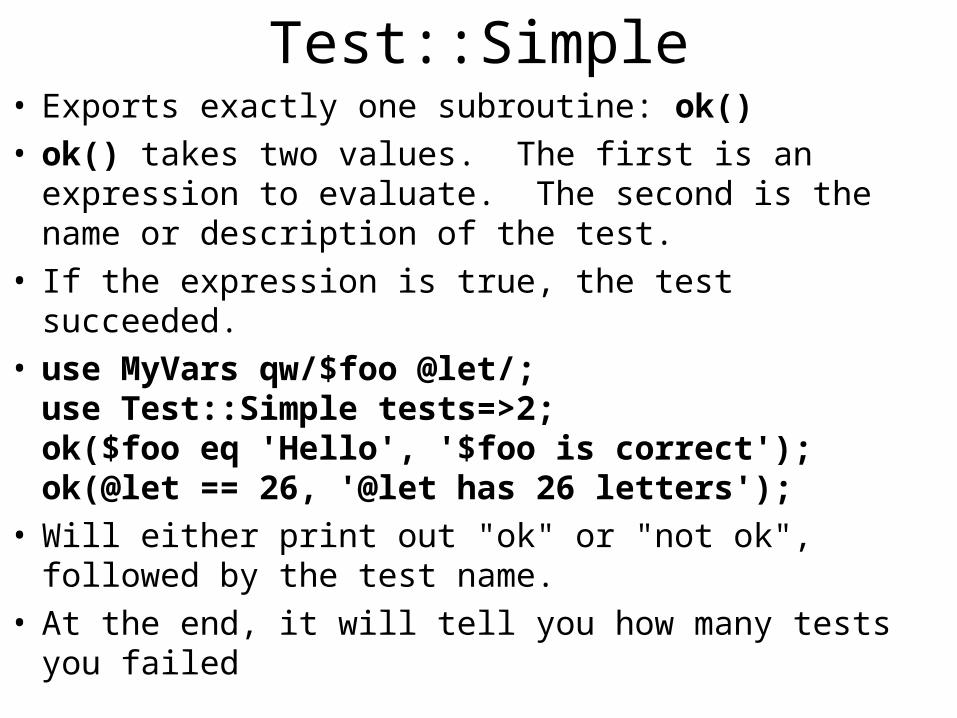
Test::Simple• Exports exactly one subroutine: ok()• ok() takes two values. The first is an expression to
evaluate. The second is the name or description of the test.• If the expression is true, the test succeeded.• use MyVars qw/$foo @let/;use Test::Simple tests=>2;ok($foo eq 'Hello', '$foo is correct');ok(@let == 26, '@let has 26 letters');
• Will either print out "ok" or "not ok", followed by the test name.
• At the end, it will tell you how many tests you failed
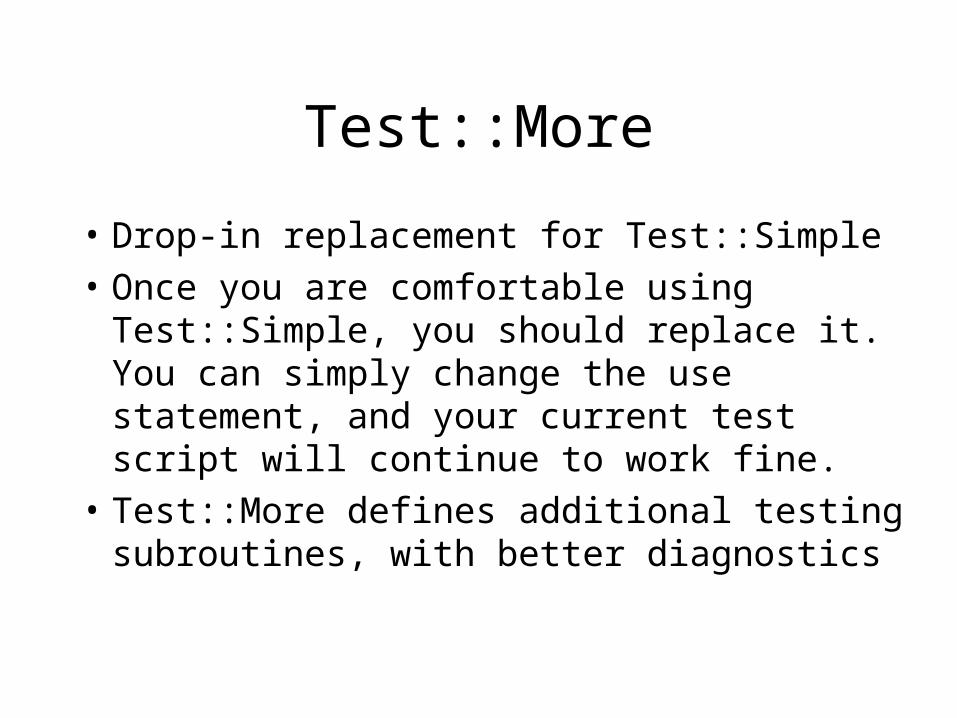
Test::More
• Drop-in replacement for Test::Simple
• Once you are comfortable using Test::Simple, you should replace it. You can simply change the use statement, and your current test script will continue to work fine.
• Test::More defines additional testing subroutines, with better diagnostics
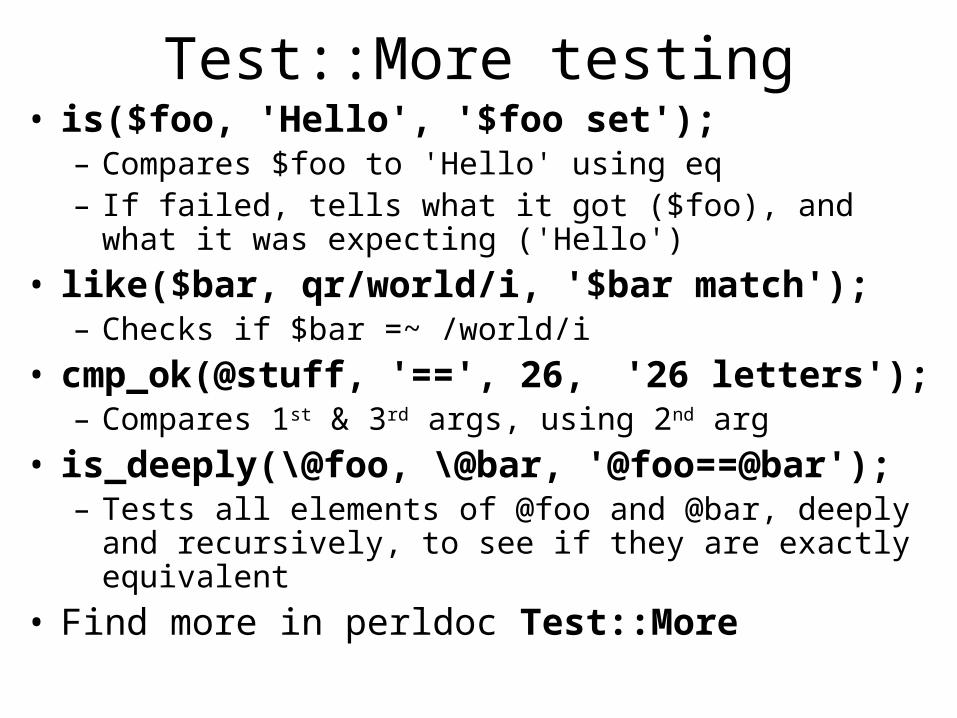
Test::More testing• is($foo, 'Hello', '$foo set');
– Compares $foo to 'Hello' using eq– If failed, tells what it got ($foo), and what it was expecting
('Hello')• like($bar, qr/world/i, '$bar match');
– Checks if $bar =~ /world/i• cmp_ok(@stuff, '==', 26, '26 letters');– Compares 1st & 3rd args, using 2nd arg
• is_deeply(\@foo, \@bar, '@foo==@bar');– Tests all elements of @foo and @bar, deeply and recursively, to
see if they are exactly equivalent
• Find more in perldoc Test::More
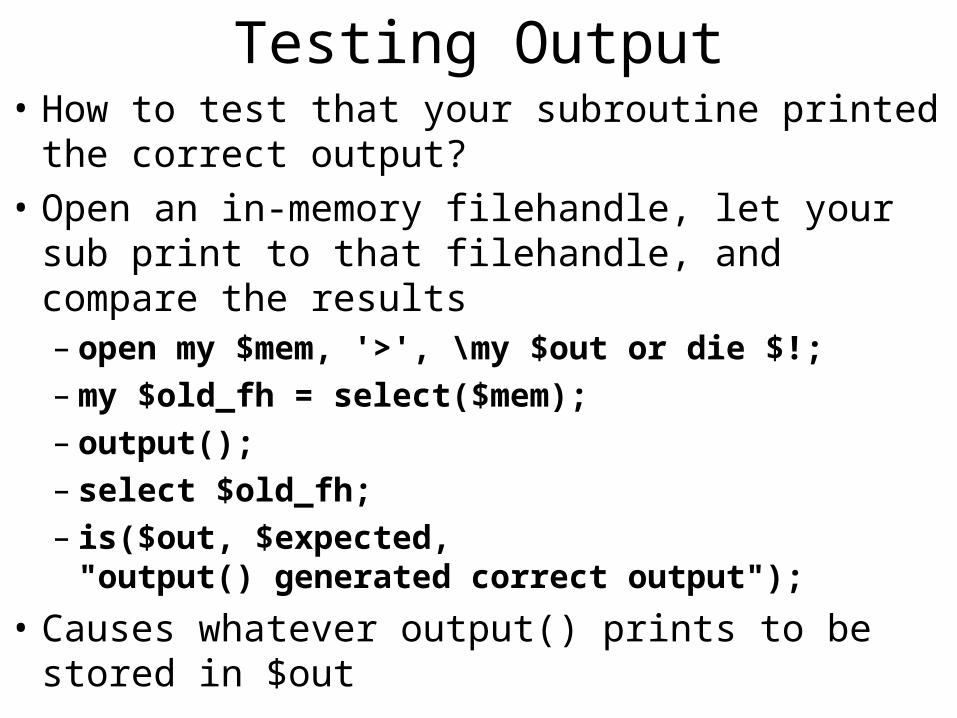
Testing Output• How to test that your subroutine printed the correct
output?
• Open an in-memory filehandle, let your sub print to that filehandle, and compare the results– open my $mem, '>', \my $out or die $!;– my $old_fh = select($mem);– output();– select $old_fh;– is($out, $expected, "output() generated correct output");
• Causes whatever output() prints to be stored in $out
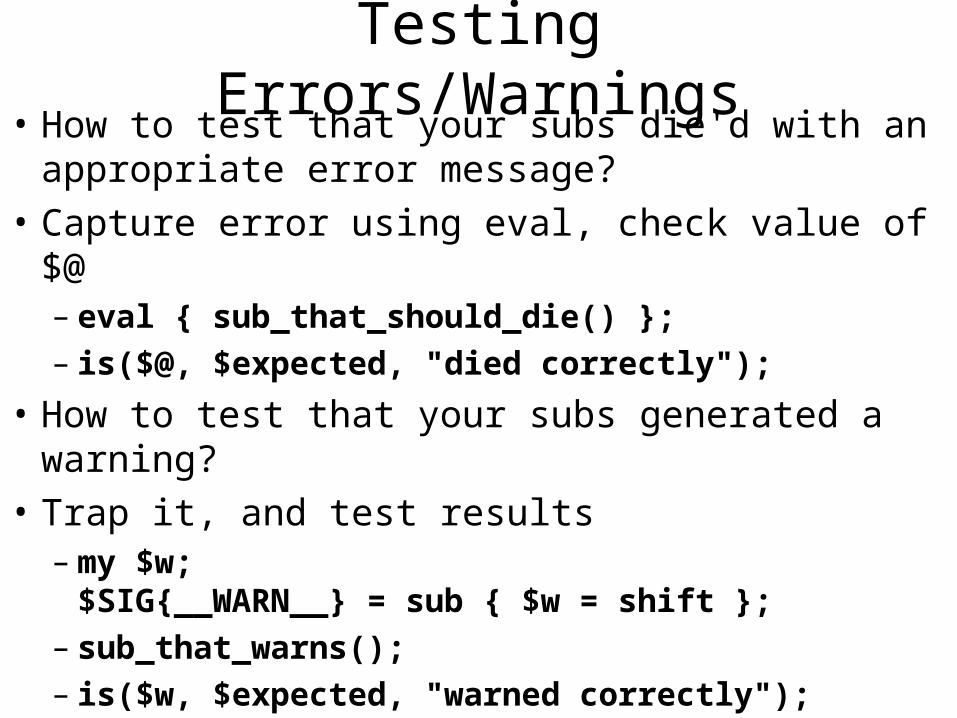
Testing Errors/Warnings• How to test that your subs die'd with an appropriate
error message?
• Capture error using eval, check value of $@– eval { sub_that_should_die() };– is($@, $expected, "died correctly");
• How to test that your subs generated a warning?
• Trap it, and test results– my $w;$SIG{__WARN__} = sub { $w = shift };
– sub_that_warns();– is($w, $expected, "warned correctly");
Letting Perl do the work• At this point, you may be getting
overwhelmed at the amount of things you have to (or should) do when creating a module
• Fortunately, Perl comes with a tool that sets everything up for you.
• h2xs– Legacy name – original main purpose was to
translate C header files into XS code
• Now also simply used to get prepared to write a module

h2xs• Before you create any files, before you write
any tests, run the following program:h2xs –AX –n MyMod– (replace 'MyMod' with the name of your module)
• Several files are created for you.
• Most notably – a skeleton MyMod.pm and a skeleton MyMod.t (for testing)

Skeleton Module• Located in the lib directory that was created by
h2xs• This module skeleton will have already inherited
from Exporter, and already has a POD framework laid out
• Use this skeleton file to create your module. Add whatever you like to @EXPORT_OK or @EXPORT, define all your subroutines, change the $VERSION number (if appropriate).– If writing an object-oriented module, completely delete
all Exporter stuff.
• Don't forget to edit the POD as you go.
Skeleton test• located in the t/ subdirectory, you will find
MyMod.t
• This perlscript loads the Test::More suite, and runs your first test – attempting to load MyMod.pm– use_ok('MyMod.pm');– will fail if MyMod.pm has syntax errors
• Write all your tests, and change the lineuse Test::More tests => 1;to be the number of tests you've written.
Use your module• Once you've created your module and its tests, you're ready
to build, test, and (if the tests pass) install the module• h2xs created Makefile.PL. This is a perlscript which will
create a makefile for you. • Because you likely don't have root privileges on
solaris.remote.cs.rpi.edu, you need to supply a prefix, to install locally:– perl Makefile.PL PREFIX=~/– (simply says to install the module in your home directory)
• This script creates Makefile, that sets up an automated build and testing location.
make• Once you've created your Makefile, run three commands:• make
– copies your module from the development directory to a build directory (blib/lib)
• make test– Runs all .t files in the t/ directory, and checks for the "ok"
messages. Reports total number of passes and failures.
– By default, only shows results of tests that failed. To get full output, runmake test TEST_VERBOSE=1
• make install– If all tests passed, run this to install your module into your library,
so main scripts can use it.
Where'd it go?
• On solaris.remote, your module will be installed in ~/lib/perl5/site_perl/5.10.0
• Within any Perl script you write that uses your module, make sure you first tell Perl where the module is located:
• use lib "$ENV{HOME}/lib/perl5/site_perl/5.10.0";use MyMod;
• If your scripts all work with your module, success!
• Recall also the PERL5LIB env variable you can set in the shell

What to submit• For homework 4, you will be writing two modules.• I expect everyone to be using the h2xs method just
described to create each installation package• Please name your modules with your RCS Id
– ex: h2xs –AX –n Lallip::MyMod
• When you have finished testing and are ready to submit, for each module, run:make dist
• this will create a "tarball", a tarred and gzipped file containing all of the files that h2xs created and you modified.– Lallip-MyMod-0.01.tar.gz
• These tarballs are what you will submit for your homework.
Help
• The documentation for creating a new module, using the process just described, is available at perldoc perlnewmod
• That documentation also tells you how to contribute your module to CPAN
• If you ever write a module you feel would be useful for other Perl programmers around the world, please by all means consider contributing it
• The syllabus also contains an example Person.pm and Student.pm, demonstrating documentation and inheritance, as well as a Student.t to demonstrate testing.