Embed Size (px)
Citation preview

INSTALLATIONSELECT A LOCATION
The sensor is more sensitive to motion across the front of the sensor than to motion towards the sensor.
The detector senses heat in motion and possibly heat sources that change temperature quickly. Therefore, to avoid false triggering, avoid placing the sensor where it will be aimed at air conditioners, heaters, and other sources of heat or cold.
The single pole motion sensor wall switch au-tomatically controls indoor lighting. In AUTO mode, the control automatically turns the light on when motion is detected. The motion sensor keeps lights on for a fixed time of 5 minutes after motion is last detected.
Installation is as easy as replacing a wall switch.
Some codes require installation by a quali-fied electrician.
Items included in packaging:• SensorSwitch • CoverPlate• 3WireConnectors • 2LargeScrews• 2SmallScrews • Owner’sManual
Motion Sensor Wall SwitchModel 6113
© 2010 HeathCo LLC 200069-01
Features include:• 110°motiondetectionangle• FixedON-TIMEof5minutes• Workswithelectronicandmagneticballasts• Workswithincandescent,halogen,compactfluo-
rescent(CFL),fluorescent,andLEDlighting• Workswithmotorsupto1/8hp• SlideswitchselectableOFF,ON,andAUTO
modes
AUTOOFF ON
OFF/AUTO/ON Slide Switch
Motion Sensor
20 ft. (6.1 m)
10 ft. (3.5 m)
Figure 1 - Typical View of Coverage
110°
WARNING: Turn power off at the fuse or circuit breaker before wiring.

2 200069-01
Typical Installation1. Remove existing wall switch from junction
box.2. Connectelectricalleadsofsensorasshownin
Figure3.Beforeinstallingsensorintojunctionbox, make sure there is no wire exposed at each connection.
3. Mountsensorintojunctionboxusingtwolargemounting screws provided.
4. Turn the power back on at the circuit breaker.5.SetmodeselectionswitchtotheAUTOposition.
Whenunitstabilizes(about1minute),thesensoris ready to detect motion. If sensor detects motion, the lights will turn on. The lights will turn off 5 minutes after motion is no longer detected.
Note: If lights do not turn on when motion is detected after the warm up period, the switch is wired incorrectly. Turn the power off at circuit breaker and switch the black and brown sensor wires. Test again.
NOAUTO
OFF
AUTOOFF ON
Green ground wire to junction box screw or grounding wire.
Brown
Black Line “Hot”
Neutral Return
Lighting Load
INSTALLING SENSOR1. Removethedecorativecoverplate(securedby
twosmallscrews).
Mode SelectionSwitch
Figure 2 - Removing Decorative Cover Plate
Figure 3 - Connecting Electrical Leads of Sensor
To Lighting Load
WARNING: Turn power off at the fuse or circuit breaker before wiring.
CAUTION: Do NOT connect the motion switch to house NEUTRAL (white wire).
IMPORTANT: The switch will not work unless the ground wire is connected.

3200069-01
MODE SELECTION SWITChThis switch allows you to select one of three modes ofoperation:OFF,AUTO,orON.
OFF:Lightsstayoff.
AUTO:Lightsautomaticallycomeonwhenmotionis detected. The lights will turn off 5 minutes after motion is no longer detected.
ON:Lightsstayoncontinuously.
IMPORTANT ThINGS TO REMEMbER• Themotionswitchwillsoundalowaudibleclick
when motion is detected.• Theswitchwillactivateonlyifthemotionswitch
is in AUTO mode.
COMPLETING INSTALLATION1. Replacethedecorativewallplate.Ininstallations
where the motion sensor switch is combined with other switches or outlets on an expanded box, you will need to purchase a combination wall plate. Various combination wall plates are available at home centers and electrical supply stores.
2. Slidethemodeselectionswitchacoupletimesto make sure it moves freely.
SPECIFICATIONSThis product is to be installed indoors only.
ElectricalInput ........................................................................................................................120V,60Hz.FluorescentLoad .............................................................................................. Upto400WattsMaximumMotorLoad ...........................................................................................................Upto1/8HPMaximumIncandescent ...................................................................................Upto500WattsMaximumat120VACOn-Time .....................................................................................................................5MinuteFixedTimeCoverage ........................................ upto10ft.(3.5m)at110°,upto20ft.(6.1m)infrontofthesensor
IMPORTANT: In AUTO mode, if the sensor turns the light off, there is an 8 second delay before the sensor will turn the lights on when motion is sensed.
IMPORTANT: When sliding the control switch from OFF to AUTO, there is a 1 minute warm up period before the control will become fully functional.

4 200069-01
TROUbLEShOOTING
SYMPTOM POSSIbLE CAUSE SOLUTION
Light does not come on.
1. Circuitbreakerorfuseisturnedoff.2. Ifthelampbeingcontrolledhasan-
other switch, it may be turned off.3. Bulbisburnedout.4. ModeswitchisintheOFFposition.5. Poorconnection.6. Switchgroundwireisnotconnected
to house ground.7. Controlmaybewiredwrong.
1. Turncircuitbreakeron.2. Turnotherswitchon.
3. Replacelightbulb.4. SetswitchtoAUTOorON.5. Verify all wiring connections.6. Connectswitchgroundwiretohouse
ground wire.7. Verifywiringiscorrect,seeFigure3.
Light does not turn off.
1. ModeswitchisintheONposition.2. Motionisstillpresent.
3. Fixed time (5 minutes) has not yetexpired.
4. Controlmaybewiredwrong.
1. SetswitchtoAUTOorOFF.2. Makesurethereisnomotionduring
TIMEcontrolperiod.3. Wait5minutesafterallmotionhas
stopped for switch to turn off.4. Verifywiringiscorrect,seeFigure3.
Light comes on randomly in AUTO mode.
1. Switchisbeingtriggeredbyairventor other heat source.
2. Controlmaybewiredwrong.
1. Determinethesourcetriggeringtheswitchandalterairflow.
2. Verifywiringiscorrect,seeFigure3.
Light comes on in the AUTO mode without motion.
1. Modeswitchhasbeenturnedoffandback on.
2. Therewasamomentarypowerinter-ruption.
1. Controlwillfunctionnormallyafter1minutewarmupperiod.
2. Controlwillfunctionnormallyafter1minutewarmupperiod.
Light does not stay on in AUTO mode.
Motionhasstoppedintheroom. Continuemovement.
Light does not come on in AUTO mode but works correctly in the ON and OFF positions.
Controlisnotwiredcorrectly. WARNING: Turn power off at the fuse or circuit breaker before re-wiring.Switchtheblackandbrownsensorwiresandtestagain.SeeFigure3.

5200069-01
ONE YEAR LIMITED WARRANTYThis is a “Limited Warranty” which gives you specific legal rights. You may also have other rights which vary from state to state or province to province.For a period of one year from the date of purchase, any malfunction caused by factory defective parts or workmanship will be corrected at no charge to you.Not Covered - Repair service, adjustment and calibration due to misuse, abuse or negligence, light bulbs, batteries, and other expendable items are not covered by this warranty. Unauthorized service or modification of the product or of any furnished component will void this warranty in its entirety. This warranty does not include reimbursement for inconvenience, installation, setup time, loss of use, unauthorized service, or return shipping charges.This warranty covers only HeathCo LLC assembled products and is not extended to other equipment and components that a customer uses in conjunction with our products.THIS WARRANTY IS EXPRESSLY IN LIEU OF ALL OTHER WARRANTIES, EXPRESS OR IMPLIED, INCLUDING ANY WARRANTY, REPRESENTATION OR CONDITION OF MERCHANT ABILITY OR THAT THE PRODUCTS ARE FIT FOR ANY PARTICULAR PURPOSE OR USE, AND SPECIFICALLY IN LIEU OF ALL SPECIAL, INDIRECT, INCIDENTAL, OR CONSEQUENTIAL DAMAGES.REPAIR OR REPLACEMENT SHALL BE THE SOLE REMEDY OF THE CUSTOMER AND THERE SHALL BE NO LIABILITY ON THE PART OF HEATHCO LLC FOR ANY SPECIAL, INDIRECT, INCIDENTAL, OR CONSEQUENTIAL DAMAGES, INCLUDING BUT NOT LIMITED TO ANY LOSS OF BUSINESS OR PROFITS, WHETHER OR NOT FORESEEABLE. Some states or provinces do not allow the exclusion or limitation of incidental or consequential damages, so the above limitation or exclusion may not apply to you. Please keep your dated sales receipt, it is required for all warranty requests.
TEChNICAL SERvICEPlease call 1-800-858-8501 (English speaking only) for assistance before returning product to store.
Ifyouexperienceaproblem,followthisguide.YoumayalsowanttovisitourWebsiteat:www.hzsup-port.com. If the problem persists, call* for assistance at 1-800-858-8501(Englishspeakingonly),8:00AMto5:00PMCST(M-F).Youmayalsowrite*to:
HeathCoLLCP.O.Box90045BowlingGreen,KY42102-9045ATTN:TechnicalService
*IfcontactingTechnicalService,pleasehavethefollowinginformationavailable:ModelNumber,DateofPurchase,andPlaceofPurchase.
No Service Parts Available for this Product
Please keep your dated sales receipt, it is required for all warranty requests.
HeathCoLLCreservestherighttodiscontinueproductsandtochangespecificationsatanytimewithoutincurring any obligation to incorporate new features in products previously sold.

6 200069-01
INSTALACIONESCOJA UN LUGAR
El detector es más sensitivo al movimiento queatraviesa por el frente que al que se dirige hacia el detector.
Elsensordetectacalorenmovimientoyposible-mentelasfuentesdecalorquecambianrápidamentede temperatura. Por lo tanto, para evitar falsasalarmas, no coloque el detector frente a acondi-cionadores de aire, calentadores u otras fuentes de calor o de frío.
Elinterruptordeparedcondetectordemovimientodeunsolopoloautomáticamentecontrolalailumina-ción interior. EnmodalidadAUTO,elcontrolprendelaluzautomáticamentecuandodetectamovimiento. Eldetectordemovimientomantienelaslucespren-didasporuntiempofijode5minutosdespuésdeque ha detectado el último movimiento.
Su instalación es tan fácil como el cambiar uninterruptor de pared.
Algunas normas exigen que la instalación la realice un electricista calificado.
Interruptor de Pared y Detector de MovimientoModelo 6113
© 2010 HeathCo LLC 200069-01 S
Sus características incluyen:• Angulodedeteccióndemovimientode110°• FijadoenONTIME–5minutos• Funcionaconlosestabilizadoreselectrónicosy
magnéticos• Funcionaconelalumbradoincandescente,ha-
lógeno,compacto(CFL),fluorescenteyLED• Funcionaconmotoresdehasta1/8hp(caballo
defuerza)• DesliceelinterruptorselectoralafasedeOFF,
ONyAUTO
AUTOOFF ON
6.1 m
3.5 m
Figura 1 - Vista típica de la cobertura
110°
Detector de movimiento
ADvERTENCIA: Desconecte la energía en el disyuntor o en el fusible.
Elementosincluidosenelpaquete:• Interruptordeldetector • Placacubertora• 3Conectoresdealambre• 2Tornillospequeños • 2Tornillosgrandes• Manualdelpropietario
Interruptor deslizante de OFF/AUTO/ON

7200069-01
Instalación típica1.Quiteelinterruptordeparedexistentedelacaja
de empalmes.2.Conecteloshiloseléctricosdeldetectorcomose
muestraenlaFigura3.Antesdeinstalarelde-tectorenlacajadeempalmes,asegúrese que no haya alambre expuesto en cada conexión.
3.Monteeldetectorenlacajadeempalmesconlosdostornillosdemontajeprovistos.
4.Prendalaenergíaenelcortacircuitos.5.Fije el interruptor de selección de fase en la
posicióndeAUTO.Cuandolaunidadseestabiliza(dentrode1minuto)eldetectorestálistoparadetectar movimiento. Si detecta movimiento,laluzseprenderá.Laluzseapagará5minutosdespuésdequeyanosedetectemovimiento.
Nota: Si las luces no se prenden cuando sedetecta movimiento después del período decalentamiento, el interruptor está conectadoincorrectamente. Apague la corriente en un disyuntor e intercambie los alambres negro y cafédeldetector.Pruebedenuevo.
AUTOOFF ON
Negro
INSTALACION DEL DETECTOR1. Quitelaplacacubertoradecorativa(asegurada
condostornillosdecorativos).
Figura 2 - Remoción de la placa de la tapa decorativa
Figura 3 - Cómo conectar los hilos eléctricos del detector
El alambre verde de conexión a tierra al tornillo de la caja de empalmes o al alambre de conexión a tierra.
Carga de luz
Interruptor selector de fase
Línea “Caliente”
Retorno neutro
A la carga de alimentación
NOAUTO
OFF
ADvERTENCIA: Desconecte la energía en el disyuntor o en el fusible.
Marrón
IMPORTANTE: El interruptor no funcionará a no ser que el alambre de a tierra esté conectado.
8 200069-01
2.Deslice el interruptor selector de fase unascuantas veces para asegurarse de que se mueve sin problemas.
INTERRUPTOR SELECTOR DE FASEEsteinterruptorlepermiteseleccionarunadelastresfasesdeoperación:OFF,AUTO,ON.
OFF:Laluzpermaneceapagada.
AUTO:Laslucesseprendenautomáticamentecuan-dodetectanmovimiento.Laluzseapagará5minutosdespuésdequeyanosedetectemovimiento.
ON:Laluzpermaneceprendidacontinuamente.
COSAS IMPORTANTES DE RECORDAR• Elinterruptordemovimientosonaráconunclic
audible cuando detecte movimiento.• Elinterruptorseactivarásolosielinterruptorde
movimientoestáenlamodalidadAUTO.INSTALACION COMPLETA1.Cambie la placa decorativa de pared. En las
instalaciones donde se combine el interruptor detector de movimiento con otros interruptores oenchufesenunacajaextendida,senecesitarácomprar una placa combinadora de pared. Varias placas combinadoras de pared se pueden encon-trar en los centros comerciales para el hogar y‚ enlastiendasdeaparatoseléctricos.
ESPECIFICACIONESEsteproductodebeserinstaladosólodentrodecasa.
Entradaeléctrica ......................................................................................................................120V,60Hz.CargaFluorescente ............................................................................................. Hasta400VatiosMáximoCargadelmotor ........................................................................................................Hasta1/8HPMáximoIncandescente ..................................................................................................... Hasta500VatiosMáximoDuración ................................................................................................................5minutosdetiempofijoAlcance .........................................................................Hasta3.5ma110°,hasta6.1mfrentealdetector
IMPORTANTE: En la modalidad AUTO, si el detector apaga la luz, hay un retraso de 8 minutos antes de que el detector prenda las luces cuando detecta movimiento.
IMPORTANTE: Cuando se desliza el interruptor de control de OFF a AUTO, hay un período de 1 minuto de calentamiento antes de que el control se vuelva completamente funcional.
PRECAUCIÓN: NO conecte el interruptor detector de movimiento al NEUTRO de la casa (alambre blanco).

9200069-01
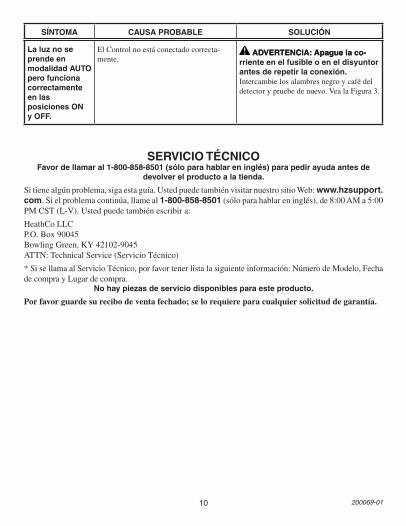
SOLUCIÓN DE PRObLEMAS
SÍNTOMA CAUSA PRObAbLE SOLUCIÓN
La luz no enciende.
1. El disyuntor o el fusible está desco-nectado.
2. Silalámparaestácontroladadesdeotrointerruptor, este puede estar apagado.
3. Bombillaquemada.4. El interruptor de modalidad está en
posiciónOFF.5. Conexióndeficiente.
6. Elalambredeatierradelinterruptornoestáconectadoaldeatierradelacasa.
7. Elcontroldebeestarmalcableado.
1. Conecteeldisyuntor.
2. Enciendaelotrointerruptor.
3. Cambielabombilla.4. Ponga el interruptor en AUTO o en
ON.5. Verifique todas las conexiones del
cableado.6. Conecteelalambredeatierradelinte-
rruptor al alambre de a tierra de la casa.7. Verifiquequelaconexiónestécorrecta,
vealaFigura3.
La luz no apaga. 1. El interruptor de modalidad está enposiciónON.
2. Elmovimientoaúnestápresente.
3. Eltiempofijado(de5minutos)todavíano se ha terminado.
4. Elcontroldebeestarmalcableado.
1. PongaelinterruptorenAUTOoenOFF.
2. Asegúresequenohayamovimientodu-ranteellapsodelcontroldeTIEMPO.
3. Espere5minutosdespuésdequesehaparado todo movimiento para que el interruptor se apague.
4. Verifiquequelaconexiónestécorrecta,vealaFigura3.
La luz se prende al azar en modalidad AUTO.
1. Elinterruptorseestásiendoactivadopor una ventosa de aire u otra fuente de calor.
2. Elcontroldebeestarmalcableado.
1. Determinelafuentequeactivaalinte-Determinelafuentequeactivaalinte-rruptorycambieelflujodeaire.
2. Verifiquequelaconexiónestécorrecta,vealaFigura3.
La luz se prende en modalidad AUTO sin movimiento.
1. Sehaapagadoyprendidoelinterruptorde modalidad.
2. Hubo una interrupción de energíamomentánea.
1. El control funcionará normalmentedespuésde1minutodecalentamiento.
2. El control funcionará normalmentedespuésde1minutodecalentamiento.
La luz no se queda en modalidad AUTO.
Ya no hay movimiento en la habitación. Hagaqueelmovimientocontinúe.
10 200069-01
SERvICIO TÉCNICOFavor de llamar al 1-800-858-8501 (sólo para hablar en inglés) para pedir ayuda antes de
devolver el producto a la tienda.
Sitienealgúnproblema,sigaestaguía.UstedpuedetambiénvisitarnuestrositioWeb:www.hzsupport.com.Sielproblemacontinúa,llameal1-800-858-8501(sóloparahablareninglés),de8:00AMa5:00PMCST(L-V).Ustedpuedetambiénescribira:
HeathCoLLCP.O.Box90045BowlingGreen,KY42102-9045ATTN:TechnicalService(ServicioTécnico)
*SisellamaalServicioTécnico,porfavortenerlistalasiguienteinformación:NúmerodeModelo,FechadecomprayLugardecompra.
No hay piezas de servicio disponibles para este producto.
Por favor guarde su recibo de venta fechado; se lo requiere para cualquier solicitud de garantía.
La luz no se prende en modalidad AUTO pero funciona correctamente en las posiciones ON y OFF.
ElControlnoestáconectadocorrecta-mente.
ADvERTENCIA: Apague la co-ADvERTENCIA: Apague la co-rriente en el fusible o en el disyuntor antes de repetir la conexión.Intercambielosalambresnegroycafédeldetectorypruebedenuevo.VealaFigura3.
SÍNTOMA CAUSA PRObAbLE SOLUCIÓN

11200069-01
HeathCoLLCsereservaelderechodedescontinuarproductosydecambiarespecificacionesacualquiermomento sin incurrir en ninguna obligación de tener que incorporar nuevas características en los productos vendidos con anterioridad.
GARANTÍA LIMITADA A 1 AÑOEsta es una “Garantía Limitada” que le da a Ud. derechos legales específicos. Usted puede también tener otros derechos que varían de estado a estado o de provincia a provincia.Por un período de 1 año desde la fecha de compra, cualquier mal funcionamiento ocasionado por partes defectuosas de fábrica o mano de obra será corregido sin cargo para Ud.No cubierto - Servicio de reparación, ajuste y calibración debido al mal uso, abuso o negligencia, bombillas, baterías, u otras partes fungibles no están cubiertas por esta garantía. Los Servicios no autorizados o modificaciones del producto o de cualquier componente que se provee invalidarán esta garantía en su totalidad. Esta garantía no incluye reembolso por inconveniencia, instalación, tiempo de instalación, perdida de uso, servicio no autorizado, o costos de transporte de retorno.Esta garantía cubre solamente los productos ensamblados por HeathCo LLC y no se extiende a otros equipos o componentes que el consumidor usa junto con nuestros productos.ESTA GARANTÍA ESTÁ EXPRESAMENTE EN LUGAR DE OTRAS GARANTÍAS, EXPRESADAS O SOBREENTENDIDAS, INCLUYENDO CUALQUIER GARANTÍA, REPRESENTACIÓN O CONDICIÓN DE COMERCIABILIDAD O QUE LOS PRODUCTOS SE ADAPTEN PARA CUALQUIER PROPÓSITO O USO EN PARTICULAR, Y ESPECIFICAMENTE EN LUGAR DE TODOS LOS DAÑOS ESPECIALES, INDIRECTOS, INCIDENTALES Y CONSECUENTES.LA REPARACIÓN O EL REEMPLAZO DEBERÍA SER LA ÚNICA SOLUCIÓN DEL CLIENTE Y NO HABRÁ RESPONSABILIDAD POR PARTE DE HEATHCO LLC POR CUALQUIER DAÑO ESPECIAL, INDIRECTO, INCIDENTAL O CONSECUENTE, INCLUIDOS PERO NO LIMITADOS A CUALQUIER PÉRDIDA DE NEGOCIO O GANACIAS SEAN O NO PREVISIBLES. Algunos estados o provincias no permiten la exclusión o limitación de daños incidentales o consecuentes, de modo que la limitación o exclusión arriba indicada puede que no se aplique a Ud. Por favor guarde su recibo de venta fechado; se lo requiere para cualquier solicitud de garantía.

12 200069-01© 2010 HeathCo LLC 200069-01 F
INSTALLATIONDÉTERMINER L'EMPLACEMENT
Le détecteur est plus sensible au mouvementtransversal qu'au mouvement perpendiculaire au détecteur.
Ledétecteurperçoit lachaleurenmouvementetpossiblement les sources de chaleur qui changent rapidementdetempérature.Parconséquent,pouréviter les déclenchements intempestifs, éviter demonterledétecteuràunendroitoùilseraitorientédirectement vers les climatiseurs d'air, les chaufferet-tes et autres sources de chaleur ou de froid.
L’interrupteur mural unipolaire à détecteur demouvementcommandeautomatiquementl’éclairageintérieur.EnmodeAUTO,ilallumeautomatique-mentl’éclairagelorsqu’unmouvementestdécelé.Le détecteur de mouvement conserve l’éclairageallumé pendant cinq minutes après la détectiond’unmouvement.
Soninstallationestaussisimplequeleremplacementd’uninterrupteurmural.
Certains codes de l’électricité exigent que l’installation soit confiée à un électricien qualifié.
Interrupteur mural à détecteur de mouvementModèle 6113
Ses caractéristiques comprennent :• Anglededétectiondemouvementde110°• Duréedemisesoustensionfixedecinqminutes• Compatible avec les ballasts électroniques et
magnétiques• Compatible avec les lampes incandescentes,
à halogène, fluorescentes compactes (CFL),fluorescentesetàDEL
• S’utiliseavecmoteursjusqu’à1/8hp• Modes OFF, ON et AUTO sélectionnés par
interrupteuràglissière
6,1 m
3,5 m
Figure 1 - Zone de couverture classique
110°
Détecteur de mouvement
MISE EN GARDE : Coupez l’alimentation au disjoncteur ou au fusible.
Commutateurà glissièreOFF/AUTO/ON
AUTOOFF ON
L’emballagecontient:• Interrupteuràdétecteur• Plaquemurale • 3serre-fils• 2petitesvis • 2grandesvis• Guidedupropriétaire

13200069-01
Interrupteur de sélection de mode
Installation type1. Enleverl’interrupteurmuralexistantdelaboîte
dejonction.2. Raccorderlesfilsdudétecteurcommeillustré
àlafigure3.Avantd’installerledétecteurdanslaboîtedejonction,s’assurer qu’aucun fil ne soit exposé à chaque connexion.
3. Monter le détecteurdans la boîtede jonction àl’aidedesdeuxgrandesvisdemontagefournies.
4. Rétablirl’alimentationaudisjoncteur.5. Régler l’interrupteurde sélectiondemodeen
position AUTO. Lorsque l’unité se stabilise,(environ1minute), ledétecteurestprêtàdé-tecterlemouvement.Siledétecteurdétecteunmouvement, l’éclairage s’allume. L’éclairages’éteindra5minutesaprèsabsencededétectionde mouvement.
Note :Si l’éclairagenes’allumepas lorsqu’unmouvement est détecté, après la période depréchauffe, c’est que l’interrupteur n’est pascorrectementbranché.Coupezl’alimentationauniveaududisjoncteur,puis interchangez lesfilsnoiretbrundudétecteur.Faitesunnouvelessai.
AUTOOFF ON
Fil de mise à la terre vert à la vis ou au fil de mise à la terre de la boîte de jonction
Noir
CHARGE D'ÉCLAIRAGE
INSTALLATION DU DÉTECTEUR1. Enleverlaplaquedécorative(fixéeaumoyende
deuxvis).
Figure 2 - Retrait de la plaque décorative
Figure 3 - Raccordement des fils du détecteur
Ligne sous tension
Retour neutre
Vers la charge d’éclairage
NOAUTO
OFF
MISE EN GARDE : Coupez l’alimentation au disjoncteur ou au fusible.
Brun

14 200069-01
d’autresprisessurunboîtierd’expansion,ilvousfaudraacheteruneplaquemuralecombinée.Lescentres de bricolage et magasins de fournitures électriques offrent diverses combinaisons deplaques murales.
2. Glisserl’interrupteurdesélectiondemodedeuxoutroisfoispourvousassurerqu’ilfonctionnelibrement.
INTERRUPTEUR DE SÉLECTION DE MODE
Cetinterrupteurvouspermetdechoisirundestroismodesdefonctionnement:OFF,AUTO,ouON.
OFF :L’éclairagedemeureéteint.
AUTO : L’éclairage s’allume automatiquementlorsqu’un mouvement est détecté. L’éclairages’éteindra 5 minutes après absence de détectionde mouvement.
ON :L’éclairageresteallumécontinuellement.
POINTS IMPORTANTS À RETENIR• L’interrupteuràdétecteurdemouvementémettra
un léger « clic » lorsqu’un mouvement seradécelé.
• L’interrupteurfonctionnerauniquementsil'inter-rupteuràdétecteurdemouvementestenmodeAUTO.
PARAChÈvEMENT DE L’INSTALLATION
1. Replacerlaplaquedécorative.Danslescasoùl’interrupteur à détection de mouvement estcombinéàd’autres interrupteursmurauxouà
DÉPANNAGESYMPTÔME CAUSE PRObAbLE SOLUTION
L’éclairage ne s’allume pas.
1. Ledisjoncteurestdésenclenchéoulefusibleestgrillé.
2. Sil’appareilcommandéestdotéd’unautre interrupteur, ce dernier est peut-êtrefermé.
3. L’ampouleestgrillée.4. Le bouton Mode est en position
OFF.5. Problèmedebranchement.6.Lefildemiseàlaterredel’interrupteur
n’estpasraccordéàlamiseàlaterredelarésidence.
7. Lacommandeestmalbranchée.
1. Réenclenchezledisjoncteur.
2. Ouvrezl’interrupteur.
3. Remplacezl’ampoule.4. PlacezlecommutateurenpositionAUTO
ouON.5. Vérifieztouslesbranchements.6. Branchez le fil de mise à la terre de
l’interrupteuraufildemiseàlaterredelarésidence.
7. Vérifiezsilescâblessontbienbranchés.ConsultezlaFigure3.
IMPORTANT : En mode AUTO, lorsque le détecteur éteint l’éclairage, il y a un délai de 8 secondes avant que le détecteur ne puisse rallumer l’éclairage lorsqu’un mouvement est détecté.
IMPORTANT : Lorsque vous faites passer la glissière de la position OFF à la position AUTO, vous devez attendre une minute que l’appareil se « réchauffe », avant qu’il ne soit pleinement fonctionnel.
ATTENTION : Ne branchez PAS l’interrupteur à détecteur de mouvement au fil NEUTRE (blanc) de l’alimentation résidentielle.
IMPORTANT : L’ interrupteur ne fonctionnera pas si le fil de terre n’est pas branché.

15200069-01
SPÉCIFICATIONSCeproduitdoitêtreinstalléuniquementàl’intérieur.
Alimentation requise ...............................................................................................................120V,60Hz.Chargefluorescente ........................................................................................Jusqu'à400WattsMaximumChargedemoteur ............................................................................................... Jusqu'à1/8HPMaximumChargeincandescente ................................................................................... Jusqu'à500Wattsà120VCATempsencircuit(ON-TIME) .................................................................................Délaifixede5minutesCouverture ............................................................... Jusqu'à3,5mà110°,jusqu'à6,1mdevantlecapteur
L’éclairage ne s’éteint pas.
1. LeboutonModeestenpositionON.
2. L’appareildétecteencoreunmouve-ment.
3. Duréedemisesoustensionfixedecinqminutesn’estpasencoreexpirée.
4. Lacommandeestmalbranchée.
1. PlacezlecommutateurenpositionAUTOouOFF.
2. Assurez-vousqu’aucunmouvementn’estfaitpendantlapériodedefonctionnement.
3. Attendez 5 minutes après la détectiond’unmouvement;l’interrupteurcouperal’éclairage.
4. Vérifiezsilescâblessontbienbranchés.ConsultezlaFigure3.
L’éclairage s’allume de façon aléatoire en mode AUTO.
1. L’interrupteurestdéclenchéparunebouche de ventilation ou une autre source de chaleur.
2. Lacommandeestmalbranchée.
1. Déterminezcequidéclenchel’interrup-teuretmodifiezl’écoulementdel’air.
2. Vérifiezsilescâblessontbienbranchés.ConsultezlaFigure3.
L’éclairage s’allume sans détection de mouvement en mode AUTO.
1. L’interrupteurdistantapeut-êtreétédésactivé,puisréactivé.
2. Ilyaeupannedecourantmomenta-née.
1. L’interrupteur fonctionnera normalementaprèslapériodedepréchauffede1minute.
2. L’interrupteur fonctionnera normalementaprèslapériodedepréchauffede1minute.
L’éclairage ne demeure pas allumé en mode AUTO.
Aucunmouvementn’estdétectédanslapièce.
Faitesunmouvement.
L’éclairage ne s’allume pas en mode AUTO, mais fonctionne correctement en position ON et OFF.
L’interrupteurn’estpascorrectementbranché.
MISE EN GARDE : Coupez l’alimentation au niveau du fusible ou du disjoncteur avant de modifier le branchement.Interchangezlesfilsnoiretbrundudétec-teur,puisfaitesunnouvelessai.ConsultezlaFigure3.
SYMPTÔME CAUSE PRObAbLE SOLUTION

16 200069-01
GARANTIE LIMITÉE DE 1 ANIl s’agit d’une « Garantie limitée » qui vous confère des droits juridiques spécifiques. Vous pouvez également jouir d’autres droits, variables d’une province à l’autre.Pendant une période de 1 an à compter de la date d’achat, toute anomalie de fonctionnement imputable à un vice de matériau ou de main-d’oeuvre sera corrigée gratuitement.Exclusions de la garantie - Réparations, réglage et calibrage dus à une mauvaise utilisation, un mauvais traitement ou à la négligence. Les ampoules, les piles et des autres articles non durables ne sont pas couverts par cette garantie. Le service non autorisé ou la modification du produit ou d’un ou l’autre de ses composants fournis invalidera totalement la présente garantie. Cette garantie n’inclut pas le remboursement pour le dérangement, l’installation, le réglage, la perte d’utilisation, le service non autorisé ou les frais d’expédition pour le renvoi de la marchandise.La garantie ne couvre que les produits assemblés HeathCo LLC et ne s’étend pas aux autres équipements et composants que le client pourrait utiliser conjointement avec nos produits. CETTE GARANTIE TIENT EXPRESSÉMENT LIEU DE TOUTES AUTRES GARANTIES, EXPLICITES OU IMPLICITES, Y COMPRIS DE TOUTE GARANTIE DE REPRÉSENTATION OU DE CONDITION DE CONVENANCE À LA COMMERCIALISATION OU À L’EFFET QUE LES PRODUITS CONVIENNENT À UN BUT OU À UNE UTILISATION PARTICULIÈRE, ET SPÉCIFIQUEMENT DE TOUS DOMMAGES SPÉCIAUX, DIRECTS, INDIRECTS OU SECONDAIRES.LE REMPLACEMENT OU LA RÉPARATION CONSTITUENT LE SEUL RECOURS DU CLIENT ET HEATHCO LLC NE POURRA ÊTRE TENUE RESPONSABLE DE TOUS DOMMAGES SPÉCIAUX, DIRECTS, INDIRECTS OU SECONDAIRES, Y COMPRIS, SANS S’Y LIMITER, LES PERTES COMMERCIALES ET PERTES DE PROFIT, QU’ELLES SOIENT PRÉVISIBLES OU NON. Certaines provinces n’autorisent pas l’exclusion ou la limitation des dommages indirects ou secondaires, et la limitation ou l’exclusion ci-dessus pourrait ne pas s’appliquer à vous. veuillez conserver le reçu portant la date d'achat; vous en aurez besoin pour toutes vos demandes liées à la garantie.
SERvICE TEChNIQUEveuillez faire le 1 800 858-8501 (service en anglais seulement) pour obtenir de l’aide avant de
retourner l’article au magasin.Encasdeproblème,suivezceguide.VouspouvezaussivisiternotresiteWebàwww.hzsupport.com. Sileproblèmepersiste,composez*le1 800 858-8501(serviceenanglaisseulement),entre8h00et17h00,HNC,dulundiauvendredi.Vouspouvezaussiécrireau:HeathCoLLCP.O.Box90045BowlingGreen,KY42102-9045ATTN:TechnicalService(Servicetechnique)*Lorsd’unappelauservicetechnique,veuillezavoir lesrenseignementssuivantsàportéedemain:numérodumodèle,dated’achatetendroitdel’achat.
Aucune pièce de rechange n’est disponible pour ce produitVeuillez conserver le reçu portant la date d'achat; vous en aurez besoin pour toutes vos demandes liées à la garantie.
HeathCoLLCseréserveledoitd’abandonnertoutproduitetd’enchangerlesspécifications,entouttempsetsanscontracterquelqueobligationquecesoitquantàl’incorporationdenouvellescaractéristiquesauxproduitsdéjàvendus.