Embed Size (px)
Citation preview
MUD
LAURIE BAKER
About the Author
Born in Birmingham, England, in 1917, Laurie Baker studied architecture at the
Birmingham School of Architecture from where he graduated in 1937 and became an
associate member of the, RIBA. During the World War II he was an anaesthetist to a
surgical team in China where he also worked on control and treatment. On his way back
to England he had to wait for about three months for a boat in Bombay. There he met
Gandhi and was influenced by him. He decided that he would come back to India and
work here. During 1945 - 1966, apart from his general freelance architectural practice
throughout his life in India, Baker was architect to leprosy institutions in India and 1ived
and worked in a hill village in Uttar Pradesh. In 1966, Baker moved south and worked
with the tribals of Peerumede in Kerala. In 1970, he came to Trivandrum and has since
been designing and constructing buildings all over Kerala. He has served at various times
as Governor of HUDCO, on the working group on Housing of the Planning Commission,
and on several expert committees at the national and state level.
Introduction
The very fact that you have picked up and opened this book means that at least you
wondered however any one could be serious enough about a substance like mud to write
a book about it. It may be that your interest is even a bit more than mere idle curiosity
and just a faint possibility that you might like to know a bit more about mud.
Before writing and drawing what I think about mud and I think it is important that I, first-
of all, let you know why I think it is important. The fact that you are reading a book
written in the English language means that probably you are educated and are living in
“reasonable” circumstances in quarters of some sort. They may or may not be adequate
and according to your tastes and wishes but there is a roof and the walls give you a
certain amount of security and privacy. Now, without arguing about the usefulness and
veracity of statistics, it is a fact that something between twenty and thirty million families
in our country do not have anything like your living accommodation and these 20 odd
million families do not have anything that can even remotely be called a home or a house
or even a hut. So I wish that we had a collective national conscience about this and
seriously all of us, not just ‘the Government’ should set about doing something about it
so that this disgrace is removed.
Unfortunately these days so many of us think that we can only build “properly” and
“satisfactorily” by using such items as reinforced concrete, cement blocks, burnt bricks,
etc. But equally unfortunately the manufacture of steel and cement for reinforced
concrete is now called “energy intensive”. An enormous amount of energy that is some
sort of fuel-is used to manufacture these so-called essential materials. Furthermore we do

not really have enough cement to go round and quite large quantities are imported, for
example, from Korea. Although bricks are made of mud, we burn or bake them to make
bricks. In many parts of the country; to do this, we use firewood to make the bricks hard
and strong.
If you build an ordinary middle class house of brick-you probably are not aware that two
or three large trees were felled, and chopped up and burned to fire your bricks. But we
know - or you ought to know, that trees and forests are diminishing and we cut down and
use far more than we replace and grow. This is one of the causes for increasingly large
floods in places like West Bengal. So, we also ought to develop our consciences about
not using ex pensive and imported materials but also about those building materials
which use up a lot of our natural resources to provide fuel for manufacturing many of our
currently fashionable materials - not only cement, steel, concrete, bricks and timber, but
glass, aluminium, asbestos, galvanized iron sheets and so on.
The natural and reasonable retort to all of this sort of thing is “But what CAN we use?
What does not need a lot of energy for its manufacture? One answer is to use more stone-
but in many parts of our country there is no usable stone. The other answer is that in
many areas there is mud and, believe it or not but the National Census will show you that
numerica1ly, there are more houses -in India made of mud than of any other material.
So why we have stopped using it? Actually, we have not stopped using it. Many rural
families and many of our poorer people still build with mud but ‘official’ or
‘Government’ housing schemes rarely use it and our growing ‘Middle Class’ also rarely
uses it. There are many reasons to explain this -people do not do or make things
themselves these days, they get others to build and plough for them, they have jobs to do
and older children can’t be used because they now carry on with their education until
they are grown up. So there is no time to do and make things. More and more people
never acquire the simple rural skills, which were known to all of us fifty years ago.
Further more, we seem now; to be much more class conscious and mud is connected in
people’s minds with “the Poor”, with “Poverty “. With Cowsheds and Pigsties, with
“Rural EWS Schemes”, with ‘Tribal” and so on. “Who will marry my daughter if I live in
a mud house?”
So I want to show that mud may be old fashioned. (That to me is a plus point - it has
tested and tried over thousands of years whereas concrete has been in circulation for less
than a hundred years), but it could be successfully used even for the best houses, and,
indeed, if all of us are to go into 21st century with a roof over our 700-800 million beads
we will only be able to do it if we put mud into its rightful status. So, this book is to see
how we can go about it.
I have tried in this little book to introduce you to mud. I have tried to make it all as
simple as possible, both with word and picture. I have noted that there is a scientific side
to-the subject, but far more important is to go ahead and use it, experiment with it, have
fun with it and drop the idea that it is only for the rural poor. A lot of the illustrations
unfortunately perpetuate the rural path of it. I have shown overhanging grass roofs and so
on, but what is very-very important is to stress the fact that if properly and neatly and
expertly finished, the resulting looks can be -5 star. Although I personally prefer to let
whatever building materials I use express themselves and their special characteristics in
the building - (for example a brick house, I think, should look like a brick house) and it
will look different from a stone house. But in general current architectural practice, most
people prefer to plaster over their walls and paint them and add tiles and ‘claddings’. So
there is absolutely no reason why such people and such architects who design for them
should not do the same with mud. Indeed, in a country like Australia, for instance many-
many houses are basically mud houses - but most of them are not distinguishable as such.
So my sincerest hope and wish is that every one, Rich or Poor, Lower, Middle or Upper
Class, will come to understand and accept the fact that mud is a reasonable, acceptable,
strong, durable, basic building material that has stood the test of hundreds, if not even
thousands of years of time.
Mud has its limitations, but so do all materials. So learn what are the limitations of the
mud you would like to use - and then build within those limitations, or when
economically possible, remedy those limitations.
Usually water has to be used to mould mud into a shape and it is only strong, and will not
only “stand up”, when that water has dried up. Thereafter water is the constant enemy of
a mud wall so you must protect mud walls from water and dampness. This is the one
really big limitation of the use of mud and you must never forget to ignore it. Much of
this book therefore is to show you how to keep mud dry - even in heavy rainfall areas like
Kerala or Assam. Again, keep- in mind that even if mud seems unsuitable for your
exterior walls, you can probably safely use it for interior walls and save some expense,
and some energy - intensive materials by so doing.
Many of the tricks of the trade of mud building have been empirically developed over
thousands of years and they seem some-what “unscientific” but the visible tangible
incontrovertible fact remains that in many countries of the world (including some of the
so-called Affluent Societies) a large percentage of all housing is of mud, or part mud
construction and, furthermore much of it is 50, 75 or even 100 or more years old.

MUD WALLS MUST BE PROTECTED FROM WATER
Very few houses are built entirely of one material. For example only in dense forest areas
where wood seems plentiful are piles, floors, walls and roofs all made of wood. A
“Concrete house” has a concrete frame and slabs, but walls are often infillings of bricks
or glass or metal sheeting etc. A “Brick” house usually means only walls are of brick, but
floors and roofs are of other materials and so on. So when you think of a “mud house”, do
not expect to make the entire house of mud (though it is a possibility!). Bricks use a lot of
fuel to burn them; stone needs quarrying, shaping and transporting. Concrete needs a very
great deal of energy to make the steel, cement and then skilled labour to turn these
materials into concrete. But in many parts of the world mud is right there on the site as an
old, well-tried wall building material. Often all that is needed is the manpower to convert
the ground on which you stand into a wall to surround and protect you.
WHAT DOES A MUD HOUSE LOOK LIKE?
IS THIS THE SORT OF PICTURE THAT COMES TO
YOUR MIND
THIS ALSO IS A MUD HOUSE
AND THIS TOO CAN BE A MUD HOUSE
(AND YES IT IS MULTI-STORIED AND HAS A
CONCRETE ROOF!)
One of the greatest problems to face during the next
fifty years is that of Energy-fuel- Power. The
pressure of this problem will be less if we can make
use of energy free materials as much as possible.
One of India’s major tasks is to provide homes for
at least 25 million families who have no home. If
we are to build with burnt bricks and concrete and
steel etc. we add to this vast energy problem, and to
the overall cost of housing 25 million families. If
only we will apply our twentieth century know-how
and techniques to our Age-old mud, we can solve
this housing need without adding to this Energy
Problem. So don’t just say, “Mud is old fashioned”.
You can make it the latest fashion-mod mud!
All over the country mud of some sort or other is found. Even if the surface soil is
unsuitable for wall building, there may be suitable mud beneath. Or by adding stabilisers
your mud may be made suitable. Compare this situation with the burnt brick industry.
Comparatively few areas have suitable mud for the purpose of burning mud into a burnt
brick.
So the ideal is to find mud on your own site. If this is not possible, bring it from as short a
distance as possible, or find the nearest stabiliser available and then you only have to
transport that to your site.
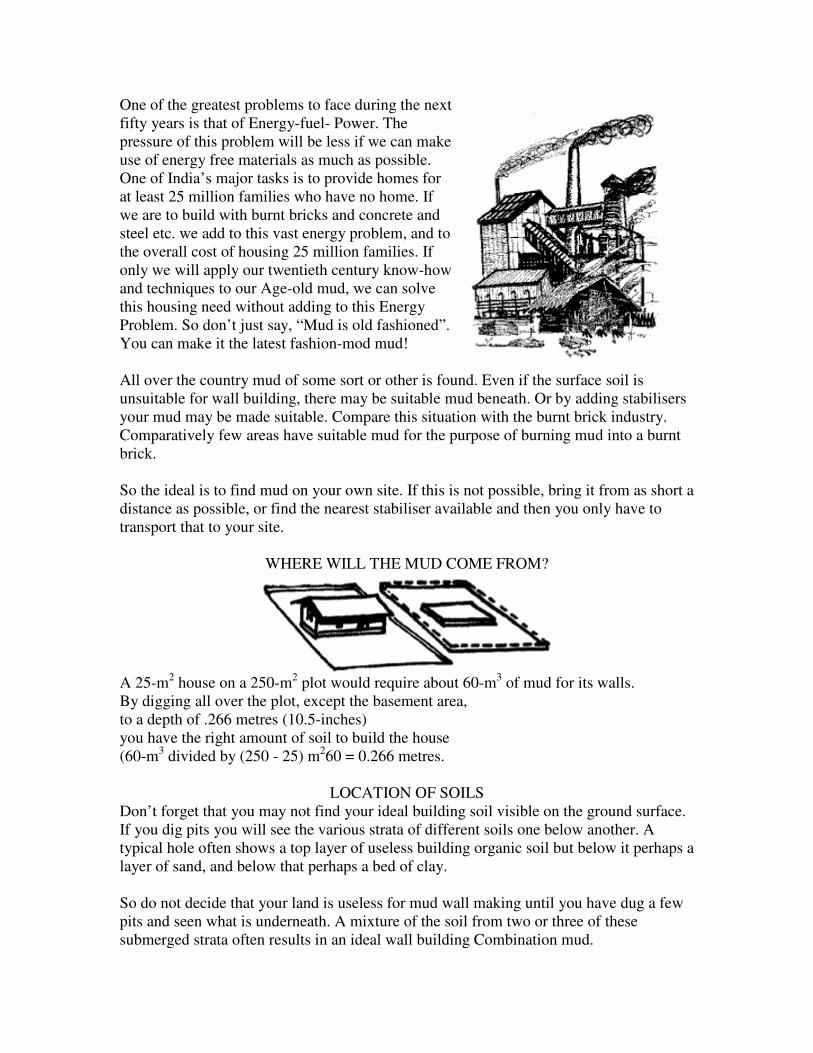
WHERE WILL THE MUD COME FROM?
A 25-m
2 house on a 250-m
2 plot would require about 60-m
3 of mud for its walls.
By digging all over the plot, except the basement area,
to a depth of .266 metres (10.5-inches)
you have the right amount of soil to build the house
(60-m3 divided by (250 - 25) m
260 = 0.266 metres.
LOCATION OF SOILS
Don’t forget that you may not find your ideal building soil visible on the ground surface.
If you dig pits you will see the various strata of different soils one below another. A
typical hole often shows a top layer of useless building organic soil but below it perhaps a
layer of sand, and below that perhaps a bed of clay.
So do not decide that your land is useless for mud wall making until you have dug a few
pits and seen what is underneath. A mixture of the soil from two or three of these
submerged strata often results in an ideal wall building Combination mud.
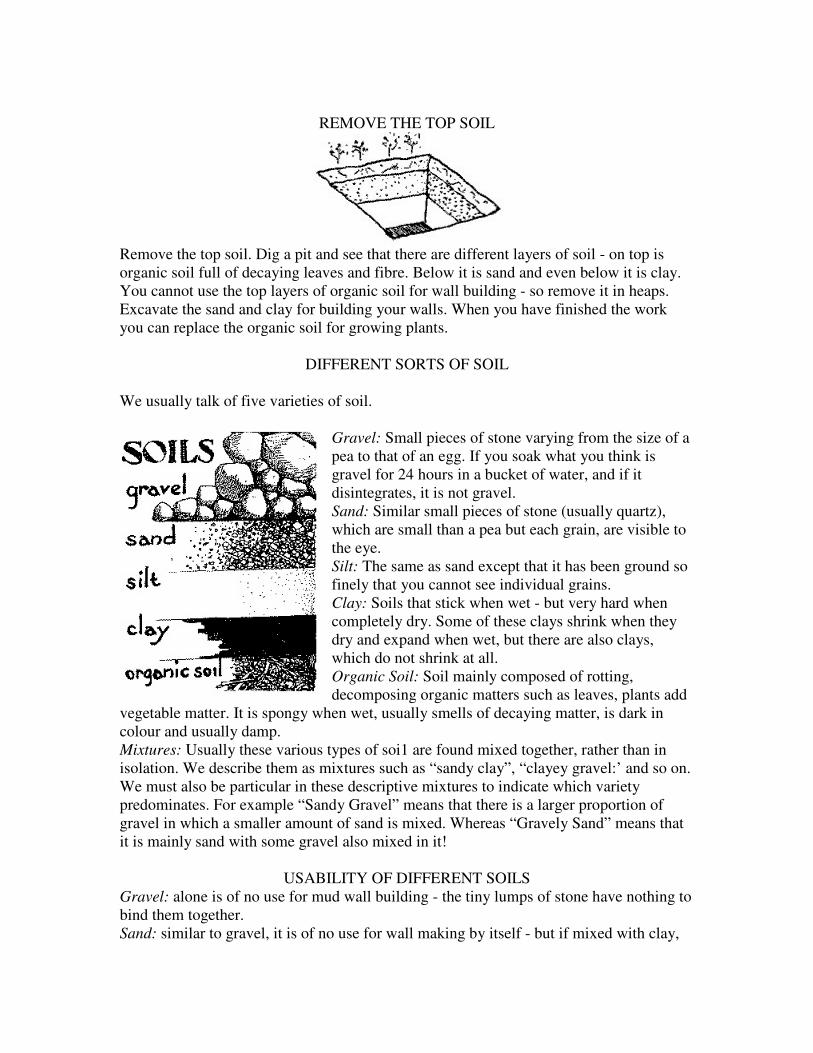
REMOVE THE TOP SOIL
Remove the top soil. Dig a pit and see that there are different layers of soil - on top is
organic soil full of decaying leaves and fibre. Below it is sand and even below it is clay.
You cannot use the top layers of organic soil for wall building - so remove it in heaps.
Excavate the sand and clay for building your walls. When you have finished the work
you can replace the organic soil for growing plants.
DIFFERENT SORTS OF SOIL
We usually talk of five varieties of soil.
Gravel: Small pieces of stone varying from the size of a
pea to that of an egg. If you soak what you think is
gravel for 24 hours in a bucket of water, and if it
disintegrates, it is not gravel.
Sand: Similar small pieces of stone (usually quartz),
which are small than a pea but each grain, are visible to
the eye.
Silt: The same as sand except that it has been ground so
finely that you cannot see individual grains.
Clay: Soils that stick when wet - but very hard when
completely dry. Some of these clays shrink when they
dry and expand when wet, but there are also clays,
which do not shrink at all.
Organic Soil: Soil mainly composed of rotting,
decomposing organic matters such as leaves, plants add
vegetable matter. It is spongy when wet, usually smells of decaying matter, is dark in
colour and usually damp.
Mixtures: Usually these various types of soi1 are found mixed together, rather than in
isolation. We describe them as mixtures such as “sandy clay”, “clayey gravel:’ and so on.
We must also be particular in these descriptive mixtures to indicate which variety
predominates. For example “Sandy Gravel” means that there is a larger proportion of
gravel in which a smaller amount of sand is mixed. Whereas “Gravely Sand” means that
it is mainly sand with some gravel also mixed in it!
USABILITY OF DIFFERENT SOILS
Gravel: alone is of no use for mud wall building - the tiny lumps of stone have nothing to
bind them together.
Sand: similar to gravel, it is of no use for wall making by itself - but if mixed with clay,

i.e. sandy clays or clayey sands, it is the ideal mud wall building soil.
Silt: by itself is also no good for building walls. It will hold together but is not strong.
Furthermore, it will not compact so it is also of no use for pressed blocks or rammed
earthwork.
Clay: can be rammed or compressed but in drying out they often shrink. During the
monsoon they get damp and expand again and crack form.
Laterite: is also a type of clay, which contains red iron or aluminium material. It is strong
and stable and is cut out of the ground in blocks and hardens further when stacked and
exposed to the air. It is of course a first class building material and we usually think of it
as a stone. It is wise to follow local traditional opinions about clays and laterites. There is
some clay which have proved to be unsatisfactory as building material and over many
centuries local people have learned to avoid these particular unsuitable clays.
Organic Soils: are mainly useless for wall building. A reliable rule is that if a soil as good
for growing plants in, it is not good for building walls with.
Mixtures: Find out which soils are contained in the mixture and then the usability
depends on the proportion of the various types of soil listed above. Always look at the old
buildings in your district and see for yourself the types of soil that have been used,
durability, or shortcomings of these old buildings.
Gravel - No Good
Silt alone - No Good Plus stabiliser - Good
Sand alone - No Good Plus Clay - Good
Organic Soil - No Good
Clay alone - No Good - Plus Sand Good
SIMPLE SOIL TESTS
Of course proper soil testing can be done, but if you yourself want to know the building
possibilities of the soil on your site you can find out quite a lot from simple tests. Better
still is to go round your locality and see and ask about the mud that other people have
already used for building their houses. You may find in many districts homes of mud that
are seventy or eighty years old. The results of their “soil testing” are convincingly there
for you to see.
THE CIGAR TEST
Roll a small handful of-soil (to which just enough water has been added to make it stick
together) into a cigar or Sausage shape. Now with the thumb and forefinger squeeze the
end of the cigar until; it is about a quarter of an inch thick and go on squeezing and
pushing it out of your palm to see how long it is before it breaks off and it falls to the
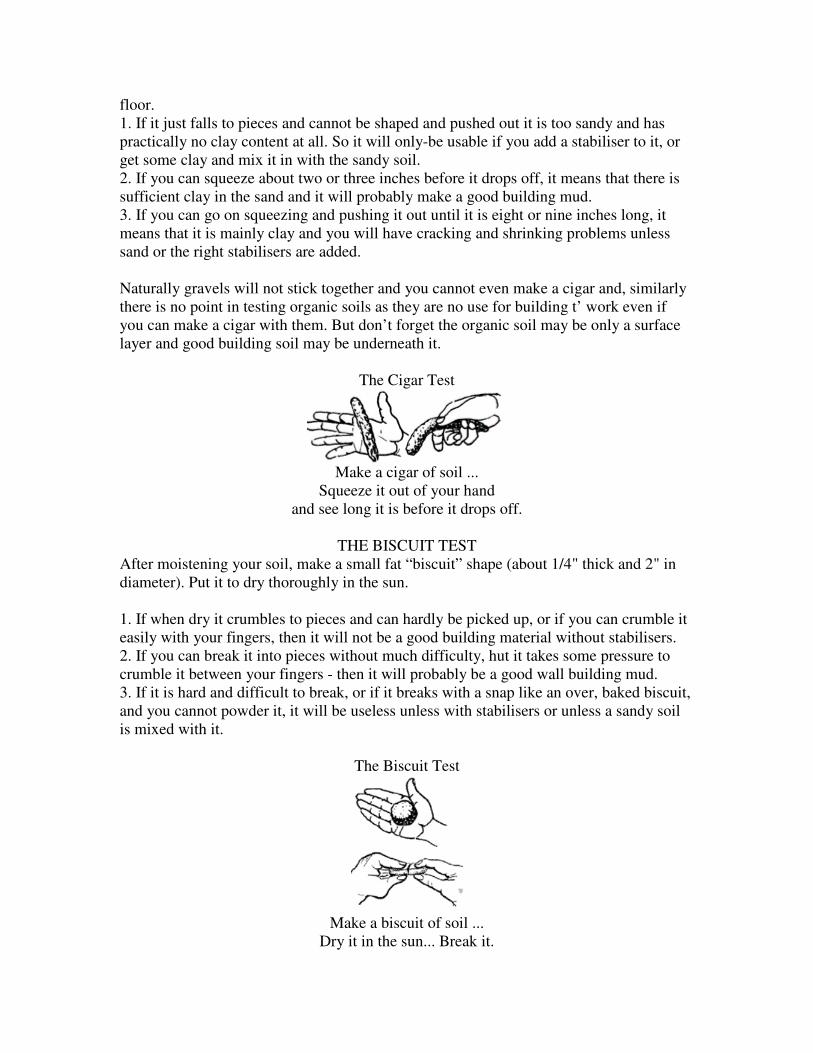
floor.
1. If it just falls to pieces and cannot be shaped and pushed out it is too sandy and has
practically no clay content at all. So it will only-be usable if you add a stabiliser to it, or
get some clay and mix it in with the sandy soil.
2. If you can squeeze about two or three inches before it drops off, it means that there is
sufficient clay in the sand and it will probably make a good building mud.
3. If you can go on squeezing and pushing it out until it is eight or nine inches long, it
means that it is mainly clay and you will have cracking and shrinking problems unless
sand or the right stabilisers are added.
Naturally gravels will not stick together and you cannot even make a cigar and, similarly
there is no point in testing organic soils as they are no use for building t’ work even if
you can make a cigar with them. But don’t forget the organic soil may be only a surface
layer and good building soil may be underneath it.
The Cigar Test
Make a cigar of soil ...
Squeeze it out of your hand
and see long it is before it drops off.
THE BISCUIT TEST
After moistening your soil, make a small fat “biscuit” shape (about 1/4" thick and 2" in
diameter). Put it to dry thoroughly in the sun.
1. If when dry it crumbles to pieces and can hardly be picked up, or if you can crumble it
easily with your fingers, then it will not be a good building material without stabilisers.
2. If you can break it into pieces without much difficulty, hut it takes some pressure to
crumble it between your fingers - then it will probably be a good wall building mud.
3. If it is hard and difficult to break, or if it breaks with a snap like an over, baked biscuit,
and you cannot powder it, it will be useless unless with stabilisers or unless a sandy soil
is mixed with it.
The Biscuit Test
Make a biscuit of soil ...
Dry it in the sun... Break it.
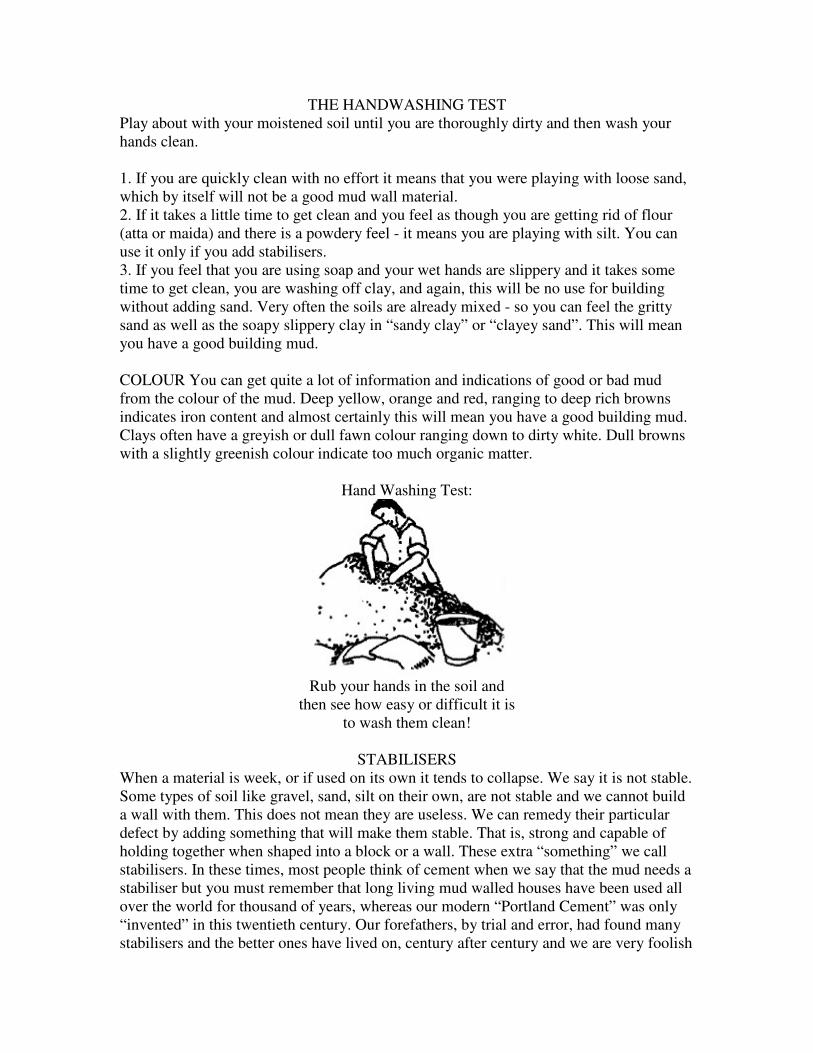
THE HANDWASHING TEST
Play about with your moistened soil until you are thoroughly dirty and then wash your
hands clean.
1. If you are quickly clean with no effort it means that you were playing with loose sand,
which by itself will not be a good mud wall material.
2. If it takes a little time to get clean and you feel as though you are getting rid of flour
(atta or maida) and there is a powdery feel - it means you are playing with silt. You can
use it only if you add stabilisers.
3. If you feel that you are using soap and your wet hands are slippery and it takes some
time to get clean, you are washing off clay, and again, this will be no use for building
without adding sand. Very often the soils are already mixed - so you can feel the gritty
sand as well as the soapy slippery clay in “sandy clay” or “clayey sand”. This will mean
you have a good building mud.
COLOUR You can get quite a lot of information and indications of good or bad mud
from the colour of the mud. Deep yellow, orange and red, ranging to deep rich browns
indicates iron content and almost certainly this will mean you have a good building mud.
Clays often have a greyish or dull fawn colour ranging down to dirty white. Dull browns
with a slightly greenish colour indicate too much organic matter.
Hand Washing Test:
Rub your hands in the soil and
then see how easy or difficult it is
to wash them clean!
STABILISERS
When a material is week, or if used on its own it tends to collapse. We say it is not stable.
Some types of soil like gravel, sand, silt on their own, are not stable and we cannot build
a wall with them. This does not mean they are useless. We can remedy their particular
defect by adding something that will make them stable. That is, strong and capable of
holding together when shaped into a block or a wall. These extra “something” we call
stabilisers. In these times, most people think of cement when we say that the mud needs a
stabiliser but you must remember that long living mud walled houses have been used all
over the world for thousand of years, whereas our modern “Portland Cement” was only
“invented” in this twentieth century. Our forefathers, by trial and error, had found many
stabilisers and the better ones have lived on, century after century and we are very foolish
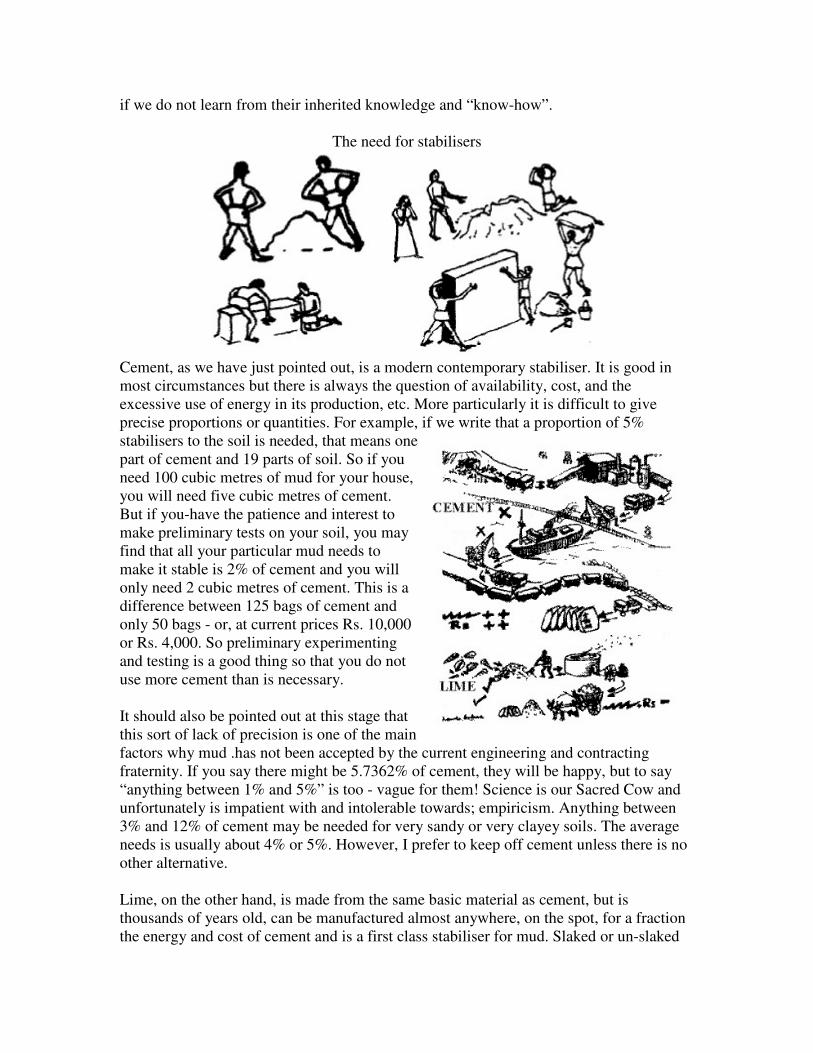
if we do not learn from their inherited knowledge and “know-how”.
The need for stabilisers
Cement, as we have just pointed out, is a modern contemporary stabiliser. It is good in
most circumstances but there is always the question of availability, cost, and the
excessive use of energy in its production, etc. More particularly it is difficult to give
precise proportions or quantities. For example, if we write that a proportion of 5%
stabilisers to the soil is needed, that means one
part of cement and 19 parts of soil. So if you
need 100 cubic metres of mud for your house,
you will need five cubic metres of cement.
But if you-have the patience and interest to
make preliminary tests on your soil, you may
find that all your particular mud needs to
make it stable is 2% of cement and you will
only need 2 cubic metres of cement. This is a
difference between 125 bags of cement and
only 50 bags - or, at current prices Rs. 10,000
or Rs. 4,000. So preliminary experimenting
and testing is a good thing so that you do not
use more cement than is necessary.
It should also be pointed out at this stage that
this sort of lack of precision is one of the main
factors why mud .has not been accepted by the current engineering and contracting
fraternity. If you say there might be 5.7362% of cement, they will be happy, but to say
“anything between 1% and 5%” is too - vague for them! Science is our Sacred Cow and
unfortunately is impatient with and intolerable towards; empiricism. Anything between
3% and 12% of cement may be needed for very sandy or very clayey soils. The average
needs is usually about 4% or 5%. However, I prefer to keep off cement unless there is no
other alternative.
Lime, on the other hand, is made from the same basic material as cement, but is
thousands of years old, can be manufactured almost anywhere, on the spot, for a fraction
the energy and cost of cement and is a first class stabiliser for mud. Slaked or un-slaked
lime is both acceptable but slaked lime will give less trouble to the workers hands and
feet. Again, the quantity of stabiliser depends on the quality of your soil mix. A lot of
sand or a lot of clay means a lot of stabiliser. Lime can be used between 2% and 6%.
Usually a 3% mixture is sufficient. A special point about lime and cement stabilisers is
that you may need hardly any stabiliser from the strength and stability point of view, but
your mud may easily absorb any dampness or moisture. So in such cases very often only
a small amount of stabiliser is enough to prevent this damp absorption. Another point is
that often a mixture of Lime and Cement is good especially where you want to build
quickly. Lime sets slowly but the addition of a little cement speeds up the settling time.
For such mixtures, 2% of lime and 1% of cement is often adequate.
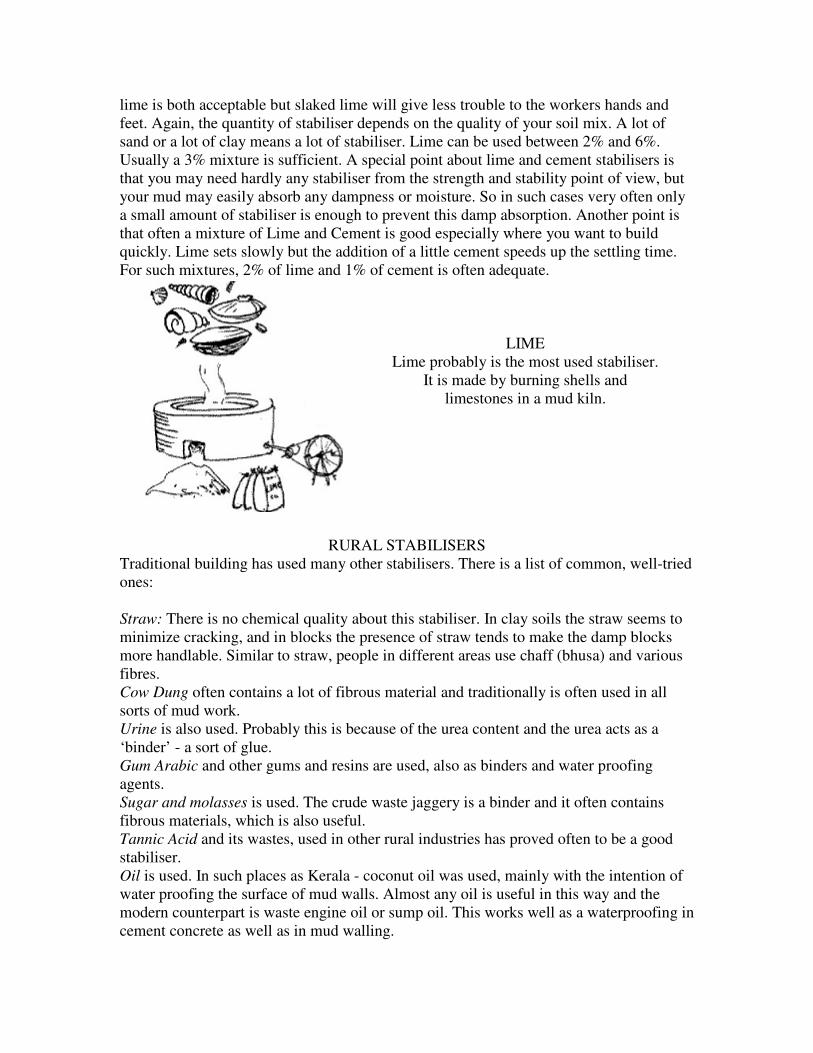
LIME
Lime probably is the most used stabiliser.
It is made by burning shells and
limestones in a mud kiln.
RURAL STABILISERS
Traditional building has used many other stabilisers. There is a list of common, well-tried
ones:
Straw: There is no chemical quality about this stabiliser. In clay soils the straw seems to
minimize cracking, and in blocks the presence of straw tends to make the damp blocks
more handlable. Similar to straw, people in different areas use chaff (bhusa) and various
fibres.
Cow Dung often contains a lot of fibrous material and traditionally is often used in all
sorts of mud work.
Urine is also used. Probably this is because of the urea content and the urea acts as a
‘binder’ - a sort of glue.
Gum Arabic and other gums and resins are used, also as binders and water proofing
agents.
Sugar and molasses is used. The crude waste jaggery is a binder and it often contains
fibrous materials, which is also useful.
Tannic Acid and its wastes, used in other rural industries has proved often to be a good
stabiliser.
Oil is used. In such places as Kerala - coconut oil was used, mainly with the intention of
water proofing the surface of mud walls. Almost any oil is useful in this way and the
modern counterpart is waste engine oil or sump oil. This works well as a waterproofing in
cement concrete as well as in mud walling.
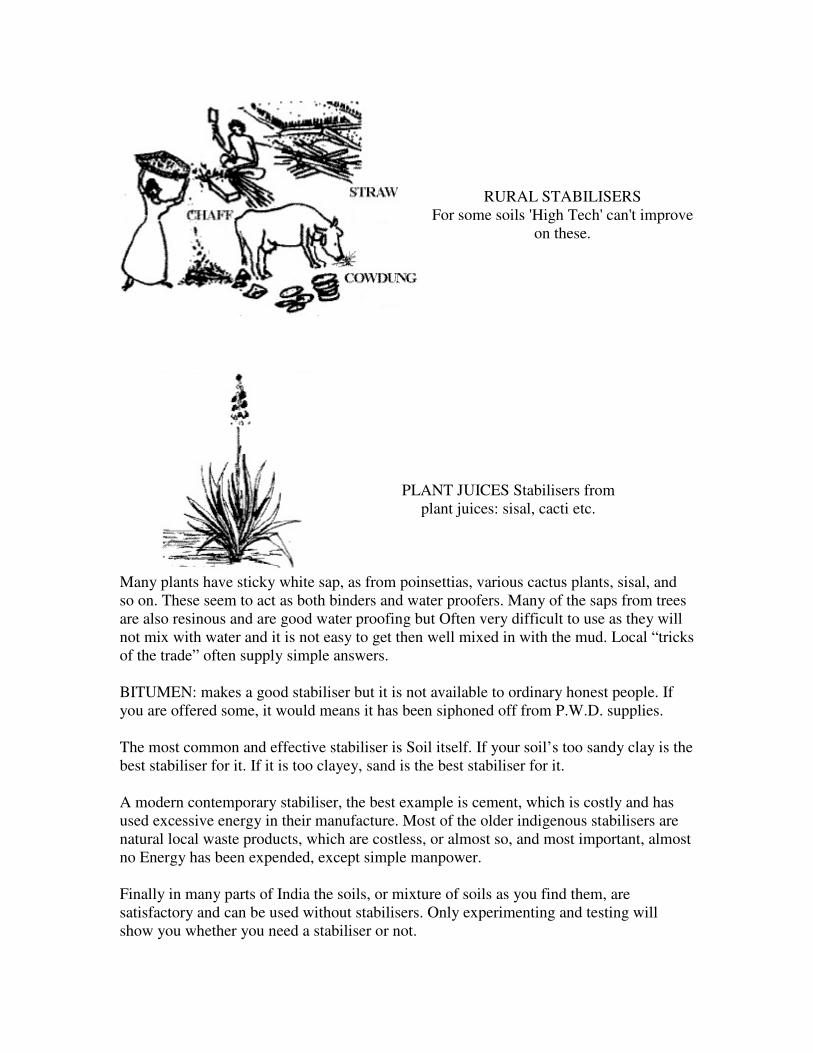
RURAL STABILISERS
For some soils 'High Tech' can't improve
on these.
PLANT JUICES Stabilisers from
plant juices: sisal, cacti etc.
Many plants have sticky white sap, as from poinsettias, various cactus plants, sisal, and
so on. These seem to act as both binders and water proofers. Many of the saps from trees
are also resinous and are good water proofing but Often very difficult to use as they will
not mix with water and it is not easy to get then well mixed in with the mud. Local “tricks
of the trade” often supply simple answers.
BITUMEN: makes a good stabiliser but it is not available to ordinary honest people. If
you are offered some, it would means it has been siphoned off from P.W.D. supplies.
The most common and effective stabiliser is Soil itself. If your soil’s too sandy clay is the
best stabiliser for it. If it is too clayey, sand is the best stabiliser for it.
A modern contemporary stabiliser, the best example is cement, which is costly and has
used excessive energy in their manufacture. Most of the older indigenous stabilisers are
natural local waste products, which are costless, or almost so, and most important, almost
no Energy has been expended, except simple manpower.
Finally in many parts of India the soils, or mixture of soils as you find them, are
satisfactory and can be used without stabilisers. Only experimenting and testing will
show you whether you need a stabiliser or not.
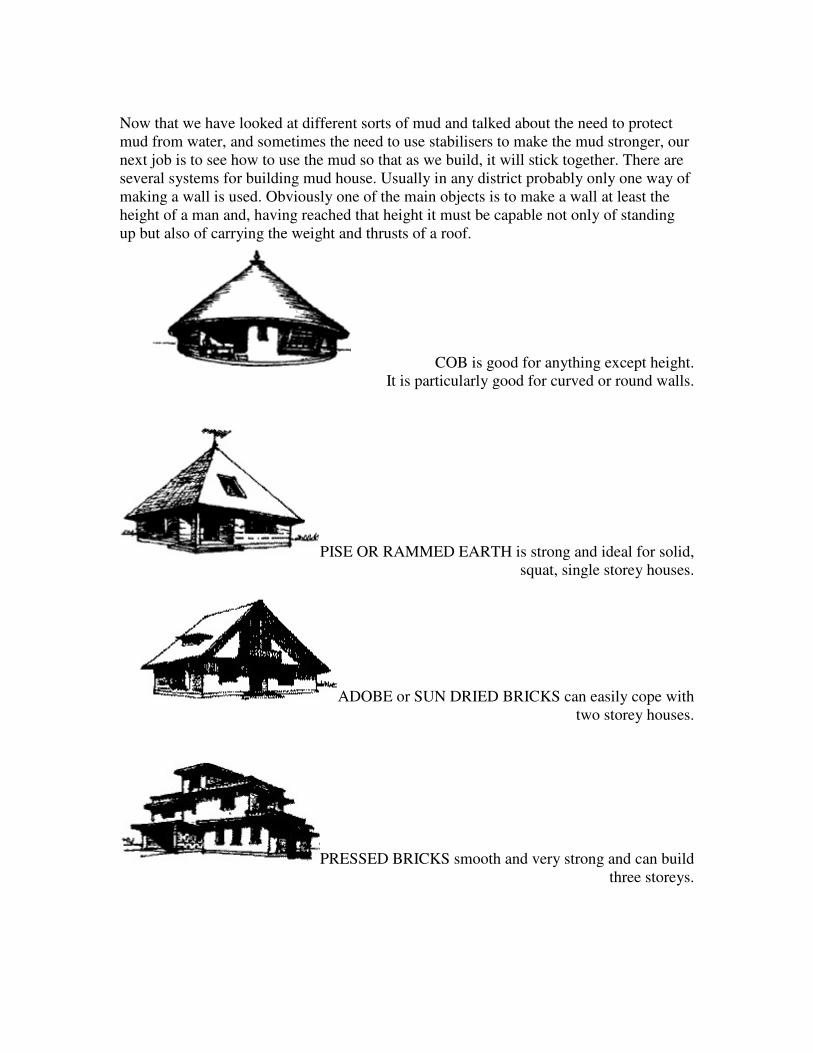
Now that we have looked at different sorts of mud and talked about the need to protect
mud from water, and sometimes the need to use stabilisers to make the mud stronger, our
next job is to see how to use the mud so that as we build, it will stick together. There are
several systems for building mud house. Usually in any district probably only one way of
making a wall is used. Obviously one of the main objects is to make a wall at least the
height of a man and, having reached that height it must be capable not only of standing
up but also of carrying the weight and thrusts of a roof.
COB is good for anything except height.
It is particularly good for curved or round walls.
PISE OR RAMMED EARTH is strong and ideal for solid,
squat, single storey houses.
ADOBE or SUN DRIED BRICKS can easily cope with
two storey houses.
PRESSED BRICKS smooth and very strong and can build
three storeys.
WATTLE & DAUB is elegant and fine for Seismic
Zones.
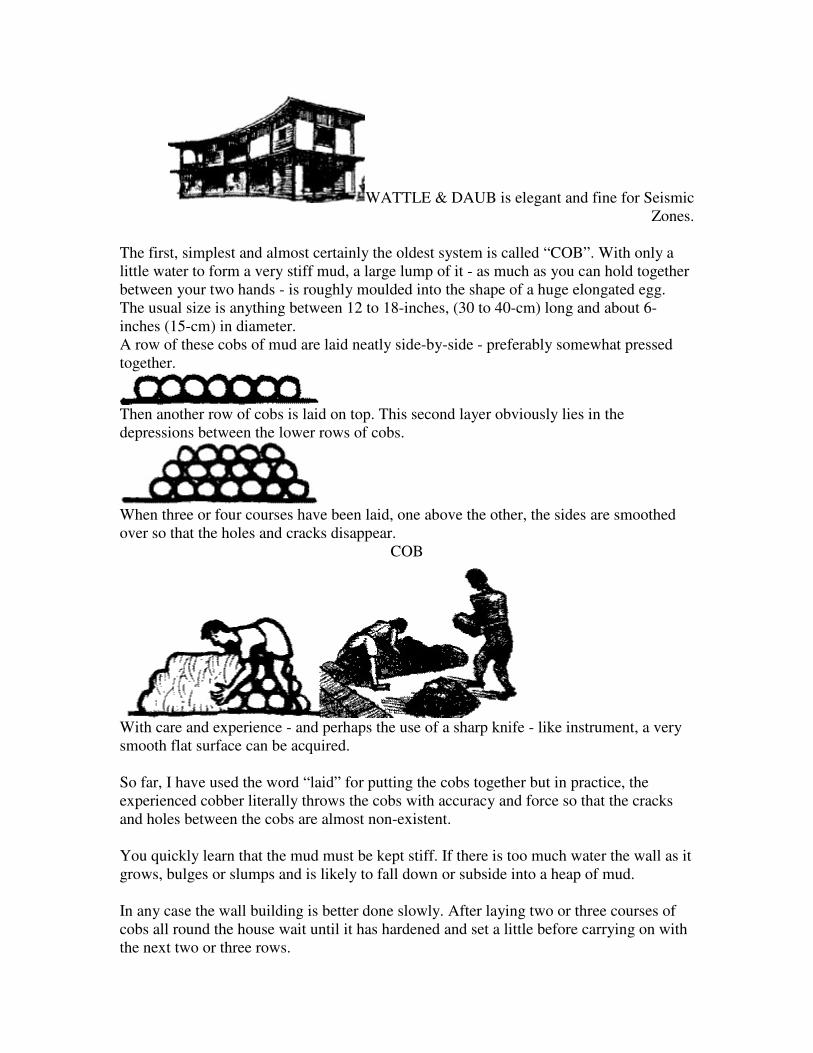
The first, simplest and almost certainly the oldest system is called “COB”. With only a
little water to form a very stiff mud, a large lump of it - as much as you can hold together
between your two hands - is roughly moulded into the shape of a huge elongated egg.
The usual size is anything between 12 to 18-inches, (30 to 40-cm) long and about 6-
inches (15-cm) in diameter.
A row of these cobs of mud are laid neatly side-by-side - preferably somewhat pressed
together.
Then another row of cobs is laid on top. This second layer obviously lies in the
depressions between the lower rows of cobs.
When three or four courses have been laid, one above the other, the sides are smoothed
over so that the holes and cracks disappear.
COB
With care and experience - and perhaps the use of a sharp knife - like instrument, a very
smooth flat surface can be acquired.
So far, I have used the word “laid” for putting the cobs together but in practice, the
experienced cobber literally throws the cobs with accuracy and force so that the cracks
and holes between the cobs are almost non-existent.
You quickly learn that the mud must be kept stiff. If there is too much water the wall as it
grows, bulges or slumps and is likely to fall down or subside into a heap of mud.
In any case the wall building is better done slowly. After laying two or three courses of
cobs all round the house wait until it has hardened and set a little before carrying on with
the next two or three rows.
Another cob problem is to keep the walls straight and vertical. The easiest way to
overcome this problem is to stand astride the wall while you are working.
The surface of the walls will be somewhat rough if only the hands are used to smooth
over the holes and crevices. Soon after completing the wall you can smooth its surface by
using a mammaty or an adze or a sharp knife or trowel. Such instruments will slice off
bumps and give lumps a clean smooth surface.
Once you have obtained the feel of the right consistency of mud, this cob method is a
very simpler straight forwards uncomplicated, way of building a wall and almost anyone
can learn quickly how to do it.
If you wish to build curved- or circular walls ‘cob’ is the ideal system for doing it.
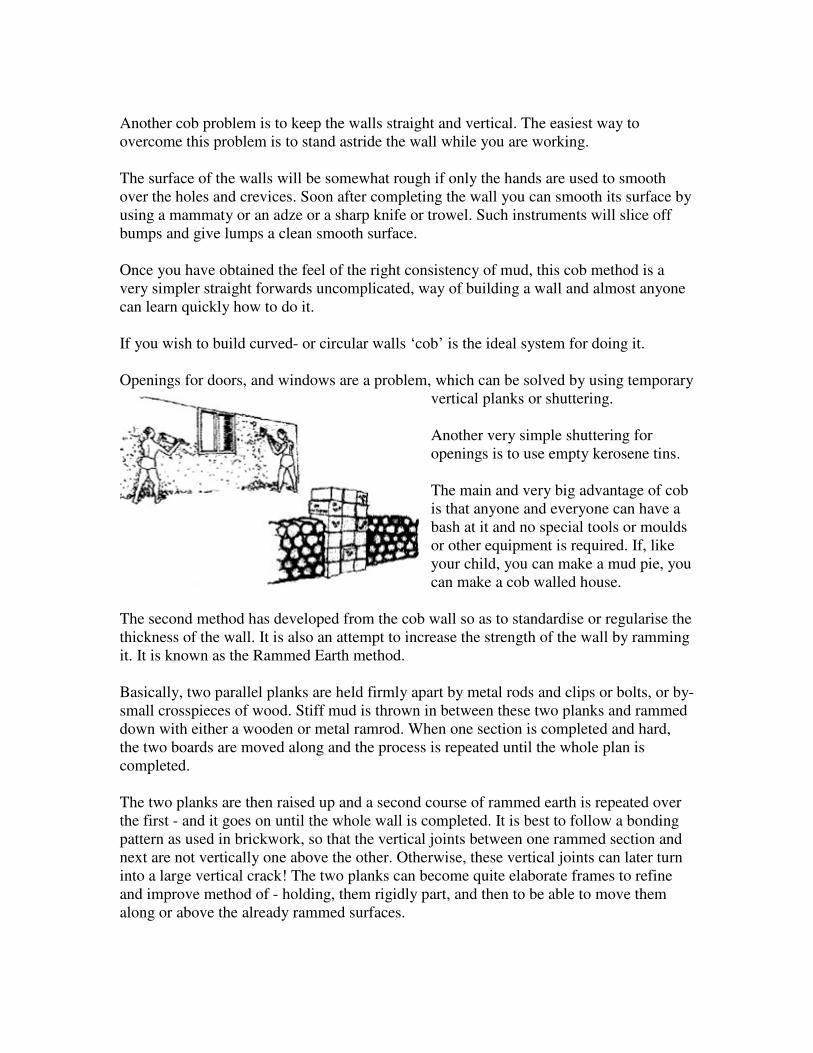
Openings for doors, and windows are a problem, which can be solved by using temporary
vertical planks or shuttering.
Another very simple shuttering for
openings is to use empty kerosene tins.
The main and very big advantage of cob
is that anyone and everyone can have a
bash at it and no special tools or moulds
or other equipment is required. If, like
your child, you can make a mud pie, you
can make a cob walled house.
The second method has developed from the cob wall so as to standardise or regularise the
thickness of the wall. It is also an attempt to increase the strength of the wall by ramming
it. It is known as the Rammed Earth method.
Basically, two parallel planks are held firmly apart by metal rods and clips or bolts, or by-
small crosspieces of wood. Stiff mud is thrown in between these two planks and rammed
down with either a wooden or metal ramrod. When one section is completed and hard,
the two boards are moved along and the process is repeated until the whole plan is
completed.
The two planks are then raised up and a second course of rammed earth is repeated over
the first - and it goes on until the whole wall is completed. It is best to follow a bonding
pattern as used in brickwork, so that the vertical joints between one rammed section and
next are not vertically one above the other. Otherwise, these vertical joints can later turn
into a large vertical crack! The two planks can become quite elaborate frames to refine
and improve method of - holding, them rigidly part, and then to be able to move them
along or above the already rammed surfaces.

Other refinements are adjustable baffle boards so that wall ends, as at corners, or where
door and window holes occur, can be dealt with
more easily, while the cob wall can be done by
almost anyone, the rammed earth wall calls for a
small measure of expertise - though the Handy Man
can soon master the system. Similarly, as, already
mentioned, an understanding of a large simple type
of bonding is also required to avoid cracks
developing in the walls.
However, there is no doubt at all that the life of
rammed earth walls is usually very long and they
can carry heavy floors and roofs and be used for
two and even three storey buildings. There are
examples in many parts of the world of rammed
earth buildings, which are hundreds of years old. RAMMED EARTH
or PISE (pee-zay)
The third system is known all over the world as ‘Adobe’ (pronounced a-doe-bee). Here in
India we know it as sun dried bricks. This is probably the most popular form of mud
walling because the mud blocks or bricks can be made by anyone and after drying, they
can be stored until there are enough of them and the right time to build has come.
ADOBE (a-doe-bee)
SUN DRIED BRICK
A small box or mould of wood or metal is used and the stiff clay is squeezed into the
mould and then turned out to cure and slowly dry. After that a mason can use them in
much the way as he would use burnt bricks or cement blocks. The adobe bricks can be
made to any size. They can be the same se an ordinary burnt brick (about 9" x 4.5" x 3")
or they can be bigger (l2" x 6" x 4") if a thicker wall is preferred or indicated. (The
smaller brick is likely to crack less) If care is taken to dry the bricks slowly (about the
minimum for a month) the walls are built in the normal proper way, strong crack free
walls are normal and can be used for 2 or even 3 storey houses. Of course, the usual care
must be taken to protect them from wet and to use standard bonding patterns. There is
nothing new or risky or even ‘rural’ about this system of building mud walls and it is an
obvious answer to the need for millions of small houses for the homeless without using
any fuel or energy for their manufacture.
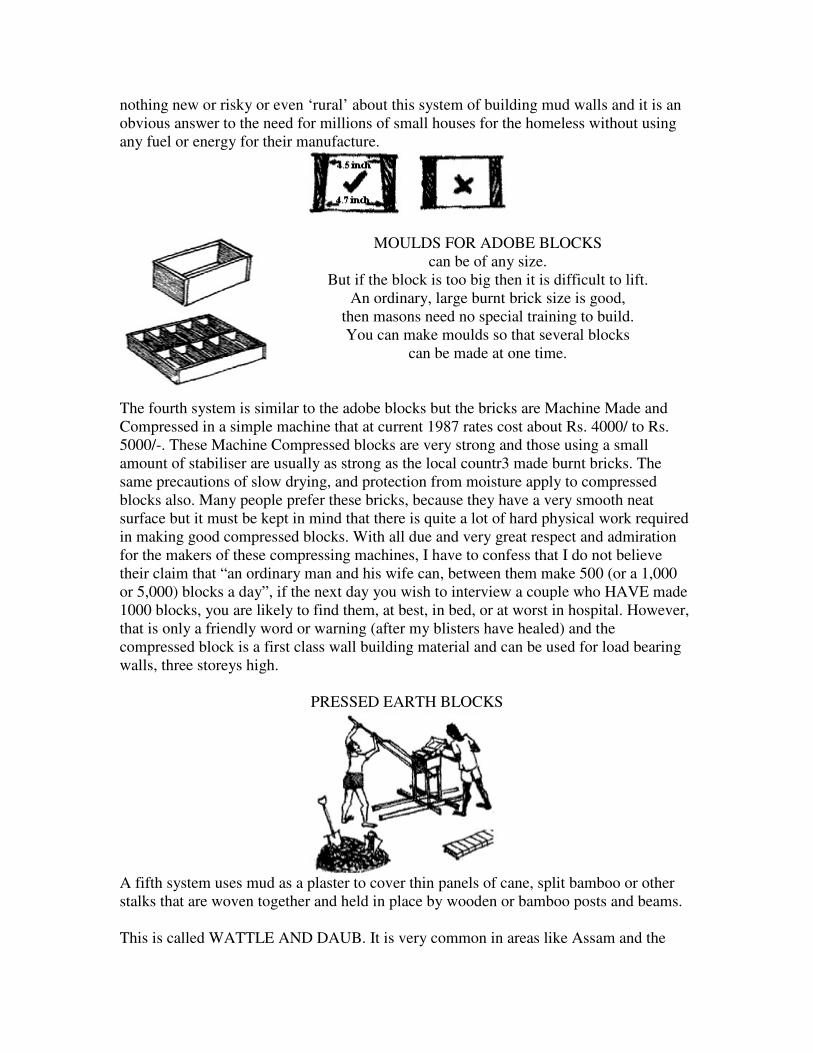
MOULDS FOR ADOBE BLOCKS
can be of any size.
But if the block is too big then it is difficult to lift.
An ordinary, large burnt brick size is good,
then masons need no special training to build.
You can make moulds so that several blocks
can be made at one time.
The fourth system is similar to the adobe blocks but the bricks are Machine Made and
Compressed in a simple machine that at current 1987 rates cost about Rs. 4000/ to Rs.
5000/-. These Machine Compressed blocks are very strong and those using a small
amount of stabiliser are usually as strong as the local countr3 made burnt bricks. The
same precautions of slow drying, and protection from moisture apply to compressed
blocks also. Many people prefer these bricks, because they have a very smooth neat
surface but it must be kept in mind that there is quite a lot of hard physical work required
in making good compressed blocks. With all due and very great respect and admiration
for the makers of these compressing machines, I have to confess that I do not believe
their claim that “an ordinary man and his wife can, between them make 500 (or a 1,000
or 5,000) blocks a day”, if the next day you wish to interview a couple who HAVE made
1000 blocks, you are likely to find them, at best, in bed, or at worst in hospital. However,
that is only a friendly word or warning (after my blisters have healed) and the
compressed block is a first class wall building material and can be used for load bearing
walls, three storeys high.
PRESSED EARTH BLOCKS
A fifth system uses mud as a plaster to cover thin panels of cane, split bamboo or other
stalks that are woven together and held in place by wooden or bamboo posts and beams.
This is called WATTLE AND DAUB. It is very common in areas like Assam and the
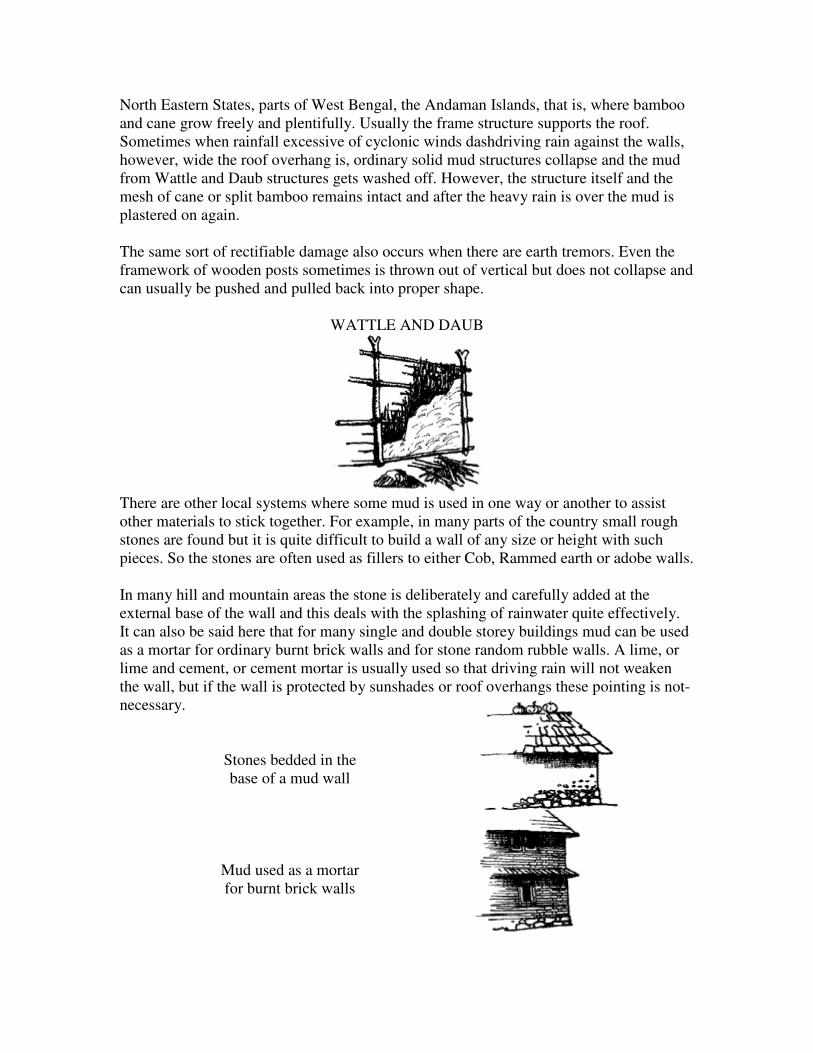
North Eastern States, parts of West Bengal, the Andaman Islands, that is, where bamboo
and cane grow freely and plentifully. Usually the frame structure supports the roof.
Sometimes when rainfall excessive of cyclonic winds dashdriving rain against the walls,
however, wide the roof overhang is, ordinary solid mud structures collapse and the mud
from Wattle and Daub structures gets washed off. However, the structure itself and the
mesh of cane or split bamboo remains intact and after the heavy rain is over the mud is
plastered on again.
The same sort of rectifiable damage also occurs when there are earth tremors. Even the
framework of wooden posts sometimes is thrown out of vertical but does not collapse and
can usually be pushed and pulled back into proper shape.
WATTLE AND DAUB
There are other local systems where some mud is used in one way or another to assist
other materials to stick together. For example, in many parts of the country small rough
stones are found but it is quite difficult to build a wall of any size or height with such
pieces. So the stones are often used as fillers to either Cob, Rammed earth or adobe walls.
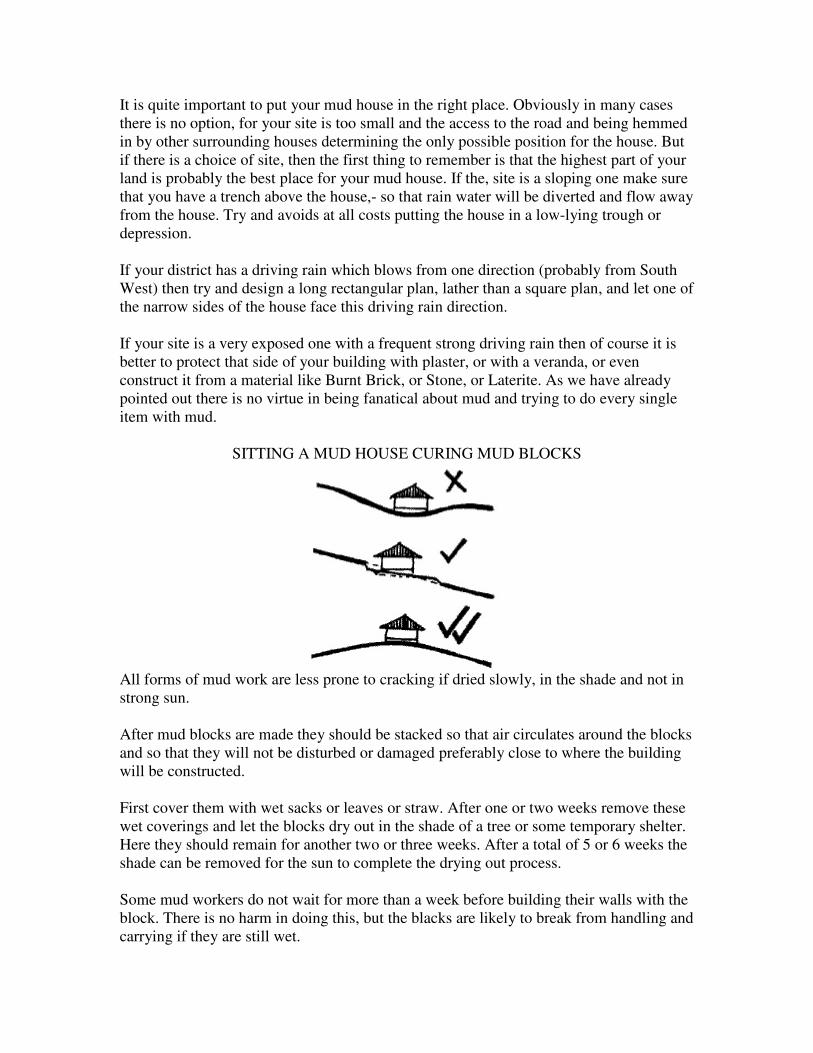
In many hill and mountain areas the stone is deliberately and carefully added at the
external base of the wall and this deals with the splashing of rainwater quite effectively.
It can also be said here that for many single and double storey buildings mud can be used
as a mortar for ordinary burnt brick walls and for stone random rubble walls. A lime, or
lime and cement, or cement mortar is usually used so that driving rain will not weaken
the wall, but if the wall is protected by sunshades or roof overhangs these pointing is not-
necessary.
Stones bedded in the
base of a mud wall
Mud used as a mortar
for burnt brick walls
It is quite important to put your mud house in the right place. Obviously in many cases
there is no option, for your site is too small and the access to the road and being hemmed
in by other surrounding houses determining the only possible position for the house. But
if there is a choice of site, then the first thing to remember is that the highest part of your
land is probably the best place for your mud house. If the, site is a sloping one make sure
that you have a trench above the house,- so that rain water will be diverted and flow away
from the house. Try and avoids at all costs putting the house in a low-lying trough or
depression.
If your district has a driving rain which blows from one direction (probably from South
West) then try and design a long rectangular plan, lather than a square plan, and let one of
the narrow sides of the house face this driving rain direction.
If your site is a very exposed one with a frequent strong driving rain then of course it is
better to protect that side of your building with plaster, or with a veranda, or even
construct it from a material like Burnt Brick, or Stone, or Laterite. As we have already
pointed out there is no virtue in being fanatical about mud and trying to do every single
item with mud.
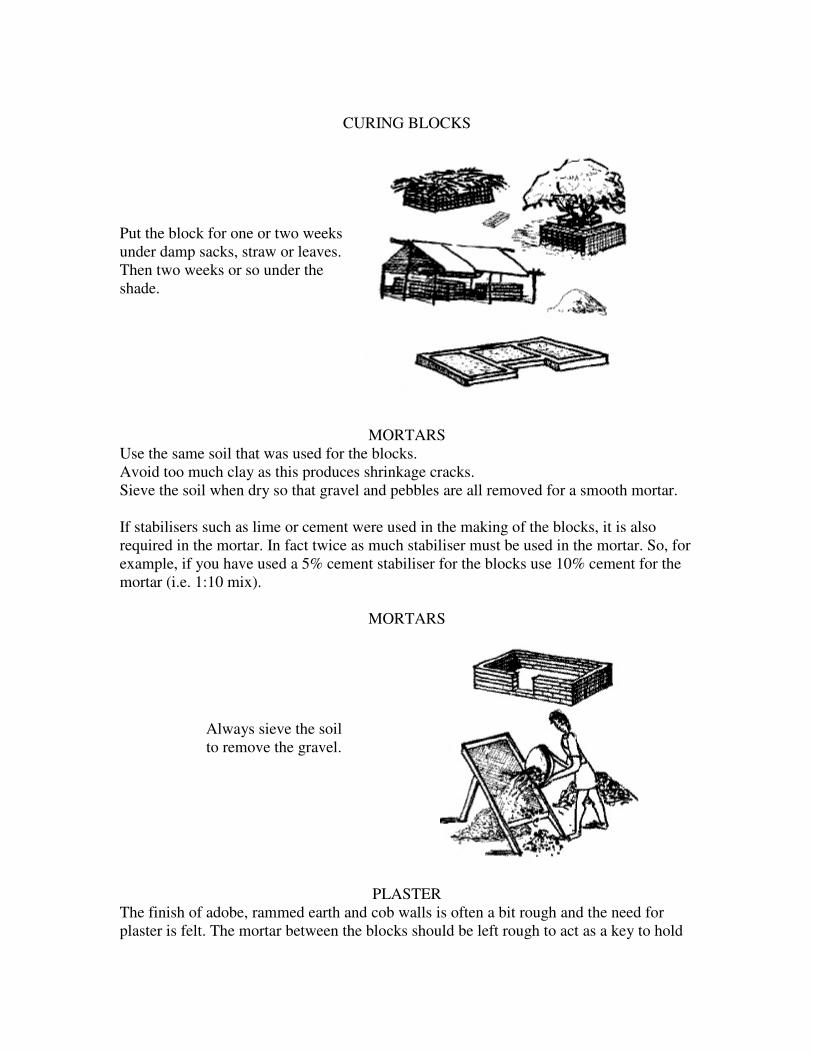
SITTING A MUD HOUSE CURING MUD BLOCKS
All forms of mud work are less prone to cracking if dried slowly, in the shade and not in
strong sun.
After mud blocks are made they should be stacked so that air circulates around the blocks
and so that they will not be disturbed or damaged preferably close to where the building
will be constructed.
First cover them with wet sacks or leaves or straw. After one or two weeks remove these
wet coverings and let the blocks dry out in the shade of a tree or some temporary shelter.
Here they should remain for another two or three weeks. After a total of 5 or 6 weeks the
shade can be removed for the sun to complete the drying out process.
Some mud workers do not wait for more than a week before building their walls with the
block. There is no harm in doing this, but the blacks are likely to break from handling and
carrying if they are still wet.
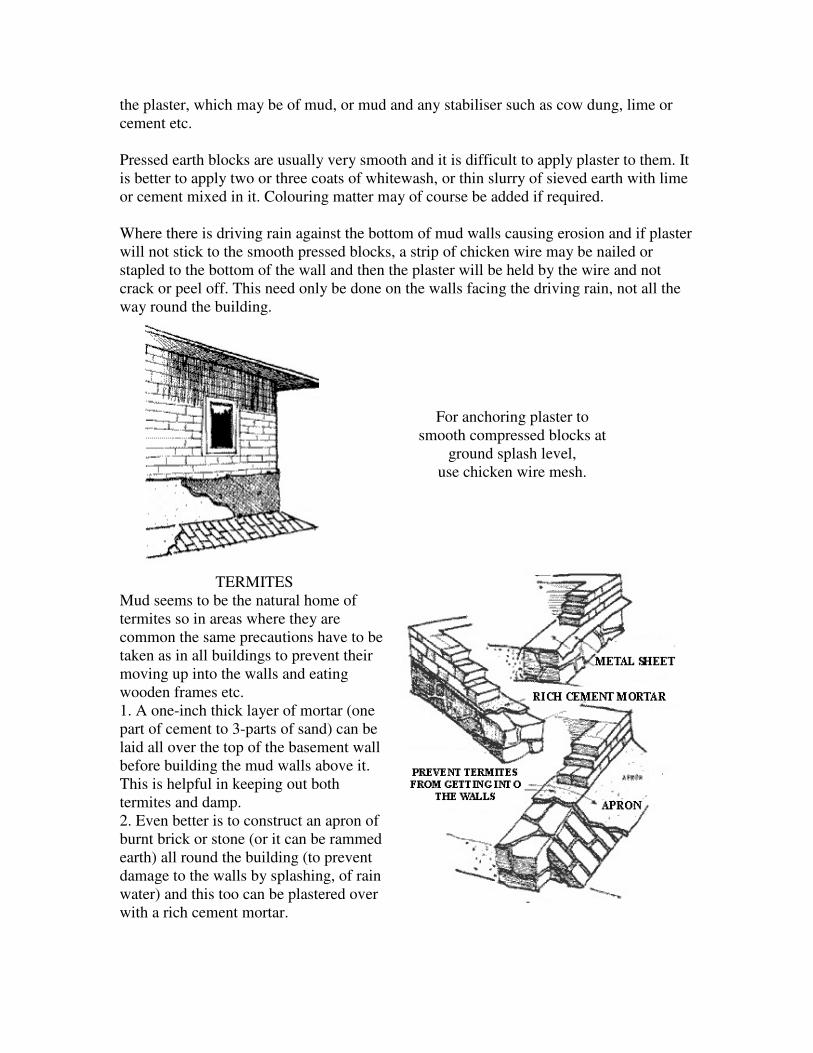
CURING BLOCKS
Put the block for one or two weeks
under damp sacks, straw or leaves.
Then two weeks or so under the
shade.
MORTARS
Use the same soil that was used for the blocks.
Avoid too much clay as this produces shrinkage cracks.
Sieve the soil when dry so that gravel and pebbles are all removed for a smooth mortar.
If stabilisers such as lime or cement were used in the making of the blocks, it is also
required in the mortar. In fact twice as much stabiliser must be used in the mortar. So, for
example, if you have used a 5% cement stabiliser for the blocks use 10% cement for the
mortar (i.e. 1:10 mix).
MORTARS
Always sieve the soil
to remove the gravel.
PLASTER
The finish of adobe, rammed earth and cob walls is often a bit rough and the need for
plaster is felt. The mortar between the blocks should be left rough to act as a key to hold
the plaster, which may be of mud, or mud and any stabiliser such as cow dung, lime or
cement etc.
Pressed earth blocks are usually very smooth and it is difficult to apply plaster to them. It
is better to apply two or three coats of whitewash, or thin slurry of sieved earth with lime
or cement mixed in it. Colouring matter may of course be added if required.
Where there is driving rain against the bottom of mud walls causing erosion and if plaster
will not stick to the smooth pressed blocks, a strip of chicken wire may be nailed or
stapled to the bottom of the wall and then the plaster will be held by the wire and not
crack or peel off. This need only be done on the walls facing the driving rain, not all the
way round the building.
For anchoring plaster to
smooth compressed blocks at
ground splash level,
use chicken wire mesh.
TERMITES
Mud seems to be the natural home of
termites so in areas where they are
common the same precautions have to be
taken as in all buildings to prevent their
moving up into the walls and eating
wooden frames etc.
1. A one-inch thick layer of mortar (one
part of cement to 3-parts of sand) can be
laid all over the top of the basement wall
before building the mud walls above it.
This is helpful in keeping out both
termites and damp.
2. Even better is to construct an apron of
burnt brick or stone (or it can be rammed
earth) all round the building (to prevent
damage to the walls by splashing, of rain
water) and this too can be plastered over
with a rich cement mortar.
3. Any thin sheet metal may be laid over the basement wall with a 3-inch downward
projection before starting to build the superstructure mud wall above. This is expensive
but very effective.
4. There are various chemicals on the market, which can be used.
FOUNDATIONS
Often it is feasible to build the walls of a home on mud, but some more solid material is
needed for the foundation and basement. If stone is locally available it can be used.
But in any case, many builders excavate a wide trench in which they lay concrete, then
build up the foundation and basement wall and then fill in the remaining empty sides of
its trench with the originally excavated soil. This is mainly wasteful and expensive and
unnecessary exercise as far as ordinary house building is concerned. An 18-inch (45-cm)
thick random rubble foundation cum base wall is all that is necessary to carry the load of
the house above, i.e. the walls, floors, slabs, roofs etc.
A trench only the thickness of the basement wall should be dug so that no infilling is
needed. This will prevent much soaking in of water, which in turn would seep upwards
and weaken the mud wall above.
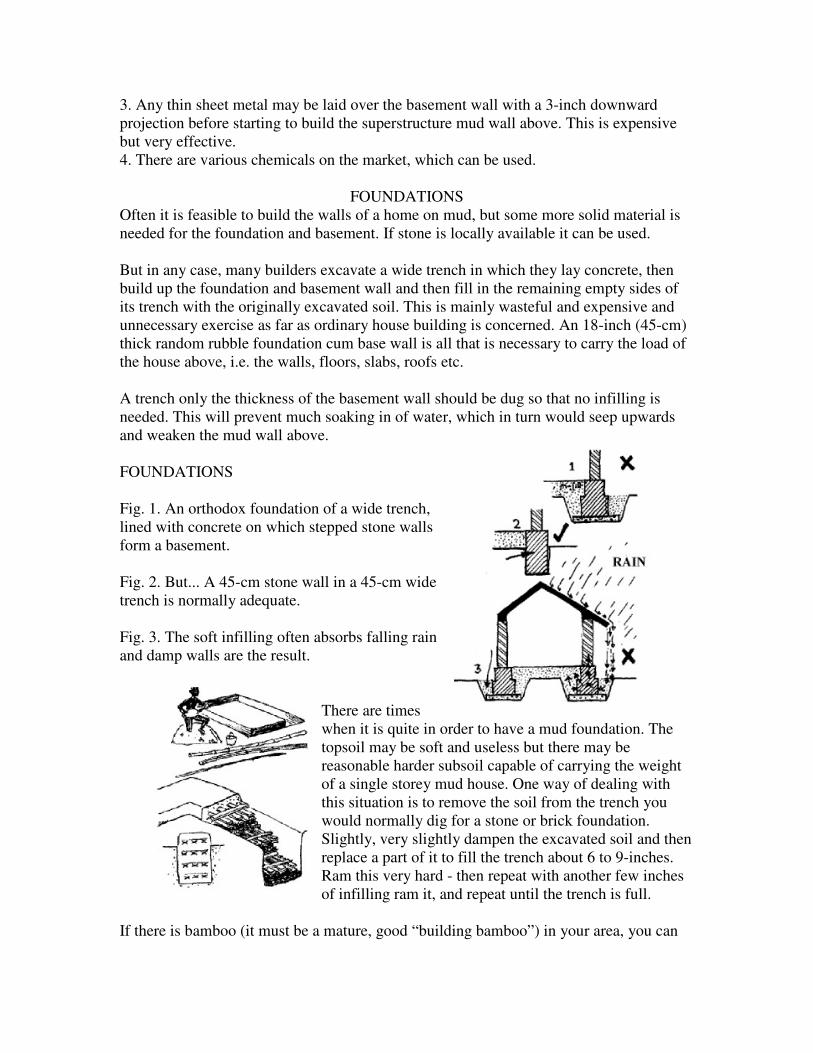
FOUNDATIONS
Fig. 1. An orthodox foundation of a wide trench,
lined with concrete on which stepped stone walls
form a basement.
Fig. 2. But... A 45-cm stone wall in a 45-cm wide
trench is normally adequate.
Fig. 3. The soft infilling often absorbs falling rain
and damp walls are the result.
There are times
when it is quite in order to have a mud foundation. The
topsoil may be soft and useless but there may be
reasonable harder subsoil capable of carrying the weight
of a single storey mud house. One way of dealing with
this situation is to remove the soil from the trench you
would normally dig for a stone or brick foundation.
Slightly, very slightly dampen the excavated soil and then
replace a part of it to fill the trench about 6 to 9-inches.
Ram this very hard - then repeat with another few inches
of infilling ram it, and repeat until the trench is full.
If there is bamboo (it must be a mature, good “building bamboo”) in your area, you can
make narrow rafts of split bamboo. Having done the first 6-inches infilling and ramming,
lay a raft of bamboo strips all around. Then repeat the process until the trench is full.
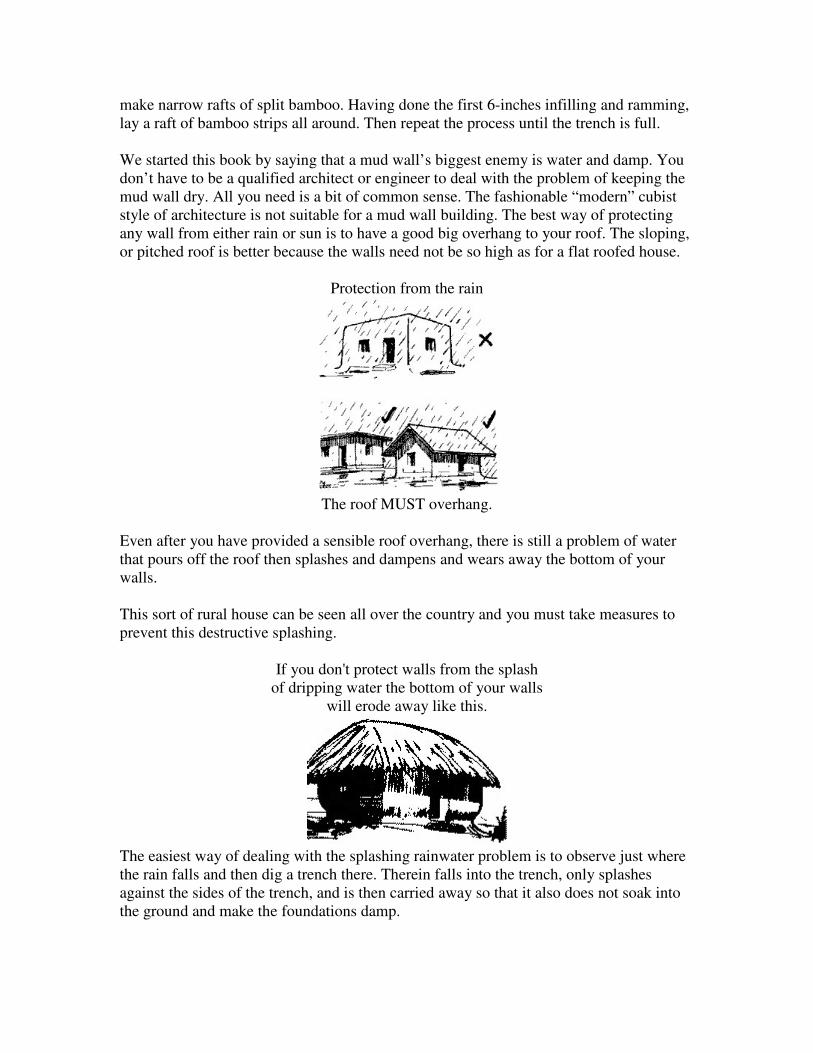
We started this book by saying that a mud wall’s biggest enemy is water and damp. You
don’t have to be a qualified architect or engineer to deal with the problem of keeping the
mud wall dry. All you need is a bit of common sense. The fashionable “modern” cubist
style of architecture is not suitable for a mud wall building. The best way of protecting
any wall from either rain or sun is to have a good big overhang to your roof. The sloping,
or pitched roof is better because the walls need not be so high as for a flat roofed house.
Protection from the rain
The roof MUST overhang.
Even after you have provided a sensible roof overhang, there is still a problem of water
that pours off the roof then splashes and dampens and wears away the bottom of your
walls.
This sort of rural house can be seen all over the country and you must take measures to
prevent this destructive splashing.
If you don't protect walls from the splash
of dripping water the bottom of your walls
will erode away like this.
The easiest way of dealing with the splashing rainwater problem is to observe just where
the rain falls and then dig a trench there. Therein falls into the trench, only splashes
against the sides of the trench, and is then carried away so that it also does not soak into
the ground and make the foundations damp.
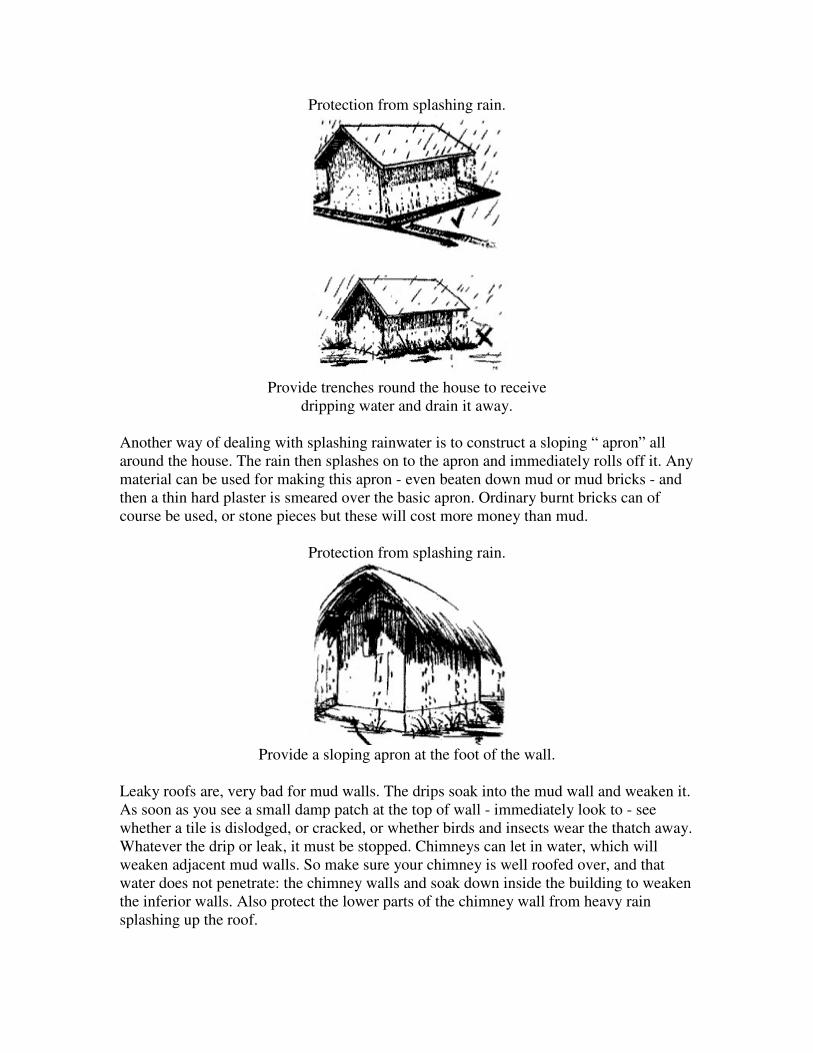
Protection from splashing rain.
Provide trenches round the house to receive
dripping water and drain it away.
Another way of dealing with splashing rainwater is to construct a sloping “ apron” all
around the house. The rain then splashes on to the apron and immediately rolls off it. Any
material can be used for making this apron - even beaten down mud or mud bricks - and
then a thin hard plaster is smeared over the basic apron. Ordinary burnt bricks can of
course be used, or stone pieces but these will cost more money than mud.
Protection from splashing rain.
Provide a sloping apron at the foot of the wall.
Leaky roofs are, very bad for mud walls. The drips soak into the mud wall and weaken it.
As soon as you see a small damp patch at the top of wall - immediately look to - see
whether a tile is dislodged, or cracked, or whether birds and insects wear the thatch away.
Whatever the drip or leak, it must be stopped. Chimneys can let in water, which will
weaken adjacent mud walls. So make sure your chimney is well roofed over, and that
water does not penetrate: the chimney walls and soak down inside the building to weaken
the inferior walls. Also protect the lower parts of the chimney wall from heavy rain
splashing up the roof.
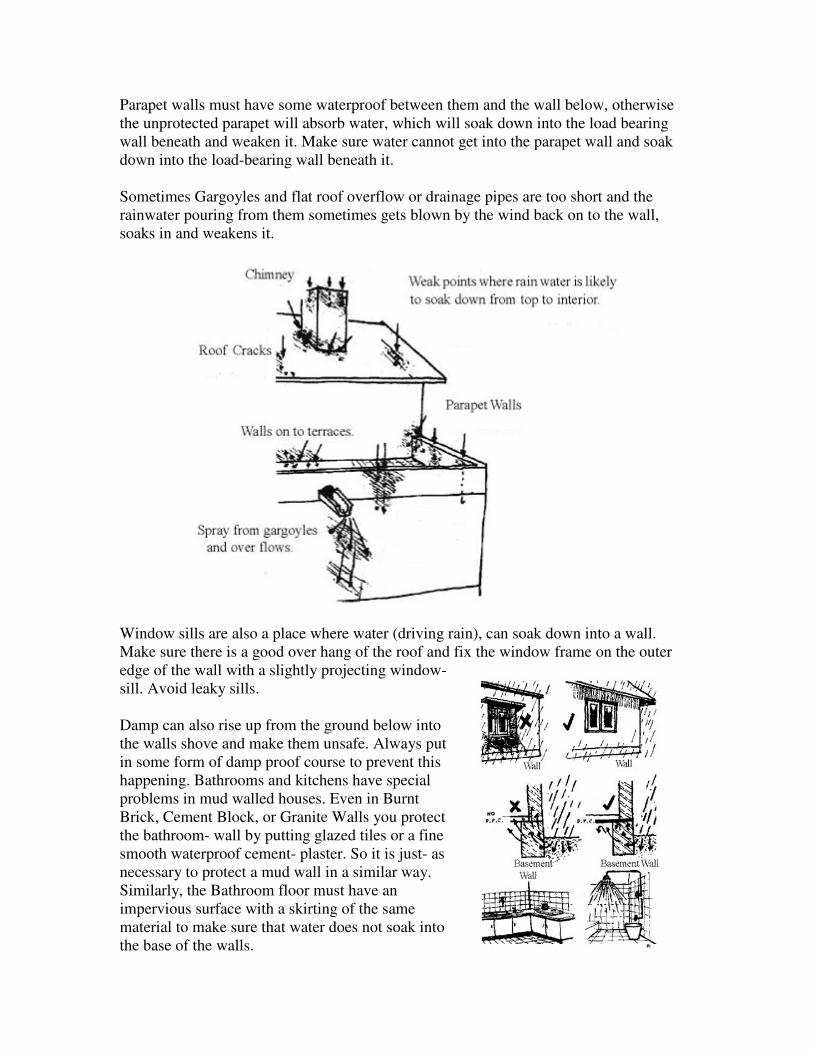
Parapet walls must have some waterproof between them and the wall below, otherwise
the unprotected parapet will absorb water, which will soak down into the load bearing
wall beneath and weaken it. Make sure water cannot get into the parapet wall and soak
down into the load-bearing wall beneath it.
Sometimes Gargoyles and flat roof overflow or drainage pipes are too short and the
rainwater pouring from them sometimes gets blown by the wind back on to the wall,
soaks in and weakens it.
Window sills are also a place where water (driving rain), can soak down into a wall.
Make sure there is a good over hang of the roof and fix the window frame on the outer
edge of the wall with a slightly projecting window-
sill. Avoid leaky sills.
Damp can also rise up from the ground below into
the walls shove and make them unsafe. Always put
in some form of damp proof course to prevent this
happening. Bathrooms and kitchens have special
problems in mud walled houses. Even in Burnt
Brick, Cement Block, or Granite Walls you protect
the bathroom- wall by putting glazed tiles or a fine
smooth waterproof cement- plaster. So it is just- as
necessary to protect a mud wall in a similar way.
Similarly, the Bathroom floor must have an
impervious surface with a skirting of the same
material to make sure that water does not soak into
the base of the walls.
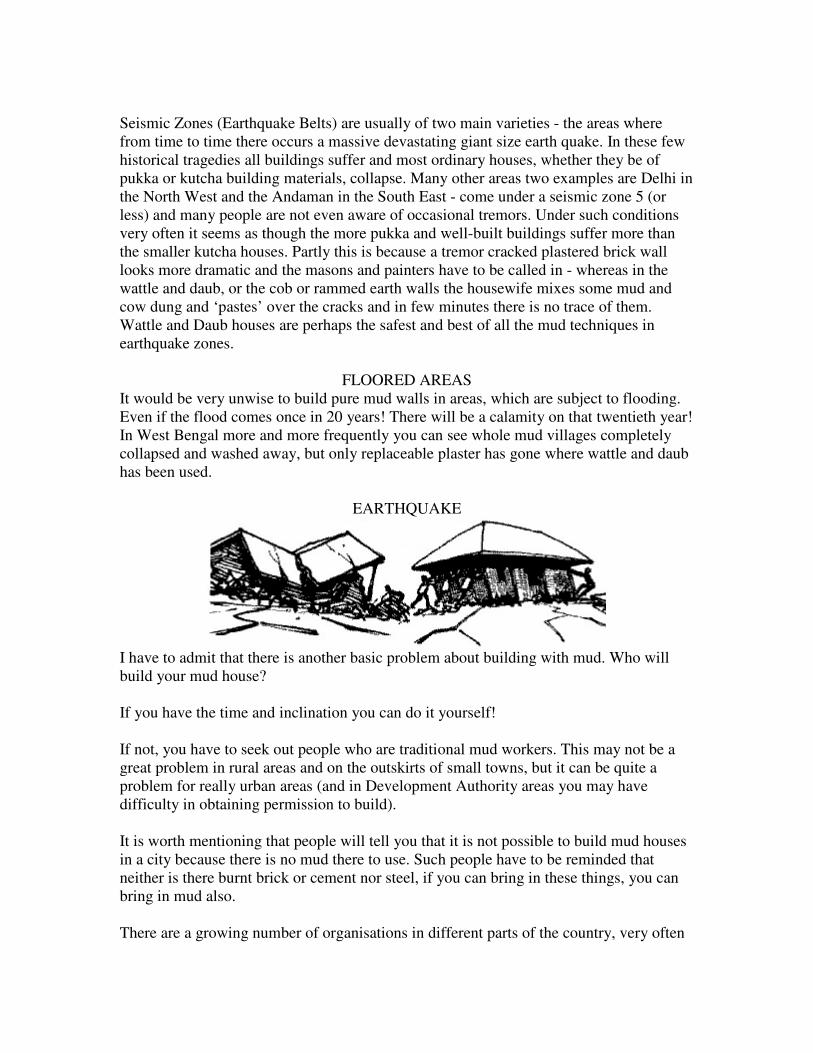
Seismic Zones (Earthquake Belts) are usually of two main varieties - the areas where
from time to time there occurs a massive devastating giant size earth quake. In these few
historical tragedies all buildings suffer and most ordinary houses, whether they be of
pukka or kutcha building materials, collapse. Many other areas two examples are Delhi in
the North West and the Andaman in the South East - come under a seismic zone 5 (or
less) and many people are not even aware of occasional tremors. Under such conditions
very often it seems as though the more pukka and well-built buildings suffer more than
the smaller kutcha houses. Partly this is because a tremor cracked plastered brick wall
looks more dramatic and the masons and painters have to be called in - whereas in the
wattle and daub, or the cob or rammed earth walls the housewife mixes some mud and
cow dung and ‘pastes’ over the cracks and in few minutes there is no trace of them.
Wattle and Daub houses are perhaps the safest and best of all the mud techniques in
earthquake zones.
FLOORED AREAS
It would be very unwise to build pure mud walls in areas, which are subject to flooding.
Even if the flood comes once in 20 years! There will be a calamity on that twentieth year!
In West Bengal more and more frequently you can see whole mud villages completely
collapsed and washed away, but only replaceable plaster has gone where wattle and daub
has been used.
EARTHQUAKE
I have to admit that there is another basic problem about building with mud. Who will
build your mud house?
If you have the time and inclination you can do it yourself!
If not, you have to seek out people who are traditional mud workers. This may not be a
great problem in rural areas and on the outskirts of small towns, but it can be quite a
problem for really urban areas (and in Development Authority areas you may have
difficulty in obtaining permission to build).
It is worth mentioning that people will tell you that it is not possible to build mud houses
in a city because there is no mud there to use. Such people have to be reminded that
neither is there burnt brick or cement nor steel, if you can bring in these things, you can
bring in mud also.
There are a growing number of organisations in different parts of the country, very often
staffed with young scientists and men of advanced education with practical knowledge of
civil engineering - who are turning to these various forms of alternative technology as an
answer to some of India’s tremendous building needs. ‘ COSTFORD’ the publishers of
this book, or HUDCO or CAPART of New Delhi would put you in touch with such
organisations for advice and help about building with mud.
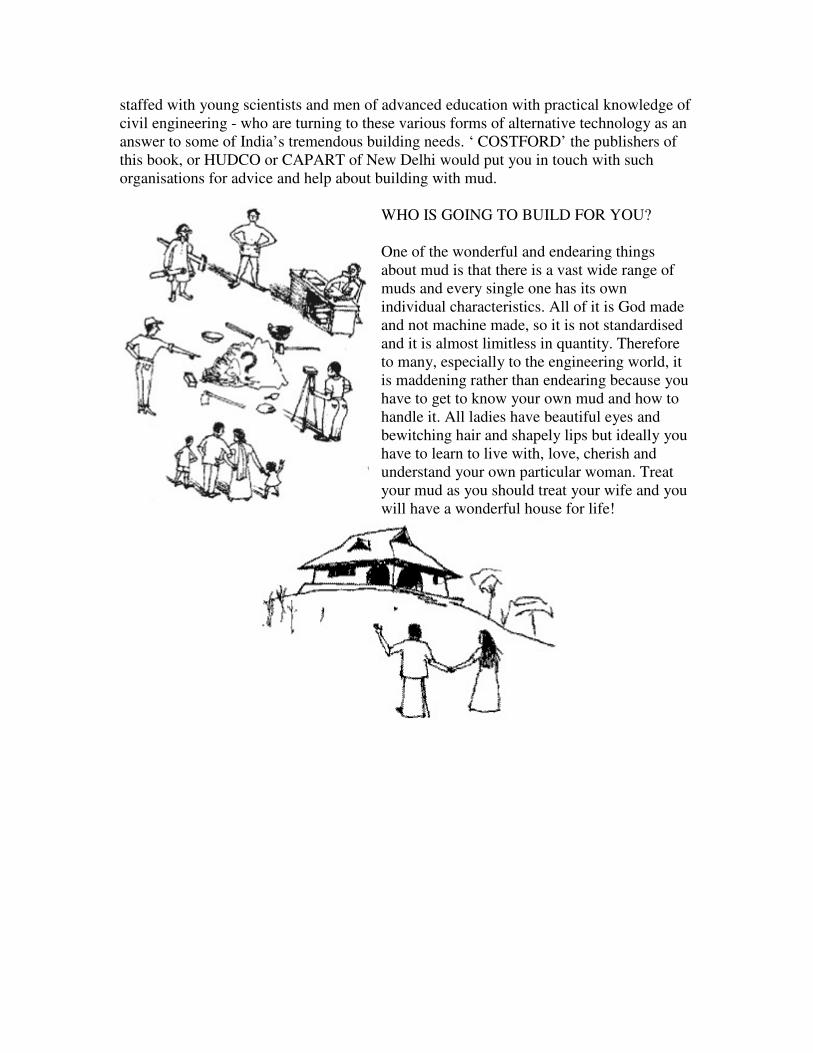
WHO IS GOING TO BUILD FOR YOU?
One of the wonderful and endearing things
about mud is that there is a vast wide range of
muds and every single one has its own
individual characteristics. All of it is God made
and not machine made, so it is not standardised
and it is almost limitless in quantity. Therefore
to many, especially to the engineering world, it
is maddening rather than endearing because you
have to get to know your own mud and how to
handle it. All ladies have beautiful eyes and
bewitching hair and shapely lips but ideally you
have to learn to live with, love, cherish and
understand your own particular woman. Treat
your mud as you should treat your wife and you
will have a wonderful house for life!
MUD
Mud is another name for Earth,
It never gets tired, giving birth,
To dwellings in Agra or in Perth.
It is one of the few sources,
Which does not require artificial forces,
And is easy to use, if used in courses.
Buildings that use mud,
Have a lot of strength,
Depending on requirement can have any width or length,
Or height, which may reach floor, eighth, ninth or tenth.
For thousands of years it had been used in a simple way,
But now they have started, experimenting and play,
With different percentages of sand, silt, aggregate and clay.
You can learn how to use it, without going to school,
It follows certain principles, and one simple rule,
That while building with mud, you have to keep your cool.
- Amit Sharma